Transcripts
1. Welcome to my class!: Hi, I'm Anastasia from
naturalist strata and I'm a Russian nature illustrator and surface designer
living in Italy. This is my second class where I will teach you how to transform your natural history paintings into custom vanilla stickers. Stickers are a fun way to
decorate any kind of objects. It can be a nice and unique gift for your friends or clients. And you can also
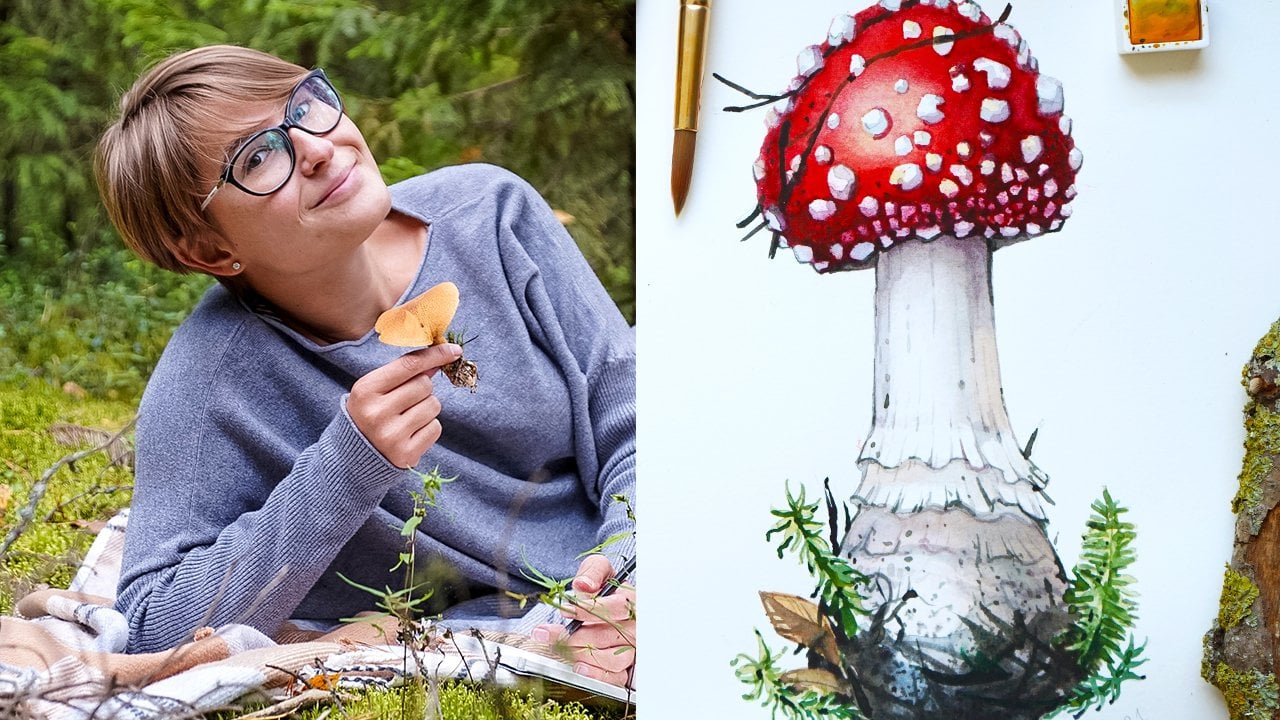
sell it online just like I do in my previous class, I was teaching how to create a realistic illustration of a
fly agaric with watercolor. Today, we will learn how to scan or photograph your
illustrations properly, how to bring it to Photoshop, how to separate it
from the background, and how to prepare files
for online printing. I will walk you through the
whole process of how I order stickers from one of my favorite print
on demand websites. As a final project, we will make our
own unique stickers ready to use for
any kind of needs. For this class, you can use one of your existing paintings. Or if you want to learn to
paint something like this, you can watch my
previous class first. So if you're ready for this new adventure,
Let's get started.
2. What you will need for this class: First of all, you will need
a finished illustration. It can be made in any technique, but it's better if you're painting has a white background. But if you have a
color background, don't worry, you will be able
to work with it as well. You will also need a computer with installed Adobe Photoshop. If you don't have Photoshop, I will put a link in the class notes where you can
subscribe for a free trial. Ideally, you will
need a scanner, but if you don't have one, you can use your camera or your mobile phone if it
takes good pictures. That's it. In the next lesson, I will show you how to scan your illustrations or how you can take good
pictures of it. See you soon.
3. How to digitalize your illustrations: In this lesson, I will show
you three ways of how you can bring your
physical illustrations into your computers. So the first one is
by using a scanner. I use a Canon Pigma
mg 40 to 50 scanner. It's quite affordable and
it works just fine for me. I put my illustration right on top of the
scanner if you want to prevent the blurry areas because watercolor
gets a bit distorted, you can put something heavy on top or you can just
hold your illustration steadily with your hands while scanning and it will give
you a better result. So now you're inside my
computer and I use a Mac. And this is the application
for scanning in the Mac, which is called
printers and scanners. First of all, we
will need to choose the resolution and the color. So I will scan
this one in color. And the resolution that
I choose is 300 DPI. I would like to remind you that 300 DPI is a standard
for printing, then it gives us the
possibility to name your file. So I will just put
fly and Garrick here, and then we can choose
the file format. So I will leave
this one as a JPEG. And now we can see the
overview of our scan. To be able to scan it
in this application, you actually need to drag an
area that you want to scan, which is drag and drop this box around my flag and
then I hit scan. Sometimes it might take awhile because we're scanning at
a pretty good resolution, but you just need
to wait a bit until your scanner finishes
this process. And we're almost done here, and it goes pretty fast. Now, as you can see, my scanner is done. I will find it on my desktop because that's where I saved it. I will just open it. And here we go, the
scan looks quite saturated and all the
areas look very clear. The other method is to bring your illustration near
the light source. I usually use this little
table near the window. I use a Sony Alpha three camera, but you can use any
DSLR camera you have. So I'd like to make a
couple of horizontal shots. And then what I like
to do is actually moving my table to
the sun area where I have the direct
sunlight and try to make a couple of shots there
to see the difference. Because sometimes direct
sunlight gives better effects. But we will see at the
end of this lesson, which results turned
out better if you don't have a DSLR
camera, no problem. Actually what a usually
use is just my phone. I have an iPhone
X and actually I prefer taking my
pictures with my phone. I think it's more quick. I will try to do the
same thing I did before. I move my table to the sunlight. And I make a couple of shots
here to some vertical shots and some horizontal shots just to have what
to choose from. And let's see what we get. So these are the shots we made with the camera
using the daylight. And this is the
shot with my phone. Looks quite similar though, but I think that direct light does not give us
the desired effect. It kind of changed
the original colors of my illustration. It looks too yellow
and too warm, and I think it's not the
best results we can get. These ones look
quite nice though. These are the same pictures
taken with my camera, with my phone, but without
the direct sunlight. And I think these
works so much better. The colors look natural. We have this nice white
background and as you can see, the red on the cap and the
green look very saturated, quite close to the reality. So I think these pictures
are very good to work with. The scan turn out
nicely as you can see, the resolution is very high. The only thing I would
like to work here on is the saturation of the cap end of the whole
mushroom in general, because sometimes scanners
eat your saturation and make your
illustrations look a bit dull and a bit faded, but we can easily adjust it in Photoshop during
the next steps. So when you have your scan, Let's bring it into Photoshop and start to prepare
it for print. See you there.
4. Introduction to Photoshop: In today's lesson, I will
bring you to Photoshop and show you the basic tools that
I usually use in my work. So I opened my Photoshop and
that's how it looks like. Here are some of my previous
works that I was working on. And what I will actually do, I will use this picture
of a flying Eric. I will just drag and
drop it to Photoshop. So here you go. There is my photograph. We'll actually use
just a picture that I took with my phone. So that if you don't have
a scanner or a camera, this is a proof that
you can totally work with just the pictures
from your phone. I will make a quick overview of the basic tools I
use in Photoshop. So if it's the first time you open Photoshop, don't
be overwhelmed. I know it might
look a bit scary. There are lots of instruments everywhere on the left
side, on the right side. But actually we don't
need to know all of these and we will not use
all of these instruments. I will just show you the
basic ones that I find very handy and very useful to quickly
adjust my illustrations. So let's take a look at
the layers panel first. It's overhear. Don't have it here. You can just go to
Window and find layers. Mine is already there. So that's why there is
this little sign there. So you can find
everything here in the Windows panel if
you're missing something. So layers actually means that
you have different layers, one on top of the other. So you can click here
to create a new layer. You can also create
a group of players. So I will just delete these and I will
explain it a bit later. Why do we need layers? But for now, I will just show
you one more thing here. By default, when you put a
file or an image in Photoshop, you will see this lock sign and you just need to unlock it. This way. Photoshop will allow you
to adjust this image. So as you can see, there's
the sign disappeared. So we will use the
crop tool to actually delete this unnecessary
background here. So we don't need this one table and we don't need
that much of a white. Go to the Crop tool,
just press once. And as you can see, there is this kind of a white
frame that appeared here. And if you go to the
side of this frame, you can see that there is a
double arrow that appears. So what do you need
to do is just press on this arrow and just drag the side where you want your edge to be
your new edge to b, and then you just release it. So I do it on the
left side as well. So I release it here. Maybe I will move
this one a bit more. And I just do the
same thing on the top and on the bottom sides. So what you see here is actually an overview of your new image, how it will look like
when you press Enter. So if you're happy with how
it looks, just press Enter. And as you can see, we have this cropped image here. In the next lesson, I will show you how to work
with layers and how to adjust the color and saturation
of your illustrations. See you there.
5. Brightness, contrast and saturation: I will show you a few more tools that I like to use
to adjust my images. So this picture
looks pretty nice. As you can see. It's quite saturated and there's almost nothing
I want to change here. But I will show you the panel that I
often use in my work. So it's the
adjustments panel and you can find it here
on the right side. Or if you don't see it, you can just go to
Window and adjustments. You always find it there. So I click on it once. And here you have all
of the tools available. So basically what you can do, you can adjust the color, the saturation, and all
different things here. But one instrument, I
always use our levels, so I find it very handy. So you can just click
on it and then you see this little
panel appear here. So what it does, it allows you to make
your image more clear or more dark and adjust
these kind of tone things. So usually when
you scan an image, it's especially handy because
the scanner usually makes your image look much
more dull and bleak, less saturated, and
you need to kind of lift up a little
bit the blacks. But here I think it
looks pretty nice. What you can see here
is that if you drag the little white arrow
and the left side, as you can see, it makes
your image lighter. See that? And on the opposite side
you have the black arrow. And if you drag it, see what happens, it
makes your image darker. So of course, we don't
need to go that far. We will just play
around with it. And I want to make this image
look a little bit lighter. I think it's a bit too dark. So what I will do, I will take the
right side arrow, the white arrow, and drag it a little bit
on the left side. So as you can see, there is a new level
appeared here. And it's on top of our
existing layer with the image. And you can actually toggle
and click on and off, you see this little icon. So when the eye is there, it means you can see it. And if you click on it one more time, it
becomes invisible. So this way, imagine
that this layer is invisible and you just
see what's underneath. So you can see the difference. Now, my image became lighter. I think I can go even more and make it even
a bit more light. So now you can see the
difference better. Instantly I lightened
my image up and it's a very handy way of how you can give
your images more light. And if you want, you can also adjust the darks. So for example,
if I want to make the dark areas even
darker, I can do that. And our adjusted
just a tiny bit, just to have a bit more
of these blocks here. And of this contrast
here under the cap, I think this might
be a bit too much. And let me see. I think it looks pretty good. You can see the difference looks much better with this
adjustment here. One more instrument
I like to use, I go back to adjustments,
just click once. Sometimes you can do
the same thing with the panel brightness
and contrast. So basically it does pretty
much the same thing. You have two options here, so you can add more
brightness and basically does pretty much the same thing and the same with contrast. Contrast is quite
different though. So as you can see, it makes your image sharper. Sometimes I use it as well
as for the brightness. I think we already adjusted it previously in the levels panels, so I will not use this. So if you're not happy, you just can press on
the level and delete it. And as you can see,
it disappeared. And this kind of editing is
actually non-destructive. So it means that your
original image will always be there if you
conserve this level. So if you're not happy, you can just hide this level or even deleted so
your original image will remain untouched
and you can always adjust it in a new
way if you prefer. The other instrument
I wanted to show you is this vibrance instrument. So here you can adjust vibrance and saturation
of your illustration, which is very handy if you're scanning your images
because scanners tend to make your images less
saturated and more gray. So I always use this panel
when I work with scans. This picture is
quite saturated and I think there's almost
nothing to adjust here, but I will still drag this little saturation
arrow on the right. So as you can see on the right, it gets very saturated. So this is way too much. Looks a bit crazy, and if you drag it
to the left side, as you can see, it
becomes black and white. So basically you need to find a sweet spot here
that you're happy with. Just play around with it. And it's up to you to decide the level of saturation
you want to obtain. I think this is too much. I will just increase
mine just a tiny bit. For example, maybe 12
points more actually, what it can do as well. If you don't want to play
with this arrow here, you can just go and
add a number here. For example, let's say 25. And as you can see,
it became much, much more vibrant today. If I put 100, as you can see, it became crazy. So you can also play
with it this way. Put a number here if you prefer, but I actually like to just
to drag it, I find it easier. So I think I will leave
mine at ten points more. So as you can see, the difference is
almost invisible. So maybe I'll put
something like 14, I think looks fine. So see that there is
a slight difference. So I think it looks a
bit nicer this way. I think that's all
I will adjust here. We have other
instruments like curves. This one works pretty much like levels and brightness
and contrast. So actually I don't
use all three of them, but I actually
prefer using levels. I think it gives me
better results exposure, I don't really use
this hue saturation. This is basically the
same thing as vibrance. And then you have all these other
more advanced tools that we will not be using today. And basically Dan said, I think the image
looks pretty good. It became more saturated. And what we can do is, I don't like having all
of these layers here. So what I like is to group some of the layers and
have them altogether. So for example, I like to have these effects in one group. As you can see here, my top level is selected and
I can select both levels. So I just need to
press Shift and click on the second
level as well. So now they're both selected
and then I can group them. So you can either press this, Create New Group icon. You can see they got
instantly grouped together. I can toggle the group and see the difference of
before and after. So pretty cool. I can also name the groups. So I will call this one effects, and I will call
actually my layer, my original image as well. To name it, you just need
to double-click on it. And I put fly. And Garrett here, this way your files and your levels
are more organized. So now you have an idea of
the basic tools and how you can adjust your illustrations using the adjustments panel, play around with it. Maybe you will find
instruments you prefer more than the ones
I showed you today. So just don't be afraid of it, click on it, try it. So in the next lesson, we will start to spread
our illustration from the background and
I will show you different instruments
that I use to do so. See you soon.
6. Removing the background : Magic Wand Tool: Welcome back. And in today's lesson, I will show you how to separate your illustration from
white background. And I will show you
four tools that I usually use to make it. And I will show you my
favorite tool as well. So why do we actually need to separate the illustration
from white background? You may wonder. So first of all, if you want to be able to place your image on a different
background, for example, you want to make
a pattern of it, or you want to take your illustration
and make a postcard, but instead of having
a white background, you want to have a
colored background. You can do so a few, save it as a transparent PNG. So to be able to do so, we will need to select the white background
and delete it that way. This illustration will
becomes like a cutout and you can place it on
any background you wish. First, I will show you
the magic wand tool. This is probably
the quickest way of how you can get rid
of the background. You find it on the left side
under Object Selection tool. Some of the tools are hidden
inside of the other tools. So don't worry, if you see this little white triangle on
the right side of the tool. It means you can select a
tool from this toolbox. We can call it, you need
to just click twice. Or with Mac. I actually click
with my two fingers. And you have this fly-out menu. And you can select Magic
Wand from this menu. Or as you can see on the right side there is
a shortcut which is w. So I just press on it and make sure you're
on the right level. So on the fly, agaric level, not the effects level, because look what will happen
if you go to the Effects. It actually does not
allow you to do anything. You see this little white
circle with a line. It means this tool is
not available here. To be able to use this tool, you need to go to the
fly Garrick level. And now you see there is
this kind of across peers. So what I do, I just click once. And as you can see, there are these
little running lines that appeared here
in what I just did. I selected the white
background around my mushroom in what I can do is just press
Delete and as you can see, it actually deleted the
background, instantly de-select. You just need to do common d. This is a shortcut
to de-select, but the only thing
is, as you can see, my magic wand tool
missed some areas. For example, this area of
background is still white. And there is also a little problem here is you
can adjust the tolerance. For example, now,
our tolerance is 32. If we put 0, see what will happen. So it actually selects only the exact color
you're pressing at. For instance, if I press here, it will select just
this teeny tiny area because in his opinion, these surrounding areas
has different tone, different color, and depending
on the tolerance you put, the Photoshop will
select more colors. So for example, if I put ten, Let's see how this goes. So see it's selected
a larger area, but it's still left
a lot of white here. So 32 was actually pretty good. So I will put it back. And let's see, You see it's
selected all of this white. But what it actually
did look at this, it's selected one
of my white spots and look what will
happen if we deleted. So press Delete,
press de-select, and to check out how
Photoshop did its job, we can actually put our
mushroom already on a different background and see how it looks to
be able to do so, I create a new layer by
pressing this icon here, and I drag the layer
underneath my fly Garrick. This way my flying
eric will be on top. Then what I do, I just
take the black color, so I just switch
here and I make sure that the black square is on top. And then I take this paint
bucket tool, I press on it. What I do, I just click
once on my background. As you can see, it instantly
got colored in black. And let's take a look
at the illustration. This is the quickest way I
can delete the background, but as you can see,
it is not always working as we want it to. It's deleted these two spots. I actually wanted to
keep here as well. And it actually left some
of these white spots. We actually want it to delete. So it's not always working as we would like it to for some
very quick editings, it actually can work
pretty nicely if you don't have a lot of
white on your illustration, this tool can actually
be very handy. For example, if your
illustration is, has a quite a uniform
color or it's really dark on white background. This tool can actually
make a good job for you. But for our illustration, I think it's not the
best tool we can use. This actually is a
permanent change. So if you just press
Okay and you go forward, you cannot get your
background back again. And just to make sure
that if you did something and you're not happy with
it and you want to go back. We can actually copy our main level so the
flag Eric levels. So to do so you just click on the fly agaric level
and you do Command C, and then you do common
V. So as you can see, we have a copy here and we're just going to hide
one of the copies. So this is the copy
we want to keep for ourselves in case
something goes wrong. And now let's continue to
explore other tools that are available and see which is the best method to get
rid of this background.
7. Eraser and Pen tools: Welcome back. The next tool I want to
show you is eraser tool. Here you go, eraser. It's on the left side. Here you can adjust the
size of your eraser. So you have this
little panel here. You can go and make it larger, you can make it smaller. You can really see It's up
to you to choose the sides. And now I can just go and actually erase the
background manually. This area is without
the background. Now, the only disadvantage of this tool is
that it will take you a lot of time to separate everything
from the background. And you need to be very
careful so you don't want to accidentally
mess up your image. And when you start to
work on these areas, it's not easy at all. You need to change
the size of the brush and just spent a
lot of time on it. And I think this is
not what we want. So I will just go back
and delete these changes. The other tool you can
use is the pen tool. You can find it here
on the left side, you press on it. And what a pen tool does, it actually allows you to select the area more accurately. But if you're a beginner, I think this tool is a bit too complex and might be a bit
frustrating in the beginning. But in some situations, it can be an ideal tool to separate your subject
from the background. And I will show you why. So what it allows
you to do is to make a very accurate selection
of an area, put a point. So you just press once. And as you can see, there's this little blue spot
that appeared there. I want to trace the outline of this little bump
here very accurately. What I do next, I just put another point, I hold it and drag it. There are these two little
lines that appear here, and it allows me to
adjust the curve and you can decide what's the shape of
the curve you want. So I will try to
follow as accurately as I can the curve of
this little bump here. So I think this is pretty
nice and I just leave it. So I just need to
continue going into this direction and
make a new point. And as you can see, if I just make a point
and release instantly, Photoshop actually made this
curve for me because he decided this is the natural
way this curve should go. And if you want to adjust
this little thing here, so depending on where
you place this thing, your curve will go into
different directions. See that? So you need to hold
Option and you can actually move this
thing as you want. You can make it longer,
you can make it shorter, and it will influence the curve. You will make.
What I usually do. I just leave Photoshop to decide the natural curves for me and I just go and
adjust the other ones. So just you basically go, you drag and drop, you go, you drag and drop. And it gives you a
lot of control over what you're doing and
just keep going this way. And then when I
selected an area, I need to close this area that
should be a closed shape. So what I do, I go here and I close the shape. And when I'm about
to close it there is this little pen sign
that appears there. So I press on it
and as you can see, we have a selection here. We need to go to Paths. And there is this
little path appeared, a little white thing appeared. So we need to press
on this point circle. You press on it and you
can see that there are these lines that
started to run here. It means this area is selected. Now in what you do, you just press Delete I
deselect by pressing Command D. And as you can see,
we just deleted an area and let's test
how it worked for us. So I create a new layer. I put it underneath
my flag, Eric, I fill the layer with my black color using the paint bucket tool
just like before. And here you have this
area here, the white area. This is still my background, so I still have it. And this is the area that we just deleted using the pen tool. And it's actually did a
very good job for us. The lines are nice. There's no weird white
background spots here. So it really allows you to have a lot of control
over the selection. But if you're new to this tool, it can be very frustrating, especially in the beginning. So if you're just starting out, it's good to practice
with this tool. Actually, you will
see with practice, you will become very
quick with this tool. So just practice and you will
see that it gets better. In the next lesson, I will show you the fourth
tool that I personally prefer. And in my opinion, this is gonna be
the ideal tool to use in these kind of
situations. See you very soon.
8. Magnetic Lasso tool + export: Welcome back. In this lesson, I will show
you my favorite tool that I usually use to separate my illustrations
from the background. This tool is called
Magnetic Lasso tool, and that's where you find it. You have other tools
like Lasso Tool, polygonal lasso tool, but we need the magnetic lasso tool. So what it does, it actually does a
big job for you. It works pretty much
like the pen tool, so it allows you to make a
very accurate selections, but without making all
of these curves and lines and wrapping
your head around it, especially if you're a beginner. So what it does, it actually does
everything for you. We need to zoom in to be able
to have a better control. And then what you do, you just click once and
you have this point here. And what the
Magnetic Lasso does, it actually understand the shape and it makes these
points for you. But the only thing is that sometimes it is not that
accurate as you want. For instance, see
this area here, and we'll delete these points. This area, it's
not very accurate. So as you can see, it does not understand that he
needs to go here. So what I can
actually do is I can manually adjust where I
want to put these spots. So I just click once and
you see the spot appeared. I can click, click
one more time. Each time you're sure you
want a point somewhere. You can actually put
these points by herself. And then in the
other situations, it just kinda puts the points for you so you just
don't do anything. So you put the points
where you see that it has some limitations and then you just leave
it, do his job. As you can see, my
points are placed automatically and if you have these points that
you don't want, you just press Delete and it will delete the
individual points for you. And so we've selected
this area here. And just like with the pen tool, we need to close this shape
to be able to deleted. So I'm closing the
shape just like with the pen tool and
there's a little sign appeared and when
you press on it, it is directly selected, so we don't need to
go to Paths selected. It is already selected
for you in what you just need to do is press
Delete just like before, and Command D to deselect. And let's test how it worked. I will make a new
layer and just like before, put it underneath, fill it with black and look
at it, works pretty good. It's actually gave us almost the exact result as
we had with the pen tool. But I think it's
much more painless, especially in the beginning. And this is personally
my favorite tool that I usually use to separate my illustrations
from the background. So I will just keep going now. And I will use this
tool to separate everything and I
will let you watch. So as we can see, the Magnetic Lasso Tool did
a pretty good job for me. I deleted all of
these individual, every still have all
of these details here. Even if you want to delete some very tiny details
like these four examples, you can totally do it. So you might ask, why do I need to be so accurate? So actually for the sticker, we don't need to be that accurate because my
sticker will be on the white background and
because it it will be printed on a fairly small size, you will never be able to
see all of these details. But if you want to make
a pattern, for example, in the future using this illustration in place it
on the colored background. This method is very handy. Now, I just need to get rid of the rest of
the background. I could just go and select it with the same
magnetic lasso tool, but I will just erase it. I think it's just
easier and quicker. There are different ways of doing the same
thing in Photoshop. So just go ahead, try
different methods, different tools,
and I'm sure you will find your workflow. So I will delete my
black background and there is my finished
illustration here, so it has no background. And now the next
step we need to do is to save it as a
transparent PNG. You just go to File, Export, Export As, and here you have all
of these options. So there is a dialogue box
and I will choose PNG here. The most important thing is that this transparency
box x clicked on, so we want the transparency. So don't forget about this one. I will leave the size as it is, and I will just click on Export. And I will name it, fly gag. I will save it on my desktop. I will just hit Save. And I think it's done. Let's see, here it is
our brand new PNG. And if you open it, you will see your
illustration is actually on a
transparent background. So it means it has
no background. So if, for example, you want to place this illustration on
a colored background, now I will create a
new document here. Let me just show you the
difference between the JPEG. So this is the PNG,
no background. So I will put the jpeg side-by-side with
the illustration. And as you can see, this file has the
white background. And if you want to place it
on a colored background, you will not be able to do so. So that's why we did
all of this process of deleting these little pieces and separating from
the background. Because now this PNG
is so versatile, you can actually make
a pattern with it. You can put it on
different backgrounds. This file is perfect
for any kind of use. So in the next lesson, I will show you how we
actually print our sticker, how we order stickers from
one of my favorite websites. We already have our
nice file here. So here we go, my PNG, I will use this file. I will see you in
the next lesson.
9. How to create vinyl stickers: Welcome back. In today's lesson, I will
show you how I order stickers from one of
my favorite websites, which is called sticker app. So we have our
illustration here. So it's now a PNG. If you remember from
the last lesson, That's how we saved it. So it has a
transparent background and you can place it on
any kind of backgrounds, like on black or any kind
of colored background. Let's dive in. I will just go to my browser and stick your app
in the search bar. And here you go. So you can actually explore different possibilities
this website can offer you. So you can go to
custom stickers. And here you see all the
options that you have. So it can be a dicot sticker. It means it will repeat the
exact shape of your subject. In our case of our mushroom, you can make square sticker, circle stickers, round corners,
thicker sheets, stickers. And there are some pretty cool customization
options here too. These are vanilla stickers. You can stick them on any kind
of surfaces, even outside. So on your bike, on your bottles that you
take with you for hiking. And it's very resistant, It's scratch resistant
and water resistant. And I sell these online and the stickers
are very popular. So my favorite
option is this one, the die cut stickers. And I will show you the whole process of how
I usually order these. So let's dive in. I will need to choose
the material first. So you can see you can make some holographic stickers
glow in the dark. Mistake is glitter stickers. And all of these options
here are available, but I usually order just a
normal vanilla sticker Size. And you have the size in inches
or you have custom size. So what do we can actually do is manually enter the
size that you want. I think I will leave
mine as it is. And here you have the
quantities and prices. More you order, less
expensive, it will be. So it starts at $26 for
more than a 100 pieces. I think the shipping
should be already included in the
price, I believe so. Here you can upload your file. So it allows you to
upload a variety of files and you can actually upload
a normal JPEG here as well. But as we have our nice PNG, I will upload this one. So here you go, fly guy, PNG. And here we go. Basically this is the
overview of your sticker. And here you can adjust
some other things too. For example, if you
don't like the cut line, you can adjust it here
or you can add text. You can even change the
background though let's play with this and
see how it goes. So let's see, this is
what I'm talking about. Because your file is a PNG, you can easily choose the
background of your sticker. So I will leave mine as white, and I will try to explore
this cut line feature here. So this is very nice
because you can actually choose how much whites do you want to have around
your sticker? Let's try small. And I think I like this better. You see I have
less of this white and I think my illustration
looks bigger this way. So I think that's the
option I will go with. So basically that's it. The quantity I will get for
this size is 123 stickers. And if you change the size, you will see that the
price is getting higher. Or you can order a
smaller quantity and you will see the
price will change. But basically what
it costs you less is just their default
size and quantity. So I think it looks
pretty good for me. So I will have
12023 stickers for twenty-six dollars and I added to guard and then it would
go just go to checkout. As you can see, it's just
a matter of minutes, if not seconds, It's very easy. You just enter your details. You're entering your card
details here, and that's it. As I said, the shipping is free, so I will get my stickers
around this date. That's it. Now you
know how you can order your stickers from this app, which I find very easy to use. And I will show you what kind of stickers I've printed with them. And you can see with your
own eyes the quality and decide for yourself if you want to choose this provider, if you want to try sticker
app or maybe you know, better websites for
printing custom stickers. By the way, if you know such a website and if you want to recommend it to someone, you can put it in Class Notes. And of course, I'm waiting
for your projects. So please share with us, share your finished stickers. If you have some in the
class projects section, or if you don't want to
order your stickers yet, just show you're ready
to print file with us. Share your PNGs on transparent background or
even on color background, or just your edited
images ready to print. So please share this one
in the project section. I cannot wait to
see your results.
10. What you will learn in my next class: It is such a unique feeling. Holding stickers with
your own illustrations enhanced something that
you created from scratch, literally from a
white piece of paper, became a product
in the real-world. Now you know how to edit your
illustrations digitally and how to prepare it for print for all kinds of fun projects. In my next course, I will teach you
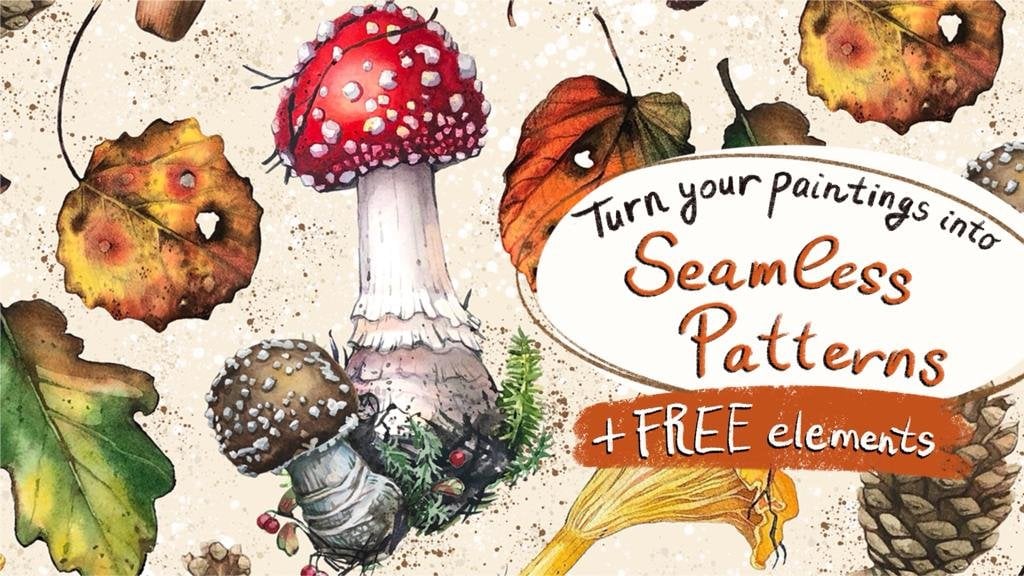
how to transform your illustrations into a seamless pattern
that you will be able to print on any
kind of surfaces like fabric, wallpaper,
stationary anymore. I'm so excited and I
hope to see you there. Bye bye.
 Natura Illustrata, Anastasiia - Watercolor artist