Transcripts
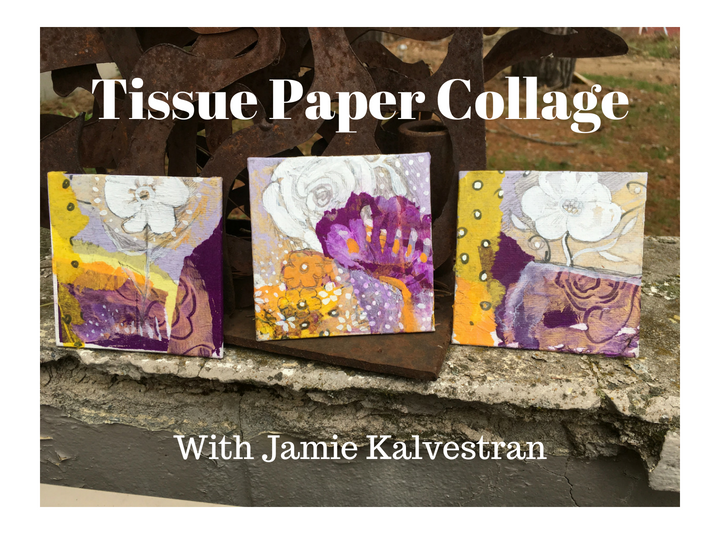
1. Introduction: everybody. I'm Jamie Kalvestran, and I'm here today to share a technique with you. Uh, that's one of my favorites. It has to do with this stuff. Tissue, paper, tissue, paper, eyes, super inexpensive. And it's a really fun medium toe work with, um, I always feel like I'm a kid in kindergarten doing an art project when I do this, but it can result in spectacular results, so let's get going. I can't wait to show you.
2. Supplies : So here's a list of supplies that you'll need. I'm using 34 inch canvases for the project that I'm in a demo. I like to work on more than one at a time. An assortment of tissue paper. Ah, this is a meat tray. I like to put the gel pad in there. And then I could put the Breyer ears and the men keep kind of keep the mess contained. These air, the the pain time using and the color palette I chosen from the tissue papers in the next step will start putting it all together.
3. Ready Set Go!: Wait. Here we go. This is a permanent marker, and I'm just sort of doodling on some of the torrent up scraps we're gonna fast forward or forward fast through Ah, some of this doodling. But you can see I'm not being very precise. I'm just kind of having fun. This is kind of the The kid in kindergarten was a part of it. I like to do a little something on each of the colors. And here's where If you were brave enough to run tissue paper through your computer, you could print anything on the tissue paper. Ah, you know any of your current artwork or lettering, text, whatever. I really need to investigate that myself. So I really don't know what I'm creating yet. Um, I like to just create all kinds of stuff and then you that stuff to make stuff. So I hope youll get out your tissue paper, tearaway Mark away. Take a picture of scan and uploaded so I can see what you're doing. I'd love to Ah, I love to see working process, so look forward to it. Have fun
4. Printing: So the next step is to apply paint to the, um, printing pad and you can see my pad is Well, well, well used. I do clean it. It just over the years it has, ah, decided to keep some of the paint. Um, and I'm not super precise here. I just kind of wanted all over, and, uh, maybe make some doodles in here. You know, you could actually draw real things if you can do whatever you want, and then you just place the tissue paper over it and gently pick it up. So the tissue paper will be a little bit fragile, and sometimes it will tear, but we're gonna tear it anyway in the end. So, um, so I'm not I'm not bothered by that. So one tip when you're doing this is you want to have a lot of, um, table or ah, horizontal space toe. Lay these all out on eso. They can dry because you you may get caught up in this. Sometimes I spend like 1/2 a date Does doing this part because it's so much fun. And I love things that are unexpected. And with this process, you really don't know what you're going to get until you get it. And, um, sometimes it's really beautiful, and sometimes it's really ugly. But all of those pieces can be used somewhere. Somehow. I remember when I first started doing this, I got some really humdinger ugly ones. And, uh, a dear friend of mine who's an artistas well came over with a little crop tool, also known as her fingers. And she said, But what about this? What about this? And she would find the little beautiful corners and little beautiful marks that were within the full sheet, while those you can you can clip out later and use use the beautiful things. The other thing that I do is I will have a pile of of, you know, rejects in, and they get printed over that over with other colors. And sometimes I paint sometimes that print sometimes. Sometimes I did Italy do stuff on top, so keep all the uglies, put him in a box, put him in a drawer, pull him out every once in a while. Sometimes you think, Oh, that's not so ugly. What was I thinking? So, like I said, all of these little pieces of painted paper need to go on a horizontal surface to dry. And I put this photo and it's not the greatest photo, but, um, it shows one of my horse. I'll surfaces from a previous project hand. Uh, so what I'd like is for you to upload a picture of your horizontal surface. When? Once you get done with the this phase, I would love to see it. You can send close ups. You concerned? Ah, A picture of the whole collection. Like what I have here. Be great. I'm looking forward to it. Thanks.
5. Layering: So here's Thea stuff that you need for the next step. And here you can see I'm using the mat medium to and the very south brush to apply the tissue paper. So when I use other papers, uh, in collage, sometimes I use a stiffer brush to apply or sometimes a sponge brush. Um, when you use tissue paper, it's really, um, fragile. So if you use ah, stepper brush or refuse ah, scraper tool, you'll end up tearing chunks out. And, you know, actually, sometimes that is the super cool result. Um, actually, it happened. Uh, I don't know if it's on the video, but it did happen in, um, in this case, and it ended up turning into a flower. So again, sort of just go with those mistakes, embrace him. Um, don't get too attached. Remember kindergarten thinking? Just have fun. I know it's not always easy, but, um, I think that's part of the joy of creating. So here's the Here's the scraper I was talking about. This doesn't, um I don't This doesn't tear in this in this particular use, but the other thing that you'll see here is that the tissue paper wrinkles a lot of a lot of clash papers. Wrinkle. Um oh, there, there we go. There's where I scraped too hard and I scraped and I created those, like, chicken shapes down there. But, um, I see two little chickens there. Um Or maybe it's a chicken in the mouse. Leno. See, I always see things in things. Anyway. Ah, I remember what I was saying, But have fun with this and just keep layering up there. See there some more scrapes. See who cares? Describe the next piece. Go back and forth. I do. I do love working on multiple, um, pieces at one time because, you know, you can move pretty quickly. Um, between them and you don't get you Don't fall in love too much or contemplate too hard What goes next? What? What looks good, See? I mean, that's it. That's my contemplation. Pretty fast. So the other thing that you'll notice that's happening here because this is a Siri's, um, well, I don't know, technically, if it's a serious because it's painted all at one time, but anyway, um, so there's I'm using similar colors in each one, so there's, you know, the light violet in each one There's the eggplant, purple on each one and that That way, when you display them as, ah, as a group, they all ah, work together. And if one starts to kind of go tone direction, you know, you can you can just go with it or you can say no. I need to add something back in to, ah, balance it with the other two. So here I'm pulling some doodles. Ah, of the flowers. So now at this point, I'm I'm sort of deciding. Okay, this is this is looking like, um maybe an abstract still life for something along those lines. People sometimes ask me, What are you thinking? Were you thinking when you're doing this? Actually, I'm not thinking in a lot of cases, I'm not thinking. I'm just doing And, um and occasionally the thinking comes in like like I just mentioned, you know? Oh, I need a little more of this to keep it in balance or whatever, but for the most part, I try to approach my art as play. And, like, what? Would that What would it look like if I did this? So, um and you know, the great thing is, you really can't make a mistake. You can just if it looks ugly, it could go in the ugly drawer, or you can just keep layering it or painting over it. So I like to photograph my work as I go. And that way, if I ruin something, I still have a photograph of it beforehand. And, um so that takes away kind of them the scariness of ruining it. So this is a good time to step back, walk away, make a cup of coffee, come back, maybe sleep on it. Look at him tomorrow. Um, because you might be lost might not know where to go and sometimes fresh eyes. A first day. You'll have a new perspective and you'll know exactly what to do. So if you don't know what to do and and you've looked at them from a distance, you've looked at them close up. Um, it's time to ask the what if Question What if I painted white over the black? What if what do I love about the upper left image? And do I want to add that to the the other two images you'll see next session? Here's here's what How I solve this cartoon flower with this messy, layered rich bottom. See, there
6. What If?: Here's the whatever question. So now I've got this kind of cartoon flower and is rich layers, and it's like, What do I need to do? So here I like those dots in the top, the top one. So I'm go back to the tissue paper, grab some more of those dots. So now you can see the three year are, um, integrated a little bit better. Oh, I know what I was talking about earlier. The wrinkles. I love the wrinkles. They're almost impossible to arm avoid, but they create a wonderful texture. And if you go over these pieces with wash at the end Oh, it's wonderful. So I've dried it in between here. It's not wet anymore. I used, um I have a heat gun. You can use a blow dryer hair blow dryer. Um, here, I'm spring some water on, hoping that this white will kind of bleed and run. And this is ah, white acrylic paint. And actually here is you'll kind of see the effect of some of the wrinkles. Um, well, maybe not right here, but the wrinkles will, you know, move the paint in certain directions and add kind of highlight the texture of it. And I love that it's again another unexpected, Um, the thing that happens when you just when you just do and you don't think so. Now I continue to add white layers and you could use, um I'm using acrylic paint, but you could use wash. You could even use watercolor. You get a completely different effect. But come you could experiment with that would be fun fun to see how it works together. The map medium because the tissue paper is so thin and it's transparent, which gives it, you know, the nice effect. That's one of the things I love about it. But when you use the mat medium on it, you're basically painting on, you know, almost ah plasticky surface. So you don't have any of absorption like you do with, um, watercolor paper. So I'm not sure what color would work that, but who knows? Try it. Experiment. So again, I've dried and I looked at thes and I thought, no, what to do. Um, so I decided to add some pencil. Actually, I edited out. I actually tried charcoal over the top, and then, um, I didn't want to spray the fixative because I don't like using it because of the health issues of breathing it. So I thought, Oh, I'm gonna I'm gonna put down, um, the charcoal. And then I put over a layer of plain white tissue paper and started to adhere it down, and I thought that will protect it. Keep the chalk from the Turkle from moving. But actually, it created this big mess, and I ended up just wiping it off with a damp, um, rag. And so then, ah, here we go to this to the pencil thing, which worked Great. I was gonna leave it in just to show, like how it doesn't always turn out, But then the video at super long. So I did edit it. But I'm not embarrassed to say I have lots of bloopers. I think this is working twice the speed of what I was actually working. So yeah, I'm not quite this quick. So when you look at the three of these, even though the bottoms kind of cut off here when you look at the three of these, is there something that, um, that these pieces say to you, Can you see or predict what I might do next. Um, what would you do next? So I love dots. I love using dots, paint a paintbrush, dots or paint pen dots. I, uh I think they're fun, and they're kind of meditative. Teoh, you know, during the process of it. So you you'll see dots and a lot of my work. Um, this is one example. Gotta love the dots. So here I have added, um, some white dots around the floor. But I wanted it to be different from the first dots on the upper right hand corner, so it ties them together, but it doesn't repeat the exact same thing over and over. So I love using the white, um, as a highlight. So one thing you can do is, um, squint at your work When you if you're asking a what if question and And you, um you don't quite know where to go. If you squint, you might see an area that's like, way brighter or lighter than the rest. Or you might see an area that's way darker than the rest. And, um, so that will help you navigate to the next step. So when you look at the top, there's those. Both of them have a nice size chunk of that, um of that eggplant purple. And the lower one has just a teeny tiny chunk, which I'm painting over right now. So now I would say there is, like, none of that. Um, So again, when I look at these three is a Siri's, I think. Mm, the one I'm working on right now. The one in painting on is Ah. If I squint, it doesn't match the other three. It doesn't work with the other three. Um, so I decide Teoh ad some of that purple back in. And, um, it's like I wasn't sure I was gonna love it. Now here's an example of that brush is a stiff brush, and you see how it just tour holes in the middle of that and the where the porn just showing through. So I'm like, that looks like a flower now. So I was hoping Teoh manipulated into being a flower, but it kind of the terrors that happened accidentally actually, um, helped me. So I love accidents. You know, we always talk about happy accidents, but I like him. I it's just take it as a challenge is. What is that? What can I do with that? Now? What can I do with that next? So now when you squint and look at this where we have a better balance of color throughout the all three. So you can see a lot of the details up close with these images. Sometimes I'm surprised myself when I look at him. Close up. What exactly happened? These were photographed outdoors, so it gives you a better idea of the actual color, which is much more vibrant than what some of the earlier images showed you. So guess what time it is is time for you to finish up your projects and upload them to the skill should share the skill share site. And, um, I cannot wait to see what you created. I'm super excited and just Just don't be shy. Don't be shy. Just do it. I'm I hope you enjoy this class. Um, it's not quite over. There's a little bonus section coming up, but, um, please do. Ah, show me your work. Thanks, everybody
7. But Wait . . .: So I get a little crazy about wasting about not wasting our supplies, um, and paints and that kind of thing. So, um, this campus is ah, gets a 12 by 12. Is getting all of the leftover tissue paper from the project. Um, of course, I could have stashed it, you know, with all my other scraps. But I thought it be fun to see what I could do with, um, with what was left over. So that's what you're seeing here and again. I have no idea what I'm gonna create. There is, ah, calls sewing pattern to shoot paper, which I use a lot. Um, some wonderful unknown person left me two boxes of sewing patterns on my on my outdoor steps last summer, and I have never been able to, um, find out who who left them. But, um, I I'm super grateful. So, as you can see, this is very different from the what I did earlier. That's half the fun. So if this ends up not being something I'm happy with at the end, um, which I usually live with for a few days or weeks or months. But a lot of times it's the base for a painting. So who knows? Maybe that will be the next skill share video. Hey there. So I forgot to tell you one important thing. And that is when you're all done, you're gonna want to put a protective varnish coating with a UV protectant in it because tissue paper does fade. And so you want to take that last step? Don't forget. Like I did take that last step and protect your work. So I really enjoyed this. I hope to get to know you via skill share. I'm looking forward to seeing your work. Oh, that's Axle in the background there. Picking up for miss now anyway. Um, yeah. I look forward to seeing your work and getting to know you. And, um, I'll see you there dying.
 Jamie Kalvestran, Licensed Artist and Surface Designer.