Transcripts
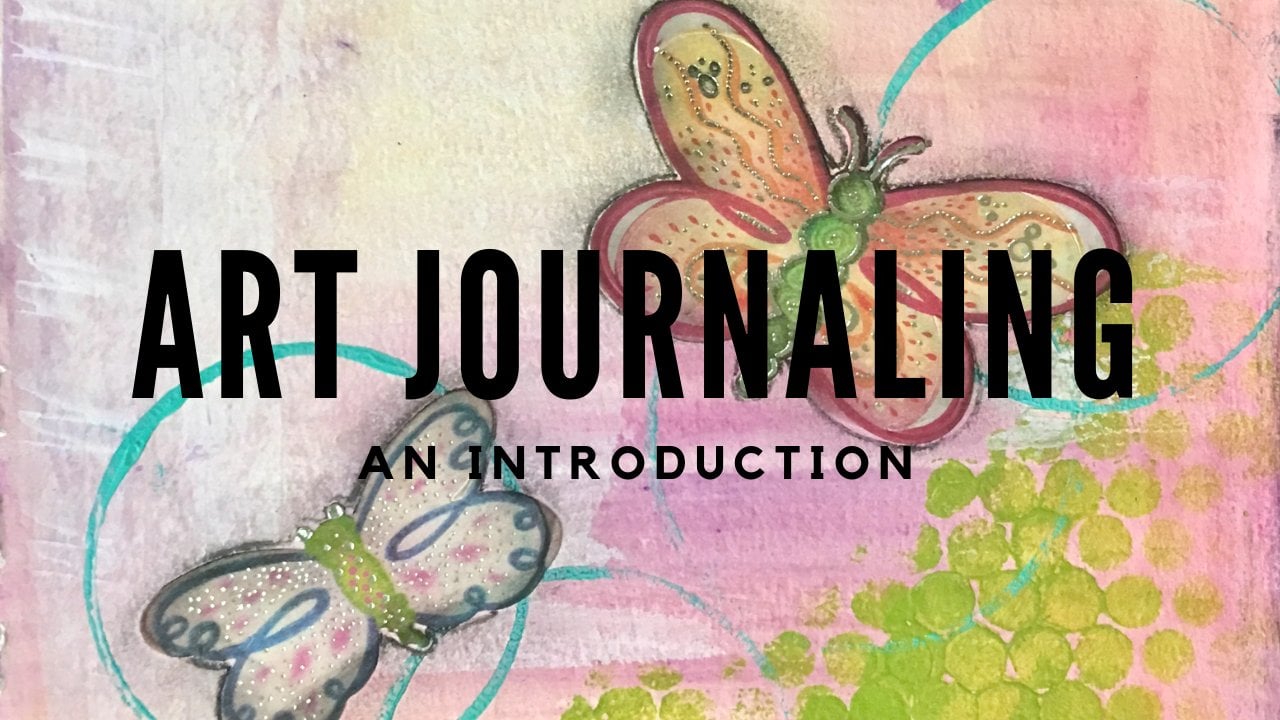
1. Class Overview: in this class. We're gonna make this therapeutic art journal using layers of papers, found objects, paint, pastels and more.
2. What is a Therapeutic Art Journal?: a therapeutic art journal simply an art journal that you used to document your life. Events, feelings, thoughts. It's a great way to help process emotions and events of your life that sometimes words just don't express. They're my therapeutic art journal has helped me through a lot of tough times. Sometimes I don't know what to write. I don't know what to say, but a song or a poem or a splotch of pain is exactly what I need to express that emotion or that thought. Help me process what has just happened. So today we're gonna be making a therapeutic art journal. We're gonna use cardboard shipboard material, assortment of papers, and it brings to bind it together. We also have page all sorts of quotes on creativity that we will use on a cover as an instant reminder about being creative
3. Making Pages for Your Art Journal: so we're gonna start out with our chipboard. This package came from Michael's is 40 point chipboard, and it's basically like a thin cardboard that is thicker than poster board. But it is not a stick is regular cardboard. You can also grab heart order from here. Amazon boxes or what? Using carbon running, cutting it down Teoh to the right size for my journal. I have it a little bit smaller with 46 pages. But today we're gonna dio 8.5 by 11 Cheat cut in half so that it's a more standard size. These chip boards come in 1/2 by 11 and we're gonna start cutting. I've got a handy dandy paper cutter, but you don't have to use a paper cutter. Yeah, just make it quick and easy to do that. Okay, way. Want to paper? Next? I'm gonna cut down my papers, Teoh from the 18 half by 11 half sheet size. So I've got some playing copy paper use. It's really thin compared to the other papers that will use. But whenever we use my carnage or Joe medium with other papers on top of it sort of melts and becomes all the way through. It becomes one big paper instead. So you're gonna go and cutting through a bunch copy paper. So just size also got so watercolor paper, one of colored paper. Uh, take a few sheets of this and cut it down. Watercolor papers is much thicker than regular paper, and it has a texture grass home to glue and paint perfectly. I just my paper cutter again. Five. What is the line that we're cutting off? Maybe your cross right now. Most. Do you have a paper cutter with adult light? That's okay. Our paper is a little bit jagged like that. It's not perfect. It's not perfectly straight lines. Pages are, and that's awesome thing. This is handmade. It's not bought from a store and made by machine. It is perfectly hours and perfectly meeting us. I've been helping is okay to talk about school. Also elementary school teacher. We're making our journals, the Cancer center, frustrated that they just don't line up perfectly. I tell them again and again. It doesn't have to be perfect. We're not robots. We are no machines. We are individuals and were creative. And I cut this down to 8.5, and it's really needs to see you start to get that. And whenever we have creates problem solving times, they're remind such creative things ways adults do the same. One of our boats are boats Page that we will be referencing and you can Teoh cut up and included in your mixed media journal one of the quotes on There's From Picasso. He said that every child is an artist and the problem is as we grow up remaining an artist as we become an adult creativity, these deluded down the wife being a grown up.
4. Binding the Pages : Alright, so next we're
going to add our rings. These right here are
two inch book rings. You can order these
are the Amazon or purchase them from your
office supply store. Craft stores may
have them as well. And they come in
different sizes. I like this size so that whenever you have
a big stack of papers, it holds it really well. It has a class for it here. You can open up
and take pages out and put pages in, snaps back. So what we're gonna do is go
ahead and add our readings. So it's just as simple as threatening your papers
through the hole. It doesn't matter what, order your papers or
stick them on like this and add the cover
and snap it glows. Right now we have a
lot of extra space, but we're just getting started. And hopefully by the time
you get going in this, it's gonna be filled
up really quick. This side. Now, out of those holes. There we go.
5. Choosing a Quote: Alright, so we have our therapeutic art
journal right here. Here we go. Now that we have put together
and let's take it apart so that we can begin to mix media, decorate our cover, snap
that up and put this aside. And I'm ready to
decorate my cover. Like this is the printable
downloadable list of quotes on creativity
that I found. I'm just going to pick one
of these and cut it out as my inspiration for my cover. Let's see. Should have decided which one. Okay, so I'm gonna
pick this quote right here by Kurt Vonnegut, who I don't know if I
said his name right. But it says to practice
any arm no matter how well or badly is a way
to make your soul grow. So do it. And that's a great
reminder to me because it's so easy
when things get busy and I get stressed
out to not make R, to find a way to make up excuses for
not using my art journal. And especially when, whenever
I feel insecure that draw really well or I can't do
this or that really well in my art journal looks so much different than anyone else's. It's easy to make excuses, but it's good that my art journal looks different
because it is different. It's my no matter how badly I draw or create in
my art journal is for me, in the creative process
itself is healing. So this quote is
really special to me. So this is the one I'm
going to use on my cover.
6. Setting Intention: So now that I've
chosen my quote, before I do anything else, I'm going to set the intention of my cover
whenever I'm making art, I always like to begin by
setting an intention is a way of me putting my
heart into my work. So what we're gonna do is I'm going to take a
piece of vine charcoal. It's really lightweight,
thin charcoal. It smears really easily. And I'm just going to write
the word three. Really big. And I'm going to add
some extra curls, swirls to fill my page. Then I'm going to set my intention in because
it's very smear. You see, I don't know
if you can see how that smears with some mod podge. And I'm going to do is my brush in it and trace over the top it with this glue, adhesive that we'll use again
later for papers probably. And just trace over my words. As I'm doing that, I'm just thinking about the word create and what
that means to me. I'm thinking about
the creative process and how the act of
putting pen to paper, how using a paintbrush to make smear your lines is therapeutic. How the actual process of
doing this is helping my soul. It's feeding my soul. And I hope that
you find your way to feed your soul using created tivity and your
therapeutic art journal. Now, I have this set and I'm going to speed it up and
dry it really quick. And I'll be right back.
7. Adding Textured Paper: all right now that I have my intention and my cover with work create animal swirly. It's semi drive a little bit, a little bit wet, but that's OK. The cool thing about the market podge is it. Give some texture that we can you work with. It might show up again later. Uh, we'll see how this turns out. So with using some paper, he says this the thing about papers ISS. It's not so much the color because we can always paint over it. But the texture and that's what makes me excited about mixed media is the textures. So I chose these papers here that have, um, nice texture and I just into pieces. Where did you get those papers? Thes papers were from a scrap pack at Wal Mart. In a craft section, you can find scratches paper with textures on different colors at your local craft stores. But I was excited to find this pack. It had a great assortment of different types of papers and different textures that we're really well for what we're doing now. This paper that I chose has stitching, which is really great, but it's not allow me to return it. So I'm gonna use my scissors for this. But I would say don't use your scissors. Just hear it so that it has that nice edge to it. Um, it's okay if I cover my goals because I can always re punch those. It's good. Teoh use little pieces, big pieces. You don't have to think a whole lot about what you're doing with it. Just the paper, and I'm gonna go back and use Hodge again for this. You can also use a Joe Media, so I'm just gonna This paper is pretty big, so I'm gonna paint the back of it with the model lodge, and I'm gonna pain the board that I'm gonna stick it onto you so that it's almost melts into the surface of the board becomes part of it. So I'm putting this. I'm pretty thick and clocky gloopy. That is perfectly good, because we wanted to have that. The texture, that life that it has, that it's not just a clean cut. A piece of paper flew down. It's alive has feeling. So as I'm doing this, I keep thinking about quote that I'm gonna put in the word create that I've set into this, and as my mind wonders and start to daydream, I try to focus on what this intention creating and the life that it gives to me and my effort Teoh, make it a part of my everyday life. Our journaling is so amazing for reducing stress and anxiety. It bills created creativity and creative problem solving. And it, um, helps clarify your goals in your vision. And it does so many great wonderful things. It's It's been so helpful to me in processing emotion and feelings and events that are out of my control on understanding things that I can't control and things that I do have control over. I think about those things while I'm working in this process. So those things, those thoughts, this feelings are put into the work that I'm doing. So I have some paper on here and we'll let this dry for just a little bit, and we'll add some pain
8. Adding Paint: Okay, so we're back to my
podcast. Mostly dried. It's a little bit tacky, but I kinda like it that way
because it makes us with the paint and just continually
gives more texture. And I know it's hard
to see on the camera, but the brushstrokes
from where the blue was, has a nice glossy sheen to it. And we're just going to keep building from that
and up and up. So I'm going to use some
artist's loft paint from Michaels and
squirt some on there. This is a fallow blue. That's one of my favorites. And some white. Let's use some silver. This is a different green and this
one is from Hobby Lobby. This is some silver. It's kinda separated on. So you can squirt your
paint directly onto your board and use a
brush to brush it in. Kinda get flooded. Capture some of that texture of the paper and
glue that we have. Another fun way is to
use an old credit card. Or whenever they send you
the fake credit cards in the junk mail and just spread it across
the surface like that. I'm just using this
to kind of blend the blue and the silver into one another a
little bit on one side. Leave it kind of
rough over there. I liked that. I can kinda see little hints of the
word that's underneath. Another technique for using your credit card is
to scratch into it, can scratch lines into
it, crossways lines. You can dig into it
to scrape the paint off and swipe across
with blended in. And I really like how that's capturing that paper texture. So now we have a layer of
paint on top of cardboard. And we're going to move on to see what
else we can add to it.
9. Adding Found Paper: Speaking of junk mail, I'm gonna add some of these paper textures to just keep building up on our players. These are It's really great these envelopes that they really great pattern on the inside of these envelopes where they see you, They want your money. Thank you. I was never possible pieces. And this time, use so heavy gloss Jill Cortex. And I am gonna use I don't have my spatula with me. So I'm just gonna use the end of a paintbrush to disco off this on this again is gonna give more texture and work as a glue to hold this layer of paper. I'm just gonna but some under the paper. Some top of the paper. Eustis. Oh, it's mixing with paint. Nice levy. If you have a paint spatula, you could use it to kind of make it smooth. You can use your credit card again. Sorry. That's a It's good to check. So let's see. Let's add another small piece. A good role in composition is to do three. Yeah, I heard that the rule of third is to do three different pieces, So I did want to three big sections of the paper earlier. And now I'm gonna do three. 123 This pattern in the way that kind of you are naturally sort of connects them. So even when we're doing abstract stuff, we can consider the composition as a whole. So now that I'm looking at it, this space over here is a little bit empty. So it's at some paper on again. I use the heavy Joe medium, and I'm just gonna lob it on there, stick it down those air ellipse with other kind of paper found paper, please. I I love using junk mail. It's something about it that it's like hot. You sent me this junk, and I'm gonna make something good out of it. You didn't mean to, but you could use paper towels. Let's he's looking. Or tissue paper. Uh, gift wrapping tissue paper has a great texture too. This paper towel was with me. All sorts of found papers can be used in this paper. Tallis melt into that really nicely. I see some books behind you're gonna use thrills later. Yes. Books are another fun element to add into your mixed media the words it's always fun. Teoh clip out certain words um, other times you might use it so that you can't necessarily read the words but old books from thrift stores. Um, but this one here, this is What about fairy tales? Has little illustrations. That my spark interest, the words you could highlight certain words. Um, there's animal pictures. Look at this mermaid community. Use her. I'm just gonna hear this page. Really see where we want her. We've got to remember that. We've got a quote. I'm gonna put this. Think I want her to be, like, right there in the middle, this down. And you can see some words on here. Steel toward and after the paper is coming off right here. You could fold it over the other side, or we can tear it off. I like it folded over. Let's do that again. I'm just using this, Joe medium as my because I love the way it dries texture that it gives and the fact that you get when you use it. So I got a mermaid on here now from my old book, um, capers. Air. So fun. Another type of thing. Painting papers. I have pick papers that I painted whenever I was playing with water colors. These were some thinks that I was playing with. This is another great element that you can add to your mixed media piece. So I think I'm just material and let's see, let's add it right here. I don't like this white, but I'm still tearing it off. Sort of Frame them for me right here, like this is coming together. A lot of times when I'm doing mixed media, it just sort of comes to me. I don't really know where I'm headed with it. I find something that inspires me like the papers or the mermaid quote and go from there. So it's just a touch more this purple so that there's no, it's not the only area that has purple. It's more what's good. So let's let this drive and then we'll come back and play with somewhere elements
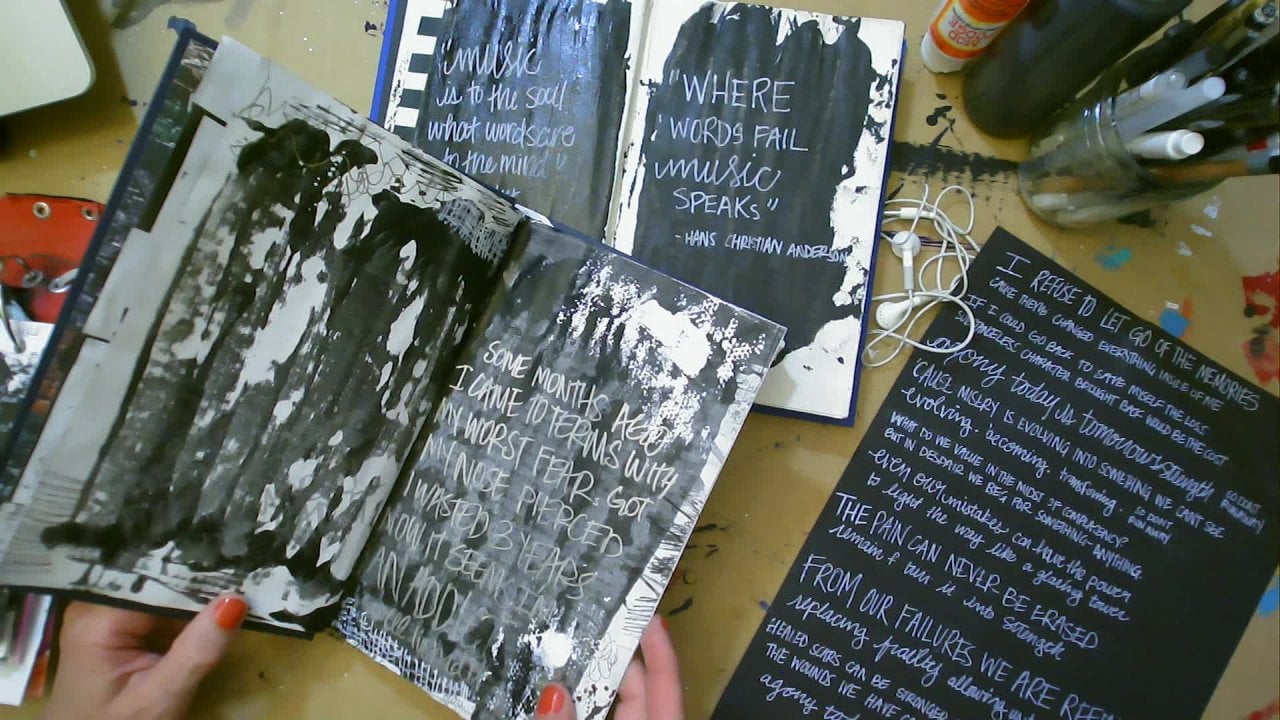
10. Making Marks: good. So way have our paper. We started with paper and we add some found papers from books and junk mail, paper towels, painted paper pieces and added a few found object elements to it. This paper just caught my eye. There's something about it, Dad. It feels like it just wants to go in here somewhere. So I'm gonna go back to adding some more paper. Um, there's no particular order that you have to do this, So that is perfectly OK for us to add more paper. Get to that. I just put a piece right here on the corners. There's something about shine of it just caught my eye. So I'm gonna stick this on. This is going on top of paper, paper, towel, sand, my part and this medium's it is very well layered up. And that's the fun. Part of next media to me is just how many layers that you put into it. You just build it a okay so way have that hard. Next I'm gonna plays with adding some ink using a stamp. This is a fun Stan. I'm pretty sure it came from Michael's and a colored box of peaks. These were the kind that you can take out and dad on, Teoh, your stamp. This It's like it's a big It's not showing up very well. Oh, I see. Just a little bit. Try a darker color. Oops. This red pink color will have more contrast. It's mixing with the blue that I had on there, so it's gonna have a meat watercolor. Fateless trained. It didn't come out completely, but I'm like in the way it's looking. I'm just gonna dab this around in places that looks like it might need a little bit. Some. Let's see what happens in Fitted on top of this paper. That looks cool. A lot of mixed meeting. It is exploring not so much starting out with a goal what you wanted to look like, but just playing. It's about play, so I like that. But I added stance to that. Now, Next plenty. We've added so chalks and pastels. I've got some chocolate stone. I've got some oil pastels and some charcoal sticks. This is a fun idea. This is a fun charcoal pencil that we could I think I'm gonna under draw lines under these words just to give a striped feeling maybe kind of like she's caged and she's breaking free from her track of perfectionism and fear and insecurity. And it's breaking free into creativity, creative living, seeing things creatively, finding solutions to problems, finding peace of mind and strength to face what's ahead for her. Okay, let's add some green. I'm just gonna just play with using this spring brush across this texture, and I like some of the the texture that we have there. I'm feeling some of these grooves to make Have some depth. I did some green up there, so I should do some green. It feels interesting on top of a sand. Let's see. You see, this is this is an orange color. This is an oil past. Still, I'm going to try since worlds right here. I really love to combine that's street swirling nous with the rough textures that we have different. I think this is really Oh, yeah, that's nice. Agree that doesn't scratching looks on my sand with but this office and I'm just play just and I think I'm gonna get my whole back out and place. All right? It looks like we're about ready to order. I'm gonna clean up my mess a little bit and come right back
11. Adding Your Quote: Alright, now I have my
quote to fit on here. And I'm just going to play with how I'm going
to put it on here. It would fit that way. Add some stripes elements,
but do it like that. But what I'm feeling is
cutting it into sections. To practice any art. No matter how well or badly is a way to make your soul grow. I really like that. I'll put
the guy's name down here. So I'll remember who said it. Could do that or
if you cut it into smaller pieces and do here. I think I'd like that
to practice any limit to how well, badly. Some way to make your soul girl. You go like that. So get our gel medium by Cao. Could use a brush with
this or a special thing, but I'm just using the end of
a paintbrush and I'm going to use it to glue
these words on. And I'm going to make them
angled, lopsided on purpose. Because it's not perfect. I really like this no
matter how well or badly. This is a really cool design for my therapeutic art journal. It's probably know masterpiece. So somebody who probably would be like that
looks like crap. But no matter how well or how badly this process has been therapeutic to me to
talk this through with you, to walk you through how
to do this yourself. It's been therapeutic to me. It has definitely fit into my soul and made me grow
just by doing this. Like how this is kinda
getting the smearing, smudgy, not perfect. Sand is kind of smearing
and ink that was at the pastel that was on my fingers kind of
blending in with it. I'm just going to using my finger to get
across the top of it, makes sure that it's sealed on. Asks his name at the bottom right here that looks like that was meant for that. There we go. We'll let it dry and
then we'll punch a hole, and then we'll put our book
back together and we'll be ready to start some
art journaling.
12. Putting it all Together: So now we have our cover that has been put
together with so many layers. And as we build up these layers, we've been thinking about creativity and the
creative process, and how it has the
power to heal. How it has the power to
relieve stress and anxiety and help us to process the
things that happen in life. So now this cover is filled with all of those
reminders plus this quote. To remind me to, no matter how well or badly I
do are to do art every day, did work in my
journal every day, no matter how bad it might be. So now I'm ready to put
my journal together. I read punch the hole on the
top where I covered it up and just going to snap it
in right here on this side, and snap it in
here on this side. Now, part of this class includes printable page that you can use for your journal. I printed it in and out. I cut it down the hole, punched it, and I'm going
to add it to my journal. Days when I feel stuck and I don't know what
to journal about. This will give me some
ideas to get started. So here's some of the
ideas that we suggest. You can doodle on a
napkin at a restaurant, at a coffee shop. Grab a napkin from your
kitchen and just doodle, right words, little
squiggly lines, flowers, hearts, basic shapes and
anyone can draw, just do, just perform the act of
the creative process. And amazing things will come from it by practicing
that every day. So doodle on a napkin and then glue or taping
into your book. You could use only colors to express your
mood for the day. You could use all receipts and junk mail and
you're layering to make a collage and paint over it or
don't paint over it, just leave it there
as a reminder of your everyday purchases and things that you
have to face every day. Another font idea is to
use only black and white. This list includes even
more ideas that you can download and add to your journal printout,
add to your journal. We include some things that
you can journal about. Some themes that I've
used lately and my journey through ups and
downs got been hope and feeling lost. The word reclaim and restore. The idea of vision
and looking forward. These are ideas of things that you can think
about as you are journaling. And I hope that your journey through discovering
your own inner artists, through your art journal is as exciting and refreshing
as this has been. Thank you. See you later.
 Ashley Coxwell Walker