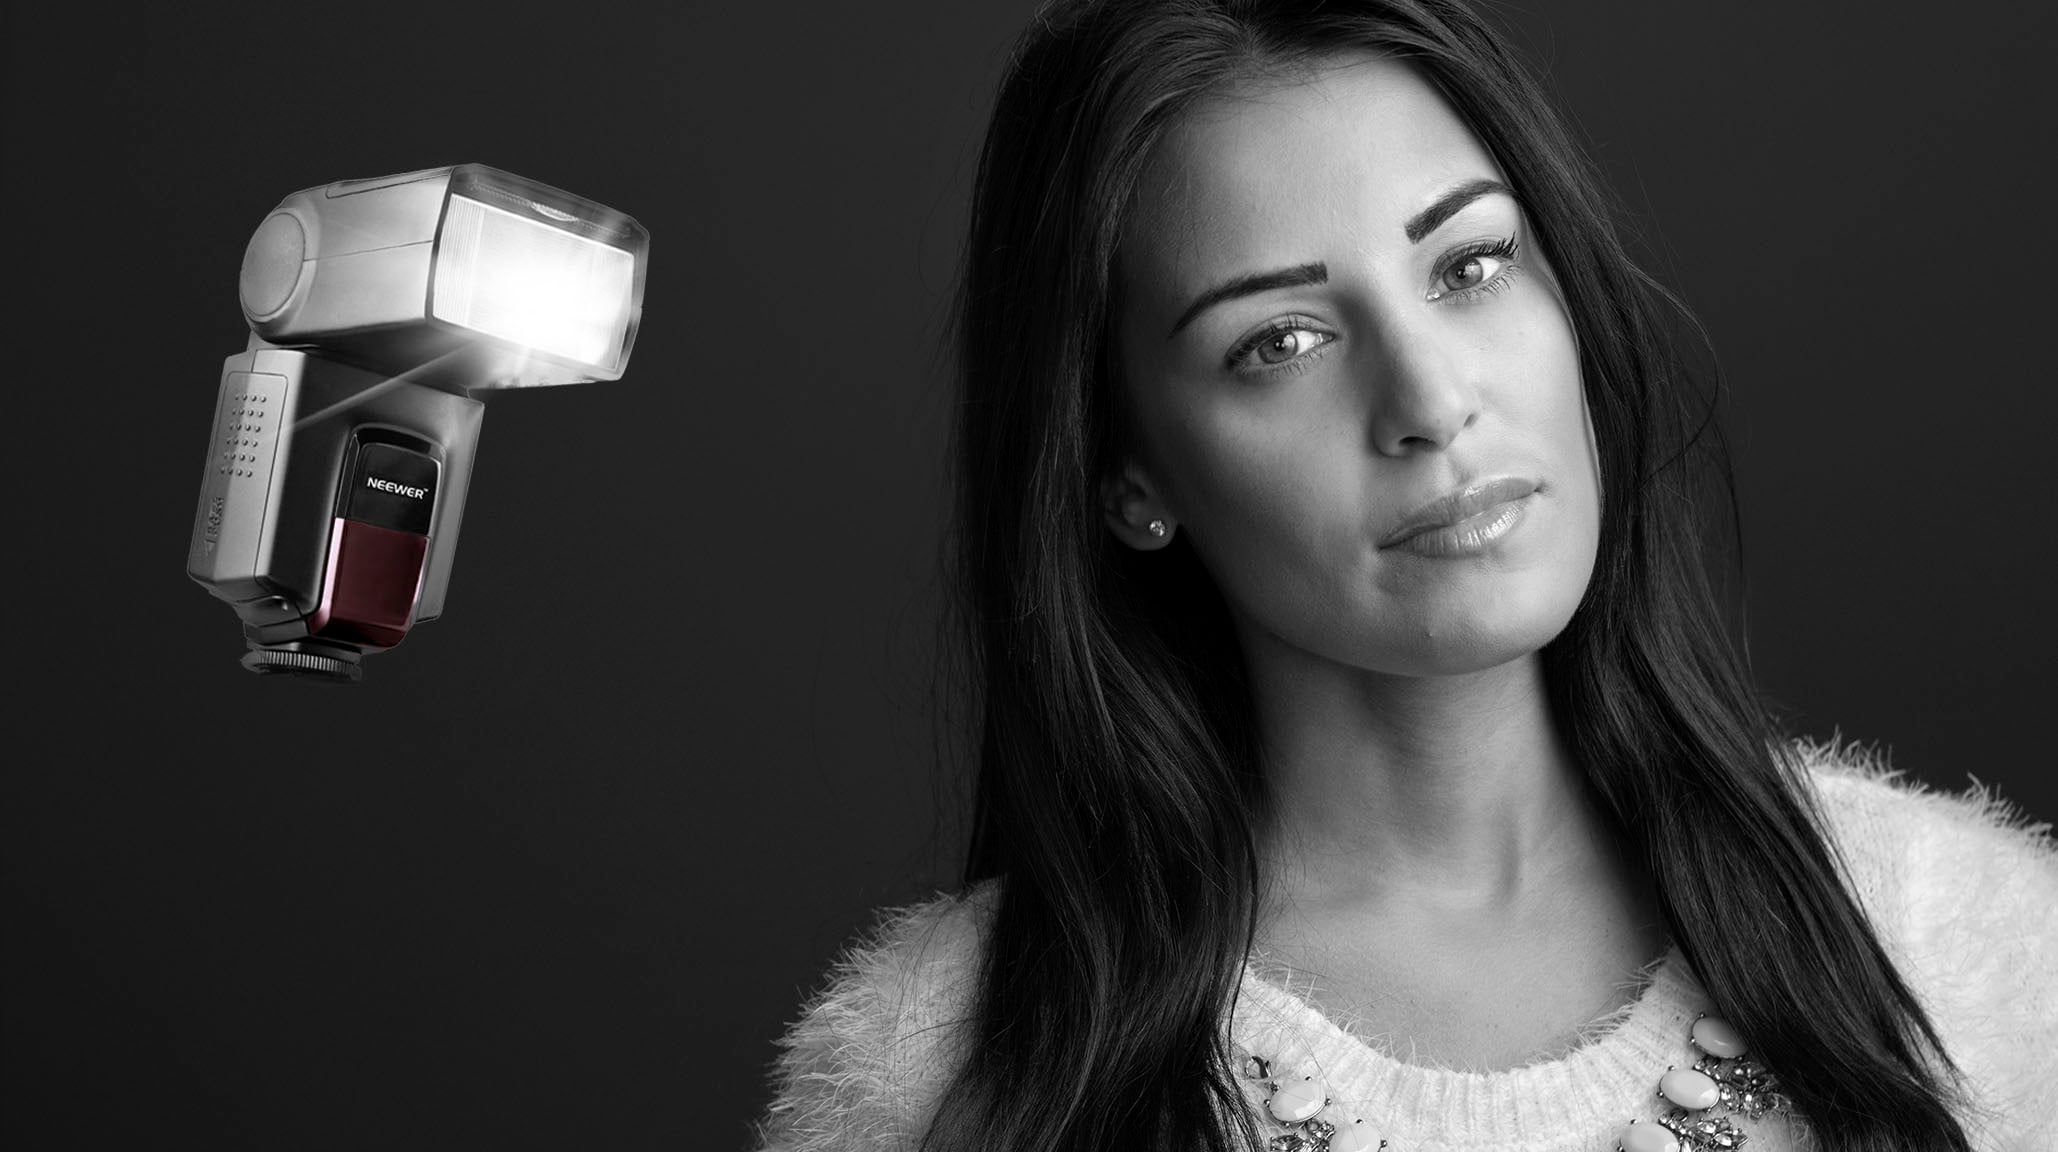
Transcripts
1. Course Introduction: Hi, I'm burning Raffi. Hopefully you'll know me already for my other courses. If no, I'm a professional photographer and teacher based in the UK on Welcome to the second part of my course on off camera Flash. The first part of the course demonstrated how to use off camera flash in a studio type environment. This course follows on from that and shows you how to use off camera. Flash heart doors on the two are quite different, although this course could easily be watched and understood by photographers of all levels . It will be of most benefit in media on advanced photographers. And that's because most beginners are just getting started on learning about the camera settings on Salam. And they'll want to practice more basic techniques before moving on toe off camera flash, which can be a little tricky for newcomers, especially when used outdoors. In this course, there were seven live outdoor photo sessions with lovely models, each one explaining slightly different techniques. You're learn out of balance the flashlight with the ambient light, where to position your flash and soft box, how to use, like utilize the sky as a background on how to make the most of some other backgrounds. But before watching those live session videos, please watch the first few videos dealing with outdoor exposures. High speed sink on high speed sink versus neutral density filters. Those videos will prepare you for the live session videos, so I'll have you enjoyed this course and find it useful Bye for now.
2. Introduction to outdoor exposures: I hope you have enjoyed the indoor photo session so far Now that we've come to the outdoor shoot, Sorry, but I do need to talk about exposure again because it's kind of a different mindset to indoor exposures. And that's because when we're outside during the day, you've got a whole lot more ambient light to contend with on instead of trying to shut out the ambient light like we did indoors. Now we've got to balance the ambient light with the flash. So what exactly do I mean by that? Well, let's say you have a lovely summer's day with a beautiful blue sky and you want the sky to be nicely exposed in the final image. You also know that you're shortly going to introduce flash, so to set, so you set your camera to the maximum sync speed to 50th of a second on you set the I Soto 100. You take the picture, you got a great shot of the sky. Lovely color in the sky. On the aperture that the camera gave you was F 16 so the settings were to 50th of a second I so 100 aperture at 16. Those are fairly typical. Settings were bright, sunny day. Now you put your portrait subject in front of that sky and take another shot. What happens? Your poor subject? Who gave you such a lovely smile for that shore is now practically silhouetted against the sky. You can't even see their face. It's that dunk. So now you want to light your subject with the flash. The trouble is, the aperture controls a flash exposure, and F 16 is a very small aperture in order to balance the light from the flash with that of the ambient light you need to get F 16th worth of life. From that flash on, let's say for the type of photo you got in mind a wide shot, the flash has to be, say, six feet away from the subject, and you're going to be using a shoot through umbrellas site. And if you set your flash to four power, you'll probably get on an aperture of around their 5.6 give or take. So if you put your subject in front of the sky again and take the same shot with the flash even on four power, the flash will make no difference because it's only giving you enough light for F 5.6. You need for it to get past FAA past F 11 up to have 16. So you need three more stops of light from that flash. Now, this is the crucial part that you need to consider and think carefully about. Okay, You say I'll increase the I. So from its common setting of 100 I so 200 will given aperture of f eight I. So 400 aperture of 11. I saw 800 aperture of F 16. And you think that's it. I'm there. The trouble is, the I so know only makes a camera more sensitive to the light from the flash. It also makes it more sensitive to the ambient light. So your sky will now be overexposed. How you say I know I think I can increase the shutter speed. Oh, you're already on the maximum sinks made. You're already at the faster speed you can use with flash. You might think I hang on. I could put a neutral density filter on the lens and that would knock three stops of light off the sky. Yeah, you're right, it would. But it would also knock three stops of light off your flash. So you're back to square one again and still have that three stops difference if you change the I. So to brighten things up, everything moves up that way. No good. If you use a neutral density filter to reduce the light entering the lens, everything moves this way. Still no good. So what's the answer? Well, you need more light from the flash. Let's say that instead of four power, you are, say, half power on the flash, you could up it to four power. And in so doing, you double the light output and that doubling of flash power is going to one aperture f stop, but you're on four power already. One flash on four power as giving you f 5.6. What you can do is bring in another flash on four power that gives you F eight, but a way you can use more than one flash simply by using a special type of flash mount on the light stand. Now, the FAA, you're now two stops away from your target of F 16. So you pick up two more flashes again doubling the light. You're now F 11 1 Stop away from your target. You're almost there. Just one more stop to go. But now, to double the light and to reach F 16 you need another four flashes. Well, four was bad enough to start to start. Attaching on worrying about eight flashes is the straw that breaks the camel's back. Sure, it's giving you F 16 but it's not realistic. How can you cope with that money flashes. How you even going to mount them on a life stand? The answer is, you wouldn't. Instead, you find another way around the problem. Here's what you can do. You can purchase a larger, more powerful and more expensive strobe like this one. You take it out, plug it into its battery pack, fired a flash through an umbrella five or six feet on bag straight away. You've got F 16. Why out of the box? Those type of lights are obviously more expensive, but much cheaper on convenient than buying eight speed lights along with the required triggers. The other thing you can do is to use more sophisticated triggers and flashes that do high speed sink Now I explain high speed sinking another video, which you'll find elsewhere on this course that will allow you to use faster shutter speeds so you can go from 2/50 to 500 to a 5000 to 2000 to four thousands. That's four stop F stops. So now, instead of the ambient light requiring you to be F 16 a to 50th it now only requires therefore, of four thousands of a second. You're now only need, therefore from your flash. But there's a small problem. I know there's always something isn't there? High speed sink loses you some flash power on the higher the shutter speed, the more power you lose. But you could double up the flashes to give you an extra stop. So that's not a bad solution, but one that requires ah, high end camera on more expensive flashes and also triggers and receivers, all of which need to be capable of doing high speed sink. So finally, after all of that is my favorite way of balancing flash with the ambient light, using budget flashes on manual triggers, just like the ones we've been using so far in the indoor shoot, it's simple. You do no attempt to shoot in bright sunshine. Instead, you shoot at dusk when the ambient light is much lower. You'll still get your beautifully exposed blue skies or darkest background, but you won't be fighting the ambient light. If you go out with one of these in bright sunshine and expect to use off camera flash, you're going to be so sorely disappointed. It's winter here in the UK and in the following outdoor photo sessions are be shooting late afternoon. We're not have farm or manageable ambient light levels. So see you in the next video, Martha now.
3. Flashes and Triggers Update #2 - 2020: Hi everyone. Well, it's been coming up to six years now since I made this off camera flash coast in 2014. This is the second of two videos are updating you on Flash and triggering developments. Since that time. Hopefully you will have watched the previous equipment update early on in the course. And as I said in that lecture, although there has been some new Flash and trigger models, fundamentally though, things haven't really changed. Having said that for outdoor sessions. And if you're really serious and wants to spend, willing to spend a lot more money. There are a couple of new Flash products that make life a little bit easier. In the previous video called Introduction to door of camouflage exposure, around the five-minute mark on mentioned that it is very beneficial to have more light from your flashes, especially when shooting in black conditions. Plotted out and a video I talk about doubling up on the number of speed lights and how after four or even to speed lights, that can quickly become cumbersome. Over the last few years, God dogs have announced a couple of products which are portable and which will provide two or three extra stops, stops of light. The first is the ID3 60. These look a little like speed lights on steroids and require a separate battery pack, who's normally comes with the flash as part of a kit. They do high-speed sink, but they cost over 250 pound h. And the tongue of making this video in September 2016, there still listed on the Goldilocks website, but I'm wondering whether the old models now, as they seem to be unavailable, Asana stores, possibly a more up-to-date got dogs products is the ID 200. Another portable option that does high-speed sink and which has a bill in powerful rechargeable battery. Use the ID3 60 extensively in the policy and have heard good things about the id2 100. Both of both of these flash products are relatively expensive compared to the manual speed lights. You'd need to be pretty serious about your location off-camera flash photography, but they will make life easier if you're shooting in black conditions. As I said in the previous video, if you're flexible with your session times, you can get around the problem of overpowering Assange simply by avoiding I was very bright ambient conditions. Just shoot lighter in the diarrhea dusk, then you can get away with much cheaper manual flushes. Bye for now.
4. Max Sync Speed & High Speed Sync (HSS): have you ever noticed when you pop up your flash or put an external one on top of the camera, the setting sometimes change without you actually doing anything. You may have a shutter speed of, say, 5/100 of a second golden, but then you pop up the flash, and suddenly it changes to 250th of a second. The information in this lecture applies to all DSLR cameras. On most Miller's cameras. They will have what's called focal plane shutters. Now the reason for the change of shutter speed that you just saw is that these cameras have been in heaven maximum shut shutter speed limit when shooting with electronic flash on that limit is called the maxims. Maximum sync speed. It's usually 250th of a second, sometimes a little slower than that, maybe under knighted for two hundreds of a second. If you have a flash unattached, many cameras won't even allow you to set the shutter speed faster than the maxing speed. Although some may lower in the manual exposure mode, my Nickens don't allow it. Some camera systems have a way around this limit, using something called high speed sink, But I'll ignore that for the moment and talk about it later in this video before looking up . Flash photography. Let's take a quick look at how focal playing shutters work. Here's the sensor at the back of the camera. If you remove your lens and lays a mirror, you'll see it in real life. These two curtains, called First and second curtains or front and rear curtains, form part of the focal plane shutter. And in their home positions, they protect the sensor from the light. Here's the sequence of events during an exposure the second cart and raises just to get ready. The first curtain loves to expose the sensor toe light on. After a certain amount of time, the second curtain comes down to end the exposure and then finally first cuts and goes back up again to atone position, I must admit, Before I even started looking at this in depth, I just assumed the curtains move quicker when a faster shutter speed was selected. But no, that's not how it works. The curtains always move at the same speed, regardless of the selected shutter speed. Yeah, I was a bit supplies by that, too. What actually happens is that depending on the shutter speed, it's the time lag between the motion of the two curtains that actually varies. But as you can see here with Shudder speech faster than 250th of a 2nd 2nd curtain starts his journey downwards to cover the sensor even before the 1st 1 has time to complete its movement. For really sure exposures, this slick can be very now. Sometimes a small is one millimeter as it moves down the sensor. So that's the basic sequence of events when taking photos using just natural or ambient light. Let's now take a look at what happens when you pop up your flash or use a speed light and see how it synchronizes with the shutter. Once the first curtain is loath, flashes fired and soda sensor is exposed to both the almost instantaneous light from the flash on from the continuous ambient light. Finally, the second curtain closes, assuming your camera and flash exposure settings okay, that all works great. The problem is that the sensor is only completely exposed to the light and shutter speeds up to 250th of a second got whatever to sync. Speed is on your camera. When using shutters Base farce of Matt, There will always be a section of the sex sensor that's covered by a part of the curtain. That's because the second curtain has already started covering a sense when the first court in is fully open to trigger the flash. In case you blinked, here's a freeze frame from that exact moment, when the flash fires you can clearly see that part of the sensor is covered by the second curtain. Most cameras won't allow it, but if you do use a camera that will allow you to manually set high the maximum sync speed when using flash, the consequences will look something like this, assuming that the subject is only lit by the flesh on that, there's no ambient light. A dark band will appear covering part of the image, and the faster the shutter speed, the wider the band will be. If there is any of available ambient light, then the band may not be completely dark, depending on your settings. By the way, you may be wondering why the band appears at the bottom of the image instead of at the top . That's because the focus on the sensor by the lens is upside down. Interestingly, in the days of film cameras, the shutter curtains would go from side to side instead of from top to bottom. And because the shutter had further to travel, the maximum sing speed on many older campus was only 1/60 of a second. And if you did exceed the if you did exceed the sync speed, the black bart would be in the side of the image instead of at the bottom. When taking fotos indoors, you usually don't need to exceed the maximum. It sinks speed, so it's generally not a problem. But if you're working outside during daylight hours and you need to use fuel flash or want to be creative with off camera flash, the maxims sync speed does create problems. For example, you may want to add a touch a fill flash for a paltry and also want to use a large aperture to blur the background. But even at the lowest I so settings, the correct exposure might be something like F four shutter speed 1/100 of a second. So you're stuck because 1/100 of a second exceeds the maxing speed and you can't use a slower shutter speed unless you close down the aperture, which defeats the object. By the way, see my film on fill. Flash brings up for an example of this. However, as always, technology has come to the rescue. There is a way to safely exceed the maximum sync speed, but but you have to have the right equipment. Some cameras have some very clever internal gadgetry called high speed sink, but it can only be used on certain cameras on with either that manufacturers own external flash guns or with specialist for flash guns from third party suppliers. The focal plane shutter behaves as usual, But instead of firing a single flash, the flash gun fires a series of bursts of life throughout the shuttered slits movement down the sensor. It's a great system and very clever. It works very well, but it is a bit of a compromise because the amount of light hitting each part the sensor from the flash is much lower due to the brief, lower power pulses of light. I forgot to say that this is only part of the reason for the low flash power. The main reason is that the flash has now become a continuous light source just like that on, because the shutter speed also controls the amount of ambient light, the higher the shutter speed, the less effective will be the light from the flash. This means you lose a stop or two of power from the flash, so the range of the flash won't reaches far. But hey, that's life bye for now.
5. Shoot 1 - Dramatic portraits using sky as background: hi. In this outdoor shoe with the lovely Tiffany, my aim is to use off camera flash to get a more dramatic type of photo than I would if I was just using the normal, not natural life. First of all, please ignore my scrappiness. I've just cut my finger on bled all over my jeans, so never mind. Anyway, the light we have is okay, but it on its own would only get a kind of average mediocre top of image. Shooting outside with off camera flash brings a few more challenges than when we shoot indoors. Now, I talked about it in detail in the exposure introduction to this chapter. So if you haven't watched that already, you really need to stop this video right now and go watch it. Okay, so now it sounds like a talk schoolteacher. Sorry about that. But there is some very important info in that video now when using off camera flash life does become a lot easier if you shoot a dusk when the light levels are low. That's what I'm doing that even though it looks quite dry, it is. That's because we've opened up the aperture for the on the video, but generally speaking is like getting a bit louder now. It's not too bright. I'm going to start taking a straight short in the P mode. Just a normal portray using existing natural light against the sky so we can compare the images at the end. So I see what is looks like shooting with a wide angle lens here. So you see, we've got a great Sky Avenue waiting beautiful blue in the sky. But Tiffany is completely under exposed. You can't see your face at all. So now I'll use exposure compensation to brighten up the image. Still in the P mode on, I'll use a plus two exposure compensation. Let's see how this looks. I'm again. Both. Oh, there she's still a little bit too dark, isn't she? So I'm gonna open it up by another stop. Probably slow down the shutter Speed is world that will. So I think I'll increase the I s o to about whoever got I'll make it 6 40 again. So what if it is nice and bright now she's well exposed, but unfortunately, we've now got a white sky to get started on creating a more dramatic photo I want to make the image darker and to bring back the color in the sky. Now, as in previous you tell use manual mode on off, set the shutter speed to 2/50 of a second. That's my maximum sync speed. Remember, shutter speed controls the ambient light. It has no effect on the light from the flash. So far. The shutter speed cuts out more ambient light. Plus in. It's a more flash friendly setting because it means I can open up the opportune more. Why is that important? Well, flesh exposure is controlled by the aperture. And, as I explained in the Exposure Introduction video, if use an aptitude, say, F eight or F 16 combined with a slower shutter speed, the flash is going to have to work really hard and even on four power. It probably won't be strong enough averages of around six F 16 or what would have to use in the bright sunshine. It's much better if you could name for an aptitude, say, at 5.6. So that's why we need the fastest shutter speed possible. How about the iced? I s Oh, well, the aim is still to cut out the ambient light, so we'll go for the lowest I s O of 100. So there's the 1st 2 settings. Maximum shutter speed lowest. I so remember that formula. It's a good starting point. What are petition I use? Well, that depends on the background. I have to make a decision. Do I want to expose for the foreground area for the trees in the background or for the sky ? As you saw from the previous compositions? I'm shooting low and using the sky is the main background. So I want to expose for the sky and also for the bride is part of the sky to It's just a matter of taking a few shots and adjusting the aperture accordingly. I'll start off f eight. No, I start off. Yes, I start off F A. I think and see how we get on pointed at your face. Yeah, again. It's pretty good, but I think it's just a little bit too dark. So I think we'll we'll go to at 5.6 and see how that looks. Remember, we're just checking the exposure. Really. We're not really ready to start shooting just yet. Yeah, that looks better because I'm exposing for the sky, which is the brightest part, the part of the image. Anything else in the photo like buildings or trees, as in this case, will go quite dark. Ideally, I'd like to use an umbrella or soft box, but I eat up a stop or two of light, so I just use a bare flash. It will be a hard light, of course, which is one of the reason I ask Tiffany to dress a little more grungy looking as you'll see in a minute, and that will give an edge to the shoot. I probably wouldn't use a hard life actually being wear and say, a cocktail dress. I want to go for a wider shot as well, which is why the flash is about six feet away, which puts the flat, which does put the flash under even more pressure. He is going to take a coat off, get changed on Duh, were something a bit more. Probably Tipping has taken a co off on that jacket with jeans in the boots as a great look for this type of shot, the final settings and the 2/50 of a second at 5.6 higher. So 100 the flash is about six feet away. That's on full power. I'm gonna get really low on the ground and show up against the sky and the sky is going to be my background. So let's get down and dirty on the helmet. Go shooting with a wide angle lens. This is I, um, Nick on 12. 24. Therefore, lens on. I'm probably about 15. 15 mil. Now put your hands in your jean pockets. If you're your thumbs in there, that's a You're a couple of close ups here as well, you know, on one get any ground, then that at all we weren't using any Modifies eso. We've got quite a hard light on Tiffany's face now that the light levels have dropped even lower. I put an umbrella on the issue queue Umbrella on the flash. Moved the flash in a little bit closer, Aziz. Well, the flashes on 1/4 power and I've just checked the exposure that you're pretty good. Let's see how this looks. So they just stand towards me now turned a bit more towards May. Yes, that's it. Yeah, Maybe just fold your arms okay. I know. Looked old delight. Great. I'm gonna get low again. Shooting against the sky. Yeah. These are great. With a softer light, you can only really start using on balers when the light level start to really drop. I made it in the video now and realize I forgot to say more about the camera settings, but the light was dropping fast, and I forgot. Anyway, notice in this short how the shutter speed is still at its maximum, but because of lower light levels are raising I so and open up. The aptitude by one stopped F four. I'd also bought the lighting closer. So those three things combined allowed me to drop the flash power toe 1/4. In this next shot, you'll see that the skies a little bit lighter, but Tiffany is let the same. That's because I've slowed the shutter speed to 1 1/60 of a second, allowing him or ambient light. Remember, shutter speed has no effect on the light from the flash. Now I'm going to change the mood of the image slightly. My white balance is currently set to flash. Yeah, the little lightning sign. I'm going to switch the white balance to tungsten. Watch what happens. Try that again. So I face that way. Enough bulge arms saying sort of things before. Just take a couple of quick shots. Yeah, Yeah. Everything was turned blue, isn't it? That's what happens to daylight when you use the tungsten white balance preset. Actually, that is the effect I was looking for. The trouble is, Tiffany has gone a bit blue as well, hasn't she? So now I have a couple of CTO jails to the flash toe warmer up that will counter the effect of the tungsten white banners preset on being a flesh tones back to normal. But everything else lit by ambient light will remain blue. So I'm just gonna put a bit of tungsten a bit of ah CEO Joo on this flash. Okay, We put the jails on the flash. Now there's actually two of them together. We've taken so long to do that that the light is quite Loughner s o. The settings have changed. I'm only on F four on the flash is on 1/4 power, so it's quite close as well. Let's see how this looks now. So I've got the tungsten preset on. We've got the gels warming up, Stephanie. So let's see. I just gonna look. That's right. Put your legs for the further part. Looked all July. Just look at these now. Fantastic. What in effect? That you just love photography? I think I got a bit overexcited. They're actually now that I see them on my computer. You know, I'm not so sure about them. This type of effect works much better when you have clouds in the sky. Anyway, we got some great images today with a real wow factor. Just remember, this type of shoe is a whole lot easier dusk or maybe even in the shade, rather than trying to fight with the very bright ambient light on a sunny day. So thanks very much differently. Have you enjoyed the film to in the next one?
6. Shoot 2 - Balancing ambient and flash light - Photo session between the trees: Hi. In this film we're outside in a park and I'm going to demonstrate to you how to balance ambient light and flashlight. Now you hear that expression Quite a lot done. You're But what does it really mean? Because if you have a perfect balance between Ambien and Flashlight, then what you've really got is a flashlight at isn't and acting as a kind of feel like just to fill in the shadows of the from the sun on although, like, Look, that could look great. We're not really after that kind of effect in the shoe. What I want to do is try and create a more dramatic type of light, and to do that, I need to reduce the ambient light and use the flash is our main light. So in effect, the ambient light becomes, ah, feel like. In order to do that, I'll be juicy the exposure for the ambient light, but stopped, maybe stop and 1/2 maybe even two stops building on how dramatic I want to make the picture . Let's think about our settings. We want to use the fastest flash's speed you can. Bearing in mind, we're using manual triggers so that's 250th of a second. Well, I want to use the last I. So for the best quality, and also to cut as much ambient light as possible. So that set to 100 The flash, because we're here during the day in the moment offset the flash power toe for four power. So that really only leaves two variables the flash to subject distance on the aperture. Now we can use the aptitude to cut down on the ambient light even more so. Generally speaking, I think this scene would probably be about four. At 5.6, I'm going to set an aperture of their fight. So there's our settings to 50th of a second ice I 100 aperture f ake. I'm a flash on full power if we wanted them brighten up the picture later on, you will. We have to do is maybe slow to shutter speed down, possibly 160th of a 2nd 100th of a second. That will give us more ambient light, but keep the flashlight exactly the same. So let's give this a try. I have put the flash. I'm gonna hide the flash behind a tree. It's a bear flag, so it's gonna be quite a hard, hard light on. I think Gracie's gonna walk towards me as I shoot as I shoot on just as you gets To a certain point, I'm gonna take the short and she's gonna be looking at the flash we should get. Ah, nice bit of sun on a hair as well to actors. Kind of a little bit of an accent light or possibly Ah, rim light Escape's try See how it goes. What? So we got the flash on four power? The flash is set to 24 mill. That's his wider zoom set in place a little twig here which lines up with a flash. So as soon as Gracie, it sat twig on attack the shop Let me get my focus in sort of I'm gonna put it in continuous focusing single shot, continuous focus in See how we get on going up. So yeah. Where is that? We go. So it is OK. Yeah, And when you get there, look towards a lot. Okay, go straight away. We've got a pretty good shot. We've got some sun on the trees which has been darkened down, you know because I'm under exposed a little bit like on Grace's hair on Dive lowered the camera angle so that she's against against the sky. There will try a few shots. So how we get on and turn towards the light, your face, all the light. I'm getting a lower angle, just that I can position her, but I want to draw on sticking out the top of the head. Yeah, there's a few cases where the Flash wasn't going off. That's my mistake, because I'm forgetting it's on four power. Have to wait for it to recycle. But we've got some great shots here, so I want small. Just turn your face a little bit. Does it perfectly great. Let's try now going to say 100th of a second that's going to Brighton the whole scene up, but still give us the same light from the flash. A couple more, same as before. Just I think I might prefer that little bit more ambient light. Just editing the video afterwards, I should mention that I actually change the shutter speed to 125th of a second. That is one stop slower notice. The ambient light is brighter, but the light from the flash is the same on Grace's face. I think these photos look pretty good. I'm quite pleased with them. So to sum of isan, here's my general formula for balancing the ambient light to get a stronger, more dramatic effect. Set your shutter speed to the maxing speed. Usually around 2/50 of a second I s o toe 100 flash on four power. If it's quite bright, then take a normal photo of the scene without the flash on whatever aptitude the camera gives you close down the aperture by a stop or two depending on how dark you want the ambient light. Well, that's it for this video. More outdoor wants to come by for now.
7. Shoot 3 - Balancing ambient light and flash - Photo session at the narrow gauge railway: hi. In this session again, we're going to be balancing the ambient light on the flashlight. Now it's ah, Is that Harp asked for. We're in the winter, Onda. Some is going to set about heart past five. So the light levels are quite low now, so that gives us quite a lot of flexibility. Average exposures to 50th. The second I saw 100 around kind of F F four. So that's great, because we don't need to have too much power on the flash. And in fact, when we were setting up, I put two flashes on the one stand, which I think is just about to fall over on. I didn't really need to do that, but I've left the two flashes on there any anyway, so we want to under exposed slightly. We're gonna shoot against the sky and about why tracks on, uh, let's see how we got on them, got the on brother said on for a slightly softer, softer light. We have been using a hard light for many of the outdoor shoot. That's one of the reasons I said up to flashes as you lose a little bit of light when you shoot for modifier. So let's get this strike, I said then would advise the light a little bit. A little bit. Love, isn't it? Right? There's an area of blue sky, the back, and I want to try and put Grace grace his head just in. Yeah, that was lovely. Just turn your face. Just very slight. That said, Crawford, it's got a little better if Gracie is looking to more this way, which is obviously towards a lot. Yeah, that's probably got a bit of sunshine now in the background because we're at 4.5. We were able to blow the background, which looks really nice as well. I think we're gonna bring the light brown slightly. Stay there, Gracie. Just bring it around slightly this way. So none of the train people come out and tell me off? Uh huh. That pointed at you. Yeah, it's but a bit further behind. It's about the trying. Okay. Yeah, I will. So about that Great. Yeah. You have to shoot these models a little bit rough. You know you don't want and taking advantage of you. Yeah, that's nice. We've got a bit more kind of modeling on her face now because I bought the light around a little bit and in that position insisted a slight but a triangle underneath a light higher , giving us a kind of a red van light in, just shooting up against a sky a bit more. Come back a little bit and the hair is now caught the light as well. But yeah, please release. That's great. And as I said, because the light levels allow it gives us a chance to use a wider aperture, which means that we could have the flash on less power. Plus it also means we can blow the background, which looks nice in these shots. That's all for this session, see later.
8. High Speed Sync (HSS) – Wide apertures on bright day: when you take photos outside during the day, you want the most efficiency from the flash, and there's what you might call a sweet spot that maximum flash sync speed. Now it's usually to 50th of a second, but sometimes 1/60 depending on your camera. This is because higher shutter speeds imply a wider aperture on this wider aperture allows your flash to reach further or work less hard for the same exposure. By the way, one thing I have a mentioned before is it with some camera radio trigger combinations. Even though you have the shutter speed set to the maxing speed, there may still be a slight dark band in the bottom of the image. I'm not going to go into any great detail on this, but very briefly, because because of maximum flashing speed, you're on the very edge of your cameras capabilities. Slight synchronization errors can creep in, so if you're maxing speed to say to 50th of a second, you might have to shoot a 200 especially inside where the slightly dark band maybe more noticeable anyway, back to the subject of this video. Being limited to the maxing speed causes problems when shooting. On bright, sunny days, they say 2/100 of a second. You may need an aperture of F 11 just for a correct exposure. And then, if you want to darken the ambient light and also softened, the flashlight would say, an umbrella or soft box. Well, then you're going to be struggling to get enough light from your flash. Also, even if you had enough, like you obviously don't always want to be shooting a such small averages. Sometimes you might want to blur the background, using wider aperture such as F four or even wider. There are several ways around this problem. The first is to shoot at the time of day, when ambient light levels are lower, or if it's Sunday, just maybe move into a shaded area. But, you know, sometimes you might want to take photographs in the bright sunshine, and there were two solutions to this, neither of which is ideal. But with care they do work. The first is high speed sink often refer to his H. S s. Now I've included a visit video from one of my other corsage, which which goes into quite a lot of detail about maxing speeds and high speed sink. So please watch that for more information. But very briefly. High end D SLR from Canon and Nikon have this special HSS flash flash mode, but this mode could only be used with high end flash guns dedicated to that particular manufacturer. The manufacturer themselves make these speed lights, but there are also available at lower prices and third parties. In this HSS mode, you can use shutter speeds that exceed your maximum sync speed. So if your maximum sinks, be to say 160th of a second you can use to 50th. 500,000 to thousands had even higher instead of the flash firing a very short burst of near instantaneous light. If I was a pulse of light for the whole duration that through the shutters open. So in effect, the flash becomes a continuous light source. It's a brilliant technology, but because shutter speed controls the continuous light, the higher the shutter speed, the more light you lose from the flash. Think of ambient light. If you change your shutter speed, you change your exposure, and that's exactly what happens with flash in the HSS mode. So with that in mind, If you want to correct flash exposures with high speed sink flash, then you either need to move your flashing much closer to your subject or use multiple flashes. But even three speed lights will only buy you 1.5 stops of light. So just be aware that your flash could end up as just being merely a feel like right away. As well as requiring capable camera flashes. You may also need triggers and receivers capable of high speeds sink, but the price of radio triggers and receivers has recently come tumbling down, so it's a good option on. Instead of having to shoot a say to 50th every 11 using high speed sink, you can shoot it to thousands F four. But as I said, you'll need to get the flashing close or use more than one flash for some for some extra power. So to summarize, high speed sink is a good option for allowing you to use wider apertures for selective focusing. But it doesn't buy you a great deal in terms of overpowering bright sunlight. There's another in some ways, a better option for getting wider apertures during data hours, and that's using a neutral density filter usually referred to as nd filters. These air darken peters of glass that are placed over the lens and which cut down on the amount of light. Because the filter covers the lens, both the ambient light on the flashlight entering the camera is reduced, so it doesn't really buy you anything. In terms of getting extra light from your flash, you know, to overpower the sun, it simply allows you to use wider apertures. It has other uses for other types of photography, but for off camera flash, wider apertures is what we're interested in. So, for example, if required settings were to 50th Ice I 100 Apertura 11 you could put a three stop nd filter over the lens, and then the equivalent exposure would be to 50th ice I 100 aperture F four. The downside of nd filters is that first off, you're putting more glass over your expensive lens on depending on how good the filter is, it could reduce image quality or cause a slight color shift. Also, because the ambient light is reduced, you might have problems focusing. The good thing about nd filters is you. You can still use your cheaper manual flashes and triggers. Plus, you don't need a high end camera to illustrate the point. Better have set up a little experiment. You're probably sick of the side of her. But now, But first of all, I want to shoot up without any flash just against the brick wall on the settings. I've got to 50th of a second F 11. So first of all, we turn. There's no not gonna be any flash assiduously. Are this looks to start off with. Okay, so the pebble dashing on the wall has gone quite dark. That's what I wanted. Now I just switched the flash on Flash is on 32nd power. Not really really matters. Okay, so I've got he could exposure, but the war is quite sharp. Well, I want to do now is shoot F four and two. Luda are put on an nd filter a three stop nd filter. So I've got the nd filter in place. This is actually a variable nd filter, but I've said it to three stops below. So the settings I've got now are to feature of the second same shutter speed, the three stops below. So it's now shooting F four. In theory, I should get exactly the same exposure as the previous one shot at F 11. So let's give it a try. Yeah, great looks exactly the same. Except now we've got a slightly more blood background. So now I'll take the ND feel to off and try it with the high speed sink triggers. So instead of using 2 50 of the second, I'm going to go to 500 thousands to thousands of a second still F four. So that's three stops difference on a shutter speed. Let's give that a try. Move the nd filter. Okay, said the shot a spade to 500 1000 to thousands of a second. How this looks so yeah, that's worked fine. So it does seem that using either an indie filter or high speed sink is equivalent. Actually, you can't really see it in the video, but looking at the original for size images afterwards on my computer, I noticed that the ambient light in the nd filter, which is slightly darker So although there's not much in it, I would say that the ND filter has the edge over high spacing. So which is better for getting wider apertures for blowing the background high speed sink or nd filters? Well, they're both got their pros and cons. When you use HSS, the ambient light stays the same. You're just reducing a flash power. But when you use nd filters, you lower both the Ambien and the light from the flash. So I'd say nd filters are probably more efficient. But having said that, I tend to use high speed Seymour because I have all the necessary equipment. Andi. I just find it more convenient, and it gives me less to think about. It just kind of works. Plus, it's a great technology. So for gadget loving people like me, it's a bit sexier. Bye for now.
9. Shoot 4 - High Speed Sync (HSS) Wide apertures on a bright day: we're in a park again. It's a very bright day. We're here with a lovely grace on. There's a few things I really want to cover cover to say, I want to go through the exposure in a lot more detail than I have been in these outdoor shoots. I want to kind of go through my thought processes as I get to the white exposure I also wanted to get try to get a nice soft light on glaciers face on. We started off by using an umbrella, but you saw what happened last time on. So I've just put a small soft box on the Understand Because the umbrella was catching. The wind on git was falling, falling over natural partner got I, uh, a weight on the bottom of the stand today to avoid the stand falling over. Otherwise, Grace might ask for danger. Money now, typically on a day like today, would be shooting at 2/50 maybe F 11 but I want to try and blow the background a little bit , and so, ideally, would like to do is to shoot a wider apertures, maybe F four. I have to point I in order to blur the background. The problem is, I just can't do that to 50th of a second. So today we're gonna be using high speed sink that will allow me to use fire the shutter speeds on. Then that in turn, will allow wider apertures. Just used a small soft box. Andi, it is very small, but I'll try and get it very close to grace so that we could get a site slightly softer light on her face. It does loses a couple of stops of power, so if we really run into trouble, I might have to remove it. But to start off with, I just want to take a shot of the background. Just Teoh judge the ambient light. So let's try that, first of all, and I've started off to 50th of a second RSO 100 I just set the camera to f ight. Normally, I would be standing in the shade to take this shot, but because of because I'll go dark in the video, I'm standing in the sun, so I'll have to protect the lens from the light from entering the lens. So this is to 15 seconds F eight. That's know about exposure. But I want the background to go darker. So I'm gonna shoot F 16. Try that, try and get a bit more color in the sky. So that's probably a good good exposure now for the background. Why? So I've kept the same set in 2 50 of the second F 16 s I 100 crises in the shop. Now let's just see a lot of this look. But I turn the flash off trudging. See, we've got the nice background, but Grace has gone completely dark. She's just silhouetted. So what I'll do now It's our turn. The flash on still a 2 50 of the second have 16 and I think we've got a good, good exposure now. The problem is, the background is quite sharp still, because I'm f 16. So now I want to use high speed sink to open up the aperture so to 50th. The second is a river of 500 F 11 thousands of a second F eight to thousands of a 2nd 5.6 for thousands of a second. They're full. I'm using the young now. Why in 6 to 2 triggers these allow high speed sink on TT else, and then they have been more expensive than the manual triggers, but have come way down in price. I should say I don't have any relationship with Yang now. They're just the ones I've always used and been happy with. There's plenty of other equivalent type of products on the market on our list. A few in the shopping list, supplementary material that you turn your body this way, that's it. And then look back at a flash. Just come over this way. Tiny bit. That's it's what can hide the lamppost. Let's put you don't chop your arm often. I'm only getting so maybe put your hands in your pockets. Yeah, that looks great. Try and maybe foot holding up your collar. Yeah, these are nice. I'm keeping on the right hand side of the image because I don't want the flash to be in the shop. It's so it's so close. I could, I guess, photoshopped out later on, but I don't really want to do that, but I might try my try one. Let's try one over here just commenting on this while I did the video, you can see I put Grace on the left and Photoshopped out the soft box and stand, in fact, originally planned to use a 43 inch umbrella with multiple flashes on with them further away. But it was just too windy. I think it be interesting to see how what a normal exposure would be like just exposing for grace grace his face with without any flash. So let's just try a short. Not that I'm now 3/20 of a second. Therefore, there's no flash involved here. Here's the simple Shot Without Flash. With a bit more thought on the composition, I could have taken a better photo, not necessarily better or worse than with off camera flash. Just different. The off camera flash photos do have more dramatic lighting, though. Here's a comparison of the F 16 photo and therefore one just to show the difference in the background sharpness. We've just turned things about a little, and now we've got to some behind us, or I will have when I start shooting Crazy is going to be in the shade who could should have a nice blue sky behind it as well. Eight thousands of a second F 2.8. So I have really opened up the aperture to get a blood to get a more blood background. First of all, take a shot without the flash. What about the focus in there? But anyway, you can see we've got a blue sky, blurred background. Grace is very dark. So now we switch to a fresh on that one's audio on. It's a full power. The flash is going is a four power throughout this whole session. That's right. Yeah, it's really nice. Just tell you face this way slightly and then look eyes back to May. It's not too hard a light on greatest face because we've got this soft box on there and it is very close. The deep blue sky on blood background gives us a more of a dramatic image with the light on gracious face. So you're not gonna feel for high speed sink. It doesn't really allow you to overpower the sun, but it does allow you to get wider pictures by using a faster shutter speed on. Alternative would have been to use an indie filter, but we'll try one of those in another film. That's all for this one. Bye for now,
10. Shoot 5 - Graphic or Grungy backgrounds – Store shutters: if you've watched any of my previous films, You know that I love shutters on. We've got this pavilion here, my local town and lighter buzzard on again. They closed close up, shop on the shutters, come down and we can use this area here. Great. A graphic element taking a picture along. The shot is here. I'm getting ah ah, an aperture of everybody before. So, dr 2/100 of his 250th of a second. I saw 100 andan apertura before. Remember that Normally, Orman out one. You outside, you go for a hike. Maximum shutter speed on a low I So So that's why I chose to 50 that the second I say 100 that's a great formula. Try and remember that one s o were normally F four. So I'm gonna dark in the image a little bit, but going one stop on under 5.6. We got a camera with a flash on the stand over to the side here on, of course. Positioned it. So it's gone. Teoh, light up a lovely model, Gracie, who I forgot to introduce on. Uh, we're gonna light up on the stream of Ah, a kind of beam of light along the shutters of integrating Andi. Because of that, I've got the zoom headset to 105 its maximum on the flash. I'm gonna get really close to the shutters to kind of if you get the diagonal line guy actually come forward A tiny bit price about there. That's fine. You know, I really like this. It has a nice feel to it, I think helped by grace is somewhat moody expression. I actually think if you take your coat off a little better yet, that lovely now that's great. Already beautiful. There's obviously that distinct shadow on the shutters caused by the hard light source. But I don't think that detracts too much from the image. So apart from that bar between the shutters, I'm happy with it. Yeah, please. With those, the type beam really accentuates the graphic element of the shutters. So I'm pleased with those in the red jump of this world. Graces when looks great against the shutters. Is that said before the exposure is dark in the hole and the ambient light, if I wanted to increase the ambient light, will not need to do, would be to open up the shutter speed saber one stop nights on 1/100 of a second. Let's see how this looks. I told you. Lie again, guys. Thanks. So the whole images now got brighter, but the flash power remains the same. But a flashlight, I should say, remain to say, one of the problems we just had was that bar. The end of the shutters was in the shop, so I bought Gracie a little bit closer. Closer in on. Now we'll get it in the foreground. Maura's well, and I'll get the long edge of the shadows going off into the distance. Oh, yeah, he's a great I know it is a hard light. So we've got the shadow. We got greatest shadow on the shutters, but still think that's a great look. So when you want to increase the amount of ambient like all you need to do is change the shutter speed, just slow down. But bile, say one stop that will bring in more Ambien light while keeping the same amount of light from the flash. That's all for now. See you in the next video
11. Shoot 6 - Graphic or Grungy backgrounds – Graffiti (using HSS): If you want some of my other films, you know that I like kind of grungy, graphic type of backgrounds on. We've chosen this area in the park with a little bit of graffiti there on. So I think that would make a nice background. Christ has got is wearing kind of grungy clothes, so that should go quite well against the against Graffiti. Now I don't want to get off easy to be too sharp, so I think I'll shoot. There's something like F 1.4, because great is going to be quite closer to graffiti anyway, So it's only a small area, So I'm using F 1.4 on a typical exposure. Ah, standard exposure of look of 80. That's just check would be a thousands of a second F 1.4 per ice I 100 I wonder. Graffiti is a little bit darker, so close it down by 1.5 stops. So I'm gonna make it 3200 of the second. And of course, I'm using high speed sink with the young know you're now triggers. So let's give this a try for about away. The flash is on four. Power. Andi, I've got a small soft box on here which does lose you a couple of stops of power, but it will start from the light a little bit especially. It is quite close. So to start off with, I will say to four Power What? Full power on the trigger summat. F 1.4 32 100 of a second. Let's try one first of all, with a flash turned off. You see, we got some nice swim like him on the hair. But she's too dark, isn't she? Which is Expect, obviously. And a graffiti looks about like So now let's took the turn of flash on. It's on the full power. Come back a tiny bit. Uh, well, it's nice. We have an uncomfortable position there for grace. Just turn your face towards a lot. A little bit more about eyes back to May. Yeah, that's a good look. I can tell from the back of the LCD how how to focus. See, background is in itself a proper look. The background hasn't gone quite as our focus as I would have liked, so I think we'll move Grace just a couple of feet forward to see if we can get a slightly more blurred background. One important we've got, obviously, is that it is only a small area of graffiti. Yeah, I think that's nice about that. This trial for you may be important. Carlo COLUMN Apple Actually, if you're gonna hold on there, yeah, let's put a hold on. Kind of goes with the shop. I think I switch to four thousands of a second or maybe even 5000. Just a dark in the background. A little bit more that a bit closer. Hold the holders. If you're about about, you're just putting the hood up. You have to be careful shooting too quickly because the patently flashes on four power. So it needs time to be cycle. So I've lost a couple of shots because I've shot two too quickly. I think that is not really good, though. Try one more. It is a shame is such a small area of graffiti behind? So that's just a quick. These are full of using a more graphic, grungy type of background. Andi, it does help. If you could just try a little bit out of focus, which is difficult to do when you're using manual flashes and you your stocker f A or F 11 . So that's all for now. See you next film.
12. Shoot 7 - Graphic or Grungy backgrounds - A brick wall (using HSS): in this video again with the lovely grace, I'm going to use a grungy background like this. The brickwork on this wall. Grace is going to stand about three or four feet in front of it, and I'm going to shoot a wide aperture to try and blow the background. Now if I just take a normal shop, first of all, without any flash, let's see how that looks. Turn the flash off and this is at this thing five hundreds of a second F 1.4. That's a little bit overexposed. Let's make it a thousands of a second F 1.4. Yeah, that's gonna okay, So that's how it would look normally. But I want to get a darker background, so I'm going to go from a thousands of a second two stops down to four thousands of a second. Let's take the same shop. Still without a flash. I think the background has gone too dark now, so let's open it up or so to shutter speed. 3200 2500. Yeah, that's probably about right now, so we've got a nice dark brickwork, slightly out of focus. But of course, great is now too dark. So I switched a flash on the flashes on half power because it is very close because I want to try and get a nice soft light. The windows dropped a bit, which has allowed me to use an umbrella. I've still got the weight on the bottom of the stand to avoid any nasty accidents. So let's give this a try now. Just tell your friends very slightly towards me. 40. We got a drainpipe at the other end. Czar Com Put Grace on the left hand side of the flame. Yeah, that's good. Now turn the other way and then look, don't tell quite as much as about there. That's it. Stay there. Just look. You bring your face up towards the light. So I just saw your eyes. I meant I totals a lot. He's not great. I nail of the grand G type of background, and it goes with what Grace is wearing as well. The light. The umbrella was very close to grace, so the light fell off quickly on DSO hasn't let the wall. That's another advantage of keeping the light very close on dive using umbrella. So we've got a lovely soft light on our fights. It looks beautiful. Thanks. Christ. Hi. This video just follows on from the previous one we did with Grace against this wall on as an experiment. I just thought I set up a couple of lights either side. Couple of flashes either side on. They've got blue gels on them just to give her here kind of ah, blue color and also changed the put a gel a tungsten gel on the main flash. Just curious to see how this looked on. Were under exposing the big wall as we did before. Let's give this a try. My sessions are to 50th of a second cause I'm just using manual triggers now on of started off F five, I saw 100 the flashes on these two on 60th power that one's on 1/4 power. See how we get on right from the start. That doesn't not too bad. Could keep their chin down a little bit. Looked straight at me. That's quite a nice effect with the blue and the orange. Your orange gel Look, that's good is an unusual look, isn't it? Goes with the clothes you're wearing as well. So that's it for now. See you in the next film.
13. Course Conclusion: Well, that's the end of the course. I do hope you enjoyed it and also hope you agree that I got some great results in those live sessions, and it really wasn't that difficult. As you saw. Harnessing the reduced ambient light with the flash can produce and really dramatic results . We loaded techniques are little advanced. Once you've done it a few times, it does become second nature, and it's easy and quick to set up. It's important now, at first, to find a willing model and to go out and practice. The last thing you want to do is to try this for the first time on an important photo session, become familiar with it. First play around with different backgrounds and composition and light, of course, and then you'll be in a much better position on those important photo sessions. Most of all, though, enjoy your photography and keep learning and practicing Bye for now,
 Bernie Raffe AMPA, Award winning photographer and teacher