Transcripts
1. Trailer: Welcome to mastering Logic Pro instruments with me Jack villain. In this course, you're gonna learn about every single instrument, synthesizers and drum kit inside of Logic Pro. Not only that, you're going to learn them sequentially step-by-step from the simple to the most complex. At the end of this course, you'll be able to understand exactly how the sounds of your favorite artists work. And you'll be able to emulate and learn from them. You'll also be able to create the sounds that are in your head, all because you understand the first principles behind sound and sign, synthesis and production, you'll also be able to understand every single dial and button on every single logic instrument, Drum Kit or synthesized that. And you'll also have mastery over your patch library, which is your palette as a working composer and producer, I've been producing and composing music with a logic constantly since I was 13 years old. I'm now 28, and I work as a composer, conductor, and arranger and have extensive experience in film music and post-production. I also work privately as a music teacher, and over the last year I've taught over 1000 lessons, producers, composers, and hedonists in my hometown, whether you're a beginner or a semi-pro at logic, I have a theory that most Logic users, whether pro or beginner, don't fully understand the logic pro instruments nor virtual instrument design in general, this is a kind of glitch in our skill set as producers and composers. And I've been totally guilty. On the one hand, we have our production skill set on mastering engineering side, but on the other side, we don't really know how to create sounds, mold them into exactly the feeling of genre that we're often imagine being able to create any sound you hear or deliberately generate fresh, new sounds that no one has ever heard before. This is what mastering Logic Pro instruments gives you. I've structured this course incredibly carefully to give you a methodical, progressive and biocides structure that builds from first principles through the simple instruments all the way up to the most complex and covers every parameter on every instrument. Rather worryingly, I've read the manual now. I mean, like the whole menu. Read it, it's really long. So as well as using this as a kind of fully fledged music production and synthesis course. You can also see it like your virtual instrument encyclopedia, so that you can return to this course whenever you want. If you're trying to remember exactly how that functionality of the instrument works. The thing to remember though, is that mastering Logic Pro instruments is only the beginning. After that, you have the journey of creating amazing sounds and using your new skill set, create new, empowering stuff inside of your music. So hopefully see you inside mastering Logic Pro instruments.
2. Introduction: When you start playing around with the instruments in logic, you start realizing just how many there are and how complex some of them are. Some of them, like drum kit designer in it, are exceeding a simple. But then others, like alchemy, have many, many separate pages with incredibly detailed synthesis parameters, other ones or somewhere in between, like the es one. Or perhaps that you access 24 maybe sculpture. But they all require a lot of thinking and work in very different ways. The aim of this course is to break down step by step, every single one of these instruments so that you know how every single knob and dial that you see on this page and more works for a full list of all of the instruments that I cover . In this course, check out the course description on the main page of this course
3. Resources: At various points in the course, I prompt you to download some resources for that particular lecture. To get those, you can just go to the link that you see on screen now. And there you'll be able to download all resources at once, so you won't have to download them at a time. So each of these is really important to use if you're not sure about the instruments when you load up one of these session files here, it'll basically present you with an initialized patch. That means the most simple version of that instrument. The reason I've done this for you guys is that, for example, when we open up sculpture, there are so many parameters that often come already loaded with a preset. Or when we open up alchemy, there's so many things that can be going on to learn the instrument from a standpoint of say, let's go for a cinematic patch, like a pad or something that, that's going on here. There's loads of modulations going on at the moment that actually we'd need to kind of unpack in order to get back to first principles. So to work from first principles along with the course, if it's useful to use these initialized patches. Now not all of them are initialized patches. We have the introduction to synthesis, the session that you'll see in the video to the introduction synthesis, you have control over all of the things I had in there. So you can kind of explore that and understand what's going on with everything. I also have a couple of chapters which have ESP building sounds. So in this one, what I've done is I've built a number of sounds with, for example, creating a hi-hat sound or a bass drum sound, or an organ sound just from that one synthesizer from scratch. And I've done that for the ES one as well. And you can kind of go in and understand what's going on. They're pretty cheesy tracks, but some interesting sounds as well. And then with the 24, because that's a sampler, that's actually the sample, sampler instrument that we built during the course. So make sure you use these if you're unfamiliar with these instruments. Because starting from first principles and a simple patch will help you follow along nicely. For all assignments, support, and questions you might have. You can chat with myself and other musicians in the lean musician community. That's community dotted-line musician.com. I'll be there to support you with your goals, your work, and I'm excited to hear what you come up with. All right, let's get started.
4. What is an instrument : the thing I want to clarify straight away is what is an instrument in logic. And therefore, what does this tutorial Siri's go over? The way I think about this is that the instruments are the instruments that we plug into each channel strip here, the midi performing instruments, thes Airil instruments that you can load up and then start designing Sounds with, for example, alchemy here. But within alchemy, you have many, many patches. We could load up loads of different sounds here, like a 70 space, bad or many, many other things inside of this one instrument, I go over in this course exactly how to use every parameter that you see inside of every single instrument that you can plug in here. The thing I don't go over, however, is for example, if you're in the General Browse Library here and you find a guitar and you choose, for example, acoustic guitar, what that loads up is the excess 24. I go over that instrument separately, but I don't go over all the different patches that you can load up here. These are kind of using instruments like samplers like that you access 24 to perform the sounds inside of it. So to recap in this course, I go over pretty much every single instrument that you see here at the date of releasing this course. Alchemy drunk, it designer all the way down to sculpture retro synth, ultra beat vintage B three organs, everything like that. The things I don't go over, although I might update in future are the recently released studio horn studio strings, and the vintage military on everything else is covered an incredible depth.
5. Option Click: this video is about a particular functionality in logic, where you can reset a parameter on the instrument after having fiddled with it. This is quite useful. If you've been playing around with a plug in, you change loads of parameters. You can just reset everything by pressing a button on your keyboard and then clicking with your mouse at the same time. Now this actual button on a Mac keyboard, a new Mac keyboard today in 2018 is option. So you hold down this option button and then click parameter. Let me show you what that does right now. So if I've moved a parameter in retro synth like shape modulation and I think actually I don't like that, I want to move it back to where it's default setting is I hold down that button and then click the mouse and it switches straight back for various reasons. Due to my keyboard on my desk, I actually got a bit confused during this course and into changed option and command. But you just need to ignore me when you hear me say that and know that what I'm referring to is the option key
6. Quick Help Functionality: When you first started using logic, you probably turned on the quick help button on that men that you could move your mouse around different things on your digital audio workstation and be told what things did. Everything from the record, the transport down to your instrument panel on do anything else. But the thing that's really easy to mrs that thes also carry through to most of logics instruments and to most of the premises inside. If we just click on the vintage electric piano that I have here and then hold hover over one of the buttons, it tells us what this button is doing. This one, this one, this one, in fact, nearly everything tells us. But occasionally you come across something like here details. That's kind of probably fairly obvious. But if we go into alchemy, probably a more complex since we've got again explanations for pretty much everything that we have on here, which is really, really useful and with all of them, if you press command and then slash, what it will do is bring up the logic help, which is a really, really useful feature. I love it. Obviously, it's a bit dense this sort of reading here and can take a while. So which is why I've done this tutorial, Siri's. But once you've gone through the tutorial Siri's this could be a very super quick way off, reminding yourself what certain buttons do, and it works in pretty much every single one of the instruments. We're gonna go over both the new and the old.
7. Setting Up Controller Assignments: So obviously, logic has a wealth of instruments, a huge amount of synthesizers on modeled instruments. And if you had the rial versions off those instruments either physical ones, your studio would look pretty crowded. So it's really quite beneficial to be able to do in the box creation with synthesizers. Obviously, however, you do miss out on that very tactile connection with the incident where you can actually reach out and grab these dolls here and move them around. Kind of gives you a more visceral kind of riel experience of actually changing the instrument. So one of the things you can do to kind of create that sensation is due controller assignments for your instrument controller assignments is where you get a physical part of your keyboard or your outboard gear. That's got midi enabled in it on. Did you assign it to a parameter inside of the instrument in logic? So let me just breathe. You show you this how this works, and then I'll I'll dive into it and teach how to do it. So what I'm gonna do is I'm gonna collect learn mode on this window here. I'm gonna move this parameter here and then I'm gonna move my modulation wheel and suddenly just by moving my modulation well, I can turn this parameter up and down Now let me get through how I did that. So firstly, I'm gonna delete that ongoing close this window because this is the controller assignments window with many things in logic. If you're not sure where to find it in the menu, you can go to help and then search, learn. You'll get two different things here. Obviously you don't want learn about mainstage, but this brings up learn assignments, uh, control services window. So I'm gonna press enter, and now I'll bring up the same window. There's another way of getting their which you see here on my toolbar, which is this learned but in here and it will bring up the same thing. So now that this is up, we are in learn mode. We contend that off by pressing that button, But when we're on learn mode, basically, logic is listening to what parameter you want to move inside of an instrument. So I'm gonna do is with a different one here to show you that it's possible. So let's change for Barato and watch this sign here or rather, this parameter, so it suddenly moves to vibrato and it's on the brought a depth. So this is what we're going to be controlled. But there's no message received from my hardware yet, But if I move, my modulation will and I mean my mass at the way you suddenly see that is learned, and we have immediate control over it. So this is a really, really useful way off getting control of your instruments, and you can save a lot of time. Obviously, you can save these in different folders long here, but it's not within the scope of this course to go over this side of things. You can find many tutorials online on YouTube, particularly going through how to set up controller assignments inside of logic.
8. Copy Commercial Sounds Copyright Free: Sometimes you want to steal stuff on. I mean that in the nicest way possible. I mean it in a sampling way. You listen to something. Can you think? Hey, I'd love to have that in my sample library, but of course you want to do it without worrying about copyright issues or asking for permission to use that audio file. Alchemy has a way around that. By essentially copying or emulating that audio file using its own internal algorithm or synthesis engine, what you want to do is go to the main page off. Rather, the advanced page and click on one of your sources will go into alchemy, obviously in a much later tutorial. But just follow along for this time, so import audio and then find the sample that you want. Theun hit import. But before you do, make sure that you're on these settings that you see here additive, and you don't have to have for Montagne and just hit import now right across your keyboard . You have that sample, but it's not the original sample. It's mathematically created by the instrument, So if you want to do use this on any commercial stuff, you'd be completely within your right because it's nothing to do with the original sound. It's just a mathematical emulation of it. It's essentially created entirely from sine waves, and you can see that on one of the source pages. So if we go down to a and then we hit edit, what we are actually doing from this sample in additive is that we are creating that same sound, but just using sine waves. The complexity of how this works is beyond the scope of this course. But just know that you're not listening to the original sample here. You're listening to an emulation off it, and largely speaking, you can do with it what you want. However, if you are genuinely going to be releasing this as a commercial track, I would always seek advice. Don't take mine 100%
9. Create Your Own Waveforms in Retro Synth: let me show you a quick thing in retro since that a lot of people don't know about when they use logic. If you go to the table page and click underneath shape one on this menu here, what you can do is actually create a wave table from your own audiophile. Basically, what this means is retro synth is gonna listen and analyse your audiophile and create a number of different wave forms or wave tables that emulate the sonic characteristics present in your earlier file. So basically what this means is you have to have a relatively constant pitch in the source material, so it usually likes toe. Listen to stuff that isn't kind of noise or cords and stuff like that. I have tried it with a couple of tracks, but that doesn't work so well. So let's try this again with an audio file where I'm singing again. I'm not gonna play it to you, will spay that? So that's more successful. So I did stuff like I just saying hello and I saying, Yo yo and we're different vowel sounds. So this new wave table contains 45 way Ford's That's have a little listen e is a bit more success there with our sound. So that's that's technically speaking. That's the instruments that's me. And so the insurance weird like some weird instrument android synth Let's go and eso after that Then I created something that was even mawr kind of Forman based. So I started exploring vowel sound. So I started just going like, wow wow, you were what? But singing constant turns now created a really good results. I have a little listen to this. Wait table contents 48 way forms. This one I like quite a lot way, which is pretty cool, right? I like that. So the great thing about this is that you can you can create your own sounds if you're looking for that kind of really nice Victory Forman vocal style instrument, but you can't find it will create it using loads of settings you could just import your own . Would you felt you could even just say out loud or sing out loud The sound that you're after bringing into here is a custom wave table and play around with it
10. Creating Endless Drum Beat Grooves: As of recording this tutorial, video logic has actually recently updated its drama library, which is really, really good. We have a number of people, as we've seen before, on a number of different genres and functionalities for the drummer player here. But one of the things I used to find is that I got a bit bored with the drum grooves that were built in here. And so we started messing around with things and trying different things out. One thing you can do is you condone Load up, for example, a drummer in, say, an alternative genre. Have a listen to the group and say that you like that and then change it to another instrument. So, like a real drum kit, for example, let's put this in Portland, see what it sounds like, what you've got. There is potentially quite interesting sound. You can do this in lots of different ways. One of the things I really like to do is to go to Elektronik one. Make it really, really complex. Um, play around with some stuff in here. I wouldn't do that now. Maybe we'll turn the phrase variation up. Let's go for that for now. and then I can do convert to mini region and then change my drum kit to be a real one. Let's get for Brooklyn. So that's actually kind of interesting. We can play around with some things like that, and what I tend to do is I do a lot of thes. So I then add another one of these. See what it's like. Let's try and other one of these. Let's say I like that. Convert that to Midi region. Try another one. Let's go for that And then what you've got is three different regions that you can start messing around with an editing yourself rather than starting from scratch and going, you know which we've all done. Guys, come on, admit it. And instead of going from a standing start, you can work with something that's already existing. So that's one of things I like to do. Create regions from different drummers and apply them to different kits, and it works particularly well when you go across genre. What you can also do is select some of these regions and quantities them in different ways according to the grooves that you have in here. You can also create your own groove templates. So what I've done is I've created this drama region. I should have really called them different regions to make this clearer. I've made both of these a groove templates. What I can do is I can affect one by the other. So here we've got this groove template of this region affecting this drama here. If I do that, you'll see some things shift around and then suddenly we get a nice variation on the bathroom. The other thing that you can do, which is super cool, is used midi effects on the drama program itself. If we go to the Randomizer, what we can do is we can actually get the randomizer to effect our note number. This is something I play around with occasionally. Now you can obviously change the range and stuff like this, but let's have a listen to this. So obviously changing the range gives us a different random ization across the keyboard. Here, you get some really, really cool stuff going on. So obviously what you need to do, because that is a midi effect, it won't necessarily be the same every time. What you need to do is play around with this by doing bounce in place. So what we do is we right? Click on it. We get on to bounce and join and hit bounce in place. Or, if you have a keyboard shortcut like Shift B is what I've set up. You can do it there. We do that. Let's have a listen to that audio file now. So essentially you're creating your own grooves, right loads and loads of different groups, which you can then add to Apple Loops Library you contempo map, which isn't in the scope of this tutorial. Siri's. But you can. You can create a huge range of different ideas that then you can map out across your composition to help you plan what you're gonna be doing.
11. Drums into Chords: one of things you can do with the Evoque 20 police synth is run drums through it and make those drums sound like chords. Let's have a listen to this really simple loop from the Apple Loops library. There's clearly no pitch or Kordell content to that. But if we run it through the Evoque 20 polis inthe Onda, then play courts. As you see I've done here. It sounds like this waken do is we can blend the signals together rather than just meeting that one. I'll pull this down and then blend in slowly. So that's really useful. Let me show you quickly how to do. It's firstly, you need an audiophile like this, then probably start with this meted so you know exactly what's going on. Load up the Evoque PS instrument here. You want your side chain this thing up at the top to be connected to the actual track which has your samples on it. So my track is called vocal samples. So I find in the side chain menu here vocal samples which I've already found down here, and I've connected it. You'll see all of your other potential things that you can. You can collect here. Then the most important thing to do is to choose on this menu here the V O. C. Which basically means that it's gonna be listening to the drums on, then running that through whatever notes you play through this synthesizer. I would if you're new to this, just use the presets in vintage vocoder to get kind of different sounds that will just set everything up nicely for you without you having to understand what's going on here. Let's move through another few of these presets that one didn't work so well. So some of these are a bit strange. That's a bit more suitable that we're clipping a little bit. So let's pull this volume down of it. Supply around with this guys have fun and create a drums into cords.
12. Modulate Anything in an Instrument: it's possible when you're playing around the instruments inside of logic that you'll find a parameter that isn't modulate herbal in the sense that you can't get the computer to move these things automatically. So I was just playing around with a pickup position inside of the vintage clap on. I realized that, actually, I'd quite like to modulate that without having to move it myself. In fact, I'd like it to be modulated on a regular kind of interval if you go above your instrument in the Channel strip. Here we have a number of different options for MIDI FX, and if we choose modulator here, what we suddenly get is a modulation. So it defaults to modulating the mod well, which in this case is rats to the damper. But I don't want that. What I want it to do is to learn a plug in parameter. If I click that and then move, the plug in, parameter will see that it's moving in. Now You have to play around a little bit with with what's actually happening here, because you can't, for example, get the pick up to be the the whole pick up. In this case, so it's not perfect. But you're in here now that I've got an LFO moving the pickup position and you can, of course, do this with anything. We learn this another one, and let's see the stereo spread on the pickup. We see this moving now, so I have a listen to that doesn't make up doesn't make a huge amount of difference if you're not listening on headphones. That's basically what's happening. There were modulating something that wasn't much relatable beforehand.
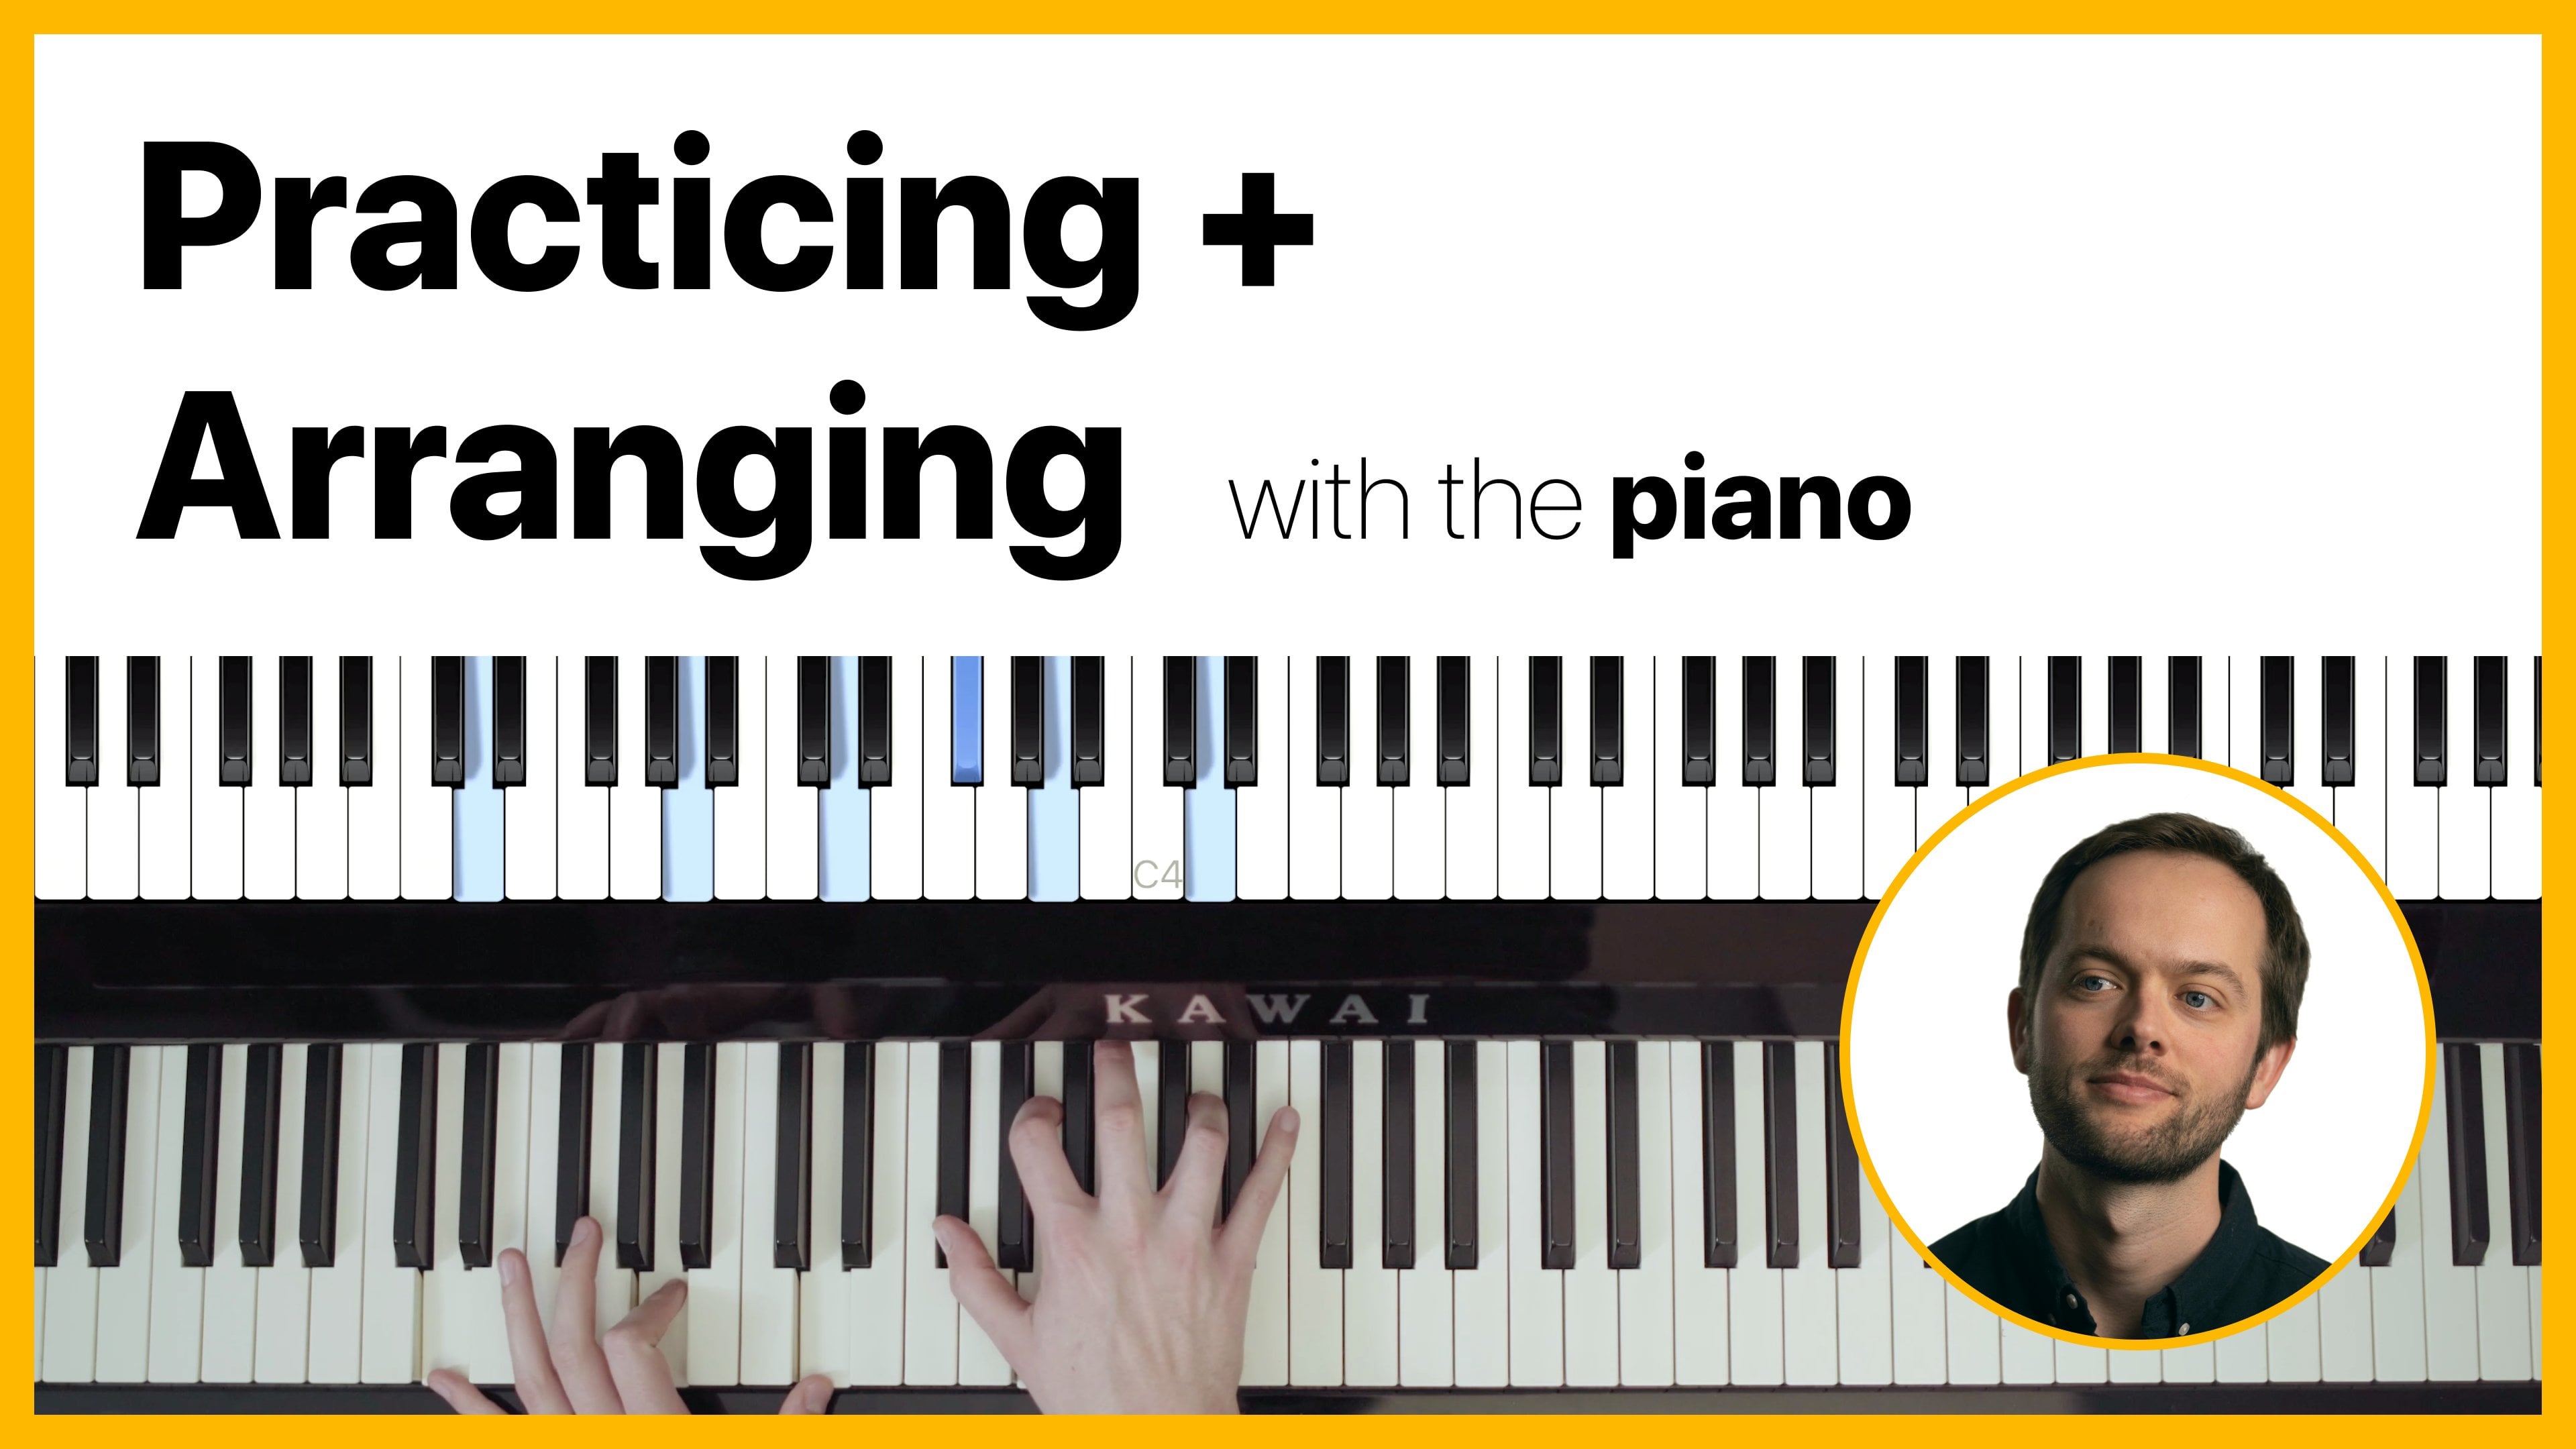
13. Introduction to Synthesis: So in this video, I'm gonna give you an overview off synthesis and sound production, not just in regards to creating and using the instruments inside a logic pro. But I'm gonna go over principles which are universal on will hopefully give you some really cool thoughts and concepts about how to build your instruments in logic and in other scenarios. So what you see in front of you here is the logic template I've set up for this part of the course. The value of using this template is that you can follow along with everything that I cover in it. And you can dive into the exact settings and tweak stuff because the main way that you're going to get better at learning how to do synthesis is by opening up patches that is the instruments in their specific settings. Andi messing around with him and trying to recreate stuff. So we're gonna start from the bare bones level. So hopefully by now you know a little bit about how sound works. I assume you kind of know that basically sound is created in vibrations and waves. I'm not gonna go deep into that sort of concept, but Basically, it's really vital to understanding how instruments work and particularly synthesis. So we're gonna do is I'm gonna open up this folder here as I start talking thes are track stacks if you're not aware of them. Tracks taxing logic are a way of us just organizing folders. You can either do it so that all of the sounds come through one fader, or you can do it like a folder, and I have it set up in a fold of you. I can't go through exactly how to use them because it's not within this cover this course, but suffice it say, you just need to click on this little arrow here and it will open up each track stack. So under my 1st 1 here, the synthesis overview. We have the first instrument. These are all in order here on. You'll see it's called test oscillator. Now, if you don't know about the test oscillator, it's kind of an instrument within logic. Although it's you don't find it under your standard instruments list here. What you find it under is under utility. You have a number of things in here. Club guys, I think I can pronounce that well, external. It's room, which is where you control other instruments outside of your computer via midi on the test oscillator. Now, the test officer later is used by audio engineers to kind of calibrate speakers and such, and there's also other tasks. But what I'm gonna do is I'm going to just play you a simple tone and then we're gonna talk about it. So I'm just gonna un muted and you'll notice that actually, I'm not playing anything on the keyboard. This is a constant tone that's just out putting from the incident, which is hence why I have to have it meted. I'm sure you've heard that sound before, and if you don't know the name is called a sine wave, it's the simplest form off oscillation. So we all know that when we're listening to music, wave forms are arriving at our ears. On that when we're listening to, say a violin or baby crying or a window smashing, the sound over that wave is different or the shape of that wave is different. Hopefully, you know that by now the simplest form of wave is the sine wave. And if we have a look at it here. I'll just show you what Hunt 1000 hertz sine wave Looks like What we need to do is we need to open up this audio file. What I've done is I've rendered the test oscillator as an audio file, and if I double click on it, we see that we have our track view opening up of the of the audio away form. Now, this just looks like a long band, right? If we have a little listen to it is make sure that I got the right tracks on Meet it. Here we go. It's a little higher up. Then we had 500 hertz. If I zoom in a little bit, you consume in using here. I've got a short cut that use nothing's happening. Oh, and we're starting to see an oscillation. Now, here you can see the oscillation is got these little ridges in it. But if I zoom out a little bit, you'll see that kind of actually, those ridges disappear a little bit. And this is how I want you to think of the sine wave. It's a very, very simple, perfect way form where it just oscillates up, down up, down at a certain frequency. And that's how the sine wave works, What you're seeing when we zoom in, there is actually just the samples on the sample rate off of this actual recording. Its to do with audio. You can ignore that. Just think about the shape. So if I close that a second and then we maybe go to the 80 Hertz sine wave and have a little listen to that much lower. So let's open up that way from on. Do the same thing. So the way forms here. I mean, I've zoomed in quite a bit and you would be able to do the same thing. The way forms here are moving a lot slower, and that's the reason why pitch changes is cause we've got less cycles per second. So ah, 1000 Hertz means that there are 1000 cycles per second and 80 hertz means that there are 80 hertz cycles per second and that sounds very different. You hear this one lower and then you hear this one much higher. Okay, Now the wave form there was perfect and smooth as we were saying. The test are selected, creates a number of different way forms and the sine wave is this perfect sound. You can't create that sound in real life. It's It's a perfect kind of computerized version off oscillation. If we go down to this one here, have a little listened to it. Ah, a little harsher, isn't it? Right? It's called a square wave and basically the clues in the title resume in a little bit, you'll see that the way form looks very, very different than doing it on the wrong window. Here, let's zoom in on this one. See, we have the oscillation completely goes up in a very, very sharp lift here and then a very, very sharp, sharp drop there. And that gives it a very, very different tonal quality. What we start to get our different structures. So when I say different structures, I mean different upper structures, and this is a really a really important point in sound production. So the fact that we've changed that initial wave gives us different upper partials. Now, if you don't know what I'm on about, just stay with me. I'll explain. So what I brought up here is the channel e que inside of logic, and that's gonna be listening to this 80 hertz sine wave, right? And I've turned on the analyzer here, which means that we will see where in the spectrum from low to high, The sound is being most produced. And because it's a sine wave, we'll just see one area. So you see, there we have one tone, which is around the sort of 75 80 mark here, 80 cycles per second, which is exactly what that is, right, If we did the same thing on, for example, the test, our selector. But as you remember, the test oscillator, what we can do just gonna initialize and e q by double clicking here. Andi, I am. But we can hear where we can see that. Actually, it's picking up tests. Also later, even though we've meted it, If we open up the test oscillator, we can actually change the frequency. So you can see here 500 500 turn the level down so that we're not all dying. You can see I can move it all the way out the spectrum. That's fun. Okay, so that's how the audio spectrum works Now. That was a bit of attention, but the reason I did that is because if we look at this 500 Hertz Square wave right as opposed to a sine wave, which creates one part of the spectrum, it's gonna create a couple. Let's have a little listen. Well, more than a couple have a look at that. The very fact that we've changed the way form itself to be a different shape. Create upper partials in relation to what's called a harmonic Siri's. Don't worry about that. You never heard of that before, and it creates a different sound. So, for example, when you hear a violin or a cello, for example, let's have a look and a listen to this show here. It's a very complex sound right way. Change notes. Incredibly rich. Ah, spectrum. They're of different sounds. We see it. We have all of the lower sounds and all of the high sounds on what we can do with Channel EQ. You, if you've never done this before, is if we play that again, just gonna put this loop on a so I can cut out the hiring on. Then we're hearing this part, the spectrum really quietly. So the higher end and we're just hearing the lower and we can also do the opposite. We can also do the opposite of that. I'll cut out below in and we'll get a really tinny radio cello. Okay, so these two concepts the way form which we had a look at here for you zoom in again the square away form here, Andi, The spectrum, as seen in the analyzer off logics e que are two really important concepts to mess around with whenever you're playing with instruments. So what I've done here is I've bounced the sound from the test oscillator and exported in audio and then put it back into this Here, Hopefully you know how to use it. I'm sure you'll be able to find out on YouTube. I did a cello the other day and created the way forms so that we can have a look at them. This is the way that you'll actually look at the way form and you'll be able to zoom into it. You can also get a little tool which I find really, really useful. If we initialize this tool that I've got free online. I'm just gonna go into my list here instantly. Start plugging list. So what this is actually gonna be listening to is the sound of the test oscillator. If I let go and then hit play, we can see that the the sill assoc a calm, pronounce it the Zulus poke a scope is actually visualizing this and you can zoom in and you can see the way forms of different things live. So that's that's another option, are linked to that in the notes of this video. But you can you can do that. So the principles that we've just learned here can then be used in our understanding off logics virtual instruments. Now, in this chapter, we're not going to go into detail off the instruments that you'll see. But I want you to think big picture 10,000 for overview principles. So I'm gonna open up this one here, which is the retro synth on going to just show you a couple of things. Now, if you've never looked at this before, it probably like Oh my God look so crazy. It's It's actually kind of straightforward. Once you understand the principles behind stuff, and that's the purpose of this course. I want you to look just at the left here. What we have is an oscillator, which is what we've been talking about here and also later inside of a synthesizer. It's just a very, very simple wave creation system. You see, in the oscillator off logics retro. Since we have two of them, right? And you see these little icons or long left it, these are the types of waves. So you remember the 500 Hertz square wave that we had inside of the test oscillator. Remember that we can change the actual type of sound that's coming out of this from things like sine wave. If we on mute that to square wave on, then also strange things like needle pulse on pink noise and white noise Just gonna turn that off. So this is basically exactly the same thing. I'm gonna turn off all of the other things in here. Andi, we want that off that off on. We want to click on the instrument on. Let's make sure what we've got here is we've got a slider which is going between the two oscillators. I'm just going to use one of these oscillators on what we've got is fairly close to a simple square wave. Go this, lad. Okay, but we can change that here. We're changing away from very slightly. You can see with moving more towards that kind of shape. Listen to what the sound does, Theo. Or if we go to this one, which is a sore tooth wave, we get to this one. Wish I don't actually know the name of it just looks a bit more complex. Oh, it's noise. That's it. So it's just white noise that so that is basically the creation off that instrument there. So let's let's have a listen to those with the channel. You cue up and see what happens so you can see that that Sawtooth Wave has a sort of endless upper harmonics which are going almost into infinity. There it feels like that's what gives it its sound. And then if we change it to a square wave, has a different sound. But I want you to realize that the sound or the pitch that you're hearing is this fundamental tone here. The stuff above it gives it a very, very different quality. Now you know what we did earlier. When we did this, we pulled the eq use shelf in and that took off the high end. Just gonna get rid of that. Andi, I'm gonna go over to here. I'm gonna turn on this. This is what? Another thing that happens quite often inside of logic. Synthesizers is called a filter, and it's doing very much the same thing is what we're doing there. So you see, this here is a shelf and it's pulling off the high end. I'm just gonna put it all the way up to the tops that we don't hear it. Then I'm gonna pull it back in way, and we're already creating a very, very different sound. So hopefully those principles have landed a little bit. And you're feeling a little bit more aware of how synthesizes air going to kind of unfold and how they work in regards to oscillation and filtering. Let's just briefly review it by looking at another instrument and how we can create upper partials. So let's go on to the retro sent here, which is the 2nd 1 where it's called upper harmonics. And what I'm gonna do is gonna bring in the EQ you again and we'll just explore how we can bring in those upper partials to change the sound. So here, in this patch that you'll have, you'll have exactly the settings here. We've got very, very simple tone here. But what we can do is we can add in in this setting harmonics, right? You see here this to do with FM synthesis will get into this later on. But, hey, we're cycling through, but we're leaving behind the original tone, Teoh, So you can have a play with that just to understand how harmonics work. And I would also google the harmonic Siris in music and get some explanations about that. Okay, so I'm just gonna close these windows. So as I said in a synthesizer, the task of tone generation falls to a component called the oscillator. In all synthesizers. In logic Pro, they have this oscillator, the production of a fundamental tone with potentially rich overturns of it. On the standard way forms we've seen are the sign on Dsquared. We've also seen a sore tooth briefly and there's also a triangle on a pulse wave. Those air this standard way forms that you'll find. But there are also many others to be on that point is what makes each individual synthesizes so interesting. Sculpting that initial tone and related harmonics into another sound is achieved by routing their signal. That initial way form through different components like the filter that we saw, but many others as well. Like Dr On then modulation and many other effects. These components are called modules. Hence why you've heard of potentially the term modular synthesizer In a typical modular synthesizer. Signal routing is achieved by physically cabling modules to each other. But in modern outboard synthesizes, the routings all wired in, and the variations are changed by using knobs and buttons in digital synthesizers, which is what you're using inside of logic. Everything regarding this signal flow is digital. It's just to do with binary descriptions, but the principle stay the same in most of them. So in general, outside of logic, pro and just in the world, you've got different types of synthesizes. You've got analog synthesizers, which use circuits which controlled by voltage and create sounds simply just by electricity . So these are kind of the old school analog synthesizers. You've seen this digital, which is basically a digital synthesizers they described earlier on hybrid analog and Digital, which has a mixture of them both. But the thing that you want to know about is virtual analog, because that's most of the things inside of logic. So this is really a digital synthesizer that mimics that architecture and idiosyncrasies of the original analog synthesizer. So imagine finding an old synth that's really retro and kind of out of tune, and then try thinking about emulating that sound right. This is exactly what the instruments inside off logic do. The programmers off these instruments try to recreate that characteristic sound off the old school hybrid analog or analog synthesizers. So if what we've done so far still isn't quite making sense, I left in a few tones here for you to mess around with. What we've got is an initial oscillation of 500 hertz. We've got an oscillator at 4 90 if we put them together, we can kind of create our most basic type of synthesizer. It's a bit like within the retro sent here we have two oscillators, which we can use, but we've used the test off selector on we've changed one of them to be ever so slightly different than the other and let's listen to what that sounds like. That's creating its own interaction, right? Doesn't sound quite as simple as a sine wave anymore, and that is basically the simplest type off synthesis you can create inside of logic. Another simple but probably silly example of using the test oscillator is actually running it through an amplifier. So this is just yet another idea of taking a simple sine wave or a simple well. It is a sine wave in this case, or another form of wave and pushing it through an effect like an amplifier. It's like it's pretending to be a hybrid analog digital synthesizer. Even though is a digital, it's just virtual izing the amplifier. So what we've got is the AMP here. If I just open that and we're running the test oscillator through, so it sounds a bit funny, Theo, right? And if we turn it off, we just get back to that test oscillator. So this is just another simple example of some of the things we're gonna get up to. It's really rubbish examples, musically speaking, but it's the principles are universal to how we start messing around with synthesizes cool . So I hope this video's been useful so far. In the next video, we're gonna go over filters and then in the subsequent videos, all of the other essential fundamental principles that you're gonna need to know going forward on understanding the logic instruments the problem with logic. Instances when you open them up, they look hideously complex. But if you know what you're looking for and what generally these instruments have, you're gonna understand it a lot quicker and be able to use it to create the sounds that you want.
14. Introduction to Synthesis | Filters: So, as I said in the last video, one of the important things to understand is the overarching principles that guide synthesis. You've got the oscillation phase, which is the way you create a fundamental tone. We just looked at that in the previous video. Then you've got the filter stage. What? You filter the basic signal. We're gonna have a look at that in this video. Then you have the amplification stage of the amplifier stage where you control the signal over time. More specifically, this is called an envelope where you have precise control over the beginning, middle and end of your sound. And then there's a final edition, which is modulation where you change the parameters off the instrument. Whatever's available to you, whether it's volume or other things, like filtering over time, you change those those parameters over time. And then you can add effects and stuff like that afterwards. Some some of these synthesizers have their own inboard effect, but you can also use outboard ones as well. So let's dive into filtering now and the fundamental principles you need to know. I'm gonna go over to my filters folder here on day. I'm gonna open up the first track, which is called noise plus filter. We have a little listen to that. I'm gonna get rid of this. E que onda started again By double clicking there, we can have a listen to what's going on? Just a load of noise. Basically, Now, if you've ever used an old TV and unplug the aerial, you'll know that sound. If you've never heard it before, it's basically everything in the audio spectrum played randomly at once. So, you know, when we heard the sound of the cello or the sound of the sine wave Very characteristic, this is entirely uncharacteristic. It's a bit like having a white wall where you're seeing all the colors in the spectrum at once. This is what white noises. You hear all of the sounds in the audio spectrum at once, and it gives this quality, which is slightly more difficult to listen to, then looking at a white war. But they get so what I'm gonna do is I'm gonna filter out part of this noise, and I'm gonna filter out the high end first. Now what? This is typically known as is a low pass filter so that is because it's letting the low part of the spectrum come in and let's see what happens to the way form underneath. See, we've filtered out the higher frequencies. Let's get rid of that on. Let's pull in the low And or rather, should I say this is now called a high pass filter. So the high end is being left, let through and low and is being cut off. So we hear the high parts of the spectrum. If we pull, they send in on descending. We're only gonna be hearing Mawr off the frequencies around 500. Let's hear what that sounds like. This is what's called a band pass filter. We specify a specific frequency that we'd like to hear more than everything else, and everything else gets cut away to a greater or lesser degree. I wouldn't necessarily use EQ you in this way, because filters actually are much better. That was much better processing in proper specific filters within instruments, but I'm showing you, as usual on the EQ you so that you can understand the principle first. The next type of filter we have is a band reject filter, and that is the opposite of what we have here. What? We pull these out, I'm gonna turn them off completely. And then it's only the frequencies you specify that are filtered out. So if I pull in this notch here and I pull it really far down, Andi, maybe ah reduced the key factor. If I can do that properly on here, okay? I can't do it. There we go. Finally. What we're doing is we're filtering out the sound at this point and that phasing sound that you're hearing or it's not really a phasing sound with with changing the sound over time because I'm pulling out a No, that's pretty subtle. There one more final principle that I want to show you that get rid of all these. I'm gonna cut off the high end, and I'm gonna push up a point here on day. You do this using the the bottom numbers here, and I've pushed up this point where I've cut off. So there's two things here. There's the cut off point. This is a term you'll hear a lot in filtering in inside synthesis and then the the cut off point boost, which is otherwise known as resonance. Okay, So this this creates a boost at the point where we cut off and it just makes the sound of the filter even more obvious. Have a listen to this. Okay, So cut off and resonance. That's the last final principles as we go forward. Okay, so I'm just gonna close that now. Onda, We had a bit of clipping their Sorry about that, and I'm gonna mute this. So let's have a listen to retro synth. Very simple kind of almost sine wave like sound. Right? And I've got my channel eq you. This is what this is. Conceit is a few upper partials. Now, what I'm gonna do is I'm going to automate if you don't know automation in Lockett. Logic is it's basically creating changes over time using these kind of lines here. So I'm automating the inbuilt filter inside of retro synth. So if we open it up, we're going to see this filter moving left and right. Let's see what happens to the sound and turn the volume up it so we can properly see it here. Romans meet it, and I'm on my wrong channel. Eq. You started schoolboy era stuff, guys. Theo. So that's giving you a certain sound right, and we're starting to get a little bit more complex intent of our filtering. Now, if we bounce that out as a filtered way form, something really interesting happens. Remember when we thought about the sine wave on the square wave and how they're very different? Let's zoom into the beginning here. It's quite harsh sound at the beginning. Have a listen, right? Quite edgy, and you can kind of see that right. It's very obvious in the way form. There's this kind of very edgy looking oscillation. But as we move to the point where we filtered out more, let's have a look and zoom in at the way form there. We're back very close to that sine wave shape. It's really, really interesting this so just from simple way forms at the very, very high speed level, we can create these different effects. Okay, so I'm just gonna close that. Let's have a look at a different type of wave, that kind of sorted sound again unfiltered. Now let's look at it when it is filtered. Theme thing to realize is the amplitude also goes down. We're in the wrong here There's a bit of a collection logic with that when you open up in the window so you see that the amplitude when we filter it goes down, so actually gets quieter as well. So this you can compensate for that. And if we zoom in on this point here, wrong window, we've got that sign sound. Whereas at the beginning, we've got that sorted sound for shape that classic sawtooth shape there. Okay, cool. Now let's listen to what it is with residents. So here's a sort of filtered over time by the modulation without residents. Listen to what it sounds like on then we want to go to the sort of filtered with resonance . Listen to the difference. Eyes were boosting that point where the signal is, we result in a kind of an extra. It sort of feels like an extra tone. Look at that bound that boost their zooms along. We hear these kind of really higher parts, which may be the sound a lot more interesting. So that's an overview off filtering on the fundamental principles you could need to know inside of the logic instruments. In the next video, we're gonna go over envelopes
15. Introduction to Synthesis | Envelopes: So when you think about the control of sound over time, it basically means the beginning, the middle and end of the sound. And this is what I've drawn here. The attack, which is the beginning. The middle, which is called the UK and sustain, will get into what they both mean in a minute and then the end, which is the release off that sound. We think of a simple sound like a clap. We have a very sharp attack face, probably not drawn exactly like I drew it there and then a very sharp decay phase. Andi, if we were to look at that on away form, it would look very much like that. Every with zoom in, we think of something different, like a bell. We have a sharp attack phase, and a very long decay phase will eventually go quiet. But it stays around for a long time. If you think of a cello or woodwind instrument, you can control the attack. You can bring in the attack much slower, or you could even do an interesting kind of curved sound. There you have much more control over it, and then ah, string player could kind of make thats a kay go slowly or really fast, and then they could sustain it for a very long time. Then when they let go of that instrument or they let go of that string and it stops playing , they could make it stop very suddenly by putting their hand over the string and making it suddenly stop. Or they could let it ring out, in which case that would be a longer release. So these are the phases off an envelope in and synthesizer, except it's controlled not by a person but by the parameters inside off the synth so we can have a fast attack on. Then we can have a kind of minimal and slow decay on. Then the sustained level is set to control how loud or quiet your volume is when you hold the note. So, for example, you could have a very sharp attack to a sound very sharp decay. But then, as you keep holding the note that sustain remains at a low level, you could also have the sound be really sharp, beginning decay a little bit quickly and then sustain at a very high level. You could have any parameters of this slow attack, a slow decay and then a low sustained period. Then you could have a slow attack, a slow and minimal decay, and then a long sustained, which basically all sounds like one thing. In this example, you pretty much only hear the attack on the sustain. But there is still decay inside of the parameters of the instrument. So when you let go of that key, the release determines the behavior of the instrument, so you could have a very long release. Or you could have a very short release, which immediately pulls the sand sound out of the way, or you could have a mixture. So this is what envelopes are. They control the beginning, the attack, the decay, which is from the initial attack, sound down, usually into the sustained level on. Then, after you let go of the key, it's the release. So let's dive into this now and have a look at it inside of logic. So I'm gonna open up my envelopes folder in the session file, and I'm gonna look at these short but straightforward examples about envelopes. So here, as we spoke about earlier, is a sound with an a short attack way here. The sound come in straightaway, right? But what if we had a long attack? That's a very long attack. The sound. After pressing the key, you see the MIDI information here. The key is still being pressed. It exactly beat one in both of these examples, but the control of the instrument brings in the sound much later. So that's a slow attack. So slow a taxi usually used on pads or strings type sounding instruments, synthesizes. So then we have the decay. So the time from which the initial attack goes down into the sustain. So let's listen to this. This is a short decay, right? Very short decay. In fact, we don't have any sustained in that instrument decays very, very quickly after that initial attack, then we have a long decay, getting quieter and quieter and quieter and quite it into what is essentially and non existence sustain on. Then we have This is sustained example where we have an initial sound, and then we've fall down into a long and low sustained sound. Next we have the sustained high. This is where we go from a quick attack to a short decay and then into a long sustained. So when I've changed the terminology here too low and hires post a long and short in this example, the sustain is going is sustaining at a low level, and here the sustained is staying at a high level. Let's have a listen to that one. Ah, just carries on until you let go of the key. So that brings us finally to release release short sounds like this. It's very, very short. So as soon as I like of the key, your CDs are much shorter MIDI files here the sun will go away with such a short release. There, you hear a little click at the end. That little click is just the audible sound off the sound, dipping away incredibly quickly. So we like kind of like a tiny bit of shading on either end of our attack or release. Other ways we end up with these very cliquey sounds, then release Long is where assumes I let go of the key. That would be incredibly long release, so I've let go of the key here. But the sound of the instrument is still holding on until finally that release ends. So that's a quick overview off a D S R, which is attack decay sustained release. So any time you see a TSR or some equivalent inside of your instruments in logic, that's what it's talking about. And when we get into the actual instrument chapters, you'll see the different controls and the different sounds you can create with them.
16. Introduction to Synthesis | Modulation: So we now come to modulation. We like sounds that change if you listen to a cello or I keep giving the example cause I love the cello so much. But any other instrument that's played acoustically, the sound itself is not static. You just need to listen to the test oscillator for any length of time to realize just how much your ears hated and your ears feel sort of dazed afterwards. I do, especially if you're listening on headphones, so we like that sound to change a little bit. Otherwise, it just seems really boring. The most simple type of modulation would be really getting louder or quieter with a tone or perhaps a simple ver barato on a violin or a ben non guitar. Essentially, it's changing some properties of the sound via the parameters of the instrument over time. So with regards to synthesizers in logic, modulation has a source on a target. A source is the thing that is modulating, also called the modulator, and the target is the thing that is being modulated. Also called the carrier, so is an example. If you think about string player, the finger is the source. The modulator on the target is the string, which is being modulated in the synthesizers. In logic, we have modulation routing, which allows you to route a source to a target. In fact, you can route one source too many targets on many sources, too many targets. They're typically more types of targets, but only a few types of sources that you need to be aware off. So an example of modulation in logic pro. This 1st 1 I've created, it's ah aptly titled because it's not exactly modulation, not strictly. Well, it is, but it's just a bit rubbish, to be honest. So I've got the GSM here on. What I'm doing is have used my own rubbish automation that I've drawn in to modulate mix between the sore wave or the square wave, and you'll hear that now. Ah, away sounds absolutely rubbish as we know. But the thing is that these instruments have their own modulations, usually inside of them, that do this much better. So I'm modulating that with a kind of low frequency, and I won't need to kind of keep that in mind. That idea of low frequency oscillation, a low frequency in terms of synthesizes a frequency that you can't hear, so the instrument itself is creating its own frequency. But the frequency of this oscillation is very, very slow. You would be able to hear this because it goes. Are one completes one cycle now so very, very slow. It does speed up a bit, but that's not spectrum or audible oscillation, said Low frequency oscillation. Insight will come back to Let's have a listen to this next one, which is modulating the pitch externally, using vibrato or rather creating vibrato by modulating the pitch. Externally, we open the automation again. What I've done is I've used the pitch shift, which is a plug in in logic, and I've moved it up in sense very, very quickly and again badly. I'm just showing you how this works. So the pit shift, which is the plug in, is gonna be moving quite quickly, keeping. So I'm creating a very subtle the broader there that you hardly noticed. But it gives it a tiny bit more realism if we're to turn this off. Modulation is still happening inside of here, but it's not affecting the sound. We turn it on. Let's have a look at modulating the pitch internally, using one of logics instruments. We could modulate that pitch much better than the way that I did it there by using an inbuilt feature inside of E S P. So let's look here at this wheel. We have vibrato to the left. So I'm gonna turn it that I'm gonna tend to speed up. I'm gonna have a little listen. So that's modulating inside of an instrument, Essentially, what we did here very badly. Okay, finally, we can do while which is basically modulating a filter. So you saw that when we were messing around with the filters in the filters tutorial that we created a kind of resonance that the cut off point When you modulate that and you set the parameters just right, you can actually create a wire effect. So let's have a little listen to this. What I'm gonna do is I'm gonna open up the auto filter, which I have on eyes modulating the filter, right. It's called ultra auto filter because it filters kind of with its own modulation. But inside of an instrument like the E S. P, you can also do this. You may have even seen that next to the VA Barato. We can modulate the filters so that they move and cut off the frequencies and create a wire effect that would be like me pulling up the e que setting the frequency to be a cut off or low pass and then boosting up the if I can grab it this bit here. So let's try. Let's try and listen to that and see whether that that does it. If we turn off the war, it'll be much. It wouldn't be as good as, well, obviously. Uh Well, well, well, well, well. So that's essentially what y is. There are other things in logic that are considered modulation. So we've been just looking at what's called a low frequency oscillation, which is a source. So it's the thing that modulates the target. But you can have other modulation sources in logic pro So, for example, the velocity or the impact of your playing on the keyboard can affect things like the filter or any other number of parameters, depending on the instrument. So you could set it, for example, that the filter is wide open when you play very hard on when you play softly the filter will be much, much more cut off. You can also have modulation to higher notes so that they have a different Tom breast or when you play higher up. The higher notes modulate the Tom Burr of the sound, either through the filter Qatar for through the way forms to behave like riel instruments. So, for example, on a piano, the sound changes as you go higher. The actual Tom Burr is different. It's not just hire the actual texture or sound or feeling of that note is different. You can also modulate stuff using controllers. That's what the modulation wheel is on. Most standard Midi keyboard controllers. The mod wheel you can modulate using your paddle or fade er's or you can have automatic modulation. So this is the one that you're most likely want to think about when crafting the sound with in a virtual instrument, low frequency oscillation on many other things. Okay, so that's a brief overview of modulation. I'm gonna go over some further principles and ideas that you could explore to take this whole thing further
17. Introduction to Synthesis | Advanced Concepts: so the principles we've gone over so far are really fundamental to synthesis. And they're gonna take you a long way once you learn the interface of the instruments. So I'm gonna open up my further principles folder and you'll find that the first patch in there is titled Mono Phonic. We're going to start off with is talking about Monta Phonic verses. Polyphonic. So the es M is the first instrument we're gonna look at when we get to the synthesizer. When we look at the actual specific synthesizers and it's ah mahn, a phonic based synthesizer. And basically that means that you can only trigger one noticed time from your keyboard even if you play a chord. So right now I'm just gonna play a chord. You'll see it up here registered in logic transport. I'm actually playing four notes e flat, G, B, flat and D. But the last note that I played, which was the D is the one that the instrument is actually listening to is basically what Monnet Phonic Instruments do. Now. You can have different types of mata phonic. You can have Monta Fornicola garter, which means that after the initial attack of the first note, which has a powerful attack, Theo. All the other ones are kind of joined to it. So they don't get that initial attack at the beginning of each note where you can get Mullah Fornek detached, which sounds like this thing. So each of those notes gets its own powerful attack at the beginning, off that face rather than being joined on there just very close together. Even though I am playing Lo Gatto, the beginning attack phase of each of those notes is still there, as opposed to when we're in La Gata. So now Polyphonic Instruments. You can play more than one now at the same time, but it depends on the settings of the instrument. How many notes you can play at the same time, I set this one to be as many as I wanted, but you can restrict it still. So let's say you only want the instrument to be able to play two notes at the same time, and for it to cut off whatever note you were playing last. Let me show you what I mean. So his one note is another note on the next note is gonna cut off the 1st 1 So the one that was in the left speaker got cut off. Let's try that again. Thing interesting. Then there's something which sounds similar but is actually very different. One voice or more voices. This is not to do with prolific me, but the actual sound itself. From each key. Let me show you what I mean. If I play one note here or if I play two notes Theo. Each of those keys, which was an F and an A respectively, has only one voice or sound coming from the synthesizer. If we upped that to a voice is what is effectively happening is every time I play the F, we've got eight efs coming from that synthesizer, which creates an interesting phasing effect. But you can do that polyphonic as well, so you can have eight voices on the F that I play and eight voices on the A that I think that's a setting that's inside lots of instruments, particularly retro synth. Then we come to unison, which is to do with well in this case octaves So in the E s P instrument, what you can do is you can dial in an octave below wherever you're playing. So here, playing that normal f and then I can bring in the octave below, which is a very standard technique and synthesis to kind of beefing up your sound. Then we have F m synthesis, which you'll see, particularly in the retro synth. Basically, what that does is it has a carrier which is the original signal on. Then it has the modulator, which is Thesiger Nall which modulates the initial signal. This is very much like we had our source and our carrier. Sorry, our source in our target. You hear what we have is rather than the carrier being oscillated by low frequency oscillator like we usually see, we have the carrier, which is the fundamental tones thieving, changed by an equally high frequency. Very unusual thing. But what it does is it results in some very interesting tones. Have a listen to this. If I mix them between each other. Yeah, very, very strange sounds. That's not particularly good examples, but you can see how crazy that sounds you can get from it then finally, we have a number of different effects thes air, the typical ones that you find in instruments besides reverb and compression and stuff like that. You have chorus ensemble. This is on the S e. Here on this is giving us a kind of a broader modulated sounds, which sounds like their arm. Or if those notes playing you can stack those effects in that instrument. Phasing is an interesting is one as well, too. So here's that yes, to again look crazy. Don't worry. We'll dive into this some point. You'll definitely understand this. By the end of the course, Theo phaser sound there and then also physical modelling. Finally, with sculpture. Sculpture is a very, very interesting instrument which will get into, but basically it uses mathematical algorithms to replicate the sonic characteristics off naturally occurring instruments or acoustic instruments or acoustic objects. Let me start talking to show you what I mean. Listen to this sound, Theo. So that's completely created by the computer. But it does sound rather acoustic. There's something Flutie about that. There's something textural, which is really, really, really amazing. Okay, cool. So hopefully those further principles will guide you in when you're opening up these instruments and finding different things, like prolific me or voicing parameters and ah, different effects within the instruments. I'll see in the next video
18. ESM: So this is the E S m a mono phonic synth bass. It's our first instrument because it's one of the most simple ones. And it's great to start understanding the principles we've covered in the synthesis introduction if you're new to this. So first of all, like many an instance in logic, the u I is pretty dated. This looks like something out of Star Trek from the from the eighties, but you can get over that. It is actually a great instrument. I bet you logic will update the your eyes for all these guys in the last years, they've done it certainly with their plug ins like the certainly the e que and various river plug ins of this. Most of these instruments have a kind of flow and particularly this one we go from left to right, and the U I slightly reflects that this being the lighter and this being the darker. So we're going to think about these going through. This is the initialized patch which have set up for you, and it means that it's the most simple patch you confined. Usually, these patches don't start with simple one, so I've created them for you. Let's listen to this. Sound pretty much a sine wave. Although we've got a few partials up the top there on the left. Here. What we have initially is our octave jumps 8 16 32 People are from wonder what the 8 16 32 refers to. Some people think. OK, well down eight notes. Right. So we're down at the sea below this one. That's actually not the case. This is indeed actually see for when I play it we're not down at C three is what you're hearing. This is to do with pipe organ lengths and the length of pipe organs and feet. Don't worry about if in our basically all you need to know is that this is true down one octave down two octaves and you can hear that we're getting a really rich tone down there to really, really great great sound to have in your mix. So we're gonna put it back up there for these the same called glide here. And that means the glide between notes since it Samana phonic instrument when you're playing the garter. If you listen to this, it's hardly any glide. But if I turn this up bit more. If I turned up loads, it becomes ridiculous. And this is quite a useful effect, probably for here to get a kind of nice Leedy bass sound that's too much. Still, in my opinion, probably down here. So we have two fundamental way forms that we're creating the sound from on. We can mix between them. Here we have a sore tooth wave on. We have a square tooth or sorry square wave. It's quite tooth wave on. This is what it sounds like. No, we're not hearing much different to the moment because what I have is the cut off quite low . So we're cutting off a lot of the frequencies. Imagine this. Hi, part off the inspection being cut off. That's not what we want. So to hear the waves fully so I'm gonna pull the cut off up. So we're now hearing more of the spectrum and you'll hear more of the sound of thes waves coming through thing. Ah, really like that sound. And this is a beautiful thing to have up because you can see visually the what the which partials come through. Let me just expand. That's a bit so you can see it is probably too big. There we go. 125 on Let's have a look. So you can see that the square wave is a bit fatter in naturally, deeper in turn of in terms of eternal quality. So we're gonna leave that saw, and I'm gonna talk about resonance. Remember that thing that we looked at earlier that boosts the cut off frequency? We're gonna pull the cut off down and you're going to see it. The point of cut off, which is roughly here. I'm gonna boost that point Way can hear this boost going on now. And if I move this now, this is an extreme example. I'm gonna pull us down and you might want Now, residents doesn't actually make much of a difference when you have a static modulation. In other words, when the cut off is just staying where it is, you get a tiny bit of heart lift in the frequencies at the cut off point. But really, where residents comes in is when it's modulated. So what we have here on the right is the filter envelope section, and this is the modulation of the filter cut off position after a key is pressed. So what we have is the initialization of it, or the initial point from where we start. So this and this dial are basically the same, but this is in relation to the envelope. So if I pull this cut off down to here and I put this up to here, what's gonna happen is that when we play a note and we pull the decay down on velocity, we're gonna immediately shoot from this side all the way down to this setting here. So that's what that slide is doing here. So the initial point from which this envelope will pull us down to this cut off position so we polis all the way up, you hear nothing. But if we pull this all the way down, we here kind of were spinning through the cut off. It was almost as if if I turned this right down and we're not hearing the filter, it's almost as if the second after I press a key, I go like this and I pull this wheel down myself. But I don't want to do that every time. So I get machine did it so I pulled us to hear Bring the decay up. You'll hear it more obviously. See, I'm not doing anything with my mouth there on this decay. Time is determining that rather slowly after I kept press, the key will come down through the spectrum to this part of the cut off. Sorry to this cut off point. Okay, Now you can change whether this is affected by the velocity. So So there I'm playing harder and it's taking longer. If I play softer, it goes quicker. If I turn the velocity up on the decay up even more, we'll hear it even more so I'm gonna play softly. We're pretty much down here already when I play softly, but if I play hard comes down after it. So this is really gonna affect the attack. Sound off your sound that you're creating. So, for example, let's let's put it something bit shorter. It's usually used for that kind of shooting laser sound at the beginning of a of an instrument. Ah, an instruments attack. So let's pull the cut off to here Now. We've got kind of a nice, tight sort of pluck sort of thing, but we've still got a note that's carrying on. What if we wanted this to be just a pluck? Well, we have a volume envelope here, right? And we have just the decay time here. So what we can do is we can pull the decay right down, so we have a very short decay time that's a bit too short. That's almost like a click. Now if I go down a bit, in fact, I don't even need to play lower on my keyboard. I can use these octaves. Let's bring in a bit of reverb too much. That's not really the best river for this, but I wouldn't change it now. So really good pluck sound there, Basie Pluck sound. We also have a velocity dial here, which basically allows us to choose how sense to this instrument is to the velocity with which we play the keyboard. So at the moment I'm playing really softly. You can see here, so I'm richest thing about 19. And then if I play harder right up, won t four sort of mark on the sound that you're hearing is exactly the same. But if we turn up the sensitivity, if I play quietly, e I have much more dynamic in my actual playing and you can change the overall volume on then finally we have overdrive. One of the things you just saw me doing a bad habit. There is. I just I still the clipping. And immediately I thought our orange quick turn this down. Shouldn't do that. Actually, you should try and find the parameter inside of the instrument so that all your fate is kind of remain reasonably equal. Then you have maximum control, So don't do what I dio. Obviously, as you turn the overdrive up, the sound gets louder. So you need to pull a volume down. Cool. So that was an overview of the GSM. Hope you guys enjoyed it. I'll see you in the next video.
19. ESE: the S is like the older sister of the es em in there. It's just a little bit more mature. It has a few more voices. It's a polyphonic synthesizer on the interface works very much in the same way. So we're gonna go from left to right in our tour here. So on the left here, you recognize those normal organ pipe lengths. Now, it's slightly different to the SM, which was 8 16 and 32. This time we have 48 and 16. So we've got on organ length, which is shorter than eight. And eight basically means that we are at concert pitch at the same pitch off the key that were pressing. So you'll see here. I'm gonna place three C four bond. We get a C form, and when I play the piano, we get a sea full. But if we go back up to the E S e initialized catcher and we move this up to the four here , the length of the organ pipe, it's gonna be an octave higher on. You can tell that because I'm playing exactly the same key here. And if I get into the piano on playing that see for back down an octave below. Still So we have three options. We have the same. An octave higher than where you're pressing or an octave lower just like you different. Okay, so then we have the wave shapes. So this has a similar thing in that you can move between waves. But now we have a couple more options. We have a sawtooth wave. We also have a square wave like we did before. But now we can modulate or change the pulse width, which you can kind of see here Basically where the square gets squashed towards one end on , we can modulate between here, so have a listen to what this sounds like. I'll start on a square wave, gonna bring my cut off up so we can hear the structure of that square wave. And I'm gonna move my wheel to the right so that we modulate the pulse width manually sends a lot thinner or glitchy. Oh, just a very interesting sound on. Then we can switch it over to so underneath we have a modulation off either vibrato or pulse width modulation on that modulation is being controlled by an LFO. So you can change the low frequency oscillations speed with this dial. Here, let me show you what I mean. Lost. I explain. It's going to turn the intensity of this vibrato up. Speed up. Ah ah, okay, on that is controlling the brought the vibrato at the moment as I described. And you can tell that because we've got vibrato on the left here, which is where this line is connected to. Now, what you can also do is you can control the pulse width modulation, which is between this wave shape here on this wave shaped here and usually when I first used this instrument, what I found is that I opened up and I expected this to now be in pulse width modulation cause we've switched from here to here, and that would make sense. Right? But have a listen. It's still on librato. So what you actually have to do is unlock this from that little icon, their from their little dot on push it into the the transition between square and the squash square wave. So very, very different sound gives that kind of some some kind of cross between brought the librato and also a tremolo, but and also maybe even a chorus in there. It's a very, very interesting effect. So thanked Worth worth checking out, Gonna pull these back down. I'm gonna put it into sort of way. Have our standard cut off and residents here. So cut off basically means where we're cutting off the higher frequencies because we're it is a low pass filter so we can let some of the low end through on mawr the middle ends and then pretty much everything, and you can see that reflected on here. The resonance, as you probably know by now, is where we boost the signal at the cut off point. So I'll just illustrate again in case you're watching this video for the first time, I can cut off here using the Q. But I can also boost the signal at the point of cut off like that. So that gives us a really interesting sound If I move this around a bit of a rubber sound and you can, you know, clip things is the for that. So we don't do this. I'm just going to sit this to factory Duke default and we get a much, much nicer sound. This is the thing you don't ever use Really cute to do that sort of thing because you get just a lot better sound from kind of filters, which I meant to do this sort of thing a lot. Ah, uh, we're getting that wire which is really characteristic off resonance and adding a bit of residence at the cut off. If we don't have the resonance, there is a war, but it's more like a were were were sort of thing as opposed to what? So let's move up the residents even more. Let's see what it sounds like. Wow. Wow. Okay, so really cool sound there with just the cut off and resonance. So in this instrument, you can't modulate the cut off and residents with an LFO so low frequency oscillator like we had here, controlling either the brother of pulse width modulation that comes in much mawr complex synthesizes, which we're going to see next. You can of course, do that with various plug ins and stuff like that. But it's not inside of this instruments not built him. What we do have, however, is control over the attack and release with regards to the cut off and resonance. So we have an envelope controlling the cut off from residents like we did in the E s m. The first thing to know about this envelope is that it controls both volume onda the cut off frequency. So at this setting that I have currently here on the a r intensity, we are right in the middle and you compress the zero button to return it to that at that setting. The envelope is only controlling just the volume. Approve this t So we've got the cut off quite high. You'll see the frequencies coming in a broad range of the spectrum, but the volume will come up slowly. If I move it up even more, you'll hear that right from the beginning. We have very high frequencies coming up from the $2500 in a bit more, but they all come up equally together. So that's this setting. When we have the a R intensity in the middle, if we move it to the right, let's see what happens Theater AC is now doing is modulating the cut off toe open up even more according to the intensity that we set That's because we've pushed it to the right. If we now push it to the left, listen to what happens from this cut off point by the envelope way go the opposite way. We're now cutting off frequencies from this point of where we've started. So let's move the cut off point even further down and push the intensity up. Listen to this. We're starting lower from the cut off and we're opening up higher, Higher, higher, higher All the way to the top, Theo. Almost all the way to the top. What this Slater does here is it tells you where it's gonna go, right? So if we push this all the way to the top, it will genuinely go all the way to the top theme, right to the top of the spectrum on. We can do it the other way. So let's pull this right down. So, basically, now what we're saying is that we're going to go from this point, have cut off assumes, repress a note, and according to the speed of the attack, we're gonna pull all the way down until we basically don't hear any frequency and you will have a listen and watch on here. Ah, way. That's the way it works. OK, so that's the attack side of stuff. Release is slightly different. If I pull the attack down to a normal rate here and we bring this back to zero and cut off here, we'll put this up too intense to again with quite a strong release time. When I let go of the note on effect on the cut off is going to be heard, right? Let's see what it does if I play a note and I'll tell you when I let go of it. So I'm currently holding the note. Nothing happening because we've got quite a strong attack time. We've already reached this point. But when I let go way see the envelope affecting what's happening now that's the opposite way to which the attack worked. Because if I play a note way open up to the right with our attack and when I let go, the release pulls it back down. So essentially, what we're doing there is we're going with the attack. We're going from here to here. And then when I let go, were pulling it back down. Okay, so let's pull this to the left for one final observation of how this works and see how this effects the release. If I play the note again, we can hear that we've gone down with the attack as we saw earlier. But when I let go of the note, it opens back up with long release. So let's have a look at kind of some normal settings. Again, we can change the velocity filter of these attacks settings. So currently nothing is happening because I have got velocity field settings on low. But if I bring this up on, I changed my settings here. Sorry, so soft for lost uses. You can see up there affected in one way on harder velocities affected amore basically affect the intensity. Mawr were affecting it a lot more when you play harder. Okay, let's pull these back dance and normal settings. Velocity volume is basically do with the volume here, almost certainly just playing the same level of volume, even if I play the key very softly. But if I turn this up, I can play incredibly quietly and incredibly loudly. You have your overall volume and then finally, at the end, we have our effects So chorus is basically doubling up the sound to an extent. To put it simply, you listen to this sound just gonna pull the cattle down, Theo. You can hear it in your stereo field kind of a tiny bit of modulation, and just the sound gets a lot more interesting. You can see this stuff's going on here and add weaken. Stack these as well, which is quite cool, even more modulation going on, or just one of them ensemble as well. So that's the GSC as a few extended parameters here, which is to do with your bend arranged. So this is your pitch bend. So at the moment, currently, when I play a note, it's gonna go up an octave when I move up right. That's because I've set it here or whether it's the natural setting. It's set there. You can change that to whatever you want. I believe all the way up to 24. So So the two octaves there and you could do a negative bend arrange here. So we're gonna set this Teoh probably 12. Let's try that. Well, we could set it even less. You can change it to be say, a tone, Do you on? You can change the overall training here in sense or more So that was an overview of the S e. I hope you enjoyed it. I'll see you in the next video.
20. ESP: the E S P is a polyphonic synthesizer with a number of oscillators and up to eight voices playable. That means that I can play eight voices or keys on my keyboard before the notes start dropping out. When I play nine notes orm or at the same time you can see it's got very similar interface to the E S M on the S E. And it's got a similar flow from left to right. It also looks just as retro. So on the left here will start with the pipe organ links, so they mean moving up or down in octaves. Don't worry about what the pipe organ and numbers are to do with. It's just really essentially to do with feet. But when you press, say Defour like I am and you're on the eight setting, you are hearing Defour, but when you move up toothy four, that means we're an octave higher than where we are on the keyboard on. When we moved down to the 16 we're hearing or sounding a note that's an octave below where we're playing on the keyboard so you can play a pitch octave below octave higher. I'm gonna keep it on this setting for now. So you can see here we have a number of different oscillators, or wave shapes that we can blend in on. What I'm gonna do before I do that is go to my frequency knob here and pull it up a little bit. And you'll need to do that. If you're working from my initialized patch, Theo. Now we're hearing Mawr off the sore tooth and less of the triangle. Now we're hearing more of the triangle unless of the sort. If etcetera, etcetera and you can blend these in, I'm gonna have ah, slightly harder sound here with sore tooth and square. Then you can have sub oscillators, which are a fixed width square wave. That means that it's a square wave an octave below this one here. So if we listen to this on its own, we're currently listening to this oscillator here. Normal square wave, pitch that pitch. And if we bring this in, this is a fixed width square wave and you can see it coming in on the e que that Let me do that again. Initial on on that, I could bring it in two octaves below the original oscillator get really, really nice fat, doubled, sound or tripled sound there. So the final fader is our noise and that can, as you'll see in the next video, give us a wealth of wealth, of different sort of sounds we can create from just simply noise. But the simplest use of it is to actually build in a little bit of dirt or Gretel. What kind of edgy sound Teoh creations on if we listen to on its own sounds crazy on its non key specific cause it's just random. So I'm gonna keep that on a simple square wave with a bit productive in there and a tiny bit of just gonna keep it square. So then we have our low frequency oscillator here. So this is like the other incidents we've seen able to be turned between vibrato or watch on that site. And if you want to reset it back to nothing, so no low frequency selection, you press this zero at the top here, this button and it brings it that you can also press option on your keyboard and then click , and it'll do the same thing. So let's have a listen to that I'm gonna make sure that my speed is up quite high. This is the rate of the low frequency oscillation you can hear. We're already going to the librato there. It's ridiculously big this for librato, so even a tiny setting. That's kind of like a natural vibrato that guitarist or violinist might do, but the whole rest of the wheel is still available. Teoh. Incredible ridiculous range there, which I hardly ever use. But you might do so then we if we move into why here we can hear the while working. Let's pull the frequency down on. Let's tend Avila feet up, filter up. We'll come to that in a minute. Just make sure that you do that if you're playing along. So what we've got here is the intensity. Now the intensity of the vibrato was clear, really. It's just going wider or higher and lower without vibrato with What's happening is we're modulating the frequency further round just to remind you, if you haven't gone through the introduction, Teoh Synthesis and the other previous videos. Essentially, what this low frequency see oscillator is doing is it's moving this slider in an automated way, so it's doing it without me having to do it. But if I do it just so that you can see what's happening, that's essentially what the low frequency oscillator is doing, and we can determine the speed with this wheel on. We can determine the intensity with this wheel. So if I have the intensity set low on, why what's what's actually happening? Is this frequency Well, is not going too far around. It's going like this, right? But if we set the intensity really far, the wheel is spinning all the way to the right and back. Essentially, we're cutting off load of our frequency and bringing it back, cutting off loads. Bring it back. Let's have a listen to that being affected. And then if I bring the speed down, the whole spectrum is coming back in. Okay, so we're gonna bring those back to zero. So, frequency, as we were talking about that we have the frequency cut off, and we also have the residence residences where you can boost way you're cutting off the frequency way, Theo. Theo doesn't make sense to make sure you watch the introduction to since this part of this tutorial. Siri's then in the center here. What we have is three buttons, one that says 1/3 to 3rd 3/3 And basically what these do is the cut off frequency could be modulated by the MIDI note number. In other words, how high or low you are on the keyboard. You've probably heard of this. Karam Attar is keyboard follow on other synthesizes. Now you could choose 1/3 or 2/3 or the full keyboard, which is 33 But if no button is active, essentially the key you strike won't affect the cut off frequency. So this makes the lower notes sound pretty bright compared to the high ones. But if you choose 33 or all of the keyboard, the filter follows the pitch, resulting in a kind of like a constant relationship between the frequency cut off on the pitch. This is kind of typical of many acoustic instruments, where higher notes sound both brighter in tone and higher in pitch will come to this section, particularly in the next episode, when we talk about creating different sounds. So I'm gonna pull this residence down and the frequency to normal. We'll keep it there for the moment we then have our standard A. D. S are on with our 80 s. Our intensity sliders set to full. We're going to hear the full effect of this. 80 are slighter. If you want to pull down the intensity or effective ist, you can pull it to the left. I'm gonna keep it here for a moment so that we can see the effect of this. So attack means how fast it takes for us to hear the initial note by Polis Away, Up. We're gonna slowly come in with the note like a pad. But if I pull this all the way down, we're gonna hear a click because there's not even gonna be. There's not gonna be no transition. It's gonna come in straightaway, usual for percussive sounds. Decay is how long it takes for the note to fall down from the point of attack to the point of sustain. So if I pull my sustained down quite low, my decay quite high, what we're gonna hear is the sound go up quickly in the attack and then decay down into a sustained level which is gonna be quite low, pretty low, sustained. I'll bring it up a bit way remain there until I let go of the sustain and then we're in the release. So if we bring the sustain up, I can make this release incredibly long. So as soon as I let go of my note, let go. It's still going right, or you can have a very short reliefs like, for example, a drum sound. Obviously, that's not a drum sound. We'll get to that later. But that's essentially what a DSR is, and that's a quick, super quick tour Through it. In the next section will sort of apply that to create all different sounds that you can do with the SP. So once you've got your settings correct with your envelope on. But let's just bring this up, and what you can do is you can change the amount that the envelope is applied via your velocity. So in other words, if you play softly, the envelope isn't applied that much, or if you play hard, the envelope is applied. Let's have a listen to that, so I've turned this. This filter is the default setting in my patches already right at the top, So if I play softly, seem I have lost a up here. It's quite low. But if I play harder theme the envelope is affecting the sound even more. Whereas if I pull this sensitivity down or the velocity filter setting down every note I play, no matter how hard frequency is affected by the envelope exactly the same for each one. So essentially, if you want your envelope to respond to velocity, then you can turn this all the way up on somewhere in between. If you want a mix or if you don't want your envelope to respond to velocity, turn all the way down. So I'm gonna keep that down for the moment. We then have a general volume button here, which basically pulls the volume of the whole thing. Remember that you can't you have to re trigger and know each time you can't say, For example, if I play a note and try and change this, you won't hear anything. Whereas if I play another note now, it's much quieter, but it doesn't go down to zero. It's really just a boost in a in a poll. So then we have velocity volume, so that's kind of basically the same idea here whereas except this is this is affected by the the envelope on the filter. This is just the overall volume. So here there's nothing happening when I like water. Whereas if I put it all the way up and play quiet on that, I can play louder. So a response then we have finally too little effects at the end. We haven't overdrive and a chorus. That's what they sound like now. Obviously, the Overdrive pulls up the volume, so you wanna pull the volume down to compensate, gives you a little drive there with our settings. It's not really noticeable theme here a little bit and then courses more next. Theo sounds in their great. So in the next video, we're gonna dive into all the different sounds that this instrument can make. It's a road very start to be a lot more flexible. Are synthesizers now because we've got a combination of polyphony with a number of different oscillators on DSA. Interesting envelope effect on DSM. Normal effects. At the end, you could make a huge amount of different sounds. So that's the E S P. I hope you enjoyed this video. I'll see in the next one
21. ESP - Build Your Own Sounds!: Hey, guys, this is a quick video about the PSP and one of the course files I'm including in this course. It's a session where I've designed all these different sounds in here from the SP to kind of create the sound of a high hat, for example, or bass drum and then snows on, then basically put it together to make some really fairly cheesy police drama track from the eighties or something like that. It's a bit strange make of it what you will. But the point is, is about creating all of these different sounds just from one instrument on using the principles that you've learned so far Before you go further to kind of understand how I'm creating all of these different sounds, both using kind of, obviously the the wave parameters, the different oscillator parameters, residents, filters and particularly the envelope how one can use the envelope to create things like a high hat as opposed to a lead sound. So dive into this. If you're really interested, understand how have created the different sounds. Andi, Andi Try not to laugh the track too much
22. ES1 Part 1: Okay, so now we get to the ES one and it's room that has a lot more versatility in it. But that builds on the foundations that we've covered so far. So what you'll notice is that the interface, if it was even possible, is even more cheesy an old school and it's got a nice green vibe going on. Love it on the left. There you'll see that there are similar parameters, like the pipe organ lengths you have the wave shapes, which you are aware off aware of on. You have your filter section, you have a TSR, and then there's some other stuff down here that you may not be familiar with, and these signs as well a DSR and gate are so the interface. Here we have those pipe organ links, except we have a few more now. So this makes sense, right? We've got eight, which is the same octave were playing in we have for which is one octave higher we have to , which is to walk to tire on. We have 16 which is one octave lower on 32 which is too active slow, so basically you have two octaves either side okay, So past that. We've got to oscillators. We've got the main oscillator and in my preset that I've given you the initialized patch. What this slider is it's all the way to the top. So that means that we're only listening to oscillator one. This is the higher oscillator, and it has three different wave times. You've got square sore tooth and triangle on the square wave. You can modulate the pulse width will move the pulse with You can also modulate it later on . So I believe that where is on then? I'm gonna move down there, Slider, which is gonna move between the first oscillator and second, and you'll hear that it's the sub oscillator. Really, really nice sound coming in there. Right? So at least two octaves below, and you've got a really nice rich overturns over the top of it. Okay, so you've got the mix between the sub, but you've also got the main volume. So if sorry, the main pit shift here. So if we put the whole thing down, this sub would be way too low. You get all of this down here, so you gotta watch that in your mix, right? because essentially what you've got is you've got the sub which is already down here in the mix on. Then you're putting that two octaves lower, which gets us down into the almost the audible spectrum of oscillation. So watch out on that one. So this one has a lot more different varieties and and options, right? We've got we've got various forms of square wave. The one thing you just saw me, they're dragging down and nothing happening. The one thing I don't like about this instrument sometimes these problems with changing the parameters here, you kind of pull it. Nothing happens. Nothing happens. Then it spins around and goes mental. So watch out on that one. Yeah. So you've got much more interesting sort of sounds going on there and open up the cattle. But all of these, you'll see in a minute have a really nice filter that we have in there. Give us a kind of really nice, strong, moody bass sound. We'll go over e x t in a minute later on in the in the video, but that basically, that means that we can bring in a next journal instrument inside of this synthesizer vintage keys or vintage Hammond organ, that sort of thing. So you'll have a noise setting on. You can also set it off if you don't want it all. So now we're only listening to the first oscillator. But obviously, if we bring the mix all the way to here, we're not hearing anything. So now we have the filter section on. It looks a bit weird, right? We've got these kind of, like, four failures either side off this main circle here. So what? These four options refer to here 24 db Classic 24 db fat 18 db and 12 db. What they refer to is essentially the slope off the band rejection above the cut off frequency. So let me show you what this looks like with our e que in our kind of typical representation of a low pass filter that we've done before. So what we have here is the low pass or I The low end is being passed, allowed to go through on where we're rejecting this band of the higher frequencies here. Now, obviously, this is the cut off point. You can't quite see it here because quite a long, long point here, but we This is the point where we're starting to cut off and it's a long slope there, right? So we can actually change that on e que to be steeper. So if I change it here, it's a much steeper 48 db. So that's a very strong cut off point. So we listen to something that's really open a lot of frequencies waken here that we're cutting it off really strongly. But if we change that slope to be something like 60 B, that's quite that's quite tame. Have a listen to the same thing fades out much slower. And we can still actually hear some of the high frequencies here because it takes so long for it to get to the lowest point, which is over here. So what this filter section is doing in the middle here of the S one is describing the steepness or significance off the or intensity rather off the band reject curve all the steepness of that slope of the cut off. So basically you have 24 TB Classic, you have 18 db and you have 12 db so that's decreasing in intensity on the 24 db fat filter basically compensates for any Lohan that's lost in the filter. Cut off, typically, when you increase resonance in your filter, this tends to reduce low frequency content on what the 2024 db fat filter does Is it compensates for the reduction of low frequency content when you use a high resident value. So then we have two parameters either side of the filter section one, which is drive, and this basically affects the behaviour of our residence. Settle. Shift in sound, depending on your settings, changed eternal quality of the residents. Pull that back down just for my cut off down because I want to talk about this one. So this is keyboard follows that this is the effect off Theo the pitch that you are playing on the filter cut off. So we've looked at this in other instruments, but it's designed to mimic the Tomball changes of instruments as they go higher and lower. So if you have this set to zero, basically your loan owns sound quite bright, mixed this up, and if you push it up to the top, you're low. Notes get a little darker, so let's have a little listen so and then, of course, as you get higher up the keyboard, the filter opens up on you start getting a little bit more of the high frequency content in there. So then we have a DSR via fell, which is basically velocities. Effect on the envelope on the envelope is affecting the filter cut off so we can change the intensity by pushing this all the way up to the top. Here, eyes is full intensity. So basically the full effect off the envelope is hurt, or we can pull it down to zero here and minimal effect or rather minimal intensity. Now you notice As I was doing this, I was inadvertently showing you that where there are two sliders here and this is basically showing you the range. So from here, what I have is a full effect of velocity. In fact, I could make it even more sensitive so that it goes down below barely hear it, right. But if I play hard, we go all the way up to these values here. So you can basically say OK, I want a bit of lost t sensitivity, but I want it all to be fairly strong or intense. Uh, there's hardly anything. Now bring it down a bit, you can hear a bit. Or you could say, you know what? I want a bit of a lusty sensitivity, but I want it all to be really satel and soft. So that's basically what that slided us. It changes the intensity of it if you don't want range. If you don't want velocity to be affecting. But you just want a constant level. You want to put these two arrows next to each other and then dragged over the top of the bottom one to move them both. So here we're gonna have everything Super choir. And here we're gonna have everything super loud. Okay, so then we have the amplifier stage. The amplifier is fairly straightforward. It also has two of these arrows which set the range. So from here, what we have is the ability to play. This is just affecting volume. By the way. That's what an amplifier is just affecting volume not to do with the filter. So yeah, complain really quietly as well is really loudly, really hard. Andi, if I want to play loudly all the time with only a tiny bit variation. I can push that all the way up and we only gonna be able to play inside of these values. So you kind of see this is a velocity from 0 to 1 27 up here, we will be playing quite loud all the time on down here will only be playing quiet all of the time. Basically, you set your range. You want a really responsive instrument. Keep it those settings there. Now, we're gonna come back to this in a minute, But just bear in mind that at the moment we've got a d s are at the moment. And essentially, that means that a. D. S. R is in full effect for both. The amplifier said a volume onda the filter. So this is the thing to bear in mind. Now we've got an envelope, a TSR which is affecting the filter cut off as well as the volume. So we've gone over that top panel here, the green one. We're gonna come back to this bit in a second and we're gonna go over this bottom panel now . Now the very bottom part is our global controls. This set of controls right at the bottom here. Over on the left hand side, we have our subtle tuning in sense. Very, very subtle tuning there. Waken. Return it back to default settings i e. Zero by holding down option and then clicking. We then have analog, which is a really interesting setting. This basically emulates the analog style of synthesizers and introduces random changes to the instrument. Very, very subtle, but if you want to play around, that's quite cool. You could barely hear that at the moment, but depending on your settings, it will introduce interesting ways of shifting the instruments color a little bit. We then have the bender range, which I love great name. We can change that to be either an active or two octaves or anything in between by semi tents. So here we have two semi tones which causes the tone bend thing. This is down and up, or we can have this lawyer to the top. Then we have our out level, which is basically our master volume, and we can pull this up and down. It's defaulted to minus 60 be because this is quite a fruity instrument. It's got a lot of power in it and it tends toe tend to clip if you're playing around with parameters that you can pull this right down depending on what you're doing. Option click Teoh. Bring it back to where it was to. It's default settings. Then we have our voices setting. Currently in my default patch. It's for leg Arte, but you can change this if you click on it. You can't type in it, but you can click and drag. If you drag all the way to the top, you end up at full, which basically means it's a polyphonic polyphonic instrument or you can pull it down one step from that on its leg. Artur Mm. On. And then you can pull it down from that and you can change the number of voices to be specific. It jumps from 16 to 32 to 64 right? You can't go in between that because they don't see the need. But right the way down for 15 you can choose what you want all the way down to one voice that basically means you're gonna have a non league arto instrument. Every single notes gonna re trigger the on the loan. If you scroll it all the way up to full. It's gonna be as many voices as possible doing the same thing. And then if you scroll it down one to Lagardere, it means that the first note that you play is going to trigger the envelope that you've set up. But every subsequent note won't trigger the envelope again and you'll get that nice licato sound. Then you can change chorus to have two types of course or ensemble. We've seen that another instrument so I won't go over that. Seeing as we're on this leg arto setting, what I'm not gonna talk about is the glide setting. So this basically determines how long it takes you to glide from one notes the next in Lagarde voice. I'm just gonna bring this up so that my velocity isn't affecting the sound as much on you guys get a nice clean sound so you can see we've got a natural bit of glide there. If I pull this all the way down way, just go straight from one note to the other. It's still gotta, but it's not gliding. But if I want something, I can pull it in. Let's do a really long glide really, really long. So you can change that Here. Really, really nice. Okay, so I'm gonna leave it there, and we're gonna cover this next low frequency oscillator Mod envelope on the router as well as the 80 s are in the next video. Otherwise, this video is just gonna get too long and you need to go and get company we see in the next one.
23. ES1 Part 2: So let's talk about the bottom panel. We've got our standard attack, decay, sustain and release controls. Here I are envelope on. The thing to know about it in this instrument is that it's hardwired to the cut off here. So our attack, the case stain release will be affecting our cut off. Regardless of what we want, it will always be controlling it. However, we can change a little bit. It's controls over the main output i e the volume or the amplifier, as it's called here. I didn't make it clear in the last video either that this congest function simply is your volume slider. But it also doubles as an ability to control how much the effect of velocity has over your output volume. That's what the two sliders are just to clarify. So these three buttons here currently we're on the setting A. D s arm. What that means is that the attack took a sustained release, are affecting both the cut off on the output volume. So if I play this note here and I increase the attack time way here, the cut off coming up on the volume coming up at the same time way. Go back down to our sustained control set. So Oh, are sustained settings. If I bring this down, you can hear the cut off on the volume coming up very quickly. Now, if I move it over the gate are what that means. Is that a d and s and no longer affecting the output here? But we have. It's still affecting the cut off. So if we increase the attack time, we'll hear that the volume comes in straight away. But the cut off is then slowly coming in because it's still rare to do this attack volume. This attack does that make sense? Basically, you've got controls over this cut off going on independent of the volume bond. Now, if we pull this down again, we're back to our normal settings. But if we pull it up, volume comes in straight away. But this attack is still affecting. Cut off on def. We put it to a gate. Are that basically means that the attack on the release are affecting both the cut off and the volume. But the decay and sustained settings are only affecting the cut off. No, the the output volume. Okay, so let's go down to our low frequency oscillator. If you remember from previous tutorials, this is a low frequency or selector which can then affect certain things. So we have the wave choice here, a number of different things, including an external instrument, our external source. And we have our rate here. So we cannot have this sink to the beat clock or we can have it free sink. And then this is in in conjunction with our router. So currently, we're saying that this low frequency oscillator will be affecting our pitch right now. When you first do this, if we pull the settings up here, let's pull our attack time, right? You think? OK, well, nothing's happening. Why isn't this happening about my rate up? Have chosen the wave? I've routed it to the right place on its to do with this fact that we have this intensity via wheel or it might be initialized by Well, I can't remember. Essentially, it means roughly the same thing that the modulation wheel, which is the wheel, is the thing which will start this off. So if I move my modulation wheel were then initializing the or rather starting the low frequency oscillator. We have one of these sliders that you recognize from up here. It's kind of characteristic of this instrument, and incidents will start to see like that. Yes, too. So basically, what this is saying is how much control this has or your wheel has over You're over the actual oscillation itself. So if I move my well at the moment, Aiken, move it all the way down and we basically have no oscillation. But as I move way, get away to a huge amount of modulation. Now, if I want less control over that on near the bottom part, the range there, settle, settle smaller. In this case, Pitt shifts my modulation wheels now all the way over the top when we've got a slightly smaller modulation. Whereas if I put it all the way up the top here on increase, decrease the range of it modulation wheels all the way down to the bottom and moving It hardly does anything. So if we did this with safer are cut off, right waken get some nice sounds in here. Oh, If we increase our residents a little bit on, then increase the range waken control. What are LFO is doing effectively Turn it off if we pull this all the way down here. So everything that makes sense to you this next section here is quite interesting. What we can actually do is modulate a number of different things via velocity, Which is it? Guess again are initialized or intensity via velocity. The 1st 1 I want to show you is the LFO amplitude us that's really, really powerful. This is where you can actually control the amplitude off this this oscillator rather than with the wheel here but with your velocity with which you strike the key. So I put my module reach modulation were all the way up to the top. You could also do this Put this up here and when I play harder now, the velocity I either higher amounts of velocity that I'm playing my keyboard means that we're opening up this low frequency oscillator more if I play softer were much much, uh, much were playing in a much smaller range. So we did this with cut off. When I play notes that are harder are low frequency oscillator becomes mawr intent, which is quite a useful way of doing it Now let's pull this all way back and let's keep this to basically off. So there's nothing happening here apart from just a few things to do with the envelope on. What I'm gonna do is I'm gonna put this up to pitch here, right? What I'm doing is I'm playing at different velocities and pitches affecting our, uh or other Sorry, this setting here fire a velocity are modulation via velocity is affecting our pitch. So when I play softly with lower and then when I play harder, we get higher on, we can change. The intense did this, so that's a small intensity but near the high part of the range. And this is small, intense debate near the lower part of the range of this modulation, which is obvious because we're in pitch. But if we did this with cut off, it's a bit more interesting because when you play softer notes, it cuts off in a different way, and when you play harder, notes opens up in a different way, which is a really, really kind of characteristic or kind of gives the instrument more of a really responsive feeling. Now let's move back to pitcher second thing is a bit ridiculous here. What? This usually gets useful rather than the randomness settings that I've got here is in conjunction with a modulation envelope, and this is where we can increase the attack time off the of the modulation itself. Let me pull this down a bit here, other way. So now every time I play, I know it takes 520 milliseconds to get to that point. But it's also responding to the amount of settings that I have here on my sensitivity. So if I play softly well, basically at that note, But if I play hard 520 milliseconds pretty much to get all the way up to that pitch. So it's a really useful in another way, and you can have this with, obviously with cut off. Ah, oops, Sorry. Another way of making this nice and responsive. So the last little thing I didn't show you in the previous video was this external instrument setting. So if we grab this wheel here and we pull it over to external and then we go to our side chain option, which is in most instruments, we can then choose, For example, external audiophile, right? And so now if we're playing this sound here and if also if we mute it currently this track is muted from what we're listening to, but the ES one is listening to it for our second sound. And if I play a note, what we're doing is we're pulling in the audio from here on. What we can do is we can apply a lot of different things that we've looked at so far to this audio for So this is just on audio track. You could have exactly anything that you want. You can also do this with, for example, an instrument. Let's load up, suffer instrument and let's have it be the vintage electric piano. Let's record going into the vintage like a piano, Andi. Then let's go back to this is mute this on, then have a listen s so I can get this to listen to that. But I could also do an even more interesting things. So that wasn't life. What I could do is I could mute this track. So this instrument here, let's call it so it's obvious e piano, and that's record enable both of them. So what's happening here is that we record enabled both of the tracks so that you can do. You can basically play both both instruments at the same time, but we've meted one of them. But we can still hear the e piano because it's coming through as an external instrument. The es one. We can have all the different things that we want on here. So let's put something really obvious, like on oscillator on here on a pitch or pulse width, actually, or mix actually increased. Let's pull us down a bit again. Free tea sounds going on here. So what we've got now is going electric piano being routed through the S one. Theo. Theo. So you can put anything you want through here. That's the power of the external instrument as an oscillator. Okay, cool. So a lot of settings they're affecting each other can get a bit confusing. Might be worth if this is all new to you watching this video a few times and perhaps even reading the manual. But I hope this tutorial series has been useful to you. I'll see you guys in the next video
24. EFM: So far, we've been looking at subtracted synthesizers in that we create an initial signal like a wave square wave, sawtooth, whatever on. Then we subtract frequencies from them, either using a filter or an envelope and then oscillating them, using low frequency oscillations or effect and such in frequency modulation or FM synthesis . What we do is we add additional frequencies. It's putting it quite simply, but it's the best way to think about it. So cast your mind back a second to the low frequency oscillators that we've looked at so far. Low frequency oscillation refers to the fact that we are oscillating a parameter like, for example, the filter cut off in Wa or the pitch in vibrato were oscillating that at at speed that we can actually hear. So in vibrato we can hear the oscillation of the pitch. So that's why it's called Low Frequency. We're not hearing the frequency off that low frequency. We're hearing the low frequencies effect, if that makes sense. So in FM synthesis is exactly the same idea. Except we take the, uh, modulating frequency what we've seen so far in low frequency oscillators on. We make that incredibly first In fact, we make it as fast or mawr or close to the actual signal that it's affecting. Let's dive in because this is all a bit abstract. I want you to look at this interface, which is as as with all the other incidents, pretty retro, but it's also pretty complex. And I just want you to look at this section here on this section here. So this is what we call the carrier signal. This is the signal that you will hear when you play. This is the thing that will be affected by our frequency modulation. Now, over here is the signal that is modulating this signal here. Right? So in a in a standard synthesize that this would be like an LFO, Right? So we turn this up and we'd hear an effect in in terms off, you know, the oscillation or the changing of the way for but in frequency modulation, it's actually just combining the two waves, or rather, behind the scenes. This wave is affecting this one. To be honest, I can't go much more into the science behind it because my knowledge degrade somewhat at that point. But you don't really need to know much beyond this point to actually create good sounds. It's more of a scientific venture to kind of find this stuff out if you're interested. So what I'm gonna do is ending in a slowly dialling this frequency, which is the same frequency we'll talk about. Why I know it's the same frequency. Later, we're gonna dial it in and see what happens. The this signal e o uh, you can see that we're adding upper harmonics, and this is how frequency modulation roughly works. You have a carrier signal being affected by a modulator signal on that interaction creates upper partials or harmonics. Now it depends what form that wave is in, right, because you can. These are both currently sine waves. You can hear that this is a sine wave on. You just have to take my word for it. That all of the left hand side, this setting here is a sine wave. You can cycle through different types of waves here, Theo, that's that's a really interesting sound. Already it's not necessarily that musical because we need to do lots of other stuff to it in terms of production values and obviously some kind of recognizable, useful melody. That's not stars, but you can see it's a sound that we haven't got yet, you know? So using different wave types through this slider here is one way of doing it and creating a different sound. But all the way to the left here is a sine wave, and we're going to keep it to that. You'll notice that this wave shape a tool here isn't on the carrier signal. So what we are actually affecting is only a sine wave, and we can't change this. And that's what makes effort. Since it's so interesting, we're actually just affecting a sine wave. We're affecting it with different waves. So I'm gonna pull that all the way down. So I want to talk a little bit about the harmonic spectrum. Hopefully, you've looked up online how that all works, but let me just show you here. If you change the harmonic part of this up, it really effects Theo. Essentially, what we're doing is we're changing the modulator signal to go up higher through the harmonic Siri's, and that's affecting the initial sine wave in a very particular way. You can also change the ratio on both sides. So, for example, we could change this being the fundamental frequency. So in this case, a C four said the modulator is a C for as well. But now the carrier is gonna be a knock tive Higher because of the harmonic series is the first harmonic after the fundamental right just changes the turn there. But if I go up one more, we know that this is the fifth above the first active way, fundamental thing that's being affected there. I usually keep this up at one, to be honest. And I used this theme thanks so much variety that you can find a sentiment with just this and just this. But of course, it wouldn't be a lot of get sprint without even Mawr parameters. So I'm just gonna pull this down to a one on one and talk about how everything else works. So this middle slider here, you probably gathered by now is your FM depth slider. So if you have some crazy setting up here, you're not gonna hear anything if it's down at zero. But you can dollar in a bit, so let's pull that down again. I'm gonna reset those on and I'm gonna put this up to about that. You also have fine tuning setting so way we're changing the harmonics here. But we can move by sense everyone, which creates a kind of weird beating sound pretty out of tune. I tend not to use that, but you can use it. Definitely you can do that also on the carrier side. And the last thing that you can do on this side is detached the carrier signal from the keyboard on the modulations. To be honest, I also keep this off most of the time. So in the next video, we'll go through how to create different sounds using the different harmonics off either side. But for now, I'm going to keep it simple and just give you a tour of the interface scrolling on down beneath this, we have a normal volume envelope where you have a standard a DSR, which is your attack so we can set this longer, have a slower attack. We can have a longer decay. So are short decay a longer sustain on a longer release? Your standard settings, you could keep it about that on. Do you have a main output level We also have velocity sensitivity and we contend that up If we want our people to be more sensitive to the velocity that we play on a keyboard, we also have an LFO which is quite interesting because earlier I was saying Oh, this is no on LFO. This is not enough. Hello. This is a This is a fast frequency oscillator. What we have here is a normal low frequency oscillator which can in turn, casali either vibrato or the frequency modulation gets a bit better here. But basically, if I turn this to the left, you will hear a standard for brought a coming in with a very slow rate of the moment which I can control with this well. But we can also control the F M synthesis by the LFO. What that does is it modulates the intensity off your FM settings. So again, like I've shown in previous examples, that's me moving the FM slider. But if I leave it where it waas and I turn up the oscillation with a fast rate, it's doing it for me. So that's what that's doing, that we also have sub oscillator level which basically creates a lower sub base underneath our notes. So if you notice away, form him. Just gonna turn this up a bit on way. Add in and much lower. No underneath invites Just an octave below. So this is Teoh Beak up your base sounds. It's kind of like an octave unison. We have stereotype a tune, which is kind of what it says on the tin sti cheating it but inside of the stereo fields so that you feel kind of let me this orientated effect when you go from, especially if you're wearing one hat wearing headphones right now gives it some death and fatness and kind of a really nice, rich sort of feeling inside of your mix in attend that offers. Well, we have some global promises up here. Like tune. Uh, you have to re trigger that. I know. As you do this, it isn't update in real time. On we can put the thing up one active. I could have also reset that just by doing our normal option command or sorry, our option. Click on a Mac. We can also control the amount of voices off. Sorry. I should say number voices. My dad would kill me for that. So number two here means or rather to means we have two voices. Uh, you can hear that Those notes of cutting out every time I play new one rather than holding on. I like to keep this on Lo Gatto because I use this more as a lead town. But you may use this as a cordial sound or, in effect sound, in which case you can change it there we can change our glide time to be ridiculously long time or somewhere anywhere in between waken option click Teoh, Turn that back to zero Then we have a really interesting section. We haven't a DSR for the actual modulator itself. So what this does is effects basically the f m depth. You can also change the pitch as well, but we'll come to that in a second via the 80 s are. So if we push this up, were effectively controlling the FM slider Vyron envelope. So if you listen to this, I'm gonna turn the attack Time to kind of average and you'll hear the FM slider moving in with the attack after I play the note. Right? But we haven't got any of these other things. So it drops out really quickly cause we got incredibly short K time. No sustaining, no release. So let's bring this decay time in on it goes away. Let's bring this to sustaining stays in and then let's bring in the release time. Do as much. Right. So that's the FN depth, and you can pull that down as well on it works in verse. Then I'm gonna bring that back to zero and nothing happens. So you have to have this. You have to have this honor setting either plus or minus to actually have the radius are working and you can alternatively Sorry. In addition, you can have the ideas are affecting the pitch off the harmonic modulator so you can see there are attack. Time is also affecting our pitch. So we push the pitch up even more really strange sound they're on. We can invert it. So they're the pitch goes higher and then comes down with the attack on There it goes down and up with the attack in the u Turn that back up. OK, so there's our overview of the FM one synth pretty crazy instrument when you're messing around with those parameters, you can just do settle stuff and you get a whole wealth of different sounds. Cool. So that's the E F M. One. I hope you enjoyed it. I'll see you guys in the next video.
25. Retro Synth | Overview and Analog Settings: So this is retro synth, one of logics newer synthesizers, its newer not just in terms of its creation, but also in terms off. It's you are. You can tell it looks a little bit prettier before we even get started in it. I just want to explain why I've put this here because you might be thinking if you know, logic sense, Mintz, Why hasn't Jack done the E s to? Which is one of the other e magic instruments? One of the synthesizers that was in the E Siri's. Well, I kind of thought that was a little bit more complex. And there's a number of principles that we want to go over here and solidify and retro synth first before we go into the complexity of the ES two on Ben, of course, alchemy and sculpture and stuff like that. So even though this is a new instrument, I want to do it now. So before we get started it with this page that you're currently looking at, I want to bring your attention to this panel up here because what this does, it switches between four different ways off synthesis. There's also this button down here settings, which brings up the global settings panel nice and pretty as well, Which is great when you pull that down. We're gonna come back to that later. Just know that what we're currently working on is the analog page. We're gonna come to sink Table and FM, which bring up entirely different looking synthesizes. You can see when I click on these. They look very, very different. Sink actually looks very similar to analog. I'll explain why in a bit. So analog on the left. What we have is our to oscillators. We have to oscillators in this instrument shaped to and shape one on what we have is a mix between them so we can have both of them. And when we're at 50 in the middle or zero, which is only oscillator one or one which is only oscillated to I'm gonna keep it like my default patch, which you have in your course files as also later one so that you can hear our Sawtooth wave. Now we've spoken about the standard wave shapes that we have in a lot of synthesizers as being Sawtooth Square, triangle and sign, and you'll notice that this particular instrument doesn't have a sine wave. Or at least in this initial oscillator section, it doesn't have a sine wave, and this is what makes it particular kind of instrument. So you can't get that exact sign sound unless you sort of pull out a lot of the high end with a filter. But then, essentially, that's not really creating a sign from scratch. That's that subtracted synthesis. So we've got a couple of other options on oscillator. One we have a square wave on. We can push that square wave to be a squashed square wave where we modulate the pulse width and anywhere in between so hardly squashed it all and then fully squashed Andi. Then back to a normal square wave. And we also have noise here. That's what this Sinus, and you'll hear that now, right? So you can use that to create lots of different sounds like we've seen in the other instruments or add a bit of grip gonna put that about back down. Teoh back up to the Sawtooth Wave underneath that we have shaped to which is a second oscillator, and that has very similar controls. Although you notice that we don't have a noise setting. Here we have a triangle setting. This is our sub oscillator, where we can use this underneath or in conjunction with shape to. Typically, it's used for pitching down an octave to make your instruments and a little fatter, or tuning it very slightly to the to the up or down to make it a little richer. We'll get into that in a second so you can have Ah, 2nd 1 here, and you can mix between them. So let's go through these knobs in order here. So first up at the top weaken use shape modulation with either an LFO are low frequency oscillator here or without filter envelope over here. So, according to whatever we have set here, we can modulate the shape off our oscillator with an LFO or without filter out envelope, and you can increase the intensity. So at zero you can. You can't here and if there's no modulation coming from the LFO or the filter envelope on the shape. But if you move it slowly towards the LFO setting, you'll him more modulation from whatever you're LFO settings are more, more, more, more until we've got full. So we're gonna leave that will come back to it later. When we actually dive into the LFO settings, we then have vibrato. Now the barato is patched to the actual low frequency vibrato panel here. So whatever your settings are for vibrato, you will get into those in a bit. You can then dial in how deep that librato is and you can see here that says 0.81 semi not saying 0.81 off a semi tone. So we're going up in kind of a higher than sense, really. But we can we can dial in how deep of a broader is. So obviously that would be a three octave abroad to, I think, be ridiculous. So we'll come to that later as well. Keep that down. Keep that down. Or rather, in the middle, we come here two semi tones and this is basically controlling the second oscillator. So at the moment, by playing note, nothing's happening right. And that's because we're only listening to shape one because we've got oscillator. All mix all the way up to the top. If I bring this down and I reset this Teoh center by pressing optional my keyboard and clicking the wheel and then I slowly Dallas. In theory, you can hear that we're moving up by semi turns, right? We can actually type into here as you can in most of the logic synthesizes. So I'm gonna just do a full octave below if you can hear minus 12. So now we've gone down minus 12 semi tones and will be an octave lower. I'm still playing d four for an octave lower than also later one. So if you can push these together, you can mix them together on you get that classic octave doubled sound with our synth. You can also change the pitch in terms of sense. So that's how many sense there are in a semi tone. There are 100 cents in a semi tone and you can actually create a really nice sort of semi chorus effect going to bring this back to unison so that we're both playing exactly the same note. Both on this sawtooth wave on then are slowly de tunis and you'll hear a kind of nice kind of natural, uh, d tuned effect in this instrument which will wide on the sound. And you can see the activity here. And this is basically the oscillators Sorry. The oscillators interacting with each other. That's what creates that movement. Kind of nice phasing that goes on. So I'm gonna bring that back, Use that to get a thicker sound, But you obviously don't go too much because because that just sounds out of tune. Maybe if you're going for that kind of dirty, weird kind of retro sound, that's cool. But ah, you always probably usually want it to be kind of from 2 to 15. I think probably that's my opinion anyway. So let's move on from the oscillator section and let's keep it at a simple amount of the moment. So all of our other parameters sort of quite simple and clear to understand. We next have our filter section, which hopefully if you watch the other videos or you know anything about synthesis will be clearer by now. I'm gonna turn this on. You can see all of these panels here, including these effects eso glide low pass and Flander, you can turn on and off. We're gonna turn the low pass on, and now we have our filter activated. Now I said low pass. That's because currently that's the setting. We've got a low past 24 db Peru Active filter so you can actually change this by clicking on this and you get a pop up menu. So if you remember in through the previous incidents that we used, we can change the cut off type and to be less intense, So low pass filter of 18 db that would be less intense and then also low pass filter of 12 debate. You can see that this slope is getting less intense each time, so that means that will be cutting off less of the higher end. Whereas here we're cutting off quite a lot low past 24 db Fat basically compensates for any changes that happen when you increase resonance. So if we increase residents here by either changing the resonance values by clicking here, or actually this is interact herbal. If that's a word, you can push up the residents here. When you push up residents on a low pass filter that reduces low frequency content, it's just part of what happens. So if you use a low pass filter 24 db fat that compensates for that. Do you see that just raised up a little bit. Therefore, we bring that down. The low is still low. Whereas if I do look, pass 24 db fat We've kept some of our low in its compensating for what we do. So I'm gonna bring this down. Teoh Low pass 24 db the other ones that we have our high pass 12 db You actually get a nice indication of what this is doing, Just like when I showed you on the channel Inky e que in our synthesis and introduction. So if we put high pass in its what's around, right, I'm gonna bring my residence down to zero again Or that we get Andi. Also, if you change to ban past six TV, that gives you an indication of what band passes doing. Is cutting off the lows, cutting off the highs and it's giving you a band and you can move that band wherever you want. And you can change the residence of that and you can change the cut off frequency left and right like that. I'm gonna bring that back to the middle or to default setting. Rather. Then you have a band reject, which is the opposite. So we're hearing all the frequencies apart from the place where your specifying you can change the frequency and the resonance off that on. Then you also have a peak which basically means that you can't cut frequencies were only boosting them. So if you've learned anything about EQ you you know that one of the best ways to use e que is subtracted rather than additive. So you know when when you first open up a sequence I remember in my early days of using logic, I was like, I want it to sound more fat. So I start doing crazy things like this, which absolutely ruins my mix so that that's kind of it's a very specific thing, a peak filter. But you can use it to get that nice, resonant sound without any filtering going on. So let me give you an example of that on. There you go. There's me being an amateur and clipping for you guys. Sorry about Theo. Okay, so those are the different types of filters and you can actually use this with the LFO, or you can use it with your envelope as well. And that's what these two sort of these two buttons are for here. So you can dial in how much your filter envelope is affecting the going to bring this back to a low pastoring for TB, you can dial in how much your filter envelope is affecting. Ah, the the filter that you have set. And you can actually do this negative as well. So we'll come to that in a bit. I'm gonna bring this back to zero. You can also dial in how much your L. F o is affecting the filter on and you can modulate that using the LFO parameters down here . We then have the filter FM number, which is where you can set the intensity off the filter. Cut off FM modulations of frequency modulation with the oscillator, one sine wave generator so behind oscillator one, there is a sine wave which always generates a sign signal at the same frequency is also later one. So positions to the left set the strength of the static sine wave modulations and positions to the right set the strength of envelope controlled sine wave modulations. So basically it dissented position or the off position. This disables the FM modulation by the oscillator, one sine wave generator. So, to be honest, guys, I leave this in the middle. It's only subtle shifts that you have from left to right. But you can play around with it. Then we have our general volume area, which you can set to default here. Or you can pull right down or push above as well. But I usually keep it there on. We also have our sign level, which is what I was just talking about. So behind. If I just play this filter down a little bit, you can hear and see an extra sine wave coming in behind with boosting the sign that is behind the original signal here and this to give a warmer sound. This is what's so great about the retro sent. We then have the Flander effect very, very simple Flender effect. And we can change the mix here. So if we bring the way, change the rates off that floundering effect there, so mix here and then the rate of the effect. And this can also change to be a chorus effect with exactly the same controls, mix and rate. I'm gonna turn that off and we're gonna go down to this section going through sort of sequentially. Although we've obviously with the filter here we've referenced the LFO and with the vibrato there we've referenced. This one here will come to this again before we go to glide. I want to show you this settings panel because it's going to affect how glide effects are instrument. So when we hit settings, we bring up this panel. Weaken knows no longer see the lower panel. What going to do is go over to our voices setting, which we've seen before. And I'm gonna first of all, move into La Guardia and we'll come back to this in a second. But it will help us understand how glide works if you've never used it before. If I turn this on while actually sorry before I turn it on If I move between notes Theo, that's our leg arto setting where basically the envelope isn't affected after the first note is played. So the envelope is only triggered on the first note. If you're not sure what I mean by that, you can go back to some of the other videos in this in the earlier part of thes synthesizers because it will explain just what I mean by the envelope triggering on the first note and not the second. So nothing's happened there. I've just turned it on. If I turn this out now, you can hear 64 milliseconds between each notice how long it takes a stick allied there. So if we push it up even more thing, Theo gives us a nice glide sound. Now you can do this. There's a couple of modes, right? We have all oscillators which is basically affecting these two oscillators. Here we have oscillated to write. We have oscillator, one plus the sign. So this is basically telling you that you can behind oscillator. One is that sign there, right? So you're affecting the glide on just those. So that would you'd have then if we mixed in the lower one, you wouldn't have glide on shape to on you here kind of weird interaction there between between the moment where oscillator one is gliding on where shaped to has already reached the next note. And that's where you get that kind of interesting relationship between the two notes as they get closer together on then finally they're in tune after the glide of oscillator one and it's sign has finished. We have another sitting, which is opposed, which basically means that the glide will be opposed to each other. You'll hear one of them going one way and one go in. The other theme, one of them comes down into the note and the other one comes up into the thing way have oscillated plus filter, which basically is the glide affecting the oscillators and the filter. I'm gonna keep this back on all oscillators and just like when we have the effects panel here, we could click on and change between Flanders and chorus and also between the different types off filter cutoffs in our filter section. We can also change here to auto bend. So Auto bend is a bit like leg arto glide in that when you play a note, it changes the pitch. If I just pull my depth slider up here, have a listen to this. Theo s were flying into the note from a higher frequency determined by our sitting here. So this is eight semi 10 tire. We bring it down to 1 17 it's gonna be a settle one. That is going down over the course of 790 milliseconds from a semi tone higher than C four . So I play C four and over 790 milliseconds. It goes down from C sharp to see to see Natural. If we bring this up, it will carry. It will go that same distance. If we do an octave, perhaps I could get it there. Theo, same time of 790 milliseconds will be flying down for an inactive. This gives a really, really interesting sound, especially we do. Sort of coming up is that kind of sort of siren life siren light thing that's often using tracks theme. But you notice that we're in league arto mode at the moment, so that when I play a note after I played another one and if I play llegado so I don't take my finger off the first note, it won't re trigger Theo only when I take my hands off the keyboard and then play again. Three Auto Bend gets re triggered. And of course, this behavior changes when we go back to our voices, settings and change it here. If we get to mono, analysis happens every single time that auto bend feature is applied again. So let's go into a polyphonic mode. So we were playing a chord. Have a listen to this theme. So all of the notes in that polyphonic cord were applied or sorry were affected by my auto Ben setting. And this is where the interplay between glide and auto bend on the voices settings is really important for you to comprehend. So I'm gonna turn that off and we get to finally our telephone vibrato settings. So by default, are LFO settings are routed to our filter on the vibrato. Settings are routed to other barato settings. Well, here. So this is where we'll start So the vibrato is controlled. Basically, it's a low frequency oscillation. We have it here currently at 470. Sorry. 4.70 hertz per second. Too slow rate. You can speed it up and down here and keep it This that we have a natural ish for Baratta. Now, at the moment, obviously you're not hearing anything and this is basically because we need to dial in our settings. Here's probably about 1 70 You can hear that. It's ah strong setting there. So what we can do is we can actually control this fire the wheel. So if we push this all the way up to the top, this gives us full control over the intensity of the modulation that we've set up for vibrato. So as I move my modulation wheel, currently, you don't hear anything. But as I move it up way, pull in and pull out the vibrato as brother settings that we have here. So if we have a really, really huge Theo way, essentially make it bigger. So we're kind of pulling this wheel around according to our uh according that, Sorry. Using our modulation wheel, which is quite useful. So you can also change the low frequency oscillation way form here, so you can have kind of a steep drop off at the end. We have a listen to this. Get more of a cut there at the end, relevant and kind of more natural for Britain. We don't have a sine wave here, which would be the most kind of natural. But you have a square wave which might be confusing you a little bit, because if you listen to that again, that actually sounds like a tone as opposed to a semi tone, which is what we had in our vibrato settings will. But basically what is happening is if if you think about this central tone, perhaps we could imagine this line. Here is the central tone. What we what we are doing with the vibrato is we're going up a semi tone above and then a semi tone below. So always leave. You have a set, any tone higher and a semi turn below. What that create is a tone either side of the fine, the fundamental frequency altogether. So if you listen, if we if we pull it out, we've got this sound. But as we push it in theory, Thean initial turn that's inside of that disappears. That doesn't make sense to you. Don't worry about it too much. Basically, it's just to do with the extent of the vibrato on did. Usually What you want is, that's why that's why a square wave setting is so strange. Usually what you want is this triangle wave for librato anyway, so you can sing this to your host tempo as well. So in which case that our speed setting or hurt turns into note values so you can speed this up to be something according to your tempo. All the way up, Teoh 1 64 t and then all the way down to 16 bars here. Okay, guys, we're almost there. Don't worry. 20 minute video already, but we're almost there. So let's go over to the LFO settings. This is controlled or dialed in by this button here. So we need to increase this and now are LFO will be active currently, though, on the setting that I have at the bottom here. It's not on. And sometimes as I'm Azzam doing now, this doesn't actually turn on. You have this weird thing that happens where when you hover over it the you I supposed to turn on, but sometimes it doesn't recognize you've done it. So there I can't interact with it. So if that happens to you, just wiggle Your mouth's a little bit until it comes orange. And then that means that you have control over it. So I'm gonna turn this up, Teoh to 50 hertz. We're gonna hear the LFO affecting the filter. If we bring down the settings a little bit we'll hear a little more obviously. Now you're hearing that kind of bounce pluck sound because we've got a very fast attack in our LFO shape, as we saw. Really? If we turn it back to the normal Sawtooth Triangle way, way here, the LFO affecting it in that shape so we can change the rate obviously here on weaken, dull in the intensity like we did with the wheels, lungs it's all the way up at the top there. So currently my my model is all the way down. But as I push it in, you hear that coming in. One of the things you also heard there was that this is not sink. So if you play one note, you've got the elephant affecting that. But it becomes a real mess because they're not all sync with each other. So that's in our settings here. So that's basically because we're in polyphonic mode. Mono mode works very much the same, but because you can only play one note at the same time, it doesn't matter anymore way going to polyphonic again. I can re trigger the LFO two star every time I play a note. So if I bring these settings down here. You'll hear this. So we've got a slow cycles a second. But if I play the other one way, you can hear that there's multiple LFO is coming in on each of those, so it's no actually sink to that flashing light that flashing lights just an indication of roughly how fast it is. So I'm gonna bring this back up here. In fact, I'm gonna change it to be sync with the host. Tempo is usually what you do with LFO thing. You can change the intensity head. So I said I'd come to the shape modulation, which is up in the oscillator section. We mentioned that earlier and how we can route the l A photo it or route the filter to it. So this basically means if I change to pulse width here that we can change the shape off Theis Square wave with the LFO. So if I turn the intensity all the way up to the LFO there and we have a little listen, play down here waken here that the LFO is affecting square wave, according to an eighth note. So let's bring this up to a faster so you can hear the difference quite useful there. Then instead of that, if you don't want to write it to the LFO. Were you in the LFO affecting? You could make the filter on the lope effect the pulse with off this square wave. So here we have a very sharp attack. But if we slow down the attack, you can hear it changing tha That's the other thing that you can do with shape modulation in the LFO. Some really nice sounds that you can get out of that. Okay, cool. So I'm gonna turn that off there. So we're back to us. Kind of normal sound here. I'm gonna talk about the filter envelope. So you should know by now and for the purposes of keeping this video. Quite sure I won't go over how envelopes work. But basically, you should know that filter envelope is like a normal volume envelope, but it affects the filter cut off. So here we can change our attack, decay, sustain and reliefs. And it has very much that interactive same interface that we had on the low pass filter here. Sorry. On the filter section one on the one thing I forgot guys, is that you have to obviously increase its effect here. So right there there was nothing happening with the envelope, so it's on zero. So that meant that no matter what I changed down here, this envelope setting is not going to affect the filter. But if I put this all the way up to the top, this envelope has maximum effect over this filter thing here, the filter coming in nicely. So it's important to think about both of these in conjunction with each other. You've got the filter enveloping the amplitude envelope with volume envelope because sometimes people get confused, right? So they said, they say they want a really fast setting on their on their filter and look, they want a really strong attack. But for some reason, they're hearing this right there thinking, Hang on, I've got really fast attack what's going on? And that's because you've got a really fast attack on the filter, but a very slow attack on the but on the volume and similarly vice first that you could have a really slow attack on the on the filter there on a very fast attack. So the sound comes in straight away, but the filter opens up over 10 seconds. So you noticed that with this? Obviously the whole filter opens up after the first note. It's not like the LFO here that so we don't continually get lots of notes. That increase their frequency is the whole thing opens up over 10 seconds, and then we're done, and everything after 10 seconds is full frequency. Okay, so finally, finally, we have our settings window. We've already gone over the voices settings here. Just gonna turn off that clip monitor. So we have transposed global transpose off, down and active or two octaves up, and you can also tune it in sense. And you can also change your bend range. This is to do with your bender whale. So at the moment, if I move, my Ben will, it's gonna open up. Sorry. It's gonna move to Senate entire. But you can change this to be up and down. You can't change it down and up separately. It's just uniforms. So you can either go 77 tens higher and lower or forcing returns higher. And Allama, etcetera, etcetera. So we said about our voices. Here we have leg Arto mode, which is where we have a legato phrasing. Between notes, we have mono mode where every note re triggers the envelope, and then we have polyphonic mode where you can restrict yourself to only two voices. So here, if I play one note, then another note on. Then I play another along the notes beneath. They're going to be cut off, but usually what you want. If you want a tree polyphonic instrument, you don't want to think about it. You want 16 because you don't have 16 fingers and therefore can't play 16 notes at any one time or more. So you shouldn't worry about it too much. If you keep it a 16 we then have stereo spread. I'm going to skip to this first. This is a kind of a natural stereo spread between zero and one you can hear this is more of it. More of a mono sound at the bottom and more of a stereo sound right over the top. That's the default setting. To have it there really would recommend it. Thes settings come kind of stock with the synth because ah, that's what's great about the Red Crescent that can create some warm old school since signs inside of it. We have a voice d tune. So depending on what our settings are in here, we can actually kind of introduce more D tuning inside of the voices of our instruments. So here it's gonna be quite cold sound. I'm just gonna change envelope that I've got defaulted from. Let's change this here so voice quite quite my let's let's listen to it. With some property tuning in too much, let's bring it back to the O voice, stacking a slightly different voice d tune Voice de Tunis, where we change the the tuning of the voices that already inherent in the instrument. Voice stacking is where we add extra voices, so two voices what it defaults to. But if you listen to that without two voices, it's a bit thinner. Now, the thing that you notice, if I keep playing that note you and watch the panning or rather our Teoh left and right meters hit you notice that were kind of especially for wearing earphones or headphones. You're you're hearing some of the left in some of the right. That's because we've still got stereo spread up and that gives you an indication toe. What stereos but actually does it kind of spreads around the voices around the speaker. Ah, left and right channels kind of randomly. So if we bring this down, we won't notice that anymore. So let's keep that down for the moment as I bring in the voices and see what adding to four and then a voice is does to the thickness of the sound natural phasing. Theo, of course, if you want. Really, if you combine this with voice D tune, you get really rich sound. The's are rather like nice, subtle some things to get your teeth into a little bit. Finally, then we have our continuous controllers in the settings here, and this is where you can change things like your mod wheel to actually control, say, the LFO rate or the brought a rate or wave shaped the pulse width modulation. Or if you have a keyboard that has after touch, you can do the same thing there or, for example, the velocity. So this one is where you can dive into, and you can change those settings as well. But it's not within the scope off this video because We're already at a really long one, and I'm gonna leave it there. So in the next video, I'm gonna dive into the other three windows that that we have. In retrospect, Mr What makes it such a powerful, interesting synthesizer. It's essentially four synthesizes in one. The good thing you'll realize is that actually assumes we moved to one of these. Other take their instruments. Is that the What's the interface looks hideously blue and everything changes. We've still got the same settings over here. We've still got a filter. We've still got core settings. We've still got auto Ben vibrato, LFO, Filter Envelope and AMP. Envelope. But what's changing is the method through which we create oscillation. So here we have a wave table synthesizer. Here we have a sink option for oscillators. And then in this one again, it's just the oscillator panel that changes. We still have all of these other ones. Okay, so I'll see in the next video for sink modulation.
26. Retro Synth | Sync, Table & FM Pages: Okay, so we're gonna go over the three other methods of oscillation or sound production inside of retro sent in this video, we covered the basics of the instrument and how it works from the analog page on those principles. In terms of the modulation, sources still apply whenever we move over to the other ones. There was one thing, though, listening back to the video that I just did that I missed out, which was thes velocity sliders. So this is the ability to tell the instrument how much you want it to respond to the velocity from which you play on the keyboard. So this is the velocity sensitivity for the filter envelope. So if you pull it all the way down, the filter envelope is just gonna be applied universally across all the different velocities that you play on. If you have this down the amp envelope, you're going to be at the total volume all the time. You're not gonna be able to play louder or quieter, whereas if you want more control over or more dynamics, you can push this all the way up to the top. But I'm gonna keep these down for now. So let's go over to the sink oscillator section. The best way to think about sink oscillation or sinking to oscillators to each other is to actually use a drawing or an image. So I'm just gonna pull up one now. So what we have here is my crude drawing off way forms. So we have a master way form, so you need to oscillators for this to work. We have massed away form and then we have a slave away form, which is a different frequency. You can tell that it's a different frequency because it's got different oscillation, Period. Now, when you slave the 2nd 1 or connected, or however you want to describe it to the master, this is what you get in the slave. So the sound of it actually matches up with the oscillation period of the first. So you get these interesting patterns. This is about the most simplest example I could come up with. But you see how the principle works. So let's dive back into retro synth and see how that sounds. So we've got oscillator one again. We've got that same slider. I've got this on one voice at the moment we're gonna change it in a minute. But I just want to keep it super clear for you guys. So if I bring in oscillator to which is on a sore tooth wave, maybe actually change it so that we get a different effect, allow your hearing at the moment is me switching between the oscillator so you can make this page behave like the other page. Theo. Just merging two way forms together. However, with this button down here which says sink on it, you can dial in How much shape to is affected by shape one the master, and have a listen to what that sounds like. Theo. All the interesting overturned appearing above this because what we're essentially doing is we're changing the pitch of also later to Theo. But because we're changing the pitch, Andi, it's still sink. We go back to that image because we're changing the pitch, but it's sink to the master one. We are still hearing the same fundamental tone because of this oscillation moment here. It's this moment here in this moment here that give us the actual frequency of the tone that we here. But the tambra is affected by the differences in the way form between these two oscillation periods. So you can play around with this as much as you want. Change the pitch and all that will do will change your overtones. Now, you kind of think that this is a little bit like FM synthesis. But if you think about it logically, really, FM synthesis is where you have a carrier signal, which would in this case probably be shaped one. If we're thinking about it on, then you have a modulation signal which would be shaped to in this way, it's actually not working like that. What we have is a slave to the main or oscillator, so it's not affecting the main oscillator. Actually, the main oscillator is affecting this one, so it's kind of like the reverse of FM synthesis. In some ways, that would be the simplest way to think about it. So anyway, survives. It's safe that that is just a really great way of creating extra turns. But what I'm gonna do is I'm gonna go into the settings here, and I'm gonna change my voice stacking to be four, because that was a really thin sound that we heard there. Listen to me. O okay, So you can play around with that, Gives a certain quality. We then have vibrato. Obviously, that's still the same settings as last time. But we have a sink modulation and this is where you can actually modulate the sink parameter with the LFO. So if I turn this on and I make sure that the LFO is on well, it was always on, but I'm telling on to sink and let's put up to eighth notes. Let's have a listen, Teoh. Okay, so you have the same parameters with the LFO, but you can apply at this time to the sink modulation. You can also apply it with the filter envelope as well. So let's have a listen to that. Uh ah, uh, do that quite useful. So now we have the table section and this is basically wave table synthesis. This is the ability to choose from a huge range of fundamental wave shapes. So whereas in analog, we had only a few wave shapes we can modulate, will move between are different types of square waves on in sync. We started to get a little bit more variation because we can kind of slave, the second shape to the first shape and result in even more interesting shapes. Now in table, we have a huge range of different sounds, basically what we have. If if we're just listen to shape one on, we're on, our default table will come to these menus in a second a planet. I just cycled through about 100 different way forms that are in this default table, and then you have the same, I believe, for shape to. So as if that wasn't enough, you have a number of different wave tables, which you can choose lots of different sounds from. So we have a listen to this one. Another one that's more subtle. That's one of the ones where you hardly have anyway forms. It just sort of shifts itself. Let's try this one, Theo. Load a different sounds that you can get in here, and of course, you can blend it with shape, too. But the really cool thing I love about this is that you can create a wave table from an audio file. So basically what this means that the retro sent will analyze your audiophile for various different things. Ah, and create. Ah, create an A really interesting sound from that thing about this, you'll realise to show you a few mistakes that people typically make when they use. This is that you can create a custom wave table from any audio file that contains one or mawr sections of constant pitch. So basically that means that you can't use something that doesn't really have much pitch in it. So, like, you know, if you were to record drums, perhaps it wouldn't wouldn't work so well. It likes kind of for mint style long notes. And when I say form in style long, let's. That's kind of like a long note where you change the sound of syllables or the Tom Bohrer and stuff like that. So every time in your audio track that you import the tambra changes that will result in a new wave table or rather, a new entry for the wave table. So let me just show you this rather talking about it and I'll show you first with something that doesn't work so well. So if I go up, Teoh create way of table from audio, and I've got four options here, right, we're gonna start with something really, really stupid, which is just a cockerel. Good times. Let's have a listen to that. See what happens. So new wave table with 56 wave to it forms. That seems like quite a lot. But that's probably just because of the nature of that sound and see what that list that that sounds like. So that is a wave table created from that Cockrel sound. So if you're doing a film about chickens, you could, uh, in the great instrument. With that, let's try another one quick way to from audio file on Gonna try voice Now I won't play. This is just me being stupid, doing things kind of like hello and things like that. But you'll see that we get a problem here because I was just talking. I wasn't creating a constant pitch. So it says to create wave table, the audio file must have a constant pitch, several pitched section separated by silence or one or more single cycle sections. So basically what this means is you have to have a relatively constant pitch in the source material, so it usually likes toe. Listen to stuff that isn't kind of noise or cords and stuff like that. I have tried it with a couple of tracks, but that doesn't work so well. So let's try this again with an audio file where I'm singing again. I'm not gonna play it to you, will spay that? So that's more successful. So I did stuff like I just saying Hello and I saying, Yo yo and we're different vowel sounds. So this new wave table contains 45 way forms. Let's have a little listen. E is a bit more success there with our sound. So that's that's technically speaking. That's the instruments that's me. And so the insurance weird like some weird instrument android synth Let's go and eso after that. Then I created something that was even mawr kind of Forman based. So I started exploring vowel sound. So I started just going like, wow Wow, your what? What? But singing constant turns now created a really good results. I have a little listen to this. Wait table contents 48 way forms. This one I like quite a lot way, which is pretty cool, right? I like that. So the great thing about this is that you can you can create your own sounds if you're looking for that kind of really nice Victory Forman vocal style instrument, but you can't find it will create it using loads of settings you could just import your own . Would you felt you could even just say out loud or singing out loud? The sound that you're after bringing into here is a custom wave table and play around with it. So once we've got the sound that we want from this side, we have the same sort of settings that we had before in the analog settings. We have the ability to modulate the shape with the LFO or the filter envelope, so let's have a listen. Teoh e really weird, slightly freaking me out. Remove always coming out of this instrument. You can also play with the Roboto sense semi turns all that stuff, so the other thing you can do is move from shape to for mint. Basically, this is changing. The way of the wave table is working to be more Forman style synthesis. If you're not sure what forming stars synthesis is essentially that part of what makes the tumbler of a voice or instrument consistent over different frequencies is kind of the presence off peaks or fixed frequency peaks and is a cold for months. So these peaks stay in the same frequency range independent of the actual pitch, which is being produced. So if you play a really low note on an instrument like piano or something like that and play a really high note on an instrument, the peaks of those sounds will often stay the same. But obviously the fundamental tone will stay different, and that is eso. It will not stay different. We'll change. And that basically creates the sound. That's what we hear is the individual Tom, right? This is the same with voices as well, so you could play around with those settings as well. And you get more of those vocal sounds. Just turn this off the O recall towns in there. So let's dive over to F m and see what that's about. So you probably remember about FM synthesis. If you've watched the F M video, that's a really good introduction to FM synthesis. What I'm gonna do is I'm gonna pull down all these sliders here, and I'm gonna direct your attention to this fatal here, which is our modulator and our carrier, and this is how FM synthesis works, essentially just to recap. What you have is the original signal, which at the moment is more pretty much basically a sine wave with its own slight changes. Get over time, right? And then we also have the modulator, which currently is basically the same almost the same. Now that that's fine, right? But it's when you start mixing these two together with FM synthesis. That stuff starts getting really interesting, so right now you can't hear anything. A zai push in the affirms emphasis. What's happening is this modulator signal is affecting the carrier You can actually in this synthesizer here the modulator if you want right, which is different to the FM one where we couldn't hear the mortar later, I believe so. That's fairly settled on. That's that's all the stuff that you can get just from two sine waves. So it's a huge amount of sound, right? You can get. You don't need this setting up very high, told by the way, this isn't like volume. This is kind of you can put this in less is more often, No, but what you can do is you can change in this instrument the theme, the harmonic or in harmonic content off the modulator. So let's pull that back and we're gonna go and listen to the modulator again, and I'm gonna change it harmonically. So have a listen, so you can hear that. What I'm doing is I'm moving the fundamental frequency off the modulator up through the harmonic Siri's. So here is the fundamental sine wave of D four, which is what I was playing. But if I push it up, 1/5 becomes more obvious on then the operative. I'm losing track now, but essentially, it's the harmonic serious you hear it going through. So that's that's the harmonic one, and that gives its own interesting sounds. If you mix those together theoretical Celts, Andi, then you can dial in in harmonic sounds so basically or in harmonic intervals above the fundamental frequency. So we have the modulator here, that's all. We're listening to FM's up. It doesn't need to be actually on. Then we have the harmonic content have listened to the O right, so that will bring in some really dirty interesting sounds when we mix these together, have a little lesson, Ah, adding grit. But within the harmonic Syria, it's not necessarily just noise. So let's have a listen. It's crazy. It's bullets down a bit. So again, all these sounds a bit weird at the moment. They'll get a lot more interesting when we get into the secondary videos, where we kind of create nice sounds with all these different judgments and start emulating stuff. But that is basically an overview off the four stages or four pages off the retro synth. We have the analog. We have sink what we can combine to weigh forms or slave one way form to a master way, for we have the table where we have a huge amount of fundamental way forms and we can create our own custom way forms from audiophiles like we did. And then finally, we haven't a proper FM synthesis oscillator, which we can use within this instrument. All the other panels remain the same. They just look slightly different. Cool. So I hope this Siris for retro sent has been useful. I will catch you guys in the next video
27. ES2 | Oscillator: So I think by now, in the course we've seen enough interfaces on slowly increased our knowledge of synthesis to be able to tackle the ES two. You can see there's a whole load of buttons here. And if you're just looking at this for the first time and you haven't looked at any of the other videos, it's gonna overwhelm you. So what we have is just a few simple sections, really, But it just looks very, very complex, the way they've laid out. We just got more parameters and Mawr duplications off controls. So I'll just give you a brief overview for about a minute of how it works in terms of the interface. And then I'll go much more deeper into the instrument. So on the left here we have our oscillator sections. We have three oscillators and the pitch controls and tuning controls for those we have. The filter, which has two filters, filter one of altitude, and we can have this in series or parallel like that. So that's in Siris. We then can you contend it on and off their the We don't have a number of effects here, an X y pad, which will come to you later. In the tutorial, we have a huge amount of modulation routings that you can customize exactly how you want so we can have the target any of thes. And we can have the source to be any off these at tennis on Sorry here. So a huge amount of stuff. We then have our LFO and our LFO two, which is a polyphonic LFO and a mullah folic LFO. And then we have our envelope section. So there is one more interesting thing about this instrument which is the vector envelope, which basically means that you can really, really customize your envelopes and create even more than four points or five points. And you can also have those envelopes loop go backwards. That sort of thing is a very, very powerful part of this instrument. And then write the bottom. We have our global controls. So let's start with the oscillator section, as we usually do. We have three oscillators 12 and three and these can be turned on with these buttons to the left. It right. You can have all of them on some of the bone. Any combination that you want so we're just gonna look at oscillator one. We start off with a simple sine wave, and that's the one that you have in your default patch, which are in which is in your course files. We moved to the left first. What we get is a square wave with a shorter up pulse on. Then we also have a normal square way, a sawtooth wave triangle wave. And at the moment, what looks like a sign. No, this is actually slightly misleading. The interface isn't very clear about this. If you right click on this sign here. What you get is a huge drop down menu of 100 different way forms. Musical didi waves basically the different sounds created from the style of sounds. So, for example, you get words like saxophone or piano or sore or box. We have a listen to one of those yet more of a Formenty style way form that sounds like the title who is roughly like the title. If we try something like, um, club. Ah, on we could try something like, uh, let's try bell. You get loads of different sounds that you can try and there, and you can click and drag as well through that. This is also really cool to automate. I've done this before way you kind of start playing according Theo. Really nice, glittery, obvious digital sounds going on. So let's pull us up to sign again. Now you notice that that what I can do is I can start pushing that fundamental sign all the way up to FM. And this basically turns r sine wave or so later, one as a sine wave into a carrier signal. So if you remember from our fundamentals of FM synthesis in the e f m one and also the retro synth FM page, if you remember roughly how FM's and this is works, what you've got is a carrier, which is this signal? A signal that you eventually here on, then the modulator signal which it has to be another oscillator at audible spectrum oscillation. So eso not low frequency oscillations. So if we turn on oscillator to write, what we can do is we can make this oscillator. Let's put it to just a simple square wave. Ah, or actually, it's put it to this one. What we can do is we can make this oscillator to effect oscillator one in FM synths, sister theme of interesting sounds you can get from that. Now, if you remember with FM synthesis, if you change the modulator, you actually effect the carrier in a very different way of you changing the modulators pitch. So on the left of each oscillator, here we have the pitch section so we can change the picture of each oscillator. What I'm gonna do is I'm gonna move this up, but before I do, I'm gonna introduce you to this here. This is our kind of looks like an X y pad, but it's no, it's more to triangle. So what we have is the ability to push the volume or the mix between the oscillator. So in the middle, a few optional collect, you get back to a constant mix between oscillators 12 and three. If you push it to the left. Here, you get to three and then one. So all I want to do is I want to listen to our carrier signal, not the oscillator that's affecting the carrier signal in this FM synthesis. So let's try this. So what I'm gonna do is I'm gonna press oppressor note waken here that this pitch I'm just gonna turn the volume down. We can hear this pitch is being affected in some way. But if I change so that's the effect of FM synthesis that you can use in this instrument. Let's put it back to a sign on and oh, yeah, let's put about to sign and open up isolated, too, on clothes that So now we're listening to also to and I'm gonna option click on here so that my pitch goes back to normal. We have a number of different settings on here. We have square on. We can modulate the pulse width of that square. We have a sore tooth. We have triangle. We also have sink or square sink. So this is similar to what we had. Well, it's exactly the same as what we had in the retro synth on the second page, where we can sink to weigh forms together. So if you don't remember about that, What that is essentially is that you have a wave form which is a master. So let's make this one a square as well. So also later, one is the master. And then, if you choose square wave here on you. Change the pulse. Eso you change the pitch of it. You won't hear the change in pitch because this is slaved to this original master. So what you'll really be doing is changing the tambra off oscillator too. So let's have a listen to that. If we pull this back to the middle, Theo not changing the fundamental frequency. But what you're doing is you're changing the way that wave to interacts with wave one because it sink to that original pitch. So even though you're changing the pitch here, you don't hear the pitch change. You just hear the trumpets. The Tomba change. So you believe that moved down here? We have sink it in two forms. We have either a square sink or we have a sort of sink. Then we have ring. Mod ring modulation is a little bit like sink. It's essentially where you get to signals together and you combine them. And that creates two brand new frequencies. Which, technically, are these some and the difference of the input frequencies. Don't worry about the technicalities of how that works. Just know that it's a bit like sink, so if we put it on Ridgemont headed. We've got oscillator two and one interacting with each other. But if I change the pitch, it's no actually changing the pitch that we're hearing with changing the way Theo have some really interesting sounds that are a bit like sink. So if you're interested in finding more out about how ring modulation works from a technical standpoint, you could go to lean musician dot com slash ring mod one. And that will give you a really funny video British guy who's really hot during the Olympics doing a video, which I found about how I'm about how rigged modulation works and also synthesizer academies. A little article on how it works and that will be at lean musician dot com slash ring, March 2. Okay, cool. So also on this also later, we have the same as we had almost later one we have the ability to cycle through. If we right click all these different aled these different didi waves as well. So those air on there as well, and we also have square wave, which we can modulate the past with. I think I probably said that so then oscillator three we have some similar things we have sink. But now, instead offering modulation, We have noise which doesn't change it, he tracked. You can use that in different ways. And we also have the digit waves here. So eso that's also later three. I'm gonna turn back on oscillator one over here on. Just say that we can change the pitch like we saw before. A huge range of pit shift here an option. Clifton, get back to where you are and you can also change the sense by clicking and dragging on here both of these intractable. If that's a word, then each of these has their own controller. So too has the same and three has the same. Then we can also control the global training. So just incense up here. So just just a little only 50 so half of a semi tone so and you can option click that to get it back to where it was. You condone some analog type processing which just introduces a number of different random aspects to emulate the sound of it of a real an analog synthesizer. You also can change your glide here, which is which is dependent on, obviously your voice settings, as we saw in the retro synth, and you can change your bend range here and you can either link it or you can You can change it so that, say, Bend Low is different to bend. Hi. So here we have it linked, so bend up and down is both will both be seven semi turns, and here we can change it So that, say, I bend down its six semi tones for or anything up to three octaves there. So then we have the keyboard tuning section where we can change the intensity off keyboard following the pitch. You can use this as a way to correct beating between oscillators, which often results when you're kind of d tuning them. But mawr, obviously, it's what we've seen in the other instruments where it's, ah, creative tool to emulate the stretch tuning president in instruments like the piano, where the higher notes have tuned ever so slightly higher and the lower notes attuned up so slightly lower. So this is really important when you're playing alongside pianos or investments like that, because because of that stretch tuning so you can change Teoh. Five different values you have off 25% 50% 75% and 100%. So if each is 100% the characteristic off this stretch tuning will be full. So your lower notes will be slightly off or lower, and your higher notes will be slightly higher on this is the central point of this is middle C, so middle c will be unchanged. When you do this setting, however, your lower notes will be lower on. The Hornets will be higher. Okay, cool. So that is the oscillator section. We're going to go in the next video through the filter on, then the effects panel.
28. ES2 | Filter & Effects: So in this video we're gonna go over the filter settings and the effect quite a short video . But that makes change to usual. So we have this filter section in the middle, which this wheel here and I mentioned earlier that we can change it to be Siri's or parallel. Now, if you never heard that before, basically what that means, it's actually helped by the visual here. So what that means is that these oscillators will go through Filter one on Ben Filter to in Siris modes that they go in Siris, right? You can change that so that this signal between the oscillators get split in half and half goes 3 1.5 goes through to, and that just changes things right. So let's start in. Let's start in Siris mode, right, and we'll have a little listen to this. The way to turn the filter on is also depress the filter button because currently it's no active, so the signal is just going straight through that and bypassing and going into our volume on then whatever envelope settings that we have. So let's turn this on what we have. There is a cut here on a low frequency. Sorry, a low pass filter, and we have another a number of other types of filters s. So we have a high pass, have a peak of a band reject and a band pass every each of these. We have the controls of resonance and drive. And remember what Dr does is it changes the behavior off resonance. So let's have a listen to that with low pass. So what you can then do is pass that through. Filled to currently filter to settings are off, but what you'll notice that is that the dots that we have here, all the selections of the type of filter that we have our only 12. TB 18 db 24 beat DB and then fat. And you'll probably recognize those if you've watched the retro synth first part of that tutorial because it's basically settings for low pass filters, and that is what filter to is. It's only a low pass filter, so we have various different options for filter one and only a low pass filter here. So just to say one more time that basically this is the steepness of the cut off shell For that sorry, the cut off curve after the cut off point. So that's a tame low pass filter stronger, even stronger on. Then the fat one basically modifies the 24 db. So this basically adds a bit of boost to your base it and when you're when you're using the 24 db filter and this is to contract the when you when you increase residents on a low pass filter s Oh, I forgot to have this blend up. So when we're in this mode, what you need to do is have this in the middle and that will blend how much you're hearing through filter one and then filter too. So if we have it all the way to the right, what we're hearing is just filter to right. So if we tear it all the way down like this, we can't hear anything. So this is the other control. So as well as going Siri's, you can have it. You can have it blended more towards the left and more towards that. Right? So then also we can put it into parallel. And that just changes Thebe behaviorist of the instrument, because you get some of the signal going through one and some of the signal going through to. So I'm gonna pull this back to normal and turn this down and I'm gonna turn the filter off . Actually, I don't need to turn anything down if I'm turning off. So next we have volume. That's the overall volume. You have a boost of plus 60 b and then everything down to minus 84 which is basically nothing. We have distortion, and we have a soft and hard version of those slightly different qualities. Doesn't show up so much on our settings at the moment that you can play around with those and then you can also change the tone, right, So you can have a brighter distortion. See, this doesn't actually affect anything at all. When we've got distortion off. So you can you can change as well as doing hard and soft. You can change the tone to be dark and bright. So underneath we have the sign level. So as you remember in the in the retro synth tutorial, we have a signed level behind or an optional sine level behind our signal. So you see there, what I've done is I've boosted it and we see a strong and we start to hear a strong sign level behind the fundamental tone that we have on the. So if I turn off hostility, which currently is on a sign right now, you're only hearing the square wave with a tiny bit of sign behind. You can turn that up and hear it more so we're gonna pull it down. You don't have three effects. You have the chorus, but you can turn up here and you can change the intensity or the sorry, not the intensity. The rate. Here you have a Flander on a phaser. Now, the thing about this interface, which is like some of the interfaces and logic, is a bit misleading. We have an X Y pad here, which doesn't have anything to do with these controls, which is crazy, really, in terms of your own design, because it looks like that's very much related to these. They've even got a graphic rounding, then connecting them all together. So it's we're not gonna go over that now. The last little thing is just to say that we will get to these controls there. I'm not missing them out and also this control here. But they are more global controls which will come to at the end. Okay, so I'll see in the next video where we talk through our Ella foes are envelopes on, then our modulation router.
29. ES2 | Modulation & Envelopes: so the thing that makes yes to so much more flexible than the synthesizers we've seen before is just how many modulation targets and sources we can choose tend to be precise on . We can choose these with each of these routings here. So, for example, let's have a look at this. 1st 1 here we have a target we have sent called a vo, which we'll get to in a minute. And our source. Let's just think about target and source for him. And what I'm gonna do is I'm gonna click here, and we get a drop down menu. If I If you look down here, you get all these different parameters of the instrument mainly the things that are up here above the instrument. So things like pitch 1 to 3. That means the pitch off oscillators 12 and three, or pitch one, which is only oscillator one. Then you could look at the oscillator waves, so that's all of the oscillators waves. You can modulate oscillated twos. Waves are selected twos. Waves be cut off. One cut off. Two. There's a huge amount of stuff. If any of this doesn't make sense to you, don't has take to reach out to me and I'll and I'll let you know. But it should make sense from looking through all of this what they are and you can try out . If you're not sure, Just pick one of these. If you're not sure what Rizzo means, you can probably guess that its resonance But you can just start the routing, route it to an effort lfo and listen to what it does. And then you can probably work it out. But yeah, For now, though, I'm just gonna stick with pitch 123 And that is gonna mean that we are our target. Is all the pictures off? 12 and three. So what would be modulating is thes pitch wheels off each of our three oscillators. So our target is pitch 123 and our source is going to be simple on LFO one. Now, if you look below here we have our LFO one here and LFO two and we can change The wave shapes off those Allah photos of various different wave ships that we have more random ones and more regular ones here. So lfo one underneath it says Polly an effort to, says mono LFO one is a polyphonic LFO. That means it will re trigger for every note that you play, whereas lfo two ism on a phonic. So it just applies to all notes at the same time. If you remember in the retro sent tutorial, I was talking about how the LFO in that wasn't sink. Actually, that's not the best way to describe it. The way that the LFO works in retro synth is that it's a polyphonic LFO. So you can't get that nice uniform modulation across a chord that you play the notes separately off. Whereas you can do that in yes to where you can change either the ratting to be in a polyphonic LFO and Monta Phonic elephant. Let me show you what I mean. So here we've got the pitch 123 And if I play Oh, firstly, you need to realize that what we have is I always forget this, that we have a depth slider here so we can decide whether this is going to the minus or into the plus of our depth. So here will be modulating the pitch quite significantly because it's it's a huge range that we have, but not as full as we could to have a listen. Everything. We can change the rates here. But if we push this away up to the top or close to, we're gonna be going much further round our wheels, pushing it into the negative just changes the sound. We get negative first, that's all. And if you want to set it back to zero, you just press this button here. So I'm gonna leave this there for a second. Then you're gonna listen very a very slow oscillation off the pitch. Now what I'm gonna try and do is I'm gonna play a second note a different point after the first notes in the oscillation face. So let me show you, Theo. So one is going up whilst the other is coming down. And that means that basically, the elephant's re triggered on the second note and that's what makes it a polyphonic telephone so that we're going up and down at different points. In fact, any note that I play is gonna re trigger it and get own LFO starting from the beginning off the way form. So going up and then down, I believe this one's going down and then up. Theo, you get a really messy pretty on musical sound depending on what you're doing, especially with vibrato. But if we round this to LFO two, which is a model phonic, LFO, that means that everything is gonna be moving together regardless of when I play the first note you can hear and see on the channel eq you that everything's moving up and down together. If I play two notes really far apart, you can see roughly that they're going up and down at the same time. Whereas if we're in the LFO one, they'd be moving up and down at different points. So our sources could be many, many different things. We could have envelopes, we could have mod wheel touch and we can have different external control controllers that we haven't set up yet on side chains as well. Very, very extensive modulation to then we have the via which we've seen in other instruments. But basically, if we turn this on on, return it to the classic of year setting, which is the mod wheel. We suddenly get to settings here or two sliders, and this is where we can set our range again as we know. So if we bring this to basically zero and we have our modulation wheel down to zero when I play a note you'll hear no modulation off the pitch. If I push the modulation well up slightly, we can dial in on modulation, right? And we can have this wherever we want. We can have it in the negative as well. Which gives a funny sound. It was lower and then hire. Okay, so I'm gonna reset that and bring it zero so you can modulate any target with any source in this. And you can have a huge amount of ears in this as well. So really, really flexible instrument. So I'm gonna turn this off now You take away mod wheel for RVs on. I'm gonna keep it on pitch. Keep the intensity up, and I'm gonna move this to LFO one because I'm gonna talk about the specific settings inside of elephant one. So we have this fader on the left here, right? We've already got a bit of modulation going on, right, But this is our delay and decay slider. So when we're at zero and we can reset it, by the way, by pressing that button there. It basically applies the LFO the whole time. But we can change that behavior over time. So if we push this up with Dick delaying hence where we have delay at the top when the LFO comes in. So here it's gonna take us 2.3 seconds to get to the to get the full effect of the L A phone. It's gonna fade in, Have listen, So it's like a sort of, well, approximately like a natural vibrato. One of violinist Sorry that a violinist does it basically wait. They bet. Will they wait for a bit and then they play the vibrato after a few seconds. So here, we're gonna wait longer so early will start coming in on that After eight seconds, you hear the full effect of Okay, Now we can do the opposite of that. We can decay it. So the the NFL will start as soon as we press a note and then gradually disappear. Way need to increase it a bit more. So, actually, it's It works the opposite way. I wear now a normal tone there, Right? We have a really short one, so it decays very quickly. That's kind of pointless way. Have a bit of a broader at the beginning of the note there on. Then it disappears. Now you can change thes style of wave. I'm just going to this back to zero. So the moment we have a normal LFO way form, which is just a triangle wave, we can change this to a sore tooth wave front, sawtooth wave or back sort of wave. I know that's not the technical term to them. Here we have, ah, more of a clicker biting sound at the beginning, and here we have more of a kind of build sound. We have two different forms of square wave. We have a bidirectional square wave on. We have a uni directional square waving. This just determines the extent of the modulation. Here. You'll hear that we're going down essentially almost a tone, and there's kind of a major third, almost no. So it's it's kind of extending the amount that we that we modulate. Then we have various noisy waves here, so I know these are really ridiculous on musical examples, but I tend to use pitch in explaining how telephones work because it's very, very clear what it's doing to the sound. It's also very clear that it sounds rubbish, but it's very clear how that would then apply to say, your field cut off. So we have L f 01 down Onda we can see the setting sail can actually write these in ourselves or pull them up and down like So I can modulate this now too LF have to talk about the settings here you see we have the same ability to choose between the way forms here. But as I said earlier, this is a model phonic LFO so basically applied to all notes uniform. Basically, everything's in phase with each other as opposed to out of phase with LFO one on we can pull this down to be beat sink here so below the d c mark here we're in beat sinking toe api clock or ah, our temper clock And up here we're just normal hurts basically so let's keep that back down here. So before we get into the envelopes, let's just change our sound I'm gonna get for synth pad on Probably astral pad, See what that sounds like that's got its own modulations going on here. What I'm gonna do is I'm gonna bypass them all so that we just have our fundamental sound. You don't need to bypass these. So this is a fundamental sound. I'm gonna bring down the cup here, so I bring it up so that we get more of the sound. Okay. Now there are three envelopes. We have 12 and three than three is the more extensive one envelope three says vole underneath, which means volume. And it means it's hardwired to volume the whole time so you can route stuff. If we turn this on here, we can route stuff to envelope three. But just know that it is controlling volume the whole time. So you should be aware off the different phases off envelopes, but basically, we will attack at the moment. Got reasonably slow attack, and we can bring this right down so it's fast comes in straight away. We can also bring our release down so it goes away straight away, and then we suddenly don't have a pad sound anymore. So if we bring these back up, we get the pad sound again. Yeah, decay is how long it takes for us to g o down from the attacker level into the sustained level. So if we bring the sustained level right down and make sure that the decay time is quite long after our attack, which I'm gonna make sure it'll take a while to go down to our sustain. And now we're pretty much are sustained level. We're not even yet. Actually, if I bring it up a bit, this is our sustained level now, so it is very quiet. But if I hold this, no, it will just carry on forever. And that's how sustain usually works. But what we have is an additional setting here, which is which changes that feature. So if I put this to rise, it means that when we reach the sustained time, it's not going to stay like that forever. It's actually gonna rise over 3900 milliseconds. It comes down in the decay hit sustain. And then once it's finally hits sustained, it will then rice. After a while, my settings were long lap that they get that makes sense on. Then I let go when we're in the relief face. So if that makes sense. Just go through this yourself and what you can do is just follow along with your mouse exactly where we are. So we can also go for it to fade down after the after we hit sustain. So if we have allowed sustain on and short decay, what we're gonna do is we're gonna go to the attack very quickly, get to this stain level, and then we're at the sustained level. We're gonna then fall. Have a listen to this. Now I falling right, very interesting setting. And if you want to set it back to zero and just have a normal a DSR where your sustained is infinite, hit that there. That looks like I think it's an infinity sign. So that's envelope three and its hardware to volume. As I said, but you can write other stuff to it on bloke to is basically exactly the same in terms off . It's in terms of its controls. One thing I forgot to mention here is that you can change the velocity sensitivity off your of your envelope there. And you also have that setting here on envelope too. So you can change the you can change exactly the same settings as I described here, but it's free and you can. You can route other stuff to it so that that means that you can have settings for on block three fuel volume and other stuff and also settings for envelope, too. Then we have Envelope one, which just hasn't a in a D. But as you can see in the year, I hear that the a D has a little looks like a button on Indian, and if you press it, you can turn it to release. But the important thing to realize a bit like with LFO one being a polyphonic LFO on LFO to being a model for Nick LFO, we can change the behavior of envelope one from Polly to monitor and also re trick. So let's get into how they work. Let's make sure that Envelope One is affecting our felt cut off and have a listen to this. It's a quite fast attack that's make it slower attack. You can hear that the d m the on envelope is opening up the field cut off there right now. If we change this if we have it, is Polly. Every time I might make it pitch, actually, cause that might make it even more obvious. So what we have here is that over the course of 1920 milliseconds will be going. The omelet will be affecting our pitch, right? But when I play another note and I'm still holding that first note, it will re it will restart again on that. On that second, have a listen. So I'm holding the first night. So they're really, really interesting behavior. So every subsequent note gets the envelopes modulation. But we can change that to be monath Onek, which basically means that after the first time and no is played, the envelope won't re trigger. Now I can play other notes and it won't do that. Okay, now re Trig. Sounds like it's pretty much similar to Polly, but what it actually does is it affects the first note. Will previous notes again. So whereas in poly, our first note after it had gone up and gone down, then stayed where it waas. So if I play another note, the first note this one here. If you're looking on the Q. Staying where it is, even though I play other ones on re trigger it. Richard is everything according to the envelope. Have a lesson. You'll hear that first note be re triggered every single time according to the envelope and pitch settings. So those are our envelope settings. In the next video, I'm going to go over the X Y pad the vector envelope settings as well as the global controls.
30. ES2 | Vector Envelope, XY, Global & Macro: so that yes to has a multi point modulation source, which is called a vector envelope. When I say multi point, that's different to say, an LFO, which has kind of two parameters that it moves between up and down in the case of pitch or open and closed. In the case of filter, cut off, an envelope has an attack. Two. K sustain and release and potentially Maurin advance synthesizes like that? Yes to, but it doesn't loop. The vector envelope is probably best thought off, as in a very long or extendible envelope, so you can have multiple points that aren't just a tactic. A sustained release on that each of those points you can change the parameters off, and you can loop that. So it's kind of like a cross between a long attack, the case sustained release and a LFO. So let's get into that to explain exactly what that means to actually access the vector envelope. What you need to do is when if you're on router here, you want to click on Vector, and that will open up the vector settings and you'll see a number of things here. The first thing I want to draw your attention to Is this what basically looks like a timeline here? We have a point here. A point here on a point here. We can edit these. You see this in time premises in between. And we can also do some other things with these settings down here. But basically you could think of this in, even though we don't have the terms of attack the case sustained release. To put it very simply, you could think of this at the moment as the attack or the start of the note. This is the sustain. You can see that because we haven't s there in the middle on, then release at the end. So we've got three different points him. We can immediately start adding them. The way that you do that is, you click on one of the points and you control or right click, and you get this drop down menu. What you can do is you can uncertain point to the right of selected point and that will bring in one here. Now it's quite an old interface. He can't click and drag to the left. A lot of things don't update in real time, so you have to think about it kind of quite scientifically. So really, from the beginning here, from this point in the let's call it an envelope while it is really an envelope. We've got 500 milliseconds before we get to this point. Then 260 milliseconds and then 250 milliseconds until we get to there and we can start adding more. Right. So let's add another one here on what that basically does. Is it places something pretty much halfway between here and here? We see we've got a little bit of time added. It was 500. Now we've got to 50 into 60 but essentially, you've got a point now in between these two points on, we can do that again. We can half the space between here and here. We call this point to 1.3 c. We've got numbers appearing every time. We at a point now we put 0.3 and this is 138 125. So what we've got here is we've got 0.1234 which is our sustained point. Remember that from an envelope which is basically where you hold the key on, then five and then six, which is essentially you could think of as part of our release phase if we wanted to ADM or toe our release phase more detail in the everyone that it really interesting, evolving texture. After we take off the note in whatever we're modulating with this eventually we could add lots of points after after the sustained point. Now you'll notice that the S is over this one. But we can actually move it not by clicking and dragging, but by clicking in other points in this blue bar above the whole timeline here. And this means that you know you're playing. No, it'll move from this phase here, and then it will rest so long as you're holding the note on here and then it will go into the release phase, which is here. But you can move. This s wherever you want. This will become important as well, particularly when we start playing with Luke mode later. So before we get into the nitty gritty of all the different settings here, let's talk about what this envelope can actually do. What it does is it modulates two areas on this instrument, one which we have covered before, which is the mix between the three different oscillators here. Andi Also the x Y pad which we haven't covered. So the X Y pad is a really interesting area we're gonna get into in a second. But I'm going to start with a simpler concept, which is the mix ie the volume difference between the three different oscillators here. So you'll see that I can, if I'm playing a note, modulate by just making sure that I'm let me put this up on active here and then this down and active. So it's quite obvious I can actually modulate whilst I'm playing, you know? Ah, just by doing it myself, right? But obviously we don't do that in insurance. We get the instruments to do it for us in much more interesting ways. On the envelope here, the vector envelope is one way that you can do that. So what we need to do is we need to go and do two things to make this active. Now, before we can actually start changing the settings, we need to go over to this button here which says vector mode and click on it and choose mix. And that means that this vector envelope here is gonna be affecting the mix between the three oscillators. You'll see that we have two other modes. We have X y, which is where we can modulate the X y pad and we can also modulate the mix and next y pad with whatever our settings are from the moment No, we're gonna stick on mix, then the other thing we need to do before we start is go over to this button here on the left, so low point. So the point is essentially the on off button and the reason why is that when you got solar point on? Basically, the vector envelope is not in effect because we're not moving between here, here, here, here, etcetera, etcetera. What we're doing is we've soloed this point, so it's like pausing at one point in the attack. Two K sustained release phase just means that we're only hearing these settings. So let me show you. So if I sell at this point, we're currently listening to this mix here, right? But if I move this say up to here, we're only hearing oscillator one, right. If I then go to this point here, watch what happens to these settings here they switch back. That's not actually switching back. What's happening is we're moving to another point in this or another setting in this envelopes face. So if I move this all the way to this part so mixing to oscillator three and then I moved back to here, it will remember the settings. You see, we're now back towards us a later one and to and this is basically the crux of how you start modulating or designing the parameters that you want to evolve through your envelope . So if I play now, you're not actually going to hear any difference. What you're going to hear is the settings off Number two here, mainly hearing also later three. But if I click on one, remain Lee hearing there. And also let's set up another one. Let's set up three to be entirely mixed to oscillator to right, so here I'm allowed to solo these points and hear what it would sound like indefinitely. But as soon as I take off solo point, the time factor of this envelope is taken into equation So what will Here is this first point, which is oscillator one, mainly because the mixes up there, then after 260 milliseconds, will move to this setting. And then after 130 milliseconds reading these numbers in between, here will move to isolate too, Right? So let's listen to what this sounds like And it doesn't matter where now, when I turn off solo point Doesn't matter where my my selection ist I could select it down here. It doesn't really matter, because we're always gonna be starting from one. And this is where the visual side of this instrument, because it's slightly older, doesn't necessarily help you understand this. In a more modern you I what would they would actually show you is almost the points moving through each other. But you just have to imagine that basically, when you start now, you're gonna start from here. Move Today I moved to their mood today, etcetera. So let's have a listen to what this sounds like. Ah, you hear? There's some modulation going on there right on. What we can then do is we can increase the time between there's modulations, so it's a bit quick, isn't it? Really, at the moment. So 260 milliseconds, what I can do is I can click and drag up here to a much longer. So that would be a second. Ah, right on. The reason that we're hearing that long sustain is because really, what we've got here on all these other settings is the same setting. Right? But let me show you what happens when we bring in sustain. So I'm gonna delete a couple of these points. So we go from this setting which we set up to this setting to this setting. And then what I want is I want us to sustain totally here for a minute. And ah, I was trying click and drag, but you can't click and drag, so you just need to click there and then I'm gonna delete these afterwards, said that we're kind of just sustaining and then we'll finish right. So let's have a listen to that. Ah, now we're sustaining here, right? What if we want us a stain point to sound a bit different? Let's how about how about we have our sustained point up an octave? So now we're gonna sustain When we hold the key, it's gonna eventually arrive at and note, which is a productive, because we're mainly on setting number four, which currently has this mix setting, which is all the way over oscillator three, which is a productive on. That's a sustained point. What if we want our sustained point to be actually on this setting here, which is over oscillated to which is down and active? I'm gonna move my sustained point to hear. Ah, but of course, what we hear there is that the note drops off straight away and we're not hearing any of this release phase now that is determined by our normal release in our volume envelope over here. So if we bring this up Ah, when I let go, what I'm gonna start hearing is more of the release phase, which is to the right or after the sustained period. So let's add in a load of points here. So here, what we're gonna have is we're gonna have an opening part here. We're gonna hold on the sustain, and then we're gonna have a detailed change that happens on every single one of these. After we let go of the key and I'll explain it as I do it. So you see here on each of these points have made sure that each of the settings is different. So we're gonna move between each of these of Ah, um, let's increase the time. So it's a little bit more obvious here. Okay, So I want you to do is I'm gonna hold a note. We've now gotten through here to here, and we're now holding here on when I let go because we've got a longer release time here. You're gonna hear it, then move through these different points. And then, of course, it ends on that note there also or rather, on that. That setting. You heard it really fading out on that setting. If we want it to fade out on, say, this setting, it's now sustaining on here. So hopefully that's a quick crash course on how the vector on the low works. I'm not going to dive into a lot more detail about the different things, and then eventually we're gonna get to the X Y settings. So to get back to kind of a simple vector envelope, what we can do is we can go to the timeline here, we can open up our sub menu by control clicking or right clicking on hitting clear envelope . You can also see here that we've got copy envelope, which is a really useful thing that you can use on other setting. So So you had two years to synthesizers open. When we can do is we can copy the envelope between two synthesizers, which is really useful. So I'm gonna clear this. I'm going to get back to our normal start end and sustain points, so I'm gonna add one to the right here, insert point to the writers selected point, and I'm gonna make this are sustained point. Then I'm gonna go down to loop mode and turn this on. And this is where this instrument starts getting really interesting or even more interesting. We have a couple of different settings here. I'm just gonna stick with forward for the moment, Will come. Come to what those mean in a minute. Now, when we've turned that on, basically, you see this l has appeared and we see this dotted line. And this is saying that the loop is from this el all the way. Toothy s that sustain said the loop is always between the the L and the sustained point. And I just clicked here and that moved it from this point, which is 0.0.0.2, so that we've now got a loop between this setting and this setting. What we can do is we can set up a loop between here and here. So let's let me show you what this sounds like. So now I've got on this setting put solo point back so you can hear it. Got this setting. I'm gonna put this all the way down to here on then on this setting and put this all the way up to here s we're gonna be looping between these two settings. Quite subtle. In fact, I might make this a bit more obvious. Let's put this down. Torto. Okay, so let's have a listen to this. When I turn off solo point, we're gonna go through here, and then we're gonna go through here, and then we're gonna look back 2.2 point 32 point to 2.3 indefinitely until I let go the key and then we'll be in the release face. Who needs 10 off? Seven point. Always forget. So this is the loop mode right on. You can change this to B faster and slower, obviously with your settings here. But when you start using loop mode, you're probably wanting to sink it to the host tempo. And this is where we become to this setting of the instrument. Here we can change the loop rate so as set is as set. So those are the settings that you see here you it will be as sets of 500 milliseconds, 260 milliseconds, etcetera, etcetera. But if you move it to the left here, what you can start saying is that everything starts becoming percentages, right? We have 32nd notes and 16th eso. These are more familiar things that we know musically. So if I set up a loop here in my logic session and I put on the metro name, what we're gonna here is the metro. I'm going. And if I play, it's a very musical modulation going on there as according to whatever my settings are in here. So you can click and drag left to right with this slider here, or you can click and drag up and down here. Let's listen to this one. Now, you can also do this free time as well. So if we move this away to the right here, we're now gonna be in hurts. So let's have a listen to this one. Very slow oscillation there. And this is independent of the host tempos. If we hit play, begin here. That is not in time at all. So that's really useful. So let's have a look at our loop mode settings. What we have is forward, backwards and alternate. So that means that what we're going to do is where if we're in forwards mode, we're gonna start at one, and we're gonna go to two. The sound is gonna modulate through from l to s. And then it's gonna sort of teleport straight back to L and then modulate from L through two s according to our time settings. Teleport back straight to l. So it's kind of this reset to L and then travel through to us. We can sort of reverse that so that now, in backwards, what we're gonna do is we're gonna go through to l will travel through from l s. And then we're going to travel back to l switch back to s or that teleport travel back to Al switched to us. Then it's just changes the sound. Depending on your other settings, will you'll see the detail later? This won't make much difference now, but then you can also alternate. So that means it will go from L two s from El Toe s and it'll travel both ways rather than just skipping on one of the ways. Let's have a listen to that one. And then it's compare that to backwards, see hardly any difference at the moment. But we'll see with the other settings like cut off and things like that later that the big step change in the sound, particularly if we did it with pitch or something later on, it will make a huge difference. So what we can actually do is change the loop count. So the moment it's on infinite, which means that it's just gonna loop around and around. But we can change this to be 1 to 10 different loops. So that means it will go around here from lto s 10 times, then pause that the sustain on, then finally finishing our release face. If we pull this down to say three or two, let's have a listen to that just lips twice and then pauses it sustain and then finishes off in the release face. We can also smooth the loops. So let's let's show you what this will be like with, say, Ah, different setting. So let's make this a bit more obvious. So let's pull this 12 here. Let's change it to infinity and then let's make this longer here. So let's make it at the moment, we've got loops moving, which you can hear. Basically, that transition between two and three is quite smooth. It's like it's fading. But if we pull this right the way down, what we've got is we've got that step and this is where we start hearing that thing that was talking about earlier, which is where we're going forwards or backwards. So the moment we're going from L to s and then we immediately have a skip back toe. L have a listen. That's because we haven't got smoothing on anymore, Whereas if we turn this up, we'll hear that kind of fade between. We won't really hear that step sort of sound okay? And you can change your curves to a number of different things so you can get it step and hold sound here or holding steps sound. And there are a number of different other ones that you can hear. So you got linear, which is the standard one. You can change this. Two other ones, like holding step. So the last little thing to talk about now is the time scaling on, then envelope modes to time. Scaling is where you can just basically stretch out whatever your current settings are proportionally. So if you like kind of the ratio off between your different points, What you can do is you can make everything a bit slower by pushing this up, and you could make it faster by pulling it down. So that's what that is. I'm gonna reset that to 100. So to illustrate the envelope mode, I'm gonna pull up a new patch here, So this is kind of standard to what we've done so far. We've got a number of different settings on the three oscillators pitched very differently so that you can hear the difference in the changes between them, and I'm gonna add a few points here. Now, the best way, in my opinion, to use this vector envelope is in loop mode because you don't want to necessarily use it to try and emulate a standard envelope or an LFO. You want it to be much more detail. That's where its flexibility comes in useful. So I'm gonna turn on loop mode to just be forward, right? And then we get our l. A. The beginning and R s is at the end, and this is where we kind of have our full control over everything. Now the one thing that always happens to me and you want to be aware of is as well is. Before you start messing with any of these settings, you need to turn on the vector mode. It's a glitch in the instrument that if you turn it on to if you if you if you addle these settings, say you'd changed all these settings now and you got exactly how you wanted and then you turned vector mode on to mix, everything gets reset and you lose all of your settings, so you need to make sure that you're on the vector mode. That you want. So at the moment, we're gonna do a bit more mixing. So here, I'll change my settings. So there we've got all of us things. Uh uh Right on. If we turn off solo point, we're looping through the whole thing. Now where envelope mode comes in, is it basically decides how it will behave with a long release time. So if we turn up the release on our volume envelope here when I let go now we hear that were just sustaining right or not sustaining where just the sound is kept the same. The mix between those three oscillators is kept the same as per the last note here, right or the last setting. But if we change this to finish, it will keep looping after we've let go the no. In other words, this loop will keep applying. The omelet will keep applying to the release phase as well on now. And we're still looping through that envelope so really kind of useful feature there. If you're working with pads and anything with a long release time that you want to still be dynamic and not just shut off. So everything that we've gone over so far has just been with the mixed settings here. And I did that to keep it simple. We're gonna now apply it to the X Y pad. And this is kind of a bit interesting because the X Y pad on its own doesn't affect anything. Itself is a modulation source. So what we're doing is we're modulating a secondary modulation source. But we can apply different things to the Y and X pads. Here, let me show you what I mean. If we do the standard thing with pitch, what we can do is we can click here that are ex target I left to right or horizontally on the ex wife had is pitch 123 to the pitch of these three oscillators on. That means that when we in turn the intensity of that up that this envelope is now gonna meet, no affecting the mix. We're going to just be hearing whatever setting were on at the moment, which is that it's going to be released down here. It's going to be modulating the pitch right. But the thing is, is what you still need to do is now change the settings on the X Y pad because currently, on all of these settings here, we're just in the middle. So let's move this all the way to the right for the 1st 1 and all the way to the bottom for the next one and then in the middle. I'm not thinking musically in all these examples. Ah, uh, you can hear that. We're moving right. We're moving the pitch. If we turn the intensity up, you'll hear even more. Ah, So what's happening there is on the 1st 1 we start at the top, Then we go lower on. We go back to the middle on the end one. Right? And we can do this however we like. Let's change the white target to be cut off one. Right. So let's move this. Let's make sure that our setting now is incorporating the Y axis on. Let's make sure that I cut office down here when we need to turn our intensity up. Seven different parameters, guys. So this is where it gets really useful. You can around anything that you want that you see on this list here. But you can also not do this. All right. You could do this in a different way. So that's Tony's off. These settings are still there. Look, you see, the X Y pad is still moving, but it's now neutral, right? Because we haven't routed it to anything. What we want is way. Want the router here to be routing to the X Y? Let me show you what I mean. So do exactly the same thing. Ah, we wanted pitch 123 to be going to the source. Turn off my via off Thebe Pad X and we want our cut off one to be modulating Teoh the or by the pad Y Let's listen to that Ah, and turn our intensity up as usual So you can do this in two ways. You can do it at the vector level so you can do on this panel or you can set it up in the router and have these kind of empty. Here. These targets is off two useful ways on. Of course, you can combine them together to have a mixed and X y z. Oh, you can hear there were changing the wave shapes on that so you can get in a lot. A lot of detail here So let's go back to the default recall default, and we're gonna talk about the global controls. So what we see over the top is Polly Mono and Lo Gatto. So polyphonic, as we've seen in other insurance, means that we can play multiple notes at the same time and weaken set when we're on polly mode. How many that is. So here. I've only got two notes that I complain. Even though I'm holding down all of those notes, you can hear that the earlier ones are cut off. You can pull this all the way up. So I think it's that, too. Yeah, so that's that's a really useful when we go over to mano we can. This doesn't really affect anything. What it does is it stacks the voices on top of each other when we move into unison. But for the moment, this doesn't actually change anything. You're here. Mm. Pull this all the way down to zero and pull it all the way up to 32. Nothing happens. So that's mono. And that means that the every time you play and you know, thieve Ali, um, envelope will re trigger at the beginning of the attack. But if we move it to Lo Gatto, we'll skip the attack phase and we'll just all of the other notes, will be on the decay and sustain it and then release time. So that gives us a nice, softer sound for every secondary note. Bet. Every time we take off the note and play again, we'll hear that heart attack harder. Attack at the beginning, we turn on us and what that does it doubles up, triples or actually goes up to 32 notes on each one. So if you listen to this so we're on the garter. You can hear if you're listening on headphones, that there's something that's starting to happen in in stereo field and we bring this up a bit more. What we're doing is we're stacking notes on top of each other, and if we add in a bit of the so random d tuning that the analog brings in waken, start hearing that kind of nice chorus. He phasing sort of feeling. So that's what those set things up. The free setting, which we have for our selector star, is a very, very sort of nuance setting about where we start the oscillator in its way form, so basically each of the oscillators can run freely. So when if you play no, it will just pick up where the oscillator is currently or taken. Start at a different point each time, the note instruct. So, basically, if I if if, if we're in free the initial oscillator face start point is random. Basically, for each note, it is very, very subtle but adds a bit of life to the sound. But the downside is depending on your settings. The output level may differ each time and notes, plays and played, making the attack phase sound a little bit less punchy if you have it in soft mode. The initial oscillator face starts at zero point for each note, so this mimics the sonic kind of feeling off normal digital synthesizers. And if you have it on hard, the initial phase starts at the highest level in the way form cycle, so this is particularly good for adding that extra punch. We've already covered the things to do with volume and also our pitch. Over here there's a technically global controls, although we've gone over them already, then we come down here to the macro controls, and I want to draw your attention to this button here. If you press this, it drastically reduces the size off the ES two. So, macro, we're only looking at macro controls here. And these are the ones that are at the bottom of the synthesizer here, and you'll see if I start moving something like D tune that other parameters on the instrument, notably up here, start moving on their own. So if you know if you've covered macro control before, you'll know what's going on here. But essentially a macro control is one knob that can control many, many other knobs to put it simply right. So here you can dial in just a. It's just a much simpler way of using the instrument. Typically, you'd use this if you're in a live setting here, writing Mawr D tuning in but without having Teoh. So here I can control the volume the global William, without having to dive in to the settings here, and then we can also contrary control. The wave shapes here, but of course we need all the different oscillators on to hear the difference in that. Actually, this one's only changing oscillator. One, we have cut off his well resonance modulation Attack, decay Sustained release. So we have our controls of our envelopes here and the global volume. So finally, we have our midi controls here. And this is where you can add in separate midi controls things that are already set up or mawr more interesting things like your foot or the volume or breath. Or you can even learn external controllers here. So, breath controller, for example, it is a midi controller. External control that you can actually blow into it registers on ah, continuous controller Andi, you can then modulate that so you could actually increase, for example, the d tuning orthe e sign level or any of thes parameters here. Like pitch on. Then if you change it to control A you've set it up as a controller breath controller, which is controlling pitch one and you increase your slider here. So that's what these are here. You're almost certainly not going to need to use them. And you're certainly not continue to use all of them. But like these instruments that were starting to use now, like the s two and alchemy, we have a huge amount of settings that are just there at our disposal we can use if we want , but most of the time we don't need them. So that is the ES two rounded up very, very extensive synthesizer lots and lots of different parameters to know about. But you should be feeling confident now, if not slightly overwhelmed, that when you open up a synthesizer, you'll be able to understand pretty much most of the things that are going on initially, when you open these new synthesizes, you won't understand the interface. But drawing on the principles and knowledge that you've gained so far, you should be able to start deciphering what's going on in there. So this has been that yes to I hope it's been useful I'll see you guys in the next video.
31. ESX 24 | Introduction: So the astute of you will be thinking, Why has Jack but the excess 24 inside of the synthesizers section? Because really, the excess 24 is a sampler. So what's the difference? A sampler plays back audio files, which in the music world is called samples. You load these into the instrument riel audio files of real things in real life, usually on. Then you mangle them and place them across the keyboard and create virtual instruments. But the reason I've put it here is that this instrument has many of the features that you studied so far in the other synthesizes particularly like the es two. And so it made sense to put it afterwards. The other thing is, is that we can think of the audio file that we load into this instrument as a way for while it is away form. But it's just not internally generated by a synth. Many of the ways that we treat the sound are treated the same inside of the excess 24. So in this video, I'm just going to give you a very quick overview of what it does by actually creating an instrument from scratch and Then in the next video, we're gonna dive into the two different interfaces. One which is the parameters screen, which is this one here. And then this one, which is the instrument editor, which is where you actually create your instruments and map the samples across the keyboard . So what you do is kind of a silly example. I'm just gonna quickly bring this to the middle here and then show you how to get to that window you edit here. And this is where we start creating our new instrument. Open this up of it. So, as I said, this is where you actually create your instruments and I'm gonna whiz through this. But I'll explain how to do this all in one of the following videos. So I'm gonna create a new zone, and I'm gonna import my sample. So I have to stupid samples hear me saying hello and also me to singing a long note. So I'm gonna import this 1st 1 the hallow. What that does is it Places it down. Here is this blue line, and that means that now it's mapped across the keyboard and we've got it set so that it's following the pitch of the keyboard essentially so that if I play the note roughly on Well , if I play the no on C four here, this will be exactly the sample that I set. Hello? Right. But if I play something up here, it speeds it up and pitches it up at the same time. Vice, Ever sit down here fun stuff. Now you can also edit this file itself inside of here by doing different things. You can cut it up. So if we just wanted the low bit, probably we could just do this. I think that's probably the little bit. If I hit trim, I think everything will now just say low. But let's see what happens so kind of cool. Alright, I'll just put one more of these in Is me singing badly. Long note or spade, that Andi way. You hear that little gap at the beginning there because I didn't start seeing things. Is our little minion instrument quite fun to do these things, Onda. And you can actually edit that little gap here by cutting them out. And then we got functions again and trim. Save that sample on. Then let's have a Listen, I think I can actually play this on the keyboard. It's in front of me. Oh, so this is obviously know the best way to create instrument. In fact, it's just illustrative and very, very stupid. So heavily gives you an idea. If you actually have urine samples, you can start loading them in here and moving them around and doing interesting stuff. Once you've done it, you save it as an instrument, like a hit. Ah, don't save here on. Then you can edit it in here with many of the promises that you've seen in instruments before, particularly the ES two. So in the next video, we're gonna go over all of the parameters on this page and then in the video. After that, we're gonna go through creating instruments from scratch.
32. Parameters Window: So in this video, I'm gonna take you through the front interface of the excess 24. But before we do that, I want to show you something. What I've got here is I've got the new instrument menu here, and I'm going to just create a new software instrument, which is an empty channel strip, If you remember from our introductory videos, what we did is we went over to the browser or the library on. We searched our sounds and we created an instrument from one of these presets it. And let's just do that again. So I'm gonna go down to Orchestral on. Then I'm going to go over to harp and click Harp. Now, look what instrument loads up here. The E X s 24. So this is our instrument in logic, which plays a lot of the samples, right? We don't actually have a specific harp instrument here. You can tell, because if I turn the volume all the way down, you hear that? I'm having an effective of this instrument. And all of these other effects will have an effect on that sample. That's what you're seeing up here. So just know that all of the instruments inside of logic that are usually in your sort of your pre shipped sounds such as harps and or Castrol and World and different things like that usually get played in the excess 24 Unless it's something like the vintage B three organ or cloud for electric piano, even things like the vintage melodramas. Well, which will come to in a further all video. So I'm gonna close that and I'm gonna delete this, and I'm just gonna start from scratch so that you can follow along So empty channel strips off Twenge instrument and I'm gonna load the e excess 24 which is a sampler at the moment I'm just gonna do it is default, which will default hysteria. And I'm gonna load up our standard ik use that you can see what's going on. So as you can see, it's very similar to the es two, particularly this section down here where we have our modulation routings. It's the only two instruments in logic which have this interface where you can route 10 different modulation. Routings are the es too and the e s x, the x s 24 there's a bit of a tongue twister realities. So let's start with the top global controls. We have our voice settings in my explanations. Now I'm going to start leaving out the bare bones basics of everything because I have to assume that you understand the principles here. And as we start moving into the more complex instruments, it's gonna be a little bit more tricky to fit everything in. So if this doesn't make sense, you can always go back to previous videos and understand what these things mean if I don't explain them properly. So we have Lagarde, tamano Polly and we have our voice count here, which is basically our control over how many voices we have, depending on what setting we're in. We have another neat little window here which tells us how many voices we're actually using . This updates in real time, which is very, very useful. Finally, we have our unison setting which applies to these different settings here, going along to the right, we then have the top part, which is our instrument navigator. So this is where we can load in the samples and the instruments that have been that have been pre created So if I do something like, let's choose guitars, acoustic guitars, acoustic harmonics. And if I load this in, you'll see that not only do we have acoustic harmonics here, but all the settings have changed here to match the settings for this instrument, and I can play this guitar. But if I do something on the settings down here like change the glide setting, I can mess around with it just like you would with a synthesizer. But we won't get to that just yet. So to go left and right or cycle through the different instruments that we have, you compress this. We're now in a vibraphone eyes useful here, and there's a whole whole hierarchy of different insurance. If you need to find something, you can actually search this library. So let's dio literature to do piano. Be boring and you notice nothing happened, right? And that's just a slightly old interface. But basically what's happened is that this menu has now been filtered, and you can see if you can see that we can now clear are fine. But essentially, this is showing us everything that is to do with a piano inside of the library. we've greatly reduced our menu. So if we clear that we get full access again to the whole money. So that's how you do that. Here we have edit and options, which is basically to do with the creation off sample libraries. Sorry, the creation of sample instruments that yourself. So we're not gonna get to that in this video. We'll get to it in the next video. So that's come back to the left here. This panel here is to do a couple different things. So we have a velocity offset which basically allows us to control how much our velocity is affecting. So if I play quietly or generally three, this isn't the best instruments here. Let's try with guitar again. You can hear that I can actually control the instrument intends of velocity. But if I pull it right down so that I don't have any lost E, I don't have any control now over my velocity. So that's what velocity offset is hold via is basically if you've ever played a piano before, you'll know that they have sustained pedals and when you use the stain peddles inside of a midi instrument, this is called hold and that's typically only control 64. Now, if you want your whole to be on something different like another controller, then you can change that here to any one of these different controllers. But I would just leave it on 64. If you're planning on using the pedal which is attached to your MIDI controller, this bit down here, we're gonna leave. For now. It's to do with cross fading between different velocities within the samples. So we'll get to that. As I say in the next video. We next have the pitch section this panel here off the instrument so you can globally transpose what note you're playing, and you can also tune it. Now It's a bit confusing looking these two because if I play an instrument on, then I transpose it down. Definitely goes lower. You can reset it by pressing that zero, but in there, Or if I could move it down eight. I think it was a united right. What's the difference? Well, in this one, what we're doing is we're actually stretching the individual sample itself. So if you try and listen one more time to the quality of it, So this one here is eight Sounds quite clear and bright and normal Sounds really to me anyway, but this one something different about it. What we've done is we've actually pulled this the existing sample down just by the instrument itself. We haven't actually changed the sample. Where is on this one? We're triggering a much lower and realistic there for sample. So that's the difference there. You also have fine tuning off the insurgent networks very much in the same way. It doesn't trigger a new sample. It pitches the sample that you're playing on. You have your usual 100 cents range there, which is a semi tone. You can then introduce like we saw in the ES two. Except it's got a different term here. You Can you introduce a random variations in the pitch? This would be the analog setting in the ES two. You can hear that It's now changing very, very slightly. We have our pitch bend settings here so we can change the range that are pitchman wheel moves. So here, if I'm now, bend up on the wheel. I can now move an octave or if I get down to five, which is an old one, right? So and you can link it or you can have it separate for when you go down. They wouldn't have. We then have a glide settings, so we relied between. So the moment I'm just moving between their samples, But within the actual algorithm of the instrument, you can move between them on adding glide. Now the picture here, it basically determines where your porta mentor's coming from. So here we're gonna come down into each note way. Move this the opposite way mixture in between, right with all these settings. Obviously, if you press option on your keyboard and then click on either of these of these buttons, these parameters here they'll reset back to normal. We then come to our filter. Here on, we have a number of different filters, much like any other ones. We have a high pass filter low past with different settings, and we have a band pass as well. We can also turn on the fat setting that we usually need in low pass filters to boost the but to boost the lows when were particularly boosting residents so cut off Dr Resonance and then key tracking for it. You can. Also, if you press this one in the middle here, you can control both of them at the same time on an X Y axis. So you see here if I've if I press on this icon in the middle here, if I pull up on controlling the cut off. But if I get a left and right, I control the resonance. Which means if I do a circle, you'll see it there moving at the same time trolling anything that's just for your own kind of ease of use. I never use it to be honest, because I'm a lot more precise in the way that I do stuff. But if you want to mess around with it, you can. If you're doing any nice automation stuff, that's cool, and you can turn that on and off here. Next we have the amplifier or the volume part of the instrument, which is this one Here. We can control the overall volume level by pulling these two parts of the slider together on moving it lower or higher, respectively, or if we split them apart, we can determine the dynamic range of the instrument. So if I have this lowest one here. This means that the smaller velocities or the soft right play means that I have more control over the smaller velocity is down here on. I can also play louder, whereas if we want to only play quietly, we could restrict ourselves to only this part of the velocity range. So no matter how loudly I play on my keyboard or heart, how hard I can't play those higher samples and you could do fi server. So if you only want an instrument that has a louder a long time, this doesn't affect the internal. If you know about the excess 24 this doesn't affect the velocity, a triggering different samples which is inside of the edit window. This is just the volume that you are actually hearing. So anyway, that survival on the overall volume is just here. So and then you have key scale, which is basically to do with where we are on the instrument and how loud the instruments. Also, positive values basically mean that that the higher notes are louder ever so slightly got quieter there and then negative values means that are lower notes and allowed oven arm, then are higher ones. And this is to emulate the characteristics off different riel acoustic instruments that get louder when you play higher or get louder when you play lower. So then we have our modulation routings, which hopefully you remember from the US to I'm not gonna go over that really a tall in here because basically, it's exactly the same as as that you have the same ideas here. It's just that you will you won't have necessarily the same parameters that you can choose from here. Now, the one thing I will introduce you to is something called S Select, which you'll see in this routing here. So this means sample select. So sample select here is routed to velocity. So as we play higher on the keyboard, sorry. As we play louder on the keyboard, you'll hear that what we do is we trigger a different sample, so ah, much brighter sound comes through, and that's very much a different sample here. Now, if I turn this off on, I play really loud, that doesn't happen. But basically that is the That's the instrument routing. And but we don't have things like the vector envelope like we didn t s to because this is really a sampler instrument. Not not an extensive Ah synthesizer. So then we have our LFO, which is a polyphonic LFO which you'll remember from previous instruments. We have our wave shapers here on our LFO two and our telephone three. The difference between these three l a foes is as I said, LFO one is Polly but the and you can actually control it with the internal envelope generator as we saw in the years to with delay in decay LFO two and LFO one you can control the wave shapes off the of the LFO but LFO three you can it's just a normal triangle way form And all of these elephants can either be free sink here or sink to the beat clock And then finally we come to the two envelopes on the light one and envelope too. We won't go over too much about how envelopes work with anything at all. Really? Because you guys have covered a lot in this course so far. I will just say However, the envelope one is hardwired Teoh. The filter envelope too is hard wired to the volume. You can however, route any other parameter that you want to these envelopes. But just know that that's what they're controlling a long time. You can't change that. You have your via veil for the attack side of stuff, and you can control velocities, effect on it and the velocity range or your dynamic. So that's the envelope section, and that is the overview off the front end of the excess 24. In the next video, we're gonna go over the real crux of this instrument, which is creating your own instruments or patches from scratch using urine samples.
33. EXS 24 | Importing & Zones: So in this video we're gonna go over the instrument editor window and how to create your first patch from scratch. Now, if you're in kind of a rush, I would probably head over to the alchemy tutorial. Siri's. That is, if you watch the other tutorials in this course and understand the basics of the synthesizer interfaces, because alchemy has a little bit more of a simple or helps you create samples more than the excess 24 and you'll see it better in that Siri's. However, if you want to understand sample creation kind of from the ground up, then I would stick around and watch the excess 24 this video now and also if you do that, if you do stick around for this video, you'll be able to understand other samplers that you might use on your journey. So, like native instruments contact. So let me just open up here and show you to contact his assembler, probably the most famous sampler that we have that allows you to play play virtual instruments that are not synthesized but sample based. So this is spitfire, my favorite sort of library. I think this is real strength thinks is a very, very, very detailed sampler where you can actually go in and kind of edit samples off different instruments and you can load different files creator and things from from scratch. And if you understand the principles within the access 24 then also the principles in alchemy, they're pretty much the same. And they will also help you use things like contact. So let's start with opening up the instrument editor window. I'm gonna click edit here up in the top, right? And this brings up our panel that we saw before in the introductory video. Now you might not be seeing this, or you might not be able to access this. As I mentioned at the beginning of this tutorial, Siri's that you need to go into logic pro Preferences and then advanced tools and make sure that all of these options are on here. So if they're not, you might not be able to access this edit panel. So there are two views to this window here we have the zones view which we're currently in , and the groups of you looks pretty much the same. But you have this left hand panel in the zones where we see the group's basically so groups air here where you can actually change the settings. We'll see in a minute and then zones. Here you can change the settings of the zones here, and then you have your groups that you can look through here on the left. Now we'll get into what zones and groups are and things like that in a minute. But before we do that, I want to talk about something, which is the file path, which is where all of the samples in the excess 24 live. If you go on your Mac to Macintosh HD library applications support logic, you'll be able to see a number of different things, notably the sampler instruments, which is where we selected earlier in the previous video the different excess 24 instruments. Because when it says sampler, that means the excess 24 and then the E. X s a factory samples, which are the actual samples that the instruments play. You can see here that a huge list of different samples, and if I preview one, I've got piano sample in there just ringing out, and it's these raw, wild files that the instruments, actually that the excess 24 reads when it plays thes different instruments richer in here. So that's how you manage this. If you want to actually create you in your own folders and new folders delete staff, reorganize stuff, this is where you'll actually do it, much like the patch settings inside of logic where you can reorganize your unpatched. Ah, uh, presets. So now that you understand that I'm going to create a new instrument, so you understand that it's actually gonna be created in that location. So I'm gonna go up to instrument and click New Instrument now it doesn't do anything right , but that's just because it defaults to creating a new instrument anyway. But if we want to change the name of it, we can say that as a certain thing. So you see here that it's defaulted to audio music APS sampler instruments. Now this isn't the location that we had earlier. If I just go back to it, this is actually in another place which I have set myself and you might need. Teoh said that basically, it's the place where all of your custom files and presets and changes to logic are kept. It's like a separate place to the kind of default factory stuff which is here. So I'm not actually going to save it here. I'm going to save mine to the desktop for now, and I probably when you're messing around, I would probably do the same. Just said that you know where they are and you can delete them on. Then you can get into the library management stuff later on. I'm gonna call this first instrument. I'm gonna save it. So now we've set up an instrument. We need to add some samples. And this is where we come into contact with zones. So what I'm gonna do is I'm gonna create a zone first New zone, and you see two things have happened. We've got zone one here, which is on this throw here on. Then we also have this long blue line which is basically telling us that this is own is mapped across the entirety of our keyboard. You can pull this up here. I just couldn't grab the edge of it there. See, we're reducing the space. So what I'm gonna do is I'm gonna pull this up to see three on gonna pull it down to see three said there were only mapping to the zone off C three. You can see now that I three military today, but yeah, if you've now got it only on C three and we've got a zone now, which is only on that note on, we can now load an audio sample, right? And I'm gonna go to the desktop, which I'm already on Andrea to my piano samples here. I'm gonna choose C three because this is actually a piano sample I have ready? Uh, no, I press space bother to preview it. But you notice that actually, in this view here, it's quite useful. You can you can review as well. There's a couple of other settings here, like hide used audio files that basically would hide anything that I've already imported into this instrument. But since I haven't, there's nothing. Everything's everything's open, so I'm gonna open on. We have now assigned this now that it's loaded to this note. Now we've done that, but what we have here is we have a couple of things. We have the key route right, which is basically the note at which the sample sounds at the original pitch. Don't worry about that. Too much for basically I'm just keeping it simple for the moment. This can't be C four. It needs to be C three. So I'm gonna scroll up to Ah, here we go. See? Three. You can also type these in. And now when? Where? When we play C three, we're gonna trigger that sample. Right, Which is great. So basically, we have a zone which ranges from C three to C three. So basically one note and its root key is C three onda Note in the sample is C three most simple kind of of course we can't play anything else. Were any triggering one sample? So the first thing we could do is extend hope. Sorry. Accidentally open that window. We can extend this zone a little bit higher. So now that when we play C sharp, it's gonna go on a semi tone. And this is what's great about this instrument because we've routed the story we've mapped the right note sample is C three and we've mapped it to the root key of C three. It's gonna know the instrument that when we increase the range so that the highest C sharp three. Teoh, expand that pitch upwards. Let me turn. So what we're listening to on this sample eyes actually, a pitch shifted version of this sample, right? And if we do this too high, so we expand. It was so we just use one sample for everything on the keyboard. That totally doesn't sound like a high piano. Sounds like some weird club because basically what's happened is we've stretched the sample way too much there. So this is where we need start creating more samples for each for each zone. Or rather, we need to create more zones with their own sample. And this is the thing. So each zone here you see, I always have trouble with this because I use a stylist bear with me to put this right back down on. What I'm gonna do is I'm gonna expand this to to an octave or just below inactive, and I'm gonna create a new zone with a new audio file from C four to be for I'll just do that now. So I got to zone new zone, and I add, make sure that this is from C four. You can type these in Have more success with that. To be full on, we need to open up an audio file for this one. So this is a drop down menu. There are three options. Load audio sample open in sample editor and reveal in finder. Now, I'll show you what these others do to do with this sample here because you need to have one loaded. If we open it up in sample editor, we can edit. It will come to that in a minute. And if we open it in finder, we can see exactly where it's located. If we switch to find her, we have it. That right? So it is really useful. So now that we've got that new zone, we're gonna go load audio sample, and you can see that this one's great out because we've already loaded it, which is really helpful. So I'm gonna add C four. And now when we play here now. So this is the thing that often happens. We have This is a lot lower. So it sounds really weird, right? Because we've matched C four toe, have a root key of C five. So we need to go down to C four so that these two match Okay, so now when I play c four, it will be truly playing that sample at the original pitch. But then everything above it will be pit shifted. So this is a super, super simple example of creating, you know, a piano, but you here it's really, really not. The greatest sounding piano on this is because most riel sounding sample instruments use basically a zone for each key. In fact, they use multiple zones for various different things. What if I wanted to play harder and softer? Well, I can do. But all the instruments doing at the moment is it's increasing the volume off that sample, which is not realistic. Really. When you play a sample on a piano, the string vibrates in a very different way. You get a different tambra on, then a saxophone or anything like that. The sound of that instrument changes as it gets louder or quieter. So this is the basic bare bones of creating zones. It's really important to understand the basic principles. First, in a kind of simple, clean format like this in the next video, we're gonna go over groups in a very similar way in a simple, clean former on. Then in a further video, we're going to really dive into this and do it deeply with the excess 24 so that you can understand how to do it at a much higher level.
34. ESX 24 | Groups: So in this video I'm going to go over groups and to make it really clear what I get up to, I'm gonna use a couple of silly, simple, kind of laboratory style examples that aren't necessarily super Musical. But first, what I'm gonna do is I'm going to rebuild a five zone version of the piano that we started in the last video, and I'm going too fast for the process so that you can see it quickly. Bit painstaking, right? You'll see later. Actually, we don't have to do it that long winded. And that's quite a convoluted way of doing what we did here. And actually particularly examples like alchemy. It does a lot of this for you, but I was just doing it there, says conceptually. You could understand what is going on under the hood. Now let's say that we're happy with this instrument. I'm no, obviously, because it's just a rubbish sounding piano because we're using a few samples in it. But let's say we're happy with it, but that we want a different kind of sound when we play harder on the keyboard. That would be the most standard way to start using groups so that that way we create another set of samples for the same zone. So see one sorry C two to be too. And separates s a C three to be three. We create another zone for each of those those areas and that for that group of zones, what we do is we change the settings so that they trigger when you play at higher velocities. Hopefully, that makes sense that will emulate the sound of hopefully riel instrument. In this case, we're gonna do it with a very strange, distorted sound. Just said that it's obvious what was get what's going on. So what I'm gonna do is I'm gonna first will put all of these these air on normal samples inside off a a normal group. So to do that, I create new group on die. Call this group normal and call it whatever you want. It's however you want to think about it, and you can click and drag, and you can also change it on the thing here. So I'm gonna create another group. I'm gonna call that higher velocity now. Obviously, there's nothing in this folder, but there is in normal because we've placed those samples in there if we want to see Sorry , although zones in there, if we want to put if we want to see all of the zones that we have, we go back to this one. Now, we could create all of the zones again, like I did in that fast forward a bit, but it would just take far too long. So instead, what I'm gonna do is I'm gonna select all of these zones and then I'm gonna copy them into the high velocity thing. Now, if I move them like this without sorry, if I just click and drag them like this, you have to click on this part here. The name and I just move them into high velocity. What's gonna happen is they're going to move out of normal and into high velocity, which is not what we want. What we want to do is actually copy them and then edit the samples so that we can then use the same mapping. So we've got the 1st 1 on SETI to be too etcetera, etcetera. We can use the same mapping, but then change the samples out. So instead we're going to click and drag with option held down now a copy across. So now we have these in here and these in here. So what we want to do is we want to change. So you see, at the bottom we've got the same duplicated zones. What we want to do is you want to change the, uh samples. So I'm gonna change the sample here to be C two distorted, and I'll get through this now and fast forward. So what we've got now is two groups we've got normal and then the higher velocity. But if we play anywhere on the keyboard, it's gonna play. Both of them. Sounded like the opening to a game show. That's cool. So what you want to actually do is change the group settings. So this is where we go to the group's panel. Now we have normal on high velocity vz the two groups that we set up long, and it is just expand this a little bit. Now, the different parameters that you see here right are changed by our view settings. So what? We want to activate his velocity range here and you'll see that both of them have the velocity range of 0 to 1 27 which is the full range of velocity in terms of Midi. So what we want to do is probably zero to, I don't know, let's say 80 to be the normal velocity or the normal sound and then from 81 2127 to be the higher velocity, right? But those groups are map to right across the keyboard. So we're looking now at the bottom here to groups not to zones. If we go back to the zones group, we see that we're looking at the zones on the zones are on separate on separate notes is a bit of distinction there to get your head around. So now if I play a note on I play below 80 you heard one of thumb peek through that extended played louder. If I play really hard now, right, we get that distorted sound. So again, a rubbish musical example off of some bling. But hopefully one. If you've never thought about this before, that gives you a very clear idea about how you set up and create these instruments that then feel kind of realistic as you play when you use really, really good sample libraries, like spit for our audio or Native instruments or anywhere else. When you're playing the instruments, they actually feel mostly like riel instruments to an extent, as much as that's possible on a on a MIDI keyboard, because they respond to your the way that you actually do stuff, especially if you have things like after touch enabled in your keyboard, so that when you press a know, it actually gets louder after you pushed it down. So those sorts of things really, really useful. But we're not going to get to in this course, creating instruments at that level of detail. It's just a whole nother course in itself. This is just the kind of introduction to you basically, how zones and groups work inside of the excess 24. So what I would suggest that you go and do now is open up a number of patches, right? So I'm gonna say this. So let's open up another you access 24 and we're gonna go Teoh something like a riel classical piano. They've done well and let's look in at the options here. So there's so many more groups and settings here right on. We have loads of different parameters. If we change our view to have velocity range, we see that we've got a number of different groups here, which are being triggered on different velocities. We go back to the zones, we have a number of different. So here they have for every what looks like a major third or a tone minor. Third, actually, they have for each one on then the top range. They don't have samples beyond, because the piano they want to make a realistic piano that doesn't actually play lower than the lowest note on a on a full size piano. So that's why do open up some pre existing patches inside of the E excess and on understand how they've created zones and groups. In the next video, we're gonna go through some of the auto mapping options, which is where you can set up full instruments like drums and other instruments using the auto kind of import feature
35. EXS 24 | Multiple samples and multiple outputs: So as we saw in the previous video, you can create zones with their own samples in them across the keyboard. And then you can create groups to group those different zones and then change the behavior of those groups, depending on various different settings. Now, this is particularly good for obviously velocity and other things like articulation that you could change with perhaps your mod wheel. But there's another way that you can do, which is grouping the notes or the sounds of a drum kit to come out through different outputs. You access 24 is a multi output instrument, so I'm gonna make sure that I got that version of the instrument on this track. So I'm gonna go up to excess 24 go to multi output. Now you don't see anything change, but when we get to the mix of you in a bit, you will see something if you don't know about this already. So before we get started with this, there is one caveat, which is that you should probably be using ultra beat or drum machine designer or the drummer even to do drums inside of logic Pro. We'll get to that later in the course. I'm kind of just showing you this so you can understand the full of parameters of the excess 24. It's not necessarily the best way to do stuff, and it's a lot easier. A lot of these drunk it's been created for you. In other instruments, however, let's dive into it. So I'm gonna open up the edit window here, and we're gonna load a load of drum samples, which I've downloaded for free off the Internet on. But there's a great website which I'll link to on screen now, and you just need to get a lean musician dot com. That's not the website. This is just a short link. So just totally musician dot com slash free drum samples and that'll take you to the website, which has free drum samples. Really, really useful in these are the ones that I'm using. So because we're loading load of them, we want to do this option. Here, load multiple samples. Andi, I'm already in the folder here. Andi, if I just select one of them, you'll be ableto here it right? Obviously, this is one of the members of the kit. Lots of different symbols and stuff like that on then. Lower down. We have the high hats and kicks and snares and stuff. For that, I'm just gonna hear Adul. And this will add all of these to be imported. Now I'll hit. Done. You could have obviously added some of these. Say you didn't like this one here. You can, uh I don't think you can play from here. You could say, OK, I'm gonna remove that so you can choose exactly what you want. I'm gonna get done, and we're gonna get this many, Which is the kind of auto map menu. And we have three different options. Auto map by reading the root key from the audio file. Now, I haven't shown this in this tutorial series, but basically and the reason is because alchemy, there's a much better job. But this basically, that first option would be reading from your or your file names what you've called it. So if you'd called your file name see to see on de two e two, etcetera, etcetera. Theoretically, the excess 24 will mapped, um, effectively. But in my experience, it's really less than effective, so I tend not to do that if I'm messing around with the access 24 stuff on Like I say, alchemy is much better. Drums would be the obvious answer for what we're doing at the moment on DA. That sometimes works, But what I'm going to do for now is contiguous zones. Basically, that means that we're importing everything starting from C two. So zone with basically means how lo how long or wide the's own will be. So for every sample at the moment, we're gonna have it on every subsequent key. So it's gonna be chromatic. So each key is gonna have a new sample. We could have it so that, you know, one sample stretches across three keys, But since this is a drum kit, we don't do that, and then you're starting. That is where you want It starts, so it's gonna go. All of the samples are gonna start from here and go up through these casing and here, Okay. And here we go. So here we have it. So we have a full drum kit, right? But the problem is that if you've used many drum kits before, you'll realize that actually, if we go all the way down to see to. We haven't got the standard instruments down here. We've got thesis amp ALS in the order that they were in the file folder and usually with GM drum kits. What you have is kick on C two. You have snare or similar snares up here. Then you have high hats and then Tom's and then symbols up here. So what I'm gonna do sing Just pause the video and rearrange everything. And before I do that or to show you roughly how you rearrange stuff, you just move it like this. So there, we're gonna have a kick. Andi, that sample on that key. Obviously, we don't want this because this is all samples stacking on top of each other. But it's the way that you move it around so fast forward this bit. So I went back into my samples folder and I pulled out some of the samples that I thought were okay. And I created about the most simple drum kit ever known to man. What we have is kick from Shelton. Hi hat. So if you know about the GM kit, your knowing that it's probably roughly following the kind of standard thing. I'm missing a few things out. So we're gonna do is I'm gonna adul And this should make things a lot simpler now in our organization. So contiguous zones again for now on, we're gonna hit. Okay? And now we have mapped to the keyboard summits resembling a bit more of the drum kit that we used to, uh, let's go down to see to, but because it's contiguous zones and we've got some which are a semi tone apart on some, which should actually be a tone apart, basically on different notes. I'm gonna do a tiny bit of organization now and I'll start the video again a second. Okay, so I've kind of mapped everything roughly how I wanted. The one thing that happens, though, is that you can't just simply move these samples around which out without thinking about pitch, Okay, because what's happened is if I play this ride Cymbal, which is up here now, it's incredibly high, right? And that's because we've imported this as a kind of just a normal sampler. And so the somewhere is thinking, OK, well, Jack's moved that from where originally was. Let's find that No, so that Is this the ride here? So it's root key is a two. So down here on because I've moved up major Third, it's moved up the audio file a major third to see Sharp three. And that basically means that it's a lot higher. So if I turn off pitch and we play that same sample, it goes back to what it should be, right? The normal ride sound. We put it back on. Okay, So what I'm gonna do is I'm gonna select all of the's by shift and clicking, and they're gonna turn off pitch for all of them. So that would make sure that that's not happening to the right. We have one shot. One shot basically means that when you press the key, the whole sample will play. If you think of the kind of release phase of a bell, it's an incredibly long release phase. Whereas if you hit, say, you know your desk, it's a very short, very sharp sound that dies away straightaway with drums. You want the full sound of the sample, right? You don't want it to cut or gate. Let me show you what happens if I go toothy, snare and I turn off one shot and I press it and I pressed my note really quickly. It cuts off, which is unrealistic. Whereas if I put one shot back on, you're always hearing the full sound, so that's quite useful. You can also reverse it, which is quite useful. So I think this is okay. And this is roughly where, as I said, Guys, this is for tutorial purposes. So which is gonna leave this for now? The one thing that you can also do is, uh, turn the volume up of notes. My kicks quite low. So I'm gonna turn it up to 12 which just boosts a bit. You can do this later, basically gotta have good samples rather than messing around too much in here, right? Finally, we get to the bit, which I was trying to do in the first place, which is set up a group so that we have separate outputs for different parts of the kit. Now, if you have a mixed a drum kit inside of logic, before you'll know why or indeed any drunk it, you'll know why this is really important. It's important to treat the different parts of the drum kit differently in terms of audio. So we can have this coming out of different failures in the mixer. In logic, I just switch over to the mixer here. We can have multiple outputs coming from our kit, and that's that's quite useful. So what I'm gonna do is I'm gonna create some groups we've got group to, which is sort of the default group. But I'm gonna create a few more. Andi, I'll start the video again in a second. Obviously, this is proper overkill for this instrument because it's a very bad instrument. But if this is a full drum kit, you'd very much want these groups. So we've got kick here on. We're gonna drop that into into the right zone, so into kicks, it already is and kick their all in kicks already. You can see that by the fact that it's in Ah, if we show view, we can see that they're all in kicks at the moment. So we don't need to be that in there. I want to move, snare into snares and room show into snows all three high hats into high hats. Notice. I'm not doing the option drag here. I'm not holding option on my keyboard and dragon, cause that would be copying them. And I don't want to do that this time to move on my Tom's into here and then the ride into symbols or other symbol in this case. So now we have thes groups with exactly the right things in what we want to do is you want to get to groups on show view on Do we want to then? Actually, it's already here. So I'm gonna draw your attention to this parameter here, which is output. Okay, so with a multi out for instrument, what we can have is basically these different channels going out of different, uh, different outputs. So what I'm gonna do is I'm gonna start with the kicks coming out. 34 get the high hat. The snare coming out off 56 the hi hats coming out off. Ah, 78 turns out of 9 10 and symbols 17. 18. The reason why I'm choosing through the these double numbers here and not the single numbers is thes are mono outputs. And I want the stereo ones again. Sorry about skipping over the details in this guys this is not within the scope of this course, Really. Hopefully all of watch other tutorials or I'll be creating one soon on logics outputs and plug ins and features like that. So now that we've done that, I'm gonna close this and it forced you to save it or ask you to save it. Just gonna put it to my desktop sample instrument or second instrument. Andi. Uh, then I'm gonna go. I'm gonna cross this out, and I'm gonna bring up mixer. I did that by pressing X. You notice Because we've created a multi output instrument. We, uh, can add a few more things here. So if I play my instrument again, we hear kicks coming out of this one. If I play snares, they come out of this one, right? So I'm gonna start labeling them. These are the different outputs. Remember, we set up outputs 34 to be the kick here, so I'm gonna go through this now, so that's really useful, right? What you can do is also add these to the timeline here. So if we add these together in perhaps a track stack, um, that's not do that. Let's put these in a folder. What we can do is play this instrument and have them coming out of different output, which is really useful for our mixing purposes. Check out my beats s. Oh, yeah, so not so. Not so useful necessarily with ah ban instrument like that. But you can see when you're really spending a lot of time carrying instruments to create multiple outputs is pretty useful. So that's the overview of the excess 20 fours instrument capabilities. I'm afraid I have miss stuff, and that is really simply because it's not. It's almost a course in itself, creating instruments on Do you kind of dive in by by showing you all the parameters of the excess 24. You have to talk about all of the different facets of creating instruments. I chose the best bits so that you can kind of get started. Get going. So there is one more thing that you should probably know about, which is thesis ample editor. So if we go back to our first instrument here, we can go to the, uh to go to the one of the samples and double click on it, and that will bring up the sample editor. Now in the case you saw in one of the early tutorials that I had a gap at the beginning and you can kind of you can cut stuff up here, which is really useful. This is really, really unique to the excess 24 this editor, because it's actually hard kind of sink or hardwired, basically trying to say it's hard to say it, but basically this functionality to be able to open up, away form and edit it with such detail that you see in here is to do with the fact that this is This is essentially logic, the program logic that you're looking at the moment this ability is kind of coded into logic. It's not necessarily inherent to the excess 24. I believe I might be wrong about that. But essentially, that's that means that you can. You can edit samples in the way that you edit audio in logic when you bring up through the edit window on audio. So if I create an audio file now, Andi, I pull in, say, an apple loop, just a really simple one, and I put it on here. We can then see we've got direct access to that apple loop here as the track, or is the file. And this is the same editor we were looking at a moment ago in the sample editor. So really, really powerful features, if you know about this already again. Scope of another course. So that is that you access 24. I have. It's been useful, and I'll see you guys in the next video.
36. EVOC PS: the Evoque 20 Polly Synth works as a vocoder and a vocoder. If you've never heard of this before, basically analyzes incoming audio signals and allows you to play that through a synthesizer . It's way more complex than that, but the scope of this course can't go into quite how vote coding works, because it's a synthesis. Andi Instruments course. This is the only instrument in logic, which uses faux coding. Essentially, it listens to an incoming signal, much like we've seen so far, like in the ES one or another. Siri's where we listen to an external audio file inside the instrument, and it listens to those signals and then imposes the sonic character off that sound onto a synthesizer that might sound like a low gobbledygook. But let me try and explain what I mean. Here. What I have on this evil PS instance here is the side chain set to listen to the vocal samples, which is audio to which is thes here. Now when we play, obviously I've meted this track at the moment. Don't worry about all this other stuff going on down here. We've got this track going on and we can hear the samples if we, um, muted everything. But if we meet again, what's happening is that this synthesizer or that evoke 20 police in, is listening to that. We can show that because if we move over to the analysis, this is showing us the analysis signal on. We're now playing through this instrument, OK? And we can also change over to synthesizer and play Thea actual synthesizer itself. But where it gets really interesting is we merge those two together. So the synthesizer listens to the sonic characteristics, the vocal sound and puts it into a combination. Now, when I play my keyboard and play the audio file at the same time, you'll hear a combination of those three. So I kind of cool sounds going on a nurse. So let's dive into how on earth metal kind of gets put together inside of the instrument. As I said, you need to do this and we'll look at that in a minute. You change, you choose the samples, but let's start with synthesizer parameters. In the interface itself you have on the left here, this panel inside, where I'm drawing at the moment, we have all of the synthesizer controls and we'll get to those in a minute things that you've seen before. And we won't go over too much in depth because we covered them so many times now. Things to do with voices, pipe organ lengths, balancing between them, you know, voice types, analog drift, glide times, things like that. Then, just above that, we have the side chain analysis in controls. Then we have controls here over the actual analysis off the incoming audio signal, which is currently this audio file. Here we can change how we want the synth to output it's stuff or analyzed the incoming signal, and then we have some global controls over here, Down at the bottom, we have just a few modulation things to do with Shift, which will come to you and then a normal pitch LFO, which you know about. So as I said, let's go over the since settings first and quite briefly because the principles you've heard in other lessons in this tutorial course. So we have Polly Mono and Lo Gatto settings for our synthesizer, so when we play it, we need to move back to our synthesizer setting here so we can hear what's going on. So here we have Polly mode and I can play up to 16 voices. I can pull that down and have only two. Or I can move to a mono or I can have leg rt e can also then have unison way pump up the amount of voices that are played on each note. So here we have four sounds off this oscillator being played so the signal gets a lot louder Then with that leg Arte mode, you have glide controls down here and also with those voices settings that you have with the unison on. We pull this to four on, then we turn up the analog drift waken here that that really affect the tambra. Underneath we have two modes for our two oscillators we have oscillator one which is wave one on isolated too. That's normal in Jewell mode. But then you have FM mode where this becomes the carrier and this becomes the modulators signal we're gonna stick with dual mode for the moment. You can actually choose between lots and lots of different way forms in here, but it's not very clear on the interface. Essentially, I'm dragging this number up and down here and I'm choosing between lots of different wave types. If I pull this balance up for any gonna listen toe wave one choosing lots of different way forms that you can play around with those and find the one that you like. As I said, pipe organ lengths. You've seen those before That just drops the octave or pushes it up. They're down with wave to again. You can change the sounds on You can also de tune them both in semi tones. Andi, thats one here. You can also change the global training here in sentence and any of thes windows. Here you can double click in and type to add your your values. Here we can add in noise here and shift between two types of noise. His white noise on here is blue noise, which is essentially higher spectrum noise thistles useful for when we start making adjustments to the four months side of things they were we're dealing with, basically, continent sounds inside of this instrument. Don't worry about what that means yet. We'll get to in a second we have our bend arrange here on, then we have our residence and cut off which is essentially a filter on. We have a very limited envelope with just attack and release here. So those are oscillator settings. Let's pull in the signal again and start talking about how he can the rest of the controls control the actual analysis off this vocal sample. So I'm gonna move this midi region down so that I don't have to play on my keyboard all the time, but all the time now when we move to Volkova, which means that it's gonna combine the settings that we had in the synthesizer mode with the analysis signal. So basically, this is the main setting. You want to be honest vocoder, but if you want to dive in and listen to either the incoming a signal that's gonna be analyzed, you can click on there or you can go to the synthesizer and listen to that. Now What we need to do because I played chords is I need to move this back to Polly and pull my voice is up and pull down unison. Let's have a listen to that way. Go! So we've got a chord. Now let's move over to vocoder so we have a combination of both of those things. Cool. So that's the incoming signal. Let's talk about basically how vote coding works. What you see here is essentially a four minute filter. The way Informant Filter works is it's kind of like a multiple band pass filter where it analyzes very, very small but very important parts off the EQ you spectrum that are related to the voice. If you remember the the retro synth tutorial that we had here, we talked about that. I think it was in the second video where we imported our own sounds, and it kind of created a really, really interesting vocal style synthesis sound. This is sort of a similar thing, except we're analyzing audio in real time as we as we play our synthesizer. So each of these bands here is analyzing an important part of the audio spectrum Andi on, then imposing that on to our synthesizer on. We can change the amount of bands that we have. So with 20 bands, it's quite a detailed sound. Let's have a listen to that. In other words, the instrument is listening to 20 different parts of the spectrum off the original audio signal. So this this vocal sample and then imposing those 20 bands onto the synthesizer that we've already got the settings off. Let's have a listen thing, Theo. That's really lovely. We've got the actual sound of the vocal weaken basically hear what she's saying and her singing there, and we're playing it on cords, which is great. So we split her into three, but in quite a synthetic way, obviously. Now, if we pull these bands down, what we're essentially doing is minimizing the kind of resolution off this instruments analysis off the three e que bands, which make the vocal sound a vocal sound. And it sounds a bit rubbish thing. Thea. Other thing I find is that it tends to peak quite a lot when you reduce the bands. I don't personally like the sound I like Theo. The slightly more realistic sound off more bands so you can include you can change where it's looking so you can say I want you to look at the higher part of her spectrum of sound through the lower part theme. And again, I can't go into the real nitty gritty scientific stuff because one I don't know it into its not within the scope of this course. But with all these features you can just mess around with until you find the right sound, you don't need to necessarily no the science behind it. Below it. We have our formance stretch, and if you move this, this will show you essentially what's happening. We're taking the incoming bands from the the signal from the import and stretching them out right? So let's listen to what that sounds like. Thing Forman shift moves those output signals around the spectrum. Let's have a listen to that now. This can be quite a good thing to modulate, which is where the LFO will come in later. The shift LFO What that's doing is it's moving. Let's move this up a bit and it's pull the intensity up. That sounds a bit crazy. Let's pull that down on the right down. Let's listen to it now, Theo. Essentially, what that LFO is doing is moving this for you here, and then the residence is just the residents off those bands. You know what residents is by now? This mode here controls the blend don't do with unveil voiced voiced detection, so Unveil voiced his constant sounds like tea and things like that inside off the vocal sound that doesn't have a pitch sound. So, in a sense, when you say and they don't have a pitch attached to them, your your vocal cords aren't moving necessarily at that moment. Where is the voice sounds of the vowel sound? So when you're when you're singing, you're saying R E all of those have the actual tonal or the pitch qualities attached to them. So this is the analysis off those different parts. Basically, I I don't want to go into it too much again because I've gone over lots and lots of other things in this course. And it's not really, of course, for the science behind Vaux coding, but the best sound to be using for if you actually vote coding with a vocal some. But like I am here, is blend just to do with the mix between constant. How this affects the continents and the vowel sounds and send that sensitivity up full is usually pretty good as well. You hear that? Obviously, when you pull down the UV detections level, you basically don't. Here is many of the sounds that make it a vocal human sounding thing. You basically it's illegible. Or rather, you can't hear what you're she's saying anymore. Okay, so those are the things that you can actually control to change how it's analyzing the sound of the vocal sample. Over here we just have attack and release controls over the input sound. So in other words, if you if we pull this back up and have a listen, wait, pull this down. Currently, these are quite modest settings, but if we pull the release up off the analysis sound, which is coming in, it'll become while you're here Way thing. We've got a lot of stuff left over after she sung so a bit like the relief. Well, it is exactly release in a synthesizer, so you don't hear the end. Part of her words is clearly because 2000 milliseconds other work. In other words, two seconds is a bit too long of a release for someone's voice. If I said hello and then the O part of that hung on for two seconds, it would sound really weird, right? So that's what's going on here. Attack is similar. If I said hello to you and I turned the attack up on my hello the hello or the her part of it would be would be basically missed so you wouldn't hear the constant. So let's have a listen to what happens here. Thing way. Pull this down again. You get a lot more of the attack of her continents there. The freeze mode is a bit strange. Basically. All it does is it freezes the sound at that at that point thing, so you might be able to find some cool sounds in there. But personally, I don't find anything that useful. You got pitch LFO, which is easy to understand. We've done loads of those by now, but just notice that we have the intense teat via wheel, so this is connected to your modulation. Will you need to use that in conjunction with it? Finally, then we have some output parameters and some controls. Here we have a stereo width, which is often really useful to use with these signals. So that's full stereo with on That's no stereo whip, so just kind of pretty much a modern mono sound almost on. Then you can add on stumble so on summer is a great effect to add tuvo coded signals through the's great thing about this and forgive me, this is a very short, simple track here is that you can just put in. Ah, any vocal sample doesn't matter what someone's what key someone sung in. So long as you get your settings right here, you can then just do a quick track, and then you can just make the vocal sample fit in as kind of like, you know, 34 part. Have many part harmony inside of the key of your track. So have a listen to this thing. Okay, so that need need us to say that's not fitting in, well, rhythmically. And it's not necessarily a well thought out track, but you can hear that it works, which is great. Whereas if we didn't do that and we just listen to the vocal sample on this, it's completely the wrong way. Okay, so we won't need to listen to the whole of that. So quite an interesting instrument, I think probably if you're particularly interested, invoke coding. I would research. Vocoder is outside of logic. This is from what I know and I don't know loads about bo coding not the greatest vocoder. It's pretty old school on gets you some old school sounds, but nice to play around with and particularly interesting when you run other things through it. So here we're running a vocal. But if you think about it, what we could do is we could change this. Let's do it now. Briefly. So now what I've got is I've got a drum loop on here. If we have a listen to that right now, let's listen to the drum loop and see how that works with the Yes, Theo so kind of cool. Actually, that's a nice little thing. Teoh Tryout. You can create Kordell or harmonic content on things that don't necessarily have harmonic or even note content in them like drums. I hope this was useful. I'll see you guys in the next video.
37. Alchemy | Introduction: so, guys, it's been a long journey, but we are finally at alchemy, arguably logics, most extensive and complex synthesizer once you understand all the parameters inside of alchemy and you could really use it. Technically, you're not going to really need to pull on the other instruments that we've looked at so far, which might seem a strange thing to say, because why on earth have we gone through all these other instruments? Well, from a learning point of view, it's very beneficial because I've structure this course so that we go through the simpler instruments first and hopefully as much as possible, build on the foundations of what we've learned before. If we were to dive in strike straight at the beginning of this course into alchemy, it would be a bit too overwhelming. But from a creative standpoint, should you drop back in some of these other instruments? Is alchemy far superior? Well, it really depends on your perspective. If you want one instrument that you completely get to know and you utterly use it all the time for everything, then alchemy is your main instrument. Maybe a bit of sculpture and some of the other ones But if you're more of the kind of person who likes different interfaces, and particularly if you like restricting yourself, then you might want to go back to the other instruments. There's a lot to be said for using instruments that restrict you. In fact, that's a rule for creativity in general. If you pull up an instrument that has insane amounts of choice and detail, like alchemy, sometimes it can be a bit overwhelming, and you find yourself instead of composing, messing around with dials and knobs. And suddenly it's 9 p.m. At night and you haven't written anything. So if you're aware of yourself as a composer and producer that you sometimes get caught in those traps of messing around with things for too long and no actually writing, then I would say, probably go back to the other instrument. However, you feel very disciplined and you want one instrument that you really get to know inside out. Stick with alchemy. So, as I said, alchemy has an insane amount of control and granular detail. You will probably know usual the detail most of the time. In fact, there are many parameters in alchemy that I don't use on a daily basis. In fact, I don't think I ever use apart from just messing around and also creating this tutorial Siris in this video, I'm going to give you a broad overview about alchemy, the interface on the principles behind it. And then in the following videos, we're going to go through all the different sections to help you build up a good picture of how it works. So the first thing to say about alchemy is really that is multiple types of synthesizes. In one, we have a virtual analog engine synth, which is like pretty much all the other synthesizers we've looked at, apart from perhaps maybe the vocoder and the excess 24. That means that the instrument is generating its own way, forms inside the computer to emulate older analog engines. But it's also a sampler, and it's just, if not more extensive than the excess 24 that we looked at. I mentioned that in that video, if you've looked at it that the sampler inside of alchemy is probably a lot better to use. Alchemy also has re synthesis granular synthesis, spectral synthesis, additive synthesis on. Most importantly, you can combine these types of synthesis on mix them together. There are so many parameters here, so let's take a look at the structure of alchemy. Currently, what you're looking at is the scary page. In other words, it's the advanced page. We look here, we have three buttons. We can look at it in three ways simple, which drastically reduces the size off. The interface advanced, which is what we're looking at before. And that basically brings up this darker panel here on the panel that we were looking at in the simple view sort of gets moved down and then we've got the browse view, which is a huge library of preset. You can also store your presets and sort them in a very useful, creative way. And we'll talk all about that in this part, of course. And then up at the top here we have a number of different items which will come to basically global controls and kind of menu items here. So we're gonna start with the browse window. So the whole of this window here this darker window is a way of sorting through essentially this list of items here. Currently, I'm on a sorting menu hit, which basically is hierarchical. If I choose all in each of these columns, it means that in this right hand panel here, I'm looking at every preset that the library hasn't. As you can see, there is a huge amount. If I click on one of these, let's just choose a random one here. Sitar drones. You see that something's loaded, and if I play, wait that we're playing that patch free. Click another one. We hit it up. We're playing another patch. And of course, that's not necessarily your standard synthesizer. In fact, that sounds like a drum loop, and in fact, you'll see in this part of course, that alchemy is pretty extensive, and you can use it as a drum trigger or rather, a loop trigger. So in looking at all of that, it's probably a bit too much. So what the creators of this have done is they've created a sorting system and, as you can see here, weaken sort by category, subcategory genre articulation, newer and older than etcetera, etcetera in these drop down menus here. So essentially, these get combined. So if I click on arpeggio, hated and then base everything, that's in here is arpeggio hated base. So let's try this. And then if I click on, say, brass, the subcategory options change on. We've got the sub categories off brush, which are ensemble solo synthetic. So everything here is synthetic grass. And let's say that this is still too overwhelming for you and your like, you know, that's too many to choose from. Let's look down here and say Okay, well, what genre are we looking at? Okay, we're looking at, Let's say, rock. Is there any rock brass? Let's see what this is like according to the makers of this patch and the sorters of this patch, they think that's a rocky brass sound, so you may not agree with necessarily all of these things. But you have to admit that it's a very useful way off, thinning down the huge and vast library. Now, the functions of these sorting menus, they're actually interchangeable. These last two, and you can see with these drop down menus going actually change. A number of different things will come to use the tags, but that's an incredibly useful way of sorting your library. If you imagine yourself in two years time having used alchemy every day, Andi added. Your own tax and stuff like that. It's gonna become an immensely useful resource. You'll know how to draw on exactly the sounds that you're after, and this is one of the important things that I talk about in this course, and also other courses that are creating the importance of your library. Management is a composer. It sounds about the most boring thing in the world, but in fact it's a very creative thing. You imagine an artist like a painter, right? Imagine if they didn't know where they're paints were or whether brushes were they'd be so ineffective. They spend too much of their time looking for the right stuff, and they might even get too lazy and say, Oh, I can't find that brush or I can't find that particular color So I'll just use this red instead. That's an incredibly bad way to work as an artist. So, really, for us is composers inside of something like logic with logic, instruments like alchemy. Our version of that is really using things like user tag and patch management stuff like that, although it sounds incredibly geeky, so we'll get to that in this course. So that's the browser view, right? And you can set your star rating for these as well. That's another way of managing stuff. So if we try searching for something like bass guitar, that's going to drastically reduce the library and we're gonna have a number of things that have bass guitar in their keywords and will come toe playing it quite high. But apparently that's bass guitar. So all that bass guitar is relevant to that patch is really what that means. So this is the browser window. Then we have the simple view, right? And this is where I'd suggest that you start. If you're messing around with this instrument, essentially, you could think of these as macro controls. There's a lot of things in here that you can do with say, you know, delay cut off resonance volume that make things a lot simpler than diving into the advanced happened. Using all of these buttons here and sub menus. You see, we've got some X Y pads here which basically controlling different effects deeper inside of the instrument again, these are kind of Mac Rose, and then we have our normal envelope controls here in very simple dial settings. The most prominent part of alchemy is this X Y pad, or really the variations of the patch that you've currently got loaded. So if you listen to this patch that we played a second ago currently wrong guitar way. So these are kind of like subtle variations within the patch that have been saved by the people who designed these patches. It's a really, really useful when you can modulate between these, you will see later in the course. So I'm not just switching between these here. I'm blending between different patches on This is where you start to get a bit of an idea about endless variation within alchemy. It's absolutely extraordinary, the endless variation that you can get between patches and we'll see it's a very creative sound design tool. So that's the introductory video. Very brief overview of alchemy. Dive into this simple page and maybe the browse patch page and just start playing around with some sounds. Get an idea for the different sounds that are contained within this library and then dive into the later tutorials where you can really understand how alchemy works
38. Alchemy | Browse & Simple View: So in this video, we're gonna go over the browse and simple views, as I mention in the previous video for browse. What you have is four columns here which allow you to sort this library here. Currently, we're on all which means that we're seeing everything in the entire library, which is a huge amount to sort this down to what you are looking for. You can click on these items. So, for example, lead analog lead. And then we want all of the Ambien analog leagues. And if we want to make it even more specific, we could say all of the analog leads which have a kind of pulsing quality to them. And then there are two and we have the ability player Cities have a pulsing quality toe. Now, these two columns here at the beginning category and subcategory are fixed. You can't change them, but But these two columns you can, and this makes it really powerful for your ability to sort. So you could say, Well, I actually want to sort by the tambra off it. So that's the quality of the sound we want. Let's say we're after really nasty sounds, and we want something that's, um, percussive right? Because of sounds. And maybe we're not sure exactly what type of instrument we want. So we get here load of different stuff. That could be kind of kits. And since vocals leads, it could be anything that these things were in here. But what you notice is some of them are grayed out. And essentially, what that saying is that there are no dirty, bowed, percussive patches, right? It's saying that this doesn't apply so that there are no bowed subcategory instruments in here. So it's quite useful, actually tells you everything that's in here. If you look back and kind of refer to what's great out. So let's choose alien dog affection. Probably the best name in the world for an instrument that's quite freaky. Let's try Age of Steam Kit. So really, really useful library sorting stuff. Here, let me just talk you through the other options. Here we have articulation. As we said, we have genre, which is the genre of music, and we have newer than and older than that's basically when the pact was added to the library. Depending on your settings and what you download, it may well be the same, right? You may have things that let's click all here. Three months, six months, one year, two years? Yes. So everything will probably be in the two years one here because this is the age of the patch. But for example, I have created and I have created a committee completely initialized patch for this course , which means that this was created one month ago. Ah, but there's nothing in one day in one week. But if you create anything, it will appear in here and you can do the opposite. That with older than as well. Sound designer refers to the person who created it and currently because I haven't saved my patch properly, it says Unknown artist, which basically means I am the unknown artist and this is my patch in here. If I had to save my patch properly, as you'll see later in the course, my name will show up here, and if you save your own or you buy patches online or you download any from the course, they will appear properly. So hopefully by the time I got my act together and you downloaded this patch, it will show up in your library is jack phone. So then the last few are sound library on these. Come with a few stock kind of sort things. If you only want to do what Alchemy deems or Apple Dean's as cinematic patches, you can look through there or modern since stuff that's quite useful if you're doing kind of genre related stuff. But you think that they're genre folders orbit limited on, then tambra, which is the quality of the sound. So you have different words here, which describe thin or dark or bright sound. And then finally, we have user tags, which will come to later in the course, which is about managing your library and very effective way, and you have the same one here. So you could have say, for example, genre and genre, which is quite interesting. So you could have down tempo on, then pop, right? So down tempo pop is now what we're looking at, everything that's down tempo, pop, or you could have industrial German base or techno soundtrack right s. So that's a really useful way of combining genres, because sometimes these genres can feel a bit. If you're choosing pop, it's like well, what the hell is Pop? So there's a useful way of browsing your library, As I said before. Also, you have the search feature, which is really useful here. Sometimes it's a bit unclear why things turn up, and that's basically to do with the user tags and keywords in the meta data inside of it. Just be a bit free and tries and things out. You're probably if you're looking for instruments specifically your best to use these. But if you're thinking of other keywords or perhaps name of a patch like that, that dog patch that we found earlier alien dog affection, you can find it straight away. You know, if you're remembering what that patches that you're looking for on, then finally, if you want to edit that patch, that's where you get into this area, which will come to you later in the course. But I'm gonna close that for now, so that's a bit of a deeper view into the browse view. Let's click on this button now. Simple on. We're just gonna talk about the simple view, which, of course, still exists when you're on the other window, whether it's the browse view or the advanced view, it still stays at the bottom. But by clicking on simple What you do is you you reduce the whole screen. And if you notice these options here performed, often effects suddenly disappear then no, on that menu anymore. So we're looking at a simple view on I want to talk about this top bar here. Obviously, we've got the browse simple in advance, which are three views. We then have another way off, moving through the essentially the patches, right? So this is like a mini browse window, and it means that you don't have to open up the browse window. You don't have to change windows so you can click on this button here, and that basically goes through the different libraries, right? We saw earlier that these are the different sound libraries, atmospheric, basic cinematic, etcetera, etcetera. If we go back to simple, that's what we're looking at here. So that's quite useful in you could say, OK, I want I want guitar, cinematic guitars, right? So once we've that doesn't look like anything's happened, but if we go right here, so this is this is searching through the different things we've got arpeggio hated acoustic cascades, which is part off theme cinematic guitars library here on If we collect next, we're gonna get the next one inside of that thing, and that's that's quite useful way of browsing through sounds. Rather than having the huge browse window up and worrying about all the different tags and stuff like that, you can kind of just, you know, our scout coming to find good stuff for you within these different libraries Once you selected one of these, if you click on the actual text itself, you'll get this drop down menu, which is basically kind of view into the browser view here, and you can see all the ones that inside you can actually click ones. So then we have file save and save hours, which basically menu items. If we want to clear the patch and take it back to the original alchemy initialized patch, not my one that have including this course, you'll get back to them on. That will get back to almost a simpler settings as possible. You also have refresh library. Now, this basically means if you're creating your own patches inside of audio music caps like we've seen so far and you've reorganized stuff. You might want to refresh the library that basically gets alchemy to relook at that folder . In any folders. You might have changed the names of stuff, and it's going to go through and do that. Now it's It's quite a long process, so I'm gonna skip the video. Cool, so that's not done. If you click on save with any of your settings at any point in alchemy, you can save your patches and alchemy Patch. Here. It's defaulted to alchemy, which is inside of my plug in settings folder inside of all your music caps. But you can save it anyway you want, so that's quite useful. Then we have safe as right, and that basically works like you would know in, say, a word document or something like that. It will save it as a separate file. So if you are already working on one of your patches and you think hang on, I've created some really cool settings here. I've messed around with my patch. You can save that as a new patch without updating the old patch. Next to that, we have quality, which is basically as it says, the quality off the sound alchemy can use an immense amount of processing power. So if you do notice that you're getting this kind of glitchy sound that really and then your systems having a bit of trouble playing all the patches if you're building up a huge if you're building up a huge patch with lots of different sounds and samples, you might want to pull this down to good or draft. Even sometimes people like to put work in draft or good, and then when they come to print their peace and bounce it down to audio, they put it up in ultra Don't play it, but they hit bounce, and that means that everything is gonna be super high quality. I would, depending on this back of your computer, just working ultra until you have issues on Bring it down. And then finally, we have our volume here, which is defaulted to minus 12 DB because there's four different sources and lots of different powerful noises that go on inside of alchemy. You will want to be referring to this a few times just to pull everything down so that you're not clapping to match, so we're gonna do is I'm gonna load a patch and I'm gonna get back into my brows view. Gonna get something like Let's go. Well, I quite like the guitar stuff. So let's see what was going on with this again. Ambient guitar. Get back to my simple view on we noticed that suddenly are simple View is populated with all of the settings off this patch, and this change is right. So if I click through here, watch what changes on this screen. Not only did these sub patches the kind of variations on the initial Pactual, the main patch, which is high traveler up change. Not only do these change, these effects change, right, so we'll talk about those in a second. So let's go back to that original one that I liked A Z. I said. You can move between him just by moving your mouse, and you can either click on them or you can drag between them, which is quite useful. So alchemy calls these variations on the initial patch snapshots and you can kind of look them is looking at the original patch through a kind of different angle with different effects and processing, and you can see that if you click on this settings icon here, this is the snapshot menu will come to it later when we start saving and managing our own patches and their own snapshots, I'm going to skip past it for now, though, because it's a little complex. This drop down menu here is to do with key switching. If you don't know what key switching is, let me just show you what going to do is I'm gonna play some of the really low notes on my keyboard and you'll see that I'm switching between the snapshots Now. This is a really useful way because you don't want to be stuck on your computer screen, especially if you're playing live. And it's a very nice way to play between the patches. Imagine yourself playing like a cord up high on. Then you may be changed to another instrument or another snapshot. It's quite useful way of doing stuff, and all of that is gonna be registered by your your MIDI, and it will be recorded in this kind of sort of a bit like automation, although it's no automation, so it's a really useful feature on what you'll probably want is to set it on C zero. You noticed I was using C minus one or see negative one. And basically, that is to do with an issue that I have with my computer at the moment. But you probably wanted to set it on Caesar. And then when you play C zero up here, you will actually be playing. If you see again, I'm playing C zero and it's not quite working. You'll be playing these key switches. So if I put that back on C minus one, I'm just going to show you another thing. That's this thing called rate here, and basically that allows you to control how fast or slow the instrument is gonna switch between the patches. If we put this to, say a ah, like a whole note over here, this means that the switch between of these patches is gonna be quite slow. It's gonna take a whole note to move. You hear that? It blends a little bit later on. Let's try that again. And then it changes, right? So that's just makes it a little bit more settled. You can actually make this rhythmical if you do say eighth notes just goes to that next patch over an eighth note. It's quite useful. The mod wheel is where you can control the number of different parameters on the instrument with your model on management. So if we choose control of five, that's going to control this dial here, which is essentially the macro. So 12345 on What we can do is we can dial in the amount of reverb on control of five with the mode. We also have a listen to this. Now push. My model will lawyer up to the top, and that's changing the effect of that river, which is actually changing the mix, not just the size way can also did this with residents and stuff like that. So that's quite useful where you can actually music. We can control any of these macro controls that we have here. Snapshot volume, or Snapple, is basically the volume off that snapshot. They should all especially with the library presets, be fairly controllable on minus five. DB. But if you open up one of these and say it's too loud, you could maybe pull it right down on every time you go back to that snapshot, it's gonna remain at that. That volume that you've set, or if you need to be right a lot louder, you can push it all the way up to is already. You can't unfortunately go higher than that. It needs to change the settings inside of hail, like perhaps the overall volume, and then bring everything else down. So, as I said, Thies change depending on the patch that you have. If we just change the patch now we see that delay and cut off remain, actually. But these other ones changed. Let's try another one and let's try another one. So notice up, sustain here, changed the modulation and pitch as well comes in and harmony and different things like that, which is quite specific to the individual patch. The effects, which are assigned to the X Y pads also change, and this will get into later. But basically these are routed to different effects inside of the advanced view, and you can mess around with them just for now, building different noises depending on the settings before. So what we've got here is we've got the cross fade between A and B on the X axis and the cross fade between CND on the Y axis. You'll understand what that means later when we get into the advanced tab on the X axis. Here we have a Flander on on the Y axis. We have the telephone way. Have our standard enveloped the end attack, decay, sustain and release over here just in simple dial format. So that's the browse and simple view of alchemy. We will come back to elements of this throughout the course so that we can understand things like snapshots more. But we're going to do in the next series of videos is go into the heart of alchemy, which is the advanced tab, and where you build and understand how all the noises are made and start building up your own patches.
39. Alchemy | Advanced Sources View: So this is the advance view, as you've seen so far. And I'm gonna talk you through the hierarchy because it's important to understand things from a broad overview level before we dive into the little bits. There's kind of two panels to this main panel that you see here. The top panel is our source panel, and that's where the sound is coming from. That's the kind of place where we choose what sound we're working with. And it's also the place where we do certain things to it, like filtering and changing the voices. Then we have the panel in the middle, which is our modulation panel. This is where we change the sound over time with various different modulation parameters. So those are the two fundamental ways that we used the advanced view we have of sources on their respective controls. And then we have the modulation off those sources. All this is down here is basically are performed controls and then, as well come to later the AARP educator and the effects. I'm just wanting to you to think about these two windows, particularly this one in this video. So this top window here we can see that there are a number of taps global A, B, C, D and morph. And if you click these the windows change right? What the's are are basically zoomed in views off these four sources here. So we have one oscillator here we have one also later here, here and here. And to zoom into their controls and get way more control over them. We can click on their names or their letters A, B, C and D. So if we go back to the global view, I'm just gonna go over this now for each of these on the global view, we have kind of the most essential controls that we have at the global level. So those most obviously are gonna be volume chiming and pan. But we also have our filter sentence here, and we'll get to that in a minute. When we talk about the filters to actually change each source, what we do is we click on the actual name of whatever sources loaded, and we get the source menu in this part of the course. We're gonna just look at virtual analog wave forms, which is the load veet option here. You can of course, import audio and make it into a sampler instrument and dual the interesting stuff like granular synthesis and stuff like that. For now, just this many. So I chose my sign away from the basic form here, but you can see we have a huge amount off virtual analog way forms here. So by choosing something like, let's say, metallic, too, let's have a listen to that. We really, really changed the sound off the initial wave form, something that might have taken a lot of work in one of the other synthesizes we've actually got already, as our source sound with having done any mangling or affecting to it. If we want to browse through, we can click right and left on. These buttons here is really thick with that one for now, and you can, of course, load and blend different way forms. So let's add in another metallic eight, and I'm gonna tune it up, say, on Active Way, Theo E O E. Okay, so that's quite useful. Being able to do these things here, you can change the volume of these and blend them all together, and you can have four sources at once. when you want to dive in and start understanding mawr of the settings behind each of these , click on the panel. So if we're gonna edit, say, source A, we click on a here Suddenly we get the source view on. We get this menu here, which is talking about all the different methods of initial sound production in the instrument. So here we're on via which means virtual analog. And we're gonna talk just about that In this video, you notice that we have a sampler granular sampler Forman pitch spectral additive, All this other really cool stuff. We're just gonna leave that for now. So we come back over here. We're now on this zoomed in view for source A. We have the same view here. We can open up the source menu here on weaken Solo it. This button here is this stereo button. So depending on the source that you've loaded, you can revert it to mono or put it back to stereo there and this button edit. We're gonna leave for the moment. That's to do with much more complex stuff to do with sampling off the instrument and key tracking things like that going below. What we have is our volume pan course tuning and fine tuning, and you notice that all of these dials pretty much in the entire instrument, have these little lines around them. That's to do with modulation will see later. But the moment you see that this one is blue and that basically means that that's been turned up to that point. It sort of tracks it whenever you see orange, that's to do with modulation. It's kind of roughly the color scheme of this instrument. Underneath we have this button here, which is a weight parameter Thean Owing thing is, yeah, So if you put your mouse over, it disappears. The whatever the the item is disappears and you only see the parameter or the value off what that is. You have to pull your mouse away to see what it is again. And it's sometimes it takes a little while. So wait has to be shown really with two sources. So we're going to do is I'm gonna copy this source and I'm gonna go it on two r b layer on . I'm gonna hit paste on that copies. All of the settings I have on a to be. So if I done any parameter changes and stuff like that, it would it would it would pull that over, which is really useful. So be I'm gonna move up and active. Andi, what going to do is I'm gonna turn on its weight feature to, let's say, a whole bar. Right. So this basically what will happen is we'll get be coming in a bar later. According to my host Tempo, have a listen. So that is saying that basically wait for one bar until this oscillator comes in and you can make nice effect. So if you make it more if you make it faster theme a nice step sound that you get in the instrument. So that's what that buttons for their this drop down menu is our key scale option. Key scaling is basically the pitch of the notes that you play on your keyboard and how it affects the way form. So here we've got key and PB, which basically means if you play any notes on your I'm just gonna turn off. Uh, it's weights. Feature basically means that if you play higher notes on your keyboard, it's gonna play higher notes which is what you'd expect. PB means pitch bend, and that means the pitch wheel is gonna affect the instrument as well. But if you want to turn those off, you can have just keys so that your pitch Ben well doesn't affect it, and you can also turn it off. So it's just oscillation. So if I turn off oscillator A, we just listen to be you can see up here. I'm playing different notes, but it's just the same note in terms of the pitch settings for this instrument. So that would be useful for, say, a drum sample. If you're using that or if you want, say, a noise sound, that doesn't get higher. But basically, I think just keep it on key and pitch bend loop mode. We won't look at now because it's to do with samples. If we look down here, we have our own filters just for the source level. So if we go back to global view, we see that we have filters here and these are the global filters, so that if you look at this kind of like a flow A, B, C and D will go into these filters here and then go out of the master. If we want just filters on one of those, we have three of them that we can use inside off each source. A kind of reasonable question is why so many options here? Well, the reason is because of modulation. Later on, when we look at the modulation section, it's possible to modulate just the filters inside of one off the voices or one of the sources, and then have normal filters for doing something else. For the global sources, it's just a deeper level of control so that you have filters only for each source that you can modulate. So be has its own three filters. C has its own three filters, etcetera, etcetera, so these can either be in Siris or parallel. So Siri's means that you go through felt one first, then to filter to then filter three or parallel means that the signal gets split between how many filters that you have on on. Then output it through the main source volume. I'm gonna put it back to Siri's, going to turn on one of these and talk you through the different options that you have so obviously you have your cut off residents and drive. We've seen these before. Theo. Increase the residents to get more boost out the cut off point on Affect the resonance with Dr Okay, But we have lots of lots of different filters going on here. We have loads of different low pass filters Bam, pass, high pass and then we have loads of other kind. Pretty much effects. We got compresses, bit crushes, mech filters and some other really cool stuff. So it's kind of not really a filter section. I mean, even they call it filled sections kind of a sort of filter and effects section, especially if you're using things like bake crushes and compresses and stuff like that. Usually you just want to use it like that because we have a whole effects section later on in the instrument you're likely to use. But it's there, you know, you can always use it. So I'm gonna skip over this send view here cause it's only really relevant to the filters section which will come to in a minute on. I'm gonna go over to the oscillator controls here. Now, first glance, this section looks exactly the same and you'd be right to an extent if I click right here and get a metallic nine. Metallic nine has updated here. So this is the oscillator, right? But if you click on metallic or rather whatever way form is there, you'll see a slightly different menu. You'll basically be seeing these sub menu of load V A. So this is the only This is only the V a section here that we have control over. We don't have the ability to copy and paste our our source like we do on that menu so we can turn this on and off here, right? But that doesn't change. So what's happening here is we have two parts to the oscillator or to this source. We have the oscillator onda noise part you see here on white, and it has its own drop down menu, and this is the ability to add in extra noise behind whatever oscillator we've chosen. So let's choose something like vinyl. Turn it on and make sure that our cut off is now all the way up further using this low pass filter that we had earlier way vinyl noise going on behind our way from here I'm gonna just change this because I feel like it would work a bit better with maybe just adds in some stuff you can low cut because you can see that that noise has a huge amount of amplitude down at the bottom and the spectrum has come out way. It's kind of weird, nice crackling stuff going on behind it. Let's add in. Try, uh, try normal white noise on it. Just add some more depth to the sound. If you want some more bite or texture to these way forms, you can add in the noise now on its own. It doesn't work so well. It's really a lot better when you start adding in effects. Andi filters Onda also modulation to this. It makes it really, really interesting, especially getting more filter, sweep, sort of stuff. You can add in a bit of white noise and then doing modulated filter sweep. That's a lot more effective because you've got a lot more in the spectrum to actually sweep across. So after the volume level, we have the wave symmetry slider, which basically alters the symmetry of the shape of the oscillator way from depending on what it is So, for example, if a square waves active symmetry is gonna actors like a pulse width control s Oh, yeah, that's it. That's a really useful one there. Phase Norm is quite subtle again. We've covered it in other instruments. It's where you set the oscillators. Start points of the phase of it. It I don't find in this instant makes much of an effect. Eso I tend to leave it sync is where you enable the oscillator sync and set the pitch that the main oscillator is synchronized with. So if you remember from other other tutorials particularly ah, retro synth This is where we can use the sink side of stuff which is really useful thes $2 at the end here, deal with the voices in the amount of unison that we have. So here we just have one voice. I'm just gonna turn off the noise hit. We just have one voice. We can increase that more and more on If I pull the g tuning down, you won't hear anything apart from an increase in amplitude and perhaps a tiny bit of phasing due to the unison. But if we introduce d tuning Teoh get that lovely chorus sound. But as you notice, we're very close to clipping in this. What happens when you add unison voices? So we need to pull down either at the main volume here? Well, probably so smooth. And of course, noise has its own controls down here. Volume tuning, low cut and hike up. The reason why noise has its own kind of filter here really is so that we can separately filter the noise from the oscillator rather than using the filter on both the oscillator and the noise. So that would be so. If we turn this on and we have a listen, way could have say, a really high part of the noise spectrum or the full noise spectrum way could cut out the higher end and just have a low part of the noise. Turn out here and start to see it thing. This is good for blending the sound. If you've got kind of a Spectrum way form, if the become the dominant part of your sound is kind of safe around here, you can blend your your noise to B'more around there because obviously way, just listen to that. That just sounds like noise and away form, which is not really the point of this section. The point of this section is so that you can add kind of interest in depth to the main part of where you're playing your Austin like oscillator. So I would probably for me if I mainly playing in this area. So round Middle c three. Just in my opinion, that's a really good thing to do to keep the you kind of noise based around the fundamental off your of your escalator. So that's an overview of each source. We're going to go in the next video through how filters work both at the source and at the global level.
40. Alchemy | Filters, Sends and Voices: the filters inside of alchemy can be a little bit confusing in terms of their flow or their signal flow. Let me go over these now. So if we zoom into source A, we see that we have this send which I said I'd tell you about later. This is distinct from the filters inside of the source. Thes filters are only relevant here to source a and if I click on be these filters here only relevant to source B. But to the right of it, we have ascend here, and this is our option to send to the global filters. If we move back up, keep your eye on this and and remember the settings we go back to global here and then we look at this one. It's exactly the same. In fact, if I change this, pull it all the way to the left, updates there or if I put it in the middle, updates there on the drop down menu is the same now on F one fx A on dhere f one f x A. So this is the way this works. So what this is saying is that we can send source a After everything that's happened on this source level here, we can send it to filter one or filter, too. That's currently the setting we have here, right? We'll talk about the other drop downs in minute. So I have filter one here with a low pass filter loading into it, and I have filter to here with a high pass filtered into it. I'm gonna turn them both on and at the moment we have this sore. Actually, let me tell them off a second. You can hear the roar signal if I turn it on again There. What you'll hear is that this is going entirely into filter one, so we'll have a low pass on it way and then if we go entirely to fill two way, have okay, so that's basically the flow off each global filter send. And you can do these, of course, with all of the's Right now, this could be done in two modes. You can do parallel or Siri's mode, and that's what this button is here or this dial. So at the moment, it's in parallel mode so that this truly will be when you move from the left to the right. We're moving to filter one or filter to, and if we have it in the middle, you'll be splitting the signal 50% between both filters, so you'll have both a low pass and a high pass. If you have it in serious mode, what will happen is 50% of the signal. After it goes through Filter one will get into filter, too. We can hear this quite significantly if we move over to just feel toe one. We're only hearing filter one, but as I move into Siri's mode, you can hear a tiny bit of the signal from our resident settings on here coming through. So this is where we hear the Siri's side of stuff, and this will become clear later on. If you want to sort of filter out some signals and then put it into another filter, particularly, you're doing modulation. That's quite useful. So after we've sent it to the filters, it's possible for us to send it to effect. And that's what these two dials are here. So if I turn off our filter, too currently, the logic of this is that we are sending this source here to filter one because we've got it all the way to the left Filter one is receiving it on filtering in on. Then we can either just send it to the output, which is currently what's happening here. Or we can send it the whole signal or some of the signal to our FX. Right. And this is where we have down here are effects, right? If we go on two main here, this is what we're sending to. We have FX main. So this is our effects Iraq that we're sending to. We can also send to FX A or FX be and C and D and so on. Right. So maine is kind of a global setting that you might want to use if you're keeping quite simple instrument, whereas if you want some sources toe have certain effects, you might want to use these channels. Here, let me dive into this and kind of explain what I mean. So here let's Ah, on the main channel here. Let's have a delay so we can hear there is a delay being affected. And if I turn this down and I make sure that this button is all the way here currently we can't hear any of the delay. But as I Darla in way here more and more of that main effect. So we've got source a going to filter one, which then gets put through this no pear into the main effects. So let's add another one to make this really obvious. Let's do some distortion. Now we've got nothing. You heard a little sort of glide down there. That was basically the effect cutting out. So we're not sending anything here. If we wanted to send this only to effect a here where we have let's just put a river been here currently we can't hear anything. Even if we push this up, What we're just gonna here is the effects that we have on the main channel. We're not going to hear the effects that we have on a But if we change this now to send to a we're going to start hearing that reverb. So that's the way that that works on the kind of send after the filter here. But if you notice that these drop down menus here have a number of options, so this is where you can send two effects before filters or really instead of filters. So here we have F one fx A, as opposed to F one F two. And this is saying that f one fx a means that we can push this only two fx A. And we can make sure that this sore is not going through any filters. If we don't want any filters, it all on anything we can make sure that they're all off on the source level on DCI's one of these options here, like FX A And this means that bypassing all of this stuff here and going straight to this effects rack here, which we have thing is a bit confusing, perhaps to get your head round initially. But I would just start creating instruments on changing these settings. Andi sort of basically trying to route these things in different ways. So, for example, here f to FX be on. We've currently got this sending to FX be, but we're not gonna hear anything cause we haven't got anything on FX beef. We're just gonna have a dry signal. But if we put on a phaser, we're going to suddenly hear that. Whereas if I have this back on FXC We're not gonna hear that phase there anymore because we're sending it to here. So there's kind of the ability to basically have so many different effects attached to very different sources, Says makes this instrument so extensive. Open up some patches and start messing around with this on kind of sending them to different places. However, I would say Use an initialized patch either the alchemy one on my one that I've added in this course said Things are a bit clearer often when you wrote load up One of these patches from inside of alchemy is Patch library. It's got tons of different sends and effects applied to it, and that's what makes it sound so amazing. But it's also really quite hard to unpick if you're not used to Al Commies kind of hierarchy, so probably would be good to go over the hierarchy just a little bit more conceptually so that you understand this. This is taken from the Logic pro manual, and this is kind of representing the hierarchy in the flow off alchemy. What we have is our sources. We have source A, B, C and D. Currently, we were just working with one of our sources. But you know that we have four of them inside of each source. We have, obviously, are sound source. You can ignore this for the moment. We've just been working with V A. This then goes into our source filters on. Then our filter sends. We weren't using source filters, so it just bypasses source filters and goes in tow filter FX end. And this is what we're doing here. We were either sending to filter one or filter to. And then after that, we can then send two effects. And then after that effects, we go into the output. So try and play around with those instruments. Look at this. Try and understand the flow in it, and then start the video again and we'll talk about the master volume and voices just around up. So after we've done all of those things that are source level and we're happy we have two more controls before we hit output. This is obviously not counting in modulation. We have the master volume. We have Pan course Jenning and fine tuning, which we have been over before. In this course, I'm not gonna go over it, but Pan is quite useful, one that we haven't seen so much in the previous instruments. That's really useful. And we can, of course, modulate all of the's will come to this later. We have our voices as well, so this is quite useful because we have. If you're looking for voices on voice settings inside of the source level, you won't find it. Unfortunately, I mean, you will have control over the unison voices, but in terms of the actual playable voices, that's where you control it here for all levels. So if we want to change all levels, we make sure that we're on all here on. This means that all oscillators are all sources were controlling, and we're changing the settings off. So here we could change all of the the sources to have only one voice thief so I can play chords. Or if we want tohave, say only five nights or three notes in our chords assumes I plot. As soon as I start playing other notes, as you know, it cuts out the lower notes. You can leave this on any setting that you want. One obviously is going to be the style of a kind of a lead sent and you can hear is a tiny bit of licato there just a natural setting from the instrument. You can increase the glide, or you can have re trigger, which re triggers the envelope each time, even though it's still sort of a lo gatto setting. The glide has two options. You have either the rate, which is the percentage. So if the further away the notes are from each other, the longer it will take. Whereas if you set it to a time setting, you can actually just make sure that the all of the notes travel to each other over exactly the same speed. So here I'm going to a really big interval for, and it travels in exactly the same duration as a smaller interval. They all travel to each other over 320.2 milliseconds. That's what that setting is. There you have our pitch bend, obviously, that you can send here for the pitch Well, on this window here, the priority window is basically about are politically settings, so as we just did a second ago, when you play on content and like when you exceed the amount of polyphony that you have. So here we've said the maximum polyphony we are allowed or the maximum out of voices is three. When you exceed that, this is the setting that determines which notes get dropped off. So here, the priority of the newer notes of the oldest notes. So in this case, the lower notes will get dropped off. So way here, all of those low notes dropping off. Whereas if we change this to perhaps the lowest, right, so say we want our low notes to be prioritized when I go up, they are going to remain right. So if you look up in the top part of this in the transport here, you can hear. I'm trying to play higher notes on the instrument, but it's not prioritizing them. It's prioritizing the lowest. We change that to the highest. I'm playing lots of low notes at the bottom of that court just then at the end, and it didn't register them. And then, of course, you can have oldest as well, so that's a really useful one. To be honest, I usually keep it a newest because it kind of makes sense is to the way that you think is your playing. But if you want to change the settings, you can. And of course, as I said, you can do these just on the source level rather than the global level. Okay, so that's an overview of the filters, the sends and the sending to effect, as well as the voice and master volume controls in alchemy. I'll see you guys in the next video.
41. Alchemy | Modulation: So I've brought two of our previous instruments up the GSM and the DSP to illustrate a point about modulation, which is the subject of this video. If you remember in the SM, we started out with very, very simple modulation capabilities the ability to do things like envelopes on our filters on also our volume here on. Then we increase the complexity ever so slightly, and we got a bit more modulation by being able to use OIR Onda the barato inside of the E S P Now in alchemy. What we have is the ability to modulate virtually any parameter in the instrument with many different types of modulation sources. As I said in one of the previous videos, this is our modulation panels, sort of the middle horizontal panel in the middle here. What we have is our assignments here. We'll talk about that in a minute and then our sources here we have a number of different sources. We haven't LFO or multiple effort Ella foes. We have ah, envelope here come toe. Why, that's gotten h in it in a minute and m segue sequencer on a modern map. So lots of lots of different ones we're gonna talk about. The LFO in the H. D. S are in this video. So let me try and explain a little bit about what a assignment is. If we take something very simple like our pan here and we click on it, you notice that this assignments panel changes if I move over to volume, it changes back right. What we have here is a kind of setting. It's showing us the settings of whatever parameter or target that we're clicking on. And you notice I mentioned it in a earlier video that whenever we see orange, the that means that modulation routing is in effect there. So if we click on volume and find out what's going on, we see that there is a modulation going on in our assignments panel here. We won't talk about that just yet. I'm gonna go back over to Pan and I'm gonna click here to turn one of these on. Currently, I haven't actually assigned anything, but what is now happening is we are The incident is listening because we've set up a target to be pan here, right? We can see that our target is Master Pan. No, here is our drop down menu which gives us our source are modulation source. So this is whatever will be affecting our pan And I'm going to go over to LFO on our settings here and choose LFO. Now you notice that says lfo one we can add multiple LF owes will see that in a minute. So now we have our settings, the LFO I'm gonna keep this exactly as it is so that it's just the kind of default stock sine wave setting and I'm gonna play and you'll you'll hear that the panning is moving from left to right. If you've got headphones on hopes. Okay, I'm on the rolling instrument. Let's get back to alchemy Here you can hear that it's moving left and right. If I turn it off nothing happening on, I can increase the depth of that. So if we want a very subtle pan, that's what's going on there. Say we wanted Teoh give a tiny vibrato as well. Let's go to fine tuning. We click on that knob. What that does is it brings up our modulation assignments Panel here will do the same thing will choose LFO one for the moment on that turns it on automatically and will make sure that our depth is kind of reasonably low so that we get kind of subtle barato here. Now if we want to increase the depth, watch what happens if I push this up? Watch the orange extent here. The extent of the orange part of the modulation this is showing. It's a very useful representation of which we haven't seen in other instruments of how how extreme are deficit's. You see that now that that white dot which moves left and right, the rate right down. So it's quite a long way can see that it has mawr space to move in a way we can reduce the space that that white modulation could be moving around. Okay, I'm gonna put that back back up to 1/4 notes. So what we've done there is We've routed Theo lfo one which we've set up here so that it's affecting both the pan on the fine tuning now say we don't like to say we want to keep the pan as it is. I'm just gonna turn this off a second. So say we like that frequency or that rate of the pan. It's kind of nice quarter note sort of thing. We're liking that on that We actually want a faster vibrato. For some reason, what we can do is instead of routing it to LFO one, we can create a new LFO like this New LFO Now, that number there changed me. Just show you that again. So we're on l f a one here, let's move it to LFO two We created one and that changes So we're now controlling lfo two. This looks exactly the same but we're actually controlling a second LFO. So if I change this to a square wave are modulation is gonna be a the modulation of the pitcher is gonna be controlled by a square way you can You can hear that if I think they're so we've got two telephones, we've got one LFO, which is a sine wave, and it's affecting our pan. And then we've got a square lfo and that's, uh let's make it a different rate as well. Let's make it a bit faster. Thief Better silly sound, But you can see the logic off it now I'm going to initialize the patch again. I'm gonna clear it here. Actually, I'm gonna initialize it is my own default. So I just got my normal sine wave there. Now. What you notice is that I've still got some modulation going on, even though I've gone back to my what I think is the most simple version off alchemy. Ah, an initialized patch. You still have a tiny bit of modulation going on on. This is because we have tohave an envelope to be able to control the volume you notice here . What we have is the HDs. That's basically if you think of that, is just for the moment a DSR we'll talk about what h means. If you think of that is just the normal envelope, we have to have that on to be able to control the volume. If we turn it off and I play a key, listen to what happens. I'm not holding the key anymore. And the sound is just still going. I can't I can't stop that note. I can. I can add more notes or or just stack other notes on top of each other. But they didn't stop until I turn it back on again. And that's basically because We have to have some kind of modulations quite logical here to be able to control when the no ends. If we don't have it on, it's just gonna keep going. That's the logic of the way that it works. So never, really. You never really want to get rid of the HDs are, um, modulation on a source on volume, but you can stack things on it and around it, but keep it going, keep it going the whole time, you know, so we don't have a depth on it because it's because of this envelope setting. So that's the basics of how these routings work we're going to do now is going to dive into the settings of the LFO, and then the A H D s are so to illustrate the LFO modulation inside us instrument. I'm going to do our trusty thing and modulate pitch, so it comes incredibly obvious again. It's not necessarily always the musical setting, but it gives you a very clear idea about how things work, so to set up our modulation routing or our assignment. What I do is I make sure that I've clicked on the parameter that I want to modulate here. It's on our court on our fine tuning and our modulation assignments Window is is set to that. We can see Master tune. Fine is our target and then we turn on LFO one and that's what we're working on at the moment you can have quite a lot of elephants at this instrument, but for the moment, we're just gonna stick with one. So our depth automatically is all the way up to the top. You can turn it all the way down so that you effectively turn off the modulation. Here, let me just reset that 20 You can also turn into the negative, which basically turns the turns it backwards. So if I play a note, you'll hear that That's no active on def. We want less of an obvious or subtle thing. We basically changed the range here. Now, what we could do is say we want a small range, but we don't want it to start here. We want it to be up here. You notice now that we're gonna be modulating around this part or if we wanted to modulate around here. So we're modulating here, but only wherever my settings are This would be quite useful, say, if we were modulating the resonance or the cut off point off a filter, but we only wanted it to modulate around a certain area of the frequency. So let's actually look at that. Now. What you need is I'm gonna turn this off here, and I'm gonna go over to my cut off and make sure that my settings are right here. Yeah, that's all good. That's working. So because I've selected this wheel now, we've now got our target selected in the modulation assignments Window filter at one cut off. And we know that this is working because of our filter settings earlier. We're currently listening to filter one. Make sure that it's not one filter to like that, because you just be listening to filter, too. So we're on. We're on the right settings here. Let's try and do that. But let's try and modulate just in a small range. Rather than doing a huge filter sweep like this, let's try and modulate within LFO just in a small range. I'll show you how you do that. So you get just a little just a little sound that maybe even we could pull in a bit of a while. Let's try and do that with a modulation. So what I do is I have selected this wheel. This means that we've got this here. We select LFO one and we've got the rate set up. So you see now, however, we've got a huge modulation range, so you'll see that the white dot when it illustrates how far it's modulating will be going around the whole of this orange part of the circle, right? Let's say we think that's too wide. We don't want that much. We just want a little subtlety. We just pulled the depth down and you watch the orange part of that circle move to a smaller range. And now we're gonna modulate just around that part the frequency spectrum, maybe even less so. That's a really, really subtle bit of modulation that's going on in there, and we can change the rate and stuff like that. So that's how that works in terms of the depth and also the where you are on the actual value of the dial. Let's talk now let's go back to the tune settings here and let's go on turn that back on again and let's talk about all the settings that we have on in here. So file is where you can actually save and load presets. Let's try one of these. Let's try ramp down eight BTS. See what that does. So that creates basically a different shape here and a different load of setting. So you're sync settings as well as turn it on again. Theo Way could change another one. Let's try ramp up. That's obviously going to the same way. Theo. The's sound ridiculous with tuning on course chaining, but obviously it's gonna make really interesting, different shapes and textures with your routings on things like your filters and other parameters. So this is These are the presets that you have in here and you can actually save your own. So if we would say that we want thes settings here, Theo Okay, so let's say we like those settings. No, obviously the sound, but the actual settings of them, what we can do is we can save it, and then we get in this pop up menu here, which is basically in our audio music caps, which is where everything works in them in in terms of logic, respect about this before. So this is ah, lfo settings within alchemy. And we could call this. Ah, and then we've got that. So let's, uh, recall the default patch and then let's say Oh, yeah, I know that I want to use that one that I've used quite a lot. And then you have it right there fast telephone with delay and you consign it to chaining. I think you have it back. Obviously, with your your settings with, you need to change your way from to make it sound exactly the same as what we had a second ago. But that's how you save your LFO settings now, as you saw just then, what we have is a number of different wave forms for our low frequency oscillators. We have a kind of basic stuff that you've seen instants before, but you have some really, really interesting sounds. So we're gonna do is I'm gonna change the sound here to be a square wave on. I'm going, Teoh Clear. This s so we're back to our normal settings. I'm going to show you some of the other stuff. So listen to this one Theo. There's a lot of different ones in here, and these can create some really, really good effects. Obviously when we're not on tuning again, guys, this will sound a bit weird. I know. So Trigger relates to whether you're controlling all of the notes separately with separate telephone. So we can make this really obvious here if we go back to basics sine wave and we make the rate really, really slow turn off sync theme moving at different times. Whereas if we put trigger off, it means that they will move at the same time, regardless of when you press the nose thing, which is slightly more musical when you're playing chords the controls to the right here basically control number of things to do with the LFO and how it behaves. So the 1st 1 here is delay and this is where we can delay the effect off the off the LFO to be coming in a bit later. So let here it's gonna come in after two seconds, and that's the way that that works there. Or we can blend it in. This is where attack it. So if you imagine the attack of an envelope instead of delaying. Now it'll take two seconds to blend in so you'll start to slowly here the effect of it. Let's try that one more time. T take even longer here. So there's been more obvious and on. And then you finally have the full effect of it. After 7.6 seconds, you can also, if you re around the would rewind the video, see the effect of it on there if you didn't look at it already. So phase is where it begins in the cycle. If you listen to the sort of effect of this elephant at the moment it starts at the bottom and goes up each time I play. That's because we're on this one this on trigger setting. But I can change that if I put it up to 50% to start the other way. E Okay, So depending on the way form that you have in here, you can change the phase of it and make it started at a different point if you want. And then, as I said, the rate setting you have here and you can have this there's a sink. What ah, rate setting, where you have actual musical values or you can just have hurt, Which is which is the standard setting for LFO is that you've seen so far also so far you've been used to looking at what's called a bipolar LFO which basically goes above and below this central line here. Now, if I turn this off here by uncheck ing the blue bipolar button, watch what happens to the orange part of this modulation it harms and we only get the top half. So with this with tuning in effect, that basically means that we're only going upwards in shooting from thesis Entra point. Whereas if we put it back, it's gonna go up on down below. The central point through this can be quite useful. Depending on your settings. Just know that that's there. So that is the LFO settings. Let's go on to the H. D s are and explain what that is now. So as I mentioned before the 80 s are in, this instrument is automatically on pretty much every patch got one routing, which is the master volume toe, have the normal envelope and if you turn this off, it really messes things up. So just leave this on. For the moment, you can add many, many other envelopes, the different settings within the instrument. But you want to keep that last modulation on this, that it works properly. So currently we have our attacks. At 0.1 seconds, we move this out, we can see it moving visually above. We have our decay set here. We can make this much shorter. So it's only a few seconds. We can bring down the level of our sustain, and then we can also bring out the release point or make it even shorter. So this, you know, by now the effects of this and you can play around with this. But you can actually control these by moving them on here, which is really, really useful now what I did there is I pulled on this point and suddenly a new one has appeared right. And this is where the H comes in. So we have another thing between attack and decay. We have a hold setting, so that allows us to hold the sound before we enter the decay phase. So if we have a decay phase that goes down here instead of instead of immediately from the attack going into the decay phase we can have. It's almost like a secondary sustained face, so this is probably bit long. We need to make this a bit longer here and it took a bit longer and now we're in our sustained face. So it's almost like we had a higher, longer hold point before we go into a sustained phase which is actually here. And then when I let go, if I create a really long release, that's what I love about this instrument you can actually play. This isn't re trigger from the start each time you can. Actually, after you've played a note, change the settings and it will do it. So now we have a really long release. Where is when I started playing that night? We had a really short release. It's quite useful. So this is the H. D. S R. And that's how it works in here. It's actually a lot more logical to have a hate involved in the process rather than just that a D s are. I like it a lot on. As with the LFO, what you can do is you can add presets, right? So reverse along or pluck. That's at pluck. This is really I love this. This is so useful to have these presets, innit? Thang eyes. You can have something like Cinespace. Theo didn't sound like a synth bass, obviously, but it's the envelope for over off what the instrument deems a synth bass on the low. So we have the same idea of triggers, right, and we can also sink this to the beat clock. Now this is really interesting. We can have an envelope and you'll see also when we get to M SEC sequence wherein Lord map that we can sink these as well. We can have an envelope that sink to the beat clock just, really, really useful. So instead of having time here, what we have in musical values for the ones that you can change the time off. So now we have an attack of 1 16 so you can dive in and get really, really detailed about how you want your instrument sound. So if you're playing very, very, Kwan ties, the music where everything is is not necessarily really free, it's it's really defined, and to the to the grid, you might want to play around with the settings quite useful. So as with the LFO, we have multiple ones so we can assign many, many different ones. So let's assign new eight H. D s are to perhaps our filter a classic example. I'm gonna reset this to the default on. I'm going to go over to my filter here and now we have a modulation assignment ready to go here. You turn this on and I'm gonna put it to R A. H D s are envelope, but I don't want this one because I want to change the settings a bit. So new HDs are now Currently it looks like nothing's happening. And that's cause we've got our cut off to the maximum settings here. What we want is probably to pull it down a bit, obviously increase our attack thay So we've got to HDs ours going on when we put the global one, which is the global volume which means that we're hearing the sound straight away We go back to our ah modulation for the hcs are which is on the global volume. We're hearing the sound straight away but the filter is being modulated by the second HDs are to come in a bit later way. Make this even longer here. So it's like five seconds. We hear how sound straight away. But then, over the course of this envelope, we're opening up the cut off of the low pass filter over here. So that's the way that the HDs our works and you can add many of these theatrical limit to how many of these modulations you can put into the assignments window is 11 I believe. Let me just show you now. So I've made this patch. It's not a musical patch, but you can see here that what we've got is 11 LF owes on one thing here. So we've got all of them. That's the limit here so we can cycle through 11 of thumb, which is more than enough, and I think it's in pretty sure it's the same for the envelopes and then also the M second sequences as well. So a huge amount of variation in our modulation settings that we can do now the other thing . That's really cool, because when you start using this for the first time, and especially if you're trying to understand complex patches that you haven't created what's really really useful is you can show the target. So let me show you what I mean. So let's say we assign the tuning. I'm just going to do this arbitrarily. Also to the second envelope on Let's also signed the pan to the second envelope on Let's also I'm just doing is completely randomly here and then the volume of oscillator de Teoh is well, so we've got a number of things now being modulated by HDs are, too. And if I now click on show target that will show us all the different things that are being modulated by a HDs are right. And if we have LFO as active as well, let's have one of these affecting. Ah, Dr Again guys really random on musical examples here. Now, when we click show target, we can see all of the different targets that we've got in our modulation settings here. So it's saying that the HDs are one is modulating the master volume and then we've got all of these settings for a HDs are two on volume Dheepan see tune Cosby filter one cut off on save the Elephants. So that's a really useful setting. If you have been upset thinking you're like, What the hell is going on here? There's so much modulation. I don't understand it. Just click on show target and you'll understand it there. Okay, cool. So that's an overview off the modulation section and also the LFO and HDs our parts. In the next video, we're gonna go over the M sex sequencer and mod map and how those work
42. Alchemy | MSEG: So the M sec is really an envelope. That's the best way to think about it. But it's one way you can create multiple points. If you watch the es two tutorial Siri's you'll know that we created with the vector envelope envelopes, which had lots and lots of different points on them and could also loop. M sec is basically the same thing, and it stands for multi segment envelope generator. So what I'm gonna do is I'm gonna leave the current envelope. As I said on on volume. You need that all the time. But I'm also gonna route volume to a new M sec. So here we are, is the M sec. So I'm gonna pull this down here, and then I'm gonna pull it up a bit. So we've got a normal volume envelope, and you can see that what I'm doing is I'm clicking on these parts of the line to create new points we don't have like in the HDs are these kind of dials down at the bottom because you can theoretically have as many points as you want. You see here I'm just clicking wherever and actually what I can do is I can keep clicking out here and extend it even further. So this is a massive envelope and you can just keep going. I have just kept going before. I'm not actually sure, and I can't really be bothered to try to find out. But let's see what happens here. Now we're sustaining here because this is our sustained point and also our loop point, which is quite useful. So if you have a need to zoom out again, you pull these bars down at the bottom and I'm gonna pull this across. So that sustained point when these two lines it together, that means it's a sustained point. And then when I let go, were in a lip release point so we can actually make a very complex release point here. And then I like it, actually, because we haven't got much sustain on the main envelope. What we need to do is pull that out or sorry much release me that really long released on the main envelope. And then we'll hear this M sec release. Yeah, so that's the M sec. It's saying that you can draw load yourself. I'm just gonna clear this. I'm going to get back to what we know. We have to start again from scratch. And what I'm just going to show you now is what you can do. You can curve the lines in between the points so you can get this nice kind of shaping going on in between your actual your points and you'll see this in some of the presets. Z, that is not just a linear scale between them that you actually can get logarithmic and exponential curves going on in here. So before we get into the settings, what could this actually be used for? Well, I mean, I said probably that your most of your insurance in terms of their volume envelopes are gonna be fine with a normal volume overload like this. M sec has really used for really interesting sort of modulation sounds. So I'm gonna denies I'm gonna create a little an example ongoing Fast forward the video. Okay, cool. So what I've got here is I've got some crazy, uh, m sec envelope that I've created, and I've ratted it. Teoh the cut off, modulate the cutter frequency. Really, really simple idea. But just the very fact that this is quite complex shape. It makes it kind of just a lot more interesting. It's already pretty interesting. The other thing that I forgot to mention in one of the previous videos is about this smoothing factor. So whatever you're routing. So say, here, we've got our filter cut off. What I've done here is I've added in a tiny bit of smoothing just 13%. If I take that off, listen to what it sounds like, right? Why I'd actually have to do is draw in these kind of curves here that we should. You have to do just a second ago. But it's actually quite hard to do so. Instead, if I basically acts in the same way, it makes it a lot smoother, which is really, really cool. So that's kind of what I'm Sector four. Let's go through the settings. I'm just gonna clear this back to the patch that we had before, so it's a bit clearer. So going from the top, we have our selection, so if we have multiple M sex, we can switch between them here. This is our farm. Anywhere we can explore the presets that we have in here, let's load up one of these eight steps up. So that's affecting our volume at the moment s rest of volume, and it's kind of increasing it slowly trigger you hopefully remember from before. Basically, that means that if we have it off, it's gonna be a mono phonic envelope. So is that all of the notes are gonna follow the same stage. They're going to be following this line here wherever we play in the process. So here they're all quiet. And then here, whatever I add to the court, it gets louder if I put it on. It's essentially a polyphonic envelope so that each note that I press will successively get its own version of this m segue. So that wants rising. Then I had another note that will rise as well. You could watch this on the channel EQ. You actually, and you'll see this usually represented We owe a lot rising up in their own time according to when I press the note. Whereas if I put this back on trigger, they all arise or sorry, if I put this back on off that we're gonna rise at the same time, regardless of when I pressed the Sync button essentially creates a sink feature to this so that you can synch it with your beat clock. We still that earlier snap. Why is the ability to snap on the vertical axis? So you see here I can move this point anywhere I want from syrups and up to 100%. But if I change this net y to say four or rather 4/4 I only have four points that I can use on the thing. If I move this to half their only two points I can use or other two points above the bottom and etcetera, etcetera. So that's what snap wires usually probably want it off so that you can create more expressive ones. But if you're wanting a real kind of a love, these to be kind of locked to a sort of grid of volume, almost like quanta izing the volume levels and you can turn on snap Why? And you can pull these back down, too, so that these two are now exactly the same here. So if you remember from our yes to Siri's, we spoke about the loot modes in the vector envelope. This is a similar things. We have here of Load up a new M sec here to make this a bit clearer. So I've got my to loot modes here or my to loop guides here like and I can pull their extent left and right. If I put them together, I create a sustained point. So at the moment, look, motors off. If I turn it on, we're gonna loop around this area after we hit it. So we're just going round and round until I let go. And then in the release phase, you'll hear that return this to sustain and then pull list to be together were then get a sustained just on that point on, then if I also put it in forward and back, it's gonna go forward on back. It should be doing it anyway. But I didn't change it every day. If I change it to Fordham back, you'll see that the line is now moving forward and backwards actually doesn't change the sound of it too much because of my because my setting here but if I change it forward and back is very different to continuous. Where you get that stepwise movement edit mode is to is referring to basically what happens how when you move these points. So, for example, if I move from, just turn this off here eso it stops moving around in front of us. This basically, if I move this point up and down left and right, Yeah, we've got this snapping to the grid, but it's not affecting any of the other points right there, independent of each other. Whereas if I change this to slide and I start moving these points, the other points are gonna move accordingly. Right? So these are sliding along to the right, the ones that left unaffected. It's always to the right, the ones afterwards. If I hit stretch instead of that, what's gonna happen if I move? This point here is thes thes. They're gonna stretch to the left and squeeze to the right. That's our created. That glitchy kind of cut off modulation we did a second ago is using stretch and just moving stuff around so that you that you get that kind of crushed sound or crushed kind of modulation toward the end of the pattern. So that's M sec. In the next video, we're gonna go over the sequence er and the modern map
43. Alchemy | Sequencer: we saw in the last video that we can create quite rhythmical content with the M sec, especially when we sink it to the beat clock. You can also of course, do this with the LFO. But the sequencer allows us to create incredibly precise rhythm called content in our modulations. Now, if you're looking this interface here and you've seen in ARP educator before, whether it's logics are paid educator or the AARP educator which is built into alchemy, you'll see that they're very, very similar on the principle is kind of a very, very similar, but not entirely. The difference is is that we primarily used this part off three instrument the sequencer to modulate sources, whereas the arpeggio later is usually something that we use to up Heggie eight notes in different ways. So before we dive into the controls, I'm just gonna give you a quick example if you've never heard this before, so I'm going to set up a stock modulation target to be our secret. Sir, Cut off. Pull this down so that we have a large extent modulation. Make sure my depths up on. I'm gonna just play a note first. You hear that We're kind of gating a little bit between these steps in and we're on this. We're moving through here. You can actually change these values here so that the lower ones more mean that we're we're less were less open on our cut off thing. These higher parameters here is when we open up throughout, cut up. So this is this is currently set to modulate the cut off the opening and the closing of that cut off. We can change different premises like gate here and control exactly what goes on. And you can make things in any pattern you really like. So you can see the potential of this really, really useful tool. I'm gonna reset this. And this is where our fireman you comes in. So I'm gonna clear and it'll go back to our standard one. As with all of the modulations that we've seen so far Lfo HDs on em said we have multiple versions and we're currently looking at sequence of one. We can, of course, creates a new sequence served by going here and creating a new sequence around and you on a new routing. So, as I said, we have a farm in here on a few presets, which is useful, but you can create your own as well. There's a number of other things here, like copy paste and clear, but also randomize, which is really, really useful. So that's actually not randomize that much. Let's try that again. So they dio. So if you're looking kind of for around and quality, you can, you can do that as well. The sequence. It also has the ability to read MIDI files and extract certain data like Velocity Groove Note. So basically, that allows these files to generate their own kind of sequence of settings based on something that you've perhaps played or that you've downloaded from the Internet, which is just a MIDI file. The benefit for this is, of course, kind of. If you've actually played something in on a keyboard, it's gonna have kind of a more human inflection, and that's gonna be represented inside of the sequence of. To be honest, I've never used this. This is one of those parameters that I don't just don't find useful, because if I want Teoh do that, I'll probably if I want something sounding human, I'll go in and edit the values a little bit myself to make it more human. But it's kind of a weird idea, having a sequence of its more human because really, a sequence of by nature in some ways is not human in its musical output. It sounds much more, much more randomized. I would probably leave it if I were you, but it's here if you need it. So we have the same trigger idea here where we can trigger either notes separately. So if I make this really obvious so you can hear that they're out phase with each other. So one of them starting when the other one's sort of finishing the first. So if I put this into off, they're gonna always start at the same time, regardless of when I play the notes that your planet now on now on now always gonna open up together now. One of the things I didn't mention in the last videos is thesis thing on this menu here, which is voice on effects off. Basically, this was a new release in 10.3 point two of logic, and it basically allows effects parameters to be re triggered on all midi notes. So this is the same as on. But it also means that the effects parameters are gonna be re triggered on every many note that you play underneath that we have our rates. So currently we're on 16th notes. If I reset this back here and I play with my mention him, I could change this to eight notes. Now, of course, this is sink to your beat clock, which is really useful. But if I play this note, which is currently on 1/4 note off the B, it's gonna continue off the be. So it's no, it's not gonna wait until the next be so it's not gonna latch to the structure of whatever I've put here. It's actually gonna play quarter notes, but in the tempo that were on, So let me just play and you can hear this. So I'm gonna play off the beat first, and now we've got a triggering, which is happening off the beat. So you have to make sure that you Kwan ties your notes even when you're using the sequence . If you want that effect, the arpeggio later, I think, is probably different. But we'll come to that in a minute value snap is similar to when we had on the M sec here, we could snap toe r Y position. So what we did is we said, you know, we can only have two points that we can use. We can't go in between them. That's always gonna snap. We get back to the sequence here, we can add our own. Right. So here, let's have quarter. And that means that we only have four ones. Weaken Dio. That means that everything is gonna be a lot cleaner. So if you wanted everything to be strong like that in the middle, the other thing that I don't know what I mentioned before with that is that once you then turn it off, you can then change them exactly as you want. So it's if you're say, there's a certain section where you want everything to be totally equal and for some reason you can't. You can't make it equal. You can turn it on like this, get perfect and then and then turn it off and do something a bit more expressive afterwards . Like that. So then we have our edit mode, which is basically between three different options you have value, length and swing value is the mode that you've seen so far. But you can actually change the length off these notes. So if I change these to be much shorter, it's actually gonna open up and close much quicker, because the basically we're changing the length of this modulation. Whereas if we wanted to be open for longer way can change that there. So that's the length of the modulation on each on each step. And then swing is basically you can swing up or down all that, although to the left in the right, if you're thinking horizontally through, so that's not the best way to do it. Obviously, I'm just gonna reset that. So that's a slightly more realistic way to do swing here in that you have some notes, which are swung more heavily and some swung less heavily. So it's a real riel super control over your swing parameters here, and also you can swing notes that aren't usually swung like the first note of the on beat, which is a bit strange as well. So that's that's what thats for. I'm just gonna clear that, but of course you have a global control over your swing here, which is probably the better one to use if you're just thinking kind of simply about it through. This is quite a subtle sorry. This is quite powerful Dial here, so that's not really swung. That's just over so on. You can hear that. It's so they're so close to each other that they're overlapping. So kind of standard swing or light swing would be here Strongest wing superstrong swing. And then we're basically overlapping the notes. We put it up to 100% basically that they're back in alignment with each other. So instead of 16th notes, we have eight notes, so I'm gonna pull it back down. So they were back in straight again. Attack is similar to smoothing, right? If you listen to the difference is I pull us in going to smooth the attack of the note here . We've got a real kind of strong attack at the beginning of the note, but we can smooth it out so we almost don't hear it. And it's more just a kind of slow, pulsing or no settle pulsing thing. In earlier versions of alchemy. This button here or this dial wasn't gate, it was sustained. Basically, gate creates a longer or shorter version of, you know, if you have a listen to this, be like a global way off doing length. So if we make them all really short here, But obviously if you have them both down at the same time, you hear absolutely nothing. So I'm gonna reset this and I'm gonna get back to value so you can see that these are kind of more global controls where if you want real specific controls over it, you can go into the edit mode and edit, say, one of your steps in the sequencer. So releases standard in here. We're letting go off the modulation of it later there, so you can double that in as well. So the other thing as well is that you can control how long this is here, which is really, really useful. So, actually, if you want to keep things simple and you just want a just a four note pattern where one's higher ones lower one Taiwan's like you could just keep that that's quite useful. And then the last thing is that we can tie notes together. So currently We're just on 16th notes here. But we could have say, Let me just get this back toe setting here. We could have say, you know, 4/16 notes and then a whole note on, then 1/4 note. And then, uh, sorry to 16th and then 1/4. And then, you know, let's say another whole note on what that does. Is it ties? Thes notes together? If you don't know what I'm talking about, don't worry about it too much. Just play around with it. You'll understand. I'm trying to explain it. Really? Anyone who understands a little bit about music theory. Cool. So that is the sequence it in the next video, we're gonna go over the model from what that's about.
44. Alchemy | Mod Map: the mod map is a secondary modulation source. What does that mean? Well, what we have in our previous examples, what we've been doing is we've been modulating the cut off or pitch to make it quite obvious. So I'm gonna turn off on the sign lfo to modulate our cut off when we get that classic sound that we've heard before Way. Okay, so my own LFO settings Let's say I'm happy with them roughly, but let's say that I want to kind of modify the behavior of it cause the LFO currently just does This shape doesn't it just goes up and I don't have the ability to modern move stuff here. So yes, I could create my own m sec and stuff like that, but maybe, Maybe maybe there's an easier way, right? Modern. It basically adapts the behavior off an initial modulation and you find it here, You actually assign it here. So this is just to the right of our modulation routing. We have a secondary modulation source which we can choose the mod maps so we can choose Mob Matt one. And currently then we have marred map one affecting LFO one, which is then affecting cut off. Really, the best way to explain this rather than me rambling on, is to actually show you an example. So we're going to do is I'm gonna make this a lot more con cave this thesis slope here and listen to the difference. So this was our original setting. So our modulation is gonna make this a bit slower here if we're gonna make this, uh, tha basically, the speed of this modulation is going round on background back exactly the same speed. There's no change in speed as we're going around this circle. However, listen to it now. We've made it incredibly fast at the open end right now. Let's do the opposite. We've now made it incredibly fast at the closed end. So this is what's going on here. We're changing the effect off the actual modulation. You may remember from previous videos Thea bility in certain instruments to change how much D velocity affected the actual instrument. In other words, how hard you played and how soft he played and how that actually affected the instrument so we could turn it off so that even if you're playing softly, the instrument would play loudly on vice A versa. So what I'm gonna do is I'm actually gonna set that up. That's essentially kind of Ahmad map. Really? That's what the more map does. But it does it with not just velocity with kind of any parameter that you want. Let's look at it with velocity. So what I'm gonna do is only the delicious modulation here. So we've just got a normal sound. Open up the cut off and I'm gonna go toe master volume here, and I'm gonna turn on velocity as a, uh as a modulation. So currently we have what we created those we said that the lost city. So now the modulation is listening to the lost city and its modulating the master volume According to how much we play, we want to turn that off. We can pull the depth down to basically zero now all notes of the same volume. And now my softness had really soft in my lab. Let's are back up now. We can modulate this as a secondary with the secondary modulation source with armada map. So let's go to our mod Matt now. So if I pull this right down, so it's con cave. It means that I'm gonna have to play incredibly hard on my keyboard here to get the louder notes. You just hear it there. I'm playing incredibly hard, and then you're hardly hearing anything. Conversely, if we put this like this and you look at my velocity here on playing incredibly softly, that was a one there on 17. Easy, usually incredibly quiet. If they If we pull this back to a standard mom upsetting, I play those volume levels again. You can't hear anything. So if you want to control the velocity side of things on your instrument, you won't find it in a standard place on this instrument. That's what makes it quite a logical and a fairly advanced instrument. You actually have to set this up yourself. You won't find it in the voices or the master settings. There's no velocity setting a such you have to actually create it as a modulation routing. So that's what the mod Matt does. It's a bit like smoothing in some ways, but what you'll notice is you can actually create multiple points, which is a bit crazy. So I could say that Okay, well, this part of my velocity so that earlier lower parts of my velocity there really loud. But then when I start getting middle of the range when I'm playing in the middle of my velocities, it's really quiet on. Then it gets allowed again. Which, of course, is not necessarily a useful thing to do. But this This sort of thing becomes really, really handy when we start playing around with other things like L F O s. So it's a secondary model, it modulation source, so it just adds even more depth and control to your modulations.
45. Alchemy | Arpeggiator: So alchemy comes with its own arpeggio later, which is similar to the step sequencer. Except that this time we're gonna be controlling the notes rather than the modulation. If you're not familiar with that, what an arpeggio gator is. Basically, it derives from the word arpeggio, which is, if you take a cord like this chord here and you break it up, that's an arpeggio. Classically, but an arpeggio doesn't necessarily have to be a very simple court like that. It could be that would be breaking up Accord. And that's what our Peggy ate. It does. There's some really interesting stuff, so let me just show you a quick example, and then we'll dive into the details. I'm just gonna hold down this chord here, and the upper JT's gonna do loads of the work for me. It's a really, really cool tool there. Let me just reset it back to our default and you can see that the apogee it is moving along here, which is really useful. It's got the same kind of step thing that we have going on here, and we can change stuff just like we had in the sequencer. So the first thing to know is that we need to actually turn it on. This dial here actually is the on switch. Currently, it's on off, which is what most of the incidents default to. Endless. It's one of the AARP educated patches. So the first mode that we come to his mode up, and that means that we're gonna be going up through whatever cord that I play. So if I play three notes that spaced far apart here, so it's gonna be going up through that chord wherever is always going from the bottom upwards and then swapping back down to the booth, we bring this down a little bit so it's less harsh on our ears. The next mode is down, which is obviously the opposite, and there are lots of other modes in here. They're quite useful, like up. And now, as played means which ever note that you play first will be the first note that it hears so I could start with one night, and then it will go down to the next one on down to the next one. But then, if I play a higher one, that will be the last one. So the order is the order that you played the notes and that's the hierarchy of it. There's a random one which is also quite useful. So that just continually changes the passing without you having to change anything here in the settings, which is quite useful. And then the final one is a chord mode. So for these tutorials, I'm gonna keep this on mode up because that's the classic arpeggio hater setting. Now, what you see here is the ability to control which voices air affected by the arpeggio. Currently, it will default to affecting all voices, so all of them will go through the arpeggio later. But if we go to a we're gonna get, we need to turn this back on again. We can hear that oscillator B is not affected, but also later A is. And that's quite useful if you just want add in some different stuff within the texture. So I'm gonna keep this on all again. Next to that we have sink and this is sinking to the beat clock. So if we play, I thought if I pull this right down to a really slow, it's gonna follow the tempo of that next to that. We have key trigger. Now, this is really important when you're thinking about sequencing and arpeggio later. So on basically means that wherever we are just gonna pull the tempo down again. Actually. So here were quite slow. Onda, we are on the 16th notes. I believe you will come to that in a minute. You hear their I'm slightly out because I pressed my note ever so slightly off the beat. If I try and it really obviously we're no in sync there so we can make sure that the sequence that always makes sure that we're snapping to whatever tempo and whatever the it's almost like live quanta izing. So now whatever I do, I'll be totally in time. I'm randomly playing notes on the piano. So, for example, if I just turn this off again, what I'm gonna do on the piano is I'm gonna go just randomly play notes at different times . That is totally un rhythmical. But you'll hear that the arpeggio gator makes them completely rhythmical, which is really, really useful. So if you're just trying to play chords over a sequence, it's gonna make everything work really well. So there are a number of different settings with that. So this is like live quanta izing to 16th notes, quanta izing to 8/4 half or whole notes. So this is quite an interesting one. If we listen to this, I'll tell you when I play the court and you won't hear it until the beginning of the next bath, I'm playing the court. Andi. Then it starts, right? So that's really useful. If you feel like you're playing, it's her really out of sync or it's a live setting and you want everything to completely sink the BTK Lakas well on you can turn it off a swell, which is really useful. So now we come to the controls down here You heard just a second ago. I was talking about the fact that we're in 16th notes. Let's bring this back up to 1 20 Andi, Let's pull this down so that we're now in eighth notes. So waken change anything here, right? And if we turn this off that makes it not sink, that's totally not sink. So I'm gonna get that back on because usually that's what people usually do with sequences . They keep them on sink modes octave is the next dial that we have, and that allows us to, uh, pushin kind of octave shifts in the in what you're playing. So I'm just gonna play three note. Try it. It's just closed position. I'm not gonna play any other notes and you'll hear that I'm adding in an octave above when we hit two on, then three actives and then for because it's a bit, it's a bit confusing with this lighter. It hasn't got steps like this slider has here. This should really have steps because you're there's no differentiation between here and here. It's only when you push far enough to get to, and then it switches into two octaves, and there's no differentiation between here and here. Say we're still in the setting of to So there's only four settings on that dollar. Even though it's continuous. Length is our ability to shorten the notes to make them really, really short and sharp and then long as well? And then pattern is really useful. Basically, you can create up Teoh 16 different patterns and then cycle between them. So if I just show you we can change the pattern. Let's say pattern one's gonna do that. If I push this up to pattern to you see, we get a new version and I want Patton to to dio to do that so I can Then be I can mix between you. So, Patton one on then if I move up to Baton to, we're gonna move to that one as well. Okay, so and you can actually modulate this. You see that up pattern? All is modulated ball When we can do that, which is really, really useful swing you can dial in swing. So note velocity is where we can make it really, really sensitive to lost. If I pull this down here or completely uncensored tive to velocity here was basically not being affected by our velocity. I'm gonna put this back in the middle. Then we have ah, split. So split is where that you can split the keyboard. If you remember from the vintage B three organ, if you've watched that video, we talked a lot about splitting the keyboard in one of the videos in that Siri's, And that basically means that you can have one part of the keyboard which is affected by the operator which is the left side or the lower part of keyboard and then the higher part not And that kind of and that kind of acts as a classic, a complementary and then melodic patterns. So here in the left, here, I've got the apology later. But then, in my right, it's quite useful. If you're doing this in a live setting on latches, just the ability Teoh keep the notes going. So we have two modes we have hold. And then when you can add mode, add notes one on top of the other. So currently what I've been doing here is off, which basically means I have Teoh hold the nose. All right, so I'm getting confused on my split here. There we go. So what I accidentally did there is. I had my split all the way down because I'm used to turning dials down to turn them off. But actually that what that did is it ruined my keyboard. So the appreciator wasn't working because everything above C minus two, which is very, very low, would not be appreciated. Here. We want it to be everything is appreciated. So currently I'm having to hold my keyboard down in order for this to work. But if I turn this into hold mode, which is a type of latch, I can let go. So I'm no longer holding the keyboard, right? But I can't stop it right until I play another court I actually want. Stop it. I can hit play on my sequence here and start again. And then is course this is one way you can add notes instead of swapping between chords there. So those are the controls on the left Onda. We have basically two views here for the actual sequence itself. You saw that I was able Teoh dial in some different controls or velocity here, depending on our velocity settings here, so we could have loads, acquire notes and a lot of loud notes. Let's make sure this is really way got a huge amount of sensitivity to velocity on. You can also increase it, just like we saw in the sequence of part of this tutorial. You can also tie the notes just like we saw in this part. But there's another view here, which is the multi view which is unique to the arpeggio that you don't actually get this on the sequencer. So it's kind of another view and you get a lot more controls. So here, I can actually just turn off these parts here. So we get. So if you prefer this way of working rather than thinking about kind of pulling this all the way out, that's that's That's one way of doing is just simple buttons, but and you also have the same idea of tying notes here, which is useful. But you also have control over to other parameters. You see, here we have tuning and panning so we can choose each of these up, which is really, really useful and reset any of these. You hold down option on your keyboard and click on these parameters here, which is useful. So then you also have pan, which means that you can make this thistle Peggy eight actually move stuff around, which is really good in the mix. I'm keeping using that one. So that's a really, really cool thing here. So I'm gonna about step mode. I'm gonna talk about this drop down menu here, so this is no active in multi, but it is active in in step mode, and this is the ability to kind of go into those things that we saw in multi mode on this level here. And we can actually change stuff even in a different way, so we can do the tuning here. But obviously, with one of these on these go extremely far 48 semi tones. You can play around with that and you have Panoz well and you see, the settings that I applied in multi come across here in pan mode left is down and then up is right. You can, darling your swing as we saw in the sequence of section and length as well, which you know about cities along on, then really short down here. Art mode one and two are basically a way of turning the arpeggio later into a modulation source. So basically, let me show you an example. So if we put this on here way so we keep this let's make this really obvious like this. So you're not hearing anything at the moment because what we've done is we've set this up basically exactly like the sequence of so essentially that what I've done here is exactly the same pretty much as this, but this is now modulation source and we can select it. So let's do our classic thing that we've done before with Cut off. Turn it on and we go. Teoh, forget where it is. Note property. That's it. And down here we see up mod a one, and we can Now that's tennis. Down a bit through this is now modulating are cut off. So you might think, Well, why? Why on earth would you have this over here as opposed to in the sequencer? And it's a really, really good point. There's only one as far as I'm able to tell, or maybe two reasons why you might choose it in here is simply because of the latch function. You don't have a latch function on on here, and so so basically, it won't be necessarily following in the same way. So I'm not holding the keyboard anymore, but we're still getting that modulation from the stepped sequence modulation on the cut off . That's the only thing I can think of for that. But that's the reason why is that? Value snaps similar weaken control. How many? How much of this? We have control over it. So you see here I have no control over going in between cause I've only chosen basically a hole there. If we choose eight, we have eight points on here that we can move the values to. Or if we have it off, we have basically infinite variation or rather, percentage. Here file is the ability to use pleat presets that we have. We can load this on any level, whether we're on the Los T tune pants, wing length of art, mod Onda, we can save copy, paste, clear and randomize. And there's also the ability to import Midi like we talked about in the sequencer. Cool. So I hope that was useful. I'll see you guys in the next video.
46. Alchemy | Effects: before we get into the effect of alchemy, it would be worth just reviewing the signal flow. If you remember the filters section of this tutorial, Siri's we spoke about the fact that you can take these signals and put them to different places. So, for example, here we have this square wave going to filter one and filter to, and then we have a dial where we can blend between filter unlawful to after it gets to filter one. It then could get FX main or to any sub effects lots. And these are the sub effects lots. So you could have the ability to have sort of an effects channel on a here and send perhaps only some of your sounds toe a. And that way you can free up other sensor. You can have a delay on one of them on, then, not on the other ones. As an example, the one thing I will say that I didn't say in the filter section is that every time you move off main in this effect section down here, the A, B, C and D effects rack all have this send to Maine and basically what that's doing is it sending it after it comes into a back into the main. So you just have to think about that carefully in your signal flow. So, for example, if you have a delay that you definitely don't want on, say your square wave and you want to send you a square wave, too A distortion. But you let's let's do this. Actually, otherwise we're gonna get way too abstract. We do this now, so I'm gonna send the source A to FX A. I'm gonna put on a distortion on gonna make sure that it's going to a We're here. We're definitely getting some distortion in there. So we're sending the square to a at the moment. But let's say, on our main channel we have four. Perhaps our other oscillators. We have, say, a reverb for put this on. Suddenly what are square that we had our own channel for has suddenly got river even though on the a channel we haven't got river. That's basically because we've got this send feature here so we can pull this down and then we don't have it and we can reserve that river just for the main channel so that was the only thing I wanted to go over. Let's dive into what the effects are now and all different types. Okay, so the first fact that we have is a delay. So this delay is fairly straightforward, and it has two channels. So we have controls for the Left Channel up here on for the right channel. So that's into in terms of your stereo. So currently we have it on quarter notes, so you'll hear 1/4 note delay according to your host tempo. Of course, because it's in sync mode that you can turn that off and then you get values which are non sync values. I'm gonna keep on sink values. And obviously you can do this independent for left and right. So currently, we've got quarter notes here, and we've got quarter notes here. But if I change this toe, eighth notes, listen to what happens got quite a nice kind of interaction going on there between the two speakers, so you can offset each of these by a tiny tiny in parts of a second. Nor indeed, actually, oh, yeah, it's all parts of a second soap just adding a little bit more kind of detail in there. Between the two things, it's nice to offset. It just emphasizes the kind of stereo nature of this delay. And then, of course, you have feedback, which is how long the delay goes on for If I turn this up, it's gonna be indefinite. And it's just gonna keep going until I turn it off. I believe, Yeah, that's right. And so we're only hearing the left Channel. So I have to pull this down at least away from 100% before it's gonna go to you, lengthen your delay kind of tail there. So then we have our own filters, which is quite useful here. So we have exactly the same filters as we have usually. And we also have other effects, like the compresses and stuff like that. And we have Ah, so if we can actually have a kind of different effects or different filters on the Left Channel as the right channel here, So that's a really, really cool feature. And of course, this is on the same here. Mano basically turned thes controls into the main controls. And of course, if you do this, you don't have you don't change any settings. If you do stuff down here, nothing's happening. It's only the Left Channel. So that's what mono does. So you can turn this into a monitor delay. If you find that kind of stereo thing not useful, I'm gonna turn it back on because it is useful. I'm gonna reset this Teoh normal settings. So if I had clear, we'll get back to those stock settings and you'll see that we have presets in here, which is useful, and you can save your own so you have crossover. That's where you can determine the stereo placement of the feedback signal, and you also have been initial pan. And this is where you determine the stereo placement of the initial delayed signal, which is prior to the feedback. Typically, you keep this at zero apps, and, um, but you can mess around with settings here and then finally, you have the mixed dial here, and this is where you determine the wet, dry balance. So zero person is basically just dry. 50% is equal, 100% is wet. Only so wet is the delayed signal, and dry is the initial signal before it goes into the delay. So next we have the distortion effects and we have three of them. Based enhancer distortion wave shaper. Let's look a base. Enhance the first to the base enhances fairly straightforward. You just input. You're just adding in strength of the base here. So if you listen to the difference and look in the channel eq you. So here's my bass sound first, and then look at the EQ you as I bring in, and it makes it a bit like a distortion as well you had. You have not just based enhancement, but you have other stuff in there that's making it a lot richer. You have also just a normal distortion, and there are different types of distortion going on here we have first a bit crusher, so bit crusher is really like a low fi digital audio distortion, and it produces a distortion by reducing the resolution off the file, which is why you hear that kind of computerized sound in there. You then have a kind of mechanical distortion, which is more of the distortion you'll probably be aware off. Ah, really useful. Obviously you need Teoh. You need to be aware of your your amplitude in this because you're really, really boosting the signal really, really useful for turning just a simple, just a simple square wave with So that's original sound with a tiny bit filter on. And then we bring this back on. We've got much more of a kind of Qatari roads ive distorted town, which is really cool. The truth, not basically, is used to simulate the warm distortion effect of an over driven tube. AMP. So this is what it sounds like. The exciting knob is used to create distortions with an enhanced high frequency range that really, really bright distortion. So let's have a listen to that obviously will open this up a tiny bit more and in here that really, really coming through there, the higher and you can see it hopefully on the channel Ankiel on my computers, thinking about a lot of things at the moment, so keep some glittering Sorry about that. So then you have your pre game, which is where you set the amount of input gain applied before this distortion effect. So this is kind of enabling you to produce heavily saturated distortions, especially with the tube setting. And the postgame knob is where you set the output level. Let's have a look at the final distortion that we have in here, which is the wave shaper. Now, this is really useful for emulating the sound of tubes and rectifies and other different distortions. But I'm not gonna go into the details of it here cause we're already at the 10th video for Alchemy. And if I keep doing the detail within these effects were gonna be a little too deep into it by that point. So what I would say is go to lean musician dot com slash wave shaper. So that's W A V e shaper. All one word. Lee musician dot com slash wave shaper and you'll get redirected to a really good YouTube video by FL Studio about wave shapers and how they work. So those are the distortions that we have in here. Let's have a look at dynamics, so we have basically two compresses fat compressor on a vintage compressor. Put simply, the fact compressor is, as it says fatter. It's based on a soft limiting compression algorithm, whereas vintage compresses, or at least in alchemy, are based on the analog compression hardware that people have tried to emulate. So again it has a fat option, which you can turn on, and that adds a saturation effect for kind of a different compression color, for kind of more neutral or transparent compression. Just keep it off. We don't have the amount knob, which is just basically the amount of compression that's going on, and then the release button as well. The release just basically determines how quickly the compression effect goes away after the input signal falls below the threshold for that compression again, this isn't the course to go through the details of how compression works, but there are endless tutorials on it online so you can look it up. If we get rid of that, then let's look at the vintage compressor basically the same. But you have a little bit more control in terms of your ratio threshold and your makeup gain as well as the input gain. So this is Ah, all of these have their presets available, which is really, really useful. Then we have filters, which is really cool. We have a band pass filter and multi mode filter, so basically the multi mode filter is what we've seen in these filters down here. It just allows you to access that menu in an effect setting. So if I click on this, we have exactly the same menu as we had before there. So this is where you can add those which is great. And we also have a three band EQ you, which is, if you don't know about that, that's basically controlling three different parts of the ICO spectrum. So it'd be like if we had one section down here to control one section here in one section here. Eso it's That's the That's the lower frequency in the high, middle and the high. Or rather, you can change where it is. It's just three bands that you can control here. So then we have modulation. Soemadi FX Mod FX is basically kind of a short delay with built in LFO modulation. It's useful creating fledging and related effects like chorus and stuff like that. So let's have a listen to what it sounds like. So it's useful and again it has its presets, which is really cool. We also have a phaser which is similar. You've got more of that resonance modulation going on in there, which gives you that kind of vocal Forman quality in sync that the tempo, which is quite way, have reverb. So acoustic river, classic reverb and convolution reverb. So a convolution reverb actually uses recordings of actual real acoustic spaces. So buildings, holes, caves, forests anything that the people who at the presets want to record their basically known as impulse responses. So you can get one of these recordings of, say, like a clap in one of these places, and you can translate it into a really upsetting, which is really, really cool. So it's basically people who say it like being in the chosen space that you've you've done thean pulse response off and you'll find that these are really, really quite realistic. So the kind of settings that you have on here are very, very similar to normal re verbs. And again, we probably don't have time to go through all of them. Here we finally we have amp and Pam, which are basically both utilities. So amp is basically the ability to increase the gain. If for some reason your sound is too quiet and you've turned up your volumes as much as you can and then you have your pan, which basically panzer left and right. So really not necessarily, uh, necessary. But for some reason, if you've got a pan thing here that you don't want control, you want to control it at this level, you can actually you can modulate that, which is great. So this is the other thing goes, you can modulate any of the parts of these effects. So let's take this back to, ah, distortion Right on. Let's take it to this one on Were listening, Teoh, Let's listen to the mechanical. And you see that because I've got that affected here. I'm gonna pull this down. So it's not so loud because I've got that affected. We've got on our modulation routings the ability to modulate this. So this Modulate this with an LFO modulating our distortion in effect again, just like I always say, unless there are so many possibilities, infinite possibilities with alchemy, considering you can modulate basically anything with everything or everything with anything , however, that works. It's the last and really cool things say about effects is that you still have a file menu, which is really cool so you can add presets and save your racks, which is really, really useful. So if I choose based emphasis, we're gonna get a load of effects which are ready to go, which already we can change the settings a little bit off. So if we choose another one, let's try. Ah, punchy a taxi. What effects? Come on their compressor and base enhancer. So let's try another one. Distorted delays. Let's try space delay. So this is really, really useful. So be worth building up your own presets in here If you use alchemy quite a lot. With all of these effects, you can have up to 16 effects. I believe in here. That was in a recent release for alchemy. You can have 16 effects on each rack, so a, B, C D. And also the main as well, which is really useful before alchemy will stop adding more here so you can add up to 16. Cool. Alright, guys, I'll see in the next video where we're gonna talk about library management
47. Alchemy | Library Management: So in this video, I'm going to talk about library management. And as I said in a previous video, this can sound like pretty boring thing. But as composes and produces, we really need to be organized. I used the analogy in a previous video about a painter being organized with their paint and brushes, and it's very much the same for us in here. So there are a number of features inside of alchemy that gives strong control over our library management. The 1st 1 we're gonna look at is user tags. Now, if you remember in the introduction to the browser, I said I'd come back to this one here, use attacks. Now I don't use alchemy hugely in terms of managing my sounds. I use logics built in ah, feature. You can see my library over here in terms of patches, and I'll talk about why I do that in a minute. But basically I've set up a few example, says that we can kind of look at how it works. But before we do that, let's go back to kind of looking at one of these normal patches here. If I click on just a random one here eighties pop electric piano. Everyone loves an eighties pop electric piano. You'll see here that we have no user tags, right, whereas if I go now to my user tags here and I click on, say, my major leads and I click on buzzing Metallica lead that I chose earlier, you can see that we've got a user tag as a major leads. And this is the tag that I have set up inside of soul vinyl. These just random names I've given them here. You can see that this one has that tag right? But you can have more than one tag if you look at this one here. This one has major leads and sold vinyl. So according to my thinking, at least for the purposes of this tutorial, Siri's This sound belongs in both major leads and sold vinyl. So let's talk about how you add use attacks. I'm gonna go back to all here and just get to articulation and choose something that I have not created myself. You see, there's no use attacks. Let's have a listen to this Teoh, right? Let's say we want to add attack, which is cheesy on what we do is we click user tags in the new tag and we get this dialog box up here. So we go cheesy when we add it, and then we have a use attack of cheesy. So then later on, we can find it by going these attacks cheesy. Let me have it that if you want to delete a tag, don't get confused between deleting the tag as a whole, which is like the category and un assigning the tag. So let's say we had loads of things in our library that were that were tagged as major leads, right? But suddenly we were realized. You know what? I don't think that prophetic brass actually belongs or should have the tag major lead anymore. You don't want to go and delete tag major leads cause that's gonna delete everything in your entire library that has got major lead on it. What you want to do is under sign it, so you just hover and then let go. And now that no longer has major leads on it, and you will no longer find prophetic, prophetic brass inside off major leads. Now, user tags is like your level. It's like your way of organizing the library. However, if you don't want to do that and you actually want to really adapt Theo organization of how things are organized here, you can actually change any patch. So let's just choose a random patch here. Lush, multi layer one. I don't know what this is. Let's look at the this page here. So the logic of this is that this patch is assigned all of these blue highlighted categories here. So if we search for simple ambient pads were almost certainly what we definitely are gonna find the lush multi less. So let's do that now. So simple. Ah and ah, let's get to genre ambience on that. We get it pads. We see that it's still there, all the ones around it, a changing, but with still able to find the lush, multi layer one right? Let's say let's think of another example. Let's go to keys here and that's choose a recently Let's look at that right, so this is what it's got. So in terms of its articulation, it saying that it's dry, decaying, sustained, and it's got a virtual analog element, right? Let's say we thought that this was kind of nice. I know that sounds funny, but if you're using these features, you want to think about it like this that, say, the Tom Burke. This is nice because that's a pretty vague explanation of what Tom Breeze. But let's see, we think this is nice. What we can do is we can add that parameter to it, and it's now going to show up when we search in Nice. Right? So if we make sure that we go on Ah, articulation here or sorry, Tom Barrett was, and then we get into Nice. It's still gonna show up there, whereas before it wouldn't have shown up there because we've added are in presets. So just know that however this are, this library is organized with all of these categories, and the sub categories is not fixed in stone. You can go along and say, You know what? I don't think the alien dog affection is nasty. I like alien dog affection. So I'm gonna keep it, and it's not gonna show up in the nasty bits, or you can add step in state. We know what actually, really? I actually think that's a bit distorted sound so why would probably add distorted there? So this is this is really, really detailed stuff. You almost certainly not gonna need to get into this. But if you want to, it is there. So that was user tags. And also changing the categories off each one. Remember, you also have searching here, but I said a minute ago that I don't like using the organization here. Hence why? I don't really use user tags and stuff like that. I use my own organization inside of user patches. And we spoke about this a little bit at the beginning of this course, but I'll just go over again. The way this works is your your channel. Strip here is basically made up of a number of things. You've got the overall channel strip setting here, and then you've got the sub channel strips. I think so. You've got the EQ You midi affects the actual instrument you got loaded. Any effects you've got in the plug in your sends on, then very settings down here and your volume, right? So if you look in here, we've got the ability to search alchemy in the same kind of way. But a little, a little less easily. We see all the patches for alchemy. But if I turn up here, these are all of my patches that I've saved in logic. So, for example, if I get to acoustic strings and then evolutions or SS ensemble, I'm gonna load up one of my patches that I've created a while ago and I haven't got my drive plugged in so it wouldn't work in a moment. Don't worry about that. So But that's the way that you can manage your own stuff. And I personally like that a lot more because I work with all of my samples all in one place, and I can search all of my son. So even though these these folders incredibly deep and they've got loads and loads of things in there that I've used for years, I can just go like this and see that the last time the last cello I created was here, so that was probably the last one that was working on. I can click on it and it loaded up. It won't load up now because I haven't got my drive connected. But that is basically the way I choose to do stuff. And so let's let's go back to alchemy a second. Let's say you created a nice sound in alchemy. Let's for the sake of argument, say that this is the sound that we like instead of saving it through here with user tags and stuff like that. What you can do is just ignore this to get the settings you want. Make sure that this arrow is up here. So you see, as I hover over here over setting, which is the overall channel strip setting, this menu changes and we're in our patches here. And if I hit, save down here. By the way, if you can't open this menu, it's hits this button here or you compress why and he hits safe, and that's going to save it inside of your patches, which is located in audio music caps and then patches here and then instrument patches. And you can create your own folder structure as I off here So you can see here I have a full of the courses and then other folders, which is just the way I think about creating stuff, so that's the way I like to do it personally. But you can do it both inside off alchemy and also out both of them work fine. Let's talk a little bit now about opening up patches on and analyzing them, because this is one of the best ways to learn alchemy. So as I've been doing throughout this course, what I do is I usually have an eq you up. If I'm trying to understand something so I can see exactly what's going on with sound, it really helps my ears a swell get better, because if I see a huge part in the spectrum that I wasn't necessarily aware of, I can kind of listen back with my ears and understand why I'm actually hearing it's. It's a very good way of getting good. You're mixing and e que. If you keep this up whilst you're working with instruments, So let's let's load a patch right. Let's go to a random patch Soundscapes. Let's try and make something quite complex, like Ambien flatter, and let's go back to the advance view. So you see, there's lots of, well, potentially things going on here. Let's listen to it reasonably complex sound really cool. I like it look, so but we want to understand what's going on here, and this is quite a good skill when you open up a patches to take it back to initialized and then build it up again. It's a bit like taking apart computer and then building it back. You're probably not gonna get back exactly the way it was, but it's a really good way of learning stuff. So, as I said before, you can see what kind of modulations air going on by clicking on a show target. So here we can see that we got a number of different things that we can dive into an understand so tune Find A is being a changed by oscillator. Sorry, LFO three. So let's look at that tune. Find A, which is here is being modulated by fo three. Let's turn that often see what it does, probably not much, because it's quite deep. That's not much. But you see what I'm doing here. I'm gonna dive in sort of these different settings and see what's going on. You see, something's moving over here and you say Okay, what's going on there? Okay, I've got additive FX. Harmonic fifths will come to this when we start looking at the additive section that's being more modulated also by an elephant. Let's turn that often, see what it sounds like Without it. I am not much. Let's start pulling all of these out. It's good to pitch here, see if there's anything on here. So no modulation. It's nearly all here that's being modulated. See what's going on here. Turn that off. Basically, you're trying to reduce everything. And Tim, you notice the difference. So here there's a tiny bit of difference there I can hear, but hopefully you understand what I mean. There that you're you're basically understanding what's going on with these patches. And once you won't understand what's going on with those patches, you can do really cool stuff. You can actually copy modulation. So let's open up a lead here. Let's go back into the browse view going to Leeds. Choose something random. Okay, so let's let's say I like that some of the sounds that going on there. So let's look at the global view and say okay, what? We've got a number of sources. So a is the main source, really that I like. That's the sound that I really like. So what I'm gonna do is what I don't even have to go to this level. I can just hit copy, and then if I create a new patch, right, so called default. What I can do is I can do paste on. I've got that saw there. But of course I've copied the sore without any of the other settings in there. So I have to go back to that original patch. This is where you can have two alchemy is open and copy settings from patches that you like and you're learning from inter patches that you're creating. It's a really, really useful way again of learning and also modifying your own patches. If you have, say, a preset that's come with alchemy that you really like one of modulations, perhaps an lfo one of the M segues or the you know it's some kind of envelope modulation, but you're not sure quite how to create it. You can simply just copy it from the patch that you really like to one of your own. Okay, cool. So in the next video, we're gonna go over performing controls, which we've talked about a little bit on. We've encountered during the simple view, but I'm gonna talk about Mawr off the settings in it on why you want to be using them if you're using alchemy seriously and professionally.
48. Alchemy | Should I go Further with Alchemy?: So I guess one of the first things that you need to ask yourself before you dive into the next few videos is Do I need to go further with alchemy? Well, it depends on how interested you are in this sort of thing, and particularly how interested you are in creating and mangling your own unique sounds. Let me just give you a couple of examples. So here's thes similar, which is in your course files, and I've imported it into alchemy inside of an existing patch, and I'll talk about what that means in a second. Essentially, I've loaded up a normal patch, so this RPG ated liquid echo bells patch. But I've changed my source here to be my own audio file. If we have a listen to that. What? That sounds like pretty cool sound and all coming from just this sound here, right with all of thesis, Infosys features inside of alchemy. So if you want to play around and create sounds that is just that far away from the original noise on DTA, be able to kind of create your own patches from scratch. Then I would dive into the next few videos and There's kind of another reason why you might want to use alchemy. Let me show you now. So let's say you find an artist on They have a sound in one of their tracks that you particularly like. Now, if you're worried about copyright and using other people samples, what you can do is re sample using alchemy. Let me show you an example of what I mean. First, I'll show you with an example off something I can show you without incurring any Ah, an illegal stuff s So I'm gonna What I'm gonna do is I'm gonna go here in Port Audio on Let's say, for the sake of this tutorial, Siri's that I found a string sample here that let's say it's, you know, from a really, really famous recording or something like that. This isn't because I have to show you this. So what I'm gonna do is I'm just gonna click additive here, hit, import and essentially what that's done. Now, if you listen to it doesn't sound the same. Obviously, we know that it sounds a bit different, but there's nothing that you're hearing. They're which is the original file. Essentially, what alchemy has done is it's listen to the original file, and it's created using sine waves and basically the algorithm inside of alchemy, something that sounds a similar as possible. And you can edit this and make it sound better, obviously, because you can hear it's not totally string sound eyes pretty good, right? And it's mapped it right across the keyboard. We just fantastic. So let me show you an example now with something that I can't show you, obviously like a famous audio file that will know hopefully So I won't show you the original file because I can't do this on this tutorial, Siri's. But I'll show you the result and then you'll know what it is. Hopefully afterwards. Okay, so using additive synthesis, what I did is I imported award audio file on its created exactly the same or very close to the original, but without using any of the original audio. So do you recognize this? Theo is all over my keyboard now, and I have control over the thing now. I am not a lawyer, so you might need to check totally with these sorts of things if you start using them in release tracks. But at least messing around with them could be super fun. And if you didn't know what that was, that's Beyonce. So if you think that stuff is for you, you can go into the next section of this tutorial series, which is the sampling sections of alchemy. Or if you think it's too much for now, leave it and you can come back as always whenever you want to this video.
49. Alchemy | Preparing Your Own Samples: on DSO. The similar is basically a type of instrument way you hit the strings with a little stick. Piano is very similar. Obviously, you know the inner workings of piano, and then we have strings as well. So they're all string instruments, and there's no reason for that. Necessarily. What I actually chose was to, quite because of sounding instruments with different Tomba's and then also, um, ah bowed sound from a string orchestra there, and you'll notice there are a number of files there. But what I wanted to talk about is two things. One. Finding more samples online because you could get tons of free samples, as well as pay for some pulse that you can then mess around with, and then also recording and creating your own. If you put in free audio samples to any search engine, you are gonna get infinite amounts of stuff just going on somewhere like way. The audio on downloading a sample pack here will give you a whole load of different things . If we open this up, let's see what's inside. Have no idea. Hope it's not a virus. We have different things in here that we can use as part of our sample creation loads and loads different things. You can create your own really? So there's tons of free stuff as well as the ones I've done here and some as you'll see a prepared slightly better. So what I've done is I've prepared samples that are kind of more specifically used for pitch instruments and for actually really mapping across the keyboard. Hear what I have is something that's been prepared across the whole turn scale, etcetera, etcetera, and I'll show you how I prepared those now so you can get a sense of how you can prepare your own audio files. If you're recording them, live on location. I've got three audio files here we've got that you're using in the course on. I just wanted to show you roughly how I prepared them so that you can do it with your real audio files. Now these air done with virtual instruments, and I've just bounced them in place as audio. Now there's not really much point in doing that at all unless you kind of want to use thes audio files to mess around inside of alchemy because these have already been prepared just a swell if not a lot better by different instrument manufacturers. So really, what these would look like in your case would be location, audio files. In other words, you've gone into a studio somewhere and you've recorded a piano meticulously like this. So what this recording is doing is it's going up in tones from the lowest part of piano, a way up to the top, and that that kind of granularity of details so up a tone each time, as opposed to a semi tone, is what I think is probably best for my instruments. And that is just entirely up to you. Obviously, if you don't know what I'm talking about, you need to watch the sampling part of the alchemy section of this course or the excess 24 introduction. So what you do is I'm gonna meet these two, and I talk about the similar because you can see that the piano here is split up nicely into these files. And that's what you have in the course files. But the similar bounced in place, isn't we? See, it's just one long audiophile. Now, I could slice this all up like this, but there's actually a much quicker way of doing it. If you don't want to do that and say you're doing a lot of instruments and you want to slice everything, this works particularly well with percussive sounds with a kind of clear decay. Which is why I'm not going to do it with strings because it's quite tricky. And I will do that by hand. We'll see what I mean a minute. So what I'm gonna do is I'm gonna click on the region on. We've got our audio file editor down here both in the track and file forms on. What I'm gonna do is I'm gonna turn on flex pitch. That's a reflex time, Onda. If you don't know what that is, don't worry about it too much. It's not within the scope of this course to look at it. Make sure that it sounds flextime slicing on. Then I'm going to right click here and you say slice a transient markers. Now that's done a pretty good job. You can see what's happened here. Is that mostly apart from this bit here, which are just tidy up by glowing together because those aren't separate audio files. Logic doesn't find that hard. It'll everything else down here looks a bit weird. It's all pretty good here. Let's check until the end yet. Great. Okay, cool. So now that I've sliced thes nicely, what I can do is I can select them all. And if I go over to file export, not bounce, we'll see that because I've selected 25 regions. Logic knows that I want to. You kind of export these. So if I click this, I get this option here for this drop down menu. So what I'm gonna do is I'm gonna go Teoh my desktop, and I'm gonna create folder, and I'm just gonna call it Sim Alum. I hope that's how you spell it. Probably not be my luck. You can all laugh at me, Andi. I'm gonna make sure that down here, we've got these kind of auto generating file name tags here. So you see, it's going to see here. It's gonna be called the region name. Um Ah. Custom. Which I don't actually have any custom text. And then in increments. So 10112123 Yeah, so we see here. We've got the I p 5701 we have right, and the next one will be incremental. So if I hit export, it's gonna going to go through all those. And now that's done. So if I get to my desktop here, what we'll see is a piano samples on the similar samples. We can hear that we've got all of these in here nicely tidied up very, very useful. So that's a quick overview about how you prepare your own samples. As I said, if you have the if you have something doesn't quite respond so well to logics flex time cutting, you just will have to do it manually like this. Just get your scissors and cut it before their, um so. And the last thing to say as well is that you need to create me to leave enough room for an audio tail. So if you listen to these strings here, the sound actually stops. Or rather, the players stopped playing there. But there's still a long decay time right from here onwards. It's a really, really important point there. You need to leave love enough room. Otherwise it sounds kind of like this. You get that kind of quick drop out and then move into the next instrument in your samples and you don't want that
50. Alchemy | Sampling Basics: So now you know about samples and they're prepping. What you can do is you can actually start importing them. So I'm on the advanced page. I'm on a source view here, and you can do this obviously, from this level of the global view. Or you can do it on a a zoomed in view and I'm gonna click on the source and I'm gonna collect import audio. And that brings up this page here, which is are basically our import sampling page. So what we have at the bottom here is different analysis modes. We're gonna go over what these are. You'll recognize these names additive and spectral. You'll recognize those from the source window over here. For the moment, we're gonna leave them on, and we're just gonna go to sampler. Okay, now, the first thing to do is to change between drum and pitch, and this basically determines the settings off Alkermes auto mapping features. So we're doing pitch related instruments, but you can do drums. I won't be doing them in this tutorial. Siri's They're a bit simple, so pitch will leave on for now. Okay, now what? This is on the left is basically file directories and you can add your different ones. You see, here I've created favorites. But if you're looking for the file that you've downloaded, you probably want to go to Macintosh HD and then library or sorry users and then your person, Whoever you are gone forward too much. There is a bit Laghi this one and then probably downloads, which is where you find it. Or if you've saved it in the location, you'll find it. Once you've you found one of these that you like. So, for example, for me, maybe your desktop is most important. You could create that as a favorite, right? So all you do there is press that star, and that makes it a favorite here under favorites. So it's a useful thing. So you see here that I've actually created preparing samples in deep inside of my, um, my folder system just so I can get to these samples quicker. So once we've got those folders, what we can do is we can open them up, and we see that we have all the audio files in here, and we can just click on one to preview right now. What? I'm gonna do first is I'm just gonna import one audiophile even though I've created loads of these for sort of maximum quality of this instrument, I'm just gonna choose one of them, probably in the middle of the piano on what alchemy is going to do is it's gonna automatically map. It's gonna analyze the picture of that sound, and it's gonna map it across the keyboard so I can play. So again, that's only one note is one audio file, but I've imported it. And now listen right and I can play it all over the keyboard. But if I get really high, have a listen to the sound incredibly short. That's because it's essentially speeding up the audio file if we go down really low sounds pretty sort of morphed and mangled there. So that's why you might want to use lots of audio files that you've actually imported that you've actually recorded. So if I select all of these, I can click the top one, hold down, shift on, select the rest on just add them to here by clicking and dragging. So I'm gonna hit import, and we probably have a slightly more sophisticated sampled instrument. The now the first thing you'll notice when you open up samples is is an incredibly short decay on them, depending on whatever your settings. Where if it's in initialized patch, so you want to go straight over to your HDs are and increase the you won't increase the release that's more realistic there. You probably needed to be 15 seconds and change the curve here as well. And that means that you'll hear your samples if you remember the year Access 24. What we had is a one shot mode, which basically means that we hear everything for its full length. You don't have that in alchemy. You need to actually change it with the HDs are so that's importing audio files. And, as you can tell, it's a whole lot easier than doing any access 24 because you've got this algorithm in the background, which is basically mapping it for you. But let's have a look at what it's actually done. The way that you get. Do you find this page is you go to the edit window on each source and you see here what we've got is it mapped across the keyboard? So here C C one. Sorry, this is a one and B one have this audio file here, which is similar B I P 1706 and then the next 11907 So these are different audio files, so we have thes notes, all playing from the audio file. Sorry, These two both playing from the audio file B I p 0.2108 No, as you'll notice here, we've got a strange thing going on. And this is the Automat feature. Generally speaking actually works. Fine. If I play these notes, we've got some strange things going on there. We've got opted jumps on. This is where you can start moving stuff around. So we see this now. So when you're editing this stuff, you can actually zoom in on stuff by changing these bars down here. So you get more control over stuff you saw. I was having a bit of trouble there, So I'm gonna map this across the whole velocity range, which is from high to low movies around. Okay, Now, I won't do it within this video because I'm going to try to keep it short. But you can see now how you can move these audio files on appropriately, move them to different places here, and you have your controls down here about how you control the sound itself. Let's try another one. So that's mapped thin string sound right across now because this is a long, sound way. Do want slow a shutter Sharper release here because we don't want it to be like some crazy long pad probably want to pull this down as well. That's more like the original sound, and you see what's happening is even though there is still way form, this still material here kind of slowly cutting it off their much like a string player would. So again, let's go into edit here because we've imported one audiophile. It's map, the one audio files you see one block here, right across the keyboard. So all of these keys, a hearing or referencing one audio file so we can mess around with that one audio file just to make things a bit simpler in how we work with stuff. But the principles still apply again. If we had one sample on each key or indeed, multiple samples on each key for kind of velocity mapping. So down here we have the audio far and we can change where we wanted to start from. So currently we're starting from before the string hits the bow Here we're halfway in the attack phase of the instrument cesspit quicker. And then here were right past the attack phase. So you here. It's kind of slightly unrealistic string sound at the beginning, so you can mess around with your already there. You could also say, you know what? I want my son to be really sure I didn't. Why you do that? But you can do if you want to. So the other thing is loop mode as well. If you listen if I plan, it stops. What if I don't want it to stop? Well, you can turn on loop mode and this is this thing here. So let's say continuous and suddenly we get these two lines here, which is really useful. So let's have a listen to this now. Okay, well, we're looping, but it's really annoying Click, which happens every time we switch back. And that's because the audio file is a French essentially going from here immediately to here. And that creates an artifact kind of in the in what we hear in the output. So then you can do an X fade right, which basically means that we've got this kind of X this fade point on the on the loop itself, right? But there's nothing going on there in terms of the X paid. So what we need to is put it here and you hear a bit of a fade going on right now. You can't go outside of this, so let's try and put the feed more in the middle. It was a bit of a bit of gradation there, which is Okay, so this is really where you start to play around with the best parts of your audiophile and think, you know, where's the most constant part of this audio file on Where's my ending? Should I end on the same kind of amplitude or kind of volume? Say that start and end here roughly the same way. So it sounds like a thief again, Not great. But it takes a lot of thought and thinking to kind of actually do this, and I'm trying to keep this video serious short so I won't get into it. here again. Forgive me. There's all this other stuff here to do with velocity mapping and many other things to groups and zones. It's not within the scope of this video to go through everything in alchemy. But if you're interested, drop me a line. Make a comment in the course, ask a question and I will respond. And also, if particularly if there's a lot of questions about it, I will just create another course on alchemy itself. So that's the basics off the sampling mode of import or analysis mode. Next, we're gonna go through granular, and then we'll look at these three additive spectral informant.
51. Alchemy | Additive: as you saw in one of the previous videos, we brought in a sample on and basically re sampled it. So we're not listening to any of the original audio file and got alchemy to kind of analyze it and create our own version off that sound through additive, and you consider it three spectral synthesis. So if we just click on the additive panel here, what I'm gonna do is I'm going to click the edit window here on this will turn us into Thean Edit Window where we can control our sample, which we saw earlier or are additive controls. There are special which will look at in a minute. Additive here basically works with combining sine waves on top of each other. If I zoom this back in a bit, sorry the other way, what we'll see is that we have a fundamental sign. So now we're just listening to one sign way if you can see it on the spectrum here. But if I add in another one, I have to read, have to press the note again before we hear it, you can see that we've got another partial. This is following the harmonic Siri's here at the moment. You can change that later. But we're just adding in lots of other partials. And you see No, exactly. Here I can change the volume level. If I want to put that one up much higher, we can see it in the and the analyzer there at the EQ. You. So why is this important? Well, you can kind of create some cool sounds of you, kind of dialing a whole load of overturns. It's quite fit through, right? But there's loads of sounds you've heard like that before. What we're gonna do is we're gonna do the same thing about importing an audio file and see what additive does on this page here with the tune pan phase on other settings. So I'm gonna clear this. I'm gonna go back to my main menu here, or rather, my advance view and import audio using the additive here. So I'm gonna choose a piano sound alike, and then here, import for the moment, I'm gonna leave for men on. You don't have to, but I'm just gonna leave it on anyway. It's gonna analyze it. Andi, let's zoom back into that edit window here. So, basically What we see is we that alchemy has actually analyze the sound and created using sine waves and all of the other set settings in this Penhall something that is quite like in Tokyo awful playing their sorry, my keyboards at very odd angle s. Oh, yeah, And you could mess around with this a bit. So if you kind of want to try out moving some of these, I'm gonna change my quality down because you can see a computer glitch in a little bit. You can mess around with stuff in here and you have controls over the tuning the panning on the phase off the different parts of this analysis. Obviously, we've got our loop abilities as well. So here I'm starting later in the kind of attack phase that's right at the beginning of the modelled attack phase on here. This is later on, so you could create quite nice lead or pad sounds from this later phase of any generated noise. You can also change exactly how this kind of on the slope of the sound to an extent all that kind of the phases of it get interpreted so you can actually draw all of these again. You can zoom in on this and actually draw things in that can add other points and move them around Just really, really useful. Of course you can change your mode here. So if I just move stuff around here like this for grab a point, I could just move it like this or if I hit slide, what happens is everything to the right and moves. And if I hit, stretch the stuff to the left moves. So you probably remember this from the from when we were on the advanced panel and we're inside of three m sec face. We can change the edit mode to slide and stretch, and we move stuff around there. But this is obviously within this panel here, and you can move stuff around there so really, really good fun. And again not within the scope of this tutorial series to go diver that to go deeper in, but have some fun with it and reach out. If you have questions about it
52. Alchemy | Granular: so granular I'm gonna go over and import one of my piano samples. She's a relatively high one here, maybe. Yeah, and I'm gonna make sure that our analysis mode is in granular here so I can hit import, and we have our granular controls automatically turned on over here. So, as I said, I can't go into deep detail with all these analysis types, but I will put on screen now a couple of links off videos that I found that really, really helped me understand a bit more about granular synthesis and, as always, with these kind of real deeper elements with inside of alchemy and any synthesizer, Quite often, you don't really need to understand the science and the specifics behind it. A really, really deep level. It's only really a scientific inquiry, really. To try and understand really, really how it works. You can mess around with sounds here on do a little bit of button bashing, and you can actually create some really, really cool stuff. So, essentially, granny, a census represents continuous sound as a kind of little grains or small pieces of sound. So we extract small little parts of an audio file on, then shape that and reorder them in different in different ways. There's a great video which will put on screen now the link to which is where we have two guys from point blank music school talking through how to create essentially granular synthesis, using just the time stretching elements within logic. Really, really cool. Conceptual way to understand how granular synthesis works on essentially what alchemy is doing in the back end through these dials here. So here you have the on off button, which basically turns on and off granular synthesis. At the moment, if I have it off, there's nothing. But now we hear that it's a piano sample going on here. It sounds a little interesting, right? It's not. It's not what we originally has, certainly, so we can change the volume here on we can change the size of the grains, and this is a very, very distinct sounds. If I pull this right down to the grain son so that each grain that is being sampled is tiny , we get a very sort of glitchy, dirty kind of sound way. Turn this up. It's sort of like the definition of each grain is gonna get greater waken here that the piano is very, very clear there, right so you can mess around with that density basically controls when each grain is sent to the output stream of this of this particular sound generation side of alchemy. Don't worry too much about what that means, but basically, if you set the size to around 100 you get kind of quite a smooth sound with no kind of transients. But if you said it down lower, it's useful for kind of drums and sharper transients. So let's look at that. So if I tend to stand steal the way, way really, really affects the size and all, rather the sound of the size of those grains that are coming through the RT time not basically adds a small offset to each of the grain. So when it's extracted from the sample, the pan knob introduces some random offsetting to the pan of each grain. Again really, really useful for adding that brightness or depth in your mix in the stereo field. So basically, the taps re trigger the attack phase of the source. If we try out what that means, let's have a little listen, so, basically, if I turn this up to two taps, we're gonna get a tap here. And then if I turned up to three, we're gonna get three taps during the space of this audio file on. Then one more about now. There we go. And if I turn this up for, we're gonna get eight, which means that they're quite often on we can offset where these are so we can have the taps near the end if we reduce this percentage. So there's nothing here and then we were right to the end. We're gonna hear all the taps close together like that, and you can also offset the story of stuff. Uh, or the sound. Basically, depending on what you've done here, you can change stuff. Here. You can move stuff around in your head phones. So the green shape is a funny one. You see, we've got two key here because I'm dyslexic. I read that when I first saw it is Turkey, which is hilarious. We click on this. We have a number of different things here, which I won't go into bit basically creates a very different sound in the way that you're you're sampling each grain. We listen to that. Now we've got basically a needle thing, which it is like a needle pulse. So all of this stuff is super fun to work with. And you can tell that obviously we've gone from what was a piano sound. Teoh this and it just can be quite cool to play around with these things and create your own sounds. So that's granular.
53. Alchemy | Spectral: Let's have a look at spectral Now, I'm gonna do the same thing in Port Audio. I'm gonna make sure that when I import this time, say a string sample, E I make sure that I'm on spectral here and I'll leave formal on. One thing to say is that the reason why we do this is so that we later have control over the foreman. If I if I untech this and I hit import, you'll see that we don't get controls over the Foreman analyze section here. Whereas if we try that again in Port Audio hit Forman and hit Import, we get control over the analyze section there. So that's why basically So I'm gonna do this again in Port Audio and hit spectral. So that's where we were. So let's go into the edit window. And instead of being on additive or the main, which is the sampler we looked at earlier, where we see the actual sound that we're working on, we move into spectral mode. Now this, if you never seen it before, probably looks a bit wild and a bit scary and definitely to do with sound design. I'll put up on the screen. Now a couple of really, really good videos that I've seen on YouTube with people taking you through in isotope how to create samples. There's also a really great video. Stockhausen's son playing around with isotope and spectral synthesis with a new orchestral sample. Really, really amazing sounds that come from it. And you start to get the idea Essentially, what we're looking at here is the spectrum of sound from low down here toe high on what we can do is we can actually edit what's going on from left to right is obviously time. If I play the sound waken cr play head moving through because this sound basically stays the same apart from at the end here we basically see the same. These kind of our partials here and in between is the noise right? This is a much better view, kind of what gives a sound its character. So throughout the tutorial series, so far what we've been doing, we've been watching just Theo analyzer on the channel eq you that gives this kind of basically off fundamentals. But it doesn't show you all the really tiny detailed noise within the tumbler of an instrument So what we see here, obviously on the analyzer is Ah, Lois fundamental. And we also see it here. Then if we go up here, we see our next fundamental Onda. We saw that on the analyzer there on. Then it gets smaller and smaller. But you can see a lot more detail right up at the top and also in between here, right? We've kind of got this kind of background noise here, which is quiet, and you can tell that it's quite because it's a It's a kind of darker shade of blue bluey white and the whiter whiter we get, the louder that part of it. So you see, at least controls up here. What we can actually do is start rubbing out parts of this. So if we don't want that fundamental anymore, But we want all of the upper partials weaken literally, just rub it out like this. Now, when you get on to this screen, I've got quite a powerful computer. But this is kind of lagging quite a lot. It uses a lot of processing power. It feels like so So now we haven't got that fundamental. We've see that it's disappeared from here. And in fact, I'm just gonna rub out loads more on DFACS for the video. And what we get is really bright sound, which is just the up a partial. So you could have done this, I suppose, with e que. But this is just absolutely foolproof way of cutting out the lower parts. But notice what we've done is we've cut it out horizontally, so it's kind of staying the same. You're not noticing anything. What I'm gonna do is I'm gonna increase the size off my brush, maybe change it to just a horizontal line, Um, and kind of rub out a section so we'll hear it initially. Then it will cut out, and then it'll start again. Right? So this is where you start messing around with these things. You can also select a bit and then use that to draw right? So now I have control over what I copied there, and I can move it down here and start drawing things so it can really yield some interesting results. And what you'll see in that video, particularly Stockhausen's son doing it, is some very, very interesting sounds that you can create from it. So That's the spectral side of stuff, and obviously you can import sounds and mess around with them. And again, remember, guys, this is all at the source level. This is all. Adjust the source level. You can create just your source sound and then do all of the other Mary out of things that we've looked at so far inside of alchemy to create an amazing sound. So my point about this is really just to open up a patch that you like. You know, I'm quite a fan of our appreciated stuff. Um, see what this is like, E Theo, that one. Let's say we don't like the original sound. Or maybe we do like it. We just want to start creating our own patch from all of the settings air in here. So you see, there's quite a lot of modulations going on a fair amount of them or a lot there with perform controls, obviously, and what we want to do is we want to change the source with one of these. So let's change this and with pay, perhaps our own kind of prepared samples. So let's choose one of these and hit import on. Let's go toothy source view on Let's hit, edit and then go to the spectral page. So this is our sound. Right? But we still have actually are setting from earlier were still on that brush mode. So I'm gonna get rid of that on gonna go Teoh blood circle again on Let's kind of draw some things in here and then sort of rub some things out. This is not gonna sound good, because I'm not necessarily thinking about the exact sound that I'm after, but waken here that wear affecting the sound quite significantly way Want some more of that low end weaken Draw that in too much there, obviously Because what we've done is we've drawn in three fundamental harmonic. Or rather, we've drawn in too much harmonic content on the vertical spectrum. Here, you see here this is the fundamental harmonic that were kind of interested in. And then this next one, so I'm gonna undo that will sound a bit better. And then I just sort of draw along these lines a bit. Probably That's too wide. I'll probably still sound a bit rubbish. Okay, so under that one on, do that again. I can't do that. So let's bring this size down and control. Just a bit more Here. Whoa, way Change your start point. Obviously theme. You can see for my analyzer here that it takes a lot of thought to do these sorts of things in logic. Especially when you're moving stuff around. You see, soon as I move my mouse over here, logic kind of moves. All its resource is over to this. I have to take it off to actually see what's happening. Okay, so that's spectral and hopefully gives you a good idea how to have mess around with your sounds. Basically, the one thing I wanted to say is that obviously you can do additive Inspector at the same time and then combine it with Foreman, which we're gonna go over in the next video.
54. Alchemy | Formant: So Foreman is kind of connected very much to additive synthesis, so it's It's not using samples, but essentially, the synthesizer creates kind of an acoustical model off what voices often sound like using additive synthesis. So this is a sound that I just created very quickly, using my voice not necessarily massively tidy sound, because I just wanted to create a briefly for this tutorial series. But you can hear that I've essentially created from me just going worry you like we did in the Red Crescent tutorial, something that actually works. So I'm gonna give it to my former controls here, and we'll see that we've analyzed it through the additive synthesis here. It's analyzed the sound, and we have various controls over here to do with shifting the sound and key, tracking it as well as changing the size where the center is, whether it's higher or lower, and then smoothing whatever we've done. We also have been the synthesized component which where we can shift the semi tones, change the size on the center point as well, and also change our vowel sounds here, which is really quite cool. So we have different things that we can actually create. So if you're going for that really kind of synthesised Forman sound, I would actually create this from scratch. So let's do that. Now we're gonna do is I'm gonna get additive Tenet on. Then Foreman comes on and we have only our synthesized option here. So tell us down a little bit, cause it's quite loud in my ears. Wait a lot of different sounds on. The other thing you can do is, of course, modulating. So you gather that I heard that when I moved way started getting that really nice Formenty sound. So let's modulate that within LFO. So let's lfo one side decrease the debt way Get instantly kind of modulating Forman sound there. So that's Forman synthesis inside of Additive because it's very, very connected to it. And also, when you're analyzing sounds, it works. So let's just import audio. Choose my voice one. We're going to go, Teoh, we're gonna go down to here to Additive and Forman important, and we get control over our forming controls. Let's have a listen to what that sounds like. Stop playing around steps. It sounds rubbish at the moment, but you get the idea, guys
55. Sculpture | Overview, Objects & Material: so sculpture is a really powerful synthesizer and one that's quite unique compared to the ones that we've looked at so far at the beginning of the alchemy tutorial, Siri's If you watched it so far, What I mentioned is that alchemy can kind of be used in place of all of logics. Other instruments. That's kind of true, really, from a technical point of view, apart from with sculpture. Because sculpture is a modeling synthesizer that basically means that generates sounds by simulating the physical properties of a vibrating string using essentially mathematics. That's where it goes over my head, I'm afraid. But that's that's all you need to know to understand it. So this approach to tone generation is called component modeling, and it's what we see in the instruments like the tone Will organ and also the electric piano in logic, something that creates a sound from scratch rather than it's sounding like real instruments . It's actually a modeled instrument, so in addition to the physical properties of the instrument, you can determine how and where it's played. So for example, you can the mathematical models inside of this instrument give you render the kind of effect off, say, plucking a string or blowing a pipe or, you know, doing any other manner of things. That's a very, very powerful and the creative sound creation tool. So let's dive into it. Like with the other synthesizers. It looks like quite a complex interface, so I'll just give you an overview of it first. And then we'll dive into the details what we have or in the center here and then to the left. This basically this area here is the tone generation side of stuff, and it's where we control basically what the sounds are that are coming in. You kind of see this a bit like three oscillators, oscillator 12 and three, although it's not technically like that, and here you can kind of change the characteristics off that sound on the right. Here we have a number of different parameters. We have two effects delay, and then we have the E Q. And then we have our output parameters. Along. Here are a DSR Global 80 Asada is our stereo spread, our main volume and also a built in limiter which has a number of different settings down at the bottom. Here we have our modulation routing. So we have LF owes one and two we have another modulation which will come to in a bit with vibrato, some controls about our velocity and random effects, and also where we can control our controllers or a sign our controllers. We have a morph pad which is like the X Y pad that we saw in the es two. It's very, very similar and a more envelope. And we also have, ah to other envelopes we can use here as well to modulate other things as well as the global envelope. And then we have some global controls and some other things to do with MIDI controller assignments down in the bottom. So in this video, what we're gonna do is going to dive over the main concept off sound production, which is the heart off sculpture because it's quite a complex synthesizer. I've created initialized patch like I have done with a lot of the other synthesizes where we basically start with a sine wave was something that seems like a signed waiver. First it is, but basically is being created in a different way. You see, as I play, not only do we hits here and see the sound. We see this moving around here on what this is is a string, or rather, a kind of a representation of a string inside of the way that the instrument is coded again . Guys, forgive me. This is where it goes of my head, how it actually works inside in terms of the maths on the the development of this software . Basically, all you need to know is that what we are doing here is we're affecting this string like a string on a guitar on what we have is here a pick up on another pick up here as well. And we're listening to that string. We're affecting it at this point here. Number one is where the point where I actually affect the string. If I move it to the right here, we're affecting it more towards that end. But at the moment, you're not hearing anything, really? Because what we have is kind of the most the most stripped down settings. So I'm going to do is just go over to this slider here will come to what it means in a minute, and I'm gonna pull it up. So the resolution of this sound is much clearer. So this now sounds and looks a lot more like a string kind of vibrating. And we see that we've got a lot more of a partials here. This is because we've increased the amount of resolution off that sound. If we pull it down, we've basically got a sine wave. If we pull it half way, way get different variations in the sound itself. So what we're hearing there is essentially the mathematical model of a string being struck . But we can change that. If we get to this button here, we can go down to say something like a bow and have a listen to this or why it would be better. Now we're bowing the strings. So this is kind of creating different ways off changing that sound, and you can obviously change the number of it a little bit, so that brings it down toe, not that clear a Tamara. And this makes it very clear eso that's the method of sound production. So either Boeing or striking in different ways. But we can actually change the material off the string. And this is where this material section is in the center here So we can see here that this dot which is essentially our mouths within this instrument is mawr down towards steel. If we move this up towards nylon, listen to the sound. It's a bit different if I move it over towards would sound a bit strange. I'm gonna move this over Teoh impulse again And if we move it down to glass waken really, really change the structure of that string. So that's the kind of principle Here we have material, which is the string on then the way that we hit that material or we make it sound. But there are two other objects here or kind of think oscillators in the way that you've done before. We can actually affect what happens to the string after after we play, which eso, for example, this disturb is a bit like adding, say, metal bits on top of a piano string kind of effects. The string itself, you could do something like bound. It's been loud. Sorry about that goes, you kind of changed the effect of it. That's like muting a guitar. Currently, that's what dampers doing. So here we have the effect on the actual string itself after it's been plucked or here toward blown and stuff like that object to basically has the ability to do both of those. You have your everything from object one. Andi. Everything from object in. You can blend all of these together and then, of course, move where they are. So if I turn off to a second, the way that this is working is that in this mathematical model of a string, what we have is we have object one hitting currently because that's essentially what impulses the string in the middle of the string. And then we have object three, which is this slider here? Dampening the string towards the end of the string near the pickups is what these sliders are here. And then we're hearing that. So if you move object three, we hear that wonderful kind of like overturned Siri's. And if have you ever done this, if you ever just if you have a good time to you and you've never done this before, basically, just put your finger on one of the strings and move it up higher across the frets, but without pressing the fret down and pluck the string that you're on and you'll hear exactly this. So they're doing really, really fantastic model off this inside of the instrument. So that's a kind of conceptual overview of how sound is created inside of sculpture and an overview of the instrument. In the next video. I'm gonna go into more detail about these objects on the material settings in the center here.
56. Sculpture | Modulation: like alchemy. There are a huge amount of modulation capabilities inside off sculpture, many more than the instruments that we've seen before, and you can route a lot of things to a lot of things. Inside of sculpture, it's often the modulation and the layering of subtle modulations that creates an incredible depth and realism of sounds. So let's dive into the different modulations inside of sculpture down on the bottom. Here you will see that we have to lfo LFO one on LFO two. They have exactly the same controls. We just have different. We have two different ones that we can route to different places and have, for example, at different rates in different settings. But we'll go over these in a minute, so next thing is jitter as well. Just is kind of like an LFO, but more of a random thing, and it creates random variations inside of whatever you're you've routed it to. We also have a built in vibrato setting, which is like an LFO hardwired to pitch that you can't change. We also have some controls, do with velocity sensitivity and also note on random settings will get into that and minute and also our controllers. So let's start with LFO one right up in the top left. We have our way form type on this. We can choose from a number of different way forms here and then underneath we see a visual representation off that way form below that you can actually change the curve settings for that particular way form and it updates so very, very useful there. Obviously you have your rates Slider here and this can either be sink or free and you change that here, single free. Below that, we have our decay and delay settings, in other words, are envelope for the LFO itself. So if you turn up the delay setting here that will delay the LFO for, let's say, 1000 milliseconds there one second and you can do it also with decay as well. But you can't do both at the same time, so decay is how long it takes until it it leaves so the LFO can actually decay off and not be an LFO anymore and be inactive. Then we have our phase and this slider changes between a polyphonic LFO where we have the LFO affecting different voices on a monitor for Nick LFO. If you don't remember what that means, let me just show you briefly now. So here we are on Polly on. Let's change the LFO two pitch so it's super obvious. All increase the amount. Bring us right down. So currently what you're hearing is one LFO going down. And if I play a separate note a second later or a few a few moments later, you'll hear that the LFO starts again on that other note. But it's out of phase with the 1st 1 You'll also see this on the EU, que different phases to each other, whereas if I pull this all the way down to here, it will be in mono mode. Ah, als sink to each other so that what? That's what that does. And in between, you have different degrees of randomness. Okay, so strange musical result, obviously, but I show it with pitch to be super clear. Next we have our target. As you saw that I set up there. We have a number of different settings that we can choose from the top here, and these are controlling all of thesis things that we saw earlier in the previous videos things like string stiffness in a loss that we saw over here. And we can modulate all of these things so really, really cool. You can even modulate the pickups and the pickup pan and stuff like that. Then you have your via so you can actually modulate or adapt the actual modulation itself. Fire, for example, velocity. If you remember that from previous videos, what you can do is you can do things like, uh, the higher up the keyboard you go, the more three LFO will affect the the pitch, which is this setting that we have set up here. So that's good. That could be quite useful for different things that will see. And as I said, we have two targets that we can use of this LFO, which have the same menu So you can write this LFO 22 things at once. If you want to use another l a phone, you can route that also to two other things. So in total, you've got for LFO routings that you can do with two LFO sources. So what if you want to modulate the rate of this LFO over time without doing it? manually yourself. Well, you have this panel in the middle, which is our rate modulation. So you could, for example, change this to be your key scale or, more likely, control. A control array is where you can set the modulation wheel to control a and then you can use the modulation will to control the rate of your LFO will talk about how you assign control array to your modulation will in a minute. But for now, we're gonna leave that off. Just know that this is for modulating the actual LFO speed itself, which is in turn modulating each of your targets depending on which one you've set here. So I love too is exactly the same in terms of its settings, we get to jitter. Jitter is a really interesting one. It's essentially random variations inside off sculpture that change the parameter in a very interesting way. This is often used for creating kind of more real life artifact Andi the kind of organic changes that happen in instruments. So let's load up one of these and I'll show you how it works. So I'm gonna turn off LFO one so that we're not getting any strange things going on from that thing. This is our sound, so it's already quite an interesting sound. But if we go over to our jitter settings here and we choose our target to be, let's say, string in the los theme, you can see that what we're gonna be doing there is we're gonna be modulating this in a lost setting here on this string, and it's changing it in a kind of a random, jittery way. Eyes no logic to it. In fact, that's what makes it quite an interesting sound. So it's useful for creating deeper textures and richness to an actual sound. So let's try that on something else, like object to position Theo. It's really, really interesting sound that you can get in there and you can actually change the rate of it. So if you think that's too fast, so it's very useful for long, kind of evolving sounds to make sure that they're not monotonous, but they actually keep interest for the year. So, as I said, we have a barato already set up here where we have the same kind of controls as our LFO one . We have the different types of wave forms for librato itself, which is always quite useful. We have the little screen here which shows us what weight form type we're currently on. And also what are curves are currently doing to the way form itself. We can also change between a polyphonic Levorato or Mata Phonic Roberta, or somewhere in between as we saw with the LFO. Change the rates here and we can also make it sink toll free. And we can also control the depth via the vibrato. Control on the vibrato control is set down here. So currently it's off. But you could set set your brother control to any CC that you'd like. So if we set it to the mod wheel, we can actually control vibrato via the mod Well, so let's turn this all the way down here, Theo. So as I'm moving my mod will, the vibrato is increasing as well. So the amount is the default sort of lowest level of your modulation whale. So currently it will be on slightly on as I push the mode whale up will go up to this point here where the V a slider is. Then we have the lost e note on and random settings. So as we saw earlier in the object section, what we have is each object apart from object three has its own velocity sensitivity. The filter also has its own velocity sensitivity, which we talked about, but it can be quite useful to set up more velocity controls for other parameters. Before we do this, I'm just gonna turn off our vibrato and Jeter so that we're not getting any obvious stuff going on here. So just needs to be turned off over here on the librato needs to be pulled all the way down . There isn't actually an on off button here. Pull Our modulation were all the way down to the bottom as well. So let's go over to the lost Tegan. We need to turn on one of these and choose pitches our target. And currently nothing is gonna be happening. But if I push this up here, the harder I press the higher the pitch on this one note waken Invert that Obviously, if I pull this down, you heard it Jump up there. That's actually to do with the kind of harmonics side of things here, but it does go lower as I play harder. Okay, so that's obviously not that useful for pitch. But there are plenty of other things here, so you can change the Tom Brose, you go a Z play harder, really, really emulates the kind of feeling off rail instruments when you kind of if you if you've ever used a violin or seen some play of Ireland, if they dig in really hard and try and play incredibly loud, the Tomba really gets very kind of gnarly and kind of strong. And that's a real tonal characteristic shift when you play harder on the violin so we can reset these and also turn them off here. So we have to velocity targets, which is useful, and you can also change the curve of those that lost the response curve. And then we have no tone random, which can be quite interesting. It's a bit like jitter, which is a random setting, but it's specific Teoh each note that you play and so essentially a value is randomly generated. Each note that you play on that value remains constant until you take that note off. So this is kind of really thickens. The sound and ADM. or interest, emulating real life imperfections off Rheal Instruments, so to speak, So we can turn this on and off, obviously here. And then we change our our settings here and again. You don't really want to do it with pitch because it'll sound a bit strange, but you might do on. I'm just gonna do it here, so it's obvious what's going on. So let's increase the amount here. The's are all roughly the same. Velocity my my way. I'm playing here on we've actually turned over Los de Target off here so you can tell that we're getting random pictures going on thin. This is quite useful thing when you turn it to something like the string in Los, I think getting different. Tomba's on each note that you play, so if you're doing something that is quite repetitive, then it's quite a good thing to do to add interest and rather than it's sounding like a kind of kind of repetitive sample that you're using over and over again. So control A and Control B is really to do with this bottom window here, so we'll talk about it at the end. So that's the first part off the modulation routings inside of sculpture. We've looked at L A foes before, but we've introduced a couple of new things jitter on velocity and no Thanh random variation. So some interesting stuff there, but we haven't even got to the really, really interesting part off sculpture, which is the more pad. However, in the next video, we're gonna cover the envelope settings and then in the final video, will go over the modulation using the more parameters.
57. Sculpture | Envelopes: so there are two envelopes inside of sculpture, each with two targets. You access them by clicking on these two panels here, envelope one. An envelope, too. They have the same setting, so I will just go over one of thumb over on the left. Here we see we have are two options for our envelope routings. Here we can turn envelope one on and envelope to on as well. I'm gonna keep on pitch, so that keeps it really obvious. And I'm gonna turn up the amount you'll see that we've gone envelope going on here, which we'll get into the settings off in a minute. But for the moment, I'll leave it as a simple kind of attack there. Way here were affecting now the pitch via this envelope. And if I turn the amount up, thats envelope is affecting. We're following that curve down their on pitch. But we could, of course, do it on any of the other modulate herbal parameters that we've seen in the other modulation routings. Over here, we can, of course, set up via So let's do this with velocity and let's pull this down on reset, actually by control, clicking on the bottom one. They're a bit glitchy, these instruments. So sometimes when you click on one, the other one moves instead. So I'm gonna move my via all the way up to the top. And this means that when I play harder, we're going to hear more of this modulation. When I place software, we're gonna hear less of it. So I can play really soft to start with, play hard so you can do this for filter cutoffs and kind of anything that you can imagine in here via velocity key scale on any others. Now, I want to talk about the actual envelope settings which were over here. The actual display of the envelope here shows us the actual time of the envelope and depending whether on milliseconds or sink mode will see it in a very different way. So here we've got 5/4 notes, 4/4 notes. Ah, and then here we are on milliseconds, so we see it in terms of milliseconds. So if you're using an envelope which is sink to the beat clock, then you want on here, and if you want it sort of more generally open, then you you have it on milliseconds. I'm gonna use sink for this tutorial and we can see that we're on one bar here. The actual grid in the background is when you're in sync mode on 1/4 note, and when you're in milliseconds mode, it's 100 milliseconds, as we'll see. If I zoom right in here, we'll see that if we try and create for, ah, lines on the screen will have basically 400 milliseconds altogether, showing that each one of these is 100 milliseconds. And it says down there as well as you see what I've been doing. There is. I've been clicking and dragging the background, not these bars here. If you want to zoom out to the full amount off, whatever your envelope currently is, you can hit that button there. As you saw earlier, what I was doing was I was clicking and dragging here to zoom in. But instead of doing that, what I could do is just hit the zoom button and it will bring me into the right settings, that which is quite useful. So how do you create envelopes? What you have are five possible nodes inside of the envelope here, you have to start this one here and you can't change that. You can change the amplitude of it, obviously, but you can't change where it starts because it's obviously at the start. You have the 2nd 1 here which currently has the sustain on it. As you see with that little ass above it, you have 1/3 4th and then the fifth. All of which you can move the sustained point to we'll also see in a second you have loop nodes where you can bring an L into the equation on loop between the sustain and L points. As you'll see, you can't add extra points here beyond here. This is truly your end. It's not like an m sec that you'll see inthe e in alchemy synth or indeed like in the es two, where you can create a vector envelope. This is just a five stage envelope, so you can adjust the time between them by clicking and dragging. Here, See, we're getting different time amounts here. You can actually change the shape of the curve between these points by clicking on the line itself and pulling up or down, which is useful, and you can actually copy and paste by control clicking on the actual envelope itself. And this is quite useful between two envelopes here. If you've got some settings that you like here and you want to pay someone to envelope to weaken, do that there again. We have the same settings there, pasted across, or you can actually copy between multiple open instances off sculpture, which can be really useful. Let's talk about the actual parameters around the window. Now we've touched on sink milliseconds Zoom button here, but there are a couple of other things up at the top here. We have something that says a time Velo sent That basically means the attack time velocity sensitivity. Let's go to Envelope one and try this out. So, plus values reduce the attack time at low velocities and minus value's reduced the attack time at higher velocities. So if you want a velocity sensitivity to impact your envelope in when it kicks in, then you can change the settings here. If you want to globally speed up or slow down your envelope, you can use this timescale feature here. You can see that everything's changing in the background as I do that 10% is 10 times as fast. If we put this all the way down here, that's gonna be 10 times as fast as the original on def. You put this all the way up 2000%. That's gonna be 10 times as slow as the original one. Although this isn't a multistage envelope, you do have loop capabilities. And these air down here currently were in sustained mode, but we can put it into finish mode. Loop forward, Luke Backwards on loop alternate. If you've watched the S two tutorial Siri's, then you'll know what those mean. Basically, what we can do is we can set up on loop to actually occur between a number of different points on this here. So we'll see here that as I zoom out here, let me just click this. What we've got is a loop point here on a sustained point here, so we can make sure that we pull this look back here and we're gonna loop around with this envelope from beginning to end. So let's see this in action. I'm gonna pull up the amount on my target here so that we actually get some modulation going on from this envelope setting to our pitch and we'll hear if we're in Finnish mode, then just finishes and stays at the pitch that we originally played. But if we turn it on to loop forward mode, what we're gonna get is that sound is gonna go from here all the way to the end, then loop, then immediately shoot back to L and then loop through. Shoot back to l looked through and this is what forward mode is. We went through this in the years to to tour of syriza won't go over it too much here way also have these other settings like sustained, look backward and ultimate. So I'm gonna leave those. If you set loop before the sustained point, we get a normal envelope behavior where we're in our sustained point We get a loop is what you've been hearing so far. But if we put the sustained point prior to the loop, we'll hear no modulation until we let go. But obviously what we need to do is have a long release time. So nothing. We don't hear anything there. But if we increase our release time, we'll hear that when I let go over Key, which is now the modulation then kicks in. So if you want release phase modulation Vyron envelope, you can use that setting there. You can actually record your own envelopes, which will see here later. But I'm going to move into the next video where we can go over the more pad Onda, the actual set up of thes midi controller assignments that will enable us to record our own our own envelopes in a bit.
58. Sculpture | Midi Controllers, Morph & Envelope Recording: So before we start doing more modulations and also recording our own envelopes, we need to understand this bottom panel here, This is MIDI controller Assign. If you've seen any of the quick tip or advanced tutorials inside of this tutorial, Siri's you might remember me setting up logic to be able to control or rather set up my MIDI keyboards. Be able to control an instrument parameter, and this emulates the real life physical control that you get with analog or physical. Synthesizes. Sculpture actually has a built in feature to do this, which is control A and control A B so you can set up physical or CC controllers to control different parameters within the instrument. But it can get a bit confusing because there's the target off the controller on, then the assignment of that controller. So let me talk about this. So before we even start messing around the controller and control of B, we have to work out what is control array and control A B because, say we had loads of different MIDI controllers, like your modulation wheel and other things on your desk, you could assign any of them to control array and control a B and you determine this down here where we have control, array and control the B. So you see, if I click on off here, this will bring up a big, long menu here of all the different CC's that I can choose and we can see that the first thing here while after after touch is mod wheel. So let's have a look at the actual controller A and B panel. You see here that for each of control and control a B, we can have two targets. And when we click on this target here, we can choose from a number of different parameters which are up in the top part off this instrument, nearly all basically to do with the actual sound production itself. But we also have controlled over our filter and wave shaping. Currently, you see that it's got the target is cut off, and if I pull this all the way up, we're gonna have controlled by my mod wheel, which we set up a Z control or a four, our assignment in control re. Before we do anything, however, we do need pulled down the cut off so that we can open it up with the mod wheel. Otherwise, if we keep this all the way up, the model is not gonna do anything because we know because we're fully open as our base setting. So we need to pull this down. And then when I play a note with, my modulation will down because we've really filtered out the high part of the spectrum. I can control it now with my model, and we can add another target. So let's make this, um, let's make this object one strength and see what happens. So again, similarly, I always forget this. You need to pull down the strength and then bring in again. That doesn't make it a huge amount of difference. That one. Let's choose, uh, string stiffness and let's pull this up. A swell changes the quality off that as well, so you can see that you get physical control over the parameters that you're after. If you want Teoh control the note after you've played it like I am now, if I play a note, so that's just one. Or rather, I'm playing a number of notes, but I can control it along the time throughout the whole decay phase. Then you can keep it on Continue. If for some reason what you'd rather is, let me just turn the volume up, skiing it quite here. It to be on note on what this means is that the setting with your modulation wheel or whatever your controller is at the moment when you play the note will be the complete sound for the whole duration. That note. So let me show you what I mean. So I'm gonna play a note with my mod wheel about halfway up on. Then I'm moving my mod well, but nothing's happening now. I'm going to start this note again with my model all the way down. I'm moving it all the way up, so it's fully open. But nothing's happening on their I've played it when it was at the top, moving it, nothing happening. So continue. Really, if you want proper modulation, is is probably what you'd like unless you want real time control over kind of a static setting for your instrument, in which case you could use that there. So, obviously, control of A is exactly the same as what we've just gone over. It's exactly the same you can. You can define two more targets there as well. I'm gonna turn these off for now. So next to that, we have ever brought a depth control. So if we go back to our vibrato settings here, we can set our rate and everything like this here. But we can set the depth here, and this is where we can turn it on and control vibrato with any number of cc's. Here we can also change its settings via Vera as well, which is quite useful. So you're determining how powerful you have brought a depth. Control actually is according Teoh your settings here. So that's what brought a depth control to the right is where we have the parameter. That's really important for controlling envelope one and recording that. So what we can do here is if I turn off mod wheel on control A and I turned mod wheel on for control envelope one. What we now have is envelope one listening to the movements of my mod wheel. Now, why would you want to do that? Well, nothing in terms of your your normal settings, but you will want to do it when you want to start recording your envelopes, which I show Domenico. So I'm gonna just change patch, and then we can go through this. Now, you'll notice that now that I've changed patch here this setting that I had earlier of these two controllers, all these three controllers being off on my control under load one being set to model that was retained. And that is because we have this mode here enabled use default slash Keep. Now, if I change it to load from setting, they all change. That's because each patch that you see here saves its own settings of midi controller assignment. But if you don't like that, if you want to completely keep your own money controller assignments the whole time, you can use use, default, keep. But what we'll do is that when you load up a patch, all of the's will be off or whatever settings you usually have. So I usually keep used to fault keep so I can set up my MIDI control is exactly how I like for every single sound. Okay, so now we've got control envelope one listening to our mod wheel. Let's hit record Before we do. However, I'm gonna click on this menu here, and it brings up a dialog. So this is saying, When will the envelope start listening to our control of movements? So if I have it currently on this setting, which I think is probably the best, and I would just leave on this, it will start listening to the envelope I'm drawing when I play a note and move my modulation wheel notes plus control of movement. You can set this to just note on. So it'll start listening to the kind of the beginning of your envelope, even when you're not moving the controller and then you can set it to note, plus sustain pedal. To be honest, I would just use it on this because it's a lot more intuitive than the other two. So I'm gonna hit record. But nothing's happening yet because I haven't played a note or moved my controller. But as soon as I do will start recording our thing now, you didn't hear anything there because we haven't assigned it to anything. But if I zoom out, that was the movements that I did on my modulation will exactly how I did it, so that's quite useful we can create exactly the type of envelope that we want and we can create incredibly long envelopes as well. Then, as we saw earlier in the previous video, we can then assign this to things that we want. So let's have a listen to this. I think it s that was the envelope that I drew with my modulation and it's gonna now move through that every time I play a note and you can also set up a look forward and leap back exactly how you want. So now we didn't just look through that last a Z many times as you want. So this is a really, really useful way of recording your own envelopes. So I'm gonna turn this off on We're gonna leave that they're now. Now we turn to the morph pad. If you've seen the ES two tutorial, Siri's what you'll remember hopefully is the X Y pad there where we can move a number of different parameters using the X Y pad. Now that's quite similar to this. It's very similar in the sense that we do have an actual X Y axis here that we can move this red ball on but it's not quite the same in the years to what we're doing is we're assigning different modulations to that pad and we're moving multiple things at once. Here in Moore, what we're really doing is saving the settings off many, many different parameters to part of this table. So let me show you what I mean. If I push this all the way to the left here, Andi, I keep my settings really obvious. They're gonna move all of these controllers to the right, would make a great sound, obviously. And then I'm gonna go over to this part here, and we're gonna change all the settings to be all the way to the left. When I moved this red dot we can see that in the background. We've got this ghost moving left and right, and that ghost is the current settings. So let's have a listen to this So very, very quiet settings here. Actually, you can tell that the instrument is listening to these sort of ghost outlines in the background. And this is this setting. Now, what's important about this? Well, yeah, it's cool. You can move and kind of more between these different settings that you have on the pad here. But the really, really profound thing that you start to realize when you use more is that you create endless variations on your initial sound. So if you listen between here and here the loads and loads of different sounds in there, that could have been quite interesting and especially if we did stuff that was way more interesting on the example I gave is purely for visual purposes. If we kind of turned on a number of objects here, I have no idea what this is going to sound like. I'm randomly doing stuff on and let's turn it bouncing like bouncing, See what it sounds like. It's OK, so that's our setting there. Let's move this all the way over to here and change the settings completely, So that's another setting Now. Now, if I move between, these wave morphed back to the initial settings that I had, and there are so many interesting sounds that we get between here and here. It's like having like seven or eight people moving all these different parameters perfectly for you to create lots of different variations. Now, of course, what you can do is you can record this movement into logic. Let me show you how you do that now. So I'm gonna close this e que That we usually have up in the corner, and I'm gonna go over Teoh my track gonna press a and that's gonna bring up our automation . Now, here on the left, I'm gonna turn on latch. And that means that the automation is gonna be listening to whatever parameters I change inside of the instrument as we play. So I'm gonna play a note on and hit record and I'm gonna slowly move this more on. We can see automation being drawn in the background. Uh, now if I close this out a second and we press this arrow here, this will show us all the different modulations that we have to have a tiny bit of morph enveloped level Ah x one. But mostly it's the more X because we're moving horizontally on the access. If we listen to this again, it's remembering what we did. And in fact, the ball is moving as well. So here we have logic. Controlling are more parameters, so that's one way of doing it. But sculpture doesn't need logic to do this. This is what's quite interesting about the more pad on the more envelope. You can actually do this purely inside off sculpture itself, but we'll get to that. So let's go over the basics of the more pat. What I just did then is I created two more points he saw here. I say for the settings for when we were in a You can see that causes a little aid and we save the settings for when I was in B. And then we started morphing with this red dot. In between them, we have five points A, B, C and D and also the central point as well. So what I've done with two points here we could do with five and then more for all axes between them. We can create some really, really interesting sounds, depending on whatever settings that you have happened down here. But what I said a second ago about finding really nice sounds in between here, I want to just dive into because say, I'm going between here and on. I get to this point. I'm like, Hey, I really like the sound of the saying Interesting. What's going on. You don't necessarily need to analyze it or understand it. What you can do is you can save that as a new setting. So what you can do is you can control Click on this more pad here, and you can copy either the selected point, which would be the settings that I set up myself on A. Or I can copy the current pad position. So this is exactly the settings off where this red dot is, as opposed to the settings of A and B. So if I do that like in copy current pad position, if you look at that exactly now, try and try and save that in your mind. That image of all the settings there, if I click on D on my pastes a selected point That was exactly the settings that we had where Maria here and now it's a D. So we've got that settings now at D. Hopefully that makes sense. What we did is we set some settings up a some settings that be we morph between them and then we like to the settings in between there, and we save those settings as a new more point so you can copy the selected point, which is this This is a more point. This is a more point, or you can copy the current pad position. And then you can pace that to one of these other points as well. Or you can pace toe all points if you want everything to have that setting. Now, when im orf around, nothing is gonna change because all of my more points have exactly the setting that we saved a second again. So you might want to set up your own more points and change the settings just like I did then. But it's got a randomized feature which is very, very useful thought kind of chancing upon interesting sounds. And this is kind of the philosophy of sculptures that they talk about. The creators of sculpture talk about breeding sounds where sounds a bit funny. It's a bit like if you imagine, you know, leaving something to evolve for a long time. It will eventually create very, very interesting results exactly like evolution itself. So if we do this with a sound and randomize stuff, it creates really, really interesting results that you didn't intend to create. That's kind of the philosophy, as I say behind sculpture. So there's two parts to the randomize feature. There's this panel on the right here, the random button, which actually affect the random ization, the intensity of the random ization, and also the points that you want to randomize. So if we collect this button here and hit random and also increase the intensity all points 12345 will be randomized. We see that he has been randomized. De has been randomized and see has been randomized according to our intensity there, but say I just wanted the outer ones to be randomized and not the middle one. So let's make sure that we're clear on what the settings are for the middle one. Here. Let's move all of these to the left and I click Random owes its not going to randomize the middle on anymore. So if you have kind of the central point is your core sound and then some interesting variations of it on the outside, that's what's quite useful about this feature, so you can have a really nice sound there and then randomize everything around it and then modulate backwards and forwards between it or you could do the opposite. That where you randomize only the central point or this last one. Where we see we have a yellow dot in the middle means that we're randomize ing the selected dot here. So if I click on that one and then we're on a we'll see that will be random izing a but that these guys haven't got randomized. If you control click on the randomize button, What you get is the randomize menu, and this allows you to choose what it is that you're random izing. This could be quite useful because simply just using the randomized feature, especially with high intensity, can yield some very, very strange results. Obviously, if that's what you're going for, it might be useful some weird, every sound design. So let me go through what all of those options are. Obviously, all more feeble parameters is a sui just said they're all the parameters that your random izing there's also all except tension modulation. So this obviously excludes tension modulation. So we're not randomize ing that this string material slash media, which includes the material pad position, which is this thing here that stiffness of the string in a loss, media loss, resolution and tension. Mud. We have objects and pickups, which is obviously just what it says on the tin. The objects that we have here on, then the pickups it randomize is those. And then there's wave, shaper, filter or wave, shape and filter. And that randomize is the settings of your weight, shape and filter. So kind of the way to do this is to load up sound, kind of start playing around with it, get something that you like, and then more or sorry, randomize the different more points Teoh in specific ways and breed a sounds. So let's have a go at recording an envelope or rather, a more for modulation using an envelope and I'll show you what this panel does down here. So I'm gonna go down to here, and we have a very similar something that we had up when we recorded our our traditional envelope area. And what I'm gonna do is I'm gonna play a note and move more point, which is of course, what the setting is here. So we're not actually using theme modulation wheel, which we set up for controlling overlooked one. We're actually gonna move this physically with the mouse before we do. However, I'm gonna just change patch because I know this one is not gonna work as well as another one that I know about. So with this patch actually loads up without more on and to turn it on. You want to go down here, which is where you have the envelope controls for the pad and click pad, and then you have control over it here. We've already got a few settings in here. It's not making a load of difference, but I'm just gonna use them just for illustrative purposes. So let's go for this. And there we have our more for modulation. You can see that. That's exactly the pattern that drew on around it. You see these little points here and these are the points on the grid that we then have control over so we can dive in and we can actually drag thes around themselves. But we also have some other controls as well, so we can change the depth of our modulation. If we pull this slider up, we can increase how much of our modulation is happening. That's 220% or something like that. We can reduce it down below the 100% level, and that's going to just basically make it a little bit less intense. So if what you did, it was essentially good. But you needed to kind of tone it down a bit. You could pull down the depth of it. And now when we play, we'll see the red door morphing around. I'm gonna keep my depth up because it is quite a subtle patch on one that modulation. Now you notice that we just passed this orange point here, and this is the point that we have in our envelope. And you see, when I click on it, it says 2100 milliseconds of 2.1 seconds on like one click and drag this to the left. Which will mean that we get to that point quicker, Andi, Same with this point as well. So we start here. This is our starting point. Second point, third point pull phone, etcetera, etcetera. So if we wanted to go really, really quickly between the 1st 3 points, we could pull these to the front and you'll see the red dot zoom around a bit quicker and way. Want to go really slow? Maybe in this point we could expand this loads And as soon as we get Tonto slow right down and that red dots gonna move a lot slower And you can also do this sink to the beat clock as well, which is which is useful. So you can actually create kind of musical values according to your morpher modulations, which is useful there. And I won't go into it too much because obviously we went over it before, but we have the ability to loop. So currently we're on sustained mode. But we can set up a loop point right, and it means that will just be looping around these two parts. So let's say that we want to loot from here to here. We'll watch the more point moving around and then looping back, afforded back. So now it's just gonna look from here away to here and then back way can change that. So it's really, really useful again. If you want to press this button here, it's gonna zoom you. If you zoomed in or out too much, you can compress that one. So it works very much the same with this envelope here and helps you control the time of it . So we looked at death earlier, and that is the one that increases or decreases the intensity. But we've also got transition, right? And if I move this dial here, watch what happens to the curves between the points they start getting straighter and straighter. So this is kind of like the resolution you could say almost off are morphing modulation. So if we turn this all the way up, it will be exactly as we did it. But then we can make it tighter and the transition sort of more straight between our more points that we've drawn. And just like we have a via for our Ella foes and other modulations, we also have a kind of a morph envelope control. So we can modulate this via something like velocity or a key scale or control array and control a B, which we saw earlier. So you can control these you control like the intensity off the more modulation with another controller, which is useful. So that is sculpture. I hope you guys enjoyed this part. The tutorial, Siri's I'll see you in the next section
59. Vintage Electric Piano: so logics. Vintage electric piano aims to emulate a number of the core classic sounds of the last century in terms of electric pianos, and this mainly covers the roads of the Fender Rhodes is. It was later known the were lit, sir, and also the Hana Electric piano. If we look in the top left menu here, we can see that we have a number of presets and we can see what's going on there. Now. It could look like that. Both of these men use of the same, but essentially the lower one is loading up on internal sound. Kind of Think of it like the initial oscillator. You can't affect that initial sound once you've selected it in here, it's the fundamental characteristics that are coded into the instrument. Then on the effects panel and all of the different knobs on this natural instrument, you can then adapt it further. So think of it like your starting point. You can't make one of them turn into another one just by moving the dials on the screen. However, the top menu is where you can save and load different patches, which restore the settings of the different dials and knobs on the screen. Just that important distinction there will be diving to thes presets as we go for now that we're gonna stick with Deluxe Classic, which is thes standard patch as you open it up. So this main window we see up at the top here, actually, we want to be on effect. That's probably what you'll be seeing. When we start out, you'll be seeing bass boost on volume up at the top here and there. Just two volumes. There's just one which is independent for the base, because this is a kind of an instrument where you want to be able to control your base end a little bit more because it just gives it such a rich volume and rich tone. So then, beneath that, what we have is CQ CQ fairly standard. Just a base in trouble options here. So use that to booty bass. Use that boost and reduce your travel. We have the drive options here, so it's a bit more bite here. Then we can have two different types of drives. That one's a bit more intense, bit subtle, and again you can change the tone of that in terms of its darkness or in brightness way. We also have a chorus, and we can change the rate of that. So short, slow chorus intent and high intensity would sound like that on. But if we increase the rate inhibits moved quite a lot way also have a phaser, which also has a rate color and stereo control. And this is one of the things that makes the instrument. So s so interesting Is the kind of stereo panning element off the instrument you've got headphones on. Hopefully you gonna be no sickness. You can sink it to the host tempo. So here we've got a court. No sorry. Yeah, Quarter notes on you can also a NSYNC it and just have intensive low frequency oscillation . And then finally, we have a tremolo section which is similar rate intensity and stereo output. So here way already have a tremolo stereo going on. We pull this down, we get the tremolo, which is just in terms of amplitude, that we don't get the left right panning we can bring it back. So let's go head over to the details. Pain here. We could talk a little bit more about the elements that make up electric pianos like the roads. So in the deluxe classic, we are following just the standard roads. And what I'm gonna do is I'm gonna go to suitcase mark one, and that'll give us that internal sound. But you see that controls them, change a thing about roads they have instead of strings like a piano inside, they have times which essentially bits of metal that struck by a new internal hammer. And then then you hear that through the pick up, sort of like, literally, is an electric piano. Imagine a piano with pickups inside of it on the left. Here we start with voices, and that's really just about telling you how Maney voices you can play at a time. So here this is a mono phonic instrument. Because as soon as I hold one note, as soon as I play another note, it cuts out the other one. So if I try and hold a really low no and then play a higher note above it, I can't do it. You hear that? The lower notes stops, whereas if I increase that to to I commend, do it. But my camper, third over the top, the bottom one drops out. So, generally speaking, like with all these instrument, if you're playing chords, just walk out the topic, perhaps that you find it's not gonna take leads of processing power. So then we have a kind of envelope type thing here over here, which is to do with the decay and release time. If I pull this decay right down, we're gonna hear the initial Ah, the strike of the hammer. But it's going to go away incredibly quickly. Right? Release is when you let go of the keys. So if I pull this back up, you're gonna hear it as normal. Both of these, when they're they're 100%. That basically means as normal for the instrument, but you can increase and decrease. So here we have incredibly long released time. So as soon as I let go of the keys, we're gonna hit them going away like a sort of almost like a reverb. Very slight. There. If I put 2000% you can hear it ringing out just a little bit. I would keep these settings probably about here, unless you want kind of a real special effect. If you're doing some kind of funk thing to be like maybe, uh, maybe doing a baseline. And you want a really percussive sound? Pull it right down. OK, but otherwise keep them up here for that normal sound. Ah, OK, so let's head down to stereo with this. Refers to the stereo with off mapping off the actual piano notes from low to high. So here were in mono. So this means that if I play a really high note on a really low notes, you're gonna hear that coming equally out of the left and right speakers or headphones if you're wearing them. However, if I put this all the way up top a low notes gonna be coming out of our left speakers, we can see that here of our left Channel. And then if I go right up to the top of the instrument, that's even high. Let's go higher. We can hear it's starting to come out just the right hand side off the speakers. The Time Bell and dampen noise are specific to the inner workings off electric pianos. So the time Bell is when the actual hammer inside of the electric piano hits the metal strip the tine. So if we have this off, we get a very nice and mellow sound. The thing about this instrument that's really good for us, this is good. We'll show you show you in a second. That is really good for ghosting other instruments to give more body to the sound. You can imagine that being underneath a lot of other instruments because it very low harmonic content you can see in the E Q to the right there that's going to sit really well in the mix. That's what it's used a lot for. It kind of creates a huge Kordell texture, but rather wonderfully in the low mid range rather than kind of all this other stuff that piano or club record or something like that might have. So you might want to keep that low. But you also might want to bring in some of the time. Bell gives you some of that characteristic sound. Almost here, the inner workings of the instrument there dampen. Noise happens when you take off the note because obviously you're hitting a time which is just gonna reverb. Sorry, Reverb is not a word is just gonna reverberate for Aziz, long as it does right, but you don't necessarily want it, too. And so when you take your finger off the key, it dumps it with a temper, and dampers have their own little noise inside and they've sampled. Or rather, they've emulated that sound. We have a quick lesson here. I'll just turn up the volume a bit. You hear this little tweak or sound at the end of it, whereas if you turn that down, there's nothing. It just stops, so that's specific to that. So pitches where you can change the global pitch of the instrument might want to do that. The Bend range. Actually, this instrument is pretty cool. You can change the bend range. So let's just set this Teoh say, 1/4 on Let's set this also fourth. So good sound to bend by. Check this out. It's a really, really cool sound there, and you might want to explore that so we could change this to maybe just a tone right. We can just get a bend up of a tone really, really nice sound that obviously you would be able to get on a riel electric piano so you might want explore that creatively warmth just changes the variety off the tuning randomly from the notes. If you keep that down, there is gonna be perfectly internal terms. Gonna add a bit more characteristic changes to the tone as you as you as you play here on the stretch. Training part of the instrument is to accommodate the natural characteristics of se rial pianos. When you tune a real piano, what you need to do is ever so slightly to in the lower notes a bit lower and ever so slightly to in the higher notes of it higher. And that's to accommodates and things that happened with the equal tempered scale and kind of the connection between the notes. To put it really simply, um, and you can you condone basically, if you're playing along with a real piano here, so here I'm playing a piano on this. At the same time, you might find in the really high registers that they're not totally with each other. So here, technically, my vintage electric piano will be in the right pitch in my piano. My actual real piano might be ever so slightly higher, So to accommodate that, if I'm noticing anything I can shooting my higher end a bit higher. And then similarly, with the lower and E I consumed my lower and so that it fits in a bit more very, very specific stuff. Not things that you're gonna necessarily need to know too much about. OK, so that is the vintage electric piano. I will see you guys in the next video.
60. Vintage Clav: so the vintage Club is super fun. It's based on the old Hana clam Annette de six, which I'm showing on screen now. Like the other two instruments in this section, it is a component modeling instrument in that it's not using real samples but creating the sounds from scratch. And when you hear it, you won't be able to tell the difference. It's an incredible job in this instrument. So the first thing to realize about this instrument, like the other instruments in this section, is that these aren't presets. When you go through this, these aren't just presets that change only the parameters on the screen. What they are actually deeper inside fundamental changes. So, for example, when we choose the classic one, that's the classic D six sound. But if we choose the melatonin, it's a very, very different internal modeling algorithm, which is going on on. We can't actually get from the Mela tone to the settings off the classic one. By changing parameters on the screen, that's actually our fundamental starting point. Think of it like an actual initial oscillator wave. You can't easily change a square wave into a sine wave. It's better to go back and actually change the initial sound. So get to know the different sounds inside of this menu here on, then change your settings, depending on whatever your fundamental sound is. So what we're gonna look at first is this main page. First of all we have are pickup position. So the clarinet has two different pickups that you can turn on and off with these buttons here so you can use one or both, and you can actually use them above or below the strings, which creates different sonic characteristics. Generally speaking, if you have them near the middle, you get a kind of deeper, richer sound. If you have them both at the edges, you get quite a tinny sound. If you've used guitar and use pickups in a guitar, you'll know exactly how this works. Next to that, we have our stereo spread, and this has to functionalities. You can change the stereo spread between the two pickups when they're both active, and you can click up and down here to change the spread. So if you pull all the way down, we're in mono and you won't hear anything different in the stereo spectrum. But If we push all the way up, we can see those to red dots go right the way around the other side of the circle. And we're a very stereo kind of sound here. If you're listening on headphones, that will be immediately evident. So really, really cool. Usually this instrument works well in your mix when you've got that kind of stereo spread going on, it really, really makes you make sound wonderful if we pull this all the way back to the center. What we have here is the key stereo spread. So that basically emulates the sound off. If you had, say, your left microphone on the lowest part of the clarinet and then your right microphone all the way on the top, that will mean that you have maximum left right representation across the keyboard. So if I play low notes, we're gonna be only in the left hand speaking. Even if you haven't got headphones on, you'll be able to see this at the moment in my my controls down here. And if we play notes all the way to the right or even higher, we're only gonna be in the right hand speaker Pretty much and you can spread these around. However you feel they both work in conjunction with each other. And like with everything, if he you can reset these with the necessary key command brilliance basically increases the brightness of the sound by increasing more harmonic content on. Conversely, if we go into the miner says it will dampen or rather dull the sound a little bit. De que is where you can control the actual sound and how long it hangs on for whilst you're holding the note. So if I hold a lot a note now and I've pushed this all the way to the top, we're gonna hear that note for a very long time. Consequently, if I pull this all the way down immediately decays, we get very kind of almost percussive sound down here. We have our controls, which are reminiscent off the original D six clever net. They're essentially filter controls on when they're all in this current position clicked to the top here. That means that off so we can turn each one on in turn altogether. You see here that these four buttons is to do with filtering, and these two buttons are to do with the pickups. The first filter we have is a brilliant filter, and that basically creates a brighter sound. Onda increases a very strong base cut, so let's have a listen to. That trouble is reasonably brighter, but on a gentle base cut and medium is a slight base reduction soft actually makes a sound a lot more mellow by cutting out the higher frequencies over on the right. We have our pickup switches where we can turn one off or both on a swell, which is quite useful. Then we have our general volume slider here, which we can increase. Usually it's set to zero DP, but you can reduce or boost your signal depending on your settings. And then we have our damper wheel, which is usually modulated by our modulation wheel. But if it's not set up, what you can do is you can go to, uh, the extra controls up in the top right here. Expand your view. Go to here where it says damper and damper control number, and you can change that to mod wheel. Then, if we go back to the main window by clicking on editor here, we can see that when I move my modulation well, the dam becomes on and off if you listen to what it actually does to the sound. Now there are some other settings inside that changing the sound. But essentially it makes it a lot sort of quicker. The sound. It's literally putting a damper on the instant on the instruments of the nets get shorter and have a different quality is a bit like palm muting your guitar string. So that's the main window. If we go into the effects window will see the heart off the effects in this instrument. The effects here work in Siris mode, and that basically means that you can click please and move them around. However you see fit, so the effect will go into salon was all of these effects are on. The sound will go into our then into distortion, then modulation, then the compressor. Or you could move it's all around and have it going through the compressor first, then into our etcetera, etcetera, and you can turn them off by these buttons here. So if it goes in this conjunction here, what we're gonna have is is going to go through compressor not go through our and go straight into distortion and not go through modulation and then straight into the volume, or rather, the main output. So let's go through the four different types off effects that we have in here. We have a normal compressor, which is straightforward. Best usually to use this before war on distortion, to get kind of a stronger bitey. A sound emphasizes the little kind of nuances of the instrument on, so it's quite important to keep to keep on before you use the wire and distortion so that it can pick up that kind of really interesting sound. Now, if we turn on the while, we have a number of different options for different types of wires on we can increase or decrease the range. Now, we can't control it from this window. But as you'll see in a minute, we can actually control where the wire is being controlled by So currently, it's assigned to the model as you saw earlier, and we can actually get rid of the damper control here, so I'm gonna turn that off, will come back to that window in a second. I'm gonna move my modulation well Theo with the envelope setting all the way down. In other words, off what we have is the ability to completely control the UAR on our own by whatever modulation we have assigned. If we start to increase it, what we hear is the envelope built into this actual effects unit controlling the wire itself. But you still retain control after that point. So we'll hear that initial envelope of five seconds waken control as well still, but were reduced slightly in our range here because the envelope is in effect. So I usually like to keep that down toe off. Next we have our distortion. We don't have different types of distortion, but we can change the gain. And then the tone here as well. A. Z I said earlier. If you it's worth moving around the different things here so that you can get a different sound, they were routing it differently. No, that's a very different sound to this one. I za different effect going on there because the wire is then going into the distortion. I'm gonna turn both of these off and then turn on modulation. We have three different types of modulation. A phaser flounder and a chorus on. All of them have the same buttons, which is intensity and rate. And we can also sink that to the beat clock, which is quite useful or not down at the bottom. Here, you'll see that we've retained the bottom part of US interface. So the filter section, the volume damper on the pickup settings when we move on to the effects page, So these are exactly the same as the main window. Finally, we have our details pain, which is the heart off the component modeling side of this instrument. This is where you can really dive in and actually create the sound of the vintage club that you want with ALS. The kind of nuanced changes off the instrument that you'd associate with a real life instrument. In a sense, you could look at it like you have more control over real life than you do in real life things. Page is all about changing the sonic characteristics off the construction of the instrument , something that you wouldn't be able to do with a simple slider. In real life, you'd actually have to change the instrument itself. Pull off some keys, change from damper settings inside a road. Some felt and things like that. But you can do this always sliders in here. So the excite window is all about the emulation off the hammers, striking the string inside of a clever net worn out hammers inside of Clemen, it's produced more of a click due to the strings sticking to the hammer before its release . The shape slider colors the attack, simulating the hardness of the hammer. So negative positions create a soft hardness of the hammer on positive positions create a harder hardness of the hammer. So the intensity over the click sound when you when you stick to their key could be controlled here. So if you have a listen to this, I'll turn this all the way off. After I let go of the key, there's no sound. But as I gradually increase this and you can hear the actual release off the key, which gives it quite a realistic feeling now you can set this to be random across the keyboard so some notes will be cliquey and others won't be if you increase this slider here . If you have this all the way down, it will mean that all notes are equally cliquey or sticky, depending on how you look at it. So some notes they're clicking and some aren't. This slider is for the actual velocity sensitivity to the collect sound, so you can actually make it sensitive to the velocity of which you hit the keyboard. And you can set the settings here to be key on key off or water as well. I think there's a little glitch there with that little arrow. I believe it should be in the middle there. Teoh illustrate a middle point of the setting, but I'm not sure. Then we come to our string settings. So remember that this selected model that you've chosen here really, really does determine the basic qualities of the strings before this point. So the setting that you choose here will have a significant bearing on the behavior and impact of each of these parameters that I go through now. So before you start playing around with all these, what I like to do is to pull all of these down to the left here so that you get kind of ah , basic setting. Not release is after you play a note on let go how long it takes for it to disappear so you can have really long notes here. Or you can get into decay quite quickly. Damping is kind of like what we saw earlier. You could make the sound really, really damp Likas If you put a towel over the top of it, that stiffness actually increases the in harmonic overtones of the string. And if you combine that with in Harmonics City off the setting below it, you can really, really alter the sound in terms of its overtones. Very, very strange, almost ring modulated sounds if you keep it like this, if you remember from our sculpture Siri's. What we talked about with tension modulation was that if you pluck a string incredibly hard , there is actually a certain amount of pitch drift in the note. So if I turn this all the way up and play a note waken definitely here the beginning of that that there is a kind of real pitch drift from the kind of impact off the initial pluck or hit pitch fall simulates the actual pitch full after you let go of a note in in a in a club so if you increase the relief well here, that obviously, which is obviously a bit ridiculous. But we bring it back down to these settings in a little bit more realistic. So perhaps know exactly like a real clarinet. But you can dial all of these settings in depending on, however, sounds like a really organic of old school cloud, because we could have really slightly de tuned it that with that pitiful it really does sound like something you found in the back of a school classroom. Somewhere over here we have our pitch settings. We can adjust the global tuning in terms of sense 50 plus and 50 minus. That's useful. Stretch tuning emulates the sonic correct characteristics off a real piano on other keyboard instruments, where the person who's tuned the instrument will ever so slightly increase the pitch at the higher end and at the lower end. So if I go right to the top of my keyboard here in place in high notes, I'll just change. This set things here to be back to normal, and then I increase the stretch training. You'll hear it moved very slightly higher. But if I play in the middle of my keyboard will make any difference because that's the central point of the keyboard. They're playing C four, and stretch tuning only applies to the higher on lower parts of the keyboard, so we'd see the same thing if I played the lower part of keyboard. But hopefully you should understand that by now, having watched the other instrument tutorials, Warmth introduces some kind of random variations in pitch that again aimed to emulate the kind of degradation off the components inside of really vintage collapse increase that even more. We're gonna get some real interesting changes in pitch play, a C major scale. It will pass to be a bit more off Theo bit out of tune in a kind of nicely realistic way. So probably you want to put us around here. If you're interested in that kind of sound. Pitch well is like our bend. Arrange on the synthesizers. This allows us to determine how many semi tones are pitch well will actually control. So here it's gonna control two octaves. But if we pull this down to say a minor third now, I can't show you this one because it's to do with after touch and after touches the ability to play even more information into a no. After you've pressed it on a keyboard by pressing down harder. In other words, its velocity sensitivity after the initial press of a keyboard. And I don't have a keyboard with that on here. But if you have a keyboard with after touch, what you can do is push this all the way to the top four somewhere in between. And then when you press down on your No after you've played it, you'll actually get pitch variations in the note that you're playing. Now, if you put it all the way to the top, it's gonna go higher. And if you put it to the lower, it's gonna go lower in pitch so you could play around with that one There. Finally, we have our miscellaneous window is where we can control the amount of voices that we have , so this determines how many notes we can actually play at one time. So here, if I play, if I increase my release, if I make sure that my decay is quite long and then I hold I change sounds, this is awful. So what, you notice here is changing the patch here. It doesn't change all of the settings that I have here. What I need to do is actually recall default. So there are two ways of looking at this instrument. There's the settings that you is the initial sound that you have, in other words, the initial settings before you get to these settings. And then there's your Patrick. This level here it's kind of a bit different. So what I'm gonna do is I'm gonna hit recall default and then we'll get back to our normal setting. I'm gonna make sure that my decays up and I'm gonna move. My voice is down to two way here that my lower voices air dropping out and you can also increase. You can change this regatta, which is like kind of a lead instrument, and you can also have it in modern. I generally because it's a keyboard polyphonic instrument like the real thing we keep. I keep it to 12. You can change over lost e curve here, which is useful so you can change how your keyboard will actually respond to the strength in which you hit. And as I said, Oh, you can change your damper control, which is this thing here to be controlled by any CC that you like. You can also learn CC's here. So if I hit, learn and then I move my modulation wheel, it's gonna assign it to the mod wheel, which, of course, we could have chosen from that menu anyway. But if you have lots of other CC set up on your desk and other controllers, you can you can learn it there. Or if you have an IPAD app, you can do that as well. Through that, you can also set the war control through here as well as he saw earlier and in other instruments, you can go up to the view settings here and change to controls and see all of the controls in a slightly more scientific way. Okay, so that was the vintage club I have that was useful to you guys. I'll see in the next video
61. Vintage B3 | Main Window: So this is logics. Vintage B three organ. Fantastic emulation Off the classic tone Will vintage B three sound with its Leslie speaker ? If you don't know what a vintage B three organ is, or just a tonal organ in general, I suggest you check out different players on YouTube. Just put in Hammond Organ, Hammond Organ. Leslie Hammond, Organ Vintage B three and you'll find numerous players. Got a massive, massive variation in terms of sounds, right, and we're gonna dive into how you change all of these different sounds. So let's look at the interface. I've got it quite large here, Right then. You can change that if you don't know already through the view section, right? Some of the instruments in logic don't resize. Well, they get a bit pixelated, but the vintage B three organs got an updated you. It's absolute brilliant. So we're gonna keep it this size for the moment, what we have is three main panels. We have this top view here, which has are kind of view buttons. This will take us to different bit windows in a minute that a nice little icon of the Leslie speakers horn behind here, but you can ignore that. That's not functional. It's just there for aesthetics. So that's the top window. We have this main window here which changes every time you press one of these new view buttons, as you see here on, then underneath this window, we have a few controls. All right, which will talk about the so three kind of areas. This is the main one. We're gonna be looking out right in each section because it's where all the detailers. So let's start with the main section here, and then we'll go through Rose Cabinet options, effects and expert. In a minute, I'm gonna resize this window on gonna bring it down to probably about 125%. We're gonna put it over here, and I'm gonna open up our channel e que so that we can see what's going on with the sounds that were editing on what used to think off the vintage B three. Just like you would think about any synthesizer. Except it's an additives pesticide. Attractive one. It's not a synthesizer. You may be thinking, What's he on about thinking about it like a synthesizer? It's obviously not a synth sound, but it works very much in the same way. Let me show you if I play a note, right? By the way, this is the initialized patch, which will be in your course files. Really, always important to start from an initialized patch so that you're not confused by all the different sounds there initially coming through the instrument. So this is the bare bones. Nothing going on and we can go from here so initialized patch. Nothing happens, right? We can see that there's Midi coming through in logic here, playing F four andare manual up. Emanuel will talk about what that means in a minute, is registering that. I'm holding a note, and when I let go, that light goes off. But nothing's happening, right? We can't hear any sound if I pull down the lowest one of these drawer bars, let's see what happens. We suddenly get a tone, actually, can turn that tone down. It's very quiet. We'll get louder in a second, so if you can't hear it, so that's showing us that we have a fundamental tone, and if I play a bit higher up on my keyboard, you'll hear that is kind of just a sine wave. Yeah, very, very boring Sound right. But the way that tunnel organs work is that each of thes drawer bars pulls in an upper harmonic for the note or the fundamental note that you're playing. So here I'm playing F form. What we get is in low version the lowest version of that f right that the tone will complain from the key that impressing if I bring in this next one here, it's not strictly the next one, but let me just show you. So look at the eq you on the right here as I do this way. See, another partial coming up, right? I might do this with a lower no, actually, way go So low note and then I'll bring in the next one. Now, the thing about this instruments a little quiet. We'll look at why in a minute we can turn up the the essential volume up here, but we'll get into this window in a minute. I'm just gonna turn out for now way better so we can see that we've got that one fundamental turn and then all the drawer bars that we brought in above it. Bring that one in as well. Fifth above the first active. Now, this sounds like a cord to you, right? Cause I've just been playing one note. But if I play the instrument like that, play a melody, really, it becomes you Think of that if you heard that, you know, from scratch as an actual, like an instrument, because what we're doing is we're adding the upper harmonics, and that really changes the Tom. But we're still hearing that bottom note, the one at the bottom of the EQ. You here? This is the fundamental know that we're hearing. But all of this other stuff gives it its own Tom brah. So what you can see, this is kind of a mixture between e que and changing the sound of the instrument that's mix between a few of these and see what different sounds we can get. That's one sound. Maybe let's reverse it. Let's have more of the high ones up unless of the low ones. A little bit more kind of square, wavy almost to my ears anyway. But it will send a bit boring at the moment, right? Compared to something like this. If we went Teoh, it's kind of a little bit more interesting. Not the greats playing in the world, but, uh, so it's a little bit more interesting. So what we're gonna do is we're gonna move towards that as we as we go through in this tutorial. So that's the draw bar settings. I'll do another tutorial on exactly how to get the kind of sound that you're after with the different varieties off settings that we have. But for now, I'm just gonna talk about the architecture of the instrument. So what we've been working on is the upper drawer bars here. It's called in the upper drawer bars because we have this upper here. If you saw that organ that Cory Henry was playing, I mean to bring that up again. You can see that he's got two keyboards essentially, and we call these manuals in the organ, said the drawer bars air. Here we have the upper manual on the lower manual on What you can't see is that below him. There he is, playing pedals, right? So there are actually three technically keyboards that an organ player has up Emanuel Lo Emanuel and then the pedals, which they play with their feet and you'll see that this replicated here by the upper lower and then pedals on these of the draw bus. So this kind of replicates what a standard organ has. But if you like most of us in our studios, we just have one controller keyboard. We might have another keyboard set up in the room, but we tend not to have two manuals, one on top of each other and then foot pedals. Right? And logic is thought about this right, because it's a very unusual thing. Toe have that, but so you can tackle that in kind of a number of ways. Let's zoom the skip, pass this section for a second and go down to this area here. So we want to go over to this split menu here, and this will help us understand how we're interacting with these other two sections. The pedals on the lower manual cause currently anything I play is whether is low or high is all going to be activated or kind of running through the settings that I have on these draw bars in the upper manual. That's the default setting, and it's the one that I have saved in the initialized patch, so let's go down to split. What we see here is three options for playing the keyboard. We have multi mode, which would be having three separate Midian puts. Basically, if you had a MIDI, either if you said three keyboards or if you had a midi tone, will organ, which there are many of them. But the kind of this is the one that we started on, which is basically this keyboard here is our normal Cuban. It's completely controlling just the upper manual and then the other option is split right ? So as soon as I move over to hear what we have is three sections, we have this one here, this one here and then this one here. So this is showing us here, the upper manual. So this is saying that anything from C Sharp five or G four upwards is going to be controlled by thes after manual. So let's let's show you that now. So here's G four, right, So this is the transition point. If I go below it, nothing happens. But what you see is that if I play F four, we're suddenly in the lower manual and nothing's happening right? If I want to play F four still in my upper manual, I move that down to be f four on. I can still play in the app Emanuel and everything above that blue eyes is gonna be in the upper manuals. Now, everything between F four and C two is gonna be our lower manuals, But we're not hearing anything, right, because we haven't changed any settings. So let's just building a few things here. Arbitrarily, I'm afraid, Sounds a bit rubbish, but stick with it for the moment, that's better. So everything from F four, or rather, from E four downwards, is gonna be in this lower manual. And then my keyboard ends, right? So I can't play these pedals in this I octave shift my keyboard down and then I start playing these notes here. But as you hear, there's nothing that's happening, right? So what we want to do is change this a little bit. Now you might be thinking, Why would you do this right? Well, it's in terms of the variety of sounds between the upper lower manual and then the pedals, right? There's no basis to, as I said, it's coming from the baseline, So let's have a little listen to this. So if I pull in these pedals now, let's see what happens. Suddenly, I'm able to play these lower notes here below a two, and you can hear that's a really nice based sound, right? It's the sort of bass sound that kind of doesn't really. You see what happened there? I just went above and I went to a two there, and suddenly when you were in the lower manuals and it gives a bit of a weird sound, so you gotta be careful with what you are. So let's move this up a bit so that in the lower part of my keyboard, I can control kind of a good baseline and then in my right hand, I'm gonna play E kind of ammonia, which doesn't sound so good at the moment, but we'll stick with that. Gives us kind of a bit of variety. There were allowed to play, essentially sort of feels like two instruments. Really, if you're an organ player, gonna be used to this injury board. But this is just kind of introduction, basically, to the the concept behind having two manuals upper, lower and then pedals. And this is your way off interacting with them. Generally speaking, if you have one keyboard, you can either decide. You know what? I'm just going to use the app, Emanuel. This is what a single default to? I'm gonna split it so that I can can have control over three of them. Or if you were to like me and you have led to keyboards in your room, you can actually change the keyboard or the sorry, the manual you're playing on fire different midi channels. The other function that is quite useful is the pedal transposed option No, on the multi page, but on the split view. So you have a small controller keyboard like most people in your desk in front of your dear w on. Do you actually want to be able to play much lower notes than you can without hitting that octave transpose button that we will have on the controller keyboard? You can shift so you might be playing up. Say, let's say here I'm playing Maybe, uh, my f uh was this F three hit playing in the three range, but actually, I want to be playing down here. But actually that say my keyboard doesn't reach that far. I don't want to reach that far. What you can do is I can change the pedal transpose So that means that I'm transposing the pedals section. So I'm trans losing all of these notes here, down or up one octave. So I want to go down in this case so I'd choose minus one and then you can see up here. I'm still playing the same notes, but we've gone down an octave So this is equally useful for the upper transfers if you want to Really bright high melody But you don't on Do you want to be playing a baseline like I am here really low. You can change the upper manual to go up here. I really don't like that sound. As we go deeper into the instrument, you'll see that we can make much nicer sounds in this. But let me just show you what I mean. So here we've got really low baseline. And then I'm playing a really high melody over the top. The top there on my hands were only kind of, you know, 30 centimeters apart. Very, very useful functionality off this instrument. Okay, cool. So let's go back, Teoh. Single moat on DWI will go over toe the controls again. And this means that everything that we play on the keyboard is just gonna be affected by the upper manuals. So I'm gonna move all of these back so that we're not confused by anything. And this is typically how you'll be using it, especially just if you're in the middle of a session. You don't want that multi functionality of the different sections. You just want a different kind of. Maybe you want a cord going over the top underneath all the other stuff that you're doing with your other instruments. So I'm just trying to give you a sense of the whole instrument. So now we come to the effects panel at the bottom off the main window. I want to look at this is really not just effects on their own, but really referencing effects, which, in options which are deeper inside of the instrument on these two pages. This is kind of at the front level because it's for ease of access. Here we have a far left the upper manual button on the lower manual button. And what this is doing is turning on the Brattle chorus for the AF Emmanuel or the lower manual. As we know we're only on the upper manual at the moment that see anyone were affecting. So doing this won't change the sound at the moment, so we just have this one on. Currently, we have the setting at C zero, which means that we are on chorus zero century visa, different settings. We have chorus zero course one course to course three. And we also have vibrato 12 and three. So three types of vibrato, four types of courses and basically that means modulation. It's kind of we won't go go over the exact meaning, of course, in vibrato here, but you hopefully know it or you've taken another course on it. So here we can see that there's a tiny bit vote modulation going on in the queue. Maybe you can't hear it, but you can certainly see if you zoom in a little bit. If I turn this off, there's no modulation. There's a little tiny bit, which is just resulting from the it from the harmonics themselves. But here we have a tiny bit going on. That's changed my brotha and hopefully here there's a tiny bit of a bratty. You can see a lot more activity in the upper harmonics. Actually, all of them has tend to chorus one. Now, the rate of this convey change deeper inside of the incident. We're not going to do that now. By the way, do you want to do is when you're when you're saying up, your sound is you go deeper into options effects expert wrote Cabinet. And then once you've set the parameters, you can come back to here and just tweak the come and turn them on and off it sort of at your own discretion. So that's how that section works. The distortion works very much in the same way we need to be on an effect panel here on and have distortion turned on, and the drive put up actually will come over. This wind will go this window in a minute. Let's go back and then, then suddenly this is active way. Have more drive going on. Percussion works very much in the same way you have to have session. You have to have the settings set correctly in options here, Andi. Then you can access it. But I won't go over these too much because the volume and time settings require that we know a little bit more about what percussion is and how it works on a tone will organ. But just let's do this and I'll show you that the difference you tell us the turn off that brought. It's very annoying eso here. Suddenly there's an attack to the start of the note. So if you're playing a passage that was kind of really percussive, like on you wanted a bit more bite, you could turn that on. You can change the harmonic, which is basically the additional harmonics, which are added to the attack part off the instruments envelope Really just the first sound . So if I have that on third, you'll hear it like this on then back to second back to third, right? And these settings, as I say we won't cover. Now you might be thinking that these settings and what I'm changing is a little bit tame again. What we're doing is progressive here, so as we add each setting, it's kind of changing the sound a little bit, but it really gets accentuated. When we start bringing in the road to cabinet, everything gets a lot more exaggerated. So just learn these from first principles now. And I promise you, when we start adding stuff later, you'll understand it a whole lot better cause we built this sequentially. The last thing that we're gonna cover in this section is this slow break and fast rotation . This is talking about the Leslie speaker, which we can kind of see through this part of the instrument here through this window. This is kind of half a tone real organ and half a Leslie speaker. This interface. It's kind of showing us that there's a Leslie Speaker going on behind. If I turn this to slow, you'll see that the Leslie speakers horns start to move around. Now let's see what actually does to the sound right. Let's turn it back to break, which means off eyes is no movement from the off. Hopefully, if you're wearing headphones, you're gonna hear that kind of doctor effect, which is coming from that lesson speaker way. Tell Mr Fast get that classic vintage B three sound. You move higher or lower in terms of oscillation on the speaker. So really, really cool setting there will dive into more of that. The last thing I want to show you is this presets area. This gives us a number of different presets for the different draw bar settings. So when you first start out playing with this instrument, it's hard to know how to get the sound that you're after on. Bees come with their own presets if we have a listen to this one. So let me just go through these now so you can explore these and all the different sounds. And you can kind of use one of these presets and then dial sank back at sank in, kind of educate you a little bit about what sounds you're after. So the cool thing about this is that as you change these, essentially, this little icon here changes. So you kind of have a nen. Vacationers toe what your preset is as you change it. Life you see here adding the top end, and then our top end in the icon changes. So this is really useful. Now, if you mess around with one of these say were in an actual pre set off the library a random one here. And we go to this and we g o Okay, I'm just gonna mess around with that. And then you go, Hang on. Wait. What was that preset again? All you need to do is move to another instrument and then come back. Now it looks like that stayed the same there, but actually assumes I click on it updates again. So that's just a little bug in in logic that actually all you need to do is change during the instrument and come back to that preset. And all of your presets within that instrument will be the same. Now you'll notice this central section here, and this is a way of modulating between these presets. So if you grab your mod wheel and move it, you will be seeing this happening, right? So it's upper morph, which basically means it's morphing between these Well, actually, it's morphing between a number of different settings between, but not not through these presets, necessarily using your your keyboard. You can also select via the keyboard keys, basically lychee switches. And once I've turned that on and I play c zero on my piano. You'll see that this button here is lit up and I can go through the different notes on my keyboard. You can see there's this bug with actually logics thing, so that each each time the u I updates. But it's OK. Tomorrow you can. You can make sense of this. I'm sure to begin here on this one on the clear setting. There's nothing but it seems I change it and I'm holding a code and key switching through all these different settings. That's really, really useful because, like you said with Cory Henry playing, he has direct access to the rial draw bars. But we don't have that were just in our studios. This is kind of a proxy or kind of way of being able to actually do that yourself. Okay, so that's the main section of the tonal organ. In the next video, we're gonna dive into the rotor cabinet options
62. Vintage B3 | Rotor Cabinet: Okay, so now we're onto the road to Cabinet section off the vintage B three. This is really where the sound starts come alive. Because if you know anything about to be three organs, you'll know that they basically don't ever get played without a road cabinet. Where Speaker like Leslie, it gives it its sound. You know, everything that we played in the last video sounded like it was from a computer game or a cheesy horror movie just doesn't sound real a tool. So I've turned the settings down on the roads cabinet to really minimal and a all I'm gonna do is turn on the Cabinet. You'll see that there's no drum rotation or horn rotation here. I'm just gonna turn on the emulation off the road Cabinet itself. Hold accord. You can hear that immediately changes the sound. I play a little, uh, kind of gives it some more depth, some more realism. And there's a kind of a little bit off impulse response River regarding the the size off that actual cabinet. So at the top here, now that we switched it on, we're going to go through the mic processing section first will leave this for the moment because it's the best way to visualize it. First will go through the settings of the different types of cabinets and stuff later. So, Mike, processing what we have here is two mikes here on the horn. Andi giving us our stereo and then our mikes down here on the drum, giving a sauced area. So let's look at the horn first. If we listen to this right, we've got and we turned the horn. So this is like a slider that basically goes between the drum Mike's on the horn or somewhere in between, like your mixer between them. Both gonna turn it only up to the horns are only hearing the signal from the horn eyes quite high, brittle sound because the higher frequencies come out of the horn up here. So even if we play low note, they get quite thin. I'm gonna turn up the stereo width off the horn, which is what this is here. And you can see with all of these things you can actually dial in exactly what you want. But I'm just gonna click and drag now That's very subtle. And those of you wearing headphones will definitely hear that If you're listening to this just to your max because you won't? No, really. But basically, it's only gonna really, really become more interesting when we add the actual rotary stuff, which I'll show you in a second. So that's the horn. We can turn that down a second. Let's mix all the way to the drums. So now we're only hearing through this virtual microphone here again. Very settled. In my opinion, you want a mix of both horn and drum you decide, and you both want them to have a kind of a certain amount of stereo with. That gives it some realism. So let's head on down to the motor. So the motor is what we had a quick look at last time. This is actually these controls were on the main screen aren't controlling the organ part of the instrument. They're controlling the speaker part of enrichment, which is connected in a real life situation. So here, if I turn off break and I go to slow, we see the horn starting to move up here, and this gives us a different sound. Let's just go over again. So without then waken, see this a modulation going on as well, with the Q and the different upper partials from a fundamental sound. Now the acceleration we won't look at just yet. This is the maximum rate. So when you go from slow to fast here, this is the maximum rate that we will go to. So that's pretty slow at the moment. But if I set this up here, that's really, really fast, so you can set your maximum rate on when I say maximum. It's because there's this really characteristic acceleration phase from when we go from either break or slow too fast. So let's get from slur kind of average speed for the Leslie way. Make our acceleration kind of a bit bit Sattler. So this is gonna be longer acceleration, I guess that's 2.65 seconds on. Then let's make this really fast. And then as soon as we go from slow to fast, it's gonna accelerate over 2.65 seconds to that maximum rate on that stereo width is being picked up by the horn. So if we turned that down, you just get the amplitude changing rather than the stereo with which is theoretically coming from these two virtual microphones here, So the motor controls have a number of different settings. What we were just in there was the normal setting. And thats access the different settings by this drop down menu here. When we're in normal, when we're fast here, both the drum and the horn are moving fast. If we go slow, they're both moving slow. And if we move to break their both, will it? Whatever eventually stopped these guys slow down quite slowly, so you can change that, right? So if we go to inverse when we go fast, our horns fast on our drum is comparatively slow. If we swap that round its inverse, so the drum now speeds up lots on the horn slows down. This gives a kind of subtle, different effect in terms of what you're after, with the higher frequencies being modulated differently to the lower frequencies. The next setting is 9 10 and what that does is that when we're in slow mode, you'll see in a second the drum will slow right down whilst the horn will carry on going, so we'll continue to get modulation in the highest. The higher frequencies and no modulation on the base, and that gives us a kind of really solid bass sound. Whilst we can have a modulation with the higher my arranges, then the last final one is a bit strange called sink, and it basically means that as you move between slow, fast and break. That these guys are completely locked with each other is very, very similar to normal. But they have their own, their own shifts or their own shift times. When we're in normal, this one makes sure that the acceleration phase for the drum on the horn are exactly locked . If we have a little listen to that, see what it sounds like basically means that they're not out of face with regards the low end of the high end and their oscillation. You can also change the speed off the acceleration of the motor via different midi control . So, for example, you could have the sustain pedal in different modes. There you have mod wheels, and you can also assign different cc controllers as well. So the last section is the brake section, and this determines the sound when the rotation off the drum position on the horn has finally stopped. Now, this takes a little while so much gonna pause the video If I put it to break Now, it's gonna take absolutely ages before this thing actually fully slows down and you'll be bored. So gonna pause the video now. Great. Okay, so now it's finally stopped. Now, let me show you why I did a wet look. Now I can finally control the horns. Right? But because that graphic goes on for way too long, there takes ages to slow down. It means that we've got this. It's really hard to understand what we're doing. So let me play in no way are currently in break position on We're gonna move around the horn position. I want to listen to the sound and how it changes. So essentially what we're doing is we're moving through manually what the rotor does on its own very fast, you know, except it's obviously more uniform than me. Just jiggling up and down. Let me do it with the drum way, See it changing. So basically, these settings are saying that when we finally break, when we finish, what position do we break in, right? It's incredibly specific stuff for this instrument here is what makes it so amazing in this detail. Probably a bit pedantic, but it's important that I go through all the details here so you can actually turn off that slow transition and move straight to dry. As soon as you turn from either slow or fast break. Let me show you what I mean. So the fast mode, right if I moved to dry doesn't affect anything currently. But as soon as I move this way, move straight to the dry level. Now, if you didn't know is that, let's try that again. Make sure that the dry level is up really loud. So as soon as we go to to dry, to break now are a lot louder. So that's really what that is for. I don't use it myself, but it's a bit of a detail, and then So finally we get to the emulation off the Cabinet itself. So we've been on riel cabinet for the last bit, which is the kind of stock suggested cabinet sound to use for this instrument. But you can see we have a number of different options here. If I just keep playing, I'll get back into the rotation, right? Ah, let's get a different sort of sound. Let's rial for that one. So these are emulating different Leslie cabinets. And I, to be honest, would say, Just don't really bother with the other ones that stick with the real Cabinet, particularly because you have the mic effects that you can control. You can particularly, you can control the deflector and the my position, front and rear. So this is my favorite setting being on riel Cabinet deflected on because that gives us the Leslie sound. Turning those off basically takes off these tiny little deflectors you could see in the icon here, on, off, on off, on having the my position at the Reik. It's a really, really nice Okay, so that is the road to cabinet settings. Next, we're gonna dive into the options off the vintage B three
63. Vintage B3 | Options: so the options screen is where we can understand a little bit more about the click percussion and morph settings. Let's go into what those are. First of all, though, we've got the master volume in tuning up here, so training is just in sense of a semi tone. You tune up or down there, your volume master volume that zero DB, and you can also plus it depending on your settings. You may want to do that if you've got very low settings in your drawer bars. For example, if you were kind of exploring a very thin sound and the quiet one for some reason up here you can look at your volume level down here, and it's actually really not that big. So you might want to nip in here and pop it up a bit, but unlikely. Most of the time, you want to be controlling your volume with a healthy amount of draw bar settings, so let's go back to the option screen on. We've got one final thing here is is expression. Now I can turn the expression down here, which is kind of like the volume, but it refers to the expression pedal so on normal organs. What we have is an expression pedal, which is allowing the player to dynamically change the volume as they're playing. You get that kind of really lovely sound as well as the Leslie speaker if we just turn that on. I'm doing absolutely botch job here because I'm holding the mouse with one hand playing the chords here on my left. But essentially, as they play chords, they change and you get this kind of lovely swell and that in combination with the right cabinet as well. Telling on the Leslie too fast. It is a beautiful sound, so what you can do is you compare that with your MIDI external MIDI controller for expression. You can also control it by mod wheel and stuff like that, which will look at later. So that's the master section. Let's look at the click section, so click is the kind of accidental, so to speak, with a kind of strange, characteristic sound that comes from turn real organs. So if we if we just pull key on and keep off down, let's have a little listen to what it sounds like. We very, very subtle sound. There's no attack. If I bring on the key, it's almost like percussion is happening, right? Actually, let's just turn percussion off so that we definitely aren't hearing any of that. So there is no percussion currently now, so these settings aren't applied because on our main window, percussion is off. So let's get back. Yes, it isn't Click Sound is coming just from the key here, so you notice that we've got keep on a key off. The sound simply stops. If we turn this up, you could hear a little click when I let go as well, so you can change the settings to how you'd like. Obviously, that's louder, and that's quite a so here, both on and off. We're going to click on when you're like this, just in the beginning, on you get it, I said, Let's leave those average. Setting the pedal is the same idea. It's setting the click settings or volume for the pedal itself. So if we go to or the pedal notes, so if we get to split mode so I can control the pedals as you see here the pedals being controlled, let's go back to options. Then let's turn the piddle Clip the pedal, click off So nice soft attack there. And now you can hear the click coming in, and this is controlled as well by this. So this is global. Click these two, and this is specific to the pedal cause you might want really, really clicker upper and lower manuals. But you might want a really soft bass sound, and this is where you pull that down. Se velocity is the velocity sensitivity over the click. So if you want no velocity sensitivity, it'll in other words, the click is all the time. So you want to have this velocity set to zero. So now if we play, we've got the click all the time. Even if I play really softly. Obviously we're going to get the organ sound, which is not velocity sensitive, so you can play harder and softer and you'll still get the same Morgan sound. But if you want, you could make the click sound sensitive to how hard you play on the keyboard. Let me show you. So if I play a note, yeah, and then I play it softer as well. It doesn't matter. But if I turn this right up to full sensitivity If I play really softly, we get no clicking If I play hard way, get more click Okay, let's pull that back down there So for the percussion section, what we need to do really If we're exploring of the first time is turn off click Because the click sound and the percussion sound can kind of bet Get bit confused in our mind So I'm gonna turn those down I'm also gonna go to the main window which, as you remember, we have are sort of fundamental controls and you could see the percussion is off. So if we tried messing messing around with anything in this window, we wouldn't be hearing anything. So we're gonna go toe on and we'll leave this just the current settings that moment normal and fast and third Harmonic. So let's connect options. Now there are two modes is kind of sequential here, but they're too mode, so you can have mono mode where, when you play a note, I'm just gonna turn some settings up here. So we here click. There's a bit of a percussion sound there, so if I If I turn the percussion off, you can hear that there's now an attack coming along. You can also see in our upper partials here that by adding in concussion, we get enough a partial here. The third harmonic, I guess, is what that's after, because it was what that's doing. So then we have these two motive mono or poly. So at the moment, mono means that every single, every single know that I play is is kind of responsive to the first. What I mean by that is, if I play one note, we get the percussion there. But whilst I'm holding it down, if I play another note E. I don't get any percussion effect on those. So that's kind of like a synthesizer where you don't get the attack on any of the leg arto notes that come after it or if we want to have every single note B affected by the percussion settings we turned to Polly. So here, let's compare that again. You have to come on and off the key for the percussion to to work. The perk on preset button is a bit of a strange one, so you need to think about presets, which we looked at before down here so that when it says the Beaky on this setting here, Beaky or all, what that's referring to is the key. Switch off. Be this one here. So I just went up through the chromatic scale. So we've got C zero for our first key switch. C sharp d flat, d e flat, etcetera, etcetera, etcetera. All the way up to be here and be is the natural setting. It's where you're more sliders up all the way up and you see here it goes away from the B. If I go down to my key switches again, I can slide through all of the's as we looked at earlier. But what this button does here is it says that if you want percussion sound toe only be on the Beaky or whether you want it to be on all of them. So let me show you what I mean. So we've got this percussion sound currently loaded right where we have Sorry, Let's change up presets back. So we're on the BQE in here. We've got quite a lot of percussion going on. They're just gonna bring the volume down about now. Currently, we're on the B key setting. And that means that whenever we play the Beaky, we're gonna get that percussion. If we go to one of the other ones, percussion disappears. So if you're more thing that gives you a percussion because of sound when you first play then you more through and you haven't got percussion anymore. So if you don't like that setting, you can go back to here and you can change it to all said Now what we have is the ability to have to cash in on all of our all of our presets. Keep on clipping here. I'm gonna bring the main volume down. So next we have slow and fast time. So then you can change the attack time for the actual percussion sound itself. Have a listen to this. We turn it down more effectively, turning off the percussion, and then we're allowing it to come in off 40 40 milliseconds or sorry, rather go away after 40 milliseconds, and then we can bring it back in on. This is effectively the volume for the higher of the percussion sound. It pushes down the low as well these guys air into linked. So if we pull down fast. Sorry the other way around. If we pull down slow for this one and push up fast mail interact with each other just like you. There is a bit of a glitch actually have noticed in this program. They have not dated it. But we currently we got no setting here. It's very, very low. If we pull it all the way up, it doesn't affect the high. But as soon as I pull this, we can hear it pop in just a little buck there. So upper level basically controls thesis ound off the upper manual, which is the only manual which receives this percussion sound. By the way on, if you turn it down way get pretty much the percussion sound just as loud as we were having . But the F Emmanuel effectively gets turned down. I love that clicking sound. I don't know whether you can hear this. If I turn it up a little bit, you can actually hear the inner workings of the instrument and sounds all gritty. You can almost hear that the mechanical settings inside of it being affected by the turning of that knobs. Lovely, lovely part of this emulation of the instrument on then the velocity is the same idea about the velocity sensitivity. So here we have full percussion. And then here I'm playing suffering and we're getting virtually no percussion. So scan of librato courses where we can control the settings off the vibrato and chorus that we would have set on the main page. So here I have it on C one, which is chorus one going to turn the rate up on the depth. By the way, on Max, you can always press option and then click one of these dials determined to standard settings. For some reason, the rate here or the standard rate is 6.85 But that But with most things like depth and volume and stuff like that my volume here, I could turn it Lloyd back up just by hitting the key with my mouse and holding down option . So I'm gonna keep my right up here in my depth, and we should hear the chorus coming in now, and I can change the rate. Now, if you can hear that, I'm gonna make it really obvious pretending with it's a pretty subtle sound, but you can change the depth of it here if you want. But this only affects the course. It doesn't affect the vibrato. So let me show you if I change it to the Brattle to weaken here, really? There's of a brought a going on. But we can't change the depth of the vibrato. It's exactly the same, but we can change the way. Okay, We gotta tell if off of those settings. So next section we have is more on that gives us two options here either step or linear. And this refers to when we were going through the presets settings morph. So currently the all of the standard presets have more offset Teoh, Linear Andi only going through a small range of these presets. What this is actually doing is it's scrolling down from B through these presets here, but not that far, right? Let me show you why. So it doesn't go through all of these. It just goes through a few. And this is where you can change those settings. So linear, first of all, means that we g o, uh smoothly through each of these settings. If you hit a sound loud and you we're kind of morphing slowly through their settings. If I want to actually change through those settings like I would when im ki switching, let's change it to step on DSI what happens one way. But you see, the range of it is only going Teoh a there, right, and that is determined by this here. So the range is saying that we are only going from the B key, which is to be a coupon switching back between these windows and annoyingly resets each time. We're only going from the B key all the way down to the A case. It's only through three presets, right? So what we can change is all the way down to see sharp and that will be our entire active of presets. Let me show you what I mean now. So I'm gonna move my morpher key or sorry, the slider, which is the modulation wheel, and I could go through all of the's apart from clear at the bottom. And that means that you get access to a really, really interesting gating sound, which is characteristic Teoh organs Bit loud. Let's turn this down. I should really be changing my settings. But I'm trying trying to do this quick video. Really, really cool so you can get some good stuff in there and you can change your presets toe slightly more subtle a settings as well, but so it's It's nice arpeggio hated, kind of sort of feeling or no appreciated. But step sequenced. So that's more. And you can control that morphing by the mod wheel or any other Ah, controller. As you can see here, you can also learn the controller as well again, guys, if this wasn't enough for you, there's also another weird little setting here, which is called Edit Preset Key. And this basically allows you to to kind of restrict what you can edit off the preset in real in real time. So you're in a live session or something. So, for example, the best setting to have it on, in my opinion, is current. But if I turn it over to Asia, would be only that will mean that in the presets page we can only edit these two switches here. Sorry presets. So so currently on A and I can change the sound of it as usual. But if I get to one of these other presets none of my tone. Wheels work. It's absolutely restricted to these presets. I don't exactly know why you'd need that, but I'm sure there's a reason. But just so that you know that it's there. Okay, so that is the options window of the vintage B three. Next, we're gonna go through the effect on then expert view.
64. Vintage B3 | Effects and Expert: So, thankfully, the effects page is a little bit more simple than the expert or options for you. We're gonna have a look at the master switch first here, and this basically turns off all of the effects on this page or turns them on. It's just a way for you to just bypass everything whilst you edit perhaps the work wrote cabinet or option settings and then bring back the effects later. This is kind of like the final touches on the instrument's sound, so you can also do that for the pedal. So just like we had for the the click settings here in the options panel weaken, turn off the click settings for the pedal. We can also do that for the effects so we can bypass the effects for the pedal or we can turn the effects on for the pedal. So here, everything here will affect the pedal notes as well. When were in that split view or using a riel midi organ controller or weakened by, pass it and get a clean bass sound. This section is the river setting, and you could turn that on or off, and you can set it to pre or post pre basically means pre the road to cabinet. So if you listen to this, we've got the road to cabinet on fast on. We're hearing the roads cabinet before we go to reverb. Let's make it really large and obvious. It's pretty settled, but if I switch this now, we're gonna be hearing the road cabinet. And then the reverb wear is here. We hear the roads cabinet first, and then the re herbs patched in later. Essentially, the river is affecting the rotor cabinet sound either pre or post. So here you can also change the type of reverb. We have a number of presets here on. We also have a spring river, which is quite poetic because three guy who invented the Hammond organ also invented the Spring River is classic sound, and you can change the level here. Next we have the equalizer, which you can turn off on, and this works like most equalizers. He had an output level. You can change your lows, mids and highs. We have huahua settings which have a number of different presets here on. If we said it classic war, you'll hear that sound. Actually, you won't hear that sound Because what we need to do is we want to be able to control this setting for our one of our controllers here. Now you'll remember hopefully from our presets that are more slider which is currently on our modulation wheel eyes controlling going through our presets. But if we dio wrong window if we go to here and we click mod wheel What this does is actually overwrites that preset Sorry that controller so that now we're no longer controlling unmoving. You have to believe me. I'm moving my mod will now. And nothing's happening with the upper more. But it is controlling our watch. So have a listen to this Really, really cool sound really, really cool Sound there. And you can change that to be anything that you want on. You could change the settings, the range of the wire. So here's a minimal while here on then here is ridiculously loud and wide wa and by is just an extra setting bit like resonance. So then we have distortion on off. You can change the tone of it and you can change the amount of it which is the drive writer darker and you have a number of different presets here. Okay, so that's the effects window. We're gonna dive into the expert window now. Okay? So the expert windows, where stuff gets really, really crazy on deep on, Probably pretty pedantic feminist. But it's useful to know if you're really, really into getting a perfect perfect organ sound. So you're very, very welcome. Skip over this chapter. There's not loads here that you're gonna necessarily need. And yet everything that you want pretty much to get so much variety and sound in these four windows, this is rather rather specific. So you'll notice that I brought up the logic tuna here. And then you can get to this. You can insert this in any either audio or instrument track, and it will give you the exact pitch help you understand what's going on. And I brought that up so that we can understand this pitch section. So, uh, the, uh, the normal Hammond B three without these settings is set to an equal tempered scare, which basically means that every notes equal as you go up the octave as you go up. Sorry through the higher frequencies of the instrument. But what you can do is emulate the kind of behavior or characteristics off the tuning off real pianos and such so that the higher notes on the piano are ever so slightly tuned higher just to give a brightness and same with the lower notes. So let's show you how this works. What we have to do there is go over to the main window and make sure that we're only using the higher frequencies here. And I'll make it simple. Just pulling my the that drove by there and let's have a little listen. So if I play a high F, we see that we're basically in tune. You can forget about this minus one cent. That is, essentially it should be in Tune on. Then. If I push this upper stretch up, this gives us a bit more deviation ever so slightly. I think the maximum you could do a seven cents hardly hear it. Very, very subtle on then. The lower stretch is for the lower frequency, so if we bring in a low key, though maybe so you can hear it a bit better. We've got a normal f. We get back to expert view. We can stretch them down and you can see that Iraq has gone down nine cents here as well. So let's bring in kind of a regular setting obvious setting now warmth basically does this slightly randomly and it gives it a bit more realism. So here, if I just play one, though it be a but a lot clearer Assoc changing a little bit way get sharper one on a low once it kind of thistle normal on Then if we bring it all the way up the theist oot of you'll know that that's actually slightly slightly changing it pitch, bend up basically changes how much our pitch bend wheel is gonna affect stuff. So there were gonna be a productive if I move my pitch will and pitch bend down is the same thing. So if I actually just want my pitch men to take us, say, like a minor third, I could set it hit three semi tones and yeah, so you can change that there. So sustain is basically the decay time off each manual so you can change this. So currently we're gonna be on the upper manual on here. You can hear that I'm changing so I'm actually getting a decay. I'm only hitting my note very briefly, but there's a long decay time. You could do this independently with the lower upper manual or the pedals as well. He noticed that the default setting of 10 milliseconds probably to do with something off that's characteristic off normal turn real organs. So in the miscellaneous section, you can choose your preset for actual hardware controller. So if you actually have, for example, the Nord Electro See Siri's or any of these other ones here, logic has actually created presets specific for that Hammond organ controller, so you can choose those there. So the conditions setting is where we get into the nitty gritty off the specific sounds of this instrument, like the Click, the Draw, Bar Leak and Random FM stuff. So let's talk about the click maximum and minimum here, so I've changed sound. We've not click active on the options window up at its maximum setting on. We go back to expert and we'll have a little listen on, and I turn these up. Get the full click basically between these two sliders. So let's say the click it's minimum will be five milliseconds on the click it is maximum will be 20 milliseconds. There's gonna be a very a random variation between these two settings, so you can if you set these up here, you're going to say, essentially to the instrument. Hey, I want all my clicks to be as long as possible and you'll give me around. Variation between these will always be a little bit of variation. Again, it's very subtle. Look, if I turn this right down to one millisecond e, I don't know about you, but I'm hardly noticing anything, but he go click color again is another one of those really, really nuanced things. You can change the color off the click. It sound itself and tens of its frequency so higher frequency clicks, lower frequency clicks you can change the filter Age as well, gives an interesting sound slightly dull around the edges. Leakage is an interesting one. Basically, what that means is that you're gonna have a tiny bit of leakage from the main draw bars to each other. So let's have a little listen. It's very, very several, but it gives you a kind of breath. Equality may actually realized that I'm on the wrong channel leaky here, so we can't see anything that's happening. Sorry about that. Guys, look at this now. See whether we can see anything. Probably No, it's very subtle. You can't see anything, but you can hear a tiny bit of high end coming in. So the next one draw bar leak is very similar, but it's kind of cross talk to an extent between exactly crosstalk. But between these drawbacks, If I show you what happens if I turn easel down, you can still hear a note, particularly if I turned up. And that means that we're still hearing all of the's draw bars, but a quieter level, and it's kind of emulating the natural thing that happens in Hammond organs. But if we turn this down, we genuinely can't hear anything. Live are tuning is showing us that there's something happening. But believe me, there's no signal coming through here, so I'm gonna turn that off. Stop being confused. Okay, so then we come to the organ model part off this So Maximum Wheels is talking about the essentially the emulation power of it. So set it at 91 for full quality on emulating 91 wheels inside of the instrument. But as you turn this down, you can hear. I'm only using one of the tone wheels inside way get more and then up here as well. So, obviously, if I'm just playing one note, I can't. I'm going up my keyboard in a scale. And that's due to the way the handle that works with its tone will generators here if I increase it, starting to sound a bit more like a scale on, then if I turned out more, it's sounding a lot better, so just basically, keep this at 91. It doesn't impact CPU if you're finding that there are issues with it and you must be having you must have a very, very old computer, in which case you can turn this down. But just keep it in 91. So tonal balance is to do basically with the eternal balance between the upper and lower. Sorry that the higher and lower frequencies inside of the upper manual, if we have a little listen to this so slightly shifts it towards the high end and slightly shifted towards the low end. It's a bit like a very subtle e que? Again? You can do that with the accused and really almost no need to come in here. Lower affects the volume of the lower drawer bars. So currently we're not gonna hear anything here. We'd have to switch back in our split view for that. So let's get split. Make sure that we've got enough space in our lower currently in lower. Let's go to this way we can change its volume below a sorry guys that's been allowed pedals , volume, eyes, the same idea. So if we make sure that were playing in pedals here waken change the volume independently for the pedals Onda then we can do shape and shape is basically the sound off the sine wave for each one. So if you move it away from that central point are sorry, we need to change back. Teoh Ah, single view so that we're only playing the Emanuel very subtly changed the wave shake off that manual on then based filter is a similar thing, but just for the base parts of that split make sure that were playing the bass Keep it nice and they keep it nice and deep with hardly any higher frequencies you can see the frequencies coming in that nice, crunchy sound of the internal mechanics, which I love. And ultra Bass adds a bit of base to everything even lower. Really, really, really low base going on there. Okay, so a huge amount of information there. I hope this Siris on the vintage B three has been useful to you. I'll see you guys in the next video.
65. Drum Kits vs Drummers: so drums and drum kits and drummers inside of Lord, it can get a bit confusing because there's a couple of layers going on what we have in front of us. Here are the four different modes of sound production or instruments that can play drums. Inside of logic. We have the access 24 which is the oldest. We have the drum kit designer Ultra beat and then the drum machine designer. I'm just gonna close these windows out. What we have in your session files here for this chapter is a layout that will hopefully help you understand this a bit more. The blue tracks that I have up at the top are instruments in other words, these instruments that need to be controlled or triggered by midi for us to be able to hear them. So at the top here we have ultra beat. I'm just gonna play this region. We can see stuff going on here, but if I press stop, obviously I can play in on the instrument as well, which is useful. So that's ultra be. This also works for drum kit designer. If I open this up, some other sounds in there that you can't see in terms of the drum kit. We got some collapse and stuff like that. And you can also play that on your keyboard. Drum machine designer is slightly different, okay? And that can also play Midi. And then we've also got the excess 24. So all of those you can edit, just like the instruments we've seen so far. But these are distinct two drummers, So drummers basically trigger these instruments. So as soon as you click on a drummer track, what you get is this library for the drummer on the left on also your groove controls on the bottom. Now, what you see here is a drummer region, and this is just basically controlled internally by logic. You can change the parameters here, but you can't go in and totally edit that. If you right, click this, you can convert to a midi region and then you have full control over whatever settings you had last. But then you don't have access to the drummer panel anymore. So if I click controls Ed, we'll go back to that drummer panel on weaken change stuff here. Lots of useful stuff that will get into there but it's controlling the excess 24 so I'm not actually able to go in and edit those individual notes without converting it to a midi region. This is being controlled by logics internal drummer. Similarly, with this one now I can edit the sounds by using the drum kit instrument on. I can edit the groove by using the drummer panel, but they are very distinct things. Lastly, we have ah, drummer for the drum machine waken Edit what we like in here, but currently that region is being controlled by the drummer, which is an internal algorithm from logic where you can't exactly edit each individual hit . You have to turn it into a region. Ah, before you do that. So that's the distinction between these. There are four instruments that can control drums. Access 24 which we've already looked at in the synthesizer section. The drum machine designer, the drum kit designer and then ultra beat on all of these convict controlled either by yourself by designing your own MIDI or playing in life all biologics drummer, which is kind of logics really, really useful tool for building grooves very quickly and easily. Now there is one more distinction. Here we go over and focus on the drum machine designer track. It looks like the drum machine designer instrument is in there, which is true. It is the drum machine designer, but it is being controlled at a much deeper level by ultra Beat. Now you'll see this when I click on one of these sub instruments, so this is a track stack. Everything sums into one instrument there, but underneath we have many, many different channels, and each of these is being controlled by Ultra B is a multi output instrument. Don't worry about that too much for now, if that's bit confusing. But just know that underneath the hood off this instrument drum machine designer, if you're playing around, say with your high hat and you're trying to understand the sound that you have there and you don't have enough control, is your like you know what? I want to make this it longer than Maybe the envelope isn't quite right. Some things that I want to dive into, but there's not enough controls here. You can absolutely do that. This is just the top level controls for your whole kit to actually go in and design sounds for that high hat. We open up this panel here just gonna close my, ah, piano Rolla play my instrument that I want to change or play the part of the kit that I want to change And I can see that it's this high hat, one dash trapdoor. Now what I need to do is go into Ultra Beat, which is on this top one here. And I realized that what I'm playing is that note there. So I click on this and then I can finally control all the different things. Like the volume obviously, is the most obvious. We'll get into all of this stuff in the ultra beat tutorial. But those your distinctions about how drum kits work because it can be a bit confusing with drummers, drum kits and then three different sound or four different sound sources for those drum kits
66. Drummer: so before we dive into creating our own drum sounds and editing them and getting really, really detailed with the actual sound production of it. What we need to understand is one of logics, really famous and useful features the drummer. This is a way off getting the computer to create incredibly interesting different drum grooves that you can then manipulate change at it and do what you want with. So it's a relatively new feature for logic. In the last five years or so on, do you can access it by clicking plus here on our new instrument. Now it's the one on the far right. When you click that you can choose between genres. I'm just gonna stick to songwriter for the moment. We can change all of that later. And then this tick box will open our library so that we can see what the drum is all about . Now a couple of things have happened. The libraries opened on the left. We've got our drama controls at the bottom and a new drummer region has been created. A drummer region is very different to a midi region. As we saw in the previous video, it's something that's only controlled by logic internally. Now, if you move stuff around, if we carefully look at this region here, I'm gonna make it really, really big. You can see stuff changing as I change stuff down here. If I make this all the way to the bottom left, we see everything changing here. I push it to the right if I choose a different pattern. This is kind of emulating the sort of the characteristics of a wave form, but it's not strictly away form. It's just showing you what a way for might look like for this. Let's have a listen to it now. This is really useful because it's not an audio file, its many audio files inside. I can pull the tempo right down and everything will change. I can also cut it up on add different parts and you'll see that the region's change accordingly. Obviously, that's gonna sound rubbish. So I'm just gonna do all of that. So in the back end all the time, logic is kind of doing the hard work for you of creating drum grooves and sounds. You can add fills, etcetera, etcetera, but we'll get to all that I want to look on the left hand side here. And this is where we can control the drummer themselves on also the drum kit that we're using. So, as I said when we opened it up, we chose thesis on writer option. And currently we're using something called Darcy Tasteful, restrained and dedicated to serving the song, etcetera. That, er there was have these cheesy explanations which are kind of useful and kind of funny. So those air those there and you have your different genres as well with different people inside them. The latest version of logic has a percussion as all recording this video, which is a really, really useful library here. But again, remember that these are not he sounds thes are the grooves. What we can do is change the sounds that that person is playing. So we could, for example, get someone from the songwriter section who or maybe the RMB section load up a groove and then change the kit that they're on. We could change it to be like an electric kit, right? So nothing changed here in our region. But now we're going to get an R and B modern Iran be sort of groove with our whatever the boutique 78 drum machine is. So that was me. I changed the sounds there in my library, but I can then change that back to say, if I choose Curtis, it'll automatically choose a new kit. The kind of default kit for Curtis Andi the Neo Soul sound. We have a listen to that. When? Now, with that riel drummer drum kit sound, which is useful. Actually, you want this to load up like this? So this is the best way to kind of go through the drummers is to really not worry about the sounds down here and just play around with You're different. You're different drummers, and it will load up the most appropriate sounds in the later videos. I'll show you how to dive in and change load of stuff, just like I did then. So going on down to this section here we have the drummer controls. So you noticed that having chosen Curtis, what we have is a number of different options or groove options beat preset since they call it right and we can actually save our own dif beat presets, which is really cool. There are a number of different things here, like keep settings when changing. Drummers keep drum kit when changing drummers. Those a fairly self explanatory a bit like the settings that we saw a second ago there. I won't leave. I won't look at those in this tutorial. I'm sure you can wipe them out. So if we choose Center City, we see that the group changes up here, get a different sound and he's a presets. Remember, we can go in and change these. So let's say I like rim shop. So let's say I like the group, but maybe the articulation or the intensity of his playing is a little too hard. Rather than pulling down my volume, I want to hear some more softer articulations on those drums on this X Y axis. Here we have two things we have on this axis allowed and soft on left and right. We have simple and complex, so simple and complex is the really, really useful feature of this. This is going to change logics internalize algorithm for creating this thing this groove and is gonna make it even more simple. And that makes it a bit more complex when we're over to the right. If I wanted to be softer, I can pull it down just like I was saying a second ago That's giving us this nice soft articulation. So that's your way to play around with stuff here. You can move this around in different ways, quite useful over on the right here we have more controls over what we want the drummer to be playing. So this isn't the controls of the drum kit where we can change the sounds themselves will look at that in a later video. This is how much we want the drama to be playing on the toms or the symbols or the high hat , and you see that we can actually cycle through here different variations for high hat. Or we can cycle through different variations for Tom. So if we want a group, which is mainly based around the toms, let's say we don't like that one. Okay, that's a nice variation on the toms. We've got three variations to choose from and, of course, within that variation, weaken. Change it up complex simple. So there's a lot of variety that you can gain just from one preset currently Rim shot. Let's change it now to be sent to City and see what that sounds like. Let's bring up the tempo as well, because all of this is completely sink to a lot of ex temper. So now we're on a groove on the symbols. Let's change up the group that's useful. So kick and snare again. You can change your pattern for the kick and snare, which is the bulk of any groove. It's the course sound that you're after. So the best kind of methodology for using the drama is to use it within the context of a track. So kind of put it on cycle like I have done here, by pressing this button or clicking and dragging out like that, and then just go through these different presets and create a region, let's say that you like that region. But then you wanted a different region. You can create a region that's very similar to it, right? As soon as you go into that region, it's gonna be the same settings of whatever region was before it. But then you can slightly change that. Let's say this is ramping up toothy, um, chorus. So we want maybe a bit more complexity on a few more fills. When we go between these two sections now it's gonna reflect that when we hear that detail changing so really, really useful. We can also add percussion up at the top here, but you can add all three bits of percussion. You can only have one at a time, but they all have their own variations. Let's have listen to the collapse on this one Here. This is a little fast as well. Pull this down and what I tend to do is say you found something that you like that one. What I tend to do is convert to Midi region quite often and then change a few things. So we've got some collapse going on up here, right? It's all right down here. Let's say I didn't like that 2nd 1 and I wanted it there instead so you can edit stuff like that. But unfortunately, you can't then go back to a drama region. So this is the slightly unfortunate thing. It would be nice if you could sort of turn Midi regions into drama regions, but you can't, but we can straight after that hit another drummer region. So if you want any kind of meticulous control like I just did, then you can mix up drama regions Andi normal regions side by side, and it will work just the same. You just don't get the controls you do here. So the way that the logic thinks about editors is a bit different. If you open up this region, we get the drummer controls. But if you open up this region, we get the piano roll, so there are a couple more features. There's also doubling the time from 8th 16th Let's listen to what their sounds like. Essentially, it gives the illusion of being faster, and you can also add in Phil's further control. Over your groove can be found under the details, but in here we get the feel ghost notes and also our high hat controls. What you notice with High Hat currently is that it's grayed out, and this is because we haven't got the high hat enabled in our grief. If we change this over to high hat, we go back to details. UnTech automatic. What we have is control over our high hat. Now let's have a listen so automatic didn't do much, then it will depend on the group that you have. But this is where you can open your high habit more. We see the way form changing a little bit up there as we move into the open high hat and closing when we're in the closed. So if you don't know what feel is Puller pushes and you never heard of that term before. Essentially, it's about the feeling of a groove. Pushing the beat forward or pulling back generally music with a low chilled vibe has a poll feel on music that's more intense and wanting. Driving forward once a bit of a push feel you can play around with this, but essentially, it's kind of if we have it right in the middle, your groove is gonna be normal or kind of pretty close to the grid of logic. But a few things changed to give the illusion that the A temper is speeding up, or that the drummer is just a bit ahead off the beat when you push on its the opposite. When you pull ghost notes are very, very quiet or different articulation notes that give more variety and interest to the groove. For example, a drummer might play their snare drum, but then, very quietly, just before they play it, they might play on a different beat. That was a rubbish example, because it's on my keyboard here, but let's have a listen to what this actually does. You can see a few things changing on there, mainly to do with the snare drum and high hat. Essentially, what this does is it changes the volume of the ghost notes that are already present in the groove. It doesn't necessarily ADM. Or which is what you might expect. So all of these controls are the same when you move to different instrumentalists. So here the drum kit changes as well talk. We're now on Drum Machine, and we have a few different controls here, but the idea is still the same. Now this is basically the same. But there is one thing that has changed. If we go into the details panel here, we see that we have more control over our complexity range. So this basically means if we pull our groove down to something that's quite loud but very , very simple, our complexity range will be down here, right? It's being controlled by this X y pad. But if we want our shakers, for example which are currently on to be actually really quite complex well, we wanted to be really simple. We can restrict the effect off this X Y pad on it. So if we pull this all the way up, it means that the X Y pad is completely controlling the Shakers. Right? So when we get really complex, the Shakers will get complex. But if we go back and we restrict the shaker to be actually only in a very simple range when we move, the whole grew up too complex. The Shaker won't get too complex. Now, if I increase that complexity again, we see the shaker get more complex. And we could do this with a high hat as well. If we want the high had to be super simple. Whilst everything else is complex and also say the drum Sorry, the kick drum. We can also have that simple. Yeah, Now is a couple of really useful features on this particular setting as well. I the electronic said things We can humanize the beat of it more so by default. the Elektronik sounds are very Kwan ties because that's generally what Elektronik music is . We can make it a bit more human. We turn this up and we get a match. Flame on Way turned the temple right down waken here, a tiny bit of variation in terms of what's going on. Whereas we pull this back up, it will be exactly on the grid. Let's pull this up again, change our phrase variation so that the whole region starts to feel a bit more interesting . Changes a bit. We turn up, fills up, we're gonna get more interesting stuff. So drummer is a really useful tool for creating your own grooves. Once you've created, these groups can either export, um audio files. You can export individual instruments and bounce those down and mix those. Or you can use the region's for other instruments. For example, if I create a drum kit now and say I liked that sound or that groove that I created Aiken, copy that. Then press control Z, I've copied that midi region there. Make sure that I'm selected on this track here and now I have exactly what the drummer was playing there, but for my drum kit. Let's have a listen to what that sounds like so really, really useful feature that after creating interesting drum grooves and loops and stuff like that that you wouldn't necessarily create by going from genre to genre.
67. Drum Kit Designer: So the drum kit designer is fairly straightforward instrument to understand and that we're triggering drum samples very much as we see it on the image here. If we start clicking on some of these entrance, we get their controls on, some of them have the ability like the snare and the kick to choose different instruments. We also have our controls down here. Now you can load this instrument up in both the stereo and also a multi output mode. Now, just in case you haven't watched the tutorials on that so far, What you can do is if you go to your mix of you. Once you've loaded up a multi output instance of drunk it designer, you can then break out all of the different sounds for inside of that instrument. But what you'll notice they've only map the kit to four different outputs. So if I minimize thes again here, we can see stuff coming out of different places here. So I'm gonna keep that on for now on. We're gonna go back into the kit doesn't affect obviously what goes on inside here. Let's go through all these And as I say, it's quite simple right click on our ride over here. We have a very simple controls Over are tuning so you can also write these in yourself. Dumpling them as well can get up. That's like someone putting something on to the right itself to make it less ringing. And then we have our gain as well, where we can increase the volume off just that as opposed to the overall kit. So let's click on the toms. Now. We have four different windows here. We have all of them where we can globally control the three times or we can control them individually. Either the low What would be that one? The mid which would be that one or the high, which would be that one. So I'm gonna go to all and I'm gonna start playing some These Tom's here, make them really low and flat or nice and high. Probably around here is best. Dampening is the same thing. It's like putting a jumper or something over the drums itself. If you've never played drums before and then you can increase their individual gain. As I said with the kick and the snare, you have two panels, one on the left and one on the right, the right we've seen so far, so I won't go through that again. It's the same controls over training, dampening and gain. But you can choose between three different kits for each kit. Usually the high hat on the symbols have same controls that we've seen so far, So that is basically it with the drum kit designer. Very, very simple, straightforward get going sort of instrument to control your drum sounds with and again it loads up with many of the drum of presets.
68. Drum Machine Designer: So when you first load up drum machine designer, you're presented with quite a straightforward, nice looking into face. Now this is quite new in logics history. Previously what we controlled all of these drum samples with If it wasn't the drum kit designer, either More electronic ones was something called Ultra B, which will be coming to next. Ultra B is quite a complex instrument when you dive into the Settings page, and it's quite hard to understand. Instead of building an entirely new instrument to control drum sounds or changing ultra beat, what Logic did was create a rapper to control Ultra Be That sounds like complex, But let me show you what I mean. Here we have the drum machine design, a window right, which is controlling the sounds. It seems like it's controlling the sounds, right, But actually, if you look inside of this track stack, where on the top we have the drum machine controls. Inside, we have ultra beat, which is actually the sound source, which is where everything's coming from. I kind of think of it a bit like the drummer controlling the sounds, but this is we've got two levels deep again If this is a bit complex, you don't quite understand it. You don't need to essentially realize that we've got drum machine designer on the top and then deep inside underneath, we have ultra beat. However, you can just think about the drum machine designer. That's really what logics intention Waas to do away with the complexity of ultra beat for beginner users. When you load it up, you also see that it loads with a number of different effects inside of the Channel strip. You have control over these facts in a much simpler way than you would if you opened up one . Each one of them individually, just by the symbol dials here. And we also have control over those down in our smart controls. So I'm gonna close that on. We can start going over the instrument itself. Now, as you're browsing, it's really important to understand the difference between your sound sources and the kit. This is what I mean. So if we look on the left here, what we have is we have the browse window here and we have this tiny little blue arrow which is currently pointing to the patch itself. If we change that can move between different patches and load up different kits. I quite like dropkick, but you can also choose an empty kit. And when you do that, all of these disappear. So what we have is assigned to the different parts of the keyboard different sounds. And as soon as I click on that, we see not the kit library, but the actual keep kit pieces library, which is down here right, and we have the ability to choose from a huge amount of different parts of the instrument. So it's naturally opened up the kick part of this life because I'm on the kick one here, which is usually see one in GM drum kit language. But if I click on, say, the D one, that automatically moves us to the snares menu, and I can choose a rim or another type of snare for this part of the instrument. But I've only got now the ability to play a snare. When I played the one, let's choose a kit like those on. Then let's play the note on our keyboard, which would usually be the high hat, and we've got f sharp one. It automatically take us to the Hi Hats menu. That's quite cool. Let's say I like that sound right, But it's a bit high for me. What I can do is actually pull down the pitch were really, really simply, That's cool. I like that so you can see that you can build your kit from scratch here, which is really useful. The whole drum kit takes up three pages, as you'll see, and when we load up on actual incident itself by clicking on empty kit and then going to create Digger or one of the other kids themselves, we see that to those paper pages is populated, one of them half, and then one of them is completely empty, and this is where you can create the rest of your keyboard toe. Also be part of the kit so you can load in more sounds down here. So let's go back to our snow one. We have our controls here over the snare when we're clicking on this item here, or are controls over the high hat here. We can also move these around different places in the instrument, but it doesn't change what the what key it's matched to it just changes the way that you think about this page itself. Now, if we collect back on the title of the kit itself, all of these change on. We get controls over the kids as a whole. We have these groups here of kick snares and collapse, high hats, Tom's percussion shakers and symbols and effects. And you can pull these up and down within your kit rather than opening this up and doing a proper mix. So these are essentially groups. All of our effects here are reliant on the effects that load up with this. So don't try and delete all of these and then change all that the effects inside of here. So, for example, river, we turn this up and then we turn these off way Haven't got any reverb anymore. So we need these. These are hard wired to this setting here. You can also send parts of your kit to reverb or delay, which is quite useful. So we have group delay. Let's turn it up for the kick and group River. Now we've got a really big river be delay kick and everything else is Dr. We could pull this up and have reverb just on us next, So this is quite a straightforward way of using this instrument again. You choose sounds by clicking on one of these here, which is determined. You see which note it's on on your keyboard, and then you choose the sound source for each one or the sample, Really, But you can also change the whole kit if you like a kit that you've created from scratch, like we started doing here. When we chose Empty Kit on, we chosen pieces for it. Let's say I like that kit, even though it's just got one high hat in it. What I can do is I can go to here. Click on this button just to the left of empty kit. This now means that the library is going to be on the selection off drum machine designer patches on. What I can do is I can save this patch as my own. I can put this wherever I want to compete in the default place, but I usually save it in another location, which is where all my instruments are. So that's drum machine designer really straightforward, easy way to understand and use the sounds inside of Ultra Beat, which will get into next
69. UltraBeat | Overview and Assignments: So Ultra B is our final sound source for our kits, whether we're playing them ourselves and creating our own MIDI files or whether we're using logics drummer to create it for us. What we saw in the last video is that the drum machine designer is a neat little rapper to be able to create and mold the sounds that are actually in fact loaded up underneath by ultra beat. So if you want to dive in to your kits that you load up via the drum machine designer and really, really control the sounds inside of it, you can use Ultra be on this tutorial. Siri's will help you understand that, or you can, as I have here, load up ultra beat as an instrument on its own and start creating your own sense. It's entirely up to you, so let's go over the interface. The way to think about Ultra bait is really as a synthesizer, but that's mapped across the whole keyboard. There are three main things I want you to think about on the left. Here we have our assignments, which is obviously across the keyboard. Then we have our synthesizer window, which shows us the controls for just that sound source of whatever key that we're currently on. So they're all changing here. So currently we have I think it's 25 yet. That's it. 25 different synthesizers inside of one instrument and each key, Or rather, each sound has its own control. So a lot, A lot of detail in this instrument on then at the bottom. Here you have our sequencer, and if we click full view, we can see that we can actually sequenced us. Really, really useful. We're gonna look at that in a later tutorial in this video, we're gonna go over assignments in the next few videos. We're gonna go over the whole of the synthesis page and then in the final videos, we're gonna go over the sequence of controls. So like most instruments and logic, we have a loaded of presets. We have drum kits and drum banks. Drum kits are where we have what you would expect an actual kit mapped across the keyboard in GM style. Whereas if you want drum banks, you can choose, for example, your kick bank, where all the kicks are mapped across the keyboard so you could have for example, and it's from where you actually create. You know, these are our kicks here. And then you do Pok ultra beat and you have, ah, high hats. We could load up a high hat bank and then you could load up, for example, another for our snares and effects and things like that. And just have that up whilst you're working so that you get access to a lot of different sounds. However, I'm not gonna do that. I'm gonna make sure that I'm using it in kit mode because that's usually what we use it for , especially if we're using the sequence of later on. So I'm gonna go over two drum kits on I'm gonna choose Gritty Funk. Cool. So that's loaded up across our keyboard, all of these different sounds. Now we can change these sounds inside of the synthesizer, but I'm gonna do it in a much simpler way because we're not gonna touch this window just in this part. I'm going to choose import. What that does is it opens up ultra beat folder deep inside our ah computer here, and we can see that we're loading up different kits or drum banks and stuff. So say you didn't like that kick sound. We could load up a drum bank on. Let's choose kick Banks and we'll get this panel here right and weaken sample of these kicks. Let's say we like that one minimal kick. We can click and drag it over onto their and we've suddenly changed it. Now, of course, you can do this. As I said, Ah, synthesize of you. If you want to minimize this window, you compress this arrow here. But we'll do that later. But what that's done is it's loaded it up in sample mode, so we've now got that minimal kick inside. Let's say we don't like that snare to cause it's got a bit of a symbol or something in there. Let's choose a new thing from our snare bank. Let's open this up. Oh, that's nice. I like that. Well, that minimal kick doesn't go with it anymore, so I might change that again just to be really clear. Let's go with that for now. Let's say this is OK. Guys can be a perfectionist in these videos. Cool. That's nice. I like that. So each one of these, as I said has its own page, but it has these little controls on the left like volume so we can turn up the kick. So what we want, we can also mute. It will weaken solo it, and that's kind of evident when we're in sequence modes. We can also change the panning of each one, so currently all of them are defaulted to center. But we can change them to be left and right, which is useful, and all of these work in the same way you can reset them by, uh, option clicking. We also have the ability to do multi outputs, but I can't cover that in the scope of this tutorial, essentially, what you see when you open up a drum kit. Designer instrument is many, many outputs grouped in a track stack, and that's controlled on a lower level by these outputs in Ultra Beat. But we won't go over that in this tutorial. Siri's We're just going to stick to stay area. OK, so that's the introduction to the assignments panel, which is where we map the different sounds and import them across our keyboard and have minimal controls over them, like mute solo pan and also a multi output mode. In the next few videos, we're gonna go over this whole synthesis section, which is where we can really dive in and create exactly the sound that we're after.
70. UltraBeat | Synthesiser Window: So the synthesis panel is really where we control all of my new shy of the sound that we have loaded and we can have a number of different sound sources. I'm gonna give you an overview off the entire screen, and then we're gonna dive in and get really detailed with this panel. So what we have are to sound sources or really oscillators. It's this oscillator here, this panel here and then this oscillator here and they're called oscillator. One on oscillator to each of them has many controls which we will go over, for example, pitch. We can change the pitch of this oscillated here, and we can change the pitch of this oscillator here. Now you'll notice that they have these different words on them and this is the mode of oscillation. So oscillator to convey in phases the later mode which is basically like the synthesis side of drums. It could be in sample mode where we're playing real life samples, or it could be in modeling mode, which is a bit like sculpture, but for drums for us, the later one we have another phase oscillator, but then we have FM mode where we can create frequency modulation sounds inside of drums by merging or interacting oscillated to with oscillator one, we can also do a side chain signal where we bring in a separate signal which is outside of ultra beat into into ultra beat itself so we can use, for example, other instruments or audio inside and get ultra beat to actually trigger it, which is quite useful after these oscillators. What we have is this flow here into the filter and our distortion. Now, if we turn off these two buttons here, what's happening is that we're still going out through the output which is hear our voice volume. But we're not going through into the filter or the distortion so essentially wants. You can turn the filter in the distortion kind of on and off here. This is the most important thing to think about. Is your sound going into it or is it going straight into the output? So currently, here we have none of these oscillators. Sor sorry I should say neither of these oscillators are going into the filter or distortion because we haven't turned on these two panels. But if we turn them on, they're gonna then go into the filter and distortion before it comes out. So obviously we have our filter in distortion section, which is useful on we have a final oscillator which is just a noise oscillator which creates interesting white noise that we can filter in different ways and make it dirty and things like that. We'll get to that in a sec after the filled section, we have our own ring modulator where we can further make oscillator one and also later to interact with each other. Then we have some e que controls Simpanan modulation and spread controls here and we also have our final output volume. But of course there's modulation built into this instrument as well. And this is this panel here whilst this ax primarily is the volume which is the Red slider . You're seeing me moving here. It also has the ability to modulate different things so we could modulate this volume here with LFO one, for example, or we can modulate the pitch off the phase oscillator with LFO two and we can change these settings here. So we have an LFO one on a foe to and we have their settings here and We also have four envelopes on these air controlling different things inside of the instrument. We could have the volume of our, uh, oscillator to controlled by envelope one, and we can have the envelope off. Sorry, we can have envelope too. Controlling also later. One did it in a slightly backwards way there just to show that we can assign these in different ways. Finally, we have some global controls, which of course, we will go over. So let's now dive into the details of the synthesizer. So we, as I said, we have three oscillators. We have oscillator, one isolated to and really actually it's to oscillators and a noise generator. Why have so many oscillators for what is essentially just a drum? Surely that's too much. Well, really, The layering of sounds is quite important inside of one sound I with with playing and thinking of. This is one kick in terms of our midi, but we're playing. A number of different sounds are released. We have the potential to play different sounds. We listen to the kick on its own. That's a reasonably good sound. We obviously change parameters, but if we layer it up with something tells, say, for example, a really deep sine wave sound. It gives it a lot more thickness if we take it away so we can actually mould it. But more if we dive in some noise with a bit dirt. We've got something a bit more interesting. Said Layering is really, really important. So there are general oscillated controls which are these here. And then there are specific oscillated controls which are here on these change. When we change between the different oscillators. Sample mode is when we loaded and riel sample and if we click on this here, what we can do is we can load in different samples. This will open up our menu off different ultra beats samples. If you click in here, you have access to the actual audio files themselves. So if we choose a different kick, let's listen to this one. That sounds quite cool. Open that one up way. Have control now over this sample. If we go over to phase also later, the sound will change immediately. We've got control over the sample and we've got control over the sound. But obviously we need night. We now need to shape that we also have modeling modes. For the moment, I'm gonna stick on sample mode because that's most straightforward to understand. In the beginning on then in a bit, I'm gonna go over the different oscillating modes. The first global oscillator controls. We come across his pitch and we can change and shift the pitch off our sample up or down as much as we want, which is really useful. We can also modulate this later on with some, for example, an envelope. I'm gonna have this offer. The moments that we just get the rule sound. That's kind of cool. Then we have our volume here, which also doubles as our modulation controls. So if we turn this all the way down and then turn on modulation to be for example envelope one, we then have the extent of our envelope one controls on our volume. So this is the modulation off volume. We can also change that to not be an envelope, but also LFO, Or we could just simply have a map which essentially means that this is now acting like volume. I'm gonna put this off and pull our volume back up so that slider will come back to when we get to the modulation settings. So we've got the settings for our kick so far. OK, we've got the right sound. We've got the right pitch and we got the right volume. If we wanted to just go straight out, then into R e Q and R pound modulation and volume, then we can just leave it as is. But if we want it to go through our filter and distortion, we need to click this button, which then pushes the signal flow through our filter and distortion. But still nothing is happening cause we haven't turned on our distortion or are filter. Let's start with the filter. We have four different types of filters low pass, high pass band parts and band reject on. We also have different slopes here. So the strength on the left we have our cut, which is where we're cutting, and then our residence at that point of cut off, pull that down. Keep with this setting for the moon because I quite like the high end of this kick. You can modulate these filters as well, which will come back to in a minute. Any time you see this mod or the blue writing on the via which is in green writing on the instrument, you know that you can modulate that parameter. So then we have our middle button here, which changes the signal flow. Currently, what's happening is oscillator to is going into the filter and then into the distortion. We can change that and have the distortion as the first part, and then it goes into the filter. And this will change the sound, obviously. So I'm gonna change this back to filter so that we're going from filter too distortion, and I'm gonna turn on distortion here. So distortion is your kind of standard distortion. Then you also have crush, which is like bit crush, which you can get some much more gnarly A sounds. If it's a really, really useful, really, really cool sounds going on in there, then we have also oscillator one so we can turn that on and it has the same controls. We have our pitch here we have our volume and then our ability to modulate the volume via either are LFO or are envelopes which will come to in a bit again. We'll go over the different sound sources FM side chaining phase Also later in a minute, then we have our noise generator in the center. This is where we can add real grit and depth to the sound by adding in another layer off sound which is non pitched based a noise. So essentially, when you turn this on, this creates white noise and you can fill throughout that white noise in different ways. So on the left we have a low pass for that white noise. We turn this off and this off. Well, here we're just listening to noise. At the moment, we can low pass it and cut it or we could high pass it well, we combine, pass it different places or weaken bypass that. And here, the whole off the spectrum of white noise. Now, currently, I've got dirt on. But if I turned that off, we just hear that pure, pure white noise. Dirt kind of muddies up the sound a little bit and creates more of a usable tone when you're working with drum samples, especially with snares and collapse and sort of sounds like that's really used useful to put behind snare, kick and clap sounds on when you're using high hat sounds, you probably want it to be less dirty so that you get that kind of higher 10 year sound. So, as I say, it's useful to blend in with noises that you've already got. Andi, probably. Let's turn off the filter in the crush here. The problem with that that you suddenly here Is that the noises going on for a little too long? And this is because we actually need to control it with our envelope. So let's do that now. Essentially, what we're saying is that the kick, which is coming from the oscillator one and oscillator to sounds like this kind of quite short. But the noise goes on too long, right? Doesn't quite sit behind that sound. So we want to make that much shorter. So we want to modulate the volume of this with an envelope, something like envelope one, that's quite short. Now I'm gonna pull the volume all the way down, and so that and I'm gonna tell my veil off said that now this envelope, which is really short 98 milliseconds, is gonna turn down the noise quite quickly, and then we only get a little bit of noise at the beginning. We increase this, so it's really long. We get a long decay of that noise. Let's pull it down again to about 90. What we also notices. The phase oscillator is also a bit long. So let's control That's pull out all the way down. If that sounds pretty good. So we've got a multi layered sample here in that we've got also later one phase oscillator , some noise behind it and the rial sound. And that gives us a really nice thick kick noise. Now I said I'd go over that modulation thing again. Let's be a bit clearer about it because it can get a bit confusing, especially as the designers of ultra be have put the modulation the via on the volume all on one round slider gets really, really confusing. So when you see the red, that's just the volume. We've currently got the modulation off, but we could say, OK, I want to modulate this with envelope one right, And then we're gonna get only a very short part, this sample because I've turned the volume right down. But if I put this alloy up to the top, which is the extent of our modulation that this has control over. We're going to get 100 milliseconds of this sample bit too short. Really. We probably want a bit longer. Let's turn off our noise. So that's obvious. Problem is with using this envelope is that as you notice them, the noise is being controlled by envelope one. So I'm gonna choose another envelope that isn't being used. So envelope to, I believe, isn't being used. Onda. We can modulate this with envelope too. So then we have the volume of oscillator to being modulated by on the envelope to So let's make that a bit longer. So now we're hearing the full sample, and now we're tightening up. Example is, well, we think decrease the kind of shape of that if we want. This is less obvious on short sounds like this and more obvious on long sounds. So let's try it on, say, for example, a crash symbol. I'm gonna click on the crash over here and you see that our whole interface changes. Let's have a listen to that Now let's have the ride Cymbal being modulated by envelope, too, and we'll pull the volume right down and then pull the blue slider, which represents our modulation. I'm gonna turn off my via here on. Let's make this shorter. Now we've got that ride or crash being controlled by the envelope here. This is quite small here, so we actually want to zoom in a bit. If you hit Zoom, you can zoom in to the extent that you are at. So now we've got greater control over the the kind of depth that were already at that. But obviously, what you can do is you can change these via velocity or via another control. So let's go over to our scenario and a really, really obvious one here. We're going to set a modulation to be enveloped three an envelope, but we haven't used yet, and we're gonna have it be controlled via velocity. So there we have the extent of our control or the extent of the modulation, and we're gonna pull the volume that sorry. And they were gonna pull the pitch down a little bit. So now, uh, wrong snap. If I play quietly or without much velocity as you'll see up here for a low pitch and then if I play hard were at a higher pitch, so that's what the velocity fear does. But you could also do this for control and controlled B, which weaken set up later up here So we could also control this firearm. Odd. Well, so that's an overview of the controls off both three oscillators oscillator one are slated to on the noise generator as well as the filter and distortion parameters. In the next video, we're gonna go over the different oscillated types phase oscillator sample mode, which we've seen modeling and also FM and side chaining.
71. UltraBeat | Oscillator Types: So let's go over the different oscillated types that we have inside of Ultra Be going to start with oscillator to where we have our phase oscillator, sample and model mode. If we go straight of it, phase oscillator from a setting that was previously on Say, you've loaded up a patch here and it was on sample mode and you just switch straight over. You might get a sound like this when I play the kick down here. Have listen. That's just a sine wave. It's nothing like what we're after, which is a drum sound, which has a very sharp attack and short decay. So what we need to do is play around with the envelopes. So the envelope that we're after is the volume envelope. So we're gonna go over to the volume slider here, pull this all the way down so that we have maximum controlled by the envelope. Turn the modulation on and let's choose on the lope one. Now it's a 98 milliseconds. But if I play, you're not gonna hear anything. That's because what we need to do is we need to move up the extent of our modulation capability in other words. This is saying how much control the envelope has over the volume. So if we wanted it to be, you know, the envelope to be controlling just a little part of it, we'd have it down there. But I actually wanted to be the whole thing. And now we've got that kick or something that's behaving like a kick. It doesn't really sound like it sounds like a sounds like a comedy GameBoy kick. At the moment, that's a bit better. So we're changing the pitch there, which is good. That's probably around the right range, and this is where you start, then playing with the actual way form itself. Saturation will give it a fat of sound, and a symmetry changes the shape. Both the wave makes it less and symmetrical. Obviously, if we want this to be even shorter, we get zoom in to the envelope a bit more, make it even shorter. It's okay, generally speaking, in my opinion, and I like to layer these with other things. The phase oscillator is often used, kind of as we've used it here, often with just simple sine waves to create kind of a really nice deep sub base behind a sample, as we saw in a previous video, so you'd have assemble here on the phase oscillator appear. That's how I use it anyway. So let's move over to sample mood. You can see the windows changed in What we now have is away form here, and this has a couple of things going on. If if you click on this writing here, this is where you can load or unload samples or show them in finder. So here we have full access to our our actual file system, which is really useful to know where things are. So if you want to point it anywhere on your system, you can do that. So let's loathe sample on. Let's go to one of the kicks in here. Now that's still being controlled by our envelope. So we've cut it short. So what I'm gonna do is I'm gonna pull this out of it. That's now taking the whole of that sample. So you have to be aware that the envelope is still routed here, retains your settings from there, the's Max Min slide. Is it to do with the velocity that which you play? Usually you just want to leave these at the start. That's kind of the simplest one. However, you can say, for example, that my maximum velocity I want to start at that point in the sample and at my minimum velocity. I want stuff at this point in the sample so much latest. If I play really quietly now, we just get this strange bit here. But then, as I play harder, if we get fuller parts of the sample and you can, of course, invert that, so when you're playing quietly, you get the whole sample. When you play hard, it cuts short. There are various reasons why you want might want to do that, but you can. You can play around with that. If you want to reverse the sample, just press this button here and then we'll be playing it backwards, which is quite cool. The thing about that, though, is you have to probably change the the minimum Max start time to be in line with your tempo . You might want to start a bit later than the final part of the sample. When you're loading up the excess samples inside of Ultra, be at also attribute samples, they can have layers within them. In other words, different velocity layers. This slider here allows you to control that via velocity, so basically allows you in this full setting here, where we have green up at the top and blue at the bottom to trigger all the different samples in the layers. Whereas if you want to just trigger the higher samples, you could go up here and vice a versa. Down here, I usually leave this open. So then we have our modeling section. And if you've watched the sculpture tutorial Siri's, this will be familiar to you. What? We have a things like in a loss and stiffness where we're actually controlling the physical characteristics of an instrument, or at least we're doing inside of an algorithm were changing. What the algorithm is is out putting. Now. We only have two types of sound, something that's a little bit more bell like on, then something that's a bit more meth I like now resolution. If you remember from the sculpture tutorial, Syriza's basically how clear the sound is if you want to kind of something that isn't that clear, but if you pull it up, get a lot more harmonic content. Uh, some interesting stuff in there, not the sort of thing that I would use, but you can again layer. It would be a really good thing to do so for me personally, I use phase oscillator on the modeling road to lay under samples. Problem with the model mode is that as you'll see, it's no up here, so I use it underneath in a separate ultra be instrument. You can't have, for example, a sample up here because you see there's no Sam promote, and then the model down here only exist here. So usually the good combination inside of one ultra be instrument is to layer phase oscillator up here and with a sample down here. So now let's talk about also later one and two. Using these guys in conjunction, as I said, can really thicken up your sound, but you can also do simple things like have two pitches. Here we have phase oscillator, one on a zero, and here we have oscillated to on F sharp one and together. Obviously, if we increase the length of the envelope, it's just a horrible mess. But obviously, if we bring this back, it can give us a bit off of an interesting sound. Kind of a crushed kind of interesting sent. I've also got the crusher on here which helps so useful thing to do that. But you can make them interact in different ways as well. Here we're getting oscillator one and oscillator to to interact by f m synthesis. So here we have also later one being the carrier on isolated to being the modulator, and so affect it. So you get really, really interesting sounds. So again, if you remember the FM, one tutorial, Siri's and also when we were on the front page of retro sent often less is more with their friends synthesis. You push this all the way up, it starts to get bit crazy. So it's a bit. It's quite a nice thing if you're really going for that kind of interesting crush to sort of dirty sound. Using a bit of the crusher and then a tiny bit of FM synthesis as well can get really sorry guys, my drumbeats orbit uninspired put the so that's FM has best basically very simple controls the amount of FM synthesis and then also remember that if you change the pitch of your carrier and your modulator That really, really effects the sound. You can also modulate the amount of FM synthesis with, say, in LFO or even an envelope. Finally, then we have our sign chain options. What I'm gonna do is I'm gonna fast for the videos. I set up some audio so we can talk about outside chaining works. Okay, so I've loaded up some audio. Just simple stuff from I believe it was Apple Loops. Eso You can do this with any type of audio, and I believe you can do it on the instruments as well. We'll see in a second so often the top right here. We have the side chain option, right? And this actually needs to be turned on before we can actually do stuff here. So we need to say 12 to be where you listening. So it's already recognized all the other tracks, which is only one that we have in this session. And it's sixties to shuffle Drum set, which is the name of our track. So then that's called audio one by ultra beat. And now we're listening to that track. Now, the confusing thing about This is if I play my kick, I'm playing it. Nothing's happening here, right? What we actually need to be doing is playing so that ultra beat can listen to the audio file. What we've got is our sequence or on. So I'm just gonna turn that off on what I also need to dio Sorry, guys, is I need to mute this track it. You're learning from my mistakes. Eso Now, what's happening is ultra b is listening to this track, but we can't hear this track on its own. Right? So it's playing. I need to pull the envelope. How? A little bit, Um but only when I play my kick drum is it going to? So I'm gonna pull the on the laid back. So to make this really clear, what I'm gonna do is I'm gonna draw some, uh, midi information here on my kick. I'm just gonna go down to my low kick and then also here on may be over here, actually. Sorry. So what you're doing there is you're tricking, triggering an actual sample that's going on and this doesn't have to be a drumbeat. It could be a really, really interesting kind of World music sample, for example, or a vocal sample, and then you start layering a drum, be over the top of it and you get really, really interesting results. So let's listen to open up, ultra beat again and let's look at the parameters so we don't have many controls here, but you have to think particularly about the envelope that you have in here, so you could just turn the Overlook down and just turn the volume up. Or you can control how much it comes in and out. I You're the k time. So currently it's envelope one. Let's pull this on, make it kind of decay really, really slowly or rather after a long while, um, on and we should hear the sample kind of fades out thieves not the greatest musical example . But you get the idea where triggering an external audiophile via our kick here. So those are all the oscillator types inside of ultra be in the next video. We're gonna go over the modulation parameters, the output parameters and also our global controls. And then finally, in the last video, we're gonna go over our sequencer, which is down here
72. UltraBeat | UltraBeat Modulation: So let's go over the modulation parameters inside of ultra beat. I want to take this snare sound for the moment and I'm going to do something quirky with it . Like running through an LFO which is our LFO set things up here. So first what I have to do is I have to set what it is that I want to run through the LFO. So do I want the volume to go through the ever order? I want something like the filter. I'm going to try the filter And so I remember what you need to do is whenever you're modulating something usually what you want to do is pull the parameter down so that you can then control it with the modulation here. So that's what I don't I've pulled the actual setting down and then I pulled the modulation range up. Right, So now I need to set it because it's coming on enveloped one to l. F 01 So now this LFO is affecting this blue part off the filter cut up on before we do anything else, we need to remember that we press this button so that our flow is set up correctly. So we've got isolated to going into the filter which is being controlled by LFO One so really interesting sound going on there. Of course, this LFO has normal LFO settings you have sink which is where your rate is determined by the BTK lock on, then free, which is where it in hurts. You have different types of waves here and you can cycle between them. This isn't switching. This is actually moving between which is quite interesting or then give their own different effects. Now, usually you're working with quite short sample, so this one doesn't really matter. But if you have a very, very long sound like an extended symbol sound, let's move this over a vase also later at the moment so that it's kind of quite clear. So here we have a constant tone being created by the face or so later on because our LFO settings are on at the moment we turn this off. We just got the constant tone at a quiet level. But if we turn this down in turn LFO one on again Thistle fo is now affecting the cut of this. Now if we turn the cycles down we've got, say, seven cycles. So it'll finish after seven time, okay? And we contend this up. Usually you want to leave this on Infinite. It's not something that you want to play around with too much, but it depends on what you're doing. So we've seen decay and attack before. Basically, what that does is it determines when the LFO comes in and goes out. If you pull that two K down, it's going to decay quite quickly. He pulled it to K down a tiny bit. It's gonna very slowly decay. And then we're going to get back to the setting, which is just simply here after a long while. Similarly, with the attack, it takes a while for that elephant come in a bit like for Barato coming in slowly. E usually Levi's on their normal settings. We've covered the envelopes. There are four different envelopes that you can use. We have our view controls here on the right are zoom to the attack phase of the decay phase as well, and we can also add in a sustained point for envelope, which is quite useful as we come out of the filter on Duthie Distortion Section What we hit is a ring modulator. Now, the ring modulator I didn't talk about in the oscillator section I could off, but I kind of feel like it's more modulation. I don't know. You could argue with me about that, but basically you're making very much like with FM synthesis. You're making oscillator one and isolated to interact again. I'll link on screen to a good explanation of what ring mod is, but this is where you have your settings. You can also modulate the ring mode, and once you've done that ring modulation, you can also then route that into the filter and also the distortion as well. We have our e que controls. Here we have the ability to pull in and pull out different parts of the spectrum. We can also write in numbers here, which is great and increase our Q factor. We have a band one and band, too, so basically they're different, different controls. You can have different two different excuse going on for your whole system. Here. Pan modulation is a really, really interesting one. It allows you to modulate a sound across the stereo spectrum. We take this thing snow here way have hand moored on. We start using this LFO, which we've routed here to modulate the panic, which gives us a really interesting sound. We can also increase the spread off this particular sound, this one sounding snare across the stereo spectrum. So that's the high frequency off spread, and that's the low frequency spread. But unfortunately you can't use this at the same time as the pan modulation, obviously, So it's high the using spreads for its season pan modulation. Then we have our output controls, which are our volume. So by default is routed to envelope for we don't actually have a red controls at the end here, so Envelope four is controlling the final output. So this envelope, he is modulating the controls here. But we also have that fire velocity setting set up as well, which is giving us control over the velocity. If I don't fight and they're off, basically we don't have any control anymore if I play really, really softly, whereas if I turned its back on and I reduce this so that base level is quite low in our on our velocity level is quite high, I have much more dynamic control over our our velocity settings. Cool. So that's a quick overview off the modulation section. I'll see you guys in the next video where we look at the sequencer.
73. UltraBeat | UltraBeat Sequencer: so the sequences side off ultra be could be accessed by clicking on this full V button in the bottom right. The sequencer is already present at the bottom in minimized form, but you can click and see the actual drawing parameters when you click full view before you start using the sequence. So you need to make sure that it's on, and that's the button to turn on over here. We're gonna leave it invoice mode, but know that we can move into step sequence a mode in a bit. Essentially, what you're seeing here is like the piano roll, except it's particularly suited to creating drum patterns by clicking at different points. On here, you can play different parts of the drum kit and set them up to be played inside of the sequence. It was pretty fun to play with also, so you can see you don't need to think to musically all the time because it's locked to the grid. I just drew essentially a line going down there, and I can raise it in the same way, and it would create these patterns that work inside of the grid. You notice I can either play here to listen to the pattern. Or I can play in my host tempo by pressing play so it sinks. So whilst you're working an ultra be If you have some other stuff in your song, you can just be pressing play and stop and editing your beef Now to clear this page here. What I'm gonna do is I'm gonna go down to this menu here on. I'm gonna right click on it. We'll get to what else it does later. But this allows you to copy the whole pattern that you have up here. This is the pattern in the main window and this is the pattern menu down here and you can clear it. Copy and paste. I'm just gonna clear it for now, so we don't have anything. So currently, when I'm playing, I'm just gonna hit play on the actual ultra be itself. It's just gonna go round and round If I build a kick on each be standard thing and then add in the snare. - So it's super fun to play with one of the things you can also do. If I just clear that is, you can add certain rhythms that are built inside of the instrument. So here this meant many gives you, for example, at every downbeat on this one here or what had every upbeat on this one here. And then suddenly you're building beats in a very quick way here. So you have loaded up a new sound here for new kit comes with its own new pattern, which is cool. Andi, I want to explain basically this panel down at the bottom here. So after we built our sequence, we can, or rather, whilst we're building our sequence, we can have control over the sounds, length and also their velocity or their strength. So let's solo out this correct this kick right. This one is a little bit quieter because I've lost years low, and this one is a little louder and you can control all of these, right? But they double as our gate controls. So for gate controls, let's look at something like the base hit, because this is something that's more of an instrument or more of ah tonal instrument. You listen, if I play, that's quite a long sound rather than a kind of one shot sample. Now, if I play a few of these here. You see this one in the middle. It's really quite long. We can reduce the length of that by changing the gate. It's now really, really short. So that's what the gate does. It increases. The length is a bit like an envelope increasing the length of the envelope. So you hearme or the sound so down on the bottom Here. As I said, you have your patterns, you relate. You're able to switch between different patterns here. Often these come with the presets inside of the, um, the patches that you load up and you can also save your own. If we go down to an empty slot here, we know this is empty because it doesn't have the words or the letters sq by them, which means sequence. We go to 13. We can build our own incredibly detailed, well thought out pattern. And listen to that. I'm always surprised when I do stupid things like that that actually creates, um, recently good results. It's kind of quirky causal link to the through the grid of the 16th notes, so we could then save that you don't actually need to do anything to say that you just moved to another pattern, and then when you move back to 13 there's your beautifully, well thought out pattern. The's patterns also serve, as you see as something that you can key switch between. What we have here are note values here, C minus one C sharp, minus one, and these incredibly low notes on the Midi keyboard that usually don't get used for playing notes because they're far too low but that you get used for key switching for some reason, with my system at the moment, it's not working with ultra Be. I have no idea why it must be something to do with logic itself, because, ah, this particular iteration of logic, some kind of glitch going on because I've checked everything. But when I play C minus one here, if I go down on my keyboard C zero and then C minus one, and I make sure that my patent modes on, we should be playing at the moment. But nothing's happening. I should be cheering Goring, basically these patterns to play, and what I'll do is I'll linked to onscreen Now a video that music tech help guided on YouTube Really, really good tutorial syriza ultra beat Andi. Hey, goes through it there, but I'm sorry I can't show It's the same is one of the only things that's gone wrong in this tutorial. Siri's at key, switching off ultra beats patterns, but I'll link to that now, and he'll take you through basically all the different parameters on here. Like the toggle between patterns, it's very, very useful feature. So once you've gotten to know the sequence of mode and also the velocity and gate settings here, you can then turn over and use step sequence a mode now step sequence. So if you remember the alchemy tutorial, Siri's is where you can modulate different parameters on the instrument with a step sequencer. So that's what we have here. Here's the step sequencer and here, the modulate herbal parameters shown highlighted in yellow. All you need to do is click on one of these slots here to say where you're going to start modulating and then move one of these parameters, something obvious, like pitch. We could start at the beginning really high, then come down now hit play and you can do this with any of thes. So let's look do this with a high hat now to run the high hat. Let's have this really, really high high hat to the beginning with the pitch. So that's the step sequence aside and anything that you see this yellow here that we went over in the synthesizer section, you can modulate in step sequence as you assign ease. You see that they show up here and then when you click on another part here, you can then control that one and then we're on oscillated to and the mawr of thes you assign. So if I add a load of these in now, then on your menu you get all of them assigned here and you can switch between them. Finally. Then we come to our global controls and there's only a few of them, Really. There is our voice auto select. And if we turn this on when we play a key on our keyboard, if I make sure my cables in the right pitch it will switch to that window. So we're switching if you want to just see whichever one you're clicking on permanently, I would keep Voice auto. Select off sometimes can be quite helpful if you're like Wait. Which note? My playing here, Which note my editing, This one. Okay, percussion to. And now I'm on its setting. So that's quite useful there we saw the import settings here. This is allows us to import samples, which is really useful. And then once we've imported them, load our drop down menu. I'll just go over that briefly again. So now we've got a drop down menu. Come drop any of thes wherever we want, and then we want to get rid of it. We click that many there, I won't go over MIDI controller assignments too much because you've seen them inside off sculpture. And this is where we can control which of our assignments are set up over a, B, C and D down at the bottom. Here we have our controls over the max active voices, which means how many voices were allowed to have at any one moment if we pull this all the way down to one, if we can switch his back on, we try and play the sequence. We don't get the full sequence. We can't play For example, a snare Andi I hats at the same time, it's only allowing us to play one voice. So some reason you want to play around with those, then do. But I usually leave 50 because then you get the full access to the kit with all notes at the same time. And then you can change your input mapping from GM to other ones. So that's ultra beat on its settings. I hope this tutorial Siri's has been useful to you. I'll see you guys in the next video.
 Jack Vaughan, LeanMusician.com