Transcripts
1. Intro: Hey everyone and welcome to
the Spring Boot crash course. The best online resource you need to learn Spring Boot from scratch and become a
better software engineer. Springboard framework is used by many big tech companies to build their microservices
architectures, and large-scale
back-end systems, because it helps you to build highly performant production
rate applications while keeping your
code base scalable. Having sprinkled in
our skill set will allow you to become
more competitive in the job market and is definitely
a required technology to master on your way to becoming a senior back-end
software engineer. In this one, our course, we're going to build from
scratch a rest API using Spring Boot that
communicates with an external API via HTTP, but also with a
local MySQL database to store some user data. The goal of this course is to show you how Spring
Boot works in an end-to-end application with the functionality similar
to a microservice. And hopefully this will
give you that powerful starting your journey of
becoming a spring with master. The only requirements for
this course is to have intelligent idea installed
basic Java knowledge, and of course, a strong desire
to learn new technologies. So with that, let's jump into the first lecture
of this course.
2. Why SpringBoot?: Hi everyone, Welcome back. So before we dive
into the actual code, let's take a moment
and understand why do we need to learn
Spring Boot framework. Right here we are
on the official website of spring width. And if we click on the Overview, we can see a number
of advantages of this framework which are actually validated
by the industry. I mean, they are added
right here on the website. But the popularity
of this framework actually says something about whether those advantages that are actually
true or not, right? So first of all, about the popularity, right? But the reason it's so popular is because
it's very flexible and allows you to build
production rate apps really fast. We're going to see further
in this course that spring with is really
easy to configure, whether using annotations
or configuration files. And it's also important to
mention the landscape of applications where
Spring Boot can be used. We can use it to
build microservices, which is kinda like the, the new trend nowadays. Pretty much any big company has this microservice
architecture in some part of their
infrastructure. And Spring Boot has actually full support
for this Mosley. If you use the Spring Cloud and the Cloud capabilities that
Spring Cloud actually offers, um, but apart from that, you can also build
reactive applications and event-driven applications. So it integrates with pretty much all the new stuff
that's going on out there. So in other words, if you
know how Spring works, you have an, a, an advantage in this software engineering
world as of today. So there are a number of
clips and documentation on the internet that
you can actually follow if you want to see an overview, or Palm Springs actually works, a lot of people are
actually using it. So There's plenty of
documentation on the Internet. And the main role of
this course is to enable you to use springboard
really fast. So we're not going to dive into all the small
details of springboard. We're just going to
start right away and get going with the main capabilities
of Springfield, right? I'm going to assume
that you can have no object-oriented
programming and how things work in that space. I'm in classes, interfaces, methods and things like that. So basic Java knowledge. And then we're going to
build on top of that with the capabilities of
Spring Boot framework.
3. Create your first Spring-Boot App: So enough talking. Let's see some code, right? If you want to build your
first Spring Boot application, we got two options. The first one is to use this
spring initializer website, which you can access at
startup Spring dot io. And this website allows you to create a pre-configured
Spring Boot application. You just have to click around, select your project,
your language, your Spring Boot version, and complete your project
name artifact group and things like that, including the Java version. And when you click on Generate, you're going to see
that the browser will download an archive
with the project in an intelligent idea project that contains a simple Hello
World application with springboard preconfigured. This is of course the easy path, but we're not going
to go on that route. Instead, we're
going to start from a clean intelligent idea
project and we're going to add what's required in terms of spring dependencies to
see how it actually works. So right here I have the intelligent idea,
Community Edition. I'm going to click
on New Project. I'm going to say
Spring Boot course. I'm going to select Java as a language greater
as-built system. I'm going to use Java 17. And right here I'm
going to say Java dot, spring, spring dot course. I want to hit Create
and we're going to wait for Gradle to get refreshed, to download all the
initial dependencies. And this is our first project. Now we're going to go
back on the web and search for Spring
Boot starter web. Maven, Central. Central is of course
the main repository for JVM based dependencies we're going to search for
this dependence is called Spring Boot starter web. This one is kind of
a slim dependency which includes pretty
much all the things we need to create a very basic
Spring Boot application. We're going to click
on the latest version and select Gradle. And we're going to
copy this right on our build-up Gradle file,
the dependencies section. I'm going to paste it here
and then hit greater refresh. And then we can see that it
got downloaded properly. Now I'm going to get back on the main class and right here on the class level and go into annotated with Spring
Boot application. These are rotation
comes from, of course, the Spring Boot
framework identifies the entry point for our
Spring Boot application. And in the body of
the main class, we're going to say Spring
application dot run. And right here we're
going to provide the main dot class object. So this is a, this
is the identifier for the main class where the spring with
annotation is located. Then we're going to
provide the arguments that were provided
on the main method. So what this line actually
does is to start, the actual framework is basically
a blocking instruction. So the application, the process, JVM process will not exit until the application is
killed or until it gets, the process gets terminated
in some way, right? Any Spring application, I mean, any web server actually should be long running
because it should accept continuously
connections from HTTP clients. So when we click on run, we're going to see in
the logs this output. So you can see this nice art saying spring as well
as the spring version. And on the logs we
can see that we got here the logs from
Tomcat web server. We can see the port on which
the application is running, and we can see that it
started successfully. In other words,
Tomcat is basically a web server which
comes with Spring Boot. So you can also install
it independently, right? It's built by the
Apache community and it's basically a
classical web server, just accepts connections, follows the HTTP protocol
and all the stuff. The main reason it was
imbedded into the framework, I believe, is because
it's very lightweight. So it doesn't consume too much memory and too
much, too many resources. And probably this was the
reason it was chosen to be part of the
springboard framework. I believe we can also
change it if you want with Apache or caterer or
other web servers. This is how it works in a
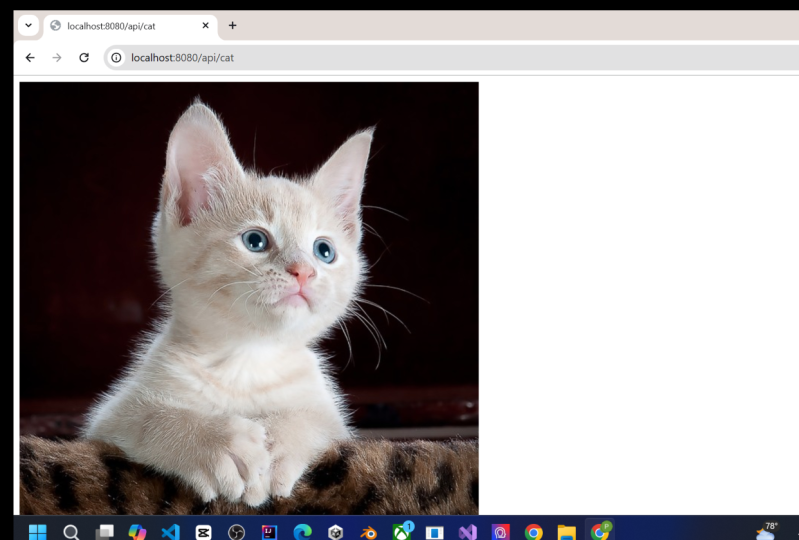
default version, right? Right, so this is how our
first Spring Boot application actually works. Currently application
doesn't do anything, it just accepts
connections on ADHD. But if we go in our
browser and say localhost, local, solicit, local host ADHD, and we just click on it. We can see that we
don't have anything. This error actually comes from Spring Boot or
from Tomcat, I believe, because it needs to find some paths to map the
request and on the default, Patty doesn't have
anything to map to. So currently our application
just runs and we haven't specified any kind of action to be executed on a particular
interaction, right? So this is currently
the state, right? We just have an application
that doesn't do anything. How do we tell to this
obligation that it needs to do a specific action when the clients are interacting
with it in a specific way. So for that reason, we're
going to create a class which is called a controller,
a rest controller. And we're going to
put that class into a dedicated package called
controllers, right? Just created package
and then I'm going to call this user controller. So when a Spring
Boot application, a controller is the
first entry point for a request in
the application. So when the clients are making a request that needs to
hit the application, usually it will hit
a controller first. Then based on the logic
defining the controller, the request will get propagated
in other components, as we'll see further
in this course. So to make an idea on
how a controller works, let's create a method
here called public void, actually public string get user. This method is a very
simple classical method. It just returns something like user John Doe just
returns a string. And very important, this
method will be annotated with get mapping followed
by getUser right here. We can have any kind of string which actually
should start with a forward slash
because it needs to have a path-like structure. So what this annotation
actually does is to create a path or a route
in our application. So when a client, either a browser
or any HTTP client is going to call that path. This method will be called right inside our
application, right? So this is how it
actually works. Now let's rerun
our application in order for those changes
to take effect. And we're going to hit
Enter on this one, right? So as you can see here, we've got this
string back right? Now, if we click on Inspect
to see the actual request, if we go So on the Network
tab and hit refresh, we can see that the
browser actually launched this HTTP get
request on that URL, localhost 80, 80 getUser, the browser by default, when you refresh any page, it makes this get request. Actually it makes, actually it initially makes
this get request. And then it can download
some JavaScript back, which then gets executed
by the browser, which then can allow
other requests and so on. So in practice, this
is even more complex. But in this very
simple use case, the browser just
launched a get request on which actually hit our API, which returns this
string object. So this is how you get
data back from our API. Now, if we just click here, if we click here
on the response, we can see our string payload. And if we click here
back on the headers, we can see that on the response headers we also
got this information here. Those headers were actually
added by the framework. So we didn't, we didn't do anything to that data
to show up here. Those are the request headers. And by the way ahead, that is just a key-value type of
information entry, right? And this is what the browser
Chrome actually added on the request to
our application. Now, of course, we can
change those headers by using the Spring
Boot mechanisms. But a very important
thing to note is that their structure, the name, the key name of the headers, and the values are actually regulated by the HTTP protocol. So the HTTP protocol,
and by the way, HTTP stands for Hypertext
Transfer Protocol. Hypertext actually
refers to HTML, but it's more of a legacy
naming because you can actually transfer
binary data using HTTP. So HDP has a number of rules. Any protocol basically
has a number of rules which governs
some kind of action. In this case, HTTP governs the communication between
the client and the server. So you can see basically
all kinds of details about the way header
should be passed away. Your proxies actually work. And in other words, if a client and the server
respect the same rules, they're able to communicate
correctly using the rules of the HTTP
protocol, also caching. But the scope of this
course is not to go deep down on the HTTP protocol because it's very, very complex. And lots of details are
inside this particular topic, maybe for a different
course in the future. But for now, we're going
to limit ourselves to these very basic usage
of this protocol. As a short summary, when you make a get
request to a web server, you are basically
requesting data from it. When you're making
a post request, you're delivering some
data to that server. In this case, we
define a good mapping, which means that we
instruct the API, the Web server, to allow
GET requests on that path. We also have post mapping, which means that we instruct
the web server to receive data from external clients
on a different path, e.g. edges. And this is what
we're going to do next. In the next lecture, we're
going to continue to build this user controller in order to explore
that interaction with external clients even more.
4. How can we use POST requests?: So we saw the way
we can basically get some data back from our API. Now let's learn and
play with this input, output mechanism of Spring Boot, which is the controller
and the mapping setup. A really nice thing
about testing with a browser is if you have HTML returned back
from your application, because browser will
actually render the HTML. If we say something
like HTML closed, and then we say body, of course this is not, this
is just for testing purposes, just to play around to show you that the browser
renders the HTML, just any texts here. So if we run this again
and reload the page, we can see that the text is basically rendered
by the browser. Accordingly, we return HTML, but it gets rendered
automatically by the browser. Now, when you have web server
as you usually transfer data in some kind of format
like JSON or proto buff. And you don't really
need this kind of interaction with the browser, but it might be useful if you
have this kind of use case, just returning back HTML. Now, instead of the browser, we're going to use
dedicated HTTP client, which is called postmen. This is basically
a tool which has this nice user interface that allows us to interact or test an API with different
kinds of requests, types, and different
kinds of payloads that can configure in
a very easy way. So when you design web service, usually play with
this kind of tool to see how it works and
to test different things. So the exact same
request that we made from the browser, we can, we can make from Postman
by saying localhost 80, 80 followed by Git user. And if you click Send, you can see that
you get the HTML ran, returned back, right? You can also format and
response in different ways. So now let's say
we want to return a string back from our API. That string should actually be the JSON representation
for our user object. So let's first define a
model in our application. I'm going to create a new
package called model. Right here, I'm going
to say User model. This is the class for our user. And inside it we're
going to have private String,
firstName and lastName. And let's say we also need to provide integers a
membership by d, right? Which is kind of a
premium platinum user or things like a single
server level in, in our application just
to test things around. So we're going to add, first of all, a constructor. We're going to also add getters and setters for
all the fields, right? Intelligent idea helps us to
do this really, really well. The only controller
we're going to return a user model back, right? We need to import that class. And right here when
we return that, we need to say New User model
of John Doe and 1234, okay? Of course, we play with
classes in real-world, we play with actual
objects models. So for that reason we need to experiment with that as well. So when I hit send
on the response, we get back this JSON. So as you can see, the, the, the framework actually converted our object into adjacent, basically the, our object, a model gut serialized into
adjacent format, right? And this was done automatically by the
spring would framework. Now, if we go back
to the controller, we can have a situation
where we need to return different users
based on an ID, right? So e.g. let's say
we have here a map, private map of string
to UserModel, right? Call this user map new HashMap. Alright, and let's say we add a small controller right
here, public user controller. And on this map we
have two users. Let's say, let's say on
the user map we add, we put first of
all the user John, which has this, this
model right here. And then we also put
the user Jane e.g. and this is Jane Doe with
different membership by d. So basically we have those
two users in this map. And when we want to get
the user from our API, we want to get it depending
on the name, right? And this means that the name needs to be provided
on the request. So the client
should actually add here a name that
can be a variable. And this one should be
called username, right? This is the way
you specify on us, on a path, the fact that you want to extract a
variable from it. So right here on the username, we need to also add it
on the parameters of this method using the
path variable annotation. Here we need to specify
the type of the variable and the same exact name that
we added on the path, right? So when you make a request, if you say getUser John right from the browser
or from postman, The John value will be propagated on this
username variable. And we can use it like
any other variable. So in this case we
can say user map dot get of username, right? So let's rerun this. And actually I go to
also hit Debug and put a breakpoint right
here to see that this variable gets
populated properly. So the application started. I'm going to get back
on postman and say getUser dot John and
hit Send and rice, we can say that the username
variable has the valid John, and it will just go
into the map and return the actual object, right? So I'm going to
hit Next and back. We can see that we
get the same thing. Now if we use chain, we can see that the
variables so that we played properly and hit F9, and we can see that we
get the other objects. So this is the way you
guys basically provide some data to the
application on the path, on the request path so that you can select different
kinds of information. This can be a user ID,
it can be an email, it can be anything like that, anything that actually makes
sense in your application. Now let's shift gears and play with some pause to requests, which is the way a
client can provide data to an application. For Spring Boot application, we want to create a user, right? We're going to say create user. When we create a user, we don't want to
have anything back, but you want to update
this, this contract. Second, we're going to say
here, post mapping, right? Because we want to
provide some data to our webs are in that data should be the user
details, right? The FirstName,
LastName, and so on. So we're going to say
Add User, and that's it. And right here on the
parameters we need to provide something like
response, request body. This annotation
tells Spring Boot that it needs to
extract some data from the request body and
put it into an object. That object should be e.g. the user model, right? So this means that on the
user map we can say put and we can say user
dot get firstName followed by the actual object. Yeah, I don't have to return
anything here, right? Because the method doesn't
have any return type. So in other words, I'm extracting the
user model from the request and I'm putting
it on this user mapper. Let's do this. And the first time I'm going
to try with a debugger to see that the user object
is populated properly. Yeah, So the
application is started. So I'm going to create
a post request. I'm going to make a new
tab here in Postman. And I'm going to select
here post, right. I'm going to say Add User. And right here on the body, I'm going to say your row, and I'm going to select JSON
application json right here. I need to provide adjacent which contains the actual
information for the user. I don't want to create
that Jason should follow the schema of that object or the user model object, right? So you should convey
the first name, last name, and the
membership ID. I can simply get them
from the other tab. And of course I'm
going to populate them with different values, e.g. Daniel, Craig. And this should be a value
like any integer that we want. If we click on Send, we can see that we get an error called internal server error
or something happened. Let's see what happened. So if we go right
here on the logs, we can see that cannot construct an instance of user model, no creators like default
constructor exists. So this is an arrow that you can probably see pretty
often actually, if you play with objects,
with serialization, deserialization,
things like that, which actually tells
us that when you provide this Json, right? And the spring with the
receives that Json, it basically tries to
create a user model object. But when he tries to create
this user model object, it doesn't use this
constructor, right? Which has those
three parameters. Instead, what it expects, it expects to have
a constructor with no parameters to just
create an instance. And then it expects to use the setter methods to set all those three
fields one by one. This is what actually the
Jackson civilization framework actually expects, right? This is the component
inside springboard that deals with serialization
and deserialization. So in other words, we
just have to provide here a default constructor
with no parameters. And it will work creating again, running again the
application with debug mode. It should have started. Okay? Now, going back to Postman
and click on Send, and it says that we
have a bad request. Let's see what the
error now it says JSON parse error numeric
value is out of range, right? So it looks like this
number that we add here is out of the
integer range, so we just have to add a
smaller number here, right? Now if click on Send, we
can see that it works. So if we click on
this user parameter, we can see that it populates
with the right values. And if we click on F9 to
continue the execution, the value should be
stored in the map. So if I'm using the other tab
to call getUser for Daniel, we can see that we got
back the proper response. So this is how we actually
add data to our API.
5. Implementing standard responses: One thing that I wanted
to also mention about these controllers
functionality is that usually when you
play with microservices, you need to be able to specify the right status for your
introduction for your request. In this case, we can see
that we only have Status 200 for all the requests that we made is this is the default one, status to 100, okay? In HTTP, protocol means that the interaction
happens successfully and everything worked well. Now you can also search for
the HTTP status is online, and this is the full list of statuses that are mentioned
by a protocol, right? So e.g. if you have
status 500-599, that should be a server error. Successful responses is 200-299. And this will also has all kinds of status is like if
you respond with 201, this means that you created
the resource successfully. All kinds of
interaction models that happened in your
application, right? So well-designed. Web servers, the responses and the status is of your
application should reflect the actual thing that happened in your application
through this status code. And in spring would have
a way to do this in the controllers using an object that we need to return
on each method, which is called response entity. And this response entity
is a generic type. We can also add here
http status object e.g. and what this actually
means is that we can return from that method
something like return, response entity,
response, entity, dot accepted, dot built
responsibilities. It follows a builder pattern. And when we say accepted here, it means that we add this
HTTP status accepted, which is 20.2 on the
response, right? We build this object. So basically now when we run the application and
we create a new user. So now when we go and postmen
again and say Add User, and we provide here some data. We click on Send. We can see that on
the response we get to zero to accept it, right? Which is a status code
that we add a right here. This of course, for
the best practice of your, of your application right? Now, same thing can be done here and all over the place
in your application, in any controller you should have this kind of interaction. Also need to mention that
the inner controller, you can also have other
types of methods, right? Also managed by the
HTTP protocol, e.g. if you search for HTTP methods, actually this one,
you can see that we get a number of
methods here, right? So until now we used
GET and post methods. But you can also have
head PUT, delete, connect options, trays, patch, and those are all of them. E.g. if we want to
use delete, right? If we want to
delete a user, e.g. we just have to go right here, copy this method,
say delete mapping. And right here we need to
identify the user, e.g. we need to say delete user
followed by a username, which is again a path
variable parameter, right? So we can say here, remove followed by the username, which means that we just get
the user out of our map. And when we return the
response entity back, we can just say
deleted or nutrition if there's any status
with no content, can be used for delete
operations, right? So if we just reload
the application now, and by the way, when we
restart the application, which is the only way for
the changes to take effect, the map is getting empty again, so only those two users will be added from the
constructor, right? So if we add some users and then stop the app
and restarted again, the new users will not be in the map when the upper
is restarted, right? Because it's of course
stored in memory. So let's see, we want to get the user Daniel back
should be here, actually now, or it needs
to be the user John, right? So this is the user, and now we want to delete. So we want to create a
new tab and say Delete. This is the request type
delete request method to be more accurate. And I'm going to say
delete user followed by John, write, delete it. It says to zero for now content, which means that the
deletes what's successful. And then I'm going to click Send again to get the user John. Again, I see that I
don't have anything. We can also of course, reshape this a little bit
to say something like if the user map contains
key username, then I'm going to
return it directly. Otherwise I'm going
to say return a response entity dot
not found, built. And here of course
I need to return a response entity of user model. And here I need to say
response entity of this one. And this should be
actually an optional, optional off this one. So in other words, if I have the user in the map, I return the actual user. But if I don't, I'm going to return not found, which is 404, right? So let's rerun the
obligation again to see this functionality
inaction, right? So I'm going to get
a user John back. I can see that I have it
because I just restarted application and the
data populated thrown. The constructor
actually is in the map. Now, I want to delete
a user John, right? When I get the user John back, I can see that I have 404
not found, and not 200. Okay. This is the way we
can, of course, update the HTTP status to reflect the right operation that took place in
other application. Alright, so with that, we learned about the way we
can play with controllers, the way we can get some
data from SAP clients, from Postman, and
also the way we can get the data back
in a proper way. Now, let's shift gears and talk about services in
Spring Boot framework.
6. Creating Services in Spring-Boot: Alright, welcome
back. So up until now we'll work with
the rest controller. We saw the way we can add and get information from
our Spring Boot application as an HTTP client and also play with Postman to
launch your requests. Now we're going to continue with a structural change over application because as
I mentioned initially, a rest controller is the entry
point of your application. So it allows you to
specify how you should get the data from your
clients and also how you should deliver it back. But usually those components
should actually forward the interaction inside your application in
other structures. In other words,
you shouldn't add application logic
or you shouldn't connect to a database from
your risks controller. You should only get the
data in the model that you want and then call a
different component, a different class where your logic should
be executed, right? The first component of this
kind that we're going to dive into right now
is called a service. So we're going to create here a new package called services. It may seem that I'm creating here one package for each class, but I'm actually creating a package for each
category of class. Because if you want
to add your models, you have a dedicated package for that same four controllers, services, and other aspects. So usually you should
structure your code in this way in order to
make it scalable. So I'm going to call
this user service. Now, a service in Spring
Boot is just the class annotated with the
service annotation. And what this annotation
actually does is to enable your application to be seen in the dependency injection
framework of Spring Boot, or it registers your
class into that setup. So in other words, if we click on that
interface to see what's behind it or to
see the implementation. We can see that this notation is basically an interface
because this is the way you can create
annotations in Java. And it also has this
component annotation, which is the root annotation in Spring Boot and
also other ones. Now, the only functional role of this annotation is the one that I mentioned
previously, right? Is it registers the class into the dependency
injection framework. And it also has an
informative role, right? It tells you that this class is expected to do some kind
of computation logic, either calling external services
or do some validations, or do any kind of logic that has something to do
with the user management. So we're going to move
this part right here with the user map storage into this user service and also this particular
initialization. We're going to put it into the user service
controller right here. And of course we're not going to have access to that map in
the controller right now. We need to create some methods which reflect the ones that we have
in the rest controller. To enable this separation, we're going to say public,
public, UserModel, getUser. And we're going to have
here the username, right? So we're going to say
username dot yet. So this is a regular class, doesn't have any anything to do specific with the
rest controller, so we don't have to return a response entities
from services. This is a class which, which connects to the way we get data back on
the HTTP client. So he has a moral framework
level are all right. But in a service or
in a generically in, in any component class, we can add any kind of
basic plain Java code. So this is getUser. Same for AD user. We need to have
here a user model. And right here when
you say Put of user, and here we can say void
or something like that. Of course we need to
say here user.name, firstName, and then user. And we're not going
to return anything. And we also have
delete user, right? So we're going to
say delete a user by user name, firstname. Actually, we're going
to say remove username. Now, the main question would be, we move that logic into this
user service class, right? How do we work with this
class from our controller? Because we need to have
on the instance of the user service in
our controller, right? To be able to do the
exact same things, right? Adding, deleting or user. So the way we do
this is by first, I mean, there are
actually two ways. One which is not recommended
in one which is recommended. So the first one
would be to create an instance of the
user service, right? Either top-level right, as a private field or on
the constructor write. In this way, we manually
create this instance, right? So as long as the
controller leaves, it will have one instance. This is one way
that it would work. But still, if we need to have, if the user service has a constructor right in the
future, let's say, right. A public user service, right? And right here it will
need some kind of other class which concerns
only the user management, so it doesn't have anything
to do with controllers. Then we need to update this
constructor right here, this call right here, right, to be able to get
that dependency, that validation service, e.g. and provided right here
on this construct, this problem is getting
given bigger, right? As more parameters are added because we'd no longer have
any kind of decoupling between user
processing logic and input output classes, right? So we're mixing concerns if we do this kind of
approach right here. Instead, the recommended
way to play with instances generically in spring is to use the dependency
injection setup of spring. So spring with has this very interesting
pattern which can also be found in external
frameworks like juice, e.g. Google juice, which is called
the dependency injection. And essentially a dependency
injection framework is just a way to get instances in our application in a decoupled manner without
using the new keyword. Because every time you
use the new keyword, you hit this problem where
when you need the class, you also need to provide all
its dependencies, right? And this is problematic, goes to this concern
mixing problem and dependency injection
framework allows you to approach that problem
in a very clean way. So in other words, what we need to do
here is to say, is to create basically
a private level variable user service, and to add it on this
constructor here. And then we can say this
dot service equal service, or we can rename this one. It actually knows that we're talking about
different variables here. The scope level one and
the class level one. But what does, is that when the user controller is
being instantiated, right? So when the, when the framework instantiates the user controller
class in notices that this user controller needs
a user service object and it tries to create an instance of the
user service class. And this happens
behind the scenes. You don't need to
worry about this. And it says that the user
service doesn't have any constructor parameter
and it just creates the instance like you would
do it, the new keyword. Instead, if the user service had any parameters
in the constructor, the framework we'll go
ahead and search in and try to create an instance for those
parameters as well. And it will go like that
recursively, right? Until it manages to create all the instances
that needs to be resolved. If it can manage to
create one instance, it will just fail on
the compile-time. That's a very useful
thing because you can see that right away. So let's see that in action. So I get this User
Service right here. And of course I can
use the Contains key or metal right now because it's internal to
the user service. So instead I'm just going to say response entity of user service, actually service dot
get users by username. And in this case, I have to ensure that getUser returns null or
something like that. If I don't have the
key on the Add User, I just have to seek
service dot add user of the user model that I
got from the parameters. And same thing I have
to say for the delete. So delete user by user name. So right now we're going to
run our application actually, let's, let's make sure that
it compiles first, right? So we're going to
hear the debug to see a little bit how this controller is getting instantiated, right? So as you can see, the user
service has an instance. The framework created this, this user service instance. For us, this is the dependency
injection framework that created this
instance automatically. And it's very convenient, right? You just have to provide this in the constructor, and that's it. You don't have to worry about how that
instance gets created. Of course, let's run it to
see that it still works in the functionality should
be the same, right? So I get the user John. I can see that it works. I add a user, Daniel Craig. It got to zero to accept it. I request for the user Daniel. I get it back. I delete the user
John. It worked. And then if I ask
for John again, it looks like I don't
have the user John. Let's see what happens. Usually when you've got 500, something went wrong, either
a null pointer exception or something like that. Yeah, actually we have
that NullPointerException. So in the getUser, we can see that we
get optional off. This one actually throws if
you have a null value here. So we need to say off nullable. So when you say
optional of nullable, if you provide null right here, it will just transform this
into an optional of empty. Okay? Let's try that flow again to see how it works this time, right? So I get the user John, now I delete it. And right here when I get, get it back, I can
see 404 Not Found. Right. So this is this is how it works. So yeah, this is how the
dependency injection framework. Works behind the scenes
in a springboard. Now I want to show
you one best practice that you really need
to internalize because it's absolutely mandatory
when you play with co-design and you will create services and play with
Spring Boot in general, which is that you usually have
to depend on abstractions, your classes, and not
on concrete classes. And if we take a
look right here, we can see that the
user controller class depends on the user class, on the user service class, which is a concrete class. Instead of having that, we need to create an interface
called actually first, we need to rename the
user service class into the user service
implementation I MPL. I'm just going to
make that short. And right here I'm
going to create an interface called
User Service. And that user service should
contain those methods. Get user at user and
delete user void. And this one should
be user model, right? That interface
should of course be implemented by the user
service implementation. As you can see, IntelliJ
idea highlights the fact that we implemented
that interface now. And this is the core idea
behind this strategy, is that in the user controller, I'm going to request
the interface, the user service interface, and not the implementation. And Spring Boot
does the following. When it's tries to instantiate
a user controller, it looks on the constructor, it sees that it
needs an interface, and it actually interprets
this in the following way. So the user controller
class has a dependency of a class that implements the
user service interface. So it tries to search for a class which implements
the user interface. In this case, we
have a single class that implements the
user service interface. And it will go to create
an instance of that. If you have multiple classes implementing the same interface and you're asking for an
interface and a class, then you need to
be more explicit into which class you
actually want, right? And you do this by using
the qualifier annotation. The qualifier annotation
just allows you to add a string and string
that you want to add here. That string should also be added when you request an
instance of a class, but also when you
create that class, right, on the class definition. So if you have two classes, implement the same interface. You need to add a qualifier
for both of them so that the spring would knows which one it should
provide in which place. You can also experiment and see how this works in
action with two classes. So this is how you
should actually build a service in a production grade, let's say implementation. It also helps out
with the testing because when you're trying
to test the user controller, you need to create a new
user controller instance. But when you want to create one, instead of having to create all the dependencies with all their dependencies
and so on. We just have to mark an
interface here and provide the Dominions were for
all those methods, right? And you're done. You don't have to go on the dependencies of the user service implementation
on all that stuff. You just have to
mock that interface. And that's it, right? Also try out with a unit
test to see how it works. You're going to see
a big difference in terms of the way you
implement testing. Alright, so with that, let's jump into the next
lecture where we're going to call an external service from our Spring
Boot application.
7. Adding configs in application.yaml: Welcome back. In this lecture we're
going to reshape a little bit this particular
time service implementation, as you can see here, we're using the uterus to make
a get request to this world time API to
get the current time. But you know, this endpoint
might change over time. You may have to use a
different API or you may have multiple endpoints in
your application and you want to manage them
from a single place. So instead of searching for
them in all kinds of classes, it's usually better to have a config workflow where you can store all your constants and details of your
application that can be, that should be managed
from a single place in a dedicated
configuration file. Spring Boot has this
configuration mechanism which is very simple to use, and it integrates really well into the dependency
injection framework of it. So we're going to
use it right now. So first of all, we're going
to go on the main class. We're going to add
this annotation enable configuration properties. This is required because
we're going to use a dedicated
configuration annotation that's really useful, that's mandatory for any
configuration files. So we're going to create a
new package called config. And right here
we're going to call it time API configure
this class. We're going to annotate with the Configuration
annotation, which basically makes it available in the dependency injection system of Spring Boot, but also, but also tells
Spring framework that this class should be used to
store configuration data. We're going to also
add a new annotation called configuration properties. And we're going to
update this in a second with a parameter
inside this class. We're going to have our fields, which we want to grab from
the configuration file. In this case, we want
to get the end point. So basically this one we want to store in our
configuration file and also the continent, because we may want to shift the continent inner
configuration based way. We're going to say
private string, endpoint and also continents. And we're going to create getters and setters
for those two fields. And where are we going to
store the configuration file? We're going to go
into the resources directory and we're
going to create a new file here called
application dot YAML, spring with nose to Logan
in this location resources, right in the
resources directory. And it will look for this
application yaml file. If this is present, it will look inside it for configurations. So in this configuration
file I'm going to say api dot API endpoint. And right here I'm
going to paste the endpoint of our application, which is this one, and alert you also paste here the continent, in this case Europe. So having this
configuration here will allow us to store the
data in a single place. Now, in this time, maybe I config on
configuration properties. We're going to set a prefix
for our configuration. Now a prefix for
our configuration is basically what
as the name says, the prefix under which
our configuration for the application
should be located in the application yaml file. So in this case, the value
for our prefix should be API, because under this API key, we have those two
fields that we want to store into the
time config class. In other words, this
allows us to have all kinds of hierarchical
configurations, right? And depending on the prefix, you can select which area of the configuration you want to
store in your class, right? Because you may definitely
don't want to have a big class with all
the configurations in application yaml, right? Alright, so once we have
this class created, we're going to use it into the time service implementation. We're going to basically
inject it right? In the same way we did with the other services that we
added on the constructor. Dependency injection
framework took care of their initialization. So we're going to say
constructor time API config where you want to store that in our field,
and that's it. Now we're going
to use it, right? So we're going to say time API, config dot, GET endpoint. We're going to concatenate
this with get continent and then with the time zone that we get from the parameter. We're going to also
make this a little bit more short on that line. Okay, so the end point, if we take a look
a little bit on documentation and in slash, and then we have the continent, which is Europe, and
then we get a time zone. So we need also an
extra slash here because the time zone
is a direct string. So we need to add an extra
slave ship. That should be it. Let's put a breakpoint here to see if this actually works. Alright, so now we're going
to make a request to add a user and we're going
to take a look on this time called API config. And we can see that
we got our values populated correctly
in this class. And if we make the request, it should work as
we expect, right? So we get to zero to accepted
if we get it back yeah. Should work as we expect. Yeah, that's pretty
much the way we can play with configuration
classes in Spring, but we can also change some default
configurations which are read by springboard, e.g. the port on which our
application is running, in this case, ADHD. If we want to use
a different port, we can easily say
server port 9019. And when we realized
the application, Spring Boot will read that configuration and it will change the port
accordingly, right? As you can see, the change took effect immediately
on the next run. Of course, the
documentation covers all the available configurations
that we can add here. You can also do the
same thing using the application properties file. So if you're searching on the
Internet and you're hitting this configuration file is
pretty much the same thing, except that it has a shorter way of specifying the
configurations application. Yaml works pretty
much in the same way. So with that, let's jump
into the next lecture.
8. Calling external services via HTTP: Welcome back. So usually in a web service, you either interact with a
database to grab some data, process it, and then deliver
back to your clients. Or you interact with a
different service in order to grab some data
or add some data to that service in order to execute some kind of business workflow that your application
is supposed to do in our application. Let's say that whenever we
add a user into our map, we want to also store
the creation time in UTC when that user was created for the creation
time of that user. And instead of doing
this by calling the native methods that
we have in Java API, we want to use an external
API together time from in order to account for time
skews or things like that. We're just going to make that also for the sake of the example on how to make an HTTP
call to an external API. We're going to do that. So the API that
we're going to go to call is called world time API. It's a very simple
one. You just have to make a request
to this URL with the time zone and you get back a JSON payload width
to it some times, then we're going
to use this one. So let's prepare all application
a little bit for that. We're going to create a new
service that we're going to call time service. Not necessarily the best name, but it's the one that
we're going to use. So we're going to
annotate it with the service annotation and
we're going to also change that to time service
implementation, right? And we're going to use the
time service interface. So what methods do we
need to use so we can actually return the
actual time, right? Get current time, we can
say get current time. And here we can provide
some time zone, right? Which can be something
like the city in Europe or in other
areas of the global, we want to get the time. So going back to
the implementation, we can implement the methods. Right here. We can, we can actually
make the core, but now let's use that service in our
service implementation. So on the constructor
we can request from the dependency
injection framework an instance of the
time service time, service time surveys that we can also store
as a private field, which can also be final
by the way, right? Same thing with this
one because we want to create the instances
single time, right? So we got the serve, the time service here, and we're just going to use
it on the Add User method. What of course we need a
field in the user model where we want to store
the creation type. Creation. Also need the setter and
getter for this field. And we're going to
create it using the intelligent
idea functionality. So we got a getter, and we also wanted a setter
for that field, right? So we're going to move those two methods down
below after deconstructive. So now we have a place
in our model where we want to put this
creation time. We just have to say
time service dot actually on the
user model, right? When you say user dot,
set creation time. And here we need to say
time service dot get current time of,
let's say Amsterdam. This should be a time. So let's say it's in
Europe by default. Amsterdam is the
city that we want. Now, of course,
this, this time zone can be fetched from
an external service, co-location services,
which detects the location based
on the client IP. So you can expand on this even more to get more and more
complex functionality. But in this case we're just
going to leave it as it is. The main question here would be, how do we get the time? How do we call that HTTP API? So for that, we're going to use an HTTP client which
is called union rest. In Java, we can
manage to be clients. We also have a built-in version, but this one is the
easiest way I know to make an HTTP request from an
application to an external API. So we're just going to
import the dependency unit, whereas Java, we're
going to put it into the build-up Gradle
file and hit Sync. See if that's the right. 11311. Looks like great. Detected that there is a newer version of
that dependency. That's the one. So in our in our time service, when we want to get
the current time, we can say something like this. Union rest dot,
get us a URL here. And the URL is the one
that we have right here. But of course, it needs to
include this time zone. Then we can say as Jason. So what this does is to make the request and get
the response back. Now as Jason return an HTTP
response of Jason node, which is a more
primitive datatype. We don't really want to do this. We want to also convert
this to a model. So let's see if we have
other options for this, for this HTTP client. So let's say as object, right? We have this as object here. We also have the async version. So when we say as object, we need to provide
here a class which has this format of the
response that we expect from the API, right? So this is something that we
need to create in and out. So in the models
we can say time. Or timer's time API response. This can be a name for our class and we have
two options, right? In, in defining this class, we can either create one field for each key value pair
that we have right here. But because we're not going
to use all those fields, instead we're going
to use only this one. We don't necessarily have
to create all of them. We can just create
only this one. So UTC date time, we're going to say private
string UTC date time, the name should match. We can add constructors, right? And also getter and
setter for that field. And we're going to move the
constructor a little bit up right here on this
class level place, we're going to say json, ignore, ignore, ignore
properties, right? So what this annotation
does is to ignore all the properties
that we're not at a right here as
fields in our class. In this time, we just extract what we need
from that payload. So having this model, we can use it right here. And you can see time
service implement. We can see time API
response to class. And we can have it right here. Get body, right. We shouldn't forget this
body because as object returns an HTTP
response of your type. So we need to use
get body to get the right get the
actual response object. Once we have this response, we can say response dot get
you to datetime, right, extracting the field
from our class. Alright, so let's see what
we've done until now, right? So we use this service to extract the two together
time from this external API, and we place that time on a new field in our
UserModel class. Now, well, of course we
need to see if this works. So let's hit that breakpoint
and restart our application. I'm just going to also
add a breakpoint inside our time service
implementation to see if the coal has been
done correctly. So I'm going to
add this user back and I can see this
response, right? And that's the one. So I can see some data here, which means that I
got the response correctly from
this external API. If you want to
debug more things, you can also remove
that yet body and use this HTTP response of
time API response, right? And then say response dot, get body, get UTC, date, time. Because in this HTTP response, you can see more things like the HTTP status or if
there's any data buffering, all kinds of details can be
seen in this object, right? So I'm going to hit that again. And I'm going to see this HTTP response
getting back right. So you can see that we
get the status code 200. You can see that
we got no error. You can see the headers that
were received from this API. We can see here all of them. And also we can see the body. The body has this, this object with our datatype, right, hit F9 to
continue the execution. And that's it, right? We got to zero to accept it. Now if we get the user back, we should also see this
creation time because these get flow actually returns the whole object and displays
it on the HTTP response. So that's pretty much
all about calling an external service from your
application in Spring Boot. That's a very interesting way of connecting with
other services. And in the next
lecture we're going to work a little bit on this time service
implementation to make it a little bit
more configurable. So with that, let's jump
into the next lecture.
9. Configuring MySQL with Docker: Hey everyone and welcome back. In this lecture, we're
going to see how can we connect to a database from
a Spring Boot application. Because as I mentioned
in the services lecture, the microservice can
either connect to an external service to grab
some data or send some data, or it can actually connect to a database for the exact
same thing, right? So you somehow need
a way or a place to store your information and retrieve it back from
your application. And of course, bring wood
has a number of mechanisms to allow us to do that in a more easy fashion compared to, let's say you're
doing it on our own. And it's also
important to see this in the context of having multiple database flavors and models and data
modelling schemes. So we're going to look
to this exercise from those lands of this complex, let's say, data
storage ecosystem that we have in the
industry as of now. So basically what we're going
to do in this lecture is to replace this user map
with my sequel table, which will actually have a
schema with very similar to the one that we have in
this user model, right? So pretty much all
the same fields with, let's say with an ID
that will serve as an identifier for a record in the database as a primary key. So basically this lecture
will have two parts. The first one will be the one
where we're going to create a database and configure it
to create the actual table. The second part will
be to actually modify our Spring Boot application to interact with the database. So let's start with
the first step, right? I'm going to open my
terminal and I'm going to use Docker to run
a MySQL container. Now of course, Docker is not a prerequisite for this course. I don't expect you
to know how it is. So for that reason, I'm going to make a
very small introduction to this particular technology and I'm going to explain all the commands that I'm
running step-by-step. So it can be actually easier
for you to follow along. First of all, Docker
container runtime. You can actually go right
here on docs.docker.com. And you can actually find a lot of details about Docker
as the technology. In a nutshell, docker
is a technology that allows us to run containers. And container is basically a
lightweight virtual machine which doesn't require
a hypervisor, like VirtualBox or
VMware or Hyper-V. So you can basically run
a container using darker if you install the Docker Engine on your operating system, and of course if you
run some commands. So e.g. we want to run MIC called container
on this machine, I already have Docker
installed here for Mac. So to be able to run
a MySQL container, I have to say
Docker run minus E, my square root password, and then a port mapping, and then my sequel image
followed by version. So let's see what this
command actually does. Docker run means that I want to run a container
using darker, right? Then minus e says, I want to create
this environment variable and make it
available in the container. Environment variable is
basically just a key-value pair of data which is accessible
in a specific environment, either in the current
show or in a container, usually on a system
level, right? That's the reason it's called basically environment variable. So in this case I want to
set the root password for the root user because to be
able to login into my sequel, we need to have the
password for the root user. And in this case, the value for the password will
be simply test. And then minus p means that I want to make
a port mapping. A port is basically
an identifier for an application in the context of a bigger system with
multiple processes. So an operating system
has a number of ports that you can connect
to over the network. And each port basically
identifies an application. And the application can receive connections
on that port and handle them and get responses
back and so on, right? So in this case I want to say, I want to map this port treaty
O6 from my local machine. From the machine when I'm
running this command, which is also known
as the host to the port 3306 in the container. Now, in the container
on this port, my secret process actually
rise. For that reason. I chose this portrait, the O6 right on the container. So on an axis, the process through this port and the host port can
be something different. So I can have at a
different value here. And from our Spring
Boot application, when I want to connect
to this MySQL database, I have to specify this
host port that I, that I sit here right. Now for simplicity, I can simply say that I want to
use the same port, which is the default
one for my school, so that we don't run
into other problems. I mean, you can simply see
if the port is not right because it will just fail on
connecting to the database. So you can immediately
change it to the right one. The next argument is minus d, and minus d stands for
them on container. So when I run this command, the terminal will not wait for the container to be
killed or terminated. It will simply start a
container in the background. And the final argument of this
long command is my sequel, followed by calcium,
followed by latest. My sequel is
basically the name of the image that we want to run. The images for the containers can be found if you're searching for my sequel Docker image. And you can see this
website, Docker Hub, where you have basically
all the images that you can get
publicly, right? So they're going up is basically a public image repository. And this one is
the official line. So if you are e.g.
if you are running this command docker,
pull my sequel. It will start to download this image on your
local system right, from the remote repository. I already have this image. Download it, so I don't
have to download it again. Now, what latest
actually means here is the image version because
the image can have multiple tags or
right, or versions. So I'm currently
using the latest, but you can also use an
older version if you want 8031 or any,
any other ones. So let's run this command. So as you can see, we got this error which says that the
port is already allocated, probably because I have
this container running, let's say docker ps tells us which containers are
currently running. So e.g. I. Can actually say docker kill this container and
this command will simply destroy the
running container, which was created
previously by me. So if I run docker
ps now it says that I don't have any
container running. And if I run the command that will start a
container again, which of course would be
a different container. In this case, I get
back this very big ID, and this is the ID of the
container is basically should be a unique ID that
Docker generates for us. Now, if I run the Corp, yes, I can see that the
container is running. I have this ID here
which identifies the container is basically a
shorter version of this one. Then I can see the image which
is used by the container, followed by the first
command which is being run when the
container starts. And this is inside
the image itself, so we cannot control
this and the forest. Other important
information around this container is created
status and so on. Also the port
mapping that we saw previously are also
displayed here. So we have this
container running. Now let's login on this
container so that we can configure the MySQL database. So to login on this container, we just have to say
docker exec minus IT, followed by the container
ID, followed by batch. So i t means
interactive terminal. I want to execute this command. Exact means I want to execute this command in an interactive
mode on this container. And the command is
simply Bash that I want to get shell access
to these containers. So if I run this command, I can see that the
shell actually changed. And it changed because
now I'm basically executing commands in
the container, right? So I'm not on the
local host anymore. I'm on the container file system and on the container
system basically e.g. if I'm running the ls command, I can see that I have a
different set of files, right, compared to the
one that I got before. Now of course, the thing
that I'm interested in right here in this container
is to access the lab. So to do that, I have
to login on my screen. So I have to say
my sequel minus U, which stands for User route, right surrounded login with a root user minus
p and then Enter, now I have to enter the
password for the root user, which is actually
this one that I provided through this
environment variable. So I can say test here, I just typed test
and then Enter. And I can see that.
And now I'm logged in on the my sequel database. So the first thing that
I need to do here, because this is a
fresh database. I have to say create
database test. I want to create a
new database which is called test and that command, now I have to use this database. So I have to say use test. And now I need to create a
table inside this database. So I already have query which allows me to
create this database, which is this one, right? So I integrate this
table user entity, which has this primary key. And I did that is
auto incremented. And then I got the
fields which already are part of the user model in our Spring Boot
application, right, so I'm going to just
copy this command, paste it here, and then the query was executed
successfully. I want to get some data
from that new table. Of course I'm going
to get zero results, but just to see if the table was created correctly, right? I got an empty set. So now the database
is basically set up. There are no other things to
do here will give the user Spring Boot app to actually
add data in that database.
10. Configuring our Spring-Boot app to work with MySQL: So let's switch to
intelligent idea to start configuring
these pre-multiplication. Alright, so the first
thing that we need to do is to of course import
some dependencies because we don't have
built-in support for data access in the Spring Boot starter
web dependency. So we need to add the
following two dependencies. For the moment, we're going
to see if we need other ones. Along the way. We're going to search
on the web for Spring Boot Data,
JPA, Maven Central. So JPA stands for
Java persistence API. And Spring Boot has a
dedicated dependency which deals with
any abstractions or are they actually
the entire API that allows us to access
data using Spring Boot. We're going to copy
this dependency, Spring Boot starter Data JPA. And then we're going
to also search for MySQL connector,
Java, Maven Central. This is basically a
dependency that allows us to connect to my SQL database. You basically need
to have a connector for each database that
you want to connect to. And they should be in
the same repository. So still on, on my central. But this one is for
my sequel and we need to, of course, important. I'm going to hit gradle
sync using the shortcut. And of course we were going
to wait for for Gradle to pick the dependencies
up so we can start working on the project. Alright, so now we have
the dependencies on, we need to do the
following changes. So we're going to create a new package that we're
going to call data. So this data package, I'm going to create one class that I'm going
to call user entity. And this class is the
one that we're going to, that we're going
to use in order to send data to the database
and get it back. So you may wonder, why don't we use the
UserModel class for this? Well, because this class is
part of the domain model that we use for communication
with the rest controller. Or saw this, this schema
is the one that we are getting from the user
directly using Postman. So we need to decouple
those two models, right? Because we may not
necessarily have the exact same structure
in a real application. From the front and
from the client side, all the way up to
the database women, we may have a different
models right on this floor. So for that reason I'm
creating a different one, which is going to basically
be very similar to this one. So I'm going to basically copy it and paste it right here. I'm going to say user entity. This one is a little
bit different because it needs to implement
serializable interface, right? In real life. So the reason it needs to
implement serializable is because this class will be
passed to the database, right? It needs to match the columns on the
table that we created. So as you probably
saw right here, we got firstName, lastName, membership ID, creation time. So those fields are actually
those ones, but of course, written with the underscore
between the words, right? So they basically need to match the ones that
we have in the table. And also we need to
annotate this class with a very important
annotation which is called entity, right? This class, which comes
for Java, Persistence API, basically tells us
that this class needs to be matched with table in our, in our database, right? We can also annotate fields with all kinds of annotations
related to the entity class. So we can customize this class even more if we have a
more complex scenario. But for this course we're
not going to go into too many details on how
to configure this class. We're just going to keep it
simple for the moment to see how things connect end-to-end. And you can also explore more aspects in this area
if you're interested. So we got the entity class. The second aspect that
we need to create is the user repository. Now the user repository is
basically an interface which extends credit repository of user entity followed
by a string. So why do we have here, we have an interface
called user repository, which is annotated
with a repository in which actually extends
crud repository. This interface which is
part of Spring Boot, is basically the
main abstraction for a data access
which provides create, read, update, and
delete operations. And we need to also provide
here the objects on which we want to execute
those operations with the database course. And also the primary key
that we want to use when we execute the operations
on those entities, right? So as you can see on this
interface, we have save, save all fined by
the exists by ID. So the operations that
we can execute directly. So now that we have this
user repository here, we can actually
use it directly in our user service implementation. So we can inject it right here, user repository, we can store it as a field and we
can also use it. E.g. in the getUser, we can say return user
repository dot find by ID. Now we need to provide an ID. So we added this find by
first-name metal here, which basically allow
us to make a query in our database by using
the firstName and right, and getting back a user entity. Now first, we have this small
problem that we need to convert the user
entity to user model. And for that, we're going to create a mapper
writing a class that especially that is
designed to convert from user entity to
user model and back. But before going into that part, we're going to also use the user repository
to add some data. So to add data in the database, we need to use the save method. And on the save method
we need to provide, of course, a user entity, right? We're going to
provide it right away once we have the
mappers created. But let's also implement a
delete the user methods. So we're going to say
user repository delete by username, right? So we need another
query right here. So to do this, we also need
to create a new method, delete by first name. So we're going to say here, delete by first-name,
adding the username. And also we need to
remove these user map. Actually we don't
need it anymore. And also let's create
that mapper class that I mentioned previously. So we're going to create a
new package called Mappers. So a mapper is
basically just a class, let's say user entity
mapper that allows us to convert from one
type to another. So let's actually create an interface first
called entity mapper. And this interface,
let's say has to generate parameters and
it has two methods. So nFET mapper
basically allows us to convert from this
type to this type. So we're going to return, you say map, and then we're going to take entity
as a t, as a parameter. And we also provide the reverse operation
where we convert, where we get a t
from a you write. So let's say this is the abstraction that
we're going to use. And the user entity mapper
will implement entity mapper of user entity and user model. Okay? So if we implement
those methods, we can see that the first one will get us a user model
from a user entity. The reverse map will get us a user entity from a user model. So we're going to also make this class a component, right? Because we use it as a tool. In this case, we're
able to simply return user model of user, actually entity dot FirstName, LastName, membership ID, and
creation time, of course, with a new and of course this is a little bit
redundant in this case, but in a real scenario you're, you're going to have
those models drifted. So you need to add some
changes right here, right? Some class will not have
a specific parameter, the other one will have it. So you need to make some conversions right here to make some sanitization
sometimes. So I'm doing this more like
an exercise to kind of know that this may and will
happen in a real scenario. Now with this user
entity mapper, we're going to inject it on the user service
implementation. But of course we're going
to use the interface, right, to have things decoupled. So entity mapper, where you have to use the entity mapper, which is this one, let's say user, let's
say entity mapper to be, to be sure we got it as a field. And right here where we
find by first-name, right? So when we get the
user entity back, we're going to say
map because we have the entity and we want
to get back the user model. Okay? So this is what we want. Now, when we want to
save a use an entity, what you want to say entity
mapper dot reverse map. And we're going to
pass the user, right? We pass the user model, the reverse map
retrieves a user entity that is used for
the same operation. So this is basically
the way we would do it. Of course, we don't
have error handling, we don't have exception
management in this code. It's basically simple as possible so you can
get the main idea. We can also make those final. And the last thing
that we actually need in this application to
be able to connect to the database is to add here on the application
yaml configuration for the database, right? So for it, so basically endpoint the port and this configuration
is the following, right? So I just, I just pasted this
configuration from a file. The restored previously
is basically a spring data source configuration
where we pass the URL, right, which includes
the endpoint a port. This is the host
port, very important. So the first one in this
command right here, right? So this one, the first
one, the host port, followed by the database name right here we got the
username and password. So with those details, we can connect to the database. Of course, there are other ones in production grade
applications, you need to specify
the all kinds of connection pool setups
and lots of other details. But to keep the example, this is the minimal
configuration that we need to provide here to be able to
connect to the database. So let's run this application in debug mode to see if it works. Most probably it won't
because it never works in the first try. So as you can see here. We have no class. They found Java x, x xml. Very weird exception, right? Usually when we have
a class not found, a dependency is probably broken. And in this case we're basically talking about this dependency, J XB minus API. Not really sure
what's the problem. Found that on the internet
as being a common issue. So we're going to add it here
to see how it works, right? So now it says that we have no identifier
specified for entity. So this means that
we need to add a identifier for
that user entity. Identifier is basically a
field annotated with the ID. So in our case, we have to add this
ID annotation, of course, on the primary key. In our case, we don't
necessarily want to add, let's say, an integer ID right
here might not be useful. Let's say we can try it
out it firstName and see, and see how it works, right? So as you can see, the
applications started. Now let's try to add a
user in our application. So we're going to go right
here on the safe metal on the Add User method in Rio to use Postman to add
a user, right? Let's see what it says. We hit F9, no exception, we get back to zero too. So it means that no exception from the application, right? So we may hit select
from user entity. We can see that the user
is on the database, which is of course really great. I mean, we managed to add
data in our database. Let's also add a different user. So it seems to
work as we expect. Now let's try to
get some data back. So this one, it
looks like it works. If I if I'm searching
for Daniel, seems to work pretty fine, which is really great. I mean, yeah, let's
also delete a user. Yeah, So on this operations
looks like we have a problem, looks like we have an error. So what it says, it says that no entity manager
with actual transaction available for current
thread cannot reliably process to
remove coal, right? So this error tells
us that we don't have this transactional annotation
on the delete method. And this is very important key point that I wanted to touch base upon because usually delete operation is very sensitive. I mean, you can actually run
it from multiple threads, from multiple, let's
say execution flows because you may run into
concurrency issues. So you can have actually inconsistency
issues, race conditions. To solve those in Spring Boot, you need to use this
transactional annotation, which basically tells us that all the operations in this
method related of course to the user repository
will be executed in a transaction which is basically an atomic
operation on the database, which can either
succeed or fail, but it cannot be
executed partial, right? So for that reason, we need to have this transactional
annotation on our method so we can have the delete operation
executed properly write. So let's also add a new user
so we can see that it works. I deleted the markets user
to see if this works. If I delete, let's say
the Daniel user, right? Looks like we got 204, okay, and the user is
deleted from our database. So this is how it works. I'm going to let you fix this problem with
the user entities. So just try it out, see if you can use, you can find in the
documentation and annotation that will allow
us to generate an ID. So in other words, you can, you can try it out to grab
this ID field here on the table to add it as a field only user entity and
see if it works. See if we can generate
it automatically from our Spring Boot application
and not from the table. So this is basically
a way you can play around and covered things. See if it works, see
if it doesn't work. See, investigate why.
This is the way you can, you can learn basically
all those things. So this is basically
a very simple way to access a database like an end-to-end without too
many complex aspects on it. As I mentioned
initially, because this landscape of databases and flavors is actually huge, you may end up running into all kinds of issues
with dependencies, with versions, with classes which are not present
as we saw previously. So expect this flow
to not be flawless, want to not be something
easy to achieve. So with that, we'll jump
into the next lecture.
 Cosmin Ionita, Senior Software Engineer