Transcripts
1. Introduction: Hi. So if you don't
know, my name is Connie. Sometimes I go by
Connie Lee, and today, I am going to talk to you
about crocheted snowflakes. No, we're not going
to start with the itty itty bitty ones. Okay? What we're going
to do is we're going to use some worsted
white cotton yarn, and we are going to make a much bigger snowflake
and this is a simple one. It's only got three rounds. There are no picos, there is no crocheting
into the chain stitches, none of that. You're
going to love this. This snowflake works up so quickly and it's pretty
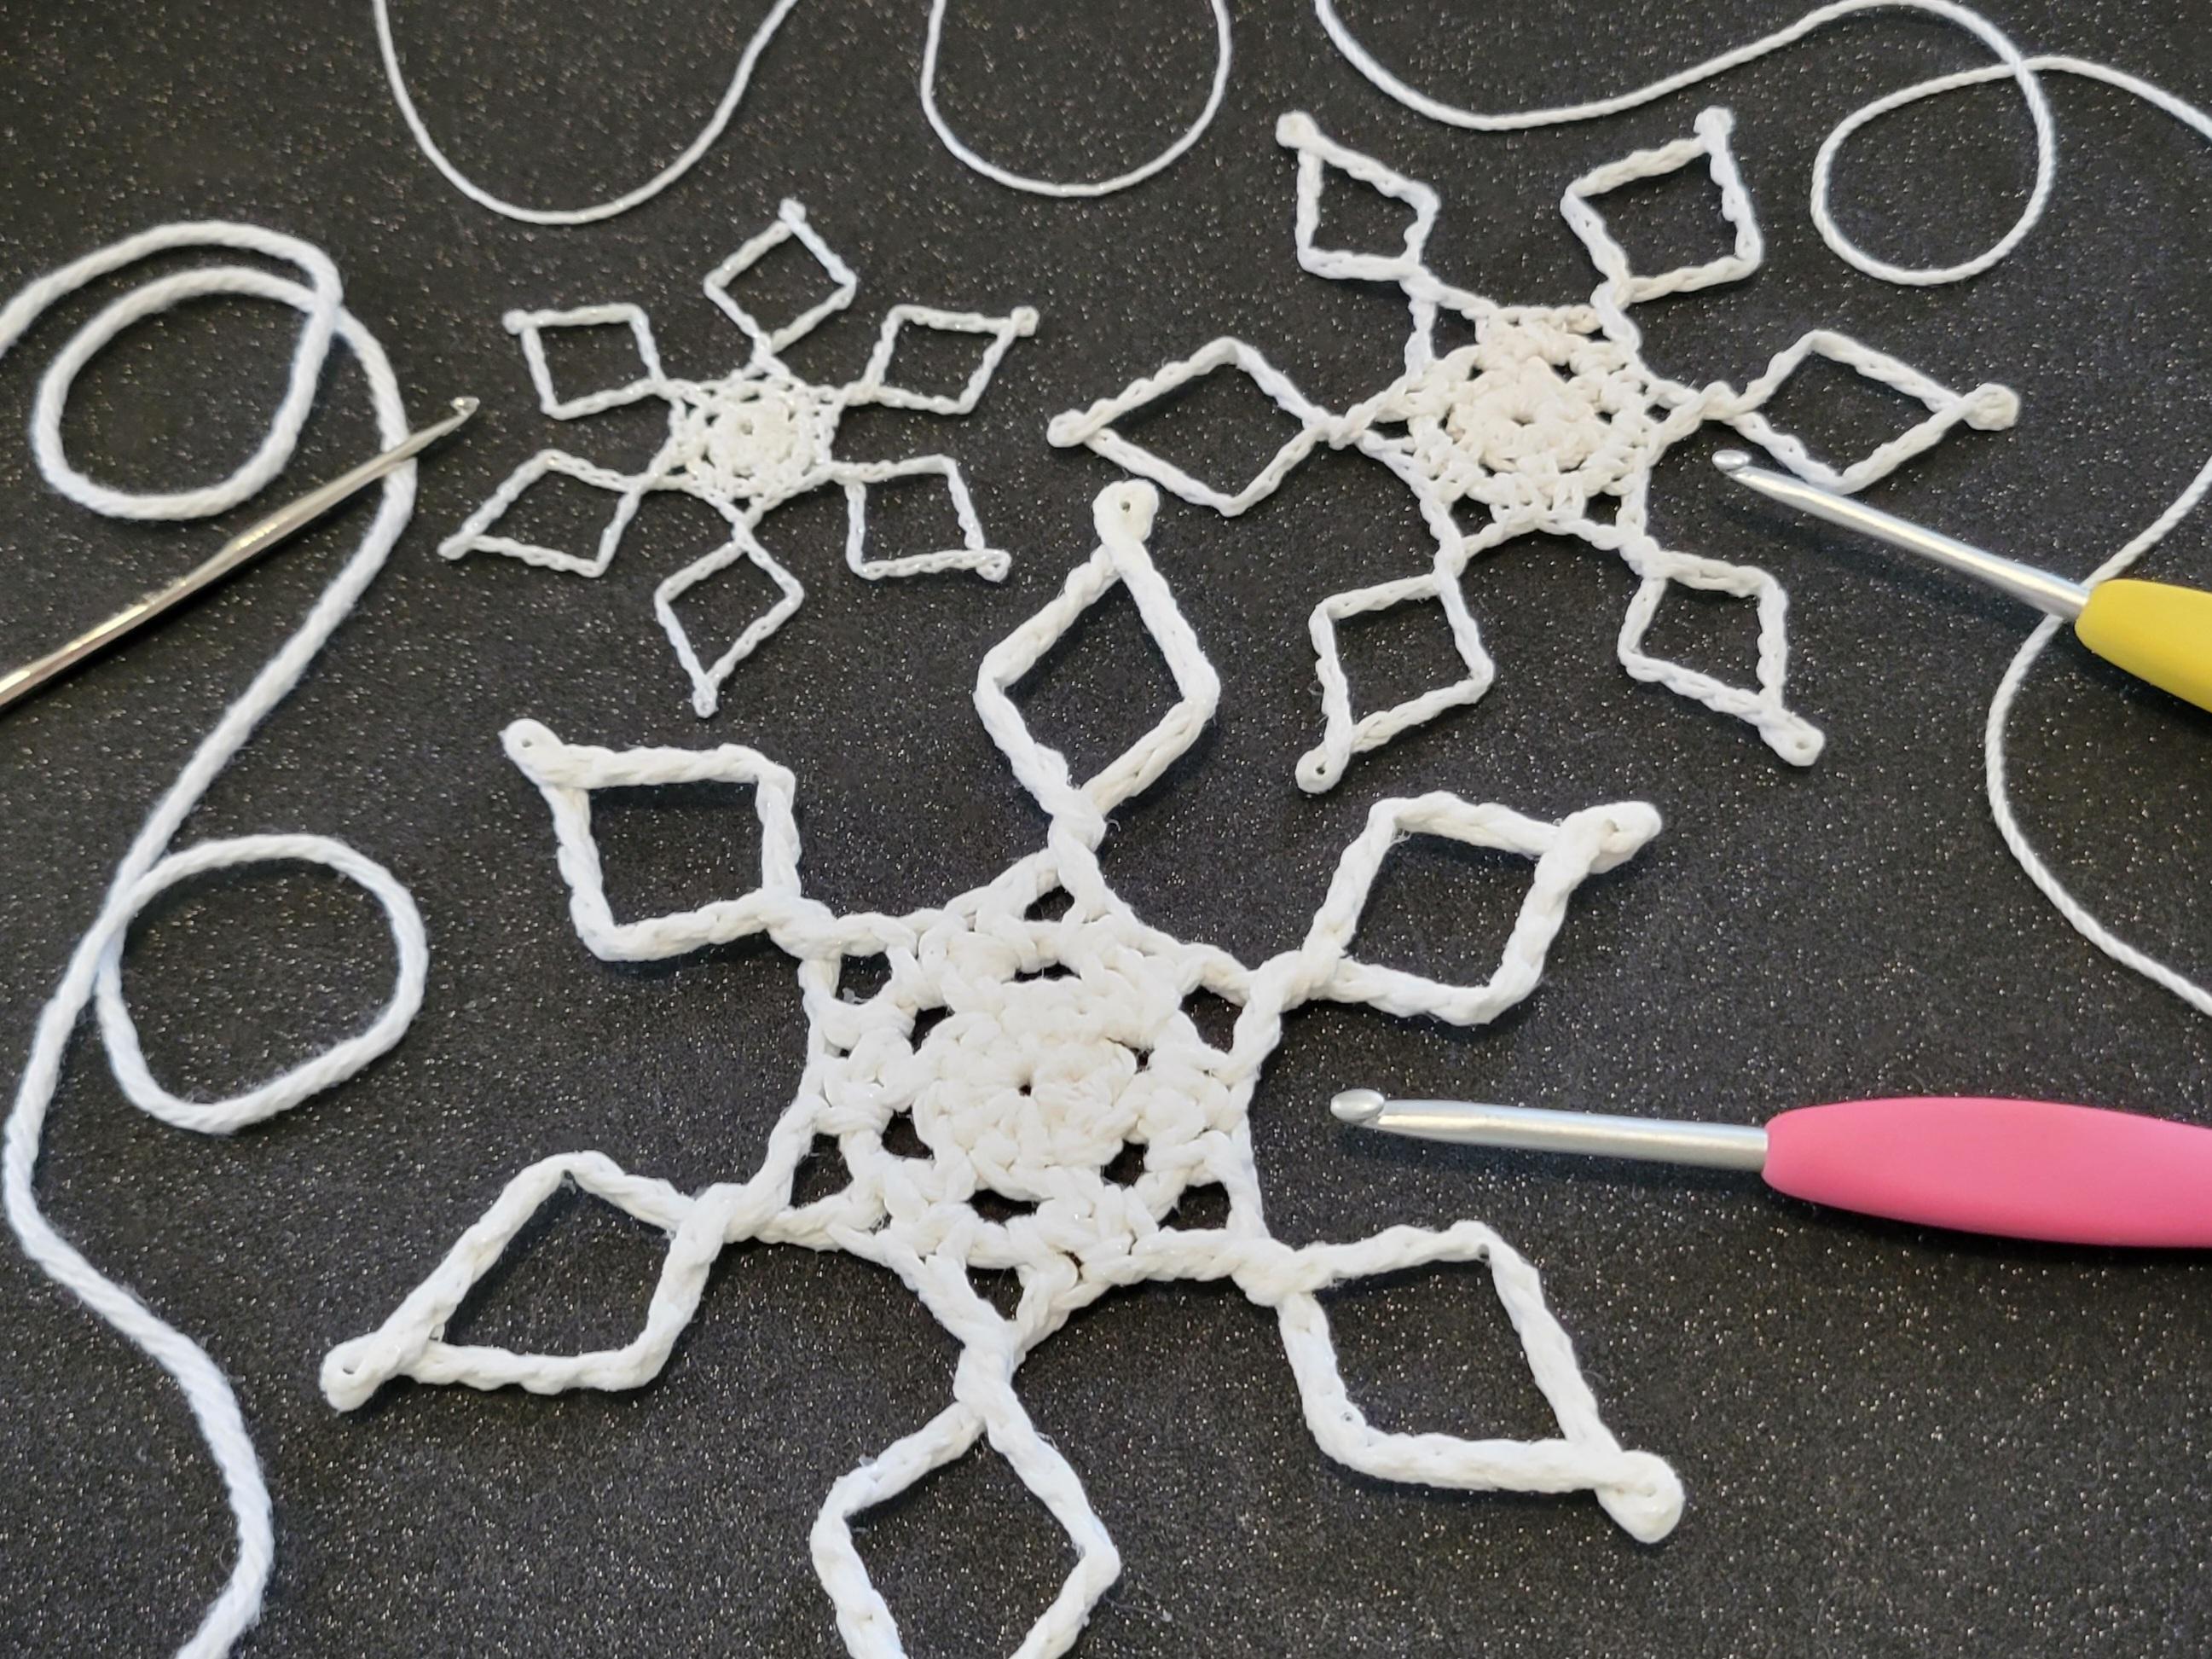
easy to block too, because I'm telling you, it goes from this
squiggly little thing here to this gorgeous snowflakes
just a little bit of.
2. Supplies & Suggested Materials: So let's talk for a second about the supplies that you're going to need to make one of these. So I already told
you that we're going to use worsted
weight cotton yarn. This is lily sugar and cream, and it is a medium weight yarn, and it actually calls for a five miller hook five
millimeter hook on the back, but I'm going to be using
a 3.75 millimeter hook. So if you are doing this
on your own at home, give it a try and see which
one you like working with. I'm going to be working
with an F hook, which is 3.75 millimeters. But if you're working
with something that's small and you're having trouble with a loop flipping off your hook or
anything like that, try going up a hook size. Like I said, the skin of yarn does actually
recommend an H hook, which I believe
is 5 millimeters, so it is a little
bit bigger, right? So besides yarn and hook
specifically for snowflakes, what you're going
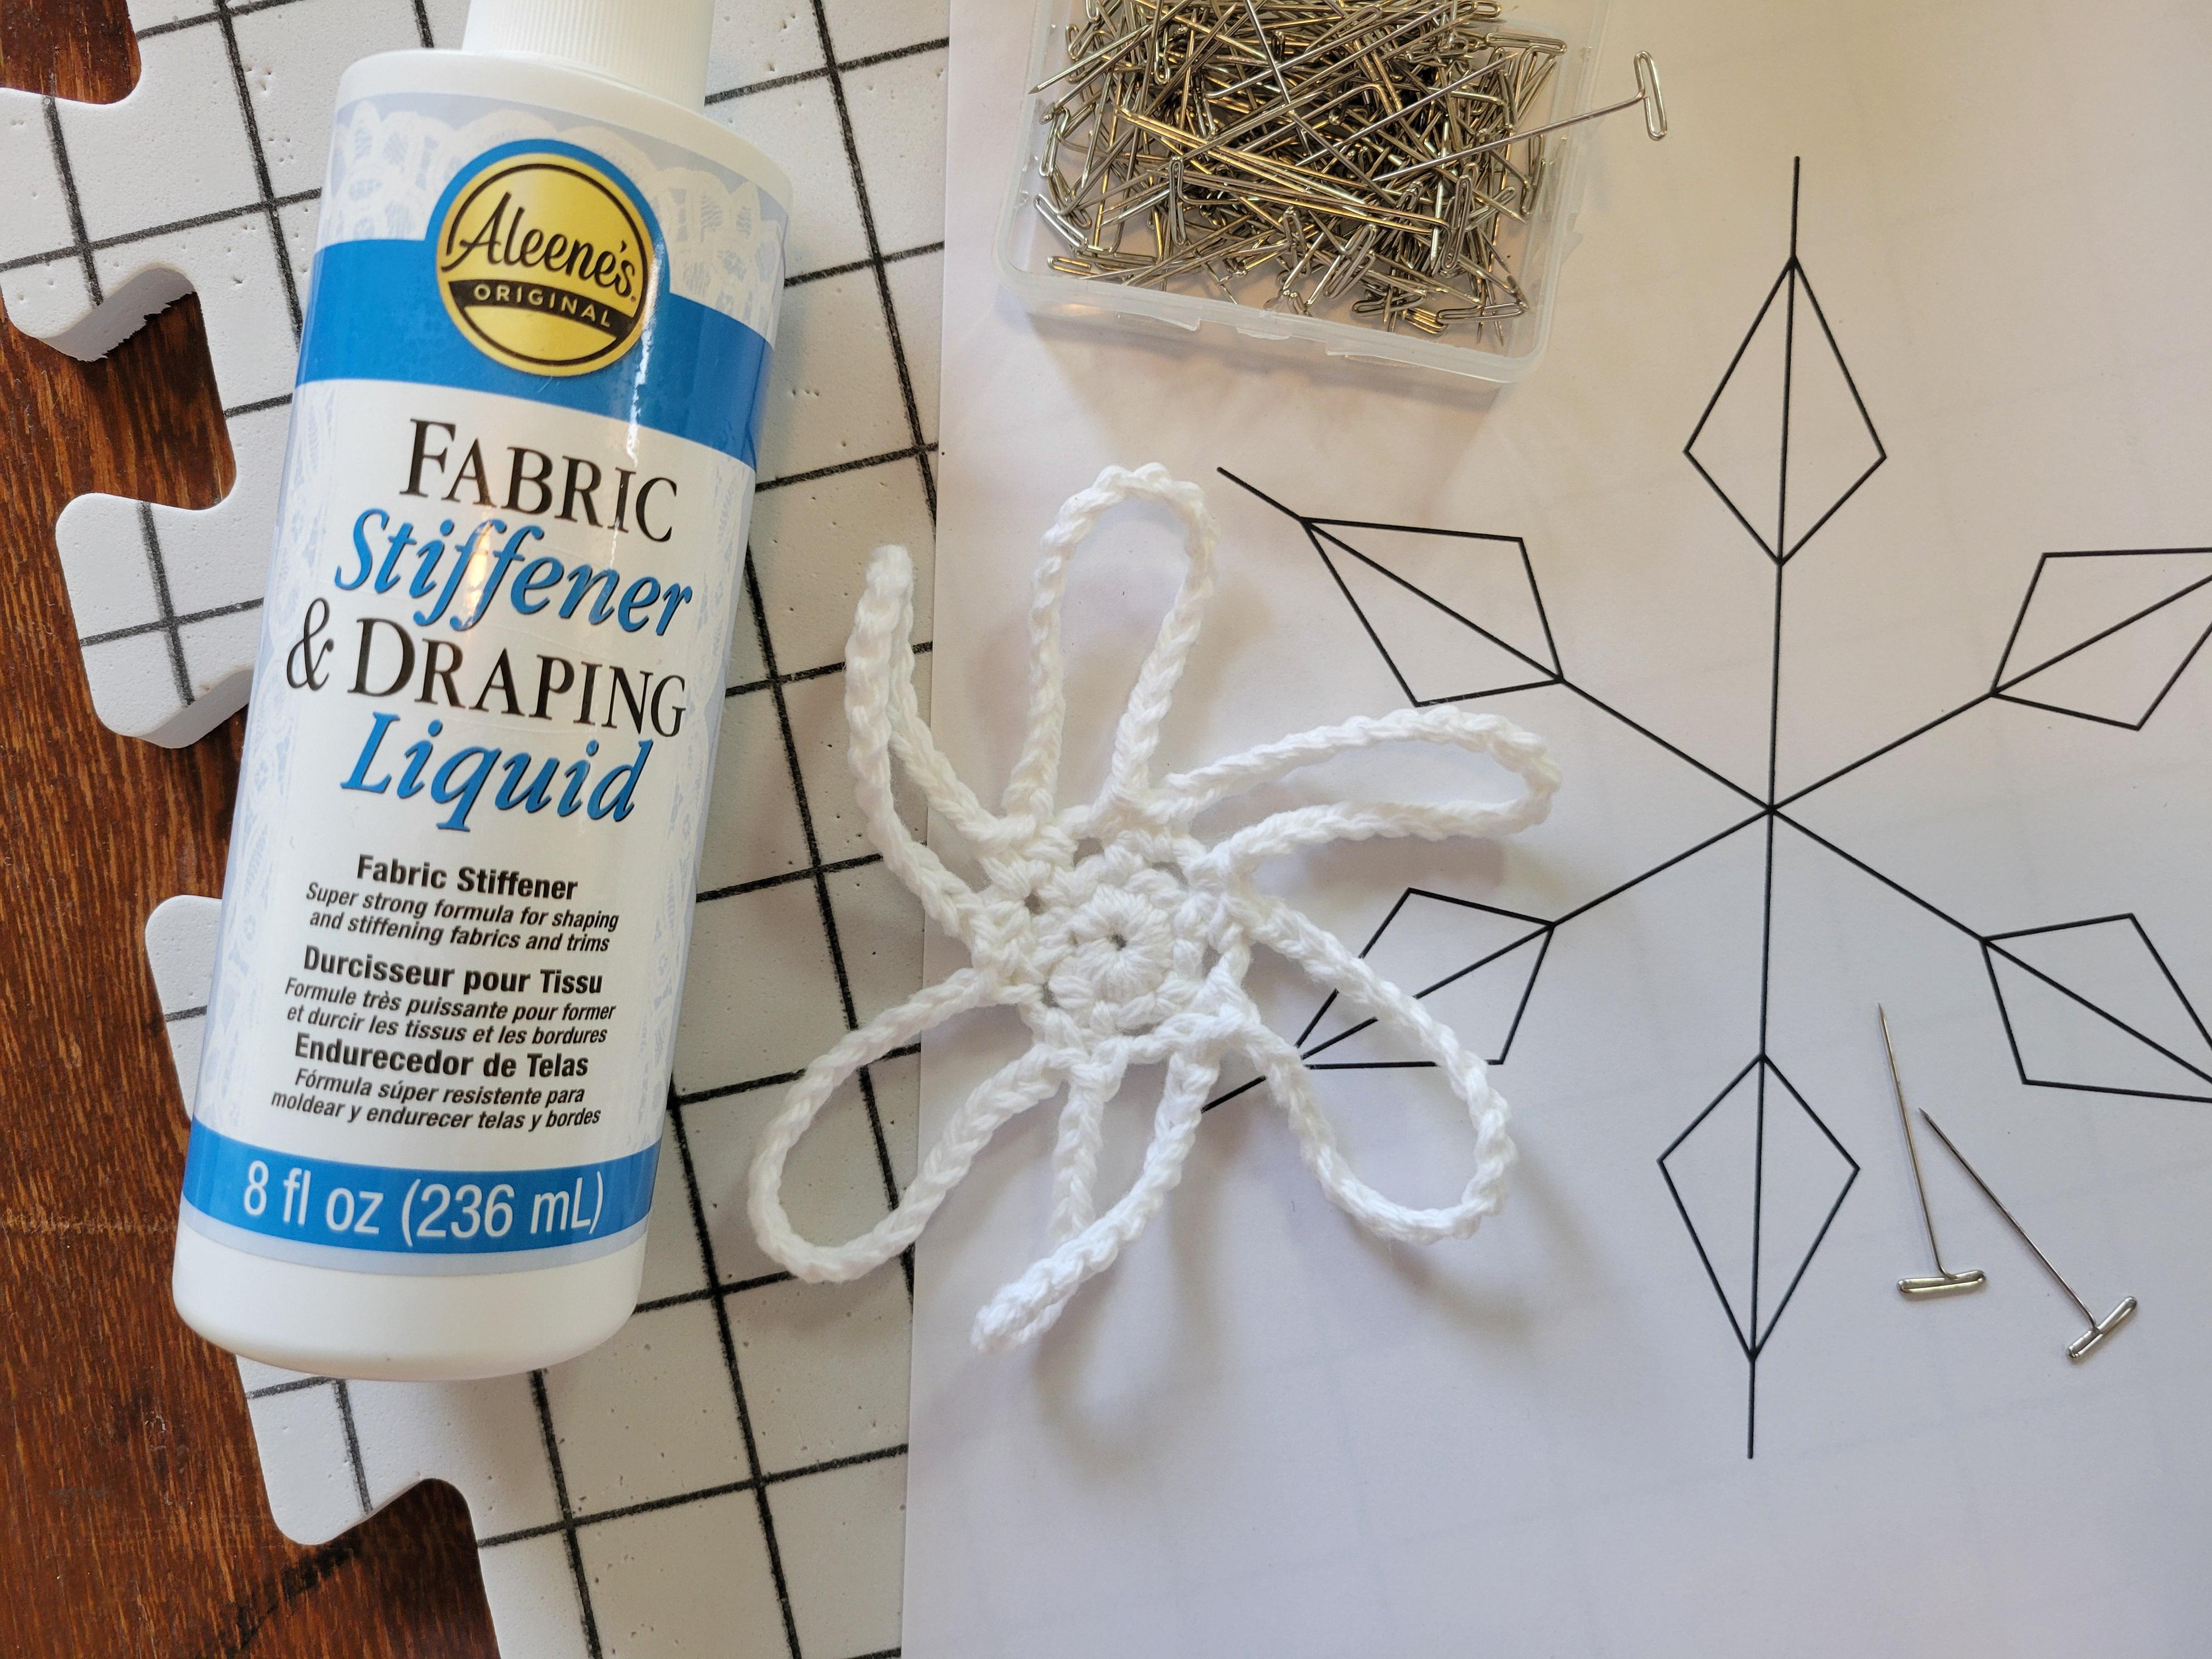
to want to get is some sort of stiffener. I like to use aleins fabric
stiffener and draping liquid. You can usually find this at
your big box craft stores. We have Ben Franklin's here. I'm still not used to
the Ben Franklin store. I've also seen it at Joanne's or Michael's stores like that. Check next to your
cotton threads for this. If you don't see it there,
check the sewing section, and if it's not there, try with glue because it does
work like a glue. Other options would be creating your own stiffener with
sugar water or saltwater, but this one is my very favorite because
it doesn't get soggy. And you don't have
to re block it. Other than that,
really, you just need a pair of scissors of
course and a needle to weave in your ends
and then some sort of blocking surface to block
your snowflakes on. I have these foam
interlocking boards that I do almost all
of my blocking on. That's what I'll be using today. Additionally, if you want to, you can print out a
blocking schematic. So this is the schematic that I have available along with
this pattern, its snowflake. And all I've done
is I've covered this printout with
some plastic wrap, and I just taped it in a
couple spots on the back. So nothing fancy. Just
print it out or draw it. If you want to just
draw your own, you would want to have
six equidistant spokes. So that you can block
out each arm of your snowflake evenly or
as evenly as you can. Now, of course, you
can eyeball it. So if you don't want to do this, you can do it straight on your
blocking surface instead. But covering the paper
with the plaster at makes it last a little bit longer so you can
reuse it several times. And it also helps
keep your stiffener from sticking to the paper because if you do it
directly on the paper, then the gluey stiffener
will stick to the paper too, and you'll have to pull it off the backside of your snowflake. Any other things so you
might want to have? I like to wet my snowflakes before I put
the stiffener on them. So you have some water, a little spray bottle,
something like that. You can have a stiff
bristle brush, like a toothbrush to brush
off any flakes of stiffener. I like to use Where are they? Where do I have them?
Some stitch markers. So I mark the first stitch of each round that I work
with a stitch marker. That way, I don't
lose track of it. And then the um I think
the only other thing that I use is maybe a
small paintbrush if after I get done
blocking the snowflake, it has some weak spots. You can use a small
paintbrush to just, um, kind of spot correct, add a little bit of extra stiffener and then
let it dry again. Then sometimes I use if I get too much stiffener
on the snowflake, you can use an absorbent cloth to soak up some of
that extra stiffener. That is, I think that's everything that I have ever
used for blocking snowflakes, but really the essentials are
your yarn or your thread, if you're ready to dive
into the crochet thread. Your yarn, your hook, some sort of stiffening agent, and then a surface
to block it on. And rust resistant pins, of course, I like to use T pins. All right. I just get a
little box of T pins, and the T pins here are easier on your fingers
when you're pushing them in if you're using them
to stretch out arms and little openings,
little doodads. Go. There just. I hit it. So if you wanted to say, add an extra space
for hanging it, you could open up a
little loop at the top of your snowflake to make it so that you can add a hanging wire in there if you're gonna put
it on a Christmas tree. So, yes, I definitely do
recommend t pins instead of the ones with the little balls on top because I don't know if you have ever had one of
those little things pop off. Those little balls
on top of the pin, they pop off. It doesn't feel. So I always feel safer
using these T pens instead. Yep. That is everything
you're going to need. Are you ready to get started? I'm telling you, you're
going to love this guy. I will meet you in
the next video, and we're going to
go ahead and dive right in and start
making the snowflake. All right. You ready?
I'll see you soon.
3. Crocheting Rounds 1-3: Okay. Are you ready
to get started? I have here my yarn. This is worsted way cotton
it's 100% cotton. I've got my 3.75
millimeter crochet hook. It's an F hook. No, we don't want to focus.
There it goes. F hook, 3.75 millimeters. Then, of course, I have
a stitch marker because they are my favorite tool ever. Okay. To begin, we are going to start with a
slip knot on our hook, just like any normal project. And I'm going to do a
loose chain here, right? I want to make this loop big enough that I can crochet
12 stitches into it. I'm just going to
make a slightly loose chain stitch here, and then I'm going to chain
a second time. All right. Now, if you do know how
to do a adjustable ring, you can start that
way as well, but this is a bit more
beginner friendly. And since this is a very
beginner friendly snowflake, we're going to start
with a chain too. I'm just making
that first chain, a tiny bit bigger so that we
have this loop here that we can work our stitches
into. All right. So are you ready for
round one? Let's do it. A into your loop, you're going to work
12 single crochets. There was my first one.
I'm going to insert my hook into the top two
loops of my first stitch. That way, I don't have to count backwards around to
figure out exactly where it is because
that first chain there also looks like a stitch. There's one, two, three, four. Then as I work, when I start
running out of space here, I'm just going to pull those
stitches around the circle. I'm going to just smooh them
together to make more space. So we've got 56, seven. Oop, split my arm.
Let's try again. Seven. I'm gonna make a
little bit more room. Mush. Eight. Nine. I think I'm almost
out of room to make. Ten. Let's do one more on
this side of the knot. That's 11, and I'm going
to move this thread to the other side and I'm going to work our last one on the
other side of the knot. Right here, that'll
be number 12. That's 12 single crochets into the second chain from the hook for our
very first round. To finish it off, we're
going to join it with a slip stitch to the top of the first stitch
that we made, which is where the
stitch marker is. We can drop that down, insert our hook under those
top two loops, yarn over and pull that loop
through and I'm going to snug it up a little
bit there and that joins our first round. All right. Round two is going
to be more single crochet, but we're also going to create some chain two spaces
as we go, right? So I'm going to go ahead and
insert my hook back into the same single crochet
that I joined to. So there's our slip stitch
coming out of there. Going to insert my hook right back into the same spot there. And yes, you can do a
chain one if you want to, but you don't really need
to on this kind of project. I'm going to do a single crochet right there in
that first stitch. Yes, I'm going to put a stitch marker on the top of it again. And now I'm going to chain two. I'm going to skip the next single crochet,
that's right here, and then I'm going
to single crochet into the next stitch. That's what we're going to
repeat all the way around. So we're going to create
six chain two spaces. And as you're working this, or if you use a smaller yarn or thread than this and you can't really see these chain spaces, make it a chain three space. It's not going to negatively
affect your snowflake, so don't be afraid to
improvise a little bit, chain two, skip one, single crochet in the next
one all the way around. Chain two. Skip the next
single crochet right there. Single crochet in the next one. Chain two, skip the
next single crochet, single crochet in the next one. Chain two, skip the
next single crochet, single crochet in
the next. Very good. There we go. Now we're
all the way around. That's our last single
crochet right there. So we're going to chain two
and then skip over that and slip stitch to join in the top of our
first single crochet, which is marked, of course. That is going to
complete round two. There is our slip stitch join, and now we should have one, two, three, four, five, six, chain two spaces. There's also six single
crochets in here, if you want to count those. But what we're going
to do is we're going to work into these
chain two spaces. And like I said before, if these are too small for you
to see what's going on, do a chain three
instead of a chain two. All right. Okay. Now it's
time for round three. This is our last round already. Can you believe it? All right. We're going to go to this. We're going to skip that
first single crochet, which we joined to. We're going to go to this
first chain to space. What we're going to do is we're going to slip stitch into it, and all that does is moves
our yarn over into the space. Now I'm going to go
ahead and single crochet into that space as well. And you guessed it.
I'm going to put a stitch marker in there we go. All right. Now we're going
to make some snowflake arms. All we're going to do is
we're going to change 20. Yes, that really is it. We are only going to chain 20 to create our snowflake arms. And if you're wondering how I can talk and count
at the same time, it's because I do them in
groups of threes and twos. So that should be 16, 17, 18, 19, and 20. If you do lose track
of them, yeah, you probably do want to go
back and count them just in case so that all of your
snowflakes are the same length. So let's double
check me, shall we? All right. Let me
use the other end. So here's our single
crochet right there. I don't know if you can see it way down there on the table, but here's here our
chain stitches. One, two, three, four, five, six, seven, eight, nine, ten, 11, 12, 13, 14, 15, 16, 17, 18, 19, and 20. The loop on the
hook does not count as a stitch. All right. So now we're going to bring
this chain of 20 back down. So just bring it
straight down and into that same chain two space. We're going to single crochet. So just bring your loop,
pull on your yarn so that your loop comes
together back into that same spot and then
work a single crochet. All right, and that is your
very first snowflake arm. Whoa, and I'm throwing
it. Let's not do that. All right. So one
down, five more to go. All right. Skip the next
single crochet there, and then into the next chain to space, we're going
to do the same thing. So single crochet, change one, one, two, three,
four, five, six, seven, eight, nine, ten, you'll notice that
I move my fingers up about every five
stitches or so. Move it back up. That
helps me keep control over it. That should be 20. I'm just going to
run my finger down this chain here to try and make sure that it's
not twisted up. If it does get twisted up, it is not the end of the
world because this is simply a loop that we're
actually going to twist and turn and stretch
when we block it anyway. Don't worry too much about that. Also, don't forget your
second single crochet in your chain two space
because I already did it. I didn't talk about
it. All right. That's two arms down.
Let's do another. Single crochet into the
next chain two space. Chain 20, three,
four, five, six, seven, eight, nine,
ten, 11, 12, 13, 14, 15, 16, 17, 18, 19, 20, and bring it back down, single crochet into the
same chain to space. All we're halfway
there. All right. Pretty easy, right? You are almost done making a
snowflake, my friend. One, two, three, four, five, six, seven, eight, nine, ten, 11, 12, 13, 14, 15, 16, 17, 18, 19, and 20. Now, if you do this with 20 chains and you
decide, you know what? I would like some
longer snowflake arms or shorter snowflake arms. Do it. Change it up. Have fun
with it experiment. The only thing that I
do recommend is that you make sure that you
know how many stitches are in each arm so that they're at least close
to the same length. All right, so two more arms. Single crochet, change 20. Three, four, five, six, seven, eight, nine, ten, 11, 12, 13, 14, 15, 16, 17, 18, 19, and 20. A back down here. Single crochet into
the change to space. Here's our very last one.
Single crochet into it. Change 20. Four, five, six, seven, eight, nine, ten. Oops, 11, 12, 13, 14, 15, 16, 17, 18, 19, 20. I guess I should say, if you drop it and it gets turned
around and you pick it up and you don't quite know if your row is
straight, again, it doesn't matter
that much, but if you find the fronts of the stitches,
these little bees here, just run your hand down them
and let the snowflake twirl, then that's going
to bring you back. To where you started. Again, if it doesn't a big deal. All right, so we're going to
finish that last arm with a single crochet into the
same change to space again. Now real quick, I'm going to
lay down and I'm going to make sure before I cut my arm that I actually have
six arms and not seven because I have occasionally added an extra arm because
I wasn't paying attention. All right, so here's one, two, three, four, five, six. All right. So this is what our snowflake looks
like before we block it. It's just kind of
a squiggly little octopusy flower
looking thing, right? Okay. So to finish
off the snowflake, I'm going to simply join with a slip stitch to the top of
our first single crochet, which is marked here. If you know how to do it and you would prefer you can also finish it off with
an invisible joint, which is my favorite way get in there now to finish
off these snowflakes, but I am demonstrating for you the simplest basic
crochet techniques for finishing off this
project because it is a introd crochet
snowflakes pattern, join with the slip
stitch, snug it up, and then we're going to
do a slip stitch again. I guess it's a chain
stitch technically. To finish it off, cut,
make sure you leave at least 4 " so that
you can sew it in, pull the end through, and then snug that up so that
it won't come unraveled. All right. So there
is your snowflake. It's ready to go. We
just need to weave in the ends, and then
we can block her. So let's do that. Let's flip it over. Okay, I'm going to get my needle here. Move these out of
the way. And this. We don't need the yarn either. Okay. So when I saw
ends on a snowflake, especially one that's
simple like this, I don't really do a whole lot. Because we're going to block it, we're going to add the
stiffener and we're basically gluing
the stitches down. But I do want to make sure
that it's secure enough so that if I do have to
wet it and re block it, if it gets dirty and it
needs a bath or whatever, then I can go ahead and wash it without worrying
about the ends coming undone. What I'm going to do is
I am going to insert my needle close to this
knot that we made, but not back down into the knot because we don't want to
accidentally unravel it. This is usually easier
with a pointed needle. But I know sometimes it's
hard to find a nice, large darning needle
with a pointed in. You can also do it
with a blunt needle. It's just a little
bit easier usually because we have
these snug stitches. I'm just going to
weave in and around. I don't like to get
too far down into the center here
because that's where I'm going to weave this end in. But you can run it down and
grab a couple loops here, the tops of your single
crochets if you don't want to go straight across this
little bit of a gap there. I don't know how well
you guys can see that, I'm going to come over
here and I'm going to work through the legs of these
single crochets right here. And so now I have sewn across
from the side, this corner. That's where our slip knot
joint is to over here. And that is all I'm going to do. I'm going to run it through a strand of yarn to
kind of hold it on this end, and then I'm going
to run it back the same way that I came, you only have to go about
half an inch really to get a nice secure end woven in on here
because like I said, we're basically gluing
it down when we're done. I popped my needle off and it looks like my yarn
split at the same time. That's a fun distraction. What I'm going to do is I'm
going to let that come loose. I'm going to pull
what's left through. I'm going to have to trim
that off on this side. Let's see if it pulls
the rest of the way through. Yeah, I think I got it. All right. There is our first
end woven off or woven in. I go ahead and cut the
rest of that yarn there. And now we're just
going to do the center. To do the center, I'm going
to do the same thing. I'm going to begin sewing in
the end as close as I can to where the yarn came
out of my stitches. I'm going to keep it nice
and close to the origin. That way we don't
have a big lump or stretch of yarn that
isn't woven into anything. Now I'm going to work basically can go around this circle. That way I can cinch it up
as nice and snug as I want to work if you begin
with a adjustable ring, then you can do the
same thing, pull on your tail to cinch up the
center of your adjustable ring. Just make sure, especially with cotton yarn that you
do not pull too hard because I have
broken yarn trying to cinch up the center
of pieces before. Just start gently. Don't pull too hard before
you have secured it. Because even though
we're gluing it down, if we have to wet it,
if we have to wash it, we end up having to re block it. If those ends aren't sewing, sewn in at least a little bit, it's much more likely to unravel and we definitely
don't want that. All right, so I've sewn all
the way around the center. Now I'm just going to pull
gently and I use my fingers on this side and this side to hold that center flat and I'm
going to pull gently, gently, gently to
snug that up as much as either it wants to
go or as I want it to go. I'm going to do the same
thing as I did before. I'm just going to snag a
little bit of yarn here, and then I'm going to
turn around and I'm going to go back the
direction that I came. To secure this end. Almost done. A little
bit more. There we go. I'm going to go, let me go
more one more pass here. I'm only going maybe
halfway around the circle the second time. Okay. All right. There it
is. I'm going to call that good enough.
We're going to cut this. And a, there is our squiggly
little snowflake, right? Yeah, it looks like
a flower. I know. But you are going to turn it into a snowflake
in the next step, so I will meet you there.
4. Blocking and Unpinning: Okay, friends, I am back. I am ready to block
my little snowflake. I have gone ahead and I
have wet this with water. I just ran it under the faucet for a little while
with some warm water. Warm water just soaks
up more quickly. It doesn't have to
be warm. Then I just squeezed out
the extra, right? So it is wet, and
that's going to help the stiffener soak in
a little bit better. Now, I'm just going
to pour some on here. You can do this over, say, a little saucer or even
in a plastic bagging, but it's just glue. Basically, I'm going to
fold these legs in on top here and I'm going
to squish it all around. If you feel the need
to enlist helper, say a child who doesn't
mind getting their fingers a little bit gluey or maybe that one friend who
always loved peeling the glue, the dried glue off their
hands, go find that friend. To help you with this
part. Right now, I'm just working this glue into all the parts
of the snowflake. So it's already wet in there
and by squishing it around, it's working that
stiffener into it. You can do this as much or
as little as you want to. Actually, I think I'm going
to add just a little bit more because it doesn't feel quite
as tacky as I want it to. So I'm going to add just a
little bit more on there. Mostly, I'm going
to work this into the the little snowflake arms. I'm just working this
in with my fingers to make sure that we've
got enough stiffener in those arms because
that's where we're going to be doing a lot of the
shaping for our snowflake. Squish, squish, squish, squish. I think that's probably good. What I'm going to
do is I'm going to lay it down and I'm going to go wash my hands real
fast. I'll be right back. Okay. All better. I am at least starting
out with cleanish hand. I'm going to shake out, I don't know how many of the pins I actually used
on this, but that's okay. We can count at the
end. I'm going to start by pinning
it in the center. I'm just going to go
through the center of our snowflake and then
I'll hold it in place. Now I'm going to work. You want to work quickly. But what we're going to do
is we're going to stretch these little arms out, but we're going to
put a twist in them. What I do is I put my needle in. Let me scoot. Hold on. There
we go. We'll readjust. I put my needle in from
the top to the bottom, and then I twist it around like this so that
it goes all the way around and then
I'm just going to stretch it and pin it. Okay. I'm going to do
that on each arm. I'll turn in from the top, bring it to the side, twist it all the way around, and
then just stretch it. I need to redo this blocking schematic and make
the arms longer. It's not long enough
for the snowflake. Then we're going to do
the same thing again here. I'm a little bit off here. Turn. I looks twisted around. Stretch it out. Let's turn
on my blocking board. It just makes it
easier for me to do it straight up in
front of me like this. When you're using your
blocking schematic, it doesn't have to be perfect, don't obsess over it. Please just have fun
with it. All right? There. Now we have all six arms stretched
out and you could, if you wanted to, just
stop here and leave it at a cool little star. But what I'm going to
do is I'm going to open up some little
diamonds on this. I should have tipped my
plastic rub down better. What I'm going to do is
I'm going to open this up. This is where a twist is. Scoop this down a little bit more. I'm going to open this up. I apologize for my light today. It's not snowing, but
it's rainy here today. I'm going to twist this down. And I'm going to pin it open. You see a little diamond there. I'm going to pin it at the
bottom of the diamond, and now I'm going to
pin out the sides. Like I said, I need this
to be a little bit bigger, so I'm going to
improvise a little bit. I'm going to go out
from the sides of those corners a little bit. I'm just recreating
this diamond shape. Don't pull that one out. Then if you want to, you can put another
little half twist in up here or full twist, if you want to, that's
a little tough to do. For this one to do a half twist, I'm going to go in from the
bottom and then I'm just going to twist it once
and stretch it out. Pin it, and then you can adjust these a little
bit if you need to so that it's the shape
that you want it to be. I do like to put the pins at an angle so that they're
coming in like this, it'll hold those corners out
just a little bit better. Let's do the next one. I'm going to unpin from the top
and open this up, making sure that I keep
that twist in there. Then I'm just going
to bring the twist down to the bottom here. I'm going to pin it.
Let's try to pin it on the spoke. Right there. Here, let me pin my plastic wrap down on that side because
it keeps sticking to me. All right. Now we've pinned that
twist open at the bottom, and now I'm going
to place my pins at an angle out from
this corner here. Then I'm going to add you can either stretch
it straight like this or you can put a little half twist on it I'm going to do a
little half twist. Stretch and angle. Let's there we go. That's right. Let's bring
this in just a smidge. I don't like that better.
Stretch that again. All right, so see you can tweak it a little bit as you need to to make it look the
way you want it to. I think my center is
stretching out on me. Okay. Next. All right. Open it up, pull our little twist down, pin it on my spoke. And I need two more. I'm just going to pin out at the sides. Doesn't
have to be perfect. The blocking schematic
is just a guideline. Like I said, I need to redo it clearly make my diamonds
bigger for this size. We're going to stretch
it and pin it, and I'm going to tweak
it a little bit. I'm going to tweak
just a little bit. Now I'm actually going to spin around here and I'm going to do this opposite side because I feel like I'm getting off
track just a little bit. Let's get, yeah, that's
going to help a lot. Let's go down for
you a little bit. And pull a little twist. Pin it here at the bottom,
for a little triangle. N two of these. So pin there. And over here, I'm trying to keep my
hands out of the way, but it's hard to get in there
and do all the pinning. Can you imagine me
demonstrating this with one of those teeny tiny
thread crochet snowblakes? This is better for
teaching, too, not just doing. All right. Now, you got two left.
Open this guy up. Squeeze our twist
down to the bottom. Pin it right there. Man, it's getting
dark out there today. I go to get better light system. It is officially rainy season
here in Hawaii. All right. We got one more twist here, little half twist and
little tweak. Little tweak. Hold those corners out nicely. Let's pull this a little bit tighter. There we go. All right. We have just one more and squeeze that twist
down. Pin it open. Get our corners. Yeah, the pins do get
in the way as you are getting to the last, but
you just work around them. Do your best. Like I said,
does not have to be perfect. Every snowflake is
different, right? Every snowflake is unique. So embrace a little bit of
imperfection and have fun. Have fun with these, you guys. All right. I think that will do. I'm just kind of eyeballing it here to make sure
it's still on track, equidistant and all that. We don't really need that
one in the center anymore. All right. So now we have a blocked snowflake and I
just need to let it dry. So usually this will
take a day or two. The worsted weight yarn
takes a little bit longer. I need to leave it
at least 36 hours here and it's humid here. So I would plan on leaving
these worsted weight ones to dry for at least two days if you want to make absolutely
certain that they're dry, especially if you live
in a humid environment. Okay. All right, so
I'm going to put this one aside, and I've
got another one here. I'm going to show you how to unwlock it or unpin it rather. Which is pretty easy. You just take the
pins out, right? Alright here we go. Okay. So here is another
snowflake that has been drying for about
three days, I think. I'm going to do is
I'm going to start unpinning I'm going
to kind of push down. So I'm going to push
down and unpin. And you might want
to turn your pins. I don't know if you
heard that crack, but sometimes the film from the stiffener will
stick to your pins, and you can even do
this while it's drying. So make sure you push down
because if it's stuck, it'll wrench your
snowflake arm up and that can break the stiffener
and make a weaker joint. But yeah, as your
snowflake is drying, you can come along and twist your pins or push the mi
a little bit further if they can to break
that film so that it's less likely to stick
to your snowflakes. We're just going to spin
her around as we go. I'm trying not to wiggle
the camera too much here. And I can't believe how
dark it has gotten. No snow, no rain, making it feel well
that stuck in there. If not so much festive, a little bit moodier than I was expecting it to be it's in the 80s
almost every day here. It's really weird. We've
been here since July, and the weather
is almost exactly the same as it was
when we got here. Alright, this is
the very last one. Make sure I break that film, pull them out carefully, make sure that you're
pushing on them. And you can probably
see the little flakies from the maybe. Yeah, little flickies
on my skin from the stiffener because I didn't
wash my hands this time. All right. Are you ready? Now we're going to
separate it carefully. See, this is why the
plastic wrap is good because it does kind
of stick on the back. So remember just
ease it up off of your blocking surface,
yeah see here. This is why you might want
a stiff bristle brush like old toothbrush
or a new toothbrush, whatever, so that
you can just scrub off any little flakies that are on the backside
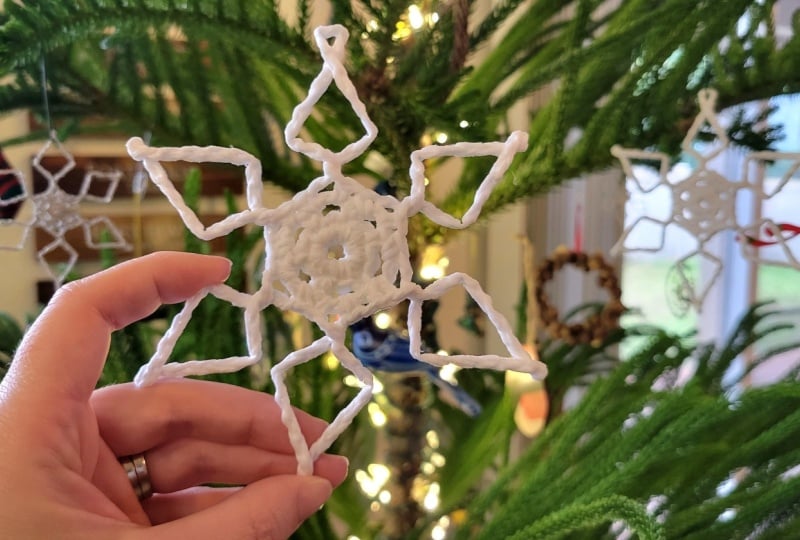
of your snowflake. There she is. That is our finished and fully
blocked snowflake. It is ready to hang. If you have thin enough wires, you can put it through one of the pinholes or if
you're smarter, unlike me, you can do
that to begin with. Let's take this one right here. We're going to just
open this loop up a little bit more like this. We're going to pin it open using two or three pins like that. Then when that
dries, that will be a slightly larger opening to
add a hanging loop through. Don't forget to add that while you're blocking it if you don't want it to end up
drying with no holes. You can't see that.
Move this out the way. There now you can see.
Tara. She's so pretty. Isn't she cute? I just
love these snowflakes. Alright, I'm going to hush because that's all
I have to show you. It's done. She's so cute and short and
sweet and easy to do. It's just a really fun
little project and makes great gifts, makes
great decorations. I'm going to have to do
a whole little snowstorm of these things to make it feel anything like winter
here in Hawaii. But I am well on
my way because I have three or four of these little guys already
in the worsted weight. So yeah, the these might just get hung
up in my windows to make it feel just a little bit more like the winter holidays. All right. Thank you so much for
tagging along and watching me do this
little snowflake. These snowflakes. I've
got two of them here. They're ready to
go. All right. Bye.
5. Conclusion: Okay. So tell me,
what did you think? What did you think about taking worsted weight cotton yarn, turning it into this crazy
squiggly mess, right? And then blocking
it out to become this cute little easy snowflake. Am I right? It's easy, right? You could do so many of these great holiday
gifts all around. And, you know, it just I just
love snowflakes every year. They just they mesmerize
me. They're so magical. They make great gifts. They make quick gifts. And
I always want to do more. I just I always want to do more. I hope you enjoyed this class. If you have any questions
about it, let me know. Feel free to reach out
and if you're ready to dive into some smaller thread crochet
snowflakes after this, what you probably want
to look for first is maybe a size three or a
size five cotton thread. I dropped it out of its label, but this is a size three thread. And I've had this
for a long time. I don't know if
Red heart actually puts crochet thread out
on their own anymore, but this is definitely a thinner weight thread
than the yarn that we use. I use just a B or a C hook. So that's going to
be 2.5 millimeters. It's quite a bit smaller than the F hook that we used for the worsted
weight snowflakes. But that would be
the next step down. I would go from the
worsted weight yarn to either a fingering
weight cotton or a size three crochet thread because they'll be
pretty similar. This will be a little
bit lighter than a fingering weight or, but not too much, especially if you
use a B or a C hook, it'll work up pretty similarly. Then, of course,
going down from there would be a size ten, something like this, and
this is a lot thinner. But it makes such
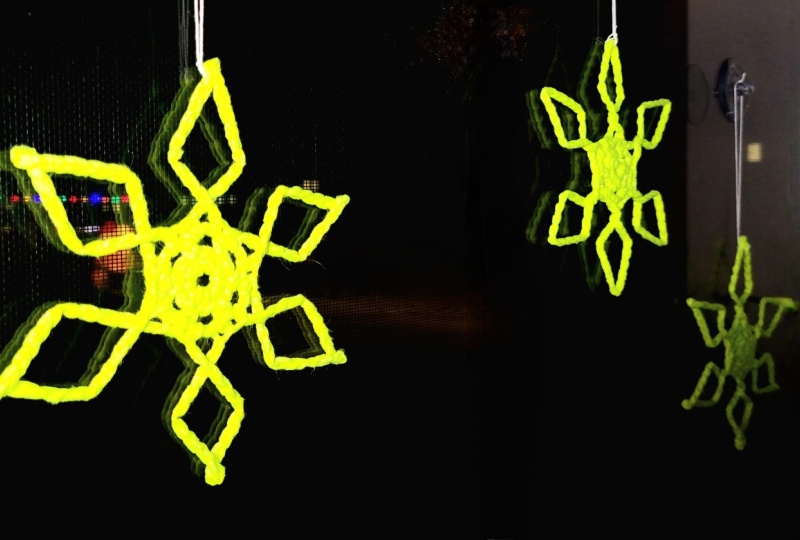
pretty snowflakes. Let me show you this is our
worsted weight snowflake, then this right here, this is the size three cotton thread, snowflake you line it up there. It's quite a bit smaller. And then this cutie right here, this is the size ten thread. Snowflake. So right there, we've got all three sizes. And here let's compare these
two next to each other. But it's the same pattern. It's still simple. It's
just smaller thread. So if you're going to dip into making these thread crochet snowflakes with size ten thread, make sure you've got
some good lights. Don't do it at Twilight.
Ask me how I know. Get yourself good light, maybe some reading glasses. Again, ask me how I know. And yeah, just have fun with it. It'll be a little bit tougher to block this one just
because it's smaller, but it's the same thing, right? So have fun making these. Try out some different sizes. Even try out some
different fibers. You know, the stuff works on just about anything.
So have fun with it. Make a whole flurry of
snowflakes this year, and sere pictures, tag me. I want to see what
you make. So let me know if you have
any questions. Come join me in the
free facebook group and have fun making
snowflakes. I'll see you soon. I
 Connie Lee Lynch, Crochet Designer & Fiber Artist