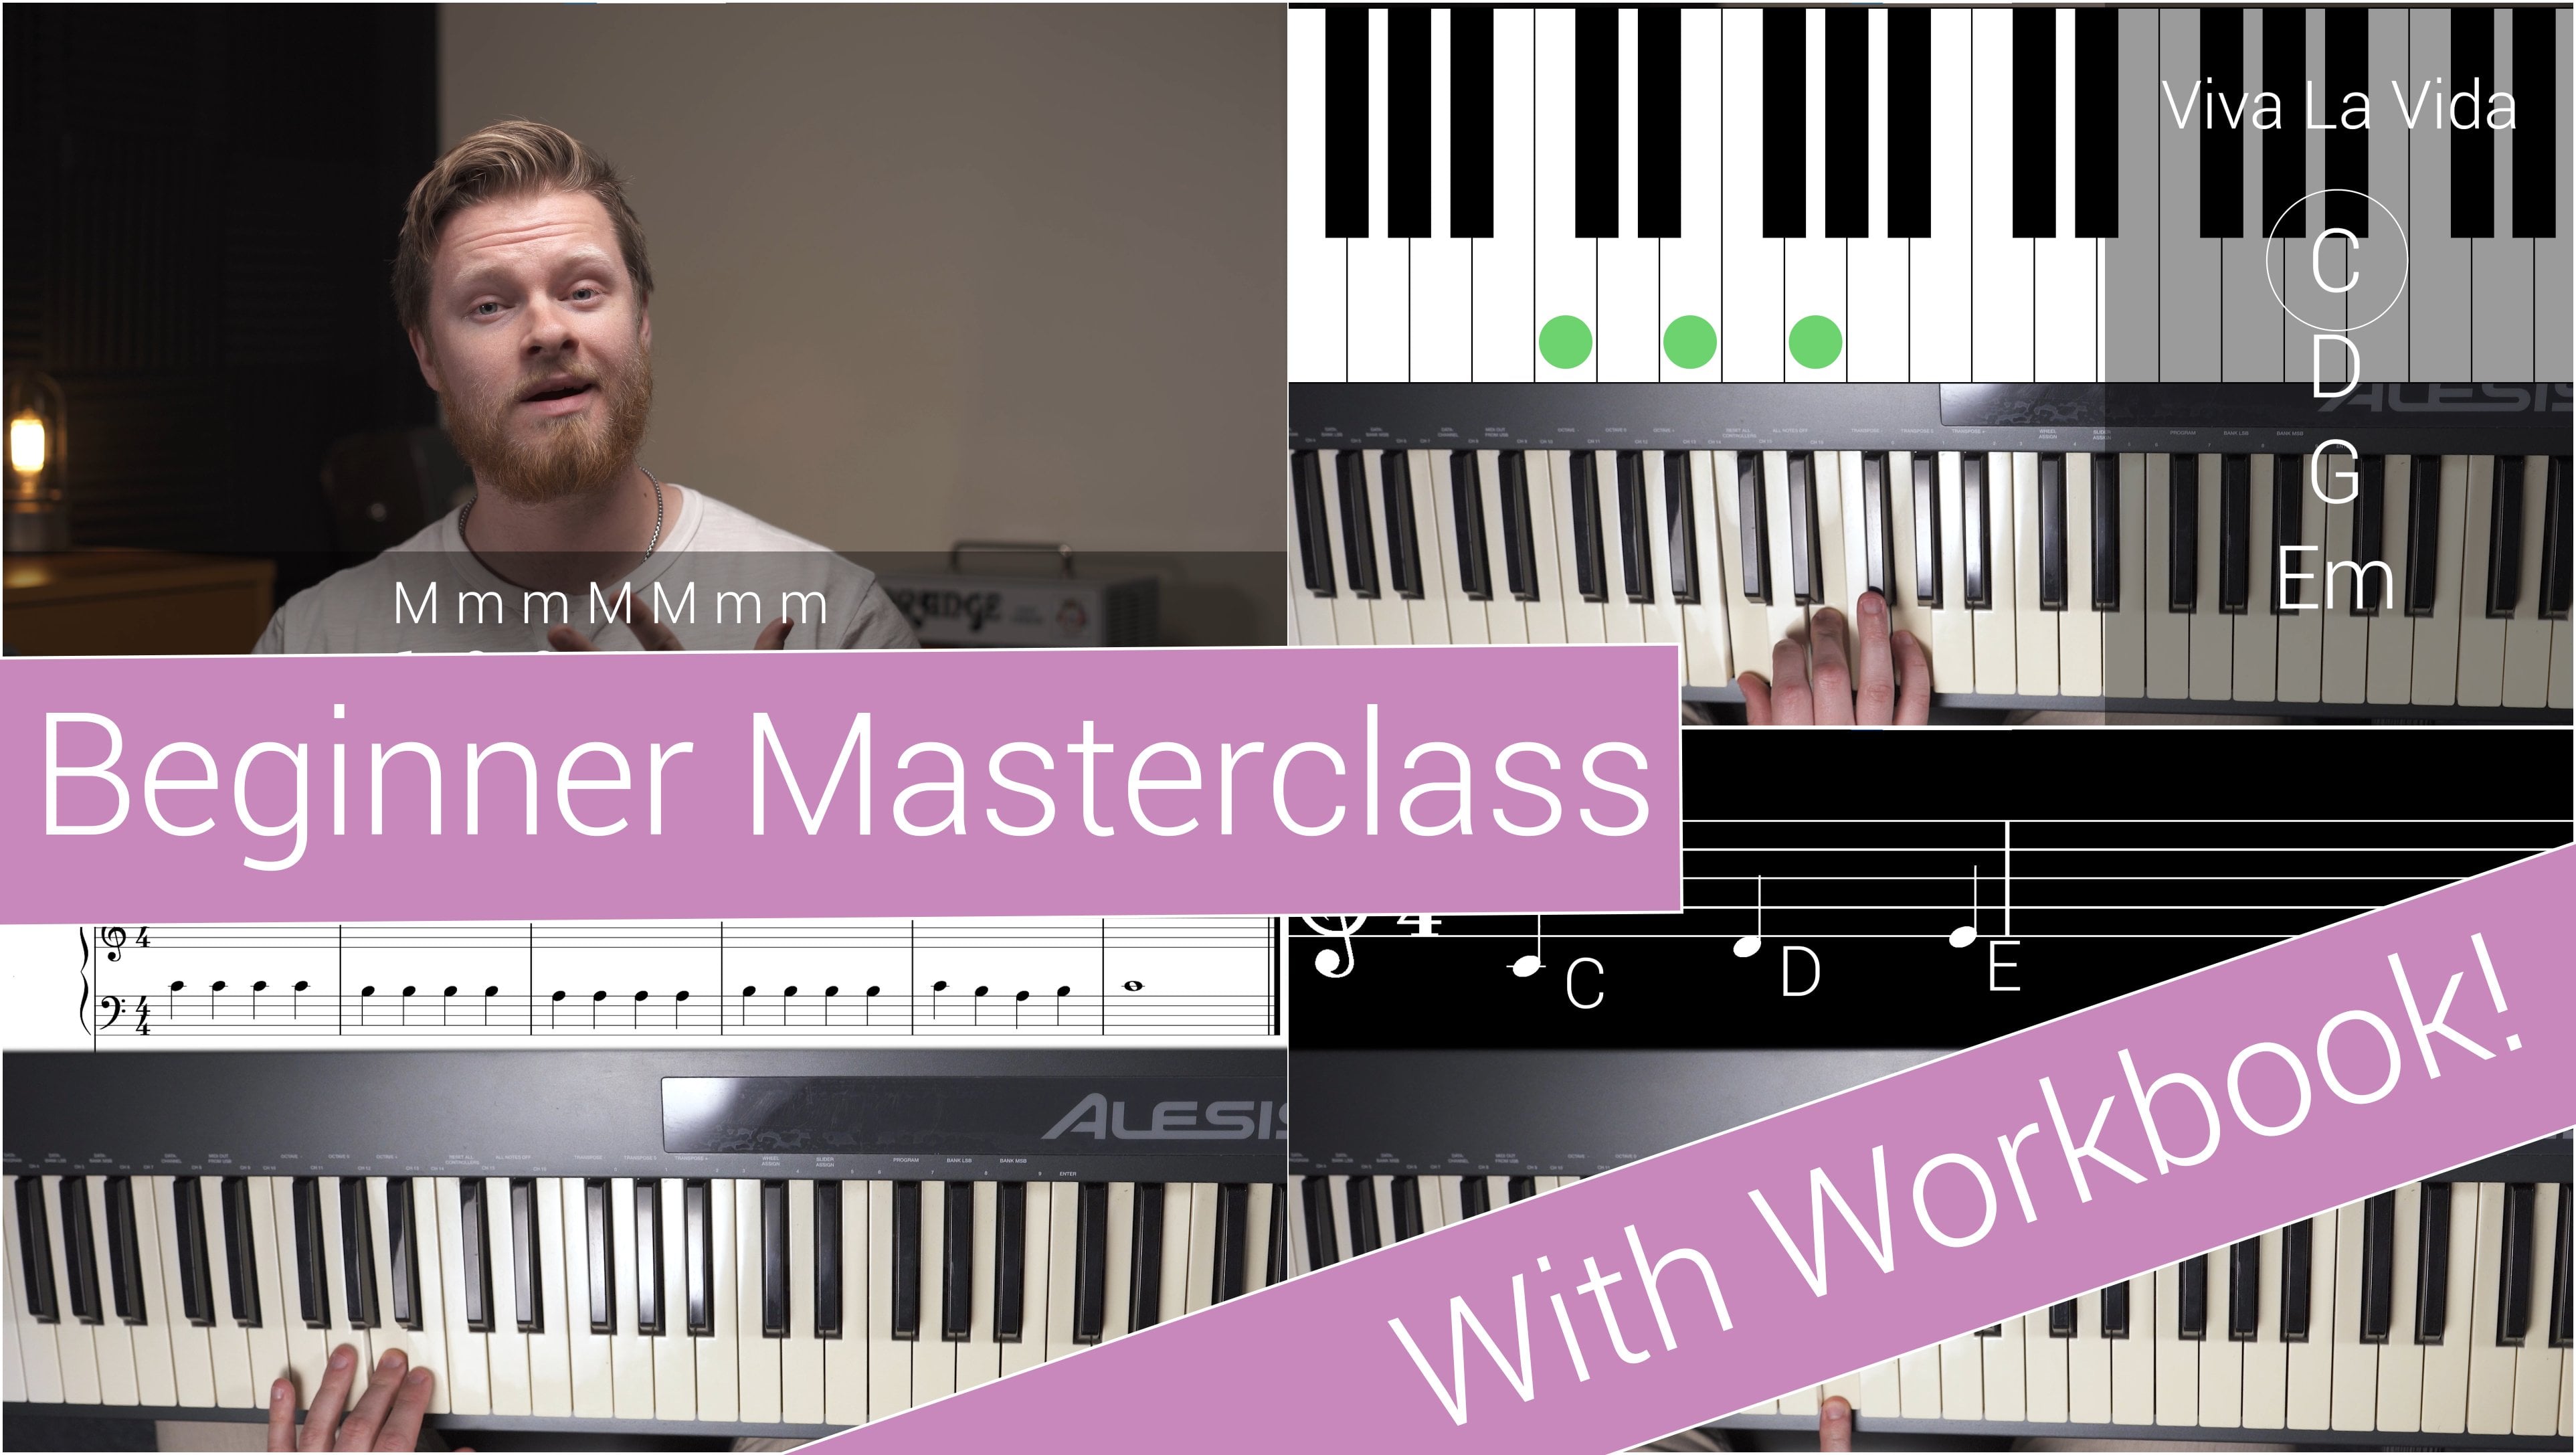
Transcripts
1. About This Course: Hi, My name is Jacob Lam. I'm a musician and
a music teacher. In this course,
we're going to cover piano chords from
beginning to end. This course is broken
into seven sections. Will start with basic courts. What they are, how they
work, and how we build them. By the end of this
first section, you'll already be playing
chord progressions. Then we'll learn about
how chords fit together. And this will help us with song writing and
even transposing. We'll jump into intermediate
chords as our third section, where we'll learn
unique shapes to start putting some dressing on
the salad, so to speak. Then in our fourth section
we'll do advanced chords. These are where we deal with really adult chords and how we break apart long looking courts. We'll talk about styled chords in Section five
and go over blues, jazz, and rock courts. Then we'll talk about common
chord progressions that you can use in your songwriting
or playing with a band. Finally, in the end, we'll talk about
finding chords to your favorite songs and how you can play with
a band as the pianist. Now, these are all
taken step by step. So if you've already got
some chord knowledge, you can jump in at any point
that you feel you need to. But you can also come
in as a beginner, not even knowing anything
about the piano. This course also comes
with a free book. Each chapter of the book is
one lesson in the course. So you can follow along and get good practice sessions
with visuals as well. By the end of this course, you'll be able to play any chord progression that's
put in front of you and have a basic understanding
of how to play piano for different
styles of music.
2. Half and Whole Steps: The first thing we
need to understand here is half and whole-steps. Everything we cover in
this course is going to relate two half-steps
and whole-steps. That's how we'll
be counting notes. Now, these are actually
really simple. A half-step on the piano is the smallest amount that
we can move up or down. Now, you'll notice
on the piano we have white keys and we
have black keys. Now, both of these
are included when we deal with half-steps
and whole-steps. So if I start from any note, I'm looking at a half-step, is going to be the next note up, including white or black keys, or the next note down. You'll notice that it
doesn't matter if I'm moving to a black
key or a white key. If I move up by one half step, I'm moving up to a black key, Fi, moving down by a half
step from this note, I'm moving down to a white key. Sometimes people think of
half-steps as the black keys. And to be sure, we need black keys to
play many half-steps, but not all of the time. You'll see here we have two
white keys right next to each other without a
black key between them. And so these would be
a half step apart. In the same way, if I'm
starting from a black key, then I can move up to a white key and say
that was a half-step. Or I could move down
to a white key and say that was half-step. Now, a whole step is going to be two half-steps
put together. E.g. if I start
from that same key, well, now I'm going to skip
over one of these notes. If I need to move
up by a whole step, I'm going to count
12 half-steps. So now I've got a
key in between. If I'm starting
here and I want to move down by a whole step, I'm again going to
count 12 half-steps. So I'm jumping from here down a whole step
to this black key. You'll also notice a
whole step could be me moving from a black key up, skipping one note to
the next black key. So again, if I'm starting here and I want to
move by half steps, I'm going to press every key on the piano, white and black. If I'm starting
here and I want to move up by whole-steps, then I'm going to skip a key. Skip a key. Skip a key again, which now would be this one, since there's no
black key between. Skip a key, skip a
key, skip a key. Those are half-steps
and whole-steps.
3. Names of the White Keys: Now this is a course on chords, but we're looking
at basic chords. And one of the rudimentary
things we need to know are the note
names on the piano. So if you already know this, you can move forward
to the next section. If you don't know this, we're going to quickly look at the notes on the white keys. And then in the next
lesson we will look at the notes on the black keys. Here, on the white keys, we work with the letters
of the alphabet from a through G. After G, we start back over at a
and repeat that pattern. Now, this pattern carries
over the entire piano. So even though it looks
like there's many keys, it's the same notes repeated
over and over and over. Each one of these
sections is an octave. So I could move
from one letter to the next letter up and say
I'm jumping up an octave. Now, these letters
work like this. The first note on the piano
is an a, which makes sense. Then we can just
count up the notes, like we're counting
up the alphabet a, B, C, D, E, F, and G back to a. And the pattern repeats B, C, D E, F, G a, B, C, D E F G, a, B, C. One of the ways
people remember where these notes and go is to
aim with the black keys. You'll notice that
they're in patterns 2.3. So something I like to do
with students is have them relate the names of these notes to the black
keys that are around them. E.g. in the middle of the piano, will start with these
two black keys. Before these two black keys, we have a C note. In the middle of the two
black keys we have a D, and then after the two
black keys we have an E. Then we're on to a group of three black keys and
the notes around them. At the beginning we have
an F in the middle. On the left, we have
a G. In the middle. On the right we have an a. And at the end of three
black keys we have a b. Then our pattern or
section repeats with a C. Again. These are the white
keys of the piano. From a through G. Just put
in blocks across the keys.
4. Sharps and Flats: Now we can take a look at the black keys on the
keyboard as well. The black keys actually relate
to the white keys. So e.g. here, if I have a C note, while the black key above it
will be a type of C note. Now, there are two words
we need to know here. That's a sharp and a flat. Sharp is when we take
a note and we move it up to the right of the
piano by a half-step. So if I have a C note and I
move it up by a half-step, that would be a C sharp flat is when we take a
note and we move it down a half step to
the left of the piano. So I can start with maybe an a. And if I move it
down by a half-step, that would be an a flat note. Now, one of the questions
you may be asking is, well, doesn't that mean the
black keys would share names? We could have a C Sharp, but that's the same
note as a D flat. And the answer is absolutely. The difference is which direction we're
coming at the Nope. From if I move my seat
up by a half step, I won't call it a D flat, I'll call it a C sharp. The one other thing we want
to notice is that there's not a black key between
every set of notes. B doesn't have a sharp, and C doesn't have a flat. And in the same way, E doesn't have a sharp, and F does not have a flat. We have C, C sharp, D, D sharp, E, F, F sharp, G, and so on.
5. Major vs. Minor Sounds: Now just a quick video
on some terminology. One of the things we
need to understand our majors and minors. Now, majors here we can
relate with a happy sound. Minor, we can relate with
a sad or somber sound. Now as we learn chord shapes, we're going to see exactly what we change and what we do to make things major or minor. In this lesson, we just want to understand the sounds of each. As an example, here is
a major sounding chord. It's got a happy sound to it. Here is a minor sounding chord. That's got a much
more sad sound to it. Sometimes people
confuse major and minor with higher and
lower on the piano. And that's not quite what
we're talking about. Again, in the future, we'll see exactly what makes something major and what
makes something minor. It has to do with the
distance between the notes. But we could have minor
sounds higher on the piano. And we can have major
sounds lower on the piano. As an example, I'll do major
and minor side-by-side, higher up the keys and
lower down on the keys. So lower down here is major. And here's minor. Now
higher up, Here's major. And minor.
6. What Are Intervals?: We mentioned that
major and minor sounds are caused by the
space between notes. And that space between notes
is called an interval. The interval between two notes. We could have a large interval or we could have
a small interval. As an example intervals
we can just count, we just need numbers. And if we can count to seven, we've got everything we need. E.g. I'm going to
start from a note and it doesn't matter what note,
but I'll start from a C. Now, I'm going to call intervals things like
a second or third, fourth, fifth,
sixth, and seventh. If I want a second interval, I just have to start
from my C and count 12. Now I'm at two, so
those two notes together would be
a second interval. If I want a third, I would count 123, play my first and my third. Well that's a third interval. So as you can imagine, we also have a fourth,
fifth, sixth, seventh. And then I'm playing the
same note from a C to a C.
7. Major 3rd Intervals: For this course on intervals, we're going to
focus in on thirds. Which means if I take a note
and I want a third interval, I count 123, and I
play my first note. And the note I just
counted as three, that's a third interval. We're going to use
these to build chords. But guess what? There are major intervals and
there are minor intervals. And specifically for
what we're doing, there is a major third
and a minor third. Now, if there are major
and minor third intervals, and we're using intervals
to build our chords. Well, now we're starting
to understand why chord sound major or minor. Let's take a look at a
major third interval. And then we'll look at a minor third interval and how
we turn these into chords. Now, a major third interval is going to be four
half steps apart. Now what does that mean? It means we start from a note and we know
how to find a third. But you'll notice between these, we've got four half-steps. We're starting here
and we're counting one half-step, two half-steps, three-half steps, and four half-steps to make
a major third interval. And that rule works from any
single note on the piano. I could start from a black key, and I could count one-half step, two half-steps, three-half
steps, and four half-steps. And that would be a
major third interval. Again, as an example,
let's try from a, B and count 1234 half-steps. And that's a major
third interval. So you'll notice when
we're counting thirds, It's not always from a white
key to another white key. Sometimes it's a white
key to black key as well. But as long as we're counting four half-steps will
always be able to find a major third
interval on the keys.
8. Minor 3rd Intervals: We also want to be able to
find a minor third interval. Now, a minor third interval
has more of a sad sound. And it's still a third. It's wider than a
second interval. There's more space
between the notes, but it's not quite as far as the major third interval
we just talked about. Instead of four half-steps
like our major, we're going to find
a minor interval with three half-steps. So it's the same exact process just with a slightly
different number. I'm going to start from
the same note here, a C. And this time I'll
count three half steps. I'll count 123. And I've got a minor third. This was my major third. Now I've got a minor third. You'll notice it's
a half step closer. Again, we'll try this
from a black key, and I'll count three half steps. There's one-half step, two
half-steps, three-half steps. And I've got a minor
third interval.
9. Interval Practice: Let's very quickly do some
interval practice to make sure we understand these
major and minor thirds. I'm going to start from
an F on the piano, and I'm going to look for
a major third interval. So to do this, we're going to count
four half-steps, and I'll count 1234. And now I've got a
major third interval starting from an F. Let's do the same thing. Maybe from a D. This time
I want a minor third, so I'm going to count three
half steps from my d. I'll count up 123. And I've got a minor third. What's really
important that I want us to recognize is that major thirds can sometimes be from a white
key to white key, or a white key to black key. Minor thirds can sometimes be from a white
key to white key, or white key to black key. So don't think about
these as white or black. Think about 3.4 half-steps. And wherever that lands, as long as we're following
the rule is right.
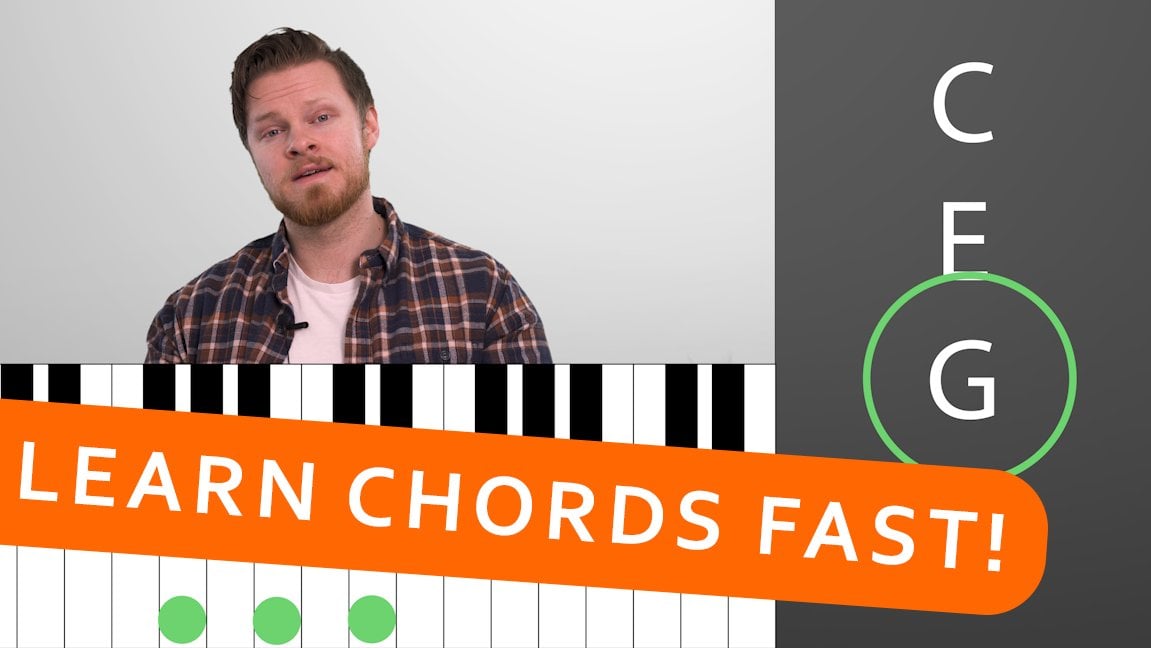
10. What is a Chord?: Now that we know what
half and whole-steps are and we understand
what major and minor is. We've also seen
those in practice with major intervals
and minor intervals. It's time to talk about
what a cord actually is. Now, you may see people play some crazy shapes on the piano, but really cords are just any three or more notes that were playing
at the same time. See, a single note on the
piano is a single note. Two notes on the piano
would be an interval, like we just talked about. Three notes on the
piano is a chord. And then as we add
in more notes, we might make the chords
more complicated, but it will always be a chord. Whether we're playing
three notes or 33 notes, those will always be cords. So we have signal notes, we have intervals,
and we have chords.
11. Building a Major Chord: Now that we know
what a chord is, we want to learn how
to construct courts. Now, just like we have
major and minor intervals, we also have major
and minor chords. Now, we're going to focus in this lesson on building
a major chord. And we're going to
build that major chord using the intervals. We know cords are made out of two intervals sharing
a middle note. So we have an
interval on the left, an interval on the right. And they're sharing whatever
note is in the middle. E.g. a major chord is built off of a major interval
that makes sense. Now, from the second
note in that interval, we put a minor
interval on top of it. So for a major chord, I've got a major interval which
is four half steps apart. And then from this second note, I'm going to construct
a minor interval, which is three half steps apart. Now I've got my three
notes and a major chord. Let's try this from a
different position. Maybe I want to take it from me. Now from this E, I want
a major third interval. So that's four half-steps up. And then a minor third
interval on top of that, starting from this second note, which is going to
be right there.
12. Building Major with Steps: Another way that we can think
about building chords is just with the half-steps
from those intervals. So maybe when we're
building a major chord, we can think about that
as four half-steps. Then on top of that
three half-steps. So I can start from a
note and think about the second note in my chord as being four half-steps above. So that's 1234. And then starting
from that note, now I'm looking for three
half-steps above, so 123. And I've got a major
chord shape with four half-steps and
three-half steps.
13. Building a Minor Chord: Now a major chord
is built off of a major interval
with a minor one on top or four half-steps, with three-half steps on top. For a minor chord, we're flipping that order. So a minor chord is built
off of a minor interval. Then on top of that, starting from that second note, we've got a major interval. Another way to think about it is the three-half steps
on the bottom, four half steps on top. So here for my minor chord, I'm looking for a
minor third interval. And from that note, a major third interval. Again, I could try this
from maybe an E note. I'm looking for a minor third. And then from that note, I'm looking for a major third. And we're building
sad minor courts.
14. Building Minor with Steps: Just like with the major chords. Another way we can think about this is with the half-steps. So starting from any
note on the piano, I'm looking to build a chord. My second note will be
three half steps above. So I'm counting 12.3 and
I found my middle note. And then I'm looking to build four half-steps on top of that. So 123.4. And I've got my minor
sounding chord. I can try from kind of a
crazy note on the piano. Maybe I'll try from black key. And I want to build three half-steps and
then four half-steps. So 123 to find my mental note, and 1234 to find my third note. And I've got a minor chord
from any key on the piano. Again, as long as we're
following the rule of 3.4, we're playing the right notes.
15. Basic Chord Practice: Let's pause right there. Before we move on
to new information, let's practice what we just learned with a little
bit of chord naming. E.g. let's see if we can
find an F chord together. Well, for an F chord, we would start on an F note. Whatever chord
we're looking for. We're going to
start on that note. For an F chord will
find an F note. And I know that that's
at the beginning of three black keys. So I've got, and we'll see if we can
make it a major chord. Now. A quick note. If we're naming just the chord, like F chord, it's
going to be major. We assume a chord is major. By default. If we want
to name a minor chord, then we specify F minor. We're looking for an F chord. So by default, that's major. Start on an F note. For major, I need a major third interval and a minor third
interval on top of it. So I'm going to start with
those four half steps, 1234. Then from that note, I'm looking for the
three half-steps of a minor interval, so 123. And these are the three notes, F, a, and C for an F chord. Now, what if I wanted a D minor? Well, we'd start from a D note. Now to make it minor, we need the minor
third interval, and on top of it the
major third interval. So I'll start by counting the three-half steps of
the minor interval 123. And then from that note, the four half-steps of the
major interval, 123.4. Now I've got a D minor chord. Again. We've named this before, but you'll notice we're
on all white keys here. When we did an F chord, we were also on all white keys. So again, major and minor, don't worry about
white and black, just worry about the
steps between the notes. F major, D minor.
16. What Are Root Notes?: Now that we've got
basic chords down, we're going to look at
something called root notes. Now, here we've got something
specific to play both for our right hand and
our left hand. Our right hand is
going to manage the cord itself. So e.g. if I wanted to play a C chord, well, that's all going
to be my right hand. Will grab the major interval and minor interval for a C chord. Now, the root of the chord is the first note of that chord. So when a C chord, our route would be a C
and a G chord root would be a G and an F chord or it
would be F. Big surprise. So you can think of
the root like a plant. The root is what is growing
out of something, right? Our chord is growing
out of the root. Now, the reason that's
important is that we can expand the sound of the chord across the piano a little
bit more when we add in the root with our left
hand, an octave lower. Here's what I mean.
We're playing a C chord. Well, I know my root is a C. So I can take my left hand. I can play a C note, an octave lower, so I'm
moving down to the next. See. Now I've got my cord and my
root note, an octave lower. When I play them all together. It's got more of
a full sound than just the C chord by itself. Now the root note will
always follow my chord. So if I'm playing a C chord, I've got my sea route. If I move my cord
down to a G, Well, my route would also
move down to a G. So wherever this hand goes, I'm gonna look at
the lowest note and play it an octave lower. Those are root notes.
17. The Sustain Pedal: Now we're going to talk
about sustaining our courts. At the moment, the chords
that we're playing are sustained so long as our
hand is pressed down, press down on a C chord. The minute I let
go, the cord stops. This is tricky, especially
as I'm getting to know and grow comfortable with my chords when I need
to play them in a row. Maybe I want to play a
C chord to a G chord. Well, I can play my C. Then as I get my fingers
in position for a G, there's this long silence
until I finally hit it. One of the things these
chords getting cut off has always reminded me of
is like a karaoke machine. It's a little bit silly. Well, this is where the petals of the
piano come into play. Now, if you're on a keyboard
or you're on a real piano, you've got some
petals underneath. You may have one pedal. You may have to, or you
may have as many as three. What we're looking at is the pedal all the
way to the right. If you've got three petals, we're looking at the
rightmost pedal. You've got two petals. We're looking at the
rightmost pedal. And if you've got one, that is the one pedal
that we're looking at. This is called the
sustain pedal. The sustain pedal holds
down notes for us. Even when our hand
lifts off the piano. You can see I've got my
sustain pedal right down here with my foot on it. If I press down a chord and
let go, the note stops. If I hold down the
sustain pedal, I will press down a
chord and let go. And it continues until I
take my foot off the pedal. This is a great way to
fill space when we're getting our fingers
used to moving back and forth between chords. So again, if I'm doing C to G, I have C, G. Well, this can change a lot
if I hold down my pedal. But now the notes are
blending together. So here's a great rule for
sustaining our courts. When your hands go down, the pedal goes up and then
immediately back down. That's going to cancel
out the notes of the previous chord and sustain your new cord.
Here's what I mean. I'll play C and sustaining. I'll move to G and I'll lift up to get rid of the C and
then sustain it again. So every chord is up with
the foot and back down, up with the foot and back
down, down, down, down. That's how we
sustain chords using the pedal to fill space that
would otherwise be blank.
18. What is a Key?: Welcome to the second
section of this course. We now know basic courts
and now we want to figure out how to make
them fit together well, whether we're playing a song
or making our own song. There are some chords that fit well together and some chords that really don't fit
that well together. The first thing we need to
understand is what a key is. Now, a key is a set of notes on the piano
that sound good. Together, they work well. You can think of them almost as a family of musical notes. Now, each one of those notes
can be turned into a cord. And these are the chords
that sound good together. Now, the chords in a key also use notes
that are in the key. So we've got a key of notes. All of the chords in this key
will use notes in the key. E.g. we know that cords, the basic chords
use three notes. Well, looking at the
first chord in a key, we're going to be using
note 13.5, a key. Our second chord would take that exact shape and
move it up by a note, every note moving up. So the second chord
would use notes 24.6. The third chord would
use notes 35.7. Now the fourth chord
would use notes for six. And then you'll notice we've run out of notes and we start back at the beginning
with note number one. So every chord in a key
starts on one of the notes in the key and uses notes
exclusively from the key. Let's say we're in the key of C. Now, in the key of C, we have a list of notes
that sound good together, and we'll talk about how
to find these as well. Your first chord in this key
will start from a C note, and we'll borrow the first, third, and fifth
note out of the key. So here that would
be C, E, and G. And we realized that
that is a C major chord. Your next chord
would start on a, D, the second chord,
and it starts on the second note out of the key. And it uses notes
24.6 or D, F, and a. So we know just from this that a C chord and a D
minor sound good together. Now why is that D minor
and the C is major? Well, that entirely has to do with the space
between the notes. When we're looking at 13.5, that just happens to work out the intervals workout
to be major and minor. When we're looking at
24.6, in this case, the intervals happened to work
out to be minor and major. This gets complicated and can
really easily be confusing. What we need to know
right now is that a key is a set of notes
that sound good together. And each one of those notes
can be turned into a chord. And so we can find a set of chords that sound good together. In the next lesson, we'll look at how to
find the notes in a key. And then we'll look at how
to turn those into courts.
19. Finding Notes in a Major Key: Back at the beginning
of this course, we talked about half-steps
and whole-steps. And now we're going
to use them to figure out how to
put together a key. Just like intervals. And just like chords, we can have major
and minor keys. Now, when people write
a song in a major key, the overall theme of the
song will sound happy. Even if there are minor
chords in the song, we're in a major key. So you can kind of
think about all of this as a funnel. Almost. You've got the key which sets the tone of the overall song. In that key are chords. And there are major
chords and minor courts. But no matter which
chord we're using, if it's in the key, the key is what's going to
set the tone major or minor. Right now we're going to look
at how to find the notes in a major key and turn
those into courts. There's a simple rule for
finding the notes in a key. This rule is whole, whole half, whole,
whole, whole half. Now, what does that mean? That means that, that no matter
what note we start with, we can move up whole-steps or half-steps to find the
notes in a major key. Let's say I want to create
a song in the key of G. Now, I don t know the notes
in the key of G, right? So we'll start from a G note. And we'll say, I need
to know the group of notes that fit really
well together. Well, if I know this
rule, I can apply it. Take g and I need to move whole, whole half, whole,
whole, whole, half. So a whole step up from G, I'm going to move right here and I know that
that's an a note. Next is another whole step. And I know that that's here. At a b. I've got a half-step,
which is right to, uh, see another whole
step, which is a D, whole step which is an
e. And now a whole step, if I move a whole step up here, I'm going to land on an F sharp. And then one more half-step, I'm back to G. So I know that in the key of G, It's mostly white keys, but we do have one sharp. If I didn't use that rule and
just played the white keys, my f without the sharp
might sound a little odd. We want that to be sharp. Let's try a different key. Maybe I want to play
in the key of a. So I'll start from an a note. And again say I need
to know all the notes that sound good with this a, to make it major
and happy sounding. Well, we'll take the same rule and apply it to the notes here. Hall. We need a whole, so I
am going for C-sharp. Half. Whole, whole, whole half. So I know to start from an
a and make it sound major. I need a C-sharp,
F-sharp, G-sharp. Otherwise, I have
a very sad sound. If I do all the white keys, I need those sharps in
there to make it happy. We can apply this
rule to any note on the keyboard to find the
notes that make a major key. Now when we've got a major key, we can turn each of
these nodes into a chord that sounds good with the other
chords in the key. Let's see how to do that.
20. Turning Major Notes into Chords: Now that we know how to
find notes in a major key, we want to learn how to
turn each of those notes into a chord that works well
with the cords around it. So we've got our
notes and we'll use maybe the G as an example. We're in the key of G, and from the last video, we learned that we
need an F sharp. And then every
other key is white, so we have whole, whole, half, whole, whole,
whole, and half. All of those notes
sound good together. Well, maybe not when you
play them at the same time, but they work well together
in a musical family, we could write melodies
with those keys, but we want to turn each
one of those into a court. So how do we know
how to do that? Well, here's another
rule that helps us. Major, minor, minor, major,
major, minor, minor. When that's written out, it looks like you've had
a delicious meal. But we can apply
each one of these to each note in our key. Now, we see we have courts. We have a G major and a minor, B minor, C major. And so now this is a group of chords that
sound good together. We figured out the notes in
a key with holes in half, and we turn each one
of those into a chord. Now, I can take any one of these chords and I can
put them in an order. Maybe I want to do G to a minor, to C, to D. Okay, well, those are
all in the same key, so they should sound
good together. I've got G with a root note, a minor, C, and D. Interesting. Let's try another combination of these chords and see if
those sound good together. Maybe this time, I'll start
with D. I'll go to a minor, B minor, and end on g. Once we figured out the notes in a key and turn
those into chords, we can't make a mistake. These are all chords
that work well together and notes that
work well together. And we can create songs
using them with confidence. Now, that's how we
create a major key. But what about a minor key?
21. Finding Notes in a Minor Key: We figured out how
to make notes and chords in a major key
that sound good together. But not every song in
the world is happy. We want to figure out notes in a minor key and how to
turn those into courts. With a major key, we started with a major chord. Now in a minor key, we start with a minor chord. The rules look the same, starting with whole and half
notes for the single notes, and then major and
minor for the courts. Except this time they're
a little bit different. As for the notes to find
notes in a minor key, we have whole half, whole, whole, half,
whole, whole. Now, there's an easy
way to remember this. This is actually the same
exact rule as the major key. But starting from
the sixth note, you'll see that they
overlap and match up. We're just kinda sliding it down and starting from
the sixth position here. So again, if I'm
starting from a C, I had my major key. Now to make it minor. I'm going whole, whole, whole, half, whole, whole. So I had major.
And I have minor. In the same way. Each one of these notes can
be turned into a chord. When played together,
they'll sound good together. They also may sound
a little bit more somber than when we
made our major key.
22. Turning Minor Notes into Chords: Let's turn each one
of these notes into a cord to complete
our minor key. Now, in the major key, we add major minor, minor, major,
major, minor minor. In our minor key, where again, taking the same rule
and sliding it down, starting on the sixth position. This time we have minor, minor, major, minor, minor,
major, major. So that means if we're
in the key of C, will have C minor. Our D will be minor. Our E, or in this
case, E flat major. Now we're getting into
flat and sharp chords. So let's keep in mind here that all we
really need to do for these chords to not be overwhelmed is to
count the spaces. We're starting on a black king, but we're counting for
a major chord, 1234. And on top of that, 123. So again, we've got a set of chords that
sound good together. But instead of for a major key, well, we're looking at
chords for a minor key.
23. Roman Numerals: Now, one of the ways
that we referenced these chords is with
Roman numerals. If we look at a key
again like the key of C, and we will write out
every chord in here. Well, underneath the
chords we're going to apply roman numerals
to each one. Now, frequently when you
see a chord progression, you might see the
name of the chord. Or you might also see
Roman numerals, e.g. in the key of C, we might
say we're playing C to F. We could also say
that in the key of C, we're playing one to four. It's the same exact thing. Now, of course, writing out
the chords and writing out the Roman numerals each
have their own benefit. For now, it's just important
to remember that we apply roman numerals to
the chords of a key.
24. Chord Progression Practice: We should practice
chord progressions. We'll start in the key of C. And let's say
we're going to do C, F, G, and E minor. Now, for the Roman numerals, this would be 14523. So on the keyboard, I'm going to find a C
chord with a sea route. Now. I'm going to move through the chords
one after the other, to F, to G. And then to E minor. Maybe I want to do the key of
G. Now I'm going to play G, a minor, B minor, and D, which now would be 123.5. Practice these
chord progressions as well as some of your own. We'll talk later about
how to go online and find chord progressions for any song that you're interested
in learning. And remember, you can write chord progressions by choosing a key using the whole and
half rule to pick notes. The major and minor rule to
find the chords in that key. And then picking some
with Roman numerals. And all of a sudden you've got
a progression of your own.
25. Transposing Progressions: One of the important things
that Roman numerals help us to do is to transpose chords. Now, transposing is when we take chords and change the key, we've got the same distance
between every chord. We're just changing the key. And there's a few reasons
you might want to do this. You may find as you move
forward that different keys have different feelings
attached to them. Or are you might be working
with a singer or singing yourself in a key that just
doesn't match your range. You might want to move
up by a step or down by a step so that you can more
easily hit some of the notes. In that case, we
would transpose e.g. let's take the key
of C and again say we're doing one to four, which would be C to F. You'll notice between C and F, we've got 12345 half-steps. We've got C, five half-steps up, F in our key, it's one in four. Well, you're working
with a singer who says, I'd really be more comfortable doing this in the key of G. Well, it's the same exact thing. We were playing one
to four in the key of C. Now we're transposing
it to the key of G, and we're still playing 1241. Now in this key
would just be a G, and four in this
key would be a C. So we've got G to C. And we can count the half
steps again and see 12345. It's the same distance
between the cords. The only time that
transposing might not line up with the
half-steps like that, is if you change from a
major key to a minor key, but moving from one
key to another and keeping it major or
minor, the space, the distance between
the chords will always be the same because each key follows the
same hole in half rule. We can try this with
a larger progression. Maybe I want to do 1564
in the key of C. Well, that would be C, G, a minor to F. If I want to transpose
that to the key of say, a, my one would be a, my five would be E, my six would be F sharp minor, and my four would be a dy. So I have key of C or key of a. Similar feelings because
it's the same progression, but in a different key.
27. Tonic, Subdominant, and Dominant: Welcome to the third
section of this course. We're now into
intermediate chords. We've learned how to
construct basic chords and how they fit together
in major and minor keys. From this point on, there's not a whole lot of new chords we're
learning so much as we're manipulating the
chords we've already got. We're either adding notes or changing notes to follow
certain sets of rules. But the fundamentals
will always be there. For now, we're going to
start with a little bit of terminology that helps us
understand chord progressions, like we've just talked about. We're talking about the tonic, the dominant, and
the sub dominant. Now, these are not new chords, but rather new names for
things we already know. We're talking about
the chords in a key. The first chord in your key, the root to the
one, is your tonic. When we finish a song, it's nice to land on the tonic for a nice resolving sound. E.g. if I'm in the key of C, I'll play C. G, a minor. That's hanging. Hanging. And it wants to land on the tonic. The dominant is the
fifth chord in a key. So we just played C to G. G would be the
dominant of the key. The sub dominant is the four
right before the dominant. Now, why are we going over this? Well, this is terminology
that you may hear playing with a band or watching courses. These are also, if we look at our key with the
major and minor rule, these are the major
chords of the key, the tonic subdominant
and the dominant.
28. Octave Root Notes: Now we know how
to do root notes. But a common
practice on piano is to double up the root
note with octaves. Now, this will take a
little bit of practice, but muscle memory will kick in. We're also going to
stretch our hand. As long as you can
stretch your hand one octave, you'll be fine. E.g. here I've got a C chord. And we've chatted
about adding in a root note, an octave below. Now we can take it one step further by playing
that root note with and reaching the next
C down with our pink. Now we're expanding
our cords even further across the piano to
get a more full sound. Take some of the chord progressions we've
done in the past, and now try playing them. Doubling up your root
node with an octave.
29. How to Play Rhythm: Knowing how to play chords and chord progressions is fantastic. But we can really
bring a song to life by thinking a little
bit about rhythm. Rhythm can be the difference
between a boring, plain song and an
exciting, really fun song. E.g. here's the same chord
progression played twice. The first time. We're
just going to let these chords ring out until
we play the next one. It's nice. Sounds nice. But that same thing
for three 4 min. Well, your audience
could fall asleep. Now, of course, simpler rhythms can be really nice for slow
songs or sad songs. But we also want to know at
least how to add rhythm in. It's important for us to
understand that songs typically have one of two timings. We either have four
beats or three beats. And all that that means is
that we count our song in groupings of four or three, e.g. playing that progression,
I can play 12341234. Or if I'm doing three
beats, 12312323. Now, each of these
4.3 can also be subdivided with ends 1.2
and 3.4 and 1.2 and 3.4, or 1.2 and 3.1 and 2.3. And now we can pick and
choose which beats. We want to press
our chord down on. E.g. maybe I want to press down if we're doing
four beats on one, the end of 2.4, well that's going
to sound radically different than just
holding down my chord. So now I can play the 1 and
2 and 3 and 4 and 1 and 2 and 3 and 4 and 1 and 2 and
3 and 4 and 1, 2 and 3. And that's a big one. We could pump on every
number one and 2.3 and 4.3. A great way to pick rhythms
is actually just to circle different options in front of you and see how that sounds. You might find some really
interesting rhythms in there. The other note is, we don't need our hands, our left and our right hand, to sync up all the time. We could do a little
back-and-forth with the root node and
the core itself. And so again, as you're
circling options and finding out these
different rhythms, you can also try
mixing left hand, right hand and sometimes together to really bring
your song to life.
30. The (b5) Chord: One of the really
nice things about some advanced and
intermediate chords is that you'll realize
they really just tell you what to do in the
name of the court. That's the case here as we
look at the flat five chord. Now, the flat five
chord is an add-on to a chord that really
just tells us to make the five of our chord flat. Now, remember, when
we're numbering the notes in our chord,
We're playing 13.5. So when we're talking
about a flat five, were talking about
that highest note. So let's say, I want to
play a C minor flat five. Well, I know I'm going
to start on a C note. I know I'm going to
play a minor chord, and now I know I'm
going to flat the five. So we've got C, C minor. And then I can take my five
and I can make it flat. It's got this haunting, eerie feel to it. Now, if you've been
paying attention, you may have noticed
something odd when we were building keys and
finding chords in them. And we're gonna take our
new knowledge and we're going to go back and fix it. We had said that the chords
in the key were major, minor, minor, major,
major, minor, minor. And this is true. We didn't learn that wrong. What we didn't mention though, was that for the cord to
perfectly fit in a key, the seventh chord is a
minor with a flat five. And we see that because we're
building every other note. So by the time we get
to the seventh chord and we'll use the key
of C as an example. By the time we get to
the seventh chord, which in this case is a, B. We've got the notes B, D, and an F. Now, that is not
a B minor chord, but it is the notes in the key. It's really a B minor
with a flat five. So when we're putting
chords in a key, it's important to note
that the seventh chord in its perfect key fitting
form is a minor flat five. So we've got major,
minor, minor, major, major, minor, minor flat five. And that fits perfectly. We have C, D minor, E minor, F, G, a minor, B minor flat five. There's a tension there
that resolves back to C. That is our minor
flat five chord.
31. What Are Suspended Chords?: The next few lessons
are going to be about suspended or sus chords. Now, sus chords are a
special type of chord. And really what we're doing
is we're taking the three of our basic chord and removing
it to either two or four. We're going to look at each of these shapes in the
next couple of videos. But in this one,
let's talk about why suspended chords
are useful to know. On the one hand, suspended chords can help
us keep one stagnant cord. Interesting, if
there is a part of a song and this happens
frequently where you need to play one chord for a long time that can get
very monotonous and boring. Suspended chords help us keep
a single chord interesting. E.g. let's say we need
to play a C chord. We need to play that C chord. I don't eight times in a row. Oh man. That's four. That's five. That's six. I mean, it drags on
suspended chords. Help us keep that interesting. Let's give a listen to
what it sounds like. And then we'll go
learn the shapes. That was eight times right
there and it moves much quicker than when we were
just hanging on that. See? The second reason to learn
suspended chords is that they can help you
resolve really well. If I'm playing a chord
progression that goes C, G, a minor, F, and lands on SSI, or that would be 1564. Back to one. Let's listen without
a suspended chord. That's pretty nice.
Now let's try it with a suspended
chord to finish. So we'll suspend the C and
then play a regular C. Or we could do
something like this. It's a nice way to
finish a progression.
32. The sus2 Chord: We're going to start by
learning a SAS to chord. Now, these sus chords, again, we're moving the three in
accord to either two or four. So instead of playing
13.5 with USCIS to chord, we would play 12.5, pulling the notes
again out of a key. Which means if we're
playing in the key of C, or we're playing a C chord. Instead of playing C, E, and G, we would
play C, D, and G. You'll notice from
a major chord we're moving three down
by a whole step. So if I want to play a
CSS2, playing right there, if I want to play an
F Sus too well again, I'd take my three, I'd move it down.
By a whole step. This changes a little bit. If we're moving to a SaaS
to from a minor chord. Notice here that
the big difference between a major chord and a minor chord is that we're moving the middle
note down by one. From an E to an E flat. Major to minor depends
on the middle note, because the middle note changes either end of the
interval, right? One gets larger and the other
gets smaller or vice versa. So when we're moving from
a major chord to assess to our middle note would
move down a whole step. If we're moving there
from a minor chord, we'd be playing the
same exact notes. But if we're going to change it and relate it to our chord, now we're moving
down by a half-step. Minor to major.
33. The sus4 Chord: Let's take a look
at a sus4 chord. So now in this case
we'd be taking 13.5, which for the example
C chord we've been using is C, E, and G. And now we're moving
that three up. So it's 14.5, or in this case, C, F, and G. From our major chord, you'll notice we're
moving up by a half-step. Which means that if we're
playing something like an F chord and we want
to change it to a sus4, we wouldn't move our middle
note up a whole step. Even though it looks right,
it doesn't sound right. We want to move our middle
note up by a half-step, which in this case
would be a black key. If we're moving to our
sus4 from a minor chord. Again, remember that three, that middle note is moved. So now we're moving
up by whole step. So remember a major chord moving to SAS for removing
up by a half-step, a minor chord moving to assess for removing up by a whole step. Two and sus4 are
the same shapes. No matter if you're moving
from a major or minor, we're only changing how far
we're moving to get there.
34. Slash Chords: Occasionally when
we're playing a song, we're going to come across a
chord that looks like this. It's got a slash right
through the middle of it. Now sometimes people will guess that we're playing two chords. One chord with the left hand and one chord with
the right hand. And that's not a bad guess. It's close. What we're actually doing is changing the root
note of our chord. A great way to think
about this slash is to replace it with the word over C. If we look at something
like C slash E, we can think about
it as c over E, which means that we'd
be playing a C chord. But instead of a C root note, we'd be playing a
C chord over an E, C with C, c over E, c over f. Sometimes these
can get a little crazy. Maybe we'll have dy over g. Back to regular d. You'll find that oftentimes, whatever the slash is, is probably one of the
notes from your chord. It's either the one, the three, or the five, because those fit best with the
chord we're playing. Now, that's not an absolute
rule that may change, but it is a frequent rule. So C with the root, C with the third
would be c over E. C with the fifth
would be c over G.
35. Spread Voicing Chords: Let's talk about
spread voicing chords. Now, spread voicing is a
really nice and unique sound. The chords we've been
playing so far have been within an octave space. Now for getting the root
note an octave lower, these three primary notes of a chord are within an octave. Spread. Voicing is when we
take a chord and expand those three notes
wider than one octave. So e.g. maybe I will have a C and a G from a C
chord in the left hand. Now, in a normal C chord, my E would be between
them and they'd fit in this little octave space
in a spread Voicing chord. Maybe I'll move my three higher. Now I've got the three
notes of my C chord. This is still a C chord, but it's spread out
over an octave. There are two ways to use this. We can play them as regular chords and it
sounds really nice. Another way we could do this
is use our left hand to play those three notes underneath a chord instead of
just a root node. This is where things
start to get a little complicated
and we're going to talk more about this style of playing later in the course. But as an example, I
could play a C chord. And with my left hand, I could spread out a C chord. So I've got my regular
C chord down here. I'm playing these
notes one at a time. In this spread
voicings style, root, fifth, third, all
the way on top. That will be a little
tricky at first. But practice playing
around with that, both as the way you're
playing your cord. And you can also
try it as the root notes underneath accord
with your right hand. Don't get frustrated if
it's difficult at first. We'll keep practicing and
will absolutely get it down.
36. Intermediate Chord Practice: Let's pause right here and get a little
bit of practice in. We're going to take
another chord progression, but instead of just
doing basic chords, maybe we'll start
to play with them. We could take a
progression like C, F, G back to C. Let's start right there. Now let's take the new things that we know and start
to combine them. Maybe we can play C, F over a, G. And our last C, we can
suspend and then resolve. So we'll say c sus4 to c. So now we're playing C, F over a, G, c sus4 and resolve it. One thing you may notice is
that that changed the base, the roots down here a lot. Instead of C, F
and G. Walking up, we went C, F over a to G. And that made our
root very different. Instead of walking up. Now we're going. That can change the
feel of a song a lot. So let's practice again. C, F over a, G, c sus4 and resolve it. That's pretty nice. One
other thing we could try doing is maybe spread
voicing with a sus chord. You can always combine
different rules. So we have a C, maybe we do a CSS2, and maybe we do spread voicing. So 12.5, we can do 15.2. So CSS2 spread out to F over a. Take some of the chord
progressions we've already done, or that you've made yourself. And start picking chords in that progression to
make these changes, to make one of them a
spread Voicing chord. Make one of them a sus chord, make one of them a slash chord. Just start adapting chords to try these
different techniques.
37. 7th Chord Introduction: These next few lessons are
going to cover seventh chords. We should talk about
what a seventh chord is. So far we've been playing three note chords that have been 13.5 borrowed from a key. Now, seventh chords
are when we continue this pattern and we
add in a 7,135.7. So these are now
four note chords.
38. Major 7th Chord: Now, there are a few ways
to find a seventh chord. We could do it with
intervals or half-steps, starting with a basic chord
using C as our example. If I want to put a
seven on top, well, I can take my top note and
make a major third interval. And that would be four
half steps, 1234. I could also look at the
notes in my key and say, okay, for a major chord, that would be C, E, G, and B. Another way to think
about it that I like a lot is that your major seven is a half-step
below the octave. So if I'm playing
a C chord, well, the octave from my root node is C. The major seven is a
half-step before that. If I'm playing a G chord, my Octave is a G. So my major seven is a
half step before that. That would be F sharp.
39. Minor 7th Chord: For a minor seven chord. Here's the changes we're making. First of all, we know from a major chord to a minor chord, the note we're changing
is the middle, the three. So it's down by a half step. We're also going to be
changing the seven. So if I've got my
major seven there, I'm moving the three
down by a half step, and I'm moving the seven
down by a half-step. Another way to think about it is that on top of a minor chord, we're adding a minor
interval, so 123 half-steps. A third way to think
about it is that from any minor chord in a key,
we're counting 135.7. And finally, my favorite
way to find a minor seven. We talked about how
the major seven is a half-step below an octave, while the minor seven is a
whole step below the octave. So if I'm playing from a C note, that's going to be C, E-flat, G. And then that third
minor interval on top would be a B-flat. If I'm playing from a, gee, I'd have G minor
third and the fifth. And then sitting
on top of those, I have my octave and I move
down a whole step to an F. The seventh chords
are inherently jazzy. They have a really nice
smooth tone to them, so they could also fit
well in a softer song. I like them a lot to resolve. So if I'm playing a song, C, G, a minor, F, and I
want to resolve, I could resolve to a seven. That is a nice
resolution in a song.
40. Dominant 7 Chord: Let's talk about a
dominant seventh chord. Now, you may remember from
some of our terminology, we had in a key, the tonic
subdominant dominant. Now a dominant seventh
chord, if we're playing, this shape, fits perfectly in the fifth
position of the key. And we'll talk about that in
a couple of lessons where we talk about fitting
seventh chords into a key. Here's our dominant
seventh shape. We have a major
chord as our base, so I'll use C as my example. I've got a C major. Now to fit here, to fit our major seven. We've got a major shape on top. So a major chord with
a major seven on top. Our dominant seven
changes a little bit. We've got a major chord, and then we put a
minor third interval on top or a minor seven. I always thought this was kind
of like a carnival sound. Little bit, little
bit cartoonish. But we've got a
dominant seven shapes, so we can think of that
as root third, fifth. Then instead of seven, we've got a flat seven. We're flattening
that seven shape.
41. Minor 7 (b5) Chord: Now, just like we have a
minor flat five chord, we can also have a
minor seven flat five. And that's a long chord. Let's say we have a C
minor seven flat five. Well, we don't need
to get overwhelmed. We can just take these
one step at a time. We know we've got a C chord. We know it's going
to be a minor chord. We know there'll be a
minor seven on top. And we know we're going
to flat our five. So let's say we have a C minor
with a minor seven on top. And now we take our five
and we just make it flat.
42. Diminished 7 Chord: Finally, we have
something called a diminished seven chord. And we're actually going to
learn this one by starting from that minor seven
flat five shape. So we have a minor chord, a minor seven on top, and B flat are five. Now, we can think of diminished as diminishing smaller, right? Everything is smaller. We've got one flat,
three, flat five. And by the time we get to R7, we actually move it down. Again. This is our first example of a double flattened note. A diminished seventh has
a double flat seven. It's not a chord. You're going to
come across often, but it is a very
haunting, an eerie sound. Again, we can try
it maybe from an F, and let's take this in steps. We've got F. We're gonna go minor and
add in the minor seven. So right now I'm playing
an F minor seven chord. We've got a minor
third interval, major third interval,
and a minor third. Now I'm going to take
my five and flat it. And then take my seven and
flat it one more time. For that haunting
diminished sound.
43. All Chord Review: Let's take one quick look at
all the chords we know put together and relate
them to each other. If we've got a
major basic chord, we're playing 13.5
using C as our example. This would be C, E, and G. To change major to minor, we're going to take
our three and move it down by 11 flat, 3.5 or C, E flat and G. We could also flat the five
to play a minor flat five, C minor flat 51, flat three flat five, or C, E-flat, G flat. We could play a major, 7,135.7, or C, E, G, and B. We could play a minor seven
by changing our three in R7. One flat 35, flat seven, or C, E-flat, G, and B flat. We could play a dominant seven by playing a major chord
with a flat seven on top, 135, flat seven, or C, E, G, B flat. We could play a minor
seven flat five. By playing that
minor seven shape, flattening the 51
flat three flat five, flat seven, or C,
E-flat, G-flat, B-flat. Or finally, a, C
diminished 71 flat three, flat five, double flat seven, or C, E-flat, G-flat, and a. Next, let's take a look at
how the seventh chords fit into a key to replace our
primary basic chords.
44. Fitting 7th Chords in a Key: Now, thankfully, fitting
seventh chords into a key is really easy if we
already know how to fit basic chords into a key, C, we have major chords, and we have major
seventh chords. We have minor chords, we have minor seven chords, and these are what we
replaced them with. So we look at our key
and we see major, minor, minor, major,
major, minor minor. Or we see the rule for
the minor key as well. We replace our major chords
with major seven chords. We replace our minor chords, minor seven chords in
the seventh position, or down here in the
second position, where the minor flat
five chord fits, we replace that with the
minor seven flat five. The only other thing
to mention is that in the fifth position
of the major key, or this position
of the minor key, we fit our dominant seven chord. Now, that's not
hard to remember. The dominant seven chord goes in the dominant position
in the major key.
45. 7th Chord Practice: Let's go ahead and do a
chord progression using seventh chords rather than
just basic triad chords. Now, we'll go ahead and we'll
pick a chord progression. Maybe this time will be in
the key of G. And we'll do 15461 in this case
would be a, G. Five in this case would be D, four would be C, and six would be E minor. Now we want to turn each of
those into seventh chords. So one would be G major seven. So I'll take my G chord and I'll find my major
seven to go on top. Now for my five, I'll put the dominant seven. So I'll find my cord and find
that dominant seven on top. When I come to four, I'll do a major seven again. And then six is a minor chord. So I'm going to have
a minor basic chord, a minor triad, and put
my minor seven on top. So I end up with, go ahead and take any of the
chord progressions we've been using together
or that you made. And try turning each of those chords into
a seventh chord.
46. Rolling Chords: Now we're going to learn
a little technique where we roll a chord
for a nice effect, rather than playing
all the notes at exactly the same time. We're still playing
notes together. We're just breaking them
up by milliseconds. I'll show you what I mean. Here. I have a C major seven chord. What I can do is work my way
up all four of those notes, holding them down as I go and
rolling them very quickly. This adds a nice soft
theory will feel, rather than hitting the notes all at exactly the same moment. And we can hear the difference. If I play C to F, Here's what it sounds like. Now I'll try rolling
these chords.
47. Chromatic Motion: We're going to talk about
chromatic motion. Now. Chromatic motion is when we use in-between notes as stepping stones to get from one
chord to the next. This is a very jazzy idea here. E.g. if I'm moving
from a C chord to a D minor chord, C, D minor. There are notes
that I'm skipping over to get from C to D minor. These are notes that
are outside of the key. But we can use these notes as quick stepping stones
to work our way up. And that's what
chromatic motion is. One note to the next, to the next outside of the key. E.g. I've got my C and my D. I can go from C, moving every note up by a
half-step in-between. And then one more time to D. You'll notice my
f stays the same. I'm moving most of my notes up. I could even do it
just with the root. You can hear how jazzy that is. We can use chromatic motion
even with just our root note. If we're playing
big progressions. Notes outside of the key
that make the baseline, or even our whole chord
progression a little bit more interesting. Now, this isn't a technique
that you want to over use, but it is one that can wake your audience up as they're
listening to your song. Use it artistically and think about the right
moments to toss that in.
49. Major 6th Chord: Now we're going to look at
something called Six chords. As you may have guessed
from seventh chords. A sixth chord is your
basic major triad. With the six put on top. We'll start by looking at
the major sixth shape. I've got my 13.5 chord. We'll stick with
C as our example. And my six of course
is right after five, which in this case is an a. Now years back, six chords used to be played,
omitting the fifth. So you would have 13.6. Now we play all four
together, 135.6. Another way you
may see it written is something like a C add six. We could also try this chord
from a different shape, maybe from an a. So we've got an a major
chord and we add in a six. Something important to
note is that the six is one whole step above the fifth.
50. Minor 6th Chord: Now let's learn a
minor six shape. For our major six. We played a major triad
and we put the six on top. For a minor six, it's not that complicated. We play a minor triad and
we put the six on top. So we had major
triad and the six. Now we have a minor
triad with the six.
51. Chord Tensions and Extensions: We're briefly going to look at chord extensions
in core tensions. Now, tensions are actually
things that we've already been playing
without even knowing it. Tensions or just any
note in your chord that's not a part
of the basic triad, are the basic building
of the chord. So we just learned six chords. The sixth would be
a type of tension. Now, extensions are when we lengthen the cord beyond
the seventh note. In the next couple of lessons, we're going to learn about 9s, 11s, and even 13s. And each of these
would be an extension. So we have tensions
which can help give character to a chord without
changing its basic form. We have extensions which lengthen our chord
beyond the seven.
52. Major 9th Chord: Now, ninth chords can be
broken up into major, minor and dominant chords. And we're going to look
at major ninth chords. Now, I know this sounds
like a lot of learning, but remember, every extension is just building on
what was before it. So we took a major triad chord and we add it in a
seven on top of it. Now, we continue extending that pattern by
adding in a nine. For a major nine, we take a major chord or major seven and just put the
nine on top of it. And that's really
just counting from 123-45-6789 with a major chord. Another way you could do this as realized that nine is a D, and we also have a
D, an octave lower. And that keeps things a little more close to what
you're playing. But I also like the
spread out feel of having a nine up here.
53. Minor 9th Chord: For a minor nine, we're not doing much different. We're going to play
a minor chord or a minor seventh chord and put that same
nine on top of it. So I'll look over and I'll
play a C minor seven. Now, I'm not going
to change my nine. I've changed what's underneath
the nine for major. But now I'm moving
to a minor seven. I'm putting the
same nine on top. That is personally
my favorite chord. Minor 9's on either
piano or guitar. I love the sound of them.
54. Dominant 9 Chord: Another ninth chord
shape we can learn is the dominant nine. Now, just like the major
nine and the minor nine, we're not changing the
actual position of the nine. We're changing what's
underneath it. So I played a major
seven with my knife, a minor seven with my nine. And for the dominant nine, I'm playing a dominant seven, which was 135 flat seven. And now I've got that
same nine on top.
55. Sharp (#) and Flat (b) 9ths: As a last note
about ninth chords, you may sometimes
see a chord that specifies to do a sharp
nine or a flat nine. So maybe we're going to
play a C dominant seven, which could also just be
written C7 with a flat nine. Well, in that case, I'm
gonna come over and play that 135 flat seven. And on top of it put a
flat or a sharp nine.
56. 11th Chord Extension: We're spending one
video looking at 11. Now, in the same way, we counted up to nine, we're just counting up to 11. So we have 1357. This would be our 91011
is a very jazzy chord. And you may see something like
a C Major seven sharp 11. Well in that case we find
our 11 and make it sharp. You may be thinking that chord
doesn't sound very good. There are a lot of scenarios where chords
that don't necessarily sound great on their
own actually fit in a chord progression
very, very well. So at least understanding how to do these chords is enormously helpful for those moments when they do fit so beautifully, or for the moments
that we come across them in a song and need to at least understand what the paper we're looking at is calling for.
57. 13th Chord Extension: Finally, just like
we looked at 11's, we can do the same
thing for 13th. 13th chords could call
four sharps or flats. So if we look at our
C major seven again, we're going to find our 13, which again is the
six an octave above, and then we can make
it sharp or flat. There are very few
scenarios where you might use those chords. But if you're interested
in playing jazz, you're going to come across
those chords much more often than if you're interested
in playing rock or blues.
58. Playing Extensions Over the Root: Now some of these chords
are very spread out. And you may wonder how your hands can even
reach that far. Something you could do is play the roots of these chords in your left hand and manage the rest of the
chord in the right hand. E.g. let's take a look
at the C Major nine. I have 1357. And then nine, something I could do is play my
one in the left hand. Then I can play almost a seventh chord shape
to reach the whole chord.
59. Combining Chord Steps: Now at this point with
these large chords, it can be really
overwhelming to see something like an F
sharp minor seven, flat five sharp nine. What do you do with that? So these are the types of chords where it's
really helpful to take them step-by-step
and for the sake of future practice and not getting too nervous when we
see something like this. Let's go ahead and
take it together. In fact, let's make it even
longer and say it's over a. F sharp minor seven, flat five sharp, nine over a. This is probably
the longest cord that you'll see out there. It's not something will
come across very often, but if we can do this,
we can do anything. So let's take these
one at a time. We're starting on an F sharp. That's easy enough. Now we want to go ahead
and play a minor chord. So I know that that's
a minor third interval plus a major third interval. And I've got an F sharp minor. Now we add in a 71
step below the octave. So I've got an F
sharp minor seven. Now, next we have a flat five, which I can do with my fifth, and a sharp nine. Now, how do we get
a sharp nine here? Well, I'll put the
root in my left hand. Keep my other notes in there. So I've got my 1357. This would be my nine. So I'm gonna make it sharp. Now on top of that, we have this over a. So my lowest note, I'm going to change too, an a. So now I have an F sharp. Minor, seven flat five
sharp nine over an a. So when we come across long big adult chords,
don't get overwhelmed. Break them down and think
about them step by step. Again, these big
advanced chords, they really just
tell you what to do. Think about them more like instructions than anything else. Break it down
step-by-step and you'll realize they're
really manageable.
60. Arpeggios: Now we're going to look at
something called arpeggios. Arpeggios are when we take a chord shape and break
them up into single notes. These single notes are
a little more spaced out than when we just
rolled our chords. They might be more related
to when we were playing, are spread voicing
chords in the left hand. So looking at arpeggios, I can take a chord
like a C minor seven. Then what I'm going to do is
break them up note by note. Maybe I'll work
my way back down. What we've just done is
arpeggiating a chord. We've turned a chord
into an arpeggio. So I can play maybe a root note. And this chord that
I've just turned almost into a melody,
a rhythmic melody. That's nice right there. We could also do the
arpeggio in our left hand. Underneath courts. For arpeggios, you can practice them with any
chord progression. They also don't just have
to be with seventh chords. You could do them with
our basic triad chords. You could even add intentions
or the octave on top.
61. Inversions: We know how to construct
a basic chord, and we know how to
add character to those chords with
extensions or tensions. Now, something very
important to know is that it doesn't matter what
order the notes are in. E.g. in a G chord, my notes are G, B, and D. Now, those three notes will always hold the
substance of a G chord. It doesn't matter the order that those three notes are in. In fact, mixing up the
order of these three notes. It's called something. It's a technique
called an inversion. We're inverting or
flipping the chord. So when we learn
these basic chords, we're learning them
in root position. All of the numbers
are in order 13.5. Here's our G root
position, 13.5. Now we can mix up the
order of these notes. I'm going to take my
lowest note number one, and move it up an octave so
it's at the top of the chord. 3.5 stay exactly the
same and one is on top. This is still a G chord. I've still got G, B, and D. Now the order is 35.1. This would be a G chord
as a first inversion. Now, let's say I wanted
to do this again. I could take my
bottom note and I could leap frog it to the top. Here. I'll keep my 5.1 where they are and just put
this three on top. Now, this is not
a spread voicing because this cord is
still within an octave. It doesn't expand
beyond an octave. Now this is now a
second inversion. If I played that game one more time and took my bottom
note up an octave, I'm back to root position. Now. I can use inversions
really powerfully. I can use an
inversion to land on a chord and run it up the
piano from a root position. First, second, root,
first, second. All I'm doing is playing
G chords up the piano. I could also use inversions to play more complicated
chord progressions. Close. Here I've got C, F, G, back to C. Now, what if I went ahead and
started using inversions? Well, I can take my f and see
that I've got a C on top. If I move that C down, well, this is pretty
close to a C chord. So C to F using an
inversion is a lot easier than C to
F. As root courts, I've also got a G right there. Look at those three notes, G, B, and D. So all of a sudden, instead of playing C, F, and G, I can keep my hand
nice and close and place C, F, G, back to C. So when we're looking
at chord progressions, we want to think
about inversions. Think about playing these
chords nice and close in a way that might be easier
for our hands to manage. You'll also notice
that in versions have different fields to them, different characters, because a different node is
on top and on the bottom. So we can use these
to kind of lead and guide melodies really well. See, my top note for C, F, and G root position would
be here for the C, here. And here. This is a pretty high note if I'm playing them
as inversions. Well now my top note is G, a back to G, and staying at G. So on top. That's very different than
playing root positions. Lead lines on the top or bottom of your chord
with inversions. It's something to
think about when you're playing songs or song writing as they can change the feel and mood of
your overall song. Now, one more note on
inversions here is that we can get into third and
fourth inversions when we add in more notes, the more notes we
have in accord, the more inversions we can play. If I play a C chord, I have two options
for inversions until I get back to
my root position. If I add in a seven, well now I have more
notes to leap frog. So I have my root position. First inversion,
second inversion, a third inversion, before
coming back to my route. Now, these shapes are helpful to know compared with one another, but also helpful to
know on their own. Because what that means is, for a C major seven, I could also play it just
adding in a lower B. That's also a C Major seven. Some of these shapes
are easier to get to depending on where
our hand already is. So knowing the
different inversions, shapes for different
types of chords can really make playing the
piano that much easier.
62. Advanced Chord Practice: Let's pause right here and practice some advanced
chord progressions. I'm going to put
them on the screen. I want you to pause
and try them, genuinely try them and if
you find one difficult, pull it apart, give it
time, give it space, and let yourself learn
these different shapes. If you need to go back and re-watch and then
come back to it, that's great as well. But let's learn these advanced
shapes and then we're moving forward to
specific styled courts.
64. Blues Style Playing: Now we're going to take
a look at blues courts. If you're interested in
blues music on the piano, while I have good news for you, It's actually really
easy to play. What we're doing here is
we're going to transform the major chords in our
key into dominant seventh. So if we're in the key of C, we have a C major seven, F major seven, and
a G dominant shape. We're going to transform
our C major seven and our F major seven into a C dominant seven and an F dominant seven. And that's going to give us a very bluesy feel
for the key of C. Now you'll see what I just did there was I added a little bit of chromatic motion
in the left hand, and I went back
and forth between the key C dominant seven, F dominant seven, and
the G dominant seven. I got this chromatic
motion in the left hand. You can play around with
walking baselines as well. Move your bass note around. Another motion that
I'm making here is on that base I'm
hitting the flat seven. That's because we're
playing everything has dominant seventh, which means for our see, we've got that flat
seven in there. Same thing from the f.
So everything here, I'm just playing around with
the bass notes there and the flat sevens and
some chromatic motion and changing all
the major chords in the key to dominant chords.
66. Jazz Style Playing: Now, a lot of times throughout this course we've
played a type of chord and mentioned
how jazzy it sounds. Again, chromatic motion. Seventh chords and ninth chords are going to be where
our jazz music lies. So we've got some
chromatic motion, may be jumping outside of
the key and coming back in. We've got ninth chords and
I'm going to play those a lot with my left hand
taking care of the roots. So again, that's
jazzy right there. I've got a seventh chord, maybe I'll change my route. 13s as well are very jazzy. Adding in that
sharp and flat 13, we mentioned in that course that you'll come
across those more often if you're playing
jazz than other styles. So if you are
interested in jazz, I would say jump
outside of the key with chromatic motion
and turn a lot of your chords into nines and 13s, especially dominant nines.
68. Rock Style Playing: Let's talk about rock
music on the piano. Now, we can play
piano like a piano, or are we can play
piano like a guitar. The way chords work on a guitar are very
specific to a guitar. But if we understand
how it works, we can play that
style on the piano. E.g. rock music. Guitar very often uses
something called power cords. Power chords use roots
and fifths and octaves, but not very often, thirds, which means on a piano, maybe we can play a C chord. Take our third out, we have a root and fifth. And we could do the same
thing in the left hand, which gives us kind of a more
pop rock feel on the piano. Certainly more so than our blues style or
our jazz style. You'll notice with rock, I'm being a little more
aggressive in the rhythm. It's a little more punchy and quick rather than the
jazz which is softer, and The Blues which has a
little more swing to it. Now we're thinking punchy, quick, short roots and fifths.
70. II - V - I: We're going to be looking at some common chord
progressions together. These are progressions
you'll hear if you're looking for
them on the radio, or progressions you can use when you're writing your own songs. The first progression we're
going to look at is a 251 to 51 is a very
common progression. We work our way up to five
and resolve down to the one. In fact, an important
note is that Five often resolves to one. It's a really great and
powerful motion in music. When I had an old teacher, one of our jokes was, I'm gonna leave you on the five. That was our insult to one
another because you leave someone on the five and there's just this tension there
that's unresolved. To 51 will take these
in the key of C. Two in this case would be D minor five, and resolves down to one. Really straightforward. If you're playing a
song and you're not quite sure how to end. It never hurts to go
with a 251 progression. Since it's so common and
familiar at this point, it may even invoke feelings
of comfort in your listeners.
71. I - V - VI - IV: Combinations 145-6 will make up over half of the pop songs that you
hear on radio today. So for this video, we'll play around with 156.4. We could probably
name 20 to 30 songs right off the bat that
those chords fit. Now, if we play them
in the key of C, will have C as our 15 with G, a minor for six, and F for four. Again, we can practice
transposing by taking that 1564, maybe move, move it
down to the key of F or the key of D. No matter what key you play. 1564 in or 15461 for
five-six, you name it. It will be familiar. But there's a reason
it's used so often. It's powerful. It's, it's a major progression, but it's got a little bit of a somber feel to it
with that minor six.
72. I - IV - V - VI: Since we've done
that as an example, we'll also do 1456, just walking up the notes here and we'll finish by tossing
in a seventh chord. Maybe we'll finish
with a seventh. We'll do this in the key of g1456 and land resolve on the
tonic as a seventh chord. We could also play
that from maybe an E. You'll see there we
have a sharp chord, E to a, B, C-sharp Minor, and
land on your ie.
73. I - II - VI: Now, not to be
forgotten are some of the other minor
chords in a key. So maybe we could
play one to six. Again, a major progression, a major key, but the bulk
of our chords are minor. Something we can do that
we haven't talked about Is place chords on different beats. Sometimes chords will have
just one hit, one quick hit. We've talked about
rhythm, right? Playing, hitting differently
on different beats. But we could also put a cord
just on one final beat here. Something like this. Just one quick passing chord.
74. 12-bar Blues Progression: Another very common progression
is the 12 bar blues. Now, we actually played this progression in our
blues chords video. But here is the 12-bar blues. We play 1241 for 541. So if we're in the key
of C, That would be C, F, C, F, G, F, C. And it sounds more
bluesy when you add that dominant seven in
there like we chatted about. But let's play it
just as triad courts. If you're heading into the music world and especially
playing with other people, you may very well here someone asked you to
play the 12-bar blues. Maybe a guitarist will
want to play over it. But the 12-bar
blues is definitely essential to know
how to play 1414541. And sometimes you can
end with the five as well coming back down 5415, back to the one.
75. Out of Key? I - bVII - I: We're going to look at one more common chord
progression together. And this one we're
going a little out of qi to do a flat seven. We're playing one flat
seven back to one. So we've got one flat seven. Back to one. Really simple. This one's got more of a
heroic theme to it. It kinda makes you puff out
your chest a little bit. It's got feelings,
confidence in it. As a reminder because we haven't talked about it for a bit. Remember with that pedal, we're really lifting up
and pulling back down. Every time we're
playing a chord, I'm holding it down. Can make up and down, up and down again. So every new note is hanging on while the old
notes filter out.
76. Playing Piano With a Band: Now we'll talk a little
bit about playing with a band if that's your goal. The job of the pianist is to be where the other
instruments aren't. Base is going to be really low. Guitars can be either kind of in the middle of this
audio spectrum or, or high up, depending on
what they're playing. The job of the piano is to kind of fit in-between everyone. So if you've not got a bassist, maybe you can hit
those low octave who notes and do the job of
the basis who's missing? The guitarist is hitting
higher up on the spectrum. Well, you can deal with
chords in the middle there. Or if the guitarist
is doing chords, you could come and
hit some root notes, maybe add some jazz
notes in there and do some maybe
inversions as well. Where the guitarist is
hitting root positions or sometimes on guitar you're
playing second inversions. You can be hitting first
inversions to avoid that wall of sound and be
playing something unique. So everything's just
meshing together.
77. Finding Chords to Your Favorite Songs: Now we've chatted a
lot about playing these progressions
are making your own, but what about songs that
you're hearing on the radio? And you want to be able to
find those progressions. Well, let's open up a screen
here and take a look. For just about any popular song. You can look up the name of that song and then
the word cords. There are a few different websites that are
going to show you, but this one is my
personal Favorite. When you go in there, you're going to be looking
at guitar chords by default, but there's a piano button
that's going to show you the piano shape for
every chord in the song. Now, if some of these chords
seem a little too difficult, we can always transpose
like we were talking about, except this time we don't
have to build a whole key. We can just click this
button up and down. These sites tried
to do a great job of putting the cord
right above the word. You would be singing
when that chord hits. But they're not always perfect. So it's helpful to know
the song in your head. What we're not going to
get on sites like this is any sort of rhythm
for piano playing. You're going to have to do the rhythm method that
we talked about or listen to the song to find
what fits best over this tune.
78. Final Project: You've made it to the end
of the learning portion. Congratulations. Now we're doing
our final project. As a final project, we're going to make three
chord progressions. The first chord progression
is going to use what we learned in the
beginner cord section. We're just building basic chords and doing root notes
underneath them. The second chord
progression will be for the intermediate
cord section. So maybe you can do
some seventh chords, maybe you can do some sus chords and add some rhythm in there. You can even do a slash chord. Our last chord
progression will be what we learned with the
advanced courts. So add some tensions in there, add some inversions in there and make a great
chord progression. Or for your third
chord progression, you could also do some blues, jazz, or rock style, like we talked about. You can upload these
either as a video or audio or if your camera shy, you can just type out the
chords and share a little bit about how they went and what
you found difficult or easy.
79. Congratulations!: You made it to the end. Congratulations. Hopefully you learned something
valuable in this course. If you have any
questions for me, you can reach out
at Jacob at lamb lessons.com or go to lamb
lessons.com for more courses. Looking forward to
seeing you there.
 Jacob Lamb, Musician, photographer and videographer