Transcripts
1. Let's Go!: Hi, my name is I'm Emanuele Colombo. I'm a professional motion designer and animator from Italy. Today, I'm going to teach you about the principles of animation. I've been working in animation for almost 10 years now and have had the good fortune to work with some big international companies such as NBC, Google, ESPN, and many more. Across all of my work whether it's a character, an object or an entire scene transition, I try to use movement to give my animation a feeling of life. Many of the techniques I use to achieve these come from the 12 principles of animation. This 12 rules have become an essential guide for anyone who wants to create character and personality through movement. In today's class, we are going to walk through these basic principles and show you how to achieve them inside After Effects. We are going to focus on four of my favorites and show you how to apply each of them to a simple animated character. You will see how a very few simple tweaks in the way you animate if all added together will result in a much more realistic and appealing animation. Most of my work is character based and I don't have a background in illustrations so I rely heavily on these principles as a way to bring my animations to life. They are what make animation feel human. I'm very excited to show you how to create great animations. So let's get started.
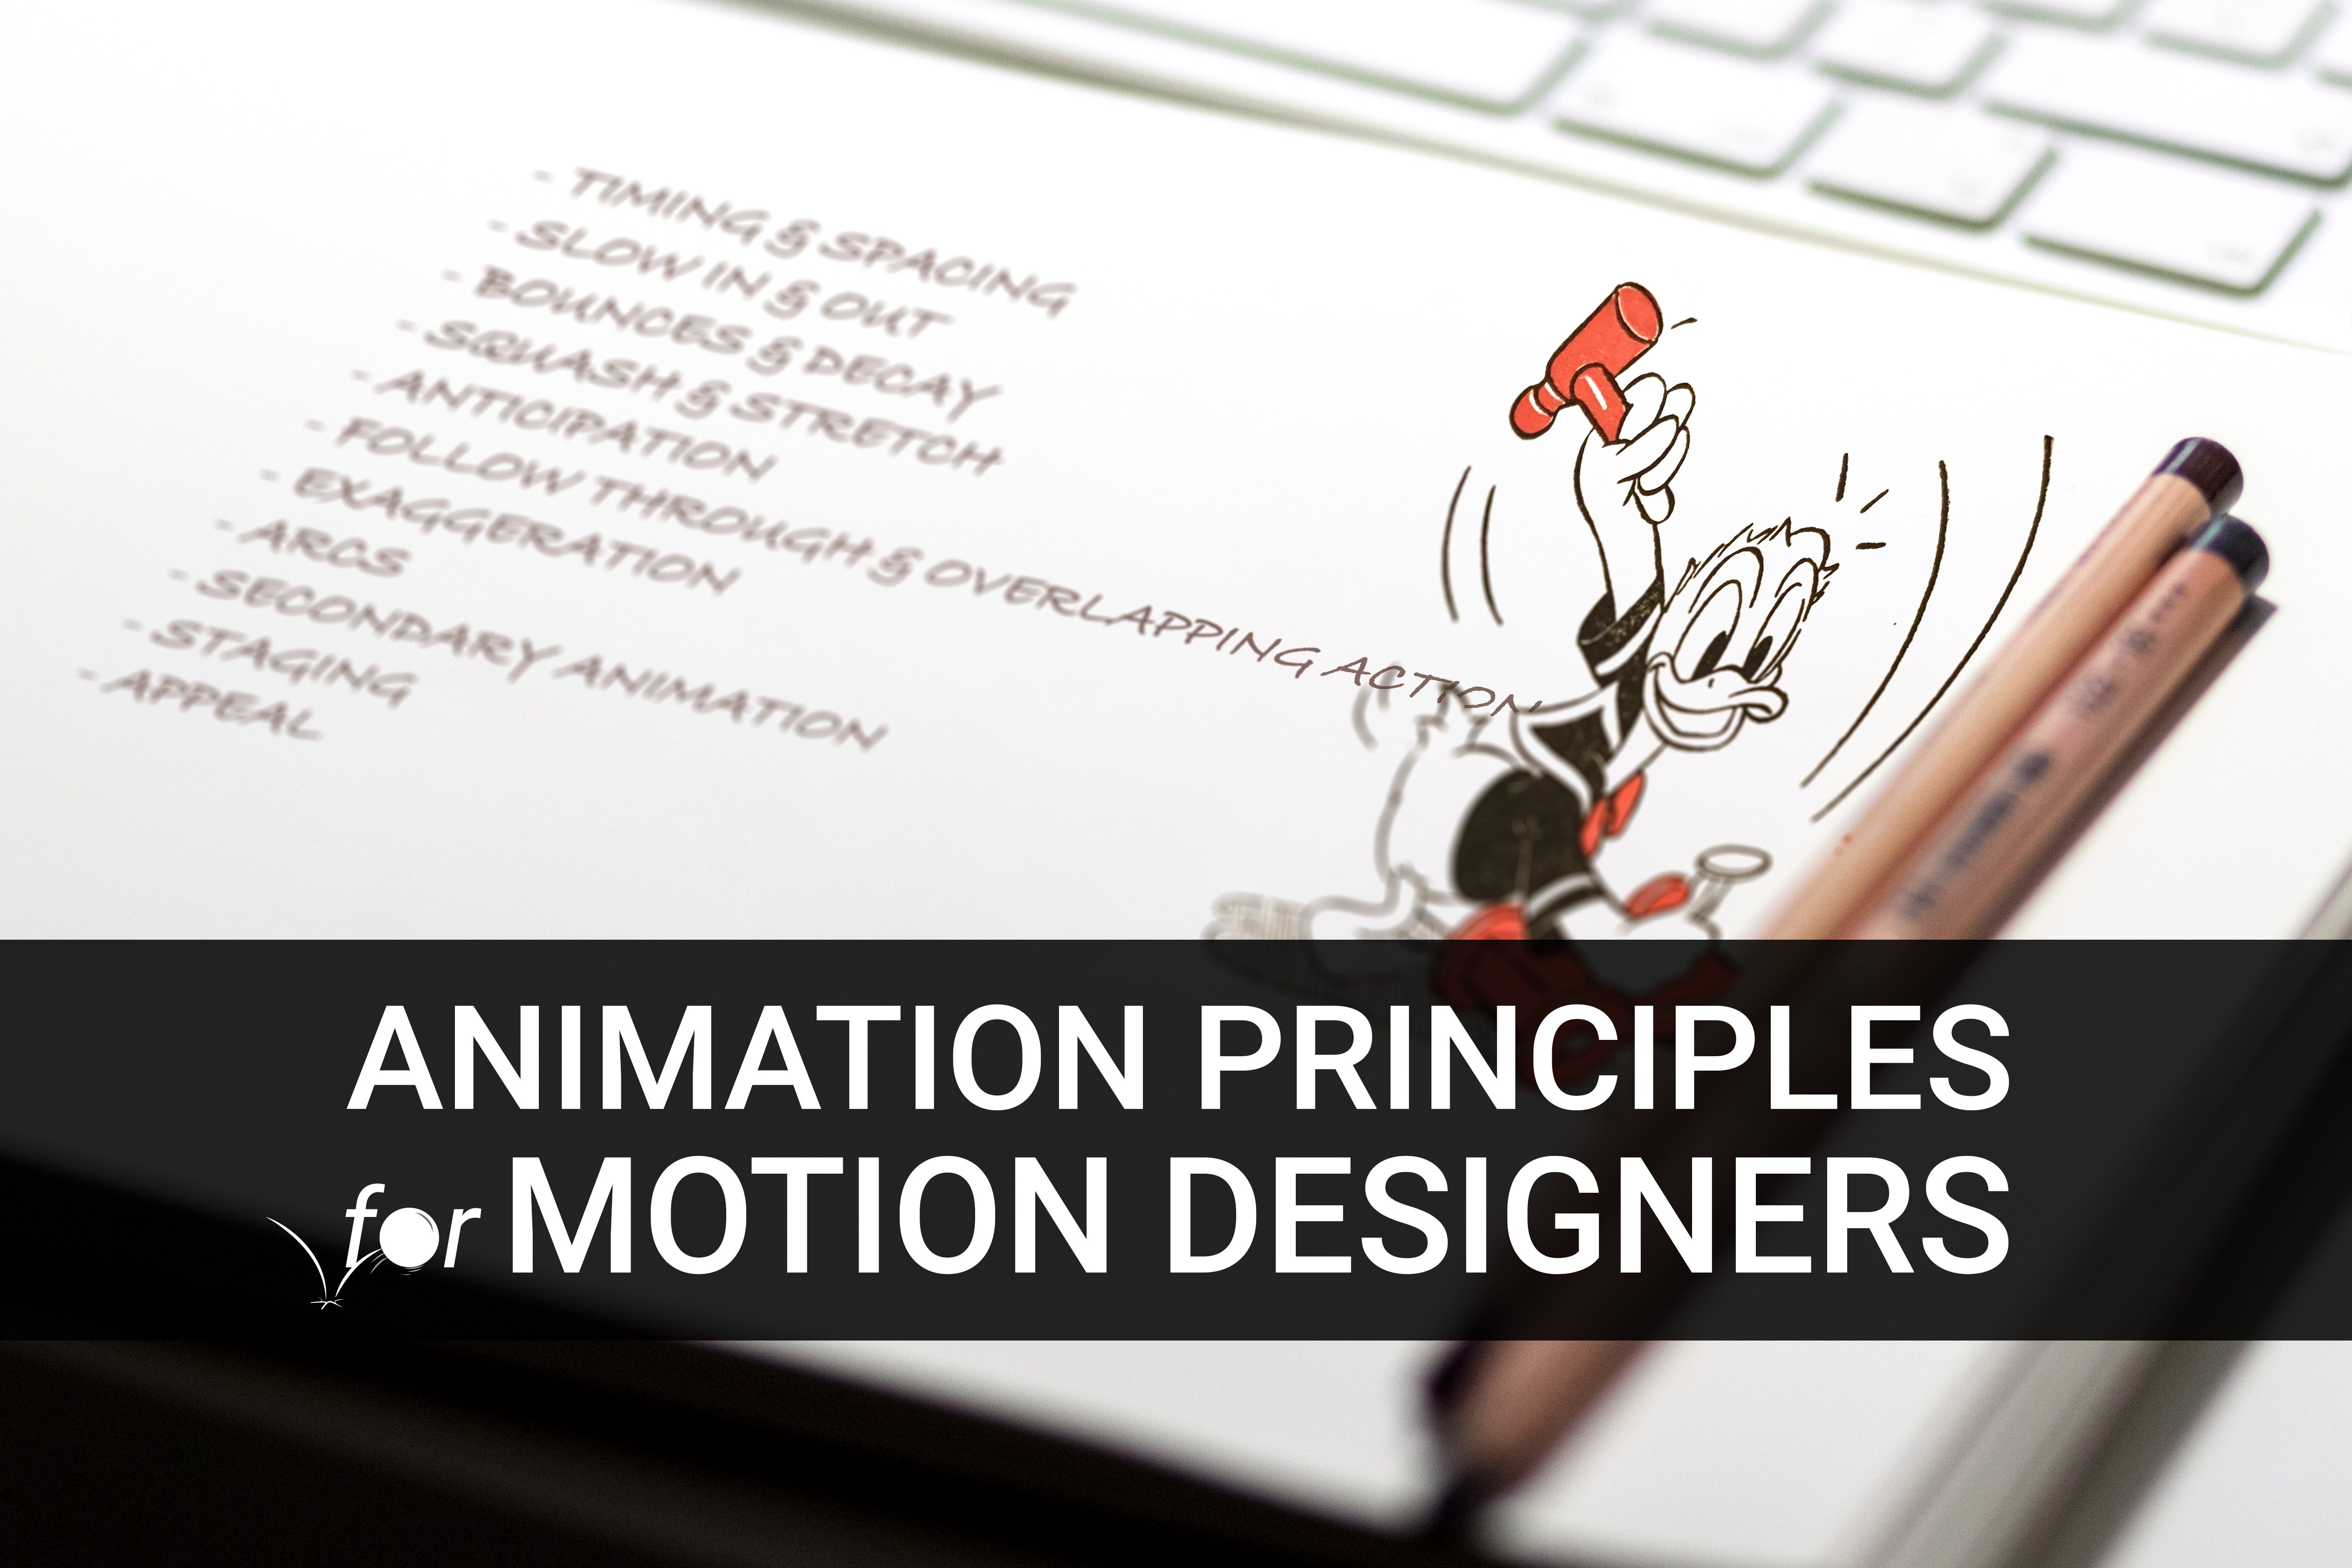
2. How Animation Works: The Principles of Animation were first introduced by two Disney animators, Ollie Johnston and Frank Thomas in their book, The Illusion of Life, which was released in 1981. In this book, Johnston and Thomas examined the work of the leading Disney animators from the 1930s and summed up their approach into 12 basic principles. This principle now form the basis of all animation work. Many referred to it as the Bible of animation and they are relevant for a number of different fields. The most of use is for animating a character but these rules are also useful in all sorts of motion design like animating texts, animating brand logos, and even animating user interfaces. To help us understand the 12 principles, let's see some examples. The first one is squash and stretch. Squash and stretch gives the illusion of weight and volume as something moves. This is done by a slightly expanding and compressing forms. This principle is arguably the most important because it really gives a clear sense of gravity as a character moves. The second principle is anticipation. Anticipation is to let the audience know that a major action is about to take place. To do these, animators will often work in a smaller action or two right before the major action to signal that something is coming and get the audience excited. The third principle is follow through and overlapping action. Follow through is the idea that when something is moving and stops, nothing stops all at once. This is a key for adding realism to the scene giving the impression that an object responds to the laws of physics. So when a character is running and stops their main body will stop but the other parts of their body will keep moving for a bit after. The fourth principle is arcs. Almost selection in life have a slightly circular motion and animation should stick to the same principle. When you move your arm or wave your hand, you rarely do it in a perfect straight line. The fifth principle is slow in and slow out. Slow in and slow out refers to the tendency things have to start and stop moving gradually. This is another one designed to add realism to the movement of characters. When something performing an action, you will draw more frames at the start of the action, less in the middle and more again at the end of the action to create these easy in and easy out effect. The sixth principle is timing. This is a technical one. Timing refers to a number of drawings or frames for a given action which translates to the speed of the action itself. By adjusting the timing of a scene, animators can make that scene look either slower and smoother with more frames or faster and crispier with less frames. The seventh principle is secondary action. Little movements that are not essential but that helps to add meaning to an action. The eighth principle is exaggeration. Exaggeration presents an action in an extreme form for a comedic or dramatic effect. It tries to overstate, to evoke a point without ruining the believability of the scene. The ninth principle is staging. Staging is the principle that directs the audience attention towards the most important elements in a scene. The tenth principle is straight ahead action and pose to pose. These are two different techniques using frame-by-frame animation. Straight ahead action is where you draw each frame one after another. With pose to pose you draw the extremes, the beginning and end drawing of an action and then you go on the middle frame and start to fill the frames in between. Straight ahead is better for creating fluid, realistic actions while post to post is more effective for dramatic or emotional scenes where it's more about conveying an idea and then a scene of realness. Then 11th principle is solid drawing. Solid drawings is all about making sure that animated forms feel like they are in a three-dimensional space even though they are shown in two dimensions. The last principle is appeal. Animator should strive to create something interesting and compelling to audiences. Some of these principles were made for traditional animation. Today, we are focused on four of them: anticipation, overlapping and follow through, squash and stretch, and secondary action. I've chosen these four principle because they are the most relevant if you are starting out with digital animation. So let's start off with the first principle which is anticipation.
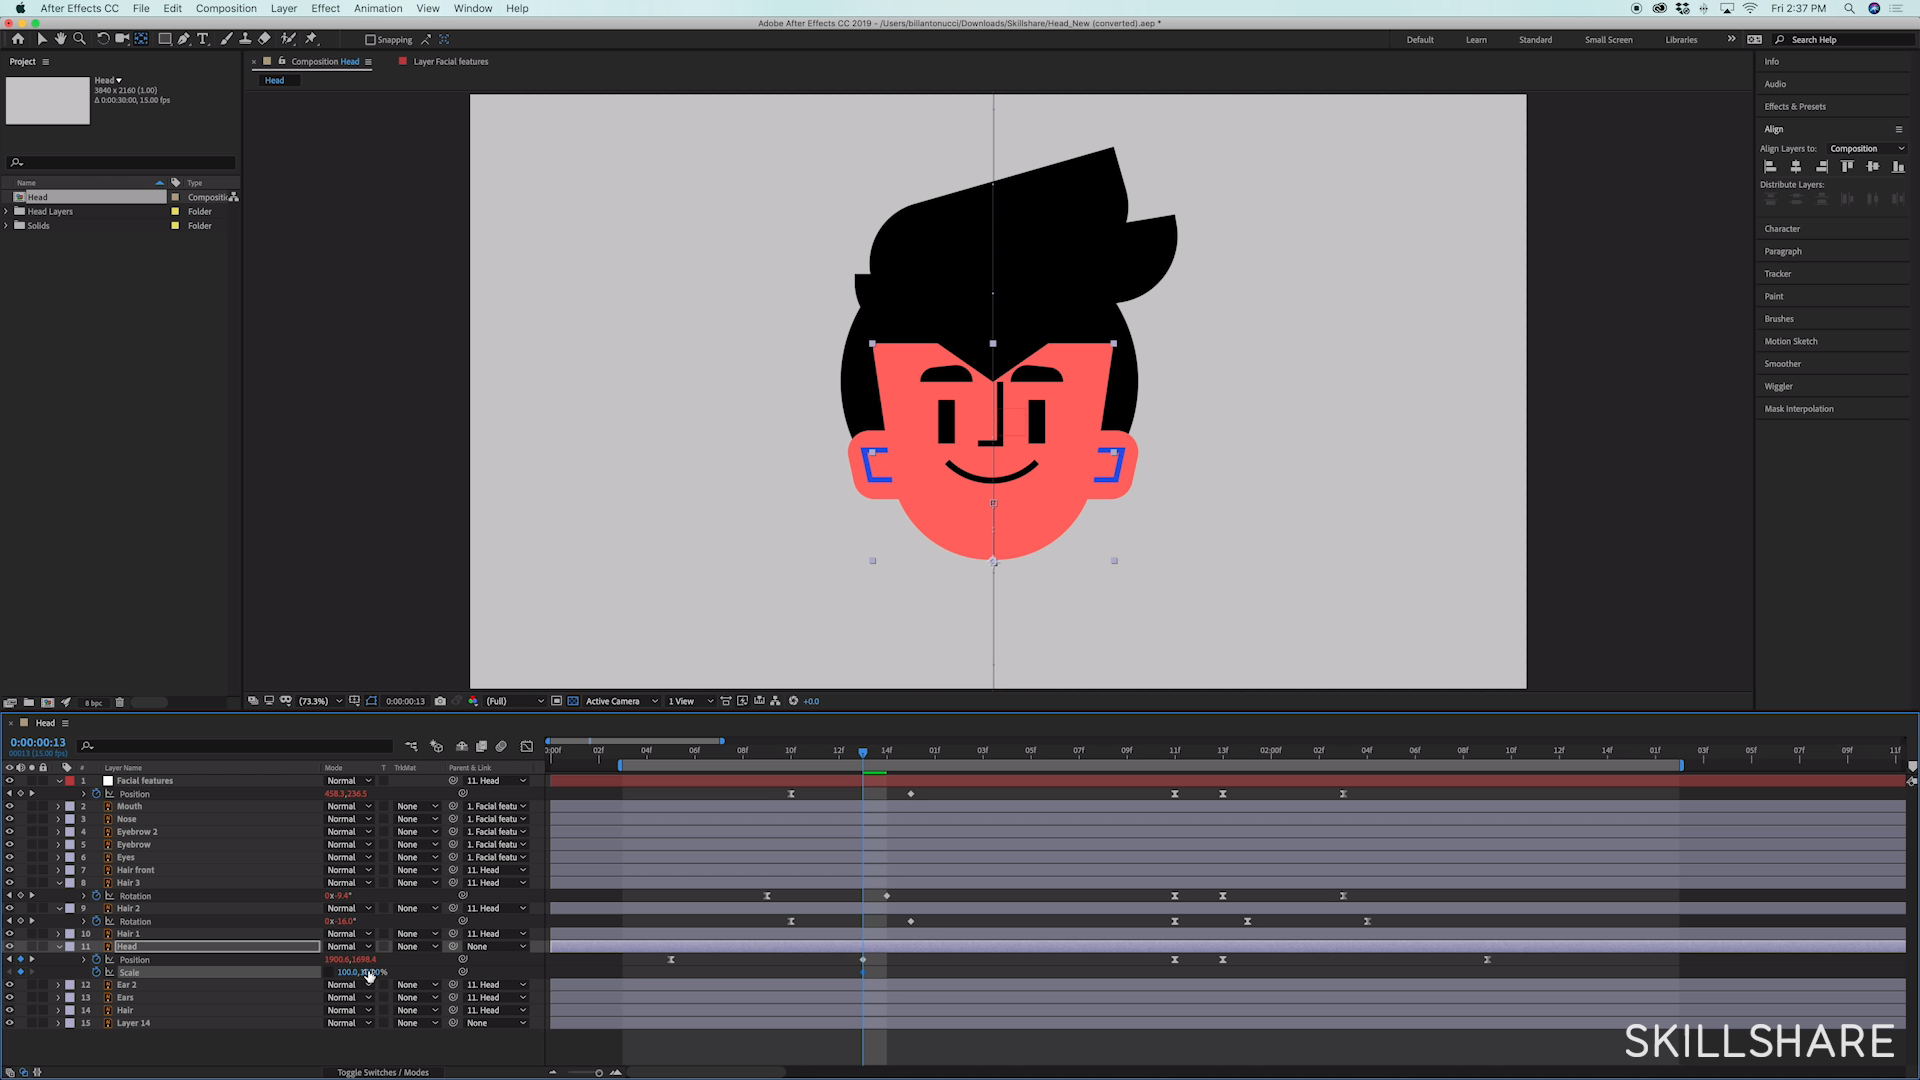
3. Deep Dive: Anticipation: The first principle we are going to focus on is anticipation. Anticipation is the preparation for the action. It indicates the viewer what's about to happen, and gives the idea that an object is building energy to complete an action. I'll show you some example in my work. Okay. So this is a clip from a video I made for a change.org. They asked me to create this animation to celebrate the fact that they reached 100 million signatures. Have a look at the cursor in this composition. Every time it moves around, it anticipates what's about to do, making a subtle movement in the opposite direction. That's the principle of anticipation. Okay. So let's jump into After Effects, and I'll show you how to create some anticipation inside the software. Okay. So we are going to create a very simple composition here. I have this rectangle, and I want to do a complete rotation. So I'm going to create a couple of key frames on the rotation parameter. The first one will be set to zero degrees, and the second one will be at 360 degrees. So as you can see, now we have the rectangle doing a complete rotation. So let's adjust the key frame to change the timing a bit. The first thing I'm going to do is to add a preset called Easy Ease that will affect the speed of the animation, and will make the movement look more fluid. I'm going to refine it a little more. You can just click on this little graph icon here. What you will see is a graph representing the speed of the movement, and you can adjust it to create some slow in and slow out. So in this case, the rotation starting slow, pick up the speed in the middle, and then slowing again. As you can see, the movement is way smoother now. Because if it starts slow, you have speed peak in the middle, and then it slows again. Okay. So to create some anticipation now, what I have to do is to place my time indicator on the first key frame and move it a few frames behind, create a new key frame, and change the rotation value of the second key frame so that the rectangle spins a few degrees counterclockwise so that the idea is the rectangle is building energy before completing the rotation. Of course, it's up to you to decide if you want to exaggerate the anticipation, increasing the rotation of the rectangle, or just keep it subtitle, so setting the rotations. So let's say minus Pi degrees. In this case of course, you're not going to drastically change your animation, but still you're adding that detail you are looking for to make the animation look more interesting. Okay. So of course, any movement can be anticipated. In this case, we work on the rotation, but I can do the same working with every movement parameter here on After Effects. So in this case, I'm going to create a movement of the circle from left to right. So I'm going to create a new key frame here, and then I'm going to move. I'm going to drag my circle so that the software creates another key frame here, and I have my animation from left to right. I'm going to find the speed adding some Easy Ease again. I'm going to have to refine the speed graph again, creating some slow in and slow out. I'm going to create some anticipation, creating a new key frame at the beginning of the composition, and change the position parameter of the second one so that the circle moves to the left a bit. So now our circle is building energy moving to the left, and then complete the main action, reaching the right of the screen. Okay. So it's time to start animating our character. In today's class, we are going to animate one of the character I designed for my personal project, Don't Be a Bully Loser. You can download the Illustrator file in the class resources, or follow the link on the screen. So the first thing I'm going to do is to import the Illustrator file into After Effects. So you just have to go to Import file, and select the Illustrator file, and After Effects will ask you if you want to import it as full touch or as composition, I'm going to check Composition, and click Okay. The first thing I do is to check the frame rate. I really like to work at 15 frames per second, because it gives very nice non-digital look to the animation. Okay. Since the main movement of the character will be controlled by the head, I'm going to connect all the layers to it. Parenting is a tool that connects layer together, and to do so, you just have to select all the layers, and click on this little spider on high point here, and drag a line to the head layer. Second thing I'm going to do is to change the angle point of the hair layer. The angle point controls the axis of the rotation. I'm going to play a lot during the animation with the rotation parameter of the hair, but I didn't want it to rotate like this. But selecting the angle point too, you can move it down here so that the hair is going to rotate this way. I'm going to do the same with the second layer here. The last thing I'm going to do is to create a null object. The null object is basically an invisible layer that can be used in a ton of different ways. In this case, we are going to use it as a controller for all the facial features of the character. So I'm going to connect the mouth, the nose, the eyebrows, and the eyes to this null object so that just moving it around, I have full control on all the facial features. I'm also going to rename it as facial features, and then I'm going to connect the null object to the head layer so that it allows me to move the facial features, but still everything moves altogether with the head. Okay. So now it's time to set up the main movement of the head. I'm going to play with the position basically. So I'm going to create a new key frame, and I want the action to start out of the screen. So I'm going to drag the head up here. Then I want the character to stay still for let's say one seconds, so I'm going to create a new key frame here, and then I want the character to exit the screen, so I'm going to drag the head down. I'm going to refine the timing a bit. Then again let's add some Easy Ease to make the animation look more fluid, and let's refine the speed graph to create some slow in slow out. Let's create some anticipation on the second part of the movement. So I am going to place my time indicator here, move it back over a couple of frames, create a new key frame, and then I'm just going to move the head up a bit so that it builds energy before it exit the screen. So as you can see, just adding one single key frame, you can make animation look more interesting, and give the idea that the head is building energy before exit the screen. Next step, let's get to the second principle, overlapping and follow through.
4. Deep Dive: Follow Through: The second principle I'm going to show you is overlapping and follow through, through related techniques that will help you create more realistic movements. Follow through is the countermeasure to anticipation. It occurs after an action and is the direct physical result of it. Let's see an example in my work. We talked about follow through when an object continues to move after the main action is finished. It's a bounce that happens at the end of an action. Have a look at this scene from my personal project, don't be a bully loser. I have highlighted the hair layer so that you can get an idea of what I'm talking about. As you can see, after the head movement has finished, the hair bounces a bit before start moving, that's the follow through principle. Overlapping actions describe the offset between the timing of different elements of the animation. One trick you always have to keep in mind is that whatever you are animating all the parts of an object take the same time to complete a movement. They just have to start and stop with an offset of a few frames. Let's see one from my work. This is the same composition as before. In this case, I have highlighted two different layers. As you can see, they look identical and they do exactly the same movement. They just started and stopped moving with an offset of a couple of frames, and that's enough to get that sense of delay between elements that we are looking for. That's the overlapping principal. So let's go back into after effects and I'll show you how to create some overlapping and follow through inside the software. We have another sample composition here, and again, as I did before, I'm going to create a movement from the top to the bottom of the screen, and as usual I'm going to add some Easy Ease and refine to speed the graph a bit and create some anticipation adding a new keyframe on each layer and moving the three circles up a bit. This is a little too long so I'm going to reduce the play area. Now, we've got our three circles doing some anticipation and moving to the bottom of the screen. To create follow through, I generally use this expression. Expressions allows you to control after effects parameter through coding, and you can download this one from the class resources or from the link below. To apply the expression, you just have to copy it and select the parameter you're working on, in this case, the position parameter and hold click on this little stopwatch icon here and paste the expression. As you can see nothing has changed and that's the cool part about this expression. It only works on linear keyframes that are basically keyframes without Easy Ease applied. So you can apply the expression by default on all the parameters that you think are going to need some follow through during the animation and just activate the follow through whenever you need it, convert the keyframe back to linear common clicking on it. As you will notice, the shape of the keyframe will change from this hourglass shape to this diamond shape. Now you have this nice and very realistic bouncing at the end. I'm going to adjust the timing a bit. Another cool thing about this expression is that you have full control on the bouncing you are going to get. You just have to click on the expression here so that you can edit it, and you just have to change one of the parameters here that controls the amplitude of the movement, the frequency, and the decay. So in this case, I can bring the amplitude to 15 and the frequency to three let's say, and as you can see the movement you are going to get it's completely different. This technique is a huge time saver because it will allow you to obtain a very realistic movement with just one keyframe, and I'm going to apply the same expression to all my layers. So again, I'm going to hold click on the stopwatch and paste my expression, and I'm going to convert the last keyframe to linear common clicking on it and that's the final result. Now, since the movement it's still not very realistic since the circles are bouncing too much compared to the size of the movements, so I'm going to reduce the amplitude a bit, so let's try to set it to 10, and I'm going to bring the frequency back to two. Okay, it looks better to me now, and I'm going to copy and paste the same expression on the other two circles. So let's try to add some overlapping now. As I told you before, overlapping is basically a delay between the movement of all the elements that are part of the animation. In this case, the composition is very simple. So to create this delay, I'm just going to drag the layer a couple of frames ahead in time so that they are still doing exactly the same movement and exactly at the same speed. But they just start and stop with an offset of a few frame, and that creates the delay I was looking for and make the animation look way more interesting than it was before. So let's move back to our character and let's try to create some offset between the different parts of the body and some nice follow through at the end of each movement. I'm going to start animating my null object and I'm going to work in backwards since the animation starts out of the screen, so I'm going to take as a reference the end of the very first movement. So let's press P to reveal the position parameter of the null object, and let's create a new keyframe. I'm going to offset it or let's say a couple of frames, and then I'm going to move a few frames behind, and I'm going to change the position of the facial features so that they move up a bit, and they end their movement a couple of frames after the head movements is over. I'm going to apply some Easy Ease too, and I'm going to do the same with the hair. In this case, I'm going to work with the rotation parameter, so I'm going to press the R button. Again, I'm going to take as a reference the end of the head movement, and I'm going to create a new keyframe on the rotation, and I'm going to offset it off one frame, and I want the hair to rotate upwards as the head is falling down. I'm going to do the same with the second hair layer. So again, my reference would be the end of the head movement. By reference, I mean, just reference for timing. I'm going to create a new keyframe, set it a bit and I want it to rotate upwards as the head is falling down. I can also create some overlapping between these two layer. So I want this one to move with a delay of one frame. Now, let's just add some Easy Ease to everything. Now, it's time to create some follow through using my expression. So again, I'm going to copy the expression and apply it to every layer common clicking on the stopwatch icon and pasting the expression, and I'm going to activate the follow through converting all these keyframes to linear common clicking on them. I'm going to refine the timing a bit, and I'm going to play with the rotation to exaggerate the head movement a little. Also, I'm going to refine the amplitude of the movement of the hair, so I'm going to bring the amplitude to, let's say 15, and I'm going to copy the expression on the other layer, so that the bouncing it's a little more visible. Now, I want to create an overlapping movement in the second part of the animation, so from here, again, my timing reference will be the first keyframe I created on the head position and I will start again from the null object. I'm going to press P to reveal the position parameter, and I'm going to create a new keyframe, and as the head is anticipating the movement I want the facial features to go down, and as the head is going down I want the facial features to move up. I'm going to add some Easy Ease, and as you can see what they just created it's some delay between the movement of the head and the movement of the facial features. I'm going to do the same on the hair layer. So again, I'm going to work with the rotation and my timing reference will be the beginning of the anticipation of the head. So I'm going to create a new key frame here, and I want the hair to rotate downwards as the head goes up and upwards as the head goes down, and I'm going to add some Easy Ease, so that I'm going to also deactivate the follow through, and I'm going to do the same on the second hair layer. Again, I'm going to work with the rotation. It's going to rotate downwards as the head goes up and upwards as the head goes down. I'm going to add some Easy Ease, and I can also create some overlapping between these two layers here. So I'm going to just drag these couple of keyframes, one frame ahead in time. I'm going to refine the speed of the heads a bit because I wanted to exit the screen a little faster. I'm going to move it down a bit, and let's have a look at the final results. Next step, let's have a look at the next principle squash and stretch.
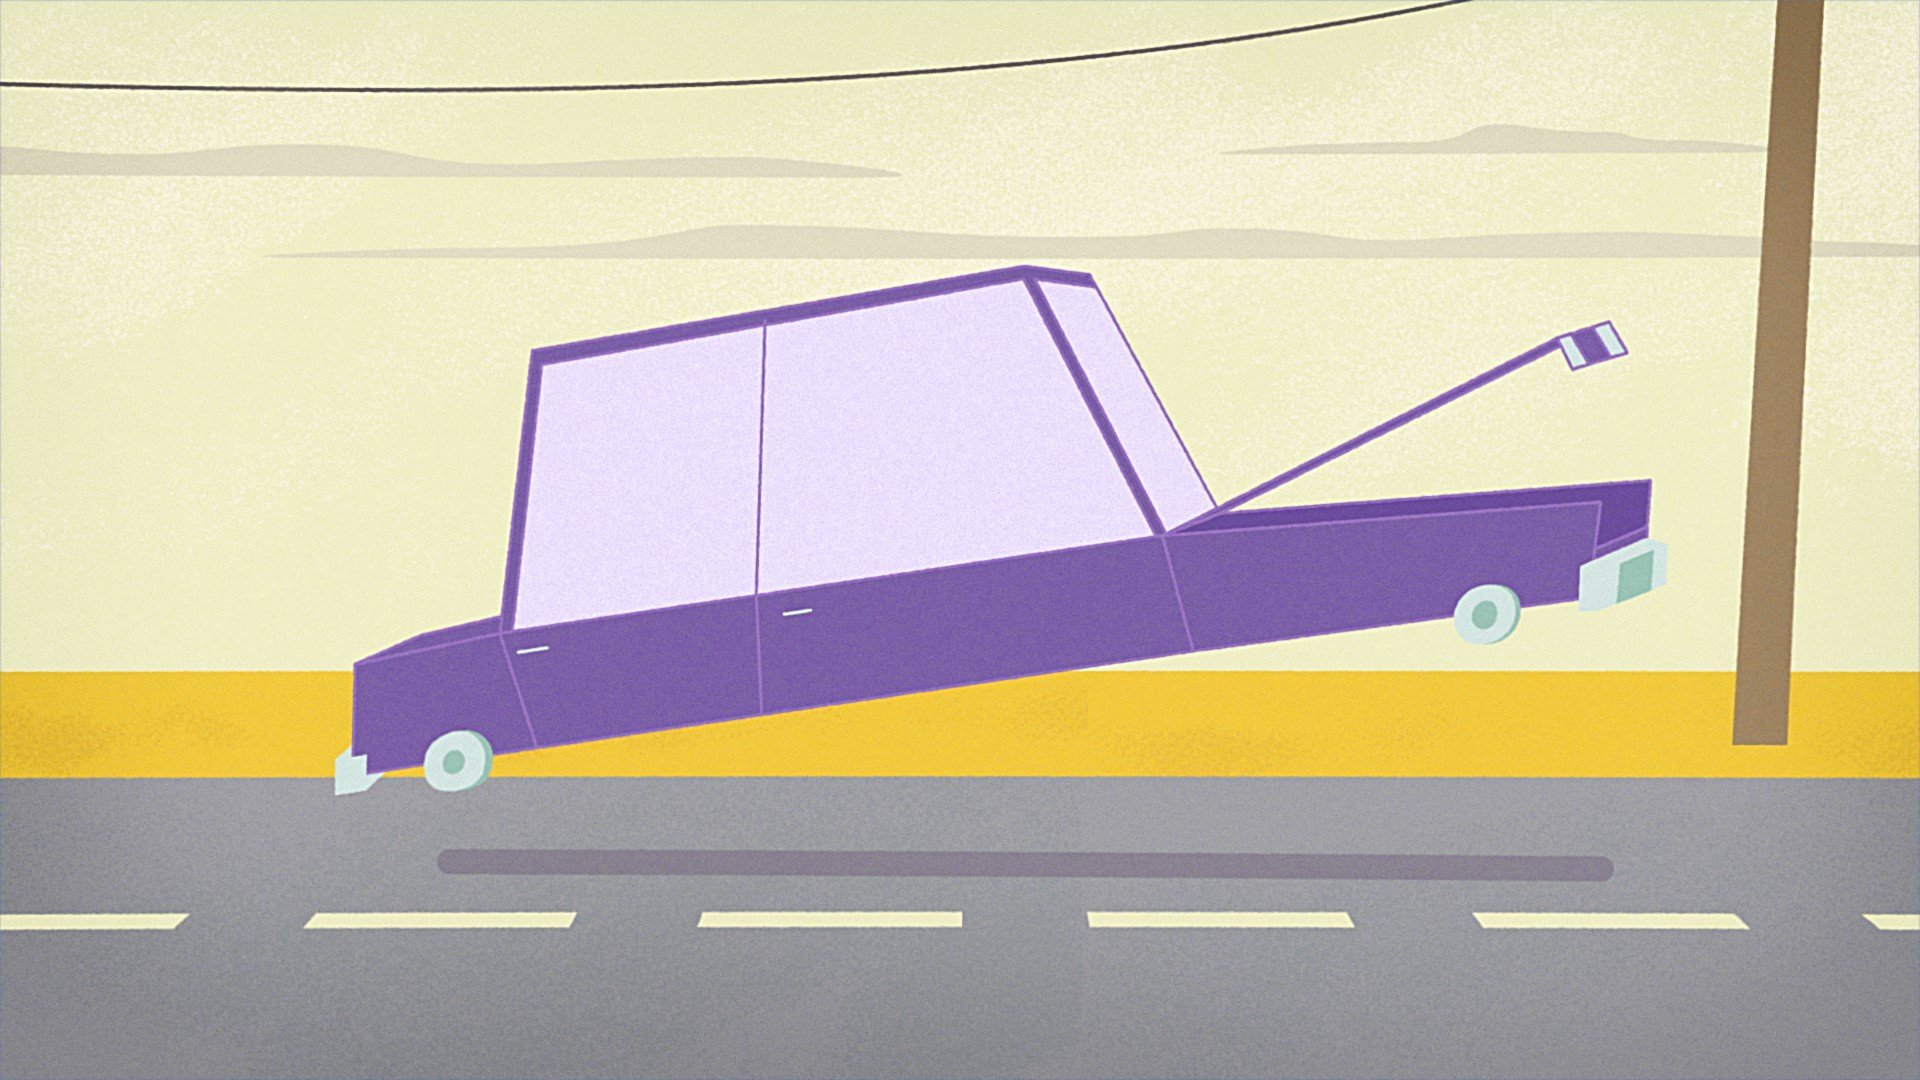
5. Deep Dive: Squash & Stretch: The next principle of animation we are going to discuss today is squash and stretch. Squashing or stretching an object gives the illusion of weight and flexibility as it moves. It also say something about the mass of the object. The more the squash and stretch, the softer the object. The less the squash and stretch, the stiffer the object. Let's see some example in my work. In this case, we have this working cycle I created. Have a look at the character's body. The squash effect we have when it's in down position make the entire body looks soft and the whole animation more dynamic. Let's jump back into after effects and I'll show you how to create some squash and stretch inside the software. We have this sample composition here. It's just a circle doing some anticipation and then moving to the right side of this screen with some follow through at the end which I achieved using my expression. To create squashing and stretching, I'm going to work on the scale parameter of the circle. So I'm going to press S to reveal the scale and create a new key frame. Pressing U, you will see all the parameters where you have applied key frames on. So now you can see both position and scale. The first thing you have to do is to disable the constrain proportion option, clicking on this little chain icon here so that you have full control on the scale of your circle. I'm going to change the scale value so that my circle squashes as it is anticipating the movement, and I want it to stretch when it reached the maximum speed, so will be probably around here. So again, I'm going to play a bit with the scale to make it stretch. Then I wanted to go back to its initial state, so I'm just going to copy and paste the first key frame. I can also add some Easy Ease just to make the animation a little more fluid. If you want to, you can also create some follow through on the scale parameter too. So you just have to copy and paste the same expression, clicking on this little arrow here to revisit your expression, and you can just paste it on the scale. So again, I'm going to all click on the Stopwatch, paste the expression, and convert the last key from two linear common clicking on it. So you have some nice bouncing at the end of the animation too. So as you can see, just studying four key frames on the scale parameter will drastically change your animation, give you a sense of speed and weight as the circle moves. Let's try to add some squash and stretch to our character two. The first thing I'm going to do is to change the anchor point of the head. Because as you can see, if you just squash and stretch the head like this, it doesn't really work. So I'm going press A to reveal the anchor point parameter and move the head a little up. Then I'm going to select all the key frames I put on the position, just clicking on the word position. Then I'm going to move everything down a bit so that we are back at the initial stage. So now the squash and stretch looks better because keeping them could point in the lower part of the head. You see here that the head itself its weight into the bottom. Okay, so let's just add a key frame on our scale parameter and let's press U so we can see both position and scale. Let's move back of a couple of key frames. I want the head to stretch as it's falling down and squash as it reached the down position. Then I want it to go back to its initial state. I set the value back to 100 and then I'm going to add some Easy Ease. I can also add some follow through using my expression. So again, I'm going to click on the arrow here. Copy the expression from the position parameter and apply it to the scale too. I'm going to convert the key from back to linear to activate the follow through. I'm going to do the same on the second part of the animation. So again, I'm going to create a new key frame on the scale, and I want the head to squash as it is anticipating the movement and stretch as the head is falling down. I'm going to add some Easy Ease. If you want, you can exaggerate the squashing and stretching as much as you want. An example, I can squash it a bit more here. I'm going to define also the anticipation so that I can exaggerate that movement too. So your animation now is starting having a good feeling of mass and weight. Let's move to the next step to add some secondary reaction and refined your animation even more.
6. Deep Dive: Secondary Action: The last principle we are going to discuss today is called secondary action. Secondary action support the main movement and add more dimension to the animation. We refer to secondary actions every time we talk about those little movements that are not essential, but that add meaning or detail to an action. Let's look an example in my work. So this character is part of the same project as the work circle I showed you before. In this case, the main action is the jump off of our character, but if you have a closer look, you'll see that there are a lot of secondary actions going on. The movement of the legs, the eyes blinking, and the circle on the top of the head moving left and right. None of these action is fundamental, but all of them contribute in adding details to the animation. So let's check out how to create some secondary action side of the effects. So we have this sample composition here. Of course each scene is different, so it's up to you to understand what makes sense to animate, to create some interesting secondary actions. In this case, we have these two circles here, so I'm going to try to animate them to enhance the sense of gravity of the whole scene. Always try to think about what the main action is and how secondary action can enhance it. So in this case, the first thing I'm going to do is to move the anchor point of the small circles. So pressing Y, you're going to select the anchor point tool, and I'll try to place it in the middle of the the main circle, and I'm going to do the same for this one. I'm going to press R to reveal the rotation parameter, and I'm going to make them rotate as the circle goes down. I'm going to add some easy ease, and then I'm going to play a bit with the speed graph to create some slow in slow out as we did before. Let's apply some of the other principle we saw today. So I'm going to create some anticipation creating a couple of new keyframes here, and rotating the circle counterclockwise as the main circle goes up. Also, let's create some follow through using my expression. So I'm going to paste the expression, the expression is usual. Let's activate the follow through convert it in the keyframe to linear. I'm going to refine the timing a bit. We can also create a little overlapping between the movement of the two circles, so I'm going to offset these two keyframes a bit. I'm going to refine the rotation value of the second circle so that they don't overlap to each other. Then we can also create some overlapping. I'm just going to offset the last keyframe on the second circle a bit. I'm going to change the rotation value a bit so they don't overlap to each other. So secondary animation in this case is supporting the main movement and also it's adding a new level of detail to the animation. So let's go back to our character and let's try to add some secondary action to it. In this case, we have a lot of elements we can play with to create secondary animation. I can have the eye blinking, I can move the eyebrows and I think I'm going to play a bit with the ears and this frontal hair here to add dimension to the character. So let's start from the ears. Again, my reference for timing will still be the position of the head. The first thing I'm going to do is to move the anchor point so that as you rotate the ear, you won't see this part of the design. So I'm going to just drag the anchor point here, and I'm going to do the same on the other ear. I'm going to create a couple of new keyframes on the rotation parameter and I'm going to rotate them upwards as the head goes down so that I achieve some overlapping between the head and the ear movements. I'm going to create a little offset so that they stop moving couple of frames after that has finished the main movement. I'm going to create some easy ease on this keyframes, and I'm going to create some follow through using my expression. So I'm going to copy and paste it from the head to the ear. I can even increase the amplitude of the expression to exaggerate the movement a bit. I'm going to do the same on the second part of the animation. So again, I'm going to play with the rotation, and my reference for timing will be the starting of the anticipation of the head movement. So I'm going to create a couple of keyframes, and I'm going to rotate them downwards as the head goes up. Now it's time to add some blinking to the eyes. I'm going to work with the scale, so I'm going to press S. So I want the character to blink when it's in the down position here and when it's anticipating the movement in the second part of the animation. So I'm going to create a new keyframe on the scale here, and disable the constraint proportions so I can create this blinking just playing with the scale and I'm going to create a new keyframe here, and then I want the eyes to open again couple of frames later. So I'm going to just copy and paste this keyframe. I'm going to add some easy ease. I'll just copy and paste these keyframes I just created in the second part of the animation so that they have the same blinking gear. This way, the blinking really enhances this fortious stretch of the head. Now, let's animate the eyebrows. I'm going to start from the left one. In this case, I'm going to work on the position and the rotation on the eyebrows. So I'm going to add a new keyframe on the rotation and one on the position, then I'm going to press U to reveal them both, and I want the eyebrow to rotate and go down as the eye is blinking, and then go back to the initial position. I'm going to add some easy ease on everything. Then I'm going to just copy and paste the same keyframes on the second blinking. To save some time while animating, instead of animating the second eyebrow, you can just delete it, and duplicate the eyebrow we just animated pressing command D and you can just flip it clicking on this little cube icon here to make it a 3D layer, and pressing R you can now rotate it on the y-axis too. Then you just have to change the position so that it sends right above the other eye. Now, let's add the final touch, squashing and stretching the frontier here. So again, I'm going to take as a reference, as timing reference the head movement. So I'm going to add a couple of frames on the scale so that my head front stretches as the head is going up, and squashes as the head is going down. I'm going to add some easy ease. The last thing I'm going to do is to animate the mouth. I want to create some squash and stretch on it. To do so, I am going to convert it to shape layer so that I have full control on the path. To do so, I'm going to go to Layer, Create, Create shapes from vector layer, and now I can go to Path here and create a new keyframe and I can just edit the mouth as I prefer. This way, I can create some squash and stretch as the head is moving. So I'm going to squash them out as the head is moving up, and stretch it as the head is going down, and I'm going to add some easy ease to everything. So as you can see, creating good secondary actions will have a huge impact in your animation and will really bring your character to life.
7. Final Touches & Exporting : Now that we have finished with the principle, I want to show you some of the final touches I'd like to add to my animations. Okay, so let's start with one of my favorite trick. I use it a lot to bring overlapping and follow through to the next level. What I'm going to do is to create some kind of overlapping between this part of the hair layer and this part. To do so, I'm going to work with the puppet tool. Puppet tool allows you to create pins that you can place on the layer and you can use them to distort the layer itself. When you create pins, After Effects will automatically create key-frames for each of them and since I'm just going to animate the third one, I'm going to delete the key-frames on the other two. What I'm going to do next is to play a bit with the position of the pin so that I can bend the hair as it's going down and I already created some kind of overlapping between the rotation and the position of the pin. I'm just going to create some VCs on the first key-frame and add some follows through using my expression. So I'm just going to copy and paste the same expression. As you can see, you will get very realistic and fluid movement on the air. I'm going to do the same on the second part of the animation. So again in this case I will take a stymie reference the rotation of the hair layer. I'm going to create a new key frame here and I want it to bend down and I'm going to make it bend up at the very end of the movement. I'm going to add some VCs and I'm going to create a little overlapping between the rotation and the puppet pin. I'm going to do the same thing on the other hair layer. Okay, now I'm going to apply the same effect to the eyebrows. So again I'm going to create three pins using the puppet tool. I'm going to reveal the key-frames the software has created pressing U and I'm going to play with the position of the third one. So again I want the eyebrow to bend up as it's moving down and to bend down as it's moving up and then I want it to go back to its initial position with an offset of one frame. I'm going to create some easy ease on the first three key-frames and I'm going to apply my bouncing expression to the puppet pin tool. Then I'm going to do the same on the second part of the animation. So again here I'm going to create a new key frame and I want the eyebrow to bend up as it's going down and to bend down as it's going up and then bent up again and I'm going to create some easy ease on everything. I'm going to refine the movement a bit and then as I did before, I'm just going to delete the second eyebrow so I don't have to reanimate everything from scratch and I'm going to duplicate this one pressing command D. I'm going to make it a 3D layer and rotate it on the y-axis and then just selecting only the key-frame I can move, the eyebrow, adjust some of the secondary. Now I'm going to show you how to add some texture to your character. Okay. So I'm going to start importing the texture. So I'm going to click on "File", "Import File", and I'm going to select my texture here. To download the texture, just go to the class resources or click on the link below. Then you just have to create a new composition with the same resolution of your main composition and with the same frame rate, and I'm going to click "Okay". Then I'm just going to drag my texture here. As you can see, the resolution of the texture is much bigger of the composition itself and that allows you to play around with the position. So I'm going to create a new key-frame, every let's say three frames, and I'm going to change the position of the texture. Okay. So as you can see now the texture is moving around following the key-frames that I just added. So I'm going to convert the key-frame to toggle hold key-frame. To do so, you just have to right click on the key-frame and select toggle hold key-frame here. This way the texture will change the position only when it will hit the key-frame. Lastly, I'm going to create a loop using an expression. So again let's just come and click on the Stopwatch icon here and we're going to go to this little arrow. Click on property and select this loop out expression here. So now we just have created our animated texture. Okay. Then I'm just going to drag my texture composition in my main composition and I want to apply it to all my hair layer. To do so, I'm going to use the Alpha Matte option that is basically going to create a mask on my texture layer based on the layer that's right above. I'm going to click on this button here and select all formats and I'm going to do the same for all my hair layers. As you can see, adding a texture to your character will create a completely new field to the animation. The next trick I'm going to show you is to give the animation one last animate feel. Okay, so the first thing I'm going to do is to create a new adjustment layer. You just have to click on layer here, New, and select adjustment layer. Adjustment layer will allow you to apply effects to all the layers that are below. I'm going to apply an effect called Turbulent Displace and I generally set the amount to 35 and the size to four. So if you zoom in, you can see that now all the borders of your character have this new handmade feel. You just have to enable and disable to see the difference. Okay, so this is your final animation and you can see how far we have gone from the very first step we did. Okay. Right before exporting, I just want to make sure that the exit point is right after the head exit the screen. So I'm going to place my time indicator here and press "N" and I'm going to do the same on the first part, pressing "B", so that now I have this very quick loop repeating over and over. I'm going to export the file, you go into File, Export, and add to Adobe Media Encoder Queue. There's a preset I you always use to upload my videos on YouTube and Instagram and you just have to click on H264 and just drag it on your file, and you just have to select the destination of your file. Finally hit play. Okay, so now you can just open your video. If you open it with Quicktime, you can make it loop; go into view and pressing loop. You are ready to upload it wherever you want; on your social medias or wherever else you might want to share it.
8. Closing: So that's it. Now you know about the principles of animation and can start applying some of them to your work. If there's one thing that I hope you take away from this class, is that making appealing and life-like movement doesn't require being an advanced animator. Anyone can do it with just a little practice. We have included the after effects files for you to download. So feel free to play around with them to become more familiar. If you've been creating your own animation, I'd love to see it. So please upload it to the project gallery. Thanks so much for taking the class. Can't wait to see what you create.
9. Explore More:
 Emanuele Colombo, Animator & Motion Designer