Transcripts
1. Class Intro: In this class, you
learn the essentials of filmmaking by creating a
ten second short film. This class isn't about creating
a masterpiece in one go, and it's certainly
not about shortcuts. It's about giving you
a tool that removes the barriers keeping you
from making your film. So this film class is different because it allows you to jump directly into the process without worrying about
rules or mistakes. My name is Olaf, and I'll be
your teacher in this class. I was born and raised in
the Icelandic countryside, surrounded by sheep that
were much smarter than me. Since then, I've
written, directed and produced 15 feature films. Our starting point in
this class will be a question that rhymes to make
a film, Where do I begin? How about starting
with 10 seconds? This class is for anyone
new to filmmaking or those feeling stuck in their journey as a
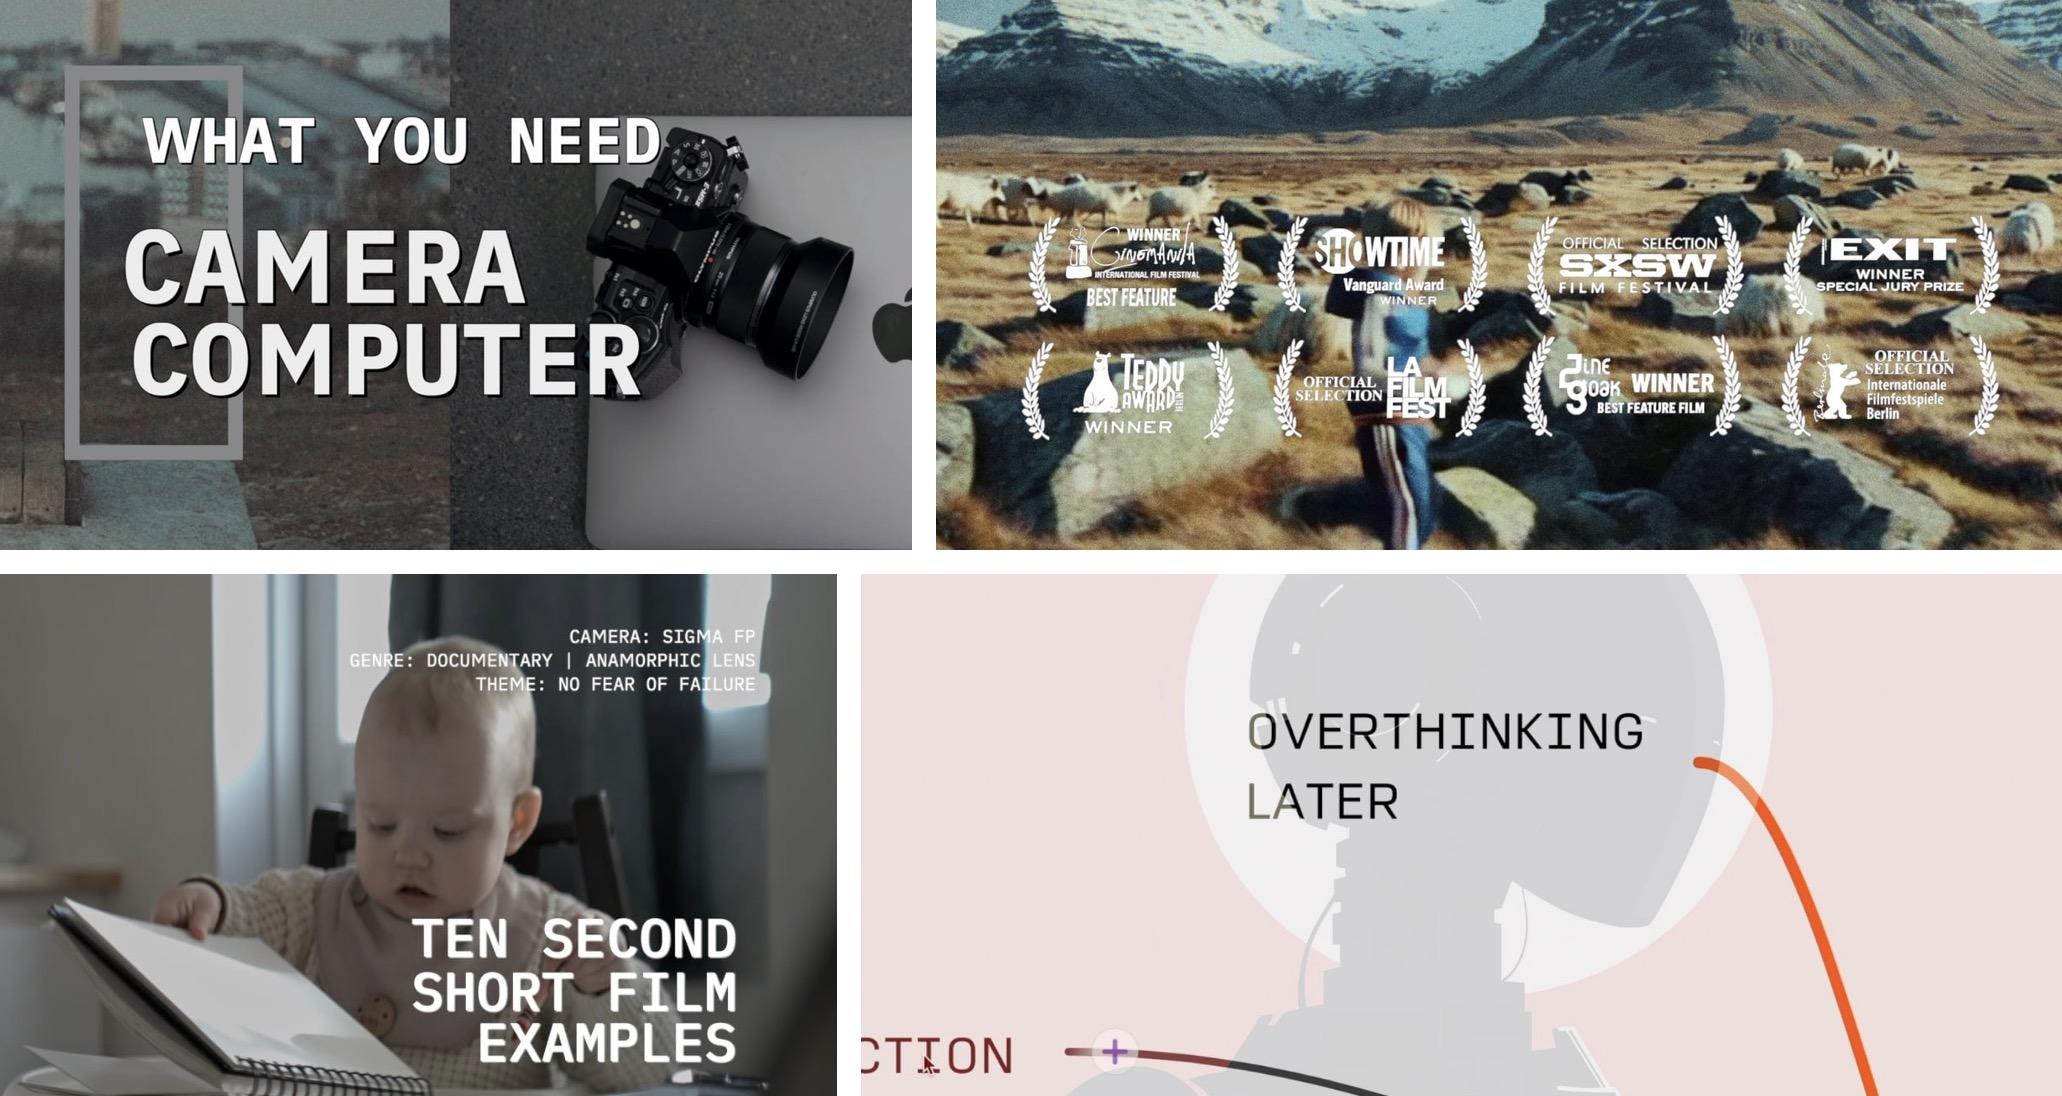
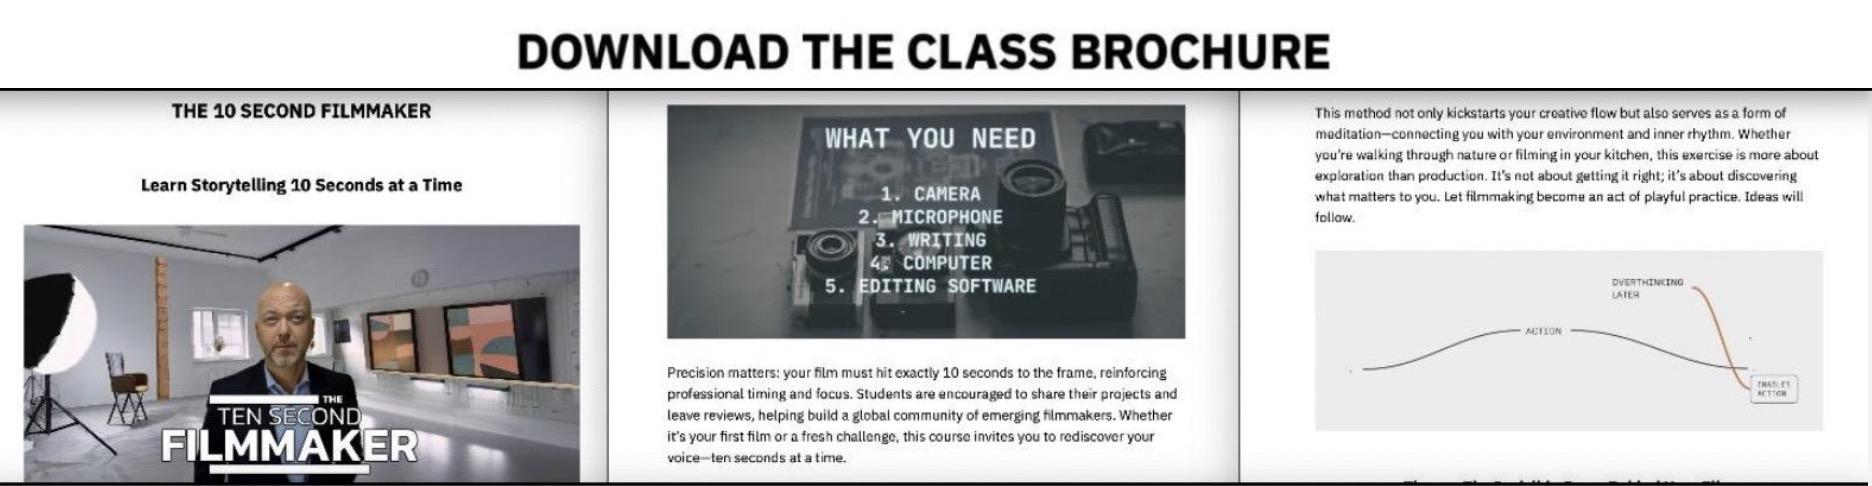
visual storyteller. What you need for this
class is any kind of camera and a computer
to edit your film. But most importantly, starting in this class will be easy. We begin with your idea
and shape it gently. 10 seconds at a time. Thank you for checking out the introduction for this class. Let me tell you a little bit
more about how it works. What kind of films can we
do in only 10 seconds? The answer is all
kinds of films, a science fiction,
perhaps, or a documentary. From lesson to lesson, I'll create my own ten second
examples to inspire you. If you have a big
idea, start small. Start with just 10 seconds. Take a slice of your concept, a single moment, and
bring it to life. So this is how this class works. Early in the class,
you're gonna be making your ten
second short film. We're gonna have some lessons. I'm going to talk about theme, directing, screenwriting,
three acts, and all that. Then I'm also gonna
shoot an example film or to several of them to
kind of inspire you. But at the end of the
class, then you're going to remake one of your
ten second films, something that you choose,
just to see how much you've learned just by
filming 10 seconds. I want to briefly share
that I've created several filmmaking
classes covering essential aspects of the craft. These include making a
short film, screenwriting, documentary filmmaking,
crafting movie trailers, and financing your film. Each class comes with comprehensive
downloadable guides to support your journey as
a visual storyteller. For even more free resources, visit my website where you'll
find additional tools, insights, and inspiration to help you bring your
stories to life. One of the interesting
thing about creativity and filmmaking is that we do not have to know what we're
doing ahead of time. And in this class, that's
exactly what we're gonna do. We're gonna reverse the order.
2. Class Project: Thank you for
joining this class. In this section, we're going to dive into the class project, which, of course, is to create your very own ten
second short film. But before we dive in,
here's the simple breakdown. Early in the class, you'll begin creating your ten
second short film. You can make more than
one if you'd like. Midway through, you'll choose 110 second film as
your main project. From there, we'll
explore screenwriting, cinematography, editing,
sound, and so on. At the end of the class, you
will remake your film to see how much you've learned making
only 10 seconds at a time. So this is how this class works. Early in the class,
you're going to be making your ten
second short film. We're gonna have some lessons. I'm going to talk about theme, directing, screenwriting,
three acts, and all that. Then I'm also going to
shoot an example film or several of them to
kind of inspire you. But at the end of the
class, then you're going to remake one of your
ten second films, something that you choose,
just to see how much you've learned just by
filming 10 seconds. In this class, it's
important to hit the ten second mark completely. We are practicing
the precision and discipline that comes with
that because in filmmaking, it's very easy to kind of let it slide 1 second over,
1 second less. But this is probably
the only requirement that I make for the
class that you hit the 10 seconds
mark to the frame. So in this class, we're
going to be doing, obviously a ten
second short film. We'll begin by talking
about your idea. That's kind of the first lesson to talk about your idea
and how you find it. A part of finding your idea
is trying not to find it. It's funny how that works. The most important thing is to kind of play with your camera. Like, go outside or stay inside, film something, anything that kind of draws your
interest, you know? Then after we've talked
about your idea, you don't have to find it yet. We're gonna explore and touch on a little bit of
things like theme, talk about screenplay a little
bit, but most importantly, it's all about placing the camera in your hand
and walking outside. And then kind of after the fact, after you film something, Oh, this could be a nice
ten second short film. Oh, this could be a nice
ten second short film. After you've done that, then we start to kind of dig into it. Then we can kind of start
talking about theme again and kind of start to sharpen
your idea little by little. What you need for this class is a camera and a computer
to edit your material. I would also add
in there that you maybe have a microphone
or something to write on, you know, all kind of everything you can
get your hands on. It depends on what kind
of film you want to make. If you are using your phone, make sure that you use the
back end of your phone, never the self emote, because that is
very poor quality. Once you've completed the class, it's super important to
leave a written review. Reviews help keep the
class alive and make it possible for me to keep
creating future classes. Once you've completed your
ten second short film, I encourage you to share
it in the class project. If you do that and
write a review, I can give you
feedback on your film, but mostly, I just love seeing films from all
around the world. Sharing your film will also inspire other filmmakers
to share their work. Before we dive into the first lesson
discussing your idea, the next lesson is a quick
but important note on why a relaxed mindset is key to making your film and
accessing your creative side.
3. Your Idea For This Class: In this lesson, we're going to explore your idea for
this class and discuss how important it is
not to overthink it given the ten second
filmmaker mindset. To prepare for this class, you don't really have to
sit down and just think, Oh, I need an idea
for the class. I should really stop
here and map it out. No, let's not do that,
but do the opposite. The thing is that your
hands and your body, they're pretty sharp, they're very often smarter than
your brain in a way. With the ten second
filmmaker mindset, our goal is to avoid overthinking
before taking action. Reflection and opinions
have their place, but here we deliberately push that process
to the background, so it doesn't stand in our way. The priority is action, imperfect action, but
action nonetheless. Start by taking a camera, go outside or stay inside, shoot your film, any
concept you have, look at the material in your computer and kind
of think about it, then eventually, you're gonna kind of grab your idea like that, like, just from the doing. And when you have
that, then start writing the screenplay
after you filmed. So we're switching the order. So when you're doing
films in the future, of course, you want to
write the screenplay. So everybody around you can kind of know
what you're doing. But in this particular
class with only 10 seconds, it's all about
reversing the order. You know. So instead of
thinking and doing, we are doing then thinking, and there's a lot of benefits that can come
from just practicing that. So I suggest that
you take a camera, be it a phone or
a regular camera and just take a walk around. Your compass is not really Oh, I got a great idea. Your compass is more like
just film something, anything and see how it feels, because the first
sign is usually, Oh, this is unremarkable. I shouldn't be filming
this. Just let yourself roam a little bit. Don't overthink it. This
comes in a couple of phases. Use your body, use your
hands, film something. So when we are working
on in filmmaking, it isn't only about
making films. It is more about, um um, it's not sure what I'm saying, but I'm saying it's
it's therapeutic to work on your ideas,
go out into nature. It's, um, at least for me, form of meditation, sometimes. Even though we're hearing
an airport close by. But I can also hear the birds. And as you film, it's
more about practicing. Remember, filmmaking
has no right or wrong, and essentially, it's
about discovery. You're discovering, as you go, allow yourself that freedom. Just play around and be open to ideas coming from
unexpected places. This is how great
concepts often emerge. In the next lesson, we'll be discussing the magic
wand of filmmaking. The most important and most challenging to grasp tool theme. See you in the next lesson.
4. Theme - Magic Tool: In this lesson, we're
going to discuss theme. It's one of those
powerful tools that's often underestimated
and underused, mainly because it
seems complicated, but that's exactly
why it's so valuable. Theme is the foundation
of your project, and studying it
will challenge you, refine your work, and
elevate your storytelling. The deeper you explore it, the stronger your
project will become. So theme is kind of the
magic wand of it all. It's almost undefinable. It is a complicated concept. Just when you hear
the word theme, who knows what it means? You could just as well
just say the air. Theme is something that I
never really thought about or worked on or wanted
to think about. I just thought it was
a fancy pancy word, useless, basically, but. The more films I do, the more
important theme becomes. For example, if I'm doing a film and I'm not sure
what the theme is, it doesn't really
matter because theme is supposed to be kind of
the puzzle of the film. So just as we're
doing the 10 seconds, we're not really sure why
we're doing the 10 seconds. Why am I filming this?
Why am I filming that, and so on and so forth. But usually, during
or after the fact, theme kind of creeps in, because as soon as I know
the theme of my film, I can kind of connect
it to my life. So as an example, let's say
that you're doing a film about injustice and some kind of specific kind of injustice, like human rights violation, something that really
strikes you to the core. That's gonna be a
fundamental thing for you because if you believe
something to the core, just like, you know, injustice, it's going to give you a drive. So when you find the correct
theme for your film, you find your theme
for the film, then you're never
going to get tired. You're gonna have
endless amount of energy because you're
doing something for cause. On top of that, when
you know the theme, theme might start to
suggest what kind of lights you want
for your film. Do you want the film to be dark? If you don't a film
about injustice, for example, maybe something
is hidden in the shadows. You're gonna have
shadows on one side of the frame
throughout the film. Yeah. You might decide that the characters in the film
are maybe small in size. Yeah? Because they're isolated. So that could be another
part of the theme, and that is this isolation. So, in an endless
amount of ways, you're gonna have
theme contributing to every single aspect of your
film, even the editing. Like, how do you
edit a film that's about some kind of injustice, some kind of isolation? Maybe that rhythm when
you edit it is gonna be slow and kind of eerie.
So theme, theme, theme. That's one of them. It's one
of the magic things. Yeah. In the next lesson,
we'll dive into the three structure of
filmmaking and how it applies specifically
to this class. Great.
5. Three Acts - 10 Seconds: In this lesson, we're
going to discuss how the three act film structure applies to your ten second film. In terms of this
particular class, the three act structure
technically does apply. But still, when you're
doing 10 seconds, and the reason why we're doing 10 seconds is that 10 seconds is enough to kind of chop
things down into three parts. So even if we're doing only 10 seconds,
we are, of course, practicing in microteps for the future to do
longer pieces of work. And that's always going
to be a three structure, beginning, middle, and end. Anything you do is
going to be a one, two, and three, yeah? Um, so as we do the 10 seconds, you're always gonna
feel that thing of beginning, middle, and end. And because this class and these 10 seconds
are, of course, just a little we're kind of cheating ourselves
into making something bigger, like a bigger bigger project. But we start with
the 10 seconds. There's always
that same thing of crawl and walk and all that. Even though we know that's usually the correct path
to take to start small, it's hard to do it
because the human mind is just it's not a linear thing. Yeah, so as you take
your camera outside, film something, I'm always looking at the birds,
film something. Um, it is really hard
because it's so undefined. It's, you know, it almost
sounds silly to do that. But again, take it from me,
20 plus years of experience. Trust the process a little bit. And even if you don't
like the process, it's gonna be harmless.
It's gonna be 10 seconds. Yeah, so just to sum it
up a three act structure, you don't really have to
think about it beforehand. You're gonna think
about it afterwards. There's gonna be like
something you film, like if I'm filming a bench, it's gonna be here's
a bench, close shot. Here's a bench, and here's
a bench from another angle. That's always going to be a start of a three hour structure. Because as soon as
we see the bench, regardless if we edit it or not, if it's just a one shot of
a bench for 10 seconds, we might start to think,
I've sat on the bench. I bet a lot of other
people sat on the bench. And I bet they
have some history. So instantly with only 10
seconds, the story begins. And usually it begins within us. The only thing we have
to do as filmmakers is film things clearly. And then the viewer is
gonna bring the rest in. So doing the 10 seconds is
always a little bit like, almost like a clean
language of filmmaking. You just do simple. And it turns out, like
everything in life, it's pretty, pretty complicated. In the next lesson, it's time to make
the first version or versions of your
ten second film. At the end of this class, you're going to select one
of your ten second films and remake it with all the tools you've picked up along the way.
6. Start Making Your Film: This lesson is
technically not a lesson. It's an official green
light for you to start making the first
version of your film, your first ten second
film for this class. So let's talk about
how many shots you can put into 10 seconds. You can put maybe one
shot, have, like, a one shot all the way
through these 10 seconds. Two shots, obviously,
three shots, for sure. Four shots and then five shots. You might be able to squeeze in five shots in your
ten second film. The most important thing
is that you, test it. Like, regardless if it's
one, two, three, four, five shots, um, you want to make sure
that it comes across. So the best way to
do that is to simply do the ten second film
and then test it. You know, show it to
someone and just see how it if the message comes across. So another important thing to keep in mind
when you're doing your short film is regardless of how many
shots you're doing, just keep in mind
that sound plays a huge role in getting
the message across. Like let's say if you're
using five shots, but the sound is choppy,
chi, check, chi. Then it's going
to be irritating. It's going to pull
anyone who's watching your film. Out of it, yeah. So sound is kind of the
hidden kind of hidden shot. Like, if the sound is smooth, then it's more likely that
you get the message across. It's also to use an analogy, sound is sometimes like
almost like an embrace. Like, you can do 10 seconds. But with the correct sound, you can kind of slow
the experience down. Like, let's say you
have five quick shots, boom, boom, boom, boom, but the sound is almost
like a bed of feathers, like an embrace, and the
time is going to slow down. So keep in mind. So as you
are directing your film, it's important to remember
that we are practicing. It takes a lot of courage to attend second short film
because it's so short, it is almost too easy through the years when I've been
teaching filmmaking, one of the biggest obstacles
I've seen in students and with myself included is that doing something that
is apparently so easy. Is probably one of
the hardest things, but it's also the most
rewarding things. Again, don't take my
word for it because making any kind of film
is as I always say, it's not a linear path. Um, I mean, I can do a film class and I can
say, D A, B, and C, but everybody's
thinking is different. So it isn't really, like, there isn't really
a one size that fits all. So just to be clear, I'm
filming now here in my car, and I'm not on a road where
there's, like, family houses. It's a road to the
site, so to speak. And this filming that
we're doing now is being done very carefully
and thoughtfully. So, the more I've been
working on this class, this philosophy of only
10 seconds at a time, the more I've come to
realize that there's only so much I need to
say or do or teach, so to speak, because it is very much like grab a
camera and film something. And then it's somewhat of a road of self discovery.
That's one thing. But however, I do think that kind of the framework of this class can be beneficial. Like, this is not
a live recording. But it is kind of nice to have
some kind of a structure, you know, like this
kind of class to have as a sort of
witness to your process. So first, you're going
to experiment with making your film kind
of in your own way without listening to too much of the rules or anything
that I might say. So I'm basically
saying, Ignore me. To a degree, maybe. But
as you do your film, do it kind of blindly,
do it in your own way. And then, um, by little, you can check out, you
know, the rule book, some of the guidelines, and then basically just take what
you think is right for you. So what I'm not saying that, Oh, you already know
what you're doing. I'm not saying that.
Absolutely not. But there is a part of you that definitely knows
what you're doing. So listen to that part. Like, so much of this kind
of class needs to come through your
hands, not just here. This is something
that everybody knows, but it's really hard
to put into practice. I know it for sure because even though I have a
lot of experience, I deal with this thing
every day in every project, it's hard to go and do. And it's really hard to
know the difference. Like when should I take action? When should I be home,
writing and thinking? Yeah, and when do I go
out and actually do it? Yeah. So in this small
exercise, which, of course, isn't
small in the end, but it looks small. It looks doable
to do 10 seconds. So So if you haven't already made several attempts
to do a ten second film, now is the time to go out
and do your ten second film, at least your first
version of it. It might be the second
version, whatever. And I just want to
stress that it's very important that you do
this first attempt, that you do a version of your ten second film without
thinking too much about technique or film philosophy because when you
reshoot your film, you're going to really
see how much you can learn in this short
period of time. In the next lesson, we'll
explore what it means to be a film director and the many responsibilities
that come with the role.
7. Film Directing: In this lesson,
we're going to talk about how to approach
directing your film. In this class, we aim to be strict about the
ten second limit. While it may be tempting
to exceed that, doing so risks losing the benefits that come
with this discipline. So in this class,
it's important to hit the ten second mark completely because we are practicing the discipline and the
precision that comes with that, because in filmmaking, our
ideas are big, massive. They are undisciplined. And
when we practice this kind of precision that comes with the
philosophy of this class, we are kind of countering that because we want
to be able to tame something so massive and
undefinable as a film idea because also when you are a toothpaste and you're
not in the toothpaste can, how are you going to
brush your teeth? As the director of the
ten second short film, you are in many
ways, everything. You're the producer,
the director, and possibly the
cinematographer. But in all cases,
you are the author. The great thing about working
with this short format is that it allows you
to practice and refine your approach frequently. When directing a longer film, the scale and complexity
can be overwhelming. Many directors begin
shooting without fully developing their
visual or directing style. With this format, you
can micro analyze and experiment with
different styles to find what resonates with you. So being a film director
is in a metaphor, much like being a
Swiss Army knife. You kind of have to be
good at everything. I might surprise you how much administration and
organization and organizing, listening to other
people, that's a high percentage of the job. Kind of learning to listen
to your environment, to the people working with
you, and so on and so forth. Um however, mostly and kind of, most importantly,
being a director is kind of like learning
to trust your gut feeling. And a part of that
is learning to see the value of artistic mistakes. Like when you're
taking a chance, with a scene or with
a film concept, is that you really
have to kind of tolerate when you scold yourself or when anyone
around you is scolding you, like, telling you, This is not a good idea, and so
on and so forth. Well, the thing is you
don't really know or never know if it's
a good idea or bad idea unless you test it. But it takes a lot of
energy to kind of learn to kind of embrace making mistakes. Um, I would just say, like, as you kind
of practice it, you will learn very
quickly that when you take these artistic
chances or make a silly idea, um, you kind of get
away with it endlessly. If you just do one
thing, if you're always polite and if you respect
your environment, you respect the
people around you, then everything is
going to go much smoother in terms of
taking artistic chances. Um another tip, maybe for you, something that I usually
think about is very often, tap into, like, being a child, like having the eyes of a child, just being vulnerable, not sarcastic and kind of being
in it, and being in the film. It's hard to explain it, but
you just in your own way, try to connect to it and kind
of be your film, smell it, sense it, react to it, feel how you feel just physically towards
the world of your film. It is an abstract art
to think like this. But that's, I would say, a big part of the job is to do this kind of this
kind of directing. In the next lesson,
we'll talk about screenwriting and
why for this class, it can be helpful to write your screenplay after you've
finished shooting your film.
8. Screenplay: In this lesson, we'll practice writing a
screenplay for your film. Before we begin, let's take a quick look at what
this lesson covers. First, I'll talk about writing your screenplay and
thinking about theme. Then I'll show you how I wrote the screenplay for my
own ten second film. And finally, I'll walk you
through a minicrash course, how to write in the
screenplay format so you can confidently
write your own. Before we start
this screenwriting lesson, let's be clear. Making your film actually
physically with your hands with a camera is the absolute
priority in this class. So if you feel like writing the screenplay might slow
you down at this stage, then skip this lesson and
come back to it later. As we move into the writing
part of this class, and of course, we're doing
this ten second film. We want to make
sure that we also practice writing the screenplay. However, because this class is all about bypassing
overthinking, we want to yeah, make
sure that we do that. For example, in my case, I film my film first, my ten second film,
kind of use my body, go into the camera and
kind of go got feeling. And then after the fact,
I write the screenplay. The whole point is to kind of
overstep the overthinking, because when we
sit down, we start to write our screenplay.y say, you can get easily
consumed by it all. So everything kind of
speeds the process is good. So jump into making your film. The main thing is that you write half a page about your ten second film and
practice the screenplay format. And at the end of this lesson, I'm going to give you
a crass course in how to write in that in that
challenging format. As an example, I'm going to
walk you through the scene I wrote for the film I created
specifically for this class. But before we dive
into the screenplay, let's watch my ten
second film first. Later in this class, I'll go into detail about how
I made this film, including the editing process, color correction,
and sound design. Go. K. Alright, now that
you've seen my film, let me read the
screenplay for you. And just so you know, it took me at least half a day to
write this short script. A 16 month old baby
girl dressed in a bib covered with smiling vegetables
sits in her high chair. Tiny fingers clutch an empty power Ad bottle,
shaking it absently. The kitchen is cluttered
with everyday life, bowls, a laptop flickering
on the table, a few drawings barely
visible on the wall. Outside the world
is a soft blur of snowfall, muted and endless. Baby turns her head.
He blue eyes widen. From her point of view, we see snowflakes dance
spinning in slow motion, kissed by the faint
glow of daylight. The baby's face brightens, her mouth slightly open, her fingers frozen mid movement. The bottle tilts in her grip. She reaches out
toward the window, tiny fingers stretching as if she could catch a
flake between them. A small hand absently brings
a snack to her mouth, but she never takes her gaze off the falling snow somewhere
in the background, a muted clink of dishes, a faint murmur of a voice from a screen, but
she doesn't notice. Her breath slows,
eyes wider still. For this small, fleeting moment, she is seeing winter
for the first time. Part of this is also practicing
thinking about the theme. What is the theme of your film? Remember, theme is the
great contributor. It's gonna help you with
coloring your film, how you film your film. Um, how you do the sound and just the
way you frame it, even. So the theme in my films about my daughter who is
sitting in the kitchen. She's looking outside a window. She sees snow falling down. And she smiles. I can kind of pick and choose. I can choose. Is that theme about well, I'm not gonna even
riff about it. I'm just gonna say my gut
feeling is it's about time. Time, snow, it's like
time. Go slowly. Stanking gonna creep up on us. She's young, and
in one instance, she's gonna be 20-years-old. Here is a quick guide about writing in the
screenplay format. Please notice that this step is not necessary for this class, but it is a great opportunity to practice writing in this
challenging format. So this is a crass course
in screenplay format, and we're going to do
it pretty quickly. We're going to start
with the scene header, when and where does
the scene take place? Then we're going to
go into characters, how we present them. What is uppercase? How
do we say their age? How is dialogue formatted
and structured? And we're also
going to talk about the fancy little
brackets that we can use all around
the screenplay in parenthesis and descriptions, off screen dialogue
and voiceover, and we're going to wrap it up with the use of transitions. So first things first, let's
start with the scene header. In the scene header, we tell the audience if the scene
is inside or outside, INT or EXT, and we say
the name of the location. Where does the scene take place? And then we tell the audience
what time of day it is. So this is several
practicalities, like, in terms of production,
it is good for the production to know when and where the scene takes place. When we introduce a character, we say their name, and usually, I mean,
it's up to you. It's a little bit
of style issue. It's nice to put their
name in all caps in the beginning and then their
age in brackets afterwards. As you probably know and we
see in any screenwriting, software is that
the characters are automatically centered in
the middle with a dialogue. It is also good to keep in mind that every line that you write, it can be very helpful to
think of it as a one shot. So right here, we can see how one shot is a one
line or paragraph. And this is the action
section of the screenplay, where we describe what is
happening in the scene. So some of the little things
around doing a screenplay are in these nifty brackets
spread around the screenplay. So let's talk about
some of them. So just after the character's
name, before they speak, we can put in what is called a parenthesis, which
is a little bit, like an afterthought
or explanation, so we can put in tone of
voice and stuff like that. We just have to
use it sparingly. So next up in this fancy
bracket section is the OS after a character's
name, which is off screen. So when something is off screen, it is happening in the scene. For example, somebody
is walking and somebody else, Hey, here, that is off screen because
it is in the scene, but they're not in the frame. Off screen can also be used as. For example, there's a scene that took place a long time ago. We can also be listening
to that scene. This is not to be confused
with voiceover or VO. That is something
we put in where the character is talking
to the audience. Like, I always remember,
blah, blah, blah, blah. So keep in mind not
to confuse these two. Of screen is one thing,
and voiceover is another. Let's go into transitions. It is very practical
to put in cut two. Like, you're in one scene.
You write the scene, and then you write cut two, and then you're in
the next scene. This is also a little
bit of a style thing. You can choose if
you use this or not. Because we're working
in this short format, I want you to write
your screenplay only after you've already shot the
first version of your film. Writing too soon can lead to overthinking and
stall your progress. In traditional filmmaking,
we write the script first. But here we're flipping the process to emphasize
learning through action. In the next lesson, we're going to discuss
cinematography and various visual styles, along with camera movements
to consider for your film.
9. Cinematography & Visual Style: In this lesson, we're
going to discuss a variation of visual styles that you can apply to your film. Before we start talking
about cinematography for your ten second film, let's look at an example
of one of my own. In this short film, I blend
a few different styles, combining tripod shots
with handheld moments. Later in this class, I'm
going to show you how I shot and edited this
short sci fi film. Also, later in this lesson, I will demonstrate some of the camera moves I
use when filming. But right now,
before we dive into discussing your general
options for camera moves, let's take a look at the
ten second Sci fi film I made specifically
for this class. If they find the signal, tell them that the
Earth was once quiet. Filmmaking is a relatively young art form and
a limited one. You only have a
certain number of methods and possibilities
when filming your project. A camera is not
like the human eye. It can only move in specific directions and perform a limited number of movements. When it comes to
camera movement, one of the most important
things is staying consistent. You might have stunning shots. But if the movement style keeps
changing without purpose, it can pull the audience
out of the story. If you start handheld,
stick with handheld. If you're using mostly tripod
shots, commit to that. It's not that every movement needs some deep
meaning behind it, but there should be intention. This is where your theme
starts to guide you. Visual style isn't just
something you plan, it's also something you feel. The more you tune
into that feeling, the more clearly your style
will start to take shape. Mm. Right, so right now,
I'm just in nature. And, uh, with my Lumix S nine. Right, so here I'm
using my iPhone. I'm using the front end of
the camera on the iPhone, which I do not recommend
if you're making a film. And simply using it now because I need to
see what I'm doing. So I'm doing a documentary. I'm just gonna be filming
some tree branches, basically, and all
these wonderful birds. So I'm also gonna be
testing some movements, testing some movements
and try not to trip over here or get stung
by the branches. It so first, I usually
take 10 seconds of still, and then I move. Deep breath? Right, so I'm going
to do this one again and now up in the air, where the sun kind of touches
the the tree branches. Yep. Focus. And So this is a quick reminder that
later in this class, I will go over how
exactly I made this ten second
science fiction film. So be on the lookout for that
lesson later in the class. As you explore
your visual style, the next lesson
will focus on light where I'll share practical
tips and tricks you can use in your film. Okay.
10. Film Light - Tips: In this lesson, we're going to cover some simple tricks to improve your lighting and elevate the quality
of your videos. Boom. Hello. Regarding light in general, like, I'm sitting here. I have one light here, and I have one back
light here behind me. Check it out.
WhoopsiHs. Here we go. Whoopsie. So that's it one. So if I take that out,
go into this light. Boom, look at you, boom, boom. And then I put the
back light here. Um, yeah, it's a very subtle. It's a subtle art,
and it's an art that I'm not a specialist in. I would just say that um, the more I work in filmmaking, the more and more I've
become curious about light. Like, I've been
doing filmmaking for about y plus 20 years. And I was never good at lights, and I still have
so much to learn. Um, yeah, so just consider
that when you're filming, especially if you're
filming on a phone, um, that the sunlight is kind of the most important
light you're ever going to get or
daylight, rather. Um, because that really turns, you know, a phone camera into a proper camera if
you have daylight. Um, also, also, if
you're using a phone, make sure that you
have the phone. The phone is usually on auto. Make sure to draw the light
down and then record. Then it's gonna
stick there because we don't want too much exposure. So what I'm saying in
this lesson is basically, be aware of any light sources. That's basically the
takeaway from this lesson. Like, if you're shooting
inside, where's the window? Maybe you can move the scene closer to the window so
we get the daylight. You know, the
daylight is basically a very expensive
Hollywood light. Part of thinking about the
light and light sources is, of course, thinking
about shadows. Um, so if you are
close by a window, and the scene looks pretty flat, then maybe you can use a curtain or something to
kind of make a shadow. So, for example, this
shot that I'm doing now, I'm here. I'm in the light. Um, somewhere here, I
have something dark. Doesn't matter what
it is. It just means there's a drawing, and
then I have the back light. So, um, yeah. Yeah, so maybe the
takeaway is be aware of the light sources
and how you can kind of draw them or kind of blank
them out to your taste. No matter what
camera you're using, light plays a crucial role in reducing graininess
in your footage. To put it simply, more light makes your image
clearer and sharper. There's a reason Hollywood and Los Angeles became
hubs for filmmaking. It's all about the
consistent sunlight. Natural sunlight is a game
changer for video quality. For instance, if you're
filming on your phone, shooting and sunlight can drastically enhance the
quality of your footage. But what if you're indoors
and the lighting isn't great? You'll need to find light
sources to brighten your scene. A simple solution
is to use a lamp. You can adjust it based on the mood and effect
you're trying to create. Here are two common approaches
to lighting a scene. One, full lighting,
flat lighting. This means your scene is evenly lit with no
strong shadows. It creates a neutral,
balanced look that works well for
certain types of videos. While some might call it flat. It's not a negative. It's just a clean, straightforward style. Two, split lighting.
Half and half. Here, you light only one
side of the subject, leaving the other
side in shadow. For example, if you're
filming a face, one half will be illuminated while the other remains dark. This technique adds depth
and mystery to your scene. It's reminiscent of
Rembrandt's paintings and even the way the moon appears
when partially lit. A striking blend of light and darkness that creates intrigue. Whether you're using
sunlight or a lamp, understanding how to use light effectively will transform
your videos and bring your storytelling to life. Mm.
11. Edit Of My 10 Sec Film: In this lesson, I'll show
you how I shaped the story of my ten second film
in the editing process. So as we move into the
editing part of this class, just be aware that this editing section that
I'm doing when I'm editing my ten second
film is in real time. Usually, I would
kind of chop it up and make it very short and neat. But a lot of students have
told me they would rather have it in real time so they can
kind of sit on my shoulder. Yeah, so just be aware of that. So have fun. Right,
so here we are. Here's my daughter. She's
holding this bottle. She loves getting
these empty bottles. And make music with them. So let me first find like, Well, like anytime I edit, it's not a direct thing. It's usually my hands
know what they're doing. So I'm just gonna allow
my hands to do the job. Here's a snow shot that's still to like this, and then I usually go one, two, three, four, four, I'm
happy with this one. So this one I'm happy with. So anything that I'm
going to fish out, I'm just going to put here, I'm just going to put a color on it. It's also a good snow shot.
Here's a different angle. Starting around here, one, two, three, four.
Happy with this. This shot is done. And here is nothing
new. So skip that. Check my daughter here. Kind of like skimming
over at first. So my intention here is to
kind of represent her eyeline. So I could use the
movement in here, maybe. Checking it. One, two, three, four, reaction
if I want it. Is a reaction here. Here's the eyeline.
Still, tack it out. Three, four. I got a three there. It's fine. One, two, three. Boom. Just about here. That's my daughter.
Different colour. What else do we have here? She's pointing maybe you
want that. Sick it out. One, two, three, four. Unfortunate camera
movement there. One, two, three, boom. Got it. Just about got it. So you need at least,
like, one, two, three, at least when I'm
editing of the moment. Let me see if I got it
here. Check it out. One, two, three, boom. Good. Like that. We have
something else here. See, missing. Smiling boom. One, two, three, four, boom. Got it here? Well, that was kind of a nice
eye movement there. Let's check the eye movement. Here is. It's all in the
eyes. Eye movement is here. Okay, so after eye moment, that will be my reference point. After the eye moment, I need something to sink
in. Let me see. One, two, three, boom,
even more moment. Is it doesn't hold it long, so I'm gonna stop
on this eye moment. Here. So this will be my
shot. I'm just gonna open. There we go. From the front end. One, two, three, four. Nice. So I can use
that to tell a story. People always follow movement. We have that shot. We
have that shot that shot. So that is not slow motion. Here we have some
tasting some snow, and here is just a door.
This is a snow shot. I won't be able to get into this scene because I'm only
doing 10 seconds, of course. I guess I'm aiming for
maybe three shots. I was just looking at something. This is probably irrelevant. Or maybe now, this is
probably irrelevant. I could have her here and then turn her head, but I
don't think I have. That she turns her head. So this is all real
time shots here. Real time shots, I can
use them, as well. So at the moment, I'm going to focus on using only
these here, you? Okay. Let me just put a
marker here for 10 seconds. Text. And then I will use this clip here to see where exactly
the 10 seconds are. Mm hmm. Just about
here, 10 seconds. So these here at 10 seconds. Disable these clips
just to test. Yeah, it's not a lot of
time, as we all know. But this is the practice.
Okay, 10 seconds. Yeah. Got it. Okay. So let's think about what can we
do here in 10 seconds? Mm hmm. Mm hmm. We could start with snow. We'll probably start on her. So I'm just gonna again let my hands kind
of rule the way. One, two, three. Boom. Just going uncuff feeling where the
edit feels right. This one was a possibility
where she's still looking. Okay, let me tell a story. This is how the
story starts. Hmm. Let's see, movie 10 seconds up here. Boom. Okay. Boom. Just want to trim
that a little bit. So this shot is 2 seconds, five frames at the moment. Usually, when you're editing
a trailer or something, you can go under 2 seconds. It's hard to do that in this context because we have
to grab the shot, okay? This might be too short, but I'm gonna let it be as
it is at the moment. Yeah. This could
be your eyeline. She's here, S is
looking to the window. So this is possibly too high. This is more from
her point of view. It's a lower angle.
Match is better. This is more like a square
angle. This would work. This can work, but
this one would be better because it represents
your eyeline. Let me check. Yeah, this works great. One, two, boom, one, two, boom, a little
bit longer, okay? So we would not go back here. Well, we could actually,
because she has a smile. So we can decide if you go
super simple like that. It's over here. Cutting
it there. Starting again. So this could be the 10 seconds. But I'm not gonna do that. I want to change
angle here, here. So this would represent like a point of view way
from the window. So there's a
relationship between her and this angle here. So the angle matches
looking up to the window, looking down from the window. So we have a decision
to make here. First, she can point to the
snow in wonder. That's good. She can also smile, and move her eyes. So
let's play with that. Maybe we can squeeze
in four shots there. Check it. Right, little eye movement a little too
early. Check it in context. One, two, boom. Mm hmm. So here we can see that the
snow shot is too short. And I would also say that
the first clip is too short. Hold on lengthen the snow clip and lengthen also the
beginning the opening shot. Check it. Very good. Okay. So right now, of course, the film
is in slow motion. I can't choose not to
have it in slow motion. Having it in slow motion is maybe within the theme of a falling snow.
It falls slowly. Um, so maybe one of the part of the theme here is the pace of the snow falling. So going deeper on theme here, you could think that the
snow represent time. Okay, this here is
normal speed here. Here, I've sped things up
closer to real time right here, so I'm gonna label it
with a different color. Take the ten second marker
here. Place it here. How does it look? Okay. So just before she
closes her eyes again? So here we have something,
one, two, three, four. Now, the snow is a
little bit too long. Just go to decrease
the snow a little bit. Mm hmm. It's like that. Take it out. Is it real time? Now, the first shot is
a little bit too short. And this speed change? Well, she's just
about to look at me. So lengthen it from
the other end. Maybe the snow is a
little bit too long. The best thing is to, of course, edit like this and then maybe wait on it for a day or two. Then you really see how
to edit it because you get pretty blind in the process. But that's how it goes, Wow, it's kind of nice. This This works. And the reason why this works is that as soon as
in my experience, as soon as I feel like I look forward to view
the clip again, then my sense tells me that
I'm on the right track. So right now, I'm like, I
get a feeling here, yeah? I don't know why specifically this works, but it just works. Okay. Now, here comes
another challenge. We have some time left
here off the 10 seconds. And a part of this class is to really try to hit
the ten second mark. So let's try to do that. The question is, do we use
an extra shot or let me see. Slow. I'm going to just
make this real time also. Coffee paste settings
here, market green. Like, so check it out. Okay. So I'm not really sure
now, which is fine. Boom. Okay. So I have to wonder
what else do I have here? Would I go back here? That
will definitely not work, but I'm gonna try it anyway. Well, actually, I got an idea
here. Let's check this out. So let's change the time
format of this one. S. Okay. Now, let's see if
we can get away with just 2 seconds here. See how this rolls. Okay. Okay. Right. So we
could have like this. She's here. C actually
reverse this. So again, nobody really knows
why it works or it doesn't. And we've entered kind of the non verbal
phase of the edit. One, two, three, so on now, not thinking, go and
got feeling Bombom. Boom, go to slice
this one off here. Slice this one down.
She's looking up here. Okay. Good. Let me see
how this flows here. Boom. And let me just take on the frontier like that because I really don't want
to match these 10 seconds, this one here. Ooh. Let's see what
happens. There we go. Boom. Okay. So what I can see here is that the first shot is
definitely too short. We're entering a scene and
then we get disturbed. So I need to shorten
something here, and this is kind of the
obvious candidate here. Let's start with this element, and let's go a little
bit like this. Link in this one. No, I need to link in from the
other end, like here. Mm hmm. Wait. Was this a smile? Well, actually, we could
be doing something here. Here. Nah. The cinematographer
there didn't do his job. I'm not mentioning
any names. Looking. This might be it, like that. Let's see what happened, though. Go Okay. This could be it. Nice. So this is one possibility. It's gonna fix
this a little bit. Check this one? No, she blinks her eyes. Notice that. So we never
dt when blinking eyes. That disturbs the audience. Let's not do that.
Let's go here and lengthen this one from
this end. Like so. Go. Okay, so we also have eye movement here, which is like happens too early, we see the snow, eye
movement immediately. We don't want that.
We want to be able to settle into the shot. See what happens? Now, eye movement. Two eye movements. Oop sedasia. Tricky. Mm. Let's just take this one here and close this eye movement and see
if we can get away with it. How long is the opening shot? 3 seconds. Take it
down a little bit. Pop like this, then we can let the eye moment here
live a little bit longer. Check it out. Boom. That's it. There's
a little movement here at the end of the camera. Let me see right here,
see if we can fix that. Go on this end, cut it here. Just check that.
Nice. That's nice. So this film feels like we
dropped into a moment, yeah? Brilliant. There you go. So this was the
editor of the film. And next up is working on the color and putting
some sound into this. In the next lesson,
I'll show you how I use color to bring out tone,
texture, and feeling.
12. Color Of My 10 Sec Film: This lesson, I'm going
to show you how I color my film as part of the
post production process. You'll get a behind the
scenes look at how I approach color to complete
my ten second film. So we've done that,
you've done the editing. Now we're going to move
into coloring this section. And I cannot
emphasize it enough. I'm not a professional
color greatest. I usually go when I do a film, I do the film and I put it into some post production house,
which is professional. But as I do my private
filmmaking in these classes, uh, I just want to share
with you, like, my process. Just take a clip, I put it into some kind of post production software
like final cut or Davinci. I usually use final cut to edit, but I also use Damnci to color. And my method is basically
this somehow method. So don't necessarily
imitate what I'm doing. Um, but you use
your got feeling. Um, it's also fun when
you're thinking about theme, like, in general, for your film, and this is
where theme kicks in, again, is that theme can help you
color your film, as well. Like, for example, the theme in my story with my
daughter, she's sitting, looking at the snow and the
snow is falling slowly. So in my mind, in the auor's mind,
the theme is time. Time kind of creeps up on you. With one film edit, she's gonna be 20-years-old. Hm. Okay, so here we are in DaVinci resolve
to point out that this is not a color
correction class because I am not a
specialized color grade. Yeah, specialist, so to speak. So please take everything that I do here with
a grain of salt, and I advise you
to seek out, like, regular color grading
classes to do this properly because
the method that I use right here is just a specific method
called the show method, where I just play with
the light shadows. Until I find something nice. Um, but I do like kind of
sharing my process with you. And I'm just going out. Put all kinds of notes.
That's what these are called. And I can add notes here. So all of these notes are going to do something in
terms of color. It's basically a
sequence, chain sequence. Check out what the
software does on its own, like do automatic
here, automatic color. That's how that looks. So
we can keep that in mind. Maybe I put that here,
automatic color, put it here, and then I'm going
to go here and kind of pull down the opacity
of this lot. This note. Note. Yeah. So I'm just gonna put like that.
Yeah, here we go. Boom. Then we have some scopes here, which I'm not a specialist in. Absolutely not. But I can see, like, kind of how
the light goes. I really want to say something
very fancy with you here, but I don't have the vocabulary, but I do have the eyes. So here I'm seeing that the highlights are
pretty burning. I'm gonna rise at this one
and the highlights here. I just take the highlights
down a little bit like that. Um, how was the
wipe on as is that? Where's the temperature
here? Warm? Cold. Snow is cold, and the theme of
the film is time. So I wonder what color is time. It could be a little
bit more like this. Obviously, she's putting
some red into it. So red, red, red. Just trial and error, but I really want to show you, like, the whole process of
how I mess around. Um, hopefully, that gives you
confidence to mess around. Don't always need to
know what we're doing. Yeah, sort of the green. Maybe we're going a little
bit too wit, but that's fine. What's that one? So, again, I have no idea what I'm doing, which is my default
method, basically. Little bit like that,
okay? See what happens? Okay. See what lots I have here. Callery, power, great. Let's check out here. Sony. I might have done some Sony work in the
past. How does that look? Oops. Oops. Oops, oops. Mm mm. Here is something. Some
old setting that I did. Okay. So, ideally, I want some
kind of a film look here. Who doesn't? Is
playing with Contrast. Take the highlights, this one. Then go a little
bit up like this. Okay, so I switched some courses and I try
it again. Let me see. Here I have something. It's automatic, yeah, automatic. But take that out. Click here. Here is something
called film Look that comes with DavincyRsolve, and DavincRsolve is free. So you can tell me that. Um, so I kind of like the
film look here. It kind of plays
with the colors. Um, let's see. It's going to play around
more with some colors. Oh, that's not good. Bit too green for my taste. Let me take a **** by the green. Mm hmm. No, I'm happy with this. So let's say if I'm happy
with this one here. Let me also, like,
add a uh let me see, a mask here, here, mask. Mm mm, Mask. Like, so let me just highlight
her face a little bit. Like that. Around
with this one here. Like so. And then I reverse it. Like so. So this is
always not good. Let me see. Mm hmm. One here. Make it softer. Like soap. Size is like that. Like so. And let me
see how it rolls. Good. And let's do
a little, like, se remove the mask here or just view the
visibility, take the mask. It's like that. So you
see what I'm doing here. Kind of blurring out the edges. So what I'm going
to do is gonna make a calorie grab still. That means that the still is going to be here as a memory so I can go into the next shot. Top click. Nope, not top click. Aha. Apply grade. It's
fairly blue here. So maybe we can
counter that with some temperature.
Thing like that. A little bit too
contrasty, also. Like so. How do
these two compare? It bit yellow, a
little bit blue. Okay? A little bit blue here. Take away the blue here. Do we want to go blue or yellow? That's a big question. So here I'm just gonna look
at the wall here. It's kind of yellowish.
And as you can see, I'm only fixing now
the mask thing. I'm gonna do that here
into the first note. Pardon me again. Right. A little bit
like that, yeah. And then highlights. Nice. I'm also looking at the scope here just
for the hallowet. Here we go. Okay. So I'm happy
with everything, but not the color itself. I do feel like the
walls are too. Uh, yeah, not real. We are real walls here. The walls are semi white. The refrigerator is white. Somewhere around
here. Here we go. Play it. It's kind of nice. Take away the mask. Fix the core here.
All right. That's it. Like so. Okay. Mask on. Mask might be a little bit too So decrease the red decrease the mask. So, okay? I just go check it here. I want to pick
individual colours here in the mask,
only in the mask. White. So as you can see, doing a color correction is as complicated as
you want it to be. This film would work fine without all
this messing around. But I'm just messing
around for your benefit. She can just kind of see
how I doodle in this. Let me see. Got the film
look here. Why pans there? Whoa. That's it. Okay,
happy with this one. Okay. How does it work here? That. That? Nope. Grab this still, clean this one. Double click, this one.
No, not double click. I apply grate. There we go. It's a little bit too blue. So warm it up like that. Now, let's see how the two
roll together. Hope so. Okay. No rolling together, but
let's go here to see that. Let them roll together. Oh Good. So this is the same
color reality. And let's see this one
shot same as this one. So let's grab still
for this one, this one, and apply this one. Boom. Nice. Let's check what
works for the snow. Might delete the mask here. Don't need the mask here
away with the mask. Cause, we see the snow, okay. So I wonder if there's any
way to increase the snow. Kind of like, Mm. Make the snow a little
bit more obvious. Here we go. There we go. Okay. That's kind of nice. Okay. Now we have
color on all of them. Let's check them out fully. All in one run these
10 seconds. And play. It's kind of nice? I do feel like the snow is a
little bit too short. Let's go one, two, three, boom. Put the snow a little bit here. Every. A little bit longer. One or two frames.
Check in here again. Yeah, that's better.
Okay. So now I'm happy with this
one. This color. Boom. Nice. Okay. In the next lesson, I'll show you how I work with sound to build
atmosphere and rhythm.
13. Sound Of My 10 Sec Film: In this lesson, I'm going
to show you how I do the post production sound using my ten second film
as an example. Before we start, let's discuss some general elements for
audio post production, specifically the relationship
between sound and silence. Sound and the absence of it can completely reshape how we
experience a moment on screen. In one film, I might
use no sound at all to push the visuals forward
with full intensity. Another, a single sound effect can sharpen focus
and guide attention. Disjointed dialogue creates
a sense of unreality, while overlapping voices
build tension and chaos. Sometimes a rhythmic
sound design gives the whole scene a pulse, and then when everything
suddenly goes quiet, that silence can hit
harder than any explosion. Sound is usually
highly underrated. As a tool, I would place the sound equal if not
higher than the visual, because usually you
can film usually you can make a film
with poor quality, but if the audio is
beautiful and solid, then you kind of
get away with it. Not vice versa. If
you shoot something beautiful and the audio is poor, you're
gonna lose people. Um, so because we're
doing a ten second film, we're kind of trying to
rush through making a film, kind of bypassing all the
overthink and everything. I'm going to do
the same with the post production on the
audio on this one. So, for example, when I filmed this short film
with my daughter, I used my usual method
when I filmed it. I don't use the audio
on the location, like in the actual situation, because usually it
is quite useless. You have all kinds of
noises and disturbances. I've come to just gotten
used to just film. So it also gives me
a little opportunity in post production that I can kind of create
my own sound world, which is exciting. Um, it's a little bit of and it's great to record
your own sound effects. And also, you can go online and find a lot of
free sound effects. But most importantly,
when you are filming, even though the sound
isn't great on location, notice what sounds there are, what sound layers are
in your environment. So in my particular film,
I have my daughter. She's watching the snow. So I can maybe find a sound for snow especially just the
wind outside the window. There might be a faucet leaking. There's a refrigerator,
and then there's some mumbling or some
sounds that she makes, and I'm going to record that especially and
place it into the scene. So right now, let me take
you into Final Cut Pro. I usually do my coloring
in DaVinci resolve, and then I move my
project into final cut, where I usually do my sound
post production from now. Yeah, let me import
the project into final cut and then kind of allow you to
sit on my shoulder. So let's do the sound production
or sound post production for my ten second short film. Okay, so here I have two sounds that I'm
going to use in this, less Let me check it out. So first, we have
our refrigerator. It's kind of a nice
background layer, you know. Now we have snow outside the window. Let's
place that here. And let's just see where
we stand with that one. But on like so and go. Good. Pet can go down. Snow can go up. Les Perfect. Just these two effects. And then I'm going to add
some effects from her, which I'm going to
record specially. Yeah. Now I have gathered some sound effects from my daughter from
a different edit. So I'm gonna hear it here. These are shots filmed on the
beautiful Sigma F P camera. Very, very light sensitive lens. Alright. Yeah, we're beautiful
sounds here. So I'm gonna take
the sounds here. Like, so boom, delete the image and just
fish out the sounds here. Fishing out the sounds. Same a little bit of work, better work area here. Gonna throw in the sounds and just kind of
see what happens. Go. K. Okay. Okay, now let's listen to everything together and
see how it makes sense. I'm guessing that the audio here is a little bit
too high on the snow. Um, before I do that, I'm just going to fade in the audio just so there
are no, like, sound jumps. So this is not done
super scientifically, just for the sake of the
practice. Let's take it out. You go. Hi. In the next lesson, we'll
discuss how you're going to reshoot and remake
your ten second film, combining everything you've
learned in this class.
14. Remake Your 10 Sec Film!: In this lesson, you'll
put everything you've learned into practice to
reshoot your ten second film. You'll use both the
storytelling and visual tools we've explored
throughout the class. Consider how you might approach reshooting your film with
these techniques in mind. So now it's time for you
to re shoot your film. So you've probably done
probably, I'm guessing, several short films, several ten second
tries in this class. And right now, it's all
about picking one of them and see if you
can elevate it, make it more cinematic
or make it more yours. It's hard to kind
of pinpoint it. Think about the theme
that you thought about, like, what really connects you
to the theme of the class? Sorry, theme of the class,
theme of your film. Like, let's say that you have let's say that you
have made a film, and, uh Maybe you did
it just on a go, kind of took your
phone or camera or whatever, and you filmed. But then later, you might have picked
it up and asked you, hypothetically guess what I'm saying is that whatever you did in terms of
making a ten second film, pick one concept,
and if I try to explain it with my
hands, Look at it again. Yeah, look at it again and
see if we can deepen it in terms of visual
style or theme. So, for example, if you filmed your film with, like, handheld, originally, what would
happen if you try to put it on a tripod or something
equivent to that? Like, make it a still thing. As you experiment, just
notice if your camera is still on a tripod,
throughout a film. In this case, a ten second film, there definitely is
some elevation to it. Like, something that is
handheld can be very dynamic, but here is where maybe
your theme kicks in. The more you think
about one idea, Um, and how you
relate to that idea. Just notice how that idea
would like to be expressed. Like, is it handheld? Is it like, moving,
or is it still?
15. Edit & Sound Of My Sci-Fi Film: In this lesson, I'm going
to show you how I did a ten second science
fiction film without really thinking
about anything. So I just took my camera, you know, drove in my car
somewhere into a forest, filmed something
from gut feeling, and then just brought the material home and
started to edit it. This is just to
show you that you don't have to fully
know what you're doing. If you just have the
camera and you have some, like, an inkling of an idea,
that's sometimes enough. And now that I'm home, I just started to edit it and
I kind of figured it out. So let's look at the film
before I show you how I did it. If they find the signal, tell them that the
Earth was once quiet. So now that you've
seen the film, now let's jump into the editing and the
sound, mainly the edit, and just see just how clumsily, really the editing process is, and also how I had to
kind of figure things out and really didn't understand the film until I did the sound. Okay, so here I have
all the material I've taken for this film, this little short film. So
let me see what happens. So let's just edit
this see what kind of material we have here. So what I did, I just went into the Icelandic wilderness and just filmed something with the challenge of trying to make a ten second science
fiction film. So right now, I'm just gonna
let my hands do the work. So that's kind of nice.
Let's keep this clap here. One, two, three, like that. Label it with a color. Let's just do it properly. What color do we
want? Let's make it pink. That's kind of nice. Pink. We're happy with pink. We like this shot, try to do
this as quickly as possible. Okay. Let's change
the color on this. Here I am in the color one.
This is the color page. Okay, let's not think
about that right now. Already getting distracted. One, two is kind of nice. Let's do a measurement. Let's just take this
audio here, random audio. And let's say that's nine. No, let's take another one. Let's go to get a
text clip here. Where's that affect
here is? Text. Let's delete this text. Or just say 10 seconds. Here is, let's measure
10 seconds, exactly. And that's nine,
1010 to the dot. So this is our duration. Put it here. Let's place
it somewhere above here, make it smaller. Paper rom. This is our measurement
here. Use this later. Okay, one, two. This
kind of nice shot. What else do we have? It's
kind of nice wind. Nice trees. So right here, I did some
light effects in the camera. So I had a small light and just waved it in
front of the camera. Let's see how that
works. That's kind of nice. Let's just use it. One, two, three, this. And we make it
pink. There you go. Try it out here. Boom.
That's kind of nice. Here's also the light effect, if I want it. That's
kind of nice. There's life in the wilderness. One, two, three, four. Like that. Boom. And let's
make a color out of it. Would be here you go. Ink. This one. L so, drag it. So we're practicing going
very, very straight at it. Here I am the lost filmmaker alone in the
wilderness. Can who? Says y'all full screen it. Here I am testing the light. Some movement shots here. Let me see this one.
What am I doing here? What am I doing here?
It's kind of nice. Could be point of view or
something from a character. Yep. Let's see if
we can use that. See if we can use this
one as a point of view. One, two, three, four. That's possible. Dragging it
up. Maybe better movement. Like I'm a Persian. Let me see. One. Check in here, one, two, three. Chicken here. Chicken here? One, two. No. Chicken here? One, two. No, it's kind of what
we already used. Mm. Not so sure about this
one, but I'm gonna, like, take it to the side. Take it to the
side, put it here. No right there. Collect,
kick it here, go back in. I'm here. Let's go here. Oh, here I'm playing
with my hand. Maybe you can use that.
Check how the hand, does it? In here? One. There's a
human here. See it. There we go checking the bogus. Let me see. How does it enter the frame?
It's take it out? Take going here, one, two, No, we don't want
to see the arm there. One, two here, one, two, one, two, three.
It was kind of nice. Not the last movement, but this one was kind of nice. It's colored pink, of course. And we do it just like
we're doing A legos. There it is. Zoom out. Put it here. Put it
into the line here. These are selected shots. T make it all pink
while we're at it. Okay, we were here, go in here. Where was the So was
the hand play here? Or you use this? Was
it better hand player? No. There's a building
in the background, so I'm not using that. Ah, I found this crazy scenario. Sofa in the middle
of nowhere, Mojan. There's a hand also. Mmm. This is kind of
in camera effects. It's just my camera in
my hand, obviously. Let me see. This
has been walking, not using that. I'm
using that, okay. This shot alone could work, but let's see, see if the
hand is overacting here. Mm hmm. Checking it out. Hand is trying to grab the sofa. What's going on here? Well,
there's something about it. See how it creeps in. Um,
this framing might be better. This kind of works,
I think, alone. Let's take two possibilities. One, two, one. And then also one
of the hand here. One. It's kind of cheesy, but, hey, we're making
hamburgers. I see. That here. Shaking the hand. Again
just go feeling one, two, three, like this. So we're taking these
two shots. Like that. Copying them, and
then we kind of got our shots here. Let me see? Yeah, that's doing it very
much eco style like that. What shots do we have? I think we have everything
we need. Okay. So here we have a collection of shots and now
we're gonna trim them down. M let's weigh with this one. Let's just two. This one. Oop. There we go. One, two light. We start on white hot. One, two, three boom.
Light is traveling. Again, there's no real, like, rationality. Worse here. Okay, nice light here. Just 12, three area. One, two, three, light traveling through it.
This is a point of view. Could be a person. Not sure. One, two. Let the light kind of fall
into the between shots. Okay. One, two. That's better. Three. It's like a person
in the woods, then? Okay, then let's do. Again, there's no real
rationality that works here. Fingers and then a sofa. That's pretty funny. Just keep the sofa clean.
Almost a 10 seconds. Let's see what
happens. Make this short because it's light. And here is like a person
hiding from something. Okay. Maybe the person
that was hiding is moving, so that doesn't work.
Absolutely doesn't work. So let's do this differently. Let's take this one
away and let's see what happens with this
one 10 seconds here. How does this work? I see the
frame a little bit bigger. Three to one, and
let's check it out. Action. No. Okay. Again, I don't know why, but this kind of kind of works, and then we're gonna add some
voice over to it and some audio to see maybe that
will make sense of it. We don't always have to
know what we're doing. That's usually a great
starting point, okay? See, this one comes here. Probably one more.
Boom. Boom, boom. Yeah, I think the audio
will let this work. That's kind of
it's a funny film. Not sure what it's about, but maybe we'll figure
out in the sound. Alright, so now I've selected the clips and I've edited
the film together. Now I'm going to move
into a final code pro, where I usually do
all my sound work. So just a note, when
I edited the film, I didn't have any volume at all, but I imagine the sounds, and when I imagine the sounds, that's basically what I use
when I do the sound design. So it's important for me, at least when I edit to
have to have no sound on. And then when I move
into the sound, then I've already imagined
kind of the sound world, even the script, as
I did in this case. I have, like, a placeholder here for our short
films for ten secs. And now I've added
some sound to it. Only two sounds, one voiceover that I wrote and kind
of did on a whim, and then one sound
like from a drone. So let me just place
it here within our little um
placeholder template. And maybe this is a little bit too wide. Let me check it out. So on first with no
sound, I'm check it out. How does it look with no sound? As you said, boom, and, like, so Boom. And let's say this should
be exactly 10 seconds. Like this. 10 seconds. The teacher, of
course, cannot cheat. And let me see. Let's put some information here
as well. Here's that. Let me see. This is camera
Sigma P. Yes, genre. That is Sci five. Mm, I wonder what the theme
could be in this one. Have not really
thought about it. Um, isolation. Keep it very broad
at the moment, because I've not really dived into the context of this film. This film was all about just hurrying
through the process. Let me see. Here we go. Um. That's good. So this is exactly 10 seconds, let's roll it and see
what um what we can do with minimal thinking and just
going for it. Here we go. Check it out. So I asked we're about to roll
this film with the audio. Notice that I only
used two sound layers. I only used, like, a general
drone sound like, boom. And then I wrote a mini
script and had it read in. And the words that I chose just kind of came
after the fact. After I'd filmed even after
I had edited the film. So let's look at the final
version. Here we go. If they find the signal, tell them that the
Earth was once quiet.
16. Thank You!: I want to take a moment to thank you for taking this class. I'm truly grateful that you've chosen to spend your
valuable time here. My goal has always been to honor that time, to be precise, approachable, and to create an inviting and
calm environment. Thank you for taking this class. I am honestly always, humbled and even surprised of how many people take
my classes, and, um, M I'm thankful, but I'm also just happy that that my
experience is being of use? It's good to be useful. Um, when students are
contacting me from all over the world, I'm like, Wow. It is. Yeah, it really
to sound corny, touches my heart. Um Yeah. Um, I'm trying to say
something very smart now. Where's my smartness?
I seem to have lost it. Maybe
it's in my pocket. It's not in my pocket.
Yeah. Yeah, it's good because what I'm
what I try to teach, is I try to teach,
like, clean filmmaking, which is I try to make the lessons as
neutral as possible, because in the end, what
I'm teaching is just, uh um, like, providing
a pen and paper. B films are like dreams.
They're really tangible. It's hard to kind of track
them down and get them and, you know, manifest them. Um, but I love thinking
of my lessons and my classes as neutral
tools as possible, so you can kind of put create your pen and paper to
keep that analogy. Yeah. So thank you
for taking the class. One important thing, um, when you have
finished this class, remember to write
a written review. Um, because that really is kind of what keeps this
kind of class online. It makes it sustainable
because not only does it kind of
help other students to find the right classes
for themselves when they have people writing
reviews about them, but it also gives me great
feedback on how I can, like, improve my lessons and get my message across even
better with each class. So please write a review. Once you've completed your
ten second short film, I encourage you to share
it in the class project. If you do that and
write a review, I can give you
feedback on your film, but mostly, I just love seeing films from all
around the world. Sharing your film will also inspire other filmmakers
to share their work. I'm always curious to see what kind of films people
make in my classes. And this class really excites me because with the
ten second limit, it's going to be
so easy for you to do your film and
kind of get started. And not only that,
you're also going to allow other people to see
into glimpses of your world. Because remember, filmmaking is not really about filmmaking. It's about communication. So, the more films you make, the more we share
from our world, the better we
understand each other. And the better we
understand each other, the less possibility
of a conflict. So share your world, share
your film, and, um yeah. I want to briefly share
that I've created several filmmaking
classes covering essential aspects of the craft. These include making a
short film, screenwriting, documentary filmmaking,
crafting movie trailers, and financing your film. Each class comes with comprehensive
downloadable guides to support your journey as
a visual storyteller. For even more free
resources visit my website where you'll find
additional tools, insights, and inspiration
to help you bring your stories to life. Okay.
 Olaf De Fleur, Filmmaker & Creative Coach