Transcripts
1. Welcome: Animating texts is something every motion designer will need to know how to do at some point. But even if you're not
a motion designer, if you make videos of any kind, being able to animate texts is a super handy skill.
And, you don't need any prior experience with Adobe After Effects to create
custom text animation. This class is all you need. Welcome to Text Animators: Custom Text Animation
in Adobe After Effects. In this class, you'll
learn all about After Effects built-in system specifically designed
to animate text. I'm Megan Friesth and
I'm an explanimator. I write, illustrate, and animate educational
animations, mostly on health and
environment-related topics. While there are a lot of
different ways to animate texts, some of which I've
covered in other classes. The benefit of using text
animators is that it's easy to change what the text says even after you've
created the animation. Plus, you can save the
animation as a preset, so you can easily reuse it on any text layer, in any
After Effects project; no need to import anything. You can even share text
animation presets with others. Text animators work a little bit differently than other types of animation in After Effects. This means that if
you already have experience with After
Effects animation, but haven't touched
text animators, you'll get a lot
out of this class. But it also means that
you don't need to know a ton about After Effects
to be successful. In fact, if you've never
used After Effects before, you can watch my free
orientation video and then you'll be ready
to go for this class. In the first part of this class, I'll show you how text
animators work and go through some essential things
that you'll need to know. You'll also get these
free guides to help you remember what the
different options do. There are a ton of
different properties and methods for animating
texts with text animators, I'll show you how to
create a handful of different examples
that demonstrate a wide range of possibilities. Using what you learn,
you'll be able to create your own custom text animations. So if you're ready to
master text animators, then let's get started.
2. Text Basics: Let's go over some of the
basics of working with texts and after effects just to make sure we're
on the same page. To create text, you just want
to go up to the text tool up here and then click
anywhere in your composition. Then you can start typing. Then to get out
of the text tool, just go up to this arrow tool right here, the selection tool. Over in the Character panel, you can adjust the
settings of your texts. You could change the font or the weight and you
can adjust the size. If you want to
reposition your text, you can just click and
drag it to move it. Or you can go over here and toggle down the layer
and then toggle down next to transform
and then you can adjust any of the
transform properties. You can also adjust the
colors by clicking here. You can flip the stroke
and fill or easily choose black or white by just selecting these
buttons right here. Then you can also do
all the normal texts adjustment things down below. To edit your text just
double-click on it to select it, and then click again to
get the cursor to edit. Use the selection tool to
get out of that editing. This text is just
going be in one line. If you were to add more to it, you'd have to hit
"Enter" to add more. I'm just going to
delete this to show you how to make paragraph text. First go up to the text tool. Now instead of just
clicking to start typing, you want to click and drag
to create a text area. Now, you can make
paragraph texts. It'll just fill the
area that you've created and then you can use the paragraph panel to align that text in any
way that you'd like. If you needed to convert paragraph texts back to
line texts or vice versa. What you want to do is go to the Text tool and then
right-click on your text, and then choose
Convert to point text. Even though this doesn't look
like anything has changed, notice how there's no textbox, a solid red line around
this that we could adjust. If you wanted to make
this all on one line, you just have to go in
and delete the return. If you want to convert it
back to paragraph text, just go back up
to the text tool. Right-click, convert
to paragraph text. Now when you click
into the text, you can see that textbox
that you can resize. If you told on a text layer, the first thing is
going to be text, which is obviously
things that are specific to text layers. Then you also just have the
normal transform properties. The first thing underneath
texts is source text. This is actually what the text says and you can
key-frame this value. Let's say we want this
to say text layer here and then once it
gets to one second, we want to change
what this says. With a key-frame already set. We can just go in
and change this. Now, once we play this back, once it gets through
this second key-frame, it'll just automatically
change what that text says. These are whole key-frames, so there's not going to be any
animation in-between them, which is a sudden jump
between what it says. Next is path options
and this is how you can have text on
a path or a shape. To create a shape that your
text is going to align to, there's a couple of
ways you can do it. First, you need to
make sure that you have your text layer selected. Then you can either
use the shape tool, which if you click and hold, there's additional shapes here. Or you could use the pen tool if you just wanted
to create a line. I'm going to use
the pen tool and just click and drag to
create a wavy line. You can always go
back in and edit these handles to adjust your line after
you've created it. Now if I toggle down
the path Options, I can go to this drop-down
and select mask one. Now the text is
going to align to that path and setting that up has given us a
bunch more options. We could choose to
reverse the path. We could choose to make this
perpendicular to the path so notice how the
letters are all upright. Then when they're like this, they more aligned to the path. You can also force alignment, which will just stretch
them out to fill the whole path and
you can move the text along the path by adjusting the first margin or
the last margin. Once we get into text animators
just know that you can use text animators and have your texts beyond
a path like this. That can be a
really creative way to get something totally unique. To animate a text layer, you could obviously animate the transform properties here. For example, to create a
very simple text animation, you could just
animate the position and maybe also the opacity. By just doing some simple
Key-framing like this. Maybe we'll add an easy
ease, and there we go. But what if I wanted to move
this text layer later on? If I'd move it, then it's
going to set another position key-frame because I've already
key-framed the position, so that's going to make things a little bit more tricky to work with and I also can animate
each individual letter. In order to do
that, I would have to duplicate this text layer. Let's hide the first one. Go in and delete all
the letters except for the t. Now the spacing
is going to be off. Then for the next one, I would have to go in, delete all the letters
except for the e. Then now I have to
adjust the position and you can see how this is getting really messy and really tedious. But there's definitely
a better way to do that and that is
what texts animators, which is what the rest of
this class we'll focus on. I just undid everything
I did to the text layer. This has no animation, it's just a simple texts layer. Before we actually get into creating our own
texts animators, I wanted to just show
you that there's some default ones built
into After Effects. If you go to your Effects
and Presets panel, which if you don't
see this go under Window and then you
can find it here. Once you locate the
effects and presets panel, then toggle down Animation
Presets, then presets. Then you can go into
the text folder and here's a bunch of
different presets for texts. The ones you're most
likely to want to use are probably in the animating
in or animate out folders. To apply a preset to a text layer there's a
couple of ways to do it. Let's just locate a good one. Let's use typewriter. You can either just drag it onto the layer and wherever
your play head is, that's where the
animation will start. If you hit " U" on the keyboard, you can see that it's pasted key-frames starting
at my play head. Then if you play it back,
you can see what it does. Then you can go in and
adjust the key-frames like this to speed it up or however
you want to adjust it. If you decide that you want
to remove this preset, this text animator that
you've applied to your layer, just make sure that
the layer is selected. Then go up to your animation and choose remove all
text animators. You can preview
these text animators by applying them to your texts. Another way to apply a
text animator is just to have the layer selected and
double-click on the preset. Then again, remember
it's going to paste those key-frames wherever
your play head is. This one is a little bit crazy. If you go up to the hamburger menu next
to effects and presets, you can go to browse presets, and this will open
up Adobe Bridge. From here, you can go into the text folder and then
you can preview any of these animations
without having to actually apply them to any
texts and After Effects, you can just watch
them all here. Now, you'll notice
that a lot of these are outdated looking and ugly, maybe a little too crazy. But there are some
good ones like the typewriter one is
simple and works well, but others you probably
don't want to use unless you're trying to make like
a satire of the '90s. Now that you know the basics of working with text layers, in the rest of the
class, we'll dive into animating texts with
text animators.
3. How Text Animators Work: Let's look at how we can animate this text layer with
text animators. If you go over to this
"Animate" button, these are a bunch of different properties so you can animate. For the first example, let's just do scale. This is going to add Animator 1 and this is a text animator. If I adjust this scale value, you can see that each
letter is scaling. Instead of scaling the entire
text layer as one thing, it's scaling each
individual letter. If you wanted to change
how the letters scale up, you can go underneath More Options and under
Grouping Alignment, you can move these little x's. See these little x's here represent where it's
going to be scaling from. This is a little anchor point. Now if I adjust the scale value, you can see that
this is going to scale in the center
of each letter. You can also change the
anchor point grouping. Right now, each
character is scaling, but you could change it so that each word scales so
that would look like this or you could also change it to line or to
all the text on the layer. I'm going to set it back to character and then let's look at how you would actually animate this with the text animator. We can just close up the
More Options for now. Let's say that I want this
to scale from 25% to 100%. I could just key-frame this, like this, but this is going to scale each
letter at the same time. Everything is scaling at once. If you wanted to have more
of a waterfall effect where the T starts first and then the E and then the X and so on, then we need to use
the range selector. I'm just going to delete these key-frames on
the scale property to show you the range selector. How the range selector
works is that it applies the value set for whatever
property you are working with. In this case, scale to a
selected part of your text. right now it's
applying 25% scale to my entire text layer. You can tell because the
start value is at 0%, which is indicated by this
red line at the start of the texts and the n
value is at 100%, which is indicated by this red line at the
end of the text. If you don't see red
star and n lines, make sure that range
selector is selected here. If I adjust the start value, you can see that it's moving
the selector and the text that's not within the selector
goes back to 100% scale, which is what you
can think of as the default look for
this text, 100% scale. You can tell what part
of the text lies within the text lecture by the
start and end red lines. The little triangles point to what's inside of this selection. You can also adjust the
star or n values in the composition
viewer by dragging the line by the
little triangle part. Make sure you see this
icon for your cursor. I'm going to set this
back to 100% and let's look at how
I would actually animate this text
animator to make these letters scale
from 25% to 100%. What I would do is
go to the start of the timeline and I'm going
to animate the offset value. I'm going to hit the stopwatch for the offset to be at 0%, then go to like,
let's just do one second and set the
offset to be 100%. Now you can see that this is
going to animate each letter scaling up from 25% to 100%. What animating the offset
does is it animates the selector from all the way on the text to all the
way off the text. When a letter is
within the selector, it's going to have a
25% scale applied to it and when a letter is
outside this selector, it will have the default
100% scale applied to it. As the selector
moves from covering all of the texts to
covering none of the text, each letter animates
from 25% to 100%. This is how I and probably
most motion designers like to animate text animators. You can achieve a
similar result by animating the start
value from 0-100%. But you'll see in the
next video why it's often better to
animate the offset. Now that we have this
text animator set up, it's actually very
easy to change what the text says or change the style of the
text and still have the animation work in
the same exact way. If I just double-click
on this text layer, I could go in and change
this to something else and then the text animation is still going to work
the same exact way. You could also go over to the
Character Panel and change the font and the animation is still going to work
in the same exact way. I'm just going to undo to
get back to how we had it. You can change things like the font size and the
text animator still works or you could even go and animate or adjust the
transform properties. If I wanted to move this
text, I can do that. If I wanted to scale this text, I could do that and it doesn't affect the scaling that I
have for the text animator. All of this is really handy
so that you can create text animation that's easily
reusable and adjustable. If you change what
your text says to be a lot shorter
or a lot longer, then it's going to change how the speed of your
text animator looks. But you can adjust the
timing by dragging your key-frames to make the
animation faster or slower. Let's look at a few other
options that you have. Under Animator 1, underneath Range Selector, there's going to be
an advanced toggle. If you toggle that down, you can choose based on characters excluding
spaces, words, or lines. Let's just change this to words. Now you can see that
it's going to scale in text and then animators, so there're two
different words here. If I had multiple lines, I could change that based
on two lines and then it's just going to animate the first line and then
the second line. Those are some easy options
that you can adjust. Right now this text animation
looks very mechanical, one letter animates
in at a time. In the next video, we'll look at how to make the animations on the letters overlap so
that it looks more smooth.
4. Selector Shapes: When using the range
selector to animate texts, you have the option
to change the shape of that selector to
get different effects. This can help smooth
out a text animation. To get to those options, you want to have
the animator open, the range selector open, and then go under advanced. Then right here you
have the shape. This is going to be the
shape of the selector. By default, it's
going to be square. Let's look at the other options. Let's just choose ramp up. Changing this to
ramp up affects how the text looks and
the text animation. It's not animating each letter from 25 percent to 100 percent, it's starting halfway through. What we need to do to fix this
is just set the opposite. Instead of starting
from zero percent, we need to actually start it
from negative 100 percent. Now this is going to go from negative 100 percent
to 100 percent. See how it changes
the text animation. Now each letter
is going to start animating a little bit
after the letter before it. Instead of just one letter at a time like we had it before, this is making more of
a waterfall effect. Let's compare the
animation that we had before where the
selector was set to square and the animation that we have now where the
selector is set to ramp up. In the last video, I mentioned
that it's beneficial to animate the offset value
rather than the start value, even though it seems
like you could achieve the same look. Let me show you why that is. If I delete these keyframes on the offset and just set
it back to zero percent, and then just try to animate the same thing with
the start value, you can't actually move the start value to
negative 100 percent. You'd have to just go from zero to 100 percent until you're stuck with an
animation that looks like it's starting
already halfway through. You can only animate like that. I'm going to undo
all that to get back to how I had it animated before. It's better to animate
the offset value because when you have a
shape that's not square, you can push the
selector all the way to the left by setting
the offset value to negative 100 percent and
then you can push it all the way to the right by
animating it to 100 percent. To help you see what the
different selector shapes that you can choose
from here do, I created this visual for you. For each of the
different selector shapes you can choose from, I created an actual shape, that is the shape
of that selector. Then I just moved that
through the texts to help you visualize what the selector actually is doing. These are all animated from negative 100 percent offset to 100 percent offset
and then back again. This visual also
explains why when we were animating with just
the default square shape, that we could start
with animating at zero percent because at zero percent with
the square selector, your entire text is going to be influenced by the selector. Whereas with ramp
up at zero percent, the selector is covering
your text also but that makes it so that it looks like the animation is already
halfway through. When using ramp up, you want to animate from negative 100 percent
which pushes the selector all the way to the left but still affects all of the text. Then as it animates
to 100 percent, it's going to animate all
the way off of your text. When animating texts and I
find that a lot of times, I use ramp up
because it animates things nicely with
that waterfall effect. I really use triangle
round or smooth because all this is doing is moving
a shape through the text. The starting and ending
looks are the same.
5. Properties: You can have a
text animator that animates multiple
properties at once. This is just our first example
where it just scaled up. Let me show you how you can add another property's
animator at the same time. If we toggle this down, you can go under animator one. This just has the
scale property. If you click on
this "Add" button, you can add something like rotation or any of
these other properties. Let's just look at adding
a rotation to this. It's added this
rotation property. Now if I set a value here, let's just do -20, at the same time as
the scale is animating in because of the
animation on the offset, this rotation is going
to also animate from -20 back to the default
position of zero. You can see what that
looks here here. You can add as many
properties as you want to the same text animator. We can also add an opacity. Just set this to zero, and then this will fade in as it's rotating and scaling up. I'm not going to
go through all of the different properties
that you can animate, but I encourage you
to explore them so you can create something
really creative and unique.
6. Easing: Whenever you're
animating something, it's a good idea to go in and adjust the temporal
interpolation of your animation to
make it look a little bit more realistic
or interesting. Here's a reminder of what
temporal interpolation is. So I just have this shape
moving across the screen, and right now it's moving at a constant speed
the whole time. So this is just a
linear movement, and you can tell
because these keyframes are diamond shapes. If I go and select the
keyframes, I can right-click, go to Keyframe Assistant, and then Easy Ease. It's going to change those
to hourglass shapes. Now if I play this back, you can tell that it moves slow, quick in the middle,
and then slow again. So it's easing out of
the first keyframe, and then easing into
the second keyframe. Now the motion is not so
linear and mechanical. So in other words,
what I've done is adjusted the temporal
interpolation. A lot of times you might hear motion designers talk
about this as easing. As you've already seen texts
animators work a little bit differently than other types of animation in after effects. Let's look at how we can add
easing to text animators. To demonstrate this,
I'm going to create a new text animator
on a new text layer. I'm just going to toggle down, go to the Animate button, and this time let's
animate the position. Let's create a new text animator with the position property. So I'm just going to
drag the y position up to, let's say -200. Then I just want to have this
move down and into place. To do that, I'm going to toggle
down the range selector, and let's go into Advanced and change the selector
shape right away. I'm going to change
this to ramp up, and then let's animate the
offset from -100 to 100. I'm going to set my
work area to just like two seconds by moving
my play head here, and then hitting the "N"
key on the keyboard. This will just
make it so that it just previews these two seconds. Here's what we have so far. I'm going to also animate the opacity here
because I think it'll make it easier to see when
we go and adjust the easing. To add a property to animate
under the same animator, you just want to go
to that animator and then click on
this "Add" button. Then if you go to property, you can choose to add any of these properties to
the existing animator. I'm going to choose Opacity, and that's going to add it
right below the position. I'm going to set
the opacity to 0%, so now as the offset
value animates, it's going to animate
the position from -200 and the opacity from 0%. It's now going to
look like this. To adjust the easing
on a text animator, you want to adjust the ease high and ease low values here. I'm just going to set the
ease high to be 100%, and let's play this back. With the ramp-up and ease high, the text is going to start
off animating really slow, and then animate faster as it gets closer to
its final position. If I were to switch this, so ease high is at zero
and ease low as 100%, it's going to do the opposite. Now it's going to start
animating fast and then slow down as it reaches
the second keyframe. You could also change this to something like 50% and 50%, so it doesn't have to be
just all ease higher, just all ease low. That will look
something like this. This is smoother on both
ends of the animation. When you're adjusting
these easing values, the shape of your selector makes a difference in how the
easing will actually look. I've made two
different visuals to help you see what
those look like. So in this visual, I'm just comparing
ease high and ease low for the ramp up and ramp
down and select our shapes. You can see the ease
high and ramp up is very similar to ramp
down and ease low, and then ramp down
and ease high is similar to ramp up and ease low. They flip-flop in how they work. The second visual shows
how the selector shape is actually changing when you
change the easing values. So here I have the
ease high set to 100%. This shape was the original, and now with ease
high on ramp up, it's going to act
more like this shape, and that goes for all of these. When you're animating
with text animators and adjusting the selector
shape and the easing, you can always just play around with it and see what looks best. But if these visuals help you, you can return to these as a reference to figure
out what you need. Also, if you go back into
the selector shapes visual, each of these selectors
shapes our composition, so if you double-click
on any of these, you can see the ease
high and ease low, and how those look with
that selector shape. For a square, it
doesn't actually make sense for the shape of
this lecture to change, but if you look carefully at the selector as it moves across, you can see that when
ease high is set to 100%, is going to quickly change characters as the selector
is going over them. As it's like a partially
selected character, it's going to quickly
change values. Whereas with ease low, it's going to take longer to change values when it's
partially selected.
7. Multiple Animators: So far we've looked
at examples with only one text animator. A text animator can have multiple properties
that it animates, but with just one text animator, the properties are
animated at the same time. Now let's look at an example with multiple text animators. This allows you to
animate properties at different times to create
more complex animations. Before I animate this, I'm just going to set up
a guide layer so I can tell where the baseline
of my text is. If you don't already
see the rulers, you can just Hit Command or
Control R to bring them up, and then if you drag
from the ruler, you can bring a guide down
into your composition. I'm just going to
bring that guide down to sit right at the
bottom of my texts, so as I'm animating, I know where the final
position of this should be. Now I'm going to toggle
down the layer and let's go to the Animate button
to create a text animator. I'm going to animate
the position of this. Like the tech says, I'm going to make
it look bouncy, like it's going to
come in, dip down, go back up, and then finally
settle into position. It's not like a realistic
physics-based bounce, like a bouncing ball, but just like a more
flowing animation to animate each character in. Now with this
Animator 1 position, I'm just going to set the
position value to negative 200. That'll be for the
position to be up here. I'm going to animate this
in using the offset value. Under Range Selector,
I'm going to set the offset from negative 100, and then let's go
like one second, and then set this to 100. Then under the advanced toggle, let's also adjust the shape of this lecture to be ramp-up. Now this is going to have
the B start first and then do a waterfall effect
all the way through to the Y. This is like the examples
that you've seen already. I'm going to adjust the
easing values on these, so let's have the
ease low be 100%. That way it'll just slow down as it reaches
its final position, so nice and smooth. Now I'm going to add
another text animator so that instead of it just landing right on the baseline, in its final resting
position right away, it's going to dip down and then that'll be the
second text animator. The third text animator
will have it bounced back up and then it will land
in place after that. I'm just going to close up
this first text animator just to have some
more room here, and then making sure that I have text selected right here, I'm going to go back
to this animate button and choose position. If you didn't have
that selected, it might not create a
new animator for you. Now you should have
Animator 1 and Animator 2. Once you start to have
multiple animators, it can be helpful to name them so that you
know what's what. Let's just go Click on
Animator 1 and Hit Return, now we can rename this. I'll just name this fall, and then Animator 2
will be like when it dips below this baseline here, so let's Hit Enter
and name this dip. Now let's set the position
value for this dip. I'm just going to make
sure that my play head is after this first animation
has already finished, so I'll just put the play head on one second where
that keyframe is. These little circles
represent those keyframes, and they're
represented as circles because this layer is closed up. Now I'm just going to bring
the position value down. Maybe let's do like 100. That'll bring it dipping
below the baseline. Let's go into the range selector and then we can animate this. We'll set a keyframe, make this negative 100. Then let's go to two seconds
and animate this to 100. Then let's also go
under advanced and change this from
square to ramp up. For the ease high and low, I want to ease out of
the first keyframe, this one, and then into
the second keyframe. I'm going to set
both of these to 50. We can always see how this looks and go back and adjust it. Right now we have it going
down and then going back up. It's going to go all
the way down to below the baseline and then
all the way back up. But if I wanted this to be a little bit more fluid looking, what we need to do is move
these keyframes to the left. I'm going to look just at
that first letter at the B, and let's look at when it reaches all the way
to its lowest point. It looks like it's about
somewhere around here. I'm going to take these
keyframes and drag them both to start right here. This way, as soon as the first letter reaches
the lowest point, it's going to start animating backup because of
these keyframes. Let's play that back.
That's looking pretty good. Let's add our next animator. I'm just going to close this up, I'm going to be a little
bit lazy here and just duplicate this animator
instead of creating a new one. I'm just going to select
it and Hit Command D, and then let's hit
Enter and rename this. Let's call it up. This is when it's going to
bounce back up. The first thing that
I need to do is just take these key frames on this up layer and move them all the way over
so I can see what I'm doing. I haven't changed the
position value of this yet since I duplicated it, so it's making it go all
the way down here again. But I want it to go up, so let's just adjust this value so it's going to go
above the baseline. Maybe something
like negative 50. Now if we just
scrub through this, it's going to go
all the way down, bounce back up, and then as these third
set of keyframes animates, it's going to land
back on the baseline. Again, like I did with
the second text animator, I'm going to go and see when that B is reaching
its highest point, maybe somewhere around here, and I'm going to drag those keyframes to
start at that point. Now let's play this back. That looks pretty good.
I think it could go a little bit faster overall. What I'm going to do is
just Hit U on the keyboard. Then if you want to stretch or shrink the distance between all of your keyframes at once to either speed up or slow
down your animation, what you can do is just
select all the keyframes and then holding down
option or on a PC alt, then you want to take
your last keyframe and just drag it. I'm just going to drag it
to the left to make all of these keyframes closer together
to speed up my animation. Now if we play this back, I have a faster animation. If you wanted to make
your animation slower, you could just drag to the right to spread out those keyframes. That's one example
of how you can use multiple texts animators to create a more complex animation.
8. Animate Out: Now let's look at how we
can animate this text off. To do that, I'm going to create a new text animator
on this layer. So I'm going to select
where it says text, go to the anime button, and then add another text
animator for the position. And then with my
playhead over here, let's just choose 3 seconds. I'm going to have the
position go back up. So let's just set this back
to, like, negative 200. And let's go in and animate
the range selector. So I'm going to animate
this from negative 100. And we'll go 20 frames forward
in time and make this 100. I want to bring my
playhead back over here. Because I haven't changed
the selector shape, this is set to the
default square selector, it's actually going to animate
up and then back down. What I need to do is go into the advanced options on the rain selector and
change the shape. For this, I'm going to
want to use ramp down. That way, it'll
start from here and then go back up like that, the opposite of the
way it came in. If you weren't sure what selector shape you
were going to need, you could always just guess and check because it's
easy to undo things. But you could also go back
into this visual reference that I've given you to look at the different
selector shapes. You can see that ramp
down has the text starting at its
default position. The text animator at negative
100% in the offset is going to be all the
way off like this and the text will just be
the default value. Then as it moves from negative 100% offset
to 100% offset, it's going to apply that
text animator to the text, which is exactly what we want when we're animating
something out. So I'm just going to go
back into my example, and I've chosen ramp down
and so you can see that this is going to animate the
letters back off like that. I'm also going to
adjust the easing here. So I want this to go slow at the beginning and then quicker as it reaches
its final state up here. That option is
going to be Es low. I'm going to set that to 100%. And also, if you couldn't remember if you wanted
Es low or Es high, you can always just try them, or you can go and look at this visual reference
that I've given you to see which one you need. So back in this example, let's just play back what we have. So that's looking good. Let's add another property
to this bouncy so that it actually fully
disappears when it animates out. So to do that, I'm going to
go to this animator one, which I should really rename. So I'm going to hit Enter
and rename this animate out. And then I'm going to
go to the Add button and add a opacity property. And let's just set that to 0%. Now we can hit you just see all those keyframes and let's
play back the whole thing. So that's how you can animate your text out with
text animators.
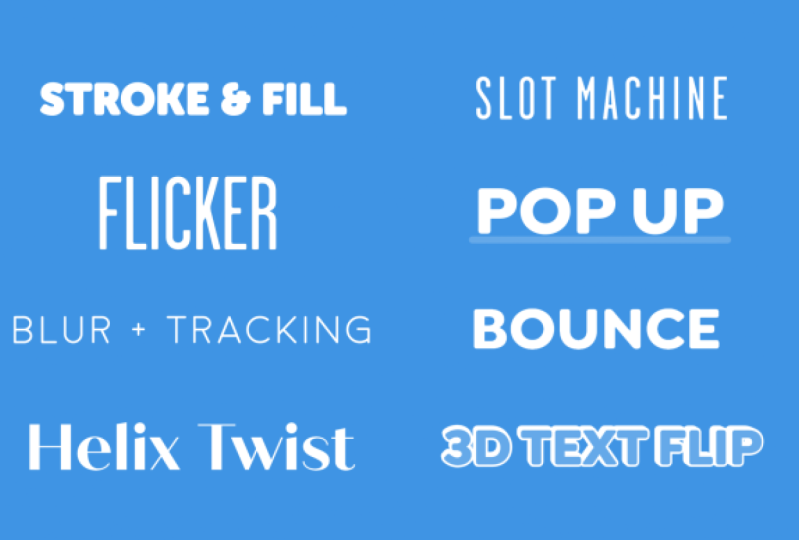
9. Example: Stroke & Fill: In this example, I'm going to have a version
of the letters, that's just the
stroke animated in. And then have the letters be filled in with the fill color. First, we need to make
sure that our text has a fill and a stroke with
the layer selected. If you go over to
the character panel, you want to make sure that
you have the stroke color with this box and the
fill color with this box. If I turn off the fill, you can see that I
have this stroke here. And the way that you adjust
the width is right here. I'm going to undo that
to get my fill back. And now let's
animate this first. Just toggle down the layer. I'm going to go to animate
and then fill color. And let's just animate
the opacity first, I need to set the
fill opacity to zero. And then toggle down
the range selector. Let's just animate this, 0-100 Now you can see that all of
those are getting filled in. Right now it's
fading in the color. It takes a couple of frames for the fill color to come in. But if you wanted this to come
in just like all at once, instead of fading up the color, you could go underneath
advanced and then change the smoothness to 0% The smoothness value is for when you have the shape
selector set to square. It's going to determine how
smooth the transition from the letter complete unselected to completely selected,
or vice versa, is. When you have smoothness at 100% it's going to
be really smooth. It's going to take a little bit for that transition to happen. When you set the smoothness down to zero, it's going
to be instant. Now if we play this back, you can see that those are
just filled in all the way. There's no fading
in each letter. You can do this
however you want. Up to personal preference, I'm just going to set this
back to 100 so it fades in. Then let's just name
this animator, Phil. Let's create another animator. This time we want to
animate the stroke color. And then let's just
add opacity to that. We'll set that down to zero. Toggle down the range selector, and then let's animate
the offset from 0% to 100% Let's just name the second
animator stroke then. I'm just going to hit
you on the keyboard with this layer selected to bring
up both sets of keyframes. We can't see the labels
of which is which, but I know that Phil is on
top and stroke is on bottom. I want the stroke
to come in first. So I'm going to have
these keyframes start at zero and then let's just slide the Phil keyframes over a few frames to the right. To animate this out. We
can actually just use these same animators
and hold keyframe. Let me show you
what I mean. I want this to animate out
from left to right. So what I'm going to need
to do is animate this from negative 100 to zero. That's going to
animate the fill off. And then we can do the same
thing with the stroke. The problem that we
have now is that this is animating in
the middle of this, where I want nothing
to be happening. What we need to do is convert these keyframes to
hold key frames. I'm just going to right
click on one of them and do toggle hold keyframe that'll make these into hold keyframes. So it's just going to maintain this same value until it
meets another key frame. That way nothing will
happen in the middle here. Then once it gets to here, it'll start animating off in the opposite direction
on the animation out. I want the fill color
to animate out. First let's just take these two key frames on the bottom. These
are for the stroke. And just move these over to
the right a couple frames. Now let's see what we have.
10. Example: Flicker: In this example,
we're going to do something a little
bit different. I'm going to show
you how you can use one of after-effects built-in default
animation presets to animate the text in, but then we're going
to customize it. I mentioned before that a lot of the default animation
presets aren't that great, but there are a few that
aren't so bad and you can add things to them to
make them more interesting. Let's take a look. First, makes sure that the layer
is selected and that your play head is wherever you want the animation to start. And then just go over into the
Effects and Presets panel. If you don't see this panel, just go up to Window, and then you'll
find it right here. You can search for Flicker
in the search bar here, or you can toggle down
like this to get to it. Then what you want to do
is just double-click on this effect to apply
it to your layer. You can see right
away that it's added text animators by these bars and the fact that
the text is gone. If you hit "Play",
you'll see what it does. If you hit "U" on the keyboard, you can see all
the keyframes that the preset has added
to animate this text. You can see that
there's a text animator because they're using a range
selector to animate this, and then they're also just
animating the opacity with some hold keyframes for this flickering
effect right here. I actually wanted to just come
in and flicker like this, but I don't need this whole
flicker going on right here. What I'm going to
do is just delete all of these keyframes. I just want the
animation to animate in. But let's see how we can make this a little bit
more interesting. I'm going to toggle
this up and then back down to get into
the text animator. There is just one text animator
that's called Flicker In. Mostly we've been animating the offset, but in this case, the start value is animated, which is going to
work totally fine. We don't necessarily
need to change that. Then you can see
underneath Advanced that the selector shape is set to square and it's just
animating characters. Then something that
we haven't used yet that's utilized in this example is that we're
randomizing the order of this. If I turn Randomize Order off, it'll just animate in
from left to right. But if you turn
Randomize Order on, it will animate in characters
in a random order. You can also change
the Random Seed here. If say you didn't like that, the K came in first, you could put in a
different number for the Random Seed and it will re-choose the Randomized Order. You can adjust this number
until you're happy with the random order that
it chooses for you. I'm going to just
close up advance, and let's add a scale to this. I'm going to go to
this Add button next to the Flicker In Animator, go to Property, and
then choose Scale. At the same time as the
letters are fading up, let's also have them
scale from, let's do 150. It's now if we play this back. It makes it just a little
bit more interesting. The letters are starting
out big and then as they fade in and they're
also scaling down a bit. If you wanted the
letters to scale from the center
instead of the bottom, if you go into More Options, you can adjust the
Grouping Alignment. Remember these
little red x's show the anchor point
for each letter. I'm going to adjust this y-value to bring those
little anchors up. Now, the letters will
scale from the center. Next, I'm going to
close up this layer, and let's create
another version of this to create a different
color that comes in first. I'm just going to
hit "Command D" with the layer selected to
duplicate this layer. Then let's go over into the Character Panel and
choose a different color. I'm going to click on the
"Fill Color" here and then just paste in the hex
code that I've copied. Actually, I want the final
look of the text to be black. I'm going to bring this
layer up above the blue one. Then let's make this black layer come in a little bit
after the blue one. It's going to have all
the same animation because I just
duplicated the layer, but now you can see
that that flicker is happening with
the blue first, and then the black
comes on top of it. Now that I see this, I don't
really like how the black is fading over the blue and
it overlaps like this, like right here on the R. I think that looks a
little bit messy. What I'm going to do is go into this top black layer
and just toggle it down until I find
that scale property underneath the Flicker
In text animator, and I'm just going
to delete the scale. Now the black layer is
not going to scale, but the blue layer will. I think this looks
a lot cleaner. When you have two
different layers to make up your text animation, there's a few things that
are a good idea to do. The first one is just to
pick which one's going to be the master layer and then have the other layer parented
to that master layer. That way, if you move
the master layer, the other layer will go with it and the text animation
will still work. Another thing that you can do
is parent the source texts. If you toggle down into the
layer right underneath text, you'll see source texts. What we need to do is
parent the source text of the secondary layer or
the little accent one, the blue one in this case, to the source text
on our master layer. You just take that pick whip and drag from here to
here like this. Now if I go in and
change what it says, then both layers are changing and the text animation
still works. If you decide that you
want to change any of the aspects of the texts that are in this Character Panel, you're going to have to
select both layers of text and then make those
changes over here. You could make this
bigger, make it bold. As long as you have both of
those text layers selected, then it will adjust
both of them, and your animation
will still work. Later in the class, I'm going
to show you how you can save a text animation
as a preset, but one thing that I should
know about an animation like this that has two
different layers is that you're not going to be able
to save this whole thing as a preset because
you have two layers. You can only save something as a preset if it's just
on a single layer. But hopefully, this
example showed you how you can use the default
text animators, edit them and customize
them how you like them. Also, another thing that you can do with text
animators in general, no matter how you started
out creating them, is that you can duplicate
them to have an offset, a different colored animation.
11. Example: Blur + Tracking: In this example, I'm
going to show you how to animate the
tracking property, which is the space
between letters. Whereas most of our texts animations have happened
from left to right, we're going to make
this one happen from the center outwards. We're also going to animate the blur and opacity
of this text. Over in the character
panel for this text, you can see that I've
already added tracking here. There's already some extra
space between the letters, but we're going to
animate additional space. These letters are
really spaced out and then the final
look will be this. The tracking that you
have here is completely independent from any tracking menu animator
with the text animator. You can have this be zero or any number, it doesn't matter. Now let's toggle down
the layer and hit the animate button,
and add tracking. If you adjust the
tracking amount, you can see that this is adding additional space
between your letters. The way that this is adjusting
the space between letters is acting as if the anchor
point is over on the left. But I want this to
happen from the center. What I'm going to do is
make sure that this text is selected and go into
the Paragraph panel. Then instead of having
it be left aligned, I'm going to have be centered. Now it's going to
move the texts, but I can just use the
Align Panel to make that centered in my
composition again. I'm going to set the tracking
amount to, let's do 75. Now let's animate this
with the range selector. Because I want this to animate
from the center outwards, I'm actually going to need two different animators that'll have each a range selector. That way I can animate one for the left
half of the text, and one for the right half of the text to make it look like it's animating from
the center outwards. First, let's set
up the left side. I'm going to select
where it says animator 1 and just
name this left. If you were planning on using the shape selector of square, you could just animate
the start or end values to make this work. But I'm actually going to want to make this a little
bit more fluid looking so that the animation on each character can
overlap a bit more. To do that, I'm going to
use ramp up and ramp down. For the left side we're
going to use ramp down. Now I'm going to change
the Range selectors and value to be 50%. That way, the selector is only covering the left
half of the text. Now I can animate the offset
value to animate this text selector moving over the texts and creating our text animation. If I bring the
offset value to 50%, then you can see that the left
half of the text is spaced out with this tracking
amount of 75. In other words, the selector is applying the tracking amount that we've set here to the
left half of our text. Now I can animate from 50. Let's go to about two seconds, and animate this all the
way to negative 100. That's pushing the selector all the way off to
the left so that those letters on the left are
decreasing their spacing, starting from the inside
and moving outwards. Now that we've got the left
side of the text setup, let's duplicate this to
create the right side. I'm just going to hit command D, and let's rename this right. Right now this is
messing up the texts, but we're going to
go in and adjust what we need to fix this. Underneath the Range
Selector and then advanced, we need to change the
shape to ramp up. Next we need to change the
start value to be at 50%. This will be starting here, and then the end will
be at 100% so that this is just selecting the
right half of our texts. You may not be able
to see the start and end bars for your texts, not just because we have
multiple range selectors, but this is how you
want it to look. Then for the offset,
we need to animate this and basically
the inverse way, so it's going to be negative 50, and then the second keyframe
will be positive 100. Now let's play this back. Now that we've got this setup, let's add the blur property. I'm just going to go to the left animator and
hit the add button, and then go over to
property and then blur. Let's make this blurred about, let's see, like maybe 30. Then because we've added this to an existing animator that
already had keyframes on it, the blur will
animate itself out. I'm also going to add opacity. Just go to add property, and then Opacity and
set this to zero. Now it's going to fade in and blur and adjust the
tracking to animated. But obviously that's
only happening to the left side let's
just copy the Opacity and blur by just holding Command or Control and
clicking both of those. Then Command or
Control C to copy. Then I'm going to close
up the left animator and open up the right
animator and just hit Command V with right selected there and it will paste
in those two properties. Now if we play this back, it will have everything
happening on both sides.
12. Example: Helix Twist: In this example, we'll look at a use case on this smooth
select your shape, and we'll look at
the 3D property. To make this texts
look like it's twisting like a DNA
strand or helix, the first thing I
need to do is go down into the layer and then click the "Animate" button
and enable per-character 3D. This is going to bring
up some new options, but we're actually
not going to use those in this example. The next thing I want to do
is just add another animator. I'm going to add a
rotation animator, and so that'll bring up x, y, and z rotation. I'm only going to rotate
in the x-direction. I could actually just delete these y and z rotations just
to clean up my timeline. If I rotate this right now, you can see that
it's rotating from the bottom where
these little xs are, that mark the anchor
point for each character. What I want to do is
go up to more options, and then under
grouping alignment, I just want to bring
up this y percentage, so it's more in the
middle of the characters. Something like that
looks pretty good. Now when I rotate
the x rotation, it'll rotate more from
the middle of the layer. I want to have these
letters to a complete flip, so I'm going to set
the x rotation to one, and this is just
setting one revolution. Since I don't want to just have all of the characters
feel about once. Instead of animating
the x rotation, I need to animate
the range selector. I want each of these letters
to do a complete flip, but the starting and
ending position of this text is just the same look, how we have it right now. One way to do this is to
change the selector shape to something that will
animate all the way through and have the
same look at both ends. If we go back into our
select your shape reference, you can see that triangle round, smooth and even square. They all animate from -100 to 100 having the same look at
both ends of the animation. But I want this to look really smooth, like
it's twisting. That's where the
smooth shape selector is going to come in handy. If I go back into
my text animation, let's change the shape
selector to smooth, and then let's
keyframe the offset. Starting at -100, then let's just go one
second and make this 100. I'm just going to set my
work area to two seconds, and then let's play this back. That's looking a little bit faster than I was wanting it, so maybe if we just bring
down the excitation, instead of doing one
full revolution, we could just do -90, and then that way it'll
just do a half flip, but it will still
read the same way. It's just half the amount of rotation, but it still works. This is getting more of that helix look that
I was going for. Now we have this animating
with the helix twist, but let's have it
also animate in. To do that, I'm
just going to first rename this animator twist, so I know what it is, and then I'm going to need
a different shape selector for the animation in so that
it actually animates in. Let's just twirl this, twist up and then we can
actually twirl more options up, and then I'm just
going to select right here where it says text, and add new animator. Let's go and animate
the scale of this. I'm going to name this
animator Animate In. Let's set the scale to zero. Then in the range selector, i'm first going to
go under advanced and change the selector
shape to ramp up. Ramp up is usually good
for animating things on. But now we need
to set the offset to -100 and keyframe this. We can make the animation in a little bit shorter
than the twist, but you can just go by
whatever looks good to you. You can always adjust
that obviously, wants to bring that up to 100. Now they'll scale in
while they're twisting. It looks like I only
got the offset to 99%, so let's just fix that. Then you could also
adjust the easing. I'm just going to make ease
high and ease low both 33%. If you wanted this to animate
out and you want it to animate out like the opposite
direction that it came in, so from right to left, all you would have
to do is copy both of these sets of
keyframes, Command C, Command V, and then
right-click on one of them, go to keyframe assistant and
then time-reverse keyframes. Now you can see it's
going to come in, and then it's going
to animate out basically the same way. We actually need to align these keyframes so that
they're mirror image, so that this last keyframe and this last
keyframe are aligned. If you didn't like it animating
out from right to left, instead of just copying and pasting keyframes and
time reversing those, you can create a new animator. Let's just do that.
I'm going to close up some layers so
we have more space. Instead of creating a new
animator with this button, i'm just going to
duplicate the animate in. I'll just hit Command D, and then let's name
this Animate Out. Then the first thing I'm
going to do is change the selector shape from
Ramp Up to Ramp Down. If you go back into
their reference, this makes sense because
ramp down starts with the texts looking
like it's final state, and then as it animates
from -100 to 100, it applies that text
animator property. If we change this to ramp down and move these
keyframes over, so let's set this
animation at two seconds. Now these will start
scaling and fading out from the beginning
of the text on the left. If we want to do
that twist again, all we need to do is go
back in to the twist, if you want to have it
animating from right to left, you could animate
from 100 to -100, but if you want it to go in the same direction as the
text is animating up, then we need to get
this back to -100. If I just set a keyframe
for -100 like this, then we're going to have an additional twist
in-between here. What I'm going to do is set this keyframe to
a hold keyframe. To do that, just right-click
and go to hold keyframe. What this says just holds this 100% value until it
reaches the next keyframe. It holds the value until
it meets another keyframe. Now we have a keyframe for -100, and then let's just
keyframe this back to 100. Let's see what we have. If we just collapse this by hitting U on the keyboard
to see the keyframes, what we need to do is just
bring these keyframes over and then the twists
will start happening, and then they'll
start animating out. Here's our helix twist example.
13. Example: Slot Machine: In this example, I want to
use multiple layers with a very similar text animation to make a slot
machine-like effect. I'll just start with
the first layer. I'm going to go into the layer, go to animate, and then
enable per-character 3D. This way I can have the
texts look like it's rotating in a spinning wheel
thing, like a slot machine. I'm going to now go back to the Animate button and
add a rotation animator. I'm only going to be animating
the X rotation so I can delete the Y and Z rotations
to clean up the timeline. Right now, when I rotate this, it's going to be rotating
from the bottom where these little x's are to represent
the anchor points. The first thing that
I want to do is go up to more options. Under grouping
alignment, I want to bring those little x's for the anchor point for
each character up to maybe say
negative 40 percent, so they're more in the middle
of the layer like this. Now let's set the rotation. I want to animate this looking like it's coming
in from the top. I'm thinking negative 90
is going to look good. Let's also add a
position so it's coming down as it rotates. Next to animator 1, I'm going to hit the Add button, go to property,
and then position. Let's change the y position
of this to negative 200. Now that we've got these
two properties set up, let's animate the
range selector. I'm going to keep this on square with 100
percent smoothness. I'm going to animate from 0-100. This will bring
down each letter. I don't like how we can
see them rotated up here. Let's add an opacity. Next to animator 1, let's click "Add", "Property",
and then "Opacity". Let's set that to zero. Now these will also fade in as they're rotating
and moving down. Let's just name this top down so we know what
this animator is doing. Now, a slot machine, if it was a spinning wheel, these letters would
animate down. Next, I'm going to
click on "Text", go to animate to
make a new animator, and let's also
animate the position. Then next to that
animator click, "Add" and grab the rotation. Again, I can delete
the Y and Z rotations because I'm not
going to need those. Then let's name this animator. Let's call it center down. Now making sure that
my play head is to the right of the
first two keyframes, let's set up the position
and exploitation. For this, I'm going to
rotate it positive 90, so that it's rotating in the other direction
as it was before, and then let's animate this in the other direction for the
position so that'd be 200. Let's also add an opacity
so that we don't see this weird flat-looking
text down here. Property opacity and
set this to zero. Now let's animate
the range selector. I'm going to move
my play head to the second keyframe on
the first animator. Now for this, we need to animate the offset from
negative 100 percent, so it puts all of those
letters back where they were. Then moving the play head
over to two seconds, I'm going to set another
keyframe for this to be at zero. What these keyframes
are essentially doing is making it so that these properties are not applied at this point because
it's at negative 100. This is a square selector, then it's animating so
that at two seconds, all of these properties
are now applied to the text because
this is at zero. Let's look at what
we have so far. All the letters animate in, and then once they're all there, they all animate out. But I want this to be more like a slot machine so the
letters continue. What we need to do is just offset these keyframes so that they're a little
bit more to the left. What I'm going to do is scrub through the timeline
and look for when that S stopped moving from
the first animator. When it's in that
center position. It looks like that's about here. I can take the second
set of keyframes, the ones that are on
the second animator, and drag those over to
the left so that they start right where that
first letter stops moving. Now if I play this back, it looks like they're
just rolling through. We've got one of the layers
set up and we need to create additional layers
that we can have additional letters
coming through. Then our final word is
going to say slot machine, so we'll also need
to set that up. To create another layer that's
a version of this layer, I'm just going to hit command
D to duplicate this layer. I'm going to rename one of these layers so that we know which one's going to be the final
look of our animation. I'll just add final to this one. If I change my mind about
what the text says, I want to just be able to
change it on one layer instead of having to change it on multiple different layers. To make this work, I'm going to toggle
down each layer until I can see source texts. On this duplicated layer, I'm going to take the
source texts and use the pick whip to parent
it to this source text. That way, if I change this text, then it will also
change this text. Now we can close
up these layers. Both of these layers have the exact same animation
at the exact same time. So in order to get that
slot machine look, I'm just going to drag the final slot machine
layer a few frames to the right so that the
letters aren't crashing and they're coming in one
after another like this. Depending on what
font you're using, you might have letters that
crash into each other. A few things that you can do
for this is to use a font where all the letters are
a similar size width-wise, or you could add space
between your letters, which is called tracking. In the character panel, you can see I've added some
tracking right here. This just spaces
out your letters. If you're adding tracking, make sure that you're
doing on both layers. Let's go into the
slot machine 2 layer and change the text so it
doesn't just say slot machine that way we don't
have multiple letters that are the same
litter lined up like this but will make it look a bit more realistic like
a real slot machine. I'm not actually going to
change the texts myself, I'm going to let the text
animator do that for me. I'm going to toggle
down and then go to the animated button and
down to character offset. This is going to add
it on a new animator, which is exactly what I wanted. Let's rename this animator. Then let's change the
character offset. If you enter a number in here, this is going to offset the character like one letter in the alphabet if
you put in a one, so the I just turned into a J. You can put in any number you want for this
and it will just be offset that many letters from what your text
actually says. I'm just going to
leave mine at one. Another thing that you
might want to adjust is the character alignment for this font left or
top works fine, but for other fonts, you might find the adjust
kerning works better. Try all these different options if your letters are crashing. That's all I need to do here. I don't need to
animate this because I don't need the letters
to be changing, I just want them to be something different than the
original layer. I can close this layer
up and then make sure it's fully selected
and hit command D to duplicate it and then we'll take these two layers and move them so that we have three
versions of letters coming in. Now let's go into this
slot machine 3 and go into the text and then the character offset and let's just change
this character offset. I'll just put in two, so now this is going to
be a different letter. Now we have three different
letters coming in. Our slot machine is
also animating out. Even though that's the
last letter to come in, it also animates out. We need to do now is go
back into the slot machine final and the center
or down text animator, we need to move these
keyframes over and we can maybe even
delete them if you don't want it to
animate out at all. Now it's going to animate in and the final texts
will say slot machine. Then it will just
animate out with those keyframes wherever
you decide to put them. Or you could delete
them and have it animate out in
a different way. Now the nice thing about this
in the way that I set it up is that if I wanted
to change my text, I can change it and the
slot machine effect will still work because I
parented that text. Now also notice I just
wrote texts in lowercase, and so I'm getting
lowercase letters in here. In order to get the all caps, even though this button is
turned on to have all caps, you need to actually write your texts in all caps
for this to work. Now you can see that
these are all caps.
14. Example: Pop Up: In this example we'll
use a different type of selector called
a wiggle selector, but first let's set
up an animation where this texts pops up, overshoots, and then
comes back down. I'm going to toggle
down the layer, go to Animate and
choose Position. Let's name this position down, and then I'm going to bring
the position value down to, let's do, 200. Then I'm going to toggle
down the range selector. We're not going to be using
the wiggle expression on this animator. Then I'm going to go
down into Advanced and change this to Ramp Up. Then let's animate this
from negative 100 to 100. Now the text is moving up. Let's also adjust the easing. For ease low, I'm going
to set this to 100%. This way as it animates in, it's going to start
off fast and then slow down as it reaches
its final position. Now let's create the
overshoot animation. I'm just going to collapse the position animator and
then duplicate it by hitting Command or Control D. Then
let's rename this up. Then I'm going to need to go
in and change the position. But if I do it right now, I can't really see
what's happening because these keyframes
are lined up. I'm just going to toggle down, bring these keyframes over, and then put my playhead
in-between them. Now if I adjust the position, I can actually see
what's going on. Let's make this negative 50. Now this is going to pop
up and then go down, but I'm actually
going to want this to happen a little bit
more overlapping. I'm going to take
these keyframes on the position up animator
and I'm going to drag them over to the start. They're actually aligned
with the position down. Right now you can't really
see anything happening. It just comes up, but it doesn't come back down because these things
are happening at the exact same time. But if we go into the
advanced toggle and then change the ease
low back to zero, and then change the
ease high to 100, now the position up animator has the opposite easing
as the position down. This is going to create a nice smooth animation where it's going to start quickly moving
up and then slow down, and then it's going
to move from the top, down, moving slow,
and then fast. It looks like this. Now that we've got the
main animation setup, let's add a rotation to give this a little bit
more of a playful look. I'm going to create a new animator for the
rotation property. This is where we're going
to use the wiggly selector. I'm just going to
rename this animator, wiggly rotation, and then let's actually
add the wiggly selector. I'm just going to hit
the Add button next to the animator and choose
Selector and then Wiggly. This is going to add
another selector in addition to the
range selector. If you toggle down
the wiggly selector, there's a bunch of different properties
that are different from the ones that you have
with a range selector. If we give this a
rotation value, you'll see that it already
has an effect on the text. It will just randomly
wiggle that rotation value. Then even after the position animators
are done animating, it's just going to continue
to wiggle those letters. It's going to be
wiggling anywhere between negative 25 and 25. You can tell that because
the maximum is going to be 100% of whatever rotation
you put in here, and then the minima
is going to be negative 100% of whatever
you put in here. Then there's going to be
two wiggles every second. Then all the rest
of these things, I'll let you just explore
and try different values and see what happens
because we're not going to need
those in this example. What I want to happen
is that it's going to randomly wiggle as it moves up, but then as the position
animation finishes, I want it to stop wiggling. What I'm going to do
is actually close up the wiggle selector and
animate the range selector. By animating the range selector, I'm going to affect when the wiggly selector is actually
able to affect the text. First, I'm going to go
under the Range Selector, under Advanced and
change this to Ramp Up. While we're at it, let's
also adjust the easing. Maybe we'll just do 50% on
each ease high and ease low. Now I can animate the range
selector here to go from negative 100 to 100. Now let's play this back. You can see that this is
a really subtle effect, but it's just having
a slight rotation on each letter as it pops up. But then as it moves into place, it's settling into a
non rotated state. We can also move these keyframes to the
right just a little bit. It takes a couple
of extra frames to settle into place as
a non rotated letter. That's just one
example of how you can use a wiggly selector. Another thing that
you could do with an example like
this is use masks. Obviously my text isn't really animating in because we can
already see it down here. You could just add an opacity, but I'm going to do something
different in this example. I'm going to create an
underline for this text. I'm just going to move
my play-head to where the text is already animated in, and then let's just
grab the pen tool. First I'm going to
change the fill so that we'd have no fill. We're just creating a line. I'll make the stroke like 20. Then making sure that the
text layer is not selected, I'm just going to click
to create a point, hold down Shift and then click to create another
point over here. That will create
a line like this. I'm going to rename this
layer by hitting Enter, and then let's toggle
down the layer and underneath contents
Shape 1 and then stroke. I'm going to change the
line cap to round caps. I'll just make the ends
of the line rounded. Now we can close this back up. What I want to happen
is I want the text to not be visible when
it's below this line. It looks like I actually need to move the line
up just a little bit so that none of the letters are poking
up above the line. It'll animate up and they'll
just sit right on that line. What I need to do is
create a matte so that the letters are not visible
when they're below the line. To do that, I'm
just going to grab the shape tool and
make sure that we have a fill and we don't
need the stroke. Then again, making sure that
no layers are selected, I'm going to click and drag with the shape tool to
create a rectangle. Now we need to set the matte for this text layer to
be the rectangle. In order to see
the matte options, you want to click this toggle
Switches/Modes button here. We're looking for the
Track Matte option. There's a couple of ways
to set the Track Matte. You can use the drop-down menu to select the shape
that you want to be the matte or you could
use the pick whip like this. It's going to automatically turn off the eyeball on that layer. This is exactly what we want
because now the text is only visible within the area of
this rectangle of the map. I'm just going to rename this Matte just so
I know what it is. That's our pop up example.
15. Example: Bounce + Echo: For this example, I'll walk
you through how I created this bounty text complete
with squash and stretch. Then we'll add an echo effect
to make this smear look. The idea behind how
I animated this is similar to other
examples I've shown you. Let's just look at what
animators I have in order. First is opacity, and this is just having each letter come
in one at a time. If I toggle this open, the opacity is set to zero. But the reason that this is
not fitting in each letter, it just has each letter pop in, is because in the range
selector underneath advanced, I have the shape set to square, then I've turned the smoothness
all the way down to zero. If I turn the smoothness
all the way up, you can see that now
the letters will fade one at a time, but if I turn this smoothness
all the way down to zero, then they just pop
in one at a time. Next, I have an animator
to animate this from up here down to here. There is a position property and I'm also
animating the scale. The first one is going to be really squashed and
also a little bit smaller than the final
scale so that it just looks like it's coming
towards us or something. The next to animator is going to be for the bounce back up. After it animates down, it's going to bounce back up, and it's going to
actually overshoot past the final resting point and
then it'll come back down. That's this one. Notice
that on this down, up, and then down, I first start the scale
a little bit smaller, and then on this up animator, the scale is a little bit
wider because this is when it actually
lands on the ground, and so it's squashing
vertically. Then as it comes back up, it's going to
squash horizontally so that's when it's going to be a little bit narrower
and then taller. Let's actually look at the
key frames for these things. The first one is the opacity. Opacity is also lined up
with the down animation. Then as soon as that B
reaches its lowest point, that's when I start
the key frames right here for the up animation, so that way the B comes right down and then
pops right back up. Then the same will happen
for all the other letters. Then again, same idea
as the B reaches its final up
position right here, then these key frames
on this down position, for it to go back down to
its final position, come in. I'm going to close these all back up and let's look at the
rotation that I have here. Just like another
example that you saw, I'm using a wiggly
selector to apply at 25 degree of rotation
randomly to these letters. That's what the wiggly
selector is doing, it's just applying
this random wiggle between negative
25 and 25 degrees. Then the range selector is animating that
wiggle so that it's actually affecting the texts
as the text is animating in. Once the text is all
the way animated in, these key frames on the
range selector make the wiggle selector stop
effecting the texts. This is the text animation
that I have so far. Let's add the additional color that smears behind this text. I'm just going to
close up the layer and let's go over to the
Effects and Presets panel. I'm just going to
search for echo. This is the effect that I want. With the text layer selected, I'm just going to double-click
this echo effect, and in the effect
controls panel, you'll see that you have
this new echo effect. If you don't see your
effect controls panel, go up to window, and you can find it down here. Let's see what this
is done by default. It's added an echo
or a smear look, but you can see little bits of edges where it's
not a perfect smear. Especially here on the O, you would want this
to be filled in. What we need to do is go
up to the echo effect and make this echo time and
even smaller number, so I'm going to make
this negative 0.001. That's going to make the
echo closer to the letter, but now it doesn't even look
like if we have an echo. I need to increase
the number of echoes. Let's try 50. Now we're getting
that smear look. Now depending on how big
or smaller your text is, you might need to use
different numbers here, but this is what is looking
pretty good for me. Now we have more of
that smear look, but it's all one color. If we go over to
effects and presets, we can add a fill. I'm going to apply this
fill effect to the layer. You can either
double-click at he layer selected or
you can also just drag the effect onto the layer and then
I'm going to go into the color and paste a hex number and now
that's recolored, but this is re-coloring
the entire layer. I want the face of these
letters to be black so that the final look of
this text is black and only the smear is blue. What we can do is use a different effect
called CC composite. I'm just going to drag
that onto my layer. That's going to make the
face of the text black, but it's going to let
the smear stay blue. The default settings are
already what we want. If you want to change the
color of the face of the text, so where I have black, you can just go to
the Character panel and then change this color. Then of course, if you want to change the color of the smear, you would just change the
color of the fill here. Here's what we have. Now one
other minor thing that you can fix is that when you look closely at a letter
like the B here, you can see that the connection between all of the
different echoes with a different copies
that it's creating, of the letter B, you can see this jaggedy edge right here, it's pixelated. We could add an effect
to clean that up a bit. I'm going to go over to
effects and presets and just search for choker. It's going to be the simple
choker that we want, so I'll just apply that. We can just bring the
choke matte number up to maybe just
something like one, and it smooths that
out just a little bit.
16. Example: 3D Text Flip: In this example, we're
going to make texts 3D right inside
of After Effects. We're going to animate it in flipping in
three-dimensional space. To make this layer 3D, I'm going to hit this
little 3D box right here. We also need to toggle down
the layer and then change the render from classic
3D to Cinema 4D. Now, even if you don't
have Cinema 4D on your computer if you have the Creative Cloud
version of After Effects, then you also have
Cinema 4D Lite. That's all you need
for this to work. Now keep in mind that if you're using some of these things, they might not work
if you don't have the full version of Cinema 4D. If you come across
any weird problems, come back to this dialog box and check if its one
of these things. But for our example, this
isn't going to matter. Now you can toggle down geometry options and adjust
these different properties. First, let's just adjust
the extrusion depth. This is going to make
this text not just flat. I'm going to set
this to about 50. If you go up to the
animate button, you'll see the front, bevel, side and back options. For these, there's a bunch of different things that
you could change, but I'm just going to keep this simple and stick with colors. I'm going to go to the side, color and just choose RGB. Now you can see that
extrusion depth is going to be this red color. I'm going to change
this to gray. Let's actually change the face of our texts to something else. There's two ways that
you could do this. You could go into
the animate button and change the front color, or you could just change
the color of your text. I'm going to go into
the animate button and then add a bevel. Let's add a colored bevel. What is your RGB? Right now I can't
really see the bevel, so I'm going to change
the bevel style under "Geometry" options to convex. Now we can see that red outline. Let's just increase
the bevel depth to 10. Let's change this color to be
the same color as the side. Now let's animate this in. I realized that I've created two different animators
for the different colors, and that's not really necessary. I'm going to select
the bevel color, copy this, and go up to
animator 1 and paste it. We can also delete
the Range Selector on animator 1 and just delete
animator 2 altogether. Now we just have the two
colors underneath animator 1. I'm going to rename this colors. I don't plan on
animating the colors, so this is all I need here. Now I'm going to go back to the animate button and let's
add a rotation animation. Because this is 3D, you
would probably expect the rotation to give
you X, Y, and Z. But the reason it's not is
because we need to go back to the animate button and
enable per character 3D. Now we have X, Y,
and Z rotations. I'm going to animate
X the rotation. It'll flip like this. Let's just set the
X rotation to one, so we'll do a full revolution. I'm also going to set
the Y rotation to 90. It just does a
little bit more of an interesting flip
as it comes in. To animate this in, we're going to use the range selector. First I'm going to
go into advanced and change the selector
shape to ramp up. Now let's animate this
from negative 100 to 100. Here's what we have so far. If you don't like
how much the text is moving up and down
as it animates in. You could go into more options and then adjust
the grouping alignment to bring those little red X's
into the center of the text. Because now we'll
flip from the center of the text so there's less
up and down motion going on. I actually liked it how it was, so I'm going to undo that. Another thing that
would make this look nice is to adjust the easing. I'm just going to
make the ease high and ease low both 50 percent. I'm also going to add a property to this animator so that it animates from completely not visible to completely visible. I'm going to add
the scale property, and let's just set this to zero. Here's the final result. This is a little bit fast, so I'm just going to drag out this key frame to
slow it down a bit.
17. Save Preset: In this video, I'll
show you how to save your texts animators
as a preset. This way, you can easily
use this text animation on any other text layer across
any After Effects project. Once you set this up, you
won't even need to import anything to reuse it in
another After Effects project. This will work with
any texts animators as long as you just
have a single layer. If you have effects like this, those can be part
of the preset too. To save this as a preset, what you need to do is
select where it says text and where it says effects
if you have any effects, if you don't have any effects, just select where it says text. Then you want to go up
to Effects and Presets, and click on this
little hamburger menu. Then go down to Save
Animation Preset. This Save Animation Preset
window should pop up, but if it doesn't,
that means that whatever you selected
wasn't working out. By default, it'll probably
have it set up to save in this User
Presets folder. But I like to save it in my
own folder because I don't know where this user presets
folder is on my computer. If I wanted to share the
preset with somebody else, I don't know where to find it. Obviously, there's
probably a way to find it, but this is just how
I like to do things. What I'm going to do is go to my Applications and then
Adobe After Effects, and then Presets, and I want to make my
own folder in here, but the New Folder
button is grayed out. I'm going to go to Finder
and find the same area, so After Effects, then Presets, then I'm
just going to go in here and right-click and
choose "New Folder". It's going to ask
for your password. But now it'll create
the new folder and I'm just going to name
this my presets. Now if we go back
into After Effects, that my presets folder
is already there, and we can just name this. Then if you go into Animation Presets and
toggle down under Presets, then My Presets, here's the bounce
text with echo. I'm just going to
create a new comp. When I save this preset, I selected texts and effects. This is going to save basically everything
on this layer, so all the texts
information including what the text says and the
style of the text. If I go in to my blank composition and just double-click
on this preset, it's going to create that
exact same texts layer as my original composition. From here, I could always adjust things and I could change
what the text says. You could also go in and
adjust any of the effects if you have them or
the texts animators, and it won't affect your original texts layer or the preset that you've saved. I'm going to show
you one more example where we don't actually save what the text says
or the style of text. This way, the preset can be applied to an existing
layer of text without editing what the text says or the styling of the text, it will just add
the text animators. What you need to do is
select anything that you've adjusted that you want to be
saved as part of the preset. For this example, I need
to select the twist, the animate in and
the animate out. Also, underneath more options, the grouping alignment
was adjusted so that it animated from
more of the center, so I'm going to select that too. Then I'm going to go into
Effects and Presets, in the Hamburger menu, and then choose "Save
Animation Preset". It might by default now put it in the same
folder as you had it, otherwise navigate
to where you want to save the preset and name it. Then just hit "Save". I'm going to go back into
this composition, and now let's create
a text layer. Now let's go into our
Animation Presets, Presets, My Presets, and then let's add
this helix twist text. I'm just going to move my playhead to the start
of the timeline so that, that's where the
preset is applied. That's where the
keyframes are pasted, and now I'm just going to
hide this other layer. Now you can see that in
this example it just copied the animation presets without the styling or what
the text said. If you have a preset file, a.ffx file that you've
got from somebody else, maybe like me, and
you want to install, what you need to do is drag this into your presets folder. I'm going to drag this
into the folder that I created specifically
for my own presets, which I just really
creatively named my presets. Then once you go
into After Effects, you don't need to
restart or anything, all you need to do is go
into Effects and Presets, and then toggle down and find wherever you saved that preset. If it doesn't just
show up automatically, go to the Hamburger menu and
then choose "Refresh List". Now you can apply the
preset to your text. Also, keep in mind
that for this effect, this was supposed to
have a stroke and a fill being animated in. The stroke would come in
first and then the fill, like the example that
I showed you earlier. But that's not
happening here because this text layer
doesn't have a stroke. What I need to do is go
into my Character panel, go to the Stroke property, give it a stroke, and now this preset is
working as expected. If you ever change
your mind and want to remove a text animator
from a layer, you could just go in and delete the text animators from here. Or another thing you can do is just select the entire layer, go up to Animation, and then choose "Remove
All Text Animators", and that'll essentially
reset your text.
18. What's Next: If you haven't already, now's the time to use
everything you've learned about text animators to create
your own text animation. If you have any questions, feel free to post them in the discussions tab
below this video. For your class project, just render out a video or
GIF of your text animation. You're more than welcome to
do more than one if you like. There are instructions
below this video, if you need help rendering
your project as a video or GIF file and uploading
it as a class project. If there's anything
in particular that you want feedback on, include a note to let me know. If you enjoyed this class, I would really appreciate
it if you left a review. As a teacher, this helps me to create more quality
classes for you. To keep learning click
on my name next to this video to check out the other classes
that I'm teaching. To learn more about
text animation, check out these classes. Make sure you're
following me here on Skillshare and also sign up for my email newsletter to hear when I have a
new class for you. The newsletter is monthly and I also send After
Effects tutorials, tips, and random
recommendations. Thanks so much for
being here and until next time,
happy animating.
 Megan Friesth, Motion Designer