Transcripts
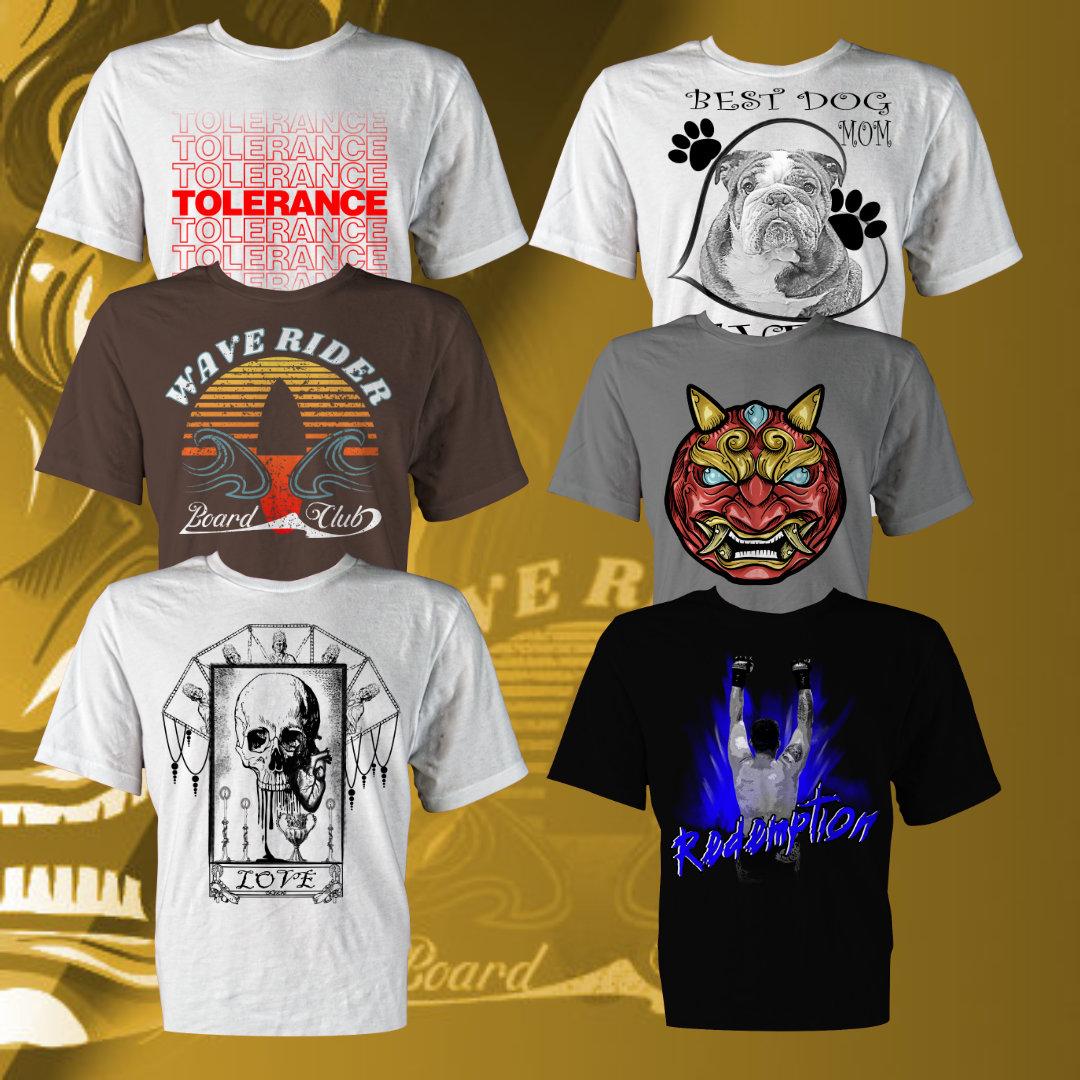
1. Introduction : Alright folks, thank you for taking a look at our course. Affinity Designer. How did you t-shirts in Affinity Designer? And I'm sure by now I've come up with a snappier name to represent exactly what's going to happen in this course. But maybe you found us to the preview. What I wanna do in this lesson is I want to cover what this course is, who it is for, what we are going to cover and what we're not going to cover. All right, let's go ahead and get started. Now, the first thing that we're gonna do, we're gonna talk about what this course is. This course teaches you how to use Affinity Designer to create T-shirts. Now, there are two distinct areas of this course. We're going to be doing four to five technical designs in this course, where I will teach you the tools and techniques and affinity designer. Even if you know nothing. And in-between, each technical project will be a fundamental theoretical project where we do cover what makes it a t-shirt symmetry, how to do colors, where to go to get ideas. So this course is about how to design T-shirts using the tools in Affinity Designer. Now, what this course is not, we are not going to cater to screen printers or D TG printers or sublimation printers. We're also not going to cater to print on-demand. So if you are print on demand or you are a screen printer, DTD printer doing the printing yourself. We're not going to cover the specifics of the technologies, okay? So this isn't geared toward one printing technology and it's not geared toward one business model. Now, into theoretical lessons, I will show you for business models around how people print t-shirts. But this is not about how to find profitable designs. This is not about how to use red bubble. Let's say. This is about how to print using Affinity Designer. Now, what is unique about this course? This course is designed even if you have never picked up Affinity Designer before. So if you're brand new to this world, this is a good course for you to start. And what makes it a good course as opposed to a mega course? It's project focused. And we're doing something very unique with the upgrade to 1.9. With 1 nines upgrade, we can now hold the studio presets. So the first thing that I'm going to do when we do our first project, I'm going to ask you to clear out your studio, clear out your tools and start from 0. And then we're going to bring in new tools every project, so that you only learn what you need to know when you need to know it. Now, a little bit about what makes me, me. I run a site called proven ground apparel where I print shirts for fighters in MMA fighting. So that's a little bit about what I do. And I've been teaching now on this platform for several years and have one of the best selling courses. So you're in good hands around learning how to use Affinity Designer to make t-shirts. Now that you know about what this course is and what it's not, I look forward to seeing you inside. Let's go ahead and get started.
2. How to get help resources and submit projects: All right, so let's go ahead and get started talking about how you get help on this platform. Now there are three things that I want to cover in this lesson. The first one is where to go to get resources. The second is where to go if you get stuck with question and answer. And the third one, if there is homework in class, is where to go to place the homework in this platform. So those are the three things that I want to cover. So let's go ahead and get started. The first thing you're gonna do is you're going to go ahead and download the resources. Now the resources on this platform are here. Now, notice where you go to get the resources. This is a downloadable file or link. And so what you're gonna do at the beginning of each section is bring those resources in so that you can follow along. Everything has been included for you. Now, it's not uncommon in an online class that you get stuck. We pride ourselves in helping you get unstuck. So to ask a question on the platform, this is where you'll go to ask your question. We have a full-time TA that answers questions, so your question will be answered expeditiously and she's really good at what she does. All right, the third thing, some classes have homework, some lessons have homework, some sections have homework. Some classes don't have any, so it depends on the class. So if homework is there, this is where you will go to submit your projects. We do take a look at the projects. We do give feedback, so we look forward to seeing your projects uploaded through these specific channels. All right, So last thing that I got, if you want totally optional, we have a phenomenal community around affinity, check us out on Facebook and Instagram, and be part of the community. We get a lot of community responses, a lot of art that's supposed to there were in it moderating. And so it's a really good place to get information plus share your art and get critiques from other students in the class. All right, let's go ahead and get started.
3. Introduction to your first T shirt: All right folks, welcome to the first section of this course. You're going to see my smiling face in every single core section. So let's go ahead and get started. Now, the first thing that I'm going to ask you to do here, we're going to start off with a bare bones minimum in this project, what should be making in this section is the plastic bag vibes, t-shirt, believe it or not, here in 2021. That is a big deal. I've included a couple of examples here from popular sites that proved that this is a trend that is taking off. So this is a perfect opportunity to look at Affinity Designer and get through the very first couple of tools. So we're going to be taking a look at the transparency tool, and we're going to be taking a look at the Artistic Text tool. We're also going to show you the basics of layers, okay? So we want to get you up and running as fast as we can. And at the beginning of each section, there's going to be an intro by me. So let's go ahead and get started.
4. Interface Basics : All right, again and welcome to our t-shirt journey here at Affinity Designer. So we're going to go something that's counter-intuitive to start out, we're going to go ahead and strip down the interface. The way that I want to teach this course is I want to take the tools that you're going to use at the time you're going to use them so that we do not overwhelm you with the interface. So in this first lesson is about getting you set up for success. Now this may be counter-intuitive to the way that you've learned in the past in other courses for other software. But as this is a beginners course, I want to give you every shot of being successful. So let's go ahead and make sure we're all starting with the same interface. To do that, I'm going to come up to view. Now, this is called the File menu here. I'm going to go to Studio. Okay? So I mean View Studio. And the thing I want you to do is I want you to reset the studio right here. Okay? Now we have reset the studio. Now, everybody should have something very similar. What I'm going to do now is I'm gonna take you on a brief tour of what you can expect in the studio. So nothing you have to do here. All you have to do is follow along. And I'm going to use this hot pink here to do this. All right, the big parts of the studio over here, what you're going to see are the tools. Now the reason they're grayed out. Let me just go ahead and go file open. Nothing you have to do here. Don't have to do anything here other than just hang out. All right, so there's our tools. You see when I brought something in abroad it open. Now the other piece of the interface is going to be the actual studio. So I'm gonna move my epic pen out of the way here. The studio is over on the right side. So this here is going to be referred to as the studio. And by default it's on the right. Now, you'll see that there's an area over here on the left. This is also the studio. And certain pallets, certain tabs, these are called tabs are available on the left. So what we're gonna do, we're gonna go ahead and we're going to strip all of this craziness down. Because you see here, what you've got is a lot of different tabs. And so this becomes a little bit confusing for somebody that's starting out. We're going to clear up the clutter here, so don't worry. So the things we've covered so far is you have your tools. You have your studio. And now up here, this little strip right here is what is called the context toolbar. Okay, now what do I mean by that? Let's go ahead and switch between some tools just to show you. Now, keep an eye up here. You see how the context toolbar changes with each tool. The way that I want you to think about it. This little area right here shows you all the options for whichever tool you select it. Okay. So kind of wrapping up here, Let's take a look. We got tools. We've got the studio, we've got the context toolbar. And this last thing here is what is called the toolbar. Okay? So that's this area right here and we can customize this. Alright? So if we take a look around the outside, that's the outside. And then of course, this is your document, right? Whenever you happen to have up. Alright, so let's go ahead and clean this out. So let's go ahead and make this as simple as possible. Okay, I'm gonna go ahead and close this out. What I would like you to do. Now, you're going to do this once. You're going to come over here and you're going to click and drag a tab. Now when you click and drag a tab, this little x is going to come up. I want you to close all of the panels except for the layer. So click drag, click drag x. Now you see the layers panel right here. Leave that. So click on the Effects. I want you to get rid of every panel you have, except for the layers panel. Okay. So don't forget the ones down here. There's some down here. Okay. So you see on my right, All I have is the Layers panel. And the layers panel. Oops, let's go ahead and bring that up. The layers panel is right here. Now the same goes for these over on the left. So let's go ahead and do the ones on the left. Let's grab the assets. Close that out, grab the appearance, close that out. So all you have is layers. And now I'm going to show you how to adjust your tools, because I'm also going to strip down your tools. Let's go to View. Let's go to the customize tools, okay? Okay, here's what I want you to do. I want you to take the Artboard tool and I want you to drag it in. The only tools that I want left. Don't do anything yet. I'm putting all these tools back. We're going to get to them, but I just don't want to get to him right now. Okay. The only tools that I went out, the little black cursor right here will be our calling the move tool. Notice how when you move over it, it gives you the tool name. I want the rectangle tool, the ellipse, the rounded rectangle, and the triangle, as well as the Artistic Text, the view, and the Zoom. When you're done, close this. Okay, these are going to be our tools for the first project. Now, here's the last thing that I want you to do. You're gonna go to View Studio presets. And we're going to go ahead and we're going to call this, add a preset. And I'm going to call this lesson 0 preset. Now, in Affinity Designer, you cannot export and share presets, so I can't give you my lesson 0 preset. So this is what is called the preset. Now, let me show you this. You don't have to do anything. Let's say I go to View and I come over here and I go to Studio and I reset the studio so everything comes back in it's entirety, right? Watch this view. Studio preset less than 0. Bone. Now, only the tools that we're going to use in this first lesson are the ones that are showing. We're going to be building different presets as we go through the projects. So right now what I want you to do, get to the point in your tools panel where these are the tools that are shown. The only panel that you're going to have out here is the layer panel right here. And then using the preset, you're going to come over to studio preset and you're going to create one. I've called mine less than 0. Okay? All right, let's go ahead and call it on this one. Once you've done that, let's go ahead and move on to the next lesson.
5. Creating your first document: Our IT folks and welcome back to our journey here on t-shirt making. Now we are in a new reset studio space. So the first thing we're gonna do here is we're going to get back to our preset. So let's go to View Studio preset and find that less than 0 preset that I asked you to create in the last lesson. Alright, so you see we have minimal tools over here on this left side. The only studio thing we have is Layers panel. And so now the first thing that I'm going to ask you to do is we're going to come over to you File and we're going to click on New. This is how you create a new document in Affinity Designer. Now, we're going to cover templates here and another lesson. I'm not going to teach you the in-depth right now. I just want you to follow along so that we get some semblance of success. And then we'll dig into the deeper stuff in later, more complex designs. So the first thing you're gonna do is you're gonna figure out what unit you want to work in. I'm over here in the States, so I'm going to work in inches. And I'm going to create a t-shirt for the front of a shirt. So this image is going to go on the front. So I like to work very close to the size that I'm actually going to print width. So the width on this one, I'm going to go ahead and I'm going to say is going to be 13 inches. And I'm going to go by 18 inches. Now you can go 16 by 2013 by 18 doesn't really matter. And for right now the color that I'm going to choose is RGB eight bit. Now we'll talk about color here in a later lesson for right now, all I need you to do is make sure that's selected and let's create. So what comes up is a new document. And you'll see over at the top here, you've got what are called rulers. Now if you don't have the ruler and the ruler is showing up right here. There's my zero-zero point and it goes over there. And then it goes down to here. And you'll see that I've got about 18 inches right here in 13 inches right here. Now, if you don't have this, let me show you where to go to get it. We're going to come over to View. And you're going to then click on Show Rulers right there. Turn it off, View. Turn it on. Rulers are going to be your friend when you get into the t-shirt business. Now, the other thing you're going to want to do now, you see how this is a white background. It is not desirable to have any common background when you're designing. So you want to make it transparent. Now we can do this in the initial selection, but I wanted to show you how to do it differently. So to change to utterance parent, go to File Document Setup. And we're going to go ahead then and go to color and hit on transparent background. Boom, right there. Just in case y'all can't see it. This is going to be your best friend. Okay. Let's go ahead and clean that out. All right. And hit. Okay. Now it becomes a checkered background. This is assigned to that you effectively have a transparent background. One of the reasons why I wanted you to create these tools over here. Let's click on the rectangle. Let's come up to the corner. Now you see I have little green and red lines. That's called snapping. Snapping is found up here. So let me just highlight the snapping icon. It looks like a magnet. Click it so that it's depressed. That means that it is on. Okay? Now what snapping does is we're going to click and we're going to drag. So we're going to click and drag. And this gives us a color. Now, this is the first time we're going to use the context toolbar. And remember the context toolbar is right here. Okay? Now the context toolbar depends on which tool you have selected. In our case, we select the rectangle. Now, the other thing I want to show you, move this down out of the way. Let's go to our Layers panel. You'll see that this is formed a layer. And right now it is called a rectangle. A rectangle folks is a shape that is a specific type of layer. Okay. So were you see rectangle, that's a shape. Now it's different than say, a curve or a pixel layer or a mask layer or anything like that. We'll talk about those later. Don't need to know that right now. So let's go ahead and kill this. Now, let's look at the options we have for this rectangle. I'm gonna come over here and I'm going to click You see where it says fill right here in the context toolbar. Right now I'm going to click and this little circle wheel, the color wheel comes up. I want you to click and go all the way down to white with this little area right here, right there, go to white right there. Okay? So once we do that, this should turn this to white. Here's a pro tip for you. Always create a rectangle, the color of the shirt that you are going to be printing against. In this case, the T-shirt we're going to be printing is going to be on a white shirt. Therefore, we want a white rectangle. So I always do this and now I'm going to show you one more thing here. Click on where it says Rectangle. You'll see right here where it allowed me to rename. We're going to go right here. I'm going to click on it. I'm going to type in background. I always type that in when I do a shirt. Okay, it's still a rectangle layer and now it's called background. So we, in this lesson, created our document. We showed you how to find your rulers. We showed you how to turn on Snapping. We created our first layer right here, and it is a shape layer. And we utilized our first tool right here. All right, that was a lot of stuff. In the next lesson, we're gonna go ahead and we're going to lay out a t-shirt design. And I'll show you a little bit about my research process, but rest assured, there are other lessons in here that do deeply into it. All right, We'll see you the next one.
6. Sizing for print on demand: Are getting, so all this talk about sizing. I want to make sure that this course is not about one particular printing method or another. So we're going to be talking about sizing in a general sense, sold you are a screen printer, a printer or a sublimation printer. Some of the information around sizing average sizes and that will be directly applicable to you. But if you are a print on-demand type of person. So let's take a look at printable, say t public or Redbubble. Every one of those sites will have their own image requirements. So what I've done here is I'm gonna go ahead and throw up on the screen. This is a illustration, let's say, and a screenshot from TEA public. So let's go ahead and take a look at this here. Now, when we work with t public, notice that they necessarily do not look to a certain size. They're going to specify the format, which is a p and a G with transparency. And then they're going to ask for 150 DPI. Now. Folks, DPI stands for dots per inch. So the higher the DPI, the more dots you have in an inch, the better your resolution is going to be. So notice here the minimum dimensions of at least 1500 by 1995, right? So they've given you the pixels 15 by 1995, so 1500 year by 2000 here. Okay? Now, if you're going to use it in all products, it's gotta be at least 5000 by 5500 pixels. And all of these sites have the design guide. So very clearly folks hear me very clearly on this. You want to look at where you are planning on printing two and fully understand what they are capable of. Now along this line, Let's go ahead and take a look at another popular site. And again, I don't endorse one over the other. I'm telling you these are the things that everybody struggles with. This is red bubble. And now red bubble again has their own designs. Now they say here, if you would like to use a single image for every product, 76, 32 by 6840, then goes all the way to a king size, do they cover? But you've got to keep the total file size under 300 megabytes, or under 13 thousand pixels in size. Okay? So remember what they're telling you here. Is that a good rule of thumb? High resolution files make the best prints. Notice they said not a massive file, but a high resolution file. So you want to keep the DPI around a certain size. For some printers, some printers are not so picky. So how do we make this happen? Let's go ahead and clear this out. And what I'm gonna do here is I'm going to go ahead and I'm going to shift back here and we're going to open up affinity. Now, previous to this, we were working with inches. I'm going to show you how to reverse engineer this thing. Alright, so I'm gonna go ahead and use t public here. And it's gotta be at least 150. And they're saying 15 by 1995. Okay, watch this. Go to File, New. This time, go to pixels. Keep it at 300 dots per inch. And let's go to 1550 by and let's go ahead and take a look at what was the, what was the size here? 1995. Alright. So let's go ahead and go 19. 1995, right there. Alright, so go ahead. That makes it by default there. And boom, there you go, folks. That is now a template that you could use and it's got the correct dpi. Now, if we were to come into here and we were to go to Document Setup, and we were gonna go to dimensions. Notice here now, we can then go ahead and we can necessarily change from pixels over to inches. And it gives us roughly the inch count at 300 dpi. So OK, and now we're back to inches. So folks, DPI is dots per inch. 300 is what I would consider to be the acceptable level for the print. And each single service will have their own design guide. So definitely go through the design guide once you figure out where you're working with, and then sit your templates up accordingly. All right, that's it for this one.
7. The artistic text tool: All right folks, welcome back to Affinity. Now, one of the reasons why I wanted to constrain the tools in our studio is because we're only going to use these in our initial design. So one of the designs that I think is kind of interesting, that's a big trend in 2021 when this is being recorded is the plastic bag vibe. So if you do a quick Google search, a plastic bag vibe, what you're going to see is a lot of different things that are being done on T-shirts, wall art, et cetera, et cetera. So a lot of this revolves around very simple concept. So let's go ahead and take a look at a couple. One, it's a very short succinct phrase. So good vibes, right? Very simple, doesn't take a lot of time to read. So whatever it is you do in this, it's got to be short and it's a repetition. And in this case they've got an even number of words. However, in this other one, they've got an odd number of words, right? So it depends on which one you want to make solid. So this is actually an actual plastic bag. So there's a lot of different things you can do with this. And it's a very simple t-shirt design, then you can knock off very simply. So let's go ahead and knock it out of the park here, I'm going to teach you the Artistic Text tool. And the Artistic Text tool is here in the tools palette. Now, if you click on it, you see it goes dark. Let's move over to our workstation and you'll see that we get a little cross hair with the letter a, that is a sign. You are in the Artistic Text spot. Now, when you do this, let me introduce you to the context toolbar for this tool. Because remember as you change the tool, the options for that tool are here. So right here, you have the font. Right here. You have any options for that font. Say if it's regular, Bold, Italic, that sort of thing. Here you have the size. Here you have what options may be in the font. As an example, for this one, you can only underline it. Here's the color. I'm not going to worry about these so much. The only other thing that I will use is the alignment. Okay? So if you understand this part, that's really all you need for the Artistic Text tool. So let's go ahead and clear this out. I'll switch back to my cursor and let's get after it. I'll move that back in. All right, When it comes to the Artistic Text, if you click and drag, it will drag out a font. We'll talk more about this later in choosing a t-shirt design. But right now, socially conscious topics are big and t-shirts always have been, always will be. So what I'm gonna do, I'm gonna choose tolerance. And I'm doing that because it's a very simple thing that you can get right off the bat. And it's something that is relatively relevant, okay, So what I'd like you to do is choose your own phrase. Doesn't matter what it is, but don't make it something that they have to read, think about. It's a one and done. It's an impactful punch. All right, Now, when it comes to plastic bag vibes, I like to use Helvetica Black. So if you do a Google search for free Helvetica Black fonts, I'll bet you that you can find a couple. But whatever font you use, I like to use something that is bold and something that is clean. So not a lot of hanky swooshing type stuff. So notice the bounding box. Let's look at the boundary box real quick. Okay, with the bounding box, you'll see you have the same circular handles. And if you want to resize this with the aspect ratio intact, Let's call this aspect ratio. This is the handle that you would use. However, if you want to mess with that aspect ratio, you would use either this middle handle or this top handle. Okay, now let me show you how this works and nothing you have to do here. I'm going to come over to my move tool. And I'm going to click and drag up, see how that changed it. Now, if you don't like what you just did, you can edit undo and that's how you edit undo. So what I'm gonna do, I'm gonna click and drag this up. And I'm gonna make it a little bit bigger. And because my snapping is on, I'm going to go ahead and I'm going to center it at the top. Now. I'm going to teach you a keyboard shortcut. Unfortunately, this is a keyboard shortcut that you're going to have to learn. I don't teach from a keyboard shortcut perspective, but this is one There's no way around. Okay, so I'm gonna go ahead and draw this out for you. Don't do anything other than passively consume right now. We're going to hold control. We're going to hold Alt and we're going to hold Shift altogether. Okay, now I'm gonna put this down here. Shift is used to constrain the image. Alt is used to duplicate the image and the control finished that is used to denote a power duplication. Now what is that? What I'm going to be showing you guys is how to power duplicate. This is an essential skill for t-shirt designers. It is not inherently easy. There's not a magical menu function. This is how you do it. Okay, I'm going to leave this up here now I'm going to do it and then I'm going to undo it and then we'll do it together. So just watch right now. I hold Shift Control and Alt, I drag down. Now notice there is a little yellow line. You see the yellow line right there. I get my spacing right. Once I have the spacing the way I want it, I released the click and then I release my three buttons. Now it doesn't look like anything happened other than the duplication. But the second part of this, just so you know, we're going to hit Control plus j to power duplicate. Now what does this do? It does the last operation. It duplicates it. Okay, Now watch this. So I come back here. Alright, so now I'm just going to hit Control J. Okay, this is power duplication. Now, I'd like to call your attention to the Layers panel. Notice here, notice all of the instances now I have of text. And this is an important thing. Now. I'm still teach in, so hold tight and we'll do it together here again. Notice the different types of layers in the last lesson, this was a rectangle there. It was a shape layer. Anywhere you have the circle a, this is a text layer. It's a different type of layer. Okay? So that's kind of how this thing works. So let's go ahead. I'm going to walk you through it one more time. Okay. Now to undo my steps, I'm gonna come over here with my cursor. And I'm going to edit undo, edit, undo, edit, undo, edit, undo, edit, undo. Let's do one more. Edit Undo. Okay, Move Tool selected, Control Shift, Alt, held, click and drag. Get the spacing right. Release that click, release the buttons, and then Control J. Okay, there we go, 1234567 instances. Now let's come over here, count them out. 1234567 instances. And you'll notice that this is blue right here. That corresponds to whichever one I have selected over here. Okay? So that's the relationship between the layers panel and what we're doing there. Alright, so here it is. Control Alt, Shift, click and drag down with your cursor still in the workspace. Hit Control J to power duplicate, and what it does, it duplicates the last operation. So in this lesson, you learned how to utilize the Artistic Text tool. You'll learn how to power duplicate. You learn how to change some of the color in your Artistic Text. I think that this was a pretty full lesson, folks. I'm not gonna do a lot of keyboard shortcuts. This is one, there's no shortcut way to learn this. Alright, let's go ahead and in the next lesson we're going to show you something new width stroke. All right, I'll see you the next one.
8. Utilizing stroke : All right, folks, Welcome back. So let's go ahead and take the next step. Now. We're going to go ahead and we're going to find in the layers panel right here which one is in the center. So I'm gonna go ahead and I'm going to go to my move. And I'm just going to click until I get to the one that's in the center. And I'm gonna go, and I'm going to call this solid. You know how to rename a layer. Now you know how to identify the layer. Okay, Now watch this. We're now going to apply a stroke. So what I'm going to ask you to do, we're going to change our studio now. We're gonna go to View. I haven't showed you this before. Go to studio. And you'll see that there are all the different studio panels you can choose. The only one that I have you working with right now is the layers. I'm going to have you add in the Stroke panel. Now, it may appear outside like it did on mine. It may appear up here. Watch this. Click and drag, or click and drag. For illustration purposes, I'm going to bring out my Stroke panel so that you guys can see that and it's not convoluted. I like to run it like this. And so what I'm going to do, I'm going to come up to view. I'm going to go to Studio presets. And now I'm going to add a preset. And I'm going to call this lesson 1 preset. Okay? So we've now added to our preset list. Alright, now, with the solid one selected, I'm going to lock this in. I do not want to mess with that. But what I do want to do is mess with the other six. So watch this. We haven't talked about this. I'm going to click and drag this up to the top of the layer. And now you see this is at the top of the layer stack. All right, so I'm going to now grab and select these. Now notice I'm on a area I'm holding Control. Now watch this. This is something I haven't showed you. Right-click and hit group. So what this did in affinity designer's world is it made this a group. Now we can apply a stroke to the group. So watch this. Right now. There is no stroke on this. Okay? So what I'm gonna do now is I'm gonna come over to fill in in the group. I'm going to hit the little white circle with the red line on it. And what it did, it just said, don't fill any of the aspects or any of the people within that group. Now if I click on this again, it comes back, click on it there, it goes away. Now, here's what we're going to do. I'm going to come over to the Stroke panel. And I'm going to click on this little line that let me kind of illustrate this. This little line right here says this is a solid line. This little one here says this is a dotted line. And this one here gives you a brushstroke. For the purposes of this, we are only going to deal with a solid line. This is going to be your line size. And what I'm going to mess with is the alignment. Okay? Now I'm going to show you this and then I'm going to do this together. So don't worry about it right now. Just watch passively and then we'll do it together. So the first thing that I'm gonna do is I'm going to kick up the stroke size. Boom, just like that. Now you can either click here. So I'm gonna make this 5. Or you can adjust the slider. I do bolt. Now notice as soon as you put a stroke on, It's got a black fill. We're going to come over here now to the context toolbar. And that my friends is right here. And we're going to click on this little black area right here. And what's going to happen when we do that? Up comes our color wheel. And we're going to match the color that we had. Now, this is an important distinction. A stroke, by default is equally distributed around the shape. If I want the stroked text to be the same shape as my filled text, I want to align a stroke against the inside. So I come to here. And now notice what just happened. Align Stroke to outside. You'll see how now this little space, let me bring it up a little sooner here. Because we align the stroke to the outside, these things now overlap. That's not desirable. If we align stroke to the inside. Now this n right here is the same size as my red in. And if I align the stroke to the center, meaning half in and half out, it changes again. Stroke adds volume. And the reason why this is important, let me bring this up so that you guys can see this. I'm going to do this blue since we're dealing kind of reddish text. Notice I've got the alignment half in and half out. And look at how little gap I have here. Look at how much gap I have here. Does this look like that? No, that will show up in the viewer's eye as something that is weird. So what we're gonna do is we're going to align the stroke to the inside. Now, let's go ahead and take a look at this. The gap I have here is the same gap that I have here. So this is an important designation. Now if you want to, you can always change the type of joints. Let me show you this. If you go to join, you can change the way that they're joined up. I'm gonna go ahead and I'm gonna keep it there. And you can also change the cap for a closed shape, that doesn't really matter. So what I would like you to do right now is we're going to keep the join right here. We're going to keep the alignment right here. And I want this space to be the same as this space. Okay? Aligning that stroke to the outside is definitely what keeps it consistent. All right, awesome. So we're gonna go ahead and I'm going to clear that out. And I think that we are pretty darn good. So now you know the Stroke panel and what I'd like you to do now, let's go ahead and move that back inside. So you've got the stroke in the layers panel. You've got the solid one up top. You've got the group here, and you've got the background text. Awesome. Alright, so what we're gonna do now is we're going to go ahead and end this lesson. And in the next one we're going to show you a little bit about transparency. And we're going to get this thing ready for export. So let's go ahead and call it, and we'll see you in the next one.
9. Adding transparency Exporting your design: All right folks, welcome back. So we're going to now export this thing and we're going to add in one artistic link here. So what I'm gonna do is I'm gonna go ahead. I am on the magnifying glass here. And I'm just gonna go ahead and I'm going to click and drag to the left a little bit. And then I'm going to use these bars kind of center up. Okay, I'm going to introduce you to a new tool. So what I'm gonna have you do, I'm going to have you go to View. Let's go ahead and go to customize tools. And what I want you to do is I want you to find this little wine glass right here. Click and drag and put it down inside of here. Okay, Let's go ahead and close. Once we've added that, Let's go to View Studio presets and preset. And let's go to section one, complete because this is the last update we're going to make in this and we go, okay. Perfect. And it seems like why do you keep bringing me back to the tools? Because if you start adding them a little bit at a time along with the studio, you get a much better awareness of what each tool is. So you're not dealing with each tool in the complexity of the entire ecosystem. This is what is called the transparency tool. So I'm going to go ahead and I'm gonna make an adjustment on my Layers panel. Now watch this. I'm going to click and drag my layer out here. I like to work with this panel. All right, so the first thing that I'm going to do is I'm going to grab my solid tolerance there. I'm going to uncheck it. I'm going to hold control. And now I'm going to right-click and I'm going to group the entire thing. So this thing is 100% grouped here. Now the way this hierarchy works, let me show you this. I'm going to use this here. These little twirly downs right here where you see the little twirly down. It means that there's indented here a layer and here a layer. And then this has a little twirly down. And that totally down is composed of all of these different layers. So if you ever get kinda lost, confused and you're not sure what you're affecting. Take a look at your grouping structure. I'll bet you that the reason why you're not affecting the layer you think you are, because you're grouping structure is jacked up. Alright, so this entire group now this is going to be a little bit more advanced. We're going to introduce it and then we're going to work with it later, more in depth. All right, so this new tool I'm going to show you, This is the opacity or transparency tool. Let's check this out now, this is totally an option. It's up to you. I'm going to click on this wine glass and I'm going to come over to the middle. Now watch what happens. I've got my entire group selected here and I'm going to center in the group. You see how my snapping is on. Now watch this click and drag. Now you'll see a white circle and a black circle. What I want you to do is I want you to take the black circle and I want you to click and drag it down to the end as well. Okay, see now we've got highly opaque, up to transparent. Now, let's come over here. I'm going to click on this little gray shaded box here. Now watch this. What I want to do is make the red tolerance the most opaque. So in the middle here, I'm going to click in the middle of the line. Now watch this. I'm in the middle of the design. You can clearly see that right here. Take the opacity and crank it up. So what's happening is when it comes to transparency, the end is highly transparent. The middle is not transparent at all. And what I'm gonna do, I'm gonna come down to this white one all the way down here. And I'm going to crank the transparency down on this guy right there. Alright, now if you don't like this, you see these little handles in the middle. They're right here. They're also here. So let me show you where those are. Those are right here. You can adjust those. So let's go ahead and let's adjust them. We'll go ahead and pull this, maybe a little more opaque towards this area, maybe a little less transparent in this area. And if you wanted to pull the transparency, you can even adjust to that. I think that for my money, I'm pretty good. Now, when you are ready, once you're happy with your transparency. And by the way, if you wanted to make it quarter to quarter transparent, you can even do that. You're going to go ahead and you're going to go to the move tool and that locks it in. So this group now has transparency applied. And you'll see by click on the transparency tool, I can make other adjustments. So once you're happy with that, here's what I want you to do. Go to File Export. Now. It's going to give you some options, t-shirts, P and G, Export. And in this case, I just want the selection, but I do not want the background. You'll see the group is selected. Let's hit Export. And now let's call this tolerance PNG with TransE. Okay? And save. That is how you export an image. Now, if I haven't showed you this before, I apologize, Let's go ahead and save our file. Let's call this tolerance mode. And in your downloads for this lesson, I will go ahead and include this. Now, the thing that I will tell you straight up, if you don't have Helvetica Black installed, because this is a font that you will get a different font. So just be aware. All right, let's go ahead and call this one in the next one, we're going to show you how to bring this into your mockup and complete our t-shirt.
10. Placing it on a mock up: All right, folks, welcome back to Affinity. So let's go ahead and put this into our mockup. Now one of the things I added for our teacher course is a mock-up. So let's go to file. Let's open, and let's go ahead to wherever it is you decided to put this course download. And we're gonna go to the front of shirt mock-up. Alright, so this is what comes up. Now, we're going to be putting each one of our designs on a mock-up. And this mock-up is of course free for you to use. And this is a shirt that I actually shot for my t-shirt business. So congratulations, this is a Physical shirt. Let's explore the mockup for just a second so that you know what you're dealing with. All of the things for the t-shirt are in the group. Now, when you open up the group, notice that this is what I mentioned about the twirly downs. That's a technical term by the way, there's the twirly down. This group is composed of a multiply layer and a color layer. The multiply layer only has the wrinkled texture. So I'm gonna go ahead and turn this layer off for just a moment. So notice this is just multiplied where it has all of the wrinkles. Now if I turn off the wrinkle air, notice you just have a color layer. So the wrinkle layer and the color layer, both essential. And the rectangle here is just the background. All right, so there's that. Now if you want to change the color, the way we do that, I already showed you this is the color rectangle. Now you'll see that this is bright red. And if we come up here to the context toolbar, this is also bright red. Well then why aren't we seeing red in the shirt? Watch this. The trick is, it has to do with the adjustment layer. So nothing you have to do here. Just check it out. This HSL shift adjustment is key. So watch this as I increase saturation and as I increase the luminosity, the color begins to come back. And so you can make this shirt any color you want through adjusting this HSL. So if you were gonna do a royal blue shirt, Let's say, we would then drop the luminosity a little bit, make it a little bit darker. And if it was a little bit over saturated, you could come over and reduce some of that saturation until it look natural. There you go. Now, what I'm gonna do, I'm planning on putting this on a pure white shirt. So to me, color doesn't matter. I'm going to take the luminosity, a crank, this bad boy up until I only have the white shirt. So the way you work with this mock-up, the HSL adjustment is your adjustment layer. Any conceivable tone, darkness, lightness of shirt can be achieved this way. Alright, so now let's do this. We went into here. We're going to right-click. And I'm going to do this the, you know what, let's do this the right way. Let's go to File Place and find wherever it is, you put your reference. So there's my tolerance PNG with trends. And bring this just like that. Now, where you put this in the stack is important. Watch this. I'm going to click and I'm going to drag, and it's got to be below the multiply and above the color. So let me highlight this because this is important. It goes underneath the multiply, but above the color. Okay? This is where this layer has to go. And so now it's just a matter of adjusting it to where you want it. All right. There we go. Alright, Now it depends on what you're printing technology is, how this works, all of that jazz. So you can do whatever you want to do with it. But there we go. We have a finished shirt on a mockup. Now you're going to file export. And this one, when you get the background done and you get everything you want to export it as a PNG. I made it square. And I turned down the quality of my mockups because a lot of times on websites, you don't need full on 300 DPI. You don't need that high level of resolution. So I tend to keep my file size is pretty low. File sizes, by the way, folks are right here. Estimated file size, so that it's 264 kilobytes. It's 1500 by 1500. And for your mockups, you really want to utilize JPEG. Okay? So after that, I'll use you to export and away you go. So for each one of the t-shirts we're gonna do in this course. This is going to be the process. Alright, folks hope you learned a little bit about this one. Hope you learned a lot about the text tool. This was the beginning one. This was the simplest one. Let's go ahead and get into a more complex one. All right, we'll see you the next one.
11. Intro to section 2 : All right, Welcome back to Affinity Designer. This is going to be our first theoretical section. Now I say theoretical because it is applicable, but we're not going to be building a T-shirt in these few lessons. This section is all about if you're brand new, even in the world of digital art, what it takes and how we size. Thanks Now I any printer of t-shirts. So what I've done in the downloads for this section is I've included a chart that shows the average placement and the average size for t-shirt designs. Now, if you're a print on-demand folk with print on-demand, again, they're going to tell you what pixel size you need to be at. So in this section we're going to cover things like vector versus raster. We're going to cover color profiles. And we're gonna take a look at how to set up templates and presets in Affinity Designer. Because if you can set up a template or a preset, that is a prerequisite to going pro. Alright, so that's what you can expect in this area. I'm going to be doing one of these every single time. And let's go ahead and jump into this section.
12. What is Raster vs Vector art: All right folks, welcome back to your affinity journey. Now, what I'd like to do here is I'd like to just go over a quick theoretical lesson with you. And it means something in the world of t-shirt design. Now there's nothing you have to do here. We're going to keep this very short, but this is going to be more of a passive lesson. And I want to talk to you about vector art versus raster art. Now, in order to illustrate this, what I've got here in front of you, I've got a 16 inch by 20 inch workspace, okay? And digital art comes in two varieties. There is what is called vector art and there is raster art. Now, vector art is based on math. Raster art is literally based on pixels. So why is this important? If you make your design out of pixels, it is prone to pixelation. Now what is pixelation? Pixelation is when you take an image that has, say, this size and there are this many pixels in it, let's say. And then you blow it up to the entire size here, right? You go through and you blow it up and all the directions. And what happens is that there's no pixels really to stretch. There's no pixels to replace that size. And so what happens? Things get blurry, things get grainy, and things get really ugly when it comes to T-shirts. So you have two options really. The first thing is that most t-shirt designers, at least for some t-shirts, work in what is called a vector. Because vector is based on math. It really doesn't pixelate. Let me show you an example. Now. I've reset my studio again. Nothing you have to do here right now. This is just going to be something we'll talk about. And let's say that I'm looking at the Pen tool. I can draw different shapes. And I can come up here and I can join said shapes. And what happens then is that the math around this shape is held in affinity so that if I bring it up to the size of a business card or I'm blow it up to the size of a billboard. It's still going to be crisp. And why? Because the stroke, the fill color and everything is 110% based on math. Now, vector art is a completely different beast. I'm going to go ahead and I'm going to show you one just to kind of show you what's up here. Alright, so I'm gonna show you kind of what an example of this is. We're not gonna go into anything nearly this complicated in this class, but this is a very simple, elegant design. And you'll see how all of these areas are based on curves. That means it's based on math. This was 100% done in vector. So how is this different from raster? Let me kinda show you guys what's up. So we're gonna go ahead and I'm going to File Place. And again, nothing you need to do here, but I've grabbed a very small type of image off the internet. Now, this image is very super small, right? And as I blow it up to 16 inches, you begin to see what happens. This is pixelation. This happens with raster based images. Now, on the other hand, a vector-based image. Let's go ahead and pull a vector. Let's go to this class, actually one that we'll be doing a little bit later. Let's go ahead and grab this skull. Now this skull, we go all the way up to 20 inches. And let's look at the layers panel here on this. And I'm going to double-click because it's an embedded image. And notice that it is a curve. This is vectorized. And if I go to my node tool, you'll see all the little notes. That means it's based on math, which means I can blow this thing up and put it on a billboard. I can shrink it down and put it on a business card and it will not lose any of its quality detail. So wrapping this lesson up, now that you know what the difference is, there are two persona's, Affinity Designer, there is what is called the vector persona. And I'm going to show you that right here where you got all your vector tools. That's what we've been working in so far. And there is also the pixel persona. Now, we're going to be working with that here in a little bit, all in good time. And when you click on the pixel persona, you get a whole new set of tools right here. So that's kinda where we're at. That's the difference between pixel and vector based art. And remember, pixel-based start is literally based on pixels and in this prone to pixelation. So my best piece of advice, this is going to be a gold star thing. Work close to the size you are going to print on. So if you are going to print a 16 by 20 shirt, do not print on a two by three, okay? That will make it pixelate. Alright, let's go ahead and call this one. I've gone off long enough. Let's go ahead and take the next lesson.
13. Getting the color right: All right folks, welcome back to Affinity Designer. So this lesson is going to be talking about color into the t-shirt space. So in order to do that, we're going to modify our studio again. Let's go to View Studio. And let's go ahead and grab the color tab. Okay, Now notice where the color tab ended up in mine. It's over here on the right-hand side. I'm going to click and drag and I'm going to bring it out. That will help me illustrate my point here for this lesson. And what I'd like to do. Let's go to View. Let's go ahead and go to Studio presets. And let's add a new preset. And let's call this preset to 0.1. Okay? Because we're going to add another one here and a couple of more lessons. Alright, perfect. This color tab is new. Now. There is something that is very unique with the color tab there. And it's something you're going to want to learn early. And the technical term from the community, this is the hamburger menu. The hamburger menu is present in a lot of these studio tabs. So let's go ahead and clear that out. And when you twirl down to the hamburger menu, we can look at the color wheel. We can look at the color as a series of sliders. We can look at the color as a series of boxes with the hue across this band and the lightness and saturation across the lower part. Or we could look at tints. So what I'm going to do for the purposes of this lecture and probably most of the rest of the class, I like to use the color wheel. Now folks, the color wheel has two little circles right here. If you grab the one outside and spin it around, that addresses and adjust what is called the hue. And if you come down and shift the inner circle, you really start affecting say, saturation, you see how if I have the little circles touching and I move over here, the color gets less saturated until I hit gray. And if I move it up and down, I affect the lightness. So with this little adjustment, you can get to any color of the rainbow your heart desires. Now, the other thing you want to learn about this, if we're looking at this and I have this circle with the hollow center selected, that is the stroke. The solid circle here that is bright red is the fill of an object. We're going to talk about those here later, yesterday. In the last lesson, you learned about the stroke and the fill of an object. So we're gonna go ahead and we're gonna clear that out. And now color the real conversation that I want to have today, color comes into two big varieties. The first one I want to talk about is called RGB, which stands for red, green and blue. Now, red, green, blue really represents all the colors that make up your monitor. Anything digital works in red, green, and blue in the RGB color space. And RGB is additive. The more light you add the something, the brighter it gets. So literally black is 000 000 in the RGB scale. And white is all the colors of light all added together. Rgb is additive, so you take the red light, add it to the blue light, add it to the green light, and magically you get white. That's how RGB works. Now, on the other side of the spectrum is CMYK, cyan, magenta, yellow, and black, or called key. These are the colors in your print cartridges. And CMYK is subtractive. So the way this works here to reveal colors, you subtract. So to get to white on CMYK, white is the absence of color. If all the colors are present because they're designed to be printed, they become black. So if all the colors are there is black. What we have to do is we have to start removing colors in order to see them. So you really don't have to understand color theory or how the colors work with the human eye to understand this, what you do have to understand is that if you are printing for digital, RGB is going to be your color space. If you are planning on printing media, then CMYK will be your space. But there is a great unifier, folks. Call your printer. Many printers today allow you to work in RGB and they convert it into a CMYK color space. Now, you may not remember it. It was a couple lessons ago. But when you set up a document, let's just set up a new document for giggles. Right there it asks you RGB or CMYK, the little twirl down menu. I will tell you folks in my career, in my T-shirt printing, I have not used CMYK ever. My printer just does RGB and then converts it. All right, now let me show you something here. Nothing you have to do here. This is a passive lesson here. I'm gonna go ahead and I'm going to put in a very simple circle, and I'm going to fill it with red. Now watch how I fill it. I'm going to come over here. You see where the little white is right here. And I'm going to make little red dots touch. That means that it is read in you. It is fully read like really saturated. This is pure red is a gets. Now I'm going to change the document color space. What I need you folks to focus on, watch the red dot and watch how the colors change on the wheel, okay, to focus points, Let's clear those out. I'm going to now swap over to my cursor. We're going to go to File, and I'm going to go to Document Setup. And all you have to do is passively watch. I'll tell you when. And I'm going to change the color format now to CMYK. Now watch this. I'm going to hit Okay, in just a moment. Got your eye on the color and the wheel. It, you see the subtle change in how the color is represented. This red now a little more muted, and this color wheel has significantly changed its colors. This is the difference in CMYK versus RGB. To illustrate this, I'm going to go back. Go to File. Let's go to Document Setup. And now instead of the CMYK, I'm going back to RGB. Alright, I'm about to hit, Okay. You guys keeping an eye on the wheel in this color? Mom, notice the change. So folks, the general rule is for printing. You want CMYK, but you want to get with your printer and find out what color formats they support. My TTG printers that I use, and even my sublimation printers all asked for RGB values and then do a conversion to CMYK. All right, folks, let's go ahead and call it on this one. Not much more to talk about without going way too deep into color. Let's go ahead and take the next step.
14. The different sizes In a T shirt: All right gang and welcome back to Affinity Designer on our T-shirt journey. So in this one we're gonna take a look at some common things in terms of sizes of T-shirts. So that's the focus of this lesson. And what I'd like to do, I'd like to go to File. And let's just bring this up in your downloads. You've got a T-Shirt infographic. Now, this is an infographic that we made here to help you along your journey. And in full disclosure, nothing is sacred. Alright, what you've got here along the top is a common T-shirt. And what I've done is I have marked common starting point sizes for different designs. As an example, onto this sleeve, it is a 3.5 by 3.5 inch graphic width and tall. So you can go larger than 3.5 if it's a rectangular style graphic and it looks good, certainly change this. Asleep is roughly six inches from here to here. So you might have problems getting it to eight, that kind of thing right? Now, when you go across the full chest, a typical full chest is around 12 inches wide. And I like to start my text at about four inches tall. Now sometimes I'll go eight inches tall. Sometimes I'll go with somewhere in between. It's up to you. The golden rule is, pay attention to your design. Make it look good. So don't hold them a certain sizing simply because that's what came out of the template. And traditionally, front based graphics started around two to 2.5 inches below the neck line. Now, I've had clients that want them lower. I've had clients that want them higher. The general rule is do what makes the thing look good? Now, the blue thing here, that's a traditional pocket T right here. And so a T for say, the pocket there is about 3.5 by 3.5 and a full frontal is roughly 12 by 14. Now these are starting points. They are not designed to be hard and fast guides. I personally do mammoths graphics. And so 12 inches by 14 inches is just a starting point for me. I'll do the whole front of that bad boy. Now on the back, same thing. You've got your cross back right here, and you've got your full back. Now, this can go up to 16, 18. My d t g printer goes all the way to 24 inches as does my heat press. So this thing goes from the top to the bottom, and I even consume this, I go fall back on it. A typical back design is about 2.5 to three inches below the start of the neck. Now if we dotted down this area on the frontier, that's kinda where that is, do not start from three inches from here. It'll be way too low and it looks super funny. Alright? Now, typical t-shirts, and I do say typical, the sizes I give are right here. Now, these are starting points. The reason why I bring it up. If you weren't doing a full chest, a full chest in a small is around 18 inches. Now, if you offer for x, that's 30. If you are rasterizing an image, you know, when you blow it up or shrink it down, that the image may pixelate. So the reason why I plan this in my offering, I don't do anything greater than three x. So I know I'm going from 18 inches over to 28. The distance from here to here is 10. And so when I do a full frontal graphic, I split the difference at five. So I do my design at 23 inches. That way, if I blow it up or I shrink it down, I have some flexibility. If you designed it at the small end and then tried to blow it up for a 28 inch chest. It would probably pixelate. In my experience, depending on your printing technology, you can get away with between 25 and 30 percent of blow-up. If you go past 30 percent, it will easily be seen by the client. They will notice a quality difference. And when I refer to printing technology in this class, It's up to however you want to print. I printed house on a DTD direct garment printer. But if you're going through printable, you're going to want, and that's your technology. And so you're going to want to work pretty close to that. Alright? Now, color settings, when you do a typical t-shirt, know your printer. Some printers require RGB, some require the C, M, YK. We talked about that. And the general golden rule for all printing. 300 DPI, 300 DPI for print. And always check the transparent background box I export in PNG, most t-shirt services allow you to upload and PNG. And you always wanna make sure that you export without the background. So these are some things you want to think about when you're setting up your design. And the reason why we're talking about this. In the next lesson, we're going to take a template and we're going to be making templates of this size. So these are good starting points, but they are not the be-all, end-all of T-shirt sizing. Alright, so a little bit on T-shirt sizing. Hope you like the infographic. This is a good place to start. Let's go ahead and get started.
15. Setting up Presets for T shirt work : All right folks, we'll go back to infinity. So now that we know the basic sizing of a t-shirt, Let's go ahead and set our first template up. Actually I'm going to use the technical term. I'm going to show you how to create your first preset. So let's go to File New. Now, what is a preset? A preset is a pre-determined document that allows you to just open all of these settings and save your settings without having to choose them every single time. So when you bring this up, you'll see presets and templates. Today, we're going to be working with presets right here where the little blue square is. Now, there are different presets across the top. These come preloaded in affinity and you'll see something called my presets. Mine is currently empty, so we're going to create one for the back of the shirt. So we're going to do the back of his shirt pretty set. So the first thing we're gonna do, we're gonna come down to the document units and we're going to choose inches. Now, remember, 300 dots per inch, DPI is the gold standard. And because I want this to be a little bigger than my art and it's a personal preference. I go 16 by 20 on my backup shirts. Now, yours might be smaller depending on if your printer cannot handle that largest size, you may want to shrink it down. The reason I like to do this, if I have to shrink it down or blow it up, what I've found, this is the sweet spot that allows me to do that without losing a lot of quality. Now, the other thing we want to pay attention to, my printer prints in RGB eight bit, and I'm going to click on transparent background. All right, Now, before you hit anything else, we're going to come up to this plus, you see where it says the plus sign right here. We're going to click on this. Okay? Now this gives us an unnamed preset. We're going to right-click and we're going to rename, and we're going to call this back of shirt. Okay? Now what affinity is doing? They are saving my settings. 16 inches wide, 20 inches tall, 300 DPI. It's an inches and it's a transparent background with RGB eight bit. And I hit Okay. Now I'm going to create and up comes our spot. Now, if I close this, nothing you have to do here. File new presets. Now I see my preset. N bone. There it is. So what I'm gonna do now, I'm going to create a couple more presets with you. This is just going to be a couple applications of the exact same technique. File, New, let's make a front of shirt. When it comes to the front of shirts, I'm going to go with about, say, 14 inches wide and I'm going to go by 16 inches tall. Okay. 300 still in inches, still transparent. And I'm going to hit the plus sign. I'm over here rename. And I'm going to call this front of shirt. I know rocket science on. All right. I can spell today, I promise. All right, now let's do a couple more here to get the hang of it. 3.5 by 3.5, you know what I'm gonna do? I'm gonna go to an even 4.5. So I have a little bit of margin, 300 inches, 8-bit RGB, transparent. I'm going to hit the plus sign, right-click Rename preset. Now what we're gonna do is we're going to call this chest and arm. All right, perfect one more and we are done. Width is going to be 14 inches because the graphic is going to be roughly nine by 12 lead site. And I'm going to go up to six inches on my height. I'm going to keep that there. I'm going to come over here. I'm going to right-click. I'm going to rename the preset and we're going to call this, let's call this chest rocker. Okay. Why I'm having problems typing around this Mike today, I swear. Alright, perfect. So now if I decide to create the back of a shirt bone, these are the templates that we're going to be using right now in this class. In a couple of lessons, I will show you how to rock through the art board tool, which will allow you to go from amateur, say just creating presets into pro for a full on T-shirts spread. All right, folks, let's go ahead and stop it here. Gets your presets lined up and we will see you in the next one.
16. Introduction to the Dog Mom T shirt : All right folks, welcome to this section. Now, this section I have a lot of fun with. In this section, you're going to be exposed to the basics of the pixel layer. And you're going to be exposed to the basics of vector. So we're going to be combining vector shapes with photos. And you're going to be working with this photo of my dog should have a Batman and we're gonna make a dog mom T-shirt. So this is not going to be a deep dive into vector. This is the first pass into that world because vector art is very different than pixel art. So you're going to learn a little bit about clipping masks. You're going to learn a little bit about how to adjust paths. And so this is going to be your training wheels in for some of the more complex things that we do later. Again, if you get stuck anywhere along the way, make sure you reach out to us here and we will get you unstuck. Alright, let's go ahead and get started.
17. Working with Effects and adjustment layers: All right folks, let's go ahead and get into doing our first t-shirt. Now, these next couple of projects are going to be a combination of pixel width, an introduction to vector, so that you're not totally lost in terms of moving on to 100% vector and 100% of the time. Now I have the layout from the last section. That's the layout to 0.1. And if you've been following along, you have that. If you just joined us here, we've isolated some of the tools so that the tool that we have are only the ones that we need to use. Now, you might have more tools than we do, but you probably shouldn't have less. Let's go ahead and open. Now in your downloads for this course, we've included my beloved dog here. Let's go ahead and find it. And we're gonna make the classic dog mom T-shirt. Okay, so let's go ahead and open up a picture of chewy. There he is. All right, beautiful boy right there. All right. So what we're gonna do is I'm going to go ahead. I'm going to dock the color back in and I'm going to pull out to the Layers panel. All right? And I'm going to bring this up a little bit. Now, you'll notice that this is a pixel layer. It's right here, says what type of layer it is. And you'll notice that it's locked. So the first thing that I wanna do is I want to convert this into a pencil sketch. Now, what I'm about to show you some of the techniques I'm going to show you very daunting. What I want you to get out of this is where things are in the interface. And the only way to get really truly comfortable is to play with them. So I would encourage you once you know where these things are, take some tutorials, learn the techniques that you want to use in your t-shirts. And this will give me the basis that you need to be successful in other areas. So the pieces of the interface that we're going to learn right now on the layers, we're going to cover the adjustments layers. That's that little half-moon circle. We're going to cover layer effects. Layer effects are where that little fx is. And then we're also going to teach you a little bit about blend modes. Okay? So this is going to be a little bit longer, less than, than usual, because even if you're coming from affinity, or I should say to affinity from Adobe. These are all very common things in digital art. And so even if you're familiar with where they are in Adobe, it helps you identify where they are in affinity. So let's go ahead and clear that out. Now I'm going to switch back to my cursor. And the first thing that I'm going to do is I'm going to right-click on the background and duplicate the layer. Now, I don't teach shortcuts. So there are of course, keyboard shortcuts. Those are up to you to learn. I hated keyboard shortcuts when I learned because they're all in the menus. All right, so this new background layer, the first thing that we're going to do is we're going to go ahead and we're going to prefer an HSL adjustment layer. So come down to the little half-moon. And these adjustment layers, you adjust the layers that you've already created. And I'm going to look for the H ASL. And that folks is right there. That stands for the hue, saturation and lightness adjustment. Now, let's take a look at this because it can be a little daunting. Every time you use an adjustment layer. You get the layer pop-up window right here. And you see where this embeded the adjustment layer. It attached it to this layer up above. So the same way that I showed you, the layer structure works in the last lessons. This layer structure works the same way. Now, if you take this slider here and we shift it to the right or left, it'll adjust the hue. The hue is a fancy way of saying color. The saturation is a fancy way of saying how much color. And the luminosity or lightness is, how dark or how light the color is. So the first thing that I want to do in order to achieve this pencil look, I'm going to use an HSL layer 2 D saturate my image. So I'm going to take this slider and I'm going to push it all the way to gray right there. And you'll see that in effect, we just made a black and white photo. Now. Watch this, we're going to change layers. Right now. This HSL layer only applies to my background pixel copy. So if I close this, you see how it sticks with it. What I wanna do is I want to pull it up above, you see where the little blue line is now. This means that anything below the HSL shift will be affected by it. Aright. So what we did, we desaturated. That's the first thing I want to show you. Now. The second thing that I want to show you is the changing of the blend mode. Now what blend mode does, blend mode, and I'm going to write this down for you, tells the layer how to interact with the layer below it. Now, there are some common ones. As an example, the blend mode of multiply is used a lot of times to create shadows. You will use the blend mode of screen to create highlights. We're going to be doing all this in some other projects. Every blend mode has its own use case. And again, the easiest way to learn them is to just take some tutorials, try some techniques. So what we're going to do, I'm going to introduce you to where to adjust them. And it's over here, right here where it says normal. Let's click on this. In order to get that good pencil. Look, watch this. Don't have to do anything. We're going to just filter through and you'll see how the blend modes change. I'm going to land on Color Dodge. Okay. There's a reason for it. And now I'm going to bring in another adjustment layer. And I'm going to use an inversion adjustment. Now, when you're doing this at home, make sure the inversion adjustment is attached to the background, not up above it. If your layer is up above it, let me show you what's going to happen. Because this is a very common thing for new people. Click and drag and you see you get this weird effect. Click and drag and it goes white. And this thing folks, should be white. Okay, Now we've covered adjustment layers. I've showed you where to go to get Blend Modes. Now I'm going to show you something called a layer effect. And let's go ahead and click on layer effect. And these over here are the different effects you can add to a layer. So the one we're going to be using today is the Gaussian Blur. Gaussian Blur, Gaussian Blur, whatever you wanna call it. Don't really care what you want to call it. Just don't call it late for dinner. Now, watch this. We click on it. I'm going to push this over here. And now I move the slider. Now you'll see nothing's happening. Why we applied the layer effect to the wrong layer. You see how the FX is right here. A lesser effect on the inversion adjustment ain't gonna do nothing when it's white and you blur it. It's just blurred white. So we close out of that. Close out of that. Makes sure now your background layer is selected. And now bringing your layer effect, go to Gaussian Blur. And now watch what happens when you pull the slider. You start to get that really nice style pencil look now it's not great yet. Let's go ahead and close this. And the nice thing about effects layers. You can always come back there right here. They're attached to the layer. And so if I ever want to change the amount of blur again, watch this. I just click on the Effects symbol and notice the slider is exactly where I left it. Now the last thing that I want to do with yet, we're going to add another adjustment layer and we're going to put in what is called a levels adjustment. So go to the little half circle, go to Levels, click on levels. Now what levels does it makes the picture more dynamic. Now watch what happens when I push this black. You see how more of the picture comes out. So I'm going to stick the black right about here. I'm going to change the Gamma to be maybe somewhere right around here. And I'm going to put the output black level. Let's change the output white level to something maybe right around here. I think that that is pretty darn good. Now, how did I know what to do with that? In reality, play with these sliders. The black level is going to make the blacks a little bigger. The left white is going to make the whites a little brighter. The Gamma's going to adjust the overall. And then a subtle adjustment of the output levels will help you along your way. It's up to you how you want to do this. I like these settings for this picture. Totally up to you. Now, when you're done with this, close out your levels. So let's close the levels. And if you ever want to adjust them again, you can easily come over to the layer, Double-click and every one of your adjustments is right back where it was supposed to be. Now, once I've got this levels adjustment folks, I'm going to tell yet, I'm going to click on little effects here. And I'm might scoot this guy down just a little bit. Yeah. I think that that's pretty darn good for a pencil style sketch. Alright, so in this lesson, Let's go ahead and recap for two seconds. I showed you where the blend modes are. There is no way possible. I can go through every blend mode and every use case. This comes with experience in time. I showed you where the adjustment layers live. I showed you where the effects adjustments live. We took a look at how to properly nest. We took a look at the HSL adjustment. We took a look at a levels adjustment, and we used an inversion adjustment to combat the blend mode. All right, that's good on this one. In the next lesson we're going to show you how to isolate this dog from a professional perspective. And the reason why it's a pro perspective, it's non-destructive. This is a key part, folks that I'll leave you with. Notice how every part of my workflow at this point was non-destructive. I can go back and change the Gaussian Blur. I can adjust the levels, I can adjust the inversion. Everything is non-destructive. If I wanted to turn it all off today, I am right back to have in the original dog image that I had. Ri let's go ahead and call it on this one. This one ran a little long. This was not about teaching you all about the blend modes, the adjustment layers and the effects, but showing you where to go to get it. The only way to attain mastery of these concepts is to try them on various projects. We're going to do a lot of projects, so you need to know exactly where it sits. All right, folks, we'll see you in the next one.
18. Working with the pen tool to create lines: All right folks, welcome back to Affinity in our t-shirt journey, it is time to start with the world of a vector. What we've been working on so far is we've got this dog. What I want to do is cut out the dog. Now, there are ways to do it in the pixel persona, but I want to show you a smoother way to do it. We're going to make what is called a clipping mask. Now, to do this, we're going to add a couple more tools to our toolbar. So let's go ahead and go to View. And now what I want you to do is I want you to come down here to customize tools, okay? Now the tools that I want you to drag over, I want you to grab the pen tool, looks like this little pen up here. And I also want you to grab the pencil tool. And I want you to grab what is called the Node tool. Now for some reason, I have two of them. I want you to grab the one with the little white arrow if you have it. If not, you can grab that one. Okay. The last thing that I want you to grab then is the vector brush. Okay? So these four tools, folks, are the vector manipulation tools in Affinity Designer. So let's close this. Let's come up to View, go to Studio preset, and let's go ahead and add a preset and we'll call it section 3.1 because we might add to this. Okay, so that's going to be our new workspace, our new preset. Alright, let's take the pressure off from doing a t-shirt. And these next couple lessons are going to be practice. You want to do the practice, Okay? I know this is going to be terribly long, boring and it's going to be frustrating. You're going to want to throw the computer around the room. I get it. Let's go ahead and create a document. Let's go ahead and go with pixels. Actually, let's just do it this way. File Open. And in your downloads for this section, I've included a practice image for clipping paths. Okay, cool. So this is a pixel image and it's got a lot of squiggly lines on it. Now, this is my practice, boot camp proving ground for vector art. Now, all vector is achieved using shapes, using the curves, using the pen tools. So what we're going to learn to do this lesson is about learning to make shapes with the Pen tool. It is true there are shaped tools over here. You've got them already. We've been using them. But what I'm going to do is now I'm going to introduce you to the pen tool. So let's go ahead and click on the Pen tool. Alright, now to do this, I'm going to move my color tab back over. And I'm going to dry out my layers so that I can illustrate this for you folks. Okay? And I'm also going to bring up my pen here. Alright, perfect. Now, with the Pen tool selected, I want to kind of work you through the context toolbar. Now, what's going to happen when you use the pen tool is it's going to put a little circle or a square wherever you click it. This little circular squares called a node. And nodes form lines. So as an example, if you click the pen tool here, click the pen tool here, click the pen tool here. The line that will be created is here. And each node you'll see has these little handles coming off it. That's the term for them. They're the handles. The handles control the node. So what you're about to see is all vector is made of nodes. And nodes have handles for control. Okay? Now let's take a look at how this works. Nothing you have to do here. This is one of those things you wish it a little bit that you didn't do it because it's just frustrating. Okay, width your device. Let's go ahead and I'm going to click right here. Now you see the little blue circle that's been created. That's a node. Now, I'm going to hold Shift. You'll see the yellow line. When I get to the intersection where I want it, I click again. Now, notice here. Let me go ahead and bring this up. Notice here, this is a square node. This one here, right now is around node. Nodes have different shapes. Around node. Create something that looks like this design down here. A perfectly square node creates a 90 degree angle. Okay? Now, you can change the style of node that is up here into the context toolbar. You'll see there is a square node. So you can invert around one to square. And you can convert a square 12 around. And you can do something called a smart node. Now, a smart node, I will tell you, I rarely ever use Smart Notes, Okay? I use square and I use a lot around. If I add my preference, I would make everything around node. We'll talk about that a bit later. All right, So let's continue on. Now. You'll notice that I've been clicking around and such, and I abandon the shape. The pen tool remembers the last shape. So if I hover over it, you see how that turns yellow. That's the last known point. Watch this. Hold Shift, click, hold, Shift, click, hold, Shift, click, hold, Shift, click. The pen tool. We'll pick up where you left off if you go in and you do some other stuff. Now, why am I holding Shift? I'll go ahead and I'm gonna put this down as well here. Shift equals straight 90 degree lines. It's a modifier. So watch what happens if I do not hold Shift? If I have the pen tool, it will still allow me to pick up a watch this. I can come over here, I can go over here. Meanwhile, I'm going to Control Z this, if I hold Shift, I'm constrained to 90 degrees. So if you're making a very simple geometric shape, 90 degree angles like a square, this is how you do it. Okay? Now, the last thing that I want to show you, notice the type of layer this creates. This is a curve layer. It is not a shape. This thing down here, remember formed a shape layer. We use those tools over here, the blue ones. This is a curve layer and a curve has stroke and fill. So I'm gonna kinda turn this off. And now to adjust the stroke on this thing, watch this. Grabbed my mouse there. I'm gonna go ahead and I'm gonna use a red stroke. And I'm going to turn up the stroke width. There we go. Now, whoa, wait a minute, I just clicked off that animate another thing. This is an important thing. I'm glad this happened. In order to tell Affinity Designer that the shape is finished, you must hit the escape key or go to another tool. This is a huge pain. So I'm going to Control Z this. Now watch this. I hit Escape. And now notice the color of the node. There is the red. This is the finished note. Okay. So Pen tool 90, not even pen tool 101. The shapes or the lines or whatever you're making are made of nodes. This is a square node. You make a line perfectly straight by holding the Shift key. Shift key equals straight line. Now, the second thing I want to do here, because this is going to take a couple lessons, folks. I would like you to practice this. Remember to hit the Escape key. When you do this, if you do not hit the Escape key, it will continue to make nodes and you'll be frustrated. The reason why I created this practice sheet is because this is a life-skill, a 100 percent. As you do this at the teacher designer, it gets better. Now, here's the next thing we're going to do. I'm going to show you how to do this with a soft note. Let's go to the Pen tool. Now watch this. I'm going to click at the beginning. And now you see how this thing begins to crest here. I'm going to click and hold at the crest. Okay, you see now this is a round node. Now, what I want you to do, I'm going to grab my pen here. We're going to talk about this. I want you to be looking. Ahead. Everybody gets confused about where to place the node. The thing you wanna do is you want to look ahead and you want to angle your line down in the direction to the next inflection point. And then we're going to angle up. We're going to put one there. We're going to angle down, we're going to put one there, and we're going to angle here and we're going to put one here. So the look ahead method is an important thing because you want the minimum number of nodes. Let me write that down. Minimum node number. The more nodes you have, the more choppy line looks. Okay, Let's do this. Remember we haven't hit escape yet, so the Pen tool is still looking. I'm going to come down here and I'm going to go to my next inflection point. And I click and drag. Perfect. Now I'm looking ahead. I'm sweeping up. When I get to the hill, I click and drag. Okay, now you see I missed the line there. That's fine. We're going to show you how to fix that. Let's do it on purpose. All right, now I look ahead. I'm bringing it down to the valley. Click and drag. I look ahead, I bring it up to the top, click and drag. And finally, you see this is the end of the line. Watch this. Click and drag do not just click or you will get a square node and it will not work. Now, the last thing that I want to cover in this line is how to adjust. Once you have created the shape, Let's hit Escape. Now I finalized it and now I'm going to come to my node tool. The node tool right here. I'm going to bring this up because I want you to understand where this is. This is going to be a huge friend, EU, the T-shirt designer. The node tool right there. What the node tool does is it allows you to adjust. So if I want to adjust these nodes now, let's go ahead and click on the node. You'll see it turns blue. And I'm going to grab the handle. And I'm going to grab this handle. And I'm going to grab that handle. And I'm going to do a little bit of adjustment. You see how now we've got that. And now I'm going to grab this handle. I'm going to do a little bit of adjustment. And now I'm going to grab this handle. Folks, after you get your hidden lines down, you're going to want to make some subtle adjustments. Notice how I'm going through now and I'm touching each one of these lines. And sometimes you have to move the node. So this little blue node here, I move it up, right? Perfect. We are spot on that line. That line is good. Ok, that last one there. All right, Now I realize I made that look easy. You're going to get frustrated. It's going to be infuriating. That's fine. Now, there's one more thing that I want to show you when we talk about lines. In the next one we're going to talk about shapes. When you want a hard point. You see here I've got a series of hard points all scrawled out in different ways. We're going to use the pen tool. You start the line and now watch this. This key is very important. I'm going to write this down so that you can get it down. When you do this type of thing. Very simply. You're going to want to click Alt. Drag. Okay? Now what do I mean by that? Watch this here. Click. Pull it out. Now hold Alt, that is the modifier. And you see how I'm only moving one handle. And then we release the L, are released the click, and then we release the ALT. That is very important. Release click first. Now, when I said move ahead, click and drag. Click and drag. Now hold Alt. It allows me to swing one handle. Release the click, release the Alt, click and drag. Click and drag. Hold Alt. Move the node, release the current click, release the ALT. There's your other one. Click and drag. Hold Alt, it swings the handle. Released the Alt, release the click. Click and drag. Hold Alt. Move the handle, release the click, release the alt and drag. And lastly, drag. All right, Now how do you adjusted folks? And notice what's been created? Oops, let's now create another one of those. Let's hit Escape. So we finalize it. Notice here it's created square nodes, all of your waypoints here, r square, all of these. Our round. Okay? So this is what a square root node does. It creates firm corners. And to adjust this. And the reason why I did one of these, and this is the one that's really going to vex you. You grab the node tool now. And what you can do is you can suddenly change the inflection points for all of these types of things. And see how moving that changes that folks getting to know this. This is not an intuitive thing. I know this is going to be complicated for you. But if you take an hour, just take an hour and play with the nodes, play with the lines. I guarantee you, you will get very comfortable, at least enough to do a modest t-shirt. Now you see I missed the bar completely on this one. Move that over. Push this node in. Reposition this, push that node a little bit there. Push this note a little bit here. I did these all different ways on purpose so that you could get a really good flavor of having to adjust it. Because if you can practice this way, you'll be good. Sometimes you got to adjust the handle. Sometimes you've got IM, route reposition the node. But these have minimum nodes. You shouldn't end up with more nodes than this. And one thing you could do, check this out. If I click on this node right here, it turns blue and I hit Delete. I can create a nice kind of swoosh there. And by simply readjusting my nodes, I can get a very different shape. So that's another way you can do it. It takes a node out of the equation. You see how this area right in here, let me turn this to blue, since we're working in red. This area here is a lot nicer than this area here. If you have multiple nodes on this line, it will make it look like a stock market term. It's not good. All right. I know this was a long one. I know this is confusing. Give it a shot, get a little bit of familiarity with it. Do not try to master it. Mastery comes with time. And in the next one we're going to show you how to do the same thing with the shapes. All right, we'll see you the next one.
19. Working with vector shapes: Now our eye getting Welcome back to avidity. Now we're going to focus on shapes. The thing that I want to connect with real quick on this, Let's take a look at what the thing we did here created in our layer structure. Notice here we have these three lines and we have three distinct curves. So each one of these curves doesn't just add to the layer. It creates its own distinct layers so that they're constantly adjustable. One thing you might do, and this is just a best practice for me. You can name these, I can call this round the curve. I can call this one square curve. And the reason why I do this, try getting a 100 layers deep in a complex vector design and find out that they're all just curves. You're going to want to practice some naming so that you get that hierarchy right? Alright, so let's now take a look at shapes. Now I'm going to show you something. Nothing you have to do here. Let's start with the square curve. And you remember earlier I said that a shape has both Fill and Stroke. Now the stroke for the shape we've already beat to death that's up here. What we're gonna do now is I'm going to fill this thing for you. Now. When you do vector, I recommend that you have the fill off when you're doing things like outlining and such because it just gets confusing. Now watch this, I'm going to fill this with black. It just gets weird. And the reason why it gets weird is because technically what affinity is trying to do for you. Let me bring something up to illustrate this. It's saying, okay, my line goes this way. Alright? So my line right now it's going this way. So I'm going to fill in this portion. But wait, now you flip direction on me. So now my line goes this way. So I'm going to fill in this portion. And then when you flip it around again, affinity gets confused. And so this is what is largely called an open curve. And open curves don't genuinely, genuinely fill well, generally. So the same is true here. Let's go ahead and I'm going to undo this. I'm going to clear that out, bring this up. I'm going to go to fill and I'm going to hit the 0. And I'm going to show you kind of the same thing here in this wavy style curve. If I fill it, it gets super weird because you've inflected the point. So the question is Jeremy, how do you then fill it? Because you're going to want to fill these shapes. The short answer is you have to create a closed shape. Now, here's what I'm gonna do. I'm gonna do something you don't have to follow along with this. I'm going to come down here. I'm going to grab my pen tool. And I'm going to put a little dot right there. And now I'm gonna come over here and I'm going to put a little dot right here. Now watch this. I'm going to pull that down. And now what I've done is I've created a closed shape for this wavy pattern. Now if I fill it, watch what happens. It still looks a little weird. Well, why? Because now let's look at our curve. Did I really truly add, nope, sorry. Wacom got away from me there. Did I really truly add to this curve or did I create a totally separate curve? Well, it looked like I just closed it but I really didn't. I created a completely separate curved, my wave curve is right here. This blue thing I've got is this weird thing that I just created right there. So what we're going to do, I'm going to show you how to do this. And these are things folks that people experienced constantly. I'm going to Control Z. And so then I come down to this thing here and I'm going to delete that out. Now. What we're gonna do, I'm gonna grab my node tool, watch this on to take my node. I'm going to join it up. And then I'm going to stretch this node out here. Now, let's pull this down just like we did. And now you have to make some adjustments, right? This does some weird stuff. We may be better off here with a square node. Allright, perfect. And if we do this part just like that, and we do this part just like that, we're back in business. See I'll change the node type. Now, let's look at my layers panel. Did I create a separate curve? No, I did not. So what we're gonna do is now when I fill it, Let's go ahead and fill this thing out. Now we get the right Phil. Folks, closing a curve is a complex thing and it will infuriate you and you will hate it. But over the time you will get used to it. I promise. Now to illustrate this, here's what we're gonna do. I've created some shapes down around the base. I hit Escape. And now what I'd like you to do and what I'm gonna do. I'm gonna start with one shape. And I'm going to show you how to create different shapes through this. Let's go ahead and go 1, 2, 3, 4. And now make sure you're reconnected right here. See how it turns yellow. But this is a curve, Let's call this square. Now you and I both know that's a square that in the eyes of Affinity Designer is just a shape. Now, here's what we're gonna do next. This is going to be tricky. Stay with me. Right-click. Duplicate it. Okay, I want you to call this one a star. Now you're saying, well jeremy, we have a star over there. That's okay. Watch this. Here's what I want you to do. I want you to take your square over to the star. Now what I want you to do is use your node tool and manipulate your notes until you get to the star. Now how do you create a node where you don't have a node? Hit just the line and it creates 14. You create one. Bring it up. Create one. Bring it up. Create one. Wearing it in. This one already exists. So let's just move that in. This one already exists. So let's move that in. Let's create one here. Pull it up. And to pull it, I'm just clicking and dragging. Okay, Awesome. See how you can get to any shape from any other shape. Now we're going to do another one here. Here's what we're gonna do. I want you to duplicate the star. And now we're going to call this half circle. Okay? Now, with your move tool selected, bring your star over and position it. Now grab your Node tool and you're going to add and subtract nodes. Watch this. Click and drag. Click and drag. Grab this node here in the middle and hit Delete. Hit this node, hit Delete, hit this node, hit delete. This node, delete this node, delete, this node, delete this node, delete. Hey, looking at a triangle. Now watch this. Click on this top node right here. And now where I want you to go, hold tight. I want you to convert that node from a square to a round. Okay? Alright, let's do it. Remember the node is selected blue. And now I want you to pull those handles and let's drop it into position. Now it's gonna take you a while to get it just the way you want it. All right? And folks, it is not an exact science. It is a little bit of guess and check. Alright. If you're ever doing detailed work, you're really going to want to use shapes if you can, because this is a pain in the backside. All right, let's do this again. Grab the half circle, duplicate it. And now what you're going to do, come over here. And we're going to make a heart with it. Now start the way that you know how to start. Start with the node tool. Let's see. We do not need to nodes down there, so I'm going to delete that. And I'm going to move this as my starting point. And I know that I want the heart right here. Okay? Now, notice where I have some inflections. Plan your attack. You see right here, you have an inflection point, right here. You have an inflection point, right? Those raises go up. So what I would probably do is I would make sure my node tool selected. I would click here and I would move those into position. All right, now this middle ground, I would probably make that a square node because I want a hard edge on it. Cool. Okay? And now notice that you can get pretty darn close with this, just like that. Okay? And now notice I'm moving the node and I'm also working in the handles. You have to move the nodes where you need them. Okay? Now, let's take a look to appreciate what we've done here. We've actually started with a square, made this square into a star, made this star into a half circle, made the half circle into the heart. And now we're going to morph this into a cat. No, just kidding. We're not going to morph the heart into the cat. But the same rule applies. Okay. The reason I put the cat on the sheet in T-shirt design, sometimes you want to do different silhouettes. So what we're gonna do with the cat is it is here for your use. And with the cat, what I would recommend you do, let me just show you what's up. You click here, click here, click here, click here, click here, click there, and drag, click there and drag click there and drag, click there and drag, move it. Notice I'm working in the inflection points. And then we close it. Now, let's take the stroke off this and let's make it a filled shape bone. Just like that. Once you get good with this tool. And of course you can come in with the node tool and you can select and you can adjust, right? I can make that leg a little bigger. I can make that leg a little smaller. This is how you make things like silhouettes and such. You really don't need many nodes. Nothing you have to do here other than watch what I'm doing. I'm just going to show you how I would do this. I always put the nodes in the intersections. So there's one there, there's one there. And I'm following the contour. Okay. There's an intersection there. Now I'm holding Alt. That gives me that nice foot. Right-click, right-click and drag. Click and drag. Click and drag. Now this is Alt. Alt. To get that nice corner. Click and drag. Click and drag. Click and drag. I know I'm being repetitive, but that's why you're not having to do this. You're just watching me do it so that you kinda see how one of these actually works. And you see that I really minimizing the nodes. And I'm only adding the nodes where there's an inflection point. And folks, this is essential for t-shirt designers because a lot of t-shirt design is done in vector. Now you see how I pulled this node quite a bit to get that background, to get that back arch. Okay, That's okay if we mess that up, not a big deal. Okay, coming around this tail, that's okay, not too worried about it. And we combine. Boom, just like that. Now, let's go ahead and adjust some of these nodes. Bringing this guy back, this guy back. Adjust the position. Just that, pretty darn close. Okay. I don't like the way that turned out. I'm just going to put one node here. And I'm going to blow that up to me. It looks a little bit. There we go. That's a lot smoother. Okay? Alright, that looks pretty good. Now let's turn off the stroke. Turn on the fill bone, and then we do the same with leg. Now the last thing that I want to show you in the leg, I'm going to do what I asked you folks to do. I'm going to tap, tap, tap, tap, tap. Notice how I have four points. Watch this. I'm going to come up to the stroke and I like to work in a bolder red stroke, let's say. And now using nothing but these four points, I can make this happen, Katherine. I add a node, I make it round. Even if you only have four points, you can add nodes. You can make them round. I'm going to stretch that the way that it needs to be stretched, bring this in. I'm going to add in around a node. So I add a node and I make it round. I position it kinda where I need it. Same thing with the foot. And I add another node. This time it is round and I make the curvature of the way I want it. Perfect. Turn off the stroke. Turn on the Fill. All right, now you see where I'm missing once I turned off that stroke. No worries. We're gonna come back over here. I think I'm going to add in a node, okay. That works folks. I know this one was a bit long and I know this one is going to be a little bit vexing for you. But realize that we start with lines. Lines get filled into shapes and vector shapes are the basis of t-shirt design. Alright, I'm gonna go ahead and call it. This was probably another 20 minute lesson. I promise you they get easier from here. This was the challenging part that you gotta get over. All right, we'll see the next one.
20. Working with Vector clipping masks: All right, folks, welcome back to Affinity. Now we are done with our exploration of a vector, you know, just enough to be dangerous. And so we gotta get you competent enough to make a difference. So we're gonna go ahead and we're gonna close this practice image because I think we're all pretty much sick of it. So let's go ahead and hit no. And what I'd like to do, you remember a couple lessons ago, we were working with this dog in the entire discussion around vector images, brought up the idea of a clipping mask, which is how we're going to isolate this dog. So everything you've done has led up to this point. Let's do what we know we need to do. We're gonna go to the pen tool. And what we're gonna do is we're going to create a clipping mask. Now let me show you what a clipping mask is. Let's say that I have this circle. Nothing you have to do here. And what I'm going to do is I'm going to take, Let's turn off the picture of the dog. I'm going to take this picture of the dog and I'm going to put it into the circle, a clipping mask. And I'm going to write this down here because this is a big deal. A clipping mask clips the image is inside of the mask. And when do you use this? You use this when you want a clean modifiable mask. Now, could I have gone into pixel persona and selected the dog? Absolutely. But let me show you why you would use a clipping mask. Let's go ahead and bring this up. If I now twirl open my mask and I go to the background and I use my move tool. Watch this. Let's unlock it here. That helps. I can now center that dog anywhere I want. And if I wanted to come back to the mask, I could control alt this thing, or I could shift alt this thing. I could make it a little bit bigger and then I could adjust the dog. And I can shrink the dog and I can position it differently inside the mask. All things are possible. Remember that I practice non-destructive workflow whenever possible. There are times in which you cannot practice non-destructive workflow and you have to destroy the image, but very, very rarely. Okay, I'm going to Control zed, this thing, bring us back to where we were at. We've seen what a clipping mask is now. All right. Let's turn back on all of our other layers. All right, so we're back to where we were. And now what I want you to do is we're going to use the pen tool to create the clipping mask. So we're going to come over to the pen tool. And now this is just my method. I always start in the intersections. And I click hold the Alt, and I click and I hold the Alt. And I click because that ear is a little pointed. And I come around. I click and I come around. And I'm looking at the ears, I'm looking at the head. Okay. And you'll see that I'm just putting in some dots and they're all round because I'm clicking and dragging. I don't use a lot of square nodes except for right there in that heavy crevice. Okay? And what I'm gonna do now, I'm going to go down the body a little bit. And then I'm going to cut across his chest. Okay. Let's see. We're going to go back a step and I'm just going to grab the chest portion. I don't want that leg. Ok. Now, this creates the clipping mask. Now this is just my method. I tend to work in a bright red and I tend to work with a little bit heavier outline, especially when I teach because you guys need to be able to see this. And I want you to use the magnifying glass to get close. Okay? And then I pick an area and I grab my node tool. Now I'm going to start right here. You see how moving that around. And now all I'm going to do, I'm going to clean up the clipping mask. So unlike position this on his ear, Right? Okay. Now you see how this isn't giving me the handles I need. I'm going to select the square node and I'm going to make it round. And just like that, we have an ear. Here we go. Okay. All right. Now, I'm going to follow the dog right about here. Now I'm going to zoom in here because you guys need to see this right about here. You see how we've got a little dip there. Bring in a node, position it right about here. Shift the node into the crevice. And that should just about do it. Yep, that looks good. Now, a word of caution. Do not zoom in super close to do this work or you will never, ever, ever get out of the hole. There is a fine line between being effective with this technique and realizing that nobody will see it. Okay? Like over here in the head, I'm not trying to follow every curvature of the head. I'm literally just making it adjustable here. And folks, there is no way around the fact that this is mind-numbing work. Okay? Some people enjoy this. I personally do not. But there is no substitute for the kind of smooth selection that it makes. So it is essential that look like that. This looks like this. Okay. That looks like there's a there we go. Just like that. Just like that. Like that. Now, if you wanted to include the leg, just stretch the thing out a little bit more, pop in a square node right there because there is a definite transition. And then I'm going to make that a little rounder. Alright, now, here's the trick. Once you get it where you want it, Here's what makes it a clipping mask. I want to come up to the curve and I'm going to call this clipping mask just to help you out. Now watch this. I'm going to take the HSL, take the background, and I'm going to group them. These things are now grouped forever. And I bring it inside of the mask and I turn off the background layer. Oh, sorry. I have to bring in the dog also into the group. There we go. Because the blend mode on this background layer is Color Dodge. It's pulling the colors from the back. Alright, now the last thing to do, Let's take the read off from the curve. So with my move tool selected, I come over to Stroke and I clipped down the stroke. And if I have to adjust my curve, I do it at this point. As an example, there is a spot right about here where the stroke was a little bit crazy. So I might adjust these slightly. I might make a subtle adjustment here. And the nice thing is, this is completely modifiable. If I wanted to expose more of the dog, I can. So right now we haven't destroyed this image one little bit. Okay. All right. I think that that is pretty darn good. This clipped image, this curve is what I am going to drag into our larger t-shirt design. So in the next lesson, we're going to combine this image with some vector and some text. All right, Let's finish this thing up.
21. Adding vector shapes and brush strokes: All right, folks, let's go ahead and lay this thing out. Let's go to File New. And now I am in your presets and you remember that we created a preset for the front of a shirt. So let's go ahead and create. Okay, now we take the Doug. Make sure your move tool is selected. Right-click, copy it, bring it in here, paste it. Okay. Go ahead and scroll this thing down. I am holding control. If you want to. Let's just grab it by the corner and we can then just control the aspect ratio that way. Alright, I'm gonna put it in the middle of the artboard. And now I'm going to be putting this on a white shirt. So I'm going to create a fill that is white and I'm going to be dropping it to the back just like so. All right, now let's talk symmetry for just a second. What I wanna do is I really want to kinda come up with something and I'll just sketch it out here. We want to talk about symmetry. We're going to kind of balance this thing out. So what I think I'm gonna do, I'm gonna create a little vector style Paul right here. And then I think I'm going to create some sort of a heart, but I'm going to turn the heart kind of on its side. And I want the dog to be not here, but I want the dog to break the heart. So I think what I'm gonna do is I'm going to create a heart and then I'm gonna go best dog. Mom. And I really want to align the text with this side of the heart. And then I'm gonna go ever. Okay, We're going to talk a little bit about this folks. But as a general rule, when you do fonts, two fonts, only, using different fonts is a tried and true design method. However, you do not want to have 42 different fonts in there. It has to be identifiable right off the get. So I balanced it this way. I want to have roughly the same amount on this side is I do on this side. And I want to have the same gap at the top as I do at the bottom. So when I think about balancing the design, these are the things that I want to think about. All right, so let's go ahead and take this step. I'm going to go ahead and I'm going to start with what we know. I'm going to start with a heart. Okay? We got a heart tool. This is downward. A little triangle is you see the little white thing here. That's the heart tool bone. Okay, now I'm going to offset this a little bit. Now. You see the little orange area here. If you want to, you can increase any of those little orange handles on a shape. And what I'm gonna do here is I'm going to tilt it now. And I'm going to kind of bring this in just like that. Okay. Now I'm going to bring this down a little. That looks pretty darn good to me. I'm I bring this down even a little more. It's clearly identifiable, it's a heart. But what I'm gonna do to add some visual interests is I'm going to break it. Now. I'm going to add some stroke to the heart. That way I know what I'm working with. And now a heart is a shape. We have to convert it to a curve. So we have never done this before. So this is going to be something new. Right now. I'm going to come up to Layer and I'm going to now convert a shape to occur. Okay, hit convert to curves. Now watch this area right here. You see how it says heart. The minute I convert this to occur, watch what happens. Bone. Now it is a curve. Now it has nodes. So let's go to our Node Tool. Now I haven't showed you this before. If I start manipulating nodes, what's going to happen is this thing moves around because it's connected. What I wanna do is break that node, okay? So the first thing that I'm going to do is I'm going to come over here to actions. And we have not talked about this before. Let's talk about actions. The action area of the context toolbar is here. And this option allows you to break the curve at a node point. So we're going to do that. The first thing that I'm going to do is I'm going to grab my node tool. I'm going to come over and then select this little blue one. You see where my cursor is? And I'm going to break this. Now. This side works independently of the other side. Okay, so that is actually pretty cool. So I, what I'm gonna do is I'm gonna kinda create a stylized sketch type style. And I really want to break up the monotony. So this is pretty much where I want it and I just wanted to move it over just slightly. Now, what do I do about this dog? Right? Because the dog is in front of the heart. Here's what I'm gonna do. I'm going to duplicate the heart. I'm going to move it up above the dog. Look at that. It's filled White data. Turn the fill off. Got to turn that fill off. And now what I'm gonna do is on the piece that is above the dog. I'm gonna go ahead and I'm going to keep this area that I want to be above the dog. And I'm going to break and I'm in the curve that's above this area. Now what just happened? You see in my layers panel, it broke into two curves. Now I can select this piece. Look at that, that's gone. Okay? And now the piece that is in front of the dog, Let's Control Z that bring it back. I want to eliminate the top piece. Now what did I just do? Notice here now, I have a layer above the dog right here. So we're going to put this bottom curve. And I'm going to add in behind the dog. Okay, now, Let's go ahead and adjust the dog. Come over to your Node tool and you remember we have a clipping mask. Watch this, drop this clipping mask so that the dog hides behind that top curve. This masks the dog behind your curve. Alright, now that's kinda cool. I like this. My layering is going well, but now here's the trick. I have to add some interest to this. So what I'm going to do, I'm going to show you something new. This is a curve. And what I'd like you to do is go to View Studio and we're going to add in the brushes tab. Okay, now I'm going to bring my brush and add it to my palette out here. You don't have to. You can put it over here if you want. And let's go to View Studio preset. Let's add a preset and let's call it section three final, because this is what we're going to be doing. This the final one. And we're going to take the curves that we did. So notice I'm on my layer and I'm on the curve. We go to Brush. And now you can apply different brushstrokes to this. So you can get some really awesome brush strokes. These are artistic brushstrokes. These are what are called vector brushes. And in order to adjust these come up to the stroke and you can increase the size. Now you see that it's increasing the entire thing here. Okay. Why is it increasing the entire thing? Because onto this behind the dog curve, we didn't split it. So let's grab our Node tool. And let's go ahead and grab this node. Let's split that right here. Break the curve. Perfect. And now what we don't need behind the dog is the lower section. Let's get that out of here. Perfect. All right. So we have the bottom curve that is in front of the dog and we have the curve that is behind the dog. And now we're applying different brush techniques. So let's see, we were working with this and we were using this acrylic brush. Let's go ahead and use the same acrylic brush for the bottom curve. Bam. Alright, that looks really good. Now, in the event that you want to change this up a little bit, we can come over here and with our node tool selected, we can adjust this curve. Now, notice here the thick part of the brushes here. If we want to reverse it, you can always reverse the curve. Now we're in pretty good shape. All right, so this was a lot here. What we are doing is we have taken a shape, we've converted it to a curve, and then we've applied an artistic brush. Now let's make the brush stroke match. Here we have a 50 point on the top. Let's make the bottom one match the behind the dog curve. The bottom curve. We want this to match 50. Alright? And I want my points to meet. Okay? So I'm gonna make a subtle adjustment here. Now what I might try watch this own. That is pretty cute there I like that. Let's go ahead and try that here. All right. There we go. You see how we just flared out the ends a little bit, added a little bit of interests, made it look a little bit more interesting. Very happy with them. Alright folks, that was a lot. What I'm gonna do, I'm gonna change this to in front of dog. So in this one, let's make sure we understand exactly what happened. We created a heart. We modified the shape into a curve. We then broke the curve using an action up above to get two independent lines. We then introduced you to the brushes tab. And by the way, if you ever want to change that line, it's non-destructive. So you can change this line to anything that suits. You. Just be aware that based on that, you may have to make some subtle adjustments to the point ij. Alright, so overall, very happy with this. In the next lesson we're going to add the text, we're going to add the Paul, and we're going to get this thing ready for export and polish. All right, we'll see you the next one.
22. Adding text and rough blocking: All right, folks, welcome back to dog mom, T-shirt. Alright, so the last thing that I kinda want to cover here is I went through and I changed up to a different brush. I kinda like the way that this looked. And so I really kinda wanted to make that a little bit different. So I went ahead and did that. Now, one thing we're going to talk about here, we're going to add in a pause. So when we do the Pogge, we're going to come down and it's just going to be made of simple vector shapes. So what I'm gonna do now is I'm going to select all of these and I'm going to group them. So these are now one group and now I'm going to make a new pot. I'm going to start with the heart tool. And I'm going to make the pot. I'm going to turn off the stroke and I'm going to turn off the fill. Mom. Now. I'm going to flip the pod this way so that we can work with it. And remember this is still a heart shape. Okay, so if I grab my Shape Tool, you remember that little orange handle that I talked about? Let's make that a little less pronounced. And then let's come over here, go to layer and convert it to a curve. Now why did I do that? Notice this is a sharp node here. I want to change this to a soft note. Now we get an instant pot. That's kind of cool. All right, let's grab an oval. And let's make some little dog tos. Alright. Now, duplicate these, right-click, duplicate, right-click, duplicate, right-click Duplicate. That's the low-tech way to do it. There are others and we're going to spread them out. And so what I'm gonna do now is I'm going to hold Shift and I'm going to intentionally put them at a 15 degree angle. Then these I'm going to go to 301530. Hold Shift 1530. And the reason you hold shift is it constrains them to that size. All right, Perfect. Now let's group them all. Click and drag. Notice my layers panel is all here, right-click group. Let's rename this plot. All right, look at that. Work in it. Alright, let's put it into the design. Now. I want to put it behind the dog. Whoops. Now why did that not work? Because I have to bring it. What is it about this one here? Do I have Phil left on it? I'm checking here. Okay. There's no Phil. Why is this not showing? Oh, because I literally did go behind the dog, did exactly what I wanted to do. Alright, and let's go ahead and pop that bad boy. Right here. Alright, that is super cute. All right, now, here's what I'm gonna do. I'm gonna take this and I'm going to group these. Alright, perfect. Now I'm going to kind of center it out here on my sheet the way I want it. And I'm going to set up for text. Alright, when it comes to text, we've already seen this Artistic Text. Click and drag. And I'm a real best. And I'm gonna go dog. And I'm gonna go Mom. Now, I'm going to try this in this same sort of line. Now, choosing the right font is up to you. I would pick something swirly scroll Lee, what is it that, based on your research you found is selling? Okay. Take a look at dog mom t-shirts. I can tell you that they are 100% brush script type swirly stuff. So it's up to you what you wanna do. I'm just going to run through my list here of norms. And I think I'm really going to settle first and foremost. I really like that. You're going to have different fonts that I am, of course. So don't get too attached to him. And I'm going to start here. And now what I might do, Let's go ahead and duplicate this. Duplicate one more. And what I'm gonna do, this gives me an opportunity to have three different adjustable rows, totally up to you if you want to do that. The reason I like to do this is it allows me to mess with each one together. Now, I might change this text. Let's go ahead and change the text. I turns out I don't like that. I'm gonna go with this brush script. I like that a lot more. Okay? So what I'm gonna do is I'm going to position these the way that it makes sense to me. I might bring that to the center of the image and I might drop this down a Scotia. Okay, Now remember I'm taking a look at kind of balancing it out. And then let's go here. Okay. Now, if I was to take this out and I was to do a little bit with this. How far off m, I should probably scoot those, just squash closer. That one needs to go a little bit further. Right? Alright, now to balance this, what I would probably do now, I would probably add another par, copy, paste, flip and balanced this right beside the other. All right. All right. Overall the big blocking I'm relatively happy with. I might make some subtle adjustments. Like now looking at it, I would probably bring that up just a little bit. And then oriented to that side. Alright, let's go ahead and call it on this one. In this one, you added in a couple of simple vector shapes. We got the font kinda right and we're ready to take it into Polish and adjustment. All right. We'll see you in the next one.
23. Polishing exporting and adding to the mock up: All right folks, welcome back to infinity. So this is the polishing, exporting and adding it in file. So once you get the major blocks down, and then it's always a little bit of a juggling game to make it work. So I'm going to show you a very nonscientific way right now to do that. And then as this course progresses, we are going to get more advanced. So I'm going to show you something called a guide over here. If you go over to where the ruler is, click and drag, a little blue line appears. And we know this thing is 14 inches. So I'd like you to put this little blue line here at seven. This little blue line is what is called a guide. And then I'd like to drag one. And I'd like you to go half an inch in right here to about 13.5, let's say right around in there. It doesn't have to be exact. And I'd like you to go about half an inch into here. Okay? And the important thing is, and I'll draw this out for you, that right now, you have same amount of distance from here to here as you have from here to here, doesn't have to be exact. You just wanted to be the same. And this center line is going to allow us to really position our text. Now as we go through in later lessons, we will get a little more scientific with this. But right now what I want to show you is after we do these initial blockings, we can then make certain adjustments. Now, I went back through and change the font of this. And so you see that snapping is on. What I'm trying to do is I'm trying to get my font to match the feel of it. So I'm lining up my font here. And I'm using a couple of different sizes. And then what I'm doing here is I'm going to make some subtle adjustments because I Strunk this plot down a little bit in the time where we were away. And I wanna kinda balance it out so that I've got the pot. I'm not crowding either the heart and, or the design, but I'm getting pretty close to where it needs to be. And my design here is not quite touching. So what I'm gonna do now, I'm going to go to the group and I'm going to ever so slightly shrink down that group, maybe even a little less. And what I'm trying to do here, folks, I'm trying to balance this out so that we've got a little more room for the text. There we go. Alright, perfect. Now at crowded the dog a little bit, but that's okay. I can go down a little bit on this guy. You see right here. How little room I have between the top of my design and the best area where the T is. I can kind of do the same thing here with the r. So if I line those two up, I'm pretty good. This is all just a balancing act. And you got to think to yourself, what do I want my viewer to see first? So I clearly want them to know that this is for Dog Mom's let say. So I'm going to make subtle adjustments here. I'm going to try to maybe increase the font on that just a little bit. Let's see. Alright. Now it's becoming remarkably apparent to me that I need to change one of these how the heart is working here. So let's go ahead and go down here. Let's go to the group. And I'm gonna do the one that's behind the dog. And I'm going to modify it just ever so slightly. So I'm going to shift this just like that. Okay. That gives me a little bit more room for the dog mom. Okay. Overall. Pretty happy with that. All right. I think that that's pretty good. Now, I'm going to make an adjustment. We're going to come to the group. And remember this is the group with the entire dog. And I'm going to add an adjustment layer. Now we did this before, but I'm going to add a curves adjustment. We have not done this before. Now folks, a curves adjustment. If you read this thing just at a high level from left to right, this is where your darks are. This is where your lights are. And you can add nodes. To, as the piece gets lighter, you can increase the lightness. Or pulling this line down will decrease whatever this is. And the classic example is an S curve. Okay? I'm going to show you what this means here. Stay with me. All right. Here, I want to increase the contrast. So I put a little note here, and I put a little note here. And i up the lights a little bit. And I dropped down the darks. And you see the further I pull like this, the more dark subgraphs. So it's a 100 percent up to whatever you think looks good in terms of where this thing Lance, I personally am a fan of that. I think that that gets my point across without making it look terribly weird. All right, now, the last thing that I'm going to show you, if we go to the behind the dog curve and let's bring out our Stroke panel. You can change the profile of a stroke. So if I click down here where it says pressure, click and you'll see how little dots have appeared. The little dots are, well, that didn't work. The little dots are right here. Now, if you click on one, you see how the dots disappeared. In just one little bit hard to get. And then you're going to scroll that down. Now you see what just happened there. Watch that tail. See that. I'm going to adjust my stroke a little bit. And this is playing with something called stroke profile. This is a pro moved here to get your stroke going the way you want it. Now if you wanted to change a little bit, you can always bring it up this way and now it'll gradually taper. I'm gonna do the same thing with this stroke. Come up to pressure. Click on it. Click on it again just to get the single handle. And boom, just like that. Alright, now, notice what that did for the look of that heart. That thing is pretty cool. Now what I might do just behind, Let's go ahead and make an adjustment. I'm going to try this. I don't know if it's going to work. Try a bunch of stuff, try some stuff. If it doesn't work, it doesn't work. I'm just going to try to kind of touch these points a little bit and make it look a little more like a real heart and not two independent strokes. And folks, there are other ways to do it. I know I'm going to get a lot of hate mail around the way that we did it here. But I didn't want to show you masking. I wanted to show you actual vector adjustment. Alright? Once you have this all together, grab all of this, and I want you to group them. So now this thing is separate from the background. And to export it, go to File, Export, PNG. This is something that we do a lot. You can either export the whole document. I like to do the selection, and we're now going to export. Let's go ahead and put this in your section 3 downloads. Let's call this Export and Save. All right, Perfect. Now let's go to File Open. And you remember in the early part of this class, we included the front of the T-shirt mockup. It's already got the white go to File Place. And let's add in dogma. And I'm bone just like that, that thing is super cute. Now this is of course, a man's T-shirt could be unisex. Who knows? But one of the things that we know is that when you're trying to sell t-shirts, a lot of times they look better and sell better when women especially can see what the tissue looks like on a female model. This is where photo mockups come in. So as we do this a little more, we're going to add in a few more photo mockups so that you can kinda see how this works when you bring them into real life. All right, folks, that's a little bit on the mockup side. If you ever wanted to change the background in this mock-up, you can always come to rectangle and place if you've got an image that you like, say this dog as an example because we just did the dog. You can always come in and change up the background. Very simple to do. I don't think you're constrained only to the gray rectangular background. All right, folks, that's it on this one. Hope you learned a little bit about vector. This was a long one. The others are going to be shorter. They're gonna go a little quicker. But vector is one of those things you have to learn as a teacher designer. All right folks, we'll see you the next one.
24. Introduction to section 4 : All right folks, welcome to this section. Now this is another theoretical section. Now that you understand some of the tactical, you understand basic T-shirt sizing. What I'd like to show you now is what makes a good a t-shirt designs. So we've got a lesson on my four things on what makes a good t-shirt design. We're also going to be looking into the technologies that are used to print t-shirts. And the reason this is important is because if you don't understand the technology that you print, you will be using. You may not be able to appropriately set up your project. As an example, let's say that you add transparency to a DTD image like what I print on. The transparency shows up different. So if you send it over as a transparency, it's going to show up a little bit different, not going to be right. Once we understand that, I'm going to show you some places to go and my process.
25. What makes a good T shirt design: All right, folks, let's go ahead and let's take a look. I thought I'd do something a little bit different with this theoretical lesson. And so this lesson is all about what I would consider the four things that are essential for a good t-shirt. So what I'm going to show you our examples from around the web, examples of t-shirts that have done well, that are common themes. Because if you understand exactly what they're doing, you can replicate these general principles. So hear me very carefully. This is not designed to be, these are the types of designs you rip off. This is, these are the four things that I would consider important when looking for a good t-shirt design. So let's go ahead and go to the desktop. And what I've done here is I've included my four things right down here. So let's go ahead and go to the epic pen real fast. And when we do this part, I'm gonna go ahead and I'm going to circle these. The first one that you're going to see is symmetry. When it comes to symmetrical designs, there is something pleasing about asymmetrical design that makes people feel good. Asymmetrical designs can be used. But here we very carefully on this. First, you've got to know the rules in order to know when to break the rules, okay? Now, the second thing we're going to look at is the use of contrast. So things like how your design stands out from the shirt, that it's under, the way that you use contrast inside of each design. These are things we're going to take a look at in these images. The third thing is it relatable. A t-shirt must be relatable and be understood very, very quickly. If they have to sit there and they have to wonder what it is they're looking at you or probably lost your audience. Remember a T-shirt is like a billboard. And lastly, please, please, please only use two fonts in your t-shirts. I see some t-shirts with three and sometimes as many as four fonts and a t-shirt. Again, there are those that are wildly successful, but you have to know when to break the rules. This is the rule. So I would consider it to be acceptable for two or less fonts. Now what I'm gonna do here, I'm going to switch back out to this. And we're gonna go ahead and look at the side of these, at some of the symmetry and some of these more things that are a little bit detailed. Alright, let's clean that out. Now, when it comes to symmetry, it doesn't matter whether it's a textual design, whether it's an illustrative design, or whether it's a combination of the two. Now as an example, all three of these, and I intentionally pulled some very graphic tees. I also pulled some very name brand t's. Notice how this Nike T divides up. And you've got some symmetry above and below the line, as well as it is well-balanced from side to side. This is a good example of something that is pleasing. Have you ever looked at something that was supposed to be symmetrical and it was a little bit off and it just bothered you. Now, something like this. This is a very graphic illustrated design and if we draw it down the side, you've got symmetry on either side. And if we take an overall shape to this, It's got a good square shape. There's nothing weird hanging out on the side or weird sticking out on this side that isn't on this side. So again, symmetry. And when it comes to even these texts designs combined with some of the circle type shapes. This design here, symmetry above and below. And even here on the one. Oops, I apologize. Let's go ahead and clear that out. Even here on the one. Notice how you've got this side is the same as this side. So symmetry is very, very important. And when you lay out a t-shirt, you want to make sure that it's symmetrical. We as human creatures like symmetry. Now if you're doing a full on graphic tee and you want to go asymmetrical. There's a time and a place. But first you got to know the rules in order to break the rules. Now, let's take a look at the use of contrast. Now, the reason why I pulled these two images, Let's go ahead and take a look at these two. Notice here you've got the black. Do not know why it continues to do that here. Let's go ahead and clear that out. Alright, so this has the black text with a pink rude, not only into their color choices, but look at the difference in line widths here. So the contrast between say, this line and this line, you've got some very bold graphic elements and some very thin lines over here, so there's some good contrast. So there's contrast in the color, and there's also contrast in the line width. Now on the other hand, this use of contrast to deals primarily with color. This is a very graphic image. And so they went with a black and white and they used the contrast of the red to really highlight what was important to them. So notice how they used the red to highlight the words that they really wanted. They were trying to get a point across. The use of contrast helps in the visual communication of the technique. And really folks, that's what we're doing with the t-shirt. We are visually communicating to the person who was looking at our t-shirt. And the use of contrast, whether it's in fonts, whether it's in colors, whether it's in line widths, are all very important to how we tell the story. All right, let's take a look now at one of the other areas here. The related ability. Now, when you look at somebody in a t-shirt, you got like two seconds, right? For them to realize exactly what it is you're all about. Now, we're going to talk contrast to notice here, right off the bat, the use of the word dad. So you know that it has to do with a father. You know that this person probably is a father. This person might have a father, right? Because the best kind of dad raises an accountant. And when we talk about relatability, notice what this t-shirt does. And while this is not a course in how to sell T-shirts, notice this could be given by somebody who is an accountant to their father. So you've got the dad angle and you've got the accountant angle. If you could appeal to more than one group, let's say, then they put you in a different group of sales. And so the related abilities important. One thing that I liked about this one, and this is my own personal fan boy. This one here. I'm a big fan of the movie Fight Club. So they used a quote from the movie to get to relate ability. Now, you want to be careful using different movie quotes. I'm saying just be careful around intellectual property. But I saw this from a mile away. I knew where the quote came from and it related to my nature as a fan of the movie Fight Club. So notice that it isn't even terribly complex, but coming back again to the contrast, a bright pink font on top of a black t-shirt, very eye-catching, very appealing, and able to be seen from across the room. Now, the fourth and final one. This is more of a general rule. I just pulled a couple of examples. Hopefully this one is not want or need to take a lot of time to explain. When you look at fonts, keep your fonts to two, okay? You can use fonts to create contrast. But notice here, this is one font and then the family and the fights is another font. So there's two fonts. Same thing here. You've got some really heavy serifs here on the rock and Southern Pasadena. But then the July is san-serif. So it's very, very simple and they've used it very well. Notice here the symmetry. Again. It's just a symmetrical design. It's pleasing. And folks, there is an interesting phenomenon just as a parting shot here, called the golden spiral, right? And there's a certain ratio that is found a lot in nature. This ratio is present In the length versus the width of some of these designs. So some of the things that are around t-shirt design, I just wanted to take this lesson and show you some examples. Again, these are not perfect examples. These certainly are not my designs. These are ones that I pulled from places that are selling where I wanted to show you what other people may be working on. And to give you the four things, remember it is symmetry, contrast, relatability, and the use of two fonts, max. All right, let's go ahead and get into the next one, folks.
26. Different technologies out there in the T-shirt space : All right folks, let's talk about printing technology now. I thought we could do this here standing at my desk, but I decided to bring you into my work area and kinda do this so that she saw that not only am I showing you how to design t-shirts in Affinity Designer, but I also print them. So figured I'd show you my setup here and we talked a little bit about the five different technologies that are out there if you decide you want to print your own. So this course is not about how to print to a certain technology. That is true. We've got another section on print on demand, just to give you a overview of print on demand as well so that you can make the choice that works best for you. Alright, so up here on the screen, we've included as a download a summary of what I'm going to go through here in terms of the five printing technologies that I consider to be the most valid for somebody starting out or moving into the commercial space. Now if you're a $1 million printer, you already know this stuff. I'm not going to teach you anything new. You already have a business, you already have a method. Alright, so let's go ahead and take a look at the first one. The first one is screen printing. This the one that most people are familiar with. Now with screen printing, the way it works is each color gets its own screen and the screen is burned so that only the color shows through. You then dump plastics, all ink on it, and you use a squeegee to apply it to this shirt surface. Now, at a simple one color style print, this can be done easily with screens purchase from Amazon or anything else. But it does get a little more complex. They can go up to 6, 8, maybe more colors. And so here's an example of one that is a multi-color press. So you just world the color to the shirt and that's the way it works. All right, so the second option is a plastic assault transfer. Now what this is, somebody takes the plast assault ink and applies it in the design the way that you choose. And then they send you the finished sheets. This method only requires heat press. This is by far the simplest method, but there are limitations. What I have up here on the screen is an example of a price breakdown from a plast to solve vendor. And notice that to get onesies twosies, you're going to make 0 money on the shirt and you're probably going to wrap money around to the shirt. Now, what is a plast assault transfer? A plastic cell transfer looks like this, and this is one for one of my clients there, and we use these a lot for sleeve logos. So this is done in Affinity Designer. You just send the sleeve logo over and they replicate it. And every printer has their own size. My printer tends to go with 13 inches by 18 inches as a size. So as many as I can put on what's called the gang sheet, that's what they print. And it usually goes by number of colors. And for people starting out, this one I would say is not the most economically viable because you really have to be in the 50 sheet area in order to make this financially work. And so if you can't sell 50 shirts of your design, at least you got a problem. All right, the third method and the one that is here behind me is the direct to garment printer. So we've got a short video that I'm going to show here on how we work with this. But again, this course is not about GTG or any specific technology. And what d t g Does, this is a shirt printed on a direct to garment printer. So TTG does high quality full color prints and so it isn't advantage over say, your screen print. Now, DTD comes with its own special type of health, right? There's pre-treat that has to be done here on the screen. Then you've got a lot of maintenance to be done in the printer. The print cost though, is pennies on the dollar, but the labor cost is substantially high. The correct application for this, if you can charge between 30 to 25 dollars on a shirt, this would be a good margin for you and you could really sell the full color nature, some of the POD services that we talk about later in here, we'll do this type of thing. Now. The third thing here is a sublimation. Actually I should say the fourth thing, sublimation works on Pali, now, a mask, right? This is a full 100% polyester mask. And notice the white face. What happens with sublimation? There is no native white sublimation ink, and so it will not work on black. Now, an example, what I've got there on the screen is the Epson printer. There are a ton of sublimation printers. Check them out. And you just print it out on sublimation paper and it turns something like that into something like this. So the nice thing about sublimation is that it will die the ink. What happens is the ink then releases once the heat is applied again with the heat press, and it infuses into the garment, so it actually dies. The garment. It doesn't sit on top of it, like a silkscreen or like GTG. Now, the last technology Did you might look at is what is called heat transfer vinyl. And for those that are familiar with those MLK kiosks, this is how they do it at the mall. You use a vinyl cutter similar to the one here. But for a hobbyist side, it is very common that you might use things like a cameo or even your cricket. So you go down, you get heat transfer vital, and you cut the design out. Now in Affinity Designer, that involves using the contour cut. And at that point you then press it onto your garment. And the nice thing about that is there are heat treat vinyls for a variety of substrates. And if you go with something like this Rowland, the print actually creates onto the vinyl. So you get a really nice high-quality print that you can use. Now I do have people much like the mall kiosk where they are doing the commercial printer say, or I should say a residential printer, like just an absent or something. And they are then just moving around the design. Those types of prints tend to last very, very short periods of time. They're not high-quality and it's very similar to buying the iron on transfer stuff that you would get at, say, your local department store. All right, let's go ahead and take the next step. If not, let's move on to the next one.
27. Where to go to find good T shirt designs: All right, getting and welcome back to this lesson in the affinity designer T-shirt course. So this theoretical lesson, this entire kind of section is about certain ways and workflows and things that you can do to identify t-shirt designs, models, that sort of thing. So what I'd like to do is I'd like to take you through how to create kind of how to do my thought process and how I look at different designs, where to find profitable designs. I shouldn't say profitable, I'll say good. And how to get some inspiration in how to get your own. Now, your process may be different than mine. So what I'm going to share with you is for things that I think go into making a widely accepted t-shirt design. So let's go ahead and get started. The first thing that I do here, I'm gonna go ahead and I'm going to go to my screenshot is I do a quick Amazon search. Okay? So when I go to Amazon and I look at Amazon merch, and again, I'm not even on Amazon merge, but it is a good indicator about what is going on and what is selling today. Now, there are entire classes on how to do this profitably. This class is not about how to sell on Amazon merch. But I want you to see even on Amazon merch, how some of the things that I'm about to talk about here will show up in multiple marketplaces. And when it comes to multiple marketplaces, if everybody is doing it and it's getting good reviews and they're selling, you're probably on to something. The first thing that I'll mention here, I usually go to Amazon and I started looking around at high sellers. And this is because one of the first things that I'm going to tell you, you want to pay attention to current events. For some reason, nasa space, that sort of thing, right now, very popular. So we're seeing some of these types of designs IQ in. And so the first thing that I'm going to tell you here is you want to pay attention to current events. So we're in the middle of pandemic here. So I figured why not go ahead and look at coronavirus shirts. And what you're really seeing here is a lot of parody shirts, a lot of text shirts. And for right, wrong, indifferent, right? I survived corona. Alright, here they took a very classic painting and they photoshopped the mask on it. Straight Outta Compton. And WA type of shirt you put straight out of anything on there, right? And all of a sudden it's there. Now, one thing that we'll look at with coronavirus, we want to also look at what people are doing, right? You've got the survivor shirts right here. And then you've got this one which anybody that knows kind of what went on during coronavirus help. I'm stuck at home with my kids. So this brings me to the second thing. A good t-shirt design uses a lot of humor, right, as one of its aspects. So if you've got to parody, you've got PAN, you've got humor. You can take a known slogan and put a spin on it and make it widely understandable. So the first thing you're gonna wanna do, pay attention to current events back in 2020 during the presidential race, people made a fortune off from different Biden versus Trump shirts. And those are widely relatable. Coronavirus, another one here. And when we talk about the use of humor, I'm going to go ahead and I'm going to show you, I looked up, punch hertz. If you can attach something new to something that people already understand, you can then attach to that emotion. So a lot of times you'll use pun in terms of how you go about presenting. So all look to humor to be one of the things that I do. So the first thing I do, I like occurred events. The second thing I do is I try to use a certain amount of humor if it's appropriate to the shirt. And probably my most successful one. The thing that I do more than anything else is lifestyle folks. If you can attach to a lifestyle, this is a highly desirable market for t-shirts because everybody wants to wear a t-shirt with something that they're into in their life audit. Because when you wear a t-shirt like it or not, whether it is a brand, whether it is an image, whether it is textual saying you are displaying your internal, on your external, what you are into. And you want to broadcast that to the outside world as status, what you're trying to do, you're thrown off the bat signal for somebody to identify that, hey, in this case, I like jiu-jitsu. You'd like to just C2. And if you're wearing adjust role t-shirt, you kinda know how that works. Now, notice the linkage back to some designs. That old school 8-bit right there. You've got some very vintage, you know, tattoo style art there. But what I really like here on especially how these folks do it, is they've taken a slogan like just roll. And they're utilizing just a very simple font with it. So they're able to create multiple products using one simple lifestyle slogan. Now, the other thing that I'll mention here, gaming t-shirts. Gaming t-shirts are another lifestyle. And notice the simplicity of a gaming shirt, but the widespread accepted nature of the gaming shirt. So the first thing that I do, I go to Amazon and I say, You know what selling. The second thing that I do is I say what's current. And the third is, is this a lifestyle choice, right? So on my site for proving ground, what we've got is lifestyle. We specialize in fighters. So we've also got certain things that are highly graphic. We've got things that are maybe a little bit more textual. It's totally up to you. So when it comes to the things you want to look at, the last thing that I'll do is I'll pull things that I'm into. So it's not enough to create a t-shirt unless you're really go into just to make a commercial. I like to do a Google search. And in my world, a lot of times Pop art is really cool and really popular right now. So all do a search on Pop art posters to look for different techniques that I might be able to use. Auto t-shirt. So things like half-tones, wild color combinations. You got some Andy Warhol stuff going on there, right? Alright, so that's a little bit on how I do, what I do. Let's go ahead and kill the screen-share here. So when you're looking for places for T-Shirt inspiration, you want to go to where the market is. So I always check the Amazons and I see what's up. Second thing I do is I look at current events. Third thing I'll do, I'll look for lifestyles that I can connect with and the brands that they're working with. And the fourth thing that I do, I always add in a little bit of my own flair with it by looking for inspiration so that when I do this design, it screams something that is uniquely something I would be proud to put out. Now if you're just pumping out textual t-shirts totally on you, you already know how to do that. All right, folks, that's enough on this. Let's go ahead and take the next step.
28. Some diffeerent models for how people create T shirt designs: All right folks, we'll come back and glass. So what I'd like to do in this lesson is I would like to get you comfortable with some of the models that you can use for T-Shirt businesses. Now again, this is not designed to show you how to sell T-shirts. But once you start doing designs, there are four models that are currently used in the industry. What I'd like to do is break each one of them down and show you the pros and cons of each. Okay, So I've included this in your downloads. So you have this for future reference. But there are four models that we're going to be covering. So let's go ahead and get after it. Let's switch over to the screenshot. All right, so let's go ahead and get started. The first and most complex model. This model is what I'm calling 100% all you. So what we've got here are a couple of different boxes. Anything that is in the EU box, you are going to do. So in this model, you design them, you advertise them, you sell them so they come to your interface, right? So your interface, your website, whatever it is you do. So not only are you responsible for the marketing, but you're also responsible for selling it, getting the money from it. Plus then you get the distinct privilege of printing the garment and shipping it out. So this model is a 100 percent entrepreneurial. Now, there are benefits to it. One, it has high margins because you're getting the garments at cost. You are controlling the labor cost. You're controlling all of the costs. There's no middleman to erode the margin. And the other thing is for control freaks like me, you have full control over the quality of your product, the type of product, what you do, how your brand is represented. Now the bad thing, labor. You, in effect, create yourself a job. Now, you can hire somebody to do the labor, but the labor is all you. So not only are you doing the website development, you're doing the marketing campaign, you're doing the sales, you're doing the design, you're also putting in shipping. And in this model, what I have found is your inventory costs are higher. So when you do this part, a lot of the times you may have in my example, for my print on-demand business, I have $3 thousand worth of t-shirts downstairs at any given time. So that's inventory, that's going to get tore up. Plus you have the disposable costs of your printing method. All right, Let's go ahead and take a look at another one. Now. This is where it's your brand and they're printing. And I'm going to use the term integrated. Now the example of this is on Wix. Say I use a Wix website for my business and I integrate through print full to fulfill it. So I am responsible for the design. I'm responsible for advertising my brand. I'm responsible for the way this sales interface proceeds. But once we cross over this wall, they print and they ship. Now, this has some benefits. One, it allows you to be a specialist, right? So say you're not a printer, you don't have to be, say you're super good at marketing, stay in your lane. Now the other thing, you have full control over how your brand looks, largely because they're just printing whatever it is you tell them to do. Now, the limitations on this, your printer will have less products, maybe different products than you want to sell. Maybe they don't have the brand of shirts you want. And because there is now a middleman, you will be taking a lower margin. I'll tell you on common shirts that I ship. Just as an example, I might be able to sell them for 30, let's say 25 to 30. And sometimes I'll pay as high as 18. So my margin is smaller than if I did it myself, and I'm able to do them for 10. So there are benefits to this one. It's less capital-intensive on my site for proving ground where I do everything myself over here, it's a lot easier. But in certain sites where I used the integrated method, I actually don't even have to print or ship the project. So it's very much up to your level of comfort and what you want for your t-shirt business. Now, the third model, this is one we use quite frequently. It's your brand. They're printing. But instead of integrated its local. Now what do I mean by that? I have a lot of shirts that I do that I go out to a local screen printer and they screen print the shirt. As an example, I might sell a shirt with a front logo and a backlit say for 25. But they're going to charge me 18. So margins are slim, right? That's a limitation. Now, when we do this part, they still print it and they'll still ship it. But the high minimum orders make this challenging. I'm gonna go and I'm gonna pause the screen share for a second so we can go face-to-face. There are advantages to this methodology and this model. But when you're doing it with screen printing, you may not have all the colors that you want and they may not have all of the options that you want. So make sure that you understand the benefits and the limitations. Now, a great benefit to this is the opportunity to work and build relationships in your field. I've made some great relationships with local screen printers who then come to me for what I do in DCG and I go to them for screen printing. And if it's a local thing that we're doing, I'll use a local screen printers so that I can advertise local for local. So there are advantages to this. And if we go back to the desktop here, you'll see that some of the advantages like we were talking about is you're able to specialize. If you're a great designer, do not try to become an adequate screen printer, okay, it's never going to work. Now, the last one, this one you have the least amount of control. This is one where you design them. That's it. And then you put them up on marketplaces. So they sell them. Your lane right here, you design it. They advertise their sales interface, they print it, and they ship it. A great example of this red bubble, right? You create your store. They take care of everything. All you have to do is upload designs. Now, the benefits to this, it is really the lowest upfront costs because you have no printing equipment. You don't have to invest in ads and do all the advertising and all that jazz. It's the lowest amount of involvement. Literally, this is the definition of passive income, right? But limitations when I use the term passive income, and by the way, I hate that term because there is no such thing as pure passive income. It is a crowded space. Everybody on Amazon merge red bubble. That's a very crowded space. So you better be bringing the heat in your designs and you better be spot on with what you think your target market wants. So your customer base needs to be well established by you. Are you targeting fishermen in their 20s with two daughters who live in Montana right? Now. The last piece here, really when it comes to your products, you don't have any control. You don't really have a lot of control over how your store looks. You don't have a lot of control over how your products look in terms of the quality and such. You literally upload the design and they take it from there. All right, let's go ahead and kill the desktop here. So this is not a course on how to tell sell t-shirts, but I did want to give you some behind the scenes into this theoretical section of four models that you can look at with the limitations and the benefits of each. Alright, right, hope you learned a little bit about this. Let's go ahead and take the next step.
29. A full printed DTG T shirt - Step by Step: All right folks, bonus lesson. Now, if you are interested, this is totally an optional thing. I have documented the process of doing a t-shirt from start to finish using direct to garment. So if you want to see how I printed this shirt right here, go ahead and check that out now, if you don't and you want to move on to the next technical section. Awesome. But I wanted to give you a little bit of value and I wanted to show you the process for a hand printer like myself, in crafting a low volume artistic style shirt. All right, so if you're interested, check it out. If not, move along. Let's go ahead and get started. All right, folks, welcome to my lab here. So this is where we run the GTG. And we thought since this was a complete guide, the T-Shirt making, if you've made it this far, you might want to see how we go about making the t-shirts that we sell. So this is just a standard Black Belt Canvas T-Shirt. The GTG really works on a 100 percent cotton. So if you have a poly blend, not going to work. So this is the first time I've actually documented the entire process. I am going to time-lapse some of this. But when I switch spaces, I'm going to show you exactly what I do. So the first thing that I'm going to do is I'm going to press this thing for about five seconds to get some of the humidity out of it, the residual humidity. So traditionally t-shirts start around two inches down from the chest. So I'm going to kind of follow that rule and I'm going to make sure that we've got it where it needs to be, and then we're going to press it. Nothing I can do about the squeaking folks. All right, once we have our shirt area, now the next step, we're going to go ahead and we're going to go to a pre-treat. When you do GTG, you've got to pre-treat. So what I'm gonna do, I'm going to spin the camera around, but I'm going to show you my preferred area here. So tonight, the pre-treat area, the plywood keeps the pre-treat from going anywhere else. And this is where we're going to set the shirt. So I'm gonna go get the shirt and then I'm gonna come back and we're going to spray pre-treat. All right, now I've lined up the shirt up here now they make pre-treat machines. That's what we talked about into the different methods. But you can also do a hand sprayer. So the hand sprayer that I use, just your standard Wagner power painter, this pre-treat is going to tamp down to the fibers and form a base for the ink to adhere. So let's go ahead and apply the pre-treat. All right, Once we've applied the pre-treat, now we've gotta roll it down. Rolling helps tamp down the fibers to make sure that nothing sticking up outside of ink. Alright, now we're gonna go back to the heat prep. And here we go, walking into the press. Alright, we center it on the heap press. Now I have a 15 by 15 Platon. This big boy here is 20 by 24. There are different sizes of heat press. Now, when you heat press, we're going to do two things. The first thing we're gonna do is we're going to hover. So in this case we hover for around 40 seconds. Alright, once we do that, now we're going to apply a non-stick paper, a teflon paper, to the garment. But this is going to do is this because it's going to allow us now to apply pressure without burning the pre-treat and again for another 40 seconds. So let's go ahead and time-lapse it and we'll come back in video land after 40 seconds. Alright, 46 because it is, Let's go ahead and see how we're doing. What I want is a dry surface that is good. All right? Now what we're gonna do now is we're going to apply the t-shirt now that we've done the press on to the plantain, that'll run it into the machine. So what I'm gonna do, I'm gonna go ahead and save this here real fast. I'm going to transition, but I'm going to show you I'm working within the same, say, a 100 feet or so for all of this, the pre-treat station, the GTG, the heat press, and then the work table. All right, folks. So this is the work table here. This is a plantain and you put this inside the GTG. So but we have to do is we have to get the shirt on to the Platon. Now this has a cantilever technology in it. You see the blue piece here. So what we're gonna do is we're going to slide the t-shirt over top, leaving the print area. And if you asked me growing up whether or not I would be working like this to go hospital corners on a t-shirt. I would've said absolutely positively not. So what we're gonna do here is we're going to position this where we need it. Just like so make sure that it's there. And then we're going to tuck it inside. So it's very simple on a t-shirt to do. But if you do more complex things like hoodies, yeah. This is a huge pain in the backside. All right. So once you've got this done, the next thing is we're going to load it onto the GTG. So I'm gonna go ahead and cut this. And I'm going to bring you over to the DTC, which is right there. Alright, so here we are, the GTG. What I'm gonna do now is I'm going to load this onto the bed. So coming up here and loading it onto the bed. And I'm making sure that I'm flat, any sort of raised areas going to be a problem. Okay. And I push it in, I raise it up and away it goes. Now watch alone. All right, Now let's cut over to the RIP software. Okay, so we're gonna go ahead and we're going to now go over to the RIP software. I'm gonna show you how to set up the rip. All right, folks, this is the RIP software for the DTD version that I have, so I'm going to be working in a black shirt. Q. In the graphic. Q. I'm going to bring this up. I'm going to come over to my desktop and I'm going to look for wherever it is that I decided to put this magic elephant. Alright, now what I'm gonna do, I'm gonna change the positions simply because I already did that. Makes the graph at about 14 inches. I'm going to unlock this and I'm going to go to an even 14.5. Lock that back in, bring that back to 0.5. All right, so this is going to now HRET, now, just so you know, and this isn't about how to print t-shirts. But since you guys asked, let's talk about cost. Now, in my model, T-Shirt runs me about $3 and 20 cents. Here. Notice that this entire thing, including the pre-treat, is going to run another $2.06. So this shirt so far is about $5.20. Alright, Let's go ahead now. And let's go ahead and print it. All right, what I'm gonna do before I hit print, I'm going to position the camera so that you guys can see this and I can walk you through it. All right, so what this is going to do first, it's going to go ahead and apply a white under base. So what you're gonna see is as the printer moves through, it's going to apply the white under base. And then it's going to bring it back in in order to apply the color. So you'll see it run two passes it with the magic of video editing. I'm going to speed this up because you don't want to watch the six minutes of this head going back and forth. Okay. Now it's going to go back through and it's going to apply the color layer over top of the white under base. So it's going to go back in. And again through the magic of video editing. Away we go. Okay, so we're back. Let's take a look at how that worked out. That is a good-looking print folks take a look at how rich those colors are. That's a good under base, that's a good t-shirt. Chances are you're going to see me where in this bad boy during the intros for lessons like this. So all we really have to do now, we take it and we unfold it. Just like so. And now it's still wet. So the brushes up against something, it's going to be a bad day. And what we're gonna do now is we're going to come over to the heat press. So I'm gonna go ahead and pause this then when I get on the press will redo. All right gang. So while it might be outside the scope of what we're doing with this t-shirt. If you are thinking about getting a DTD or starting this, do yourself a favor. It's the most common size of heap press is a 16 by 20. I have the 15 by 15. Well, because I made a mistake right place to games when stupid prizes. So I'm going to upgrade with 16 by 20 here soon. And then I went all the way to the 20 by 24. Don't get that because it will cut the scenes when you press, it'll show every scene. So the next thing we have to do now is we have to hover for one minute. So I'm gonna go ahead and hover this. We're going to set a timer for one minute. We're going to fast forward this out here in webinar land and we'll be back. Alright, so what I just did, I put down the release paper and we're going to give it a two minute press. Now, this is one of the reasons why a 100 percent cotton shirts are the way for GTG one, the white ink will not stick to a poly under base. As a general rule, there are some other based treatments. And secondly, a polyester shirt will never stand up to two minutes under 350 degree heat, it will literally melt. So that's a little bit about what we're doing. What I'm gonna do here in webinar land. We're gonna go ahead and we're going to fast forward this and we'll come back when we're ready to pull it out of the heat press. Alright, let's go ahead and bring this up here. So we peel that off 350 degrees for two minutes. And there we go, folks, you might see this actually on me here when we do the intro videos, take a look at how crisp that is. Take a look at the different colors. That's a good, good print right there. All right, folks, hope you'll learn a little bit about GTG. Let's go ahead and kill it before my memory card.
30. Introduction to the Wave rider retro shirt: All right folks, this section we are upping our vector game. What we're going to be doing is we're going to make a retro based t-shirt for this surf club. So this is going to use a lot of a vector and we're also going to show you how to create textures. So we're gonna take the basics of vector. You folks remember back to the dog project. With the DOM project, we had a shape, we convert it into a curve, we kind of sliced it up. What I'm going to show you now is how you do operations. We're going to cover things like gradients, and then we're going to modify text is a curve in order to create those cool switches that you see. So we're gonna do some custom text in this one. We're going to make this one old school and we're going to apply kind of a plast assault age effectiveness. All right, this is one of my favorite projects in the course. Let's go ahead and get started.
31. Pulling reference and sketching: Our ageing and welcome back to infinity. So we're going to continue on and, and now what we're going to be making is a retro 70s type vintage surf shirt. So this is going to test our vector knowledge. We're also going to show you something called an operations. Some people call it a Boolean operation, right? And in this lesson, I'm going to show you how to work with art boards. So let's go ahead and go to File New. Now we're in presets and I'm going to do a new design for a front of a shirt. You guys created this already. Boom, there it is. Now, let's go ahead and start with our studio. So I'm gonna go to my preset and we left off with Section three final. All right, so these are all the tools that we had in the last technical lessons. We went through the editing and all the vector stuff. So I'm going to start with adding a couple of panels and then we're going to change up some of the tools. So let's go to View Studio. And in this shirt, what we're going to learn a little bit about is we're going to come in and I would like you to go to the let's do the transform panel. That'll work. And for right now we're going to shove that up there. And as far as tools, Let's see. Let's go ahead and customize the tools. And what I'd like you to do, Let's grab this little thing here called the fill tool. Looks like a little spur here. We're going to go ahead and we're gonna put that down there. And then we're also going to grab the Artboard tool. All right. Let's grab the Artboard tool. All right. I think that is going to be everything we need. Let's go ahead and close this. All right, now, let's go ahead and get this thing started here. Thus far, we have been only working with one document, right? Oh, wait a minute before we forgotten studio preset. And let's go ahead and add a preset. We'll call this Section 5.1. Alright, perfect. All right, Now if we get lost, we got it. All right. Now, we have been working with a document here. But to work as a pro, one of the coolest things that Affinity Designer has, it's a Affinity Photo doesn't as of yet is art boards. Now the artboard tool is right here. Now let's click on it. Now before we go much further, let's take a look at the context toolbar it creates. You can create an art board of any size. Right now we're going to create another artboard the size of this document, so 14 by 16. And all you have to do here now is hit Insert Artboard. So let's go ahead and clear this out. And let's do it. Boom. Now, what just happened? Let's go to the layers and you'll see that now we have instead of a layer, let's say we have an artboard. Think of an artboard at the large container. Now what we're going to do, we're going to insert one. And there it is. Now you've got art board 1 and Artboard 2. Now you rename these just like you normally would. I'm going to call this reference. And I'm going to call this work. Okay? Now you'll notice that it's just a copy of the document. Now, me personally, I find when I switched to art boards, this light gray, just unsettling. I don't like working in the light gray that gets harder on my eyes. So what I do is I come over to Edit and I go to preferences. We're going to go ahead and go to User Interface. And you see where it says artboard background gray level. I drop this down. That's a preference for me. Okay. Now, for the purposes of this lecture, we are going to make two art boards that are the exact same size. One of them is going to be reference, one of them is going to be work. So let's go ahead now and search for references. Now, you can do your own references. Here are the ones that I pull. I'm gonna go ahead and go to File Place. And I'm going to grab some references here. I went in and I searched vintage style t-shirts. And what I found that I liked, I really liked the text onto this one. I really liked the surfboard that we had here. And really this is just part of the process, right? I really liked the color scheme for this one. So we're going to put that down there. I'm gonna go to File Place. And we're going to go ahead and we're going to choose let's do summertime one more. And just like that, I think that that is enough. Now, let me show you a quick trick here when it comes to cropping these images because Affinity Designer does not have a great crop function. In your tools. So here's a new tool, customized tool, grab the vector crop, and let's go ahead and put that in. All right, close that out. Now select vector crop. And you can crop this thing down because it's a vector image. It's similar to putting it into a Clipping Mask. Alright? So what I'm going to ask you to do, I'm going to ask you to go out and find a few reference images. These are mine. You don't have to use mine. Okay. I'm just picking examples of what I like in order to create what I'm going to be working with. Now once I have this reference layer, the way I want it, lock it, and I twirl it down. Everything else. The rest of the work will occur here. Now I'm thinking ahead and I am going to be printing this on a black shirt. So I'm going to be working on black. And the first thing that I'm gonna do now is I'm going to come over and I'm going to grab a circle. Why? Because I kind of like this one right here. I kinda like, I want something in half circle here. So what I'm probably going to do now I'm gonna do some live sketching. I'm probably going to do a half circle here. So we're going to have a half circle. And then what I think I'm going to do, I really like the way that this is chopped up. So I'm gonna go ahead, I'm going to chop this up a little bit. And this is kinda what I do when I plan out t-shirts. Now, I wanted this symmetry, right? So I want the symmetry here, right, about seven. And I'm thinking a good symmetrical item is a surfboard. It is easily identifiable. And so I'm thinking the surfboard is a good thing. Now, one thing I also kinda want, I want to do some texts, so I wanted to do text on path. I'm going to put some text up here. Okay, so that's the plan here. And then what I'm going to do is I'm probably going to do some sort of board Club. Alright. So what do we want to call it? Let's call it the wave rider, wave rider board club. Okay, now I really want to take some things from here. So what I think I'm going to do, I really think I'm going to take this board and I'm going to bring it kind of like that. I think that I'm going to do something kinda cool like that. Kinda tie it into here because I want to balance this out. And I really want that wave right now I do, I don't know if I'm going to keep it, but I think the wave is kinda cool. And then I might even do this EST, 2020. Okay? So I don't know yet, we'll see how this works. But I think that is going to be kinda cool to do. So. I think that's going to be a plan of attack. And so if you ever wanted to remove this art board, by the way, you do it the same way you would remove anything else. Click. Oops, cancel. Let's go ahead and do this. Aereo. Click, Delete and delete them all. Edit, undo. All right, so that's a little bit on how work with art boards. When I do a professional project folks. And we are going to do one where I'll show you how to adjust the size of the art board. I usually have two artboards side-by-side where I have all my references and my assets that I may drag over into my work as part of the blocking process. Alright, let's go ahead and call it on this one and the next one we're going to get down to vector and I'm going to show you the basis of operations. All right, we'll see you the next one.
32. Working in vector using operations : All right gang, let's go ahead and get after his old vintage design. So I'm going to start off with a ellipse. I'm going to hold Shift and it will bring out a big old ellipse. Okay. Make sure you're snapping is on. Make sure you've got your Move Tool selected and center that thing on the Canvas just like that. Alright, so there's our ellipse. Now my colors when I block are always super annoying, right? So what I'm gonna do next is I'm going to have this circle. So there are other ways to do it, but I want to show you the correct way so that you learn the correct way. Rather than taking a shortcut. We're going to come over to our Node tool. And we're going to come over to layer. And we're going to convert the ellipse to a curve. Now the nodes become visible. We're going to click on this little note here you see where it turned blue. Slice it up here with the action, break the curve. Now come over to this node over on the right, and also come to actions and break that curve. Now see what happened to my layer. I now have two curves, the bottom and the top. I'm going to take the bottom and I'm going to delete it. So it just hit the delete key, leaving only the top. Now watch this Right-click. Duplicate this curve. Let's call this text, okay? Just like that. And then I want you to lock it and hide it. Okay, we're coming back to it. We created it right now though. Now the curve that remains, what we're going to do. We're going to create this really cool thing on the front of her Sunstein shirt here. To do this, I'm going to show you how to power duplicate, which I showed you in the very first thing when we did the plastic bag vibe. And what I'm going to do now is I'm going to create a rectangle. Now I'm going to start out pretty thick down here. And I've got the rectangle bigger than this. And I'm going to move it up probably the width of that rectangle. All right, now let's make this an annoying color of green. Okay? So you've got the layers are important, curve, rectangle. Now watch this Control Shift Alt. As a matter of fact, I'm going to write that down for you because this is important. You want to hold Control, Shift and Alt. Okay? This will allow you to power duplicate. Now the shift is going to hold it straight. The ALT is going to duplicate. So Control Alt Shift. Now watch this. Here we go. I've got my thing selected Control Alt Shift. And I pull this up. Now, I'm going to make it a little bit bigger here. Now watch this and then drop it right about here. Now I'm going to release the click, release the buttons, and I'm going to shrink it ever so slightly. Now watch this. I'm going to hit Control J. Okay? You see why that worked? Control J power duplicates. And the reason why you had to hold Control Shift and Alt. The ALT did the duplication. This shift kept them straight and the control told it that your next desire was to power duplicate after the event. And we shrunk these down. Okay. So every time it duplicated, it shrunk them to a lower level. Now, here's what we're gonna do next. We're gonna come down here now. You see how the topmost rectangle is selected. I'm going to hold Shift and I'm going to grab all the rectangles. Actually, let's do this. I'm going to grab the top rectangle. Now I'm going to zoom in for a minute. Grab the Magnifier, zoom in. I'm going to hold Shift. And I want to move this thing up until this is the last piece where I want it. Now what I'm going to do, clear those out. I'm now going to grab all the green ones. I'm going to come up to Layer and I'm going to come up to alignment. And I'm going to tell Affinity Designer to space them out vertically. Now what it's going to do, it's going to space them between the top one and the bottom one. Just like that. All right, Now watch this. This is now going to become a shape. So we're going to use our first operation. Our operations are up here in the toolbar. Now, let me illustrate this for a second. This is one of the first times we're really going to be turned into this toolbar. And the operations are here. The one I'm going to have you use is right here. It is called ADH. And what ADH does, it takes all of these rectangles. You see how these are shapes in different layers. And it's going to make it one object. So it's going to combine. Think of it like combining. All right, so watch the Layers panel now, I'm going to hit Add and bone. This is now one curve. Now, if we just did the ad, I'm going to show you the subtract. Okay? The subtract feature is going to be right here. Now you'll notice it is grayed out. Subtract requires two layers. It requires the layer on top. You're going to subtract from the layer below. So watch what happens. This option will become available once I select two layers. Okay? So I'm coming up with my Move tool. I've got my curves layer. I'm holding Shift, and now I got this layer. Notice that subtraction icon came up. Now watch this. It's going to subtract the green from the red. Mom. And just like that folks, we have a nice sunset type of look there with a nice gradient type of hash on it. Very happy with that. All right, let's go ahead and zoom out so you can see that we just made here. That thing is pretty cool. So in this lesson, you learned a lot. We learned how to convert a shape overdue will curve. We then broke the curve to get this nice half circle. We then created power duplicated rectangles in order to create this, distributed them using the layer alignment function. And we taught you two of the operations for add and subtract. Now there are three other ones. We're going to use some more of those here in the next lecture. But for right now, I think we're done stretch and brains on this one. Okay. So go ahead and step away from the computer for a minute. I understand this one with a toughy. And then when you're ready to come back, we're gonna go ahead and we're going to create this surfboard. And we're going to put the surfboard right inside of that sunset. All right, folks, we'll see you in the next one.
33. Adding the surfboard and gradients: All right folks, welcome back to Affinity. Now, any old picture of a surfboard will do right? I'm going to go ahead. I'm going to come to my reference and I'm going to twirl it down. And I'm going to grab this surfboard picture and I'm going to move it over here. Now. Any picture of a surfboard will do, do not think that this has to be a certain way. Now, I'm going to grab this image and I'm going to create a vector. So we're gonna go ahead and we're gonna grab the pen tool. And I'm going to start at the top, tippy top here, bone. And I'm going to come down here. I'm going to click and hold. I click and hold. And then I'm going to come back here and you see how it's turning yellow. Ma'am. Alright, now let's go ahead and add in our Node tool. And the first thing that I'm going to do is I'm going to try to match this curvature. And if I cannot, we're going to go ahead and we're going to turn that down a little bit, just like that. That is perfect. And it will traverse this just a little bit. Okay? And then we're going to move this over just a hair. And we're going to bring that in just like that. And we're going to move this node just a little bit. And the downward direction and pull that in. Pull this in, shrink that a little. I got a little wide army variety. And I think that we are pretty darn good right about here. K a little bit more there. Hope that got away from me. All right, close enough for horse shoes in and grenades. I didn't tweet that in just a little bit there. Alright. I'm going to turn off snapping there and I'm going to push this just a little bit in the other direction. All right. It doesn't have to be perfect. It doesn't have to be great. Just test to be passable. Alright, so I think that we're pretty good here. Let's go ahead and fill this thing again and annoying green, just like that. Okay? And you see once we get to the annoying green, you can start to see subtle imperfections in the board, right? And just like that. And there were pretty darn good right about there. All right. That is a good surf board. All right, let's go ahead and we'll bring the image back over to Artboard 2, leaving this one. Alright, now I want to put a good sunset here. I don't want to rush it. So I'd say right about halfway down here is where I want to put this thing. Now watch this. This is a curve. This is a curve. I'm going to show you a new operation. I want you to go to the surfboard curve. I want you to hold Shift to grab the sunset curve. Now the operation that I'm going to show you is this one right here. What this one does, it divides everything into its own shape. You can see that here. So this'll be a shape, this'll be a shape, this'll be a shape. What I'm trying to do is I want this surfboard piece to remain, and I want this surfboard piece to go away. All right, Let's try it. We're going to come over with my and we're going to pop it in there. Look at all the pieces that were created. So now what I'm gonna do, I'm just going to go up the list here. And I'm going to just start removing them. Okay. Typically somebody right there. Perfect. All right. That looks pretty darn good. So pretty happy with that. I think that we're in good shape. Now. Let's go ahead. And what I want to do now is I wanted to change the color on this to be the same color of red as the rest of the unit. And what I'm going to do now, I'm going to take all of these leftover. So now this is going to be one solid unit except for that text, right? And I now want to add them. Why do I want to add them? It will become one solid vector. Mom. Now, this is an important designation. We haven't talked about this yet, so might as well talk about it. Now, let's introduce you to the fill tool. Once you have a solid piece, we're going to go to the fill tool. And now I'm going to start at the bottom of this board and I'm going to click and drag upward. And what the fill tool does. The fill tool revolves around this little box right here. Now let's look at the context toolbar. Think of this little box right here as the gradient. Tool, they call it the fill tool. It's the gradient tool. So we are looking at the fill of the object, not the stroke. And we're looking at a linear gradient. Now, watch what happens when I come into this box here. Because it all happens within the context of this box. Notice that coming up here now. Oh, that's not going to let me do it while it's open. Okay. We'll just do it this way. Oh, I did not mean to hit that. Let me delete that out. Let's go ahead and click on this circle. Now this circle you can see is bigger than little circle and we can choose color. So now we can add yellow and it will Grady to whatever color I put in this circle. So let's do it. Click here, come over to this color. And we can adjust the colors. So you can make this white and you can make this a little bit purple. You could do complimentary colors, whatever it is you decide to do. It's totally up to you. Now, how do you color pick? Okay, stay with me here. I'm gonna show you some of the new. And this is another reason why we use our reference. Okay? I'm gonna come over to my art board and I'm going to shrink that down. And I really like some of the colors that we have going on here. So what I'm gonna do, I'm going to come over, I'm going to be on my curve. I have my fill tool selected and notice that it came back. And the first thing that I'm going to do, I'm going to select the yellow, which is where the gradient origin is. I'm going to come to color and you'll see this little eyedropper right here. Click and hold the eyedropper. And it will move into some of these colors. Now what's going to happen when I release it? It's going to give me that color. So if I want to, I can color pick at least from a starting point, the colors that I want to use in my design. So here I might want to go to say a red, but I want it to be a little bit muted. Now, if you want to switch this, watch this, see this little reversal handle. Bone. Now it's switched. So you can choose any color you want. I'm going to choose something that I kinda like here. I think that that's a good color. And I think that for this one here, I'm gonna kinda go something with the red. I think that that is retro enough for me. All right. So we've got the beginnings of a surfboard. You been introduced now to the hill tool, which is right here. And we've used that to color pick some of our colors. So if you liked some of these color schemes, like if you liked that brown or you'd like to this blue with that brown. This is how you can color pick from some of the shrubs that are out there to get that period specific look that you're looking for. Alright, now, the last thing that I'm going to do here, I'm going to show you text on curve, okay? Now once I've got that down, the next thing I wanna do is I want to show you a text on curve, and this is where this curve is going to come up. So let's bring that up. Now, why did that go? Rent will clearly because this is red. So let's turn off the fill. Now. You're going to use your Artistic Text tool for this. So right there is your Artistic Text tool used. Use it a ton of times. Now watch this. You see where the little cross hair is with a watch what happens when we approach the curve? It changes to a little squiggly line with the T. And now this is now text on curve. Notice what just happened here. I'm gonna go ahead. I'm going to type wave writer. Now you can't see it, right? That's because one it's black. So we need to make it white. And secondly, it is super small. So we're going to now move this thing up to an insane style level, something like that. Alright, now let's take a look at how we do this. The reason why it was so important that you did another half circle. Notice the type of layer. This used to be. That half circle look like this right? Now it is text. So it's no longer a ellipse. It's no longer occurred. Get the text layer. And there's something called the baseline. So let's go ahead and clear this out. And if we go to the Artistic Text Tool to adjust to this, there's something called the baseline. Let's go ahead and increase it. The further you come off the baseline, it gives you the space to do what you need to do around the circle. If you didn't have a circle of the same size, you would spend all day trying to make it right and it would never be right. Okay. Now, to change the font, you come up here and you would change it just like you would any other time. And now the last thing that I want to show you, the last real big adjustment. You see here. There's a little green arrow here, and there's a little orange arrow here. Those are the beginning and end points of your text. So if you want to adjust it, once you have the size you want and the fonts you want, you push it until you get it where you want it. Okay? Now, there's a weird one. Let me show you. I'm gonna do this. You don't need to do this. Watch what happens when I move this little orange thing. If I go and touch the r, We'll see how it goes inside. Not good. Inside, not good. So what you're really trying to do here is you're trying to just center up your text to get it where you want it. And as far as the text goes, I'm going to go ahead and end this lesson. What I would like you to do is find a nice retro text from any of those free fonts or any font that you got downloaded to do this part width. Okay, so let's go ahead and call it on this one. In this lesson, we did a lot. You learn about connection. We made the surfboard, we made the fill, we did the gradient, and we learned text on path. That is a tremendous amount of learning on this one. All right, folks, we'll see you the next one.
34. Adding waves: All right, folks, welcome back to affinities. So in this one we're gonna make a slight editorial adjustment. And I didn't have this on my original sketch. But one of the things that I wanted to do is I want to add in like kind of a Rip Curl style wave here. The kinda codons through. And the important thing is I wanted to kind of follow up, let's say, and kind of tie in to this circle. Now, I'm going to be putting board club underneath here. So one of the things I wanna do is I want to make sure that it comes out and swoops down. And so what we're going to be doing, we're going to do two different things here. The first thing we're gonna do in this lesson is we're going to create a shape. And we're going to use that shape to remove a certain amount inside of this sunset. So we're going to kill this sunset again. And then we're going to do some line art. And so this is going to look really cool and it's going to be a great element inside here. And I think that this is what's going to set it apart and break up a little bit of this monotony. Alright, so we're gonna do this a little bit different. I could bring in a shape, but the problem with that then is that it would get terribly confusing to manage. Two art boards, show you the shapes. So we're going to isolate this thing. We're going to come over here and we're gonna go to File Open. Now in your downloads, I've included the wave for tracing JPEG. Alright, let's open this thing up. Now. What I did here is of course, because I do all of these before to make sure that what I'm doing is quality. I created a very simple wave. Now, what we're gonna do first, we're going to start with the shape. So let's go ahead and start with our pen tool. And now here's what I'm gonna do with this one. To go 34. Okay. Now, what am I doing here? About halfway through, I'm gonna put in another node, but I need my node tool. Okay, so the first thing that I'm going to do now, I'm going to begin moving this over. So what I'm probably going to do, I'm gonna put this up here. I'm going to stretch this back. And what I'm doing, I'm setting the outward perimeter of this shape. So if we come up here, I'm going to pop a note in here. I'm going to make it round. And I'm going to put it down in this curvature area. Perfect. Alright, let's go ahead and put a node down here. And one of the reasons why I did the square node is because I wanted to create some sharp corners. So what I'll probably do right here is pop that in to right here. Put a round node over here. Move that up over here like that. Okay, probably need a round node over here. And this just makes sense to me a lot of the time. I always put in my anchor points when I do vector. And then I go through and I start fleshing out the shape. Now there are people that do it differently. You can take any class out there and everybody's got a different opinion on how it actually happens. But I think that this is very unique to help people necessarily think. So. One of the things I like to do here is I like to just put in my anchor points, adjust the shape from here. Now, once you get the shape kinda how you want it, you remember how I said we should close the shape. This is one of those times where I may not close it because it really doesn't matter. I'm not counting on the Fill. Now that being said, let's go ahead and fill this and see what we're working with. Okay, one of the best ways to determine whether or not your shape is good. Fill it with something. And I'm going to fill it up here with a bright, annoying style of red. Okay? Now, once you fill it, you get a pretty good idea of where it's not flowing correctly, where it's not looking at its best. That looks pretty good there. Because again, my sketch is just that a sketch. So don't be afraid to kind of make this thing flow. Remember that especially a surf shirt is all about the flow. Alright, so I've got a good flow down that way. I think that I'm actually pretty happy with that. All right, Now we're going to keep this knowing red. I'm going to right-click and I'm going to cut it. Okay, let's go to our working file and we're going to Edit, Paste. Ok. Now what we're going to do, I'm going to bring out. A guide, and I'm going to set that to seven. Okay? Now what we wanna do, we wanna come in and we want to make this a little smaller. Because one of the things we wanna do, we only want to cut off the, let's go ahead and cut off some of the board. I think that cutting off some of the board is going to be cool. All right, make sure snapping is turned on. And I'm actually pretty happy with that. And what I'm looking at right there, I'm really looking at this intersection point. I'm looking at how this lines up here and I'm looking at giving myself enough of that board right there. So overall, pretty happy with that. All right, now let's do this, right-click and duplicate. And now I'm gonna show you something new up here on the toolbar. And we're talking about right here. We have been working right there in the operations. These are now the transformations. So you can also get there if you like. Let's go ahead and take a look at layer. And notice here if you go to the alignment, I'm sorry, I transform my bad. You could flip it horizontal or you could flip it vertical. I'm going to go ahead and I'm going to flip this thing. I'm going to hold shift. And shift is going to allow me then to make sure that I put it in the right spot. All right. That looks pretty good. Now you're saying Jeremy, that looks like a hot dumpster fire. That's okay. Watch this. Take that curve. Select the board curve, because remember that board is all one curve and subtract. Take this curve. Take the board curve, and subtract. Perfect. All right, that looks really good. Now what we're gonna do once we've got these cutouts, we're going to create some strokes, okay, so we're back to our wave. And I'm just going to go ahead and I'm going to use my pen tool. And it's up to you how you want to do this. I just like to kind of create this shape. And then I come in with my Node tool and I stretch it. So all I did is I created the two points. And now I'm just stretching it around until I get it kind of the way I want it. Now, what I'm gonna do to start with, I'm going to come up to stroke and I'm going to make a terribly annoying and terribly red. That's my MO. And I'm going to increase the size. Now. I'm now going to come down to my pressure curve. And I'm going to add in some work. So we'll make it a little smaller on that side. Make it a little smaller on this point, and make it a little fatter as it goes up through here. Let's see how that looks. Okay, we can do better. Now I'm going to shift it over this way a little bit. Let's bring back up the stroke panel and bring them my pressure curve. And let's bring that down a little. There we go. Yes, something like that. Alright, Now, folks, easiest way to do this, 100%, right-click over here on curve. Duplicate, grab your Node tool. And now just move your node where you want it. I'm gonna go ahead and shrink that down there. This is the easiest way because now I don't have to redo the stroke profile now I know everything's touching up. I'm in pretty darn good shape. Right-click, duplicate. And you don't have to use exactly the same strokes I do, right? So I'm gonna go ahead and anchor that there. I'm gonna go ahead and anchor this here. And then I'm going to just go ahead and adjust the handles. You can do whatever it is you wanna do with yours. What I'm gonna do is I'm going to have the editor fast-forward here until I'm done with these strokes. Alright folks, once we've got this, we're going to come in and we're going to group them all. And then we're going to come in and we're going to edit cut. We're going to bring them into our word. And I go to edit, paste. Alright, so this is our rough adjustment. What we're gonna do now we're going to position these where we want them. And now we'll won't line up, perfect, right? We're going to have to do that ourselves. So I'm gonna go ahead and position this right about here. Let's say I'm going to give myself a little bit of gap. And I think that this is a good starting space. Now, what we're going to do now, we're going to come in here and we're going to get the flow right once it's now nested inside where we want it. So now I come in with my move tool and I connect here. And now it's a matter of just lining it up and getting the flow the way that you want it. All right, so again, I'm going to have the editor go ahead and speed this up because you guys don't need to see this for the entire time and I'll bring you back once we're done. Alright folks. So what we're gonna do now is we're going to come in now. And the last thing we're gonna do is we're going to apply color and a little bit of brush stroke. Now I am in my brushes panel. And now the trick is finding and miss none a nice brush that kind of makes it look good. I'm going to work in oils and I'm gonna work in 64. And let's go ahead and increase this just a little bit. Yeah, that is pretty cool. Now what I'm checking, I make sure that I didn't hit any of the areas around here. And I really like the nature of this, so I'm actually quite happy with that. And again, this is in your brushes, oils. And now the last thing I wanna do is I want to add in some colors. Okay? So what I'm gonna do, I really like this blue and I want to incorporate the blue into the sunset. So I'm going to come into the color. And in color I'm going to grab my stroke and I'm going to come over to my color picker, and I'm going to choose this color of blue. Okay? And just like that bone, that is pretty awesome. Now we're gonna come over here to the layer and we're going to duplicate. And then with our Move Tool, we're going to flip it, hold Shift and move it into the position. Alright, let's go ahead and make sure that we're spot on in that position there. Yeah. Doesn't look like we're touching anything. I am actually quite happy with that. All right, that was a cool little thing we're gonna do here now. One of the things that I might do also, let's do this right now. In the text. Along that curve there, I'm going to come in and I'm going to go to my Stroke panel. I'm going to increase the stroke of my text and I'm going to go ahead and I'm gonna make that the same color, blue. Now to do that folks, again, the stroke color was blue, so this should not be difficult for you. All right, let's go ahead and call it on this one. This one was a bit longer in the next one we're going to add the text down below, and we're going to do some customization. We are almost done with this thing. All right, I'll see you the next one.
35. Adding text and adjusting the vector: All right folks, welcome back to Affinity. Now we're going to go to File Save and let's just save our work here to make sure that I don't lose it. All right, so now what we're gonna do is we're going to come down and we're going to do two things of texts. So let's grab the Artistic Text tool and we're just going to do one right now. And I'm gonna go board. And now once we get the font right, we can do the other club now. So what I wanna do now is I'm going to pull from this stay positive shirt here. And you want to find a font that is nice and scripty. So for me, I'm gonna go ahead and I'm going to try out some different script. And I need something that not only feels right with the, the board, but also gives me enough room to be bold. So for my money, I think that that is pretty good. I'm going to turn off the stroke because it's atrocious. Alright? Yep, and now I'm going to go lowercase. Now you'll have to find your own script totally up to you, right? But the good news is the techniques I'm going to show you R1, a 100 percent applicable. Now what I wanna do is I want to line this up now I'm going to use a totally archaic method here of a square. This was in the age before rulers folks. You would take it and snap it and you would line the board up just like that. Okay, That is pretty good. Alright, let's go ahead and delete that. And now what I'm gonna do is I'm going to copy and I'm going to paste. And let's go ahead and go. Alright, perfect. Now I'm going to go ahead and scoot this over here. Now, see how it's touching. We don't want to touch in there, so I'm gonna go ahead. I'm going to drop it just ever so slightly. All right. Given enough room to breathe, folks. All right, let's go File Save, save that up. Alright, so I really liked that script. I think that it's bold. Now, what I want to do is I want to put in a little swoosh. Okay. So to do this, this is going to be a pain in the backside. There is no great way to do this, but if you learn how to do this, it's going to be awesome. You're going to work with the board. And now what I want you to do, I want you to come up to layer, and I will then want you to convert this to occur. Now make sure your text is good. Alright, convert to curve. Now what just happened with this text? We have not done this before. This text is now converted into a series of curves, which means it is no longer text. Notice Affinity Designer does not see it as text. So what you can do now, I'm going to go ahead and I'm going to zoom out a little bit. Your learners should say zoom in. And now we're going to come over to the node tool. We're going to click on the B. Alright. So now this is now a series of nodes. We are going to now break this image. Okay? So what I'm gonna do first and foremost here, what I want to do with it. Nothing you have to do here. I'm just going to show you. I want to zoom it out. I want to come over here. And what I really want to have happen is this thing to come out and go, push all the way over here. And I wanna kinda throw a little squiggly audit here. Something like that. Okay. So what I'm looking for is that big tail similar to in the stay positive shirt. All right, so to do this, let's go ahead and bring back my cursor. I'm going to bring this back. The first thing I have to do is I have to break this thing so that I can rebuild it. Alright, so we're gonna come over here. And the first thing that I'm going to do here is I'm going to break the curve at that node. I'm going to break the curve at this node and break the curve at this node. Okay? Now I'm gonna take all of these nodes and I'm going to delete it, leaving only that curve. Alright? So now what I have, notice here. Alright, perfect. Let's go ahead and delete that. All right, so I've taken care of that little bush. Now what I wanna do, I want to add a little note here. I want to pull this down. Now, why did I put a little node right there so that I could adjust it? Alright, now, let's go ahead and move this thing out. And when I say out, I mean full on out, like we're going to pull it all the way across the world here. Okay? Now, I'm gonna pull that down. Gonna pull this down. Now I'm gonna make this a square node so that I can anchor it. Makes it just a little bit easier to work with here. And now I want to come out and I want to really think through the flow of this thing. So what I'm probably going to do, I really want this to kind of end as some sort of a wave. So I'm gonna put a little hook here. Notice I'm adding a couple nodes pulling down and I'm kind of crafting out the curvature. Okay, Now watch this round node. Grab the handle, hold ALT. Bingo. Just like that. Now I've got a really nice type of wave on it. Now I can start adjusting k. Now folks, there is no substituted this point for just trying some stuff. Figuring out what works for you, figuring out how this should really flow. Now it's up to you, whatever you wanna do with it. Now. This is coming little bit too far here. So I want to move this up. Okay? Yeah, I really like that straight look. So let's see what it takes to get that straight look. Cl now adjusting this end of the curve. That's looking real good there. I really like that. And let's go ahead and tighten this up a little bit. Alright, so what I'm gonna do here is I'm gonna play with this a little bit. I'm going to have the editor go ahead and pause this, actually fast-forward it so that Julia, the watch me struggle with this line for a little bit. And what I'm trying to do, I want to get a nice type of look here where this thing begins to increase in size but isn't so large that it overpowers the rest of the design. So I'm gonna go ahead and do that. And then we will reconvene here once I get this right. All right, folks. So overall, very happy with that. I think that I'm quite happy with that. I think that we've got a good flow here in terms of how this kind of work. So overall, happy with that. Let's go ahead and pause this one here and the next one we're going to take you through texture. Let's go ahead and dirty this thing up a bit. All right, we'll see in the next one.
36. Using masks to add texture: All right folks, welcome back to Affinity. Now, while you were gone, I went and got a cup of coffee and I got a look at what I did down here, right in this area. And I made an executive decision to change this to more of a wave style swoosh. Okay? So the way that I did that, It's very simple, folks. It's the same exact process that we did before. If I come up here and I double-click on this, all I did is I added two nodes and I just wiped it over. So now this thing looks a lot cleaner. It looks a lot more organic. I did not like the street across swoosh that I did. And I thought that this really added a little something special. So feel free to manipulate it if you'd like the one, you did definitely stick with it. But a lot of times coming back to the design after a day, after an hour, even getting a second set of eyes on it makes it a little bit more easy in order to do this. Now, the next thing that I'm going to show you is a pro move, okay? This is what is called a mask layer. And now this is very, very important. A mask layer is different than a pixel layer. Now let me show you the difference. Nothing you have to do here, this is a purely passive consumption right now. We haven't dealt with pixel layers yet. We've been focusing on vector because a large part of t-shirt design is vector work. So a pixel layer is created right here in the Layers palette. And a mask layer is created right here. This is called a mask, and this is called the pixel layer. Now, I'm going to start with the pixel layer. I'm going to show you the difference, okay? And this is key for t-shirt designers. So definitely this is one you're going to want to watch more than once. So the first thing that I'm going to do here, I'm going to close this out. And now I'm going to add a pixel layer. So I'm going to come down here and I pop this in and I bring it to the top of the work art board. Okay, now nothing you have to do. Now I'm going to come over to the pixel persona. This is up in the upper left-hand corner, right here. And the only two buttons we're going to be using are these two. We haven't customized the interface right now. So I understand this is a completely new set of tools. This is your brush and your eraser. Okay? So what we're going to be doing is we are going to be adding texture. We're going to go ahead and dirty this thing up. So what we're gonna do is we're gonna make this super simple. I'm only going to be dealing in black. So I come over to my color and I make sure black is selected. And now in my brushes category, in the pixel persona, I have different brushes. A group that is always there in affinity is the sprays and spatters. And I'm gonna go ahead. I'm going to choose this ink spatter brush right here. Now, if I come over and I select my brush, notice I'm over in the paintbrush tool here on the left. Watch this. If my brush size increases, I can paint some cool black texture on this thing, right? To kinda aged out. This thing is pretty cool. Now you might be asked, and how do I adjust the brush size in the context toolbar in the brush pallet, there is this. Okay? We're going to leave opacity and flow at a 100 percent. We're not going to deal with that right now. Why? Because it's t-shirt designers. Traditionally, most of our work is going to be in vector. So we're working primarily in vectors. So we're going to leave opacity and flow alone. Now you might think, men, this is cool, this thing is ready to go, okay? But you'd be wrong. Let me show you what happens now. Let's say that I decide to put this on different colors of t-shirt. Now this thing looks all aged and really cool right here because the background is black. And we've taken areas out of the design or so we think, if I change my rectangle color, let me just change this out. And I decided that I want to print this on a purple shirt. Watch this. I turn it the purple. I dropped this opacity down a little bit and I understand it doesn't look great purple, we'd have to do some different color choices. But you see how we really didn't remove the color. The black is still there. So now this thing doesn't look aged. It looks like a hot dumpster fire. The difference between a pixel layer right here and a mask layer is the mask layer removes parts of the image. It hides it, whereas a pixel layer just paints on the layer. It doesn't hide anything. Even if you tried to adjust the Blend Modes. So if I'm on this pixel layer right here, and I come through and adjust the blend modes. There really doesn't change that much, they disappear. And that looks a little bit better, but it's still weird. So even changing blend modes doesn't work. So the pro move, the way you want to think about this, when you go to age things never, never picks a layer, always mask layer. Okay, I'm going to delete this. And we're going to bring this back now because this purple angle, I insert my eyes. All right, so how do we do masking? Now, I'm going to write this down. You're going to want to write this down somewhere where you're taking your notes. Black conceals. White reveals. Okay, this is a little mnemonic that I learned that I have taken with me my entire career. So in order to hide pieces of the design, you want to paint in black. In order to reveal them. You want to paint in white. Mask layers work in black and white. Okay? They do not work in terms of colors, they work in terms of luminance. It's a little bit complicated to explain, so we're just gonna do it. Alright, so how do we do this? Now, this is an important designation and we're setting up for success. I want you to come to the art board, and now I want you to group everything we've done except for the background rectangle. Right-click group. Okay? So I'm going to change this. I'm going to call this design. And then we're going to change this rectangle, background color. Okay? So now everything should be in a group except for your background color on this art board. I'll give you a second to do that. Okay. Now, inside of the group, we are going to add a mask layer. Now, mask layer is a special type of layer. Notice that it's even called the mask layer. Now by default, this is white. And remember, white reveals. So right now on the mask layer, it's showing everything, right? Everything is visible. What do you think is going to happen if we paint on this layer in black? Wherever we paint on this layer, it's going to hide, it's going to conceal. So let's go ahead and clear this out. Make sure you are on your mask layer and grab your brush, paintbrush from the pixel persona. We are in pixel persona, not vector. Okay? So if you get lost, I'm just going to put this up here. That way. I don't have to answer that question on it. It's right here. Boehm, make sure you're here. Make sure you have this here. Okay, Let's go ahead and clean this up. All right. Now I'm in my brushes. I'm choosing to use the ink spatter. Now. I'm going to increase the size and I'm even going to crank up the opacity to a 100. I'm sorry, the hardest wandered. And now my best piece of advice for you when doing texture, do not go heavy on the letters because it will become unusable. Alternate your size. So you see how I'm going along the sides of the brush right here? I'm touching some of the text, but I'm not really making it that bad now, if I increase brush size, come down here. And you can always add more, but it's hard to subtract more, okay? And if you want to change your brush around, there's a couple of different ways you can do it. I'm going to alternate my brushes here a little bit. Oh, why did that change? K That burst changed because the brush was different. Okay. Now let me show you another one that you can use up to you. If you come down to categories, you will have a category called texture. Now, texture brushes look an awful lot like this. Okay? And so the texture brushes you can use as well. All right. I'm going to stick with the sprains batter. Now I'm going to go ahead and stick with brushes you folks have. And you want to dirty this thing up. Okay? Once you've got a dirty it up the way you want it and you think it looks good. Let me show you what it's up. Now by come back to the background. And remember, I'm going to go ahead with my Move tool, select them to change the fill. You remember we changed it into purple last time because it is a mask layer. Notice everywhere you touched, it, removed the image, and now you can clearly see if we change the background to any subtle version, say, of any of this, notice it's removing. So that is the difference between a mask layer and the other. And when you add texture, that is the way that you do it. All right, I'm going to bring back my black because I want to make sure that we're good. I'm going to take a look at this and I might add a little bit more texture here and there. And if I turn this off, remember that it is non-destructive. If I turn off my mask layer, look, my image comes right back to the way it should be. This thing is pretty awesome. Okay? So remember with masks, black conceals, white reveals. When you add texture to a t-shirt, I prefer to use a mask layer always if I want the t-shirts to show through. Now if I'm just adding texture to the image and it's going to be flat against the t-shirt. And I don't care about the t-shirt color, doesn't matter to me. All right, In the next lesson, let's go ahead and export it, throw it into the mockup, polish this thing up, and then we'll finish this thing real quick.
37. Polishing Exporting and placing in the flat lay: Already folks, welcome back. So what we're gonna do here now is we're just gonna go ahead and export this, but I'm going to show you how to now go pro, with something. Let's go ahead and let's export this just like we have a 101 times. And because we created the group the way we did it, we can go to File export. Remember it's PNG. And remember here that we're going to go ahead and grab the selection without the background. Okay? So because we don't want the background and the selection is only the design. And we're going to go ahead and we're going to export. And what I'm gonna do, I'm gonna put this in, I'm going to put down finished PNG, so you folks have it. Alright, Perfect. All right, now let's do what we've done a 100 times before. We're going to go to File Open. Now what we're gonna do here, remember, we added in for this section, we had the front of the T-shirt mockup. Okay, we've been always coming in and doing this. Let's go ahead and go to file. And now let's go export as a template. Now this is an important thing. You're going to want to put your templates somewhere else. You could put them in downloads. But what I'm gonna do, I'm just going to put mine here and I'm going to create a new folder called templates. Okay, just like that. And so we're gonna go ahead and come into there and we're going to save it there. Now, watch this. If we come down here and we go to File New, we can come to templates, and we can add a folder. And we're going to put it in the template area, select folder. And now the front of shirt mock-up is always there. So as a teacher designer, once you get into doing 10 or 12 designs that day, Let's say depending on what you're posting, this is an important designation. So let's go ahead and go to File Place now. And now you have a template. And let's go ahead and we're just going to place this in here. This is a course under construction. And of course I gave this to you as a download and all documents. And there's my finished PNG. Open paste. Now this looks like hot garbage. Let's go ahead and change the HSL adjustment. And let's drop the luminosity. Okay, well, what just happened there? Why did we luminosity here? What we need to do now is we need to come up here. And we need to place this in-between the multiplied layer and the other. Now, if I was to go back and polish this up a little bit, I might go through and I might actually D saturate this a little bit in my working file. And by working file, I mean, this file right? Now if it's a little bit bold, just because of the way it showed up here. Let me show you something. Come down here, apply an HSL adjustment and tag it. You see how it's nested inside only to here. And you can desaturated a little bit. There we go. That's looking a little bit better. And you can adjust the colors. Now the trick is you want it to look the same way here as it will when they purchase this shirt. So you know that if it's oversaturated right there and that's how it looks. Make sure that you are true in your representation because it's only going to cause customer dissatisfaction. All right, folks, that's little bit on how to polish up your artwork, even post in the template. So you add the HSL adjustment in. Make sure you put your finished PNG right here in between them, multiply layer and the color adjustment. All right, folks, that's a little bit on this, but let's go ahead and call this. This one was simple. And now you have a template for the front of the shirt, will see you later.
38. 06 000 Final: All right folks, welcome back to the T-shirt course. Now, this is one of my favorite projects in the course. I know I said that every time, but this is the t-shirt that I actually did for the great one, MMA when he did a fight down in Kentucky, raising money through selling fight shirts is one of the ways MMA fighters pay for training fees, travel, that sort of thing. So the cool thing is in what I do, I've actually seen my shirts take the walk, even on UFC fight bass. So that's kind of a cool thing that you get to see in T-shirt design. So what I've done, I thought that right now instead of another theoretical lesson, I would lay out my process and you'd watch me do it, but in a different way. I'm going to now show you how to work with pixel layers. Now, pixel layers are raster layers. Thus far we've been highly focused on vector. We're going to switch it to pixel, and I'm going to show you how to do selection and selection of a less than complete picture, let's say, is one of the most challenging things you can do as a T-shirt designer. So I wanted to kind of up the challenge game here, and I wanted to show you the few tools you need when it comes to selection in order to do this style of white shirt. All right, let's go ahead and get started.
39. Gather references and create the artboard: All right, gang and welcome back to Affinity. Now in this shirt, we're going to explore the pixel persona. Now largely in this class, we have ignored the pixel persona. In the last design that we did, we used pixel brushes in order to create some texture, but that's really bad about it. So let's go ahead and do one, primarily in the pixel persona. Alright, so what I'm going to do, we're going to switch it up here. The pixel persona is in this upper left-hand corner right here. Let's go ahead and select it. We're going to go to File New and remember our presets. Now, I'm going to be doing one form of Buddy trusting Canada here. He's the MMA fighter that fights out of the Detroit area under the great one MMA. And one of the things that I do is I do the promotional fight shirts when he has a fight. So we're going to go ahead and show you how to replicate one of the fight shirt designs that I did. This one is absolutely usable, it is absolutely printed. And at the end of this, I'm going to show you how we actually printed it, and I'm going to show you how it appeared on television. So let's go ahead and get started. So this is going to be for the front of a shirt. And so we're going to use our preset right now. Oh, it defaulted over to the vector. Let's go ahead and move to the pixel. Now, what I want you to do is I want you to, we're going to leave the studio panels as they sit, but here's what I want you to do. We're going to set up our workspace. I want you to go to View, and I want you to come over and we're gonna go to Studio. And I want you to not show the left studio. We don't need assets. Okay. I like to work with my studio on the right. And now we're going to practice pulling out the panels that you know, so that we can do this. So let's go ahead, let's pull our layers panel first and foremost, that's one we always use. The second one we're going to pull, we're going to pull the color panel. The third one we're going to pull, we're going to pull the brushes panel. And the fourth one we're going to pull right now is the stroke. So I want you to pull these four out and remember, if you don't have these View Studio and then makes sure the little click box is there. At the click boxes there, it's on. Now, this is a little different than what we did before, before we had eliminated the studio and we brought on one pallet at a time. Now what we're doing is I'm pulling the four that we use most frequently. I like to work with all four that I use frequently out front. It's up to you. Now the other thing that we're going to do, you'll notice here that I have very few tools over here on the side. So what I want you to do, It's I want you to come over to Tools. I want you to hit customize tools. And I want you to pull every tool out. That is not one of these. So that 5, 6 actually tools that I want you to have, the Move tool, the selection brush tool, the paintbrush tool, the eraser, the view, and the Zoom. That's it. All the rest of these tools folks are used for more photo manipulation and such into t-shirt design. I don't use those a bunch. Now this is the big designation. When you're done, close that out. I'm going to teach you the most frequently used tools for t-shirt designers. There's no way I can teach you all of the tools. And I'll tell you for t-shirt design, I don't use a lot of the pixel based tools. So now let's go to View Studio presets, and let's add a preset, and let's call it pixel one. Okay? Now, the next thing we have to set up, I want to show you how to set up your art board. Now watch this. We're going to come back to the designer. We're going to grab the Artboard tool because we're going to pull some reference. And the first thing we're gonna do now, and are there pause for a second. Editor backup, sorry, Let's go and start with the artboard. So now let's grab the Artboard tool and let's insert an art board. All right. Now notice we have an art board. Let's go ahead and click it again. And now we have two art boards. Now I promised you in the last lessons I would show you how to adjust the size of an art board. So I'm going to show you that now. With this second artboard selected, I want you to find your Transform panel. And now the transform panel, which is right here. You've got a 16 by 14. See the width and the height. Let me go ahead and illustrate this. 14 here, 16 here, and there is a little chain link looking thing right here. This folks maintains the aspect ratio. Now, I'll tell you there is only one piece of reference we're going to use here. So what I'm going to do intentionally in my design, I'm going to go ahead and I'm going to keep that off Locke. And I'm going to create a 3.5 by 3.5 inch art board. Now why did I do 1 so small? This is because if you are preparing a t-shirt that has a pocket area and a front of shirt. You can put all your designs on the same file on multiple art boards. This is huge, so this is where I'm showing you how to construct custom artboards in Affinity Designer. Now, what I might do here, watch this. We're going to lock the aspect ratio. You see how this is now locked. And we're gonna go to six. Alright, perfect. So we can now dock this Transform panel back. Okay, so our artboards you set up. The last thing that I want to do is I want to think about the type of shirt that I'm going to do. And I'm going to grab a rectangle. It's going to be a black. One. Of course, always create the rectangle and the color that you're going to work. And then I'm going to move my reference in. Now in your downloads, we're going to go to File Place. And in your downloads for the fight shirt. I've included this Mike Tyson shirt here that he wanted as part of the reference. So this is really our only reference. Now if you wanted to vector crop this, if you come into the vector crop tool, crop the shirt down. And we're pretty good. Oops, Okay, let's crop that thing down. Alright folks, this is how you set up for pro. You've got your reference board, which I'm going to retitle reference. And you've got your art board, which I'm going to retitle work. We've got a rectangle that I'll retitled background. And we are ready to go. All right, so we're gonna go ahead. I'm going to switch over to the pixel persona here. And the first thing we're gonna do is I'm going to go to File Place. And we're going to lay out a picture from one of Christine's older fights with the arms raised. So what we're gonna do is we're going to do this Mike Tyson type of look with this type of image. So let's go ahead and pause it here. In this lesson, we set both our artboards up. We set our studio up in the pixel persona with only the tools that we were going to need. We grabbed the references that we were going to use and we got stage to do a pro job. Alright, let's go ahead and call it here. And in the next one I'm going to show you how to isolate images in the pixel persona using the selection brush. We have not covered this. All right, We'll see you the next one.
40. Selecting the image using the selection brush: All right folks, this one's going to be a little longer one. This is an important lesson on selection. Now, in previous lessons we showed you how to make a clipping mask using the vector persona. Now, if I was doing this for real and I wasn't teaching a class, this would be a prime candidate for a clipping mask because the arms are thin, the hair is smooth. There's no real jagged areas here in which we need to mask out a bunch of stuff. It would be very, very simple, but we're not about simple. I'm going to show you how to select it using probably the most important Selection tool for t-shirt artists. And this is what is called the selection brush. Now, the selection brush folks is right here. And now what I wanna do, I wanna take just a moment to really explain what's going to happen. When you click on the selection brush. What the selection brush does is it looks at pixel layers. Now notice, when you import a picture, it is an image selection will not work. This is a no go on. Image layers. So how do you get an image layer ready for this election? The proper term is you rasterize it. Okay? So what I'm gonna do now, we're going to rasterize it. Here we go. We take the image, I right-click and I rasterize. What this is going to do is it pixelate it. Notice the change that has been made. It is now a pixel layer and a pixel layer can be selected. Aright. Now, let's take a look at selection. This is a very, very important contexts toolbar up here. Okay? When it comes to selection, you can use the same brush to add to this selection or subtract from the selection. Make sure you know which one of these is pushed in. As an example, the way this looks now, we're going to add to a selection. And I always make sure my snap to edges is on. And I always make sure my layers are off and my soft edges are off. Okay? So make sure that yours has the check mark here. Now what's going to happen? You're going to grab the brush and the brush is going to come down and it's going to begin selecting. And it's going to look for an edge like right here between his skin and the gray of the announcers sleeve. That edge is going to be very easy for it to find. Now where it's going to get weird is say where the hair is black right here, and the cages black right here. It's not going to do a great job of seeing that the same thing is true with the black on his shorts versus the announcers gray. So the intent here is to do a first pass. Okay, Now, there's two things that really control the selection brush. We'll start with the first one. Size matters. Okay? Now what do I mean by that? The larger the brush, the bigger the selection. Now, so it is in your best interest to use a small brush. Okay, let me show you what I mean by this. Okay. I'm going to close this out. Now. There's nothing you have to do here. I'm going to come over here and I'm going to select the selection brush. And you'll see that it's very small right now it's 5.8 pixels. I'm going to go ahead and crank this up. Now. See we're at 200 pixels. You see how big that is compared to the area here. I really don't want something that big, I'd say right about here is medium. Okay. Now controls, then I'm going to come inside of the flesh area here. I've got Add Selected. Remember makes sure ad is selected. And now look at what it did. Just one touch and you'll see where were the announcers head is. It had a hard time differentiating. So I'm going to turn this down a little bit more. Now I'm down to about 50 pixels and watch what's happening now. Now it's really tasking a lot better. Now where are the flesh of the one fighter get the flesh tone of kristin. It had a hard time differentiating. That's okay. Think of this like the first pass. I'm going to come up here with the gloves. And it's probably going to have a little bit of problem with the gloves. Why? Because it's having problems finding the edge. And rightfully so right to that it looks black. He doesn't know that one is a glove and one is a background. Okay, Now the first thing that I do, and this is just my version of selection. I come in and I take a first swag. Now I zoom tool in. And now what I do, I come over with my brush. I go to subtract. And now I really shrink this size down. And you'll see now that you're zoomed in, you see how it hugged right against that line because it was able to tell the difference. You'll get a much better selection. If you zoom in with a small brush. Even here, I might be able to get his face mostly out, which I did. All right, Good deal. Problem-solve problems. Dance off. Now, let's go ahead and shrink this down even further. And I'm going to try to getting the crook of the neck. All right. Now I'm going to bring this up. Now watch this. I'm going to add, now I'm going to come in and I'm going to trace the head. Now you see what just happened. He grabbed all of that. Again, brush was too large. So I'm going to come in now, I'm going to subtract. And this little dotted line that we're seeing, some people call these the marching ants. I like that. So I'm going to use that term. So we're trying to make the selection work. And folks, this is a skill. This isn't something you're going to get right off the bat to start with, you'll probably be extremely frustrated. A 100 times. Welcome to the world of selection, even in Photoshop. Even with intelligent selection, It's difficult. Okay? So I'm grabbing the gloves. Okay? Now once I think I've got a lot of it once, I'm pretty sure I do anyway. Oh, let's subtract that. Subtract the rest of the fighter here. There we go. Get him out of the picture there. Okay. And it took a little bit more. There we go. Perfect. Now, once I think I got this, check this out, I'm going to grab my magnifier tool. I'm going to swoop in. I'm going to check to see if I got what I need. Now watch this. I'm going to zoom back in and now there's something called refine. Let's go to the selection brush again. And with Kristen selected their ongoing to refine. Now watch what happens. Affinity throws a red mask around anything that is outside. Now, there's a lot of adjustment here. I like to adjust the ramp. The ramp is how much it gears up and ramps up to find that edge. With refine, I've narrowed it down to probably negative 40%, which means I'm going to get a very firm edge. And I like to use the map adjustment. So what I'm going to do is I'm going to slowly and methodically look around the outside if there are areas you see right here where some of his shorts have been consumed? I might come in here and I might try to fix those. Now if I can't, I can tell affinity right here by clicking foreground. That very clearly this short material here is part of the foreground. And you'll see now it will come back. The same thing is true right here with this short material, you see where there's that little bit of red. Okay? So what affinity is actually doing is it's cleaning up the edge. So that looks really good. That looks really good now the gloves need some help. Okay. We're gonna come over here. Yep. I'm gonna come over here. We're going to get some more of those gloves. Yep. It looks like I'm going to get the finger there. The finger needs some help. Now, if your selection stinks, one of the first things that I will tell you, check your brush size. Okay? A brush that is too large, affinity will have problems with. And I always like a good reduced ramp. Okay. Now the other thing you could check, you could increase the border width, which would check the border around say, the arm and the other, where it would look for that edge. This right here. I am happy with. Now once you are happy, before you hit Apply, go to selection. And I want to export this as a new layer. Okay? Now, watch this apply. Mom. Now this is not a perfect selection, okay? Because of the nature of my selection, I'm going to have to come in here and I am going to have to clean up a little bit. So this is not going to be perfect. We're going to have some subtle differences here. Now, what I will tell you folks straight off the bat, do not be too hard on your selections here. You remember when I said the same thing about doing your traceable selections onto the clipping masks. You can get in here and you can get all sorts of crazy with it. But in reality, you're not doing photo compositing. You're not doing high, high detail work. You are making a t-shirt. So don't get too crazy with it. Okay. And all I'm doing is I'm coming along the outside and I'm just cleaning it up a little bit. That looks pretty darn good to me. All right, Bye. No way shape or form is perfect for compositing work. But take a look when you move out. How awesome that is. That's actually super clean. Alright, so the process folks is this, makes sure you rasterize the image with the arms raised. Then come over and grab your selection brush. Start in the back and work your way out making sure you keep your brush small enough to find the lines. Subtract around until you get a pretty good outer shape, and then refine it, turn your ramp down. And lastly, touch up the eraser as you need to. All right, this one ran a little long. This is a very complex topic of selection. So we got to rewatch that a couple times, check it out. But this is the tool I use 99.9% of the time when I do t-shirts. All right, we'll see you the next one.
41. Adjusting the image and adding the major blocks: All right. Getting so you'll hear me say 10 at times there's really no substitute for learning to make T-shirts other than working off of their t-shirts for inspiration and try to figure out exactly how they did some of this stuff. So what we're gonna do here is the first thing we're gonna do is we're going to prepare the images and we're going to block these in. And so when you look at this Tyson shirt and you look at the amount of say, illustration that went into it. It's pretty simple. Now, what we're gonna do is I'm going to show you how to make this thing happen. So we're going to come over and we're going to use an adjustment layer. Now we've done this before. I'm going to go ahead and use the black and white adjustment. Now notice where I put the adjustment. The adjustment goes on the new isolated image, okay? After you create the image, you'll notice that this is checked off, which means your image is still there. It's just invisible right now. So you want to tie the black and white to the image, not the entire shirt. And you'll notice that it is a nondestructive adjustment, which means I can adjust some of the reds in his skin. I can adjust some of the yellows and the picture. I can make adjustments. I can close this. And if I wanted to bring it out there, it comes again. Alright, now the magic adjustment, this is the one, this is the money right here. Let's go ahead and go here. I want you to go to posterize right there. This is one of these hidden things. Posterize the farther you go out, like by the time you get to 70 or so, it looks like a normal picture. But the further you go this way, the weirder it gets. So I'm gonna go ahead and say that right around here for me is a good spot them let's say between 78. Let's go ahead and go to eight. I really like that. Let's close that out. And let's also attach this to the pixel image. Okay, so now if I told them that pixel image, you see they're both there. And now if I want to, I can come in and I can bring up and adjust certain levels until there where I want. There's not a lot of greens in that picture. So I think that we're really just dealing in, say, a lot of yellows in a lot of rents. Alright, so overall, very happy with that. The other thing you might could do, it's up to you. Click on the adjustment and AD are ever present levels adjustment. The levels adjustment will increase the blacks, increase the whites, and give us a lot more contrast to where we need to be. That thing looks pretty cool right there. I'm happy with that. Alright, this thing locked in. So I'm really happy with that. We're going to call this isolated. Okay, so we're good there. Now the next thing is, let's go ahead and add some text. So to do this, you'll notice the text tool isn't in the pixel persona. We're going to flip on over here to the Artistic Text tool. But first we're going to make a quick stop by our friend the pen tool. Now watch this. Click. Click. Now what am I doing here? I'm setting up to do text on a path. So what I'm going to do is I'm going to make this redemption text kind of curve a little bit day. And to do that, I come over to the text tool. And you remember that when you do text on a path, what's going to happen to this cross hair with a It's going to move into a little squiggle with a T. And so I'm gonna go free option. Okay, now why can't we see it? Well, because for one it's black. Secondly, it's super-duper small. So let's go ahead and bring this thing up. Boom. Let's go ahead and go right there, right now. And now, here's the trick. You're going to find your own text. Find the text. That means something to you now, in the Mike Tyson one, it's very savage, very unrefined, totally up to you. What I'm gonna do is I'm going to have my editor go ahead and speed this up while I go ahead and search for textural quit for a font. All right folks, Welcome back. So I found the font that I want. And so I moved it up, right? So if we take a look at this with the Artistic Text tool, I moved it up to a 130. But now what I wanna do, I wanna show you something new. We're now going to come over and we're going to add in a new type of studio panel. So this is going to be the first move here. We're gonna go ahead and go to Studio. And I want you to bring up the character panel. Alright, now let's practice good habits here. Studio presets, add new presets. Let's call this section 6.1. Now, when you do this part with the Artistic Text Tool selected, this only works with the Artistic Text Tool selected. Go ahead and click on the expansion. And then go ahead and click on the width. Okay, this is how you expanded the size of the character. Right here in the vertical. This is how you do it in the horizontal. Now what I might also do is go ahead and clear this out while we've got it selected. Let's go ahead and add in a little bit of the tilt. Aright, that is great. Now if you wanted to adjust this, you could always come in and you can adjust it however you want there. I quite frankly, I'm happy with that amount of movement. I'm great with that. And now what I'm going to do, I'm gonna go ahead and position this down here. And I'm gonna do this in a royal blue. So I'm gonna go to color. And I'm gonna come over here to hue. And we're going to do it in a royal blue. Alright, that is pretty awesome. Now, let's go ahead and stop it here. Because in the next lesson I'm going to show you how to do fake drop shadow on here. And I'm also going to start moving through some of the other big blocks. So in this lesson, you learned how to post arise using Levels adjustment, the posterize layer, and the black and white adjustment. You then identified how to do text on path which you knew before. And we put the redemption in there so that we can take the next step. All right, let's go ahead and pause this one and take the next step.
42. Adding background and drop shadow : All right, folks, welcome back to the fight teacher aright. So we're pretty much done with the character panel. I'm going to go ahead and I'm gonna throw this on up here. I've still got these here. Now, here's what we're gonna do. I'm gonna go to my Layers panel and I'm going to duplicate the redemption layer. Okay, so I've got two of these. I'm going to call this one white, and I'm gonna call this one blue. Okay? Now this fake drop shadow time guys might disagree with me, but turns out I don't really care. Alright, so what we're gonna do, we're gonna come down and we're going to go to the bright white. Now, I'm going to do this on my keyboard. I go down, okay? So I select the white and I go down a few. And I go over just like that. All right, that is as hard as it is. So we've got a very similar font now notice that they are, on the other hand, went up and over. So can you do the same thing? Absolutely. Let's do it. You want to match that? We can go up and over just like that. All right, looks really good. Now, what I'm gonna do at this point, I'm very happy with that. I'm going to go ahead and group these together as text. I'm just going to group them. We keep the text intact. It looks good. All right, Now if we wanted to, we could now adjust the group, that kind of thing. Right now I'm going to keep that right where it is. And now we've got to create this kind of swoosh stuff, right? All right, to do that, There's a lot of different ways you can do this. So let's go ahead and take a look m. I'm going to go back to my pixel layer. Now. This is one area where I use my Wacom. You do not have to use Wacom. You can definitely do this with a mouse. All right, I want to create a pixel layer, and I want to put it down below the isolated figure. Let's call this Paint. All right, Now, let's get the color. The color we're going to color pick some are exact, is going to be the same color of royal blue as the text. So we just color picked it. And there we go. Now the brush, we are going to use our brushes. Now, it's up to you when I'm doing this wuzhi stuff. I like to use some of my gouache brushes. I also like to use some of my dry media brushes. Okay, we're going to find the right ones. I'll also use my acrylics. So folks, if you're following along, these are all stock brushes. And so you'll find them right here. You have dry media and put that down. You've got your acrylic and you've got your ganache. I'm not even sure I spelled that right. You get the idea. So let's go ahead and let's start with this. All right. I like the ones that have kind of an open area, like the taper dense would be a good one. Let's try that. So I come over to my brush. Now I want to bring this up. Now, check this out. We want the flow to be up to a 100. Okay? I'm coming down to my layer, makes sure you are on your paint layer. Now, notice how on the reference it flows with the fighter. Okay, now, why isn't it working? Well, probably because I have black selected. Let's not paint in black that doesn't do any good. Color. Blue, elite, and I look at that. Once you do that, you're good. All right, so let's go ahead and start adding some strokes. That's pretty cool. Okay, now around the body, I want to keep the strokes. Now I want to go ahead and I want to make some of these strokes bigger around the hands. Okay? Now, up to you, however you wanna do it. Now I'm going to shrink down some of these strokes because I want to kind of put some of them out here. Now, I'm gonna go ahead and switch brushes. Oh, I'm gonna do an acrylic. Let's play with this brush. Now I'm going to bring this up a little. Now. Alright, now, that looks pretty good. Now here's what I'm gonna do here. You'll see there's a little bit of white alongside of this thing. What I'm gonna do, I'm gonna come over to the layer. I'm going to add a pixel layer behind. I'm going to drop it down. Now. My goal is to switch over the color to white. I'm going to drop my brush size a little. And my goal is to create some white without making a kind of look like it's white. So we're going to do this and we're gonna do this one. Okay? Yeah. Okay. And you'll see that this is very similar to what they're doing over here on the side. They're trying to just create a little bit. Okay? All right. Now, here's something you could do if you so choose. Let me show you another tool real quick. We're going to go to View. We're going to customize the tool's nope, sorry. You customize tools. Tools. There you go. And let's grab the smudge brush, bring it in. Okay, close that out. Now what the smudge brush does, it does exactly what you think it does. We're going to crank up the strength of the smudge. We're going to go to 70 percent and we're going to go ahead and smudge this thing in. Okay. That's going to take care of all of this pesky other stuff that's going on here. Okay, now we're gonna go ahead and crank that up even a little bit more. Yeah. I get that one. Go there and there we go. Okay. Now, I'm also going to come down here to the paint. Now be careful with this. It's up quite a ways on strengths and what we're gonna do, we're gonna bring the dark in. We're going to bring the blue out. Okay? All right. So I think that we are pretty good with this. See how we're able to kind of give some of this in some of this out. This is looking pretty darn good. Okay? Now, the last thing that we gotta do here to kind of make this thing work. Once we have the figure, I want to mask the figure. So we're gonna take this entire isolated figure and we're going to apply a mask layer. Now watch this. We're going to come back to here. And with the mask layer selected, we're going to come down to here. Now remember, white conceals, black reveals. So with the mask layer selected, I'm going to go ahead and put the black over here. And I'm going to go ahead and just move this centerpiece down to here. Alright. That looks pretty darn good. I'm actually quite thrilled with that. Okay, Let's go ahead and call this on this one. And in the next lesson we're gonna go ahead and we're going to apply this into the mockup, cleaned it up and you're gonna see exactly what you got. All right, we'll see you the next one.
43. Exporting and placing: All right, gang, let's go ahead and finish this thing up. Now I'm gonna try something. This might work, this might not. And it's up to you. Now, I'm gonna go ahead and I'm going to come over to my group of text. And I'm going to go to the white. I'm going to come to my Stroke panel and I'm going to go ahead and I'm going to place a stroke. I don't want to just place small and I'm going to call it to point O. Now I'm going to align the stroke to the outside. And what that's going to do, it's just going to allow me to separate this out just a little bit from the background. Now, what's the riskiness? Let's say you do it on a shirt that's not black, then you're going to have a black stroke just so you know. All right, Now the other thing that I'm gonna do, I'm gonna go to blue. And I'm going to crank that up a little bit here. And I'm going to give it a little bit less of a stroke. I'm going to give it a 1. And then I'm going to align it also to the outside. All right. I like that. I think that that's a lot cleaner. I'm going to keep it. Alright, now, much like we've done before, you've seen this show before, select it. All right, That's my entire design there. Now what I'm going to do, I'm going to come and down, I'm going to group it. And there we go. All right. Now I'm going to come in, I'm going to File and let's go ahead and export PNG selection without background export. I'm going to go ahead and put this in. I'm going to call this finished fight. So you have this here and I'll also include the working file. Alright, perfect. And now let's go to File New. And let's try out that new template we made. Hello, Good at templates. There's a photo shirt. Boom, just like that. Now you folks are pros at this file place. Let's go ahead and go to here we want something other than a text file right there. Now that doesn't look great as it is there. That's why you always pay attention to where you want to be. And let's go ahead and change the color through the hue saturation and lightness adjustment and make that bad boy black. All right, cool. Let's go ahead and just move this a little bit more out here, just like that. All right. I think that that one is pretty awesome and I think we're going to call this one done File, Save As. And I'm going to go ahead and put this one down in my shirts for display graphics. And I call this one fight shirt. All right folks, that's it. I hope you had a good time. Learn a little something here. I like the fact that we put that little stroke on the backside. I think that this one was good. And we'll see you in the next one.
44. Introduction to the Gothic Shirt: All right guys, welcome back to the T-shirt shelf. Now, what I'd like to do in here, we've now explored vector fairly completely, and we've explored pixel fairly completely when it comes to selection and such. So now what I'm gonna do is we're going to combine these two things. And we're gonna do a Gothic inspired shirt right here. But here's the trick. We're going to use premade assets. So what I've done is I've gone into the resources. I've pulled from commercially, CSI style licenses, Creative Commons, and these are all in the public domain. So public domain vectors are one of the things that can significantly speed up your workflow. And if the licenses right, you can use them in your print work. Always check the license details. Now, the challenge is always working with these vectors because what happens is they take a black and white pixel image and they then vectorize it into one path. So what I'm going to be showing you in this section is we're going to pull only predawn vectors. And then we're going to arrange them into this really cool taro design. And why did I choose the taro design? Because again, it's hot. Go down and take a look at what you see at your local mall. These sorts of Gothic t-shirts with this sort of approach are selling everywhere. So I really wanted to give you relevant t-shirt is gambles for the year that this was made. Alright, so let's go ahead and get started showing you how to work with premade assets into t-shirt design. See you inside.
45. Licenses for pre made vectors: All right folks, welcome back to the course. So what I'd like to do in this section of the course is we're going to be taking a look at stock vector. And I didn't want to have a discussion on stock vector without talking about licensing. So what I'd like to do is I'd like to take a look at three websites. And I want to show you how you need to pay attention to certain licensing requirements because it will affect how you work in t-shirts. So let's go ahead and minimize this. And we're gonna go ahead and bring up the screen share here. Now, what we have on the screen are three different sites, right? I've got public domain vectors.org, and then I've got free pick. And lastly, I've got the site up here, vector AZ. So there are three different sites and I'm not endorsing anyone. I'm not going to tell you to use any one. What I am gonna do is I'm going to go through the licenses for these now, the first one that I like to use, I like to use anything that is public domain. Now, what is public domain? Public domain means that the creator took all of their rights and pretty much offered them free to the public. Sometimes this happens after people died. Sometimes this happens like with really old books, let's say that they were published and now the illustrations of fallen out so they go into the public domain. But these vectors have been released for use to the public domain. So this one probably has the loosest requirements. So if you go here and you just take a look at public domain. So right here, they're gonna say it's bounded by the Creative Commons Deed, CC 0. So different licenses. Creative Commons is a very common license. And so CC Zero is very, very free, which means you can copy, modify, distribute, perform even for commercial purposes without asking for any permission. So I would recommend if you're looking at a site, click on these sorts of links and they will give you the information on what that actually means. So what this says is the person has waived all of his or her rights to the work. Copyright laws, neighboring rights, everything here. Notice you can copy, modify, distribute, and perform even for commercial purposes. So this is a very free type of thing. So technically if we went down that way, we could come up here and we could pull any of these vectors, Let's say about animals and use them as part of our T-shirt work. Now the cool thing is you can find some really cool old school stuff. I kinda like that one. Some of these are pretty cool in order to do t-shirt work with. So when you come down and you click on this notice right here, it's going to say public domain. So that's a nice way to do it. Now, the other way that we're going to do it, and this is another site. Now, this one is free pick. Now the trick with free pick though, let's go ahead and scroll down to the bottom. Most companies terms and conditions are listed down here. So when we take a look at licensing agreement, this the kind of stuff that you really want to pay attention to you because this is where the devil is in the details. So once you get to hear right now, you've got to think about this. And right here it says you can't use the content from free pick on printed or electronic items, literally t-shirts. There it is, folks, right? Aims to be resold in which the content is the main element. Now that can be size, relevance, or any other cause. And this little line right here says when in doubt, It's shall be deemed the content is the main element. So while free pic might be a good idea, it really isn't. And you have to dig pretty deep to find this sort of thing. Because it was all the way down here in the terms of use. Now, on the other hand, if I had to find a service that I liked, I have used victory in the past and I find their licensing to be okay now it's a paid service. So do with that, what you wanna do, right? So with fixed TZ, you've got different pricing services. Your yearly image subscription, monthly image subscription. And you can go free or pro, right? And you wanna make sure that you've got full commercial rights. So a lot of times, if you're gonna do t-shirts and you want to stay safe, you won't have it in the free plan. Now, let me show you how this thing works out here, because there's a little bit differently. Let's go ahead and come down to the bottom because that seems to be where they cram stuff. And let's go ahead and look at this licensing agreement. I know this is not terribly fun, but This is the role of a t-shirt creator if you're going to use stock stuff. So when we come down to the licensing agreement and we scroll down, notice that they're going to look at end products. So here's their specifics of physical or digital item, the reproducing incorporate. And you're looking at using it in one design project per download. So let's say one shirt add. When we take a look at print versus merchandise use, this becomes t-shirts, Right, right there. So now you have one download per project. There are special requirements for T-Shirt use. Let's take a look at what those are. Alright, So you've got licensing options. Now this is an important one. You remember he had the free plan, right? Merchandise use content may be used up to 50 times, right, for a single shirt. So if you're planning on doing 50 shirts, my workout for you right? Now if you went pro, notice here, merchandise use content may be used up to 100 thousand times. Right? So let's go ahead and come down here. Oh, sorry. And when we come down here, if we go with the pro extended license. So once you go pro extended, now it's an unlimited number. I wanted to cover this with you because in this section we've got links to some of the vectors from public domain. Now notice there are links. So whatever you decide to do with it at that point, these sorts of common attribution licenses come into play at this point in the t-shirt conversation. All right. Let's go ahead and call it and we'll see you the next one.
46. Laying out and modifying vectors: All right, folks, let's go ahead and get back after it. So as covered in the introduction to this section, those Gothic skull style t-shirts are very, very popular in different trendy stores. They're a big trend here in 2021. And so I thought we'd do one of those. But there is no way in the time that we have for this class that I could show you how to do all of the vector art that this entails. So I thought that this was the perfect opportunity to do a really cool t-shirt design. And utilizing the resources that we talked about in terms of where to find free vector art. I would like to show you how to modify vectors that you can get online with the appropriate Creative Commons license, let's say, to create a tee shirt and just show you just how easy this is. Now we're going to be working in the vector persona. And so we're going to be working in nodes and all of that stuff that t-shirt designers working. So let's go to File New. And the first thing that I'm gonna do, I'm gonna go to presets and we're going to be working again. Let's go ahead and do a front of shirt or something like that. All right, Perfect. Now we're going to start as we always do with our rectangle. And this is going to be designed first and foremost to go on a white shirt. I am going to show you how to do the inversion, Let's say to do the back. So make sure that we are flat white here. And the first thing that I'm going to do here, I'm going to go ahead and I'm going to skip the reference materials. And you know what, let's not. Let's go ahead and bring up the Artboard. So we're gonna go ahead and bring up the art board. And we're going to insert art board. And there we go. Alright, oops, created the next one. All right, cool. Now let's go ahead and do what we do. Let's go ahead and go reference. And when I went looking for reference images, and again, your reference images will be different than mine. I'm going to go to File Place. And when I was looking for reference images, what I found was, oh, let's see. This one right here. I really liked. Okay, so I thought about doing something in a black and white. I really like that. So let's go ahead and do that one. Now, in your downloads for this lesson, I have included links for the vectors that I am going to use. Now, all of these come from public domain vectors. And the licenses on them say you can use them for anything, right? And these are all older type of things. So follow the links and this will give you everything that I'm going to use in this class. So let's go ahead and get started there with kind of this tarot card design. So the first thing that I'm going to do here is I'm gonna take my reference board. I'm going to lock it a twirl it down, and I'm going to name this one work. Alright, just like we always do. Now let's go to File. And I'm going to go ahead and we're going to place. Now. I'm gonna go ahead and I'm gonna start with this skull here. This is the skull and cross bones from the links that we have. All right, Now, notice what's about to happen here. I'm gonna go ahead and I'm gonna illustrate this. Notice that this is an SVG file. A dot SVG stands for Scalable Vector Graphic. So an SVG file is in fact a vector-based file. But notice if you click on the Node tool and you try to adjust this, nothing happens. In order to work with this image, you wanted to double-click on the layer. Now watch this. What this did is you'll see that it created an embedded image. So this image is embedded inside of the other file. So any modifications we make to this image now will show up in the other file. So this allows you to work in this image isolated. This actually works out pretty well. Now, notice that this is a vector image and this is a curve. Now the way that they do this, they use a program like vector magic or some sort of vectorization program. And it doesn't really do a great job. It pretty much looks at a pixel image and vectorizes it. So one of the things you'll always be challenged with in images like this is sorting out what the software did. So let's grab the node tool. Look at all of those nodes. That is a beautiful disaster right there. And notice you can't subdivide this, it's a curve. So the easiest way to do this, honestly, is to start getting close to your image, clicking and dragging and removing nodes. Okay, you see how I'm slowly removing nodes. Okay? If you need to, go ahead and move in here. Now, this is a painful way to do it. I am going to lie. So what you wanna do really is you're trying to get this thing down to a manageable size. What we want is we want to just isolate the skull. Okay. Now let's go ahead and take care of this. And folks, if you're following along at home, just chip away at this thing. Okay? There were strategies. But notice this is a complete curve. Okay? So I'm being very careful with my node selections here. I'm clicking and dragging, and I'm getting this thing down to where I want it. And I have to get creative with it. You see down here I'm down to single nodes. As a T-shirt designer, you can use off the shelf designs like this, but sometimes they're harder than you think. All right, now, here's what I'm gonna do. I'm going to take this curve and I'm going to move this up here like that. Okay? So I'm gonna kinda just hug this in a little bit. All right, and I got this thing hanging out right here on the right. Now let's go ahead and figure this thing out. What I'm going to do here now, watch this. I'm going to grab all of these. And I'm going to just kill that over. Right? Now. You see how this is moving that weird line. Watch this, add a node. And now you can put in a really kinda stylish swoosh on it. Okay? Alright, so let's go ahead and zoom out here, see what we think. You know what I'm gonna do? I'm gonna take this, this looks a little weird now. I'm going to shift this a little bit around. There we go. Yeah. All right. Looking good, looking real good. Alright, let's zoom out. Ok, and now watch this. We're going to come into here. Look at that, all the changes that we made now moved into this skull. So we now have an image. Let's go ahead and close out this embedded image. Let's go ahead and go File Save As, and let's call this Gothic one. Alright. So what I wanted to show you in this particular experience here in this particular video, is how you can take a commercial vector from a public domain site with the appropriate permissions, you can bring it into Affinity Designer. It now becomes an embedded image. And then you can utilize the Node tool to trim it down to get yourself something that's pretty awesome. All right, now let's do another one real quick and then I'll stop this video. And in the next one we'll apply this to block out to the rest. Let's go ahead and place. Now. I'm going to go ahead here and I don't want text files. I'm going to go ahead and I'm going to find, oh, let's see. We're gonna do a candle frame. I'm going to go ahead and do the candle frame. All right, that thing is pretty cool. Now what we're going to into making is some sort of a tarot card. So what I wanna do is I want to put this down at the bottom. And we're going to start blocking this out now, just so you know, let's go ahead and check this again. Notice the candle frame is an SVG. So that is a scalable vector graphic. So we've got the same imbedded situation that we do with the other. So if I so chose, I could come into the candle frame. I could select it. And now I can modify it. Notice here they just made the path. So again, this is composed of a ton of different nodes. And so if you were to adjust it, do with it what you will. All right, folks. So let's go ahead and we're going to move into our next step. What we're going to start laying this out and blocking in the sketch. All right, I'll see you the next one.
47. Blocking the image: All right, folks, welcome back to the t-shirt. Now we're working on this taro card Gothic style shirt. And you'll notice that I used a little blue tinge in the rectangle here. Now this is by design. When you work with scalable vector graphics, sometimes there is a fill in those graphics. And so one of the things that I do, even though I'm going to print on a white shirt, I make it off color to make sure that there's no white fill. Like if this skull had to fill in it, you would see it as a bright white. That will be important because if you're going to put it on different colors, you want to make sure that there's no fill inside of it. Both of these graphics right now are genuinely good to go. All right, let's go ahead and take the next step. We're going to go to File Place. And we're going to do the same thing now, I think I'm going to start here with the, let's do this stylized candle. Alright, that's pretty cool. And you know what I'm gonna do? I'm gonna go file place and I'm going to do a vase. So let's go ahead. I don't know why it keeps defaulting, but I'm going to use the stylized vase and I'm gonna plop that in there and we're blocking out our images right now. And now I want to create a card. So what I'm going to do, I'm going to bring this down to the base here. And I'm going to shift this down a little bit. Let's go ahead and shift this just slightly. And we're just putting in our elements. Now watch this. I'm going to come to the pen tool and I'm going to start right here on the tip. I'm going to hold Shift. I'm going to go up and I'm going to go over and I'm going to go down. Okay? And then I'm going to come up to brushes and width that stroke selected. I'm probably going to use my dry media. And let's see what happens here. Acrylics. That's kinda cool. Yeah. All right, There's the magic brush. Alright, now I'm going to come over to my node tool. And I'm going to take this and I'm going to grab my shift and I'm going to pull it down until I'm right about where I want to be. That looks pretty darn good. And now I'm going to take this candle frame and I'm just going to move it a little bit until it looks somewhat like a card. That's a really cool stylized card. I'm happy with that. And if I wanted to change it, I can always come up here and I could make this a little bigger. All right, that looks pretty awesome. Alright, so let's go ahead and now let's start repositioning a little bit of this here. I kinda like that. Let's go ahead and start here. Kinda like this. Let's go ahead and put this where it needs to be here. And let's go ahead and put this where it needs to be. All right. Looks good. All right. Bring this up. And the reason I want to bring this up is I want this to be front and center in our design. So I'm gonna make sure my snapping is on. There we go. Alright, that looks pretty good. Now let's go ahead and grab file place, and let's grab the anatomical hearts. So I'm going to come over here and we're going to drag this. All right, so we've got this anatomical heart. Now you see that this looks drastically different than this. So what we're going to have to do is we're going to have to do some adjustment on the heart right here in order to make it look like a unified piece. So let's go ahead and click onto the anatomical heart. And now I'm going to pull out my Stroke panel. Now this is an important designation. This little button right here, align the stroke, the inside, make sure that is checked. Okay? So I'm going to come up here and I'm going to put a one-point stroke on this thing. Okay? Now, watch what happens. You don't have to do anything. Notice here if I change the alignment, it changes the heart a lot. So you really want this one-point stroke on the inside or I'm sorry, on the center, not on the inside. Not on the outside. Alright. We're gonna go ahead and pop that back in there. Let's go ahead and see what that did outside. Now that is pretty good. The last thing I'm gonna do to clean it up here, I'm going to put in a levels adjustment. And I'm going to crank the blacks up a little bit. I'm going to drop the gamma slightly. I'm going to crank my output level a little bit on the black. All right, now here's what I'm gonna do. I'm gonna come over to the anatomical heart. And I'm going to position it right about here. Okay. So what I've got is I've got this anatomical heart that is quasi going into the eye here so that we can then take this vase here a bit later. And we're gonna go ahead and we're going to drip some blood down into it. All right. So it's up to you how you want to position this. You can position it outward. I'm gonna go ahead and position it a little bit upward. And I think that I am pretty good there that way I haven't obscured too much of the skull. And I'm going to show you exactly how we're going to cover this big black blotch here in a couple minutes. Alright, so overall, quite happy with this. The next thing I'm gonna do, I'm gonna throw in my font here. I'm going to call this. That's my Artistic Text tool. And now find an appropriate text totally up to you, which you want to use. I've got one that I like to use here. I'm going to stretch that out. All right. Perfect. All right. Looking good. Looking good. All right, folks. So this kinda gives you a little bit of indicator in terms of how to create and adjust with stroke into our area. In the next one we're going to add in some tarot cards. All right, we'll see you the next one.
48. Adding background and accents: All right, Welcome back. We're going to do. So. You might notice that this is a different color of blue than I had before. It's because I forgot to save my work. And so everything that I did was pretty much gone. So I recreated this thing up to this point. This is where we left off in the last lesson and let that be a cautionary tale. Make sure to save your work. All right. Now, what I did is I grouped everything together right here as a group. So all of our anatomical heart, the vase, the candles, you'll see I added a couple of candles. Totally. Okay. I flipped one of the candles. I'm just trying to create a little bit of visual interest. So this is now the group. What I would like you to do. Lock this group and turn it off. Okay, this doesn't exist for right now. Now let's go to File Place, and let's go ahead and grab the tarot card. We're gonna put a little bit of background of this. Okay, and let's go ahead and bring this up. Now. We're going to go ahead and I'm going to show you thing here. We want to duplicate this, but we want to go in 30 degree increments. So what we're going to do is we're going to enable transform origin. This is right here. What this is going to do when I click it, a little cross hair is going to recreate it right here. All of the rotation and everything will be done around this point. What this is going to do, we're going to move the center down to here so that as we rotate it left and right, this thing moves like this instead of like this around the center. Okay? So that's what we're trying to accomplish. So to do that, this is found in the move tool. We click on it and you can faintly see it right there. I'm gonna go ahead and I'm gonna pull it down and you see that snapping is on. So now this becomes the new origin point. Okay? It's from this origin point we're going to make the adjustments. So the first thing that I'm gonna do is I'm going to duplicate the card. I'm going to grab the rotation handle and I'm going to hold Shift. Now. Why am I holding shift? Because now this will allow me to constrain it to 30 degrees, just like that. And now, because I did it that way, when I hit Control J, I will get the same 30 degree. And you'll see exactly where these are all rotating around same exact center point. Now let me control Z this, okay, I'm going to show you this again. Let's clear that out. I'm going to Control Z this okay. This was my original card. Step 1, duplicate. Step two. Now this is important. Hold Shift 15 degrees, 30 degrees. Step 3, Control J. Boom, just like that. Okay. Now, I might look at going to even 45 degrees. All right, I think that might actually work though. All right, now here's what we're gonna do. We're gonna take that card and this card. So the last two you did, I'm going to duplicate them and we're going to flip them. And now holding Shift, we're going to move them. All right. That will do it now. That looks like a hot dumpster fire, right? That's okay. Group them together. Now, let's grab the corner. Let's shrink this down a little bit. I know it's going to get a little confusing. That's okay. We're going to clean this all up here in a second. And now I want you to unlock and bring back the card. Now, remember, when I said we're not going to use a fill. I'm now going to break that rule. I'm coming down to my curve and I'm going to fill it with white. All right, just like that. And then I'm going to drag the taro group down below the card. All right. So what do we have here? We're going to drag the curve down below here. All right, that works. So we have the group, I'm going to call this the card. We have the group I'm going to call this the terror. And the taro is the background. All right, let's reposition the cart a little bit. I'm gonna go ahead and reposition this and the downward direction a little. And we're going to go down just slightly. And we're going to go just like that. And I want the background to just be a little smaller. Perfect, that is going to be cool. Alright, now the next thing we're gonna do, we're gonna add some streamers. This is something you find a lot in different Gothic type designs. So I'm coming into the card. Actually, let's lock the card and let's lock the taro. We're going to do both. We're going to create a new layer. Alright. Grab the pen, click once, click twice. Grab your Node Tool, stream it down. Now let's do this. Duplicate, duplicates, duplicate, duplicate. And now what you're gonna do with your move tool, you can make this symmetrical. You can make this non symmetrical totally up to you. Now what you wanna do is you want to put these streamers into different areas. Some will overlap. You may want to put some of them here like that, that looks pretty cool. Now I'm going to go ahead and delete that. I'm just going to do to PR. And I'm going to go one here. I'm going to go one here. And I'm going to go one here. And I'm going to go one here. All right, that looks pretty awesome. Now I might add one more duplicate over here. All right, and I'm going to go for a triple over here. All right, that looks pretty cool. Now the last thing we're gonna do want you to zoom in for this. And I want you to pull the transform panel. Okay? Now we're going to grab the ellipse. We're going to hold shift to get a perfect circle and we're going to make it black. Okay? Now you see the little cross hair. We're going to turn off the transform origin. And this circle is 1.12 by 1.1 to do you a favor here. Now, you're going to hold Alt and Shift K That brings it down and it duplicates it. Now I want you to shrink it by around 20 percent, make it 0.8. Okay? Right. Now, here's what we're gonna do. We're going to Control J Ready to three RI. What we did, we made some really cool little ornaments. Now, I'm just going to make this super easy. We're going to come down and I'm just going to line these out. Hold Shift. Hold, Shift. Oops. Yeah. Let's grab one at the time I hold Shift. Hold Shift. And one more hold Shift. That'll work. All right. Let's grab all of these. Grab that one, group them. And what we're gonna do now is we're going to shrink these down. Remember they're vector so you can do whatever you want to do with him. And I'm going to place them as just little accents here. Now don't be afraid to switch up the size of them. Okay? So we're going to bring that up a little bit. Alright, copy and paste, paste, paste. You get the idea. All right, let's add two on that one. Okay, now I'm gonna show you something here. What we're gonna do now, we're going to convert a pixel over to a raster in the next lesson. So now what we wanna do is now that we got everything kind of laid out that we want it. We're going to convert a pixel into a raster. We're going to eliminate the white and the card. And I'm going to show you how to add in some black tear, some black blood into here using the pencil tool, brand new. Alright folks will see the next one.
49. Adding blood and texture: All right folks, let's go ahead and get back to it. So we're gonna go ahead and put the transform panel back. All right, Just like that. Now we've got the tarot card in the background. We've got these little curves here. So what I'm gonna do in practice, some good layering habits. And I'm going to move them down here. And then I'm going to combine them all up together. What is that? Well, if I turn it off and I don't know, I must not needed. All right. Let's go ahead and group these. We'll call them beads. Alright, so we're getting close to wrapping this thing up here. Now, what I wanna do is this layer back here of those other tarot cards is a pixel layer, right? So what I'm going to do, I'm going to come over to the taro. I'm going to come over here. I'm going to turn off the card for a minute. Actually, let's turn down the card. Okay. And now what I'm going to do with the group selected, I'm going to grab my eraser. And I'm going to erase. Now what I'm doing behind the scenes is I am erasing the pixel layer. And I'm going up along the side. This is going to allow me to turn off the white fill on my card. Okay. So you see how I'm going along the side here. Alright, let's get rid of this. Now you can mask it out. That would be the non-destructive way to do it. I on the other hand, I'm just going to go for broke here and we're going to take care of it. All right. Once you've got their back, Let's go ahead and go to card. Let's go ahead and bring that out. And now in the card, Let's turn off the fill on the curve. Filled none. Ri. So that is looking pretty sharp. Alright, now let me show you the next thing that we're going to do. It's going to go ahead and went a little bit further here. I'm gonna go ahead and delete these. So what I wanna do is I want to put some blood, some liquid, some something coming down off the heart into the bucket. So we're going to use the pencil tool. Okay, let's go ahead and zoom in here. Alright, may look like that. Looks good there. All right, now what we're gonna do, we're gonna come over, we're gonna grab the Pencil tool. Now the way the pencil tool works, this is going to allow us to paint a stroke pretty much onto the line. So what I'm gonna do, I'm gonna use an ink brush. And I think I'm going to use creative ink 02. Okay, so let me go ahead. I'm going to just try this out. Now you see how my width of my pencil is 9.5. I'm going to move this up to about 30 and I'm going to start there. Now this is a guess and check. Okay? Now, if you have a Wacom, there is an adjustment right here for a controller. If you have a tablet, you can turn on pressure. If not good, don't need it. Okay. And I like to keep my stabilizer on. What the stabilizer does is it's like this little rope that you're going to see. Let's just go ahead and do it. Okay, I'm gonna start right here. Okay? Alright, that looks pretty good. We're going to go all the way. Let's go ahead and drop one just like this and then pick it up. Now we want a little bit of dripping there. Okay, now let's do the same thing here. Totally up to whatever it is you want to do. Now let me show you a trick. Let's say you've got this there, right? Check this out. Come over to your Stroke panel, find a vector stroke. And now make the end of it pretty thick. So we're going to now change up the end a little bit. We're going to grab the nodes of the stroke. And we're going to go ahead and we're going to make it go. That looks good. All right, back after it. Now I'm gonna go ahead and change up my brush a little bit. Let's go ahead and change this one. And instead of 30, let's make it ten. Alright, oops. There we go. Drip, drip, drip, drip, drip, through, through now and I grab that one. Let's go ahead and grab this stroke. Go to layer. I've got a curve there. So I go to stroke and let's pop this one up a little bit. That looks pretty good. All right. Now, I'm gonna do a little bit of something here. You can do it with me or you can choose to do something else. I'm gonna go ahead and I'm going to use my pen tool to go along the bottom here. Now what I'm going to be doing, I'm going to grab it and I'm going to hit now, this is an important one. When we use the Pen tool like this, I'm gonna go ahead and use fill. Okay, So what we've created now folks, is a curve, and in terms of the color, I want it to fill it black. Now we use our new or new tool. And now what I'm going to do is I'm going to come in here and I'm going to begin messing with some of the nodes in order to make it look like it's supposed to. All right, that looks pretty cool. I'm quite happy with that now if you wanted to change it, you can keep on working on it. I'll probably work in here for just a minute more. And really what I'm doing here is I'm trying to get a feel for how this part works. Alright, cool. Now let's go ahead and zoom that out. That's pretty cool. All right, now the last thing that I want to do here, I wanna go over to the layer. I'm gonna go ahead and group all of these in. And I'm going to right-click and I'm gonna group, I'm going to call them drips. Right? Now. The last thing that I wanna do is I want to add a little bit of texture. So I'm gonna go ahead and I'm gonna add a pixel layer. Go to the pixel layer, come back over to our pixel brushes. Let's go to brushes. And I'm going to go ahead and I'm going to use some of the engraving brushes. I really like these. So what I'm gonna do is I'm gonna come over with the engraving brushes. And on that pixel layer, I'm going to add some texture down along the side. Okay, so pretty happy with that there. And now what I'm gonna do, I'm also going to add some texture. So let's go ahead and go to some of these. And let's texture this side. Bring it down a little. And if you go past the border, Don't worry. On in, race out whatever you go pass the border width. This is all part of cleaning up. All right, Let's go ahead and take a look at this. Last thing we're gonna do is change the rectangle color. Let's go ahead and just turn it off. That is pretty awesome. All right, let's go ahead and pause this one and then we're going to export this and bring it on in. All right, we'll see you the next one.
50. Exporting and inverting for different shirts: All right, gang, let's go ahead and export this now. Let's make it easy. And again, the art board as the work on it, grab the pixel layer, grab the group, grabbed beads, grab everything. Right-click. And what I'm gonna do here, I'm gonna go to File Export. All right, File Export PNG. Make sure the area is the selection without the background and export it. Let's go ahead and plug this in. We're going to go ahead and give this to you as a download. Sea horses downloads. And we are in, go ahead and just save it here. Gothic finished, right? And save, perfect. Now let's go to File. And let's go with new. Let's go to templates. Go to the folder for uninsured mock-up. Graham. Alright, file, place. Find your file here. There it is, open. Just like that, just like baba. Okay. That is super cool. Alright, very happy with how that came out. What I'll probably do is I'm going to pull that down here. And you go between the multiply layer in the other. Yep. Alright, I'm happy with that. Now let's go ahead and go File, Save As. And let's go ahead and make this the white one. And now I'm going to show you something. See, I'm going to put it here. Put it here. Gothic, white. Okay, perfect. Now what I'm going to do is check this out. I'm going to come down here with the invert. We're going to invert that. Now where to go? It's still there. But now check this out. Oh, there you go. Now there it is in all white. I'm going to go ahead and move that up a little bit. I think that that's a little too dark. All right. So if you like it there, we could definitely do it in the white. Let's go ahead and save as Gothic white. Now, if you were gonna do this in the original file, oops. Let's go ahead and go back to the original file. And here's how you do this. Let's go ahead and turn the rectangle back on, and let's make the rectangle black. I would then come over here and right above my pixel there for the art board, I would go add and I would put in an invert. Okay, and it's above all. Okay, Now why is that inverting everything? Group? Because now it was trying to invert even the black and the rectangle. All right folks. So if you don't want that and you want to do the other and export the other. Just click off the invert, change rectangle over, and now we rectangle color and go back to white. All right, folks will be learnt a little bit about this. This was a lot of fun for me. I like doing stuff like this. And it's one of the great things in life to be able to take some of the stock assets and make something out of nothing. And so we take the stock, we combine it, we make it our own. And I hope you learned a little bit about how to take something that's pretty done and it's turned into something that you're proud of. All right, folks, let's go ahead and get onto the next one.
51. Introduction to the packaging section: All right, folks, welcome back to the t-shirt show. Now, we're going to talk about exporting. And this is exporting in packaging. Now sometimes as a designer, once you complete your image, you will just save the PNG, forward the PNG onto your print on-demand folks, and that will be the end of it. You have officially wipe your hands lift. But if you are a t-shirt printer that does silkscreen, you now have to take each color in and do your color separations. So what I'm going to show you is if you are interested in silk screen, there's a lesson on that. Or if you're going to take your t-shirt design and package it for shipment to your printer. This is how you will package a finished good. And packaging is important because let's say that I'm working with a local screen printer or a local printer of any kind. And I want to ship him my design. And I have a font. That font only exists on my computer. So what I have to be able to do is package that up. Because if he opens that up and he doesn't have that font, now, it's going to default to just junk and your font is not going to be good. So we're going to show you how to avoid that. We're also going to show you how to convert text over to curves. And because we're in the advanced stages now of t-shirt design, I'm going to show you how to begin creating your assets. And what assets do is they're like pre-done things that allow you to speed up your workflow. All right, So this one's all about taking that last step, going that extra mile, getting it off your desktop and getting it into the hands of people who are going to print. If that's not you. Alright, let's go ahead and get started.
52. Doing color separations for screen printers Part 1: All right gang, Welcome to this lesson for mainly screen printers. Now, what this lesson is not, this lesson will not be about how to use your independent RIP software to do color separations. I don't know your software. There's no possible way I can cover every software. So what I'm going to show you is how to use the tools that we have to add your own registration marks, create a template that you can use to go into the future. And I'm going to show you how to separate colors. It will be up to you to determine how to represent this in your software. So there's going to be a couple of assumptions I'm going to make. The first one, we're going to use a 20 by 24 inch screen. If you don't have a 23, 24 inch screen, if yours doesn't go that large, shrink it down, right? You've got the tools. I just want to make sure that we all understand what it is and what it isn't. Now, that being said, let's go ahead and get started. Now, the first thing I'm gonna do, I'm just going to go to File New. And I'm going to go ahead and I'm going to create a new print file, 300 DPI. And I'm gonna make this thing 20 inches wide by 24 inches long, or I should say 24 inches high. And I'm going to be working in inches blender. Now for purposes of what I'm gonna do here, I'm going to put a white background on this right now. So this is going to be bright white. And now I'm going to use a ruler and a guide. We haven't talked about this. So what I'm gonna do now is I'm going to come down to View. And I'm going to go to the, let's find it here. Where is the guides manager? Okay, now what I wanna do, I wanna put a horizontal guide halfway around this thing. So I'm gonna come in here and I'm going to put a new guide. So I'm going to add a guide here. And I'm going to add it horizontally. And I'm going to add one vertically. So these little blue lines are guides. Now if you want to delete one, like this horizontal guide, you can delete it. If you want to re-add it. Click Add. Now if you want to change it, you come in here. And now this is a 24 inch canvas, so I want to go to 23 and I want to put a guide about an inch in. Now I want to add a new one, and I want to add a guide at one. Okay, so let's go ahead and put one. All right, Perfect. Now I want to come over the vertical and I want to do the same thing. So I'm going to add a new guide. I'm going to click on this and I'm going to make this, this is a 20 inch, so I'm going to go one and I'm going to add one more and I'm going to make this a 19. Okay, so we close this out. You see what I just did here. I created guides. Now why did this shift switch the opacity? So I wonder why that disappeared halfway through. Alright, now, what we're gonna do now we're going to make custom registration marks. Now registration marks, you can set them up in PDF by default. I'm just going to go ahead and make my own. And where you put them is totally up to you. I've seen people use T's. I've seen him use triangles. I prefer to use a little cross hair. So what I'm going to do, I'm going to come over with my pen tool. And I'm going to click once. I'm going to hold Shift to keep it straight. And that's going to be my first registration mark. Now, I'm going to bring the stroke up to 1 and it's going to be black. All right, let's see what we got. All right, that looks pretty good. Now let's zoom in, right. Nobody nobody needs to go blind here today. Now. I'm going to go ahead and I'm going to shrink this down a little bit. So I'm going to hold Shift. I'm going to shrink it a little bit. And why did I shrink it? Because I think that it's a little bit big. You don't want big ol inch and a half registration marks. Don't need them. All right, right-click on the curve. And let's go ahead and duplicate this. Grab the rotation, hold shift and go to 90 degrees. Perfect. Now grab your circle. Hold shift to get a perfect circle. Take the fill off. And this gives you your little cross hair. Now let's go ahead and move it into the middle of this circle here. Alright, we're going to shrink it down. All right, that looks good. All right, so I'm gonna take all of these now. I'm going to right-click. I'm going to group. And now let's move them out here. And now what do you think we're going to do with these? You got it. We're going to center the registration marks up alongside here. Now we're going to copy, paste and paste one more time. So we have three. Now watch this. Very simply hold Shift, center it. Hold Shift, center it. All right, now let's grab all three. Let's go ahead and group. And we're going to hold shift. After we copy and paste. And we're going to hold Shift and we're going to pull it down. Okay, Now, you may be asking why we did this. If you do screen printing, you're in the know right? You put the registration marks in. So in a multi-color print, you line up your screens exactly the same, so that the red say isn't off from the black, is an off from the gray. Alright, now, once you have this, I'm gonna go ahead and go to File. And I'm going to export it as a template. And I'm going to put it in my templates and I'm going to say 20 by 24 screen template. All right, perfect. Just like that. Now, one thing we can do later, we're going to show you how to take this in and make it into an asset, right, this little registration mark. But for right now, we're good to go. All right, now the next piece, we're going to set up our art. So what I'm going to do, I'm going to grab the baseball bat. Now this is in your download, but a baseball bat vector. I want you to grab the baseball bat vector, image vector. Okay, copy. And let's just grab the whole thing. So the rectangle and all that. And let's go ahead and place it now into here. I'm going to go ahead and shrink it. It doesn't matter what size you shrink it to folks. And I'm going to put it where I want it for the purposes of this. I'm putting it in the center. All right. That's as far as we're going to go on this one. Now in the next lesson, I'm going to show you how to do your color separations using a vector image. All right, We'll see you next month.
53. Doing color separations for screen printers part 2: Now our ODE folks welcome back to Affinity Designer for T-shirt maker. So what we're going to do now in the last lesson, we moved the baseball bat into our screen print template that was the size of the screen we're going to use. Now what I'm gonna do, I'm gonna go ahead and I'm going to click on the bat. And what I'm gonna do now is I'm gonna come over with my Transform panel. And this is where you do your final sizing. So if I promised the client a 14 inch high graphic, I now move this to 14 inch and I place it where I'm going to put it. So if it's on the back of a shirt, if you're doing like a 3.5 inch logo on the front of the shirt in the upper area. And the reason why I just have this gray rectangle here. I like to work in the color of the shirt. I'm going to put it on. That way. I don't forget to export say the white because the white is on the white. Alright, so the rectangle here is going to be sacrificial. Now, the next part is actually pretty simple. I've locked all my registration templates here, so the only thing I can really adjust is the bat. And now because it is vector, Here's what I'm going to do. I'm going to take all of my shadow layers that are the same color. And I'm going to group them. Now. If you don't have, say the simplicity of just having three or four layers. Watch this. Go to the color you want. Come up to select and hit Select Same Fill Color. And now Affinity Designer after the 1.9 update, will select all of those same colors. We're going to group. And I'm going to call that shadow. Okay? So we're just creating groups. All right, now here's just my method. Go ahead and do what you want to do. I pull this out up above, okay? And I turn off everything below. I turn off the rectangle. This gives me only the shadows that I need. And now this is going to be a destructive operation. I'm going to now take this fill and I'm going to fill it black. Because when you burn your screen, anything that's black is going to show. And the reason why I do it this way, I now know the shadows are done. It's out of the fill. The same thing is true with the curve. Now I want to grab the curve. I want to bring it up. I turn off my shadow. I fill my curve black, and now I export just this screen. You can use multiple artboards. I prefer not to. I grab each one of these and I just outport, or I should say export the correct screen. Now let's do the rectangle. I pull it out of the Fill, turn off the curve so I got nothing and make sure you fill it black. Now, we're at the point now where we gotta do the fill. Let's pull it up. Turn off the rectangle. Fill is black and export this screen. Very simple. Now this last piece is just pulling in your fill curve, the big curve, and the individual curves, and they're already black. So this is how you do color separations. You size your finished artwork. And then you go through group by group in vector and make sure that they are all out. Now, let me show you how to do this with raster, okay? And remember once you position this bad, you can't move this back because now all of these had been exported on the screen in this exact position. So you move it an eighth of an inch. All your registrations are going to be jacked. All right folks. So I hope you'll learn a little bit about how to separating vector r. I will see you the next one.
54. Preparing for print : All right folks, welcome back to Affinity Designer. So what I've got in front of me here is a new document. Now, you may never encounter this based on what you do for t-shirts, but just in case you do and you go to other print areas. I wanted to include a short lesson for you so that you know at least what it is when you do print documents. And right now I have a new document window and it is press ready. Notice that we are in inches. It's 8.5 by 11. And when you set up a new document, you have the option to include margins. So you can set margins so that the inside of that document make sure that as sample size around the outside of the document. So traditionally, I'm going to go ahead. I'm going to put in an eighth of an inch of margin all the way around here. And what margin does folks, It's tells you make sure not to put anything in this area. Now with bleed, what bleed is? This is an 8.5 by 11 document. And what will happen when you send it to a professional printer with rolled media. They will cut, so they'll print over a certain amount and then they will cut it down to the 8.5 by 11, let's say in a poster, that's how you get that good edge to edge. So they will include a certain amount of bleed. I'm going to go ahead and include a quarter-inch here or an eighth of an inch bleed. And I'm going to create a document. Now, let's go ahead and zoom this in. The bleed area is right here and the margin area is inside. Now, what do you do with this wonderful information? Well, if I'm going to place something, let's go ahead and place in. I'm just going to grab something here. Let's grab a website image. Something that I did a while ago. I'm going to grab this Cheetah. Now if this is the cheetah and I'm going to distort it. I know that this is not great. So if I'm looking at this cheetah, if I have key details that I want to make sure do not spill over and get run off the edge. That's where my margin comes into. It plays a lot of a role in text. And if I want to make sure that the bleed is there, I want to expand this cheetah out to the bleed area. And I understand then that it's going to trim down this area to the outside. So think of it as bleed, takes care of the outside dimensions like this. And margin takes care of inside the document like this. So that's bleed and margin. Now, this doesn't have to be set up off the bat. What I'm going to show you now is also how to include print marks. So what I'm gonna do here is I'm now going to go to File Export. And you want to export as a PDF. And all of these other things are down here in the More tab. Now, notice here you can include bleed if you so want. But I'm going to go ahead and click on More. Now, watch this. You come down here and you've got a lot of different areas here that you can then change. So if you want to export settings compatibility, what I'm gonna do is I'm going to include bleed on my document, and I'm also going to include printer marks. Now, what does this mean? This mean my document is going to be a little bit bigger than that, 8.5 by 11. Okay. And the printer Marks, crop marks, registration marks, color bars, and page info. The registration marks of the things that I'm going to want to pay attention to. Let's go ahead and close that. Let's go ahead and export. Let's go ahead and call this cheetah with Marx. All right? Yep. And away it goes. Oh, it's open. That's why. Alright, well we'll just jump right to it. So this is my new finished cheetah width marks. And if we scroll up here, you'll see the little registration marks. Now, obviously these are way too small for say, screen printing. And you've got the crop marks up here. So let's go ahead and take a look at those, these little areas right here are what are called crop marks. And what this does is this tells somebody when they go to cutting, where it needs to be cut, which makes all of this stuff in here, the bleed area. Alright? So if you do t-shirts, this really isn't a thing. But if you ever go into print, this is what a professional printer is going to deal with. All right, folks, that's a little bit on how to set it up for a press ready print. Hope you'll learn a little bit. Let's go ahead and get back into that p.sit shifting.
55. Packaging for shipment: All right folks, welcome back to the course. So the last thing that I kinda wanted to do in this whole finishing up thing is I wanted to show you how to prepare your t-shirt images. We been exporting them to PNG to put them on the mockup. And this is another example of makes sure that whomever and however you are printing them, that you know their requirements. As an example, as somebody that does a lot of printing for other people. I always like them to get me the vector files. Okay? Now I also have some people that prefer to give me the dot PNG for various reasons. And so it's one of those things where no, What the person that you are asking to print your stuff, know what they want. So the purpose of this lesson is to package this up all real nice. Because notice here in my fonts, I've got a very unique font. If I send this to someone and they do not have the same font, it will not copy overwhelm. You will get a very generic look. So the first thing that I'm going to do is I'm going to show you how to assemble a package. How to package. So this is the first thing that I'm going to show you. The second thing that I'm going to show you is how to convert your text. Okay? So these are the two things we're going to learn in this lesson. Let's go ahead and get started. Now, the first thing that you're gonna do is once your image is completed, you'll go to file. And now I want you to click on save as package. Now let's take a look at what happens when we do this. Now here, affinity is going to tell me very clearly that this document contains one or more restricted fonts. Those are fonts with special permissions, let's say, other than Creative Commons licenses. So the thing is, if you're not using a font for commercial, no, pass it around, right? They'll say, Hey, you're using a restricted font. Do you have the right copyright? So it's up to you at that point to say yes, I do or no, I don't need my case. It's not going anywhere. I'm just using this as an example. So I say I'm good, close it. Now, what's going to happen is that it's going to give you a summary of the package. So let's take a little bit of saying fonts total one. And we have one that's restricted. And images. Now the image we've got imbedded. So if we come down here to images, let me close this out. And we come down to images. It's not going to show up, right, because we don't have anything included. So this gives you your summary, the fonts in any images that you have used. Now watch this. If I go to, and I'm going to close this out now, File Place, and let's just throw in an image. Let's throw this in. Okay, That's a picture right? Now if I come up File, Save As package, watch this. Now I have one image and the image is right here and it's embedded. So why would you want to embed it instead of Lincoln? Embedding means the image will travel with the package. It increases the file size though. Now how do you change that? Let me just go ahead and delete this. Okay. When you have a document, let me show you something here. Let's go to Document Setup. And right here, I'll highlight it for you. You can set your image placement policy. And if you say I prefer embedded images, the images, we'll be in your layer stack and there'll be embedded in the file. So what's the alternative to embedding them? You can choose by default to link them. So you come over here and you say I prefer linked. Now watch this. We're going to go okay, File Place. And remember I'm going to place the exact same image, same image, from the same spot. Now notice here that it is a linked image. Because now when I come up and I go, let's go ahead and export the package. Notice now the image is present, but it's linked. So it now shows us a linked image. So what you're going to have to do is you really want to put these images in a consistent place. Now once you've got it the way you want it, I'm going to use a linked image. You go, Okay? And I'm going to start a new folder. I'm going to call this elephant shirts. Okay, that'll work and hit Package. Now what Affinity Designer just did, Let's go ahead and grab desktop. And let's go ahead and grab the elephant. It grabbed the font. It also grabbed the image and it embedded my file. So technically folks, I can give this to whoever might be printing this shirt. And they have everything they need it, packages it up in a nice little bow. Now, if you're not going to do that, this is a best practice here. This is something I do if you are comfortable with the font that you have. This is something you're gonna wanna do is you pass this thing around. You come over to the font, you come over to layer and you convert it to curve. Now notice what just happened to this group. Let's check this out. It changed the text over to a group. And now when I click on the group, each one of the letters has become an independent curve, but it does not become editable. Again, you cannot change the font. It does not see it as text any longer. So best-practice, hear me out. I'm gonna write this down because it's that important. If you have font in your work and you are happy with the font, convert the font to curves. Now if you're packaging it up, no problem. But I cannot tell you how many designs I get that have fonts in them that I do not have. And then I either have to sort them out, seek them out, or do something comparable and it just becomes a huge pain in the backside. So if you're getting ready to ship your design somewhere, package it up, and if applicable, convert the text to curve. And folks, if you're asking them to even do the color work, one thing I might do is I might come over here, let's say to my swatches, which is right here for me. And what I would do if I were you, I would go ahead. The palette that you've used to create that. I would go ahead and export the palette. So I would export the palette out so that we can go through and they have the same colors you do. All right, folks, that's a little bit on how to take the last step. Let's go ahead and finish this thing up.
56. Making Assets: All right folks, welcome back to Affinity Designer. So this is going to be one of those probe things that adds you become a T-shirt designer is going to save you a tremendous amount of time. So what we're going to be dealing with here are assets. Now, assets I'm not going to put in the studio, but I am going to show you where to go to get it. We're going to go Studio assets right here. Now, what are assets? Assets are pre done type of design elements. Let me show you you're nothing you have to do. I'm just gonna bring it up any old sheet here. We're just going to put on some sort of a rectangle. And I'm going to grab this little gas station loan just like that. That's an asset. And inside of it is the curve and the ellipse. So assets can be vector or they can be raster, either one. And this is unique to Affinity Designer. Affinity photo does not deal in assets. Alright, so what I'm gonna do here is we have this bulldog mom shirt that we did in step three. I'm going to show you how to do and make assets using these in two different ways. So I've included it in the downloads just in case you didn't go through that activity with us. And we're going to be using this hamburger menu right here. So make sure you've got the Asset tab and make sure you've got the hamburger menu. Alright, let's go ahead and get after it. So the first thing I do, I go to the hamburger menu and I create a new category. And then I come back to the hamburger menu and I renamed said category. I'm going to call this animals. So I'm going to, anything I have this animal related is going to go in here. Alright, so we're going to come over to this Paul. Now this could not be easier. Click and drag. Notice when I turned blue right there, What's happening? Affinity Designer is embedding that Paul as an asset. Now, how does that change things? Let's go ahead and go file new and any old size we'll do folks, this is just an example. We come over here and now watch this asset bone. And notice now it is a vectorized group. So the vector mentality still holds, so it's completely modifiable. Now this is different. Watch this. If I have this, Paul, and you don't have to do this, I don't recommend it. Go to File Export. Let's make it a PNG. And let's do the selection without background and export. And I'll call this finished working file. Now watch this. If I come over here and I go to finish working file, I can pop that into the asset category. Now, how is that different than the other one? Well, let's pull it. If I drag this in now. Notice we haven't as a group. If I drag this one in, notice it as a PNG. This is the difference, folks. You can save an asset as a vectorized group like either of these. Or you can save it as a flat PNG file. So either one works. It's a matter of what you were trying to do with it. Now, the last thing that I'll tell you here, when you go into here, you've got categories and subcategories. You can rename this. We can call this vector if you want. Or we can come in here. We can hit this and we can create a subcategory. Come in and rename it. And I will call this roster. Alright. Now, this one, remember was the raster one. We're going to drag that over to there. All right, so we've got our vector and we got our raster. Now, if we wanted to share these with people, you come up to the hamburger one more time and you export them. And I'm going to call this pause. And I'm gonna give you this asset file with these two pause in it, so you have something to work with. All right, folks, that's a little bit on how to use assets. As you begin to build t-shirts, you want your asset libraries to continuously grow. All right, we'll see you the next one.
57. Introduction to the Oni Ball Shirt: All right, gang, Welcome back. Now this is the culminating activity. This is the part that lights me up. This is what I call the high octane design. This is where we're going to go full on vector from beginning to end. And what I'm doing, I'm combining two of my passions, which is mad malls. I grew up with my eyeballs. They were really cool. These little monster style balls. And my love of Japanese folklore to do the only ball. So the ball is what we're going to be making. And during this we're going to go a 100 percent vector. So no raster. You'll see how to arrange your layers, how to work with your layers in terms of organization, how to do transparency, how to do stroke width. This thing is a 100 percent vector. Now this isn't all the vector tricks. I know that would be a completely separate class in and of itself. These are the vector tricks that you need in order to pull off your design. So this is definitely by far my favorite part of the course. I've been waiting for this one since the beginning. I hope you have two. Let's go ahead and get started.
58. Sketching and research: All right folks and welcome to one of my favorite projects that we were planning here in the course. This is the high octane vector design is I would like to call it. This is where we explore the concepts of how to do those really complex, intricate vector designs that you see in some t-shirts. Now, full disclosure, we're going to be using these techniques, but I don't have time to do a full-on vector design for say, 20 hours and neither to you. So what we're gonna do is we're going to go ahead and we're going to make what's called a mad ball. Now for those, that result is I am mad balls were a favorite child's toy. And the thing that I like about mad malls is they're fun, they're kooky. And I also want to throw in a little bit of Japanese ornament. So this is going to be an only style mad ball. Now, the techniques that I'm going to be covering are universal. And so let's go ahead and get started. Let's go ahead and go to File New. And I'm going to be creating a mad ball. I'm going to go ahead and I'm gonna do is 16 by 16 inch graphic, okay, 300 dpi. So I'm gonna go ahead and make this square. And as we always do, We're gonna go ahead and we're going to come down to our Artboard tool. And we're going to insert an art board. And away we go. Now, what have we always done? One is reference, okay? And then the other is work. Okay? Now we're going to be practicing some pretty pro stuff here. So I'm gonna show you a couple of new things. Remember, we had been working with different studio panels. We've been evolving our studio throughout the course. What I'm going to ask you to do now, I want you to go to View Studio. And what I would like you to do is I would like you to grab the swatches tap. Okay. So the swatches tab has now come into play and let's go see if there's anything else that I'm going to be using during this time. I really don't use the Appearance tab, the asset to spur another time. I'm looking here, I'm just making sure that we're complete. I think that I am overall very complete in this. Let's go ahead and look at the tools. Knowing what I know about where we're going. Do we need any additional tools? I do not believe so. I think we have all the tools that we need. Let's go ahead and close it. Aright. Now, just in case we get lost, we're gonna go to Studio presets. And we're going to add a preset, and we're going to call this section eight. Okay, cool, this is the Section 8 preset. Now I'm going to be working on a black shirt. I tend to like to work in a darker color. I'm not a big fan of white shirts. And the reason is they get to dirty quicker. If you've ever manufactured shirts, manufacturing a white shirt is harder than it is manufacturing and other. Alright, now, I'm going to ask you to find your own reference, which you might search is only o. You might search mad balls. Here's what I came up with that I'll show you what I'm working with. So I'm gonna go ahead and go here. And the ones that I chose for my design are going to be right here. I'm going to grab this one here because I really like the way that they did the ink. I think that that is extremely cool. We're going to go to File Place. I'm going to grab a baseball because well, why not? Okay, that's kind of cool baseball there. And we're going to go ahead and we're gonna place Let's go ahead and place in this t-shirt. All right, Perfect. Now I think I got one more coming. Let's go ahead and place check the desktop. Where did I put my magic? All right, Cool. Go ahead and throw that there. Alright, so we've got our references set. I'm going to go ahead and as we always do, I'm gonna go ahead and lock this. We have no desire to go out there and do this. Alright, so we are all set. Now the first thing that I'm gonna do is I'm going to go ahead and I'm going to just set my shapes. Now for those that may be familiar with digital sculpting, I approached vector the same way. And what I'm gonna do, I'm gonna write something up here on the screen that you're going to want to keep in mind. This is something I learned long ago from somebody much smarter than I am when it comes to vector art. Okay, last is first. Okay, now what does that mean? Think about it like layers, right? If I'm going to do this design, you see how all the white is laid down first. That's the last layer, the lowest layer in the stack. So this would usually be my base color if I'm looking at it from the side and then my black layer, my outline would be at the top. And then I'd have layers in between, right? So let's say that I did the mouth is one piece and then the teeth. I would lay down the mouth first and then I'd lay down the teeth. So the way that I'm going to approach this, I'm going to go ahead and give you my method and my spin on this one, I'm going to block my shapes. Okay? First thing you do is you block your shapes. Then the second thing you do, you outline. The third thing you do, you do your shadows. And the fourth thing you do is your highlights. Okay? So this is really my method. And folks, if you're looking for an artistic way to do vector, it really doesn't exist. Anybody that is a good vector, artists realized that it's a very different workflow. Then say pixel art. Okay, so it's very mechanical, very methodic. Let's go ahead and get started. Now, the color doesn't matter. I'm going to tell you straight up that I'm going to use bold, annoying colors. All right, we're going to go to File Place and in your downloads for this lesson, we have included the demon mad ball. So we're gonna go here, go here, and it's in the downloads for this section. Let's go ahead and bring this up. There it is right there. All right. Looking good. Looking good. All right. Now, notice what we've got here. If I change this rectangle to white, It's got a couple of horns on it. So all working great to start with. Now the first thing that I'm going to do, I'm going to block out my basic shapes. So I start with an eyeball. So let's go ahead and make a ball. Okay, just like that. All right. Now, can make it as big or as small as you want to make it don't really care, right? I'm going to say right about here is good. I'm going to center that where I want it right about there. Looks good to me. Alright. Let's go ahead and crank it down just a little bit more.
59. Laying out the base shape: All right, folks, welcome back to the Only mad mall. So what you've got here is we've got our reference art board, we've got our regular art board and I asked you to create some of these. Alright, now, the first thing that I'm gonna do is I'm going to continue blocking out my shapes. Okay? Now, for the purpose of the blocking out the shapes, you can make it ugly, okay, Do not make it perfect at this point, perfection, we'll just frustrate you very, very much. All right, so if I look at these big shapes, I'm now going to go ahead and I'm going to use the pencil tool. So now let's explore the pencil tool because we really haven't worked with that before in past. Now the pencil tool has stroke. Stroke width is here. If you turn it on, you have what is called a controller. If you have a Wacom and I would highly recommend you make this pressure sensitive. And because we're gonna be making some long strokes, you definitely want the stabilizer on. I set my link to 35. Now what the stabilizer is, it's like a big long rope that the stroke starts here and you pull this thing along and it stabilizes. Now at different times, we will be using the fill, but when we outline, we will not use the fill. So for the purposes of what we're about to do, definitely have that checked. Okay. So let's go ahead now, I'm going to clear this out. And now the first thing that I'm going to do here is I'm gonna go ahead and I'm going to look at my layers. Now stay with me here. There's a reason for this. And on my work art board, I'm going to drag my mad ball all the way to the top. And then I'm going to turn down the opacity. Just like that, okay? Now, once I've got the opacity down, I might even move it as far as 50 percent. Alright, let's go ahead and lock it. Now. Every layer that we draw below it will be underneath it, so your colors will be messed up. But colors right now, doe matter. All right, so that being said, I'm going to go ahead and start with blue. So I'm going to grab my pencil. I'm going to turn stroke off. I'm going to say Use Fill and I'm going to turn that on. Okay, watch this now. I'm going to move my layers panel over so you guys can see this. Okay? What I'm going to do is I'm going to start drawing the features for this thing. Now it doesn't look like anything's happening, right? Because I have the stroke off. But I'm tracing and I'm tracing and you see where the bill is taking over now? Okay. Now, come up. I swing back. Right? That's okay. And we swing back. And you see I've moved out of the line, That's fine. Okay. And we swing over. I'm going to cut that a little bit. All right, cool. Now, that was with a Wacom. Now, here's how you do it. If you just wanna do it with a mouse, because I actually prefer largely to work with a mouse. Watch this, I'm going to choose the color of white now. Now between shapes, make sure you hit escape. That tells affinity that you want to create another shape. I'm going to come over to white. Now watch this. Click, click, click, hold, Alt. Click. Perfect. Folks, you do not need a tablet to do vector art. I actually prefer to do a lot of my detail work without it. Because look at the amount of control you have with a mouse. As a matter of fact, just to do these rough shapes, I'm going to show you how easy this thing it really is. Now I'm going to hit Escape. Make sure you to escape. If you keep drawn on the same shape, it will have an issue, okay, you'll find it. And that's why that's happening. Now I'm gonna switch to another color. And now I'm going to do this tooth 1, 2, 3, 4. There we go. Now watch this. All right, it looks pretty good. Looks really good. Make that a little bit rounded. Perfect. All right, now you'll see that I'm only doing half the face. The reason is, because this is a symmetrical design. This half of the face right here, the I will be the same, the teeth will be the same. So the nice thing about vector art is you're really only deaf to do half of it for these big areas. So now I'm going to change up again. I'm going to change the color now to oh, I don't know. Let's do let's do something teal. Okay. Now, hit Escape. Let's go ahead and do something in orange at it. Escape. There we go. Alright, now somebody in teal, and let's go ahead and use our mouse still, you do not need a Wacom to do this or any type of tablet. It's a matter of fact for vector, like I was saying, I don't actually prefer to use my tablet. Okay. Close enough for horseshoes and hand grenades. Now you remember what I was saying? His last dispersed between these two teeth, which one goes under the other? That goes under here. Okay. Now I've got some teeth layer speak and teeth. Let's go ahead and hit Escape. Let's grab our pen tool. And we're going to click. We're going to click, click, click, click, click, click. Okay, grab the node, shifted down a little bit. Put some sort of a square node in there. Alright, close enough. Now machines with color this would change this to white. And now watch this. If you so choose, you can take shapes that are similar and you can pop them down and reuse them. So this kind of looks like that. Can I take this now? And remember our lesson on vector, how we made, you know, stars out of, out of a square and such. I can now come over to here and I can utilize this right here. Okay? So folks, really, what we're doing here is we're figuring out what goes behind what I'm going to hit Escape. And now I'm going to make a big old black shape right here. Okay. Perfect. I know that looks like hot trash. That's okay. Watch this. This goes down below. So what I just did, I created the mouth. And because we're doing vector, I can actually pull that right down like that and you'll never even know that I went outside the lines. Look at that. So this really is the name of the game. The last thing that I really want to do here, I want to go ahead and I want to put in lips. So I'm going to start here in the crevice. And I'm going to go around and I'm going to go around. I'm going to go around. And I go around. We're going to go around. Ok. And we're close enough for horseshoes and hand grenades right there. Alright, perfect. Now let's go ahead and change the color of that. Let's go ahead and make that an annoying orange. Okay, now let's go ahead and that goes on top of that. That goes on top of that. Let's turn this over to yellow. Cool. Okay, so what we've done in effect now, we have blocked out the major shapes. Now watch this. I'm going to come down here and I'm going to take all the shapes that I just did, right? And I'm going to take them and we're going to move them up. And I'm going to put them all in a group. So let's go ahead and move that up to. And folks, this is where naming is going to matter. Right-click group. And we're going to call this base shapes. Ok? Now this blocking process, folks, is exactly how it goes. Remember the important things. You use your pencil tool, you turn off the stroke. I use my stabilizer. And you wanna make sure that check Use fill is good. And folks it is okay right now to block out the shapes in all variety of colors. Color we are going to choose after we do the outline, I always think about my color choices after I get the basic shapes blocked. All right, we'll see you in the next one.
60. Setting stroke length and pencil tool basics: All right, gang, let's go ahead and clean up this little bit. We're going to take all these rectangles now. Alright? And we're going to come down and we're going to group them. And what we'll call these is color swatches because that is eventually what they will be column. All right, now, here's what I want you to do. I want you to lock your color swatches layer. Okay. But little lock on it. I want you to lock your base shapes. But before we do, right now, we're going to turn them off. Ok. Locked those because you do not want to adjust them. And I want you to lock the mat ball image. Alright, now, in between the base shape, this is an important designation. What I would like you to do is above the mat ball image, I want you to put your cursor here because every stroke we're going to make now really is going to go above the mat ball image. And what I would like you to do is with the Artistic Text tool somewhere, I'm going to ask you to put down three numbers. Now, let me show you what these three numbers are. When you do linewidth. I am a big fan of linewidth telling the story of the design as a TEDx to artists. Really all you had in the longevity of the design way back in the day of the nineties with the inks was your outline. The outline carried a lot of it. And back in the fifties and sixties, the color names really fell out, leaving only the outline. You remember your grandparents probably having those old green navy tattoos and the 1960s. So when we do this, I want you to think about three lines. So the first one I'm going to put down second, third, I'm going to put down primary, secondary, and tertiary. Okay? And now what we're going to do is we're going to list the point count for each one. So when we do a stroke, let's say that the primary is going to be a 10 point line. The secondary is going to be a five-point, and the third is 2.5. These numbers will be key. Now it's up to you which numbers you want to use. We're going to explore it, but I want you to have somewhere to put it. So use the Artistic Text tool, use something. I'm gonna go ahead and I'm going to try it and I'm going to put the Artistic Text tool to work here for me in just a second. All right. Now, when we use the pencil tool for this uterine use fill off. I leave my stabilizer on and your stroke is going to be black. Now let's try a simple 10 points stroke on this. Oops. Let's go ahead and not click on that. Alright. So what we're gonna do now, we're going to grab my pencil tool. We've got a 10 point stroke. And now what we're going to do, Stay with me. I want you to find one line that you think is pretty strong and pretty primary in your design. I'm going to go ahead and I'm going to choose this cheekbone. Ok. And you'll see I'm using the stabilizer. And I'm drawing this cheekbone line down across. Okay, that is a 10-point line. Here's what I'm going to do. I'm going to increase it. I think that and now you'll see it's a little bit transparent. Let's move it up. I think that it's a little bit weak. So what I'm going to do, I'm going to go ahead and I'm going to make it 16. Let's go with an even 17. Okay. So you're choosing your point counts for your primary, your secondary and tertiary line. So here's what I'm gonna do. P equals S equals t equals, and I know my secondary line is going to be 12. Now for tertiary lines, Let's go ahead and try this. Grab the pen tool, make sure you hit Escape so that you're working on a new curve. And tertiary lines are these kind of lines right here. So they're going to be smaller. Let's go ahead and move to eight. Okay. Let's try it. I'm even going to go, Let's drop this a little bit. Let's try. I'm gonna go to six. Okay, so my tertiary line is going to be 6. And now my primary line, Let's see what's up. Okay. I hit Escape to make sure that I'm working on a new one. I grab my pen and I'm just going to drag along the outside of this shape. Okay? Now let's bring this up. This one has to be the strongest. I'm going to go with an even 20 on this. Okay? So the first thing I do folks, these are now my primary, secondary and tertiary stroke widths so that I know what I'm working with. Okay? And this is just my method. I do a lot of setup to make sure that I'm good. Now, let's bring out the stroke menu. Okay. I want you to go to the pencil tool and just pull any old stroke, doesn't matter right there right? Now, the other thing you're going to want to set up this pressure curves. Watch this. I want you to set up for click on the pressure curve. You see where the dots are. Now. Click until the dot goes off to one side and drop it down. You see how this tapers. Save that profile. Raise this one up. Drop this one. Make sure you only got one down. Save that profile. Make sure they're both up. Put a node in the middle, drop it down, save that profile. Bring this up. Drop the ends down, and save this profile. Okay, these are the four stroke profiles that you will use throughout the outlining process. Alright, this lesson is all about getting your outlining right. And always, always, always make sure scale with object is selected. This one right here. If not, if you decide to grow or shrink this ball, your strokes will not move with it and it will look super weird. Okay? True story. All right. So we got our stroke setup. We know our point sizes, we know are four profiles. Let's go ahead and do our first strokes. So now if you do not have a Wacom or a tablet of any kind, I'm gonna go ahead and do this with a mouse. I'm going to use my pen tool. Now. We're going to use the same cheek area that I did here, 12345. All right, Now, why is this happening? With the pen tool? We still had the fill on. And now what I wanna do here, I'm going to change the stroke now what's my secondary stroke? 12 point. And what profile? Well, I think I wanted to start out skinny and then get bigger. That looks pretty darn good. Oops. Control zed, hit escape. Move to your Node tool. And now you can adjust this any way you want. This is another reason why I say I tend to use my mouse is a little more when I do this type of outline, because this gives me complete and total control. Now, if you are going to use a Wacom, let's go ahead and do that. I come down to my pencil tool. All right, still at 12 points, still with the same type of look. And now I want to start here. Let's go around the horn. Let's go ahead and do this. And then we disappear right here into the joint. Perfect. Now let's do another one. But this time I want to start here and I want to end here. So I need a new type of profile. Let's hit Escape. Give me the profile that. Let's do another type of profile where it's just none. Garbage. Hit Escape. There we go. All right, Let's go ahead and pull our profile. Alright, perfect, Looks good. Now let's hit escape. And let's go ahead and change our profile to where we start small. And around the horn we go. All right, Perfect. Let's go ahead and call this one. It's gotten a little long. I really want you to just set up your primary, secondary and tertiary stroke sizes. Get to the poor profiles done and try two or three lines before taking the next lesson. Because in the next lesson, we're going to AMP this up a bit. We're gonna do the primary and the tertiary. So you're going to need to know how to pull a basic line, whether it's with a mouse or a pen tablet. Alright, we'll see in the next one.
61. Outlining and adjusting : Already folks, welcome back to the lesson now, in the last lesson, I showed you the basics of the pencil tool. We set up our four different profiles and we got our primary, secondary, and tertiary line sizes established. Now, in the last lesson, you should have at least done in three secondary lines, three primary lines, whatever you wanna call it, to get comfortable with this tool. So when we go down here, let's go ahead and take the next step. We're now going to group all of these into a group. And we're going to call it outline it. Now why do I do the outline before I do my colors? Because in reality that allows me to get read of the illustration. I don't need the illustration anymore once I got my outline done. So let's go ahead and continue. Now. I'm going to go ahead and I'm going to have the editor speed this up. When I do something that's noteworthy, I will stop this. But in reality, once you've seen the show a couple of times, you don't need to watch me do this for the next 45 minutes. And that's about how long it's gonna take. So let's go ahead and get after it. All I'm going to end up doing is just kind of tracing this thing out, making it look how it's supposed to look. And at the end, we're going to have a good solid outline. Alright, so let's go ahead and take a look at this now. Now, I'm not done yet with it. Obviously, I'm still working while I'm talking. But notice that when I drop this line here, you've got this little red point. If you come down to the node tool, this little red point is the termination point. So if you reverse the curve, even if you've got your profile wrong, No worries. So that's just a little pro tip there in terms of sometimes it keeps you from having or just redraw the curve a bunch. Now sometimes it is easier just like with what I did right here. Sometimes you just want to come down and flip the script on that. Alright? So there's times where you want to do that and never, ever, ever forget to hit Escape or you will end up redrawing a whole lot of stuff. Okay, so the last thing that I want to do here, I'm going to go ahead and get into some of the tertiary strokes here. And so when we start doing the tertiary strokes, the important thing for me always is getting the flow right now, what do I mean by this? Let's take this example right here. I'm going to use a hash mark. And so what I'm going to be doing is I'm now going to hit Escape to make sure that I'm on a completely new area. And I'm going to drop down to what was my magic number here? 1 second. My magic number was six. The magic number is going to be six. Okay? All right, now, that means that everyone I draw now is going to be six. I like to start from the end and I like to drag it like that. Now, I've got to change the profile. I haven't paid attention there. Apparently, I'm like doing work twice. And so we're going to come down here. And you want to pay attention to how your cross hatching is working. Is it leading the viewer into the way you want them to when they contour? You see how this is working out. Now that one did not work out. So when you do your tertiary strokes, realize that your tertiary strokes are leading the viewer into your shape forms. Okay? So I'm going to continue on here. And now the other thing that I wanted to show you before we wrap this thing up is notice I'm only doing half the face. Generally. The reason I'm only doing half the face is because I can copy those strokes over to the other half of the face. Where I'm not doing half is over in the lips here where you really want to go from one side to the other. I personally don't like to join a bunch of curves. So if I can avoid that, That's awesome. And the last thing we're gonna do in the next lesson, you'll see this big point here. By this point and this point right here. We're going to create some shapes to be covering that. So don't try to make a line out of that. We're gonna go ahead and do some shapes for those. So in those areas of deep shadow, don't think you've got to get it perfect. We're gonna go ahead and we're going to come up with shapes for those. All right. I'm going to keep on trucking now. The other thing that I'm gonna do here that you'll see me work on. Is this is the point where now I'm going to look to some of my references in terms of how some of the pieces that I really liked have done some of this black shading. Alright, so I'm going to continue on here. Let's go ahead and wrap this up and I'll come back to you when we're done. Yeah. All right, folks, we're gonna go ahead and pause for just a second here. Now the last thing that I'm going to do here real quick, I've got a pretty good look to it. I'm pretty happy with that. The last few things that I'm going to do here before we speed up again. I'm going to go ahead and I'm going to copy all of the left-hand side stuff, Let's say over to the right-hand side stuff so that we can get a relatively symmetrical piece. All right, Yeah, The easiest way to do this is to just kind of shifted all over here. You see we got a lot of layers. This is a tremendous amount of work here. So what I'm gonna do here is I'm going to sort out through some of this. And the easiest thing for me to do is probably go through and just pulled the lines that I know are consistent like the ones around the mouth. So what I'm gonna do is I'm probably going to grab all of these throughout here. And let's go ahead and pull all your lines into the outline layer if you didn't do that already. And we're gonna go ahead and duplicate the outline layer. So once we've got them all there, make sure you grab the Move tool, and then we're just going up, flip them. Alright? Now when I say that, the easiest thing for me to do is start pulling things that do not belong. What I'm gonna do, I'm gonna turn off this outline. And then I'm going to come down here and I'm going to position this guy where I want it. And then any one that crosses the double yellow, I'm going to go ahead and get rid of such as this guy, this guy. Anything that crossed the halfway point, you know, is taking care of 0. Why is that moving? What's locking? Back to our outline? Anything that crossed the halfway point, you know, is taken care of. Okay. Let's go ahead. We're going to have to grab in each one of these individually. It looks like okay, that goes away. This goes away. That goes away, that goes away. This is just the easiest way that I've found to tell what she should remove and what I shouldn't. Anything that takes more than the halfway mark I know is redundant. Alright. Alright. So let's go ahead and do this. We're going to take all of our curves that remain. Okay. And then we're going to come down to here, and we're going to stick them all inside of the outline layer. And now we've got some final adjustments to do. But that thing is looking pretty fierce. I am very happy with how that turned out right now. All right, here's what I'm gonna do. I'm gonna finish up my primary lines. I'm going to fix some of the overlaps in the center here around the brow. And then we're gonna go ahead and cut it. Okay, and that will be the end of this lesson. Alright, and there one more speed ramp. Let's leave that to the group. We don't need it anymore. All right. We'll see you in a second already, folks. So what we did now is I just eliminated our image. So that's going to remain locked that off for the rest of the time. I'm gonna go ahead and unlock the outline layer to make sure that we do not put anything in there. And now the next step is going to be choosing our colors and then aligning these different basis into the shapes now that we have our outline. All right, let's go ahead and take the next step.
62. Choosing colors: All right gang. So in the last lesson we finished up the outline. So let's look at our outline panel here. I'm gonna go ahead and I've been working with my reference art board, so I'm gonna go ahead and lock it. So the artboard that we have, the outline group is now above the mat ball image. And I intentionally turned that off. So what we've got is the med ball image is going to really seek to be, It's not going to really be useful to us here. It's going to go into retirement. What we're gonna do now is we're going to choose colors. So notice my base shapes here have these wild colors. That's fine. What we're gonna do now here is we're going to look at the color swatches. Okay? So what we're gonna do is I want you to unlock the color swatches. Now, this is the non-scientific way to do this. What I'm going to show you is both the way that I do it when I'm working and how to do it correctly. So this video is going to be a little long and you'll get both of the down and dirty method and the more appropriate method. Alright, so let's start by deciding on a color chord. Now if you haven't heard about color chords before, what I'd like you to do is as part of the interface for Section 8, I asked you to move the swatches panel out. And I also want you to grab the color panel. Now I'm intentionally covering my design here. We're not going to need the design right now. Alright, so the first thing that I'm going to show you is how to produce pallets. So with the swatches tab, Let's go ahead and hit the hamburger menu. And let's go ahead and create a document palette. Now before you hit one or the other, let me explain the difference. Application pallets will be widely available in every document. In your Affinity Designer. A document palette will travel just with this document. Okay? So that's the difference between the two because I'm really only going to use this in this document. I'm just going to add a document palette. Now, let me break this down for you for just a second. There is the name of your new palette. Over here you'll have the recent colors that you chose. You have the normal stroke and the normal fill. You have the color picker. Now, what we're gonna do is we're going to rename this palette. So to rename this, let's go ahead and go to the hamburger menu again and rename. And let's call this the only ball. Okay. Perfect. Alright, this is now the only ball palette. Now, let's go ahead and look at color choices. So what we've done now is we've set up the pallet. So now we can start playing with color, okay? Now, if you want, you can choose colors a couple of different ways. I'm going to show you how to do them pre-done. Let's say, I'm going to introduce you to something called the color chord. So let's say that you find a color that you like. So I'm gonna go ahead and just grab, I'm gonna say this color right here. Let's say I like that color. It's a red and it's a less saturated red. Okay, Now if I like this color, one of the things that I can do is I can come over to the little hamburger menu and you'll see add cord to swatch. Now, you're going to have to do a little bit of research. Hair color chords are pre-done, sort of color formulas. So what complimentary Swatch, let me show you this. You realize where we are on the read, what it's going to do. I'm going to draw this out and then I'll come back to it. It's going to look at this color, which is the version of red. And it's going to go a 180 degrees across the color wheel. And it's going to pick the complimentary color of, in this case, what is teal? Let me show you. Okay. We're going to come over here. I'm going to use the hamburger menu. And I'm going to add a cord to the swatch and it's going to be complimentary. Now notice what has been added to the swatch. There is our color of red. There is our color of blue. Again, complimentary colors are a 180 degrees around. Now. Each complimentary color or each color court, I shouldn't say, has its own versions. So as an example, add chord. If I wanted to do a triadic. But this is going to do, is it's going to reach out to this color of red. And it's going to go here. And it's going to go here, literally the triangle. So let's go ahead and clear that out. And now to prove this out, what I'm gonna do here is I'm going to come down and I'm going to use a triadic. Notice what was just added. These three. Now, let's say here that you don't like any of these. To remove a swatch. Very simple. Right-click. Delete phil. Yep. Right-click. Delete, phil. Yep. All right. Click delete, fill. Now let's say that you like this teal. You could right-click and add a cord directly from the swatch. I'm not gonna go through all of the different color chords. That will be something for you to explore. That will be something for you to do. What I am going to do is show you my method to do color selection, okay? Sometimes I will do the chords, especially from doing like screen printing because there's nothing cooler than do in, say, a purple design right alongside of a yellow. And so there's a whole design there that we could do. For this one, I'm going to do something very unique. I'm going to click over to this color of bread. Okay, Now watch this, my Layers panel. I'm now going to take this box and this box and this box. These are my top three. I'm only going to select the red here. Now watch this. Come over to this box. And I'm going to call this shadow red. Okay. Now watch this. I've got this color of red in my color. I'm going to now drop this shade to right about here. Okay? Now, this one is middle, red. And now if this one was dark and this one is middle, yes, what I'm gonna do to the light, I'm going to shift this a little bit. All right, perfect. And I'm going to call this light red. Okay, now, once these are selected, Here's what I'm going to do. In order to get my colors right. I'm going to go to my middle red. And I'm going to go to my base. I'm going to select the base. And now I'm going to color pick the middle red. And I'm going to make my base that middle red. The reason why I set my swatches up on the side. And then I'm going to group and I'm going to lock. Okay. The reason why I set my swatches up on the side, first, I figure out my colors. Then I look at the flat nature of those colors. And from there I go through and I create my swatches so that I can easily color pick. Now, if I wanted to, let me show you how to bring this into your swatches menu because maybe that's x2. Okay? What I'm going to do is I'm going to select the recent and I'm going to add that field of the palette. Then I'm going to go to the dark and I'm going to add that fill. So even if I didn't want to use this method wire I align the boxes up along the side. You can easily create the palette that you want in the swatches panel and it travels with the swatch. Alright, that was a lot of explanation. Let's go ahead now. And one thing that I like to do here, I do like to come across and I like to keep all my colors of the same sort of a value in terms of their brightness and their saturation. So right here, where this little thing is here, I really won't move that for any of my base colors. So when I think about base colors, I think that I most likely want to do kind of a let's do the yellow. Let's do ahead, Go ahead and kinda go with some sort of a purple. I think that those would be pretty awesome. Alright, so what I'm gonna do here, I'm going to clear that out and now watch this. All you gotta do to keep the same saturation level is move the dial. Okay, So for my horns, I think that I want this color. So that gives me my midtone. Now, what do you think I'm going to do here? I'm going to call this mid horn. Okay? And now what do you think I'm gonna do with this? I'm going to come down. I'm going to color pick. And now if I've gotta create some darker horn right about here, and we call this dark horn. And then from here, we're going to color pick, bring that back to neutral. And from here, we're going to make that highlight. Okay? All right, Perfect. Let's group all these. Group and lock. Okay, Next group, right down here. Now, if I'm looking at doing the horn and I'm looking at doing kind of where the blue is right now. I kinda wanna do something really cool with that. What I think I'm gonna do with that is I'm going to do sort of a purple. So I'm gonna go ahead and I'm going to do, now Let's do purple. Kinda like purple. Alright, at work, something around in here. And remember I have the same level of saturation. So now if I select this, I color pick that level of purple. And now I go to light. And then I go to this one and I do kind of a dark. All right, Now, here's the trick. I'm going to stop renaming the purples because you get the idea. I am going to group them though, and I'm going to lock it. Now. You don't have to do every single color. Okay? What I'm going to choose to do is let's go ahead and click on that, that click on that move, that click on that move, that click on that, that this move, this click on this move, this. All right, then I go into the group. And let's make that light. Let's make that dark. And now we're good. All right, I'm going to leave all of these other colors. If you wanted to do six, you could. I'm going to leave those open. I'm going to work primarily with these three. I were to see where we go. Alright, that is how you set up the color palettes for the next step. That being said, I'm gonna move my swatches into here, and I'm going to move my color tab back into here. All right folks, we'll see in the next one.
63. Adjusting the base color and shadow Part 1: All right folks, it is time to start the moving process here. So what we've done so far, Let's go ahead and take a look at our layer stack. The outline is above all, the mat ball is non-existent, right? It's exed out. We're now going to assign to the colors, to this shapes. So we're going to lock that group down. And now we've already done that with our red base. Now I'm going to go to the horn, and let's call that horn instead of a curve. Okay? So we're gonna go to the horn and we're going to color pick. So I like to just use my colors. And I'm going to color pick the middle horn. And we're going to fill it that way. Perfect. Now, we're going to go down to the teeth. Now I look for the tooth color if I don't have a good tooth color right now what I'm going to do is I'm going to go ahead and I'm going to come up to one of my colors. And I'm going to grab loops. Let's go ahead and select the two though for we do that. All right, Let's select the tooth here. And let's go ahead and let's grab that color. All right, now, if we had to make adjustment to our color palette, what do you think we're going to do? When unlock it? We're going to find a color that's not spoken for. And we're going to go ahead and color pick. Let's just go ahead and call it pick this one. All right. Perfect. And we're going to lock that down. And what do you think we're gonna do with this one? We're going to again color Pickett and a grab it. And we're gonna make this one a bit lighter. And we're going to go to this one. We're going to put it in the middle ground and we're going to make this a bit darker. All right, Perfect. Let's go ahead and group these together. And we'll go ahead and move that up above here. Alright, moving on. Sometimes folks with different color schemes, you gotta do some different things here. So as all these teeth at the same, I'm going to click here. And I'm going to grab the same color. I'm going to click here. Now, why can't I click there? Notice that we only did the two teeth. So that's going to be lower tooth. This is going to be upper tooth. Okay, perfect. Now, the curves for the mouth, Let's go top teeth. Let's go bottom teeth. And what I'm thinking is for the, let's say, let's think this through here for the accent color for the lips. Let's go ahead and choose the purple. Let's go ahead and come over here and pop that in. That looks kinda cool. Alright, I'm happy with that. And where I've got the blue here. Let's go ahead and call this brow. Alright. And let's go ahead and pull that to be the same color as the horn. All right, That thing is looking pretty awesome. Alright, so I'm happy with that. The last thing that I wanna do here is I want to grab the eye and we're just gonna make that right now. Bright white. All right. I don't know if I love the lips yet, but that's okay. You can change it. I'm gonna show you how. Alright, so the next thing we're gonna do is we're going to take the brow. We're going to go over to here. And now that we've got our outlining done, we're going to go ahead and adjust this curve so the outline hides the sins, Our bad tracing. Okay, so we're pretty much done with the color for right now. And the trick here now is to make sure that the underlying fill layer, which is another reason why we put the outline and the very tippy top. This is what we're doing. Okay. This is why I didn't get too crazy about making sure that we were 100% inside the lines. Because we're going to go ahead and use the outline to cover most of our error. Okay, Now you can do this a lot of different ways. One way that I tend to do it is I will come in and I will address all my big shapes first. However, if you want to go shape by shape, that is completely fine. Okay. So let's go ahead and go up here. Get this taken care of. I'm gonna kinda got a little crazy. You need to add node. Add node. If you need to subtract an ODE, subtract a note. Notice I'm just adding one here in order to pull it in. All right. And at the end of the day, what you tried to do as you're making it look good. Now, there's a big, glaring, ugly spot. Let's go ahead and go right here. You see how this stroke now interferes with this stroke. Now what I'm gonna do here, this is another reason why you want to kind of connect and make this thing work. This is why I call this the adjustment step. I'm going to unlock the outline layer and I'm going to twirl it down now, there are 900 different strokes. You might have to click a couple times. And when you find the stroke that you are on, you can address this particular profile. Okay? Now watch this. If I add something right in here, I can maintain this look. Perfect. All right, Now I come back to my layer. I come back to outline and I lock it back. And folks, the reason why I do it this way, it is very complicated sometimes to grab the one shape out of a dozen that you think are going to be valuable. So when we do this part, it really does help to have clear strokes, do have clear guidance because that's how you get nice clean shapes like this. Alright, now, let me show you the next step, okay? And I'm gonna take this step-by-step, Okay? I'm gonna go to my base shape. And now I'm going to go ahead and lock this back down. Now on top of the base shape. But underneath the outline, you're going to grab your pencil tool. And again, if you have a Wacom, I'm going to show you with the Wacom, and then I'm going to show you how to do this with a mouse. It's the exact same thing. You're going to start here. Okay? So let's go ahead and grab the pencil tool. We're going to go ahead and come up. Let's go ahead and start here. Now, see how this is a hot dumpster fire. That's okay. That's okay. Watch this. Take the stroke, turn it off, click on Use Fill. Now we haven't defined a filled really right, and went white because that would last thing we did go to color. And now we're going to zoom out. And this is going to be our first shading layer. Now watch this. We're going to go to the darker. And when we go to the darker, we're going to fill it. Now. Where did I put this thing up above the outline? Move it underneath the outline. Okay. Now, you could go ahead with the node tool now. And I want you to craft out the shape that you're looking for. So one of my criticisms of the pen tool is that it adds way too many notes, okay? Many times you will have way too many nodes more than you could ever possibly need. As an example, that is not necessary. All right, now, here's the next thing we're gonna do. We're going to create a group. So we're gonna come over here and we're going to group. Now the only group, it's a group of one, right? And in the group, we are going to change the blend mode to multiply. Now you can change different multiply, or I shouldn't say different modes depending on what you wanna do. And I would recommend then we adjust the opacity. Okay? This is what he's going to give you, that nice layer. Now, I'm going to turn this off and I'm going to do it with just my mouse. And folks Believe it or not, this is my preferred way to do it. I hit Escape. I start here. I come over here. I come over here, and I close my shape. Now if I come over with my pen tool and I position it, and I get it where I want it. And I really like doing it this way because I feel I've got a tremendous amount of control over it. And notice where I put it, It's up above. Now look when I move it into the group, because the group is set to multiply and 70 percent opacity, it's there. And now, if I want to change the shape at anytime, I can very, very easily. So if I want to add a node and I want to bring that up a little bit again. If I want to come over here and I want a little bit deeper, say cut on this. I certainly can. If I want to add around node and add in some more interest, I can certainly do that. What I would recommend here folks find some vector art from some people that you really like the way that they do it and try to copy their style. And I'm not saying copy that with the intent to rip off their work, but copy it in terms of how they do what they do. Okay, So what I'm gonna do here, I'm going to end this video. And in the next one I'm gonna show you how to finish your shadows. And I'm going to show you how to use the transparency tool and then I'm going to do a speed Draw. All right, folks, stay tuned.
64. Adding transparency- Speed draw : Our, again, we'll come back to our high octane vector art. Now, we're going to go ahead and we're going to continue on with the discussion on how we do some of the shading. And I'm going show you a pro tip. Once you get the shading the way you want it. You remember here we had this curvature layer, right? I'm gonna go ahead and delete this one because I like the one that I drew. What I'm going to do, check this out. I'm going to use the transparency tool. Now we use this a little bit in one of our other t-shirts. Click on the transparency, drag it outward. And now you've got a really cool transparent type of look to this thing. This is the next level, okay, now, there's some things that I want to do here real quick. I'm going to go ahead and do them and then we're gonna speed draw this as I go through this experience. Now, this is where I start grabbing my lines and I make sure that we are solid in terms of our linework. Okay, so you see how that line ran right here? A little bit far. I wanted to go ahead and change it. All right, let's go ahead and move this outline layer backup. And let's select the group and let's group it. Alright, now, it is totally up to you and this is an artistic thing where you want to pull your references from in terms of who you like, in terms of doing this sort of thing. So I would recommend you pull some of the vector art and then an example, some of my influences come from here. I really like the way that they did theirs. I liked the way that they use the bold outline here. So I'll probably grab a little bit of that. I really like this guy right here. So I'll probably grabs some of their vector art and the way they did their horns. And at the end I may go back and I might do some more of the black here. I really am going to do a lot more with this as I go through, even if in this class we just keep it very simple. I think I might do a very advanced one that looks like that. Alright. The baseball looks pretty good around the outside. So what you're going to want to do now is you're gonna take your reference art. You're going to figure out your style. And we're going to call this group shading, okay? And you're gonna put every one of your curves in the shading group. So we're going to do this one more time together. And then I promise we will let this go. When you grab your pen tool, make sure your stroke is off. Stroke is done. We do not use stroke when we shade. And you're going to click on Use Fill and I still use the stabilizer. All right, so you don't need the controller because you're not doing linewidth. What you might do, there is a function called sculpt here. And what this does if you work on a line and you want to pick back up on the line, you can. I don't necessarily use it when I'm doing this, but when I'm outlining, You bet I'll use Skulpt. Alright, let's go ahead and clear this out. Minimize this, drop this down. Now, we're going to do one more together. And then I promise you, I will start speed sculpting. And at this point then we will wrap this thing up because you don't want to see me do this for another 45, 50 minutes, which is probably what it's going to take. Now, the same applies here as applied earlier. If you do one of these browse, you can copy paste over to the other one. Alright, so let's go ahead and start right here as an example. And now I'm going to flow back. Alright, perfect. Right here. I'm going to come into here. And I'm going to kind of follow back. All right, looks good. And right about here, I'm going to throw this in here. Now I missed that side there, That's okay. And I'm going to come back. Alright, now I'm going to have to grab my Node tool and we're going to reposition this node has shifted a little bit. And we're going to reposition this node. I'm going to shift it a little bit. Alright? And what I will probably do is I'm going to pull this node out ever so slightly. That's actually pretty cool. I'm going to keep that. That's an unexpected happy accident. Now what I'm gonna do here, there's a few, too many nodes. So we will make this thing happen here, Captain, just like so. And let's go ahead and do it this way. Alright, that thing, Let's go ahead and shift this just like that. Cool. All right, Now, last thing I'm gonna do with this, and then we'll go ahead and get to it. Let's go ahead with our node tool selected. Double-click this shape, grab our transparency, start on this side, work into this side. Perfect, and hit Escape. Then we'll come over here, grab the transparency tool. Let's start over here. We'll go to there. Okay, let's push a little bit here. And then we'll grab the tool. That thing looks pretty awesome. All right, folks, this is where I leave you for right now we're going to go ahead and have the editor speed this ramp up. If there's anything I need to show you as part of this, I'm going to go ahead and continue right on through the eyebrows, the horns, the face, the teeth, the whole nine yards. So we're going to press about an hours worth of work into probably less than a minute. All right. Acrylic additivity. Okay. Okay. All right, folks, so if you've been paying attention now, we've been going for about 50 minutes. It took me to do the shading layer of this thing. So which saw was me go through and painfully do each one of these types of layers. And so I just want to kind of clean this up. Let's go ahead and take a look at how I did it because there's some nuance. Notice that anything that crossed the line like the under knows I left as its own thing. And when I put down half face, right, What I was really doing here when we did all of this was I was then saying anything that was half the face. I'm going to regroup now somehow along the line we got the color all jacked up. So I have to read you that. So let's just go ahead and pop that in. Just like that. And so now, boom, everything is back the way that it should be. Alright, thus the beauty of working with curves. Now what I'm gonna do here, I'm going to go ahead and I'm going to duplicate the half face. And then I'm going to use my move tool. And I'm going to flip it. And then holding the Shift key, I'm going to put it under there where it goes. Alright? So if I did my job right, we now have the second half done. Alright, Now you see what I'm gonna do with the teeth here. In the next one, we're going to move the teeth over so that we get the teeth where they need to be. We're gonna lead the eye back where it needs to be. We're going to go ahead and place the horn. But only after we do all of the lights, the next one is the highlights. So let's go ahead and call this one. Thanks for watching speed ramp and we'll call you back here in the next one.
65. highlights and duplicating over : All right, folks, welcome back to this project. All right, so we're going to approach the highlights the same way we did the shading. So we're in our work art board. The same way that you did the shading. We're going to now work on the highlight, but we're going to change the blend mode. So I'm going to go first as is always. The first thing that I'm gonna do is I'm going to go to color. And let's zoom out. And let's grab the lightest. Now. Oops. Let's go ahead and escape there. Alright, now we can switch the color. All right, Perfect. The reason we hadn't just because it was saying, Oh, you want to take that shading layer and make it all yellow, we can do that. So what we're gonna do now is I'm going to zoom in here and it's the same technique. So I'm not gonna go through the pencil technique with you. What I am gonna do, I'm gonna do one of these. I'm going to show you the blend mode and then we're going to hook the layers up the way they should be. So let's go ahead and just do one here. Alright, so we're going to come down here and we've got the lighter. And let's go ahead and throw a shaded layer right around in here. And folks, this is where you really get to begin to see your vector come out here. Okay? So do it any way you want it there. The thing that I'm going to bring up to your attention, this curve. Now, we're going to right-click. We're going to do group. We're going to do this the same way. We're going to call this highlight. Alright, now this layer, watch this. The entire group is now going to get a screen style blend mode. Now let's look at screen versus the other. Watch this normal kinda muted screen. Very bright, even more so the enlightened. Now if you wanted to knock this down, I don't know that I would recommend it. You can always drop the opacity just like you would hear. I like to put my highlights as very, very bright. Okay. So that's just my personal preference. So now with this started, we're gonna go ahead and hit Escape. And we're going to do the exact same thing that we did before. Only this time, we're going to build in highlights. And by the time you have these down folks, the structure should be pretty simple for you here. Okay? The highlights don't nearly take as long because you don't quite have as many of them and you're not structurally going through and making everything work. Now don't forget that some of these objects here are rounded. So you might have some highlights to put along the edge to give it that round look. Now notice I'm bringing the curves up above here. We're going to drop these now into there. And now they're where they need to be. Alright, that looks pretty good. So what I'm going to ask my editor to do here, we're gonna go ahead and we're going to pause this. Now. I'm going to approach the highlights and the face the same way. I'm going to do half the face. You remember when we did the shading and I put everything that was there half face and have faced. Do the exact same thing with your highlights. When we come back, I will have completed the highlights and I'll be ready to move the teeth over and we'll be ready to kind of work the eyes and little bit so that we can put a little more character into this. And then I'm going to show you how to adjust some of the forms of this to give it more of that mad mall look. Alright, we'll see after the break already folks, welcome back to Part 2. Now, since you've been gone, I went through and added some highlights. Highlights don't take a lot of time because usually it's through the shadows and through your crosshatching and your ink work that you'll really get to know exactly how this thing comes about. The highlights are just that highlights. Now, what I've done, I'd like to go through the highlight layer with you that I did. Notice I did the same sort of thing. Anything that I was pointing out duplicating, I literally called half face. I have highlights for the eye, I have highlights for the teeth, and I have highlights for the brow. Anything that I was not planning on duplicating, I put under a group called single base. So I know what I need to duplicate. Okay. So overall, I think I'm very happy with this. Let's go ahead and clear this out, and let's go ahead and move some stuff over, okay, now. This is that moment of truth, right? Where we're going to see exactly how to move stuff over. So the first thing that I'm gonna do is I'm going to come over here and I'm going to clean this up a bit. I'm going to group the teeth. Okay, we're going to call this teeth. We're going to call this one the I because we didn't group them well before. The bottom teeth, the curve and the brow. We're not going to have to turn over anything but the brow. So let's go ahead and duplicate the brow. Okay, now with our Move Tool, let's flip it. And with our Move Tool, Let's place it. And yes, should be right about spot on. Okay, There may be some subtle adjustment like up here that has to be done. But for the most part, that thing is solid. Alright, overall happy with that. Now, the next thing that we're gonna do, we're gonna go ahead and we're gonna move the teeth. So we're going to duplicate. And then we're going to flip them. We're going to hold Shift. And we're going to move them into position. Look at that like button. Looks great. All right, the eye, let's go ahead and duplicate. Flip, hold Shift, move it over where we need it. Now it didn't surprise me that we'd have to move that a little bit. That doesn't bother me. Alright. So we've got the brow duplicated, we've got the teeth duplicated. The next thing we gotta do is we've gotta duplicate the horn. Duplicate. Flip. And let's go ahead. Hold Shift and paste. Righ right about there. Okay, that looks pretty darn good. All right. And that everything is coming along nicely. All right. Now the mouth is where it needs to be the teeth or were they need to be everything is looking good on my base level shapes. Now what I will probably do is with my base level shapes and that new brow. I will probably come over here and I'll make some subtle adjustments. Okay? So let's go ahead grab our Node Tool. And we're just going to adjust this thing, right? It's not too terribly off. Looks pretty darn good to me. And you can spend a lot of time with this. You can do what you wanna do with it. You can be as thorough as you want to be with it. Okay. Looks good. Let's do the eye. The eye. We just pretty much have to shift up here. And folks, the outline layer solves a bunch of sins. Okay, what do I mean by that? That outline layer is hiding a lot. You don't have to be specific in your work. The outline layer is going to be thick enough to hide it. Okay, does some awesome job. Alright, right, So overall, I'm very happy with this. Close up the color swatches. Now the next thing I'm gonna do, I'm gonna grab my shading layer. And now what we're going to do, we did move over the half face already. So now I'm going to go ahead. I'm going to duplicate the horn. And what do you think we're gonna do with that? We're going to flip it over. We're going to hold Shift. And we're going to put the horn where the horn needs to go. We're going to do the same thing with the brow. Duplicate the brow, flip the brow, hold Shift. Now this one might require a little bit of shifting around here. Actually that worked out real nice. That one went in just like button. All right, so the browser been duplicated, the horns been duplicated, the teeth need to be duplicated. Duplicate. Flip, shift, put them in position just like that all day long. Have faced has been done. The under noses good. The eye now needs to be shifted. So we're going to right-click, duplicate the eye, flip it around, hold Shift, and lock it into position. All right, Now this one is a little bit weird. Let's go ahead and take care of that before we go too far. All right. We are on that. I let's go ahead and zoom on in here and see what's happening with that. I because I changed the shape because apparently I can't follow my own directions. We have a subtle shape that is not quite what we want. So let's go ahead and grab all of these and shift these all over collectively. Now the piece that concerns me is right there. Well, let's do this actually, I think I was off. Let's go back to where we were messing with it. Here we go. Alright. That's why I was looking weird to me folks is because I was trying to make it something that was not it goes on the inside of the eye. All right. No, that'll work. All right, that's my bad, sorry. Alright. And the orb doesn't need to be shading. Those need to be transferred. Alright, now let's go to highlights. Let's go ahead and go the eye highlights. Duplicate. Move this over. Put that where it needs to go. Perfect. The half face. Duplicate. Flip it. Now let's put that where it needs to go. Alright, perfect. The teeth. Yep. Let's go ahead and zoom down here. But the highlights of the teeth where they need to go, duplicate flip, shift. Alright, that looks really good. Single-phase we don't do. And now the brow duplicate, flip, shift. What I will probably do right there. I'll write that thing looks pretty cool. Alright, now, the last thing that I will probably do on the highlights, when I was a tattoo artists, my boss always used to tell me. What you wanna do is you want to go back and see if you can make the top 10 percent of brights brighter and the bottom 10 percent of darks a little darker. So the way that I look at that now that I'm a little bit more mature, is I want to go in and I want to find some spots where I can do pure unadulterated white. Now, the way that I'm going to do this, I've got a method here. And by the way, folks, I know I'm missing a highlight on the horn. We've got that one here. And we've got that one here. I'm going to group these, call them horn. And I'm going to duplicate this. Don't do my job right the first time. Guess I get to do it again the second time. Flip this shift and move. All right, Perfect. All right, so the way that I'm going to do this, this is just the easiest way for me. I'm going to come over to here. I'm going to come up to the very top right below still the outline layer. And I'm going to go ahead and I'm going to use circles, okay? And the reason why I'm going to use the circle is because I want to make sure that then I can convert it over to a curve and I can make it relatively round. Alright, let's go ahead and do this layer convert to curve. And once we do that, let's go ahead and pop that in. And this is another example of how you can use primitives and shapes as accents. Now, I like to use my highlights to make it non consecutive. Okay. And her suits a non symmetrical. So I'll usually use the highlights in certain areas like the eye. And I won't put it in both eyes. Twist that just like that a little bit. Bring it down here just to sketch more. Here we go. Okay. All right, so you can do what you wanna do with that. I tend to like to do this just to kind of break up the monotony a little bit if you like it, steal it. If not, always come into layers and it's pretty easy to delete. All right, let's go ahead and call it onto this one for this lesson, we're going to do one more lesson where I'm going to show you now when we've got this big old thick outline, how we're going to kind of manipulated into curves to get a symmetrical style ball while not making it look terribly weird. All right, we'll see you the next one.
66. Adjusting the shape and finishing : All right folks. All right, gang, let's go ahead and get this thing started here. Now. We're just going to go ahead and I'm just going to turn off everything that we don't use, okay? Now the question is, this thing is pretty cool, but it's so circular. Let's say even the mat ball example I got here is not quite circular, right? So what we need to do is we need to change this a little bit. What we're gonna do is we're going to make a clipping mask. Now in order to do this, I'm going to pull all my palettes over here, leaving only the layer, okay? Because anything else will just confuse us. I'm also going to turn off my art board, okay, so what I'm left with is a pure art board. Now you might have to watch this a couple times because this is some pro stuff here. Okay? So what I wanna do is I want to go to the base shape. And here's what I wanna do. I want to grab this and the horn. I'm going to duplicate them. And then I'm going to drag them all the way to the top above everything. Okay. Now to make sure that I don't mess up anything else that I'm doing. I'm going to grab these and I'm just going to group them, call them highlight, let's call them bright. Those are my bright spots. And again, I practice good layering habits there because I've done it the other way and it is painful. If you're going to be done, you'd better be tough. And I'm not interested in being tough when it comes to vector art. All right, same thing with the shapes. So literally we have these three shapes. So what we're gonna do now, he is, I'm gonna take these three shapes. I'm going to come down here and I'm going to create a clipping mask, a solid base curve. Okay, now symmetry in vector is one of those things that affinity designer does not do well. So once you have the curve, Here's what I want you to do. I want you to come over to the node tool. You're going to select this node, you see how it turned blue. Break the curve. You're going to come down to here and you see how this node turn blue, break the curve. Now. You now have two separate curves. Oops. Let's go ahead and just grab the right one. See what just happened. This is now gone. Okay, leaving only the left one. Now, here's what I'm gonna do. I'm going to turn down my opacity a little bit. Hope not in my outline, but all my base. Alright, see how I'm revealing a little bit below. Now what I wanna do, I wanna make this a little bit more bullish, let's say. So what I'm gonna do, I'm going to add some nodes. I'm going to look at where my design kind of begins to go inside of itself. And I'm just going to make it a little less round. That's all I'm going to do here. So I'm going to go ahead here and I'm going to push in just a little. Now notice I'm not messing with the teeth. I'm not messing with any of that. And what I'm doing, I'm just picking out some places where it looks like based on a normal skull that it might get a little less round. I'm not making it completely weird. Okay? I think that that's pretty good. And then up here where the eye is, I'm just going to put in my eye. All right. So overall, I'm quite happy with this. Let's go ahead and tilt this slightly that way. Alright, now what we have, Let's go ahead and bring my opacity backup. We now have a slightly off center image. So what I'm gonna do now, I'm were to come over and I'm going to duplicate this and we have not covered this before. And I'm going to flip it. And I'm going to hold shift. And we're gonna join the two just like this. Now it looks joined, but it's not. In order to make it a clipping mask. I have to join these two. So to do this, this is a very specific order of operations here. Grab your Shift tool. And I want you to hold shift and select both sides. So 1, 2. Now I want you to click and hold this lower portion. You see how it turns blue. And I want you to come up to action and join curve. Now it looks like it's joined again and it actually is cool. So now I should be able, if I move this thing, it moves as one solid unit. Affinity sees it as a curve. Now what I'm going to do is I'm going to take the outline, the bright layer, the highlight, the shading, and the base shape. All can put the image in there, that's fine. And we're going to move it inside. Boom. Just like that. That thing is pretty awesome. You can put a nice background 2D. You can do whatever you want to do it. I think you've had enough of me. I know I've certainly had enough of the only mad ball for the last five hours. Thank you so much for taking this time with us here to learn how to do this effectively. And now you see some of the work that goes into those high octane vector designs that you see on T-shirts. All right, folks, let's go ahead and get into the next section.
67. Setting variable coloring schemes using artboards : All right, folks, let's go ahead and take a look at how we can do some work with this. Now, once you've got in your downloads is the only bone that we did in the last lesson. So I'm going to go ahead and I'm gonna grab my Layers panel, and I'm going to go to our trusty artboard. And the first thing that I'm gonna do is I'm going to insert four art boards. Now I'm gonna go ahead and move out. We want to get to a total of four. And what I'm gonna do is I'm going to bring them down right about here. Now. I'm going to go ahead and I'm going to change the background on them. So I'm just going to grab some rectangles and the goal is to get a couple different backgrounds, okay? And the reason why we're going to do this, this is a great way to check how stuff is going to look on different colors of shirts. So if you're going to create different color schemes, I now have a white shirt. I have a black shirt, will do kind of an off gray shirt. And then I think it might kind of be cool to do a complimentary color, but we'll find out. All right, let's go to this one here and bring this down just like this. And this is a really cool way to validate all the hard work that you put in to your vector sketches if you did the only with us, I guarantee you that you realize how much work it really truly is. Now if I'm going to go to Color Fill and I know that only ball is kinda read. I might then go ahead and do something in like a teal. I think that the teal is kinda cool And I'm gonna do a little bit off till there. All right, That's a good one. All right. So once we have that, now I'm just going to go to my work layer, and this is where the magic happens. I'm going to copy this and I'm going to paste it. And I'm going to paste it. And I'm going to paste it. And once I've pasted it, I'm going to go ahead and move it into position on all these different backgrounds so I get an idea of how it looks. Now. Bottom line is I now have four art boards with different styles. Now if I want to try some different things, one of my favorite types of adjustment, and I'm going to go ahead, I'm going to grab this one and the gray. I'm gonna come down here to my Adjustment tab and I'm going to grab the H s L adjustment. Now you can wholesale do this, check this out. I can swap the HSL adjustment and come up with completely different and unique color combinations for this thing. So there's a whole lot of really cool stuff that can go on here. Like I really dig that. So that's one approach. Now the other approach, Let's do this on the black one. I come down here, I'm going to use this same HSL adjustment. And now I'm going to intentionally target only some colors. So as an example, the red inside of the mask. So now with the red selected, I'm going to begin adjusting and I'm going to be shifting only those red colors. You see how the yellows don't shift. So if you really found one in yellow, you like, keep it. You'll see how any of the yellow or any of the blue didn't change. So now down here in the teal, we're gonna do the same thing. Only I'm going to show you a different way to do it. You can come down to here, and I'm going to do a selective color. Now, hear me very clearly. Selective color and looks at the colors that you have. So intentionally I'm going to target the yellows, okay? And then you can reduce the cyan, the magentas. You see how it's only affecting the yellows here. So which one's right? Well, it depends on what you're really trying to do. And increase the blacks. We can decrease the blacks. And then if you wanted to, you could even come over to the neutral tones. And you can make the entire thing a different shade. So this is a nice way to add some saturation to change the colors up to experienced with different color palettes. And the reason why this is so neat is because if you don't like it, Let's turn it off. Or if you want to come back to it, Just bring it back and change the sliders back to the, back to the middle. Very, very simple. So a lot of times when I am doing different t-shirts, especially if I'm going to be doing different base colors. I will run multiple artboards to see what works for me, and then I'll work with different colors. Now, there is one more. So let me go ahead. I'm just going to go create a new art board here real quick. And we're gonna do the same sort of thing here. Let's go ahead and just bring this up and we're just gonna do a Carbon Black. Alright, perfect. And I'm shamelessly going to steal her as my first art board with the work layer right there. Copy, paste over a goes perfect. Now, one more type of adjustment here. You can come over to the half circle and we can re-color. I wanted to cover this one because this one is kind of cool. This one kinda takes it and just brings it all into one solid color. And then we can drop it down. This thing changes substantially. So sometimes I like playing with this one. I wanted to kinda show it to you. It really makes it monochromatic. So if you're into the monochromatic color, That's a great way to go monochromatic on your image without making the commitment early on. And if you really wanted to, you could up the contrast. Let me show you a trick. Go to Levels and now watch our blacks and some of the grays and such. See I'm able now to pop those levels a little bit to make certain things pop a little more. Just the gamma over. So there is a ton of stuff we can do. So that's a good way to kinda do a monochromatic on that. Hope you'll learn a little something about it, and hope you learn how you can make some modifications once you do the work the first time. All right, folks, let's go ahead and continue on this finishing section on our T-shirt.
68. Wrap up and parting words : Alright folks, that was a lot when you think about it, you've got four or five different designs that you've created over the course of this class. End. Every tool that is downward along the left-hand side and every studio tab that is on the right-hand side. You understand how it's used now? Did we hit every tap? Absolutely not. Did we hit every tool? Absolutely not. What I have found after doing this for many, many years, I go back to the same tools that match my workflow every single time. So my goal here was to teach you how to use the bare minimum of tools in order to achieve the maximum amount of designs. We also walk you step-by-step. You remember the plastic bag vibe that you did all the way to this high octane only ball. So you've come a long way. All right. And I'd like to thank you on behalf of Skillshare for allowing me to share what lights me up there. I really like Skillshare as a platform. I think it's very important that these things are project focused. And I look forward to seeing you in our next class here on Skillshare. Don't forget to look up other classes that I have right here on the platform, especially relating to affinity. But this year we are branching out into some other software platforms. So hit me up in the Q and a. If you got questions. Other than that, let's go ahead and wrap this up. Run far, run fast, go do something else.
 Jeremy Hazel, Education Through Creation