Transcripts
1. Intro: [MUSIC] Hi, I'm Anna. I'm a clothing designer and a surface pattern designer
based in Transylvania. Do you love prints and
patterns and are you a fan of the Procreate app
in your iPad? Me too. In this class I
would love to show you how I create all my patterns entirely in the Procreate app in a way that they are clean, professional, and client ready. The best part is that I'm going to teach you how to
create templates that you can use over and over again to create your
seamless patterns. This way, you can minimize your layers number and
maximize your art-board size. It will make your
process easier, quicker, and more precise. You can forget those dreaded white
lines in your patterns. I also provide you with four templates that
you can download from the class resources and start to use
them straight away. You will also have the
knowledge to create your own templates for
any canvas size you want. This can be either a square
or rectangle format. This class is suitable for students with
all skill levels. However, I assume you have
basic Procreate knowledge. I will show you how the
tools work in Procreate I frequently use to
create my patterns. I do recommend you to take a Procreate class for
beginners if you haven't already to have a
basic understanding how the Procreate app works. I also show you how I use the workbook for surface
pattern designers to help me create pattern
collections to build a well balanced and
professional portfolio. By the end of this class, you will have the knowledge to create seamless, recolorable, repeating patterns
ready to send to your clients or to upload on
print-on-demand platforms. I'm really excited to share
all this knowledge with you, and I can't wait to see
what you will create.
2. Class Project: As your class project, create a template file
in Procreate with your own preferred canvas size. Create a seamless recolorable
repeating pattern. It can be a block repeat
or a half drop repeat. Make it as simple or as
complex as you want. If you feel ambitious, you can create a
whole collection. I can't wait to see how your
pattern comes together. Make sure to upload your design in the student
project gallery down below so we can see and
support each other's journey. You can find the gallery under the Project
and Resources tab. On the right you'll see a green button that
says Create Project. Click it and once you're there, you will have the option
to upload a cover photo, add a title, and write
a little description. You can upload a
low-resolution image or a screenshot of your pattern.
3. Materials and Equipment: [MUSIC]. To take this class, you will need to have an iPad, Apple pencil, and
the Procreate app. Optionally, if you are
like me and prefer to create rough sketch of
your design idea first, then you will need
paper and pencil or the surface pattern
designers workbook and pencil.
4. Basics of Seamless Repeating Patterns: [MUSIC] I want to show you the basics of the seamless
repeating patterns on paper, so you have a better
understanding of the templates we create
in the Procreate app. The box repeat. We cut our paper in
four equal pieces. If we have a box repeat, then what flows of the top, it continues on the bottom. What flows of the right side, will continue at the left side. We do the same in
Procreate as well. We cut off our board
in four equal pieces. As we flip them, we build a seamless pattern. The half drop repeat. We cut our paper in
four equal pieces. If you have a half drop repeat. Then what flows off the top? It has to continue
at the bottom, same as the books repeat. The difference is with the half-drop that was
flows off the left side, it continues from the half
point of the right side. To keep the same rules
in Procreate too, we rotate the two right
side pieces as a whole, and we rotate the two left
side pieces individually. Save for the other side, if we rotate the right
side pieces individually, we rotate the left side
pieces as a whole. This way we can achieve the
half drop in Procreate. Now let me show you how to create your templates
in Procreate.
5. Creating The Templates: I recommend that
you check that you have the latest
Procreate version. To do that, go to
your app store, type in Procreate, if you have an option to update, then tap on that,
if it says open, then you are up to date. Now let's create our
template in Procreate. You can choose any
canvas size you want. It doesn't have to be a square, but it can be if that
is what we want. I'm going to create a 12
inches by 17 inches art board. To create a new canvas, tap on the plus icon in
the top right corner. Then tap a new canvas to set
up your canvas measurements. I'm changing the
measurements to inches. For the width, I want my art
board to have 12 inches, for the height, I want my
art board to be 17 inches. For my Canvas resolution, I want to have 300 DPI. Here you can see the layers available for you with
this canvas size. You can also choose the color profile you want
your art work to have. I keep it in RGB. Then tap on Create. If you tap on Gallery
at the top left corner, you can see and rename
your art board. I keep all my templates
in a folder together. I always duplicate the one
I want to use and drag it out from the template
folder and start my design. Now let's create our template. An extra tape, turn off
your background layer. I find that the snapping is
more precise if I do that. Now fill the whole
layer with color. Tap on the arrow select tool. Make sure that magnetics
and snapping are both turned on under
the snapping option. Also, slide the distance and the velocity to the maximum. You also need to have the
uniform option selected. Now, if you select your layer, push the right bottom corner
towards the left top corner, until it perfectly snaps to the half of the length and
width of your art board. It's a perfect snap
if you can see those orange guidelines
horizontally and vertically. Now really carefully
tap again on the arrow tool or
on the layers icon, making sure not to tap anywhere else because
it will nudge your layer and you will end up with the dreaded hairline
in your pattern. We don't want that. We want to make sure now that
our template is perfect. We can reuse it
endlessly and we'll have the perfect pattern
every single time. Now tap on your layers menu on the Layer and tap on Select. Now our rectangle is selected. Now tap on Save and Load, then tap on the plus icon to get our selection once saved. Now I do the same step for
each of my art board quarters. To have my art board divided in four equal rectangles and saved. [MUSIC] I can only use this to
create box repeats. But I'm going to save the half-drop repeat
selections in these two. You can make your templates
specifically to box repeat and half
-drop separately. Filter layer again with color. Now I push my rectangle
to the left until it snaps perfectly to the
middle of my art board. You have to see those
orange guidelines. Tap on your layer
and choose "Select", tap on Save and Load then on the plus icon to save
it as Selection 5. After that, tap on the Invert. It selects the other
half of our art board. Then Save and Load and tap on the plus icon to save
it as Selection 6. Now feel your layer
one more time. Push your rectangle
from the bottom to the top until it perfectly snaps to the
half of your canvas. Select the layer, tap
on Save and Load. Tap on the plus icon to
save the Selection 7. Now invert it and
save the Selection 8. Now you have your
reusable template to create blocks repeat
and half-drop repeats. You might find it
that as you draw, you are constantly
turning your canvas. I do that all the time. You just have to remember
that Selection 1 should always be the top left
quarter of your canvas. You can also download
four templates to create a repeat pattern from
the class resources. I made a 12 by 17 inch, a 21 by 18 inch, a 12 by 12 inch, and the 24 by 24, make sure you are on desktop
to be able to download it. You can't access it from
your phone or iPad. I created guides for block
repeat, and half-drop repeat. You can refer back
to at the beginning, which you can also download
from the class resources. At it as a top layer, you turn it on when
you need to flip your canvas and need a reminder. But you see that after
creating a few patterns, you'll know it by heart and
you can delete those guides.
6. How the Template Work with Half Drop-Repeat: [MUSIC] Now let me show you
how the templates work. I gathered a few motifs of mine so I can quickly demonstrate
how to use the templates. Normally, I start to
draw in the middle of my canvas without
touching the edges, but it is the same process
with arranging motifs. Now I want you to focus on the technical side to understand how to
use the templates. I don't want to distract
you with my drawing, why I'm gathering my motifs. Let me show you how to copy multiple layers from one
document to another. Select the layers you want
to copy by swiping right, now you'll see them highlighted. Now hold your finger
down until you see them gathering together
and don't let them go, with your other hand,
tap on Gallery. Now tap on the document where you want to
copy the layers. When it opens, drag it in top of your artboard and
let them go now. Fill the middle of your
artboard with drawing. Make sure that you don't go over the edges because
it will be cut off. The key for the templates
to work is that you need one layer that is
field, and that's it. I usually keep this as my
bottom layer under my drawing. Select your drawing or
layers you want to flip by swiping right and don't forget
to select the field layer. For half drop, you can choose to flip
Selection 5, Selection 2, and Selection 4 or
to flip Selection 1, Selection 3 and Selection 6 as shown on your
helping guide. Tap on Select on the
icon that looks like an S. Then tap on Save & Load
and choose Selection 5, then flip horizontally
and flip vertically. Now tap on the S Select
icon so you can choose the Selection 2 to flip it
horizontally and vertically. Then do the same for
the Selection 4. [MUSIC] Now fill the empty spaces in the middle again. With half drop repeat, what flows over the top, it continues on the bottom. We can flip Selection
7 and Selection 8 too when we want to work on
the top and the bottom side. If you are making a
directional pattern, you want to flip
your whole canvas so it's not upside down. While you have
everything selected, tap on the arrow icon, it will select
your whole canvas. Now you can flip it vertically and
horizontally if needed. If you're making a toast
non-directional pattern, you don't really need
to do this step. Now flip your canvas to
fill the corners if needed. I love to check down to time how my pattern is
coming together. How the repeat looks, and just the general
flow of my pattern. To see how my repeat
is coming together, I duplicate my file. I usually flatten the
layers so it's quicker. If your design doesn't
touch the top, bottom, right and left edges, make sure that your flatten a field background layer
with your layers too. Now tap on the arrow
selection tool, make sure that Snapping
and Magnetics are on and Uniform is selected. Now push the right top corner to the left bottom corner until it snaps perfectly to halfway. Duplicate your layer. Select the layer you duplicate it and push it up
until it snaps. Duplicate your
first layer again. Now, drag it to the
right until it snaps. Then drag it down again, halfway until it snaps. Duplicate your
first layer again, and drag it to the
right until it snaps then up again until it
snaps to the middle. Duplicate your
first layer again, and drag it to the right
until it snaps, to the top, until it snaps then push it up until it snaps
halfway again. I find it easier
and more precise if I do the snapping
in multiple steps, if it's more further away rather than trying to
do it in one step. If you are working
with a larger canvas, you can merge the duplicate
layers after each step. You only need to keep
the first layer, you need to duplicate. You can merge the layers
by pinching them together.
7. How the Templates Work with Block Repeat: [MUSIC] With block repeat, it's even easier than that. Fit the middle of your art
board with your drawing. Make sure that none
of them goes over the edges because
it will be cutoff. Make sure you have
a filled layer under your drawing layer. Select your drawing
and your field layer. Now flip Selection 1
horizontally and vertically. Flip Selection 2
horizontally and vertically. Flip Selection 3
horizontally and vertically, and flip Selection 4
horizontally and vertically. Now fill the empty spaces
in the middle, again. If you have a blocks repeat, then what flows off the top
continues on the bottom. What flows off the right side will continue at the left side. We can flip Selection 5 and
Selection 6 for a shortcut. [MUSIC] We can also flip Selection
7 and Selection 8 too, depending on which area
we want to work on. [MUSIC] To see how your repeat
this coming together, duplicate your file and
flatten your design. If your design doesn't touches
the top, bottom, right, and left edges,
make sure that you flatten a filled
background layer we did. Make sure that
snapping and magnetics are on and uniform is selected. Now push the right top corner to the left bottom corner until
it snaps perfectly halfway. Duplicate your layer,
select the layer you duplicated and push
it up until it snaps. You can merge them and
duplicate the layer again. Drag it to the right
until it snaps. Merge them together. Now you can see what
your repeat looks like. You can go back to
the original file and make adjustments to
your pattern if needed. I always double-check
my process, especially in my sketching phase so I can see the
flow of my pattern.
8. Tools I Frequently Use: Part 1: [MUSIC] I want to show you how I create my patterns so they
are recolorable. I had a lot of requests
to show my process. You can still follow this class if you have a different style and you are not looking for creating
recolorable patterns. I'll assume you have
a basic understanding how to use the procreate app. I'm going to show
you the tools I frequently use to
create my patterns. [MUSIC] If you have a bigger closed shape and you want to fill it
with solid color, you can grab the
color swatch from the top right corner and slide it into your
shape you want to fill. Make sure your shape is closed, otherwise, it will
flood your whole layer. If you have multiple shapes
you want to fill in, you can fill your
first shape as before, and you can see that
it appears under your menu bar an option for continue filling
with recolor. Try to cite the flood
toggle as high as it lets you without
flooding your whole layer. You can manually reposition
the little plus icon. It drops it in a
random place at first, if it lands outside one of your closed shape,
don't freak out. Just move the plus icon inside
one of your closed shape, then tap on each shape
you want to fill. To exit, you can tap on the
one tool or your brush tool. Make sure to double-check
that it didn't leave any pixels uncolored if
you have sharp corners. If needed, fill in those
gaps with your brush. [MUSIC] The app recognize
shapes you want to draw. If you draw a
circle, for example, and hold down your pen, it will become an
adjustable, perfect oval. I'm still holding my
pen to the screen. If I tap on the screen
with two fingers, with my other hand, it will become a perfect circle. After I lift the pen
from the screen, the Edit Shape
option will appear where I can customize
it further. You can do this if you want
the straight line too. Draw a line with your pencil
and don't lift your pen. It straightens your line and you can move the endpoint
of your line. If you tap on the screen
with two fingers, with your other hand, you can snap your
line to horizontal, vertical, and different
angles, like 25 degrees. [MUSIC] If you want to duplicate just part of your drawing or place
it to a new layer, tap on the s like Select Tool, make sure you have the free hand selected and draw around
the area you need. Close the selection by
tapping on the gray dot, swipe down with three fingers. You can choose to duplicate
it or cut and paste it. Either way, it will be added to a new layer automatically. [MUSIC] To undo, tap with two fingers
on your screen or on the backwards
arrow at the left side. If you want to copy
the whole layer, tap on the layer
then select Copy, swipe down with three
fingers, and choose Paste. You can go to another
document too and swipe down with your
three fingers and paste. To recolor, swipe right with two fingers on the layer or tap on the layer and
choose Alpha Lock, it will appear as a checkerboard background
to your layer, then select the color
you want and tap on the layer and select Fill Layer. [MUSIC] I want to show you how you can add a
recolorable watercolor layer. Select the layer you want to redraw with the
watercolor texture brush, lower the opacity of your layer, or turn it off,
create a new layer. Select a watercolor brush. I chose the old
beach from artistic. Adjust your plain brush to
your preferred size and paint. I prefer to paint
the whole shape with one layer that has shadows, or details by painting
a second layer on it. Turn on Alpha lock, pick your color and fill layer. You can duplicate your layer to see how the texture looks and even add different
shades of color to your layer for more interest. Keep in mind that when
alpha lock is on, you can draw on the layer
but it lets you erase. If you want to continue
drawing on the layer, makes sure to turn
off the alpha lock. For watercolor textures I
love to keep the solid layer underneath so I can change the background color
with no problem, but make sure you don't
merge them together. You won't be able to
recolor with alpha lock anymore without
losing the texture. [MUSIC] You can import
a picture to procreate. Tap on the action tool and tap insert photo,
and that is it. Then choose the
picture you want. You can rotate it, make it bigger or smaller
while it is selected. I turn off magnetics and snapping so I can
move it freely. I pushed a part I don't
need out of the frame and I deselect so it
cuts that part of, then tap on the Select icon
and adjust it further. [MUSIC] I always merge it with the field
layer underneath. This way, I can flip my repeat pattern drawings and I don't need an
additional field layer.
9. Tools I Frequently Use: Part 2: [MUSIC] If you want your
pattern to have symmetry in it, you can use the
built-in tool for that. Tap on the "Action" tool, select "Canvas", and turn
on the drawing guide. Then under that, tap under "Edit Drawing Guide". Tap on "Symmetry" then
tap on "Options". There you can choose
between vertical, horizontal, quadrant
or radial symmetry. I kept the vertical
option for this pattern. You can change the color, thickness, and opacity
of your symmetric guide. After you finish your
setup, tap on "Done". I had the sketch underneath, so I made sure that magnetics
and snapping buzz off. I selected my sketch
layer and moved it to the middle of my
vertical drawing guide. Because I moved my
sketch layer to match it up with the
symmetric guideline, I filled a new layer with color. I placed it underneath my
sketch layer and merged them. This way, I have a filled
layer again underneath. It's really important to have
a fill layer if you don't want an additional layer to
flip your Canvas later on. Make sure you don't draw
in your sketch layer, open a new empty
layer to draw on. You have to turn on the
drawing assist for your layer. To undo what you are drawing, tap on your Canvas
with two fingers, to redo, tap on your
Canvas with three fingers. When I'm drawing and I forget to turn on the symmetry tool, I select my drawing, swipe down with three fingers
and tap on "Duplicate". I select the duplicated
layer and the filled layer. Tap on the arrow, select tool, and flip my Canvas horizontally. Now I select only
my duplicated layer and merge down with
my drawing layer. When I'm creating a
pattern with the help of the symmetry tool and I want the middle of it to
be more organic, I turn off the symmetry tool
and draw the part I want. Just make sure you turn your symmetric tool back
on when you finish. When I want to add
details to my drawing, I select the layer which has the shape I want
to add details to. Tap on the layer and
choose, "Select". Then I create a new layer
where I draw the details. This way, I can recall all the layer which has my
drawings with the details. You can quickly switch between the two colors you last
drew with just by holding your pencil down on your
current color swatch at the top-right corner until it swaps it with your
previously used color. [MUSIC] I keep double-checking
my process, especially if it's a
symmetric pattern. I want to make sure
that my drawings won't overlap with each other and
to fill in the gaps I missed. [MUSIC] I duplicate my layer and quickly flip it
with the help of the select tool and
my saved selection. Make sure to select one
filled layer underneath. [MUSIC] After I flipped my drawing, I flattened a part I
needed as a guide, lowered opacity and merged
it to my sketch layer. With this step, I
can see my progress better and I can remove or
add to my drawing. [MUSIC] I will show you how I add
textures to my drawing. [MUSIC] I select the layer I want to add texture to or replace it with a
textured layer, lower the opacity of the layer. Create a new layer, and make sure you draw on it
with your textured brush. Select your textured brush. I really love the dry ink
procreate brush, for example. You will find it under the
inking at your brush library. But you can use any
textured brush you want. Adjust the size of your brush. As you see, I have a
really big Canvas here. I'm designing a wallpaper, so you can see much
texture of the brush. I will show you how
to adjust that. Swipe left on your brush
and tap on "Duplicate". Always keep the original in case you make changes
you regret later. Tap on your duplicated brush, it will bring up
your brush studio. Tap on the "Grain" and
adjust the scale slider. You can see how your
brush texture is changing and getting
bigger on the right side. When you are happy with
it, tap on "Done". I can't guarantee that this will work with all of your
purchased brushes. Now tap on the layer where you have your drawing,
choose "Select". Now tap on your new empty layer, choose your textured
brush and draw. This way, you can
quickly fill the shapes. [MUSIC] If you have your drawing nicely organized
in separate layers, you can easily recolor them. Make sure to turn on Alpha lock by tapping
on the layer and selecting it or swipe right on the layer
with two fingers. You'll see the
checkerboard background if Alpha lock is on. I have my textured layer and the layer with
additional details. This is how it
looks in this way. [MUSIC] If you want a more
colorful pattern, it is better if you draw in a different layer each time when you want to use
a different color. When I'm drawing with a
gap between my elements, as you see, the flower stem don't touch the
leaves or the plums. I can select the parts I want in a different color
and cut them out. First, I selected the
layers with my details, then I selected the layer with my main drawings
and tap on "Clear". This way, my details were
cut into the main drawing. Now I can delete the
layer with the details. I want my flowers, for example, to be in
a different layer, so I tap on the S like select tool and draw
around the shape. Join the selection by
tapping on the gray dot. Swipe down with three fingers
and choose "Cut and Paste". Turn on Alpha lock and fill
it with another color. Select more of your drawings. You can do it by
drawing around or tapping in a different
points in your Canvas, and it will join it with
a straight select line. [MUSIC] If your
selection is joined, you can add more to it
by simply continuing to draw around the shape you
missed or adding new shapes. But you can also remove from your selection if you
accidentally select it too much by tapping
on "Remove" and drawing around the part you want to remove from
your selection. [MUSIC] Make sure to match
the layers with the same color so you keep your file organized
and save layers. [MUSIC]
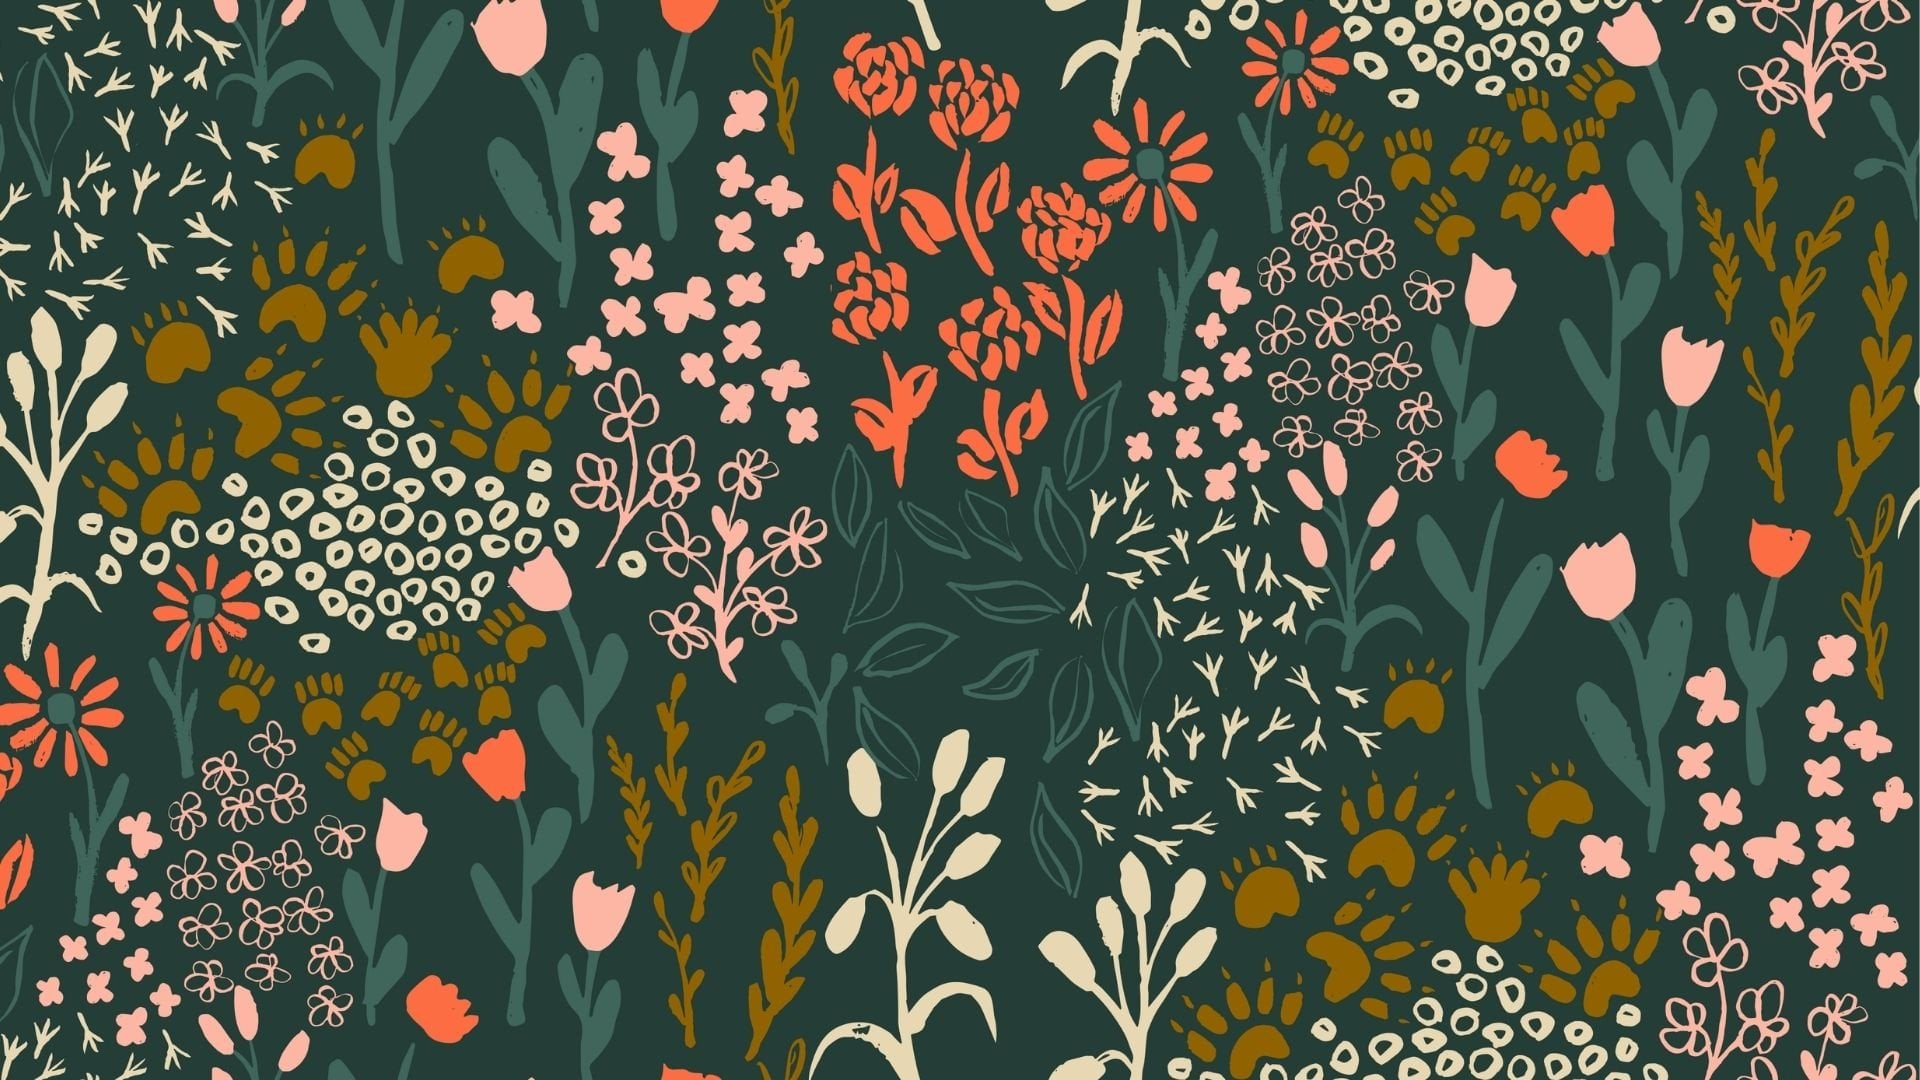
10. Quick Step By Step Process For Creating A Complex Pattern: [MUSIC] The process of creating my white flower
Botanical Damask Pattern. I will show you the speed it up version because it took
me more than 17 hours. I'm sure you don't want
to sit and watch that. First I create a rough sketch of the idea I have in my
mind in my workbook. I take a picture
of my sketch idea, insert it on Procreate. Then I start to build a rough
sketch in Procreate again. When I have my rough sketch I always test how
the repeat looks, I prefer to make changes at
this stage if necessary. If I'm happy with it I
lower the opacity of my sketch and start to draw
my pattern in a new layer. I flip my Canvas as I progress using the saved selections. Always make sure you have one field layer among the
layers you want to flip. If I'm working with
a large file and my layer number is
limited I always merge my sketch with a field
layer so I don't need an extra field
layer to flip my Canvas. This is how my file looks
like after I cut up my design so I have each
color in a different layer. With Alpha Lock on I can
recolor them easily, Here are a few options I did. I will show you two more of my recolorable design
where I plan ahead and I used a different layer for each color and how
they look recolored. [MUSIC]
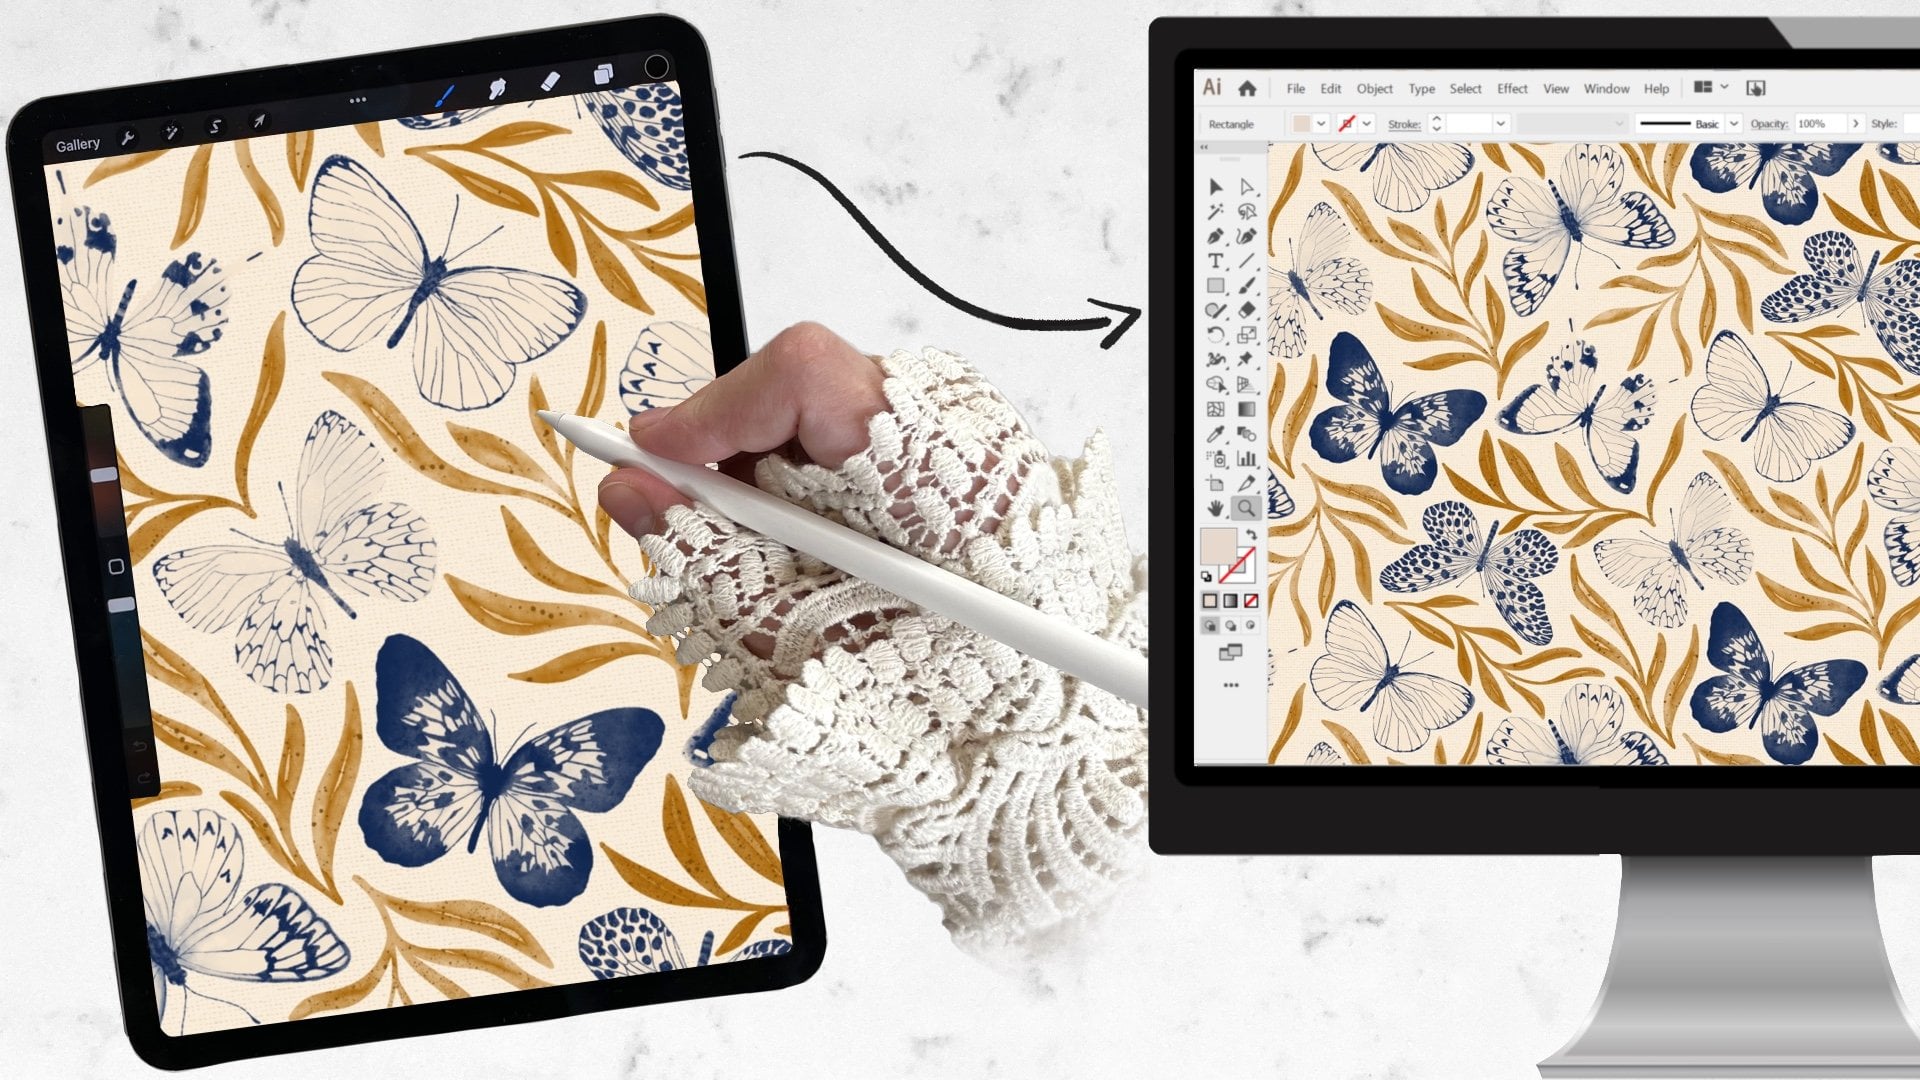
11. Survey for My Next Class: [MUSIC] You can import patterns into
Illustrator if they were build as I showed
you in the class. With each color in
a separate layer, there is a way to convert them without losing any details. You can keep the
hand-drawn quality and the watercolor effect. But make it recolorable in Illustrator tool using the
Recolor tool or manually. If your clients ask for
an Illustrator format, you can deliver that too. Let me know if you
are interested in a class where I share
this knowledge with you and I will make sure it's going to be at the
top of my list. In this class, I focus more
on the technical side, so I could show you
how to easily create precise patterns on Procreate with the help of the
saved selections. If you would love me
to go more in-depth of my actual drawing process, let me know and I put it on my list for another class topic.
12. Final Thoughts: [MUSIC] Thank you so much
for taking my class. I hope you enjoyed it and
it was valuable for you. Now you are able to
create templates in Procreate for your
preferred cover size. You know a few handy
Procreate tools for creating repeat patterns. You also have the knowledge to recolor your patterns easily. Let me tell you what my
pattern creation workflow is. I always start with
pencil and paper. I have to create
a messy sketch to quickly get the idea
out of my head. Lately, I really wanted to
focus on creating collections, not just one pattern. I created this work for myself to be able
to stay organized to avoid doodling in five different notebooks
or flying papers. In the first pages, you can find a few really basic information I
gathered over the years, basic repeat types and names. I created a chart to guide me when I'm creating
a collection, and the list of a few
other aspects to keep in mind while I'm
creating a collection. I also made an idea
generator list, topics to explore, holidays
occasion to create for, a list of styles and
techniques to explore, and the list of
geometric patterns I often refer back to when I
want to create coordinates. Then you will find
two-page spreadsheets on the next pages where you can have your first sketch idea
for a collection. I created two kinds
of spreadsheets. The first kind of spreadsheet
is concentrating on a big collection made
up from 12 buttons. You have space for
your hero pattern, for two complex
secondary prints, five simple coordinates, and four blender prints. The second kind of
spreadsheet can accommodate a collection
made up of seven patterns, or two mini collections, one made up of three patterns and the other one made
up of four patterns. At the end of the workbook, you can find a few pages
where you can take notes. This is my fork-inspired
correction I created using the surface
pattern designers workbook. I wanted to make this workbook available for other
creatives too. If you are like me
and you think it would help you to stay
focused and organized, you can have it too. I published this
workbook on Amazon. It's available with
paperback and hardcover too. If you're interested,
make sure to find it at your nearest Amazon
channel so we can avoid excessive shipping costs
or possible import duties. I'll leave a link to it under
the Projects and Resources. Don't forget to follow me on Skillshare by clicking the
"Follow" button on the top so you'll be
notified if I launch my next class or have a
big announcement to share. Let's connect on Instagram
too at denesannadesign. Make sure to tag me and use the hashtag,
learnwithdenesannadesign. If you share your work
on Instagram this way, I can see what you created and share my students' work with others so we can all support each other's
creative journey. If you enjoyed my class today, please leave a review. It will mean a lot to me reading about what you
thought of my class. You can also pop in the discussion section and ask me any question if you have, or just say hi. [MUSIC]
 Dénes Anna Design, Surface Pattern & Clothing Designer