Transcripts
1. Introduction and Background: At dawn, whole
fields of sunflowers stand at attention
all facing East, and begin their omens
with the rising sun. As that special star appears
to move across the sky, young flowers follow its light, looking up then
over and Westward, catching one final glance as the sun disappear
over the horizon. At night, in its absence, the sunflowers face East again, anticipating the sun's return. But the mystery
doesn't stop there. Once sunflowers reach maturity, the number one question arise, why did they stop tracking the sun and only face the East? I don't know the answer, but I'd like to think that God placed this
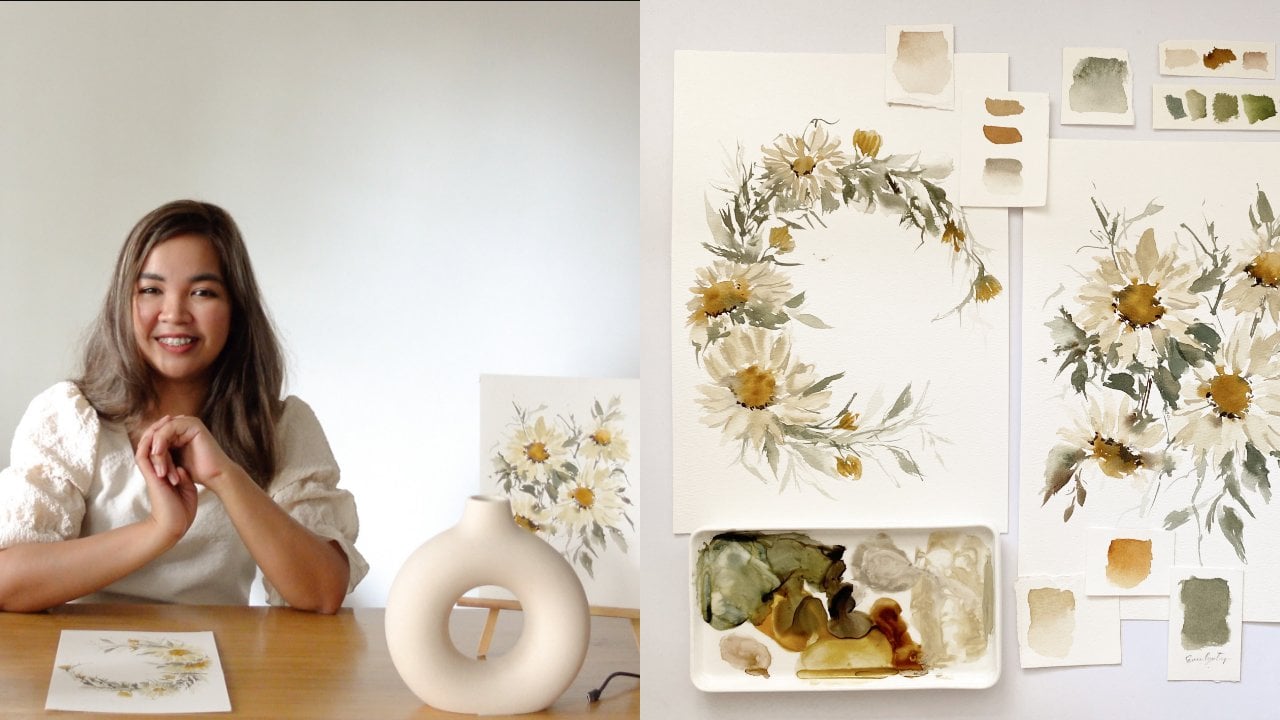
beautiful and one of a kind flower on earth to teach us life's beautiful lessons. Hello, my name is Ginny, a watercolor and calligraphy
artist from the Philippines. Welcome to my sunflower
watercolor painting class. On this class, we will
learn how to paint and capture the
beauty of sunflowers. Choosing the right
colors, studying strokes, and learning different
watercolor techniques are few of the most important lessons that you will learn
on this class. At the end of this workshop, we will paint a beautiful
sunflower floral arrangement that you can surely hang
on the walls of your home. I know you guys are excited, so let's get started.
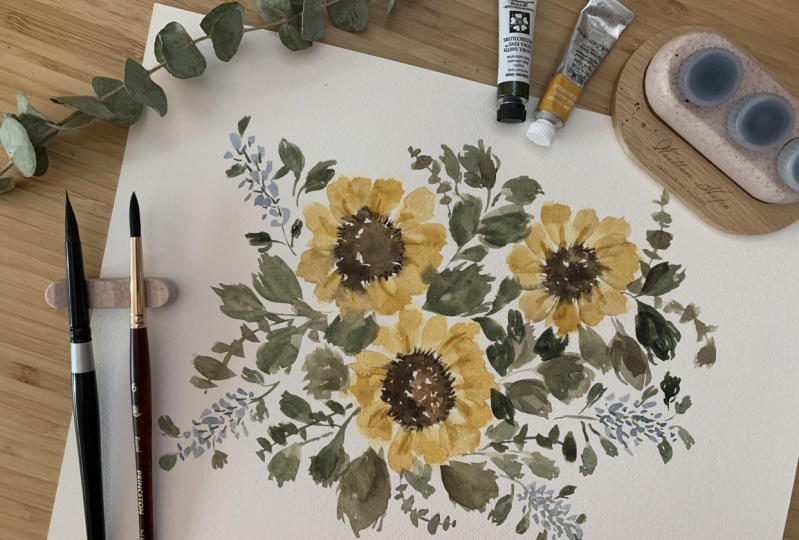
2. Materials: Hello. First, before we proceed with the painting and everything that we
have to learn today, I'm going to share with
you the materials that we have to use for this class. First is brushes. Today I'm going to use
these three brushes, the silver black velvet, Size 8, silver black velvet, Size 6, and the golden natural blend from Silver
Brush Limited as well. It is in Size 10 and
it's ultra-round silver. If you don't have these brushes, you can use any round
brush in Size 8, 6, or 4. It depends on how
big your artwork would be, but any round brush
from Size 4-10 is okay. Then you would need
a smaller brush that could be size 2, 1, 0, or double zero. Again, it's up to you and it depends on how big
your artwork would be. But if you're going to do
an art work in size A4, I would suggest that
you use these sizes. Now, for the paper, I'm going to use a
watercolor paper which is 100% cotton acid
free from Arto by Campap. You can use any watercolor paper as long as it's cold pressed. I would suggest that
for the final artwork you would use 100% cotton paper, but if you don't have one, you can use Canson Montval or Fabriano 25% cotton or anything that has similar
texture to those papers. Another thing that we
need for the class is a glass of water, and we also need some
tissue paper or rug, so whatever is
available with you. For the colors, these are
the colors that we need. First is yellow ocher, so any yellow ocher is okay, whether it's number
2 or number 1. So yellow ocher and then
we also need Vandyke brown and a shade of
sepia for our core. Then for the leaves, we got undersea green or
olive green that would be okay and rare green
Earth or any shade of green plus a shade of gray. This is a grayish
shade of green that's why I want you to have a shade of green if
you don't have this color. That's all the materials that we need and let's start painting.
3. Watercolor Techniques: For the watercolor techniques, we have two kinds of
techniques today. First is the
wet-on-wet technique. Wet-on-wet technique is
when you create a stroke, let's say this is
the first stroke and I'm going to create
another one here. Let's say this
stroke is still wet and then I added
another stroke on top. What happened? The
brown did not create a very visible stroke on top of the yellow because the
yellow is still wet, and that's what you call
wet-on-wet technique. For the wet-on-wet technique, we can use that on the
sunflowers score, so like this. There's a wet Van **** brown and then they
I added another wet, which is a sepia. here created a visible
wet-on-wet effect on my artwork. Another technique is the
wet-on-dry technique. For the wet-on-dry technique, let's say I created a stroke earlier and now
it's already dry, and I will be adding
another stroke on top. As you can see, the brown stroke
that they did is not mixing with
the yellow stroke. That is because the brown
stroke, which is wet, is placed on top
of a dry stroke, which is the yellow one. We can use the wet-on-dry
technique when creating details on our
sunflower like this. That's how you use the wet-on-wet and
wet-on-dry technique.
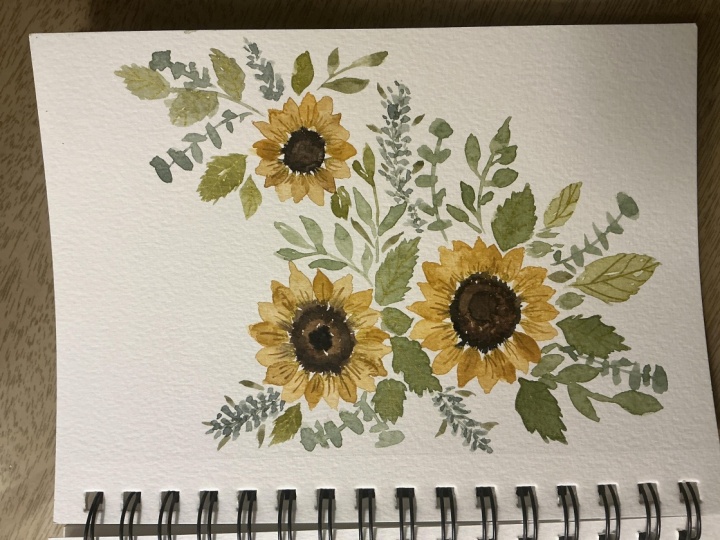
4. Painting Leaves: Let's now proceed
with the leaves. Leaves are very easy, yet they add a lot of
beauty on your editorial. The easiest way to do a
leaf is to do this slow. First is thick and then left. You can spread your color. Again. let's say you have a stem already thick and then left. That's it. That's your leaf. For sunflowers, it's a bit complicated but
not super hard. Let's say you created this leaf. You just need to add some extra strokes
around it just to add details and just to copy the illusion of
sunflower leaves. That's the first
option to do that. Another option is to do
the two-stroke leaf. First, you need to create thick and then thin and then create another
partner for that. Again, thick then left, thick and then close. When you're done with that, again, you're going to do this, add details,
imperfection and stuff. That's it. That's
your first leaf. The second leaf is somehow the same as this one, but smaller. You can use smaller brush or you can just control
the stress that you're giving to your brush so that
you can create smaller leaf. Here. What I want
you to do with this is first create a thin stroke that there if not straight and then create small
leaves around it. It is advisable to create smaller stems that they're
not beside each other. Don't make it look like
there's a pattern. Don't do this. It's not very
attractive to look at. As much as possible create imperfections in
variance between your leaves and your strokes. Let's say you're
already done with this. You can add darker shade
of green on one side just to add depth
on your leaves. But this one is optional. It's up to you if
you want to do that. Another leaf is eucalyptus leaf. Now for the eucalyptus leaf, it is nice if you will use
a gray shade of green. For me, I love using
rare green earth, but you can also use oxide chromium if you don't
have rare green earth. Oxide chromium is more common on watercolor palettes than the Daniel Smith
rare green earth. How do you do the
eucalyptus leaf? First, create a thin stroke
and then press your brush. It should be imperfect again. There should be small leaves like partners and sometimes
there could be flower. It's up to you, but this is the general idea of
the eucalyptus leaf. Again, Let's do it. Thin and then press your brush. Press. The shape of the leaf is oval. That's it. That's
your eucalyptus leaf and this is your leaves. Let's now proceed
with the filters.
5. Painting Fillers: Fillers are very easy
and they are not so important but they add a lot of glam to your arrangements. For now, we're going to
use a shade of blue. I'm going to use
Payne's blue-gray, but you can use
any shade of blue. Just add a bit of gray
if it's too bright. Payne's blue-gray,
it's a bit dark and a good shade of blue
that's why I love using it. For our fillers, we'll just use a thin brush and then create
random strokes like this. You can also use
different shades, different tones of your color
while doing the filler. Just like that, random thin
strokes using the mixture. You can also use butter
mixture, it's up to you. Then using a small brush. For now I'm going to use the number 2 brush of
silver-black velvet. I'm going to get a shade
of green and connect these strokes that
I did earlier. Just like that. You don't
have to connect everything. Just create a line, I mean, in the middle and then you
can add small leaves outside. You can also add extra strokes. That's it. That's our
fillers. So easy, right?
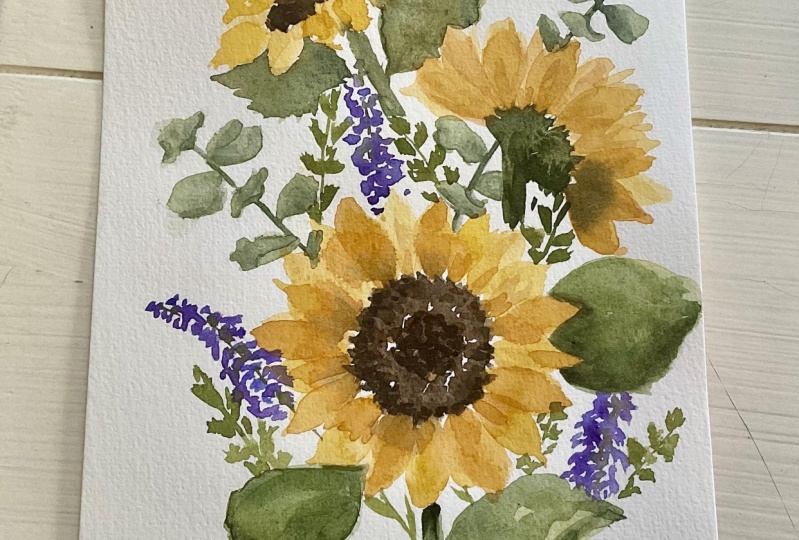
6. Painting Sunflowers: Now that we're done with
the leaves and the filler and other watercolor techniques
that you have to learn, we will now study how to
paint our main event, which is the sunflowers. For sunflowers, some of my students before
are telling me that sunflowers are hard because
no matter how hard they try, it doesn't look
like a sunflower. There are reasons why their sunflower doesn't
look like a sunflower. Sometimes their petal is too
long compared to their core. Example, this is their core
and this is their petal. At first glance,
you would think, oh, she's doing great. The strokes are nice. It's clean and perfect and all, but when you're done, you would notice that it
doesn't look like a sunflower. Why? Because the petals are too long compared to
the size of the core. Always remember
that sunflower has big cores and shorter petals compared to the seas
and cone flowers. Sunflowers have shorter petals. That is one thing that you
should always remember. Now, let's try
painting a sunflower. First thing that you
need to do is the core, of course, because this
will determine how long will be your petal. I'm using Van **** brown and this is a size 6,
black velvet brush. I'm just dabbing my brush
and trying to leave a bit of whitespace just to create
highlights on my core. Not so much whitespace,
just a bit. Always leave strokes like this. The imperfection will make
your art repeat here. When you're done with
your first wash, which is Van **** brown, you can now add a
bit of sepia on the outer part of
your sunflower, and not just on the outer part. This is a bit of sepia outside. You will also create a
small circle in the middle. There is another core
inside your core. I love using wet on
wet technique for the core but actually you
can also use wet on dry, but it is more complicated sometimes because every
stroke is already visible. Unlike with wet on wet, your colors will mix softly. We're okay with the core
and we'll just let it dry before we add the petals. While waiting for it to dry, I'm going to show you
how we do the petals. It's like doing a leaf. I'm using a size 8
black velvet here, thick, and then leaf, and then give it a part. This stroke is done if your brush is too small compared to the artwork
that you're doing,. But actually you can also do
petal using just one stroke. With this size of
core, my size 8, black velvet is enough to create a petal using one
stroke. Let's try it. Thick and then leaf. Now, another thing that you also have to remember
is that you should not put the next petal
beside the petal that you did because it's still wet and it might ruin its shape. Sometimes it's okay to have a ruined petal because it
adds art on your artwork, but try to avoid it
as much as you can. You can do this. A petal with a different shape. Let's say you're okay
with this batch. You can now clear your brush
and just use the mixture for the second batch
of your petals. You can also start with
the mixture and then add milk or water mixture on
the second or third batch. I'm going to go back
to milk mixture. Fill all the spaces. It's okay to overlap. Let's say I'm done already. Now, there are still
whitespaces on some parts. I'm just going to
cover this area. There are still
whitespaces here. You see my Van ****
brown and a small brush. I'm going to create
some small lines. Cover some of the white
area that's left. That's it. That's how
you do the sunflower. Let's wait for it to
dry and then later on, I'm going to share with you another detail that you
can add on your sunflower. For the next sunflower, I'm going to paint a
side view sunflower. We have the stem here. Just get some yellow ocher
and create upstrokes. Again, use variety of shades when doing the petals. For this one, you really have to cover all the whitespaces here. That's it. You can
now add a stem. I think our first
sunflower is already dry. A detail that you can
add is like this. You can add a thin, thick, thin stroke on some
of the petals. Sometimes it won't be very
visible because, again, we use different mixture and some of the mixture
are already dark. It's okay. That's it. You just have to
wait for it to dry. This one could be done on
wet on wet or wet on cold. Again, cold is not too wet
but not too dry like this. Sometimes it could
lead and it's okay. Because again, imperfection will make your artwork prettier, unless you're aiming for
the neat kind of artwork. That's it. Let's proceed
with our final project, which is painting a
sunflower arrangement.
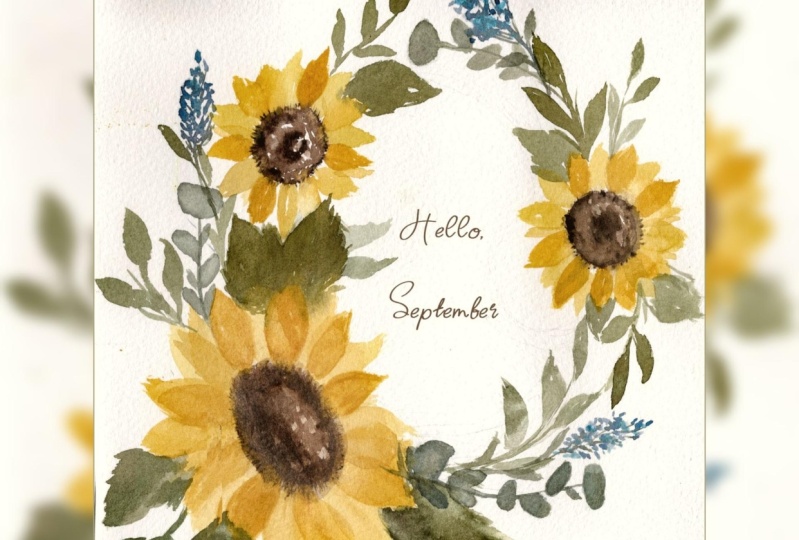
7. Sunflower Floral Arrangement Part 1: Now let's proceed with
painting our final output, which is a floral
arrangement of sunflowers. For the colors, I'm going
to use yellow ocher from a jello and Van **** brown
from a jello as well, and sepia brown from Schmincke, paints blue-gray
from Daniel Smith. For the greens, I am going to use undersea green
from Daniel Smith, rare green earth
from Daniel Smith, and shadow green from the jello. Now let us start painting. First I'm going to
paint the core, and for the core, I'm going to use
golden natural blend. Since I'm going to paint a little bit side
view sunflower, I'm not going to create
a perfect circle core, instead it's a bit oval. Then I'm going to
fill it with dots. But at the same time, I'm still leaving white spaces. Dot, dot, dot, leave a bit of white spaces. Now for the outer part, I'm going to use
sepia brown or sepia, whichever is available for you, and I'm going to fill some
of the parts with sepia, still using the same brush. We're done with the core and
we'll just going to let it dry before we move
on to the next part, which is the petals. Since our core is a bit
dry already, not too dry, but not too wet also, it's just cold, I can now put my petals. Remember for the petals, you don't have to
put the next petal beside the last petal
that you created because sometimes it's still wet and it might
damage your artwork. Also, another
reminder is the size of your petal should
not be too long. It could be big, but not too long
because it should balance the size of the core
and the size of your petals. I'm making my sunflower
to this direction. That's why my petal
is not too straight. Let's wait for it to dry. Then around the petal, I'm going to put Van ****
brown, just small lines. Let's wait for this one to dry. Then while we're waiting, we could add some of the leaves. I'm going to use the
black velvet again and add big leaves
around my sunflower. For difference leaf,
I am going to mix undersea green and
Van **** brown. Then I'm going to add some
depth using shadow green. You can also use Van
**** brown for this one. Then using a smaller brush, which is size 6 of
silver black velvet, I'm going to add smaller
kinds of leaves. I'm going to add a bit
of the eucalyptus here, and I'm using rear
green dirt for that. I'm going to mix a bit of
the undersea green just to add details on our
eucalyptus leave. We'll add one here also. I'm just going to wait for
this part to dry and then we'll proceed to the other side of our floral arrangement. Now that our first
part is already dry, I'm going to add another
sunflower on this side. Same process, I'm going
to start with the core. For this one, I'm going to
make it a full face sunflower. It's going to be a circle core. Then again on the side part and on the center. I'm going to let this dry and then I'm going to proceed
with the other details. Now let's add petals. Then I'm going to go back to the core and add some details just like
what we did earlier. Now I'm going to proceed
again to the leaves. Bigger leaves, again, of course. If you do not have undersea
green on your palette, you can use olive green. Don't feel pressure, if you have different
colors in mind, it's okay. Also you can mix colors to arrive on the palette
that you wanted.
8. Sunflower Floral Arrangement Part 2: So now we are done
with this part. I'm going to add
some more leaves around my second sunflower. So this is what it
looks like now. I'm going to add
small sunflower here before I add the filler. For this one, I'm going
to use a smaller brush, which is size 6. Same procedure. Then I'm going to go
back to the core. To add more details on our artwork, I'm going to add
a bit of fillers. So I'm going to use Payne's blue gray from Daniel
Smith for our fillers. So this is a muted
shade of blue. I'm going to connect that
using a shade of green, which is undersea green. So just create thin lines so you can add small leaves. I'm just going to add
some leaves here. So I'm just going to add some more
details here just to make this area full. That's it, that's our
sunflower arrangement.
9. BONUS: Sunflower Composition with Background: Hello everyone. Welcome to the bonus topic of our sunflower watercolor class and I'm so excited because for this part we're going to paint this beautiful sunflower with background composition that I
am sure you guys will love. Before we begin, here are the materials
that we're going to use for this bonus topic and later on I am going
to discuss with you how we're going to
use these materials. Let's begin. First we're going to use
the spray bottle to spray water all over our
paper and we are doing this so that the water will spread evenly and
it will be easier for us to distribute the color later on when we place some
color on our brush. Now, once done, you will spread the water
using your flat brush and for the flat brush I am using the silver black
velvet flat brush. Just keep on spreading until you think that the whole
area is covered. But I want you guys to leave
a little bit of margin on some sides because
we're not going to create a full background. Now using my shade of green, which is undersea green, I'm going to fill my brush
with the team mixture of my color and I will spread
it as my background. On this part I want you
guys to be carefree. It doesn't have to be
equally distributed. Actually, it is
better if some parts are a little bit darker
compared to the other. As long as it doesn't
look awkward, just read the color
as you want it. As you can see here, there are some areas
that are a little bit dark and I'm distributing it but still I'm leaving some
darker shade on some areas. While our background is
still wet we're going to add some leaves to create a wet on wet effect on our painting. This will give an
illusion that there are some leaves at the back
part of our painting. Once done, get your paints,
blue-gray or indigo, and we will add some blue
dots on our painting. This will give an
illusion that there are some fillers at the back
part of our composition. Make sure that your background is still wet while doing this. Now it's time to get your yellow ocher or
yellow ocher number 2, and this time we are
going to add sunflowers. This will give an
illusion, again, that there are some flowers
at the back part of our painting and because our
background is still wet, it will be dissolved and won't
be very visible later on. Of course, we need core for our sunflowers so I'm
using Van **** brown for the core but I'm not
going to make it detailed because it's
just for the background. We'll let for this layer
to dry first and then once it's dry we're going
to add the main layer. Since my background
layer is already dry, I got my Van **** brown
here and I'm now going to create the core
of my sunflower. Now I want you to
remember that for this bonus class I would like you guys to be carefree and not to make your
painting look clean, just make it raw and express
yourself through your art. This is my core and
I'm going to add a little bit of
sepia on some parts. This is the base layer of
my core and now I am adding some sepia on the center of my core to add a little
bit more of detail. Now it's time to add the petals. For the petals I will be mixing my raw umber and my
yellow ocher number 2 so you may mix raw amber and yellow ocher if you don't
have yellow ocher number 2. If you want your
petals to be bright, you can just use yellow ocher. I want mine to be a
little bit darker, that is why I'm mixing
it with raw amber. For the petals, I am using the
black velvet in size 4 and for the strokes it's the usual strokes for
sunflower petals. Again, as I have said earlier, I want you guys to be carefree. Don't overthink about the petals or the strokes that
you are creating. Just make it look like a petal and then
leave it that way. Later on, we're going to fix everything and make
it more detailed. For now, just
create petals and I want you guys to use different water and
color ratio for each of your petals to
create variation and also to give highlights and
depth to your painting. Now I am done with the base
layer of my sunflower. Now, as you can see, it's
very raw and that is okay. Let's move on to the next part. For this part, we
are going to add some details on the core, just a little bit dots
of Van **** brown. Then after that, I am now
going to add the leaves. For the leaves I switch to a bigger brush and this one
is called the golden natural ultra round in size 16 and for my leaves
I am using mainly the undersea green by
Daniel Smith and to make it a little bit darker I am
mixing it with my paints, blue-gray, which is
the same color that I used earlier for my fillers. Now for the leaves
itself I am just, again, being carefree and
making it look very raw. Just express your feelings
through your leaves and add it on the areas that you think needs a little bit more leaves. Don't feel like you have to copy everything that I am doing. I want you guys to
express your creativity, especially on this part, and feel free to apply
everything that you have learned on the past
lessons that we have studied. It is better if you will mix different water and color
ratio for your leaves and also mix different size oftenly used for
your composition. Add big leaves and add a little bit of small
leaves as well and also add those thin lines that I always create
on my composition. I want you guys to
apply that as well. I'm almost done
with my leaves and I hope you are done as well. Now I am switching my brush to my silver black velvet
liner brush and size 1, and I will use this
brush to create random thin and
thick lines using the same shade of green
that I used earlier. This is somehow a filler for my composition
and this gives an effect that there are some tiny branches
on my painting. Now, this is where I will
put our next subject, which is another sunflower. Now as usual, I'm using Van **** brown for the
core of the sunflower. Again, be carefree, you don't have to make
it 100% correct on your first try because
later on you can correct it once we add the details. Just create your sunflower
as you know how it is created and then later on we'll just add
some details around it. Now I am adding some dots on the border of my core for the first sunflower
that I have created. This is one of the
details that I would want to add
on my sunflower. Now, on the petals
of my sunflower, I am just using the same brush, which is the size number
4 silver black velvet. Again, I am doing it
in a carefree manner. As you can see, it's not perfect and it actually just
looks like a blob, but later on you will
see how I will give details and give life
to this sunflower. Now we'll add the leaves
for our second sunflower. You can follow what I'm doing, but you can also create your
own way of creating leaves. I want you guys again to express your creativity on this part. I am just adding random
leaves on the area. If you feel like your
composition is imbalanced, I want you guys to
step back or get your phone and take a
photo of your painting. You will notice where you should add the leaves to make your
composition more balanced. I always do that technique, especially if I am using the same color all
throughout the composition. That technique really help
me balance everything. I'm now adding a raw umber on
my second sunflower because this thing will help me
have depth to my petals, which is earlier a blob. As you can see, it
really improved. Now, I am going back to
my first sunflower and I'll add more details
on the edge of my core. I want you guys to do the same. To add more details
on my sunflower, I am using a detail brush
and a milk mixture of my yellow ocher and adding some random thin
lines on my petals. As you can see, it really gives a nice effect and separation
between my petals. Again, you don't have to add the tiny lines
on every petal. Using my filbert brush, I am adding my fillers. This is a concentrated
version of my paints, blue-gray or this is the
butter mixture of my paints, blue-gray and I'm just
pressing my brush creating a stamp
effect on my painting. As you can see, it's so
nice and the shape of my brush is really cute and adds a lot of details
on my painting. I am getting my undersea
green and I will connect these fillers using
my detail brush. I switch back to my
liner brush and loading it with Van **** brown mixed with undersea green and I am just creating this random
thin and thick lines, the same thing that
I used earlier, and I'm creating this
effect on my composition. Again, this is a filler, if you don't have a liner brush, you can use any detail
brush as substitute. Since the core of
my second sunflower was consumed by the petals, I am adding another layer
of my Van **** brown for the core and
re-establishing my core. Same procedure. Just add Van **** brown
and a little bit of sepia on the core
of your sunflower. Now I'm getting my raw umber and my detail brush and adding the tiny lines to separate some of my
petals from each other. This is a nice detail that I
also did earlier actually. For the final detail, I'm getting the bottom
mixture of sepia and adding dots on the edge of my
second sunflower core. We are done. Congratulations for
completing this project and thank you so much for watching the bonus
topic of this class. I am so excited to
see your project, so I hope you can upload it on the project section
of this class. Again, thank you
so much and I'll see you on our next class. Bye.
10. Final Thoughts: Thank you so much for
attending my class. I hope you enjoyed
as much as I did. I'm excited to see all the artworks that
you have created. Please do submit them on the class project
section of this class. If you have questions, you can send it on the discussion
section of this class. Lastly, I would
really appreciate if you guys would leave a
review for this class. You can do it by
typing your review on the review section
of this class. Thank you so much and see
you on my next classes.
 Jenny Flores Art, Top Teacher | Watercolor & Gouache