Transcripts
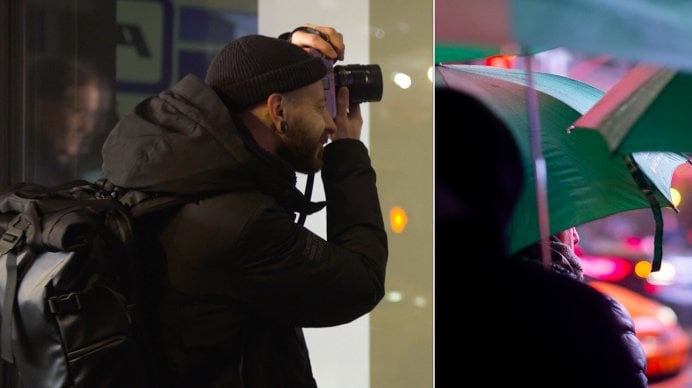
1. Introduction: Street photography for me is the obvious choice because it just encompasses everything. I get the comment all the time that people hoped they could take photos like me one day and I always respond with, "No, you take better ones." Hi, my name is Craig Whitehead, I'm a street photographer from Cambridge. Today's class, we'll dive deep into the concepts that make for great street photography. You may be surprised but we won't be going out on the street today. We'll be analyzing images across about six years works of my own photos. I'm really looking at why they're good examples of certain concepts and why those concepts are so important in the realm of street photography. We're going to be dialing down into the details. We're going to be talking about composition, really paying attention to lighting. We're going to be talking about juxtaposition, the niches within the strips of the genre. Taking these concepts away and practice them actively on the street will change the way that you see. You don't actually even need to go out and shoot new content, you can delve back into the archives and look through some of these concepts in your own work. The best-case scenario is you're in this class with an all-consuming obsession for one of these specific concepts. But at the very least, I hope next time you're out making images on the street, that you're just more aware of what you're doing. This class is geared towards someone who really wants to take their street photography further, but all of the concepts apply to pretty much every genre of photography. It's great that you're here with me, whether you've been a follower for years or you've just discovered my work. Let's get stuck in.
2. Training Your Eye: Most of the ideas in this class, the concepts that we're going to cover revolve around the idea of training your eye. We'll talk a little bit about how I trained my eye to begin with and where things also fell into place, where it clicked for me when I was shooting. Taking things further for me when I was shooting happened by accident. It wasn't that I came across things like this. I didn't have these resources or I didn't know at least where they were. I was just out shooting, capturing whatever I saw. I remember one shot of someone walking past the stripy wall wearing an exactly matching hoodie. I caught that and then realized, there's this other dimension to street photography, there's these other things that you can do with it. It's not just people on the street. There's all these different ways of approaching it. Then from that point on, I was going out looking for those elements as well as everything else. It would have been probably a good couple of years into going out and just practicing street photography that I started to discover what we would call the Old Masters of the genre. The people that really pioneered it, discovering Ted Forbes videos on YouTube and following his videos about composition and really taking a bit more care about everything. Looking back at what I had shot and analyzing those compositions and looking back at work done a 100 years ago and one they held up as examples of great compositions as well and trying to draw lines between that and my own work and integrating what they've done into what I'll be shooting in the future. In this class, we're going to dive deeper into why I think of the significant concepts in street photography. We're going to start with composition. My approach to that, what elements I've taken from work. I think it's insignificant how it's changed over the five or six years that I've been doing this now. We'll look at juxtaposition, we'll look at how playing with depth in your images can really throw people off and create an element of interest that a lot of people overlook. That applies really well to even landscape photography as well. One thing, if you're a follower of my work you'll be familiar with, will be some framing, how to go about it, different ways to practice that, and train your eye to see those things. But also why sub-framing for me? In many ways, it wasn't something I pursued because I liked it aesthetically. I started sub-framing out of necessity. I will show you some examples, and in the discussions on Skillshare's website, you'll be able to see a lot more links to people who practice these different techniques as well. But we'll be playing with perspective. I'll show you some different examples of how to create an extra element of intrigue in your images. Another concept we'll be exploring will be lighting and color. See everyone knows light is important to an image. But in street photography, if you have that kind of attention to detail, you can get some incredible results, especially if you're working in a smaller area. I'm talking about five-minute windows of light on specific corners. Finally, we'll be talking about shapes and abstraction. How to approach those, how to train your eye to see those different things. Within street photography, a lot of people fall into the trap of a wide-angle lens, which isn't always the best for this approach. Mixing things up in that sense can be really useful. For each of these lessons, I'll be pulling out examples within my own work that display the different concepts. I'll also be linking a lot of other photographers within the discussion. There will be people who worked primarily in these different styles. I cover quite a few in my own work, some things I do, as and when I see them, but there are people out there that work solely in one style. I'll be setting some tasks as well for you. If some of these are things that you've never explored in your own work, will be setting you up with a specific idea to go out and shoot. Whether you are going out to shoot fresh work on a concept that you've never tried before, or you're looking back in the archives to identify things that did or didn't work, share them in the project gallery. You can get feedback from myself and others and we can see the mistakes as well. If you go and you create something completely unexpected, trying a concept and new show like it didn't work, share that. As we go through these concepts if things feel a little too specific and you want to take a step back and just explore street photography as a whole lot more, I do have another class that would cover the basics of street photography. If you've already taken that one, tell me really what one of these concepts you're going to run with. Most people don't tend to shoot every one of these. I want to know which one really speaks to you and why. The great thing about street photography is you really don't need much to do it. A smartphone will do, any camera is going to be capable enough for street photography. Even if you don't currently have one, but you have a body of work you're sitting on, looking back through those photos and identifying what applies from this class, will do just fine. Anyone should be able to take something from this class and learn something new. Let's get things underway and start talking about composition.
3. Composition Basics: We're going to start the class off talking about composition. Because at the end of the day, it doesn't matter what content is in your image. Whatever you're photographing, you want it to look its best. You want it to be compelling. You want it to be positioned in the right way. You want to understand this as best as possible so that when you do see that once-in-a-lifetime moment, you can capture it in the right way. You're not just reacting and aimlessly shooting at something. A lot of compositional elements and the examples that we'll share will involve other elements as well. There'll be a lot of images that people will think that I'm using sub-framing, but I'm actually really strictly sticking to thirds as well, and not deliberately. It's something that I just do when I'm out shooting and I don't realize I'm doing it until afterwards. I'll look and analyze the image. But once you've gone out and practiced some of these things enough, you will just naturally do them. Understanding these rules is really so that you know when not to follow them. The very basic idea would be this shot right now. I'm centered. Going out and doing that over and over will give you a better understanding of when you shouldn't do that. When it doesn't make sense to. Maybe you've got someone looking across the frame and having them off to one side leading your eye where their eye-line is across a frame is going to be better. Going out and practicing the basics will give you a stronger understanding of when to break the rules. The very basics, a lot of people will be familiar with. The idea of leading lines, the rule of thirds. Leading lines is probably the simplest one to explain. I feel like, in this shot, there are actually leading lines in the light behind me. Just pointing your camera is straight down a street full of tall buildings is going to give you that. The tops of the buildings are leading you in to the central focal point. But leading lines don't have to be just that. They can be anything that guides a viewer across a frame. It could be someone's arm pointing across the frame. It could be some element behind in the background that leads you from one person in your frame to another. Rule of thirds is another fairly basic one. It's really just about not positioning things centrally but breaking up the image into equal parts. For me, I often describe the rule of thirds in a roundabout way by just talking about balance. Helping people compose an image live in a workshop, I may reposition them slightly, but in a way that just feels right. Probably, the best way to practice this is looking at compositions of your own that haven't quite worked and actually switch the grid on when you're editing, when you're cropping somebody in, and make it sit right with the rule of thirds and see what change that makes to the image. I think focal length plays a really big part in a street photographer's journey because it informs everything you do. Your entire way of seeing is focused in through this one choice you make. If you're someone that works with a much wider focal length, you're having to contend with a lot more elements in your frame. Composition is going to become a lot trickier. You're not focusing in on one individual element of someone. You may be capturing five people in the frame at once. You need to be much more aware of these different rules and how to balance a frame. One thing that informs my composition a lot of the time is working around light because I'm a little less people-focused, more color-and-composition-focused than a lot of people. I would tend to make my way around a city looking for good spots of light. Maybe I stumble upon something that's almost great, but I'm a little too late to the scene. The sun moved a little bit too much. Maybe I need to come back 10 minutes earlier the next day. Or maybe it's the wrong time of year. I need to come back six months later for the light in a slightly different position. Paying attention to those things and not just capturing what's there at the moment. If it's not right, just leave it. Come back to it if you have the opportunity to come back. Paying attention to light in that way is really just trying to stack the deck in your favor, giving yourself a best-case scenario. If you can find a great spot that isn't lit up at all and make a mental note of that. Maybe it's the middle of the day and the light isn't hitting it right, and you think, "That would look great if it was lit up in the morning." Come back the next day. You're just trying to build the best shot that you possibly can, and it may not materialize that exact second. One mistake I think I see a lot of people doing is assuming the eye level is just the best position to be in shooting something. They see a great moment happen and they just react to it instantly. They shoot it from eye level aiming straight at the thing with whatever happens to be in the background. They catch it. They feel happy that they've caught the moment, and then they move on. Whereas a really great image, a lot of the time, will come from walking around a space before you've even come across anything compelling and just making notes of what's going on, what the backgrounds are, where the light is hitting. Then maybe you walk 30 seconds further down the street and you see an incredible moment happening and that moment happens to be heading straight toward something you've already seen. Reacting and taking the shot there would just not be the best version of that moment that you could capture. You've already made a note of the best background, so you can follow whatever it is back to that. One compositional element for me that I often actually don't honestly think of at the time of shooting is how people may be pushing you through the frame. I'll often be capturing multiple frames of something unfolding, but then in post, in the selection process, what will compel me to go with one shot over another will be the positioning of people within the frame and also how your eye follows through the image. As I've said before, if someone is positioned off to the edge of the frame looking through, and your eye is naturally drawn through the frame, or are they looking out of the frame? Are you looking at it wondering what it is they're looking at? Being able to identify those moments in a shot will give you a better result. Maybe you don't have to put the pressure on yourself to see all of these things as the moment unfolds. You can do these things in post. You can't expect as you're out shooting to be going through the list of all these different rules and compositional techniques. Is this happening? Is that happening? Does it fit the rules? All of that. You just try and do your best at the moment. Try and pay attention to the things that are most important to you. Maybe you hit the composition how you want, you get great light, and you get lucky with a moment, but there's so many things going on at once. Don't stress about trying to pay attention to every single one of them at the time. Just get as many of them as you can. Then when you're making the selections, that's when the other things come into play. When you notice how your eye is drawn through the scene. When you can really identify what's the most compelling version of that moment. One thing that really is just a best-case scenario, and often you don't have much control over, is just trying to include odd numbers of things. Four people out in the street all dressed exactly the same, it's not going to look as nice or as balanced as if there was five. It's not always under your control, but maybe there is a big group of people, maybe there's six of them, and just getting that little bit closer will cut one of them off. That's going to be a nicer frame than including the whole group. There will always be cases where one of the rules gets broken or something goes slightly wrong, and it's actually more interesting because it's imperfect. A completely squared, perfect composition sometimes loses a bit of the feeling, especially if something's moving quite fast in the frame. It seems right to have things a little bit skewed as if you can tell the photographer was moving quickly to try and catch something. There's definitely a lot of examples in the past where you can tell someone was trying to line up two elements absolutely perfectly, and they just got it slightly wrong. For me, a lot of the time, they are even more interesting because of that. I have two tasks for you based around composition. One using your archives and one using other people's work. Whether you want to go out and find a new image, something that's fresh to you that you love, and really analyze why you love that image. Is it something about the composition? Is it the color? Is it what's included in the frame? The other task is to go back to your favorite 1-3 photos that you've shot in your lifetime. Re-crop, recompose those images. Maybe there's a single subject in the frame, crop it completely differently, reposition them in the frame, and see how different the feel is of that shot after you've done it. I know to some people in the street photography world, cropping is a bit blasphemous. But for me, I just see it as presenting the best version of what you've captured. You're not misrepresenting. You're not lying about what was in front of the frame. You're just being more selective about what parts of it you show. Playing around with cropping and the composition of a frame is something I do all the time in post. Even just excluding a tiny portion of color or one little element can make or break a frame. If something isn't working, play around with it and see what happens. Maybe you stumble across something that makes you want to go back and re-shoot that scene if you have the option as well. Try those ideas. See how you get on. Share them in the project gallery, and we can have a discussion about the results. Next up is the first core concept, juxtaposition.
4. Concept 1: Juxtaposition: The first more in-depth concept we're going to cover is going to be juxtaposition. This is something that some people within street photography practice, others don't, but suddenly you can not see when you're out on the street, even if you don't point your camera towards moments of comedy on the street or interesting elements come together. Once you've trained your eye to pick up on unusual things on the street, you will see these things, and this will give you a better understanding of why it's important to so many people within street photography. For me specifically, juxtaposition isn't the entirety of my work, there are people out there that will go out and shoot nothing but these types of images, and they may get one every two months because they keep stoking a certain spot or they're waiting for things to line up in a very specific way. For me, it's more an ASM when so sometimes I'll just be walking down the street and one of those moments just appears in front of me and I'll catch it. I'm happy to go back a few times, maybe a five-minute way, three or four days in a row to try and catch something like this, but I don't specifically go out and work in this method all the time. Probably the most basic juxtaposition shot, although really the term means just two things coming together. The unusual, the one most people will be familiar with street photography is what we call a balloon head. It's a parent and a child walking together. The child has a balloon in their hand and it lines up with the parent's head and you can make it appear like they have a balloon for a head. I'm sure everyone's stumbled across images like that. It's just taking that concept further, trying to be a bit more original with it. Seeing maybe there's an advertisement on a wall that's temporary, evenly got maybe a month before it changes, and in your head, you're thinking, wouldn't it be great if these other elements appeared in the frame? Then you just make a point of coming back and trying to wait for that to happen. An example for me of why I was talking about the idea of not actually camping out a spot specifically for something but just making a mental note would be something like this. There was a couple of days around midday where the light was hitting this red piece on the right here. As I was making my usual routes around the city, I knew that that was there. I thought why not pass and just see what happens? As I was approaching it, quite literally the two people in the center there were walking towards me, and then the guy at the front was actually walking much quicker than them and he just passed and they all lined up. If you notice though, something we talked about earlier, the rule of odds, is not quite a perfect image for me. It's not satisfying because there isn't a fifth red object in the frame, so it's okay, but it's not great. I mean, this image initially I was looking at someone who is just off to the right-hand side here, who was holding up a sign that made them look like they had forearms with hands on the end for fingers, which is quite weird. Then I noticed how the text played off each other. Initially, when I saw this sign, I then decided to frame up this guy's head above the sign, but then realize what the two bits of advertisement was saying and that became the show. It doesn't necessarily have to be objects or shapes coming together or comedy in that way. You need to pay attention to the text that's on everything around you. Juxtaposition is such a wide subject because it really could be anything. There's definitely examples out there of an interesting bit of texts referring to someone having allergies and then someone happens to all pass sneezing. It could be that simple. It could be that obvious, or it could be a reference that's really specific to something that you love, that you noticed that maybe no one else does or I've seen a few times where text on an advert if you shoot it into a reflection, you can cut off certain words and then edit the text yourself to become something funny, so it could be anything. You have to really look at everything. People think as much as I talk about seeing the moment, but before it happens, you don't always, but you absolutely need to catch that when you come to make your selections. This moment was actually two different children on the bus were drawing on the windows there was a gulf further back initially that I was getting some shots of wherever she was drawing, and then I took a few of this boy here. It wasn't until I looked at the shots later on in post that I realized the advert for the Matt Damon movie at the time, downsizing was right underneath the boy drawing at the time. It would have been an easy one to miss if I was really focusing just on him and not looking at the entire shot as a whole, I could easily not spike that. This image is another example for me of something that's imperfect and would work as a good example of just how flat and uninteresting the scene would have been without the element that I was constructing. This is another thing that I have talked about in the first class, a temporary element, so this advertising is gone now, so no one can reproduce this shot in that specific location. It's something that you could just see happening. When it rains it's obvious that people were going to pass with umbrellas and given the right height person etc. This was going to happen, eventually. They also fits into the role of surds here as well, but there's an empty third, there's a space here that is still imperfect. It would've been great if there was something in the foreground to just fill up that portion for me. A lot of juxtaposition does work in this way that you see one or two different parts of the scene, and you know the third will happen and it's just a case of waiting for the right time or the right weather or the right activity to come along to finish it off for you. This is another example of the benefit of time, I guess. Definitely check out the links that are going to be provided for other people that work in these different ways. Just before taking this, I photo actually bumped into a friend, and we saw this at the same time, it was almost comical how we both slow down exactly the same moment when we realize what was about to happen. But the woman here was just stood waiting for some friends right next to the sign. We both standing there hoping that when their friends came out to me as she was going to turn our way and not go the other way. Luckily, she did. She came our way, I got a shot. Someone walked in front of his camera so he didn't get a shot because this was in London and I'm not from here. I went home that day and found that he'd spend another two or three hours waiting in that spot for a similar thing to happen, and then he went back the next day and wait another five hours. If you check out the legs, you'll see the difference in the shot that he got and having more time to include extra things and really perfect the composition, and the shot I got almost reacting in space at the time, had about 30 seconds before she turned my way. As far as training your eye to see, juxtaposition goes. For me, I'd say the best exercise really, what you should go out and do if it's something you've never really tried before, is working around static advertising. Give yourself something that isn't going anywhere that you can create a best-case scenario in your head for, and then just see if it happens on a maybe something similar happens that you then realize there's a totally different way working with the same. Once you've got the hang of that and you can react to things when they do play out, then you can start incorporating elements that moving. If you see something, in the case of the four people wearing red, you see two people wearing red, you follow them down the street and they bumped into a group of a whole bunch of people wearing red as well, and they will come together in the same frame. But initially, try and work with something that isn't going anywhere that you can take your time with, and you can really create a frame around an idea or a concept about it. One thing I do, I do the same thing with regards to light as well, but for juxtaposition, if I see something around the city that I think is really interesting, I just keep a note of it. The possible scenarios are that would play out in front of that. Then if I see something heading that way, that is going to finish that framework for me, I'll follow it, our ground, and get in position ready for it. There's one that I've been keeping in my head for about five years now. Is a big white sticker that's been over the eye of a cosmetic advert on the back of one of the buildings in Cambridge, and I have seen someone in town with a white temporary eye patch a couple of times, but they can never turn that way. Anytime I see someone with a white patch on however where it is, I'm always hoping they're going to go that way. The task, I'm going to set around juxtaposition, I'll give you a couple of options. If you are someone that works best, really writing things down you remember and soak in information that way. Look back at past photos or go out and look at what advertising is around the city or around where you live and write down a best-case scenario, what would be the perfect scene to play out there? Then really think about how likely that is. Are you absolutely going for a moonshot? You're imagining something that is just never going to happen, or is it something that maybe happens once a month? If you're out in the street enough, you're going to catch it soon enough. If you're someone who doesn't work that way by writing things down, I would say actually just stick to your archives. Look back at those photos that have something interesting or a funny little element and then think, what would make this more interesting? What would make it funnier? What would be the other half of that image? Let us know in the project gallery and in the discussions how you getting on with this. Are there things that you're struggling with? Do you live somewhere much quieter that really doesn't have the advertising to work off? We can figure out different ways to approach this concept. Now we can move on to the next subject, which is going to be one that I'm particularly known for, one that's very close to me is sub-framing.
5. Concept 2: Subframing: The next concept we're going to talk about is probably the one that I do the most sub-framing. The idea is really closing down the frame and focusing the viewer's eye on the thing that you want them to look up. It wasn't something that I discovered in other people's work and then so I'm going to go out and shoot this, it was out of necessity, because I was shooting in such a small area every single day. There's only so many times you can take a picture of the same street, but if you work with sub-framing and blocking out different elements, you can shoot different portions of the same street over and over and over again and get different looking images. A bit like juxtaposition, there is a very basic version of it with the blonde head idea. Sub-framing literary the most basic version of it would be just someone in a window. You're taking a shot of something wider and they're framed in literally in a frame in something smaller. You can do it in this sort using backward elements to block out everything else in the scene and quite literally a window frame to put them in slightly weirder ways of approaching it. I mean, this was shot through a couple of inches low in a road sign. It was inevitable, just where it was placed in the city that I knew someone would stop in front of it eventually. I used that as a frame as well. This bar is somewhere that I've shot hundreds of times. It's right in the middle of the market. I've posted photos of that so many times, but because of the frame, there's no way anyone would know where that is. You can do the same kind of thing, but much larger scale as well as this being a central side of the image. This is just sub-framing, paying attention to the light to give you the frame to begin with, but it's the same concept. You're just directing the viewer's eye to what you want them to look at. This one, there is several frames here. You've got this very near side edge that's blocking out whatever I didn't want people to see in the rest of the frame. You've got the frame of the bench that he's actually resting on, and then you've got a literal window frame in the background as well framing him so everything is bringing you in towards that main subject. The harder way I guess to do sub-framing is to use moving elements. I've done a few times shooting through people's legs or someone with a hand raised and actually shooting through the triangle they create in their arm. This would be an example of something that I guess I had maybe 20 seconds or so until this guy moved. He was so stared with his other half looking at Nelson's Column night. I saw an opportunity to frame up the Column in the umbrella handle. Luckily, he just stayed still long enough for me to get the shot, but you can do that same thing, or if you're shooting say static element on a street, you can actually let people passing you between the lens and the subject, framing that shot for you as well and get rid of the extra information you don't need in the frame. This would be a really very literal example or you may say trapping the guy in the mirror. It's just a picture of a couple of bikes. There is not anything special to it. It is only because of the shallower depth for field and thinking a little bit ahead, the only time you can actually get someone positioned like this because obviously the mirrors look straight back at the person is if they're getting onto the bike. I saw him approaching with a cigarette in his mouth about to sit down on the bike and I just framed up into his mirror before he even sat down. Got a couple of shots. There was no issue with him. He spotted me do it after that and off I went. You can think ahead. If they [inaudible] scenarios you see like this that you know are going to play out in a certain way, you can use this within juxtaposition. You can use it within sub-framing. It applies to everything. One thing you can do to practice this is, and again looking back into the archives is there a certain space, a certain scene around you that you tend to gravitate towards something you've shot a few times because it just looks that photogenic. Frame it up the way you normally would and then think about the surplus information in that scene. Is there a lamp post or a bit of signage or a window that just you wish wasn't there. Just look around for what you can place between your lens and that scene to block out the things that you don't want. You don't have to do it person, you don't have to crop these things out necessarily, you can do it at the time. There's been plenty of occasions when I've seen a really great subjects, someone classically dressed looks at the history of the 1950s and then someone right behind them wearing something that is obviously of this year, and I will just use the edge of a wall or even in one case into a trash can to basically create a less about sized frame for what I wanted to shoot. It's completely within your control to use things around you to block out what you don't want to be in that shot. Sub-framing is definitely something that suits a longer lens more. The longer the lens, the more space there is between you and your subject, so the more opportunities you have to bring in elements between you and them to block out things that you don't want in the scene, but it's definitely something you can't with a wider lens. You just have to be a little bolder about the size of the things that you use to block out portions of the frame. If you want, if you're starting out in this concept, that can be as simple as just positioning someone on the sofa in your house, just in the very most obvious space. You have a sibling or a friend, just put them there and take that portrait, and then bring in things that are within arm's reach to close down that frame in different ways. It's part of the reason I'm so interested in umbrellas when you're out shooting in the rain, that's a nice shaped object that is constantly entering and exiting your frame that will help do that thing for you. One thing to do next time you're out shooting, this is probably the best way to practice this, you have to be prepared when doing this task some some people will see you doing it and think you're pretty strange. You have to make peace with that. Go out and find different things that you can shoot through, like me shooting through the sign. I'm sure people find it very strange standing there pointing my camera to this little hole, but there are lots of opportunities for that. You can shoot through corners of buildings. If there's shop windows, you can shoot through signs, pins, whatever ends up being. Just go out and make a bank of 10 different frames around you that you can use, so that next time you're out shooting, if a great subject passes, you already have that frame in mind. You don't have to react in the moment to try and create a composition, you already have it. The next concept we're going to go onto is playing with perspective. Anytime you can add an extra element to your image that makes people take a double take, they're not quite sure what they saw to begin with is absolutely brilliant and this is a great way to do that.
6. Concept 3: Perspective: This concept is playing with perspective in your images. The ultimate goal of all of these different concepts is to add an extra element to your images. This concept is probably the hardest to explain and when you get it, you absolutely get it. Again, check out the links to other examples of this kind of work. But the idea is to really stop people having a reference point for how deep the image may be. The scene could be thousands of feet. There could be something in the distance, but you've removed any of the elements that would be the anchor points. Maybe the lighting is completely flat across the entire plane and you've stopped down the aperture on your lens, so everything is in focus. You've lined up elements so no one really can tell what is in the background, what's in the mid-ground, what's in the foreground. If you can do it really well, you can create an image that people cannot figure out what is going on. A couple of software examples. I guess I haven't gone to have everything in focus. The fact that some things are out of focus allows the viewer to understand what's foreground, what's background. But I've still paid attention to the elements in the background and line things up very deliberately. The edge of this window frame or the edge of the building here. Similarly, say a shot like this. This is a good example of how important the lighting can be in a shot like this. On a sunny day, the light is hitting these buildings in the background, but this lamp post in the off-center here, being in shadow would completely give away the depth in the image. There will be no question that something's foreground, something's background. But on a cloudy day, the tones are completely flat across the whole image. It takes a second to realize what's actually going on. I've deliberately framed up. There's nothing in the foreground here that gives away what is foreground, what is background. It takes longer to figure out the image. I've seen something very similar to this but with a hand creeping onto the lamppost. That makes it obviously much easier to tell what's foreground, what's background. But in my eyes, that's actually a more interesting image because you take a few seconds, a little confused about what's actually happening in this frame and then you see the hand there, and then it falls into place, you realize what you're actually looking at. Be very cautious of that whether you want to deliberately include something that pins the depth of the image or not. Similar kind of thing here, although it's not perfect in terms of what's in the foreground because flips, there is a little sign here that gives away what's near and what's far. But being very purposeful about lining up the edge of this mirrored surface with the step in the building here so there's no shadow there, flattens out the image and again, it takes a little time to figure out what depth you're actually looking at in the shot. A good example of something that I wish I could reach you actually in an imperfect version of that. As I shot it, I was very conscious of the foreground and the background and lining up this vertical here to have a yin-yang thing going on. But I didn't stop down. I didn't create that constant in-focus depth to the image. That extra effect of not being quite sure what's foreground, what's background is lost here, just being aware of what's in the background and how things line up. After practicing this for a while, it will be something that you do. Again, going back to a sub-frame image of mine, I knew what was in the background as I shot it. It was lining things up so that these shapes are lined up perfectly and sat above his hat. Imagining this was just a statue, I probably would have gone around and played with, and framed up things like that to train my eye to do that. Then when something is a bit faster-paced and moving, you don't have to consciously think of it. You just do it as the shot is unfolding. A lot of these concepts will work in the same image. You could be sub-framing a moment of juxtaposition. You could be using sub-framing and playing with perspective. You could be really conscious of the light in the scene and also playing with perspective at the same time. Those two are probably the most important. They go hand in hand. Because if you really want to create an image that people can't tell the depth of, you need to be very conscious of the lie on every part of the image. One almost accidentally employing sub-framing and perspective just because of the way the image is portioned up. This is a frame I lined up. It was very obvious to me that this is what I should do when I saw the scene. Then naturally, anyone who passes and occupies the space in the lower half here is going to become sub framed. The idea of playing with the depth in the image is a little lost because of the inclusion of a subject. If I frame this up as it is, it would have been much harder to tell. But because you've got a human element, you assume they have to be closer. They can be hundreds of feet up in the air like this portion. The task for this concept is really learning to see everything in front of you in one plane at the same time. For me, I see something quite interesting and I will literally close one eye and look and see how everything in front of me lines up. The task now is really go out and shoot. But don't just take one shot of that frame. Don't take the first thing that you see. Try every angle, see how everything lines up. See if you can reduce five different vertical lines in the frame down to three, if you can line things up, if you can cut out horizontals as well and simplify the frame by lining up different elements. Ultimately, it's going to reduce distractions and make it cleaner, simpler image in the end. The next concept we're going to go onto is my approach to lie in color.
7. Concept 4: Lighting & Color: My use of color, I think it's something that I'm quite known for in my images. As a lot of people think I go out seeking specific colors. It is definitely true that I see a great red element, I'm going to gravitate towards it. But the way I handle color is more about colors that I don't like. You're very, very rare to see an image of a high base jacket in an image of mine. Because it just doesn't gel well with the rest of the scene. The colors just don't go together. I'm very aware of how colors play off each other. Some framing would actually be something that I would use to clean up an image, for colors, as well as just to hone in on a subject. This scene just taking a photo of the woman there would have just been someone stood against a big brown building. But the fact the umbrella is blue, the jacket is red, the frame I found for is yellow, you've just got a scene of all primary colors. You can employ the other concepts in different ways. Like as far as street photographers are concerned, I think a lot of this pay attention to the way the light is, the way a landscape photographer would. The weather is incredibly important to what I'm doing. But with how tight the streets are, in some situations as well, I might want light on a certain corner and maybe you're only going to get that for a certain hour, for one week a year. If you're shooting the same streets over and over and over again, you need to pay attention to when those moments hit, so you can go back to those spots. I've seen a great bit of light come back the next day at the same time and realized that the light has moved further from where I want it to be. It's actually going in the wrong direction. I've made a note of that and then thought okay next year, I'll come back three or four days earlier for the light, I actually want. A few examples of that very specific light for me would be moments like this. I know exactly what time of day, what months of the year the light hits this wall. Because I've seen it a couple of times, I've made a note of that. I know that it's unlikely that there's going to be a great scene in that space other times of the year. I know when to go back to maximize my productivity. Similarly to this scene, this is shot into the overhang of a department store. There's only a certain time of year and time of day that the light cuts in underneath that owning, the rest of the year they're left with quite dull scenes where it's all in shadow or scenes where the whole street is lit up. There's no defining shadow edge there that you can work with. If you're lucky enough to live somewhere closer to the equator, you're going to get much more saturated color than many other places. This is probably a good example of color just wouldn't exist without the light. The extra little flash of red here coming from his glasses, if it wasn't such strong sunlight on this rear wall, for one, he wouldn't be silhouetted and there wouldn't be enough reflected light to light up his glasses. That element would just be completely gone. This is a scene that I've shot actually using this exact backdrop on more than one occasion. This is another location that I would treat the same as keeping a bank of places to go at certain times of year because the light will only hit here for about a week, maybe two weeks a year at a certain time of day. It's very, very, very specific timing to get the shadow to creep far enough along the street that some people on the pavement would be enlightened, some people will be in shadow. Sometimes you've got a very short window to actually return to a spot. A lot of these, they'll be some crossover. There's juxtaposition style shots that I've employed some framing on, that completely rely on light. There's all these extra things that you have to pay attention to. But in shooting this shot I think I must've wait at about 45 minutes for this to happen. It was quite an overcast day, so every five minutes, the cloud would appear and this portion of light, this plight on light and dark that I have going on would completely disappear. I was getting quite nervous as I saw these people were approaching because it was the first people in all that time that actually walked along the street. Just before they got there, it was overcast and the cloud just disappeared before they walked up. Similarly, for this juxtaposition show, it wouldn't happen without the light. If it was just flat lighting across the entire scene, it wouldn't be as interesting as having the light picking out that specific red portion there on the right. Sometimes when just paying attention to color and finding some pattern here that it's a bit unexpected between the pot lid and the hat the lady is wearing that wasn't relying on light. This happened at night. It was just in an internal space. There was no sun to consider. Often, it's the light that creates the moment of juxtaposition, or the sub-framing only works because the sun's in a certain position or all of these different things rely on paying attention to that light. At the end of the day, learning all of these concepts and mashing them and having them be part of your repertoire so you don't have to actively think about the major shooting is just stacking the deck in your favor, having good light, is going to most likely give you better images, but it's not always the case. You can still get great stuff. Just shoot in responding to what's in front of you, but it's just less likely to happen. Everyone will have their preference. They're certainly purely juxtaposition-based shooters out there in the world that don't really care of what the light is doing. They're just interested in the moment. I tend to base my composition is more around the light. I will go out when the weather is good. I will try and get out as early as I possibly can or as late as I possibly can. Light is really cutting into windows and creating good shapes that I can then compose around. The other thing to think about with regards to lighting is what is the light source. It doesn't have to be the sun. If you're someone that likes to shoot really late, you're going to get the glow from red neon lights hitting people as they pass. You might get a police car comes past the scene as you're shooting and just throw some blue light. Whenever you can include something temporary in your frame, whether that's a bit of advertising that's going to be gone in a week, in this case, a light source that you're not going to be able to get back again. You're onto a winner. This one I framed up ahead of time. There was an ambulance coming up the street on my left-hand side, I knew it was going to pass this guy in front of me. As the ambulance was coming on the street, I was just thinking, okay, what am I going to frame up? What am I going to shoot with this temporary red light that is about to pass? This is the shot that came from it. I was shooting as fast as I could to catch the frames in between the flashes of light. After the ambulance parked up, it happened to stop in front of a car with completely blacked-out windows. The windscreen obviously isn't blanked out. The red light whenever it flashed, all I could see through this blacked-out window which just this lady's face, just appearing and disappearing when the red light here her. I just walked towards the window and shot as the poses of red light went through the car. That lighting scenario is so specific and needing that type of light source from an ambulance is posting like that or some other like a red neon sign that happens to be right in front of a car with blacked-out windows with someone in the back. It's just not something that I feel in any reasonable amount of time is going to happen again. The task for this concept is going to be two parts, One short-term, one long-term. The long-term thing is to go back to a scene that you have the option of revisiting and just see how the light differs, different times of day through different seasons. Once you start to pick up on the changes, you instantly know when you see a certain bit of light hitting something, that if it's not right then, it will be right in say six months. Or it'll be right in the evening. You know those changes. If maybe if you're traveling as well, you can look ahead of time and see some positions I've actually I've done that once just to see if it will be hitting a certain things that I knew I wanted to shoot. The other one, if you can go out at night and just similarly make notes of all of the light sources that you can work with, whether they're temporary or otherwise, just so that in the same way as juxtaposition, you have that bank of usable scenes. If you're the person that tends to shoot just in the middle of the day, really force yourself to go out and shoot first thing in the morning, or as late as you possibly can, and see how different that light is going to be. You'll also see a lot of different activity. I shoot in the morning, not just because the light is so good, but because that's when the city seems to be most interesting. You don't have the regular people out, you have all deliveries, and activity, and something you don't see throughout the rest of the day. The last concept that we're going to go onto is shapes and abstraction. It's one that in many cases uses the same elements from the lighting concept, but just in a different way to create more curiosity in the image.
8. Concept 5: Shapes & Abstraction: Like a lot of the concepts that we've gone over today, there is crossover between many of them. There's definitely moments that I've captured an abstract-focused shot that is really relying on the bank of temporary nighttime light sources that I know while going around the city. These things do inform each other, but they're all designed to really just add extra elements to your shot. Just so you're not just capturing what's in front of you. You are not sharing something they've never seen before but in a very familiar way or something very familiar in a new way. You can mix the two together, so you can show someone hopefully, something entirely new and in a way that they aren't familiar with as well. Abstraction is definitely the most playful of all the concepts. There's really no rules to it, you can just go out and make mistakes is essentially the best way to introduce yourself into this is change settings on the camera, try shooting at night at very slow shutter speeds and see what happens. Those mistakes often spark the creative juices to come up with some other way to approach familiar scenes. This is quite simple concept. The idea of planning something that if you're into sports, if you're into racing, you'll see it constantly. It's the way that they capture cars moving along the track at the speed they do. But when you apply that to a light source that I'm familiar with it at night and trying the same effect, but on people, a much slower shutter speed, you get a simple scene of someone just walking in front of a neon light and it turns into this. One thing that I'm always looking out for in different places is warping effects, so shooting through glass that's going to add an extra layer of abstraction between the camera and the subjects. If you're lucky, you can find warped mirrors or angled glass like this that's just going to change what you're seeing to make it less familiar and more interesting. Sometimes it's a juxtaposition element can come into things as well. At the time I was just framing up just to see what the choke effects with the reflection looked like. I had no intention of capturing the girl with her arm out, looking like it was going into the cone. But just as I was playing around and seeing what this composition would be, she appeared and pointed at something off to the side, and then I just happen to have the camera pointed at that element at the same time. This is another example of abstraction just because of the glass effect. This is a glass I guess you see less and less frequently now, but read do glasses is a brilliant one for that. This is a piece of glass that I saw when the light was flat and just coming back at night to let the neon's on the inside from the restaurant show through. Probably the simplest way of creating abstract shots is really just working off of reflections. These days, you don't see steamy windows and textures like that quite as often. If you want to go out and practice this to begin with, focusing on reflections and how it warps what you're saying and distorts things is going to be a great entry. Abstraction. I see a little bit differently than the playing with perspective. If someone really nails the perspective idea, and I absolutely cannot figure out what depth things live within the image, I think that's great. With abstraction, I still want to know what the thing is. I still want to understand that this was a guy in a suit holding an umbrella, but you're just showing it to me differently. For me, I think done right it just adds one extra element. It's not so abstract that it might as well be a painting on a wall rather than a photograph. I still want to know that it's rooted in reality. Looking at the wider gamut of abstract work that's out there will give you things to pull into your photography. Whether it's looking at the way an abstract painter composes their images and then trying to bring that conversation into your photography or it's certain types of textures you find that you want to then look for out on the street, whatever is it's going to improve your images. This is an example that I've already shown when talking about lighting, but this is showing how the overlap comes into play. The abstraction here would have still worked, shooting into this mirrored surface would have still been absolutely possible without the addition of good light. But the color wouldn't pop in the same way. You wouldn't see the red, it wouldn't be as strong. The separation of the figures from the ground wouldn't work the same way. One thing isn't always enough. Finding a steamy window if you're lucky enough to come across one, isn't always enough. You need the contrast in the elements behind the window to give you something to focus on. The biggest thing to learn, I think in my personal journey was really seeing the reflection before seeing what was beyond it. When you approach a window, your brain is just trained to treat it like there's nothing there, to just see the person sat behind that glass. But now, I will see the reflection before I see what's beyond there. There's definitely been occasions I've been instead of choosing your reflection and then realized a few minutes in that I'm pointing my camera straight at someone's face and I didn't even see them because I'm so fixed on that reflection first. The other thing to do is just look for surfaces that you can shoot through a bit like sub-framing, just putting something between the lens and the subject. But look for ways that you can shoot something without directly pointing your lens at them. Shooting into warped mirror effects, it's through steamy glass. It's whatever can create another layer between camera and subject. I'll give you options for the task around this subject. If you have one available and you are someone shoots with say like a lot of [inaudible] with a 35 or a 50, go out for a week with a 150, 200, 300 millimeter on your camera and only shoot with that. That will let you hone in on reflections and abstraction that just wouldn't be possible otherwise. If you don't have a lens like that, then you can try out and change your view on things and just go out and look for those surfaces. Make another bank of things that you can use, but they are based around abstraction. Look for those weird mirrored surfaces. Pay attention in the winter to what windows in your town, your city steam up. Just make a note of all of those extra layers that you could possibly use in the future. Now that we've gone over all of these concepts that I think are so important to my own work and the work of many people I admire through street photography. Once you spend time practicing the individual concepts, it will just start to make more sense to combine them. You will naturally start framing things up differently while looking for juxtaposition. You may start naturally sub-framing through different layers to create abstraction as well. All of these things will come together, you just need to spend enough time on the areas that you find the hardest to grasp. If any of these concepts don't make sense instantly to you, then I would say they are the ones that you need to focus on the most because the others you will do naturally over time. But the ones that seem the hardest now could make the biggest difference to what you're doing in the future.
9. Final Thoughts: It's great that you've made it to the end. Hopefully, you've come away from this with a new obsession within street photography, a concept from one of the ones that we've talked about that you really want to hone in on, and if not, just a better understanding of what makes up the genre and something that you can apply to your own practice in the future. I want to see what you create around these ideas, so share what you end up with in the project gallery. If you want to know more or you want to explore the why behind street photography and the basics a little more, check out my other class. Thanks again for taking my class, I can't wait to see what you create.
 Craig Whitehead, Street Photographer @sixstreetunder