Transcripts
1. Welcome and Course Overview: Welcome to Spline Master class. This course is for everyone
who loves three D design. Whether you're just starting
out or you're already a pro. This course is
designed to help you grow your skills at any level. But what is Spline? Spline is an intuitive
three D design tool that allows you to create, animate, and edit three D models directly in your browser. It's perfect for anyone looking
to bring their ideas to life through
interactive experiences or detailed animations. Spline projects are easily
integrated into websites and apps and can be used for three D printing and
virtual reality, expanding your creative
possibilities even further. Join us as we learn together and master the art
of three D design. From modeling objects to
animating them like a pro, this course covers it all. Our mission is to
unleash your creativity and guide you toward becoming a successful three D designer. We're thrilled to
have you on board. Let's get started and turn your creative visions
into reality. Hello, guys, and welcome
to Spline Masterclass. My name is David. I'm a
creative agency owner from Fry Book, Germany. We use Spline a lot for
our client projects, and if you are also
interested in how you can integrate Spine
into your workflow, then this course is
just right for you. In this course, you will
learn the essentials of Spline from creating and also animating three D objects to integrating them seamlessly
into your designed projects. Will also explore some more advanced techniques to help you to create interactive and
immersive experiences. So happy to have you on board, and then let's get started.
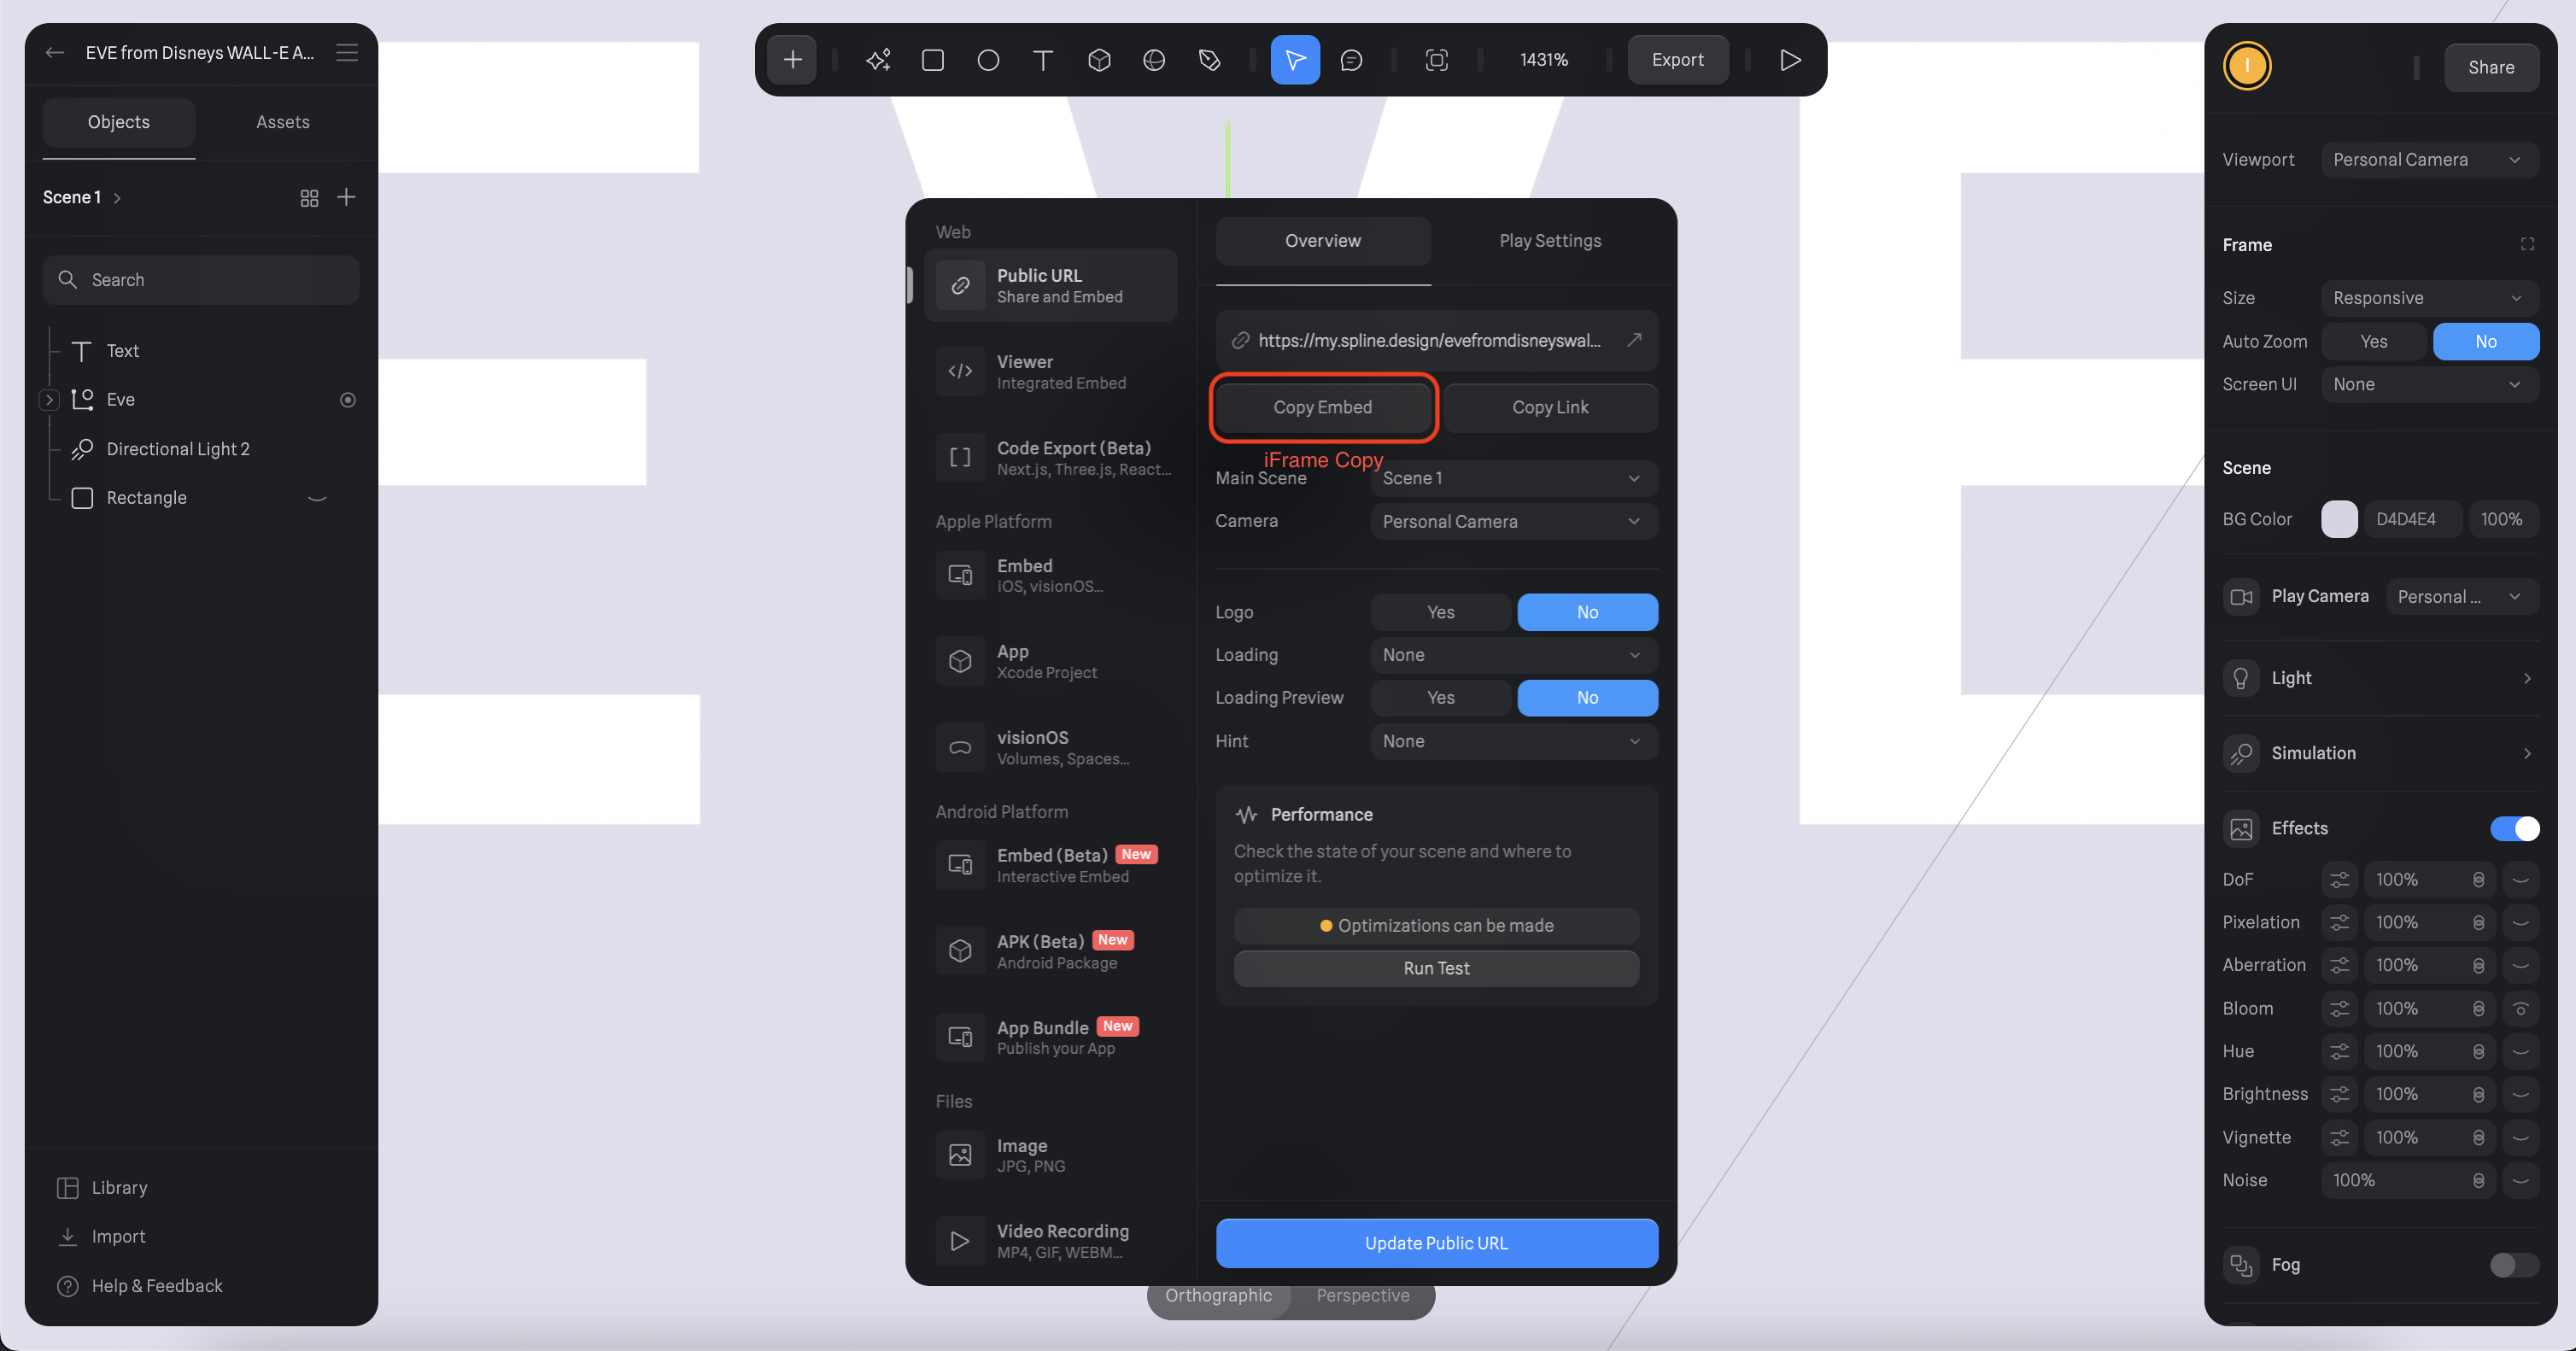
2. Spline Dependencies and Sign Up: So to get started with Spline, you simply have to go
to the website here. So the U L bar, just simply type in
Spline dot design. And then you will be
redirected to the website. And if you go down here, maybe you now see that you have different kind of
options to choose from. So for example, you can just use the browser
integration here, which I can also just recommend. It's quite fast and also
hardware independent, but you can also
just download Splide for MCO S and also
for windows here. But if you choose just
the browser integration, you can then just
click on Browser, or you can just click
on Get Started. And then you will be redirected
to a sign up process, and if you've done so, your dashboard should
look something like this.
3. Getting started with the Spline Dashboard and create your first Scene: So now if you successfully created your accountant spline, your window will look
something like this here. So this is just the
main dashboard. And on the left side here, you have some different
topics to choose from. So for example, now, if we maybe go to my files here, you now see all your
files that you just generated or created
in the grid here, so you can access it from here. Then next up, we have the
generate tab where you can just create some shapes
with the help of AI. This is a kind of
new feature topline, but feel free to check it out. And then the next one here
is shared with me tab, where team members or
anyone else can just share, some projects with you and you can access it
then from here. So next up, we have the
community tab here. So in this tab, everyone
of the community can simply publish
their own projects here with everyone else. So maybe if I click on one
of those projects here, you can see that I can like it or even remix
or duplicate it. Can also start a conversation with them and give
some feedback. So this is just a nice way
to get some inspiration, and you can also just use it
for your own projects here. So, and then we also have some tutorials here
from the Spline team. So this is also a nice way
if you're new to Spline. You can just check
out those here, and this just gives you a little nice explanation of how spline works and
what's possible here. And we also got here a little
library with some yeah, pre bil stuff here from Spline, so you can also just
check this one out. But for now, we will just
go back to our home tap, and from here, we will
create a new project. And to do so, we will just click on this blue button
here, so new file. And then we will be asked what kind of project
we want to do. But you can also
just leave it out and click on any space
here outside of the box, and then you just created
a blank project spline.
4. Introduction to the Spline Interface and Controls: So welcome to the lecture
fundamentals of Spline. In this lecture, we will do a little introduction to the Spline interface
and also the controls. We will make some
basic shape modeling and talk about light
sources and shadows. And we will also introduce
the topic materials. And yeah, let's get started. So whenever you create a new
object or project in spline, your window will look
something like this here. So this is just the basic
and default scene set up. And in some here, you
have three tool bars, so you have a left
tool bar here. You have a top tool bar and
also a right tool bar here. So, and maybe we will just
start with the top tuba here. So if we go on the left side
on this little plus icon, we now see a bunch of options
that we can choose here. So we have two
dimensional shaves, we have text elements. We have three dimensional
shaves, for instance, and we also got some things like cameras or
light sources here. But we will just go and take a deeper dive in some other
videos of this cause. So for now, we will just talk about the interface
and controls here. So we will just leave
it out for now. So and then we will just continue with the
right side here. So this one is a nice
little AI generation to where you can create
shapes by the help of AI. Then we have some often use functions here that
are just yeah, very popular, and so you can
access them just faster. Then you can choose in between the selection tool or
the commenting tool, so you can also
comment anywhere you want here and just leave some comments for
your team partners. And then next up, you can edit your frame here, by default, it's just your screen size, but you can just change it
to any size you want here. Then we got this little
zoom factor here. So if we zoom in and out, this value is just
getting changed. Then we have the pot tap here, which we talk in the
end of the course, and we have also this
little play button where we can actually just a
render our scene here. So whenever you
create a new scene, you have those two objects
here created automatically, so you've got a little
rectangle here, which we will call
the base plane, and you also got this
direction alight here. So and maybe for clarification, those two objects are
not like really special, so you can create them whenever you want here
from the top tuba also. So it's just a simple rectangle and the directional light. So if you don't want them, you can delete them
by any time here. And now what you may
also notice is that depending on what
object I select here, it will be also selected
here on the left side, but So again, maybe if I just click on the tan
or the base plane, it will then also be selected
here in the left side bar. And then also if I maybe
just drag across here, I can select both of them. And then you also
see that both of those objects are now
highlighted in blue here. And now we can also add just new shapes to
our scene here. So if we go back to
our top tuber here, I will maybe just
insert this cube. So if it's activated now, I can hover around my base plane here or also
anywhere in the scene. But for now, I will just
use the base plane now. And you may be noticed now that it's getting a red
highlight here, and this just simply
means when I click on it, it will be connected to
the base plane here now. I could also just, yeah, place it anywhere
in the scene here, and then it's just a moving
around in the sky here, so I will just leave it
here on the base plane. So now you just created
a que per on the plane. And now, of course, we are in
a three dimensional space, so we can also just
orbit around here. And to do so, you just
have to click Option, and then your left mouse key, and then you can rotate
around in your sphere. And then you also see now that your cube you just created is connected to the base
plane behind of it. But you can not only bit around, you can also, yeah, drag your view around. And to do so, you can just simply click on
your mouse wheel, and then you can just move your object from one side to the other side or
also up and down here. So this is just a nice
little orientation help. So again, you can zoom, you can bit while holding option and your left mouse here. And then you can also
just drag it around here. Then on the bottom here, you have the orthographic
or the perspective view. So maybe if I will
rotate it now here a little bit and change
to the perspective view. You now see it looks like, yeah, you have a bit
of more field of view. So you see it a
little bit wider. But this is just
personal preference, so you can just check out
what you prefer here. So now I will maybe just reorientate the view
here to the front view, Zoom in a little bit and align the camera
here to the middle. And now on the left side, you also see that the cube was also added to the
left side by here. And now if we click
on any object here, you also see this little
coordinate system here. So for example, the
cube is now selected. And now while clicking
on this arrow, I can just move it around here. I can also move it to the
top here or to the bottom. Maybe if I rearrange
the view again, you also see the third arrow, and here you can just push
it forwards or backwards. And you also can
change the angle here, so you can give it a twist in any direction
you want here. But of course, we can not
only move them separately, we can also just
move them together. For example, if I
drag across here, you now see that both the cube and the rectangle
are now selected, and then I can just
move them together here or also giving
them a twist here. But now you can imagine if we have multiple components here, I can get quite confusing here. And to get also a little bit of structure inside
of your project, you can also group
up those elements. So for example, now, if both are selected here, you can do a right click here, and then you see the
group selection here. You could also use the
shortcut command N G here. And then you see a
group was created, and whenever this
group is selected, you can then also just
move them together here. For an even better
structure here, you can also then just
rename your group or shapes dependent on
what you have now here. Again, just do a
right click here, and then you see the
rename function. So I will maybe just
call it new group. This is just also
a little nice way to get more structure
in your project. And then also on
the left side here, you have the possibility to hide different kind
of shapes here. So for example, now, if I want the rectangle or the base plane
to be invisible, I just simply click
on this little icon, and then it will be
removed from the scene, so it's not really removed. It's just invisible. And you can just make
it visible again, then by clicking on
the icon again here. And again, for the group, if you click here on the icon, you then just simply hide
the whole group here. And then what's
also possible is to lock groups or
specific shapes here. So by clicking on this
little lock icon, and whenever it's locked, I cannot select them
anymore or move them. So this is just
good when you have some objects that shouldn't
be moved anymore, so you can just save them
here with this lock icon. And then on the top side here, you also have an
assets panel here. So this is mainly used to, yeah, integrate your
own assets into Spline. So for example, you can
use your own images or videos and also maybe sounds. So this is a way to
upload it here to Spline, and then you can
integrate it afterwards to shapes or animations
or anything else. But this will be also
shown in a later video, so stay tuned for this one. So this is just here for a complete guide how to
use the left side bar. So what's also a nice
feature is the library. So if you go onto
the bottom here, you see the library
tab, and from here, you can just simply integrate some pre built shapes here
from the spline program. So for example, now, this shopping bag, I can
just drag inside of here. And maybe I will just
hide our group here. And then you just have this little nice shopping bag already integrated into spline, and you can use it for
your further projects. And then down below, we also have the import
function here. So again, you can, as
already mentioned, you can upload your own
videos or images here, but you can also use
three D models instead. So you don't have to
build them manually. You can also just integrate
them here by GTF, STL, FBI or OBJ file. You can again, also integran sounds or
Gausan splits here, and also some local
spline scenes. So if feel free to use the
import function as well here. And maybe also a
little introduction here to the right side bar here. So the right side bar is mainly here for things
like post processing, modeling, or animating
your projects. So you have just a bunch of different options here
that you can activate, deactivate, or even adjust. So you don't have to
worry about it for now. So in the further
course, we will just talk about it step by step, and then we will just guide you through all of those
properties here. But for now, I hope this was a little nice overview
to the spine interface, and then I will see you
in the next lecture.
5. Basic Shapes & Modelling: So for now we will
take a walk through to the different kind
of shapes that are available in
the spline editor. So if you're not interested in watching every
property of every shape, feel free to skip to the
next part of the course. So but for now, we will
start with the first shape. So if you go to the
top toe by here, you will see some two D shapes. So in total, you have the
rectangle, the ellipse, the triangle the pentagon and the star f, the
first demonstration. So first, we will take
the rectangle here. Place it on the plane here. For better visibility, I'm going to change the color
of the plane now, so you guys see the shapes. And if you press now
option and shift, you can resize this plane
to any size you want. Also, if you look on
the red side now, you have a table
called shape here, and also here, you can change the size of the plane
here or the rectangle. And also you can change the
cornices of the rectangle, so you can make it rounded. You can extrude the rectangle. You can boveel it
for smooth edges, and you can increase
the bevel sides re. So the second shape
is the ellipse. So if we go to the top Toba here and click on the lips part. You can again put it on the base plane and
with option and shift. You can make it bigger
or make it bigger. For instance, you can also change the properties
here in the right tuba. In X and Y position, you can change the size here. You can also make a ring. You can change the angle. So it's more like a
progress bar or something. You can change the sides, so it's more edgy. More rounded. You can extrude it, of course, and bevel it for smoother edges and also increase
the bevel sides. The third object now
is the triangle. In the top tuba, click
on the triangle. Again, you can
increase the size with option and shift,
or in the right. You can increase the x
component for the y component. Then you can choose between
the equilateral or the wreck. We see the difference here. You can again smooth out the corners for a
more round triangle. You can extrude it. Bevel it for smoother edges
and increase bevel sides. Then the fourth object, it's called a pentagon here. If you click on the top tuba, place it on the plane, and again, increase
the size with option and shift in
every direction. You can also change
the size here in the right tuba in way, axis. You can increase or decrease
the sides of the pentagon. For instance, if we
take eight here, you have an octagon. You can also smooth
out the corners again. You can extrude it. Beveled, and increase
the bevel sites. The next shape is
called the star. And the tortuba, take
the star topic here, increase it with option
and shift the size. Again, you can also increase the size here in the
right tuba in x and y. You can increase or decrease
the sides of the star. You can move out or move in. The inner part of the star. You can adapt an angle, only a half star or a full
star or something else. Then again, you can smooth out the corners, more rounded star. You can extrude it of co again, and then bevel it also. On much smooer edges. It looks maybe like
a gear or something. Again, you can increase
the bevel sides. The next shape will
be the text element. The UI is going to
be skipped for now. We will talk about this later. For now, we talk about
the text element. Place it here on the base plane. On the right side, you see tap called content where you can
write anything you want. I will texplain for now. Then you can increase the
font size as you want. Make sure that the
parent element also fits to the font size. Make this element
a bit bigger if you want to have a
more bigger font size, can also d the line heat now, the spacing between the ladders. The font type, can
also change here. You can also upload an
n font if you want, and you can also choose between old Italic or
some other styles. You can align the
text as you want. Both in horizontal and
vertical direction. You can choose between the case. And also, again, you can
extrude the text Bevet. As you want, and also
increase it level sits. Then up next, we have
the path element. Again, top Tuba and then
choose the path tool here. Click on the base plane, and then you can begin
to draw your path here. Maybe something like this, for example, with Escape, you can go out of the path tool. Then again, on the
right tool bar, we have now some settings
that we can go to. For instance, we can change the shape to a polygon or
star or something else. We'll keep it as a
circle from now. You can increase or
decrease the size in x and y, you can form a ring. It's like a tunnel or something. You can adapt the angle, so half a tunnel or full tunnel. Can change the sides here, so more edgy, or more rounded. Let's go for this now. You can or decrease the depth. You can maybe make a
transition with it or adapting your model with it, can change an offset, so it begins later. Can change the angle. The twist, and the scale. For instance, the beginning
now is much smaller, and the end is bigger. And then also in
the top part here, you can increase the corners, so it's more rounded. And also, you can increase
the subdivision layer, so it's more precise. Next up, we have the
three D elements. So again, go to the top two bar. You will find the
three D elements here. So we will talk
about cubes phere, cylinder, Toros helix cone
pyramid, and so on here. So now let's take a simple cube. Make it bigger with
option and shift. Again, on the right side, you can now increase the
corners, so it's more rounded. If it's zero corners,
it's pretty edgy. And you can also increase or
decrease the corner sits. Next step, we can go with
the sphere element for now. So take the sphere here, increase the size with
option and shift. Again, here on the
right two, you can now adapt the sizes
and x y and that. Of course, we're now
in the three D space, we have another that axis now. And here you can also
slice the sphere. The next shape is going
to be a cylinder, and the top to b
click on cylinder, make it a little bit bigger
with option and shift. Then on the right to b again, you can increase or decrease
the size and x y and that. Direction. You can. I'm going to bring
this up a little bit. You can increase or decrease the size of
top and bottom here. You can choose between an angle. So maybe half a cylinder
or a full cylinder here. You can choose if you want
to have a cap or not. You can make it hollow. If you look inside,
it's now hollow. And you can increase or decrease the corner for
more edgy cylinder, and also again, the
sides of the corner. The next up, we have the Taurus. So click on the
top two of Taurus, place it on the base plane. Again, on the right side, you can increase or
decrease the size. Can increase or
decrease the tube size, be careful with it because
it can be quite overloading. So then you can make it
more edgy or more rounded. You can also adapt
the radio sides here. You can slice it in
any degree you want. Again, like a progress
bow or something. You can also if you slice it, you can also increase
the corner here for a more rounded edge, and again, increase also the corner sides here
for more precise. Then next up, we have the helix. Top tober again,
choose a helix shape, place it on the base plane. Then again, we can adapt
x y in that direction. You can make it
twisting as you want. So you see it better. So you see what the
revolution does. You can make it
more edgy or round it again with the
sides part here. You can increase the
radius of the path. Can also adapt it to this more edgy or more
rounded part of the radius, can in or decrease the corners. Again, also the corner
sits better precision. For instance, you can model like a suspension of a car
or something with it. It can also be quite helpful
or a spring, for instance. Then next, we have the cone. Place it on the base plane, make it a little bit bigger. Bring this up real quick. Now again, you can adapt the x y and that
coordinate here. Change the sides here. So like more edgy,
or more rounded, both in y, and x direction, can change the angle. The corners. For instance, you can make a water drop or
something with it. Again, also increase
the corner sides for a better precision here. Then next up, we
have the pyramid. Make it a little
bit bigger now with option and shift. This up here. And again, increase
or decrease the size. Bring up more sides to it, both in x and y direction. And also smooth it out. Smooth it out if you want to. Then next step, we
have the icosahedron. Let's take this one for now. Place it on the base plane. Make it bigger with
option and shift. Move it up real quick. And again, change the size
of it in both x and y, and that direction, can give it more
detail or less detail. Can smooth out the corners
and the corner sides again. Then next up, we have
the dodecahedron. So again, place it on the base
plane and same as before. Make it bigger, move it up. And like same
properties now here, you can change the details. You can make it more softly. Can increase corner sides or change the properties in
x y and that direction. The next s we have
the Taurus not. Choose the Taurus not here, place it on the base plane. Move it up a little bit. Get bigger with option
and shift, like that. Then again, on the right side, you can also adapt here the
Y and that axis properties. You can increase or decrease
the path radius here. The pf slides, so more
g or more rounded. You can also adapt the radial sides for
more or more rounded, and you can also change
the factor P and Q here. Maybe like this, like that. It's more crystal inside here. And last but not least, we have a lave that it's also quite
helpful to know about. And here on the right side, you can also adapt x y and that axis to
anything you want. You can decrease or
increase the x and y sits. For this, you can drag around. You see what it does. You can also make a
drop or something or maybe like you know
it from a rocket, the fire that comes
out of the rocket. You can model
something like this. Also the lave can be
quite helpful to use.
6. Light Sources & Shadows: So let it shine.
So in this tout, we're going to
talk about shadows and light sources and how
they affect each other. So if we head over to our
basic spline scene here, we see our base plane, and to show you how we can achieve shadows
and light sources, I'm going to place two objects
again on the base plane. So just the basic up. I have to reduce
the corners again. And then make it a
little bit larger here. So we see the shadows
nice and smoothly. So maybe one bigger in the back, and then we're going to
duplicate it command. And place a small object in
front of the bigger one. So in the base scene, you also notice that there's also a
direction light active. This is just a basic setting. So if there wouldn't
be any light, you would basically see nothing. So this is also the default
of the default light, you can activate it
or deactivate it. But to show all
the light sources, I'm going to place
a new one here. So if you go to the top tub here and choose
a directional light, and place it in front
of the two objects. A little bit centered,
a little bit up here. Now you also see that the first one is producing a shadow to the second one here. So if you activate
the light now, you see on the right side
that there is a light tap, which have some
different properties. For instance, we can change
the color of the light. We can change the
intensity of the light. You can also choose
if the objects that are lightened up by the direction light
receiving shadows or not. I can deactivate the shadows
and reactivate them. Again, I can change the
resolution of the shadows. Maybe go with a huge resolution, we see a more clear shadow, but I would be quite
careful with it. So higher resolution shadows
are more computing intense. So be careful with this. You can also change the
size of the shadow, the blur and also the p numbra. So if you guys don't
know what pin number is, we'll show you
this picture here. So for instance, this
is our shape here, and this is a directional light. And this is here, the second
shape in the background, and you see the darker
part is called the umbra, and the more light lighter part around the umbra is
called the P numbra. So yeah, this is basically it
for the directional light. And we have also two
more light sources. So for instance, we
place a point light now. Maybe move it here between
both of the shapes. And also again, now
on the right side, you see some new properties
for the point light. But again, you can change the color of the point
lights, or maybe some blue. Can change the intensity, the distance, the decay, so it's basically the
opacity of the light. You guys may know it from
from colors or something, so you can change
the opacity here. You can also again choose
if you want shadows or not, and the resolution
and the rad is here. You guys see now the difference between
both of the lights, so the point light
is more centered and the direction lights
in one direction. So then we can also put
the third light source, which is available
here in the Toptuba, which is the spotlight. And maybe bring this
up here a little bit. So this is a spotlight here, and again, you have
some properties that you can change now. So you can change the
color here again, the intensity, the
distance, the angle, which is new here
and the spotlight, can change slur, DK opacity. Again, you can choose if you
want to have shadows or not. Yeah, this are the
basic principles of light sources and shadows here and in combination
with materials, and so on, you will see in the
further cost tutorials that it can be more complex, so this is just an easy example to get to know light
sources and shadows. And yeah, we will work
our way through this.
7. Materials in Spline: So in this lecture, we
will talk about materials, which is quite important, but also big topic here. As you can imagine, no matter
what shape you're building, or also no matter what
animation you're creating. It comes to life with some
different sets of materials, and this is what I'm
going to show you now, what's possible here,
and let's get started. So back in our
Spline program here, I will just quickly create
a little text here. And for the content, I will
maybe just write material. Make it a little
bit bigger here. And now you notice whenever
you create an object, no matter if it's a text or
a shape or anything else, you always have this kind
of like gray look here. And this is just the
default material created by spline here, which consists of a color
and a lighting here. So in general, this is
a material tap here, so every material properties will just be inserted
or deleted here. And again, just by default, you have your color
and lighting here, which then concludes in
this gray look here. And now what's quite important
to notice here is that materials are generally
build up in layers here. So for example, now we have a lighting layer and
the color layer, but we can now also add
another layer here, and this can be done by
this plus ich in here, and then a new layer is created. So by default, it's again, just the color layer here. But if you now click on this
little arrow down here, you now have a bunch of options which you can
choose from here. About all these options, we will talk in a few minutes. For now, I will just give a
quickly and general overview of the material tap here. So this is how you can
create a new layer, but you can also just delete it here by using the red X here, and you can also just hide your material layer by
clicking on this i icon here, so you can hide it or show it. Here on the top
by the value 100, this is just your
overall opacity here. So if you maybe reduce
your opacity here to 30, you now see that
the material tax is getting a lot darker here because the opacity was reduced. And this can be then just
changed again to 100 here. But also, some
layers have, yeah, their own opacity tap here, so you don't have to reduce
the opacity overall. You can also just change the opacity here
from layer to layer. But again, this is not possible
for every material layer, so keep in mind to look
at what's possible here. So the next s, we also have
this little icon here, which is the blending mode, so you have normal multiply
screen and overlay. But yeah, what this does, we will also talk about
in a few minutes here, so I will not go
deeper inside of here. Next s, you also have
those four dots here. And if you click on it, material assets library
will open here. So by general, you can also just a save your
material at any time. So by just clicking
on this plus icon, you will just save your
settings from down below here. You can also just
give it a name, so maybe just defol material. And you also just have some materials here from the spline library
which you can use. Here are a bunch of
different materials from patterns to gradients, but also metals and many, many more, so you can just
take one of those if you want. And yeah, this is just
the general introduction now for the material tap here. And maybe if you don't
bound the material, you can also just
unbound it again, and then you have your
layer structure again. So again, this is just when you're using a material
from the library here, you can then just
unlink it again, and then you have your material
layer structure again. So and now to show you guys what the different
material layers do, I just prepared a kind of matrix here for every
material layer. So we have just here
on the left side, all material layers that are
available in spline here, and on the right side, we have a different
blending mode here. So now to show you guys what the different material
properties do in the end. I just prepared a little
yeah, like matrix here, which has every material
layer inside of here, and also every
blending mode here, which I just talked about. So we kind of have
now here maybe for the first material
layer, the lighting layer. We have now here the
normal lighting layer, then we have a multiplier,
then the screen. And then the overlay. And this is just then continued for every
material layer here. And then we will just
simply walk through, do the different
material layers, and we will just start now
with the lighting layer. So now we have our
four spheres here, and again, they just differ
by the blending mode here. So they have all kind of the
same material properties, but just another blending mode here and the lighting
material layer. So and if you insert a lighting material layer
in your material group, this just basically means that your material is actually interacting with the
lighting environment. So, for example, if I maybe just deactivate the
lighting layer, you now see that the color is just gray here and
doesn't really interact with our
directional light or any light source that
is available in the scene. And this is just in general, what the lighting layer does. So and then if we go inside of the lighting
material layer here, we just see a bunch of options
that we can change here. So, for example, I just made every reflection here
in the color rete, so you see it just a
little bit better. But we will maybe just start here with the
type of the lighting. And for the type, you've got four different options
to choose from. So you've got Lambert, Fong, physical and tune here, and the most commonly used
are Lambert and Fong. So they differ kind
of like in the way that Fong has a specular
reflection here, and Lambert does not. So Lambert is most
likely to get used for, like mad materials,
and Fong is for yeah, more like shiny materials here. So the funk type is just in generally selected by
defolt here and spline. And you just saw that I
changed the color of it, so you can just change the color of the specular
reflection here, and you can also increase
or decrease the shininess. So you get a more
concentrated area of the specular reflection here, or you can also smooth it
out a little bit here. Now if we choose a
type lambert here, you now see that the specular
reflection disappears now. And now if I change the
color here of the lambert, you see what it does. So you don't have a really concentrated area of reflection. You just have a
more kind of like smoothed out lighting
behavior in lambert. And this is just great for
using in mat materials. So next s, you have the
physical lighting type here. This one also got a
specular reflection, but you can just change
some more options here. So you can increase or
decrease the roughness here. You can increase or
decrease the metalness, and also the reflectivity here. And last but not least, we have the tune lighting layer, and this one is also just a little bit of a
mixture of everything here. So you can change the color
and also the shining is here. So next, we have fresnel here. And again, for the setup, we have the same material setup for every of those spheres here. They just differ in the
blending mode here. And maybe what I have
to mention is that we just kept now our
lighting layer here, so maybe if you
just deactivate it, you see how it looks like
without the lighting layer, but I think the lighting layer is just an important layer, and I will just
keep it inside of, every other showcasing
here for the materials. So, and next up, we have met caps here. So Mt caps simply stands
for a material capture. So it's, yeah, kind
of a material with a single texture that stores static lighting and
reflection information here. And you can just access some met gaps here from
the spline library. So if you just inserted
a met caap layer here, you can just simply brow some of the
suplne libraries here. So you have different
options to choose from, and every of those just
has a different texture and also some different
reflection informations here. But I will maybe just stick
around with this here. And now again, you see by using different blending
modes here, how it looks. And this connection
here between all of those layers is actually one
I personally also use a lot. So the lighting fresnel
and Mt cap one here. So with this combination, you just can create some
yeah, realistic materials. And you can just try it out for yourself with those
different options. You also have the possibility to just upload your
own MDCap here. This can be also done. You will find most
MDCaps online, some free ones, but also
some paid ones here, which you can just upload. And yeah, this is it
for the MDCap here. So next we talk about
image and video. So those ones have kind
of like the same setting, so they only differ in the way that video is like an
image sequence here. So yeah, it's just shown as a video while I'm rendering
here, for example, you have this little t here, and this is just a static
frame or a static image here. So if we maybe go inside
of the image setting here, again, you have
some different kind of options to choose from. So there are also some images
here in this blin library, which you can use, but you can also just use your
own image here. Then on the bottom, we have some more settings here, so the most important one is maybe the protection mode here. So we have the possibility to choose in between U
V planar spherical, cylindrical or triplanar here. And this is just depending on what kind of
shape you're using. So for example, now, we use the sphere here, so it just makes
sense that we use the spherical protection here. But yeah, if you're
using the cylinder or also like a plane
or something else, yeah, it's quite dependent on the shapes you're using here. So now maybe if I
just use planer here, you now see that it's yeah
projected on the plane here, and now you can
for example, now, choose the axis, which
you want to be displayed. So for example, now,
this is that axis, which the image will
be projected to. Then you can also choose if you want to have both
sides projected here. So for example, I can also just only use the front
side here or the back side, but also both, of course, Then you have the wrapping here. You can just do clam
repeat or mirror here. Then you also have some
sharpness settings here, so you can choose in between pixelated or crisp
or smooth here. You don't really see it. This is just a
minor effect here. But maybe you see it this way. Then you can also choose if you wanted to crop
the image or no, and you also can
apply some scale if you want to in both x and y. You can also choose an offset. So just a symmetrical
image, but yeah, for other images, this can
be also just quite helpful, and you can also do
a rotation here. And again, if you want to upload an own image, you can do so. So for example, I've
got some leaves here, but this could be
anything you want here. And then it can be also just quite helpful to use
overlaying modes here, for example or any
other blending modes. So you can just create some really nice materials
with this effect. And yeah, this is just again the same for
the videos here, so you have kind of like
the same settings here, but it's just a video and
not a single image here. So next s, we will talk about
deaf and gradient here. So those two might
look very similar, but they have some
small differences, which I will explain
in a few seconds here. But first, we will
just start with the properties of yeah, each material layer here. So and then if we go inside
of the deaf settings here, we have some different
options to choose from again, so we can use mask
or color mode here. We can change the origin
to be vector or a. Then we also have a
blending mode here, so we can choose
linear or smooth. This is just a, like, a little difference, but you
can use it if you want to. And then we have the ramp
here where you can change the color of your deaf gradient to anything you want here. You can also just add colors here by clicking onto
the color slider. And then you have the type here, which is by default add linear, but you can also
use a radio one. And this is maybe the time where we'll just introduce
a cross section now. So the deaf is more
likely to get used for like three
dimensional objects here. So if you're using a radio, yeah, like deaf gradient, you have to notice that your gradient actually
applies from the middle of your shape to the outer
side of your shape here. So you have to
keep in mind that. That is why you only see now
the yellow color because the green color is basically
inside of the sphere here. And then I will just simply change back to the
linear type here, and we will just continue
with position here. For the position, you can choose a local or world
coordinate system. And then you also see that
the origin values are also getting changed when you
go to the world mode here. Then you have the
direction here. So for example, if I place a
one inside of the y value, you now see that I get
a 45 degree angle here, and this is just
the same year for, maybe like that, so it will
be pushed inside here. But you can just play around and get a little
nice rotation here. And then you also have the
near and far values here. This is just where
the gradient starts. You just see it here by this little arrow here
and the color pill. You can just move
it around here, this is just a nice
little indicator, and you can do this
also for the far value. And this is it for the
deaf settings here. And now for the
gradient headings now, you maybe notice that it kind of looks like it only
has one color here. But if we rotate around, you now see that the
gradient is actually applied to the whole
surface of the sphere here, and this is the main difference between both of those here, so deaf and gradient. So again, the gradient of the deaf material layer just go inside of the cross section, also, but when you're
using gradients, it's most likely to get
used on the surface here. And now for the settings
of the gradient layer, it's kind of like the same
as for the deaf one here. So again, you can choose
mask or color mode here. You can use a type here, so linear radial or polar. Then again, you can also activate the blending
function here. You have your color ramp
here, which you can change. And then you can also
just set an angle here, rotate your gradient around. And again, you
have some offsets, and you can also morph
the gradient here. So for the next material layers, we will just go back
to our matrix here. So those ones we just
actually discussed here, and now we can continue
with the bottom ones here. So next up on the list, we have the normal
material layer. So this is a quite simple one, which has just this
yeah kind of looking. So you can activate
x y and that here, and while you're activating
another color is added here, so this is just a simple normal
layer from spline itself. So this is just not
quite important. You can use it, of course, but it's not really
that customizable. So next up, we have noise here, so noise can be also just quite helpful in some situations here. But if we look inside of the
settings here, maybe, again, you have the mask mode here, but you also have
some different kind of types to choose from. So you have two
simplex modes here. You have Ashima, FBM, Perlin or Voronoi here. And maybe if you just
go from type to type, you see the kind of like
difference from each other. And then you have just again, some simple properties
that you can change. For example, the size
here for simplex. You can increase or
decrease the scale here. So less scale just means
yeah like more noisy here. You can also change the movement here or the colors, for example, we have four colors here, and you can also just increase the distortion here
in x and also in y. And then you also have
some factors here which you can play around with. And, with noise, you can just create some awesome
materials here. So for example, maybe if I just copy the
material here and paste it on this one and choose the overlay
function here, you see some really nice noise here and just in combination with some
other material layers. You can just create some
really cool looking materials. Yeah. So next step, we have
the rainbow effect. I like to use this a lot in combination with some
iridescent materials. But maybe if you just look inside of the
settings here, again, we have the mast mode, and then next up, we
have the frequency. A higher frequency just
means that you get more of those like
rainbow rings here. Then you can also change
the movement here. And you can change
the color here. So get it like more
retro style here. Then you can also
add some noise here and also scale up the
noise or scale it down, and also you have just
some offset settings here. Again, just feel free to use those effects with the
different blending modes that are available, so you can also just use the screen multiply or overlay function and get some
really cool effects done. Then next up, we have
the tune material layer. By now you don't
really see that much, but it's actually just
because of the default state. And if I just use maybe
some red and some green, for example, you see it a
little bit better here. Maybe if I move it
out a little bit, You see what the tune does, so you can just create some
nice outlining effects. And as the name maybe says, you can also just use it
for some cartoon style. And then again, you have
some different options here, so you can apply an offset
here if you want to can create some noise and
also scale up the noise here. And this is just
also a little nice, but not really often
used material layer. So the next se, we have the
outline material layer here. This one, I also personally
use a lot in my projects. Maybe if we check out
the settings here. So first, we've got
the outline here. This is this white line
around the sphere. So of course, we can just change the color
here of the outline, and we can also just change the with here
with the slider. And the next step, we have
the t threshold here, and this simply describes, how much you see of the
outline when zooming out. So, for example, now
I zoom out like here, and then when I
increase the threshold, you now see a lot more
of the outline still, and when I'm decreasing it, you see less of
the outline here. And then for the contar,
you can, of course, also just change the color here, and also the wif here, and the threshold again. So this is again
when zooming out. Then you can increase or
decrease the frequency. So depending on which
we you choose here, you see more lines
or less lines here, and then you can also
change the direction here. Again, maybe if you
just choose y here, you get this horizontal lines, or if you're just using x, you're getting vertical lines, and if you activate both, you get 45 degrees. And then you can also change in between cont or continuous here, also depending on your use case. And then next up on the list, we have the glass
material layer. So this one here, I just added an outline effect, so you see it better here
because otherwise it would simply be invisible here. But maybe if we
now rotate around, maybe here on the top
side or something else. You now see what the
glass material does here, so you can basically look
through the glass element here. And if we go inside
of the settings, you can change three
properties here, so blur thickness
and refraction here. And maybe if I
decrease the blur, you now better see what's
behind of the sphere here. So you can increase the blur and see less of what's behind, or you can decrease it and
basically see through here. Then you can also adjust
the thickness here of the gloss and again
also the refraction. With those settings,
you can again just play around and see what fits
to your design here. But the glass material is also very popular
and often used. So definitely try to get
familiar with this one. And then we will just continue with the display material layer. So this is the only layer that doesn't have a blending
mode available. And maybe it looks quite different if you use it by default because I changed
the value actually, but maybe if you go back to the a default value
here of eight. It doesn't really see
that deformed here, but you can change
it in plus and also in a negative
direction here, and then it kind of
looks like this here. If we go inside of
the settings here, we have again the same options here as in the noise
material layer. So we have two
simplex times here, then we have a Shema
FBM Perlin and Voronoi. And again, all of
those types look a little bit different
from each other here. And then you can again just play around with
the settings here. So for example, we can make
those little edgy stars here, and with the scale factor, then you can also bring in
some movement, and again, have the option to choose some values
here for the offset. So and last but not least, we have the pattern
material layer here. And if we go inside of
here in the settings, we can choose in between some
different paddings here, for example, we have a ring, we have a polygen crosses,
diamonds, checkboard, And lines, of course, and also some waves here. And then we have just some
properties that we can change. So maybe you remember from the image and
video material layer, we can change the
projection mode here to spherical
or also triplanar, depending on what
shape you're using. Then of course, again, we can change the offset values here. We can also change the
colors of the pattern here. We can decrease or
increase the frequency. So if we want to
have more circles here or less circles in
both x and y direction, Then we can also change the
size here of the circles. We can also bring
in some variation. So not every circle
looks the same here. Again, we can apply
some smoothness and also some zig zag here to
bring in even more variation. And again, we have
some rotation. Also, this kind of looks like
now like a baseball maybe. And then we can
also just cut it in half or so both in vertical
and also in horizontal here. And now we only have one
thing left on the list, and this is the mask
mode, actually. So to show you this one, I just prepared
this little sphere, and it's structured like it has two images here on top and then just delighting
in color layer. And the first image is here, just this red here
from the library, and the second one are
those little bricks here. And then to show you
what the mask mode does, I will create a new layer, and for this one, I will
use the noise one here. And then inside of
the noise settings, we will then just activate
the mask mode now. Now what you see is that this noise effect is actually applied to this
image down below, and maybe if we now change
the scale of the mask, you now see the difference here. Maybe I will reduce
it a little bit here. And then you actually see that the noise is applied
to the image here. So everywhere where the
noise is or should be, it's showing the image
down below here. And for example, now
I can also maybe change it here to something
like this gold med cap. So now you see that the
gold met cap is shining through and you can just do
it for every material here. And also every combination here, so it doesn't have
to be an image. You can also just choose a
color, for example, now. So I will just go
by yellow now here, and then you have
this nice little ball here where the noise
looks Yeah, yellow here. But again, you also
have just then parts of the met cap here. So this one, so this is just a really good
example of how you can merge those things together and create some really,
really cool materials. And this is basically what
the mass mode does here. But again, you can just
play around with it. So there are endless
possibilities how to use it. This is just a little
example here in combination with
the noise mode, and
8. Boolean Modifier: So let's talk about
Boolean operators for now. Boolean operators
are mainly used to create complex shapes out
of more basic shapes, so you don't have to draw them manually and extrude
them afterwards, which can be quite
hard to achieve. And some people of
you may know it from other design resources
like Figma Illustrator, so it's a common way
in graphic design to build some shapes. And this technique can also
be adapted to three D space, and that is what I'm going
to show you right now. In the default scene here, I'm going to place two
objects side by side. So for instance, e. L et's reduce the
corners here a little bit. So it also looks like a cube. Then also a little bit bigger. And then also put a cylinder here on the
left on the right side. We also have to
reduce the corners here and also make it a little bit bigger. A little up here. So and for better visibility, I'm going to colorize it also. So you guys see a
better difference. So white for the cube maybe and some purple
for the cylinder. So now you have to
select both of them, so just drag across
here in the bind scene. And on the left
side, you see now both of the shapes are blue now. And on the right top corner, you now see a tab called
Boolean modifier, which shows three options. And for instance, we just
take the first one for now, which is called subtraction. This is the first
Boolean modifier. And now you see
that the cylinder is not visible right now, which is totally enormous, so you don't have
to worry about it. You see it on the left side, if you click on the cylinder, it's still there,
but it's invisible. And if you drag it now to
the direction of your cube, you see what the first
boolean operator does. So it subtracts one
shape from the other. Maybe a little bit up so you
can also split them here. So this is the first
Boolean modifier. And now we are going to
check what the second does. If you head over to
the group again and now select the second
Boolean operator, which is called intersection. You now see that only the part where the both shapes
are intersecting, which each other is
now visible again. This is what the second
boleon operator does. And then we also have a
third boleon operator, which is called Union. And if you click on that, now both shapes are visible again, and it's grouped up. So basically, a union is that you merge two shapes together, and yeah, that's the
third boleon operator. So this were all three
Boolean modifiers, and now you can imagine
that it can be quite hard to draw and extrude them
those shapes manually. So it's a nice way to model
some shapes in spine. And this technique, we also going to use a lot in
the further videos, so it would be quite good if you are familiar
with the technique.
9. 3D Paths: So let's talk about the
three D puffing tool, to access the three
D puffing two, you can just simply head over to your top
tool by here again, and now you have here the
choice to choose the puff tool. And then you already see that your cursor is actually getting changed to
your little pin tool. And then you can actually
just start drawing now, for example, now here
on the base plane. So you can just simply
draw a little shape here. And if you actually click
and hold your mouse, you can also create some
curvature curvature here around. And then if you click on the last vertice
of the shape here, you can simply just close it. And now afterwards,
you also just have the possibility to
rearrange your shape, so as you want it, can also just edit your
curvature afterwards. And you don't actually have
to do it with the bench here, you can not this one here. You can also just increase
the corners here on the side. Delete this one for now. Again, you can just simply also rearrange the corners here, so you get a little bit more
smoothness in your shape. Now what's quite interesting. Now you have also the
possibility now here to change some settings here
about the par of extrusion. For now, we'll actually just
hide the base plane for now. And then you can actually change the cross section type here. You could reference
rectangle here, for example. Now you see that the p has actually a rectangle
cross section now. Or you can choose a polygon now, where you can also just increase or
decrease the sides here. So anything, again,
you already know from the basic shaping tools. You could also maybe
choose a star here now. I increasing the def here, and you'll see that it has a
little star cross section. And you can also build up your
own custom cross section, which we will do
in a few minutes. But first, we're
actually going to talk about the other options here. So maybe we will start
with the polygen now here. So again, you can increase
or decrease the sides here, you can increase the corners for more rounded polygen
and you can now here, increase the depth, so you
can choose maybe like 0.5, so you have a 50% close
shape, and so on. And then you can also
choose an offset here. You can increase the angle or decrease the angle,
rotate it around. You can also twist
your shape here, and then you can
also declare if you want the starting scale to
be less than the end scale. For example, from
little to big here, the opposite, how you want it. You can actually scale down the start and
end as you want. And maybe we can also just talk a little bit about the
star cross section now here. What's also quite
important is now that if we actually
bring this up here, so we're closing down the shape and here the twisting mode, which is quite often used, and you see that
you actually not always hit the right
endpoint here. You actually have to
imagine now that, for example, if you
have six sides here. You always have to choose a
multiply angle of 60 here. So for example, the full
rotation is 360 degrees. Now if you divide
it by six sides, you actually get 60 degrees. Actually, if you now
enter here 60 degrees, you always see that
the shape is closed and the same as for 120 degrees, or maybe like 240, anything that's a
multiply of 60, And yes, this is
quite important. Also for a rectangle here, for example, now we have
four sides in a rectangle. So we have to choose anything
of a multiply of 90, 90, 180, and so on. And then we also
have the possibility now to actually choose a
custom cross section now. And for this, I will just simply just remove the headings
I've done before, so no angle, no twist and
just the full shape now. Now if we activated the
custom note, we can, for example, no draw
our own cross action. So just hit the pent
here, for example. You can also use just the
basic two d elements here now. But for example, now we
will just choose pent and then I will draw maybe
something like this year. Okay. Now you can just leave the editing mode here now and head back over to
your path element. Now you can choose in
the object category. You can just simply
choose your shape now. And then you actually see that
it looks quite wild here. But you can actually just then maybe resize your
element a little bit, so it has more space. And now you actually see
that the cross section is actually the same as the
vector we just draw. And also now this path is actually just connected
to this shape. If you just dit it, not here, But here
on the right side, you can still edit it. And then if you
rearrange the corners, you also see that the corners of the three D path is
also getting changed. So you can also
edit it afterwards. A, that's it for the
three D puffing tool. Again, we just talk about
the basic functionality of the three D puffing tool, so you get to know
all the functions and modules that are
available in spline. And then afterwards,
in the project, we will use all the techniques and make some great
designs with it, so stay tuned for this part of the lessons.
See you next one.
10. 3D Sculpting with Brushes: So in the next chapter, we talk about brushes and
sculpting in particular. Sculpting is a pretty nice way to give you your shape
some fine adjusting, or you can also build some completely different
shapes with it. You can use it for
terraforming, for instance. And yeah, so we head over
to a plane seen here again, and we will place a plane here
on our base plane for now. So the difference is just that our base plane is in
technical is a rectangle, and we will now place a real
plane on this base plane. So just put it on
the plane here, and then exceed the size boil
holing option and shift. And for now, you can now maybe make the rectangle
invisible here. To activate the brush Mud, you can simply click
on your shape. For my example, now
it's the plane here. And then on the right side, you see under the topic shape, that there's a button
called Smooth and edit. And if you click on this button, you now see that your
shape or in my example, the plane is now subdivided
into some rectangles. And to enter the brush Mud now, you see on the top tuber here
that there's a little pen. And if you click on it, you're entering the scalp mode. So in the scalp mode, you have four
different options now. You have to choose
between the grab mode, the draw mode, the draw
clay mode, or smooth mode. So and what the first
mode does is basically, so it grabs something. So if you now click
and drag on the plane, you now see that you can
simply grab the plane, pull it up, pull it down. And this is what the
first brush does. And what you can also do is, you can increase or decrease
the size of the brush here. So for example, on
the right side, you can reduce the strengths, and you can also reduce or increase the radius
of the whole brush. And for the second
brush, Martin, now, you can click here
on the drawer icon. And by clicking and
dragging it across, you now see that the surface
is getting elevated now. For instance, you
can also push down the surface by holding
command in control. Now you see that the
circle is getting red. And now if you drag and
draw here on the surface, you see that the surface
is getting pushed down. Now we also have the
draw clam out here, which is the same as one before, the draw out here, but
it has a flat base, so it's more yeah
flat as it called. And you can also draw and
elevate the surface here. And also again by holding
command in control, you can also push it down here. Then last but not least, you have the smooth tool here where you can smooth out
your edges if you want to. And again, you can also decrease the strength here a
little bit for some better smoothing Also one tip for smoothing is you can also increase the
subdivision layer here. If you're going out of
the brush mode here, you see that you have some really different vertices here, and you can get rid of it if you increase the base subdivision layer here on the right side. So if you increase
the layer here, you see that all the
vertices are now more even, and you also get a more
smoother solution here.
11. Advanced 3D Modelling Functions: So in this chapter,
we talk about some more advanced
three D modeling tools. So you guys already got to know the more basic types of
shapes here in the designer, but it should be clear that
you can't build everything right of those
default shapes here. So we will introduce some more advanced shape
building tools here. And to show you guys the
three D modeling tools. I will place a cube on
our base plan here. Again, make it a little bit bigger while holding
option and shift. And then move it a little
bit up here, maybe. And on the right side here, I will remove the
corners for now. And also, our base plane, we don't have to use
this one right now, so I will just hide
it from the scene. And then you can
click on your QP on the left side bar or you can directly click it
here in the view. So what we are going
to do right now is we again click on the smooth
and added added button here. And then you already see that y, that the cube is now
looking a bit strange now. But we can change this now by decreasing the
subdivision modifier. But in this tutorial, I actually want to
do the opposite, so I will want to increase the
subdivision modifier here. And now you see that it's that it appears as
there right now. And now you see on the top side here that there are some options to choose from. And we will I will guide you through the different
functions here. First, we talk about the
three first options here. For example, if you harbor about this first option
here, you see the phase, and what this simply
does is that you can actually select one
of the facing sides here. For instance, if you
click on this side here, you can drag this side
however you want. I will prevert it for now. Then you have the second option which is selecting an edge. So you guys see maybe
the difference here, so I can't select the
front here again. I just can select
the edges right now. And if I click here
on one of the edges, you can change the edge in
every direction you want. And then the last option
is actually the vertex, so you can't anymore
select the edge here, you can just select
a single vertex. If I click here on one vertex, it just moves the vertex in
the direction and choosing. What you can also do is you
can select multiple vertexes or multiple edges or
multiple phases like this, you can just can drag
across here the vertices, and then you can move around
all the vertices selected. Or for example, you can also
select multiple edges here. For example, this ones here. Then you can move the
group of edges around. Or you can also just
select multiple phases here and then also move
them around or rotate them, twist them like
anything you want. What you can also
do is you can not just drag across the scene here, but you can also click
option and shift here, and then you can
select multiple phases or multiple edges or
multiple vertices. O. Then we come
to the next part, which is the modeling part. So for instance, we can now
go on the right side here. So these are just the
selections of the edges, the vertices, and the faces. And now on the right side here, you see another option, which is called extrude. So if I activate now the
extion mode, and for instance, choosing now the side here, you see that it's
selected right now, and you also see a
little blue dot here. And if I click on the blue dot, you see now that I can
actually insert a new A new layer here,
so the shape is getting transformed
in this direction. And I can do this for every
of the faces here now. For instance, let's
do this also, and then the top one as well. Now, I don't really like
the looking of this, so I will do this again. So clicking on the
face side here again, and then I will make a little one in front of this face side. So it looks a bit more. So this is like a
common shape type that you see often in spline. And this is it for the first option here,
the extrusion mode. Then you have the insert mode. If I activate the
insert mode now, and for instance, I'm clicking
on this facing side here. And again, you have, again, the blue dottia visible. And if I click on
the blue dottia and move it towards
or backwards, you now see what it does. So it actually makes the facing rectangle
smaller or bigger depending on which direction I'm pulling the trigger here, so I'll make it a
little bit tinier here. And what you can do with it is, for instance, you can now again, activate the
extrusion mode here, and then you have you can
select this little phase here. And then again, you
can extrude it, but in the direction, so you can make a
hole or something. That's what I'm going
to do right now. And I will do this for all
of the facing sides here, you can make it a
little bit tinier here. Go back to the extion mode, and pulling a hole here inside. Also for the top layer here. Again, inset mode, make the
facing side a bit tinier, going back to the extion mode, and then drill a hole
inside of the shape. So then you have the
third mode here, which is called the loop cut. So with the loop cut, you can actually add some edges inside of
the existing shape. So for instance, let's let's
put an edge here inside. So you see now that it's
visible here in the red color. And if I want to
add now an edge, I just can simply click on it. And now one edge is created in the center now of
this direction here. And I can choose that I want
to add more edges here, so I can hover on it again. So adding an edge here,
adding an edge here, maybe here again. Again, again. You see actually what it does. So first, we had a
quiet round shape here. And while adding some
of the loop cuts, you now moving the
edges in the corner. And now you have a
more edgy shape. And again, just
for clarification, you can still just move
anything you want around. For example, I want to move this facing side now a
little bit to this side, or I want to move this
edge now to this side. You can do whatever
you want here. O again, you can also select multiple vertices here
and move them around. So you can play
around with it here. So again, just the
first three runs are the selecting tools, and the remaining four ones are the main three
D modeling tools. So this was just
the first example, but we will make
another example here to show you guys all the details about the three D
modeling tools. So I'm going to delete this
old shape from now from now, and we will make Qb again here. And again, make it sharp here with the zero
corner element here, and then going to
the smooth and dit. So again, we will increase the subdivision
modifier for now. So I now I want to show you more details
about the loop cut now, so I will select the
loop cut from here. And then you see maybe more
what the loop cut does. If I'm adding here
in a loop cut, you see that the edges is
actually moving out of the box. So you get a more edge element. And what you can also
do is you can drag this edge by choosing
the edge slide here. I now add it here in a loop cut, and now I can actually drag this one up
and down as I want. And this is also quite
helpful feature. So for instance, I can also drag this
out of the box here, so you get a little hole here, which can be also useful
in three D modeling. And that's basically
what you can achieve when using the loop
cut and the edge slide here. So and maybe a little tip here, you can actually select some vertices or edges
or facing sides here, and same as in creating shapes where you're
holding command and shift, you can maybe you notice you
can hold command and shift, and then the whole shape
is extending simular. So this feature, you can also use in the advanced
modeling tools. So I've selected now all the vertices here
on the top side. And now if I'm holding
command and shift. And now I'm clicking here on this little
ball and move it inside or outside now you
see that all sides are exceeded and
decreased simular. For instance, I can also
rotate it around here, maybe also on this side, selecting all the vertices, holding command and shift, and then you can decrease or increase however you want
the shape to look like. That's it for the four
shaping models here. And on the right
side here now you have also just a
simple selection tool. Then here you have
the sculpt mode, which we talk about
in another video. And then here you have also some properties that you
can change actually, which affects the way that the three D modeling tool works, and to visualize how this properties affect the
three D modeling tool. I will create a new cube So just place it here and make it a
little bit bigger again. So reducing the corners, and then again, go in
this move and added mode. I will now keep
the cube as it is, so without the
subdivision modifier. And now what I'm
going to do is I select the facing mode now here, and I will select two
of the sides here. So by holding command and shift, I can select the two sides here. Over a little bit
here to this side. And then you see the extrude
and inset mode here. So you can actually choose between a group or
individual mode. So when I'm going to
extrude this shape now, so again, select both
of the sides here. And when I'm extruding, now you see how this extrusion
works in the group mode. But if I redo this with
the individual mode, you now see that both of the shapes now are
independent from each other, so they're going in their
specific direction. Again, this is the
individual mode. And when I'm changing
to the group mode, you see that they are getting extruded simular and
a simular direction. Then the second thing
you can change in the properties here is
the extrude direction. So again, we will select
both of the sides here. And now when you activate the
drag mode and extrude it, you know, see that it's actually extruded in the
direction of my cursor. So if I redo this now
with a normal mode, you see the difference here. So then you have to choose between the
selection properties here. So for this now, I will again increase the
subdivision layer here. So it gets it gets transformed
to a cup to a sphere here. So next up, you have the
selection mode here. So for instance, if I select
and drag across here, you see now that some of
the parts are selected now, and if I'm choosing to
delete these parts maybe. You now see that also
the parts behind the parts I actually selected selected are
also getting deleted, and if you don't want that, you can actually change the
property here to just front. So if you now select some
edges here and remove it, you just have a hole from the
parts that are that we're selected now and the parts behind the selected
parts are still there. So we do this again. You can also choose between
the selection mode here. For now, it's just if
you drag across here, you selecting the boxes, but you also have
a paint mode now. I I select the pat
paint mode now, you can actually paint by
clicking your mouse and hovering across the shape and then all the parts
are getting selected. Then the last part actually
is a hole filling mode, for instance, I will draw a
short hole inside of here. Delete this one. And what
I forgot to talk about, you can actually fill holes by selecting the
edges of the hole, so in a little bit. So if you select all the
edges around a hole here, You know that this
option here pops up, which is called fill hole, and if I click on it, you now see that the
hole is getting filled. But you have different
properties to choose from, so you can choose if you want the hole is getting filled
flat curved or engine. And for example, I
can do it flat now. I can do it in the engine. You can play around with it. So it looks a little bit different from
property to property. But yeah, that is how
you feel the holes in. That is also the
whole explanation of the property part here.
12. Physics: So let's talk about physics. So to activate the
physics mode in spine, you have to go to the simulation part
here in the right tuba. And then you see the
first choice of physics, you have to activate it. And then you should
be good to go. So first, we will make an example of how the
physics properties work. And first, we will now again, hide the base plane here, and we will create a new Q per. So put it on you, make it a little bit bigger
by holding command and shift. So but we want more like
a table or something. Turn around here. So something like this. Okay. Maybe give it
also another color, so maybe some white,
so you see it better. And then on top of this table, we will place some more objects. So choose the planar. And then again, make the cube a little bit bigger by
holding command and shift. And reducing the corner, so it looks more like a cube. And then we will place
it onto the table here. On top of that, we will
make another cube, so you can simply
select the cube now and hit command and D, so you duplicate the cube. Place it on top here. You can make again another cube. You have three in total. So then we will give
every cube another color. So you see the difference
a little bit better here. So purple maybe some
blue also here. Okay. And now we will
group up these cubes here, so you can select every cup
and then hit command G. So you group them, you can
see it on the left tube, all the cubes are grouped. And then you click on the group, and then you see on the right side here a
tab called Physics. And first, we start here
with the body type, first, it's positioned by default, and we will change it
now to a dynamic value. And what this does is basically if you move this group up now, and start the simulation. You now see that the cubes
are actually falling down. If you change the
body type back to position now, and
again, simulate, you now see that
nothing happens, so it stays in this
origin position now. So going back to dynamic, we can also give it
a little twist here. But you actually may notice that all these cubes
are stuck together, and to get rid of it, you can simply select
the group here and say that the children are not
fused, but separated now. And you may notice now that it's still not falling down yet, because now you have to go
one layer down and give all the cubes now
in the settings here the dynamic take here. So also body type, you have to select
every cube to dynamic. And when you now simulate again, you see now that
the cubes are all bouncing in different
directions. So every cube now has
some different settings. So for example, now, you can change the
collider model to a simple faster model or
a precise slower model. I will keep it with a simple
faster model now here. You can change the
weight of the cube, so you can give every
cube a different weight. We will come to this later. You can also give them
another gravity scale. So one here is like
the normal gravity, so 9.89 0.81
meters/second squared. And if you now adjust this
value to maybe like two, it gets multiplied by two, so it is like something like
16 meters/second squared. And this object will now fall much faster
down on the floor. So for example, if I'm now giving the bottom QP now
a gravity scale of two. And maybe we will bring this up a little more so you
see a better difference. And then when we simulate again, you see that actually
the guys don't see it, that grad, so maybe a
little bit more up here. So you see that the last cube is getting much
faster on the ground. Can also give the second
one a little less here. And the top one, also So you now see
that with e gravity, they are still stuck, so maybe some more gravity here. And then when you
simulate again, you see that the two top cubes are falling much lower
than the third cube now. Okay. Then what you can
also do is friction. So I will bring the whole
group down again here. Maybe like rotate it back. And maybe for example, now, if you give the last cup here some adjustment in
the friction now, so we take the zero value out here and also do it
for the other cubes. And we will make the table
here a little bit bigger. And when I'm simulating now, you see that the cubes
are all sliding now, like they are on
ice or something. Yeah. And that's basically
what the friction value does. I will remove the
table size now again. And what you can also do is you can change the bouncing values. So for instance, I know, I will move this up
again a little bit. And we will make the last cube
a little bit more bouncy. So choose the one the
value of one now. And you actually see that
it's quite really bouncy. So Maybe if I rotate it, now you see a better difference
when I simulate again, so you see how jumpy it is. So it's like it's a
very high value now. If you reduce it a little bit, Yeah, you see the
difference now. So this is a bound factor. I will shut the cup. I will rotate it back. And then we also have
the damping factor. So for example, if I'm increasing the damping
factor for every cube, So I have now every
damping value now increased and bring this a little bit more
up the group here. You actually see that
it's more damped now. Of course, the last cube is still has the
increased gravity scale, so we reduce it again and also decrease the
bound level here. I don't know what it is on the. On the other cub, we have a 0.2, so we also take 0.2 now. And then, I think I
missed it already. O the gravity scale
is also the 0.2. So change it now here again. And now you see
that it's kind of smoothly now because
of the damping factor. And yet, that's basically
what the damping factor does, so it slows down the
whole scene a bit and give some more
smoothly animations. Next step, we will talk
about the weights now. For example, now, I will bring two cubes now out of the group
by dragging it out. I can delete this group for now, and then I will put one cube on this side and one
cube on this side. And now when I simulate, nothing happens right now. Because actually the table is
now fixed in its position, but I will change it now. So if I click on the table now and again change to
the dynamic body type, you see actually that
everything is falling down, but we don't want that now. So we see another setting here, which is a translation and
also a rotation factor. So if we deactivate
all the xis here, You see then actually that it's only rotating, it's
not falling down. And we can also deactivate
now the other two axis, the x and y axis, so it only whips
in that direction. Now if I'm going to simulate, you see now that it's falling
down on the left side. And then for example, when I'm changing the weight of the right cube now to
maybe something like five. And then I simulate, again, you see that it whips down
to the right side because the weight on the right side is now bigger than
on the left side. So of course, it
makes sense now that it's moving in the
right direction. But also you can
maybe, for example, give the left one, like
a weight of three. But you can increase the
volume of of the cube now. Maybe also a little
bit higher now. And when I'm
simulating now again, you see it's bouncing
back to the left side. But on the other
hand, I can increase this value now again
to maybe something, much higher, so
100 or something. And when I simulate again now, it's moving to the right side. So you guys maybe see what
I'm trying to explain. So maybe you know it
from the math school, so it actually depends on the volume and the
density of the material. But yeah, you can play around a little bit
with it and get to know how to use the weight and
gravity scale and so on. Yeah.
13. Cloner Module: So next up, we're going to
talk about the cloner module, which is a feature I
quite like because you can create some really
awesome shapes with it. And to demonstrate
the cloner module, we place a cube on our
base spline plane here. Here, make it a little bit bigger by holding
option and shift, and then move it a
little bit up maybe. Then if you have
the cube selected, you see here on the
bottom right corner, you see the cloner element, which you can activate, and then you can also already see that there are two more
cubes added to the scene. You can increase the value here by increasing the count slider. So to any value you want, let's stick around
with ten here. And then you can choose
between some options, so you can make a radio clona, you can make a linear
clona grid clona or object based clona. So first, we're going to talk
about the radio clona here. So this one not. So let's look at this
from the top side here. So you have some
properties you can change. For instance, you can increase
the radius a little bit, or you can choose
where it should start and where it should end. You can also say if you want to show or hide the
middle component here. So I normally hide
it like every time. Then you can also
choose if you want to align all the items around
the main component. So it's facing directly
the middle one. You can choose which axis you want to have
the clone around. For instance, the
x axis, y axis, the axis, Then you can also
change the position here. And what's also really
cool is you can also change the scale
from here right here. For instance, you can make some really cool
snowflakes or something. You can also increase the y
size here for maybe a flower, and also that axis. Know this not this here. Then you can also rotate
it to any direction you want by increasing or
decreasing those sliders here. That's it for the
radial component here, which is quite cool. Then again, the linear is basically cloned around
the linear w here. Then you can also
choose the grid style. Where you can now
increase or decrease the count in every direction. For instance, I can
increase the x value here. It's increasing in x direction. I can increase in the y direction
or that direction here. Also again, you can play
around with the size. Then finally, we have the
object based clone element. So if you now maybe take
an object as a reference, to object here and take
maybe our base plane. You see that now the cubes are intersecting
with the base plane, and you can choose
if you want to spread it randomly
around the base plane, you can make a polygon centered. You can put the cubes on the edges or on the
vertexes of the rectangle. And again, you can
make some really, really awesome stuff with it, so I can recommend you to
get familiar with it. Yeah. So what's also a
nice feature about the clonal element
is this one here, so I will just show
you an example. So I will just put
the basic QP on our base plane and make
it a little bit bigger. And move this up
also a little bit. And now we'll just change the color again
here to some white. And then to the right side, I will maybe place
the sphere here on the plane and give it
the color of purple now. And what you can
actually also do is, you can, for instance, activate the cloner module here, and you can choose the object type so not
radial linear or grid here. You can actually use an object where the clona
should be applied to. For example, I will now choose this cube
now, so the it up. And now you actually
see what it does. It actually spreads around
the sphere on the cube. If we increase the
count value now, you see that many more spheres are created on the
object surface, and now you can
actually just play around with the properties
here, as it is, now, you could spread it randomly across the sphere
or you can maybe also do the polygencen mode here on the edges or
the vertices here. You can play around with it. This is also a nice
little feature about the clono module. And yes, you can actually make some quite cool
effects with this also.
14. States & Events: So, let's talk about
state and events. So state and events
is a big topic. So again, if you're
not interested in watching the full
detail of every step, you can also skip to the
next part of the course. But now we now talk
about state and events. So let's head over to
our blind sen now again. For demonstration, again, we play some objects
here on our base plane. But for this now, we actually extrude our base plane ale bit. Here in the right tuba. Let's give it a
little extrusion, and also color it a little
bit maybe in white. And we will make the plane a
little bit bigger here now. We'll holding option
and shift now, maybe we out a little bit first. Holding option and shift, you can increase
the size lee here. So now we have a nice
little plane here. And on top of the plane, we will now place a cube. So put it on here. And again, while holding
option and shift, make it a little bit bigger
here for better visibility. Okay, now, we have
now this cube here. And now I will introduce
the state and events part. So make sure your cube
is selected here. And on the top
right corner here, you now see two topics. One is the state event. One is the state, and the second one is the
events topic here. So to create a new state, for instance, you
can just simply click on this plus icon here. And now you see that
two states are created. The first one is the base state, and then you have a
second state here. So what state simply does is, so you have the base state now. This is just like this
gray cube here now. But you can actually
change the cube in a way that it's
traditioning to another state. So for example, now, I will give this state
now another color, like maybe some
purple here again, And then if you swap
in between the states, you see now that the base
state is still gray, but the second state
now is purple. And what you can
achieve now with the two states is that
you can trigger an event. So if you click now on this
plus icon on the event topic here and head over to this
one here, the start event. You can now add a
transition to this. Choose the first option here, which is called transition, and then click again on it. Now you see a bunch of
settings that you can change for the first one
now is called the target, so the target is our cube, but you can actually change anything here that you want to. And then we have this
transition part here. The first transition is base
from the current state now, but we will change it now to our initial one,
the base state. And the transition so
be Q every 3 seconds. So we put a three here on it, and we get also an e
in out transition. So we are first to
the base stage, then we have a transition here, the and out for for 3 seconds, and then we're achieving
the second state here. And what this simply does
is if I now simulate, you now actually see that in 3 seconds now the color is
changing from gray to purple. And now, what you can also do is you can add as many
states as you want. So I will now add a new
state, so the state two. And again, here, I can
change the colors, so maybe two blue. And then we can also add this state to our
tran transition. So again, add over to
the events topic here, and then we can add a new transition here by
clicking this plus icon, and then automatically add
it is now the state two. So if we again, give it a transition
delay of 3 seconds here, and close it and simulate again. You now see that
it's fading from gray to purple and then to blue. So then you see actually that the transition is stopping now, but you can actually
get rid of it by adding now a loop event here, so click on the loop here. And then you can
choose between if you want the loop
to be counting, for instance, just one time, or you can also make
it to infinity here. So it's repeating
every time over time, time, again and again. And then you can also choose
if you want to cycle it. So for instance, now, if I'm just simulating
this one here, You see that it's fading
from gray to purple to blue, and then it's restarting, but you can actually
make it cycle like ping pong animation. So head over here
to the cycle one. Then you can choose a
ping pong topic here. And now you see that it's fading from gray to purple to blue, and then actually
it's reverse now, so it's back to purple and then back to gray, and then so on. And what you can
also do, you cannot just simply just
change the color, you can also change any property you want here in the states. So for example, I am now
in the second state, and I want to increase the
size here maybe for the cube, so I will increase
x property here. And when I simulate again now, you see that the
color is changing, but also the width of the cube. Of course, what you
can also do is like give it a little
twist for instance, so changing it here to 45
degrees under that axis, and now you see
that it's moving in the give it here a little
twist or 45 degrees. Now when you simulate, you see that the
color is changing, but also the angle of the cube. And again, you can do this for any property you want here, so maybe one more example, can also translate it in a different direction here
in x y and that position. And now you see that
it's transitioning smoothly in this new state here. So and to activate
the transition, you can not only just call
the start event here, you can choose many
triggers here. So for example,
the mouse events. So if you click and then
leave your finger up, you are calling the
mouse up event. So simulate again, and now
if I click on the cube, and then I'm releasing
my finger on the mouse, you see that the transition
is starting now. And you can also do this
for the mouse down event. So when I'm clicking down, the transition is starting. And you can also do it like
for a simple mouse press. So while I'm pressing the mouse, the transition is starting, so I have to keep
my finger on here. And if I'm releasing, the transition is stopping now. So this is the
mouse press event. Then you also have the
mouse hover event. So as an M says. So when I'm hovering
over the shape, now, the transition is starting, and then you can also
have some key events. Same for the keys now
as for the mouse. The key up event, you can choose this one and
then can enter a key, for example, I'm
choosing the key K now. And when I now on my keyboard, press the button here. And again, this is a key event. So if I'm releasing
my fingernail, the transition is starting and I can also do it now
for the key down event, self I'm pressing key, the transition is starting. Then also you have
the key press event. Simulate again. If I'm
pressing the k button now, the transition is
getting started. Then we also have a
scroll trigger here. So if you select
the scroll trigger. You see two options here. You can add you can start
the transition by steps. For example, maybe I
choose you like 20 steps. And then when I
simulate and scroll, you see that the
transition is going on depending on how far I zoom out. So maybe you can also
increase the steps here, so it's delayed a bit. You can also choose
a type scroll here. So it's more you have a page dependency
depending on the view, the page, where it starts. You can also set an
offset and so many else. But keep in mind that the scroll mode only works when you're exporting
in the spine view, so be careful when you simulate. Maybe it doesn't look like it. Then next up, we also have the drag and
drop trigger here. So if you click on it,
and maybe simulate now, you know can actually
drag around this cube. And what we also
learned about physics, now you can actually apply
physics to this cube. So if you head back now, select the cube and scroll down a little bit
here on the right side, you can now change again
the physics to dynamic. And when I simulate again now, and dragging this cube
around and leave it, you now see that
it's falling down. So back in the drag and
drop property window here, you can, for instance, change the cursor here. You can also apply a damping. So you now see that
it's much more mover when I'm pulling
the cube around here. Then you can also
choose if you want it to be adaptive to the
camera or maybe to an axis. For instance, if you click
the y axis now here, you can only move
it up and down. You cannot anymore move it to the right side or to the
front and back side here. This is what you simply can do for every axis or
even the floors here. Then you can choose if you want the plane mode to
be keep initial to the plane position or to use
the current object position. Then you can change between
the world coordinate system, parent and object based. And then what you
can also do is you can add some drag limits here. But first, I will
actually change it back to the mode adaptive to camera. And then also our table here. I don't want it to
be dynamic anymore. For the simulation, we stick up with position
now from here, and then back to the cube. And then we can add
some drag limits. For example, some x values
here x min and x max. I will increase it to maybe like 70 here in the minus direction. And something like 70 here
in the positive direction. And when I simulate now again, you now see that I only
can move the cup in the x direction and it's
plus and -70 coordinates, but still in every other
direction, it's still possible. But maybe for some more
purposes now, you can, for example, change
the plane mount now here to also x xs, and now you can actually just
move it in the x direction, and maybe if I now
increases a little bit to maybe -200 and plus 200 now, you can move it
up and down here. And for maybe some real
world projects now, can, for example, I will
add something here. So we will add a cube now here, and we will create
a kind of slider. So put it down a little bit. I don't know if it's centred
right now. Oh, yeah, it is. And maybe another color
here, some black. And maybe you now see
what it looks like. It looks a little
bit like a slider, maybe I will decrease
the size a bit. And then when you simulate now, you see it's like a slider, which you can pull up and down. Now you can also increase the min and max
values a little bit more, so like minus 250 plus 250. Maybe even a little bit more, so it's right aligning
with the edge now here, but you actually see for
what you can use this for. Maybe make this a little
bit smaller here also. And then you have a nice
little slider here. And next step, we also have another feature that is
called the drop feature now, so let me just redo now
the basic properties here, so adaptive to camera. And I will remove the
drag limits from now. And then I will activate
this drop feature here now. So then you see that some new
properties are added here. And the first one is called
the Snap two function. Here we can choose
either if you want to snap it to the object
position or the surface. So for instance, this might
look a little bit awkward, but if I'm now moving it here, do you now see that it's snapping to the
center of the object. So because here from the plan now you have here
your base coordinate system. I will delete this also again, so you'll see it a
little bit better. So again, if you simulate now, it's snapping to the
base coordinate system. So no matter where I drag it, it's also just snapping to
the middle of the part here. But I can change it now, and to do this, I can change it from object
position to surface now. And when I simulate again now, I drag it here across
it's snapping to the surface of the table here. That's basically the difference between the two Snap
two types here. And you can also choose if you want to have an offset here, and you can also reduce or
increase the snap speed. For example, a lower
snap set speed, we now look a little bit smoother here now
than the one before. So this looks like maybe
a little more realistic. Then you have the
auto orient feature. So for example, if I'm
leaving this one on off now, you actually see that it's not facing the side
like it did before. So it stays in the same
orientation as it's by default, for the comparison now, you see that it's
actually rotating depending on which
side it's snapping to. And this is what the
auto orient does. Then you can also choose
the fall back motere. So if you want to that then you can also choose
a fall back mot here. So if it's stay in
the drop position, it's returning to the
original position, or it's returning to the
last snap position now. Here you can choose the drop on, so you can say that this shape drops
on every other shape, or you can actually
give a list of objects where it should snap on. So for instance, if I am now
adding a new shape here, so maybe just a cube. And back on the main Que per. I select now the
list of objects here and choose now the up two. You now see that it's
snapping to this object, but not to the table anymore. And now what we
can also do is we can change the behavior, so we can make an action based on the behavior on
rag or on drop. And for this one, I will now remove our state
that we have created before. And then we will create
two new states here, and we will just
change the color of the second state
here to a green. And then if we head over back to the Dragon drop
property window here, going to the behavior
on drop here, and then we can make a new
transition here for the cube, and we will take the
base state here, and we will do a transition
here to the second state. So what this does is
basically when I'm moving now this cube around, and it's snapping to the object. Now a tradition is triggered, and the cube now is getting in the second state
and the color is changing from gray to green. And maybe what you can
also do is you can also like at a sound maybe. So if you click on
Sound now here, you can choose a sound file
from the library here, so maybe I don't know. No a bell here, but
maybe some pop. Yeah, that sounds good. And now when you simulate
now and it snaps. Oh, that's the wrong sound. So head over back to the drop sound here. We
don't want the bell. We want the pop song here. Okay. And now again,
when you simulate, now you see it's
snapping to the surface, the colors changing to green, and you also get a
little pop sound. It's not pretty slow, but again, you can play around with
the settings here now, so I will reduce the damping
factor here a little bit. So it's more faster. Yeah, this is what you can do with the dragon
drop mode here. So in next step, we have
the look at feature, which is quite cool, so again, go on the events tip and then choose the
look at function. And for example, we
now rotate it back to the original base
rotation factor of zero here and bring
this up a little bit. And then if you
simulate again now, you see that it's actually
facing your cursor. So if you imagine this is a robot or a face
or something else, you now see that it's always
looking at my cursor. And this is what we
also are going to do in later project
and the EF project, which is a really
cool feature now. Yeah. Also here, you can
change some properties. So you can choose a target here. I would let it just
be the cursor. Then you can also choose if you want it to be aligned
with the camera or with some layers as the floor layer or the
front back layer here. For example, if you choose
the floor now here, you now see that that it
has some constraints here. It can only move in
the floor direction, so not up and down,
sidewards here. Then you can also give
it a damping factor. So it's a little bit smoother. And here you can also just
change the direction. So if I'm heading
back to aligned with camera and choosing maybe
the y direction here. You see that it's rotating
in another direction. So for instance, b the
base state is that, but you can also give it
like the x direction. H Yeah, you can play around a little bit
with this properties. Then what you can also do is adding a reset function here. If you hover out,
it's resetting. For example, now, if I'm
hovering out of the window here, it's getting back
to the base state, but you can also get rid of it. You can say you
don't want a reset, if I'm hovering now
out of the window, it stays in the position
that was detected before, and you can also
decrease or increase the reset speed So for example, I will now add a reset, and then when I'm having route, it's getting slowly back
to the original position.
15. States & Events Project: So and to summarize the
state and event topic, we will make a little
project for now. So first, we will just make our base plane
invisible or delete it just. And then we will
place a new rectangle here anywhere you want
and zoom in a little bit. And then we will form
a little button here. And on the right side, we will increase the corners
a little bit. So it's more rounded. And then also give it a
little bit of extrusion here. So you can rotate the
sen a little bit. So maybe like this here. And then we can also do some bevel for some
smoother edges. And to make it a little
bit more modern, I will also change the
background color here, so just click anywhere
in the scene. And then on the right side here, you see the BG color. I will take just a
white background here. And then we will head over
back to our button again. And on the button, we will place in ipse. And then scale a little bit up. So while holding
option and shift, you can scale it evenly. Maybe like this. And then again, on
the right side, give it a little bit of
extion and also some bvel. Maybe like this.
O's a little bit. Much extion now. Like this move it in
front of the button here. So and check the alignment so a little bit more down here. Okay. So for now, we are ready with the
basic shape here, and we will do some
materials now also. So I would like to make
it in a clean white here. So head over here to
the material settings, and I will make it
now white here. So the lighting
tape is good now, but I will also do
some Fresnel here. So click on Fresnel. So White is also good. These settings are also good. So you get a little bit
of more contra here. And then I also want some
more spectal reflection here. I will also add a madcap
here, a Mt cap layer. And for now, I'm choosing from the library
like this one here, so you get a little
nice reflection. And now you see that that
it's getting black here now. I don't want that.
I'm choosing here on the MTCp function,
the overlay topics. Now you're getting
the layer overlaid. It gives a little
nice shininess here. And this I'm also going to
do now for the button here. So I will leave
this now for now. But let's add also
a MDCap layer here. And again, from the library
here, the shiny one. And also choose the
overlay function here. But now in the state, I actually want the
button to be red, so I will change the
color here to some red. Maybe a little bit darker here, so, something like that. So it only shines
in the red color. And then I can also add a
little bit of outline here. So maybe maybe also
some red, just a here. So it's more separated now. Okay. Then I will
also add a little bit of background where the button actually slides in the position. So I will add another rectangle here
on the existing button. Then I will exceed
the size a little bit. Maybe like this. Okay. Now again, increase
the corners here, so it's a little
bit more rounded. Yeah, that looks good for now. Maybe some more on
the right side here, and a little bit down. So it's more and I will change the color to a really
light gray here. It gives a bit of modern look. Now we have the basic shape
here, so the basic button. Also it just already looks
pretty cool in my opinion. But maybe we can also add
a little outline here. Let's add another
layer here and choose, is it the outline here
and make it also red. Maybe a little bit brighter
red here. Like this. Now we come to the
functionality of the button. We actually want that if we
click here on the button, this whole button moves to the right and displays
now in a green color, so it's like an activation mode. To do that, we will click
here on the ellipse. I will quickly rename it. So you have a better
understanding of the shapes here, we call it button. And then we can also
rename this one here, the rectangle two to maybe
to the slide background, and this rectangle
is our whole button, and we will rename this to
the button wrapper, maybe. Okay. Then choose a button. And now we will introduce
two new states here. We click just on
the plus icon here, and then we have the base state and the second state here. And this is basically
just our base state. And if we do a transition
to the second state, now we want this button to
move to the right here. And to do that, just activate
the second state here. And then you can
move this button to where it should be in
the end. Maybe like here. And now, we also want that the button is
getting the color green. Still we are still in
the second state here, so you can just change the
color here to something green. Yeah, maybe like that. And then we will also head over here to our
slider background, and also here, we will
introduce a second state. Again, we have a base state
and the second state. And also, if we trigger
now this second state, the outline color shod also
change to a green here. Yeah, maybe like that.
Again, in the bay state, it's red, and in the
second state, it's green. Also, we have to do this
for this outline here. So back to our button
here in the second state, and we will change the outline color
here also to a green. So this is it for
the states now. So if we head over back
to the base set here, you see that the position
is getting changed. And to activate this
transition now, we will create a new event
and not by start here, but with the click
of button here. So maybe just the
mouse down event. And then we will trigger
a transition now. So this transition is
applied to the button. And for mode now, we will
choose the toggle function. So this transition is
not only played once, so it doesn't just go
on the right side, but it also toggles back to the left side if I click
on the button again. And I want to transition from the base state to the state here now.
So the second state. Okay. That's it for now. So if I simulate now again
and click on the button, you see that it's moving
to the right side, and the color is also
changing to green. But what you might
notice is that this little background
here is not getting green, and to also activate
this transition now, we can just simply head over back to our
event center here. And then we have to
create a new transition. Again, click the plus k in
here for a new transition, and then choose the target, the slider background, so
not the button anymore, but the slider background. Then again, also
the toggle feature, it just when it
moves to the right, it's getting green, and
if you toggle it back, it's getting red again. Then also we do a transition here from the base state to the second state. Y, that's it. And then when you
simulate again now, you have no, this
doesn't work for now. I think I missed
one feature here. Okay. Okay. So I don't know
why it changes back to one, but if you click here again
on the toggle function here from the button
now, now it should work. So when you simulate again, you now see that the outline now is changing to green
and the button also. And if I click on it again now, it goes back to the original
position and also back to the red color and the
red outline here. So I think this looks
pretty cool for now. So this is a nice
little project to introduce you to the
state and events topic. And in the further course, we will make some more
advanced and complex events. So this is just a
little introduction. So you know how to apply
states and events.
16. Particles: So in this video, we will
talk about particles. So how you can create things like particle forces,
particle emitters, and how to connect
those techniques to create some different kind
of animations and effects. So let's get started. So we are back again in our
basic spline scene here, so the only thing that I
changed is the background. So this one is black now. So you see the particles
a little bit better here. And we can also just delete
our base plane here, so we have a little nice
and empty view here. So to create our
first particles, we can just go again to
our top tool by here, click on the plus icon and
then scroll down a little bit. And here you see the function called particle emitter now. Now if you click on it, you already see some particles that are getting created here, and I will zoom in a little
bit, so you see it better. And then you see
on the right side, there are a bunch of options
that popped up here. So maybe we'll just start
with the first ones here. So you got the simple option to choose the colors here
for the particles. So you have a color A
and a color B code, and maybe I will just now
change this one here to blue. And then you actually see that this color is getting
from blue to yellow here, so the bottom ones are blue, and the top ones
are yellow here. And maybe if you just
change the colors, it will be vice versa. And yeah. But you also have the ability here to choose a coloring mode. So now it's in the
blending mode. So again, it's blending
from blue to yellow here. But you also got the option
here to choose random. And now you see
that some particles are are yellow here or
blue or even green, so like the combination
of yellow and blue here. And this is what the
coloring mode random does. Then next up, we also have
the size function here. So for example, if I
increase this value now, you now see that
the particles are getting bigger or even smaller, depending on the value
of the slider here. And you have also
the ability here. If you click on this
little icon here, you can also change
the starting value here and the end value
of the particle sizes. So in this example here now, it will start by the value one, and it ends by 50, so it's actually
getting bigger while it's yeah emitting
from the surface here. Next up, we have the
rotation value here, and this simply means that while I'm
increasing the value, the particles are
getting rotated. So for example, a value of one actually means 360 degrees. So now because we have like yeah circle or rounded particle here, you don't really
see the rotation, but maybe later on
where we introduce some like yeah custom particles,
you will see it better. So I will just skip this for now and continue with
the birth rate here. So the birth rate just simply means that if you
increase the value, you now see that more
particles are getting created. So like born or emitted here, and this is what the
birth rate means. So lower value of the
birth rate just simply means less particles and a higher birth rate just
means more particles here. And the next step, we
have the lifetime here. So by default, it's 1 second, so the S just simply
stands for seconds here. So for example, if I choose
a value of three here, you now see that the
particles are actually living like 3 seconds until they
vanished here on the top, and this is what
the lifetime means. So the next step, we have
the fading modes here. But first, I will
actually just give every particle the
same size here. So you see the
difference a little bit better in the fate mode. So we have the Alpha ft here, and this simply means now that the particles are
getting faded out here, so just the linear fade out, so it starts by
full opacity here, and then by the end, you have zero opacity. And for example, now I can also choose like linear fad in. And now, now you see
that it's fading in, so like zero opacity here, and then It has more
opacity on the top side, and you can also choose
fade in and fade out. So then in the middle, you have the full opacity here and the bottom and
the top, it's less. And then also you have like the ese in and ese out function. And you can also use
a constant here, and now you see it's a
little bit more colorful because they all have
full opacity here, and this is what the
Alpha phaate does. And then you also have
the size fade here. And what this does
is now by default, it's a fade out here. So you now see
that the particles are actually bigger here and
getting smaller on the top. And this is because
of the fade out here. So, for example, if I'm
choosing the fade in mode now, you now see that it's yeah
smaller at the beginning, and then it's getting bigger
while it's fading out here. Then you again have also the possibility to
choose fade in and out. Again, small, big,
and then small again, and then also ease
in and ease out. And again, constant,
so the size just stays the same in the
whole animation here. And then next up, you have
the speed value here, just by increasing this value, you now see that the
particles are flying much faster here and
by a lower value, they are much slower here. And you can also change the orientation mode here
from axis to surface here. So for example, now, by default, it's the axis here. And you have now different kind of directions to choose from. So for example, now, if I maybe go to
the top view here, you now see that the particles
are getting up here. And now maybe if I change this x value here to 90 degrees, you now see that the
particles are now flying in 90 degree
x position here, and I can just maybe use
something like 180 here. So now they want to
actually go down here, but because of the gravity, actually, they again fly up
and then maybe 270 here. You now see that the particles are now flying
in the opposite direction, and this is the same di for
the y and that axis here. And then we can just activate
the surface mode here now, and I will just go back
to the front view here. And to show this one, I will actually just choose another shape
for the emitter here, so not a plane, but
maybe a box here. And now we see what the
surface emitting does. So basically, now
the particles are getting emitted here from
the surface of the box. And before we had a plane, so you don't see the emitting there quite good because of
the two dimensional shape. And here with the
box, you now see that all the particles
are now getting emitted from the surface here. So the last option here from the particles step is image one. So you can just use custom
images as particles here. So for example, you can choose images here
from the libraries. So you have a bunch of different
options to choose from. But you can also just use a default image or any
image you want here. So for example, I will
use some stars here now, which I got from this side, so icons dot IO or any icon site or image
site you want here. And then you have
custom particles here. And then for the particle
emitter functions here, you can again just choose
any shape you want. You can also use
a custom object, which I will show
you afterwards. And again, you can also just change the size
here of the emitter, and you can use an autoplay, or you can also deactivate it, and you can also change
the emit time here. Now it's just infinite, and you can also
maybe do it like one time by a custom
duration here, or you can also loop it here, you can maybe just
choose a delay here. So it will only repeat it like every 1 second here. And yeah. And maybe one little thing
I forgot to mention is that you can also give them now
a rotation factor here. So a little nice transition. So for example, if I'm
placing a zero here, you now see that the
particles are getting rotated here, so 0-360 degrees. So why their lifetime
is ending here. And then on to the
next step here, which is called particle forces. Here we have the opportunity
to choose a gravity value. So now by default, it's on the value one here, so the particles
are flying upwards. And by choosing a
negative value here, they will actually fall down
and depending on the value. So by instance, I will
choose a big value. They will fall faster down here. And with the very high value, they will just simply
fly, much faster upwards. So I will just simply get it back here to
the value one here. And now we also have the opportunity to
choose a collider here, but this will be explained
in a few seconds here, and we will just continue with
a particle noise tap here. Next step, we can talk about
the particle noise here. But for this, I will just simply change some settings here
in the particle step. For the size, we will
maybe just take five here, and also yeah, revert the
rotation factor here, for the birth rate,
maybe use 1500. And for the lifetime maybe two, and for the Alphapht, we will use a linear phat out here and a speed of 100 maybe. Also, I will just delete
the five star edge here and we'll simply choose this one year from
this spline library. And for the shape, we will use a plane instead
of a box here. So it should look
something like this, so all the particles are
now getting fired up. And for the plane size, we will just simply use
a 100 by 100 plane here, so it should look like
this in the end here. So now if we head over to
the particle noise tap here, we have three different
types to choose from. So the first here is curl, then we have simplex
and also FBM here. So maybe just start
with the curl one here. So for example, if I
increase the scale now here, it looks something
like this here. While I'm increasing the scale, the noise looks a little bit
different by time to time. For example, this is
now the full scale, and this is just a
less tiny value here. Then, for example, I can also increase the
variation here, so it is kind of like the speed. While I'm increasing next step, we can also change the
variation parameter here. This kind of works like the speed of the
particle noise here. While I'm increasing
the variation, now the particles are
getting accelerated here. And then we also have
the seed function here. Maybe I will use 5 seconds here. And then you see, how the animation is getting
changed by that. Then next up, we have
the simplex noise. This looks like that here. And again, while I'm
increasing the scale, it looks a little
bit different here. So there are also like kind of clusters that are
getting created here, while increasing the value
or decreasing the value. And again, you can
just accelerate them or change the variation
in particular. And then last but not least, we have the FBM one here, which looks like that here. And again, you can increase
or decrease the scale here, and here you have also
some cluster building. And you can also change
the variation here. And maybe if yeah, you have some noises
where the variation actually doesn't really
slow down your particles, so you can just use the
speed function here in combination to slow
down your particles here. So and then you have another tap here called particle randomness. And for example, now, if I am increasing the value
of the scale now here, You see that you have
some bigger particles and also some smaller particles. So you just apply some randomness to the
size of the particles. And here, you can also increase the rotational
factor here. So the particles are actually
rotating around here. So now we talked about the basic particle
emitter functions here, and then we will
just continue with the particle forces functions. And to do so, I will just delete this particle
emitter for now. And create a new one, so we have just the same
defold properties here. Again, choose a
particle meter here. And here, we will
just maybe increase the birth rate here a little
bit and reduce the size. And increase also the lifetime, maybe to something
like 5 seconds here. And yeah, this
should be fine now. Then I will give the emitter
here a little twist, for example, like that, rearrange the view a
little bit and then I will also decrease the gravity here to something
like minus one here, and maybe I can just
increase the speed a little bit here so it gets shooted
out here from the emitter. Maybe even a little bit
more. So like that. Now with this set up here, we will introduce a
particle force here. Choose particle force here, and don't worry if it looks
a little bit strange here. And then by default, you will actually have the
force type collider here set. And now you simply also see
what the collider does here. So you now see that the particles are
actually bouncing back from the surface because it's selected as a collider here. Also, if you maybe just go to
the particle emitter here, you now see that in the
collider model here, the particle force
is selected here. And then you also have
some different kind of properties that
you can change. So for example,
you can choose if you want the collider to
be a box or a sphere here. So now it's, yeah, getting bounced back from
the sphere surface here. And you can also increase
the size of the shape here, so maybe make it a
little bit wider here. And maybe also move it
a little bit down here. And now you see
that the particles are actually bouncing
back from the surface. And now you may see that this bouncing here
is quite strong, and you can also just change that by going back to the
particle emitter here. And then under the
particle force step here, you have an option
called elasticity here, and why reducing the value here, You also see that this bouncing
here is getting reduced. The elasticity in
particular here. Maybe if you do like zero here, it's like a sticking here and
a very high value here now, shoots the particle here
away from the surface. But that's actually not the only collider model
that is available. So if we go back to the
particle force type here and go to the
force type here. We can also choose
an attractor here, so not a collideer,
but an attractor here. And now you see that the
particles are actually getting sucked in into
the collider here. So this is a second
type of force. And again, here also, you can you can choose
if you want the collider be sphere here or a rectangle
or a box in particular. Then you also have
the possibility to choose the range here. By default, it's
at infinite here. But you can also choose
the inside area. While the particles are hitting the surface here or
the inside area, then they are getting
sucked in and not just by default
by emitting here. This is a difference
from the range here, and then you can also increase or decrease
the intensity here. You see what changing the value does here
to the particles, and then you can also
apply some damping here. A And then also just yeah, increasing or decreasing the
size of the attractor here. The last one is just
a helper function, so you can hide it or show it. So this is the yellow rectangle, which indicates how the
attractor looks like. And yeah, this can be just
hide it or shown now here. And last but not least, we have the force
type vertex here. So to show you this one, I will actually just rotate the emitter
back here to zero, and then I will also move it inside of the yellow
collider here. And maybe just rearrange
the view here a little bit. And I will also make it
a little bit wider here. So by changing that value here. So maybe like that. So it's
kind of like square here. And then if we look from above and choose the force
type vortex here, you now see that it's getting
rotated here the particles. And now again, you have some properties that
you can change. So for example, for example, you can increase or
decrease the intensity, which is kind of the speed
of the particles now, so a high intensity will rotate faster here and a low
intensity will rotate slower. And then you also
have the aperture. So an aperture of one
here is like a cluster, so they stick more
together here in the vortex and a lower aperture, we just increase this gap
here between the particles, and this is just
much more smoother and not really clustered
together here. Also again, here, you can just change the height and the
width of the collider here, and this is simply what
the vortex does here. Maybe one more
function is that you can actually apply
particles to objects here, and I will just show you here. Maybe just create a new
particle emitter here, so this is just a a default one. And now you can apply those particles to any
shape you want here. For example, I will
go with a text here. Place a text wrapper
on the screen here. And for the content, I will simply write particles, maybe increase font
size here a little bit. Now if you head back over
to the particle meter, you may notice that, by choosing the shape type here, you can also use a
custom object here. If you selected, you have another tab opened
called object, and here from the object tab, you can just choose a text or maybe like any three D object
you just created here. Then it maybe looks
like this here, and this is just because we have to adapt some values here. So while we may be
increasing the birth rate, you see maybe the shape of
the particles text here, and then we can also maybe
reduce the particle size here, and maybe also the
lifetime here. So those are the
values you have to change to see the result here. And now you can just
play around with it. You can apply it to a sphere or a bole in operator
or anything you want. So this is also a
really nice feature about particles, and yeah.
17. Implementing Variables: So let's talk about variables. Variables are a nice way to give your three D scene
some dynamic behavior. And to do so, we will now again build some shapes
around the functionality. So you guys see it already in
action, how variables work. And for this, we
are now again in our basic default
blind scene here. And I will create now rectangle just on
our base plane here, which will be used as a button. So maybe just a little one here in the left
down the corner. And I will give it a
white color for example. So we have some more contrast, and also maybe a little bit
rounded for the static. Maybe also some bevel here. Let's also change
the background here. It looks a little bit
more nice and clean. And also we can
change the color of the background
here a little bit. Okay. Maybe also some
smoother edges here. Okay. So now, we will make
a little button here. Let's move it a little bit here. And this button actually should do the functionality of
increasing a variable. So I will also give it
a little icon here. So it looks like
a plus icon here. That. Yeah, that looks good. I then duplicate it
with command and D, and then you can rotate
it to -90 degrees. And now you have a
little plus chen here. And maybe I will move
this a little bit in the center now. So
maybe like this. You can also make it a little bit smaller by holding
option and shift, and then you can
size it down evenly. Okay, now we have a button here. And for better visibility here
and better understanding, I will quickly change the
name here of the rectangles. But first, we can group this up. And so select the
three rectangles here and then hit command and G, so you can group them up, and then you can rename
it to button, maybe. Okay. That's it for now. Now we need another shape. Maybe, we can just also
do a rectangle here. Maybe we can also actually just duplicate the button
here. Hit command and D. Now we have a second button. Move it up a little
bit and then you can just delete the plus k here, and also rename it to maybe. We can just call it
rectangle again. Okay. So now we have a nice plane here with a button
and rectangle. And what we want to achieve now is actually by
triggering this plus ic, the variable or the extrusion actually changes from the
second rectangle here. So to do so, we will activate or select
here the rectangle or maybe I will give it
another name because rectangle is a bit too simple. So maybe like diagram. Okay. And then if we select
this one here, so the shape under
the diagram here, we can actually change the extrusion here
of this element. But, we can actually also
connect it to a variable. So if you or on
the elements here, you always see a little plus ic in here on
the top right corner. And if we click on it, we can actually search for a variable or we can
also select one. So if you enter the
four dots here, you actually come into this
little selecting tool here, And for our application we will just simply
choose a number, but you also have
the opportunity to choose a boolean or a string. You can also select dynamic variables like
a time or a counter, and also some random variables. But for now, we will just
choose the number here. And this is then actually
just our base state number, so we can actually maybe
just choose ten here. And now we've created a variable called number
with the value of ten. And then again, we can actually choose this value
here in our extion. So if you just click
here on the plus, I can, you now see that a new
variable was created, number with the value ten here. And if I click on it now, you see actually that the extruion value also
changes to the number ten. For example, now, if I actually change this
variable number, you now see that
it's connected to this little diagram here. By changing the variable, you're also changing
the extrusion number. But we will keep it now
at the number of ten. And then what we can
actually do is we can now trigger an
event by the button, just click here on the
Group button again, and then we will
create a new event. So by default, it's
a start event, but we actually want to do
it by click of a button, so we can use the mouse
down feature here. So click on the Mouse
down feature and to trigger it just simply
on this object. So just on the button here. And then now you see again, the actions list here, and we will now select here
the said variable function. Now it's selected here, the set variable function. And if you click on it now, you can select a variable. And if you have done
everything right now, you should see your
variable created here, the variable number
with the value ten. And then you can also
add an expression to it. And if you click on
it, now you have some opportunities
to choose from. And we can actually We can actually use some
different properties here. For instance, you can
take the mouse position. You can make also
random value here, you can add subtract, multiply, divide some values. But what we are going to do now, we just simply take
our variable here now, so the number variable. As you might notice, this value is ten. But now if we actually
click on the button now, we can increase this value. You can just type
in plus ten here, maybe you can also use
this at at function here. So if you click on it, is just simply put the plus sign here. And then we're actually
changing the variable here. So the number value
we're changing the number value by adding a value of ten to the
existing variable. Now if you simulate this whole now and
click on the button, you now see that the variable is changing by clicking
on this button now. So this is actually what
simple variable does. So you can trigger
an action by it, you can increase the value or just do some
crazy stuff with it. So this is just an
easy example now. But yeah, you can for example, also put minus sign now here, so you can also decrease
the value of the diagram. So you can decrease it or maybe also half the value here
by some click of a button. So you are really free in
your creativity here now. But I also have some other possibilities
here with variables. Here we just show some
static values here, but you also have to choose
from dynamic values. For example, we can make
a little ellipse here. Then we can also change
the color here again, and then give it a resize we're
holding option and shift. Again, you can size it evenly. And then we can maybe make a little ring here.
Yeah, that's good. And now what I'm
trying to do now is we can connect this angle value
here to a dynamic value. So it's like stopwatch here. So if you click on a button now, the angle is now changing
to the dynamic variable, so you can achieve that by
clicking here on the angle. And now we will create a
new dynamic variable here. So again, on the four dots. And then hit the plus ion here. And then you have to choose between the dynamic
variables here, and then we choose the
counter variable here. So by default, it's zero, so if you let me just quickly
reload the scene here. I don't know where it's
Okay. Now we're back. Then if you click on
the angle here now and clicking on the dynamic
value of the counter. You now see that
it's disappearing because the angle
is now set to zero. And we can actually
trigger this angle event, but we can just simply
create another button here. We can duplicate this
with command and D, and I will rename it quickly
to maybe like counter start. And then we also duplicate it
here the mouse down event, so we can actually just
delete it for now. So we have this button here for the increasing
variable event, and this one here for
the counter start event. We can also maybe
delete this plus icon here and put a text on
here, which says plate. Yeah, it looks good. Make it a little
bit smaller here. Move it here onto the button. Decreasing the fun size
here a little bit. Okay. Now we have a plus button
and the play button here. And now we select the
counter start button again and enter a new event. For this event, we will also
choose a mouse down event, but not now the
set variable mode, but the variable control mode. If you going into the
variable control mode, you now see that you can
select a dynamic variable. To do so, we now see our
dynamic counter variable, which is set to zero
by initial state. And then we can choose
an interaction mode. So for now, we will just
hit the play interaction, and we don't want to delay, so it just starts instantly. And that's it for now. And now if you had back
over to your ellipse now, you see you already have
connected the dynamic value, but if you play it
now, nothing happens, So we will step back into our dynamic variable
setting here, and then you actually see
some little settings. I can hear. So if
you click on it now, you see the initial value, you see an interval
step and end value, and you can also do
an on end event, so you can actually restart
it or just stop it. So for now, I will I only
want that it place once. And then for the steps, we can maybe choose 110. And the end value we
need an end value. If you imagine we have
an angle of 360 degrees, that is full circle, and that should also
be our end value, so it doesn't
exceed 360 degrees. That should be good to
go. And the interval is set to one so every 1 second. Will bring this maybe a
little bit down here. Okay. Now, let me check the
M town event quickly. Okay. So now, if we
simulate again now, we see that actually the progress bars now actually getting added up by a
value of ten every second. For example, you can also
make this even faster. So if you head back over
to the ellipse now, and go back to the
counter event here. You can actually play around
with the settings here. You can make it like an
interval of 0.1 seconds. So if you simulate now again
and hit the play button, you now see that it's
much faster now. And yeah, what I
forgot to mention, you also have to drag
the text element, again, in the counter
start button. So otherwise, if you
click now on the text, the event would not start. So be careful with this one, so if you add new
things to one element, you also have to put them
inside of the group here. So what we can also do is we can actually trigger some events based on the state of variables. So if you imagine now, we play this animation now, and This is, for example, a stopwatch, and this stopwatch
now comes to an end so it receive it's going
to the 360 degrees. We can maybe like
change the color of it. For now it's like in a white, but if it's the full circle, now we can make it
red, for example. And to do so, we will introduce now conditional
statements for variables. So we can just select
the ellipse now here. And we have to create
a new state event. We have the base state and
the second state now again, on the second state, now we want that the ellipse is getting red or the
ring is getting red. Then we have to apply
an event for now. And to do this, we can actually we want to trigger this event when the variable is changing. So for now every second, the variable is changing, and then we want to
trigger this this event. So we will actually use the
variable change event now, and then we will select
our counter variable. And then we will
actually as I said, we will introduce now the
conditional statements here. So it's like if you are familiar a little bit
with programming, you have the I and statements. For example, now we can
select our variable here, so the counter
variable and then say, if this variable is
actually greater, so we can choose this
one here is greater than like 359 here. So if it's bigger
than this value, some action will trigger. And for this, we will choose
the transition again. And then again, the target
is still the ellipse now. And then we will change from the base state to the
second state now, and we will do this immediately, so with no delay or ease. And so what this simply
does now is actually it's getting triggered every time the variable is changing. And if you remember this
counter just increases and increases every second
or every millisecond or whatever value
you choose there. And then actually, it's getting asked if the counter is
actually greater than 359. If so, we actually trigger
this transition from the Apse. So it's getting from the
white state to the red state. If you simulate now again
and hit the play button, You should actually see
that the color is changing, why the variable
is now over 359, and under the value,
it's still white. Yeah. And this functionality, we're
actually going to implement now in a much more
realistic project now, with some more nice
looking materials and also some nice
looking shapes. So if you are interested
in this project, you can keep watching, so we will just we use everything we learned now
in this course for now. So you will learn how
to apply the states, the conditional logic,
the variables, and so on.
18. Components: So let's talk about components. So components, you may also know from other design
resources as well. So they are actually a
common way to make things much more easier and to
actually enhance your workflow. And to show you guys
what components do, we will actually make a
little project out of it. But again, if you don't want
to do all of the steps, you can also get the fire
from the spine community or in the download
section down below. But we will actually just make a little project
here in spine now. So again, we have our base plane here
and the defol scene. And we will just maybe make a little cue here on
top of the plane, make it a little bit
bigger here, like that. Then again, we can just hide
the rectangle layer here. I will change the
background color here to maybe a
little light black. Now we have this little cube
here and on top of the cube, I will actually place another rectangle and this
will be a button later on. I will make this a little
bit bigger. Like that. We will quickly
another color here, so you see the difference better and also give it
some corners here. Also some extrusion. I will just go for
the other view here, maybe, not the corners
extruion here. Maybe, maybe like 30. So we do the corners
here a little bit again. And we can also give it some
bevel here, maybe like two. And on top of this rectangle, I will place the text now
and this text will be press. And now we have to actually
resize the text here, bring it onto the button. So make it a little
bit tinier, actually, so maybe ten is a little
bit small. Maybe like 12. And then we can also just do some spacing actually
here. Maybe like that. Place it to the center here. Okay, maybe a little
bit more to the right. Okay, like that. And
then here on the bottom, we will introduce a
sphere, actually. And this one will be later on. Yeah, like a light bulb, maybe. Maybe a little bit smaller. Like that. Again, bring
it to the center here. All right. And then I will
rearrange the view here again, and I don't want it
to be spherical, so I will actually bring it a little bit to this side here, make it centered, and
this one is actually just the basic.
Design, we will do. And now for now actually, I will just quickly
rename everything here. This one will be the light bulb. This one is button text. This one is a button rectangle. And both of them, I will actually group up and then rename
this one to button. Again, the group is
just command and G. And the upon
will be our body. And. This should be it. Maybe actually because
of the light bob, we will actually also
introduce a point light here. I actually is lightened up. So bring it he maybe to the center and also to
the center or this side. And yeah, this looks good. And then actually
everything of this, we will also group up, and we will rename it component. Yeah, maybe component group. Okay. So then we will actually start over
with some of the materials, and maybe I will just
start with the body here. And I will actually maybe reduce the cornice a
little bit, maybe like that. And just make it a
little bit darker here. Maybe we can just give it some madcap here actually,
so choose MDCap. Maybe this one here
from the library, and choose overlay,
maybe not 100, but like 60 opacity, this looks actually quite good. And for the button, we will just make it a
little bit darker here. Like that. We going with
a dark mode now here. And for the text, I
will choose white, but I will actually change
the opacity here to 50 because later on we will
actually make a transition. So when this button is pressed, opacity will then change to 100, so we have a little
nice effect here. But this should
be fine now here. And for the light bulb, we will introduce
a deaf layer here. And so just create
a deaf layer here, bring it to the
first position here. And for the deaf one, we
will use a linear function, and for the neo factor, maybe choose 70 and
for the far value -70. To actually see the gradient, just remove the
color layer here, and then you will actually
see the deaf layer. And for the deaf layer, we will also use a kind
of dark mode here. Maybe maybe like that. And for the lighting, we will actually bring it up to 100. And then we will also introduce an outline layer
here, make it white. So we have a little
bit of che here. The w two is all right, and we will change
this one to overlay. And then for the
real bulb effect, we will actually introduce
a rainbow layer, and this one, we
will simply maybe. Do like 20 opacity and
also do an overlay here. And now this one looks maybe like light signal or something. All right. So this one
is our basic shape here. It's all grouped up
in the component. Maybe I will rename the point light Wreck to light source. Like that. What we actually didn't change with
the light source here. So I will actually maybe just increase the light
effect here, maybe to 1.4, the distance to 2,300 and also give it a little bit
of decay, maybe like six. And now you see we have a little nice light
effect here on the edges. So this one looks quite good. Maybe some text adjustments, maybe I will go with ten here, it's a little more
minimal here. Like that. To actually make this
one a component, we will actually just
select the component group, make a right click, and then choose the create
component function here. If you created a component, you actually see it here
by the four green dots. This one is the
main component now, and to maybe give you a little quick hint of
what a component now is. If we now maybe duplicate
this component here, and we will move it
to the right here, It looks for you like a simple
copy now of the left one. But on the left side, you now see that this copy now
has two little green dots, and this one indicates that it's a child component actually, so you may know it from programming
languages or something. You have a parent and
child function or a main and child component,
I will call it now. And what is the magic actually
behind the component? I will actually now choose
the main component here and make some quick
adaptions here to the body. And now what you see
actually while I'm changing the width here
of the cube or the body. Actually the child element is also getting changed now in
real time or simultaneously. And this is not also
just for the cube, but actually for every element here inside of the
main component. So for example, I can also just change the text here
to maybe like button. And you see that simultaneously the text of the child element is
getting also changed. So I will just call
it press here again. But this effect is again just used for every element here
inside of the main component. For example, I can also choose the red light here
for the light source, or maybe I can make the
button here bigger, or I can change the color
of the light bulb actually. I can make it maybe like red. You see actually that every change here of the main component also
affects the child component. Now you can imagine if I
make like, I don't know, hundreds of duplications
here of the main component, it can be quite time
saving because actually every child component is getting the changes of
the main one as well. And what's now also
nice about component is that if you make changes
on the chine component, those one will actually
not affect each other. So maybe I will actually give you another child element
here on the right side. So maybe like that. So I will just quickly
rearrange it here now. So you have this one
as a main component. This one is a child, and
this one is also a child. If I, for example, now want to change this one
the child here to maybe like light mode maybe or a light lighter
version of the main component, you can just simply do all
or everything you want here, and this will not affect
the rest of the components. If you make changes on
any child component, it will not affect any of other child components
or the main component. So we call it
actually an override. So every time you make
change to a child component, it overrides the value
of the main component. So I can actually just do some changes here
to this child element, and it will not affect anything. This one can be quite
helpful because you can make other versions
of designs here. So for example, this, I will
just maybe quickly make this one a little bit brighter
here. Maybe not this one. We'll keep it as it is. But now you actually
see we just created like a white version here
of the black version, and this one, you can just do
for thousands of versions. And this can be actually
just quite helpful. So what's actually also nice about components is
that you can, yeah, make changes to the
main component, that will then also affect
all of the child components. So for example, I can now just do the designs for
every button here, but I can also just introduce
other features like I could just make a change here
to this component, actually bring it
inside of the main one. And then you actually
see that all of the other child components also get this new
design element. But this is not also just
for design elements, but you can also
make transitions or like animations or
anything you want. So for example, I can now introduce a state
here to the button. And now we have a
base state and state. And now if you look inside
of the child components, you actually see
that simultaneously, all of the buttons actually
also get this state. For the state now, I
will actually want two. So this will be the button. But in the button state here, I will actually want that
it moves inside of here. So it's like clicked. And then I actually
also want that The text element, so we will
make a change here as well. So Introduce another
state to the bottom text. I now want that in
the second state, the opacity will
be changed to 100. Now we have a base
state and state here, and this will just change
the opacity of the button. And then I can actually
make an event now, and for the event, I will choose the mouse down function
here and add a transition. And for the transition, we will use the tocal mode and do a transition here from
the base state to the state. This one we will
do in 0.2 seconds, and for the transition, we will make it linear. And now you actually
see if I simulate now, you see that the button actually hovers inside while
I'm pressing it. Because of the tuggle function, I can actually just
press it how I want. Now it's just cool about it because we are in a
component base group. I can now actually do this for every other of the
components here. And we can just now
exceed further. So again, we just actually, change the opacity of the text
here in the second state, and this one I will
also introduce now to this transition group. So create a new transition here, and this one will
affect the button text. Again, also in tog mode, and it will do a transition from the base state
to the state, and also in 0.2 seconds. And then now if we
simulate again, you see now that the opacity is changed while
I'm clicking it. Also for this one, and also
for this one here actually. Now we can actually just do it as well for the
light bul, maybe. We will introduce a new state. For the state, we will actually change the deaf
color here to maybe maybe here like light red and
here darker red, like that. Then we will also introduce another state for
the light source. Again, we have a base
state and a state here, and in the second state, I want the light source
color to be red. And now we can also introduce this one
to the button event here. Again, do a new transition, one for the light bulb here. We also choose a Tuggle
function base state and state, give it 0.4 seconds maybe
and choose the linear one. We have this one and then also a transition
for the light source, choose Tuggle from
base state to state, give it also like 0.4 seconds
and also a linear effect. Now if we made
everything correct, we now pressing the button and the light source and the light
bulb will actually change, and this one will also affect
every of our component now. Now you can imagine
now that we can make different versions now again in the child components. For example, now,
if I'm choosing the light bulb here
in the second state, I can actually recolor it here, for example, so
maybe like green. Light green and
the darker green. Like that. Then also choose the second state of the light source here
and make it green. Now if you simulate again
actually and press this one, it will be red, and if you press this one,
it will be green. And maybe just for the other components
component as well. I can make this one in the
second stage like blue now. Give it a light blue
and some darker blue. Also for the light source, again, in the second state, give it some blue color. So Now you can imagine,
actually that if you have many more of
those elements, it can be just
quite helpful that you choose the component
structure because you can just make changes to everything
and also just give it some specific added for
some of the elements. So now what I actually also
want to choose is that you can also do some y revert steps. So maybe if you don't
want actually that this child's element has some overrided settings like the light bulb or the
button or something else, you can also just click anytime the child
component here and just reset all overrides
or changes to the main. You can also just adapt those changes to
the main component, but you can also just reset
all of the overrides, and now you have just simply the same settings as
the main component now. Now, maybe for clarification, I will just simply change
this one again to green here. Because later this will be published in the
spying community. So we have just a nice
cleaned up project here and also for
the light source. Again, like that. And now we have a red, a green, and a blue
button here. All right. Now maybe one little
function as well. You can actually also, if you just copy this one again and make
a new child element. You can do it anytime, just everything of
the component here. Here's a little unlink function. If you click on it, it will actually will be converted to a
normal instance here. This one is just the
same like group, which just created before, we did all of the
component work. You can also just do.
This one will be then not affected by any of the
component settings. Yeah. Now you have just again all of
the buttons here, and as you see now, we just changed the color of
all of the child elements. This is one specific advantage of the component groups here. But again, you can just
play around with it. For example, we just now changed some appearance settings
here of the lightbulbs. But maybe now you can also just go inside of the main
component again here. For example, choose all
of the functions here. And now we can actually
make the transition, for example, just longer for every of the
components here. So for example, now, I will not use the button
and text function, but maybe like the
light function here. So for example, we can
just maybe use 2 seconds here for the light bulb and
also for the light source. Now you again see that actually that the function now also just now you actually
see that all of those changes now adapt to
the child elements as well. If I click now on it, you now see that the light
is changed now more slowly, and this one also for all
of the child elements. Again, this is one big
advantage of using components. Also a nice way to actually use components is in combination
with other functions, for example, the clono module. Maybe I will just show it
here with the body element. I'll just duplicate
the body element and actually bring it out
of the instance group. And maybe give it also a
little brighter color. So we will bring this
one down here and maybe make it a little
bit longer here. Now again, as we just saw in
some of the other lessons, we can just activate
the cloner module here and then choose how
many clones we want. So maybe I will also give them a little bit of twist
like 20 degrees. Now you actually
see that you have a lot of shapes created here. Again, if you change
this main shape here, you will also change everything, every shape of the clono module, but you can now not access like any of those elements he
created by the clona element. But to do this, we can actually just convert this
one to instances. And now you see
actually that you have those body two clones here. Now if you look inside of it, you now see that every of the cloner element is actually converted to
a child instance here. Now we have this
one here indicated with the four green dots
as our main component, and this one with
the two green dots actually as our
child components. And now as we just did
here in the project here, we can actually just choose anything here of the child
components and change it. So for example, I will just now change the color here
of this element, so maybe like green,
and also for this one, maybe this one. Now again, because we are in a components based group here, you can now just
again make changes to the main component,
so like that. But you can also again just added some of the
child components here, and this one will affect
just not all childs. You can just play
around with it. You can change every property, you can do transitions
or something else. But this is also
quite helpful in the cloner module, and yeah, this is also quite
nice function, which you can do
with components.
19. 3D Camera: So let's talk about
three D cameras, so how you can
create them and how to do some nice transitions
with them also. And for this lesson, we will actually choose the same scene setup as
in the components lesson. So we have now here our
three little buttons, which will actually change the color of the light
bulb down below. And again, this is
component base. So if you don't know
about components yet, please make sure to actually watch the lesson
about components, so you know what we
are doing right now. And yeah, to start, we will actually look
at the base scene here. So whenever you actually
create a default scene, you have a camera
by default because otherwise you wouldn't
actually see anything. So if you have nothing
selected here, you see on the top right
corner that you have the viewport co personal camera. And this personal camera
exists at any time. Whenever you create a new scene, But there's also the possibility actually to create
your own camera. For example, you could
choose this option here, which calls at new camera, but you can also
actually just choose the camera from the top
tuber here on the plus icon, and here you see
the camera option. If you click on it, you will actually just create
a new camera, which is indicated by this
little yellow rectangle. So on the top left corner here, you actually see the POV, as we may call it now, so the view from your new
camera that was created. So here the camera. So maybe if I just rename it to maybe something
like second view, you now see that this one is also getting changed
to second view, and this just basically
indicates your view here. And you now see that while I'm changing the
camera position, the view on the bottom left
side is also getting updated. And now you can actually
just play around with it. And here on the right side, you actually have also some properties that you can change. For example, you
can change between the perspective and
the auto graphic view, or you can change the
ne and far value, or you can also zoom in
how you want to. Okay. Maybe we'll stick around with the perspective view now here. And here you have now
also some other changes. So for example, you also have
a FOV, so a field of view. So for example, what a
field of view is, actually, you see here the body or the guy that is
looking forward here, and the angle actually
indicates the field of view. So maybe if you compared
with some camera lenses, so wide angle, for
example, 104 degrees. It's a pretty wide angle, so you actually see a lot of
y obstacles in front of you. And maybe if you have
a less field of view, you actually only see
obstacles that are aligned here with the race here
in around 2.5 degrees. Now you also know what
the field of view is. Also here again, you also
have the zoom factor here, so you can zoom in and
out as you want to. Again, maybe if we watch
the bird ites view here, you can also just simply move your camera
to the front to the side, or give it a twist, just
like any other obstacle. Again, you can also do a
rotation maybe here as you see. For some little nice
effects or something, but I will actually just stick around with zero degrees here. And if you actually want
to lock your camera, we can also again do
this here by the block, and now your camera
can't be moved. But we will actually
just unlock it now because we will do
some features with it. And that is what we
are going to do now. So by default, you now have your second view here and also
the personal camera view. So for example, if I now
actually just do the play, you now see that it zooms in. That's because we actually going to render the view
with our second view here, and we are now at the viewport
of our personal camera. So you pre snap to
our camera now, you see that it's
also zoomed in. And now we're actually looking through the second view here. So if I render now, you see it from
that kind of view. And now we can actually also
do some transitions with it. So for example, now, I will maybe zoom
out a little bit. At first, we just see
the three buttons here. And then we will actually introduce some of
new states here, and maybe one more. Now we have a base state, a state, and a state two here, and the base state is basically how we look
at our objects now. Now we will actually
introduce the state here, and this one will be actually
a little bit twisted. For example, now, maybe if I change the view
here a little bit, the camera here, I will actually bring this a little
bit to the front here. Am, maybe in this state, but actually in every state
here, so maybe like that. Now it is indeed here on the
new position in every state, and I will actually decrease the Zoom
factor a little bit. So again, all obstacles
actually fit in the view, maybe like 1.6. Yeah,
maybe like that. If we now render, we now actually see
all of the obstacles, And for the second state, we will actually just rotate
the camera a little bit. So you now see here
the yellow cone. This spreads around the
races here to the edges. And for example, if I'm increasing the
field of view now here, you actually see how changes
in the second view also, just as a little reminder of the field of view section here. And what we're actually
going to do now in the state is we give
it a little twist. Maybe like that. And then we also zoom in a little
bit. Maybe like that. This looks good. For
the second state, we will actually do the same, but actually then on the
right obstacle, like that. For the Zoom value, I will just take the same
value as in the state two, 3.92, and then we're on
to the right obstacle. Maybe we like that. Now we have the base
state. I like that. We have the base
state, the state two, which is focused
on the left side, and the state two, which is focused
on the right side. Now you actually can
introduce an event here. For this, we will
actually just start. You can also maybe introduce
a button or something, which you will trigger
the transition, but we will just use a
start rendering function, and then we will introduce
a transition here. For the transition, we will
actually choose our camera. And we will do a transition from M base state to the state here. And this we will do in
maybe like 5 seconds, and we will use a linear
transition here. Like that. Then we will actually
introduce another state. And here we will also do a
transition of 5 seconds, and this one will be then
ending in the state two event, and also linear way. Now if I actually
start the view, you see now that the camera is actually moving
with the transition to the right side and then to the left side and then
to the right side here. But this isn't actually the only thing you
can do with cameras, so you can just do transitions
with them as you want to. So you already have a variety
of options you can do, so the possibility with those functions are
actually endless, so you can just play around
with it, how you want to. But what's also possible
now is that we can also do a transition
based on a path. So for example, I
will now actually just remove this camera for now, and also the transition
we just built. And now we will actually
introduce a path here. For example, just choose
a vector tool here, and maybe for example, we will just draw a line
here from here to here. And then press Escape. Now here on the right side, you now have the possibility
to convert the two path. So we click on Convert to Path. Now we have a little like yeah, like line here, but we actually don't want
it to be extruded. So I will just remove the size here and maybe also the
opacity of the material, so you don't even see the shape. And then with the
shape created here, we can actually just start over and create a new camera
again from the tot here. So choose camera here. And while the
camera is selected, we now have the possibility
to align it to par here. For the object here,
we can actually just choose the shape, we just draw. Now you actually see
that this camera is now aligned to the par here. Again, I will actually use the perspective view here
and zoom in a little bit. Maybe like that,
and also give it a little bit of rotation
actually. Maybe like that. And for the height, actually, I will make it like that, maybe, so it's centered here. So now it looks just fine. And now we can actually just introduce again some new states. So click on the plus
icon here on the states, and now we have a base
state and state here. And for the state here, we will actually just increase
the value of the offset 21 What this does actually is that from the
base state to the state, we now have an offset of one, which is just the same as the length of the shape we
just created, so this shape. Now you see it's now here
on the top right corner, and in the base state, it's actually just at the
beginning of the path. And now we can actually just
again create an event here. An event you want, I will just again use the
start function. And here we can do a transition. And for the transition, again, the target is the camera. But we will actually
do a transition from the base state
to the state. And this one may be
like in 7 seconds, and also I will use a
linear transition here. And then if we now
actually press start, now see that the camera
is actually moving in alignment with with
the vector we just drew. So this is not perfectly
perfectly aligned here. But for the technique,
it will be the same. Maybe what's also just important
to notice that you can also just actually use the
scene as the same as before, so you can trigger
all transitions here. Even while the camera is moving, so it doesn't really matter. But it's just like animation, how to give it a little bit more of
dynamic in your project. And I hope this one will help you actually with
your further projects, and I hope you actually enjoyed this lesson and see
you in the next one.
20. Spline Export Settings And Scene Optimization: We talked a lot about
creating shapes, customizing materials, and also animating our projects, but we also have to export them into some other applications
and show them to the world. And this is what we are going
to do now in this lecture, so let's get started. For this lecture,
we will actually use project from the states
and events cores here. If you don't have the fiber now, you can also just check out myspln community profile
and get it from there, or you can also just download it from the description
down below here. So and we start just with the
most common use case here, and this is exporting for Web. So just go to your Top tuba
here and click on Export. And now you have three different
options to choose from. So you have a public URL, you have a viewer or
a code export here, and we will just start
with the public URL now. And on the right side, now, you see a bunch of options now, so I will guide you through that and show what the
different settings do. And maybe we will just start
with the play settings here, so click on play settings, and then you see a lot of options here that
you can change. So the first one here
is play settings here. So again, if you have multiple
scenes, for instance, or also multiple cameras here, you can choose the scene you want here and also
the camera you want. And next s, we have
the logo here. So by default or any
free spline plan, you also have a watermark
on your exports. So to get rid of it, you have to use a subscription
from spline here, and then you can actually
deactivate the water mark here. Next, we have the
background color here, so you can simply hide it or show it depending
on your use case. Then you have the page scroll, so you can deactivate
or activate it, also depending on your use case. So maybe if you integrate
it into your website and you don't want
the users to, yeah, be allowed to scroll, so
you can deactivate it here, and you can also hide
your cursor here. So by default, it's visible, but you can also just hide it. So next up is the orbit pan and zoom function here and for the guys of you that
don't know what it is, I will maybe just activate
it and hit play here. So while I'm holding my left mouse cursor here
and dragging across, you now see what's
called orbit here. And when I click
my mouse wheel and drag my design across
here to any side I want. This is called pen. And then, of course, you also have the zoom
function here. And this is what you simply can activate or deactivate here. So for example, now, if I deactivate everything
and simulate again, now I can't orbit or can't
drag it across here, or even zoom in or zoom out, And then you also have the
soft orbit function here. So if I go back to the export settings and
maybe activate orbit again. So by default, it's activated the soft
orbit function here. But I will maybe just
show you the difference. So this is what it looks like with the soft orbit
function now. And when I deactivate
it and simulate again, you now see that it's
not so really damned, so this is a little nice feature here that you can also use. So next step, we have
the touch setting here. So this is mainly for
phone and tablet use. Here you declare how you can actually interact
with your design. For example, the orbit function here is triggered by using two fingers or the pen function
by using three fingers, and the Zoom is
done by pinching, and you can just maybe also use a different amount of fingers
for every function here, and you can also just
deactivate the page scroll, for instance, or also
deactivating the Zoom. So, and then we will come to
the next topic. This is on. So if we just activate it, we can now choose
the behavior of u No. So then onto the next
then onto the next topic, this is on Hover event. So here we can just
simply choose a behavior of what happens when we
hover into our scene here. For example, we can
use orbit camera here and also use the sensitivity
and damping factor here. Maybe if I just simulate again, you now see what this does here. So while I'm hovering
around in the scene, we can bit our object here. And depending on
the values here, we can also maybe decrease the sensitivity a little bit and increasing
the damping here. Now if we simulate again, this looks much more
damped and continues here. And then we also
can choose if we want to reset it if we hover
out or we doesn't yeah, want to reset at all here. And of course, we can
also do it for pen here. So if I activate pen behavior and hovering
around in the scene, you now see that I can pan
around the object now. And then you can also activate limits for
bit pan and zoom here. For that, I will
maybe just deactivate the on hover function and make sure that I can bit
pan and zoom here, so I will activate those again, and then I will maybe just activate the orbit
limits for now. And here you now have
the direction here, so you can choose
of both here or only horizontal and
only vertical here. And then you can also set
some boundaries here. For example, now, if I may be just choose a
value of ten here, around ten and stimulate now. You see that I can now only drag around ten degrees
here in every direction, so it's reaching the
boundaries there, and maybe when I
exceed this value now, so maybe to left and right. Maybe like 45 degrees,
something like that. You now see that I can go much further until
I hit the boundary. And yeah. And then you also have like
a little animation here. So this is a soft limit now. So now I've got it by none here, but you can also do bounce
or an east transition here. So for example, if
I hit bound now and simulate again and
reach a boundary, you now see that
it's bouncing back. And this is also like a little nice smoothing
function here, you can use. And you now got just
the same functionality here also for pan and zoom here. Again, you have for pan here direction and also some
boundaries, you can change. And for the zoom limits, you can use a min
and max value here. So next up, we have the
animated turntable here. If we activate it, and maybe I will reduce the speed here to
something like 0.5. And simulate again now, you see that our object
is actually rotating. But because of our boundaries, it actually stops now, so I will maybe just deactivate
all of the limits here. Deactivate the Zoom limits and also the orbit limits here. Now if we simulate again, we now see that it's getting rotated around the axis here. And you can make it
faster or slower, or you can also choose a direction here. For
now, it was right. You can also maybe do it on the left side and
then faster here. This is much faster now. But this is also like a little
nice feature you can use. So next step, you also have
an events behavior here, so you can choose
if the trigger will stop at an object or it will
pass through the object. And the last two here are
mainly for the file size. For the material, if you're
using glass materials, you can set the precision
of the glass here. So a higher value means
also more quality, but also a larger
file size here. And here you can also
activate compression. So for example, you can use if you want to have more
performance or more quality. So again, more performance
is yeah a less file size, and more quality is a
bigger file size here. And then you can
also just change the image quality here
by using the slider, and you can also activate
or deactivate the preload. So maybe if you worry about your file size or
performance in general, you can just go to the
overview tab here. And down below, you have this little performance
testing tool here. And maybe if we just
click on Run Test, we now see some metrics
or benchmarks here. So for example, we also see the file size here
and Tesco in general. And also some metrics here of
how many objects you used, how many Booleans, and so on. Also a nice little feature
here is opportunities tab. So this just shows you if you have unused acids in
your project here. For my example, I have a color
here, which I don't use, and this is also just yeah, size here, file size that
we can get rid of here. And to do that, we can just
click on the trash bin here or remove the unused
acids here. All right. So in general, for the
overview tab here, we can again switch in between our scenes here or
our cameras and also deactivate the benchmark here if we have the pro
subscription from spline and also can activate
a little spinner here. So this is just when the file
size is actually quite big, and the user's connection
isn't really that good. It will show a little
preloader here, and this one is available in
both dark and light mode. You can also just show
a loading preview, and you can also give
a little hint here. So if you have bit activated, you can activate a
little animation, which will be shown,
and this should, yeah, hint the user that
you can actually interact with the design here. And I can also show you
this one here maybe. So on top here, you have your custom
spline project domain, which you can open by
this little arrow. So if I click on it now, you see in your
browser your design. And then also here you see the little hint here
that you can bit around. And here you can also
just copy the link by clicking on it and also
copy and embed here. For the guys of you that
maybe no eye frames, so you also can embed your
design as an eye frame here. Then next up, we have the
view export function. So here we got a little
nice Java script code, which we can embed
in any website or content management Then next, we have the view
export function here. So here we got a
little javascript code and also a production domain. And the only difference to this tap here is actually
the mouse events, so you can choose if those yeah I apply to the Canvas container or the global window here, but the rest is
actually the same. Again, also for the
play settings here. So this just differs by the
type of integration here. Here you got the
javascript code, and this is more like domain
or iFrame based here. And last but not least we
have the code export here. So for the developers of you, so you also got the possibility to integrate it to
something like three Js, react, next JS,
or anything else. But yeah, this will be
done in another video. So this whole programming thing, I will append afterwards
to the clause. So now we will just focus on the public URL and the
VO export function.
21. Export into your Webflow, Wordpress or Framer Website: So now we learned
everything about the export functions
and settings, and now we will use
this knowledge to actually integrate S blind
into some of the yeah, most commonly used
website builders. So we will do Webflow framer
and world press here. And yeah, let's just start
with the Webflow one here. So now I will just head
over to Webflow here, and I prepared a
little project here, so you guys just see how it might looks in the end
if you using spline. Here's just a dif block here, with the height of six dVH. Inside of this diff block, we will now place
our spline scene. In Webflow, you can do
this by add an element, and then you go under media, and here you have actually a
native spline scene support. We can just drag
it inside of here. And make sure in the navigator that this blind scene is
inside of the dif block. And for the height,
I will use 100%. Now if we go under settings
here, we need a URL. And for Webflow, we actually
need a production URL. So if we go back to spine here, under export and Veer, we just copy our production URL, and then we will just paste it into our webflow, URL here. All right. And if
we have done so, we can just publish and then we successfully just integrated spline into Webflow. Now we can actually
just orbit around here and use the Tuggle
function of the button, and everything just
works fine here. And now we will also
do it for framer here. But this time with
another object. So just with the stopwatch
here from the project section. And to get this
inside of framer, we can just go to insert
here and then to utility, and here you find the Amber
function, and this one, I will just drag here
on the right side, and I will just make it
atle bit bigger here. And for the size here, I will use some min values here, a min with here of 100%. And also a mint
heat here of 100%. Now on the bottom here
in the Amber tap, we can now decide if we want to go with the URL here or an HTML. And if we go back here, you can now just
freely decide here, so you can use an iframe, but you can also copy the
link here or even just paste the Java script code
inside of the HTML here. But I will go now
with the link here, so I will just copy it, go back to framer here
and insert it here. And then you just got your spline scene
inside a framer here. So when I just hit on play, you now just have your
project here in framer. And last but not least, we will also do it
with Wordpress here, so this is a simple
wordpress elementor page, and we will now
integrate Ef into this, not the stopwatch anymore, so we have a little
bit of variation here. Again, if you don't
have the files, feel free to go to my
spin community profile, and you can download it
for free there. All right. For wordpress integration, we will simply add
a new element here. Again, this is a
simple container here. And then we will add an element, scroll down a little bit, and here we have
the HTM L widget, and this, we will just placed
inside of the container. And then if we go back
to EF and export, we will now use
the i frame here, so click on Copy bt. Then we will head back
over to Wordpress here, and here we can just
paste our iframe. For the size here, we can maybe use 1,000 pixels, for example, or maybe even more,
maybe 1,200 pixels, and now we successfully
integrated into world press here. Again, everything
is just the same. We can use all the
animations here, and this is also just
quite easy to do here.
22. Export as Image, Video or for 3D printing: So next we will talk
about how we can export our blind
scene as files here. And to do so again, we will just go to
the export tab here. And then on the bottom, you see all the
possibilities here, you have to actually
get files out of it. And the first one here
is the image one. So you have the possibility
to get in JPEG or PNG here, and you can just simply choose in between those
two variants here. And then you also
have the ratio here. So by default, it's at
the value one here. And for example, now, if I will change it
to two here, maybe, the ratio just
means that you get the multiplied resolution
of your screen here. So for example, I've got a
screen here by 1,920 by 1080. So I will get the double value as my final resolution here. And then you also got
the possibility here to show or hide the
background color. But keep in mind that for maybe a transparent
background here, I would recommend to
choose a PNG file here. And then you will also see
now that in the preview, your background gets
transparent here. And then finally,
you can just click on Export here and
your file will be automatically downloaded in your selected resolution here. So next step, we have the
video recording here. And here again, you have the possibility to choose in
between some formats here. So for example, you have web, P four, give or a simple
image sequence here. And maybe for example, now, if you want to paste this video on your
website, for example, I would recommend web Mm because you get a
better file size, so you don't really
slow down your website. And also for the
other formats here, there are different kind of
areas of application here. But yeah, you can just maybe try it out
for yourself here. And the next ones here are FPS frames per second
and also ebits. And here, you can also just choose in between
some values here. But again, keep in mind, so a higher value just means that you have
a better quality, of course, but you also have
a bigger file size here. But yeah, it depends on
your area of application. And here you can also choose if you want the recording
to be manual, or you can just give it a fixed
time here, so a duration. You can just yeah choose
a custom duration here. But I will just maybe leave
it here by manual now. Then you also have
the play settings. Maybe if you have more
scenes or also more cameras, so you can choose in between your scenes or
your cameras here. And here on the bottom,
you have again, just your export settings here, so the same as you have in
the web exporting tab here. So you can just activate
them if you want to. And then afterwards, you
just click on Start here. And now you have on the bottom here a
little record button. And if you click it, a screen record will start now, and then you can just simply use your scene, drag it around. And everything you do here
will just be recorded. And if you finished, just click on Stop now, and then automatically, your
video will be downloaded. So next up on the list, we have the three
D formats here. So those formats are mainly used for things like web apps, games, or AR and VR stuff. And here you have four different
options to choose from. So GLTF, GOB, STL, or UD Z here. And every format here just
supports different properties. For example, here, for GLTF, and also GLB, you can just
export the geometry here, but you also can change in between the color
and texture mode here, and then you can also export the color layer and
also the textures here. And then for STL, maybe, you can also just export
the geometry and for USDZ, you can again export
the geometry, the color layer, and
also the textures here. But also keep in mind
those little hints here. So for example, now, the texture support
is limited to only primitive geometries
with UV projection mode, so no texture support for geometries with a smooth
and added function. So if you have geometries made with the smooth
and added function, so this could be yeah, there could be a lot
of failures maybe in your projection or
exporting model here. So keep in mind that also. But yeah, you can
play around with it. So for example, the
SDL format here is also mainly used for
three D printing here, so this is also quite cool. So you can just, yeah, create any shapes you
want and spline and then maybe printed on
your three D printer. And yeah. And last
but not least, you also have the
possibility to just save a local copy of your
file to your computer. And this has many
different advantages here. So for example, you could sell your files on a marketplace or maybe also in combination with some
IOS developing here. So the guys of you that no
programming a little bit, so you could fetch your data
here from a local file, so you can use it for this. But again, you can also just fetch the data
from the cloud here. So you can choose in between
those variants here. But this is also a little
nice feature here that you can just save the
file to your computer.
23. Project: EVE from WALLE | Part 1: So then let's start
with the EF project. So again, we're now in our
basic default blind scene. And now we will actually
place an image here on our base plane as a reference for the
basic shape of EF. And to do so, we just a can simply click on the
import button down below, and then we will
browse our files here, and then we can just import some images from
Google or anything. An default source you have. And now we can actually
use this image to create the basic body
shape and arm shape, and also the head shape of ef. We will just now simply
start with the body here, and to do so, we will just create a sphere
here on the body. And place it here. Now if you rotate it, you see actually that it
looks a bit weird, so we will just hide
the base plane for now. We just have the image
and the sphere now. You now can imagine that
this is a two D image, we just actually have to
convert it in three D, we take a sphere here and not just simply a
simple circle here. Then we will actually
just increase the size of the sphere here by
holding option and shift. And now we actually
just make it like that. So the edges now are aligned
with the body shape here. And then we actually choose to move an
added function here, so enter the added mode here, and then we will actually try to convert this sphere
to the body here. And now we actually
want to convert this sphere here to the
body, by deforming it. We will choose the edge option
here now and the october. And then we can actually just
select all the edges here, and we will bring it down here. Now you have to look
at the edges here. We want actually that this little blue line aligns with
the image outline here. This line actually also
aligns with the body now, so we will step to the
next part of the body. Select the next row here, then also bring it down. Now we will do this
again and again. Now choose the next layer
here and bring it down. And so then bring this down here. So now the bottom already
looks pretty good, and we will just continue
with the top eo of the body. Now, actually we can't use
the same technique for the upper body because we
just reduce the width here. If we do the same
technique, now, we will just getting
smaller and smaller, but we actually have
to go wider here. We can actually stay in the edge editing mode here and just simply select
one edge here. And then we can just increase the width of
every edge step by step. Again, click on
this little circle here and then hold
option and shift, and then you can bring this little blue line here
in alignment to the e body. This is what we also going to do now for all the other edges. Maybe bring this also
a little bit here. This is a little bit of
fine adjusting here. Now, and sometimes you
can't see the edges, so you can actually
just hover over it and you will just
select them like that, and then you can also bring
them to the corners here. We do this step by step now. Then move this a bit up here. You see the other edge. Then also bring this out. Then what we can
actually do is to get this little curfew. We can actually go to
the vertex mode now, and then we will select
all the upper vertices, not this one in the middle here, but just the outer ones. Now we can actually
bring them up here. Make sure it's aligned
with the image, a little bit more
here like that. Then maybe we can
also just select the middle one here and bring
this down a little bit. You have like this
little nice hole here where the head is actually going to be
positioned later. And if you may just make the
picture invisible now here, you actually see this nice body. So let's go back to the editing mode because
I actually want to insert another edge here because
it looks quite edge now. You can just look quite here, and then you can create
a new new edge here. So like that, that
looks pretty good. Then you can leave the
editing mode and now you're ready with the body now. We can actually go to the
next part of the body which is the head now of
E. Don't worry, it looks a little
bit displaced here, but we can actually just
make it symmetrically. And we actually bring
this do. We like that. Then again, we will just start
over with the sphere here. We can just place a sphere here. Make sure you are actually
aligned in the axis now here. Choosing this little blue dot. Then we can actually just
increase the sphere here again, so it matches the
head like that. Then maybe see that it's not
really a full circle here, it has actually more
width than heat. I can just drag this up here to this side and
also to this side, actually and maybe like that. But then actually the bottom of the head has a
different curvature. We will just step back
to the editing mode. Now again, we will
activate the edge mode, so you can select all
the edges of the shape, and then we will bring them again to the
outline of the image. Select the edge,
and then again hold option and shift and bring this little blue outline here to align the
the head shape here. And then do this for
every other edge now. I can select the edge. And bring this out here. Oops. I will actually move the age. I have a little bit because I can't maybe I will just
move the body down. It's much simpler. So again, step back to the
editing mode and then do it for the
last edges as well. Tone here. I will just add
another edge here. So we get a smooth solution. I just want the edge. Yeah. So now we have the
basic head shape now. I will just quickly move
this body up again. And I will just
simply rename it now, so for a better understanding. So this is a head and
this is body shape. Maybe we can also
rename the image. This is just the reference. Maybe I will actually make
this a little bit down here. Maybe like this. Now, if you have done
everything right, it should be symmetrically. We actually have to adjust
this head a little bit, so it's aligned in the center. And also, because
I just actually dragged the head in both
right and left side, it's it's not spherical anymore, so you actually can just
make it spherical again. Like that. Now if you hide the
reference image now, you actually see that you have actually done
the basic shape of e. Then we can actually
start with the arm, the right and left arm
and to get this shape, we can actually the here, where is it the af one? And I actually I'm going to
hide the reference image now, and then we will bring
the lave element like here in the position where the arm should
be in the end. And now here on the right side, you see some setting
that you can change. So for example, if you drag
this here up and down, you see how the af element
is actually changing, for the top here and
also for the bottom. Then what you can also do
is you can just adjust the curvature of the
lave Maybe for the arm now will make the bottom
a little bit more thin now and the shoulder a
little bit more rounded. Maybe like this. We'll just quickly
rearrange the view, and also we'll just recolor it, so you'll see it better on
the gray background here, and then center it here
a little bit more. This actually looks quite
good from the basic shape. I will actually make this
a little bit more curved. So the hand of e, may like this. Then it should also be
a little bit longer. I actually going to increase this scale in the Y direction. Maybe like this. Then I'm also going to increase
that scale so it gets a little bit bigger and
maybe also increase the width of the
shoulder a little bit more because I actually want that it's getting
from big to smaller, so it fades in a bit. A bit as maybe like this. So if it doesn't look exactly like my arm,
it's totally fine. This is just
personal preference. So make it as good as you can. And if we just the
view now here, looks like this, Yeah, I maybe just make it a little bit tinier in the direction. So like that. And then I actually
want to bring this arm here in
alignment to the body, move it in the direction
of the body now, give it a little rotation
a little bit more. Then again, this is a lot
of fine adjusting here. Rotate a little bit more. The curvature is not quite good. I'm actually going to curve this ordering a little bit more. Yeah, maybe like that. That
should do the work now. This would actually look like the arm is aligned
to the body now. And now we actually have
to use a Boolean operator now to create the
rest of the shape. To do so we'll actually
duplicate the body layer now. Now we have a second body
here called body two, and I will bring this
up here over the layer. And then you can actually
choose both of the shapes here, so Body two and the lave now, and now you have to use the
first Bolean modifier now. And then you see a new group
is created called Blean. And then if you bring this
up here on the left side, you now see actually that the body shape is now
merged into the arms, so it looks like it's much
more aligned to the body. We can also give it a little
bit of rotation now again. So maybe like that. Yeah,
this looks quite good now. So if I just maybe recolor
both of the shapes here also. You see that it looks actually already pretty good in terms of shape of shaping. Let's so this a little bit more. Then actually, you
can just simply duplicate the left arm, hit command and D.
Then actually we will reset the rotation here, so we can bring this here on the right side without a change of the x and
y coordinates here. And then, not this direction, that the right
direction, rotated. I rotated around 180 degrees. And then you see
on the left arm, I did a little rotation
here of 3.75 degrees and that we are going also to do now for the
right arm here. So we actually have to
choose here -183.75 degrees. And then bring this up
to the body here now. Now, we have the basic shape of, so the right and left arm. For Bad standing now, I will also rename both of the shapes.
This is the left arm. And Ban two will be
renamed to the right arm. So now you have the
basic shape here of E, and actually, I want to make
a little adjustment here. So if you look at
the picture here, now you see actually
that the body of ef actually is a little bit curved
here on the top body. And I also want to Wait. Now, I actually want to make
this also for the body here. Again, I will just the body here in the added mesh mode now. And to make this curvature, I actually can just select the top edges here and move
them a little bit down. Then again, work W to the And now we actually
have the main body now and the head and
also the arms now. But I actually want to
do slightly changes here now to the body because if you look
at the picture here, you actually see that
this body actually has a little bit of
curvature at the top. And to also this curvature, we will just head back over
to our body element here, and then we will add
the mesh here again. A and then zoom in a little bit. Now we can actually just select those edges here and
put them a bit down. And then we can also
do it now if we work our way up to the center
here, maybe like this. And then we can actually also select the middle vertex here, and also pull it
ale bit down here. And now you also have this
little nice curvature here, like the reference image. Yeah. So this is it now for the basic shaping
now of the body, and now we can actually step
towards to the material. And for this, we can just
select the body now here. And I will actually
change this now to a little more blue gray here, so maybe like that. So if you want to know
it, it's d 4d4e4. And then we can also
add some fresnel to it. Again, just add a
material layer, here we clicking this plus icon, and then we can add
a fresnel layer. And for the fresnel layer, we actually just make
the color white here, and we can actually just leave the settings
here as they are. And then we actually can introduce another
fresnel layer here. Again, just add a new
layer and choose fresnee. And then I will actually do some more gray like color here. Maybe like ED ED ED. So now you have the two
fresna layers here, and I will actually increase the scale of the second
layer here to two. You have a nice little
transition here. Then we actually can also
change the background here. But for now, I will actually choose the base plane
here as the background. So maybe zoom out a little bit, and then again just
hold option and shift and then increase the plane
here to the size you want. I will also move it a little
bit in the background here, maybe like this, and then
I will back in here now. I will also rename it Real rick, background and also
give it the color here. Maybe like this, d4df four. This already looks
pretty good now. Then we can also apply this material to the
other objects here. For example, we can now maybe just create a
new material here, by clicking this plus icon, and then we can
call it like body. And now you can
actually just reference this material for
every object here. For instance, if you
click on the head now, you can actually access it from the material assets library
and just click on it, or what you can also actually
do is you can just copy the material and then paste it actually onto the next shape. You can do it how you prefer it. Now this already looks a
little bit more clean now. Then we will actually do the
next part of the shaping, which is the head element now. If you look at the
reference image, and maybe just hide
the head for now, we actually want to do
this little display here. To the head now, we will just hide again the
reference layer here, I will actually make this
head a bit smaller here because I think it's fitting
more here, maybe like this. Yeah, this looks good for now. Then we can actually just
duplicate the head layer here, and then rename it. Maybe like display head. And now we can actually
resize it also. Again, hold option and
shift and resize it. It doesn't have to be
like any specific size, we will just take a look at
how it fits to the head now. And then we will move it
out of the box here now. And we can also like, give it another color. So for now, it's again just our interior
from the library. And we can actually just click here to
unbound the library. And then we have all the
properties here now again. And I will just do some
black here for now. So now it looks like that. That doesn't really look
like how we want it to be. But we can actually just play around a
little bit with it. So increasing the wi
here a little bit. It like that. As a
little bit down here. Maybe like this for now, maybe put it up a
little bit more. Then we can again make use
of the Boolean operator, and to do so, we will actually
duplicate the head again. Now you have a head
and the head to here, and also the display head, which we just
adjusted right now. Then we can actually select the display head and also
the duplicated head. Now we can use the second
Boolean operator now. And now you actually see
that it's disappearing now. But now you actually have exactly the same curvature
again for the display. And if I just a little
bit back here now, and then again, just redo the material properties
here now to some black. Then we have to a No. That position here. We actually now get to
see the display here. Basically, you just created a Boolean operator shape now base from the head to
get the curvature right. And then for the display head, it's basically the width and the heat that you
want to get for the display and with
the Bole operator, now you mix both of
the shapes together. And now you have this little
nice display in the head. And actually, this
is not shiny enough. So we will also rearrange this we creek by adding a
madcap layer here. Again, just add a material
layer here, and then again, we can just use this
ad cap layer here, which gives a little
nice shiny surface here. And then for now, I can actually just remove one of the
fresna layers here. So maybe like this one. And then we are
good to go for now.
24. Project: EVE from WALLE | Part 2: So and then we actually have the basic shape enough
for the display. If you want to do some
little fine adjustments. Be careful with the
boolean operator enough. So you actually have to
select the display head now to actually adjust the
width and the heat. So not the Boolean
operator here, but the display head. Now we'll just do it
like that for now. And yeah, I'm fine with this. And then we can actually go
ahead now to the ice of each. To create the ice, we can
actually just simply choose the ellipse tool here now and place an ellipse
here on the head, and then actually
adjust it a little bit. So it looks like an eye. And also give it a little
bit of rotation now. Again, if you look at
the reference image, and we will just quickly
hide the head now, and also this one. You actually see that the
eyes is a little bit rotated, and also the shape
here is like that. I can maybe use this
as a reference now, make it a little bit bigger. Like that, like I said, rotation actually
fits right now. So I should be all right. Now you can make
both the head and the display visible
again and also rearrange the view here and then bring the eyes
in the position now. So like that. Then again, you can just duplicate this ellipse now and for where the
positioning now, I would recommend to
redo the rotation now. And then just bring it
here on the right side, and then redo the rotation. Here it is -21.6. We will do 21.6 in
this direction, and now you have actually the same rotation
factor here now again. All right, then again, I will just hide the reference
image for now and actually maybe I will just
quickly make them wider. Here and a little bit more down. My this. Again, 21.6 and
-21.6, that rotation here. Now we have two ice here. And now again to get the
curvature of the ice right, so we will just use the same technique as we used before for
the display head. And to do this, we will first just simply extrude
both of the ye now. Maybe like this, don't worry. It looks a bit strange for now. And then we will just bring this up here
inside of the head. And then we can actually again just duplicate the head shape here on the left side bar
and then bring this up here. And now you just simply
select one of the ice and the head shape and then just use the second boolean
operator now here. And then if you actually
drag it out here, you now see that the eye actually has the same
curvature as the head, so it's perfectly
connected to the surface. Now we actually made the first y I'll actually re
arrange this quick, the left side, so it's perfectly aligned
here, so like that. Then again for the second ei, we will again duplicate
the head shape, bring this up now, select b of the shapes, and then choose the
second ban operator here. Then again, may we go
on the right view here and bring this I in
front. Like that, And now you have
e with two s now. And maybe you know from the reference image
that we actually have some kind of pattern here in the eyes
of E. If you look at this, we actually see some
little lines here, and we can actually a this by using the pattern feature
in the material properties. To do this, I will
just quickly hide again the reference
image, and again, for better for better
clarification here, I will just also rename
both of the eyes here, so left eye and also rename
the right one to right eye. Then we can just head over here to the
material tap again. Again, it's choosing the
defol body material, but we can just simply unbound
it by using this icon now. Again, I can just remove one of the fresne layers and then introduce new layer and we can use from the
layer function here, we can just use the
pattern one here. Then adjust the properties here, and we actually
want for the style, we actually want the lines here. And we want to do it spherical. For the color, actually, we
will keep the black one, and we will introduce
also the blue one here, it looks a little bit like the color from
the reference image. Then to get a little bit more of the lines
here now in the eye, we actually have to adjust
the frequency of the lines. Not in the x position, but in the Y position. For example, if I
increase the value, we now see that a lot more
lines are no visible, we'll actually make a bigger
value here, maybe like 100. Like that. Then to get a
little bit of blurry effect, we can actually also increase this
smoothness factor here. If I increase a factor, and you'll see that
it's getting a little bit more blurry
around the edges. Again, get a little bit more of this display
kind of look. And yeah, this it now
for this material. And again, and again, we can just simply also save this material to
our acid panel now here and maybe choose
the material here. And then we can also apply this material here
to the second I. Actually, I will just
adjust the eyes a bit more. I can just if you want
to adjust the size, you can just go inside
of the bin operator. I will make it actually
a little bit bigger enough here. Maybe like that. And also a bit on the outside. I think I can do. I have to choose I
believe an operator lips. May we like that. So now again, we can make some little
adjustments here, so I will actually make
this display a little bit more like this and
also for the material, actually of the display head. I will know this one But actually, I will move this
fresne layer up here, and then I will actually
make it black here, so it doesn't look
that shiny now. Maybe also increase the
intensity here to three. So like that, and
also to get again, thistle more blurry display IT Television effect. You can call it as
anything you want. We will actually again introduce
some bloom effect here, so activate the bloom one. Then for the size actually, I will use a small size here. Treasured I will actually
bring down to zero, and also the intensity may
be like 0.3 or something, and then maybe you
can if you want increase this moving factor
a little bit, like that, And now this actually
looks really good, in my opinion, I
were maybe sorry, but I actually move the eyes again a
little bit down here. So I like that. This actually looks
quite cool for now. And then we will
actually head over to the body part where we
will add some more details. So for now, I will
actually add some buttons here and also a little
bigger red button, which kind of
simulizes the heart of E. Where we will also use the
same techniques now here. Again, as we did for
the display and for the ice now and just to get some practice here to get all the curvature right here in some
more complex shapes. To do so again, we can again
just add some ellipses here maybe like Here, I will actually size
them down a little bit. So maybe like that,
and then duplicate it by hitting command
and D, like that, maybe like three little ones, and then one bigger button here, so the heart, maybe also
centered, maybe like this. It's really centered. A bit more on the
right side here. Now we will start with the
three little knobs here. Again, if you look on
the left side here, you see that it's just a
two dimensional shape, and we actually have to bring
them down here in the body. Again, just select all of
the three little ellipses, and then them and move
them in the body, maybe like that here. If you look around,
you now see actually that all of the shapes now
are connected with the body, and then again, we can just
simply duplicate the body, bring the body up here. We will start with this one. Then again, select
both of the bodies and then merge them with
a second an operator. And then move them outside. Maybe we will look
from the top here. I don't know. We can
get a nice view here. Maybe I will also just recall
it real quickly, like that. And then I can move it inside. Maybe a little bit more. Like that. Then we can
actually just repeat the step the steps here
for the left one here. Again, duplicate the body here. I will just do it
quickly two times. Bring both of the
bodies up here, select the button and the body. Choose the second
boolean operator. Bring this up. Now you see it, and then again for the last one, choose the second
boolean operator, merge them and bring them out of the
surface, not rotate it. And then we will do it
also for the big one here. Sg move it inside of the body, duplicate the body,
bring this up here, and then choose the
second boolean operator. Now it should look
something like this, and then we can just actually change the
materials for now. And for the little ones, I will actually just
make them white. But first, I will
actually they can just rename it here for
better understanding. Little button. Also
a little button. And this is also
a little button. And maybe we can group all
of these little buttons. And you can call it buttons, maybe or anything you want. And now we can add a
new material here, and I will just make
them white here. So like that. For the big one,
we'll call this one, the heart, for the
material the heart, we can actually do some re here maybe this then we can also maybe add a
bit of outline here, create an outline layer and maybe increase the
wi here a little bit. Maybe like that, also
do some smoothing. And then I will do this
in a little more lighter. Maybe this. So now looks like this now, and I will actually maybe decrease this outline
effect a little bit. Maybe like four. So
if you them out, it looks like this. And now we can maybe also add a little text here
in the background. So like, increase
the font size here, 200, maybe 300 or
maybe even more. 40 and then also maybe increase the spacing
here a little bit, make sure that the
parent element is big enough to fit the font here. Increase it even more.
Maybe like that. And also some bolt font here. And it should look
great now, not so far. So like this and then maybe
also change the color here. Maybe some white here, can also maybe reduce the
transparency a little bit, so it fades better
with the background. And then it looks like this. Now we were actually ready with the basic shaping now of E, and now we will come to the
animation part and we will add some basic transitions to it and some follow up effect. And one simple animation
is the look at feature, which we will implement
now. This is quite easy. And we will actually
use the head for this, and I will just quickly group all the head
elements up in one group, and I will do this,
not the buttons. Maybe from here to not the arms. The right eye, the left eye, the big b the display bully
modifier and the head, and I will group this up and rename it to
the moving head, or maybe something like that. Now you have actually all the elements of the
head combined in one group, and this is actually quite
important for the look at feature to implement it, you can just simply head over
to the events topic here. And then you can actually
use a look at feature here, so not using the start function, but the look at feature. And now it's actually
just implemented. So if you simulate now, you already see that the head is actually
following your cursor. And now you can play a little bit around
with the features. So maybe just increase the
damping mode a little bit. And yeah, that's
maybe it for now. So now you have a
little nice animation here where each looks
at your cursor. So this looks pretty cool. And it's also quite easy to do. So it's actually a lot more easier than building the shapes. So now we actually implemented
the look at feature. So this looks cool now. And then we can also add
a new animation here. I actually want that Eve
is floating a little bit. Like in the movie, it's moving up and
down all the time because just simply
floats in the air, and to do that, we will make another group. We actually have to group all the shapes
that we just created, also the head and the
body in the arms. Actually everything is floating simultaneously. And to do so. We can select the heart here, the buttons, the moving
head, right and left arm, and also the body
now here and create a group with command
and G is the short key, and then I will just
simply rename it to. Then we have all the shapes
now grouped together. And with this now, we can actually introduce
two new states here. Again, we have the base
state and the second state. And for example, now
in the base state, e is now in this position, and in the next step actually be a little
bit more up here. So maybe like that, you
now see the difference. In the base state, it's here, and then in the second
state, it's here. O maybe even move this
a little bit more up. And now we can trigger this
state by adding a transition, and this transition is basically just started when
the scene is starting. So you can just leave it as it is now with a
starting condition, and then you can
click on transition, and the target is
again the group here. And you actually want
that it's getting from the base state to the
second state now. Maybe you can increase the
time a little bit like 1.5. Here you can actually
make it linear, but you can also make it
like ease in and out. The top and the bottom
is a little bit damped. So we can leave it as it is now, and we also should
do it infinitely, and we will actually cycle
it with the ping pong. I actually bound this up
and down and up and down. And this is it now. Now if we simulate now, we see that E is floating, and also the gate feature
is still active here. And then maybe we can just add another
little animation now. So for example, we can make Ef jump by clicking on the body
or anywhere in the scene. So we will actually also implement this feature
now as an example. To do that, we can just step
back to the group here, and we will actually trigger a new event here by
the mote feature. And then we will
just go back again, and we will introduce another
state here, the state two. We can actually make it. We can actually call it
like maybe jump. And when I jumps, I actually want the position
to be higher than this. So choose the second state here, the jump state, then make
this even more higher. Now you see these two
are the floating ones, and this is a jumping condition. And we can trigger this now By the mouse down event. So add a transition here for e, do it once, and then we will just do a transition
from the current state. So no matter if it's currently in the
base state or the state, and then we actually going to do a transition
to the jump state. So for example, now, if I simulate and click, you now see that it's moving up, but this is actually
quite slowly. So I will just reduce this timing effect a little
bit, maybe like 0.3. And now again, you'll see that it's moving up, so like that. But now you actually see that
it's not coming back down, so it stays in this position, and we also have to
get rid of that, we will actually make
another transition back to the base state. So back to the
original position, and we can actually make this a little bit shorter as
well. Maybe like 0.5. Now if you simulate
again and jump, you see that it's also
falling down again. So this is actually
a little jump here. And now we can actually make some more crazy stuff now here. But maybe we can also let the head rotate while
Eve is jumping. This could also be a
nice little feature. We will combine this actually with the transition
we just created. We will go to the
moving head now here and create a new state. Now we have the base state
and the second state. And in the second state, I actually want to rotate
this head by 360 degrees, so it makes one full rotation. So now, actually the head
is getting rotated now, but we also have to look
where the body is while jump. So it's in this position now. And if we head back
over to the head now, we can actually move this
up also a little bit. So it's actually losing its
head while it's jumping. And then we can actually do another transition here back to the original state. So yeah, like this position. So if you look now, We will actually then
copy this y value, and then we will place it
here in the state two. Now, actually, this
is a base state now, and if we jump, the head is getting moved
up and also rotated. I have to actually change
this value again here. Again, 360, I don't know why. It's not there anymore
and also here 360. Now it's getting up rotated, and then it's coming back down. Now we have to introduce those states
here to our click events. Again, get back over to the e body and then to
the mouse down feature. Then we leave it as it is so, and then we will do another
transition. This one here. For the target now we will
choose a moving head. And here we will now
doing tradition from the current state in
the pay state now. And then also we will do transition back to
the state two here now. I think if we simulate
this one now, No, this doesn't work. Now if you head back over to
the mouse down feature now, you should actually
this was wrong. You actually have
to transition to the state here and
then to the state to. Again, if we look at
the states here now, So this is just our base
state and we have to do a transition now from the
current state in this state, and then back to
the state two now. So if we head back over here
to a mouse down feature. Again, we actually do a
transition no matter where we are at the moment to the state where it's actually
jumping up the head, and then we will do a transition where it comes down again, so the state two here. Now if we simulate again, And do this now see that the timing is
actually not really. It's not really fitting
the simulation now. So it's moving way too slowly. We're actually added the
timing now a little bit. Again, we will just head back
over to e here to the body, and then again, select
the mouse down feature. Now we want actually that
it's getting faster up, so we will reduce this value. So maybe I will show you. So actually, this time
is way too slow now, so we will decrease
this time and also decrease the time where the
head is actually moving down. So we'll do both of
the timing events now. So this one, like 0.4. And this one like maybe 0.7 now. Now if you simulate again
and click on the body, you now see that it's
actually moving quite nicely. So the head is
actually lifting up, rotating and then
coming back down. So you might notice that I actually have to restart
the scene every time by menu because the states
are actually not repeating, and you could also do it
with some Duggle features, but this could actually be quite complex for
now for this lesson. And to get rid of this, I will actually just
do a reload of scene. And to do that, we can just go back to
the Mus Town event here, add a new action, and then we will use a reset
scene feature here. You can also bring
this down here, so you better know that it
will be played in the end. Now you can actually
choose a delay here. Now you have to
count actually how many seconds your
transition takes. Maybe mine will now take like here 1 second and 0.8 seconds. A delay of 2 seconds now
should fit now here. And now whenever I click now on E and the transition
is actually playing now, after 2 seconds, the
scene will be reset it, and then I can actually
start over again. So if you simulate
now and do the jump, we actually see now that
the scene is reset it, and then I can actually
just do this over and over. So maybe you can also do some
little features here again and Maybe one more little
transition here for you guys. We can also make
art like pulsing, so we get a little
bit more life into e, and to do that, we can just make we can make
a new state here. Again, we have the base
state in the state here, and then in the second state, we can actually increase the
width of the outline here. Now you see actually that it's increasing in the
second state here. And then we can just simply add this one to the start event. Add a new action here
and new transition, and then select the heart here. And then we can just choose the base state and the
second state here, and 1 second should be fine. And we want to do
this infinitely, and also we will use
the Ping Pong effect, so it's getting wider
and smaller and so on. And then you can actually
simulate it now, and then you see a nice
pulsing heart here. So this is also a
nice little feature, which you can add to
your three D designs. So to summarize everything, we now have the look at feature, we have the jumping animation, and we also have this
little pulsing heart. Yeah, this is it
for the E project, and I hope you liked it, and I will see you
in the next lesson.
25. Project: Stopwatch | Part 1: So then let's start with the
stopwatch project for now. So we have just again, our basic spine here now. And for now, I will just begin with the body of the
digital stopwatch. And to do that, we can just bring a circle up here
on our base plane. And then let's increase
this a little bit. So by holding option and shift, can make it a little
bit bigger as you want. And I can actually just hide
this base plane for now. So you just have
this circle here. Okay. And then we can start
by extruding the circle. So rotate a little bit and choose the width
edge as you want now. So for me, let's
go with this kind of i and then maybe some
smoother edges also. So I will just increase the
bovel here a little bit. Okay, then this should
be our body for now. So then what I'm trying to
do now is I want to add at light ring here later
on in the project. So I will use the Boolean operators to make
a little extrusion here, and to do so, I will just reset
the view here to frontal. And then I will draw
another ellipse here. And also make it a
little bit bigger. We're holding option and shift, so you can size it evenly. And also give it a
little bit of extrusion. I will just simply just
recolor it for now, so the difference
is easier to see. And now what you guys maybe see, it's not really centered. So I will just head over
here to the position tab. So the bigger one is now
at minus 213, and one. And so I will choose
also here -13, what would it minus two
minus two and 13 Okay. So now the inner circle
is now centered. And what I'm going
to do right now is actually subtract this little
circle from the big one. But first, I actually want to make it a
little bit bigger now. Maybe like that. Also
the ring be a ring, so I will actually increase
the ring value here. So maybe like this. And then move this little ring
inside of the bigger ring. So maybe like that and
check the front view again, so it looks good for now. And then I will select
both of the aleps now. And then, not this one. And then I will select
both of the ellipses now and then choose on the Bo and modify
here the first choice. And then you see now that the first one got subtracted
from the second one. And also the color changed now, so I'll just going
back to the gray here. And now inside of this later, we will placing this
light ring now. But first for now, we just have the basic shape
now here, the body shape. And then we will actually
use a little trick. So we just divide we just subtracted the ellipse two here from the whole thing, but we can actually also we actually wanted to use
later for the light ring, so we'll just
duplicate this ellipse now and place it out of
the Boolean modifier. And now you see it like that, and then just decrease
the extrusion again. So you can just do it
like two or something. And now you see that the ring
perfectly fits here inside, and you also have this
negative extrusion out. And for better
clarification, now, will simply also
rename the shapes. So this will be the light ring, and this is just the
body. And this is the Big circle maybe and I
don't know other sorry. This was a small
circle, small circle. And this is a big circle. Okay. Then what we also
need is like a little no, where you activate
the stopwatch. And to do that, we will actually use the
star shape here now. And I may it. I will do it again now. But actually, we can maybe also choose
the top here again. So rotate the scene
upwards here, and then you can place this
star icon on the stopwatch. You can maybe align it here, and then move it
where you want it. So try to center it and then
give it a little extruion. So maybe, maybe like that, a little bit more maybe. Okay. And then you can also
bevel it like this one. So it looks like it
looks more like a op. But actually, it's a little
bit too tiny in my opinion, so I will actually
increase the size here. So may like 60 maybe
even, maybe like 80. And then also maybe
some more sides here. So like this. Yeah, like that. We can also increase the bevel
sides here a little bit. And maybe the corners also. So it gets a little bit more concentrated to
the inner circle. And that's what I'm doing
with the corner value here. So Don Roy, this is
quite computing intense, so it could take a while. But I think this
looks like a nice. And now I will actually move
this thing up a little bit. And now I will also insert
a little shaft here, where this button
actually triggers on. And to do so, you can
I will actually move this a little bit more up
now, rotate the scene. And then I will place, maybe I will look from above. So take the top bird view here, and then we will place
a little circle here. And also extrude it I have to look at the
Yeah, maybe that's good. Maybe a little bit more
extrusion here. Yeah. This looks good. And
now you can actually select both of the shaft and
the star now and rotate it. So by, not like that. We have to group it first. Select the star in
the ellipse and then press command G. Now
you have it grouped up. I will also rename it
to maybe like button. Now when you have both of
the shapes now in the group, you can actually rotate
it to 180 degrees here. And then we will change to
the front view now again, and we can bring this
button down here. So maybe like that.
Yeah, that looks good. So we are getting further in
the direction we want to be. So now we have the body
and the knob here on top. And for now, we can also
start with the nones here. So you may notice every stop
watch has some nones on it. And so to create the nones, we will simply just make a little rectangle here
and give it another color. And then we will make it a
little bit smaller here. So maybe like this. Yeah, that looks good. And then we will actually make use of the cloner elements. So the rectangle two
should be selected, and then you activate
the cloner module. And now we will choose the type. We will choose a radio function. And then we so also
hide the base, so the middle part here. And then we can
increase the count here to maybe like
something like 16. It should be an even
value because of the nonus 360 degrees, and then you can
divide it by 16, and then you have
a little nice gap here between the nodeus. And what's also important
now is the alignment now. So if you choose yes now or no, so it's every nones
is horizontal here. And if you change
the alignment now, it's more aligned to the center. And if we change the
rotation value here, you guys see what I'm trying to do is getting the none here, so it should be -90 or plus
90 depending how you see it. And then we will increase
the radius here, so it fits to our outer ring. Also have to change the position here a
little bit because it's not centered right.
Maybe like this. But actually, the nones is a little bit too
big in my opinion, I will actually make
it a little bit smaller by adjusting
the parents size, the children is also getting
changed so maybe like this. Okay. So now again center
it a little bit more. Yeah, and then
increase the radius to your needs. Yeah,
maybe like this. This looks good for now. I will change the color to
white maybe again here, so you see it a
little bit better. So now you have a big nones, but I also want to do a subnna, between the bigger ones. And to do so, I will just
rename this one to the big non. And then duplicate
this clono module and call it the small none. And then we can actually just
rotate the non us first. So changing that value
here, maybe like that. I will also give it
another color for now, so maybe a little
bit more dark here. And then you can maybe I
will just redo it shortly, so just press command that. First, we're actually
going to resize this. So make it a little
bit smaller here the smaller no. Maybe like that. And now we can
actually rotate it. So you see now a better
difference. Maybe like that. And then also give
it another color. So we'll just do it a
little bit darker here. And then yeah, then you have the basic shape of
the stopwatch ready. And to bring the stopwatch
alive a little bit more, so we actually going to change the material of
the body for now. And I want to achieve a
little more metal look like, so a bit of mad metal shininess. And to do so, I will create a new layer here. Which we are going to
choose a Matt a layer. And from the library, we can maybe choose this one. This is very shiny, this is
a little bit less shiny, and this is also a
little bit mat here. This is a good solution
in between Mt and shiny. And we take this one here. And then we actually
move it down here. So it does a very bottom here. And we actually don't
need a color animal, so we're actually going to
hide this color for now. And this already
looks pretty nice. But we can actually also add
some fresnel maybe here. So let's choose the
fresnel layer here. And then maybe reduce the
bias here a little bit. Maybe a little bit
negative here. Yeah, this looks
good, maybe. Okay. And then we maybe can also do some little rainbow effect here. Maybe just changing the opacity to something like the no 12, maybe even less like this. So you get a little
bit more detail here. So this looks good for now. And now we can actually
save this material here. So by clicking the
four dots here, and then we will create a
new material here called Middle Doc And now we have saved it to our
material assets panel here. And then we can also maybe do the nop here
in this material. We'll also quickly
just rename it here to nop and the ellipse
to shaft here. And then also again,
choose the knob, and then you can actually access the metal dog material from the acid library and give
it also the metal material. So this looks definitely
better right now. I would also change
the background here to maybe some black here. Okay. And for the shaft now, we will actually
just make it white. Maybe like this. And then for the lightning type, we can just keep
it by fong here. But actually, I will move this button a little
bit more down now here. Maybe like this. Okay. So this looks already more
like a stopwatch now, but actually, we will make
some fine adjustments here. I don't really like the big
face here from the body. So I will actually just add it reduce the
bevel here a bit. Maybe two like three. Okay,
that's better for now. And then we will start over
with the light ring for now. And for the light
ring, I am going to change the material
here and add a deaf layer. So we make a little
gradient here. And so just click on the
gradient layer here, and then we make some maybe like yellow to orange here.
Yeah, maybe like that. I don't want it to be radio. I just want a linear
gradient here. Y this looks quite good for now. And then I actually want to make another little
outline corner here. So the display, so there
should be a display later on is more separated from
the rest of the clock. And to do so I will just
align the view here. And then maybe I can
just actually copy the light ring here
and duplicate it is. The reason I'm duplicating
this is because it's centered completely
in the middle here. And then I can actually
just resize it here. Again, with holding
option and shift, can actually resize it here, and I will just increase
the extruion here a little bit and also remove
this material from now. So you see the difference. So if you look around now here, we have a big big ring here, but we're actually reducing the riff of the ring here by
increasing the ring value. Maybe like this. Again, check out the
front view here. This wasn't actually enough, so I will just resize it
down a little bit more. Again, hold option and shift. And then move it. So it fits to the whole sea now. Yeah, this looks quite good. And then sorry. And then I will increase
the bevel also here. So you have much
more smoother edges, so in comparison to the bevel
here and without bevel. And then for the material, I will just add another
madcap layer here, so it fits to the
rest of the material. And I will choose
again this one. And then you have a a
nice little contr here. So it looks more like a
digital display here. And then we will
add a text here, which is the display
text from the stopwatch. So choose a text function here and then just simply
click on the layer. Then I will actually
just drag it here, so it fits scene the
display. So maybe like this. For example, I will start
just with a zero here and then align it here in the horizontal way and
also in the vertical way. So for the color, we actually just
choose white here. And then we can also maybe
like change the font here. So I will just choose one. You can choose anything
you like here. We maybe use this one, the Bi gen jewelry here. It looks a little bit more
like some digital typography. And then we can increase
the size here a little bit. So maybe like this. And for the wage, we can
also go to bolt here. Maybe like Sami Bolt. Yeah, like Sami Bolt one. Yeah. So like that. I know what you may
notice is that the nb is actually not really aligned
to the center right now, we're actually going to move
it more in the middle now. Yeah. So this is now much
more centered. And then we can start maybe with the
functionality of the watch, and we will maybe
just start over here by the button actually. And what we can do now is
we can create a new state. So again, we have now a base
state and the second state. And if you imagine now if
we click on the button, I want that the Knob actually
moves in a little bit. So we head over to the
second state now here, and actually, we're going to place this button a
little bit more down. And now you see the
difference actually, so in the default state. And in the click state, I can even maybe
make this more down. Okay. And then we can actually just trigger an
event on this button, so create a new event. And then for the trigger, we will choose a mouse
down function again. And then we will
activate a transition. And this transition should
apply to the button only once. And we want to go from the base state here
to the second state. And I think 1 second
is fine here. So if you simulate now
and click on the button, you see that it's moving down. But actually, the bottom here comes a little
bit out of the watch. We're actually going
to change this. Again, select the
second state here, and then we will just move this a little bit more
up, or we can also. This is not good. So just move it a little bit up
here, so it doesn't. Moves out here out of the watch. If you simulate now, you see a little
nice animation here, can actually make it a
little bit faster now. So maybe like 0.6 seconds. Maybe even 0.3 seconds. It's more like, it's
that looks great. Okay.
26. Project: Stopwatch | Part 2: So for the next
functionality, now, we actually want that by
the trigger of the button, the value of the
text is changing. So to do so, we will click on the
text element now. I will quickly also rename it
to maybe the counter value. And then also just
for clarification, I will just rename the
light ring also here. So you have, like,
the display ring. And this is still
the light ring. So then head back over to
the counter value here, and then you can choose
for the content here. You can actually
create a new variable, which is a counter
valuable, so a dynamic one. You can rename it to display account and this display
count value starts by zero. And then if you click
on the preferences, I can here can actually
reduce the intervals, so maybe like 0.1. So the steps can be just one, so it's incrementing 1-2, three, four, and in the end, you should reach
the value of 60. Then by the end, we don't
want to restart it. We just want to
stop the variable. Okay. Then to
trigger this event, we head back over to our button here and to the
events topic here, and then we actually
create a new action, which is a variable control. Here we actually going to
choose the display count, and we just want to let it play with
the delay of zero now. Now if we simulate again, nothing happens because we
didn't choose the value here, so we can head over back to
the counter value and then you have to choose actually this display count value
by the text content. Now if you simulate again, you now see that the counter is getting started while
pressing the button. And then it reaches
the values of 60. And then what I
can also do now is that we can maybe if the
stopwatch is starting, we can actually
change the light ring here to maybe like a
green or something, so that's visualizing that
the counter has started. And then we can also do a color
of red for the light ring if it finishes the 60 seconds. And to do so, we will head over here to our light ring and
introduce two new states. So now we have the base state, a second state, or the primary
state and the state two. I will just rename it
so the base state. Maybe green state and red state. So in the green state, I actually want the
color to be green, so I will head over back to
the material topic here, and I will change the
color to green here. So maybe a light
green to dark green. And I will also do this
for the red state here. Again, go to the
depth property here, and then change it
to a light red, which fades in to a darker red. Now if you swap in
between the states, so now by default, you have the orange state, the green state,
and the red state. So then, actually, we will head over back to
our button now, and we can introduce
another state here. Another event, which is
triggered by the button here. So we have the moving
transition button and also the variable
control event, and now we will just
make a transition now. So when starting, we want
the light ring, actually. So for the target,
the light ring, we want to get from the base
state to the green state. So the clock is activated. And we want to do
this immediately. So now, if you simulate again, you see when the
clock is started now, that the color is changing
from orange to green. And now we actually
also want that if if it hits the
value of 60 now, we finish the clock and the
color sho change to red. To do this. We will just head over to the light ring here and
introduce a new event. This event again is triggered
by a variable change. No again by a mouse click, but a variable change. For this variable change, we will use the display
count variable. And we will then introduce a conditional statement
here, and this condition. So again, we have an I
and L statement here, and we want that the
display count value, display count value
is bigger than 59. We actually want to
trigger a transition now and this transition now, again, the target is
still the light ring. And we want here to do a transition from the
green state to the red state. Also, we will do it immediately. So again, this triggers every
time a variable is changed. A variable is changing. So for example, if
it changes 0-1, this event is
triggered, and so on. And then we will ask if this display count value
is bigger than 60, and then we will actually do a transition from the green
state in the red state, and then we have
finished the clock. So again, when I stimulate now, and now it reaches 60 now, we get in the third transition, and the clock is getting red. Okay. So what you can also do
for a better looking here, and what I personally also like to do a lot is adding
a little bloom effect, especially when you're
using or you're trying to build some display mode
or some, some digital stuff. So it's the shape
is getting more blurry around some brighter modules,
brighter colors here. So, for example, if I
activate now the blue mode, can't increase it here, maybe to some large. So actually I will just increase the intensity now you see what the bloom effect
actually does. But that's way too
much bloom effect. I will keep it maybe like this. And maybe reduce the
threshold here a little bit. Increase the threshold, can
also do some smoothing. Now you see actually that this digital display
actually has some like white contur around
it, some blurry contre. And this is what you also
see in re life on displays. So this is a little nice
effect that you can add just for the looking now. So you have some break of the transition topics and so on. So maybe what we can also do now is like in the previous
explanation of the variables, we can actually make a
little progress bar here, so it also visualizes how
far the clock is in time. And to do so, I will just align
this view maybe here. And again, I could just
duplicate the light ring here. Maybe not because it has so
much states already on it. I will just duplicate
the display ring here. And then maybe make
it a little bit bigger here and also
remove the madcap here. Now you already have like
a little white ring here. And I will just resize it also. So again, hold option and shift. Then you can resize it. Also check around
the edges here, so it doesn't so it stays
connected to the body. And actually, I don't
really want an extrusion on this and also no bevel. Oh, now, you have
to again resize it. Yeah, maybe like this. Now you see it's still extruded here. So just make it maybe like this and move it a
little bit inside here. This looks great for
now and it doesn't exceed any wall or something. So based on this, we will rename it to
display progress. And then we can also just
actually connect this value, the angle value to
the display count. And maybe we cannot And then we actually have to connect this angle
to a new variable. So you could actually
use the display value, but this value actually
just goes 0-60, and again, to fill
the full circle, we need 360, so 360 degrees. And if we use this
value from the display, we only reach out 60 degrees, and it's basically not enough. And to do so, we can just
introduce another variable. So click on the angle here, and then we will
create a new variable. And this one, we were also
going to do And then well, Yeah, combine Feces go. Then we select the display
progress bar here. We can maybe just
actually change the color to more white
here, more white color. And then we will
introduce a new variable, select the angle
little circle here, and we will create
a new counter and then re to di progress. Here in the preferences, we actually have to change
it to the end value of 360. And you can imagine now that we have to increase
the steps also. But first, we going to add
it here at the intervals, also 0.1 seconds, same
as the variable before. But here we actually have
to use six steps now. So because 360/60
is six to get on the same level the
same counting level as display text here. And so that the progress circle now also fits the timing
model same as text now here. And then we will just connect the angle property to the display progress variable. So for now again,
it's disappeared because the initial
value is zero here. And then we also have to trigger this variable
by the button here. So just head back over
to the button now. And go to the events tap here. And again, we have to create a new action when the
button is clicked. And there we also have to
do the variable control, and then we will select
the progress variable, choose the play function, and again, without a delay. And then if we simulate again, you now see this
little progress bar. And now it exactly fit now. But we actually have to
stop the simulation now. So head back over to the
display progress bar, choose the value here again. And then we actually have to do to change this
property on end, it not restart. It simply stop. Now, if you simulate again
now, And now, actually, the progress bar
simultaneously reaches the end when also the other value actually
hits the value of 60. So for now, this actually
looks really good now. But we will add some
more details now. So maybe we can also
just add a feature where this progress bar actually is getting the color red
while the clock is finishing. So to do that, we will head over to our display
progress bar here. And then we will introduce
a new state here again. And in the base state, it's just simply has a
color white now. And if we go to the
second state now, we will make it red. So again, if we hit this value on the light
ring, was it, I guess? Yeah. So on the variable
change function now, And then we can just simply
add a new transition here. So if the number is actually
exceeding the 59 value, and to do so, we'll just
make a new transition. And for the target now, we will just choose a
display progress bar here. Then again, we will change from the base state to the
to the second state. Then again, we will
just do it immediately. Then if you now simulate again, You will see that this
color will now also be red. We actually have some transition
here on the background, which I don't on to state i here. We actually don't
want this transition, it also change immediately. Now again, just for for a
complete view now here. So this color also changes
immediately. Yeah. Now we can also just add
some little background here. Again, for little nice design, add as much details as you can. And I will just put a
little text here on it. Maybe like change the time, and then just center it. Actually move to the center here now and then increase
the font size like that. And then I will also add some more details here to have a much more
complete design here, so maybe like a
background text here, like change at the time. And I will make it a
little bit bigger here. And then increasing
the font size. Maybe also over
the slider values, and maybe 160 or 180, like that. Then I will also change the horizontal and the
vertical alignment here. Then also pull it here
in the background, can also give it some
ext he may like that. And then you have a little
nice background here. Maybe you can also
increase the weight here. Like, semi bold or something
Ming Yeah, like that. I actually. Maybe I
make it even bigger. I change 240. I will actually just insert
some white spaces here. So, it actually has a
gap around the clock. Like that, pull it up
here a little bit. Maybe even one more white
space two more nice. And then bring it
to the center here. Now, maybe like that. Then for a better contrast
to the background, we can actually make a little point light source
in the background. Get from above, maybe. So right to the back now. And then when you simulate, we have a little nice
lightning from the back. We'll actually make the extruion also a
little bit bigger. I like that, and then
also change it to at But I can also now make the
intensity a bit strong, click on the point
light here now and maybe make the intensity
a little bit more. Now when you hover around, you see a little nice
shiny edge around the font and to make it a
little bit more color specific. Now, we can also
add the point light maybe to the front of the clock. So pull up a new point light here and maybe we would
like here or something. And in the initial state, we will make it orange.
Maybe like that. Now you see a little
bit of the color here also reflecting
on the font. It's looking pretty cool. But I actually will make this font color a
little bit more darker. Yeah, so maybe like this. Okay. Then head back over
to a point light here. Now, we'll quickly rename it so maybe like color point light. And then we will also introduce
three new states here. Again, we have the bay state, the second state, and
the state two here. And now you can
already think about it that we will just make the
same colors for the light. Initially, we have
the orange light, then we will change
to a green light, and then if the
clock is finished, we will change to
a red light here. Again, we will head to
the second state here. And make a green light here, maybe like like this and now for the red
state, a red light. We have all state sats, so we have the orange light, the green light,
and the red light. And then again, we will trigger these states
now by an event. So for the first event, we will just simply go
back to our button here. And we will also introduce it here to the miles down event. So again, just doing
new transition, and for the target here, we will choose the
color point light now. And we will toggle it once only. And then again, with no delays, we'll do it immediately, and we will change from the
base state to the stage. So the second state here. If we just check it
over now, creek. We now see that the color
is also getting green. So the transition works now. Then for the red light, we will head back over
to our light ring. I guess, where we declared
the variable change. And then again, we will just add it to the
condition live in. So when the value
exceeds the 59 value. We will do a new
transition here, also choose a color point light. Again, we will do
a transition from the base state to the Aa we will do actually the transition from the state to the state two. Again, we will do
it immediately. Now if we simulate again, actually, the color sho change of the whole scene to the red. So this looks pretty nice now. I will actually just make
the light a little bit smoother because I
actually think that the intensities may be
a little bit too high. So maybe like 0.55. You also and also. Okay. So then if
you simulate now, you actually see
the result here. So maybe I will at some
little adaptions here now, so maybe a little bit more
extrusion on the text. And actually, I will just quickly rename it to the
background light here. We can also reduce a little
bit the intensity here. Then if you simulate again, you have this nice
little stopwatch here. Also, maybe you can again, just make some little
adaptations here. For example, you can maybe
change the material a bit. For instance, you could also make an overlay with the Fresno. It looks a bit
darker and you can also reduce the
lightning effect a bit. And yeah, you can be
creative as you want here. Maybe you can also change
the color a little bit. So I think this actually
looks quite nice. So let me know what
you think about it. This is a really
nice little project, which introduces you to state in events and variable control
and also conditional logic. And you can imagine now that you can be creative
as you want to. You have endless
possibilities to do with those things you learned
now from the past topics. And, I'm happy to see all the project
that you guys will do with this knowledge, and then we will and then we'll see you
again in the next cos.
27. Project: Portal | Part 1: Hi, guys. So in this
practice tutorial, we will make a little portal based on the particles
function in spine. And this is what I'm going to show you now
in this tutorial, so let's get started. So then let's get just start with the basic
scene set up here. So we are again in our
default spline scene here. And first, we will
actually just indicate here on our base plane where
the portal later will be. So I will actually just
place an eps here. So no sizing or anything else. But just as a little indicator where our portal later will be. And I will give it just a
quick white color here. And then we will actually just build the scene
around of this ellipse. So for now, I will actually
just also hide the base plane or maybe you can also just
delete the base plane here. And now we will actually build some walls and
also a floor here. So we will have a
back wall here, a left wall, and floor. To do this, we will just use a plane shape here
from the October, Schoss and just place it
anywhere in the scene. Now hit option and shift, and now you can actually just exceed the size in
every direction. And then I will place it
behind our portal here. Maybe I hear from it first. Now it looks like this. Maybe a little bit down here,
so it's centered. And now we will also choose
the visibility here. For the sides, we
will choose both, and what this does actually is, if you look at this, we have
now both sides visible. So every color or
material layer is actually affected on both
sides of the plane here. We have our back wall now, and now let's just do
the left wall also. To do this, I will actually
just bring it up here and then you can
rotate it. Like that. Or maybe you can just
type 90 degrees in here, and then move it here to the
left side. Like that, maybe. And then I will just duplicate again and then rotate
it to this side, so we get a nice floor. So maybe I actually
just again type here zero degrees and then
move this one down, and this will be our floor. So that. I will bring this one a
little bit to the frontier, so we are connected with both
of the other walls here. So now you can imagine that our camera angle will
be something like that. So we actually look at both
walls here and the floor. And then for clarification, I will just quickly also
rename all of the planes here. This one is I rename
it to right wall. Plane two is left wall actually. Let wall and plane three
should be our floor here. Rename it to floor. All right. Now we can actually just start
over with the materials. I will actually use
the same material for both walls here and a little different
material for the floor. But first, we will actually just or create the wall
material here. For the color, I will actually
choose this one here. I he, it is 090916, and here's the RGB code. For the lighting,
we will actually just keep it as it is now. And here we will actually add a little bit of outline
as the next layer. And for the outline color, we will choose white, and the width of two
is actually fine. And here you will choose
the overlay mode. And then we will add
another material layer, and this one will be an image. And for the image, we will choose this one here
from this blind library. This white one here, again, we will choose the
overlay mode here. This is our wall
material then and we can actually just also save
it here in the library. Click on the Plus icon here, and then we will call
it wall material. So like that. And then we can also just choose it
for the right wall here. So here in the four dots, you can just access
a material library again and then choose
the wall material. Now both of the walls are now
connected to the material, so you can also just
maybe if you want to. You can change some
properties here. For example, maybe I don't want the image to be
like 100% opacity, so I can also choose 50%. So it gets changed immediately while I'm
entering the new value here. And then we will actually just continue with our floor here, so click on the floor. And here for the color, we will choose this
one. This is in x. It is 0708 and 13, and in RGB code,
as this one here, so just copy that from
the video here, maybe. The lighting layer, we will
just again keep it as it is. And now we will actually
introduce another layer here, and this one will be a Mt cap. For the Mt cap, we will choose this one from the spline
library, the white one here. And for the blending mode, we will actually use multiply. It gets dark again here. And then on top, we will again place
the image here. Again, from the spline library, choose this material
or this image here, and for the blending mode, we will use overlay. Now if you render the scene, it looks like that here, so not so special by now, but we will go there to the end. Okay, now we can start to
work on the portal here. For the portal, I will actually just duplicate this layer here, and I will give it a
name to inner portal, and the ps two will be
renamed to outer portal. Why we do that is because
of the usage of particles, but this will be
explained later on, so just do the step here. For the inner portal, we
will use a size of 100 here. In both x and y. I will actually just hide
this one for now, the second or outer portal, and zoom in a little bit. For the ring, we will
choose a value of 95. For the extrusion,
we will use ten here and then also give
it a little bit of bevel. Then you can also increase
the bevel side zero bit. All right. And then
for the outer portal, make sure to make it
visible here again. And here for the values, we will choose the
size of 115 and both x and y and the ring of 86. The angle is just fine as
well as the sides here, and for the extion,
we will choose. And again, make sure to increase the bevel here
to maybe I don't know, something like 40 or 30 and also increase the bevel
sides here a little bit. So if you look at the view now, make sure that it's
actually center here, so that the inner portal is actually in alignment
here with the outer portal. So just make sure that you
have a gap here on both sides, as well as on the
right and left side. For the material of
the inner portal, we will just use the same
material as for the floor here. So maybe just click on the floor here and also
save this material. You can just do this
again as before here. So just give it a name here, maybe floor material and now we can also choose it
here from the library. For the inner portal, just choose the floor material here. And for the outer portal, we will use a little bit of
a different material here, so we give it a blue color. The X code here is 24, 3d48, or an RGB, again, here. This one, you can just copy it. For the lighting, we will use the physical
lighting method here. And then on top of it, we will place again our image here from
the spline library. This one and here make sure to choose a blending
mode overlay. And you can also reduce
the opacity here to 50. And to get the functionality
here of our portal, we will now use the
particle effects or the particle functionality. To do so, we will maybe just add a particle
emitter for now. So it looks kind of like that. And here we will maybe just change the colors
for now. Maybe some Blue here and lighter blue. Be like this. For
the coloring mode, we will use random. For the size, we will use
maybe something like three, so just as small as
that here, maybe. For the birth rate, we
will increase to 1,500. The lifetime of 1
second is all right, as well as the fade out, and also the speed we will just keep the
speed for now here. This one should be fine. For the miter, we will
choose now a custom object. So in this custom object, will now be our inner portal. So it looks like that now. And now we actually
want that all of the particles are now
sucked in into the portal, and to do so, we can get this done by using
the particle force here. Add this one to your scene. Now we have a particle
emitter and a particle force, and for the force type here, we will choose a tractor. What this does as
you see is it sucks all particles in now
to this little box. And we can also change this one, so it doesn't have to be a box. It can also be a sphere here, and now we can also
reduce the sizes, so I will maybe just use one
here in every direction. Maybe like that. I will just
lower the damping here, maybe a little bit for now. Now I will actually just
center this one here. I will try to move
it into the middle. Not recs it, but only move
it a little bit up here, so it's in the center. Like that. For the range, you can just leave
it on infinite here, and for the intensity, we will choose a value of 0.89, and for the damping, we will use 0.56 here. L that. All right, then we will head back over to our particle emitter here
because as you see now, this is not really aligned
to the inner portal here. And now we only have to
align it to the center here. So make sure that your camera is aligned here to the center, and now we will
just move it here, so it doesn't exceed the boundaries anymore,
so maybe like that. And this is mainly what
the outer ring is for. So if you imagine now we will
hide the outer porter ing. You see that it's quite
hard to Make this one not exceed the boundaries
because there's a bit of a fluctuation in this, so we will use this outer
portal ring actually to hide all of the noise here
from the particle emitter. And this is it now basically
for the portal here, so the portal animation. We can maybe just play around a little bit with the
colors, for example. I like to be a little bit
more dark maybe, like that. And this looks
very good for now. Now we will add a little
extra animation here. So we will in detail
place a point light here that will rotate around the
inner portal ring here, for a little nice
animation here. And to do this, we
will maybe just place a point light here
inside of the portal. Now, the scene will just be
lightened up a little bit. Maybe like that. For
the color light, we will choose a blue one. Maybe like that. And
for the intensity, we will actually make it
to ten here, so very high. And for the distance, we will reduce it
a little bit to maybe something like 400 or 500, for the decay, we will also
use a value of ten here. So this will be our
point line then. And now to get this
rotation done, we have to place another ellipse here
inside of the portal, and this one will be set
to 75 in both directions. So like that, and then again, make sure that it's kind of
centered here. So like that. Now the magic happens when
we convert it to path here. Now it looks like that, so
it doesn't matter really. So we will just reduce
the size here to 0.01, and then we will also change the opacity here for
the material to zero, so you don't see
the path anymore. Now we have an
invisible path here, which is in the
form of an ellipse, and now we can actually make use of the line
to path function. If we had back over to
a point light here, We can actually align
it here to the path. This is the ellipse
we just created. Now if we choose
this, we now have connected the point light
here to the ellipse path. And now if I change
the offset here, you now see that the light is
rotating around the portal. And based on this functionality, we can make a new state here. Click on the plus icon
and create a new state. And for the base state, we will just keep
it as it is now. And for the second state, we then will use a
value offset of one. It makes one full rotation here. Based on this rotation, we can create a new start
or a transition event here. By start, we will
trigger a transition, and this transition will be done from the base
state to the state. For the time, we can
maybe use 0.9 seconds. What is important now is to
choose a linear transition. And for the loop, we
will use infinite. Now if I am now
running the scene, we will now see this
rotational animation.
28. Project: Portal | Part 2: So and maybe some fine
adjustments from here. I don't really like
that the color is so yeah like shining
on the background. So I will maybe lower the distance a little bit
to something like 450. And also, I will just deactivate the shadows
from the light. So it looks like that.
So this is fine for now because we will just move the back wall
here a little bit. Yeah. To this side here, and
make sure that it's still connected to both
floor and left wall here. Now, if we're running
the scene again, you now see this little
nice animation here. Now we have built the basic
functionality of our scene, and for again, better
understanding, I will just quickly rename
everything we just created. So for the particle emitter, I will maybe choose the
name portal portal bullets, maybe, and then we name the particle
force to portal force, the point light to
rotating light. And the sire to light path. And all of those things, we will actually group up here, as well as the outer portal
and inner portal part. So just select everything
and then hit command a G. Now this will be
just named to portal. Now you can just drag everything here
together up and down. So we will do this now. Now we can actually try to clean up the
scene a little bit. And for this one, I will bring up the floor maybe. So it gets more nearer
to the portal here. Maybe like that here. And
also the back wall here, so the right wall, we have
to bring up in front here. So it's connected to everything as well as the left wall here, so we have a little
nice edge here. And also realign the
portal maybe a little bit. Maybe like that. And maybe
for the floor material, I will make it a little
bit darker maybe. For this, I will actually change the form color here
to a simple black and maybe also reduce the
image opacity here by maybe 25%, like that. Actually, I will bring
this up a little bit here. Maybe some fine
adjustments for the floor. I actually want that it's a little bit darker
than the walls here. I will maybe just change the form color here
to a simple black. And maybe for the
image capacity, we will go with 70 here. Now also for some details, we will make like a
little staircase here where the portal
actually is standing on. To do that, we can just take simple squares
here maybe or cubes, and just place it
here on the floor, reduce the corners here, and then maybe rearrange the view real quick
and then just drag it in a staircase
geometry here. Maybe I will just duplicate
them here, like that, and then make one stair after
another stair, like that. Then I will select everything, group it up and give it
the name stairs here. Okay, now let's check
how this looks here. So we also have to make sure that the front
view is actually aligned and also increase the width of the
staircase a little bit. So like that. And maybe a little bit smaller
in the height. So this should look
very nicely here. For the material, we just use the same one
as for the floor, so just the floor material here. We have a little
nice dark look here. Maybe I will decrease the height a little
bit more like that. Again, make sure that you Alignment is correct
all the time. Maybe for some more details, we can also, for instance,
add railing here. Maybe just choose
the rectangle tool and place it onto
the stairs here. Just increase the size, so it fits to the
staircase, like that. Maybe for extrusion, we
can just go with two here, and I also want a rounded
top left corner here. So maybe go with
20, T looks good. And then we have a railing here. And for the material, maybe some glass that
look really nice. So just use the
glass layer here, bring it to the first position, and the color to the last one here and choose the
overlay function. This looks like that for now. And I will actually use
the white overlay here. Maybe a little less, so 80 in opacity and also add
some outline maybe. So it the outline
and also in white. And the w of two is also fine, and then again, choose
the overlay function. Maybe for the glass, we could play around with
the settings here. Maybe a little bit more blur. I just like that maybe. I will go with the
blur of 21 here. And again, I will
save this material. No. I will save the material in our material acid library here. Click the plus icon and
then just call it glass. All right. And now we can
just duplicate this one. I will quickly rename it to glass railing and duplicate it, and then bring it also
to the left side here. So like that. And the alignment is a
little bit off, I think. And then just move it here to
the left side a little bit. And then finally, also bring the whole portal down
here to the staircase. I like that. Now if you rearrange the view, and maybe also just
play the animation now. This looks really, really good. And now maybe for some
even more details, I will actually introduce
a little light strip here, which is indicating
the way to the portal. I will make it ale
bit thinner here. Like that. Connected
to the staircase here, maybe even longer. Like that. And then try to align it
here again to the middle. And then for the color, we will choose a light blue maybe. So like that. Maybe we could also just
continue the stripe here, also to the staircase. Maybe we will just
duplicate the stairs here, and then resize it to
the width of the stripe. So like that. I will zoom in a little to
make it as precise as I can. I could also choose
a value here, but I will just do it by by the looking
here, so like that. Then I will quickly rename it to the light strip and quickly also copy
the color code here. And rename the stairs
two to color stairs. And here I will
unlink the material, delete the upper one, so
the image and the mad cap. And for the color, I will choose the light
blue value here, and then slightly just
bring up this element. And now we have a nice
little light strip here, which is also overlaid
to the staircase here. And now you maybe see
that this light strip here is a little bit
yeah, of position here. I will maybe just give
it some extrusion and bring it down
to the floor here. So it just barely looks up. And now this just
looks fine now. And now for you guys that
are even more interested in adding some
detail to the scene, we could also maybe
like add an animation where some obstacles are
driving in the portal here. And to do so, I will maybe just draw a path
here on the strip. So choose the vector
tool here for at first, and then just draw
a line here maybe. Now you can imagine that
we have a stair here, then we have a little distance, again, a stair a distance, a stair, and then
again some distance. And why I'm saying that is
because now if we change the view here and we
have our shape created, we can now convert
it to path here, And then I will quickly
just delete the size here and also reduce the
opacity here to zero. And now when I added
the path here, I now see all the dots here. And maybe for better view, I will just quickly
hide the glass railing. So now you see it. And now I
can just drag those points. And create this little staircase here with the pathing tool. So just drag it a little bit up, it creates a gap in between
the stairs and the path. It doesn't have to
be really precise, but maybe just like that. All right. Now we have
the path created here. And I will quickly just activate
the glass railing again. And then I will place maybe maybe a little triangle here on top, give it a rotation. So it's facing in
front of the portal. And also give it some
corners, maybe like that. It looks like a
navigation arrow here, so I like that, and also give it a little
bit of extrusion. Maybe like that. Yeah.
Just a little bevel. Maybe just one. Yeah. All right. And then we
bring this down here. And in the middle
of the triangle, we will add a point light, choose a point light here, and I will just re arrange to a bird eye view and I don't
know where the light is off. Here, I will just
bring it to this side, and then try to center it
here side of the triangle. In the bird's eye view, but
also on the right view here. So maybe like that. For the color,
again, I will choose some light blue and increase the decay and
redice the distance. So maybe like that, a little
bit more of intensity here. We have a little nice
shine on the ground here. Then also for the triangle, I will also choose
a light blue color. Yeah, like that. Maybe
give it some outline. Choose outline here. Maybe just white
and hit overlay. Now we will group this up, select triangle and point light, group this up, and we
will rename it to arrow. Now again, we will make use of the line to path function here. We will align it to path. For this one, we will
use the shape one. Now it's aligned to the
shape path, we just draw. Again, here, we will
introduce two new states. One state has the
offset of zero, and the second state
has the offset of one. When I'm moving this up,
you now see what it does. It moves up the path. Maybe just like that it
stays in front here. Now again, we can just
add a trigger here, again by start event, and then we will trigger the transition here
for the error element, and we will do a transition from our base state to our state. And this could take
maybe like 5 seconds. Again, we will use a
linear transition. You could now do this by
count or by infinite. I will just maybe just
do it once here to show you guys what's possible
with this scene. My if I rearrange the
view now, and simulate. Now you see the little triangle moving to the portal here. Yeah, this could be take you can take this
even further here by choosing I don't know icons or anything else
you can imagine, so this is just like a little reminder of how
to use a line to pass function in combination
with transition modes. Y. So I hope you like this
little particle lesson here, and I will see you
in the next one.
29. Project: Flight Unit | Part 1: Guys. In this lesson, we will actually recreate this flight controlling unit
from the grand win wing. In specific this
middle part here. Maybe we will do the other parts as well later on in the course, but for now we will actually focus just on the body part to not exceed the video
duration limit. Yeah. To start now, we will actually make
a simple screenshot of the flight controlling unit. And then we will head over to a default spline scene now and actually import
this screenshot. So to do so, just click on the bottom left side here
on the import button and then choose image and then choose your
screenshot file here. And I will actually move
this up a little bit, and maybe also resize it. So would you like 25%. I will actually just make
every coordinate here to 0.25, and then move this down here. Okay. And now we
can actually just maybe change the background
as well to just simply black. And then we can actually
rename this real quick. So the screen shirt so we
know which element it is. Rename your screen shirt
to anything you want. I will just choose
screen shirt for now. Yeah, then we can actually
just start right away. So, I will actually just start
by the body element now. And to do so, we can
maybe just choose a cue. So place it on the
place plane now. And for the size, I will actually choose
something like 190 and maybe and then we can actually use
just a simple cube element, so place it on the
base plane here. Then for the size, I can actually choose
the values like 19075. And for that, I will choose 56. Now you see the basic geometry should fit to the
original image now. I will bring this here
in the middle and maybe it's a little bit up here. The base plane here, you can actually just delete for now. Then you have this
little body here, so the corner is actually a little bit too
rounded in my opinion. So we will reduce it
to something like 0.5. Now if you zoom in, you see just a little rounded edge here. And then we can
rename it also here. Doesn't get confused later on, and I will just call this body. Now we have the basic
shape of the body now, and we can actually
just start over with the lit or the shape
on top of the body. And to do so, I will
rotate this camera on top. Then I will actually place
another cube on it here, which also has kind of the
same values here and size. So for X 190, and for y, I can maybe choose something like 65 this could
fit right now. For that, I actually want this to be kind
of thin the lids, so maybe just one. Then o in a little bit and try that it kind of
fits to the body, so it doesn't has
to be 100% precise. And then also bring this down
here. Here we like that. Now if you actually
rotate the view, you now see a little
nice lit here on top and it also
produces some shadows. If you look at the screen
the screenshot by itself, you also see that there is
a little dark shadow here, but we will come to this later. But so for the basic
geometry, it should fit now. And then we can actually
move this whole thing a little bit more up here
and also rename the Q per. I will call it top element. And then we can actually also
group the whole thing up. I will just select both of the elements now
hit command and G, and now we have a group, and I will also
rename this group to flight controlling unit. Okay. So now we can actually just start
over with the material to get this kind of cinematic
look away at the beginning. And there are now
different options, how you can get the
colors right here. On option is to choose
something like color picker. So for example, you can
add a color picker to your chromic poo chrome
by an extension. So I have here the
color colilla element. And with this one,
you can actually just choose the colors here right
from the reference image. But this option we
will not use now, so I actually prepared
a material layer, which we are going to use. And this just works work pretty well with
with the image here now and to get kind of like the same look because It's a
lot of fine adjustment here, so I will actually use some
existing material layer here. And for this, we will
actually just choose our body element here now and we will create a new material. And we will give it a
name here, so green body. And then I will make
some changes to it. So for the color, we will
actually use this color here. So it is check. This is R GB code, so you can simply
copy this right away, or in hex, it is show one, four, two, three, two, seven. This is a base color layer now. Then on top of this layer, we will actually
create a Fresno layer. So actually just add a new material layer and
then choose the Fresno one, and then bring this down
to the lightning here, that it's positioned
in the middle here, between the color and
lightning element. On the Frese side,
we will actually use the color black here. And for the bias,
choose the value, the root 0.14, and for the
scale intensity infector, you can leave it as it is now. This is it for the fresne layer. Then for the lightning layer. We will choose the
type fung here, and for the color,
we will actually make some bring in some red. I actually has to do with
those orange elements here, so you get like this reflection that the yellow elements
produce now to the body, and for the shininess, we can actually leave
it here on five. We have these three layers here, and then we will
create another layer, and this one will
be Mt cap layer. For the MDCap here, we will choose something
from the spline library. So we can go with this one here. Then actually we have to adjust
the blending modes here. For MDCap, we will actually use the screen mode, for lightning, we will use the overlay mode, and for Fresne we will
also use the overlay mode. Then we actually have to also reduce the fresnel
here a little bit, so maybe something like 40. So now you actually see that it's getting a little
bit brighter here. And then we can
maybe also introduce another color layer
and for this, we will actually use
again some orange here. This is a color here again, and in X it is FF. I want to check
real quick F A f36, so I can simply copy it. And then for the opacity, will actually reduce it a lot, so maybe like 9.3. This will be our material here. You now see actually it doesn't really look like
the original one. But you guys have
to imagine now that also we will introduce
a light source, and then you will
actually see how the material changes
based on the light. And to do that, we will
create a new object and to get this kind of shiny
cinematic look here now, you maybe see that it's
getting lighted from the top, we will actually create
a spot light here. And then we will actually move this one up
here a little bit. So you can actually change the view here a
little bit to adapt it. And I actually want
that it's lighting the body in a more
like 45 degree angle. I actually will give it a little twist here
by 45 degrees. Maybe like that. For the color, I
will actually choose some more blue lightning here. The color code is A 7c1d A. For the intensity, I will
choose something like maybe seven a little bit
brighter here. For the distance, I will
actually reduces a little bit, maybe like 1,300, and the angle, I actually see what
the angle does. It increases or decreases
the spotlight angle. For this, I will
actually choose a value like a little bit over 50. And then we can also give it some blur here for the edges. I will choose the
value of 0.5 year, and the dek can be set to zero, and the rest is maybe you can again give it
some blur here, and the rest should
be all right. Maybe you can adjust the
P number as you want. I will choose a
value of 0.6 year. Now you see actually that we are almost getting
there to the color. But later on, again, we will also create
those orange elements. The color will be
changed a little bit over the process
of creating this FCU. But now for now, this
actually looks quite good. Let me just rearrange
this a little bit more. I will actually bring this
a little bit more here. This central light is
actually reflecting on the front here. So
maybe like this. And also, you maybe
see or notice that the light is actually coming
a little bit more from the right here on
the reference image, I will actually also move the spot light here
a bit to the right. So later on the shadows, we also just reflect
more to the right here. And yeah, this actually
looks quite good. Maybe I will bring this down. So we actually see how
the shadows are also changing while I'm moving
the spot light up and down. And, maybe it's like here. Okay. And now you see for the color, it actually matches to the
reference image quite good, I would say, so far. And yeah, this is
actually the first step. So you're getting there. So then we can actually start
over with the display here. If I move in a little bit, so this one here, where the texts display
the orange text. And to do so, we can maybe just add a
little rectangle here. So choose a rectangle to from the top tub and then just simply paste it here or
place it here on the For the size, we will
use something like 161. In y direction or the y size, we will actually use
14, so maybe like this. Then actually make sure that
you align it right here, it fits to the body here, so maybe like this,
from the top, you can actually move
this up a little bit, I think, maybe there. Now for the properties, you can actually do the corners here or give the
corners a value of three, so it's more rounded
on the edges. And for extrusion here, we can maybe go with two, and for the Bevel, we can actually
choose a value of 64 and the bevel
sides value of ten. Now you have a basic
wrecked element here here, which is smoothed on the edges and also has a
little border radius here. To actually get this look here, maybe you see that
the display is actually inserted in the body. There is a little
gap here between the display and this border. To achieve this, we can actually just duplicate this
rectangle here. So make sure this rectangle
is selected here and then hit command N D. We have
now a second element, which is just displayed
over the old element, and here we will actually
make some changes now. So to get this border, we will actually make
this new element a little bit smaller here. So for example, our
excise is now 161. And if we maybe take
something like 159, you now see that the new element is now
smaller than the old one. We actually will get
this border here. And this we can also do
for the Y component here. So instead of using 14 here, we will choose 12 And it automatically fits
here to the center, so don't worry about that. So now you have a
gap of one here, one here, one here, and one on the right. And here we will actually
reduce the bevel to zero and the bevel
sides to one maybe. Now again, we will make use
of the Boolean operators now, which we already talked about. Make sure that you select
both of the elements now, and then on the
top right corner, you see the Boolean modifier and then use the first one here. Now you actually see that it's subtracted one from the other. And this looks actually
quite good now. Maybe I will change
the color to black here for a first here. Now you have this
little border here. But again, we also want this display to be
kind of black here. And so on, we will make a little change to
the Boolean modifier. So just select one of the rectangles here in
the Boolean modifier. And then I will actually drake
ittle bit behind or front. Let's see. Like this. Maybe you guys see it a
little bit better now. By moving the rectangle the
Bole modifier also adapts to the change positioning here. I will actually drag it a
little bit inside here, make sure you doesn't
rag it too far, so the bole modifier will
just disappear like this. Make sure it is still
in the canvas here. But maybe, like,
let's I know this was too far. Maybe like that. It was actually hard to
see because of the blacks, maybe I will show you
in the white color. Here now see the edge created. The water is, but we also have the surface here
right behind the edge, and this will actually
be the display later on. I will actually change
it back to black here. Now if you look at
the front now here, you'll see that it looks
all already quite good and make sure you actually connect the
display with the body here, change the view and then
move it to the body here. Okay. And now we will actually also change
the material here. And for this one,
I will actually just create a madcap layer here, and for the Matcp, we can choose the
second one here. Now it's getting
there where we want. Now you actually
see a little like nice shininess around
the border here. And if you rotate a little bit, you now see that you have this edge here, it's
all the border. And right behind
it, you have, like, the display surface
where we later on, we write those numbers
here and the text. So again, here's the border, and this surface
here, is a display. But maybe I will actually make this
border a bit bigger now, so to do so, I will just increase the extrusion of
both of them a little bit. Guy, so you guys now see that it's a little bit
bigger here the border. And y, this looks
quite good for now.
30. Project: Flight Unit | Part 2: Now again, we will actually
rename this one real quick. I will just rename the wood
in now to maybe like display. And these two rectangles, also to maybe upper rectangle, and I don't know, c behind. Who has better here? Regan behind. So now actually, again, I have a clear description
of your elements. And maybe to organize this. I will move this one up here, on the down side, you have all your light sources, and on top here, you have all the elements. Then we can actually start over with the content of the display. This little orange text here. We will actually just use
the same text and symbols and numbers here to get
this kind of effect. So I will actually maybe
move a little bit down here, like that behind our
element or body. Then we can actually just
choose the text tool here from the top to bar and then place
it here on the display. And then resize it a
little bit so it fits to our body shape here
or display shape. Now you can actually
start writing here. But again, we want
this content here. So maybe I will start
over with the top here, so the SPD MA CH, so just write SPD CH. And now you see the text is
a little bit too big here, and here you can
actually then just change the properties
of the text. But now guys actually
may also see that this is more
like a digital font, so we will actually also
upload our own font here. But, for the top one, we can actually use
an existing font here And for this one, we can actually
use the remo font. This is one which
fits quite good. So here you have a bunch of
different fun types here. But yeah, we will stick
around with the mo one, so type in Amo is and then also reduce the front size here
to something like 3.2, a bit tinier here. But I actually want
it to be bowed, ale bit more thickness
to the letters. Yeah, this actually looks
quite good for now. But we can actually make it a bit more fitting to
the display here. Maybe reduce it a little bit. And I will make it like this
for now because we actually, if you guys see it, maybe, the upper laters
are a little bit smaller than the ladder ones, the letters down below here, so the 8.8 0.8 is much bigger
than the upper part here. So we will leave a little
blank space here so we can later on insert
the eighth here. But for now, we will actually
go to the color here, so make it orange. And to do so, we will actually introduce
another material here. Again, on the right
side, click on the on the four dots here, and then we will introduce
another material and we call it orange parts. And this is a simple
basic material where we just actually
change the color here. So the color will be this one. This is a RGB code, and in x, it's let me check
CC six A one or 01. And the light we can
actually just hide for now. Now you may notice that this
orange color doesn't really fits to the reference
screenshot for now. But yeah, this is totally normal because we will actually later introduce a bloom filter here, so we will get to the
right color here. I will maybe just show you
what it does the bloom effect. So to apply effect, just, again, as we have shown before, just click on an
empty space here, and then you have on the
right side the opportunity to actually activate
the effect step. And here you will have
the bloom property. And to show the bloom effect, just simply click on the icon. And then we can actually
also do some changes here. So for the size, we will
actually use very small. And for the intensity, we will maybe use
something like 2.45. So blur scale, you can
leave it as it is. And the threshold will be
reduced a little bit to 0.22. And for the smoothing effect, we will reduce 0.44. Now you may see that also the bloom effect is also getting applied to
the reference image. So it's now quite hard actually
to compare those colors. But actually, if you maybe go
to the YouTube video again, you now may see that the orange actually fits quite good
to the reference image. But yeah, this is also something we have to
keep in mind again to actually get this model really really precise to how it looked like
in the video here. But for now, we can actually just deactivate the
bloom effect again. But we have to keep in mind
that this orange looks like the reference image just with the bloom
effect activated. So then we can actually continue with
the digital numbers here. So you maybe know that this pon type isn't really
matching with this one here, so those numbers are in the
like yeah, digital pon type. So for example, if I We maybe
place some numbers here. You see that it doesn't really look like the digit
numbers here. What will do now is actually
we will upload a fund here, a custom fund,
which we can maybe download from the Internet or anything else, anywhere else. The fund we will choose will
be actually called Di fund. And you can simply download this one from the website here, the Da Font P com. You see actually
that it looks like, like a digital to font here, and then we can actually
just download it. And in spin now, we have actually the opportunity to upload our custom font here. But now we'll actually maybe just duplicate this text here, real quick, move it here. And then again, we will
upload our font here. We actually have to
extract it real quick. Let me just zip it in my
downloads folder here. And now again. Now just zip it, and then you have the ds
digit two font, F here, I will use ds minus Dtigy, dot ttf, and then upload it. Now you have your own custom
font right now in spine. Now if I will insert
some numbers here, you actually see
that it looks more like our reference image. For the content, I will actually place the three eighths here
with some following dots. And then we also have
a little big dot here, so we can actually maybe it also just copy it from the Internet, and maybe where we find it here. We can actually just
copy this point and then place it here
in the text field. Now actually we need to
adapt the size here, again, this font here is a little
bit bigger than this one, but I will just adapt
the size a bit. And then move it down below. Here for the font size, we can actually maybe choose something like 12 could
be a little bit big, but maybe something less here. Maybe we will go with eight, and then we can
actually move it here, so it fits to the content. Maybe like that, and which maybe also note
actually from the top text, maybe adapt the heat here also. So the bottom one
is still clickable. The front here on
top is actually much more stuck together,
so the line. The letter spacing is
actually quite near, so the letters are
new to each other. We will actually make this
also a little bit tinier. Zero -0.05, and now we actually see the spacing is actually
reduced a little bit. And for the alignment, we may replace it
here somewhere. Now again, if you may reactivate
the bloom filter again, we actually now see
that it's getting more bright here and so it
actually fits to this style. This is it for the
first numbers here. Maybe we can actually also decrease the letter spacing
for the bottom one here. Maybe here again,
we use 0.05 here. Yeah, this looks more
like the reference image. Now you actually see
that the alignment actually from the H and the dot is actually like
in the reference image. Yeah. This looks
actually really good. Now we can actually
just continue with all the values here, and this is what I'm
going to do now. But first, we can actually maybe look at the
alignment here. This is also a thing you
have to keep in mind. I will actually rename the
text elements real quick. This is the upper text. And this is down below text. Maybe I will actually
group this one. Again, select both ones, command and G and group
both of the elements, and I will rename this
group also to display text. Then you can actually move the
group to the display here. You can actually move it it doesn't hide in the background,
so maybe like this. Now we can actually
just continue with the other text
elements here. Select the group here. Command and D to duplicate
the text layers, and then we can actually
continue the second text here. F here, we actually have to
change the upper text to I actually ****** up
because I actually just name named the
elements wrong. This is actually the upper text. I will just call
the text up now. And this one is the text dox. Sorry for that. Now we
can continue again, duplicate the text layer and then move it here
on the right side. Oh, and then we can actually
add the upper text here, so HG K or K L A T. This is fine now. Then we have another text here
on the right side. For this, again, we can or maybe I will rename this one real
quick to display text HDG. And this one to SPDs, so we know the difference from each text in the left tube here. Then we will create
now this little one. Again duplicate this layer, move it into the right side. Actually here, I can
delete the bigger part. We just have the
little text here, and here I will actually
use HD g, g or k. Then you see actually it's
lined to the middle here. Choose a horizontal
alignment here and place and
choose middle here, and then also reduce
the Canva size here, and then you can actually move the group down
here to the bottom. Maybe I now it's getting
quite hard here, but maybe like
position it like here. And then rename it again. This one is the HDG, T K and now we have
this text also here, so we can just duplicate this one and move
it to the right. Again, hit command in D
and duplicate the layer, move it to the right here, and then change the text again. Here we will actually use
V and S followed by FPA. So We actually have a
lot of space here left. We will see in the
end, if it fits, now we will continue
with this part here. And for the last part now, we can actually
just duplicate one of the bigger ones here again, I will actually
move this up now, so You guys have a better sting here and
then move it to the right. I'll rename it real quick to display text, what is displayed. Maybe right side. Okay. And here, we now have a lot
of eights in the bottom. So we have one,
two, three, four, five, eights, followed
by the big points. I will actually just copy
it real quick again. Here. And then
inserted here again. Then we have a little I
don't know what it is, but we can actually
just leave it out here, so maybe just a
blank space here, and then we have
some more eights. Now we actually have
to exceed the w here, so it fits like that. 8.8 and then two eighths again. Then for the architectt,
we have ALT. Then followed by character, we can actually display. You can maybe just put some rectangles
here if you want to, but I will actually just
skip this one for now. And then we have the level, LVL, C, and then maybe
some blank spaces again, and then V also exceeded
the limit here, so just exceed the wi here, and then we have V S and FPA. This one, we actually want to align to the right side here. And then move like here. Now you see the A is actually in alignment with
the third eight here, so it works now here. I can actually make just
maybe some more space in here, like that. Yeah. This should do the work. Now we can actually
make some alignment, the right part is actually
more on the right side. So I will likely move this here. And the second one here. This one there. So like that. Check real quick. Not 100%. To have to be stuck together. This is just some
fine adjustments now. So I will leave it as
it is now for now. But I think it actually looks kind of the same
as a reference image. And now again, if you activate
the bloom effect now, and zoom in a little bit. So this is actually
from the video now, and this actually looks
quite a similar now, but we will again, just deactivate it for now
the bloom effect. And then we just created
the display for now. So another part of the
SCU is now finished. And then we will continue
with all the buttons here, the sliders, and so on now.
31. Project: Flight Unit | Part 3: So now we can actually continue with all the parts
here down below. So maybe we'll just start
in the middle here now. And for now, I will
actually create these light stripes
here, the range ones. And to do so, we can again just simply create it from
some rectangles here. Here for the component, we can use maybe a value of 0.5. This could fit, maybe. For the height or
the y component, we can actually use
the value of maybe like 34 and then move it
a little bit down here. I actually is on the left
side of the HD G lettering. Maybe I it here. And then also apply the orange
material here to this one. So let me just check the
positioning. Not really. Maybe we actually have to
also like this one a bit sm. Like that, and then bring
this up. Like that. I'm looking actually at
the bottom corner now. And here, I will actually move the display maybe a little
bit more down here. Maybe I can also group all
of those elements together. So again, and I will rename it. I mean, I have display now here, but display with text, maybe, and I will rename this one to display
elements, maybe. So why I'm doing that now
because now I can actually move all of the elements down below because they are
now grouped up together. So I will move this a little
bit down, maybe like that. Now you have to imagine that this part actually
is quite dark, so you don't actually see really the height or the space between the display and
the lit here on top. I will just make it
maybe like that. And also bring this a
little bit more up here. So again, you don't have to choose some specific
values here, just do it as best
as you can now. I will do it like that now. Again, if you want to have the same values,
just stop the video, and then on the right side here, you see the values I
have gotten now here. But we will actually just
keep it as it is now. We'll be it on the left side. Now again, if you check in
on the effect tab here, now see also that the stripe is also getting lightened up. So no, deactivate it again. And then we can continue. Then I will actually
just quickly rename it to maybe a light strip, and then we can duplicate it and place one here
on the right side. Maybe like here. Now we have made the space here, where actually the buttons
will be placed now. But maybe actually it looks a little bit more tightened up. I'll actually move it a
little bit more in now. Yeah, maybe like this. Okay. Then we can actually start
over with this top part here. So a little push button here with the text on the
left and right side. I will actually just start over with the orange
elements now. So we have a little
circle in the middle. I will actually just
click on the As and then place it like here and maybe increase
it a little bit, so maybe like nine. Take a look. Yeah,
maybe like this. And now we can actually
make a ring here, and like a five here. So it fits to the whiff
of the light strips. I don't know. Maybe like 90. Maybe like that. And then
bring it here in the center. It's actually a little bit. Oh, no, this is a body
now on the ellipse. It goes down a little bit. And also here we can choose
the orange material. Then on the left and right
side, you have some text. Now what I actually
notice is that the line heat is
actually a little bit less in the reference image. I will actually
quickly change it. Just click here on
the text and then you can reduce the line
heat a little bit. Maybe 20.9, and then bring this down real quick and also
for the left one, maybe. Select it and cho 0.9, and also move it
down. Potential. Now you can I don't know if
the text is actually similar. The left and right
text is similar, so we can just copy
that. To do so. Let's just duplicate this
one and bring this up here, so move it out of
the display group. Now we can actually
move it down here. Maybe here and same
for the other text. Duplicate it and bring
it out of the group. And move it down here. So it's align to the left text. And now this actually
already looks quite good. Then we can actually may
we start to create a group here for the middle port
elements here and to do so. We will just again select
all of the elements here, hit command and G, and then
we will give it a name. Maybe like the mid
components, Okay. And maybe at this point we will do some more fine adjustments
here because I actually don't like the
overall positioning here of the elements in comparison to the
reference image. So maybe we will actually bring some elements or move some
elements more to the top here. For example, I will now move the whole display up
here, maybe here. And also the mid components now. Now they are all
grouped up so you can move them all
simultaneously. Maybe like that. Then I will actually also reduce the height
here of the body because it actually is a
little bit lower in height, select the FCU here, go to the body and then
resize it a little bit. Maybe that. Okay. This looks good for now. And maybe if we activate
the blue mode now again, So I think this color actually looks quite similar to
those light strips. Maybe I will actually show
you guys the screen she, so this color actually
looks quite the same here. But the display color
actually is a little bit more yellow like in
the reference image. So maybe I will change
this one as well quickly. And maybe we can actually just select the display text
here in the group. Now I've selected all
of the five texts here. And now you see
on the right side there is shown the
orange parts material, but we will actually unlink
it, so we can change it. So we actually don't change the overall color
of every element. And here we can actually maybe put this a little bit more
to the yellow side here. Yeah, maybe like that. Yeah,
this looks good for now. Now you have a little bit more
of the yellow color in it. My like that. Yeah, this looks good for now, so you can actually just copy the color code here if you want to have the
same color as men. And then we can
actually also just save this material as the
display display text. So we can just save
this color value. And now we're ready to go. And now you have
a more separation of the display text and the light strips or the
yellow blurry color here. So this actually
looks quite nice now. I think this looks good. And maybe also the
color of the body is actually a little bit more
darker in my opinion. So maybe we can actually change the body
color as well here. If we had over again
to our SCU group here, we can actually maybe change this color value
here to an overlay. Yeah. And now you
actually see that it's not that orange anymore, so we actually get a little bit more of the
blue color again. Yeah, I actually like this a, so we actually keep
it now as it is. Again, just change the
overlay color here as the color of the orange
color here to overlay. And now this actually
looks quite good. So next step, we can
actually start with this little b here
or this push button, as you see it in the
reference image. So this one here. So we have just a
little black button here with some specular
reflection on the bottom, and we will just rebuild that. So we just head back over
to our spline scene here. And then we can actually just make use again of the
Boolean modifier. So for instance, we can just
work with two ellipses here, so just choose the ellipstula
from the top tuba, and then place it
here on the body. And for the width and heat, we can actually maybe use a value like seven, for example. So we have a little gap
here around the button, and then align it
here in the middle. Maybe like that. Then we can maybe actually add
some extrusion here, so we can go with
two here maybe, and then we also start to
bevel it and the bevel sides, you can also just increase. Then if you rotate around, you see a little pill here, and then again, make sure that it's
connected to the body. So then I will actually just give it a
quick recolor here, so just black so
you see it better. And then we can actually maybe
just duplicate this layer. So now we have ellipse
and ellipse two here. And for the Epse two, we will resize it again. Maybe like 5.5, and
for the hide as well. And now if you actually
bring this up here, you see now that you have a little a tinier version
here of the default ellipse. And what we are going
to do now is actually just subtract the
shapes from each other, each other, so just
select both of them. And then again, on the
top right tube here, you can just select
the subtraction mode. And now you see that both of the shapes now
are merged together, and the second shape actually is subtracted
from the first one. And we can also make some
corrections afterwards. So just head over to the Boolean operator
here in the menu, and then you can
actually just move it on the right side here
or on the left side. Well maybe do it like that here. That's good for now. Yeah, that should be fine. Then maybe align it
again on that side, on this side here, and then move it a little
bit inside here. All right. For the basic shape, this should be fine now, and then we can actually start over with
the material here. Again, if we look at
the reference image, we see that it has some
specular reflection here, and to achieve this, we can actually again go
with the MDCap layer here. So I just select the
Boolean operator. I will actually just
quickly rename it for you. So we will n like no button. And then on the
material side here, we can actually bring this lighting layer
here to the bottom. Then we can actually introduce
another madcap layer here, so I choose MDCap,
from the menu here. And then we will actually use this one here
from the library. And then bring it one down here. For the color, we will
actually use an overlay. Now it has a color black. And then we can actually
also add a little outline. So we have a little bit more of a separation from
the background. Choose outline here. Here we can play around
how you want to. But I will actually maybe increase the size
here a little bit. And the outline, I also
want to be an overlay. You can look you can
also make it white. I may be leave it here, but now in black. And then we can actually
make another Mt cap layer. And for this one,
I will make it not as shiny as the first one here, but do also an overlay here. Now actually I think
this looks quite good.
32. Project: Flight Unit | Part 4: So if you compare the
two objects here now, I know this specular reflection is a little bit bigger
here on the bottom, but we will maybe change the overall lighting
setup afterwards. So the specular reflection maybe moves a little bit more on the left side here
or the bottom. But I actually think
for the first try, this looks now pretty good. Maybe we can do some
I don't know if we can maybe actually
make it a little bit smaller. So like 6.5. Because I think if we
look at the image, you have a a little bigger gap here around the light circle
and the button itself. So this should be fine now. And just for clarification, I will just rename
those ellipses also. So this is the inner ellipse. This one was the outer ellipse. Okay. So now we have this
push button created here. So this looks quite good. Maybe I will actually, you
know, maybe you guys see it. If I'm zooming out, the
outline effect actually is a little bit to too
big in my opinion, so I will actually reduce
the outline value here. Now if I out, the outline is a little bit, so this so be fine now. Okay. This was it for
So then we can actually start to continue with
the other buttons. So those ones here, the green black ones here. So for AP one, AP two, and the third one here. And based for this shape, we can actually again just use some of the
simple shapes here. So for this little
now you see it. So you have a little surrounding here in around the
main button here. We will just maybe start with
a simple rectangle here, place it in here, and for the size, we can maybe just make it a little bit bigger
here, so maybe, maybe ten in both directions, and then for the corner, we can make it a
little bit rounded. Maybe just one here, and for the extruion, I will maybe choose 0.25. And yeah, this should
do the work now. And for the color,
I will actually use black and also bring it
above the lining layer. So it is indeed black. And then I will move it a little bit down
here and on the left. So maybe I don't know if we
look at the reference image. So it's not really
aligned with the text, but a little bit more
aligned to the center. So I will actually move
this one more on this side. Maybe like that. Then
on top of this shape, we will actually place
the main button here, this a little bit more
tinier button here. We have the surrounding and then the main button
in the center. And for this, I will
actually just duplicate this one and then
for the size of it, I will actually use maybe
maybe something like eight. So we'll just try and
look how it looks. And for the extrusion here, I will a little
bigger value here, so maybe like 012.5, and then also give it a max bevel and also
Mx bevel sides. And the corner should
actually be fine now. And now if you rotate it. Yeah, you see now maybe I will just change
quickly the color here. Now you see you have
an extruded side here, and this little black one is
behind the first one here. So just as the same as
in the reference image. That's the wrong alignment here. Okay. And then we can
actually maybe start to a depth the material
of the main button here. So the background we can actually just
leave as black here, and for the main button, we will do some changes. And for the material, actually, I will change this one
again to black here. And the lighting one, I will actually change
to physical right now. And then I will
introduce another layer, which will be a madcap layer. For this met cap, I will actually again choose this white one here
from the library, and then bring it one down. And then we will change the black color
here to an overlay. So now you see the
reflection again and maybe change the opacity
here to something like 80. It's a little bit separated
here from the background, so it looks a little
bit more gray. This shod actually do the work, I think, this
actually looks good. And now we can
keep on going with the text here and
also I will show you. So we have a little text
here and another yeah, like light or green
rectangle here. So if we talk about
the geometry. So we will do that for now. For the text, we can actually
maybe just copy the text here from the button here. Is it like here? You can go in the left to bar, and then just simply
copy one of the texts here and just then copy and paste it here on
top of the new button. Here, and then you
have to keep in mind bring this front here,
and maybe like that. Align it in the middle. For the content, actually, we have to use AP one. Go to the text and then
delete the old content, type in AP one, and
then move it down here. Just like in the reference
image. Here on the bottom. And then you're good
to go for the text. Then for the rectangle here, the the green rectangle. Let me show it again,
this one here. We actually again just
use a simple rectangle, place it here on the button. Maybe for the wi,
we will actually just use the same here as the t. Maybe in a little
bit, and rec here. Maybe like that. We'll
just quickly look. K here is a little
bit more of a gap. We'll also, I mean it looks
actually quite similar, we will just leave
it here as it is. For the green color, we actually have to change
the material here again. For the color, I will
actually use I pasted here. This is GB code here, and this is hex code. So just like darker green, but we will actually work then with the lighting layer here. For that, we will actually
paste the same color here. Again, this is the
hex code here of the green color and
then just enter. Now if you compare
both of the images, it looks actually quite similar, but may we actually give it
a little bit of corner here. Maybe like that, and zoom out a little bit compared with
the reference image again. And, this looks quite good. Actually don't really like
the size of the text here. Maybe just a little bit smaller. Let's go with something
like maybe 2.8, like that. Bring this down. Now if you
compare both of the images, it looks quite similar. Now again, just
rename everything. So this one is the
background background leg. This one is the
main button here. And this one is the button text. And this one is the
green highlight. All right. And then we
will actually group this together and rename the group to maybe the other
one was button. So this one will be
the push button. And maybe we have to now look at the
reference image again. For the positioning, I will actually bring
this a little bit more up here to male here. Then what's quite nice now is that we can actually
just copy this button here. We have the three s here. Again, just copy the group, so it command N D, and then you can move
it here to the side. Then align it if it
fits to the grid here. Maybe like that, and here I will just change it
quickly to AP two. Then again, just
hit command and D, duplicate the button and then bring the last
one down here. You can also just orientate
here to the green line. It fits. I actually just check
the reference image again. This gap is actually
a little bit smaller. So maybe like that, actually move it a little bit here and the other
ones to the center. We have the same gap
here and also here. If we simulate now or maybe
even a little bit closer. That maybe. This looks good for now. If we compare it here
to the reference image, we can may bring
the light strips together for better
overall looking, move the light strips
here to the center. And then again, compare it
here with the reference image, those strips actually are like in alignment with the
last button here. I will actually just
select both of the strips here and move them a little bit in the direction
of the last button. And for the overall looking Maybe have to reduce
the height here again. Again, just click on the body and then
resize it a little bit. Maybe like that. Now if you
compare both of the objects, it looks much better now. Maybe you can just a
little bit, like that. Now we are ready
with the middle part here and now we
will just continue with the right side and
the left side here.
33. Project: Flight Unit | Part 5: So now we can
actually start with the left side here or maybe
show it on the screenshot, so this left side here. And maybe at this point, we will actually try
to make the size of the object actually
exactly as possible. So maybe you can just use the screenshot here
as a mask here. And for that, I actually try to bring this down
here on the left side, maybe to get the
hide right So maybe scale that property not
to or not 30 but 0.3, and the y component to 0.3. Now you see now that it actually matches
here, quite good. Then we can also just exceed the value of the x component. Now we actually know that the
height is actually correct, but the width of both of the
objects is now not the same. Now we can actually just adapt the size of our
object to the image, and then it should fit. Then we can actually just go to the FCU here and then resize it. So maybe like that. Now is in alignment here
with the screenshot, but now we actually also have to resize our screen
here, so the display. For this, we can also
just resize it here. Look that this is now
in alignment with this here and same for
the other side. So maybe like that. And now we can also just bring the text here,
maybe in alignment. Maybe this one here
more on the right side, and also this one This actually looks
quite good where it is. But then we can
actually also bring this whole middle component part here a little bit to the left, but I actually forgot to bring all of the other
things here in the group. Again, select everything
we just created, and then bring this one here
in the mid components group. Now we can wreck everything
here on the left side. Now it actually is again in
alignment here in the center. And yeah, this actually
looks now quite good. Okay. So then we can actually start with
the left side here. So maybe just hide this for now. And maybe what we can just start right off
are those elements here because we already created a kind version
of those elements here. The not button we can just
actually copy from here, and this little button here, we can copy from here. But this is actually just
a little bit tinier here, so we can just adapt the size to our needs and we will just
head back over to spina. First, we will actually just
copy our not button here. Hit command and C, or maybe just command and D duplicate it and bring it here on the left side.
Maybe like here. And then make sure to
actually move this out of the mid components part here because we actually
divide it here, so this is a mid component part, this will be the left
components part, and this will be the right
components part here. Then we actually also have to copy the lightering and the
description of the button. So look at the ellipse here. Maybe I can just also
rename this one here. So height ellipse. And then duplicate it and also bring this one
here to the left side. Lo that it's aligned
here in the center. For this alignment, this
should actually fit. Then we only have to also
duplicate the text here. Maybe just duplicate this here and bring it here
on the left side. Here the text is actually
down below of the button. Move this one down. Like here. And for
the description, you can look at the
screenshot here. It's called SPD MA CH. So let's just change the
content here of the button. So to SPD and MA CH. All right. This
looks good for now. And again, because we're working now on the left
component side here, we will actually
also bring this one here out of the mid
component group, as well as the
light ellipse here. All right. So this
should be fine for now. Actually, now I can group
all of those things here up. So it Command and G. Oh, no, not like that. So make sure everything
is selected. No like that, and
then hit Command and G. Now I will rename it here to what was the name
of to left components. Then if we look at
the screenshot again, we will actually create this
button now and to do so, we can just again copy one
of the existing buttons. Maybe like this
one, command and D. You duplicated it, and then you can just drag it
here on the left side. For the alignment,
this should fit now and then bring this
one a little bit down. Maybe you see they are not
really in alignment here, just maybe a little
bit more down here. For the description,
it's called LOC. I will also quickly change it. OC. Then again, we will
drag this push button here out of the mid
components group inside of the left
components group. Then we actually
also have to change the height here of the
button and to do so. Let's just go inside
of the group here, and then we will actually reduce the y value here for everything. So for this one minus two. And this is fine now. And maybe also
bring this one down here and the button text a little bit up.
Maybe like that. You actually see that this gap is much more tinier
than this one, this is actually fine for now. Maybe later on, we can just
maybe reduce the size here of the green highlight
a bit because I think it's actually a
little bit too big, but we will keep it for now. And then we actually just
resize the whole button here. And so we can also bring this down again here maybe
to this position. Now we actually just created
those two elements here, and then we can keep on
going with the rest here. Now we can actually just keep on going with the regulators. I will just show you this
one in the YouTube video. So we have four
different regulators, and we will just start
now with this one here, so this is a small one. And we will actually
make of the star shape. Maybe if you count here, we
have one, two, three, five. Maybe in summary now, we have nine edges here. If I head back over to
spline here, for instance, I will choose the
star tool here from the top tuba and place
it here on the body. Now here on the right side, in the shape menu, I
have the option sides. This one, I will set to nine
as we counted in the video, and actually also increase
this inner side value. Overall, we also have to
change the size here, so maybe 15 from now, and then also give
it some bevel here. Sorry bevel but corners
here, like that. If you look again in the video, you see that it's rounded
here, so like this one. Now maybe as a comparison, I can actually just just
drag it here to the image. Give it a little recolor here. And then if I move it
here above the regulator, you now see actually
that the size actually fits quite good. Now I can actually just
move this one down here again and just change the
color here again to a white. We see it better. And then bring this one
a little bit down here. As you see in the
reference image, maybe something like here. Then of course, we just have a two dimensional
shape now here, so we have to give
it some extrusion. For the extruion,
take a value of four maybe If we just give
it a little twist here, maybe just recolor
it a bit here, so we see it better. This is actually quite good. If you compare both of
the extrusions here. But then we can actually also
give it some bvel, maybe. So just a little value, so maybe a small
value, maybe like 0.5. Yeah, this looks
good. All right. Then we will actually
just build it from here now and then
rotate it afterwards because otherwise we will have to bring those other
elements now behind. We will actually just rotate
the whole group afterwards. We can just start over with
this con element here. You see that actually we have now the star
element in front. Then we have a little cone here, and then it's connected
to a base plate here. But we will actually
don't use the now. We will use the cylinder. Choose cylinder here
from the october and then place it here
onto the star. Again, I will just
quickly give it another color and then make sure that it's actually
aligned here to the center as good as you can. For the size, we can actually
maybe go like seven. Like that. It's a
little bit down here. Then if we rotate, we're quick We see now that it's basically
a sphere right now, so we actually have to
reduce the corner here, and also the corner sits. And then for this con geometry, we will actually have to
reduce the bottom value here. You see now the top one is two
and the bottom one is two. On our K, we have to
actually do it in reversal, we actually have to reduce
the top value here, so maybe like that. And now you actually see
this like cone geometry. This actually already
looks quite good. Then this one is actually just connected to
a base plate here. We can just maybe
choose the Aleps tool. Move to the center here, give it some little
extrusions or maybe 0.25, then increase the size here to, maybe something like ten, for instance, like that, and then connect it
here to the coal. And then we actually have just the basic shaping of
the first regulator here. So I will just quickly group
all of the elements up here, select all of them
hit command N G, and then rename it regula All right. So good for now. And actually, just now we can
rotate it real quick. We can also do it from
the top right side here, so give it a twist
of 180 degrees. So like that. And then Maybe you may actually see that the star element is
a little bit tiny, I guess or smaller
than the base plate. We will actually maybe
change this one real quick. For the ellipse now, I will actually choose a value of the bigger values,
maybe like 12. Yeah, maybe like
that. Now you see just a little bit,
the base plate here. This is more realistic
to the reference image. Maybe like that. All right.
34. Project: Flight Unit | Part 6: Then we also have
this light ring here that also needs to be
done and for the light ring, I actually can just
copy it from here, from the left not button here. So just hit command
and duplicate it, and then bring it inside of
the small regulator group, and then it here
on the right side. For the size, I think
we choose the value of 15 so we make it maybe
a little bit bigger here, so maybe like 17. This one down here. Like that. We just
a man a little bit. Maybe I don't know if the
gap is actually too big. Yeah, maybe a little bit. Maybe we go with 16. So this is better, I think. Line it here real quick. Now we also have to maybe reduce the border
with here a little bit, so I will actually
have to increase the ring value to get
a smaller border with. Maybe like that. But then again, the gap is actually
just increased by that, so we have to actually
resize again, so maybe choose 15. Now it should be fine. Now if you compare both of them, this actually looks quite good. So now we will actually start to create the material
of the regulators. So if you look at
the reference image, you see that all of
the regulators have a kind of light gray color, and to achieve this
kind of color, you maybe just select
the star module here, and then we will head over
to our material panel. The first the first
thing we are going to do is actually bring this
lighting layer down, so it's the first one here. And just for the
properties here, you can just leave it as it is, type fong and the base color
and a shininess of five. For the color here, we
will use this color code. I x, it's actually 7c82 81, and for the RGB code, you can just copy
that from here, and here we just
leave it as it is, so now blending mode
or something else. And then we will
introduce a third layer, and this one will
be a Fresne layer. Here for the Fresnel, we will choose a simple black color. For the bias, you
can actually just change it to
something like 0.14. For the blending mode, we will choose overlay. Now we will add another layer and this one will be a MTCp. For the Matcp, we will choose this ply one from
the spline library. And here we will actually choose the blending mode screen. Now a last layer and
this one will be again, just a simple color layer here. For the color, we will
actually choose this one here. In x, it's called six A 60 60, and for the G code, a can just simply
copy that from here. Here we actually again use
the blending mode overlay and maybe reduce the pass
to something like 75. Now you have a nice little
light gray material here, and maybe we will actually just add this material
to our own library. So just click on the
four dots here and then create a new
material library. And here we will
actually call it gray regulators
and it enter here. Now you can actually
just go ahead and place this material on the
rest of the regulator. Maybe here like on the ellipse. You can just choose a material here and
same for the cylinder, or you can just
select all of them. Now you have a little
nice gray color here. Then if you look at the
reference image, actually, you will see that the regulator
has a triangle on it. If I zoom in a little bit, you maybe just
barely see it here, but here's a little triangle
on top of the regulator, and to also visualizes, we will just simply use a
triangle function here. Choose triangle from the top and then place it
onto the regulator. And for the scale, I will actually increase it, so I will not actually use
the size function here. But the scale one here
to actually just yeah, scale it evenly, and
so I don't have to actually use some
floating numbers here. So I will actually may maybe even more maybe
to something like 1.8. So 1.8 in x and 1.8 in y, and then give it a
little twist here. So 90 degrees, can
also just type it in here and then just quickly
align the triangle. So like that. And then I will actually
duplicate this layer. So now we have a
triangle two here. For this triangle,
I will actually reduce the scaling
factor to something like 1.6 And then I will select
both of the triangles again, give them a little
bit of extrusion. So maybe something like 0.2. And then when again, both of the triangles
are selected, I will actually use the
Bouian modifier tab. And now you see that it's not quite evenly
spread it around. So just select the triangle two, and then you can move it a
little bit here to the center. So it has the same border
width on all sides. Maybe if you want to make this
line a little bit bigger, you can play around with
the scaling factor here. For example, maybe I can choose 1.9 here for
the first triangle. And then your border width
actually is exceeded. So I think this
looks quite good, and then maybe we can just change the
material real quick. Maybe I will just drag it to the black here
instead and maybe reduce the opacity to something like or maybe even
more. Let's say 60. And actually we'll do some
fine adjustments here. So again, we'll just move it
a little bit in the center, so it has an even border with. And so if you look now
at the reference image, this shape was just
rebuilt here and blind. Okay. And maybe some more
fine adjustments here. I actually think we should do a little less of the
star sides here. So I will actually reduce here the sides to maybe seven
or maybe like eight. Yeah, I think eight is fine. All right. This is the first
regulator here. Maybe we can even just increase the base plate
here a little bit. We'll just choose
this ellipse here, so the base plate and
actually will make it like 0.5 maybe. Actually we could also give it a little bit of bevel here. Also increase the bevel sides. Now We have a nice rounded
base plate here. All right. And this is it basically
for the first regulator. We will just continue
with the second one here, so this one on the left side. Basically it has
the same size of, but it has some more
star sides here. So we can actually just
copy our f regulator. Maybe I will just drag this one in the
group here for now. What I actually forgot to
check is the alignment here. So again, make sure that everything is
connected to each other. I will bring this.
I will rename it to triangle here
to the regulator. Then we can actually just
copy the whole thing here. But maybe for clarification, I will just start to
rename everything here. This is like I'll just
call it star sites here. Cylinder is actually
rename the cylinder, maybe to like cone. And the ellipse I will
just rename to base plate. And the light ellipse is
just quite good as it is. Now we can actually just
duplicate this whole thing, so it command N D and then move this
thing here to the left. For the alignment, I
will again just make sure that it's aligned
with the screenshot. Maybe like that. Here, you maybe see that we
don't have a triangle here, so I will just delete it
from the second regulator. And then we have a
lot more sides here, just click on the star
sides shape here, and then we will just increase
it something like this. I will actually also
increase the inner one here, we quick just a bit. You don't know how much
we maybe do like 20. We can achieve that. Again, this is a little bit
of fine adjusting here. All right. So, maybe like that. For this one, we actually
saw it in the video, so it doesn't have a con shaft. I will try to actually
find it here on the video. This one is actually
much longer and doesn't have a connement. We will actually
get rid of that. So we maybe just here make the top and bottom actually
even. Maybe like that. Maybe also just decrease it here to this one not.
This one to five. And actually, we have to
make the shaft longer. I will move it a little
bit to the front here, and I will just exceed the
size of the cone so it fits to the whole thing and then move it inside
of the regulator. So now everything is connected. And I think this actually
looks quite good for now. And, that's basically it
for the left side now. So maybe we just have
this little screw here, but we will maybe just
make it in the end here. So let's just continue
with the right side here. So we just finished
the left side here, so I will actually just move the regulators here again inside of the
left components group. Everything is just grouped up. Now we actually have like
four big components. First one is the STU, then we have the display, the mid components, and
the left components. All right then we
will just start with the right
component side here.
35. Project: Flight Unit | Part 7: So now for the right side, this should be
actually quite easy. So maybe we take a look at
the reference image again. For the right side, we
can actually just make use of components
we already created. So for example, we just got this regulator here
also on this side, and this button
here on this side, and also this button here. And for this one, we can also use this
button here actually and just change the color
here off the front. And for this regulator, we have to do some
tiny adjustments, but this should also be
just done quite fast. So let's just start over here with maybe the
regulators, I think. So I will actually
just copy this one. So duplicate it here and bring it out of the
left components group. And then move it
here to the site. Maybe like here, Yes,
maybe like here. Actually, you see maybe that this gap is actually
tinier than this one, so it doesn't have
to be symmetrical. Bring this one here
more to the middle. Then I will actually also just
duplicate this regulator, bring it out of the
left components group, and then bring it
to the right side, and just barely align
it that it fits to the screenshot here. No. A. Then we can maybe just also
duplicate this button here. We actually have
to make sure that this light ellipse is
also getting copied. We will actually just drag this light ellipse here
inside of the group, or maybe not because
it's a boolean group, so we have to keep it out here. Maybe just undo it. But we will actually just
duplicate it now. Then again, bring it out of
the left components group. Drag it here to the
middle, maybe like here. Then also just copy
the light apse, and also the text, maybe. Select both of it and duplicate, which one is actually the duplicated one. I
think this one. Again, bring it out of the
left components group, move it here to the sit. And then also for
the light ellipse, we will also bring it out of the component group and then
there on the right side. Here again, make sure that
it's an alignment here to center and same for the text. Maybe like that. This looks good for now. Maybe we can just
change the text now. For the text, it's
actually metric At. We will change this
one. Also, real quick. So go to the text and then
type in metric at. All right. Now we have three more elements
here on the right side, and then we just have to
copy those buttons here, and for this, we will
duplicate the LOC button here. This one, push button four. Again, hit command and
D and duplicate it, bring it out of the group, and then move it to
the right side here. Like that, Then we can actually just
duplicate this one again, so we have another push
button, and this one, we will just place it here
under the first regulator. For the right button, we also have to change the
text here, it's called APR. For the text, choose APR. Maybe what I just noticed is that the font is actually
a little bit too big. Maybe afterwards, we can also just resize the font
here a little bit. For this left button, actually, we can select this one here, delete the green highlight and
also the button text here. And for the main button, we can actually just maybe choose the body
materially here, so click on the four dots and then just hit on the green body. And now we have just simply, finish this button for now. This button also, and we have both the regulators
and the not button. What's missing now is basically, if we again step over here
to our reference image, we have some more text here. So those numbers and
this description here, so we will actually also make
this and to do so again, just head over to
your spine product, and maybe I can actually
just copy this text here. Duplicate this layer and then
move it here to the side. I actually forgot
the content here, so we have to take another look. We have push two
level off actually. Again, click on the text and
type in push to level off. Then just move this thing
here in the middle. Maybe if we look
at the text here, we can actually move it a little bit more to
the left side here. Again, you see that this font is actually a little bit
smaller than this one, but we will actually just maybe change it afterwards again. But we will leave it as it is now and keep on going with
the other descriptions here. For the numbers, we
actually have here 100, or maybe I will show you
again in the reference image. Here we have the number
100 and also one and and you also get this right. We maybe just place some little rectangles
here on the body. Maybe like this. For
the y component, I think we used a
wif of 0.5 maybe. We'll actually give it
some reasonable numbers, so maybe two and 0.5, and then also give it
here a little twist of -45 degrees maybe. Maybe I will just move
it so it looks good actually. My like this. Oh. Again, make sure that
it's connected to the body, this actually looks quite good. For the color here, again, we can just use it here from
the material assets panel. I think it was this color. Maybe I have to increase
the with a little bit. But if we look at it, is actually quite small
so maybe reduce it a bit, just maybe one and 0.7 here. Or maybe like the
0.6, like that. Maybe a little bit
bigger 1.2, like that. And then same for
the right side. Just duplicate this rectangle. Move this up and
you will actually just rotate it by 57 degrees, maybe and then move
it here to the side. I think this should fit now. Yeah, like then for
the description, actually, you can again just
copy any text you want here. I will just choose a metric
old one and move this Here change the text to
100, move it down here. Think actually here we already have to reduce the font size because it doesn't fit anymore. Maybe I will reduce
it to maybe 2.5. Yeah. Maybe like that. Again, we can duplicate this
one, bring it to this side, and then we actually
just have to add another zero
here to the text, and then we have this
description ready here. Then maybe it's time actually to clean this up a little bit, so we will just rename all of the things we
just created real quick. For this one, I
will just call it 1,000 and this one is 100. Also collapse it real quick. And maybe this one
is blue button here. This is A PPR. APP R also collapse it
here, and we forgot. This one, maybe we
will call a level off. This one was a
metric one, metric. And maybe we can also call it, or maybe we leave it
as an button actually. And those ones were from
the regulator actually. So I will actually move them
also inside of this group. Maybe like here, and rename it to maybe one than pin, and this is the 100 pin. All right. So I think we
got everything right here. Yes, I can't move this one inside of here
because it's Bolen. So maybe it's just more
clear now actually. But again, we will actually
also group this one here up. I think I got
actually everything. So select all of them,
hit command N G, and then we will rename this
group to write components. All right. Now we nearly have
everything up together, but this one is
actually missing, so two descriptions here
and also those arrows here. So maybe just do this for now. I can actually also maybe duplicate the numbers here because it's also a little
bit smaller in size. For the description,
we have D N and up, down and up, which just
quickly change the continuer, D N and then duplicate it. Bring it up and also name it up. So like that, and quickly
also rename the group here. This one is up text, and this one was a down text. Now when I see it right, we actually have
to do the arrows. For this one, we can maybe maybe actually duplicate
the light ellipse here, and then resize it here. Maybe to something like 18. Yeah, like that. Also maybe just change the
ring a little bit, so not that much, maybe 293. Here we actually
have the opportunity to also adapt the angle here. For this one, I will maybe
just simply use 90 here. Or maybe a little bit less because if we look at the image, it's not really like
full 90 degrees, so it's a little bit less. Maybe use 70 or
maybe even maybe 60. Let's go with 60, and then we actually have to
bring this down here. So this is actually
way too near here, but we will change
it afterwards. But if you look at the
arrow, maybe even more. Like that, Then we also have to do another one, so maybe duplicate it. This one, we have to
bring it down here. So like that. Yeah,
this looks quite good.
36. Project: Flight Unit | Part 8: Then we just have to do
the arrow cap, actually. Maybe like that. I will just quickly resize the metric text because
this one is way too big. Let me just check what we
have chosen here for the 100. We have a 2.51 size here. My we just may also use it here. This is much better now, and maybe also use it here
for the level of text. 2.5. Move it a little
bit here to the center, and then we can just
continue with the arrows. I will just quickly
rename it here to arrow line up and
arrow line down. We just see the difference, and then we just have
to do the cap actually. Maybe we can do it with a
triangle here, give it a twist. Maybe like that. Again, we have to increase the size here. You know what's good, maybe 1.4. It's a little bit
longer actually. So maybe 1.4 in x and 0.1 0.9 in y. Maybe like that. Then
just move it around. So it looks quite good. Also again, click on the
four dots here and choose the orange material from the
asset library, orange pots. Then we again just quickly
check if it's aligned. It's not really aligned,
but it looks like. So it just fits
for this tutorial, and then duplicate it. Then we will bring
this one down here. So we like that. I think actually this
looks quite good now. So we have the up
and down arrow, we have every description. Maybe we have to actually then do a little bit more added
here on this regulator. But first, again, we have
to rename everything. Again, this one was arrow. And this one was the arrow down. And maybe we'll just move it here inside of the regulator. This should be fine. I actually didn't want it to be there, so maybe like that. All right. Now we have
everything named correctly. And then we will
do some more edit on this regulator here. This one I will actually
also rename it to re left and this to regulate
right Here again, we don't actually
have the triangle, so again, we can just
delete this one. Again, if we maybe
look at the video, we now see that, we have a kind like black
base here underneath. Maybe we can get
this one also here. First, I will
actually again maybe just resize this cone here, top and bottom is equally
and for x and not y again, but that component here. We'll make it a little
bit thinner here, and then we can maybe select those three
elements here and move them a little bit
to the front here. Let me check real quick. The space plate is a
little bit bigger. But maybe not in the
width, but in the height. I will reduce it to ten here and increase the extrusion
here to two. But then we actually also have
to reduce the barvel here. Maybe 20.5. Let me check.
This one looks good. And now we just have to
insert the black base here. And maybe maybe we will actually just reduce the size of the base plate
a little bit more, maybe like nine,
maybe like this. For this black base, we, we can actually maybe just copy this cap here on the
right regulator. Let me just copy this one. Duplicate it and then
move it here to the site. And then we will just rearrange
the view a little bit and bring it here to
the body. Like that. Now we actually notice
that the light ring isn't really connected
to the body, but we will actually just
leave it as it is now. But now we can actually just also increase the
extion here of this one. Maybe just connect it here. Then yeah, just
increase it there. If we look now, this could fit quite good. But actually for the color, may maybe unbound the
material here and actually this maybe
a darker color here for the top color
layer. Yeah, like that. And then let me just check. I think this should
be actually fine. But this be good. So I think this works. But maybe if we align
it here to the center, maybe we will reduce the size
of the front screw here. But actually, I will
just maybe move it again out of out of the group here and connect
it to the regulator left because we're working
now in the left regulator. Now here, I will
actually resize it to 13 maybe like
that, and this one, I will increase a 216 maybe because if we maybe look again at
the reference image, I think actually that the
front one is a little bit smaller than the one behind. Maybe we'll just leave
it as it is now. Maybe if you look at the video, you see also that this
ground here is like black, so you will also
get this one real quick and to do so just duplicate the light
ellipse here, maybe. So we have another one. And then we can actually just remove the
ring element here, but also beside it here, so maybe like 14. And for the material. Yeah, we will just choose
the gray regulator one here, and then again, unbounded and
choose the black one here. For the last material layer. Now, this should be
quite good. I think. Nice. So then just maybe the kind of like
last step is now to create those little
screws here and that is just the maybe
not the last step, but one of the last
steps for this project. So we will just
also quickly do it. So here again, we will
just make a quick eps may choose from
the top two by the eps then I don't know for the size, maybe
three and three. Maybe 2.5. A little bit smaller, and then again connect
it to the body. I can also give it a
little bit of extrusion. Maybe like 0.3. Here you see now that it's
connected to the body. So then change to the front view and look if
the alignment is right, maybe a little bit more
to the right side, and now this should be fine. For the material, actually, we can maybe just maybe just use the material here from the button actually. So maybe to Maybe
you can just click here with the right mouse on to the button and then actually just
copy the material. This is also a
possibility to use materials and then choose the ps one and paste
material here. Now we have a little black
shiny material onto here. I will rename this
one to screw, maybe. And this one, I will just move inside of the right
components group and then duplicate it. And move this to the left
side also because there we also got to screw
maybe like here. This one, we will actually move inside of the left
components group. This one is actually far up. Let me just collapse
it real quick and then move this one in the
left components group. If you simulate now,
you actually see that the shaping worked pretty good. So it looks more and more
like the reference image. Now to finish this project, actually make sure that
maybe I forgot to say it, but also change the material of the top element actually
to the green body. So it's the body and the top is actually
have the same material. And now for the last steps, we can just maybe delete
or hide the screen shirt. We have a clean view here. Now if you just render it, it already looks quite good. But maybe for some more details, we can actually also add a little text you
to the background, and for this one, I will maybe type in FCU. For the font size, we
can maybe use 180, to make sure that the wrapper is actually big
enough for your font. Adapt the size so the font fits. And then I will move
this a little bit up here to the site, and also to the background here. Maybe give it also a
little bit of extrusion, so maybe something
like 30, like that. Also, we will actually, do a little bit of
material adaption here. For the color, we will
actually choose this one. In Hex code, it's again 14, two, four, 27, and in RGB. Is this value here. Again, you can just
simply copy that. For the lighting, will just leave it
maybe as it is for now. But we will actually introduce another layer and this
one will be a Fresno one, and this one move it down
here to the second position. For the Fresne we will just use a simple black and the
buyers change it to 0.14. For the blending
mode, we will use overlay in both
lighting and Fresnel. Then maybe for the lighting, you can bring in a
little bit of red. It fits to the whole body. I prepare a value, which I think works pretty good. And this is this color. Again, he use a hex
code and RGP code. And maybe some some more
fine adjustments here. I will reduce the opacity
of the fresne layer to 40, and for the lighting, we
can just keep it as it is. But for the overall
material opacity, we will just use 50%
here. All right. This looks quite good. Again, if we render now, this already looks quite good and maybe some little
more fine adjustments. I like the effect
step actually a lot. Maybe I will use a
little bit of ette here. Maybe like an offset
of maybe 0.28, and for the darkness,
I will leave it as for the value one. Now if we zoom in a little bit, This looks quite good. Now, I don't actually want to exceed the limits of
this video tutorial now, but you can now imagine
that you can also do some animations like for the
buttons or the regulators. For example, if you
push the button, then the light with the light will be changed
to red or something. The values of the display
are going to change. And so we have
endless possibilities for this tutorial
is actually just, how you can, maybe get the work flow for
rebuilding something like that. Again, this is not as
precise as in the video we. I mean, for this time, we actually build
it. It's quite good. Again, if you take more time, you will also
create more details and we get the same
result as this one maybe. Yeah, the possibilities
are endless, and this is just a little
example of how you can. I she something like that?
 ItsDavid, 3D & Webdesigner, Developer