Transcripts
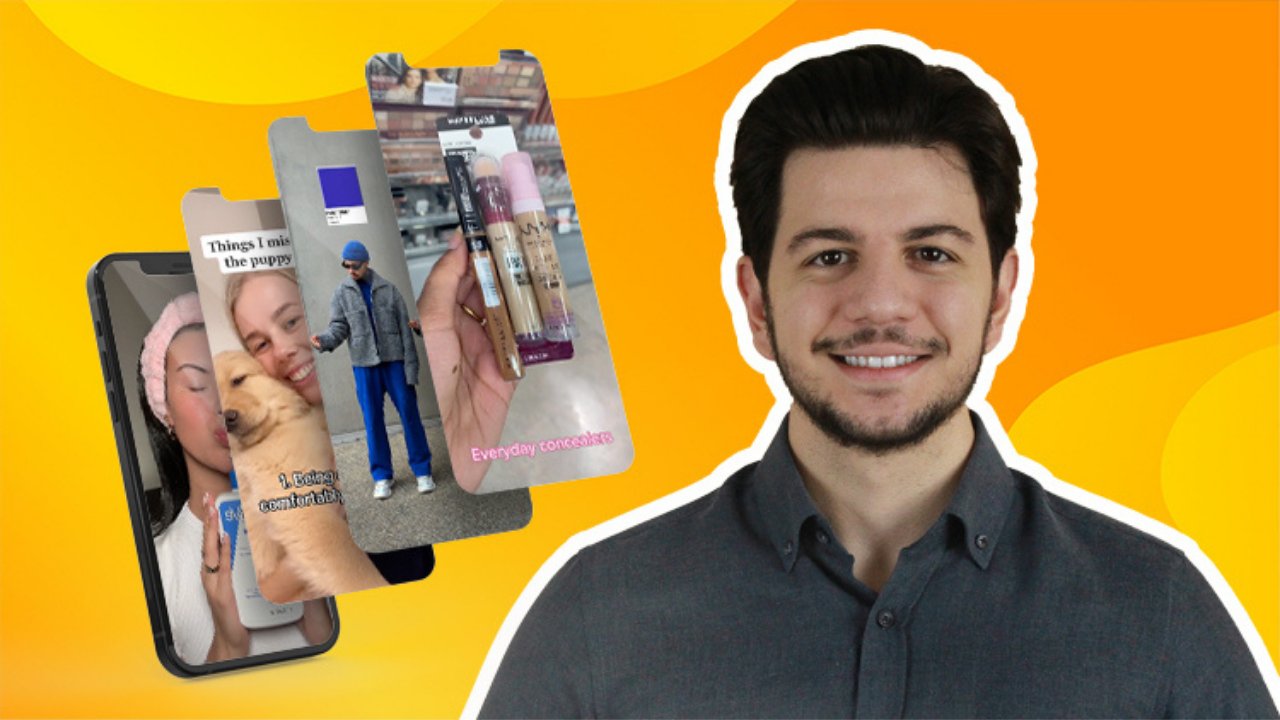
1. Course Introduction: Today's world, it is nearly impossible to grab the
attention of viewers. They have no patience to wait. They scrawl in seconds. Even if you are the
greatest content creator in the entire world, nobody is going to
watch your content. If your editing is
bad, that's the truth. But we are content creators. We are not professional
video editors who can use complicated and
expensive software to do all the hard work. That's why I and many social
media content creators use film free and easy to use editing
software that can help you produce stunning
videos in minutes. And welcome to Social Media Content Creation
with Phil Moa. The ultimate course that will teach you everything
you need to know about creating engaging and
professional videos for social media platforms. And we are not done. We
are also going to use Philmora's AI features
to write video scripts, video titles, top
nails, and many more. My name is Mils and I'm an
influencer marketing expert. I have been creating video
content for over four years, and I have created
hundreds of videos for various social media
channels such as Youtube, Tiktok, Instagram, and more. This course is designed
for beginners and nonprofessionals who want to create amazing social
media content. By the end of this course, you will be able to create stunning social
media content with Fil Moura that will impress your audience and boost
your online process. In this course, you
will learn how to install and use Fillmore
on your computer. How to import, preview, edit, and export your videos. How to use Fil Moura
screen recorder, instant mode, and AI
Text video features. How to adjust color, speed, and zoo of your videos. How to add second footage, sync video, and use stock media. How to add text transitions, effects, and stickers
to your videos. How to use Filmora's audio and
music features such as AI, music generator, sound effects, music and audio transitions. How to use Filmoras, split screen templus, and
export and share options. How to use Filmora's AI features such as AI, vocal remover, image creation, AI
copywriting, AI, portrait and image stylizer,
and noise remover. How to apply best practices for social media
content creation, such as how to blur, how to add sub scrap button, and how to add subtitles. By the end of this course, you will be able to
create stunning videos for your social media
channels such as Youtube, Tick, Tak, Instagram and more. You will also be able
to use Philmora's AI features to enhance your
videos and save time. This course will help you to
use Phil Moura and unleash your creativity without being a professional video
editor. So let's dive in.
2. What is Filmora For?: Hello again and welcome to this video on what
is Fillmore for. In this video, I'm going to
explain what Fill Moa is and how you can use it for your social media
content creation. Fill Moa is editing software
that allows you to create professional looking
videos with E. Fillmore is designed for beginners and
advanced users alike. You don't need any prior
experience or skills to use it. Fillmore has a simple
and intuitive interface that lets you drag and
drop your media files, edit them, and apply various
effects and transitions. Fillmore also has a rich
library of stock media, music, sound effects, stickers, and templates that
you can use for free. But Filmora is not just a
video editing software. Filma is also a powerful AI tool that can help you create
amazing videos and minutes. Filmora has several
AI features that can save you time and
enhance your creativity. For example, you can turn
your text into a video, create your own music, remove vocals from songs,
write catchy titles. Hashtags transform your
photos into paintings, improve your audio
quality and track, and stabilize your moving
scenes. What is Filma for? Filmora is for anyone
who wants to create stunning videos for their social media platforms such as Youtube, Tiktok, Instagram,
and many more. Film is for anyone who
wants to use a simple and easy to use video
editing software that also has
powerful AI features. Filmora is for
anyone who wants to unleash their creativity and
have fun with their videos. Let's jump to the computer
and begin our journey.
3. Installing Filmora: Yes, we are in front
of our computer, and now we can start
using Filmora. The first thing we need
to do is download it. The simplest action
we can take for this is to type Filmora
directly into Google. I Googled Filmora and clicked
on the first results. I come to Filmora's web page. I would like to remind you that instead of accessing
it from Google, you can access it by
typing Filmora dot Wonder Share.com And I click on the download button
on the top right. It automatically
detected I'm using a Macbook and downloaded the version of
Filmora for Macbook. I click on it and
accept the agreement. The Fillmorea installer opens. I click on it twice, and then say Open. And as you can see,
Filmora is now loading. We will be back in a moment. Yes, in about 5 minutes, Filmora has been downloaded and we can start using
Fillmorea now. See you in our next video.
4. Instant Mode: Yes, we have come to our
mode called instant mode. I immediately click
on Instant Mode, and tons of sketches
appear in front of me. If I want, I can search for the draft I'm looking
for from here. Or I can select the one I
want by scrolling directly. For now, I will
search for business, and I found a business
presentation. I click on it. And let's see how this
draft looks like. As you can see,
this is a template. I click on Use this
template button, and it asks me to add media. Now, I will add
my various videos for demonstration purposes. I added my various videos. Click on the Order
Create button. As you can see, our
draft has been created. Let's watch it now. Let's
see what it looks like. First, it showed me
it, put a text here. I can change this
text if I want, puts the text under it again, and continues to advanced videos by adding various effects. As you can see, the draft
works just like this. If I want, I can change
the text myself. I can change videos
and so I can create a video from scratch by
using red made outline. In this video, we have seen
how instant mode is used. Now let's come to creating videos with artificial
intelligence.
5. Import, Preview, Timeline, Export: Yes, now we can create
a project from scratch. I click on the New Project
button, and as you can see, a completely empty Filmora interface opens in front of me. Now it is up to my creativity. First of all, I want
to show you how the interface works
by adding a video. As you can see, I
added three videos, one of which is me, and the other two are screen recordings. I can see my own
videos in the section because I'm currently
in the media interface, we will continue to see
sections such as stock media, audio, text transitions,
effects, stickers. Plus in the following videos, I see a timeline just blow. For example, I take this video and drag and drop
it to the timeline. As you can see, there is one image in my
timeline right now. If I want, I can
see where I am in the timeline by
sliding this red bar. Under this red bar, I
can see my own images. And under my own images, I can see how high
or low my voice is. If I want to narrow or
expand the timeline, I can narrow or expand
it from the right. I can do more subtle things, or I can do more
extensive things. If I want to see what
my video looks like, I can enlarge it by
clicking on the button, and then I can watch
my video from here. If I like my video, I can
minimize it again and export it by pressing the
export button on the top right. And my video will be
completed and delivered. Of course, we will see
everything I'm talking about now in more detail
in upcoming videos, but this is how our
interface is in general. Let's move on to the next video.
6. Trim & Cut: Welcome back. In this section, we are going to start
editing our videos. First of all, I click
on New Projects and I'm presented with an
empty Filmer interface. Now if you look at my window
on the left hand side, you can see various
sections here. The first section we are
going to start with is media. Firstly, I click on Media, and here it asks me
to upload my media. Immediately, I click on Import. Here, I can add the videos I
want. I will add this video. In this video, I'm
talking in front of the camera and I also
have screen recordings. If you're on a Mac book, you can select other videos in bulk by holding down
the command key. If you're on Windows, just
hold down the control key, then I press open and all
three videos are loaded. First of all, I take the
video where I'm talking in front of the camera and place
it here as you can see, because I start the camera at
the beginning of the video. I waste a little
bit time in front of the camera and
then I start talking. I came to the point
where I started the video and click twice
on the scissor symbol. You see what happened. I cut the video.
Let me show you. Just like this, this area you
see here is now split into. There is no change in the clip. It's flowing very cleanly, but we have cut that gap. So what does that mean? It means that you now treat the section as a separate
clip. So we can delete it. As you can see, the video
can now start instantly. So I have removed the moment when I was in front
of the camera. As you can see, I couldn't speak on the screen
at the moment, and I needed to remove
this from the video. I'm going to go back
to the beginning. I'm going to open the video so that you can hear
the sound better. To create the center video in
this video we will explore Tito to as you can see, I couldn't speak here. So, I'm going to come back to the part where I
started speaking again. I'm going to click
twice again to cut and delete this part
where I couldn't speak. So I'm going to start
from where I can speak. And whenever in the video I
couldn't speak like this, I needed to cut it like this. Sometimes there may be
very small sections, so I just enlarge
it from here and I can do my finer work
more comfortably. In the same way we needed to
cut the end of the video. I'm going to minimize
it like this. I'm going to go to
the end of the video, because at the end of the video, I'm walking towards the camera
to turn off the camera. I want to cut here too. This time I'm not going to cut it by pressing the
scissor symbol. I'm going to try
a different way. Let's find out where
the video ends first. As you can see, the
video ends here. I'm going to zoom in to do a
little bit more fine work. And I want to end the
video right here. What I'm going to do this time, I'm going to cut right away. I'm going to select
the first clip, then I'm going to grab this clip here and end the clip like this. That's the end of our video. In this way, you can cut the
parts where you can speak, the parts where you say
over and over again. You can make your video
completely fluent. See you in the next video.
7. Music: Yes, now we have seen
the sound effects. We can move on to the
adding music to our video. I'm deleting the
music I created with artificial intelligence for now and I'm coming to
find another music. From here, I can choose what I want from tons of categories. Now I choose the happy category to be suitable for this video. And I will choose one from the
happy category and add it. I like this music. I click the download button
and download it. My video has landed now I can hold it and add it.
As old you like this. Of course, I realized that I need to turn down the
sound a little bit. I turned it down a little bit. And let's play our video
and see how it turned out. You can see I can hear a little
bit of music from below. So the parts of my video
where I don't talk, the parts where I'm silent
are becoming more attractive. Thus, you can take as much
music as you want from here and use it for without
any copyright problems. See you in the next video.
8. Split Screen: Yes, in the previous video we covered the template section. Now let's examine the
split screen feature. First of all, I click on
the split screen section. And here it shows me how
I can split the screens. Thus, I can show more than
one image in one screen. For example, I like this, I download it immediately, then I keep it and add it
to the end of my video. I enlarge my timeline to
see a little more easily. This scene is very short. I will extend it for
about five to 10 seconds. Of course, I don't see
anything right now. I click on Scene One, go into the Settings, and an edit menu
opens in front of me. I can add my videos here. I press the plus button, select my videos, and
click the open button. When I scroll down, I can see that my videos
have been added. Now I place the first video on top and the second
video on the bottom. As you can see, two videos
have been added side by side. If I wish, I can play the placement of the
videos in this way, so I can bring it to
the point where I want to be or I can
click on the video, so I get to the Settings menu. From the settings menu, I can make the video a little bit bigger or smaller if I wish. I can also go into the
settings of the videos on the right side and make even
more detailed settings. Or I can increase or decrease the volume of the
videos and I can play with the color settings or add intra animations
like I did before. The videos are
added side by side, and when I start
playing my video, I see two videos side by side. If you want to fit
more than one image, you can use a split
screen feature. I can say that it usually works very well when showing
product images. See you in the next
video and goodbye.
9. Creating Video Intro & Outro: Welcome to another new video. In this episode, we are going to try out Phil Moas resources, all the templates that
Phil Moas created for us. Let's say we are making a
video on photography and we want to add an intro or outro
related to photography. What do I do? I
click on templates, then I open templates. If you remember in
previous videos, we went into the
Youtube category and found a custom
intro or outro. You can do that again,
but this time we are looking for something a
little bit more specific. So I'm going to try to find something that's
appropriate for me. And I think the most appropriate one at the moment is how to, and when I click on how to, it shows me various entries for videos that teach you
how to do something. For example, here I see a template called
Photography Basic. And I can use that. Or I can
choose a different scene, for example, I like this one. Let's click and watch it. That's good. I can use that as an intro. I immediately grab it and add it to the
beginning of my video. And then I expand my timeline a little bit more so
I can see it better. Then I press Edit.
One thing that caught my eye here is that we use
three scenes in total. This is the first scene,
this is the second scene, and this is the third scene. I can change these
scenes if I want. For example, I see more wedding photos in
the first scene. I don't want to use
wedding photos, so I immediately go to
the stock media section. Of course, if I wish, I can use my own videos directly
from the media section. It will be much more
practical to go to the stock media section rather
than dealing with this. Right now, I type photography
in the search box and it shows me various images
related to photography. I can use any of them. For example, I'm a little bit intrigued by the
video we see here. I think I can use this one
and I download it right now. My download is complete. Now I can use the downloaded
video instead of this one. Now, as you can
see, my first scene is the scene that I added. Then I go into the second scene, then I go into the third scene. Then I click on Text. And now I can change the
text that you see here. Yes, I have edited my text, so let's watch the final version now. I can use it in my video
and click on Safe. My Youtube video intro is ready, and I have created an
intro video that is completely relevant to my
category I'm focusing on. If I want, I can do the
same for the Ultras, but this time I won't bother with the
category on the left. I will just type photography
Altro directly here. So I can choose and
use the ultras of a video related to
photography as I wish. I don't have to make them from scratch and all of
them are royalty free. I just minimize my timeline and I get to the end
of the video and now I can add any ultra I
want to the end of the video. I take my video and
add it to the ends. I select the pixel and
then I can make it a little bit bigger and I can do whatever
edits I want to do. Let's see what it
looks like. Unedited. The only thing I
don't like here is the music because it is
completely unrelated to the music of the previous intra I'm going to leave it here and I'm going to take it all
the way down to the bottom. We won't hear any music at all. Then I go back to my clip at
the beginning, copy my clip. I come back to the
end of the video. I paste my clip here, I put the ultra that I want
to use on top of the intra. Now you can see the ultra, but you hear the intra
because intro Sound is on. Now let's watch it
from the beginning. Yes, I finally activate, mute and watch my video. As you can see, we have used the music of our intro
to create our ultra. So there is a harmony
between the two. In other words, I didn't use
the ugly music of Tatra, but I used the visuals of Tatra. Thus, we have created
the intro and ultra of our Youtube video in a way that is relevant to
the subject we use. I will see you in next video.
10. Adding Table of Contents: Yes, this time we are here to
create a table of contents. Because we may be covering
too many topics in our video, it is very important to show where and what
we will explain. I click on templates again, and this time I search
by typing list. Similarly, you can also search by typing table of contents. And as you can see,
various templates with lists appeared
in front of me. I need a list where I can show about four to five items
together, like this one. For example, we have
downloaded our list. And let's say we start
our video with an intro. We will talk a little bit
about what we're going to do. And then we finish our
intro right in the middle. Then we show a table of contents of what this
video will cover. Then let's say we
continue with our video. Let's see how it goes. First
of all, I cut this break. I widen it a little bit, and then I take my video
and add it to this break. As you can see, everything
else is shifted to the right. My video is now in the break. Now I can edit it. I
opened the editing screen and since the only thing
I want to edit this text, I go to the text section
and I see text here. I will be update items 123.4 Then I will
have my draft ready. My outline is ready. I save it and now I can make
a simple intro to the video. And then I can show you here
what I'm going to cover. And then I can continue
with my video. I will have a better
quality video and more explanatory
video for my viewers.
11. Adding Titles & Lower Thirds: Yes, now we have an
intro to our video and also a section explaining
what we are going to grasp. Now let's add a lower third. What I want to do here is to simply show the
first and last name. At the point where I
introduce myself for this, I click on the title section. And under the title section, I see a lot of
different sketches. I can choose any of them. Instead of selecting, I'm going to search for a name here. And then as you can
see, there are a lot of templates where
I can put my name. I can write whatever
I want to hear. In this video, I'm going to
find a template that I can put my name on that matches
the colors of my video. I like this one
here. I just want to click on it and show
you how it looks. You can see it's like this. I just grab it and add it here. I can edit from here. I immediately choose my title. I click on my name, and I accidentally choose
the subtitle again, because the subtitle
is higher up. I keep the subtitle and
move my title above it. Then I select my title
and type my name. I have typed my name. So let's watch it
from the beginning. Let's see how it looks. If I want, I can grab
it like this and move it a little bit more to
the left side on the screen. Then I grab the
text with the name. And I move it a little bit more to the
left on the screen, so that my name enters the video from the left
side on the screen, and it appears on the screen for a while and then disappears. This way I can use my name
to introduce myself or show my social media accounts and I will see you
in the next video.
12. How to Add Product Comparison Visual: Let's say there's a
product information or anything we are trying
to explain in the video, how can we show them in
the most comfortable way, We don't always have to hold and show the products
ourselves on camera. We can also use their visuals by placing them in a nice outline. What I need to do for this is to go to the template
section again. Then I find category called unboxing under the
template menu. As you can see, there
are various templates where I can show or
compare the products, the information, or any
message I want to give. Now I'm going to pick one
of these and I'm going to put in a sketch where I can
compare the two cameras. I've got a sketch like this, let's watch it quickly. Pins? Yes. I'm going to find the place in my timeline where I want to show this. And then I'm going to press the cut button.
I'm going to cut. And now I can squeeze
this clip in. I'm holding my sketch, and I squeeze it right in. And then I click on it twice, and now I can edit it. As you can see, the photos of the products are displayed here. I select the first product, then I add a photo of it. Then I select the
second product. Again, I add a photo of it so I can compare my
first two products. Then the images change and I need to add the products again. Let me add the products again. Immediately, I
added my products. Now, let's watch it again. As you can see, I can
compare two products. Now if I wish, I can go to
the text section and write the names of the
products here so I can have a better
comparison screen. For now, I press
the same button, and let's say I mentioned
the products here. After that I add an image showing both
products separately. Then the scene returns to
me again and I continue to, so I was able to
compare two things. And that's it for
this video. Goodbye.
13. Audio Enhancement: Welcome to the new episodes. In this video, we
will be covering Best Practices and our
first topic is sound. Because I'm shooting
the video in an indoor environment right now and I'm using a
professional microphone, so my sound quality is good. But you may be shooting
a video outside, you may be shooting a V lock, or you may be
interviewing someone. In these situations,
you should be able to improve
your sound quality. So let me show you how
to do this right away. Firstly, I select my video
and double click on it. Then I press the
detached audio button. So I have completely separated
video and the audio. Now I can work
specifically on the audio. When I select my audio, I see a menu on the right side. I can make the necessary
edits through this menu. If you don't want
to bother too much, you can turn on the audio
normalization option and the system will make all the necessary
corrections for you. But if you don't
want to use this, I can increase or decrease
the volume myself. If I want to give the sound
from the left or the right, I can balance it, but
we do not prefer this. In videos like the one you
see on the screen right now, I press the reset button
and keep it at zero. Then I can use the
fade in option, which will gradually
increase the volume. I don't need this either,
so I won't use it. This is an option that
we use mostly in music. In the same way, I can use fade out in the music to reduce
the music smoothly. For example, I can
click on the music here and switch on
Switch on Fade Out. And I want to show you
the example right away. Giving that people enjoy
this type of content, it seems like a
great opportunity to create influence of content,
about gender reveal. And as you can see, the music is slowly fading out. If I zoom in a little more, you can see it more
easily on my timeline. When I increase and
decrease the fade out, you should be able to see
it on the screen right now. Now I have zoomed down again and I'm back to my
audio recording. Let's continue looking
at the new features. I'm going to scroll down a little bit and I
see Pitch option. So I'm going to turn pitch
up a little bit and I want to exaggerate it and show it to you so you can
understand it better. Or you can change the thinness and thickness of your voice by playing
with the pitch setting. When I scroll down, I see a
lot of different settings. These are the settings that are usually used by
professionals now. But there are a couple of other nice settings
that we will use here. The first one is AI
speech enhancement, which will directly improve our voice quality through
artificial intelligence. The second is wind removal. This will eliminate
the sound of the wind. Thus, you can easily shoot
in window environments. You can turn on the normal
noise option and turn it from low to strong to eliminate all the sounds
in the background. But if you are not shooting in a very noisy
environment like me, you can keep the setting at
low or turn it off directly. When I scroll further down, I see different and
different features. Here we can use options
such as home removal or his removal to remove different sounds from
the dirt background. Thus, you can completely remove various dirty sounds
from the back and have a better quality sound by simply activating the options here without dealing
with it manually. Especially if you're
recording audio from your phone or recording audio outside if you're
in a windy area. If you're interving, if there is a lot of sound
coming from the back, I say you can use such features, and I move onto the next video.
14. Subtitles: Here we come to the
feature that you will use a lot on Tiktok
and Instagram, which is to add subtitles. Nowadays, people do not add
videos without subtitles, even if the people watching
know that language. Putting subtitles still helps us to better gather
their attention. Now let me show you
that we can create subtitles automatically
using Fil Moura. Firstly, I take a video clip
and then double click on it. As you can see, there is a
feature called Speech to text. When I select it, I can subtitle only the clip I have
selected, or the whole clip. Let's say whole video for now. Then let's leave our format as SRT and let's press
the okay button. It is loading now and we
have to wait a little bit. As you can see, it is completed. I exit this menu, and when I scroll
up a little bit, I can see my subtitles here. Let's play it now.
Let's see how it looks. Creative ideas and
case studies to inspire your own influential
marketing campaigns. If I want to edit the subtitles, I just double click
on the subtitle file. I see here the file opens. I can edit the subtitles from
the right side if I want, if I used a special name and feel more I
didn't recognize it, I can immediately select the part and replace it
with the correct one. If I want to merge
two subtitles, I press the merge button here, so that the two subtitles become one subtitle and a longer
subtitle is created from below. I can follow my subtitles using my timeline or if I want to change the position
of two subtitles, I can simply click
on the subtitle. And from here I
can move the text. Also, right now the screen is white and our subtitle is white. And it doesn't look very good. So I go to the
preset section and choose a subtitle
that looks better. For example, I added a black background and
it looks a bit better. Then I go to the
customized section. Here I can select
gradient feel if I want, using color feel and
change the color. But for now, the white color is fine so it can stay
in color feel. When I scroll down,
I see opacity again. I think I will keep
the opacity bar at the end to make the
subtitle more readable. When I scroll down even further, I see different options such
as blurring thickening. For example, if we
thicken it a little more, the subtitle and the
background will be separated a little bit better
then when I scroll down, I can add a shadow. If I want, I can adjust the
settings of the shadow. Here we come to
my favorite part, which is adding background. This directly separates the
background and the text completely and allows us to present a more
readable subtitle. Finally, I come to the
animation section, where I can add animations
to make my subtitles move in and out of the video
in a more beautiful way. For example, I click on Zoom In. Thanks to this animation, the subtitles enter
the video in this way. Thus, I can draw a little more
attention to the subtitle. And inevitably, the user can look at and
read the subtitle. But there is a point I missed, and that is we only made
changes to the subtitles. You see here, the other
subtitles remain the same. What we need to do is to
apply to all button so that we can apply
the settings we made to the subtitle
to all of them. Then when I look at
the other subtitles, I can see that the same
settings are applied to them. Now I'm done with
the subtitles and press the same button
and exit this menu. As you can see,
our subtitles work exactly the way we
choose animations. Background dimensions
are exactly as we want. This is how we added
our subtitles. I will see you in
the next video.
15. How To Add Subscribe, Like, Comment Button: Now we come to the
some special stickers on Youtube, Instagram, Tiktok, and where we encourage the user to take action.
What are these actions? For example, we can
ask them to follow, We can ask them to subscribe. We can ask them to like to emphasize this at the
exact point we want. I click on the
sticker section and type like in the
sticker search part. Let's assume we won't like. As you can see, animations and sketches related to like
appeared in front of me. For example, the
animation we are seeing right now is perfect for Instagram because the colors of the sticker are exactly the
colors of the Instagram. So I'm downloading it right now, then I'm grabbing it and
adding it to my clip. I'm expanding my
timeline a little bit. I'm expanding my like
animation a little bit more. I'm bringing my
timeline to where the like animation is and that's where the
animation starts working. I'm going to make it a
little bit smaller and I'm going to move it to the
right side of the screen. But now you notice that I
have selected the subtitle. And I can't select the animation because the subtitle is
above the animation. In such cases, I immediately do control or command z and
undo my last action. Then I grab the animation and place it on top of the caption. Now when I click, I
can directly select the animation and not
touch the caption. Now I have selected
my animation. I have placed it on the
bottom right side like this. Now let's play the video
and see how it looks. We have founded an
Instagram specific like animation and we edit it. Now we can use it in our videos to remind
us to ask for a like. Now we can do the same
in different situations. For example, I search for the
comment in the search part, and as you can see, various comment animations
appeared in front of me. Again, I can take what
I want from these. For example, here I see a comment animation
for Instagram. I see a share animation
for Instagram. When I scroll down further, I see an animation for Tiktak. I strongly recommend
that you take and use an animation with
the logo of that platform, the colors of that platform, whichever platform you are
producing content for. Finally, let's type
subscribe in the search bar. We have already done this
in our previous videos. Animations related to subscribe
appeared in front of me, since it is a word
mostly used on Youtube. I see subscribe animations
prepared with Youtube colors. Again, I can buy and
use them directly from Filmora without
paying any copyright fees. See you in the next
video and goodbye.
16. Image Creation: Welcome to this episode of using Philmoora's artificial
intelligence tools. In this video, we
are going to try out Philmoora's AI tool
called AI Image. And our goal here is to
create images with AI. We are going to do
this for two reasons. First, sometimes we can't find what we want
from stock photos. In such cases, we will be able to create our own
stock photos with artificial intelligence and make thumbnail photos for
platforms like Youtube. Now let's get started. First of all, I need to
be in the media section. Then I press the
AI image button. As you can see, the
place where I can create an image is
now in front of me. The first thing I need to do
is prepare a prompt here. So what kind of prompt
should we prepare? Philmora tells us
that description of at least ten verses is best including a description of
the content composition, colors, and details
of the image. Example, a winter
lake containing a reflection of the sky
covered in white snow, shot with a wide angle lens. As you can see,
Filmoora tells us here how detailed
a prompt it wants. What I need in this video, because I'm talking about
influencer marketing. I want influencers. I want these influencers to
hold phones in their hands. And I want older
influencers for this video, because it is really hard to find older influencer images. Now I'm going to try
to prepare a prompt. Have my prompt ready.
I can choose 16 by 99 by 61 by one if I want. Since this video is in
16 by nine formats, I will choose 16 by nine. Then it asks me to
choose a style. For now, I'm going to
leave it in Freestyle because I want a
realistic visual. Cyber punk or futuristic
won't suit me very well. Then I press the Create
button and my image is ready. That's exactly what I want it because it is
very hard to find photos of people who are normally influencers
and are also old. It would be hard to find them. In the stock media section, I am downloading my image now. My image has been added
to the media section. I can hold my image
wherever I want and add it. For example, I put
it on the site, and while watching my video, I show them my image. Then I continue talking and mark the right place in my timeline
for the image to fit. Then I hold my image. In the previous videos, I accidentally held the subtitle again because the subtitle
is above the image. I take my image and bring it up, and now the image is
above the subtitle. I hold the image and
enlarge the edges of the image a little more and
place it on the screen. Then I take my image
again and lower it down so that the
subtitle appears. Now my image will
appear while I'm talking and the subtitle
will continue to appear. Then I will start talking again. And so we have created our visual with artificial
intelligence. See you soon.
17. AI Copywriting: Welcome back once again. In this video we
are going to try out the AI copywriter feature. And as you can see, it
is right in front of me. I click on it and it says
to me what you want to do. Do you want to create a
video idea for Youtube? Do you want to create
a video script? Do you want to write an article? Do you want to write the
title of a video episode? Do you want to
write the title of a Youtube video or do you want to write a
video description? Filmer says it can
help me with that. I said I want to create a
video idea for Youtube. And now I have to tell it
what kind of thing I want. I told the AI, I'm an
influencer marketing expert. You want to create videos about social media
content creation. I choose English as a language. When I open advanced options, we choose how many
results we want. Let's make the number
of results ten. Let's see a lot of results. I press the Generate
button and as you can see, the copywriter gave me ten
ideas related to my topic. I can review them or ask
for different things. For example, I can say, write a description for my
Youtube video, write a title. And now let's see how we can use this in
the video itself. For example, at this
point in my video, I want to add a title. So I click on Text and I click
on the Quick Text button. As you can see, my
title is added here. When I go to top right, I see a button just to the
right of the text here button. When I press this, I
can create titles, again with artificial
intelligence. I said, what title should I add to my video about
influencer marketing? And press the Generate button. Let's see what
results it brings. As you can see, it gave
me different texts here. For example, let's say I
like this one. I copy it. Then I turn off the AI and paste it to the
text on the right. So I have added my title here. Or let's say we have finished our video and we
want to export it. Click on the Export
button and it asks me to give my video a name, but I don't know
what to call it. Again, I click on the AI and it automatically selects
Youtube video title. It asks me to write a title Here I will explain
what the video is about. I said the video is about
influencer marketing, and I pressed the Generate
button instantly, my video titles came up. I copied the one I
like, exit the AI, then paste it into my title, and then I can
print out my video. That's how you can use AI for things like
writing descriptions, writing titles, writing text, or things like coming
up with ideas. I will see you in
the next video.
18. AI Portrait: Yes, we are here to use our
feature called AI Portrait. First of all, I click
on the effect section, then I go to the
video effect section. Just below I find the
feature called AI portrait, where we can add various shapes around ourselves with
various effects. For example, let's say
I'm shooting a fun video and I want to keep the user's
attention on me even more. Or I'm shooting a music video. Then I can use the outline here. As you can see, a shape
has formed around me. Now I add it to my video. Then I hold it and expand
it a little bit more, and I can make adjustments. On the right hand
side, for example, I can increase the thickness
a little bit more, or I can increase the distance between me a little bit more. For example, the
distance looks good. Then I can add more
than one line. The best thing I can do is at the very beginning of
the videos to show an unusual image like this for a few seconds to get
the attention better. This way the viewer
will be a bit more surprised and will be in my
video for a longer time. To figure out what's going on, let's watch it from
the beginning. As you can see, this
is how I can focus the user's attention more on me and fun videos, music videos. Or when I scroll down, I see an effect called
human segmentation. I immediately delete
my previous effect and choose this new effect. This effect has completely
removed my background. If I want to show
an image behind me, but I still want to be
in front of the camera, I can use something like this. So we have covered the
AI portrait feature and I will see you in
the next video. Goodbye.
19. AI Image Sytlizer: Welcome once again.
In this video, I want to show you a feature
called AI Image Stylizer. For this, I need to add a photo. So I added my photo right here. Now I select my photo, then I click on the
AI Tools button and I see AI Image
stylizer here. I activate it immediately and I can choose any image
I want from here, and I can make
myself look like it. Or any photo I put here, for example, let's
turn me into a zombie. Yes, as you can see, I am now a zombie. If I need such an image, I can easily transform
myself or anyone else. Thanks to artificial
intelligence. The only condition is that it must be an image, not a video. And so I can easily use different types of
characteristics in my videos. See you in our next artificial
intelligence feature. Goodbye.
20. AI Audio Stretch: We come back once again. In this video, we
are going to use a feature called
AI audio stretch. Our logic is simple. We have a music here. If you remember, we put it together. Unfortunately, this music
ends at that point. But my video continues
until this point, and I want the music to
continue until this point. For this, I will be able
to continue the length of this music until the end of the video using
artificial intelligence. First of all, I'm going to mute myself so that you
can hear better. And let's listen to
the end of the music. As you can see our
music is over. What I need to do is
very, very simple. I'm going to click
on the music icon that you see right here. And then I'm going to move
my cursor over here and I'm going to grab the music
and pull it to the right. And that's how my music
has been extended. Let's listen again to the
place we just listened to. Thanks to artificial
intelligence, my music has been converted
into a longer format. So now I can stretch
the music as long as I want and keep the harmony
of our video intact. See you in the next video.
21. AI Motion Tracking: Welcome back to another video where we learn about AI tools. Now we are going to
look at a feature called motion tracking
For this, first of all, I need a moving
video and I added such a clip as you can see
a family is taking a walk. Now I come to the very
beginning of this clip and I want to track one object from the very
beginning of the clip. What I need to do is
select the clip and then click on AI Tools
under the video section. Then I will open a feature
called motion tracking. Let's say we want
to track this kid. I'm going to select the
kid's head as an object. I have selected the kid's
head as an object right now. Then I click here and
the system starts tracking the kid's head as an
object. Let's check it now. Let's see how it
works. I started my video and as you can see, it has identified the object and it continues to track it. If I want, I can now
attach anything on this object or on the
edge on the corner. I go back to my clip and in
the link element section, I click on the import from computer button and I take a photo that says
I'm just a kit. I place it right now over the kid's head and
I replay my clip. As you can see right
now I'm just the kit is over the kid's head and it continues to follow the kit. You can use this as you wish according to
your creativity. Now I select my
video clip again, delete the I'm just a
kid photo and this time, let this kid be a criminal. I select at the mosaic. The mosaic is a bit big. Let's make it smaller like this. Reduce the blur a little bit, make sure it is on the face. Let's reduce the
opacity a little bit. And let's watch the clip again and see how the criminal
kit looks like. As you can see, we have covered the criminal kid's face as it is with artificial intelligence. We can track any image
we want in this way so we can improve the quality
of our videos even more.
22. Video Stabilization: Hello again. This time we are
here to stabilize a video. I have a video in
front of me right now, and as you can see, it
is not a stable at all. The camera keeps
moving left and right, and the character that camera is focused on keeps
shaking left and right. So I pose my video,
select my clip, click on AI Tools button under the video section and
open Stabilization, and then click here. As you can see, the
image is now a bit more magnified and I can focus on
my main character better. The person is not
moving left and right. The camera is not moving
left and right quickly, and the look has been
stabilized thanks to the AI. That's how easy it is to
stabilize our video with AI. I will see you in
the next chapter.
23. Export Settings: Yes, now we have made
all our settings. Now it is time to
export the video. First of all, I
need to make sure that my resolution
settings are correct. So I click on the
file right above. And then I click on
the Project settings, so I make sure that
the resolution is 1920 by ten de pixels, which means HD quality. And I also make sure that the
aspect ratio is 16 by nine. Now that I have
checked my settings, I can exit here and click
Export on the top right. First of all, it asks me for
a title to name my video. I named my video so
that it won't get mixed in with my other
videos on Fil Moa. And I can find it easily. It asks me where to
save it. I click on it. I usually choose Desktop
so I can find it easier. Then in the preset section, it says something like
Match to Project Settings. I don't need to
touch this at all. When I click on Settings, I see that my bitrate is
8,000 So what does that mean? You can see the recommended
settings for Youtube on the screen right now when I
scroll down, I see bitrates. When I click on bitrate, it asks for a bitrate of 8 megabytes for a
ten pic cell video. We meet exactly this condition. Also note that this applies. The SDR uploads,
not HDR uploads. It requires ten megabites
for ten AD pic cells back in Fil Moa. We already
have our Brad at 8,000 Now I'm going to exit here because I'm not going
to touch the settings. But as soon as I change the quality from
recommended to higher, I can see that the
settings have changed. I click on Settings again
and I can see that it's 10,000 There is no harm in that you can change it
higher as it is now. I exit here again
and go to formats. And it's always best
to choose MP four. Since all the platforms like
Youtube, Tiktok, Instagram, et cetera support MP four, I can say that MP four is the format that will make
your work the easiest. Then when I scroll down, I see resolution again here. Since I uploaded
HT quality videos, I will choose 1920 by ten D. But if you have uploaded
higher quality videos, you need to select
higher quality to output them in that quality. Be sure to keep this
in mind for now. I'm going to select
ten AD pixels. I'm going to leave my
frame rate as it is. I'm going to scroll
down and I'm going to see the back up to
the cloud setting, which I always like to turn on. Because even if something happens to my
computer right now, this video will be uploaded
to Filmoras Clouds. This way I can log back into my Filmora account
and access my video, which guarantees my hard work. Then I see a feature
called Auto Highlight, and when I turn it
on, it gives me a second output along with
the output of the video. Here it asks me what
kind of output I want. I can say 52nd Tiktok video
or a 62nd Youtube shorts. Let's give us a
Youtube shorts output for now and see
what it looks like. Then I leave my enabled GPU accelerated video
encoding setting on and I'm ready to export. Then we will see the other
settings we saw above. Yes, as we can see, our video and the
highlight version of our video have been exported. Now let's open it and
see how it looks. Yes, here we see our video, and below it we see the
highlighted version. First, I want to open
our normal video and show it very briefly. We have a very high quality
output of our video. Now let's look at the
highlighted version. In the highlighted version, this is how it created a little 1 minute clip for
us and presented to us. I can use that on
different channels or Youtube shorts or something
like that if you want. Of course, we will need to
make a vertical version of this video before we can
upload it to Youtube shorts. See you in the next
video and goodbye.
24. Create Thumbnails: Yes, we have pressed
the export button to output our video, but there is a very small
part that we missed, making the thumbnail
of our video. I go to the left and
edit the thumbnail. As you can see, it
automatically selects an image and wants to
use it as the thumbnail. If I like this image, I need to choose a style
from the right side. For example, when I say foot, I can choose foot reviews here, and it automatically creates
the thumbnail for me. Or I can also choose Foot Guide. Or if I want, I can go to the music category and download
another draft from here. As you can see, we selected
Top Music list and it created a list of music
for us and took our photo. When I click on
it, I can edit it. For example, I can change
my songs if I want. I can bolt their text, I can change their phones, or I can go to the
preset section and change the type of
the text completely. Now I go back to
the temple section. I can either use nave template or I can continue to
play around with it. For example, let's
go to the How to Category and try
one more template. As you can see, I choose
Life Acre One and it created a title for me here
called How to Save Money. Now I'm moving the header
a little bit more to the left so I can change my
header here if I want for me. It automatically cut
out the character from the thumbnail and put it on the side and change
the background. I can make more changes and
create my thumbnail here, let's say we like this one. I just hit the save button
and as you can see, I can now create my video with thumbnail with our
thumbnail ready. Let's move on to the
next sharing option, and that is Youtube.
25. Share Directly on YouTube, TikTok, Other: So we have exported our video, made the tombnail, and now we can share it directly
on Phil Moura. Now when I press Youtube, I see that I need to
log into Youtube. The same goes for
Tiktok and Vimeo. I'm going to log
into Youtube now. Yes, I'm logged in. And now it's asking me for the inputs that are
appropriate for Youtube. For example, it asks
me for category, which is a direct
question from Youtube. Under the category,
it asks me for tax under text, it asks me whether I want to
publish it on Youtube, public, unlisted, or private. So I don't have to go and do that from the Youtube
interface anymore. I can share my
video directly from here by selecting the
relevant options. Likewise, when I go
to the Tiktok menu, I see similar settings. The settings Tiktok asks me for, as you can see on the screen. And as soon as I press
the Export button, I can automatically share
my video on Tiktok. And of course, the same thing
goes for Vimeo as well. And finally, if you
want to save it to DVD, you need to select DVD settings. So we have finished
the export settings.
26. Congratulations, You've Made It!: Congratulations to all of you. You have done a
great job and you are now all beginner
video editors. You can edit the
content you produce for social media at a basic level
and turn it into output. You no longer need to use complicated video
editing software or pay tons of money for it. You have simply become
self sufficient. Congratulations again
and thank you very, very much for your
interest in this course. I will see you in my other
courses and goodbye.
 Dolunay Ozeren, AI & Automation Expert