Transcripts
1. Introduction: Welcome to the class
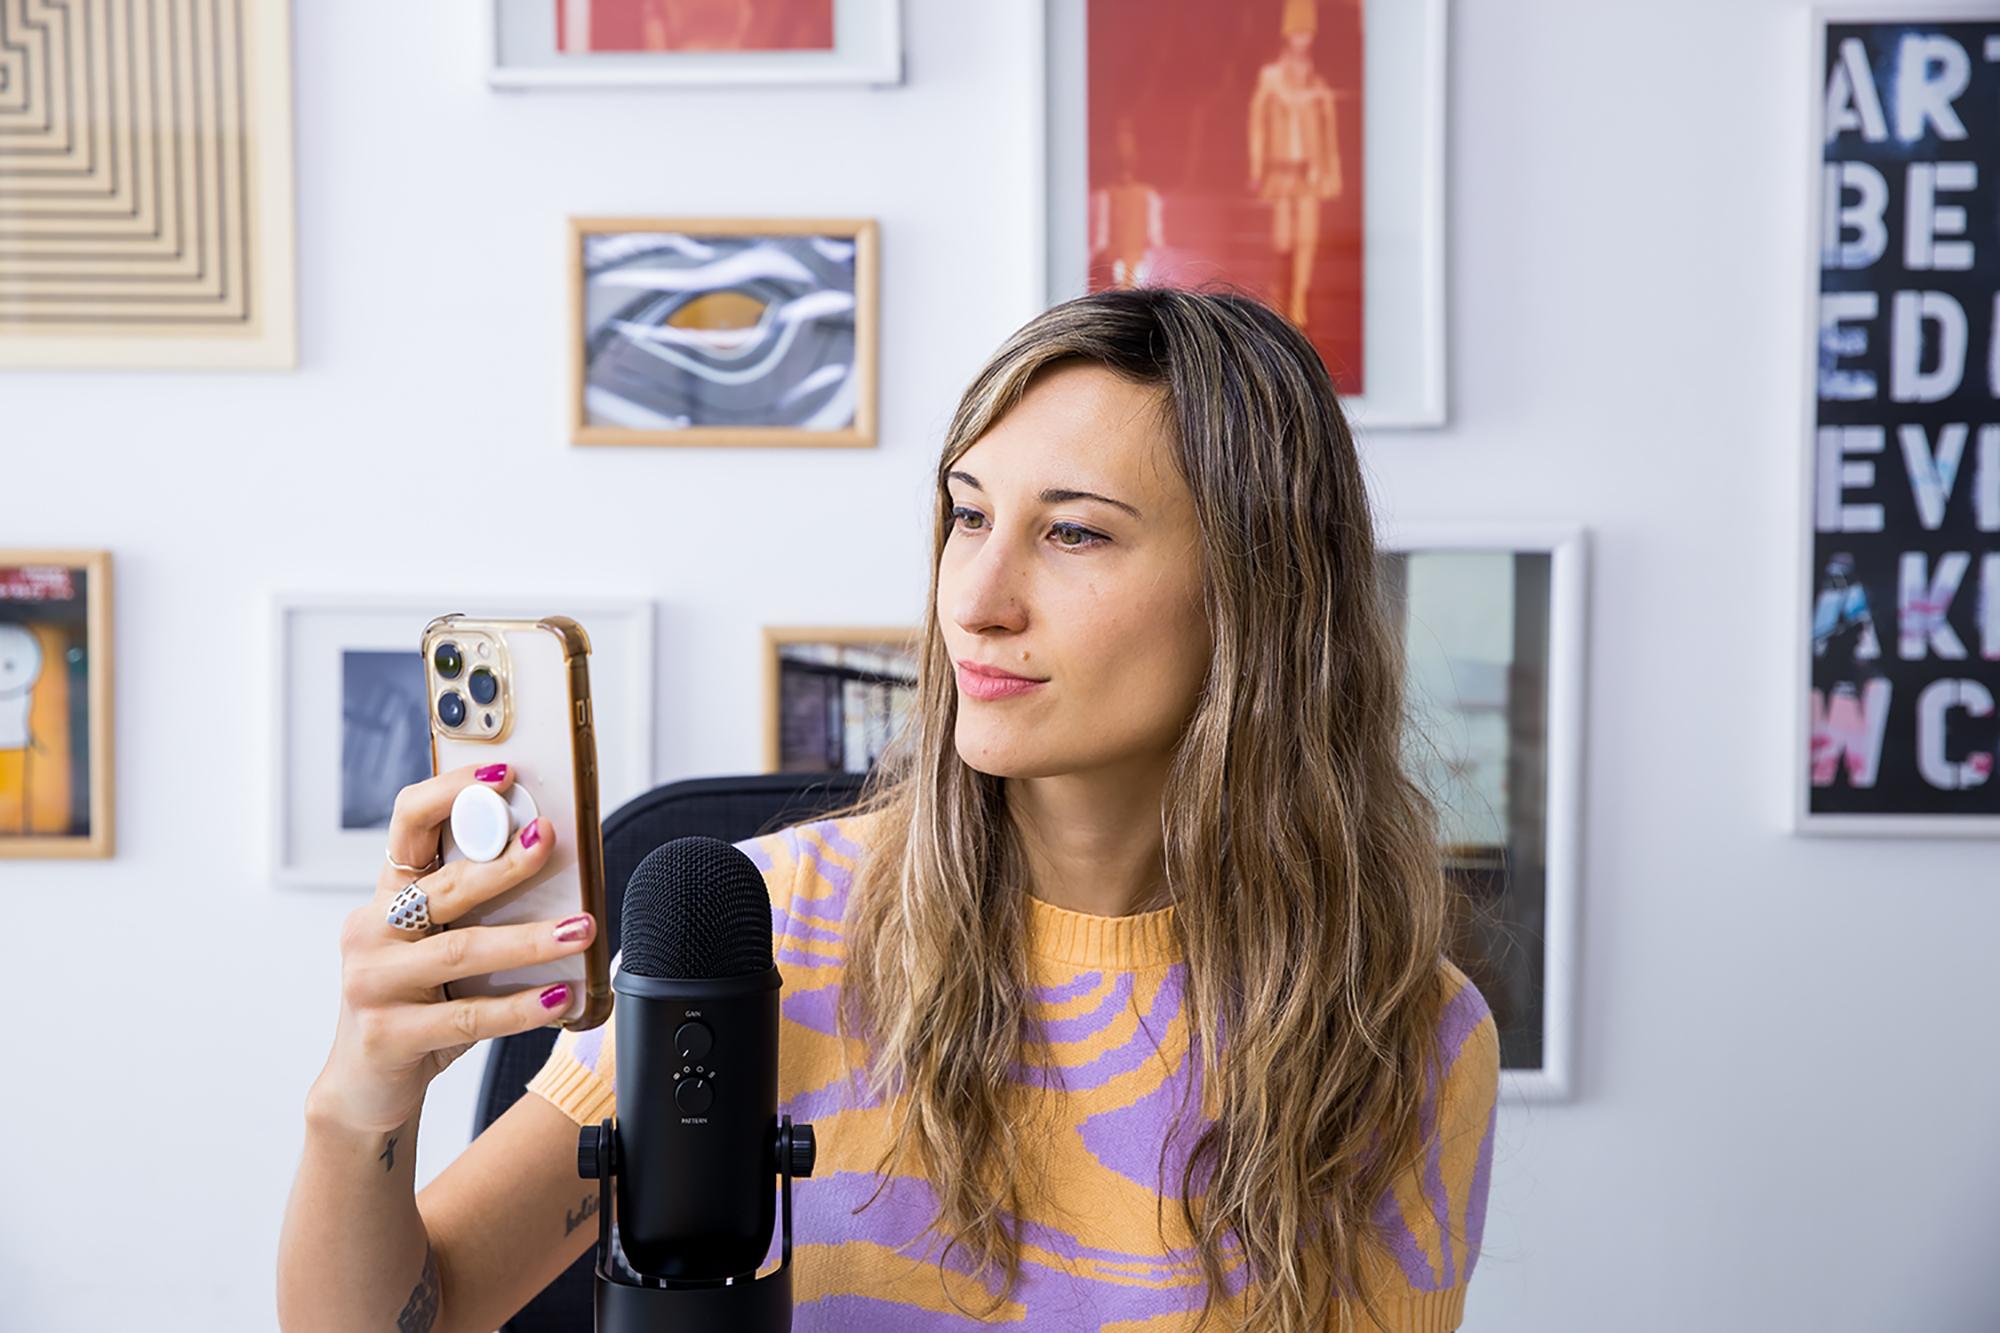
smartphone photography, a complete guide for
iPhone and Android. I'm Floor, and I have more than 13 years of
experience teaching and working professionally in corporate fashion and
portrait photography. I have covered London and Paris fashion weeks for
international magazines. I have an artistic work in contemporary photography
in which I use both my cannon and my
iPhone to take my series. I show my work in solo and
collective exhibitions, and I had won artistic
grants and awards. I also have a master
in contemporary rurating and I have curated my students portfolios
that helped them to start working
professionally in photography. I took photography into
South Around One as a hobby. And I could have never imagined where it would take me from being an amateur hobby to becoming a profession
and an art. With increasing
technology on mobiles, in the past few years, I've been taking more and
more photos with my iPhone. And I think it's amazing that we have such a powerful
camera at hand. On this class, you will have a complete guide on how to take creative photos
with your iPhone or Android and edit them like a
professional photographer. You will first learn the basics on how to use the
camera of your mobile, and then we will get
deeper into camera lenses, how to control the lighting, and the best camera modes for different types
of photographs. We will also cover my favorite part of
photography, the creative side. You will master
composition techniques, points of view, and I will share tricks to make your
photos look amazing. I will show you examples of my own work for you to be able to understand
the concepts. We will also talk
about how to curate your own photographs
and organize them in albums by
genres or themes. At the end, you will learn how to edit your photographs using two apps that are totally
free light room and snapset. You will be taught the tools that professional
photographers as myself use on our everyday
work to improve the lighting, the color, and to also
remove imperfections and create your own presets to
apply to a bunch of photos. This will save you
tons of time and will help you to develop
your unique style. I will explain
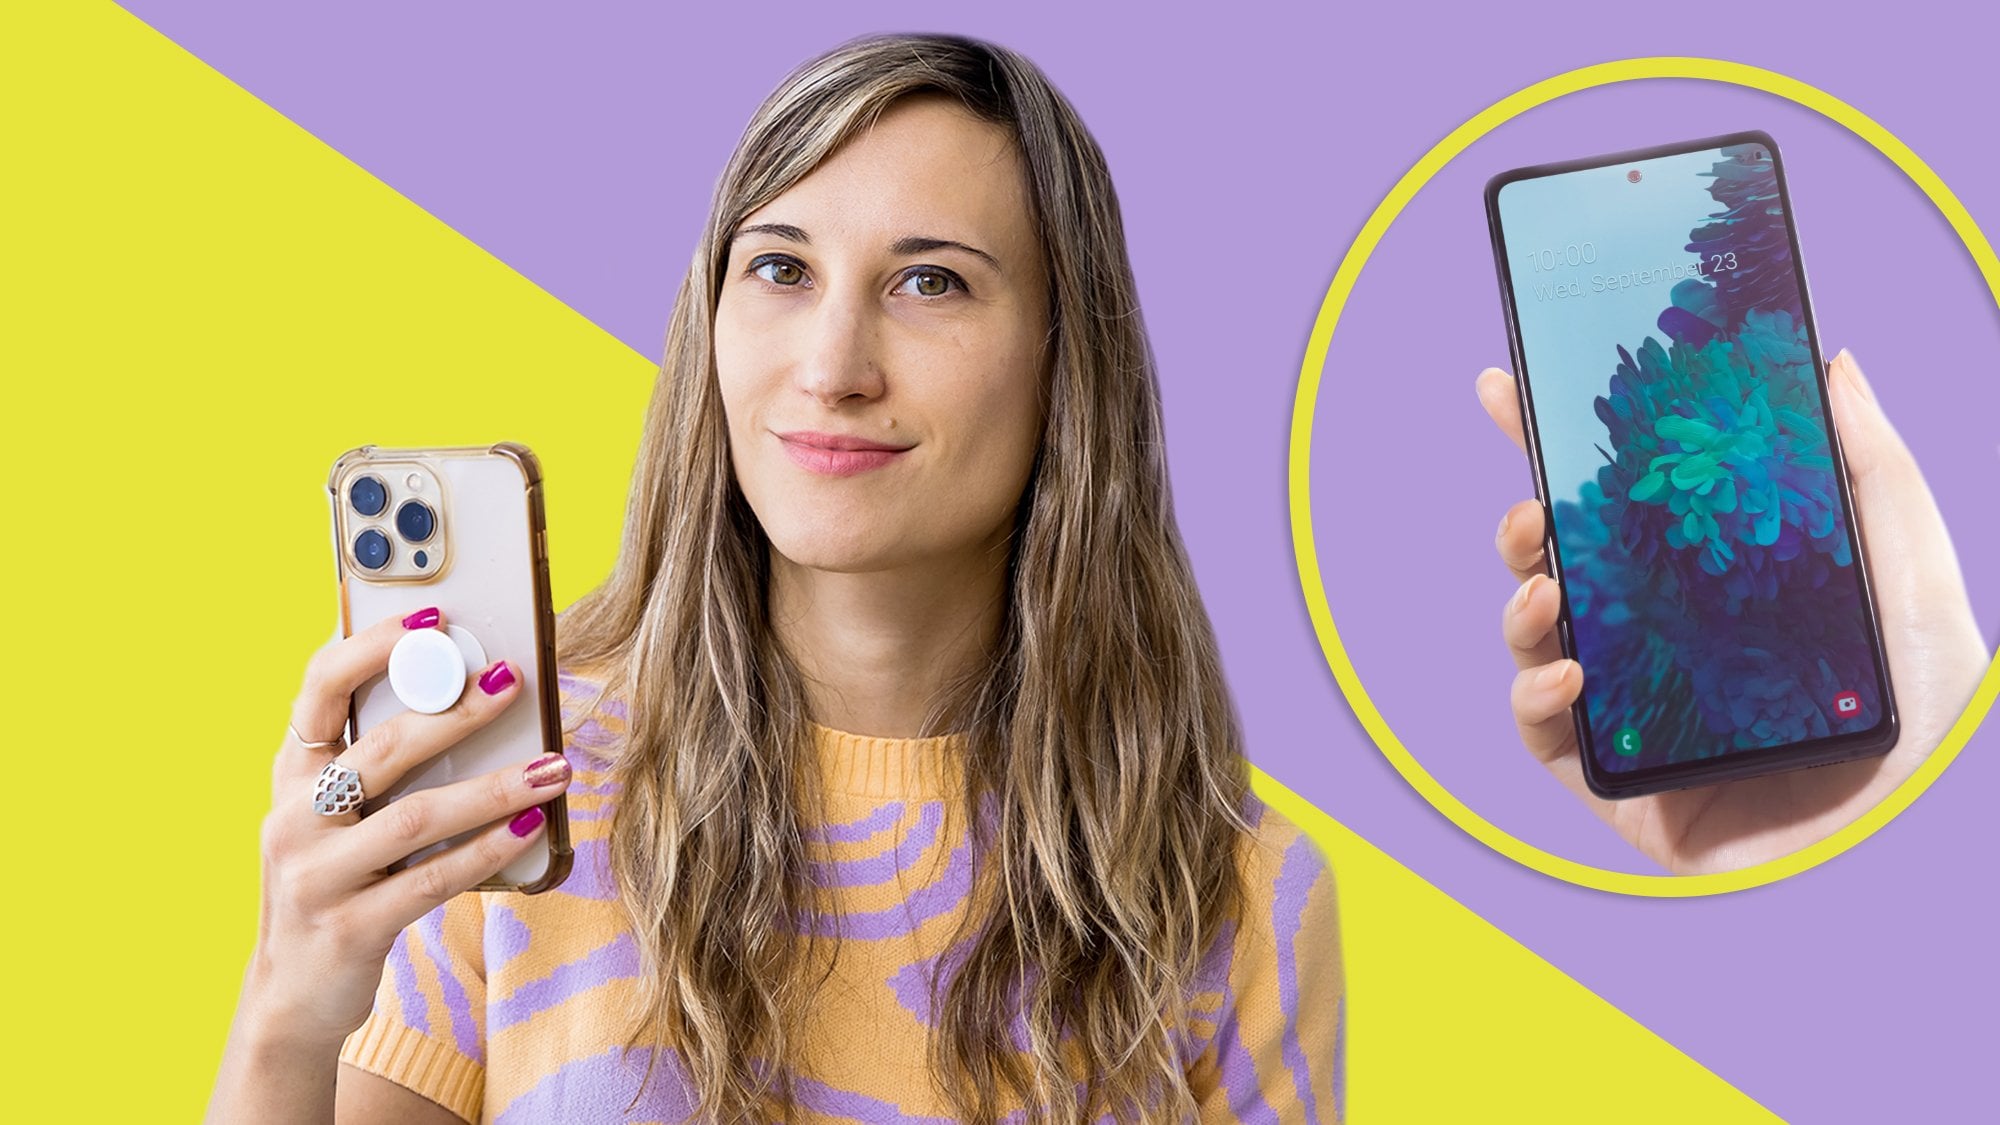
with my iPhone and sometimes also with
a Samsung mobile. In some lessons, I will
explain the two together, and in other lessons,
I will separate them. So please have
that into account. Most of the Android mobiles available resemble pretty
much these two brands. If you're using another
model or another brand, it could happen that
it doesn't have all the features
covered in this class, but you should still be
able to follow along the lessons and apply most of the concepts that
you will learn here. I invite you to do
the final project to practice what you
learned in the class. Without further ado, please speck your mobile and
let's get started.
2. Learn Some Basic Tips to Start: Let's get started. I would like to share with you my own photo tips that you can apply to your
own photography. First, we have the technique. This is an important
part of photography. To be able to apply
the technique, we have to, of course,
know the rules. As you probably heard, we first need to know the rules to later be
able to break them. Something equally
important is practice. As everything in life, trial and error
is the way to go. The more you practice, the better you will
become at something. Go out and take a
lot of photographs, but also start to take
them more consciously. Take a moment before shooting to see what
you want to shot, to apply the techniques that you will learn
in this course. Also, take a moment after taking the photo to review them, to see what you like
about your photo, in case you want to
improve something of your photo that will
help you a to learn. Finally, don't forget
to experiment. Once you know how
to do something. The problem is that
we tend to do it the same way over
and over again. Maybe we go on holidays
to a different place. But as we already know how
to take a nice landscape, probably all our landscapes
start to look the same. To change that, it's
important to use our creativity to
try new things. To leave our comfort zone
as often as possible. We will talk about point
of view later that are a great way to become more
creative with our photography.
3. Mobile Photography Basics: Camera Lenses: In this section,
we will talk about the basics of
mobile photography. Depending on your
iphone or Android, you might have one
or more lenses. I'm using an iphone 13 Pro. I have a telephoto ****, a wide angle ****, and an ultra wide angle ****. The first one is the
best four portraits. The wide angle is better for landscape
street photography. To use it on your mobile, just stop on the 05x ****. The ultra wide is the one
used for macro photography. To use it, you just need
to get really close to an object and your camera will switch to this
**** automatically. But we will cover it more
deeply in another lesson. In the next section. Remember to only use the zoom
that you see on the camera. Yes, on the screen or with the portrait mode
because these are optical zoom **** will be the
one that magnify the image. But if you zoom in
with your fingers, what will happen is that you
sum will be done digitally, the image will lose quality. You also have the selfie camera. Well I recommend to use
this one only for self. If you want to print
that photo later, Well, it won't have a lot of quality as the other lenses that you have available
on your phone.
4. Focus Control: We are now going to
cover focus control. You have to tap on the screen on the area that you want
to achieve the focus. You can have the focus on the foreground or
the background. If you have the focus
on the foreground, that area will appear sharp. But if you have it
on the background, then the foreground will appear blurry and the background
will be sharp. We will expand this more when we talk about
the portrait mode. To lock your focus
for upcoming shots, you have to tap and hold the focus area until
you see the A F lock. If you want to change the
focus to another area, you have to tap on another
area of the screen.
5. Iphone: Photo Tools: Now we're going to talk about the most useful tools that you have available in your
phone to use them. Open the camera up and then
tap the arrow at the top. You will see that the menu
appears at the bottom. On the left, you
will find the flash. You can turn it on or
off, or choose auto. Which means that your
mobile will choose when to activate
the flash or not. Depending the situation, I personally recommend to
use the flash only if you're shooting a person
or a small group of people in the night and you don't have a
lot of light available. But I will really avoid
it to shoot a landscape. Because as you will learn
later in this course, to shoot a night landscape, it will be better to
use the night mode. Next to the flash, you
will find the live mode, we will see that mode later, also in a special section. Then you have the
styles that are basically presets of tone and warm that you can
also personalize them at the moment that
you are shooting a photo. You can swipe between
the different styles. Standard rich contrast,
vibrant, warm and cool. If you want to customize
a photographic style, you can adjust the tone
or warm of each style. You just need to
drag the slider to the right or to the left
to adjust the value. If you bring the tone up, you will make a photo
brighter and more vivid. While bringing it down increases the contrast and
adds more shadows. If you bring the warmth up will hsee the warm
temperature in a photo, while bringing it down will
enhance the blue temperature. If you tap on the arrow
that looks like a circle, you can reset the values. It's important to note that photographic styles
are not filters. You cannot change them
after you took a photo. The only time that
you can change photographic style is
before shooting a photo. If you want to change
to a different style, you will have to take
the photo again. Next to styles, you will
find the format ratio. This is the aspect
ratio of an image. That will be the
proportion between the width and the
height of an image. You will find three sizes
in your mobile 43 square. And 16943 is the best
one since it uses the full megapixels of your camera square will be the
one optimized for Instaam. But unless you are only using
that photo for Instaam, I prefer to shoot in
43 and then crop it. When I upload it
to that platform, the aspect ratio of
your sensor is 43. That means that when you
shoot a photo in 169, you're actually using just
a part of the sensor. You are corroping the image. And as a result, you will have an image that has lower quality. Next to that, you will find
exposure compensation. You can move the slider
to the right or left to adjust the lighting to make
a photo brighter or darker. You can see that at the top left corner shows that you have applied
the exposure compensation. Remember to reset it to zero if you don't want
the same adjustment your upcoming shots. Next to that, you
will find the Tim. This is a great tool
when you want to take a photo and you want also
to be part in that photo, you will find two
types of timers, the 3 seconds and
the 10 seconds. One What I tend to
do is that I will place my mobile on steady place. I will set the timer
to 10 seconds, then press the shutter button. Then I will move with my friends and I will be
part of the photograph. Tap on the timer. You can select the
10 seconds timer. If you want to take a
selfie with the timer, you can change to selfie view and then tap on the
shutter button. And the timer will count 10 seconds and then it
will take the photo. If you prefer the
3 seconds timer, you can change to that one. Moving on, you will
find the filters. Filters are different
than styles. Because you can apply them. Also, after taking the photo, you are also able to
change the filter. If you didn't like the
one that you choose, you can drag the
slider to choose between the different
filters available. Then take a photo. If you want to change
the filter that you chose or if you want to
have the photo without it, just go to edit and then tap on filters and select a new one. Or choose original tap
done to save your edits. Or if you don't like your
changes, tap on cancel. I prefer to apply the
filters afterwards, but that is really up to you. Finally, you have the
option to shoot in row, tap on row, and
turn it on or off. You can also turn raw files on at the top corner
of your camera. The difference between a
JPG file and raw file is that JPG are files that have been compressed
by your mobile, which means they
are files that are going to be lighter
than the raw ones. They are files that have been
processed by your mobile. They will have a
greater lighting colors and also sharpness. The raw files, as the
name says in English, they are files that haven't
been processed. They are raw. You cannot use a raw
file, for example, to upload to Instagram
or to print an image, you will have to post
process that file, edit that file on an
app, on a program, and then converted to JPG to be able to print or
to upload to Instagram. Raw files take more
space in your mobile, but as a result, they have
more sensor data to work with, Meaning that you will
have more possibility to edit the colors, the lighting, also the
sharpness of an image. My recommendation for you
is to always shoot in PG, unless you want to take a photo that you're
going to enlarge. Let's say to do an
artwork you need really a lot of quality or you really want to edit that
image in detail. Then you can go for a raw file. A thing to note, when you shoot a photo in JPG and then
you shoot the same in raw. You won't see a difference in
the preview in your mobile, because actually your mobile
is sharing a preview in JPG. But you will see
it when you open the app that you
will use to edit. You will see that the
files are washed out. They don't have,
again, the color and the gray saturation as
we will see in JPG file.
6. Android: Photo Tools: We are going to see now how to find some basic
tools in Android. You will find a menu at the
top with different icons. On the left you
will find a flash. You can turn it on or off, or choose auto, which means that your mobile will choose when to activate the flash or not. Depending the
situation, I personally recommend to use
the flash only if you're shooting a person
or a small group of people in the night and you don't have a
lot of light available. But I will really avoid
it to shoot a landscape. Because as you will
learn later in this course to shoot
a night landscape, it will be better to
use the night mode. Next to that, you
will find the timer. This is a great tool
when you want to take a photo and you want also
to be part in that photo. What I tend to do is that I will place my mobile on
a steady place. I will set the timer
to 10 seconds, then press the shutter button, and then I will move with my friends and I will be
part of the photograph. Tap on the timer. You can select the 2 seconds, the 5 seconds, or
the 10 seconds. If you want to take a
selfie with the timer, you can change to selfie view, then tap on the
10 seconds timer. Then tap on the shutter button. And the timer will
count 10 seconds, and then it will take the photo. Next to that, you will
find the format ratio. This is the aspect
ratio of an image. That will be the
proportion between the width and the
height of an image. You can find four sizes
in your mobile 3491611. And full 34 is the best one since it uses the full
megapixels of your camera. The aspect ratio of
your sensor is 43. That means that when you
shoot a photo in 169, you're actually using just
a part of the sensor, so you're corroping the image. And as a result, you will have an image that has lower quality. 11 will be the one
optimized for Instagram. But unless you are only using
the photo four Instagram, I prefer to shoot in
34 and then crop it. When I upload it to Instagram, full aspect ratio is the most cropped and the one that
has the lowest resolution. You can see in this
example that 34 or 43 that is highlighted in light blue takes
the whole image, while the other formats
crop the photo. Moving on, you will
see motion photos. Motion photos puts a little
context into the making of the shot by letting you to capture a few
seconds of action. Before you lift your finger
from the shutter button, you will see the photo
as a little video. If you tap where it
says at the bottom, see motion photo, you
can see the full video. And it gives you the option
at the top to save the video, then you're able to share it. Another option that you have, again when you tap on
view motion photo, is to create a gift. You will see it at the bottom. You can choose which part
of the video you want to save it as a gift to
share with your friends. Finally, you will
find on the one icon, the image filters on
the menu at the top, you will see the filters option. Below it will appear different
options for you to choose. You will see the warm
filter, the cold one, and many others, like the
ivory filter, colorless, soft. At the end, you will see the
black and white filters, like the gray, the classic,
and black and white. With the slider, you can control the intensity
of each filter. If you take a photo with a filter and then tap on
the photo and go to edit, you will find the filters icon that is represented
by three circles. You will see that all the
filters appear again. So you can select another
one for your photo. Or even go back to the original photo
without any filters. Tap on Save if you want to
keep the edit on the top menu, you will find more filters to choose depending on the
model of your mobile. At the end, you will
have the phase filters, which allow you to make modifications to
your model's face. You're able to add
different filters. The first one is a
smoothness slide the bar to adjust it
to your desired level. You can also add the
tone filter again, change it with the slider. You will also find the Jo filter in eyes and nose again. You can adjust it with
the slider on the right, you will see a phase icon. If you tap on it, you can
turn on or off these filters. Finally, you have the option to shoot in a row to activate it, tap on settings, then format and advance options and then activate
the raw copies. The difference between a
JPG file and a Raw file is that JPG are files that have been compressed
by your mobile, which means they
are files that are going to be lighter
than the raw ones. They are files that have been
processed by your mobile. They will have a
greater lighting colors and also sharpness. The raw files, as the
name says in English, they are files that
haven't been process. They are raw. You
cannot use a raw file, for example, to upload to
Instagram or to print an image, you will have to post
process that file, edit that file on an app, on a program, and
then converted to JPG to be able to print or
to upload to Instagram. Raw files take more
space in your mobile, but as a result, they have
more sensor data to work with, meaning that you will
have more possibility to edit the colors, the lighting, also the
sharpness of an image. My recommendation for you
is to always shoot in JPG unless you want to take a photo that
you're going to enlarge. Let's say to do an
artwork you need really a lot of quality or you really want to edit that
image in detail, then you can go for a file.
7. iPhone: Live Photo. Creative Ideas & Long Exposure: Live photo is only
available for phones. If you're using an
Android mobile, please check the
lesson on Pro Mode. First, you need to tap on the right corner
and activate Live. When you take a photograph
using Live mode, you will see it as
a little video. Since your phone
records what happens 1.5 seconds before and
after you take the photo. This will give you the
possibility to choose a different key photo or
add other creative effects. To change the key photo, you will have to tap on Edit. After that, you will find at the bottom left the
live photos button. Tap on it, and move the
slider to change the frame. It will give you the option
to choose another key photo. Touch on where it
says Make key photo. To choose that selected photo as the one that
you like to keep. Another thing that
you can do is to tap on live and choose loop or bounce for
a creative effect. This could be
useful for example, for interm stories
or just to have fun. But for me, the most amazing
feature is long exposure. Go again to live and
tap on long exposure. This one is particularly
useful if you're shooting water to achieve the fact
that water looks like silk. Instead of seeing the
frozen drops before. This effect was only possible using a DSLR or analogue camera. In the lesson of
manual photography and exposure triangle, I will explain to you
what is long exposure. You will be able to understand it and apply it for
your own photography. You will also be able to control the exposure manually
using an app.
8. iPhone: HDR: What is HR? When I
ask this question, some of my students tend to
say high definition, but no. Hdr stands for High
Dynamic Range. Dynamic Range means the range of the lightest stones to the
darkest stones within a photo. The higher the dynamic
range is in a photo, it will have more detail between the areas of the highlights
and the shadows. It is helpful for high
contrast situations. What will happen is
that your mobile will take three photos at
different exposures. A bright image for exposing
correctly for the shadows, a neutral image
for the mid tones, and a dark image
for the highlights. And we'll plan them together. In the end, you will have
a photo with more detail. If you don't use HDR, it might happen that the
sky turns over expose. In some photo ops, I recommend to have it on
for almost every situation. The newest iphones have the
HDR setting by default, meaning that you
cannot change it. But older iphones or other mobiles still give you the option to turn it
on or turn it off. To turn it on, you have to go to the main settings of
your iphone and browse camera and then scroll
down until you see HDR. Then you can turn it on. In older mobiles, I used
to turn it off when I was shooting a portrait
because I didn't like it. It looked a little
bit artificial. But you have to really test it yourself according to the
mobile that you have, your model, and see if
you like it or not.
9. Android: HDR: What is H D R? When I ask this question, some of my students tend to
say high definition, but no. H DR stands for
High Dynamic Range. Dynamic Range means the range of the lightest stones to the
darkest stones within a photo. The higher the dynamic
range is in a photo, it will have more detail between the areas of the highlights
and the shadows. It is helpful for high
contrast situations. What will happen is
that your mobile will take three photos at
different exposures. A bright image for exposing
correctly for the shadows. A neutral image
for the mid tones. A dark images for
the highlights. And we'll blend them together. In the end, you will have
a photo with more detail. If you don't use HDR, it might happen
that the sky turns over exposed in
some photographs. I recommend to have it
on for almost every situation to turn
it on on Android. When you are in the camera up, just go to settings there Bros, until you find HDR and turn
it on in older mobiles. I used to turn it off when I was shooting a portrait
because I didn't like it. It looked a little
bit artificial. But you have to really test it yourself according to the
mobile that you have, your model, and see if
you like it or not.
10. Exposure Compensation: Let's talk now about
exposure compensation. When you tap on the screen, you not only adjust
the focus but also the exposure when you tap as sun will appear
for iphone users, or it could be a light
bulb for Android users. Depending on your mobile, you can move the slider
to the right or the left, or up and down to adjust the lighting to make the
photo brighter or darker. Imagine that you are on an outdoor setting and there is a lot of
light around you. Probably like to decrease
it a little bit. Or maybe you are indoors and
the setting is quite dark. You would like to increase
the light a little bit. This is a great
feature to adjust the lighting without
having to use the flash. In upcoming lessons,
we will see how to edit your photos
using light room. And I will show you ways
to adjust exposure, but always try to get the best photo at the time
that you're shooting.
11. BONUS: Iphone Tips: How to Open Your Camera App & Burst Mode: Let's see now how to open the camera of your
mobile really fast. From the lock screen, you can
swipe from right to left. It will open the camera up. Also from the lock screen
you can directly tab at the bottom right corner
and open it from there. When you are on
your home screen, you can go to the
right top corner with your finger and drag down. Depending on the customization
that you did previously, you will see your
camera up there. If you press for a few seconds, it will give you the
option to take a selfie, a video, a portrait, or a portrait selfie. We are going to cover
now the burst mode. It will give you
the possibility to shoot many photos at a time. You have to open the camera of your iphone and then swipe the shutter
bottom to the left. You have to lift your finger
when you want to stop. Then you can select from all
the photos that you took. The ones that you want to keep, just tap on the photos. Then it will give you the option to keep everything or to keep only
the ones that you selected. The birds mode is helpful to shoot a person or an
object that is moving, so you can later select the best photo fro and
interaction that you wanted, like I'll show you in this
example that my niece's jump.
12. BONUS: iPhone 17 Pro Photography Update (2026): IPhone 17 update. When you open the camera app, you will see two main
modes, photo and video. If you swipe left or right, more modes will appear. We have already seen
these modes before. In portrait mode, tap the
three dots at the top to access the aperture control where you can adjust
the depth of field. We have a new mode
called spatial mode. This mode captures real
depth using two cameras, creating photos and videos with a three dimensional effect. This is still an
emerging technology, but you can see a preview of
the effect on the iPhone, but it can be experienced fully on devices like
Apple Vision Pro, which is Apple's headset for viewing immersive
three D content. After you take a special photo, if you open it in the Photos
app and tap this icon, the iPhone will show
a three D preview. To see the effect, you need
to move the phone slightly. In photomode on the top right, you will also find tools that we already explore in
a previous lesson, although now they are located in a slightly
different place, and there are a few new ones, flash, live mode, timer exposure, photographic
styles, aspecto. Just like we saw before, you can customize the
photographic styles by moving your finger
inside the rectangle. When you move your
finger to the left, you will see cooler tones, and if you move it
to the right, you will see warmer tones. If you move it up or down, you will see tone vations. If you don't want to
keep the changes, simply press reset. Photographic styles allow you to customize the look of the
image before taking the photo, adjusting tone and warmth
with a visual control. Filters, it adapts
to the scene and preserves natural tones,
especially skin tones. Regarding the night mode, it will only appear when the
camera detects low light. In the top left corner, you will find the
format option where you can choose between JPG or Row. Remember that JPG is the most compatible
and compressed format. Row is a digital negative and contains more
information for editing. If you want to
review these tools, you can always go back to
the iPhone tools lesson, since these are essentially the same features we
have already covered. They are just located
differently compared to other iPhone models.
One quick note. If you go to settings, camera and formats, remember
to select most compatible. If you want your
images, save as JPG. This format is compatible with almost all
computers and programs, and it's also easier to share. If you select high efficiency, the iPhone will save the
images as hay files. They appear as HAC. These files take up less space and retain
more information, but they might not be
compatible with all devices.
13. BONUS: Android Tips: How to Open Your Camera App & Burst Mode: Let's see now how to open the camera of your
mobile really fast. On the lock screen, press the power button twice and you will
open the camera up. Also from the lock screen, you can tap on the camera icon
and slide your finger up. And you will open the up
or from the home screen, browse for the camera icon
and you will open it. We are going to cover
now the burst mode. It will give you
the possibility to shoot many photos at a time. When you are about
to take a photo, press the shutter button
and move it down. As long as you hold it there, you will be taking photos. When you lift your
finger, it will stop. If you go to your images, you will be able to see
all the ones that you took and select the ones
that you want to keep. Just stop on the photos that you like and then on
the arrow below. And it will give you
the option to keep only that photo and delete
the unselected ones. Then you can save the image.
14. Camera Modes: Portrait Mode on iPhone and Android: On this section, we will cover the different camera modes that you have available
on your mobile. Let's start with
the portrait mode. This is a great mode
to shoot people, but you can also use it to show details and
textures of things. If you have a fashion brand
or you sell accessories, it's a great way to show the details and the
texture of your clothes. If you're doing
landscape photography, it's great to take a
photo of the whole space. But also it's good to get closer to
something that you like, something that call
your attention, and use the portrait
mode to shoot that. This is a way to get more involved in what's
happening in a place. Select the portrait
mode on your phone. In newer phones you
have two options, the three X and the one X zoom. In Android you will
have to tap on more. It could say portrait or focus, or **** blur on phone. If you tap on the
upper right corner, you will find an F.
It stands for the F, stop, the aperture of your ****. This resembles analog
or DSLR cameras that have lenses with
different apertures. The smaller the F number, you will have a shallower
depth of field. The bigger the F number, you will see everything more in focus or have a deeper
depth of field. In photography, death
of feel is the sound within a photo that appears
sharp and in focus. It extends in front of and behind the point where
we have our focus point. Subjects located in this
area will be in focus. Subjects outside this area
will be out of focus. It's important to adjust
the F number correctly, because if you have
two persons or two objects in a photo and you don't use the
correct F number, it could happen that
the other person or the other objects
appears out of focus. You can see in my example that by changing the F number
or depth of field, I make the object at the
back to appear in focus two. If you use an Android phone, instead of seeing the F number, you will see a slider that you can move to the right
or to the left. That will have the same effect, you will be changing the depo
feel of your photograph. Another thing to
have into account, as we mentioned before when
we talk about focus control, we can choose to tap on
the subject that is in the foreground or the subject
that is in the background.
15. BONUS: iPhone Portrait Lighting: In portrait mode, you can tap the lighting control symbol
to select a lighting effect. You have the regular,
that is natural light. The face is shown clearly and
the background is blurred. Then you can choose
photo studio light. With this one, the
face will look brighter and the photo
will have more light. Overall, simulating
a studio light next to it is counter light. With this one, the lighting
effect will be more dramatic. The face will appear
with deep shadows, with some areas looking very
bright and others very dark. Following that one, you
will find the stage light. With this one, the
face will stand out as the background
will turn black. Then you will find
stage light mono. This one is similar
to the previous one, but the photo will
turn black and white. Finally, you can find
high key light mono. With this one, the face will turn black and white and
the background white. After choosing the lighting
effect that you like, tap the shutter button
to take the photo. After shooting the photo, you can remove the lighting
effect if you don't like it to do this, tap on the photo. Then on edit, and afterwards you can change
the effect or remove it. Also, each effect gives you the possibility to adjust
the intensity of it. Move the slider to
the right or left to make it more intense
or less intense. To change the effect,
tap where you see the effect symbols and move
the slider to the side. If you want to remove it, chose natural light, click
on Done to save the photo.
16. iPhone: Macro Photography: From the iphone 13 Pro onwards, The iphone has the feature
of macro photography, meaning that your
iphone is designed with this ultra wide
**** that gives you the possibility to
take a short photo of an object very
close to the camera. Like even this close to do it, you just have to get really, really close to an object. It could be as close
as 2 centimeters and the camera will automatically switch to the ultra wide ****. This is a fantastic
way to shoot details, textures, wildlife or
anything that you want.
17. Android: Macro Photography: We will continue with macro
photography on Android, on your mobile, you
just have to go to more on your settings
and select Macro. Then you just have
to get close to an object around three
to 5 centimeters. With this mode, you can
take a sharp photo of an object that is really
close to your camera. This is a fantastic
way to shoot details, textures, wildlife, or
anything that you want. Some androids might not
have the macro mode, so you just need to tap
on the drawing of a close up and get really
close to your subject.
18. iPhone: Panorama: Panorama is a fantastic
mode to shoot. Landscapes. To select
this mode on iphone, scroll to the right until
you see the panel mode. You have to press the
shutter button one time and start moving slowly in the direction
of the arrow. When you're ready, press
the shutter button again. On phone, you can tap the arrow to pan in the
opposite direction. I see that people tend to do the panorama like a semicircle. This can work well if you're
shooting on a garden, but sometimes it could lead to a photo that looks like this. The witch was actually straight. If you want to avoid that, the best thing to do is to place your mobile parallel to the wall and keep
moving straight. If you want a vertical panorama, just rotate your mobile to the landscape orientation
and move upwards. To achieve better panoramas, I recommend using a gimbal, that is an stabilizer
for your mobile.
19. Android: Panorama: Panorama is a fantastic
mode to shoot. Landscapes on Android. Go to the right
until you see more, and then choose
the panorama mode. You have to press the
shutter button one time and start moving slowly in the direction
of the arrow. When you're ready, press
the shadow button again. I see that people tend to do the panorama like a semicircle. This can work well if you're
shooting on a garden, but sometimes it could lead to a photo that looks like this, The which was
actually a straight. If you want to avoid that, the best thing to do is to place your mobile parallel to the wall and keep
moving straight. If you want a vertical panorama, just rotate your mobile to the landscape orientation
and move upwards. To achieve better panoramas, I recommend using a gimbal, that is an stabilizer
for your mobile.
20. Night Photography on iPhone and Android: Now we're going to
cover the night mode, both on iphone and Android. And this is a great mode
for low light situations. On Android, you need to tap on more and then select night. On iphone, it turns on
automatically when the camera detects a situation where we don't have a lot
of light available. I want to mention that the night mode is
only available in iphone 11 or later
on dark settings, The night mode button
will appear at the corner of the screen and you
can turn it off or on. When it's on, you can tap
on the arrow at the top, then tap on the icon of the night mode at the
bottom to be able to use the slider to move between the auto
and the max timers. Changing the Tim Er will
allow you to control the exposure time when
you're using auto. Your iphone will set the
exposure time automatically. With Max, it will use the longest exposure
time available. The longer the exposure time, your phone will
capture more light. This is the first example that I took when I set
the timer to auto. This is the second example. When I set it to max, the exposure time was 1 second. You can appreciate how the
whole image is brighter, but especially you can see
it on the darker areas. How the black of the background has more details in this photo, where as in the previous one, it is a more intense black. On the newest Androids, you will see that you will have a timer very similar
to the one in iphone. But older Androids won't have the option to change
the exposure time. It will be just set to auto
to achieve the best result. With this mode, you
will need to keep your mobile steel
or to use a tripod. If you have camera movements, you might get a blurry photo. What happens is
that the shutter of your camera is being open
for the time that you set. If you move your camera
during that time, as your camera is
capturing the light, you will get a blurry photo. If you want to know
more about the shutter, I explained that
on the lesson on manual photography,
please check that.
21. Manual Photography. Exposure Triangle: In this lesson, I will talk
about manual photography. You know that apart
from your mobile, we need light to be
able to see a photo. We control the light using
the exposure triangle. Understanding these concepts
will help you if you want to manually control the
settings of your camera. If you're using an Android, the way that you will
do that is by using the Promode if you're
using an iPhone, it will be through an app
that is called Lightroom. In upcoming lessons, I will explain you in detail how to use the promode on Android and
the Lightroom app on iPhone. Let's start now with
Exposure Triangle. We have three things to
control the aperture, the share speed, and the ISO. Aperture in photography is the opening of the camera lens, which is related
to the amount of light that passes
through the camera lens. I explained aperture before
with the portrait mode, but I wanted to
repeat the lesson here just to make sure that
you understand the concept. The aperture is measured
with the F number. The smaller the number, you will have a
shallower depth of fill and the bigger the number, you will see everything more in focus or have a
deeper depth of fill. In photography,
Death of Phil is the one within a photo that
appears sharp and in focus. It extends in front of and behind the point where
we have our focus point. Subjects located in this
area will be in focus. Subjects outside this area
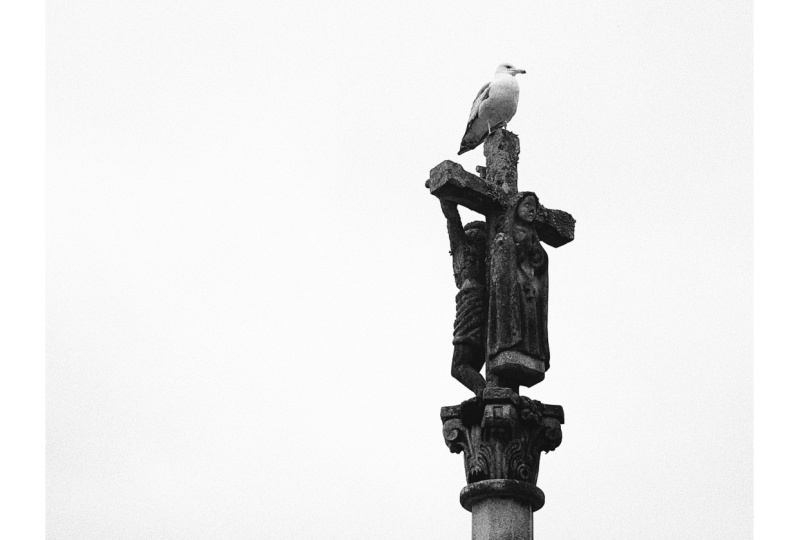
will be out of focus. In this example, I use
an F number of 1.4. The focus is in
the little angel. And as I have a
shallow the ffill, you can see that the
foreground is out of focus and also
the background. In the second example, I use an F number of 16. And again, the focus is
in the little angel, but as I use a bigger F number, I have a deep depth of fill. So I expanded my focus area both to the foreground
and the background. Another thing to have into account is that the
smaller the F number, more light will enter
to your lenses. The bigger the F number, less light will enter
to your lenses. The next thing that
we are going to talk about is the shutter speed. This is the amount of time that the shutter of your
camera remains open. A slower shutter speed
allows more light in. So the photo will be brighter. This is ideal for
photos taken at night. Also, a slower shar speed
will capture more movement. This example that I'm
sharing with you, I was able to capture the
movement of the dancers. I recommend to use a tripod for this type of photography
because if not, you will also have
your camera movement. Faster shut speed
allows less light in. This is helpful for
capturing photos of fast moving objects to be
able to freeze the subject. A shared speed of 1/125 is a standard when you don't
have a moving subject. If you're shooting sports
or other types of movement, you will want to use a
higher shutter speed, such as 1/250 or even faster than that
to freeze the action. In my example, I use 1/250
to freeze the model. When you're using
these high speeds, make sure that you
have a lot of light available for a
well exposed photo. The third element
that we're going to talk about is the isSome. This controls how sensitive is your camera sensor to light. Low values are for
brightly lit objects. Higher values are for
poorly lit objects. Have in mind that the higher
the IO that you're using, as your camera sensor is being
more sensitive to light, you will have more
digital noise. In the example, you can
see that at higher levels, the digital noise
is more visible. I recommend to try to keep your eyeso as lower as possible. But of course, if
you are indoors and you need more light, you will have to
increase the Ezo. Always check that
the digital noise that you're seeing
is not too bad. When you're shooting
night photography, my advice is to keep your eyeso as lower as possible
and instead, use a tripod and use
slow shutter speed. With that, you're allowing a lot of light to
enter your camera, but without having to decrease
the quality of it using a higher IO that will turn to a photo with a
lot of digital noise. In my example of the city
of New York at night, I use an ISO 100 and kept my
camera on a steady place.
22. iPhone: Manual Mode with LR App: On iPhone, if you want to manually control the
settings of your camera, you will have to download
an app called Light Room. We will use it later
for editing too. This one is free, and you will find it
in the App Store. Remember what we saw
on the previous lesson on manual photography
and exposure triangle. This app will only allow you to change the share
speed and the Io, but not the aperture. So remember that if your
most important thing in the photo is to be able
to adjust the aperture, you will have to do that with the portrait mode that we also
saw on a previous lesson. Open the light room app, go to camera and then select
professional or promote. On the left side, you will find the control to adjust the
exposure compensation. You can move it to
compensate your exposure. The several lines show you which areas of the
image are overexposed. Next, you can control
the shutter speed. See that at the top, you will find the shutter
speed that you're using. Moving to the right
gives you slower speeds, which means more light
will enter to your camera. Moving to the left
gives you faster speed, which means that less light
will enter to your camera. If you press reset, you return to the
default values. Then you can adjust the Isom. So if you move the
slider to the right, you will be using a higher ISO. So your camera will become
more sensitive to light, so more light will enter to it. If you move the
slider to the left, you will be using a lower ISO and less light will
enter to your camera. If one of the
setting is on auto, the app will automatically
compensate by changing the other value to
maintain a correct exposure. For example, if you change the ISO while the shutter
speed is on auto, the app will
automatically adjust the shutter speed for you
to take full control, set one value manually first, and then adjust the
other another tool that you have is the
white balance tool. It will help you to
keep the colors of your image as true as
possible to the original. The different types of light are represented
with these icons. Aw, B means automatic. So your mobile will adjust the color temperature
automatically. You have Tuxen and fluorescent
for indoor lighting. Daylight, then you have the
cloudy color temperature. You have also the
eyedropper tool, which allows you to manually set the white balance by selecting
a neutral reference area. I picked a white sheet of paper
to use it as a reference. You need to select
the light icon according to the
environment you're in. You also have the
manual focus tool where you can adjust
focus and blur manually. The green border shows you
when the photo is sharp. Depending on your
phone, you will have the option to use
white ultra white, telephoto, as we saw
in previous lessons. With a log icon, you
can log the exposure. You also have filters
you can apply. This isn't something you
will normally find in a manual mode on a DSLR camera, for example, but
I tell you about it because the option is
available here in the app. By default, the app will capture the photo
in the DNG format. This is a digital negative
format created by Adobe. It works the same
way as a Raw file, which I explained earlier in the photography
tools section. Remember that a DNG file, just like a raw file is
much heavier in size. You need to process
it and it's not compressed or ready
to use like a JPG. So I recommend to
change it to JPG.
23. Android: Pro Mode (manual mode): Let's continue with the
pro mode on Android. This mode allows you to manually control the
settings of your camera. Remember what we saw on the previous lesson on manual photography and
exposure triangle. Most of the Android
mobiles will only allow you to change the
share speed and the isome. Meaning that the
upper tour will be set automatically
by your mobile. It could happen that
in a new model, you will be able to also
adjust the per tour. But remember, if your
most important thing in your photo is to
adjust the upper tour, you will be able
to do that using the portrait mode as we
saw on a previous lesson. To use the pro mode scroll to the right on the
menu of the camera of your Android until you see
more then tap on pro mode. Tap on the icon of the shutter speed to
be able to change it. If you move the
slider to the right, you will be using a
slower shutter speed, and more light we
enter to your camera. If you move the
slider to the left, you will be using a
faster shutter speed and less light we
enter to your camera. You can also adjust the O. If you move the
slider to the right, you will be using a higher o, and more light we
enter to your camera. If you move the
slider to the left, you will be using a lower iso less light will enter
to your camera. You will see that when you change the iso or
the shutter speed, the EV will change two. E V means exposure value. It indicates the amount of light obtained from the combination of the iso and the shutter speed. If it goes red or gray
and a minus appears, the camera is telling
you that the photo is under expose,
so it's too dark. What you can do to solve
this is to increase the IO or use a
slower shutter speed. Doing any of the two adjustments will make your camera
to capture more light, so the photo will be brighter. On the contrary, if you
see that a plus appears, the camera is telling you
that the photo is over, so it's too bright. What you can do to solve
this is to decrease the iso or to use a
faster shutter speed. Doing any of these two will make your camera to
capture less light, so the photo will be darker. If your mobile has a
white balance tool, it will help you to
keep the colors of your image as t as
possible to the original. You can set the
color temperature according to the
situation you are in. In photography, the
color temperature is measured in calvins. For example, the
color temperature of daylight is 5,500 calvin. On the promote tap on white balance and move the
slider to the left or right. If you move the
slider to the left, your mobile will adjust
the color temperature, so it looks colder. If you move the
slider to the right, we adjust the color temperature, so it looks warmer. We will expand more about
color temperature in the section that we will talk about color editing
in line room.
24. Composition: Framing: Composition in photography
is the way in which we arrange the visual
elements within our frame. To compose is to create. We can think of
the composition of our photographs as an artist
that design an artwork. The first thing that we have
to choose is the framing. The frame is the portion of
the image that we decide will get inside our photograph. We have three orientations
to frame our photos. It could be horizontal,
vertical or diagonal. The horizontal orientation
is mostly used for landscapes and
shooting video. Nowadays, that lots of people
are posting on Instrum most of photos that you will
see around are vertical. So you probably are seeing a lot of vertical
landscapes, too. This also applies for videos. As everyone is doing
stories or the reels, you will see that most of the
videos are also vertical. In the old days, the
vertical orientation was mostly used for portraits
or fashion photography. Regarding composition, what
we choose to include inside the frame is equally important to what we choose to
live outside the frame. In this example, you can see that there were
tourists on the right. So by shooting the photo in the vertical orientation,
I avoided them. You can do the same if you see other distracting
elements in your frame, such as junk or other
things that you don't like. The third option is to use
the diagonal orientation. For this one, you will
have to tilt your phone. This creates an illusion
of movement and it is often used
for extreme sports. This example, I took it at offensive competition at the
Olympic games in London, so you can see how the image
has more movement when it's tilted than when it's straight. Something important
the photography is to be clear with
your statement. If you want to shoot a
diagonal photograph, then make it look diagonal and not just
a little bit because it could look like it's more a mistake than
really your decision. You can try this framing for
all types of photography, not only sports or landscapes, you can also shoot portraits. In this example, I tilted my camera horizontally
like this. And in this other example, I tilted vertically like this.
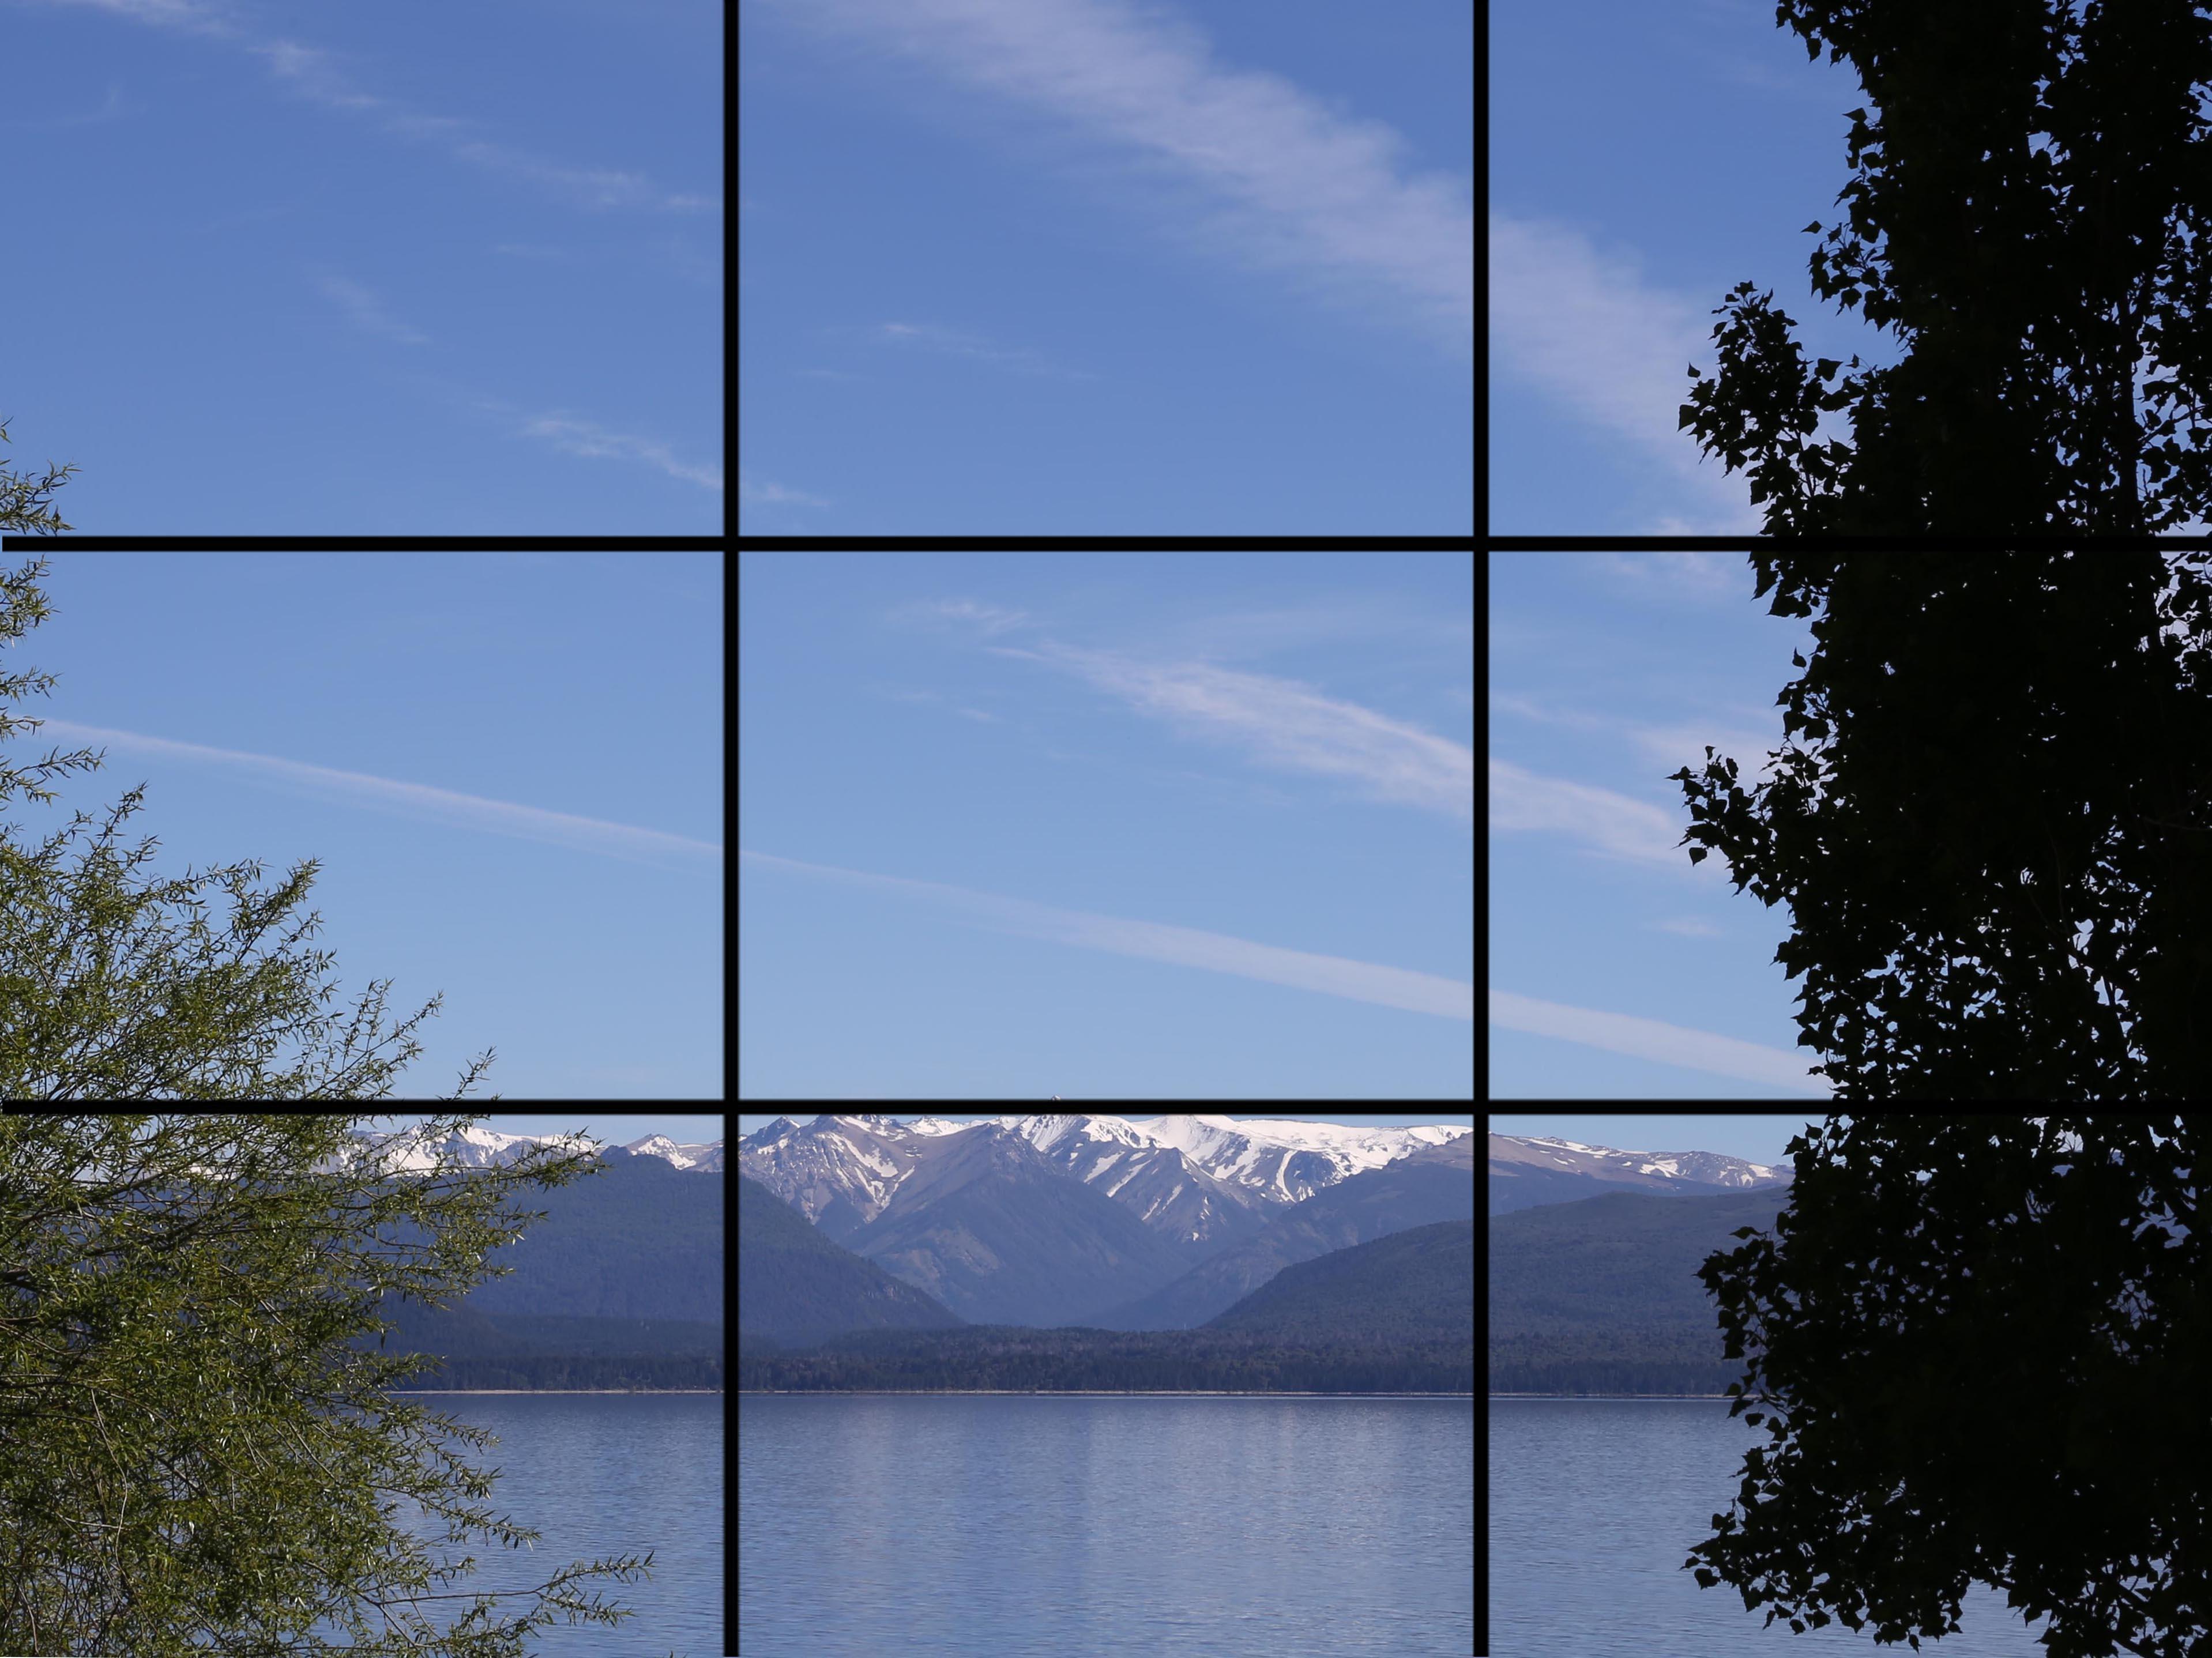
25. Rule of Thirds: The rule of thirds is a composition technique
that places your subject of center in the photograph to the left or right
third of an image, leaving the other two
thirds more open. The rule of thirds
generally leads to, well composts and balance shots. It is called Rule of
thirds because we have three vertical thirds and three horizontal ones in the
intersection of the lines, we can imagine four points. The idea is to place our most important object
in one of these points. Of course, we can use more than one object and
use more than one point. I'm sharing now some examples of the same sculpture and you can see how I play around
with the subject, placing it in the four
different points. To be able to use this
rule more easily, you just have to turn the grid on on your mobile, on iphone. Just go to the main settings of your phone and brows
the camera up. Then turn on the grid. If you go back to your camera, you will see it now on
the screen on Android. When you are in the camera up, go to the settings, and there you will
find the grid. And you just have to turn it on where it says three by three.
26. High and Low Horizon: We can also use the rule of thirds to know where
to place the horizon. People tend to place
the horizon in the middle because they
think the middle is good. But actually, it could lead to a photo that is a
little bit boring. It will be better to choose a high horizon or a low horizon. Of course, it depends
on what we want to give more importance to.
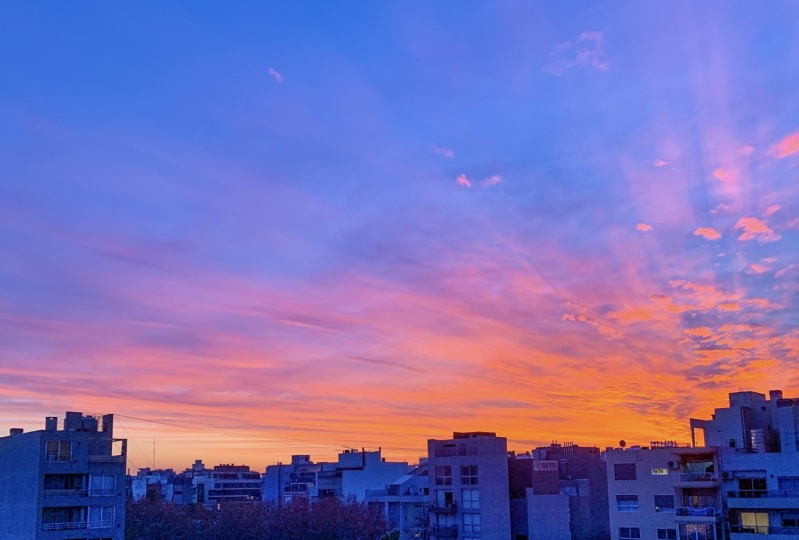
What do you think? Why did they choose
a high horizon for this photo and why did I choose a low
horizon for the second? On the first one, my priority was to give importance
to the view, the island, the water. On the second one, my
priority was the sky. I like those clouds with
shapes that look like lines. That's why I placed my
horizon at the bottom third.
27. Symmetry & Asymmetry: You can use the rule
of thirds both for asymmetrical and
symmetrical photos. If you want to take
a symmetrical photo, you just need to imagine a line in the
middle of the grid. And then plan your composition according to that symmetry. As we saw at the beginning
when I explained this rule. When we use the grid
as a reference to know where to place our subject
of center in the photograph, the composition of
our photo will be asymmetrical as the example
I'm sharing with you here.
28. Perspective: Perspective is an
optical illusion that serves to create a three
dimensional sensation. In a photograph, the
world is three D, but our photographs are always two D. Depending
on the way that we connect the foreground,
the middle ground, and the background,
we can increase the three dimension in our photos by adding an
element to your foreground. You can increment
the perspective in a photo as in this example
that I'm sharing with you. It is also important to use
a wide angle **** that, remember this is the best ****
for landscape photography.
29. Negative & Positive Space: It's important to
think on the way that we use the positive
and negative space. The positive space
is the area that is full in which we have
objects or people. The negative space is
the area that is empty, where we have the
sky or the ground living negative space
helps the viewer to focus on the subject or subjects and avoid
other distractions. In this example, I like the minimal look
of the landscape. So my focus was the man walking towards the
big tree on the left. The man and the tree
are the positive space, underground and the sky
are the negative space.
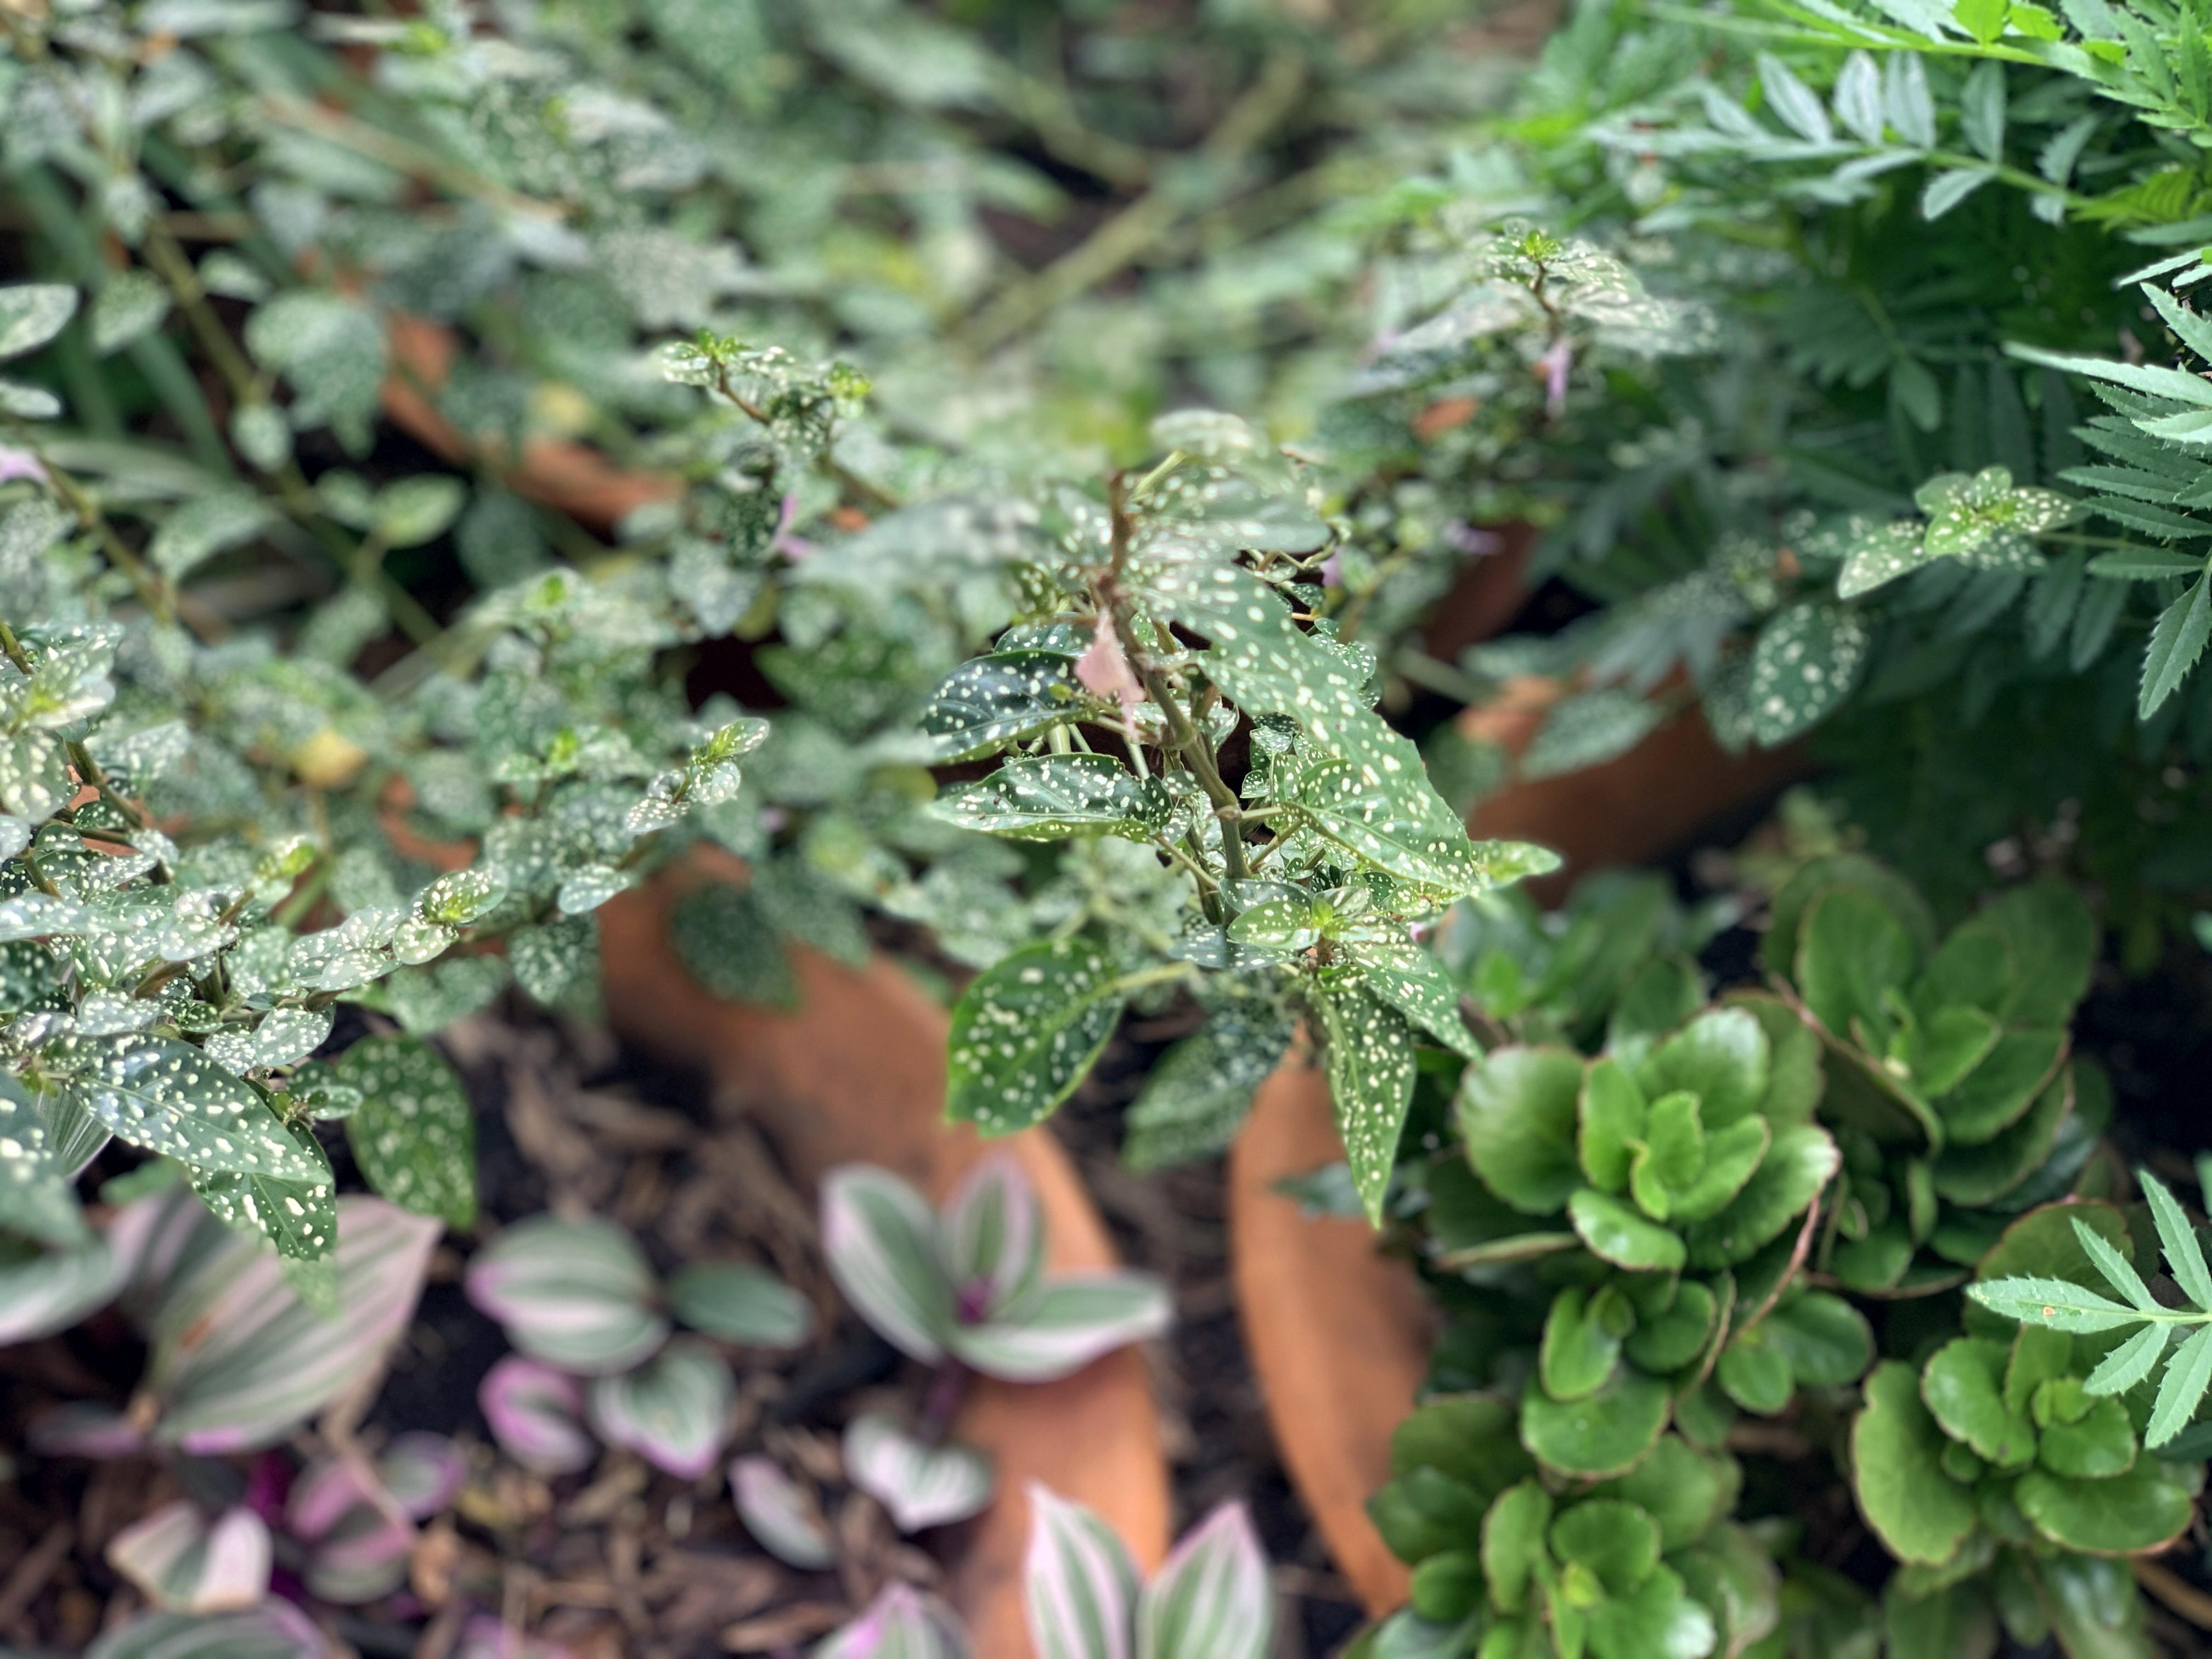
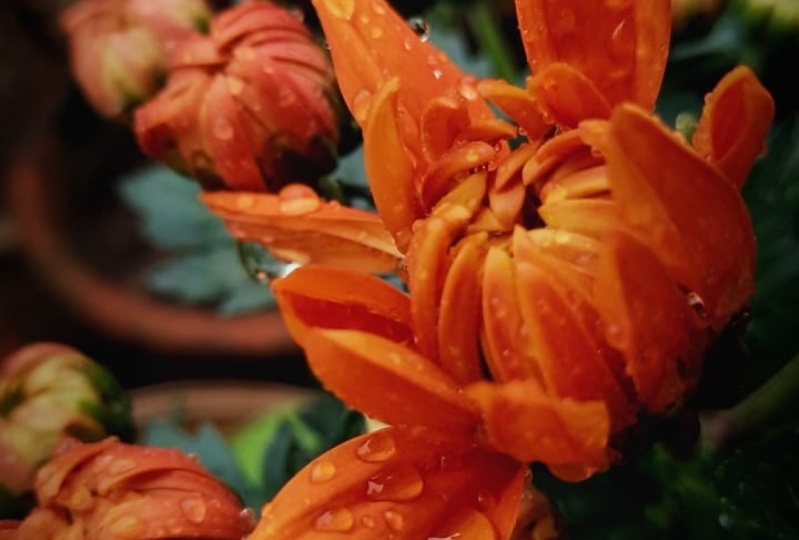
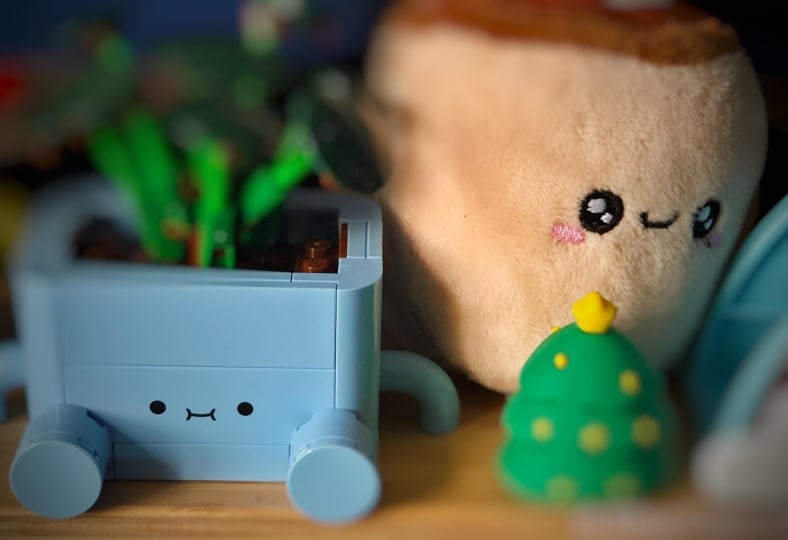
30. Fill the Frame: Filling the frame with your
subject and leaving little or no space around it can work really well for
certain situations. To achieve this, remember
to get really close to your subject and use the
portrait mode or the macromode. Remember that with
the portrait mode, you will need a certain space to be able to achieve the focus. But with the macromde, it will give you
the possibility to shoot being very close
to your subject. The photos that I
showed you before with the macromde are clear examples
of applying this rule. You can see in the first
one that the subject, the rose, takes most of
the space of the frame. So there is almost
no negative space, only a tiny it in the
bottom left corner. In the second example, the leaves are all
the positive space.
31. Frame Within the Frame: This is an interesting way to add a frame to your photograph. If you find around
elements such as windows, arches, or plants, you can
use them to frame the scene. It's not necessary that the frame surrounds
the complete scene. It could be only the
top borders or corners. In this photograph,
the structure of the traffic lights of the street surrounds the muddle of the man only at the top. In this other example
that I took in Nice, you can see that the window acts as a frame
for the landscape.
32. BONUS: Camera Shot Sizes: Let's talk now about
the camera shot sizes. Then refer to how much of a subject is displayed
in an image. This concept is
used for video two. There are different types of camera shot sizes,
as you will see. The long shot, the full shot, the cowboy shot,
the medium shot, the close up, and the
extreme close up. The long shot, also
known as the y shot, will keep the entire
subject in frame while also showing the
surrounding environment. The full shot lets
your subject fill the frame head to toe while still allowing some
features of the scenery. It is the chosen
one for fashion. For example, the cowboy shot frames the subject from the knees or mid side
to the top of the head. It's called cowboy
shot because it was used a lot in cowboy films. It's very important not to cut the photo exactly at the joint. It's better to
carry a little bit higher or it could be a
little bit lower as well. Because if not, it will be
considered a technical error. You can use the tip. Also, if you're shooting
an upper body photo, I will suggest not
to cut, for example, the photo exactly
on your shoulder. But you can, again, carry a little bit here or
a little bit here, leaving a little bit of a space. Because if you're
shooting a model, it will look like if that
person has a part of their body that is missing
to avoid given that idea. Yes. Again, try to cut it a little bit before
or after the joint. The medium shot frames from the waist up to the
top of the head. The close up shot fills your frame with just the
face of your subject. An extreme close up shot fills the whole frame
with your subject, causing the face to be
cropped within the frame. For example, you can
focus just on the eyes of your model or another part
of the body like the hands.
33. Camera Angles: We are now going to
cover camera angles. A camera angle is the
specific location at which a camera is placed to
take a photograph. Depending on the
place where we set the camera in relation
to the subject, it can affect the way the
viewers perceives it. Changing your point of
view is a great way to be more creative and play around
with your photography.
34. Bird's Eye View: To take a photograph using
the bird's eye view, you have to be standing on a place higher
than your subject. You can shoot from a terrace, a balcony or simply be standing on a chair
or some stairs. The idea is to place your
mobile parallel to the ground. You might be able to see a
cross or maybe just a line, depending on your
mobile model to help you achieve to be
parallel to the floor. The bird's eye view has become a popular angle to
shoot food photography. In my example, I had to step on a chair to be able to
shoot the whole table. Another type of
photo that I like to do is to shoot the
tiles of the floors. Pay attention because
you will see that there's something
missing on this angle, that you will be able
to see it on the next.
35. High Angle: Now let's continue
with the high angle. Can you discover what
it was missing in the previous angle that we can see now in this high angle? Yes. Something that
we talked before. The perspective in
the bird's eye view, the perspective was missing. It looked like
everything was flat. This could be great to
achieve an impactful photo, but sometimes, as we
mentioned before, you would like to
have perspective in your photos to emulate
the three dimension, especially when you're
shooting a landscape. Definitely when we
use the high angle, we will see that perspective. Also, everything that is closer to your camera will
become bigger. In this example, you can
see that the grass appears bigger than the cliffs that are located on the middle
ground and the background. This is a great angle
to shoot landscapes, but be careful if you're
shooting people because you will make their heads appear bigger
in relation to their body.
36. Eye Level. Photograph a Full Body Portrait. Photograph a Child: The eye level is the
angle that we use the most and it is the best
one for portraits. We have to set our
phone like this. An important tip to have into account to avoid
camera distortions, as we saw with the high angle
in the previous lesson, is that when you're
shooting a baby or a pet, you will have to be
at their eye level. Maybe you will have to sit on
the floor to achieve that. In this example, you can see the differences between
the high angle and the eye level when you're
shooting a full body portrait. The best way to do
it is to shoot from somewhere between
your waist and hip. But shoot from your hip
without tilting your phone. Because if I do that, I will add camera distortions. Keep your mobile straight. This is what fashion
photographers do. For example, when we're shooting a lookbook with the step, we elongate the model's body and it will look more stylized. I know sometimes
it's a little bit uncomfortable to
shoot from your hip. Another thing that
you can do is to turn your mobile upside down. With that, you will
have your lenses at the bottom and it could be a
little bit more comfortable.
37. Low Angle: Now we're going to continue
with the low angle. The low angle is the opposite
from the high angle. Remember in the high angle we
were here in the low angle. We are going to shoot from
here in the low angle. Similar to the high angle, what is closer to the
camera will become bigger. As this example of the tree, you can see that the bottom
seems wider than the top. Be careful when you're shooting
a person because you will make their feet and legs to
appear huge at the camera. Maybe you don't want that as you can see in the
photo of the sculpture. But this is a creative
angle to try out for landscapes or other
types of photography.
38. Low Angle for Selfies. Tips: Remember that we mentioned that the low angle is not
the best for portraits. But if you are on a
crowded space full of tourists and you want to
take a selfie of yourself, what you can do is to place your mobile from
below and look down. Doing that, you
minimize the distortion and you elevate your background
to avoid the tourist. If you don't look down, this is how your
selfie will look. See that I have my grid activated and I use the upper
third to place my eyes. This is a helpful tool when
you're shooting a close up.
39. Very Low Angle: Let's move on to
the very low angle. The very low angle
is just the opposite from the bird's eye view that. Remember we were here
with the very low angle. We have to, again, be parallel, but here we're going to be
parallel to the ceiling. This is an amazing
angle to shoot the ceilings of the
churches or theaters. Again, you will see that
little cross or the lines, depending on your mobile, that will help you to find the right point to
take your photograph. If you're using
this point of view, my recommendation is to go
for a symmetric photograph. Since most of the
time architecture tends to be symmetrical. My tip for this photographs is to make sure that
you're standing really, really on the center
of the ceiling. Because if you are moving a little bit to the
right or to the left, that will be a problem. Later you will see
that your photo is not symmetrical and to edit that in post production is
really, really complicated. So my recommendation is
better to wait a few minutes, the amount of time
that you need, and you will make sure
that you will have a professional photo like these examples that
I'm sharing with you.
40. Storytelling: Telling a Story with Your Photography: Storytelling is the art
of conveying stories. You are not just showing
beautiful things, but you're also sharing
a particular situation that could be real or imagined. From your point of view, you probably heard
the famous quote, A picture tells the
southern words. As we talked before, a
picture is like a painting. You are composing an image and you want to share
something with the public. When we take a photo, we
communicate something. It's important to know what is the message that we
want to communicate. You can ask yourselves
these questions. What is the purpose
of this image? What is the most important
thing in my photo? Is it a person? Is it a
feeling or an emotion? Take a moment before
taking the photo, To thinking that it will
save you editing time or having to review
one south photos with no clear objective. As we talked before, if you have elements
in your picture, don't add really nothing
interesting in your photograph. It's better to crop them out. Having a lot of things
going on in an image could be really distracting
for the viewer. As you can observe
in this example, there are some
electrical elements and cables on the right that don't really add anything of
value in this other photo. By choosing the vertical frame, I removed those objects. I just focused on the architecture of the
place and the texture of the wall that we are my main
interests in the picture. Moreover, if you use
the light correctly, you can lead your viewer's eye to the place that is
more important for you. In the photo in this picture, you can see that the museum
is full of artworks, but having the natural
light focusing on the sculpture that
is in the middle, it makes it the most
important thing to look despite the other
elements around. What I wanted to show in this picture is the
purity and simplicity of the sculpture that portray a woman who is focused,
making her art. Her image creates a
big contrast with the saturation of the museum
that is full of colors, gold, details, and artworks.
41. Curatorship: Select Your Best Photos: Now is the time to select our best photographs to
send to our friends, to print them out or to
post them on social media. A good tip to know
which ones are your best photographs
is to think on what we have just mentioned,
the story telling. You can ask yourself
the same questions again that you ask
before taking the photo. What is the purpose
of this image? What is the most important
thing, if it is a person? If it's a feeling or an emotion
that you want to share, look for the photograph that shows that message more clearly. Then think about the technique. If it doesn't have any mistakes, then think on the lighting. Which one has the best lighting? Then there is
something that has to do with your personal style. Trust your gut, in which one is the photo that touches
your heart more. I want to share with you some examples with
this series of photos. In the first one, you can see that the
composition is messy. There is a lot going on. I don't really know what is
the most important thing. In this photograph. You can see part of a sidewalk, a couple that is
going to the right. A girl that is being
barely visible. Not really a good photo. In the second example, the landscape is nice but
there's nothing going on. It's really a boring photo. In this one, you see a girl, but it's really hard
to see her again. I don't understand what's
the purpose of this image. The composition is
also not correct. The rule of thirds is
not being applied. Again, we have
another messy photo. In this one, the boy is almost being
confused with the tree. There is another tree appearing on the left, but it's cut. There is a strong shadow at the bottom that adds
nothing to the image. We can see, again, a lot of technical mistakes in
this one that follows, you can see that
the image is over exposed as we talk in
the other examples, the composition is
also not correct. From the series of photos, I selected this one
as my final image. I like how minimal it is. There are only three
main elements, the man, the tree,
and the bench. You can see that the most
important thing that is happening is that the man is walking towards the big tree. For me, this photo has
a spiritual meaning. The man seems tired. He's not walking
straight in a way. The big tree can be a
metaphor for his wish, the thing that he wants
to accomplish in life. You can see that
there is an obstacle in the middle, the bench. Or we can actually see
it as something good, that he can take a
little rest before he continues his journey
toward his objective. Of course, this is
just my story telling another person who probably
see something different. But the important
thing is that this is a photograph that
opens questions, ideas, that gives
you the possibility, think to imagine your own story. That's what good artwork
should always do, to give a space
to the spectator, to use the imagination. If a photo has technical issues, the main objects
or characters are not clear as in the
previous examples. It will only confuse the viewer. As today, the attention
span is very short. The person will move on and won't pay attention
to our photo. That's why in photography, it's important to
have a clear meaning behind the photograph and to use the technique accordingly to show the message that
we want to communicate.
42. Organize Your Material. Use Albums for Different Themes or Genres: All mobiles have the option
to select with the heart, our favorite photos, and then we will find them in
the favorite folder. The favorite folder in
iphone is inside the photos app on Android is
inside the gallery app. That's a good thing to
do, but I also like to do something different
to organize my material. I start to select the
photos that I like, I group them on albums. For example, I have one
album for my landscapes, another for myself,
Portraits for details, or a certain series
that I'm working on. Feel free to create as
many albums as you need. How to do it on iphone. In the photo app, you have to go to Select, then tap on the
photos that you want. Then you have to tap in
the arrow on the corner. Then you have to click
on a two album there. You can create a new album. For example, I'm creating one
with the name Italy on it. Then I tap on Save. Or another thing that you can do is to select your images. Tap on the arrow at
the bottom corner, then add them to an album that
you have already created. How to do it on Android. When you are in the gallery up, tap on the album tab and then tap on the three dots
at the upper right corner. And then tap on Create Album. Give a name to your new album. Then select that album to
begin to add photos to it. You can add your photos just by tapping on the
images that you want. When you finish, tap on. Done.
43. Photo Editing in Lightroom: Getting Started: Now is the time
that we're going to start editing our photographs. We will start with the first
program, Adobe Light Room. Light Room is one of the top
programs for photo editing, and you also have
the version for your computer, not only mobile. On this course,
we're focusing on the mobile version and only the settings
that are free to use. The tools that we're
going to see are the foundations
for photo editing. If you later want to use the version of light
room in your computer, you will be able to apply the same things that you are
going to learn in discourse. To get started, you
first have to login with your Facebook user or your e mail to be
able to use the app. Once you did that,
we're going to tap on the plus button and select an image to edit
from your camera role. Please start applying all the
tools that we're seeing in the course to your own image to be able to test it yourself.
44. Crop Tool. Keep Your Horizon Straight: The first tool that we
will use is the crop tool. You might be familiar
with this one. See that you will find at
the bottom all the tools. It could be that in your mobile, you see the menu on
different places. Sometimes my students tell
me that it could happen. But just make sure that you find all the tools that we
are seeing on this course. Tap on the crop tool. It is helpful to remove
something from a photo that doesn't look good or that you
don't want it to be there. You need to tap on a corner of the image to start
to crop the photo. Once you do that, you will
see that a grid appears. This is really helpful
because you will be able to apply again
the rule of thirds. You will always see
a check and an X. Press the check if you like, the edits that you did or press the cross if
you don't like them, be applied to your
photo at the top. You will also have the return
button to go back one step. The crop tool will also give
you the possibility to tilt your photo until you see
it is completely straight. Remember, it's important to
keep your horizon straight. That is the different
from a photo that looks a and a photo that
looks professional. If you really want a
photo that is inclined, then make it totally inclined. Remember that in photography, it's important to be clear
with your intention. If not, it could look
more like a mistake than something that you really
wanted to look this way. All the things that you
can do is to rotate your photo or flip it horizontally or vertically.
45. Light Tool: The light tool is
probably one of the most important
in this program. You will see with a few clicks, your photo will change
in an incredible level. Tap on the light tool that you will find it in the
menu at the bottom. We will start with the
first one, the exposure. With the exposure tool, we control the lighting
of the photograph. You can darken or lighten the image depending on
which side you're moving. If you move to the right, you will see that your
image becomes brighter. If you move to the left, you will see that your
image becomes darker. See what is it that you need
in your own photograph? If it's a photo that
you took and it was on a dark environment or during a time that you didn't have a lot of light available, maybe you need to
brighten the image. Or on the opposite, if you took it on
a very sunny day and you see that it's
very, very bright, you probably want to decrease
a little bit the lighting, the contrast tool increases
the difference in lights and color between the bright and
the dark areas of an image. You will see that
your photo stands out if it has more contrast. On the contrary, if you want a vintage look for your image, you can move the slider to
the left and it will give you the feeling of a photo
that got old with time. If you go now and pick a
photo when you were a child, you probably see that the
colors look a little bit faded. This will be the way
to imitate that. If you don't want
this vintage look, you would rather want to
increase a little bit the contrast with
the highlights tool. We control only the highlights. These are the brightest
parts of a photograph. Move to the left to
decrease the highlights, or to the right
to increase them. If you have any over
exposed areas in an image, then you have to
move to the left. With shadows. You control
the shadows of a photograph. Move to the left to
darken the shadows, or to the right to clarify them. It will help you to recover details in the dark
areas of an image. I like to always increase a little bit the shadows
to be able to see things that before were
all black with whites. We modify the purest whites, move to the right to
make your whites more pure or to the left to
decrease their intensity. For example, if you had a
session using a white wall as a background and
you see that the white came out a
little bit grayish. You can adjust the whites
to look white with blacks, we modify the pure blacks. If you move the
slider to the left, it makes the darkest
color information in the image darker. If you move it to the right, it makes the darkest
values lighter.
46. Color Tool: Before we start using
the color tool, I would like you to explain a little bit about
the color wheel. You might have seen
this before in things related to fashion or make up. It actually applies
to a lot of things. Basically, we have
two sets of colors. The cool colors
under warm colors. On the cool colors, we have violet, blue, and green. On the warm colors, we have red, orange, and yellow. Think on this. If you have to take a photo of a newborn baby, what colors would
you like to use? Warm or cold colors? Like in my example? Probably
warm colors, right? Because you want to really create this warm
environment for this baby. If you travel to a
place that is snowing, what colors would you
use for that photo? Would you use warm or
cold Like in my example? Probably call right. These colors will be given
by the setting itself. When we saw manual photography, I explain about
color temperature. Please go back to the
lesson to remember what we saw In the same menu. At the bottom, you will
find the color tool. On the left, you will have the option to turn your
photo black and white. Just tap on that icon. You can tap again to go back
to the original colors. You will also see the
temperature tool. It is helpful to correct
the color of your photos. You can emulate a
cold temperature even if you took the
photo with warm, natural light or do
just the opposite. Move the slider to the right for a warmer temperature or to the left for a
colder temperature. Here also counts
your personal style. I particularly like to edit my photographs with
a cold temperature, but maybe you like to edit your photographs a
warm temperature. The tint tool is helpful to add a green or magenta tint to the image in case you need
to adjust the colors of it. Move to the left or right
according to your needs. Then we have also the vibrance
and saturation tools. Please test it yourself. Move the slider of the
vibrance tool all the way down to the right
and come back to zero. And then all the way back to the left and then
come back to zero. Then please do just the same
with the saturation tool. Do you see any
differences between the two tools When we
use the saturation tool, if we go all the way
down to the left, everything turns
black and white. If we go the opposite way, the colors become a little
bit too artificial for me. If a photo is edited correctly, you won't be able to see that the photo
was actually edited. It should look natural. The difference between
the saturation tool and the Byron tool is that the saturation tool will
saturate all the colors, but the Byron tool will only
saturate the medium tones. What I like to do is to first saturate a little bit the colors with the
saturation tool, but then to continue with the iron tool to keep the
colors looking natural. For example, if you took a photo of a model and you
increased a lot, the saturation, the skin will look a
little bit artificial. If instead you continue
with the On tool. As this tool only works
with the middle tones, it will keep the colors of
the skin closer to reality.
47. Check Your Progress: If you tap on your photo, you can see how it used to
look and how it is looking. Now, this is a good thing to
do to check your progress. How is it going if you feel that your photo is looking better
and not worse than before? I always like to do that
to check my progress.
48. Presets: If you like your edits, then a useful thing to do
is to save them as presets. I have presets that I use always for my social
media accounts. Presets will save you a lot
of editing time because if you took a bunch of photos at the same setting with
the same lighting, then you can apply
the same edits to all those photographs
instead of having to edit each photo one by one
on the menu at the bottom. Tap on presets, then tap on the three dots in the upper right hand corner. Next, select Create preset. Give a name to your preset. For example, I call
mine Holidays. After that, you can select which edits to include
in your preset. On the check to save it. Your custom preset
now appears in the preset panel inside
the user presets group. If you want to apply the
same edits to another photo, you just need to look for
the presets that you created before you can create a as you want for
different occasions, series or social media accounts. You can also apply
the presets that you have already
available in the app. For example, there is a group of presets to turn your
photo black and white with various styles.
49. Save/ Export Your Photo: Once you finish editing
your photograph, you can save your photo, tap on the arrow inside the
box at the top right corner, and then save to camera roll. When you save your photo, you will find it
in your mobile as if the photo was just taken. You will still have the original on the day
that you took it. Another thing that you
can do is to tap on share and send it directly
via Whatsapp or E mail. You can also add a
border to your photo, so you can change the thickness, the size, and the color. You can tap on export S to be able to change the
quality of your photo. You can include a watermark if you want that tap on there. And then on customize to be
able to change the size, opacity, and the location of it by moving the slider of the
horizontal offset and the vertical on E. Or you can also use the dots that you see in the picture in case you like
one of those locations. You can also change the font, make it bold or italic, and use a drop shadow. You can tap on the
check mark if you like, what you did finally
on save image or you can share it via e mail
or Whatsapp light room. Also save the photo as a file. You will find it in your library if you later want to do other
adjustments to your photo, like for example, change the
colors to black and white, you can save it again
and you will have another version
of the same photo with the new adjustments.
50. Photo Editing in Snapseed: Getting Started: Great, now we will
continue with a Snapseed. This is an app from Google. We will see here
other tools that will complement the edit
that we did with lie room. You probably see that some of these tools are also
available in lie room, but you have to pay to use them. First, select your photograph. To do that, tap on
the plus icon and then open from device to
choose the image to edit. You will see at the
bottom a menu that says, these are like
filters adjustments that were already
created by the app. Press the check mark. If
you want to keep one of these filters or the
cross, if you don't want. Next to looks, you will
find the tools, Dove.
51. Selective Tool: We will try first
the selective tool. Go to tools and then
select that one. The selective tool is a
great way to only adjust, for example, the lighting on
a certain area of an image. It could be useful for a
portrait or a landscape. You have to tap on the area
that you want to work with. Here you will set
a control point. Move the slider at the top, to the right to
brighten that area, or to the left to darken it. You have other tools, a part of the brightness
tool, for example. You can adjust the contrast, the saturation or
the structure of an image to use other
tools like contrast, swipe your finger down on
another area of the image, and then up when you
select contrast, move the slider at the top, to the right to
increase the contrast, and to the left to decrease it. Then swipe down to
change the saturation. And then move the
slider to the right or the left to increase
or decrease it. Afterwards, you can swipe down again to
select a structure. When you move the
slider to the right, you increment the amount
of details in the image. A structure will bring out the texture of objects
throughout the photo. If you move to the left,
you will reduce it.
52. Healing Tool: The healing tool is my favorite. In a snapseed, it is helpful to remove certain
things of your image. It is helpful to remove stains, or you can use it to remove some dots on the skin of
a model, for example. To use it. Go first to tools and then select
the healing tool. Let's say that we want to remove the dark
areas of the stone. The best way to do it is to
get closer to that area. So by pinching two fingers on the area you would
like to remove. The closer that you sum in, the better that the
healing process will look. Then pass your finger tip on the section you would
like to remove. You will see that a red area appear because you are
actually creating a mask. Snapseed will copy
the texture of the surrounding area from
the one that you selected. This tool works best
when the texture is uniform because if
you have tiles, for example, it won't look well. As you can see in
this other example, you can go back one
step and reverse the last edit by tapping on the back button on
the bottom menu. Or you can tap on
the forward button to add the edit
back to the image. Once you're happy
with your image, tap on the checkmark to keep your edits or the cross
if you don't want them. Next, you will be taken
back to the main menu.
53. Perspective Tool: If you took a photo of something
related to architecture, you probably need to adjust their perspective to the photo. For the photo to look
professional in architecture, it's important to see that
the lines are aligned. The way to correct
it is Daphne with the perspective tool
at the bottom menu. Select the perspective
icon and then tilt. Then you will need to
move with your fingers to the sides or up and down
to adjust the image. It might look a little bit
complicated at the beginning, but with practice you will
become good with this. You can tap again
on the bottom menu and select Rotate
if you need to tilt the photo or a
scale to expand it. With the free tool,
you will be able to adjust the
perspective more freely. Also at the bottom menu, you will see the
edge healing tool. Keep it in as smart as
it is because it will automatically fill
any blank edges so that no cropping is required. If not, the blank edges will be left to solid, black or white. Moreover, you will find in
the same menu a magic wand. With that one, the app will automatically at just
the perspective. Remember to tap on the
check mark to keep your edits or the cross
if you don't like them. You also have this tool in
iphone or Android check. If it's easier for you to edit
directly from your mobile, I tend to do it with my iphone. Since I think it's easier. I will explain you with iphone, but you will see it's
very similar on Android to on the photos up in iphone. Go to Edit and then
tap on the crop tool. Then tap on vertical to
adjust the perspective vertically by moving the
slider to the right and left, then go to horizontal
and do the same. You will probably need
to go back from vertical to horizontal until
you like the result. Again, as I said before, it might be a little bit
complicated at the beginning, but the more that you do it, the better that you
will become at it. You can also
straighten the photo. If you feel that you
need to do that, tap on Done to keep your edits.
54. Lens Blur Tool: The **** blur is great. To increase the blurriness of the background to make
your subject to stand out, go to tools and
select **** blur. Then tap on the area that
you want to keep your focus. You can adjust how big or
small you want that area to be by adjusting the circle with your fingers and making
it bigger or smaller. Then on the top, you will see blur strength. Move the slider to the right to increase the strength
of the blur effect, or to the left to decrease it. If you tap on the
image and swipe down, you can select from
the menu that appears, another tool that is transition. Then at the top, you will find the slider again. If you move to the right, you will increase the
distance of the fade between the in focus and Bl
areas to the left. You will decrease it. Then
swipe down on the image again to access from the menu
to vignette strength. Move the slider to the right to darken the edges of the image and incorporate a vignette to the image or to the
left to remove it. If you tap on the dot, that is your area in focus, it will turn blue. You can move it with your finger to another
part of the image. For example, I now have
the focus on my hand. Remember to tap on the
check mark to keep your edits or the cross
if you don't like them.
55. Save/ Export Your Photo: If you like your edits, Now is the moment
to save your photo. To save it, go to export. If you top on share, you will be able to share
it on Whatsapp or email. If you top on save snaps will ask you if you allow the
app to modify the photo. Since it will modify
the original, I recommend to use the
option, save a copy. It will save a copy with the edits that you
did and you will still have the original
unedited you export. The photo is very similar
because it also saves a copy. The difference is
that sometimes with some mobiles save a copy is
more compatible than export. But you have to check with your own mobile which
one works best. I save a copy in my
iphone and it works well.
56. Recap on Everything That We Learnt: I hope that the things that I share with you help
you to improve your photography to make it more creative and
more professional. So let's do a recap of
everything that we learned. We started talking about the best camera settings
for our photographs. We covered lenses, focus
control, lighting. We got deep on camera modes. Then we got an interesting
section on composition that you can apply for the different types of
photography that you like to do. Then we continue
with points of view, how to play around
with our creativity. We also cover photography
storytelling, how important is to communicate a clear message and then equally important to curate our work to select our best material
and to organize it. Finally, we learned how to edit our photographs
as a pro with room and Snapseed and to save our edits
using the presets. What an exciting journey
that we took together. I want to thank you so much
for ending this course, and I hope that you
are more excited than ever to continue
taking photographs. Remember what I said
at the beginning. Keep practicing,
apply the things that you learned in the course. Take some time before
and after your shot. Don't be afraid to experiment and leave your comfort
zone from time to time. If you keep up with
the wood work, you will develop your own voice and unique style
as a photographer. Thanks again, and
please keep in touch. You will find me on
Instagram at florid dot.
 Flor Da Valle, Artist, Photographer, Shuffle Dancer