Transcripts
1. Intro: Hi, guys. My name is Paula and this is Cedar. I am a self taught watercolor artist. I really enjoy florals, simple, elegant pieces, and I've been dabbling in some animals lately, so hopefully you're going to see a video. One of those soon today will be doing a piece of three florals, this next great decor for a baby nursery, Mother's Day gifts or just scattered throughout your home. The pieces are a little bit bigger than I usually do, and still, because of that video is going to be sped up a little. Once I get started, don't let that scare you. If you're a beginner, just make sure to watch my how to tutorial on the leaves, the flowers before you dive right into the main video. That way, when it speeds up, you will feel like you're being left behind. I hope you guys enjoyed this video. Let's get started
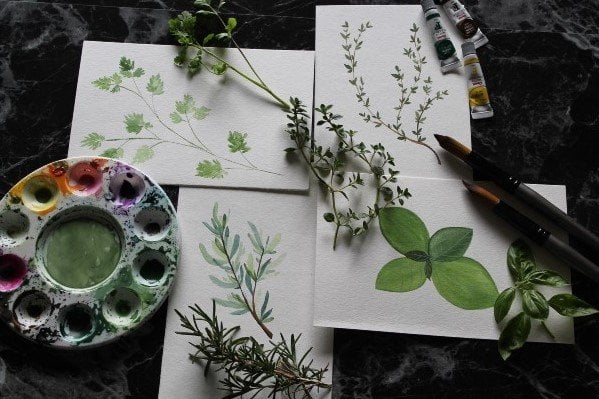
2. Prep Materials & Color Mixing: all right for this project, you are going to need watercolor paints. I like the pen. Tell Brand you will need to different sizes of watercolor paper. The 1st 1 here is 11 by 15 and it's on £140 weight camps and brand paper. You will need some brushes and using sizes eight and 16 from masters Touch a pallet clean water. It's the paper towels. The second size paper I'll be using today is 12 by 12 and it's made by a master's touch, and it's also 100 £40 weight paper. Alright, so first thing we're going to do is create the shades of green we're gonna use for these pieces, since all of these three pieces we want to match will be using the exact same greens for every single piece. So first I'm gonna show you how to create that darker color green and oops, Um, first, you will need a deep green. It is. That's what's called Deep Green. And it's number 22 in the pen tell set, and we're gonna use just a little bit of that. You don't need as much as you think you dio for the main green. We want it to be great, but we want a lot of other colors and factors in there as well. The next color we're gonna use is called lemon Yellow. It is number one in the pen tell set, and we're going to use about double the amount that we put in there for the green. So lots of yellow. All right, The next color I'm gonna put in is called Van Dyke Brown. It is number nine and browns a really great color to use. It really makes your greens of more natural. And while the earth tones it brings out So you have a good amount of brown in there. So also be using the black. It is number 28 in the pen tell set, but I haven't already on my palette here. It's dried, but I won't be needing very much of it. So what? I'm ready for it. I will just get that spot wet and use my black from that section. Now we're gonna use the number 16 brush, and I'm going to put some droplets of water in the bottom of my well, It was kind of hard to see but just enough water to make those colors mix for these pains. We want to really think this guests kind of paint. We wanted to be very bright and thick enough that we can create a vibrant, vibrant leaves with this green. Um, I don't want it to be too thin, so after I mix it, I'm gonna make sure to get as much paint as I can of my brush. So I'm not wasting any, and it's still a little bit too bright for my taste. So we're gonna add some more browns and blacks to kind of dark in that. Here's that Van Dyke brown again. Now I have some over here dried from an earlier painting and so you don't need a ton more. I am going to just get that spot. What, and pull my brown from that section and I'm gonna use my smaller brush for this is the number eight brush just cause it's a smaller area, I don't want to get too much Peyton Side. I think, um, I do tend to work with the very messy Pallet and A Z, much as I love it when my colors nix and I get Teoh experience that in my paints this is not the time where I wanna accidentally get a bunch of brown into my pink. So again, I'm gonna mix that in, get as much color for my brushes. I can, and then we're gonna go get some of that block just a little. Well, just get it wet. It'll just coat the brush, Um, as much as I can with that black and then mix it in. And there we go. That's a beautiful dark green color that will be able to use for all of the leaves that will be doing throughout these next three paintings. No, that is the dark version of these two paints over here. So this is a lighter version of that same mixture. Now, to create the later version, you're going to use yellow green, which is number 17 that lemon yellow color, and then Oakar yellow, which is number six. That's how you create the light green color. Whereas the dark green color reused the black. The deep green in the Van Dyck room
3. Leaf and Flower Practice: All right, So now we're going to paint our leaves. We're gonna use that bright, viscous paint that we created earlier. You're gonna get a little water on your brush and then go ahead and outline those leaves now, because our paint and so thick and this guess it's really easy to have a bit too much color on your brush. And I can't do the same technique as we did last time we pushed off the color down. It's right that I got too much color on my leaf. So I'm gonna dry my brush off and take my completely dry brush and go back and just soak up that extra paint that's sitting on that leaf there, and you can go back and dry your brush off as many times as you need to until you get the color of that you're looking for. So right there during my brush off again, and I was gonna keep painting over the leaf until it's the color shade, and I have the the paint spread evenly throughout belief, and you can go ahead and use the same technique for all the different colors. So here's that darker color that we mixed up earlier and again. There's way too much color on that. Leave that super dark during my brush off and just soak up that extra color and make sure you practice doing bigger leaves and small leaves. You can work on doing leaves with rounded tips, more pointed tips, elongated leaves, um, find the shape and that you like, and then stick with that shape for the entire piece of art. You don't wanna alternate different leave shapes. Um, that a look a bit odd again, just drying off my brush, soaking up that color until I get to a point that I like. Now this type of watercolor is very bribery, and it's very clean and precise. If this is not the look that you like in a minute here, I'm gonna show you a more watery look with the same exact colors that we mixed up earlier. I'm just gonna put a lot more water on my brush after I get the color on. So right there it's the same Clara edition of the Last Leaf that or bright green color. But instead of, um, picking up more color on Russia's, put a little on and then Ah, dipped it in water. And this technique, I'm gonna push my color down to the bottom of the leaf. Or you can even drive your brush off and do it that way as well. Nice to my brush was still pretty wet. So right there, I just got a tiny bit of color. And when I had it and did a darker colored leave next to it. So if you like this more water down. Look, you can go ahead and use this technique for for the following peace our artwork that we're going to dio. But I am going to use the darker, more vibrant colored leaves throughout my pieces. Okay, so now we're gonna move on to the flowers now. The colors that I use for my flowers and my palate are fairly dry right now, so I'm gonna show you how I mix them up. But I have them premixed already there. Just all dried up and need water at it to them. So that color right there is called pale orange. I attempted to show it to the camera. Didn't work out too well. It is number four in the pen tell set. And that darker color is called Red Purple in its number 41. So I'm gonna start with this pale orange on the side here and I'll show you what it looks like by itself. I'm not a huge fan of it on its own, but it might be that perfect pale orange pink color that you're looking for. And if so, that's great. Go ahead and use it as is. I like to add a little bit of the red purple to it, just so it brings a bit more pinkish color that when I painted. So just straight out of the tube, no water. This is what that color looks like. Now these little flowers will be showing you here are little buds and will be doing those on the wreath that we will be creating later. So for the bodies, you're just doing see shapes with very fine points. You're gonna have a lot more pressure on your brush when you start and then release that pressure as you get to the tip of your bud. So right there, that's the pink that I like. That's the pale orange with a little bit of the red purple makes in and these are very again, very dark. Ah, viscous colors. I don't want, um, the watery color as much for these pieces. I want them to stand out and be very bright and vibrant. So that red purple pretty much straight out of the two. Just a little bit of water added. Looks like that. And again for those buds. See shapes. You won't Linda almost touch at the top because these air just unopened buds yet, um, they haven't quite turned into big flowers, so we want them to be having more closed. Look to them. So now I'm gonna show you how to do a little, uh, 4 to 5 petal flower. I really like this flower. It's not really a specific flower that I No, the name off. It's just one that I kind of made up in my head. Just not always. Something you should to a recommend looking at a example just so you don't get to lost. So for these flowers, um, you are just gonna create lines, and again you're gonna have your brush a bit more pressure at the when you start and then release pressure and you get toe one and or the other. We wanted to taper from a point at the base or the center and kind of spread out towards the the the out that was you press you break brush outwards. Um, I like the look of where it has a color on throughout, so it kind of makes it look, the pedals are folded or folding over overlapping on each other. That's the look that I like. So this is a bigger version of the buds that we did earlier. It's going to be a more open flower, so I'm gonna wanna make the outside look like it has lots of layers of petals. I'm still gonna make it look almost closed, but I'm gonna beef up the outside, so it seems that it has, ah, lot, a lot of pedals that are that have worked their way, work their way out and have gotten bigger. And to do that, um, you're just gonna watered on your brush, do Cem lines and then don't water down your brush when you get more color on it, and that's going to create that, um, two toned leaf effect and right here in just darkening the center just because most flowers air darker towards the center of the flower, Um, as they're continuing to open up. So if you don't like that overlapping leaf look that I did above here's one that just has the pedals all kind of separate. And again, you're gonna wanna, um, spread the color out spread the leaf leaf pedals out, so that looks like they have dimension to them. Here's another little bud and I'm playing around with, um, a mixture of those two colors. The only two colors that I'm using at the pale orange in the purple, red, purple. These. They're all just various combinations of the two, so you can play around with which combination you like the best. How you want it to look. There's that pale orange, pretty much just the pale orange color with some water. It looks like
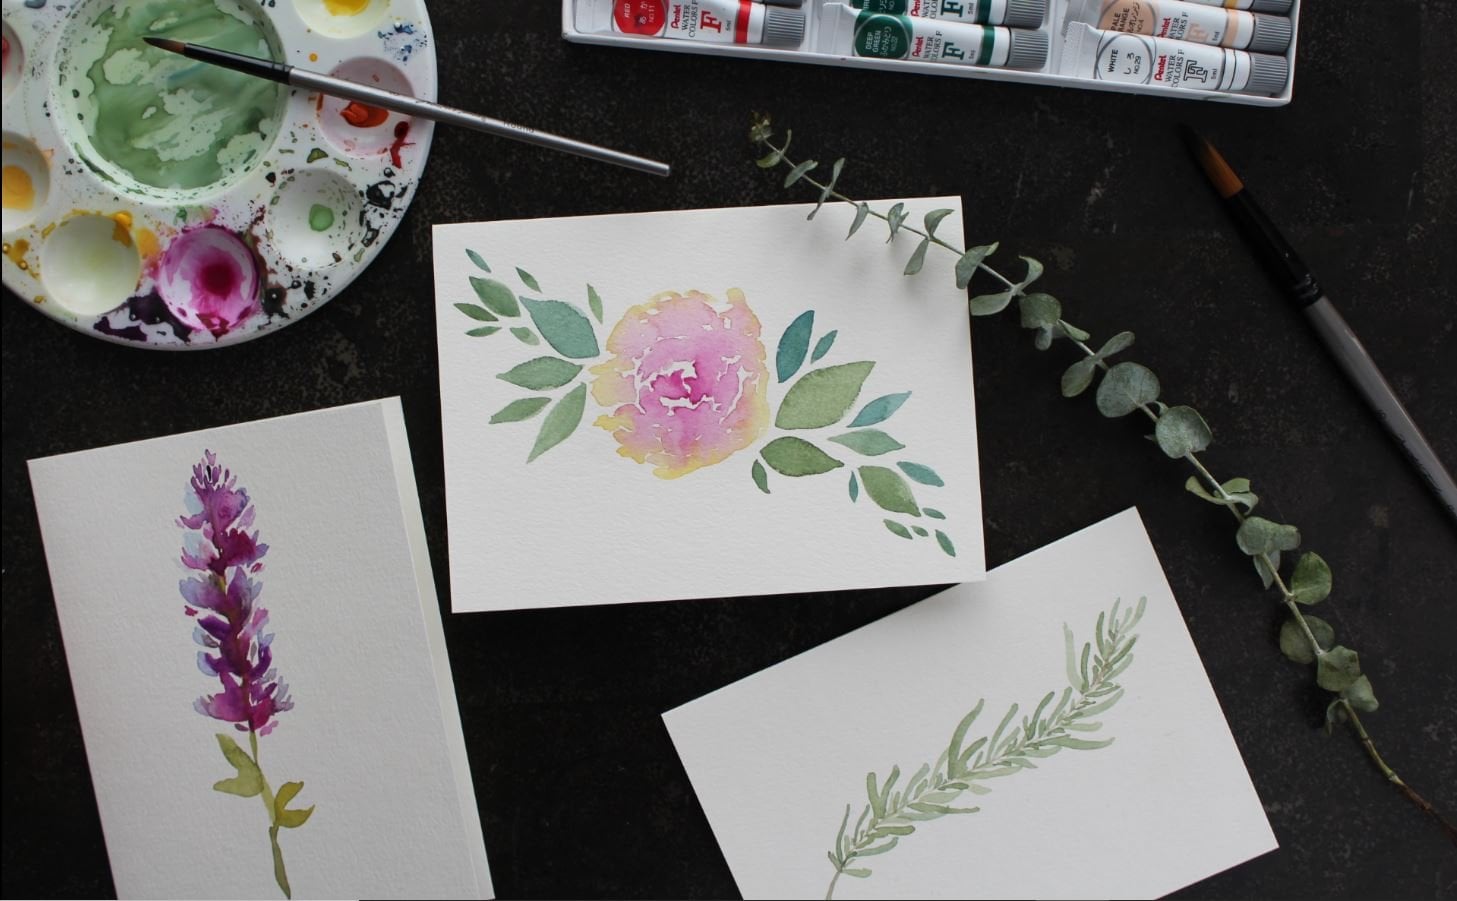
4. Floral Piece 1: okay for this first piece, we're gonna start with those big flowers. Hopefully you wash the practice video and have worked on practicing a couple different shapes of flowers and a found one that you like. Creating them in a bigger style is often a little bit harder to make sure you practice doing them big ones. Small ones, all that jazz Before you go ahead and start on your final, I'm gonna go ahead and use a couple different shades of pink for this. Just one flower I like when the flowers look like the light is hitting them in different ways. And the pedals overlap sometimes and kind of a messy, Um, easy, easy going type of flowers and petals right there. I'm just darkening. Center my flower again. You want to make sure toe make the center a little bit darker. It adds the illusion of ah, um of pollen. Or there's the darker center that most flowers have without having to actually go and think that in. Now. The second flower is going to be that that C shaped flower that we worked on, it's gonna be a very big version of it. So I'm gonna kind of outline here with a lot of little small lines in a lighter color pink . And then I'll go back through and just blend them all together to create the big overall flower. As you can see, I'm not using a whole lot of water on my brush. I'm just getting little bits of color here and there and going for it. Now, this video is gonna be sped up quite a lot a little bit later on after I get a chance to explain all the pieces of it. So don't freak out when the video speeds up. Um, feel free deposit. Stop it. Rewind as much as you need to come to follow along. But, um, once we get the branches blocked out and the flowers done, it's really just a matter of painting a lot of leaves. So with these branches, the leaves are going to go past the tips. I'm not gonna paint all the way to the edge of my paper with the branches just cause I want the leaves toe. Have some room toe, have their own space as well. Just a couple branches in there. You couldn't always add one more. Once you get going and you're painting leaves and you realize there's an empty space I would always recommend to start with less. It's easier toe add in things than it is to take them away. Once you once you get going clean my brush off and we're gonna want the leaves. So this is the size 16 brush that I'm gonna be using for these leaves. I was using the size eight earlier for the, um stems. All right. Now with these leaves like we talked about earlier, make sure you go back and watch the video and then I kind of alternate switched brushes there. So I started with the big brush and decided that I was It was too big. So I moved on to the small brush so I could get some more detail work put in their alternate your colors. I'm using three different colors of green. We only talked about mixing to um, two colors was fine. Um, I think the three that I'm using is just a more all of the tone of my lighter colored green . In order to achieve that, all of the tone just add a bit more brown. All you gotta do. Be sure to add, um, small leaves, big leaves. Alternate the colors. Try not to alternate in the same pattern over and over again. Just that doesn't look too, um, commercial or repetitive. You don't want it to look like you did it on purpose. You wanted to look, not troll and wins a call. And, um, dark color leaves here and there. And, like, Claire leaves here and there, and the leaves all don't have to be attached to the branches. You could go through and have them in more open space closer to the flowers, closer to the edges of the paper, whatever you like. All right, so now we're gonna add a little sprig of yellow. So this is just good old, old fashioned yellow that I'm gonna be using here. And we're just gonna put a bunch of dots now for this little sprig of yellow. I'm gonna make a cone shaped. I don't even know what it is, but it's a cone shaped yellow dotted something or other. Um, now, in nature, everything is not just bright yellow, so I'm gonna take that pale pink mixed with my purple red, a pink and mix it into the yellow, and that's going to create this really pretty mob color on when the yellow in the pink mix just be sure that you've put in all of your yellow with your brush first. Otherwise, if you try to go from, go back to your yellow after you've got in your pink, you're gonna model yellow up. All right, so we're gonna speed the video up here. We're gonna do a lot of leaves. A couple more little yellow sprigs. Like I said, go ahead and pause the video. If you need to stop it to catch up. Whatever you feel like, you need to do toe accurately. Follow along. Hope you guys enjoy.
5. Floral Piece 2: all right for this piece. We're gonna start with our flowers just like the last one, and I'm going to do to flowers that are kind of hanging down in those same C shape is before. So to start, creating Cem, uh, lines and build on top of those lines to create the illusion of pedals. So this piece is gonna be similar to the last one. Just isn't even the same colors I'm using. The same style of flowers I used in the last one leaves are going to be the same. Then we're gonna add a yellow element to this one. Doesn't get into the last one, but it will be slightly different. I don't want all the pieces toe look, uh, like cutter burdens of each other. So this one will be slightly different, but a lot of the same techniques. So again, at our lines, remember, less is best. If you're worried about having too many lines Um, just at a couple, you can always go back and add more if you need Teoh. Those lines are just a mixture of brown and black trying to decide if I wanted out another another branch. They're not that's what That waas And away we go with the leaves again. Remember to do lots of different sizes and colors. Alternate between your colors. As you can see, I don't clean my brush off between changing from one green to another. Totally okay, if my Greeks mix, in fact, I would love it. If they mix, it makes the leaves look more natural. It also blends them together really nicely. So this video is gonna be sped up quite a lot once we get going here. Um, if that don't what? That worry you. You feel free to stop the video, pause it, rewind as much as you need to. This is a bigger piece. So this will take you some time to dio, but it'll be worth it. I feel for you to turn the paper as much as you need. Teoh. I prefer toe to paint. Leave a certain direction a lot of the time I like to pay towards me. So I just move the paper as I need to just be aware of where your hand is. So you're not dipping your hand into a wet paint and then smudging it across your paper? All right. So bigger than add a little yellow flower here. And we're just gonna grab some fresh yellow, but yellow's kind of getting muddled with the other colors. So I put some fresh for out of the tube on the my palate. And for this flower, we're just gonna make it really simple. I wanted to seem like gravity is pulling it downwards. Um, so I'm gonna add some lines. Um, just just give it the illusion of gently falling towards the ground. But being still attached to that, these aren't docks like the last one. These are lines, but it's the same concept. Just a bunch of little lines all being blended together to create a little flower. I'll probably go ahead and do all of these little yellow pieces right now, just so you don't have to worry about my yellow getting ruined again. All right, we're gonna go ahead and speak this video up quite a bit. Um, enjoy. Have fun. And don't forget I don't know what to say. Don't forget to have fun. Enjoy this painting
6. Floral Wreath : All right. So this is the wreath. This is on our 12 by 12. Paper are square, and we're gonna start with our outline. Now, if you're worried about creating a circle like I was so hot, easier than it looks doesn't need to be perfect. And as you can see, the lines don't even need to connect. So practice a couple times. But don't overthink it too much, because if you ever looked at the reeds in the craft stores, they're not perfect circles either. So, um, what, that stress you out too much. So after I get kind of an outline, I'm gonna go ahead and fill in those lines that I didn't quite get in earlier. And I'm gonna add some little branches sticking off the edge, is there? You make sure your brushes a really clean when you're switching. Color is especially between, um, dark colors and light color. So with these little flower buds, we're gonna go ahead and add in. Make sure you watch the practice video for these. They're pretty easy. Just make sure you practice a couple times before you do your final. Now I'm gonna go ahead and at all the flower buds first before at the leaves. So you kind of me to think about where the fire buzz would be growing off the branches that you already painted. It's a lot of times the buds grow at junctions where the branches split or at the ends of branches. I'm gonna put a couple just smack dab in the middle of a little tweet there, which is totally fine. I wanna evenly spaced about. But be aware that you know, you could put ones at the edges and at the little nodes where you, um, created a fork in your twig. That's pretty common as well. All right, In a way, we go with the leaves. So again, ultimate your colors, alternate your sizes and don't with the wreath. You don't want to stray too far off from your meaning bridges or twigs that you drew just cause it'll alter the shape of your circle. Now, on the other side of that, if you drew an uneven circle and you wanted Teoh, um, fix that, you could say your circle was, you know, overly on one side, you could add more leaves to the center of the or the opposite outside to fix your shape. So keep that in mind. But other than that, you kind of want to keep relieves pretty close to the lines that you drew when this video was gonna speed up here in a minute. Uh, don't what? That were you. If you need to pause it, go ahead. Um, but it's just a bunch of leaves that were drawing over and over and over again until we finish up the wreath Here it All right. So I thought this wreath would look really cute with your baby's name written inside and calligraphy. I don't do that. So find another skill share teacher to watch that video. But I also thought would be cute to put footprints of a baby in the center of your reef. We don't have a baby, but we have a for baby. So we went ahead and put cedars pa prints in the center of the street That looks super killed and I'll be hanging it in cedars bedroom. So I hope you enjoyed this piece. It was super fun for me to dio
7. Thanks For Watching: Hey, guys, I hope you had fun doing these pieces with me. Let me know in the comments if you preferred these bigger pieces or the smaller pieces of my last video More. I love to see your work in the projects. Stay tuned for next video.
 Paula Whitmer, WaterColors and Puppies