Transcripts
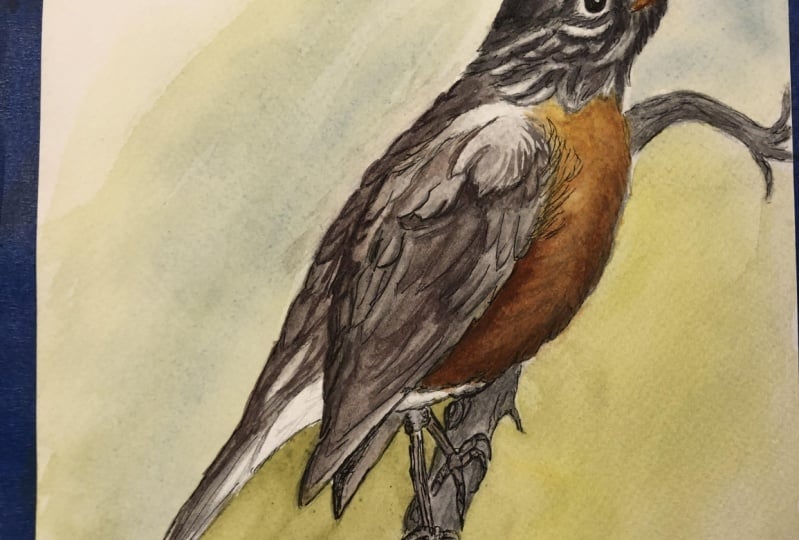
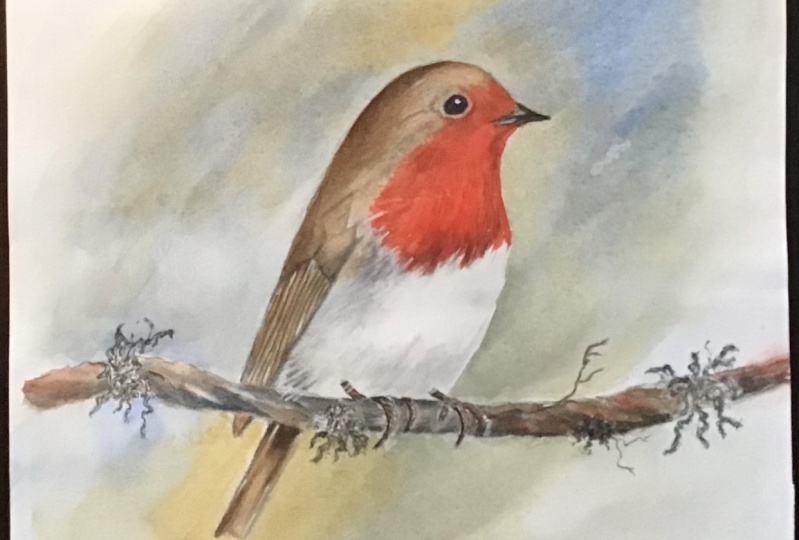
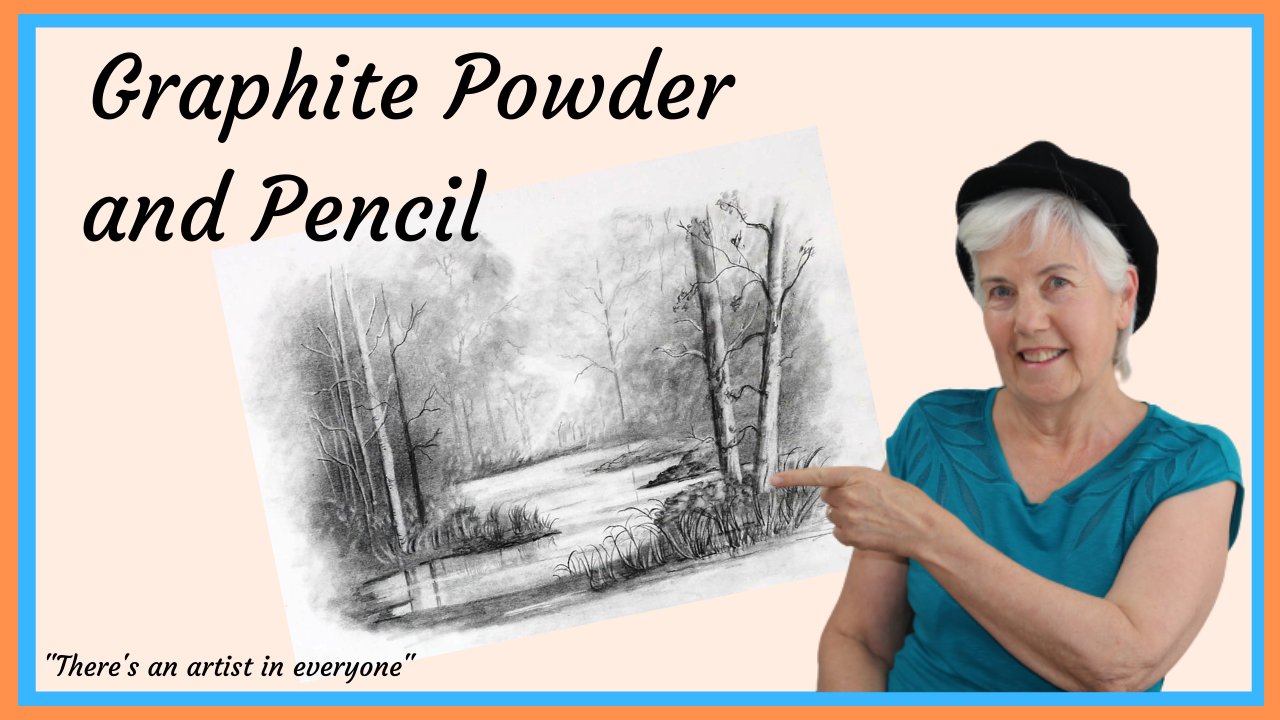
1. Introduction to the Class: Hello, I'm Anne Kerr. I'm a professional artist and a teacher. So welcome to my art studio. I've been teaching painting and drawing now for probably over 40 years. So my aim in these video lessons is to introduce you to some of the skills and the techniques that I've learned along the way so that you can take those skills and build your own individual style. People often ask me, where do I get my inspiration for My work? Well, I was lucky enough to have been brought up in the beautiful county of Cornwall, right down in the southwest of England. Cornwall is an absolute haven for artists with its wonderful light, rugged coastline, magical Woodlands, rivers and streams. And it's amazing wildlife. In this video, we're going to do or line and wash of this beautiful little Robin We will start with a line drawing and I'll take you step-by-step to the completed graphite picture. Then we'll float in some wonderful transparent watercolor washes to bring the picture alive. I'll show you how to hold your pencil in different ways to give different drawing effects. I'll also show you how to use the little blending stumps to get both dark and light tonal values. I'll use the little eraser to take out some white highlights. And I'll explain how to shade the edges of your drawing to get the correct tonal values. When we paint the bird, I'll show you how to drop in colors, wet into wet, so that your initial graphite drawing still shines through. Because of my love for nature, most of my work reflects the natural world in some way or another. And this lesson is no exception. So come with me on a journey of color and learning and we'll build our skills together. Are you ready?
2. Materials for Graphite Drawing: Now this is the line drawing and I'll make it available for you to download together with the reference photograph. Now I'm going to be using a 100 percent cotton hot press paper. The reason I want to use hot press is that I want to get a nice smooth drawing. If I use cold press, I'm going to get lots of texture coming through. But I'd rather have a smooth drawing. So this is hot press paper. Now I'm going to be using an ordinary HB pencil. And I'm going to be using these little blending stumps. These are just compressed paper. I'll show you how they work. I'm also going to be using the tiniest little rubber. This is a little very, very small rubber that I use just for taking out highlights. And I've got a little soft brush which I use for brushing off any bits that I get on my paper. Always try not to put your hands all over your paper if you can possibly help it. Your hands have oil. The oil will be attracted by the graphite and you'll get splotchy marks on your paper when you start to blend. So if you want to brush, anything off, rather than doing this, use a little brush. This is just an old wash brush that I had and I chopped the end off because then I can put it in my little travel box. Clever! I'm a Cheapskate. That's why I don't like buying unnecessary things. Let me show you how the little blending stumps work.
3. How the blending stumps work: This is just ordinary sketch book paper. And here's my HB pencil. So if I'm doing, if I'm doing some sun shading, notice how I'm holding my pencil. I'm using the side of the pencil, not the point. So I'm not holding it like that. So that the point is on the paper. I'm holding the pencil in my hand so I can use the whole length of the graphite. Now if I take one of my blending stumps and I blend that to get a smooth finish. Can you see it takes out all the lines that you put in when you were using your pencil. Now if you want to do an area that's very, very light colored and very soft, just use the graphite that's left on your blending stump. Don't put any more pencil down. Just used a little bit that's on the blending stump. Look. I can do lots of little light areas and I haven't touched my pencil. How lovely is that? You can go lighter and lighter and lighter just by using the residue that's on the blending stump. If you want to clean these up, you just get a bit of sandpaper. And you rub the sandpaper. And this will take off the top surface and leave you with a lovely clean edge. Now my little tiny rubber, tiny, tiny little rubber I can use to take out highlights. Look. Now that I've got some bits on the paper, I'll take my little brush. I don't want to put my hands on their tape, my little brush and flick them off. So those are the things I'm going to be using today. The blending stumps just come in different sizes, large, medium, and small. And I do find that the DOE went one. You can get all sorts of different makes. But I do find that the Darwin one is a little bit softer than some of the others. Some of them can be quite hard and tend to scratch the paper, but these are lovely and pliable. Okay. Let's get going.
4. Drawing the bird: I've already done a very light outline of the picture. But when I do? The editing, I will speed up the drawing so that the video doesn't turn out to be too long. However, there should be enough information there for you to follow the process. Remember, as you're doing your drawing that it's a line and wash. So we don't want a lot of detail. Just concentrate on your tonal values. Lights, mediums, and darks. And of course the lights will be the white of the paper. Make sure your dark values are really lovely and strong. And then when you put the watercolor washes on, they'll really show through. Now I'm not going to talk all the way through the video. You can see very clearly see what I'm doing. So I'll just leave you for a few minutes to enjoy the process.
5. Drawing the branch: Once again, we don't need a lot of detail. Just concentrate on putting in your tonal values. I'm just checking my tonal values that I have a light against, dark and dark against light because they won't show up. Now. I did have dark, again stalk the edge of the branch. So I've removed a little bit of the shading from the branch to make it lighter. And now you can distinguish between the branch and the tail Can you see here, I've got a dark area against a lighter area. So it really shows up. Here. I've got a dark against a lighter area, so it really shows up. So I'm just checking to make sure I haven't got any mistakes like I had there when I had dark against dark. Now that seems fine.
6. Tips about shading your drawing: When you're doing a drawing, try to have your shading the same depth of tone as the outside line. Let me show you what I mean. Here. I've got two little birds. This one has got a hard outline. That one's got a soft outline. Now on this one, if I start doing some shading, which is lighter than the outside line, you get that effect. But on this one, if I do the shading, which is the same depth of tone as the outside line. You get that effect. Now that is much more pleasing to the eye. And also, it's actually correct because this total value here is not going to change when it gets to the edge. It's not going to suddenly become hard like that. I call this putting wires around things. So you put a piece of wire around it. So always try and get your shading to be exactly like the depth of the color on the outside edge. So you have much more pleasing that is than that. And if you look back at my drawing, can you see here that the outside edge is the same depth of tone as the actual shading on the bird itself. And down here where it's very, very light. I've only got chest gentle hint of a line. There's no hard line around there. Just a little tiny hint. And then the brain puts in the fact that that line continues up through there. So try not to put hard lines around things. Try not to draw wires around things. Can you see also down here, the outside edge of this branch is very dark, but then also my my shading is very dark. So you can't actually see you on the line going around there. It all blends into the same tone. So watch out for that when you're drawing because it can make your, your drawings look much more attractive if you don't have a hard line. Obviously, there are techniques where you're doing in a way you want deliberately doing an outline that is totally different. I'm not talking about that. Sometimes you can do a drawing where you do an ink outline and then you put some color in the middle. That's totally different. I'm talking about when you're doing gentle graphite shading like this. So let's paint the Robin.
7. Materials for painting: The colors I'm going to be using for the painting, our raw sienna. But you could use any warm yellow. Cobalt blue is a lovely neutral blue. It's not particularly cool and it's not particularly warm. Burnt umber. Beautiful, dark, rich color, and pyrrol Scarlet. Now you can use any scarlet, it doesn't have to be pyrrol scarlet. Any Scarlet will do. It's the color of the lovely red breast on the robin. Now when you're choosing your colors, do check that you haven't got opaque colors. Because if you have, they will obliterate your beautiful drawing underneath. So if you've got colors like cadmium red or cadmium yellow, don't use those because all the cadmiums are actually opaque. So check that your colors are either transparent or semi-transparent. Now I'm going to be using my usual brushes, which is my three-quarter inch flat, number 12 round, number eight round. And I may or may not use the little rigger Now the first thing I'm going to do is to paint the background. Now, I'm only going to do a little bit of the background just to set off the bird. I'm not going to cover the whole page. So the first thing to do is to mix up the colors. So we're going to have some cobalt blue. And I don't want the colors to be too bright. So this is cobalt blue, and then we'll have some raw sienna. And then some raw sienna mixed with some cobalt blue to make a green. When you're mixing paints, always put the light color in first. We don't waste as much paint that way. And then some raw sienna, cobalt blue and a little bit of burnt umber to make it dark. So the first thing to do is to paint the background. Now I'm not going to do the whole of the sheet of paper. I'm just going to do a little area around the robin. So I'm going to wet the area around the robin. And then I'm just going to drop these paints into the wet paint. You can see the consistency of my paints are just beginning to run on the palette, just beginning to move. So it's fairly concentrated. Nothing weak and watery.
8. Painting the sky: Now the first thing to do is to wet the area behind the bird. I think I'll change to a slightly larger brush. Now once again, I'm not going to talk all the way through the video because you can see what I'm doing. So I'll just leave you for a few minutes to watch the process. Make sure the area around your paint is still wet so that the edge here is a lovely soft edge. If the paint gets out to dry area, it will form a hard edge. So make sure this is wet. Now I'm going to do exactly the same thing underneath the bird. Now allow all that to dry off completely before carrying on. I like to let it dry naturally, not with a hair dryer.
9. Painingt the bird: Here I've added a little bit of burnt umber to the raw sienna and a little bit of burnt umber to the cobalt blue. And I've got my parallel Scarlett already. So the first thing to do is to make mine at all. But when my number 12 brush very gently them, I'm just going to watch the colors in without disturbing what's underneath. I will go down to my number eight brush. I think I remember that your colors will dry lighter, so you would easily see your drawing shining through. Remember to drop all your colors in wet into wet. Your paper starts to dry, then just take a damp brush. I don't regret it. Now the corresponding brown color is still wet. I can let the red bleed into the brown to give a lovely soft edge. It is done once again because the brown is still wet. My Red Bull pulling it up into the brown quite happily. Okay. Scholars to my throat, piano, talking a little bit of the burnt umber.
10. Painting the branch: Now for the mosses on the tree, think I'll go back to my greens A little raw sienna on the branch of the tree. a tiny little bit of red dropped into the raw sienna to bring a bit of harmony to the painting. I've decided, yes, I will use my little rigger. I'm going to put some little twigs on. So when you load a rigger brush, you roll it in the paint in the paint and then just touch the end to bring all the little hairs back to a point. And let's put let's put. And let's have one, no think that's enough. This is just a mixture of burnt umber and cobalt blue. And I'm just going to use that tore darken the little beak. I will also re darken the little eye. The point on this rigger brushes, absolutely lovely. You can use a very tiny round brush if you wish. I don't have any very tiny round brushes so I just use my rigger. If you lose the little white spot in the eye, you can always put it back in with a little bit of white ink or white pastel pencil. Now when this is completely dry, I'm going to put one or two little white highlights in, but it must be absolutely dry before I do that. And if you wanted to, you could go back in with your pencil and you could reinstate some of the darks in there. If you've lost them by putting the washes on one or two little dark marks along the branch of the tree just to give it a bit of a bit of texture. There we have it. We'll wait now for that to dry. And I'll just put one or two little white highlights on and we're finished.
11. Final details: That's all dry now. Now you could if you wanted to and you're not too worried about adding different media to your work. You could put some little highlights in. I'm going to use a water-soluble pencil. This is my Inktense pencil, But you could use a watercolor pencil, a gel pen, a pastel pencil, whatever. So I'm just going to put one or two little highlight feathers on here. A couple of little feathers coming down over the branch of the tree. I've added a few little wiggly twiddle bits with the pencil. And as you know, wiggly twiddly bits is a technical term. And there, we have a beautiful little Robin sitting quietly on the branch of a tree.
12. Thank you!: Congratulations on reaching the end of the class. I do hope you have a go at the project. You can either do this little robin or you could do a bird of your own choice just following the same techniques. Remember that this is only a line and wash, so no real detail in your drawing. Just concentrate on those tonal values. And when you drop your color on, make sure that you're using transparent or semi-transparent watercolors because opaque paint colors will obliterate your beautiful drawing. I'm really looking forward to seeing your work. Thank you for watching my lesson, and I'll see you again soon. Now I have a little motto that comes into the end of all my videos. And my motto is, there's an artist in everyone. And I truly believe that. Thank you for watching and goodbye for now.
 Anne Kerr, "There's an artist in everyone"