Transcripts
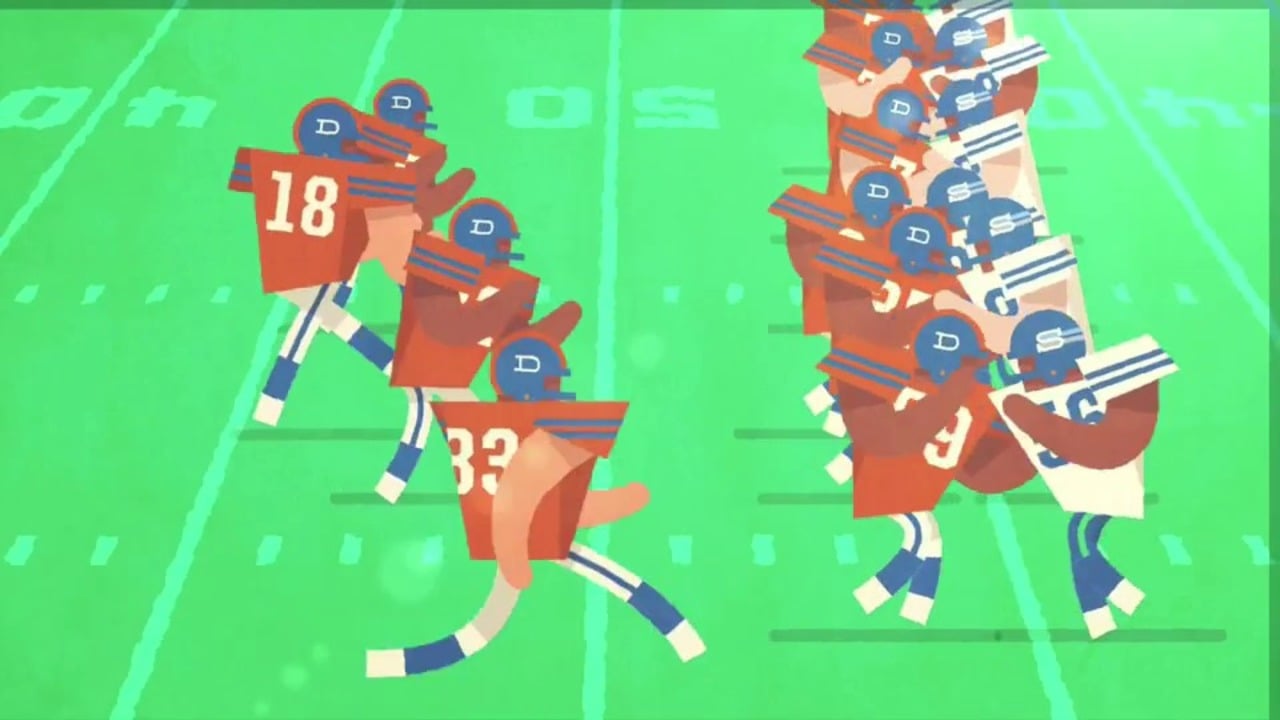
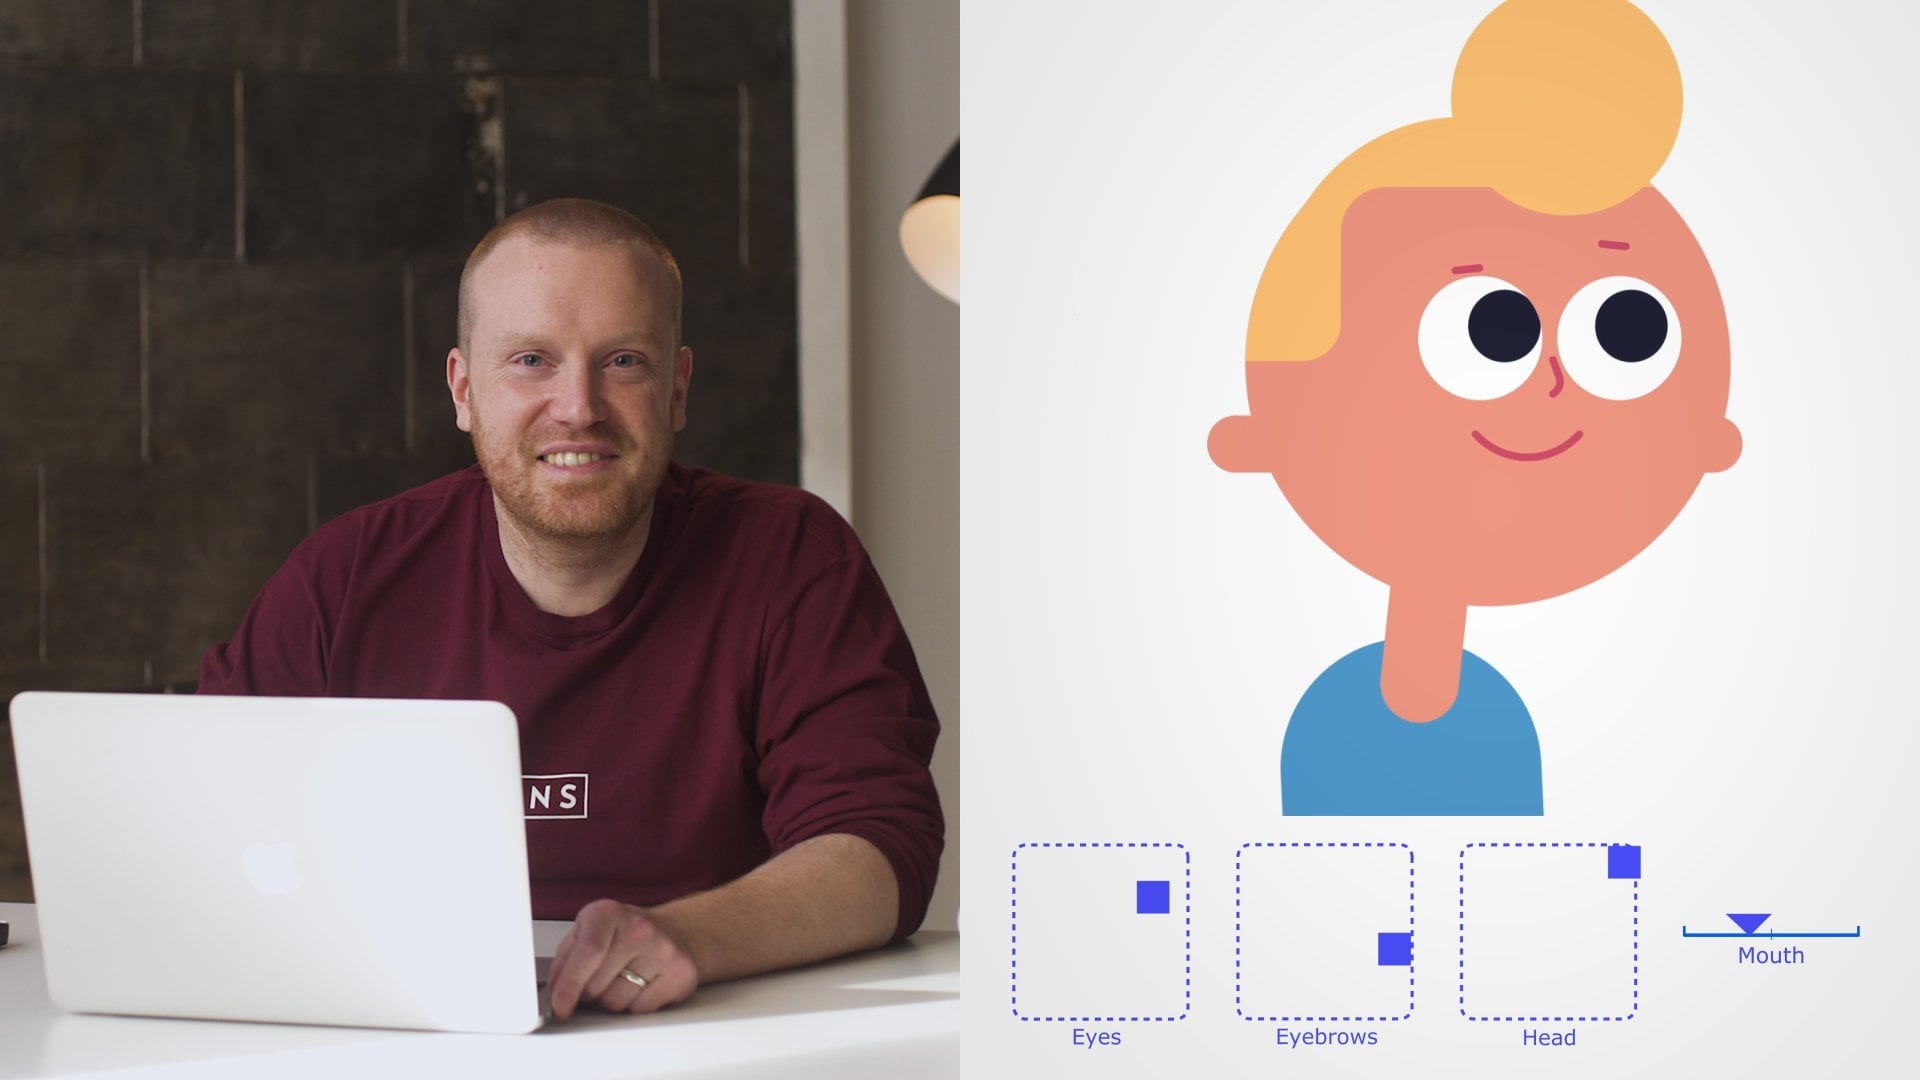
1. Introduction: Hi, I'm Fraser Davidson, I'm a designer animator from Brighton in the UK, and today I'm going to be teaching you how to animate characters, limbs specifically in After Effects. I run Cub studio and we make characterful animations for everything from sporting, institutions to social media platforms and everything between. Duik allows you to create animation using the position of hands and feet rather than having to rotate all the knees, ankles and hip joints. It essentially simplifies all animation of characters down to movements. It's one of the most versatile comprehensive plug-ins for After Effects, and anybody who is a character, animator, needs to have across with this plug-in. In this class, I'm going to be teaching you how to create a simple walk cycle using Duik. We'll start by designing the character in illustrator and preparing him to import into After Effects. We'll then prepare the character for rigging. We'll then use Duik to rig the character fully for animation. Finally with the rigged character, will create a simple walk cycle. With this tool, you'll see that you can easily simplify your workflow and animate complex characters much more simply. I'm excited to introduce you and your characters to the power of Duik. Let's get started.
2. Meet Duik: So what is Duik? Duik is a tool that allows you to rig and animate characters more easily in After Effects. Duik is one of the longest running plugins and scripts that exist for character animation and After Effects, created by Rainbox and it has been an essential tool for years now. Duik allows you to rig and animate whole limbs using just the position of hands and feet. When making characters and After Effects, you create lots of layers and rigging is a way to join those layers together and make them move in a simple and human way. While it's primarily designed for characters, the principles of Duik will allow you to rig almost anything. Once your characters are setup and rigged, it allows you to create animation quickly and easily over and over again. So let me show you where you can get Duik. We're going to go to the Rainbox production sites where you can follow the link in the corner. So we're going to scroll down to the download link, and scroll down again, and select either Windows or MacOS and download the zip file. So we're going to open the zip file. We're going to copy the Duik Bassel.jsx file, and in your applications folder inside your After Effects. We're going to go into scripts and paste the file in scripts and there it is. So to make sure that we've installed that properly, we're going to restart After Effects. Okay. So we're going to go to file, down to scripts, find it in our list here. If you click on Duik Bassel and we're ready to go. So in the rest of the class, I'm going to be showing you how to create a simple walk cycle. So the way you design your character impacts the way you animate it. So we're going to start by designing our character in Illustrator before hopping back into After Effects. So now we've Duik downloaded and ready to go. Let's dive into it.
3. Creating the Illustrator Document: Okay. So the first step is we're going to create our illustrated document. So I'm going to create a new document here. We're going to make a 1920 by 1080 pixel, RGB document, full HD size. So here's our document. We're going to save that as duik character. Now, I've created a duik file, here with my after effects illustration folders. As long as you keep them consistent, that's fine. Duik character, and just save that.
4. Designing Your Character: Okay. So here's our art board for this course. We're going to focus on creating limbs using Duik. At this stage, it's not too important what the body is, so we're going to make a very rudimentary body shape. Now using the circle tool I selected over here I'm going to create a very simple body shape. I'm just going to place that in the middle of the art board, in the top here and he's going to be our character. Now I've pre-chosen some colors. You can color him whatever color you like. I've got one of my swatch over here that I'm going to color and that's purely for continuity sake. This is blue body. Now, by Command C and Command F, I can paste in front an identical circle and I'm going to color that white. That's going to make the white, one of his eyes. So there we go. Command C, Command F, paste in front a pupil. Here we go. I'm going to group these schemata together, Command G, and I'm going to Command C, and Command F, paste them in-front again. We have an identical version and I'm just going to flip it over 180 degrees. So I've got a couple of identical eyes there. Now copy and again, I'm just going to Command V to paste a circle and that's going to become a mouth and rotate this. I'm going to use this selection tool here to pick out a couple of these vertices, delete them. I'm going to make this little stroke here into a mouth and again I'm going to use my color swatch, save it here. Shrink that and increase the stroke and I'm going to make the ends of that stroke round joints. So here's my character's happy, little mouth. Make sure that's square between the eyes there. There we go and there is his head. Okay so now we've got a very simple body for our character. We're going to start creating some limbs for him. I'm going to create nice long limbs so we can see exactly what's going on while we're animating and while we're rigging our character. So here we go, I'm going to use use the rounded rectangle tool here. Reason being that it gives us really nice ability to create perfect round joints. This is going to be our thigh and I'm going to Control C, Control F and paste an identical version of that, above it. It might help you to line these up.If we outline, we tend to fill into a stroke by switching it on this tab here. You can see, we want to get a really nice perfect circle, where those two joints overlap. That's gonna be our thigh and our shin. Finally, we're going to create a very simple little foot here. Now, we want this foot to sit at the very bottom of the ankle. So what I'm going to do, is I'm going to use my align tool. I'm going to align it to the right and align it at the bottom. That's just going to make sure that it's absolutely at the bottom of my foot there. Now when that rotates,I want that to have an absolutely perfect joint to my ankle. So what I'm going to do, I'm going to select the shin and the little circular ankle I've just created here and I'm going to align them to the bottom and to the right. I'm going make sure that that ankle is same width as the shin. Now if I make a foot and the ankle here by fills, then I can use the Pathfinder tool to join those together and I'm going to hold Command and click on unite element there. Then now what I'm going to is get rid of this point. I can either just delete that or I can select the Pen tool, hover over that extra point there and just get rid of that. Similarly, I'm going to bring this little point here and bring that out, straighten up that vertices. There we go. So we've got a really nice little ankle joint, you can see here. I'm going to move that back. There we go. We've got a thigh, a shin and a foot. I'm going to save that there. This is our character and one of his limbs. Now we want our character here to walk nice and evenly. So we're going to take these three elements and I'm going to Command C, I want to copy and command F for paste in front and create another leg next to it. Now I'm just going to color this leg ever so slightly darker as if it's in the shadow underneath his body. I can arrange this and send it to the back so that sits behind the body there, behind his little torso. There we go. That's a simple two-legged, circle-headed man and save that.
5. Assembling Your Layers: So here's our character, and now we're going to prep him for animations. So what we're going to do is we're going to break him up into layers. So I'm just going to take the main layer here of our character, I'm going to select just his eyes and his mouth, and I'm gonna command X cut, create a new layer, and command F paste in front. I'm going to call this layer face. For the moment, I'm just going to lock that. Next, I'm going to take his body, again, X command X, command F. I'm going to label this body, and do the same thing with each of the elements of his legs. They are all going to move independently of each other, so they need to be on separate layers. So X, F, X, F the same with this foot and the same with this rear leg here. I'll need that foot on this side. So we go check the layer and I'm going to call this near thigh. This next layer here, I'm going to call near shin and finally, near ankle. I'm going to call this one, far thigh, far shin and finally, far ankle. That's our character, nicely labeled up and layered, ready to take into after effects.
6. Importing Artwork into After Effects: In case, well, I've opened up to fix here, what I want to do is import my illustrate file. So I'm going to go import file. I'm going to get to my Duik folder, my Duik character. Now, this is all important, we want to import it as a composition. So I'm going to select composition, open. I'm going to check my compares, going to get boating all my layers nicely, and as seen in my character, I can see him here, just as he was in the Illustrator file. So I'm going to save him. I'm going to go to outfits folder, and I call this Duik character, and we go and that's saved.
7. Initial Character Rigging: So now that we've imported our character, it's our composition, open on the timeline down here as well. The first thing we want to do is just check this box here to make sure that after-effects treats our character as vector files rather than as an imported rasterized version of the same file. It's a small point of housekeeping that you may not notice but it's a good habit to get into and it'll help you when importing illustrate files into after-effects in feature. So the first thing we're going to do is select all of our layers here, and we're going to adjust the anchor points so that we can rig character. Now, what we want to do is open up each layer and find our opacity layers. The shortcut for that is selecting all the layers and hitting T, and that'll bring up your opacity or transparency. We're going to set that to 50 percent. So now that we have all as a 50 percent, we can close this. You can see that now we have a good idea where all the key joints are going to be on our character. Now, what we want to do is make sure that all of our joints hinge in the correct places. So what we're going to do is take each layer in turn and we're going to move this anchor point to the correct place. Now, the best way to do that is to hit the Y button, and the Y button will allow you to move this anchor point in situ without fiddling around with the positional data as well. So our first layer is my face and I want this anchor point. I'm going to drag it into the middle of the face here. I'm going to select the body and I'm going to do same. I'm going to move that just about here. That's going to be a center of balance, his near thigh, again, if you want to check which one that is, you can turn them off and on. I want to move this hinge to the point at which that part of the leg is going to rotate and that's going to be about there. If you want to get a little bit better view, you can up the resolution there, follow auto. Now, this near shin, same deal. I'm going to move the anchor point to the very center of that circle there and show you why. What we want is that circle to stay essentially the same when we rotate the joint. Near ankle, exactly the same thing. We're going to drag the hinge down here and position it in the middle of the ankle. Then, I'm going to do the same thing with the far leg. Just making sure that that anchor point is right in the center of the circle is created by our 50 percent opacity. Finally, this far ankle. So now, if we select all of our layers, what we should find is very clearly we can see where each of the layers is going to pivot on our character. Now, as I showed you earlier, if I click on the upper thigh here and hit rotate, you'll see the joint bends. But what we want to do is have that thigh lead the entire leg. So what we're going to do is select our near ankle, and we're going to use this parent tool here to attach it to the near shin. The near shin, we want to attach the near thigh. Once we've done that, what we should find is that when we rotate our near thigh, suddenly the whole leg starts to move. If we rotate the shin here from the knee down, the whole leg moves. So we are going to take our far ankle and do the same, touch to the far shin, far shin to far thigh, and we're going to select both thighs and make sure they attach to the body. The body is the anchor and the home of where all other places attach. So the face we're going to attach to the body as well. What that means is when you select the body, it makes the body around, everything else should follow it. So I'm going to save my file there.
8. Preparing Your Controllers: Now, a character limbs are all parented and ready to be rigged using Duik. We're going to do the near ankle first. But what we're going to do is turn off all the inessential layers here. So the face and the far thigh just leave the body, near thigh, near shin, and near ankle. Because these are the bits we're going to be using. To make everything on the timeline a bit clearer, I'm going to use my color labels here to make the various elements of the body different colors. I'm going to make the face here green, the body blue. The near leg yellow and the far leg elements pink. That's just because these are going to be the items that work together as part of our animation, the far leg, the near leg, the body, and the face. They're all going to be the sort of individual core elements. So now, we're going to open our Duik script. I'm going to get file, scripts, and I'm going to find. So my other junk here direct bassel. I'm going to open that out. Position this anyway you like, but I'm going to stick it over here for the moment. Now, the first thing we want to do is create a controller for our ankle here. So we're going to select our near ankle. We're going to go into rigging and we're going to click on the Create controllers icon over here. Now, there are different types of controllers that you can generate with Duik, but some of them control a position in various directions, some in control rotation, and some of them control both position and rotation. We want to create one of those. So we're going to select this position of rotational controller over here. You'll see the Duik creates a little. I scroll down, a little controller here. Now, if you select that controller in the icon drop down, we can increase the size of it to, I want to say 250 percent, just so that we can see a little bit better there. We've created our controller for our near ankle. We're going to do the same for the far ankle. So I'm going to turn on the far leg layers. I'm going to select our far ankle. Again, within the rigging drop down, I'm going to select the rotation and positional controller. I'm going to increase the size of that to 250 percent, just so we can see a bit better. So there we go. We've got two controllers now, far and near ankle, attached to the ankles of our character. Put on his face, there we go. That's him. Nearly ready to rig.
9. Creating Your Duik Rig: Now that our characters are all set for rigging, we can rig him up with Duik. The way that we do them with each leg is we need to select the elements in a very particular order, and that order is from the extremities inwards towards the body. In this case, that's going to be the ankle of the near leg, the shin of the near leg, and the thigh of near leg, followed by our near ankle controller. That's the order from the outside extremity in, followed by the controller we want to use. Going to go from rigging into links and constraints. We're going to open up the auto-rig and IK options and it's important now that we prefer standard IK inverse kinematics. Once we've done that, we auto-rig and we're away, much of magic happens in the background. Now, when you move your near ankle controller, you will find that your ankle has been rigged. Now, that we've done our first leg, we want to do the same to the far leg. So [inaudible] I'm going to select our ankle, followed by a far shin, followed by a far thigh in order furthest to closer to the body, followed by the far ankle, and then go to links and constraints, auto-rig and IK, I make sure preferred standard IK is on, and I'm going to hit auto-rig once again. Then, if I take my controller and check, we find that indeed to the tool has done it's work and we have a functioning rigged leg there. I'm going to save that.
10. Adjusting the Rig: Make sure your character is working properly by playing around with the controllers, making sure the joints bend properly. If we pull down our controller we hit "R" for the rotation, you can see that we can still rotate the ankle there, and it's back in position, should be fine. Now if you find that the inverse kinematics in Duik have rigged your leg such that its bending in the wrong direction, you have the knee, we can reverse that over here in the controller layer, IK controls here just by clicking on the reverse That allows you to change the direction of the bend of the knee. So with our character's legs returned to the normal position, we're going to select the face all the way down to the far ankle my S. I'm going to hit "T" for transparency, and I'm going to increase that back to a 100 percent to return our character to his normal states. We're going to select all of the leg layers. The reason being is that now that we have control over them with the controllers, we don't need them on the timeline. I'm going to get rid of them here by selecting the Shy Layer tab, and clicking on that, you can now tap them off and on here using the Shy Layer's tab. That means that all we have on our timeline, the face, body, and the two ankles. I'm going to recolor these ankles to yellow and pink as I had them, allow just so I know which one's which. Then we can close down Duik Bassel because we don't need that for rigging any longer.
11. Preparing the Workspace: Okay. So now, we're going to prep our composition for animation. To do this, I'm going to go to composition settings. So you can hit Apple K. Now, I've got 500 frames here. I'm not going to need that many. So I'm going to bring that down to 100, and 30 frames a second, that looks good. What we're going to do, we want 32 frames of animation. Reason being, that's two to the power eight. That's 2 times 2 times 2 times 2 times 2. It means that we can split our timeline up nicely from this into half quarters eight-sixteenths and 30 seconds. It just means that we can break up the work cycle into easily manageable chunks. Now, I'm going to put that between frame 16 and our end frame here should be 48. I'm just going to mark that on the timeline. This two little guides, cool, this stopped, and this one here, and zoom in, I meant to say, they were working with our workspace.
12. Animating Your Walk Cycle: The first thing I do is get our body and face moving. I'm going to do that by selecting both of these. Now, you can open them in the drop-down menu and key in the position data or you can just hit P and that brings up your position, and we are going to key frame both of those. Now, I'm going to key frame the start and the end key frames and on our walk cycle, a 30 second frame here is our middle. So we're going to key frame that one as well. Now, between those two and the 24th key frame, so that's equidistant between these two key frames, we're going to have the body lower. So that's going to be mid stride, just a little bit get the legs bending and then we can see our Duik rig in action as the body moves, the ankles stay in place and the legs do all the work, they bend in between and again on frame 40, I'm just going to copy and paste the same key frame. So now you can see we've got a character, he is bouncing up and down. Now, I want the head to do much the same thing here. So actually what I'm going to do is have my face when we're up here, delete these key frames now. I want his face to be up. Again, I'll keyframe that on these upstates and then in the middle of the stride, I'm going to bring his face all the way down. I'm going to copy and paste that again and what I'm going to do here is add a little bit of easing to the animation. Do that by clicking keyframe assistant. I'm going to add easy ease and that's just going to mean that our key frames ease in and out of their positions there. So now if I play back on my Mac here, that's the space bar button, you can see that our character has a nice looping beat. There he is bouncing up and down. So our characer is bobbing along here quite nicely but we're going to add a little bit of secondary motion, and we're going to do that by offsetting some of these keyframes. Now, as you know, the start and end keyframe are both the same here. The reason that we have a sort of working timeline a bit longer than what we need is so that we can copy and paste, control c, control v, these keyframes on the body and we can slide them against each other. So our face here and I'm going to show you now but I might move it back for the process of making the walk cycle. You can have it leading the bounce, you can move it further along and have it sort of sit behind the bounce. So it feels like it's bobbing up and down with the body there. Now, I'm going to move this back to where we had it originally, but that's the idea. If we just copy and paste those keyframes, so that we extend beyond our working area here, we're able to slide those frames to suit our desired motion. So now that our body is working and we're going to start animating our walk cycle and to do that, again we're going to hit P and we're going to deal with the position of the legs first of all. So we want the walk cycle to the start and end on the same key frame. So I'm going to put this leg over here and obviously it's going to end up back here. So I'm going to copy and paste that keyframe to the same location as the other leg going to have that sit further back. Again, we're going to make sure that key frame looks perfectly so our character finishes and ends on the same key frame, but now this middle keyframe, obviously we want the legs to swap over. So I'm going to create a frame where they are opposite of each other. Once again, what I'm going to do here is add easing the keyframe assistant, I'm going to add some easing. So we should now see there's almost a skating character as he moves his legs backwards and forwards. Again, he should have a perfect loop if we've done that correctly. So taking this front leg, now as I move backwards, obviously that's going to be planted on the ground. But then as it moves forwards, we want him to pick this leg up and similarly as this front leg moves forwards, we want him to pick that leg up. So now we should have something of a rudimentary walk cycle as our character walks along with this simple walk cycle.
13. Refining the Walk Cycle: So now that we've got a solid base to start from, we want to start fiddling around with his feet and give him a slightly more natural-looking walk here. So I'm going to take this near ankle, and I'm going to hit A to bring up the rotation key frames. So I'm just going to key a rotation key frame in where his foot would be flat planted on the floor. Now, once raises his foot,naturally you'd come off your toes. So what I'm going do is I'm going to add some rotation to this ankle because the controller here enables us to move both the position and the rotation of the end of the inverse kinematic Duik rig [inaudible] minus 45. Then, as he puts the foot back down, obviously is going need to be flat. But we might want to add just a little bit of an upward rotation before he replaces this foot back on the floor. Now, I'm going to use a little bit of easing. I use it and all of these. Keep it simple. So use a bit of easing on all of this ankle. Now, you can see as he picks it up, nicely bit of rotation gives it a bit more of a natural feeling as the foot lands. Now, because this is rotation opposition, we can just copy these key frames, hit all, and apply them to the opposite stride on the far ankle. It's going to be slightly further down the timeline. You can see again, as we screw up through the timeline here, that feels exactly the same. Now, you'll notice that when he picks his foot up here we have this triangular shape that feels a little bit awkward. So what I'm going to do, I'm going to grab the convert vertex tool which works a little bit like the pen tool in Illustrator. Now, I'm going to grab on this and I'm going to twist it around until I get a nice curved piece of movement there, and I'm going to do the same over here. So this sort of done triangle and [inaudible] tool again and move the foot controller out the way it's confusing the pen tool here. There we go. So now we've got the right tool. I'm just going do the same thing that we get a nice kind of semicircular movement as the ankle pulls over the middle and plunks the foot back down again. So now, I'm going to scroll back out and just have a look and see how my guy is doing here. There's a bit more naturalism to that walk cycle. We're ready to start messing around a bit more with some of the influences, and offsetting some of that timing. So now that we've got these key frames, again what I'm going do is copy and paste this position and rotation frames so that we have a second loop that comes off the end of our timeline here outside the bounding box which means that we can now just adjust some of the rotations or positions of, let's say, the head. I'm going to pull maybe the body forwards. So that's bobbing up and down with the head. You can see that just by having very simple sliding of these key frames, you get a slightly more weighted walk cycle. Now, as I showed you earlier using the easing tool, we created a bit of easing on these key frames on the leg here. Now, I don't want necessarily this leg to ease up and then ease back down again mid stride. I want this movement to be smoother. So what I'm going to do is I am going to convert this tool by hitting the command key and then clicking on it. I'm going to turn that to a square influence less key frame. That just means that we won't slow down in the middle of the stride there. I did the same thing to the opposite key frame over there. So again, we now have some smoother movement between the strides. If I hit play, here we go, you can see it just feels a little bit more natural again. It's foot doesn't kind of jerk up and then jerk back down.
14. Creating Advanced Walk Cycles: You can play with the influences of the body position in the rotation simply by selecting these keyframes into Keyframe Velocity and adjusting the influence. So let's put this up to 50. What we should find is that we get a smoother in and out of his body going up and down. Maybe I'll add a similar level of influence to these midway point keyframe. So I've selected all the keyframes I want. I go to Keyframe Velocity. I'm going to hit 50 again here. Enter. You just get a slightly different feeling from these kinds of things. You can crank that all the way up to a 100. Should just take you. That'll give you something very different altogether. So again, I'm just going to select all keyframes I want to adjust. I'll run this all the way up. This could give us quite a different feeling. A bit strange. Probably too much for my liking, but something you get to play with. So here's one I made earlier. If I stop this and show you, I've got the body moving backwards and forth as well as up and down. I've offset my facial position. Got it doing the same thing so it really filled waited like it's following the body as it bumps up and down. If we look closer at the ankles here, I've made these blacks. I'm going to need to make these yellow so that they standout. Here we go. You can see that that I've really created quite a weird, exaggerated path for the foot as it rotates up and round through and then kicks forward before coming back down again. As long as you make that loop within the timeframe, all of that stuff will happily [inaudible] part of your walk cycle. So there you go. Try it yourself. Adjust all of these parameters, play around with the easing, the position of the keyframes, the position and rotation of the ankles, sliding, the layers against each other to create interesting new secondary motion and see what you come up with. Good luck.
15. Final Thoughts: Congratulations, you made it to the end of the course. Hopefully, you now have a better understanding of how to use Do It, for your own projects. We've cover everything from creating a character to an Illustrator, and putting it into After Effects, rigging it with Buick, and then animating them. So now that you've done the hard work of rigging your character, hope you see that you can now take him in any direction. Experiment with the tool, create your own original fun book cycles and upload your work to the project gallery. Thanks so much for taking the class, and I look forward to seeing all your work.
16. Explore More Classes:
 Fraser Davidson, Designer / Director / Animator