Transcripts
1. Introduction: Hi, my name is Oliver, and in this class I'll be teaching you how to bring an animal to life using illustrations and a bit of animation magic. We'll start out by doing a few sketches and get comfortable with Illustrator, where you learn about forms and how a character is properly set up with animation in mind. Moving on to After Effects we will animate everything from scratch using animation principles such as follow-through and squash and stretch. And you'll get a better insight into my thought process while animating and what techniques I use to create fake 3D motion. For the class project, you'll be animating your own pet or the pet of your dreams. And you can either illustrate it yourself or follow along using the source files that I will be providing. But let's not waste any more time, but rather start creating. I'll see you in class.
2. Sketching the concept: So to start out, I think it'll be best to do a bit of sketching. I have grabbed my iPad Pro with the Apple Pencil. But you can very easily just grab a piece of paper and irregular pencil and sketch along with me. So one thing I want to get across is that sketching doesn't have to be perfect in any way. It's really this loose art style where you get to put your ideas and thoughts down on paper rather quickly, whereas the illustration is a lot more refined. So one thing I want to show you is the way that I usually create my things, the sort of art style that I go form. As an example, let's say you were to draw a box and you could create this in like the regular 3D perspective. You could say, well, you have all of the different sites and you try and get that perfect perspective. Right now I'm just drawing it rather quickly, but you can see here we have a box, right? And you have these dimensions. But I often think this is quite boring. And I really like the sort of flat 2D style, but I still want to add a bit of dimension. So it's sort of this mix between this style and this style where you just, you know, sort of see the box straight on like this, because this is quite boring, right? And this maybe is a bit too much 3D for my liking. So what is the middle ground between these two things? The thing I usually like to do is imagine that I'm seeing it from a different perspective. So let's say that I'm looking at this box from this perspective. And then instead of just leaving it like this, I just want to add a bit of depth by adding aside some basically extending the shape. And then let's say there was a light source up here, then the shadow would be on this side. And by just adding that tiny bit of extension, you can already see that it looks a bit more interesting. But this is a very simple sort of shape. So what if we were to take this and do it with something a bit more complex. So let's say I were to draw a chest. You have this regular 3D box and if it was a chest, you would perhaps have the sort of lit on top here, right? So draw it sort of like this. So this would be the lid off the chest. You would have the sort of whole for the key and everything like that. But how do you translate this into this style? So let's actually rather simple. You see, if we extended this far outwards, then we can start by drawing the top of the chest right here, just in the same sort of style. And then to figure out how far it will go in this direction, you simply have to take this distance and just place it over here. So it's roughly this distance, right? So you would start right here. So that would be the starting point, and then you would just drop to decide. So you roughly have the same shape as we were there. Draw that out and then you can connect it like this at the two points. And all of a sudden you have that chest. And it's actually rather simple to draw it in this style. So you save a lot of time because you don't have to do with perspective. And in my opinion, I just think it looks very interesting. Then you could add the hole for the key and you would start with the details and everything like that. But this is really just to show you the different possibilities that you have with this style. But we're not going to draw a chest, will actually draw a package. So how do you do that? Now it's basically the same principles that you're going to use. The, the sort of package if we were to draw that in the 3D perspective, it may look something like this. So one side is a bit longer than the other one, sort of like this. And then you have the sort of sides that are flapping down here. And you can see, because I'm sketching this very quickly, gets rather messy. But I think you sort of get the point right. You have all of these different sites and you have this package. But how do you add those sides to this sort of perspective? So the way I would go about doing this is actually just drawing the symbol shape first. So this is just the front view. Then we add the side right here. And then you just have to imagine that instead of just drawing this very simple flap like this, this doesn't really have any perspective. And also your offsetting these sort of side, as you can see right here. So why not just do that with the flap as well? So if we start out by drawing it on this right side, then we'll simply just make this diagonal line and match it over here. And that way you can see that it gets a lot of dimension by simply just, you know, sort of pushing that out. So we can do that over here as well, just in the opposite direction because it's pointing in the opposite direction. And like that, you can see that we have a very simple package. But again, it has a lot of dimension. And also it's rather easy to animate because it's not this very complex sort of 3D object. Because if you were to animate this, you'd have to think about a lot of different rules for the sort of animation, for it to look right? So this is sort of the, the package. You could go ahead and add a little label down here and stuff like that. But that's sort of the main idea. Now we want to draw a pet. And I, again, I really like to simplify things so they're not these complex 3D objects. So we're sort of approaching it with the same idea in mind. So the way I wanted to do this is just create a dark from very, very simple shapes. So we could start out with the head. So if we draw it over here, you just make this very simple oval. And that could sort of be the main shape for the face. And then, you know, the dog has this long nose. Will some docs do that sort of the talk that I'm going for. So the way that you could draw that is also sort of do an ellipse, but where one side is a bit sharper than the others. So something sort of like this. Right, and again down here it connects. So it has this very smooth edge. And you could draw the nose here, something like that. Pepsi's dimensions are not completely right, but we sort of getting there right. Then you could draw the ears. So you will have one here on the right here. You will have one here in the sort of back. So that goes behind. You could draw the eyes right here. Also just some half oval shapes. Throw some ice in there, then you could perhaps draw a tongue. So a very simple shape. Again, we just sticking to the very simple stuff. Perhaps you want that to be a bit further in somewhere around here and then you could draw the rest of the body. So let's just say that we don't see the legs because it's supposed to pop out of the box up here. So if we just have this curved shape for the back and then this sort of strange shape for the front. Maybe it could have some spots on the body sort of like this. And all of a sudden you have a very simple dark composed from very simple shapes. And this just makes it very easy to animate. If you were to rotate the head, you could do it from the point right here, it would be seamless. You could animate the solar of tongue going up and down right here. You can make some fake 3D rotation by sort of offsetting the shapes in these directions and of selling the position and everything like that. And really it's just quite easy to set up Rick and animate. And that's sort of the point behind the style that it looks quite symbol, which is what I like and it's also very simple to animate. So those are both bonuses. And then of course you will have the deposits down here. So the box could be something like this, you know. So again, just the same as the one up here. You have the flaps going down like this on both sides. And all of a sudden you have your illustration. And this is what we are going to create today and what we're going to animate. So this is just to go through my thoughts when I'm trying to sketch a certain style. And at this point, I'm really thinking about how easy it will be to animate and I'm already trying to optimize it for animation. And I haven't really started illustrating yet. So we want to move away from this style. Move more into the soul of simple flat style with a bit of dimensions and a bit of perspective in its own way. Solve using these rules to offset the different objects. And then we can take that style and create our own box from it. And we can even create a dark from it. So you can see down here with using servicing principles, we're offsetting some of the things. So you see a bit more of the salt knows here because it's rotated a bit to the side. And then you have the hypoxia. And really it's not too different styles clashing, it's the same style. That's very easy to estimate. So now I think we should sort of have these sketches in mind and go into Illustrator and try creating this illustration so we can get started animating.
3. Illustrating the box: So let's try and create all of this in Illustrator. I've created a new document which is 1920 by 1920 pixels. And I've simply found a color palette, as you can see on the site here, and a background color, the yellow slash Brown is shades are for the box. The white is mainly for the dog. And the sort of charcoal slash black is also for the dogs, ears, eyes, and so on. To find your own color palette, I can recommend either colours dot CEO. That's a website where you can generate color palettes. And whenever you find a color that you like, you can simply looked at color and keep on changing the other ones until you have a complementing color palette. Another option is going onto Pinterest and searching for color palettes. Here there's often a whole lot of inspiration and also a lot of color palettes taken from actual images. Last but not least, you can use Instagram pages such as colors dot Cafe. They regularly post color pellets and you can go in and find your favorite one. So with that out of the way, it's time to create the illustration. I think I'm going to start with the simplest thing first, and that is the package. So essentially you will go to the rectangle tool. If you don't see it, you can click and hold and find it. And we'll just start out by dragging out a rectangle. So you can see right now it's actually blue. So if we press i to get the eye dropper tool, we can select this sort of yellow brownish color. And that will be our base. So we can approximately adjust that. And then we just want the side of the box. So we'll draw out a, another rectangle. And we'll just not make it as wide. So let's choose a darker color to get a bit more contrast, sort of like this. And now we can create the sites. So these are the parts that's going to open from the top. And here we'll also use the Rectangle tool. So just strike out a rectangle and then we'll proceed to get the Direct Selection Tool. And this way we can just select individual points. So don't shift and select the two bottom points. And now we can just drag them out. So we approximately have around a 45-degree angle, and then we can change the color. So therefore, we can just go into the color and let's see, can make it a bit lighter. That should be fine. And now we need to create it for the other side so we can simply select it. Then we'll go in here and find our Reflect tool. We'll find the point where the book sort of splits to either side, hold down older option and click. And that way it will be reflected from that point. And of course we want a vertical reflection. So simply press COBie. Now we just want to press a again to select these two outer points. Attract the min so it snaps to the top here. So if I press Command or Control Y, you can just see that it lines up perfectly. Now we can also change the color of this so we can actually make it even dagger. And also we can play a bit around with the dimensions of the box. If we again select the direct selection tool, we can drag around the points so we get the boxer we like, perhaps wanted a bit bigger. And I think that should be fine for now. Then we can create the label here at the bottom. So if we just zoom in, we'll again use the Rectangle tool and just draw how a simple rectangle down here. And we'll just make it white. Then we'll make these sort of bar code from smaller rectangles. So we'll just start off by drawing a line and we'll choose this dark brown color. And then we click, hold down the Option and shift. That way we can create a duplicate, just drag it out, change its dimensions, and sort of keep on doing this. Now with the barcode done, we can zoom out and see if it fits. And perhaps we want to make it a bit smaller. So we can simply select it and hold down Shift, de-select the box behind it, and just adjusted to our liking. But I think this is actually fine and this should be fine for our bugs.
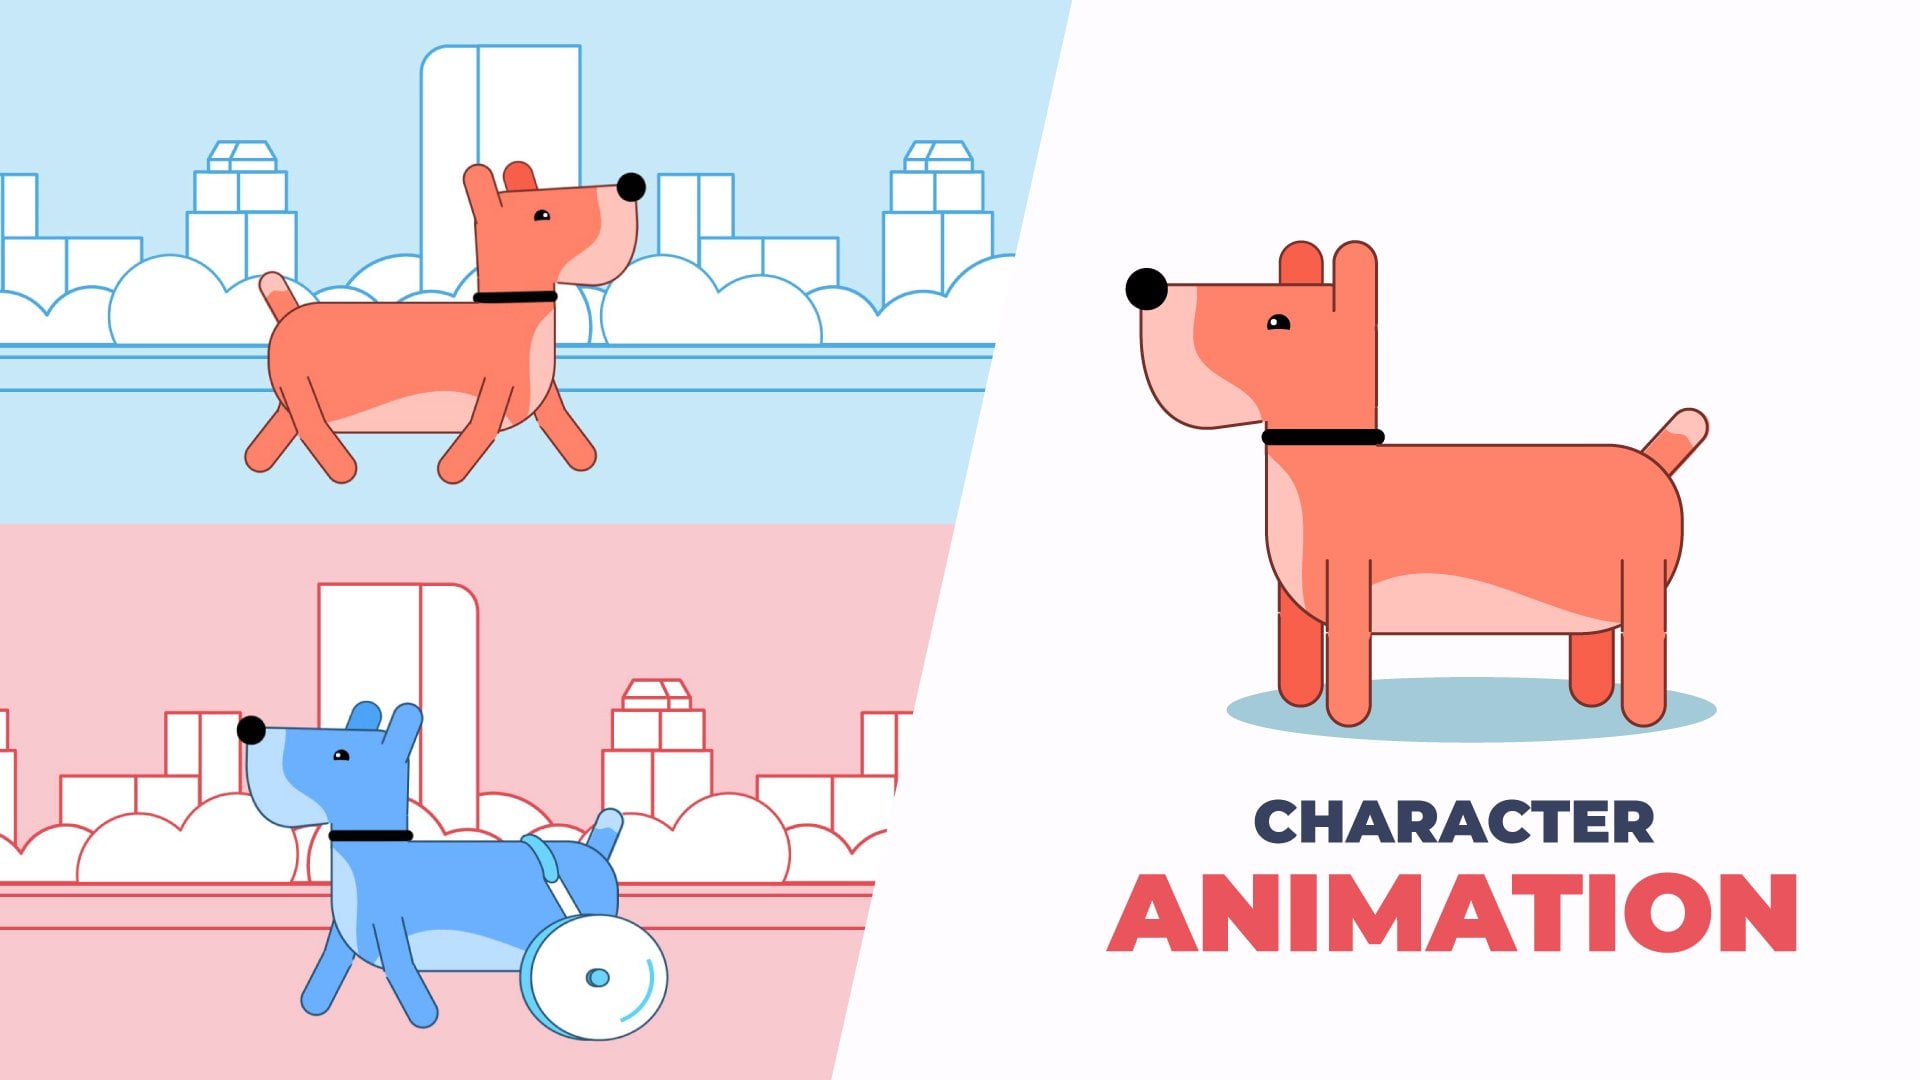
4. Illustrating the dog: Now we can start creating the dog. And as I talked about when sketching, we will start out by using the ellipse for the face. So select that and track out an ellipse. Then for the nose itself will be using a rectangle. So going again and select the Rectangle tool. And I think I'll place this a bit above the center surround here. Then just drag it out so it snaps to the bottom. And now we want to round some of the edges. So if we selected, you can see that we get these corner points and if we click one of them and drag it in, you can see that it gets rounded. So for the top part here, we don't want that to be rounded as much. That's where the nostrils are going. But for the bottom part down here, we want it to be quite rounded. And we also just want to press a and sulfur extend this part and then rounded here towards the bottom so it sort of matches with the bottom shape here. And we can also rounded a bit like this. So this is essentially the shape. Now you can go ahead and adjust it as much as you'd like, maybe triggered in a bit until you get the shape that you like. But I think this should be fine. So now we can create the ears. And for this I'm just going to create an ellipse first of all. So we can just drag this out and then I want to rotate it so we can roughly place it as an ear. And of course, we need to adjust the color of this, so make it this charcoal ish color. And we can simply drag that on so it sort of fits. And to make it a bit more interesting, we can just adjust the shape, so drag in a tiny bit like this, and also just make the year a lot bigger. So we have sort of an ear like this. I think that should be fine. And now we also want one on the opposite side so we can take it. Then again, we select our Reflect tool and we pulled down all the options and click the sensor point. And then we want to do the vertical reflection again and just copy it. And then we can go into our layer and just make sure that it's underneath the head. And we can just push it in a tiny bit. So it sort of matches and makes sense. Now I want to create the eyes of the dog. And therefore we can zoom in a bit and we can just select the ellipse tool, drag down a symbol ellipse, and then we want it to be cut off by the sort of knows. So we can drag it underneath that. So it's right in between here. And then just make sure that it's cut-off almost halfway. And then we just want to make a tiny bit of a sparkle in the eye. And we can do that by copying and pasting this ellipse and place. So do that by pressing Command or Control C, then command and control shift v. So that just make sure that it's pasted in the same place. Then you can hold down the Option and shift and drag this intermediate smaller, just like the white collar, and drag it up so it's sort of a sparkle. Then you can adjust the i, however you'd like, maybe make it a bit bigger. You can also make a duplicate and tracking that out. So you have both eyes showing. So now we want to create the nose and perhaps we can just adjust this shape. Bit, so we get it exactly how we liked before we create that knows to somewhere around here. Then we can select the Rectangle tool and drought a square for the nose right here, and just run one of the corners. So we get that sort of round nose. You can see when I hover over this shape, you can sort of see the intersection. So if we take this underlying shape, copy it and pressing Command or Control Shift V to paste it in. Please select both shapes and you see pathfinder. So that's my going to window Pathfinder to intersect and cut out that shape. And when we've done that, we can simply select a darker color Floyd. We have the nos ready. And if you think maybe the nose is extended a bit too much right here, you can always go in and select the paths. So you can see right here, we also need this path and perhaps this one. And then just make sure that you haven't selected anything underneath. And you can simply drag it in a bit if you'd like, and just make these sort of small adjustments on the go. But I think this should be fine for now and we can actually go ahead and create the Party for the dog. So you, once you get d dimensions right according to the box. So we can track the box down a bit, track the dark down, make that a bit larger around here. Maybe make this a bit smaller. So real, this is just about adjusting it until you get sort of what you like. So right around here. And now we can create the sort of shape of the body. So I'll press p to get the pen tool over here. And I'll just select this intersection. You can see if a person commanding control, why? It's right here at the sort of edge of the ellipse, go down and then just make this curved shape for the back of the dog. And then I can go in and select the anchor point tool. Just strike this in. So we don't really have that. We add angle when we are creating the next point p to get the pen tool again. Go a bit ahead. And then we just want to make sort of a trapeze shape right around here. So just strike it up and we can adjust this on the go as much as we'd like. So I think right around here should be fine with just track that underneath all of these things and select the white color. So you can see now we have created the sort of body for the dog. And I will actually take all of the parts of the dog just please underneath the box so we can really see how that looks. So perhaps we wanted sitting somewhere around here so we can even make the body a bit bigger. Like this. I also think we could actually exaggerate the eyes a bit. So if we select those and make them even bigger, perhaps also a bit wider, just make them a tiny bit closer, right around here. And now let's make the salt of spot for the dog. So it has a spot on the side. And that's just so everything is completely white. And to do that, we can just select the ellipse tool, track out an ellipse, and just rotated a bit. Try and sort of place it so that maybe around here, we can just select a dark color so you can sort of see it. And again, we use the same sort of method by selecting the shape that's underneath, copying it and pasting it in place. Then selecting the shape that we want to intersect with. And just use the intersect tool and select that dark color. Then we just need to drag it all the way down here. So we just have that spot on the side. And now we can create the tongue. So the tongue is quite simple. It's actually just a path. So I'll select the Pen tool. Then I'll click right around here. Just click down. And over here you can see that we have a fill, but you can actually swap it. So get a stroke instead. And then you just need to open the stroke properties. So that's under window. And then you can go all the way down to stroke. And here you simply just want to increase the weight quite a bit. So around here. And then you just change the capsule around cap and you sort of get this trunk shape. So we want that underneath the mouth of the nose. So we place it right here. We're gonna just see length. So let us make it this light pink color by just holding down Shift and making sure the stroke is selected when clicked that color. And then we can simply duplicated. Then we can select the darker color for this one. And then we just want to decrease the stroke weight. So we just have this sort of indent in the tongue. So you can see that's right around there. So the last thing that I want to add is a bit of a shadow. And that's just so whenever the head sort of tilted up, you can just see a shadow underneath here. So just like the pen tool, and I'll just start the shadow if a press commanding control Y and just see the sort of edge right here. I'll just start it, let's say right around here. And then I can simply just drag it up here so it sort of follows that shape. And maybe adjusted a tiny bit like this. And that way just follows it and it looks a bit better. And then I can just drag it over here and finish it suggests you have created this shape and you just want it to be this dark color and also want to change the transparency. So I'll go to window, go all the way down to transparency. And let's see where we will put this. Maybe at around 25%, that should be fine. And again, we want to cut it out so it fit it perfectly to the body. So we'll take that underlying shape, copy it, and paste it in place, then select the shadow and we'll just intersect again. And now we have to change the colors up again and change the opacity to 25%. But that should be fine. And now we can simply take this shadow and just try and find the body so we can place it on top, right around here. And now we can see there's a bit of the shadow here. So you simply just want to fix that by dragging it up a bit. So perhaps right around here. So the idea is that if you took all of these parts from the head, you would also need to select the tongue and then pressed ours and rotation and click this point, we start to drag up. You can just see that the shadow sort of shows itself underneath here. And that's just to create a bit of depth, that's just sort of a nice effect. So we can just take the overall dog now and at just the sort of scale and positioning. So we get exactly what we're looking for. And this can take a bit of time, but this is also sort of a fun part. Will just get to play around with the design. And all we need to do now is get it ready for animation. So that means creating all of the different layers and sort of separating the different parts. So it's easier to animate in After Effects. So I've just taken the freedom to create the send different layers and naming them. And let's just start from the very top. So the front LET first of all, and we can just cut that out by pressing Command or Control X, then selecting that lit layer that it's supposed to be on. And then pressing Command or Control, Shift and v That just make sure that it's on the right layer and in the sort of right position, then it's the lit side. So we can do the same for that. And then it's a package. So here you can see there's a bit more than just one layer. So we select all of them, cut them out, and then we paste them. And then it's quite important that you press Command or Control G to group them. Because otherwise it will just get messed up in After Effects. Then we have the right idea. That's the top part of the dark web, the nose that consists of these two layers. So we'll also make sure to group those, as you can see here. Then we have the tongue and the thing we need to find the tongue here, just because it's quite hard to select paths that are on top of each other. So select both of them, drag them into the tongue and just make sure that they are grouped. And then we have the AIS thing. It's also easy to find them down here. They should be on top. And also just make sure that these are grouped. And the face, this is just see sort of ellipse paste that we have the left ear, that's the bottom one. And then we have the body. So that's the Shuttle. And then the main body and then the spot. And you also just group those together. We just delete the last layer, and now we actually have our entire illustration and strategy to animate. And the reasoning why we're using a bit of time just naming these layers and, and sort of separating everything because that way it's just much easier to break everything an enemy that when we come to that point and you just see if we were just to move the body, we have that as one piece. If we were to take this part of the box or either for let's just easy that way and it's much easier to animate. So let's jump into After Effects.
5. Converting to Shape Layers: When we have aftereffects open, we can simply find out Illustrator file. So I have it right here, and I can just drag it into aftereffects. It will create a new composition. You just have to choose that and just click OK. Then we can open that up. And you can just see that we have our dark right here. So if I just drag up the layer so you can see them, we just want to create Shape layers from these because that way it's just much easier to animate. So I'll select all of the different layers except for the colours. Then I'll right-click Create and create shapes from vector layer. Then I can just drag this up and I can delete all of these illustrator layers. And now we can see that we have all of the different layers. And you simply just want to rename them and just delete the outlines part because that way it's just much easier to work with. Then a smart trick you can use if you don't want to see your sort of background layer, is that you can turn on the shy property. Then you can lock the layer, and then you can turn on the shy property for the entire composition. And that way it's there, but you just don't have to deal with it. And you just see all of the layers that you actually want to use.
6. Fake 3D Lids: Animation: Rearrange the workspace a bit because we're doing some carrots animation where animating the pet. And therefore we just need a bit more space over here. Really the way that you do this is just take the windows like this and you can just adjust them however you'd like. And I just wanted a bit more vertical space for my timeline. Now the very first thing we're going to animate is essentially the box. And therefore we can also just hide the dog for now. So what I'm going to do is actually select every single part of a dog. So that's from the body all the way up to the right ear. I'm just going to change the color so it's easier to identify. Let's go for a green Perhaps. Then I'll right-click, decompose and just call this a dog. That way we just have a lot more space and we can just hide it for now. Now when working with the package, we have to sort of imagine how these sorts of sides, the soul fillets would move. Now, you can take this, open it up and just try and find the path in here. So you can see that it would be quite difficult to animate this because you just go and keyframe one by one and it's hard to sort of imitate that motion of it being fake 3D. But what I actually figured out is that this has to move in a circular motion. So imagine that we have a circular motion path. It will move something sort of like this. And that's really how the lid would open and close if this was actually free d. So if we were to keyframe that manually, it would take a lot of time. So actually figured out a much better way of doing this. So what we'll start out by doing is selecting the entire path. Then we'll go to Window and we'll go all the way down to the bottom. And he'll find an extension called create nulls from paths. And this is native in After Effects. So when you click that, you get this box. And essentially you can make the points follow the nulls, or you can make the nulls follow the points. And we want these path points to follow nulls. So we'll just select that path, then click the points follow nulls. And now some of you make it an issue where the nulls don't line up with the columns of the layer. And that's actually an easy fix for this. So let's close down this window. Then. First of all, we have to disable the expression that's been placed on the path and see if we click this arrow, that's the entire expression linking the path with the null objects. So all we have to do is older option click on the stopwatch and that will remove the expression. Then we have to go in and change the transform of the group. Now it's very important that you do this within the group itself and not the transform for the entire layer. So you have to open up the group. And then you can see that we have the transform down here, open that up. And now we can see the issue. The position is actually offset and we want that to be back at 00. So this way you can just see that it lines up perfectly with the null objects. And now all we have to do is reposition the layer. And because of the fact that the null objects are not linked to the path right now, we can actually just take all of these layers and move them together and just lined them up with this corner right here. So you can see when we get that, perfect, we can zoom all the way out. And now I want to also in the right place. And all you actually have to do now is just go to the path. Then window, go all the way down to create notes from paths. And just points follow nulls. This way just links that path up with the same null objects. And because of that, you can take each one of them and move them around. Now if you have this issue with one of the lists, it's of course also going to happen on the other lit. Therefore, we can go ahead and just fix it from the very start. So open up the lid, go into the group and again find the group transform. Here we can see that the position is not zeroed out. So we'll just do that. And then we'll simply zoom in, drag it all the way over, and try and line it up with one of the corners here. So we have that perfect positioning again, this way the nulls for this lip will be lined up properly when we go ahead and create them later. So let's continue with the animation. And if I were to take this and move it around, you can just see it's much easier to sort of animate the points of the path individually, not the only ones who are actually going to move the bottom ones. So we take these two top ones and just delete them. We essentially don't need them. And because this is orange on this sort of brown, orange box, it's quite difficult to see, so I will just change it to some other colour. Perhaps you can go for the purple and the way it's just a lot more visible. So we're going to do now is draw out the motion path. So we'll just zoom in and focus on this corner first. We'll just go up here, click and hold the Rectangle tool and get the ellipse tool. So we'll just add a bit of a struggle up here and just turn off the fill for now. And we'll start off in this top corner. Just click and hold down command and control and shift. When you drag that out, you get a perfect circle. And then you wanted to line up with the bottom down here. So you can just see right around here it should be lined up. So that's perfect. And now essentially the motion path that we're looking for is from this point down here, all the way up to this point. And that should get this perfect motion of the box. But first we need to sort of limit the circle to that path because we don't want our corner to be moving in this sort of portion. So the way that we do this is we take the ellipse and opened it up, right-click the ellipse path and just convert it to a Bessie path. That way it's just a regular path that we can adjust. So we'll go up here and select all Pen tool. Then we'll add a point to this corner down here. And now to open up the path between these two points, will just select them. Right-click. And then we can go to mosque and shape path. And you can see it's close right now, but you can click that and it will actually open up that path. So then we can just delete this bottom point. And you can see we have this perfect motion path. So now we can add a keyframe, so this path and simply just copy that, then we'll find the corresponding null. So you can see it down here. We'll press P as in position, and just paste it onto that position. So right now you can see that it's moving on that motion path, which is perfect. We just hide it up here for now. But really we wanted to go in the other direction. We want it to start closed and then open up. That's a symbol fixed for this, you can just right-click the keyframes, go to keyframe assistant and just time reverse the keyframes. So now you can see we actually get this perfect motion and that's what we're looking for. So before we start copying and pasting this onto the other nulls, we simply want to do a bit of easing. So we'll just press F9, easy exit. You can see these two key frames are called rove across time. It just means that they're basically going to adjust based on the easing on the first and last keyframe. If we select one of the key frames and go into the graph editor, and we go down and select the speed graph. You can just see they're placed on top of that speed graph. So if we just one of these points, it's basically going to follow. And that's just the trick. So the way we want this to open is quite quickly from the start. Then slow down a bit, ease our bid, and then we wanted to overshoot and go back. Now before we create this overshoot, we just want to sort of match the timing. So imagine this should be a lot quicker. We can just zoom in. You can see it's sort of a 2.5th right now. And I actually think this is about fine. We just put it to 12 frames. Then just go a few frames ahead and edit keyframe. And then at this point of time we want it to be overshooting. And really you don't need to perfectly follow this circular motion path. You can just sort of estimator down here and it should be fine. Otherwise you would just have to sort of extend this motion path before you cut it out. But this is just a much quicker way of doing it. So go into the graph editor. And here we want a bit of easing. We just F9 to ys, ys everything again. And as I mentioned before, we want it to be a bit quicker at the start, like this. And we just want to add a tiny bit of erasing here to the end. When you're just a path like this may create a bit of it. We had motion path, just the handles, a bid. You see there's this other handle and you can see this motion path is quite extreme. It's overextending. So we basically just want to take this all the way down here. So we just get this linear sort of motion path and let you really fix our problem. There. You can see we just have this very subtle overshoot now and that's what we're looking for. So when we zoom out a bit and see the motion path and everything. And of course it looks a bit strange because it's not applied to the other null, but we'll do that right now. But before we copy and paste the keyframes, We just want to make sure that everything is aligned when we sort of pasted. Therefore will press Command or Control R to get the rulers. And we just strike out guide. So corresponds with that corner right here. And we just see that's where our null is supposed to be. Then we copy and paste the key frames from the snowball until the position of the other null. And you can see right now, it's not lining up. We just have to go to the very last keyframe. We showed that every single key frame selected, click and hold down shift, and it should snap to that grid essentially. And now when we pay the spec, you can see we have the perfect opening of that sort of side of that lid. Now we just have to repeat the process for the other side. So again, that's just going up to window all the way down and we just have to find the crate nulls from paths. And then you just have to create this sort of motion path again, but just in the other direction. So you just start from one corner. It could be this one, hold down command or control and shift. Drag it out like this. We'd go in, right-click their lives path converts Bessie path. And then just add that point down here. Select these two points, right-click. Go in, open it up. You know, it's the exact same drill and you just have to go through the exact same process. And now when you have this part, it's very simple. You make a keyframe for the path and copy it, opened up the position and paste it. So now you can see for this side, it's actually starting from the right point. So starting from within here. And then it moves all the way out. And then you just have to recreate the easing foldy keyframes. So you can see when that is done, we get this sort of motion. Quite simple.
7. Fake 3D Lids: Offsetting: And now we just want to duplicate it. So we have the sort of back side and we have the left side also opening up. So the way we do this is we select first of all, the parts for the front lit, lit front and the two nulls right-click and then we decompose it, call it the lit front. Then we select for the side1 right-click, decompose, call it lit side. So let's start by adding the backlit will take the front one and duplicated when just call this Hulett on the scope. Back. Then we opened up this scale by pressing S and unlocking the constrained proportions. We simply just want to reverse the x scale so at a minus in front. And then you can see it sort of extends to the other side. So if I were to take this out during just seats, the reverse piece and where we want this position is basically so it lines up with the right side here and just drag it all the way out like this. And then we of course, want to place it behind everything. So it's in the back. And then you can see that we have the lead in the back here also opening up. And to make it more visible and make more sense in terms of the lighting, we just want to change the fill. So it'll go to effects and presets and just search for the fill effect. Drag that up into our effects panel. And I just wanted to select the eyedropper tool and select this lighter color and just make it a tiny bit dagger. So right around here. And you just see that it's now differentiated and it's easy to see the different sites. So we wanted to replicate this process just with the side, will take the lit side and duplicated, call it the lit side on the left. That was just easier to recognize. We'll open up the scale, unlike the constrained proportions again and just go negative 100 and the x scale. So this is the same exact thing. We just want to line it up with the side here. Then we just have to take the lead and place it on top of the back. So it's not all the way in the back. And now the only way you can actually see that lid is when we're just the timing. So we want the front and the back part to open up first, and then we want the side parts. So we'll just select the site parts right here, drag them a few frames out. And you can just see it looks a lot more dynamic when we have that sort of offset. And they're not opening on top of each other, which really wouldn't make any sense in real life either way.
8. Animating the Dog: Popping Up: So now we can go ahead and create the dog and emission. We can just enable our dark again. And then we're going to the dark pre-compute and start animating. So we want it to pop up. And that motion basically derives from the body. And then we have some follow through in sort of the nose and ears, and then at last the tongue. So start with the body animation and we'll just select it and select the pen behind tool to adjust the anchor point and just place it somewhere right around here. And now we want to create a parent chain so everything is parented properly. Now the head is going to be controlled from this face shape. And here we just want to again adjust the anchor point, Hold on command and controls to make it snap and just make it snaps to the backside. So we wanted to take the ear, nose, tongue, eyes, and the other ear and just parent that to the face. That way if we rotate the face, you can just see it moves probably. And I've just placed a shadow underneath here on top of the body. And you just see you can drag it all the way up here and then it ends. But that's just so the Shadow works when I'm moving the head now want to change the anchor point of the ears, the tongue, and the ice. So we'll start with the yes. We simply just wanted to be somewhere up towards the top here on both of these like this. And then for the eyes you can see that's actually perfect in the sensor. And that's just so when we unlock the proportions for the scale, we can basically make it blink just by scaling the y position up and down. So that's very, very simple. Now for the tongue, we just want to take the anchor point and place it up at the top soil Don command and control and make it snap. And now last but not least, we just want to take the face and present that to the body. And we should have a very simple functioning Rick. When sake, the body can rotate that everything rotates with it. We can take the head also rotate that we have the sort of ears that can flap. We have both of them. And then we also have the tongue that can also move from side to side. Also, we can move it up or down if that's what we want. And last but not least, we can just scale up and down the eyes to make that blink animation. So now we want to create the movement. And first of all, we want to keyframe the final position. So we easily can go back to that. So we'll perhaps go 12 frames ahead, and then we have to decide what we're going to animate. It's for the body, it's the rotation and the position at a keyframe. So those for the ears, what I actually like to do is choose a dominant IRR. In this case, it's going to be the right idea. Select both of them, impress us and rotation. Now because the radius is going to be dominant, take the rotation of the left year older object like the stopwatch and pick whip up to the radius rotation and we just add a minus in front. So this value becomes negative. Therefore, when we rotate the idea, the left ear will rotate in the opposite direction. Now because we're going to animate the rotation of the year, we also going to add a keyframe to that right here. Now for the face will also animate the rotation for this, for the tongue will animate the brute session. And I think that should be about it for the main movement. So now we can go to the very start, and we'll start where the motion is derived from. So that's the body and that's sort of the initial energy and sort of the main motivator for the movement. We'll just drag that all the way down we can do to get the rotation. Just rotated a bit. And then we can go into the main camp. And you can see it's underneath the top of the box. So that's perfect. Will met that outlaid at the bottom here. And basically you just have to imagine, okay, what body parts are going to be used to anticipate the movement? What body parts going to drive the energy. Of course, the mean energy is coming from the body and the neck, but also the face will help. If you were to make this movement, you will actually talk down your face to anticipate and then move it up. So we can also rotate this downwards like this. And also for some follow through, the tongue would actually also follow this motion. It's also rotated in that direction. And for the ES, You can imagine that when the doc flies up, the ears will also fly up as a reaction, but they will actually start all the way tucked in. So something like this. And then if we solve, scrub through this and see that motion, but of course we don't want it to stop here. We wanted to overshoot because there's so much energy and it needs to go somewhere. So it needs a bit of overshoot and then a settle. So we can go a few frames ahead, edit keyframes, everything again. And then here this point, this is going to be our overshoot because then they can settle back to normal. So here we just want to move everything in the opposite direction from the start. So you can see that here it's sort of top-down and it's rotated to the left. Up here we wanted to, first of all, with the body, we wanted to move up a bit, rotated a bit backwards, wants to take the face. Also wrote it that upwards. We can see the tongue here. That should also be going out. And that's just because of follow-through, because you have to imagine that the tongue is just sort of flopping around, moving wherever the body's moving, and therefore, that will also flop up. Then we have the ES. And you can also imagine that because of that motion, they will also go up like this. You just see this is a very saturated pose. The sort of energies just flowing throughout the body. And then at the very end, it settles. But for some things you don't want it to settle that quickly. So these are the sort of non driving factors. The body is a main driving factor that will settle quite quickly, but something like the ES and the tongue, they are just moving according to the body. There could also be if you were wearing a hoodie, as an example, if you move up like this, the hood would perhaps wrecked and move upwards and then it would settle. So what we're going to do for this is essentially just make it oscillate a bit. So you can see right here it's going to be finished. Just move a bit ahead again. And you have to remember that the incivil also needs to be shoulder every time. So it would be the right ear and the sun. And you can just see that this is the largest interval than a shorter one and the shorter one again. And here we just want to go in the opposite direction. So you have to imagine, okay, the years all the way up there going down. And then they just need to move a bit further in. And this needs to be very, very minimal. So really avoid making this too extreme. And also for the tongue, we just want to make it go in a bit further, sort of like this. So you can just see that when the other things settled, that sort of moves a bit further. And now an easy way to sort of view this is if we select everything, right-click and we toggle the whole key frame. This way we can just sort of see if the timing is all right. We'll just press Enter here to trim the work area. And you can just see that we have that quick motion upwards. And I think this should be about fine. We can always adjust it later. But in terms of the timing visits, just where you would make these small adjustments to see if sort of needed a bit more time in-between somethings. But for now, think this is good. So you can press F9 EECS every single keyframe and just go into the graph editor. And now because we are working with soft d position down here, were not able to use the value graph. Now the speed graph is fine for this because we're just going to make sort of minimal adjustments. So you can see we start with sort of the largest motion here. Just drag these handles in a bit to make that oscillation smoother. And you have to imagine that you need to do it less and less in terms of what the timing is, the interval between the keyframes. For this last one, we may need to zoom in. And if you have the magnifying glass, the auto zoom enabled, it will automatically zoom in when you get closer to those key frames. And for the last part here, we just want a tiny bit of ease in here. And you can always sort of cross references. If you go in here and you select show reference graph, you can see the sort of value graph and that should be quite smoothed. It will also have the other value graphs down here. So we can disable that and played it back. So this is actually fine. The sort of motion and speed is all right. And we just have this very simple movement, but it's really not that interesting. And most of the time, if you're animation, it's not interesting. It's because everything is happening at once and you never really want that. You want a lot of offsetting. So I'm going to exit the graph editor. So here we just have to sort of imagine the chain of emotion. One way you can look at this is by using your own buddy. If you were to say throw a ball or something like that, initially, the motion is coming from your body and the shoulder is sort of leading the motion. Then it's the elbow, then it's the wrist and the hand. So that way you know that the first thing that's going to move this shoulder, then the elbow than the risks and then the hand. And here the thing leading the motion is the body of the neck. So that's the first part. Then the next part is the face. So we can select every single keyframe except for the buddy and just move it, let's say two frames ahead, so that that part is delayed and the body is the first thing to move, then you have to imagine, okay, what's attached to the face. That's sort of the ES and the tongue. We can select both of them and also delayed by a few frames. And now when we play the spec, you can just see it's a lot more interesting because we have that delay in the motion. You could even delay the tongue a bit more if you wanted to. Just buy a frame B2. And it's really just to differentiate the motion. And you just see this tongue becomes this floppy part because it's so delayed from the main body movement. You can see when the body comes to a stop right here, the tongue sort of follows through. It's behind. And that's just because the muscles in it aren't used. And therefore it's just flopping around. And that's sort of the same with the ear. So that's just a way to get a lot more interesting motion.
9. Animating the Dog: Idling: Now when this initial animation is done, you of course, don't want the doctor to stop completely. You want a bit more motion in a bit more movement. So the way you could do that is sort of an idle animation. You could go in, let's say with the Tn, we could go and select the position at a key frame. And then we could go, let's see, six frames ahead. So 1-2-3, 4-5-6. Move it up a bit. Then we come to the first keyframe, goes six frames ahead again. Pasted, which just makes an easy, is go into the graph editor here and just adjust these points a tiny bit. Sort of like this. Then you could all the Option click the position sidemen, loop out. And that way it should just loop this animation. So you could place it at the very start of the composition. And then you just have the tongue sort of moving all the time. And this is just to show that the dog is excited and that it's not completely still really. And you could keep on repeating this. You could also do it for this sort of body. Rotate it back and forth. You can do it for the head. Pop that up and down. And really it's just to show that this is a way of creating this idle animation. When just go ahead and do it for the body. You can see when the rotation stops here, we just go, let's say six frames ahead again. So 123456. And then we want this to be very subtle. So just add a tiny bit of rotation here. Goes six frames ahead. Copy and paste the first key frame. And then you would really just copy these three and keep on pasting them. We can't lose this because we have the initial animation. But things you sort of get the point. And you could just keep on pasting this until the end of the animation. Select every single one of them, go into the graph editor. And here we just have to go in here. And we just have to make sure that the easing is adjusted properly. And we should also get that bobbing motion in the body. Now you can see already here, it's, it's too extreme, even though it's only minus 0.7 degrees. So you can always go in here. And then you would need to select the value graph and select every single one of these keyframes. And what you wanted to do is essentially enabled this transform box down here. And then figured out the point where I wanted to scale from, say wanted to scale it from 0. You track the anchor point up, down, hold on Command or Control and click. And you can just scale this down. So that way you can just see that it's very subtle, sort of bumping. And you could just go ahead and copy these keyframes. Go to the face and then again go six frames out. Paste the keyframes. And now this should also be bobbing up and down. And for the final part, you could actually do this with the ES. So take the idea and then again goes six frames ahead. Paste it. And then you can see for the ears, that's perhaps not enough. But you can always go into the credits are here and zoom all the way in so we can see what we're working with. Make sure that you have selected the value graph and enable the transform box. And then we just have to find the anchor points. It can be a bit tricky because the rotation is so different. But you can just see that 0 degrees is up here. Drag it up, hold down command or control, click. And then we just want to increase this rotation. So maybe you want to increase it by quite a bit. And just sort of try and see if that's alright. So see you have a bit of motion in the ears. Just scale it up a bit more. And because of the fact that everything is already offset, you also get this offset in the idle animation. So you can see that the body is driving the motion. Then you have the solid phase rotating. You have the ears and you have the tongue at last. And we just see that corresponds really well. And that's just to avoid completely stopping the motion of the dog. So now we can create some blinking animation. We perhaps wanted to blink right when it pops up. So right around here when go to the ice, press S's in scale and edit keyframe. Then we go five or six frames ahead. And we only want to adjust the y scale. So pleased that at 0. Then we go ahead again and we just copy and paste the first keyframe. Add a bit of easing. And really this is quite simple. We wanted to ease in quite a lot from the very start here. So all the way in. And that's the same towards the end. And that way it just really exaggerates that blink. So you can see we have the blinking motion and you just want to time it because right now it looks a bit strange because the motion is almost done. And then it links. You usually blink whenever you're doing a motion or whenever you look somewhere, the initial thing you do is spring and then do that motion. So a bit before you see if it blinks here, That makes a lot more sense because it's blinking and during the motion. And we can just add another idol blink somewhere around here. You don't want to exaggerate with a blinking quite quickly, it can become way too much. So this is just a very simple way of doing it. Just another bling right here.
10. Animating the Dog: Fake 3D Headturn: And if the idle animation is not enough, you can save it one step further. And this is just create a bit of fake free movement for the head. So a bit of a head rotation. Now this can be very subtle, but it adds so much to the animation. It's actually incredible. And the way that this stock is setup just makes it very easy to do. So before we start doing it, I just wanted to explain the solar mythology behind it. You want the dogs look a bit more to the left. And the way you do that is by elongating the sort of knows here. Then you take the right year, the eyes and the tongue, and also move that a bit to the left. And you take the left ear and move that to the right. And that just creates this fake 3D sense of rotation. If you have a dark, you can try and take a look at it, try to rotate its face. And you can actually see the sort of movement. And that way you can see where the things are going to move. And the only thing that's going to elongate in this example is just the nose. And then we can just create the movement by simply adjusting the position of everything else. You can also find some reference images online of dogs. You can get a side view and front view. And you can sort of imagine what I'm talking about. So we want to initiate this motion when the doc blinks around here. So has wanted to blink a bit before right here. And we just want to close everything down and only work with the necessary parts. So this means that we're going to work with the position of the two ears. Also, we have the AIS and with the tongue suppress ps in position and our VC, one problem is that the Tn is already being animated in the position, but that's only in the y position. So we can actually right click. And then we can separate the dimensions. Just delete the exposition altogether. We just have to rewrite the Loop Out expression and also do the easing. But again, that's very simple. You just simply zoom in and just adjust these handles by tiny bit. And that should just give you the same exact easing like that. And now we can animate the exposition. So at a keyframes all of the necessary positions. And then we want to estimate the path of this nose. So we'll just go up in the search bar and search for path. And then you see you have the path for the black part and the white part. So edit keyframes, both of them. Then we can go a bit ahead. And here we just want to do the fake 3D rotation. So the first thing I'll do is just select the path of the nose and just select the front points here and there where you can just drag them out a bit. Then we can take everything that needs to be moved to the left. So that would be the right idea, the eyes and the tongue. And just use the arrow keys to move them out. Right around here so you can see the sort of tongue lines up with the same position. And then a last, we need to move the left ear inwards. So right around here. And you could just see, we have this very easy fake 3D rotation and it literally took seconds to make. And this just adds a whole lot to the animation. You can perhaps take some of the elements and move them a bit more than other elements. And that's just to create a bit more depth and perspective. Because this year is closer to us. And because of the sort of parallax movement that will also be moving a bit more. And therefore, we just wanted to move in a bit further. So now we select these keyframes, press F9, ease, Ysom, and we also want the dog's head to rotate back again. So we'll just go a bit ahead. Copy the final key frame here, and you just need to do it for every single layer. Go a bit ahead, and then we copy and paste the first key frames. So that way it just stops a bit in the soul of left position and then it moves back. So EECS, every single keyframe going through the graph editor. And here we'll just work with the speed graph. That's this easier when there's so many key frames. And you can just go in here. Now, this easing is quite simple. I don't want to do too much. It's mostly in the timing. And then a bit of asynchronous starts and stops. So we can see how this looks. Sort of looks to the left and the right again. And really this is fine. I think this motion should be quite fast because really think about it. When you're rotating your head, you don't do it very slowly. Sort of make a quick movement. And also when you move your eyes, you also make these Quit sort of Jackie movements. And that's something that most people don't realize. So in animation, don't try to make this headstone last 1 second or 1.5 seconds. It just looks on natural and you just want these quick motions. You can see it jumps up, then it idles, looks to the left and it looks to the right. It's a very simple animation. But when done right? And you have the offsetting, you have a bit of fake 3D, you have the Idle. It just looks great. And that's really my philosophy. You don't need to spend a lot of time on all of these keyframes. When does a much smarter way of doing it? If you just know how to create these things and do it efficiently.
11. Compositing Everything: In the main composition, we of course don't want the dog to show down here. One way we can fix that is by going up here and selecting the Rectangle tool. We need a fill for this one, we just disabled stroke. And we just need to draw a rectangle below here where we don't want it to be shown. We can call this the alpha, because it's the inverted alphabet and we can just hide it for now. Select the dog and go to effects and presets and search for the sediment effect. Correct that onto the dark layer. And right now, I can just write this out and see what we're doing. We just want to select the alpha inverted map and we want to invert the map. So that way it just isn't visible down here. It's a very simple technique and you don't need to duplicate layer. So you see alpha met settings in here. It's just very symbol, the dog pops up. And one final thing I'd like to do is just add a bit of squash and stretch to the old box. And that's just to make the motion that bit more intense because of course the box would react to the dogs movement. So just select everything, right-click and decompose. It will call this the box and information like that. And we'll just select the pant behind Tool and drag that all the way to the bottom since after box down here. And perhaps we want to delay all of the animation a bit because we sort of need a bit of time for it to squash down and then stretch up. So we'll go into this again. And here we'll just take all of these precomputed and track them a bit ahead. So you can just see a bit of time before that sort of moves up. And then we'll go back into the main composition. Precesses in scale, unlock the constrained proportions. So we just started the regular scale. Go a bit ahead and I want to retain the volume and question stretch. So let's say we go negative 15 in the y scale. We need to go plus 15 in the x scale so that we're just squashes down. And then when the box is about to open, we want it to show up and stretch up again. So that should be right around here. And we just want to go in the opposite direction. So if we go back to one hundred, one hundred, we want to decrease the x scale and increase the y scale. So we can actually just go 85115. That's just the complete opposite as you can see, like this. And then we just wanted to settle. So go down to one hundred, one hundred. Now the timing may not be right, but let's add a bit of easing first, go into the craft at ESA, we can actually use the value graph. It's just easier to look at, in my opinion. And we just want to exaggerate this motion a bit when it's sort of squashing down. So you can see the handle sort of meet in the center here. We just do this all around at first at least, and then we can sort of see if that works out, all right? Or if we need to make more adjustments. So right around here, let's see if this works. As you can see, it's perhaps a bit delayed. So we may want to go into this composition, just make it happen a bit before. And here we are just really adjusted to a liking. But I think you sort of get the point. It squashes down, stretches up right here, and then it sort of settles. And you can adjust the timing of these if you want something to last a bit longer, something a bit shorter. But you see this sort of the main idea. And if you don't want it to settle right here, you can go ahead and add another key frame and then make a bit of an overshoot here. So just wanted to squash down a bit more. And that way you can just go into the wide-scale. Let's go negative five and then go plus five in the x scale. So that way it's just not completely finished. And this is just all up to personal preference, but I just like to keep it a bit simpler in this case.
12. Exporting as a GIF: If you want to share your class project, that's a very simple way to do that. First of all, you have to find your main composition y, your entire animation is located. Then you have to trim the work area. So that just means that you have to decide which part of the animation that you want to show. To set the beginning point, you press B and to set the end point you press M. So I want mine to begin at the very start. And I wanted to end right around here when the darkest looked back again. So when I've set my in and out points, I just wanted to go to composition. So Adobe Media Encoder q, and that will open up the media encoder and agile projects to the q. So here usually go for the H.264. That means it's going to be rendered as an MP4 file. And the reason why you said it's just because it's the most optimized video format, you get quite high quality and the file size is very low, then I usually select the Match Source high bit rate. So this just means that you get the best possible quality within the H.264. And then you can simply select where you want this to be rendered to. Soldiers. Select my desktop and save it as dark animation. Press Enter and just start the render. And this is usually very quick because it's just simple shape and emission and the resolution isn't very high. Then you can upload that to YouTube and posted on the project page. Or you can go one step further. And that's by turning it into a GIF. Soldiers find the file right here, drag it into Photoshop, and then you can see you get a timeline down here where the video can be played. Then you go to file export, then you save for web legacy. Here can optimize the gift. So let's say that I thought the image size was a bit too big. Instead of 1920. By 1920, I could make it send 80 bytes and AD. And that way the gift doesn't take up as much space. Then I simply just click Save, choose a location for my gift. Press enter. Now I have a gift. I can upload directly to the project page instead of having to upload it to YouTube. So I hope that you learned something new if you enjoyed it, and be sure to leave a review and check out some of the other classes that I've posted on the platform. And that's all for now. Until next time.
 Oliver Randorff, Motion Designer