Transcripts
1. Introduction: [MUSIC] Being able to
create your garment is a skill that you
would have for life. Just being able to
conjure up something, put it into paper, into fabric, and then wear that. Honestly, I think
that's just so cool. My name is Princillia, I'm in Nigerian women's wear
designer based in the UK. My platform is called Kim Dave, where I create a
sewing content online. I also share my journey of starting and growing
my own brand. The struggles, the
victories, the wins. Today we're going to
be making a button up shirt with a two-piece
stand collar, and a cuff on the sleeves. We'll start off with
the measurements, the materials, the
sewing patterns. With those patterns we
are going to cut up a quick prototype to
check for any errors, and then if you're okay with the phase of your
prototype shirt, you can then go ahead and use your sewing patterns to
make the final shirt. Towards the end
we're going to be sharing how to add dots along the waistline to
really add structure and definition to the garment. Making sewing patterns
with your own measurement, is something that
I think if you do, the shirt fits a lot better on, but you have the freedom to also download the patterns that comes with this class if you
don't want to go through the hassle of making your
own sewing patterns. This class is great for
anyone who is looking to challenge themselves
technically. You should be able to
comfortably sew with a machine, I hope students walk away
from this class feeling empowered with a skill that they can then use for themselves
or apply to another project, the possibilities are endless. Let's get started. [MUSIC]
2. Preparing Your Project: I'm excited to teach
this class because I don't think I've ever made
a shirt on the Internet, so this will be my very
first shared class. I'm also really excited to
try out certain details like the sleeve placket
which goes on the calf. This is a detail that has taken me a few months to perfect, so I'm hoping that someone
will be able to watch this, to try it out for themselves, and have an outcome
that you're proud of. The class has been broken
down into a lesson. So these are
bite-sized chunks that you can watch through
at your own pace. Feel free to pause and take
it at a pace that you are comfortable with
so that we don't feel overwhelmed
with the process. You can get all your
materials ready and basically just sew along or watch it and use
it as a guide to create your own shirt
in your own free time. If you find that you don't
quite understand something, you can go back and
watch it again. You can take down
notes of points that would help you when you're
making your pattern, when you're cutting
your garment, or when you're making
your final shirt. Just know that it's
normal to feel nervous, but don't let that stop you from actually trying this out. You'll be so proud
of yourself if you follow through and actually create something even if it's
not 100 on your first take. Let's jump right into it. I would say the first thing
you need to figure out is the type of fabric you want to use because that affects the kind of patterns
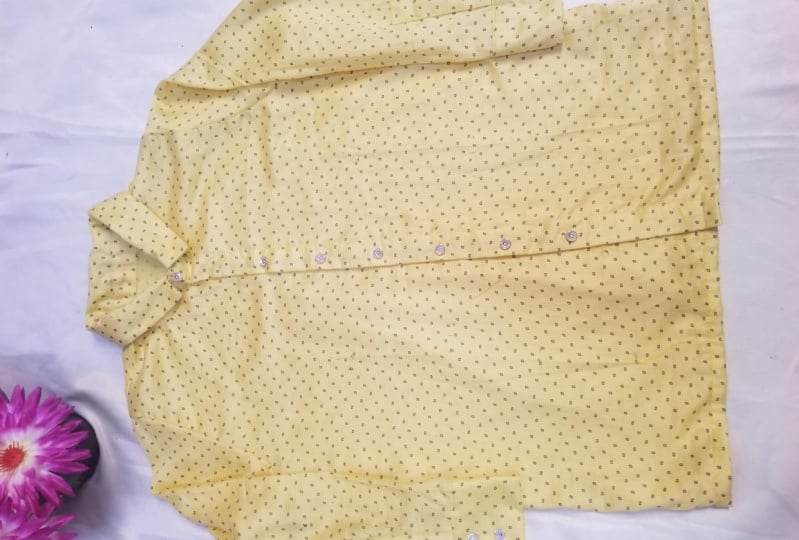
that you need to make. For today's class, I'm going to be working with
this cotton print here. This has gorgeous
combination of orange, blues, reds, and almost every
other color under the sun. I would highly recommend
curtain fabrics for someone who's a beginner and want a fabric that is easy to manipulate and to work with. However, if you're more advanced
or you want a challenge, feel free to use any silks, any satins, any chiffons
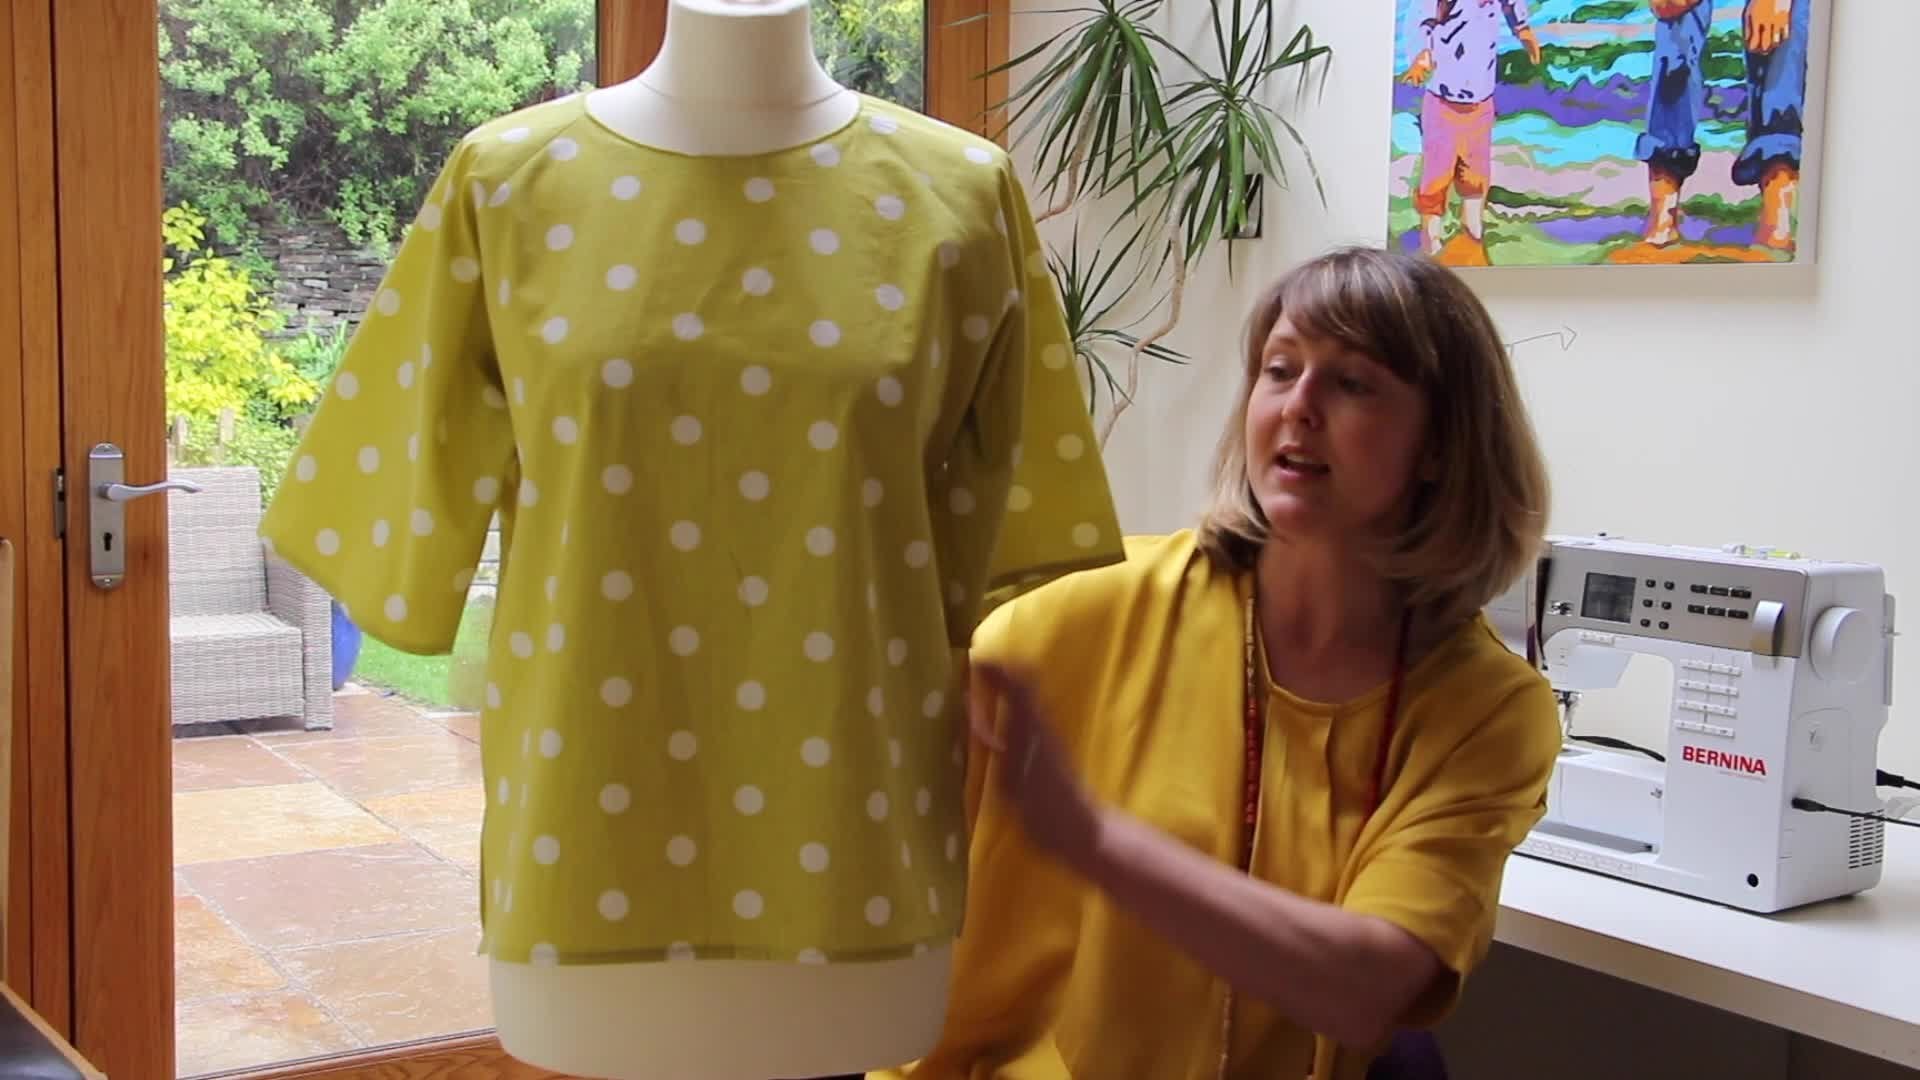
that you would like to use. Speaking of fabrics, I have
this fabulous shirt on today, but I'm going to change into
something easier to work in. [NOISE] That's so much better, let's get into the lesson. These are some materials
that would come in handy in no particular order. I have a long metal
ruler that would hold me draw my lines for my patterns. I also have my set square
and pattern master here. I have some buttons and a
fabric to create my shirt. Underneath that, I actually have something called an interfacing. This is an interesting
fabric that has a bit of glue on one side to help
you stiffen your collar, your cuffs, your plackets, and just give it more stability, so that I'm going to be
using for my shirt today. I also have my measuring tape. These ones I'll be using
to take my measurements. We're to work with mine
so I highly recommend you work with yours for
the absolute best fits. To take them and
measurements I have a pen, a marker pen to draw
down my pattern, and then I have my
array of scissors, my fabric scissors,
and my paper scissors. Please don't use your fabric
scissors to cut paper. You're just going to damage that scissors and make it blunt. So I have one for each
fabric and paper, and then I have a
little scissors here to trim down any loose threads. Next to that, I have a tracing wheel to help
me create my patterns, and then a calculator because
I'm really bad at math. I'm going to leave a list of
all the materials you would need for this project in
the project resources. Let's move on to taking accurate measurements
that you would need to create the
shirt. [MUSIC]
3. Taking Your Measurements: I have my measuring tape here and I'm going to
show you how to take the measurements that
you'll be needing to make your own shirts. I'm going to start off
from the shoulder, work my way down to the waist, the hip, and then the
measurements you'll be needing for your sleeve as well. I have a measuring tape that
has two different units. There is inches on one side and centimeters on
the other side, so you can work with whichever
you're comfortable with. The first measurements
I'm going to take is across the shoulder. This goes from one shoulder to the next and you
want to try and feel for a bone that sits right on that edge
on both sides there. The next is around your busts. You would need to wrap the tape around the fullest
part of your busts. While you take
your measurements, try and add a little bit
of what I call ease, this would allow you to actually
breathe in the garment. I'd like to add just one finger underneath the tape to ensure that I can
breathe in and out, if I decide to work with these measurements
the way they are. Below that is the waistline. This is different for
different people, some people have
their waist higher, some have theirs lower. Try and feel for the most
slender parts of your body. Mine is above my belly button, some people have theirs
along their belly button. I'm just going to feel for mine, mine is around here. Going to tape
around a little bit to be sure that it's
nice and comfy, one finger test, take note of that measurement. Let's move onto
vesicle measurements. With my tape, I'm
going to measure from my shoulder to my bustline, so try and feel for that
bone I mentioned earlier on. Down to your bustline, this would be your
shoulder to bust. This varies from
person to person, mine sits around 10 inches, some people have
theirs at eight. I'm going to take
note of that and use in my pattern later on. Next up, you need
to measure from your bustline to your waistline. If you can keep the
tape on your bust and then feel for where your
natural waistline is, and then take note of
that measurement as well. Some people have long torso, some have shorter torso. Mine is really short
because I'm a small girl, so just work with the measurement that
suits your body type. Then from the waist to the hip, hold that tape where
your waistline is, and then find your hip-line, which would be the
fullest part of your hip. That is around this area, and then take note that
dimension as well. Now, for the land of the shirt, I'm going to measure
from my shoulder all the way to the point that
I want my shirt to stop. I want mine to be around my hip, so I can wear it open with leggings or
shorts in the summer. I think mine might
sit around 26, 25 inches, somewhere
around here. You can have yours
longer or shorter if you want, the
choice is yours. Just work with the length
that you're comfortable with. The next measurement
I'm going to be taking is what I
call the nipple to nipple measurements, is
just self-explanatory. I'm going to measure from
one bust to the other. This is going to help
me plan my dots, so it falls underneath my bust in such way that
is flattering on my body. It's going to go
from this point, basically the fullest part of my bust on one and
then to the other. Mine sits around
six or 6.5 inches, if I really wanted
to be on point, that is the dimension here. Now for the sleeve
of the shirts, I want something that is
a full length sleeve. I'm going to be
measuring from, thanks, I already have a shirt on, this is really
going to guide me. I'm going to measure
from my sleeve head here down to around my wrist. This shirt is going
to have a croft, so that's going to be
added measurements, keep that in mind when you are measuring the length
of your sleeve. Mine, I think I would
work with 19 inches, so I can add a coft that is
above four or five inches, so it goes all the way down
to the end of my wrists. For the cuff, four
inches is good, because the one I have
on here is about 4.5. If you want something
really wide like what I have on
here, this is 4.5, I think I'll do four, so it's in a little bit
narrow around the arm. You'd also need to measure
around your wrist, so you have an idea of how
the cuff is going to fit. You want to have, I will say an extra
inch measurement so it wraps around and then you have space for your
buttons to actually sit along the side of your cuff. I have eight inches here, but I'm going to add an
additional inch to make it nine. I have enough measurements
to stitch into the bottom of my sleeve and then have room for my buttons and my button
holes to stand well. Now for the sleeve
dimension itself, so that's around your
bicep to your elbow, and then the hands. This, I'm going to measure
with my arms bend up. When I have the shirt on, it's actually comfortable
and it doesn't rip when I'm using it or
when I'm hugging someone. Do my one finger role to
ensure that it's comfortable. This is about 12.5, then I'm going to
measure around my elbow next to the [inaudible]
movement there. I have 12 inches on here. Then I'm going to measure around the bottom of the sleeve. I have about 10
inches here, like so. I will say when
taking measurements, if you have a mirror,
especially if you're taking
measurements on yourself, if you have a mirror
in front of you, that would be very
helpful to ensure that the tape is actually
straight across your body. When you're taking
measurements around your bust, your waist, or your hip, you are sure that everything
is actually correct. Then write down your
measurements as you take them. Some people believe that they
can remember everything, but just write it
down so that way, you don't mix up numbers together and you actually
are working with the correct measurements for the different parts
of the garment. Now that we have all
of our measurements, let's move on to make the
sewing patterns. [MUSIC]
4. Patternmaking: Front Bodice: Now that we have all our
measurements in place, let's get into making
the sewing patterns. I have my measurements
written here next to me, and I'm just going to be looking at that and then
working on the pattern. I have my long metal ruler. This is about a meter long. With this I'm going to draw a long vertical line
that's going to become my center front line, and then plan the pattern
in this direction. Just going here and draw that. I'm going to mark my
vertical dimensions next, the vertical itself from
the shoulder to the bust, and then the one from
the bust to the waist, so on and so forth. We need to mark that along this line and then square
those points across. What that means is
I just need to draw horizontal lines that
perpendicular to the vertical one. That guides me to mark
my waist measurement, my hip measurements, and so on. Now I'm going to
use a set square, this allows me to align this middle line to
the vertical one, and allows me to draw
horizontal lines that will be straight. I don't trust myself to draw lines that'll be
straight free hand like that so we want everything
to come out nice and tidy. Now let's come to the shoulder
line which was this edge, the first one that I marked. Then I'm going to mark half
of my across the shoulder. That measurement is
going to ensure that the edge of your shirt
falls in the part of your body that you want and it's comfortable for you.
I believe mine is 16. I'm going to divide that by two. That gives me eight. Then my shoulder width, which is the distance
from the very edge of the shirt to wear my
collar is going to sit. I like to work with four inches, it's like a nice width
that is not too wide and is comfortable
around my shoulder. That I'm going to mark
inwards in this direction because that is
where we're going to plan the neckline of the shirt. We do over here. Then to ensure that the
shoulder falls like in a natural form because our bodies are not
straight that way. They slant down a little bit. I'm going to come to this
edge and mark 0.75 inches, is roughly an inch but
I like 0.75 because I found that to be in my
main width for that. Next up on the neckline
for the front, I'm going to mark how deep the
neckline is going to drop, which essentially means that
from that point onwards, we will now add the
two-piece collar that a typical shirt would have. I feel 3.5 inches
is a good depth. It's a little bit high, so the collar is
high on your body, and it gives room for the
collar to sit really nicely. That I'm going to connect as a round neckline
from here to there. I'm obsessed with this tool. It's called the pattern master. It has this curved edge. After drawing in the neck line for the front of the shirt. I'm going to go into
work on the bust, the waist and the
hemline of the shirt. This is my shirt
hemline because I mark the vertical distance from there all the way down to the bottom, starting from the bust, which is this one here. I will be dividing my
bust measurement by four and adding
about half an inch. You can go up to an
inch if you really want a really comfy loose fit. So, if I divide my bust, which is like
roughly 36 by four, that gives me nine. Just add half inch to that because I'm still
going to add what I call the seam allowance
around the pattern that allows me to actually
join panels together. Now along the waistline because I want the shirt to be really
relaxed and comfortable. Then later on we can go into our dots for more
structure and definition. I'm essentially
just going to have the side seam be straight. From the bust all the
way down to the hem. This is the point that if your
hip is a little bit wider and you want it to feel
more comfortable there, whatever your hip dimension is, divide that by four, add your half an inch ease, and then square that upwards. That way the shirt sits nice
and comfy around your hips, it might be a bit loose around your bust if you have
a smaller chest, but that way you really get a nice comfy style
and a relaxed fit. My hip measurement is 39, going to divide that by four, that gives me a 9.75. Just round that up to 10. Remember, you need to draw
a line that goes all the way up back to my bust line. Let's go ahead and
draw the curves. This is a line that typically slopes down inwards like this. It sits comfortable
around your bust. This would connect from
this point to this point. With my beloved pattern master, I going to to go in
again to draw that here. You can do this in two takes. If you find that
your tool doesn't allow you to do it
in one clean swoop. You can also use a French
curve for lines like this, like around the arm, around the neck line
around the hips, curved parts of the body. The French curve
works just as well. Now we have the basic
front of a shirt done. I want to plan in the
waist data at this point, even though I know I won't
use it straight away, I just want to have
it in the pattern, so when it's time for me to
actually add it to the shirt, I have something to guide me. Now, the waist that I want to see like half of my nipple
to nipple measurements. Whatever that nipple to
nipple measurement is, I'm going to divide
that by two and then mark the dot away
along those points. Mine was 6.5, so I'm going to
divide that by two. That gives me 3.25. Let's find that here
along the waistline. Then I want a waist dot
that is one inch total. You still have some
ease in there, but you're able to
take away some of the excess on the
waistline to the dot. Grid up, and down. Now when you draw dots upwards, be careful not to go
into your bust points because you would lose
measurements there. I'm going to mark one inch
below the bust point, which is this point there. Then this top dot is going to connect from here to
here, there to there. Then it's going to go
downwards in this direction. I would make the
bottom of my dots to be about five inches long, that is roughly 13 cm. If you're using a
thick pen like I am, you could not put the edge of your ruler
against the points. Just move it away
slightly because that gives the edge of
your pen some room to actually go from one point
to the other, accurately. We have the plan
of the front done, is now time to add the extension or what
I call a placket. This is basically
the extra bit of material that your buttons
are actually going to sit on, because if you cut and
stitch this shirt like this, there is nothing for
your buttons to go on. I like to have mine at
about two centimeters which is roughly an inch
or three centimeters, depending on the size
of your buttons. If you have big buttons, you definitely want
to have your bottom stands a lot wider to
accommodate your buttons. The ruler already comes
with the units marked, so I just need to align this
with this center front line. This I'm going to extend. Then I'm going to
extend it again. I have two, three centimeter dimensions
that I can fold against each other and stitch to have the button stand on
the front of the shirt. If you don't want
to do it like this, you can actually make this
as a separate pattern piece. I'd like to just do
it this way because I know once I have the
front of my shirt done. I have the bottom stand
in there as well. If you just want a
nice clean front, you can basically just draw on another piece of paper.
That's fine as well. Here connect all of these points together
till we make hemline. I'm also going to
extend the neckline. Just has to be straight from this point all the
way to the edge. Then I'm going to add a notch right right the middle
of this front neckline, because when you
add your collar, this is a point that is going to make your life so
much easier because it tells you that this
point is meant to connect to the other points
on the collar piece. This is typically
just a short line, that just gives you information when you are making the collar. I think that is
everything for the front. I'm just going to quickly
add seam allowance around and then use it as
a guide to make my back. I'm going to use a
different color of 10, so it's visible. Least be adding two
centimeters hem allowance along the bottom, because I plan to do a
rolled hem because it's essentially just roll it
twice and then you stitch. I'm going to do one
centimeter on the side [MUSIC] Front shirt
pattern is done, please don't forget to
add your green line. The green line is what will guide you when you are
coating onto your fabric, you should always
align your green line to the selvage of your fabric, which is essentially the
edge of your fabric. When you coat your
garment along the green, it just folds more
naturally because that's how the fabric is woven. If you coat it
against the green, it might warp or shift
in very odd manner, except if you want to
buy as cut garment, which is essentially
when you cut it 45 degrees off the grain, then it just drapes in
a very flowy manner. It has a bit of stretch
along that as well. I'm just going to go in here and write what this pattern is, so if I give this
to someone else, they know what it is. This is my front shirt. I would need to cut two of this. This is a side 10 UK
because that's what I am. It's made in 2023 and my
name is Kim Dave. [MUSIC]
5. Patternmaking: Back Bodice: Let's just go in here to
layer down some more paper. This is one of the
reasons why I love this particular paper
because it's transparent, you can see things underneath. This kinds of paper are
architects actually use. Now the back is pretty
similar to the front. The side scene is the same on the back
because your front and your back have to match along the side so you're able
to join them correctly. The hem is going to be the same, the shoulder will be the same, but the back is going to
be caught on the fold. So essentially it's
just going to be this long vesicle line here. The center front line
is going to become my center back line
and when I put that folded edge along the folded part of the
fabric and cut it, I have a whole
piece from my back. I'm just going to
trace this all. These are the following
changes I'm going to be making for the back
shirt pattern. The back neck line, rather than having it
3.5 for the front, it is going to be 2 inches
because the back of the shirt is a little higher
compared to the front. Along this edge like so, I'll just be making
2 inches here. Then connect that
back to this edge. It's important that it goes back here because you want your front and your back to actually
match along the shoulder. Then the arm curve for the back is not as
deep as the front. The back one is a
bit [NOISE] shallow. This edge and that edge
still has to be the same. But this point here is
just a little bit shallow, I see by about a centimeter,
[NOISE] give or take. I'm going to to add notches at this point for my own curves. The back curves one,
it has [inaudible]. I'm also going to draw in the
dots for the back as well. To do that, I'm going to need my waistline and my bossline. Now the back can
go all the way up to the boss line because that's on the back and we
don't have ***** at the back. This one can be the same
as it is for the front. [MUSIC] You can click this out. [NOISE] I'm going to curve down these patterns
because they are going to guide me to
make the collar and the sleeve and so I'm going to be working
on next. [MUSIC]
6. Patternmaking: Collar: We have the front and the back of the shirt done
and I'm going to be using or working with the neck line that
we have drawn from the front and the back to
create the collar piece. This is going to be
a two-piece collar, which means that
it's going to have two different panels that we're joining together to make
the collar of the shirt. Starting with the front, I have a piece of paper
here and I'm going to try to fit the first part
of this collar piece. Now from neckline, I'm going to trace
off the stitch line, which is the first one we drew before we added the
seam allowance. We have to trace off
this line like so, transfer the notch as
well and then extend it upwards so that helps me to
create the stand collar, which is the bottom piece, that this shirt design has. This should go up here. Now this particular point, this is the center front. This is going to be a fold line. This is going to be
folded against this one. In theory, this edge is
going to be the edge of the shirt that actually overlaps so this
particular piece here, once it's all folded
and stitch down, this is the extension that the front of the
shirt is going to have. This collar pieces first one is going to start from
this edge and then we're going to extend it upwards by how long the
back neck line is. From this point upwards, I'm going to be
extending it by 5.5. The transform notch as well. Now my stand collar
width is going to be 3 centimeters or roughly
1 inch plus a bit. That's I want to be straight along this edge so three centimeters
birth in this direction. 3 centimeters here. Just mark that across and then connect it together to
give you the top edge. For this side of the
collar I want to round it off a bit for me to really nice shape
when that front edge is lightly more rounded rather
than having it at a point. I'm going to again add
seam allowance around this because without
the seam allowance, you actually cannot
join panels together. They've had to add
a bit of paper there just to accommodate to the bottom of my collar piece. But I'm going to cut this out and this is
going to guide me to make the actual collar
that you see on the shirt. Then just write down some
annotations on this, because I just wrote
on this **** collar. I need to cut two pairs fused. What fuse actually means is you need to iron interfacing
on the wrong side of the fabric so that way it gives the fabric some weight and somebody to hold the
shape of the collar. You need a pair for each
side of your shirt and then the actual collar
piece itself needs to be fused same as your cuff. I'm just going to this out
along the seamless edge, which is the green line. Lets not forget the green line. The green is important. The center back edge is going to guide me to where [inaudible]. Now from the times
I've made shirts with the stand collar
just like this, I found that this top edge comes out a little
bit too tight. This will come up here. This was that notch
point that we made on the center front edge and
I'm going to draw this line upwards and actually
smash and spread this line open by about an inch. This I'm going to cut
from the top edge, because that's the top end of your neck and to cut this down as close as possible to the edge
of the pattern. Then I'm just going to
knit a piece of paper , lay that underneath. Then we are going to spread
it on this curved edge, by about 1 inch. Tape this down in place. Once that is all intact we
definitely need to connect these points as well as the
bottom because the bottom has a little weird dip
there, we don't want that. [MUSIC] That's the first
bit of the collar done. Next time you go
shopping for a shirt, you would appreciate
shirts more because of the amount of work that
actually goes into making one. Okay, now that we
have this one done, I'm going to use this
as a guide to meet the other side of the collar. Now for this second piece
or this top collar, this would be the same curve
along this bottom edge, but it would be mirrored, rather than have it as
this one is like this, after we trace out
this curve I would actually turn the pattern
paper the other way, I'm drawing the actual
shape of the collar itself. This is going to trace off
along the stitch line, which is the black line. The collar sheet
itself is going to be upwards like this and like that and I feel like I want mine to be 3 inches let's do three. That I would mark here, right at the shoulder point. That's the guide. Then I'm going to
come to the front and draw a line at
those points outwards and little bit like this. There we have 3
inch marked here. This one should be straight because this is a four
[inaudible] edge. This particular side, just happens to be the center of ark and I'm going to
draw a line that cuts from this end to this end, and now I'm going to
add my seam allowance and I'm done with
collar pieces. [MUSIC]
7. Patternmaking: Sleeves and Cuffs: The next pattern I'm going to be working on is the sleeve, and I know sleeves can be
scary to make from scratch. I'm actually going
to be showing a very like my own way of making
sleeves that is very simple, very straightforward,
and would work with whatever garments that
you make the sleeves from. You would need the
front arm curve on your back arm curve. Those you would need to
trace off or not onto another piece of
paper and then mark however long you want your
sleeve to be and all the other measurements that typically
go on a sleeve pattern. Now, this piece of paper,
I'm going to fold in half. From this folded
edge I'm going to move it toward the
front arm curve, that's what am starting with. You need to move it
closer to the edge, this edge here, and then with my
measurements in mind, am measuring around my biceps, elbow, wrist and so on. My around bicep was 13 inches, so that divided by two
will be I think 6.5. Yes 6.5, and I want to try to make this folded
edge be 6.5 inches, so from here to this edge
should be 6.5 inches. Whatever yours is, whatever
your own bicep is, divide that by two and then
try and move the edge of the paper to be 6.5
inches from this point, which is your stitch pointers, your stitch line, point there. The other way around. I'll trace off the front on
the curve and we'll trace off this points with such
pointing down to here, and then I'm going to add
a notch for my front, so I know that this side
of my sleeves to go fronts and then I put that
on the actual front itself. Then I'm going to
open up this pattern. I repeat the same
thing for the back, it does straighten
off the back as well. The back does not
have the stitch line in there but I know it's roughly about this distance
from the edge of the pattern. The next thing I'm
going to do is connect these dash
lines together, but only to the point where
the notch is in both sides. Then I'm going to turn my pattern master
in this direction, and draw the actual
sleeve head in, well to ensure that this
line and this line are the same because we need
to measure it quickly. My sleeve length is
going to be 19 inches. Then I'm going to make a
cuff afterwards to ensure that it's up the
full sleeve on me. Along the sleeve
hem I'm going to mark the sleeve hem width, which is basically
this bottom part that is going to sit in the cuffed. I am going to be marking
mine as 10 inches. It's fine if it's a
little bit wider than the width of your cuff
because then you can pleat it into your cuff to make
a really nice detail. You can have yours
exactly the same. You can even have it a little bit wider
and then gather it into the cuff like I have with this style
of blouse on today. This I'm going to
connect from here to here and there to there. I have my sleeve pattern done [MUSIC] Now you would want to add your placket closer to the back
of your sleeves, so when you have the shirt on, it sits behind you or not
essentially in the front, so it wraps around in
a really nice way. Some ways to come
towards the back, which is where you have
the two notches here, then mark the vertical
line for the plackets. I will see you can sit anywhere
between 2-3 inches away from the back of this
side of the sleeve, there should be a sweet spot. Then I want it to be can be
four or five inches tall. You don't want it
too tall though. It shouldn't go all
the way to your elbow. Then I'm going to
just add the edge. Now on both sides of this
line that we've just drawn, I'm going to draw
in the stitch line, use a different color
of pattern so it's easier to distinguish
from the other. This is half a centimeter away that's how wide we're going to be stitch
from this edge, and then it's going to
be a centimeter taller. Going to do this on both sides. Now from this edge
in this direction, I'm going to mark
2.5 inches twice. Just draw in like that, and then draw it again 2.5 centimeters is
roughly one inch. Do this again. Then on this
side, two centimeters. On this end, this side am going to
be extending upwards in this direction by about 2.5
centimeters over one inch. This will all make sense when
we start sewing, I promise. Chill, now that this
is all planned out, I am going to go in
to just add lines around the edges so the
bottom one is already there, just need to add
one for the side. This is my new sleeve clear-cut. Need to cut two of these. This is 23 and Kim Dave. Thankfully because these
lines are all vertical. I could honestly just go in here and make one of
them migraine mine, so don't draw a little line. The last piece I think I'll
be able to actually draw in at the bottom here because that looks like it will be wide. This is going to
be the cuff that sits on the bottom
of the sleeves. I want my cuff to be
three inches wide. It's going to measure three
inches from this end, and we add the missing
lines as well, make that 3.5, I want my cloth to be
nine inches wide [MUSIC]
8. Testing Your Prototype: I have all of the patterns done and laid out
in front of me. These took a couple of
hours to make but it is totally worth
it, I promise you. It takes away the guess game
of making a garment because you've made a template that you can use to
make your shirt. I'd also recommend making a prototype if you're trying
this out for the first time. In order not to just make
any expensive mistakes, you can make even if
half of the shirt, try it on, see if
you like the length, you like fit on you. At that point, you
can go back to your pattern and
make any changes. If you wanted to
change up the style of the sleeve or the
depth of the neckline, that's the point where you
can make those changes. If you feel you're confident and you're sure that you can make
your shirt straight away, you can skip prototyping. I've made one
myself just to show you what the finished
shirt might look like and it gives
you a better idea of what the project would
be like at the end. If making the pattern is overwhelming for you and it's just giving you
too much headache, there is going to be a
PDF pattern that you can download in the
project resources. You can just download it, print it out at
home, assemble it, and you use that pattern to make your shirt so that way you don't have to go through
the hustle of making the patterns from scratch. If you're going
to be downloading the patterns for yourself, I would really recommend
double-checking on measurements with whatever
size you want to go with. That way you choose
a size that fits you and it's comfortable
to your liking. Just double-check the bust, the waist, the hip, the length of the sleeve, and you could even go
for a size bigger or smaller if you wanted
a fit that was a little bit different from the original design that
we have here today. But just make the whole
process a lot easier for you. I've made a prototype using the patterns that I've
made today and I'm going to try it on
to show you what the fit of this
shirt looks like. This is what the prototype
looks like all done. I have made this in simple color code which
is a natural cotton. This is a similar weight and
weave to my final fabric. I haven't added any buttons
or button holes because it's a sample but it fits
nicely around the bust. I'm happy with the fit around
the waist and the hip. I would say, be mindful of
the fit around your arms. You want it to be
nice and comfortable. This one isn't too bad
but if you would like to make your sleeves a little
bit nice and roomy, be mindful of that when you're
taking your measurements. I made a very clever mistake
when I was doing my sleeve placket and I will show you the right way and the
wrong way to do this. Now, the right way is like
this is meant to wrap like that to the back and
have the buttons done. The wrong way is it has gone the other way around
and it's like this. Now to everyday people it
doesn't really matter, you can't really tell
that is wrong but the problem with that is
when you have the shirt on the bottom just look a bit weird compared to how it really goes from front to
back on this side. When you're stitching your
placket on to your sleeve, just be aware of that. It's a little bit tricky
but just be aware that this is the wrong way and that is the right way
for it to be done. This is the finished shirt; front view and the back as well. Loving it so far. If you want to make changes
to the size of your collar, you can do that as well. You can even go for a wider
collar if you wanted it really dramatic or
something even thinner. I like this one because
it's a really nice width. The width sits
around the neckline. There is going to be a button
that sits here like this on this first part there and then there are going to be
buttons down the front. We would aim to have
odd number of buttons, five, seven, or nine
depending on the size of your buttons and then I
would aim to have either three or six on my cuff depending on the
size of my button as well. Besides that everything is
coming together really nicely. I'm excited to make this shirt. Now that we have the pattern
and the prototype sorted, let's move on to creating the base of the
actual shirt. [MUSIC]
9. Sewing: Base: I have changed from prototype into this gorgeous
piece I have on here. I mean, it's a design class, you might as well. I have cut out all of my pieces, I've made them on the table. The pattern came in handy
cut in this pieces, so don't forget to
cut your pattern on your fabric along
the green line. What that essentially
means is you want to align the green line, which is that vertical
line we drew, to the salvage of your fabric, so the woven edges
of your fabric, that way you cut everything in the same direction and it just falls naturally
on the body. I have my front pieces, my back, and I have also gone into
fuse my color pieces, my cuff, as well as the
bids for my placket. I'll show you what that
looks like real quick. This is one of them. The interfacing I used
is net white woven one. You want to use a
woven interface because you can get any
types you want as well. This one was like a
really nice lightweight, so it's not too thick and
heavy because it's two pairs, which means is going to be double on one side and
double on the other side, is not going to be
like very stiff around the collar but to hold
the shape really well. I did that for the stand collar, trust me, to make both
sides different fabrics, I like collar like that. I also did for the main color
piece that goes on top. I did this for the
placket which is going to go in the cuff and into
the sleeve as well. Then I did it for the
cuffs, these ones. This is going to the bottom
of the sleeve of the shirt. Those pieces, I fused. Another side of the shirt that I actually fuse and I
think is very important is where the buttons and the button holes
are going to be. Let me open it up and show you. From the edge to the point where I added the
extension on the front, that's where the buttons
are going to be. I have folded it twice
like this and like that. Those were the seam allowances
are added at the edge. Then I folded it in one
more time like that, and that would
conceal and hind the fusing completely on
the front of the shirt. If you made this as
a separate piece, you can go in and stitch
it along this edge, but because this is one continuous piece that
goes from the front, once you've folded in this way, you have a beautifully
finished button stand on both sides of your shirt. I did it for this side
and this side as well, so I know my front
is ready to be joined to the back of my shirt. Quick mention is, what's the green line
is like on this pieces, so this is just one
side of the front. I'm very thankful that this
fabric actually has like some visible threads
there you can see, so the grain is essentially
this direction of the fabric, so the long vertical thread. If you buy this entire
fabric as a role, you can essentially just pull a thread that will go
from the beginning to the end and that is like
the grain of your material. The selvage was
along this edge and I placed my pattern and aligned the grain of the fabric to the selvage of the
entire fabric roll. You would want to do this
for all of your pieces, your front, your back, even the smaller bits as well because that way when
everything is stitch together, they fall in the same
direction on the body. With that out of the way, let's actually join
these pieces together. I promise sewing goes by a lot quicker than
making the patterns. I find that once you have
the patterns out of the way, you have the pieces cut, you essentially just need
to assemble them like Lego. I have my back piece here, which have cut on a fault and I'm going to
be joining it to the run along the shoulder
and along the side. It's an almost straight stitch. I'm going to go in and
stitch up the sides here, as well as the shoulder. I'm going to be sewing on a one centimeter seam allowance because that's what I
added to my pattern. Whatever seam allowance
you add to your pattern, that's what you will
stitch away from the side and from the
shoulder of this shirt. If you have notched your pieces according to where they were on your pattern, this is a point where it
will come in really handy. I'm going to find
the waist notch for the front and match that to
the waist notch for the back. With right side
facing each other, I'm just going in here to pin my fabric along
this shoulder edge. Adding pin, just ensure that
nothing moves around like crazy when you move your
pieces to the machine to sew. If you are someone who is more experienced and you
are more comfortable, just say, figuring things out, you might not need
to add the pin, but they just make the
whole process a lot easier. [MUSIC] Quick tip to secure your stitch on
the sewing machine is most machines come with a reverse button
or reverse stitch. If you place your
finger on that, it takes your stitch back
and it locks the seam, so it doesn't unravel when you wear it or when you
pull out that seam. This one is computerized and
I'm going to put my hand on the button and it's
going to take it back and work the magic for me, and then if I let go, it
sews back down again. You have to secure
everything nice and tidy. When it comes to pin placement, it's very helpful to
pin edges that are like this with a pin going from this direction to
that direction, so as you sew, you
can easily pull it out and then it doesn't get in the way
of your machine needle. If you pin it like
this, which is fine, what might happen is your
machine needle might actually catch the
sharp edge of your pin. Just having it like this
just makes it easy peasy. Just pull it out as you sew. Try not to think
too much about it. This I have done on the shoulder and along
the side seam as well. I just added three pins, one at the beginning, the end, and in the middle along that waistline to just
hold that part intact. [MUSIC] I'm all
done stitching up the shoulder seams for my shirt. If you don't have an overlocker, a quick thing you
can do is just use these exact stitch along the seam allowance
that will just prevent this edge or from
unraveling with time. I'm going to use my
overlocker here because we have one in the studio
that I can work with. I'm going to go into
stitch up the sides seams and then overlock the side seams and the shoulder seams as well, before coming back to
work on this center for edge where my buttons and my button holes are
going to stand. Now what they overlocker does, is it weaves the
edge of the fabric, and this one has a blade at the edge that trims it as well, so you have trimming
and weaving happening, so it's not just a
raw edge like this, but you have a nicely beat
off the edge like this one. Nice and tidy. I've
worked with black, so it goes with the main
color of this fabric. Just secure the
end makes it look nice and good on the inside, I'm going to overlock
the other edges. [MUSIC] This next part is, I won't say it's hard. I know say you need a bit of
practice to get it right. We're going to be doing a very
narrow edge stitch to join this folded edge of this side here to the
main shirt itself. This is going to lock down that fold and is going to show on the
right side of your shirt, so just take your time doing it. If it's not straight, you can go back and redo
it again because it's going to be visible right
on the front of your shirt. Hence why I meant it
takes a bit of practice. I hope mine comes out nice. [MUSIC] This came
out really cool. This is what it looks like at the front and this is what
it looks like behind. Essentially just repeat the
same thing on the other side. [MUSIC] I'm going to hem
the edges of the shirt. While I'm here, I
might as well do that because that is basically
going to be a rolled hem. What are a rolled hem
is is you roll it once and you roll it twice and you stitch
across all the way around. You can overlock the edge
and then just roll it once. If you don't want to do it
twice like I'm doing here, I just want to have it twice because it would
make a thicker seam, and that way you just like
falls nicely on the bottom. I'm not going to
trust myself that I will roll this evenly across, so I'm going to put some pins. I will roll this and
then pin it down. You could also give
this a nice press just to secure that fold. Once you take it to the
machine and start sewing, everything is already like
folded away nicely for you. Your side seams, you would want to point
towards the back like this. For that, again, just
put a pin there. I'm rolling by one
centimeter twice because I added two centimeter hem
allowance to my shirt patterns, so I'm essentially just folding, rolling and I'm
going to stitch that away along the
bottom of the shirt. I have rolled and pin the
hem line of the shirt, so this is ready to stitch. I'm just going to
take this machine and I'm going to
be stitching along this edge and doing a similar stitch
with what I did for the front very
close to the edge, so that's secures the hem
line and just finishes off the bottom of the
shirt really nicely. [MUSIC] Hem line is all done. I'm going to give this a press, so I'm going to iron hem
line the center front edges, the side seam as well, just to relax all
of the stitching. It just makes the garment
look a lot nicer. I'm the person that
as I stitch, I iron. People like to iron at the end. I just find that seams look a
lot nicer once they've been pressed with some steam
or like a normal iron, just make the garment look
so much tidier as well. The base of the
shirt is all done. Next up, we're going to move
on to the collar. [MUSIC]
10. Sewing: Collar: Now that we're all done with creating the base of the shirt, we can move on to
working on the collar. I have all of my pieces here
I'm going to be needing. For the top collar, I have a pair. I've decided to cut one
side in the prints and the other side in a plane orange fabric
just for contrast. You can use the same
fabric for both, it's just a personal
preference of mine. For the stand collar, I have two pairs. One pair here, both of them have fused with interfacing on the
wrong side of the fabric. This plain orange, I have repeated the same
thing essentially. Now, here I'm adding
structure and stability to the
collar of the shirt, so when everything is
stitched together, it stands really
nicely along the neck. The first thing I'm going to
do is I'm actually going to work on the bottom collar first. These pairs. I am going to be joining
up the center-back edge. I'm going to put right
sides together like so, so I can match those edges, then I'm going to just put a pin there so I can work
on the other one. Putting right side together
of the collar pieces. With right sides
facing each other, I'm going to go in to stitch off the center-back
edge for both sets of my top collar before
working on this one here. This, I'm sewing only
one-centimeter seam allowance because that's how much
was in my sewing pattern. Some edges you're just
going to stitch that way. I'm going to set this aside and work on the top collar piece. For this one, I'm going to
put right sides together first because you want to join the top edges before connecting
it to the bottom collar. Let me just match
those edges nicely. I'm going to reach
for my pattern piece. Always double-check
that I have all of the notches transferred on here. The plan is you would need
to sew from this edge, there is a corner here, around this side, up, straight along this edge, and down to the other corner. This corner was essentially
the point where this one is going to match
up with this one like this. This edge would be the point of the collar on the
shirt that you see. This would have
to be stitched up first before joined to this one. I'm just going to grab
my little scissors and just notch this quickly. I know that's the
beginning of my stitch. I'll repeat the same
thing for the other side. I'm going to go in
to stitch along the straight edge
of the top collar, turn this inside-out and
give it a nice press along with these edges for the
stand collars as well. [MUSIC] I'm just going in here to iron the seam I made on the center-back edge
for the stand collar. It's nice and flat like this. This is one side. I'm going to repeat the same
thing for the second side. I'm just turning my main collar inside out and I'm going to use edge of my small scissors
just to poke out the ends, so we have a nice point there. It helps to trim off the extra fabric that goes around the corner
before you do this. Because that just reduces the
amount of bulk that you are trying to push through
this corner here. If that reaches the end, I'm going to actually
press the seam open, and then press the entire
collar piece down, flat. Ones it's pressed
down like this, you really start
to see the beauty of the collar come to life, like all of the puffiness, the tension from the stitching, everything is a
lot more relaxed. This open end is what we're
going to be sandwiching into this stand collar or the bottom collar
that the shirt has. Now that I'm done ironing all of the pieces I need
for the collar, I'm just going to join
them all together. I'm going to grab this piece and match this collar of the
fabric to this edge. I want to match the
center-back points of the top collar
to the bottom one. Then I'm going to
take the other piece and go over it like that. This part is a
little bit tricky, and I'll show you why. This edge here is
relatively straight, so that's
straightforward to sew. But this curved end, you basically have
to pull it down to this end and stitch it in place. I'm going to go
and add some pins because that would make the
process a lot easier for me. I'm coming in here, add a pin to this side. Let me open up this edge
so you see what I'm doing. Then I'm going to pull
this down like this. Basically, we're trying to join two curved ends together. I think that's where
the tricky bit is, because they both have
a mind of their own, so you try to
actually manipulate and ease them into each other. This is the point where
if you put those notches, the one that sits right in the middle of
your front neck line, the one from here should connect
to the one on top there. Just going to put
another pin here. Now that this side has
been pinned in place, I'm going to take the
other side and wrap it in. This is what I mean
by sandwiching. You are literally trapping this collar between
these two pieces, this side and this side as well. Everything I've
done on this end, I'm going to repeat
on this side. Once I've pinned everything
together in place, I'm essentially going
to set it to my machine and I'm going to sew it off with one continuous stitch from
the beginning to the end. We have one piece that join together as the
collar of the shirt. [MUSIC] I'm going
to take this to my machine and I'm going to be sewing only one centimeter
seam allowance, I'm going to be sewing around this edge down across the back, onto the other side
of the front to connect both pieces together. [MUSIC] I'm done stitching up and ironing the
collar pieces together. This is what everything
is looking like. There is one mistake that
I would like to correct. If you've done yours
and it's not perfect, mine is not perfect either. This is a chance you can go back in and make those changes. You can actually go
in and undo the seam. It's not the end of
the world, I promise. I'm about to do mine. You can undo the seam and redo whatever end or edge that you
feel you don't quite like. If you're still making
your prototype, feel free to make another
one if you really, really don't like yours,
correct your mistakes, there's nothing wrong
with that, honestly, especially if you're trying
this for the first time or this is your first
shirt projects, it's totally normal not to
get it right the first time. I promise you. I'm just going in here to undo this
particular point because I have a little puckering happening there and I
don't quite like that, so I'm going to get rid of it. Just going to undo that seam. Let's open it up in little bits, then spread it out and
stitch it in again. Going to open it enough
so it has enough room to actually even out
with the other side. Let's try this again. [MUSIC] With both edges folded in and pressed like this, this is ready to be joined to
the neck line of my shirt. I want the prints to be on
this side of the shots, then I want the
orange to be inside. When the collar is rolled down, you see a little bit of
the orange coming through. I'm going to join this
inner seam first. This edge on this side, stitch that all the way across. Then use this one to collar it off like that all
the way around. Because I've already gone into the press exactly where I
wanted to be stitching. You just need to pin
along that fold edge. [MUSIC] I'm going to be top stitching
this entire part to close off the collar. This is going to be visible
on the front of your shirt, so just take your
time, don't rush it. I am going to take
my sweet time doing this part because I
want to get it right. [MUSIC] This would
require one last press, so everything is nice and
flat across the board. Once that is pressed and you're happy with the outcome
of your collar, you can try it on
just to check how it fits if you like how
it's looking so far. Feel free to make any
changes according to your personal preference. Now that the collar is all done, this is going to be
put away and you need to grab your sleeve pieces. That's the main sleeve
and the sleeve placket. That's what we're going to
be working on next before adding the cuff to finish
up the sleeves. [MUSIC]
11. Sewing: Sleeves: We are going to be
working on the sleeves. I know sleeves are hard,
sleeves are scary. They scare me till today, so you are not alone. We're going to get through
this together, I promise you. This sleeve is going to
have a plack head sitting on the side that's going to
be connected to the cuff. We'll take it one
step at a time. To remove and reduce
your chances of error, I would highly recommend
you actually draw in the line that we had on our pattern just to show where we're going
to be placing the pocket. Draw that on your sleeve and draw that on
your pocket piece. This one has been fused on
the wrong side of the fabric, so the thread and the line and everything
will be tucked away nicely. This is the right side that
we're going to end up seeing. The fuzy just gives it a bit
more structural stability, so it will sit really nicely
on the bottom of the sleeve. The first thing I'm
going to do with this is I'm actually
going to put the right side of the pocket against the
wrong side of the sleeve. I want to match this line to the line that I've
drawn underneath. What I'd like to do is
actually just go through with a pin to check if they meet. Then if they don't I
try to like move things around on to redo case. I need to move it
a little bit more. Move this way. Pin here and pin there. The first step I'm
going to do with draining the pocket to
the sleeve is I'm going to stitch along these
choke line joining both this little piece to the sleeve on the wrong
side of the fabric. You would want to
stitch as close as possible to that dot. This you will stitch like that around like this and
then back to the middle. Stitching around the
line that we've drawn. Because this line that we have, we're going to
actually cut it open, and then flip this
piece inside out. One step at a time, let's take this to the machine. I'm going to be sewing half a centimeter away
from the choke line. [MUSIC] What may be helpful if you draw on to eyeball the way
I'm doing it now, you can actually draw in the stitch line like the
line I just stitched. You can actually draw
that by chalk and just stitch along that line, so you have something guiding
you as you sew along. [MUSIC] Now when you come
to this middle point, we're going to cut
through both layers. The sleeve itself
and the pocket, you are going to cut all the way and then stop
roughly about here. This just pop up in there. Stopover here. Then you want to cut a
triangle that goes from this point to as close as
possible to that edge. From this point as close
as possible to this edge. By cutting this, you
allow yourself to be able to turn this piece
inside out a lot easier. Because the closer
it is to the edge of this stitch on this
side and that side, you have just a little
bit more room to wiggle this to the right
side of the sleeve. Here we go. I just cut through, cut on that direction and in
the other direction as well. Now, along this edge, I'm going to be ironing
this side like this. This one first and
then this one as well. On this one, I'm going to
actually fold and iron twice, so a second time
to go like this. [MUSIC] Once both edges are folded and
pressed in nicely, I'm going to fold this and push down through
to the right side of the sleeve to
reveal this end. Now the shorter side, that doesn't have the point. This side I'm going
to fold against itself to hide this seam
that we made earlier on. You want to talk that
seen inside like this, then use this one to
consume it nicely. I will just grab a pin
to do that for us. You can give this oppress at
this point if you want to. I always think if you put a pin, you'll be able to get away with having it
like that for now. This is later taken
to the machine. I'm going to be sewing
along this edge. From the bottom all
the way to the top, you don't need to
reach the very edge. I'll say stop like a centimeter before the edge would
definitely like a very slim edge stitch just to hide that,
seeing those underneath. [MUSIC] After that edge, I'm going to come to this side
and push this underneath, then fold this one over. This is concealing the
one that we did earlier on. Kind of like that. For this end that is still open, I would need to
stitch up this way, but I want the shape on the top to be more
triangular shape. Let me just pop some
pins on this side. That keeps this down, [inaudible] have this way
instead, quickly as bulk. On the head I am going to
fold it one time like this, another time like that to
make a little triangle. On the machine, I'm going
to sew along this edge. Just on this side, this part has to be open
to open up the sleeve. I'm going to sew on this edge, like sew up this triangular
edge down to this point. Then back up until you hide
this raw edge that is here. I sew up until this
edge on this side. [MUSIC] Just pluck it all done. This is what it looks like. Any openings like this. It looks like from the front. If you've done this correctly, this opening should
point in the back. I know it's right because
this is the back of my sleeve because this has two notches and
thus the front. When you have it on, it folds towards the
back of your shirt. This is how you know you've
done it the right way. This is what it looks like from the back I'm going to give it a nice press just to
finish all of the ends, and then I'll add the curves
after joining the side seam. [MUSIC] After fitting
on the placards, I'm going to put right-side
to [inaudible] of my sleeve because I want
to sue up the side seam. Just going to sew on a regular one centimeter
sewing allowance. I have substituted off, I'm going to over-lock
it then just sew. Have that seam nice and tidy on the inside of the shirt too. The reason why you sew up the
side seam is because you've made a new opening by creating
this plaque over here, this is going to
become the new opening of the shirt when you take it off or when you put it back on. If you don't sew
up the side seam, you're going to have two
openings and it will be confusing on how you would
fit the calf afterwards. This I'm just going to
stitch up real quick. [MUSIC] I have over locker here. I'm going to be using
this to overlook the edge of the
sides seam before joining it into the arm hole and before adding the calf on
the bottom of the sleeve. We haven't finished our
best seam allowance on the inside of the sleeve. [MUSIC] I have overlooked
the side seam of the sleeve. This is what it's
looking like so far. It's looking really
pretty, it's coming together really,
really nice. [MUSIC]
12. Sewing: Cuffs: With this done, the next
thing I'm going to fit into this leaf is the cuff. The cuff I've applied a
similar styling for the color. I have one side an orange and
the other side with print. Just need to set this aside
and grab the cuff pieces. There are two pieces like this. You can cut yours
as one big square. When you make your pattern, don't have the similar ones on the bottom edge and you just
have it as a one piece. You just essentially
you just need to fold this like this, join up the size and
attach it to your sleeve. But if you've cut
yours like mine, which is two separate pieces, I am going to be
sewing up the sides, the bottom and off
the side again, leaving one end open for me to turn everything
inside out, and that's how I'm
going to fit it to the bottom of the sleeve. Realistically, this
is my machine, make sure all of the
edges are matching, add a pin or two. Everything is knot and quilt. Let's put one here or there. I will be sewing on a
one-centimeter seam allowance, which is what my
sewing pattern has. [MUSIC] To ensure I have a nice corner on
both edges of my cuff, I'm going to go in with
my small scissors. This one has a pointed edge. This is going to
allow me to really push through this corner, through this side, like so. Having nice sharp point. Going into trim the excess around the corners really
helps because you just reduce any bulk or excess fabric that prevent this from coming out nice and sharp
like the edge, like it's looking
like right now. I am going to press
this before I connect it to the
hemline of my sleeve. [MUSIC] I am going to be painting one side of the cuff to the hemline of the sleeve. This is a wrong
side of the sleeve. I am going to be joining
it this way first, because I want the top stitch to be on the right
side of the cuff. This side here, I am just going to put a pin that goes
right to the edge. If your sleeve hem is
bigger than the cuff, like mine is, this is your opportunity to make a pleats to get
rid of the excess. It could also be a decorative
thing where you gather in the excess into the cuff like a blouse
I wore recently that had like a full
sleeve and then it gathered into the cuff, as another design feature
that you can make. This one I'm going to pin here. I want the search
from here to here, I want my pleats to sit
right in the middle. This is going to move
everything here, like this. The direction you want your
pleat to face is up to you. If you haven't it facing
backwards like this, just be mindful that
it might points to the front or the
back of your sleeve. You might want to
actually pin down and then look at
what it looks like. Turn it inside out, then see if you're happy with whatever direction
that it's facing. There you are. Good. The
pleat here is facing, a super notch is
facing the front, so it's going to be a pleat
that goes in that direction. I actually quite like that. Already I have it come forward. This one, I am going to
be stitching like this over the pleats to this side on just one
side of the cuff first, and then I'll go back in with this other side too already
finished it nicely. [MUSIC] Just going to tug this into this side like so. We'll wrap it around like this. Fold it over. Same on this side. This is how always be
finishing off the cuff. I have folded over the second edge to conceal
the stitch that we just made, and by just stitching
across over this point it's going to
up it to finish it up. I'm good this is the
right side of the sleeve. I am in control of how tidy and how neat that
stitch is going to be. I'm going to take this
to my machine and put it together to
finish this up. This is what the sleeve
situation is looking like with the cuff and the
placard all stitched in. It is the most
satisfying feeling in the world, way you do this. There is a spot that it
hits that until you try it for yourself you'd
understand what I mean. It just looks so
beautiful, so well-made. I see adding this placard
is something that just makes the finishing on
the shirt so much better. You can decide to
have yours as a point if you wanted or have
it just like us. Irregular square, if
you don't want to fold this in the
way I've done mine. You could add a zigzag in there or another stitch just
to secure that end. We could have it
as I've done mine. It works just as well. This is what everything
is looking like. Now that my sleeve is all done, the other sleeve is
exactly the same process. You need to add your placard, your cuff, and join up
the side seam as well. Feel free to rewind and
take your time making parts die are bit tricky or not as
straightforward for you. Just take it at your own pace. I'm going to go ahead to
work on my second sleeve. When we're back,
I'll show you how to join the sleeves to
the shirt. [MUSIC]
13. Sewing: Attach the Sleeves: I have worked on my second
sleeve and have it ready here. These are ready to go into
the arm hole of the shirts. I'm going to show
you on one side. The second side is
essentially the same process so that way you can just follow through and do
that for yourself. For joining in the arm hole, I'm going to start on this
side. That is the front. I'm going to find the sleeve
that has corresponding side. This is what you call
joining on the round. There are two ways
that you can do this. You can do this on the flat, which is when you join
your shoulder seam first and then you need
the side seam open, then you work your sleeve
into the curve of your shirt. Well, now that we have this
side scene closed off on the shirts and on
the sleeve we're essentially joining
two circles together. I like to always start
from the underarm or the sleeve head and then pin other notched
points together. That way everything fits
where it's meant to go. I have this side seam point for both the sleeve
and the shirts. I'm going to match
them off in place, putting right sides
facing each other. Just put that here
that one pair. I'm going to look for the
notch for my sleeve head. That I'm going to connect it to the shoulder seam that
is right on top here. Just look for the
ones for the back. Here they are. The aim here is to stitch the sleeve into the arm
hall with just one take. Like joining any
two secular seams, you would have to ease things into each other as sleeves can be very scary. I admit that. It's okay if you have to rewind, rewatch and try this a couple of times before you get it right. It's also okay if you
try it and you find that maybe there's a possible excuse that you
don't really like, you can unpick that
and do it again until you reach a point that
you're actually happy with. I'm just going to go
in here to just add a few more pins around
my sleeve and distribute the ease that the sleeve has because the sleeve is just
a little bit bigger than the armhole and that's
because it just adds a little bit of room for movement when you
lift your arms up, when you hug someone
when you grab things. That's the reason why most sleeves are typically
bigger than the arm hole of a shirt or
a blouse or fur jacket. The process of fitting
the sleeve into the arm hole is typically
called easing in. This I'm really
going to distribute across as much as I can. When I'm just stitching both curved edges together I don't have to think too much. Can we just add some more
pins are on this points? That looks good. This looks fine. This one needs to ease
a bit same as here. I'm going in here to stitch in the first sleeve on
this side of the shirt. This, I am going to be sewing only one centimeter
seam allowance. I'm going to be sewing really slowly because I want to try and get it right and
minimize my errors. However, if it doesn't turn
out perfect the first time, I'll just go back in and
make any necessary changes. [MUSIC] With both sleeves stitched into the arm
hole of the shirt. I'm going to go into
overlap them just to tidy up the seams on
the inside as well. [MUSIC] This is what the
shirt is looking like. Sleeves are in, cuffs are in. I am in love. This looks really good so far. It's always so nice
when I fit a sleeve. I've actually fit it nicely with no weird gathers,
no weird puckers. Everything looks really
nice and straight and I haven't even
given this a press yet. I'm happy with this so far. Like I always say, if
yours is not come out, A plus perfect, feel free to go back in and
make any changes that you see or you deem perfect
or possible for you. You could also rewind, and rewatch bits that you
weren't really sure off maybe, how's it like ease
certain points A or how to match the notches? Feel free to do that as
well at your own pace so you don't feel overwhelmed
with the process. Now that this is all done, we're going to move on to the next step of
finishing up the shirt, which is adding the
dots for definition, and some buttons so
you can do it up, a second to a button-up
shirt and have it open if you wanted
to as well. [MUSIC]
14. Adding Definition with Darts: Now this is what the
shirt is looking like, I'm obsessed honestly. You could leave yours
as this relaxed, comfy fit that I have on here, or you could add
in the darts that we placed on the patterns in
the front and on the back. I'm actually going to be
just pinning mine on my body because I want to do mine
slightly differently. Feel free to take away
even more if you want to shape in your shirt and have it really contour to your body, or you can honestly leave
it the way it is now, I think it looks really
cool just like this. You could wear it
open or closed, it's up to you. I'm just going to go
ahead to pin my darts away to ensure that the darts come out as accurate
as possible. I've just added
some pins to hold the front end where the
buttons are going to go next. I have my pack of pins here. I'm going to start
from this side, and actually I want to do what I would call invisible dart. It's not really
going to look like typical darts that
will be stitched on the wrong side of the fabric. This one is actually
just going to be tacked around the waistline
for about 2-3 inches, so you see the pleat at
the bottom and on top. I want to try and match
it to where my nipple is, which is around there. If your mannequin is your size, you can do this on your
mannequin as well, but the mannequin here is, the chest is not the same as mine and same as the
waist and the hips, so I just want to do it on my
body to have the best fit. I'm going to grab a pin, try not to go too deep,
pleat couple instead. We add one more. Correct. I'm going to do
this on the second side, and to ensure that they
are the same distance from this seam to this edge. I'm going to take a note of what the distance is there that's two inches and then I
show you what I did. I'm basically just going to grab the excess material that
is around my waist, this piece of fabric. Then I'm going to fold it in this direction against itself. Then to be sure that both darts are the same distance from the center front
edge or from this seam, I just going to
double-check that's 2.5 I want to move this
one a little bit forward. We want to ensure that
the fold is in line with my nipple points so it sits
just underneath my breast. I'm just going to to
place a pin there. Careful not to ***** yourself. The front darts are end, but to do the ones in the back I'm going
to take this off, place it on the mannequin
and show you how to pin away the darts on the
back of the shirt on a mannequin if you have one. I have my shares
on the mannequin with the two front
darts pinned away. I have tried to space them from the middle of the
placards by 2.5 inches, so from the middle of
this to this edge here, 2.5 from there to here and
the same on the other side. When it's time for me to stitch, I'd ensure that the
stitch on both sides are actually the same height from the shoulder all the way down. If you do this on yourself
or on a mannequin, just try to have
everything centralized and symmetrical as for the left
and for the right-hand side. For the back, let's just work our way there. I'm going to find the middle
of the back of the shirt. I think it's so hard to fold. I'm just going to
fix a pin there. There it is and I'm going to here the way the
darts along top back. It's basically just
a way to add shape. I have pinned away this
much from this side. This is about half an inch, so a total of one
inch on this side. I'm just going to
fold it inwards like so and then I want to pin
it against this edge. The darts on the
actual pattern is about one inch on the back so
I'm still within my limits. If you want to take
away even more, feel free to do so. Can really customize
it to your liking. This, I'm going to stitch as a top stitch exposed so
I'm going to only stitch about this much along
this portion here and have this pleat
on the top and on the bottom as a design feature. You can stitch your dart inward if we don't
want it like this, you can basically just grab
your pattern piece and then transfer the
points along the top, the bottom, and the waistline on the wrong side of your shirt
and just stitch that away. If you don't want to do the
way I have done mine now, the option is really up to you. There's no right or wrong way
it's like what you prefer. I've always wanted to try
out darts like this so I felt the shirt was the
perfect opportunity to actually do so. I'm going to take
this in my machine, stitch the back darts and then the ones in
the front as well. I'm just going to go ahead
to stitch this down. The way I'm stitching this is slightly different
from how you would sew it if you want to stitch up your darts from your
sewing patterns. This I have folded on
itself on the right side of the fabric and I really
need to be stitching it for around 1.5
inch on the front, that's how much stitch I'm
going to be stitching in, and then 2 inches on the back. To ensure that both
front darts are even in terms of how far they are from the
headline of the shirt, I'm just going to double-check if they
are the same length. This is 10 inches let's
see what the other one is saying because once
I stitch that in, there's no turning back. That is 10.2, so we can move a
little bit lower. So with a chalk, that would be easily like
remove with a damp cloth. I'm just going to
take off the chalk marks when I'm done
stitching in the darts. I'm going to be stitching from
this point to this point. This width is 1.5 inch and this is just
around my waistline. This is very different
from where it was stitched it up using
the same patterns, I can measure an error
so bear that in mind. Waist is a very
narrow as stitches, we're going to see
it from here to here on my sewing
machine [MUSIC]
15. Finishing with Buttons: The final step to finishing
up the shirt is to add the button holes
and the buttons. I'm going to be showing
you how I'm going to do mine on this cuff here. I'm just going to
have one button, you can add more if you like. I will say that every domestic sewing machine
is different so please check your manual to
see if your machine comes with the
buttonhole function. The foot, the settings, everything vary from
one brand to the other so it's worth
having a look. There's also the option of
hand sewing your buttonholes if you wanted to do that instead of sewing with the machine. So sew your buttons by hand and your bottom holes
by hand as well. Now, we're to work on mind. This is the button
I am working with. It's a metal shank button that
is satin covered in black. This, you can buy online, you could also have yours custom made in the same
fabric as your shirt. I just grabbed this black
one because it works really well with the
prints of my shirt. I could have used red, orange but I just
thought black was a really nice happy medium. I want the button to sit on this side and the buttonhole to be on this side
because that way, I will be able to
go over the button here with the buttonhole that I'm going to fix on this side. Just going to go in
here to mark where I want my buttonholes to sit. I will come in here and find the middle point where I want that
buttonhole to sit. The button is about half an inch diameter or 1.5 centimeter. That's how wide my button is. I'm just going to mark
that as a guide for when I go into fits
the buttonhole here. Just mark this
half an inch away. I'm going to mark the end. This I'm going to take
to the machine and stitch the buttonhole
on this side. [MUSIC] That looks
so good. So nice. It's even more satisfying on the orange end because
he can clearly see. This hole I can cut
open with my scissors. If you have tiny scissors, you can use that as well. You could also use a blade
to cut the buttonhole open. Just remember to put a pin at the beginning and at the end, so that prevents
you from cutting beyond the edges
of the buttonhole. Voila we have a buttonhole. Nice. With this intact, I am going to mark the point for the button on the other end. Just lay this over like this, grab a pin, that's going to help
me know what points I can mark on the bottom here. Then lift this up and then just mark that
point with a chalk. I can remove that. Essentially going to stitch my buttonhole on this
chalk point here. Then just stitch
this over three, four times just to
secure button in place. I'm going in here and
secure that stitch. I like to tie a knot. Some people don't but I do. I don't just trust that
loop I did earlier on. I had to do double knots just then keep it nice and secure. Moment of truth, see if it fits. We have it. Button on one cuff done. I'm going to repeat
the same thing on the other cuff and on the front of the shirts and show you what everything looks
like when it's all done. [MUSIC]
16. Final Thoughts: We're all finished
with the shirt, his is what mine looks like on. I have all of my buttons in on the front and on
the cuffs as well. Something I would like to
point out for women's shirt is that it has to go
in this direction. The right side bears the button holes and then the left side bears the buttons, it's the other way
around on men's shirt. So just be mindful of that when you're coming up
with your own design. You can also customize
the placement of your dots around the waist. Mine I have decided
to do like this, it's unexposed dot and
I just stitched it very tiny around this area on
the front and on the back. You can have yours wider
or even stitch it inwards, typical dots are on
shirts and on dresses, the freedom and the
choice is up to you. If you don't get this
right the first time, if yours does not look as
good and as peg as mine, please take it at your own pace. Re-watch things again,
try things out until you get to the point that
you're happy with the outcome of your shirt. I can't wait to see the
fabric that you guys choose as well or your phone brands, designs, how you
play around with the length of the shirt
and length of your sleeve. If you are going to
be experimental, you know know different
colors for your cuffs, I'll pay your colors as well because that's something
you can actually do if you want to have
a more playful design, I really cannot
wait to see that. Please share all
your pictures in the project gallery and there we could just help each
other off as well. Until next time, I can't wait to see
what you guys create. Thank you so much for
joining me on this class. This has been an
amazing experience and I hope you'll take away something useful that
you can use for making a shirt or any other
garment in the future. Take care. Bye.
 Kim Dave, Women's wear designer