Transcripts
1. Introduction: I think everyone should learn
how to sew because how cool is that if you can
walk around wearing even a pair of shorts you made, something really minimal
and someone asks you where you got it and then
you get to say, I made it. It just means more.
It's impressive and it's not that hard to do, which makes it even more fun. Hey, my name is Joe Ando, and I love to sew clothing. Initially, I started in fashion by going to
fashion college. Luckily, I developed a community of people
around me on TikTok. It really does feel like I've found people who like
to do what I do, and it's really just nice to
have that kind of community. In today's class, we're
going to be making a pair of pants from
start to finish. I'm going to be showing
you how to fix the pant afterwards to adjust the pattern that you get at the
beginning of the class, and we're going
to fit it so that it's custom-made to you. I like the idea of
making one thing that you know is going
to be reliable and you know it's going to last
and you know it's going to have a history and a story
of living on with you. It just takes a little bit of effort to get to
where you want to go. This class is for people
who've always just been thinking about making
clothing and getting into it. I would like people to
watch this and think, oh, I guess it's not
as hard as I thought. I hope when you finish
this class that you have a pant that you can
feel very proud of, that you can wear
around every day. Every single part of it is
a creation that you made, it's a collection of all of your choices and you
should feel a big sense of accomplishment and you should definitely feel some
pride as a result. I hope you're ready to create some heirloom quality pants. Let's go ahead and get started.
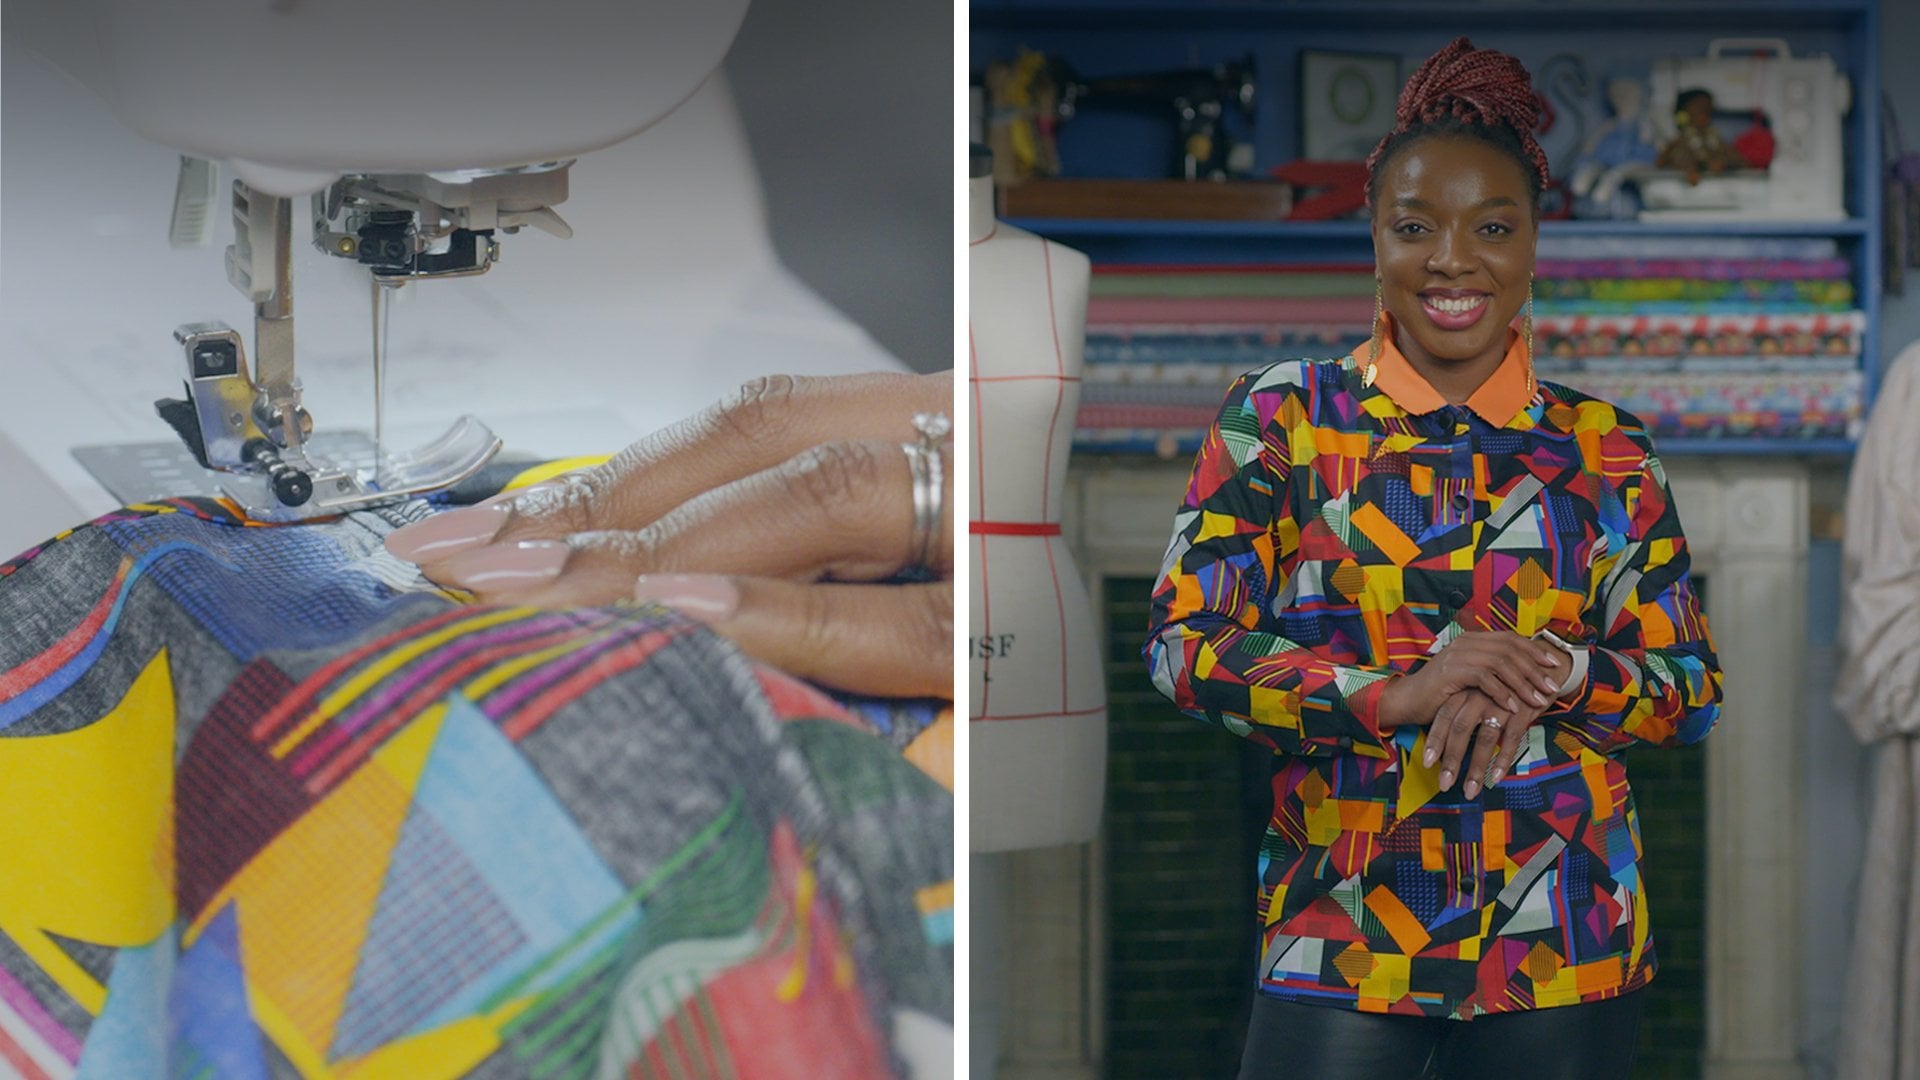
2. Getting Started: [MUSIC] Hey. Welcome
to the class. Today, we're going to
be making an heirloom quality pair of pants. I'm going to be teaching
you all the finishes you need to be able to make
something that's going to last. Today, I'm going to be
teaching you how to make pants out of cotton muslin. Cotton muslin is just
the industry standard for what you use
to make samples. The main reason it's because it's primarily very affordable. It's also just nice to
have something that you can mark and not really
worry about too much. The reason that I'm actually here teaching
this class today, I like people looking
at what I make and thinking that they
can do it too, that it's not that difficult. I would like people to
watch this and think, I guess it's not as
hard as I thought. Maybe I should give it a chance, maybe it's worth buying
a sewing machine. Maybe it's worth
taking an hour out of my day to figure out how
to make my own clothing. I want to make clothing that
people can wear every day. I'm not necessarily
looking to dress someone up for a fancy event. I want someone to just wear a pair of pants I make and beat them up and wear them every day and make them their
staple pair of pants. With this pant pattern today, there's two types of
patterns you can use. There's A4, which
is what you can go ahead to your printer
and just print out. It's going to be
about 30-35 pages and then you're
going to tape all of those pages together. Or there's A0, which is a
system where you can go online and look up
different places that print your
patterns for you. You can upload that file and then they'll
actually ship it to you. I have that today to
show you as well, but I'm going to
show you how to tape everything together
in a way that works. Then from that big pattern
that we print together, we're going to lay the fabric
out after ironing it and then we're going to
cut those pieces out and start sewing
it all together. The first step for
today is we're gonna be putting together the pockets. That's normally
what you do first because on the front pant leg, there's a missing section that needs to be filled
by that pocket. You're going to be
learning top stitching in that process and then once
we pass the pocket section, we're going to move on
to actually putting the pant legs together. In that process, we're going
to attach the pant legs on the side seams where
we're going to be doing a flat fold seam finish. On the inseam, we're
going to be doing a flinch seam and
then on the crotch, we're going to be doing
a Hong Kong bound seam, which is where we take a
thing called bias tape, which is like a long, thin semi stretchy form of
fabric and we're going to be wrapping it around for a
really nice, expensive finish. I'm going to be teaching
you how to put a zipper in, how to do a J-stitch
and how to attach both parts so that you
have a functioning zipper. We're also going to be learning
to stitch in the ditch. Stitching in the ditch is
where when you have a seam, you sew back into that seam and catch the fabric on
the backside so you don't have an extra stitch showing to keep everything
a little bit more clean, and then we're going to
be putting a hook and eye on by hand and after that, we're going to try the
pant on, see how it fits, make a couple of
adjustments on the waist, the crotch, the crotch depth, and the hem if the pants are either too short or too long, and we're going to take those adjustments and
bring them back to the actual pattern and you're going to make
those adjustments there, I'll show you how,
and then afterwards, you're going to have a custom
pattern for yourself to continue making pants forever. We actually have a
PDF available with all the notes that I've
created for this class, and they're all listed
methodically step by step. If it's a little bit
more difficult for you to follow along with
what I'm saying, you can have that ready
with you just to go step by step and take your
time in this process. Now, we're going to
go ahead and look over the list of supplies you're going to need for this
class. First things first. A sewing machine. This is a Brother CS6000i, I've had it since the
beginning of college. Next, we've got the patterns, we've got the A4 and the A0. This is the A4, it comes with a
little map like that. It shows you how you're
supposed to tape it together. This is the one that you print
out at your own printer. This here is an A0 pattern. This is the one that you upload
on a website and you pay them to ship it to you
on a big piece of paper. But we're going to
get into the details of patterns in the next lesson. This is a long French curve. You don't need it,
it's optional, but it will make your life a lot easier because this is mirroring the hip and length of what you're going to have
on the side of your pant, so I recommend getting
this if you can. This is called a ship curve. This is optional, it's
not fully necessary, it's just another option for a different shape and a
different curve, so you have it. This is also a French curve, but it's a shorter French curve. This one, I say you should
definitely have it, it's just going to make
your life a lot easier, especially when
you're dealing with your curves on your hips, when you're changing
the pattern. This is an 18-inch clear ruler. I recommend getting a clear
one with these lines. This way, you can see through
it and see what's actually happening when you're
matching things up. Box of pins. For
what we're doing, you're going to want
normal, medium grade pins. Call these snips. They're
just little scissors, but they're just handy to have. These are optional, but it's nice to have these by
your sewing machines, so you don't have
to grab your big scissors every time
you need them. Seven-inch zipper, right here. A nice sharp pair of scissors. These are my scissors. These are ones that
I splurged on, but these things are great. You just need something
that's going to be able to cut the fabric. These are table weights. I bought these that are specific for fashion patterning
table weights. But anything works as long as you can just hold your paper
down while you're working, so it doesn't move
around and shift. I'd like to have
different scissors for paper than I do for fabric. Because cutting paper with your fabric scissors makes
the scissors more dull, which will make it
harder to cut fabric, especially when
you're doing more than one layer at a time. This right here is bias tape. You can go ahead and get
whatever color you want. The reason I have white and
the blue one here today is because white is what
I would normally use to match the fabric
that I'm using, but because I want you to be
able to see what I'm doing and actually see the contrast
of how everything looks, I'm going to be using
blue today for when I do the Hong Kong seam finish. Tape, you're going to need tape to tape your patterns together. You're going to need two
sets of hook and eyes. You have the option
to put two on, you can also put one on as well, but make sure you have them. Hand sewing needles, as you can see right here, I keep them in a pill
bottle because it's just an easy place
to keep track of them because they're
very easy to lose, but make sure you have
hand sewing needles. This is also optional. This is a chalk pen right here. I recommend getting it, it
makes your life a lot easier. You can mark seam lines where
you need to sew or mark different things you
need to be aware of and it will disappear
eventually. This is a seam ripper. You're probably going
to end up needing this. I've been doing this for
a long time and I still use it, seam ripper. Next, this is the cotton muslin. This is five yards, but you're only going to need
two-and-a-half yards. I got this at a place
called Silk Thread, but you can get it
literally anywhere. This is medium weight
cotton muslin. This is iron on interfacing. It's a fabric where
one side of it, it has this glue and
you can iron it onto certain pieces of patterns and certain fabrics to
make it more sturdy. You're going to need about
a half yard of this. Generally, iron on interfacings
are all pretty light. Some of them are more heavy
for suiting or more stiff, but this is like a pretty sheer lightweight
iron on interfacing. This is pocketing. This is just the
different cotton fabric that I'm going to
use for the pockets. You don't have to do this, but if you want to, it's a nice little
detail to be aware of, especially when you're making
nicer pants in the future. For your machine, everybody
has a different one, but you're going to need
a zipper presser foot to put on the zipper. There are two types of
zipper presser foots, there's an invisible
and then a normal one. This is the normal one, that's the only one you're
going to need today. This is an ironing hem. When you're ironing
certain things like the hip of a pant, it's nice because you can
use the different curves of this to actually press
down and open them. Sometimes on a flat
surface, it can be hard. It's optional, but
it's nice to have. This is an arm ironing board, it's very small, not
necessary as well, but I like to use it. Sometimes you just don't
have the space you need or sometimes things are
too small and thin. It's nice to have this
because you can slide a pant leg over it whenever
you need or a sleeve. Also you're going to need
an iron, any iron works. Also just make sure to get a thread that you can use that's like to the color that
you're going to be getting for the fabric,
whatever matches. If you want to get
something that contrast for a style choice,
that's okay too. A thread that I really like
to use is called Gutermann. This is not that, it's a
slightly thicker, nicer thread. Sometimes it's a
little bit too thick, but for the sake
of making pants in the future, it's a
nice one to have. Just so you know, there's
a downloadable PDF. If you weren't able to
follow along or you just want everything listed
methodically for you, you can download the PDF and
have the list printed out. You can go to the store
and buy what you need. Generally, for me,
I live in New York. I'm really lucky to have
a fashion district I can go to where I
can get everything. But I know across the country, there are places like Jo-Ann's that you can go buy pins or fabrics or honestly
online shipping is just a great way
to go these days, especially when you need
something specific like a ship curve that I showed you. They might not have that
at CVS or something. Online is maybe your best
bet if you're not in a place where you can just
access everything very easily. In the PDF that I mentioned, you're going to be
able to go and look at the stores based on the products that we
have on this table, so that way, you can go
check out where I shop. Start getting your supplies
together and then join me in the next lesson where
we're going to start to prep the pattern, prep our space, prep the fabric, and then actually start
making the pants. [MUSIC]
3. Prepare Your Pattern: Now we're going to be prepping our pattern to actually cut out our pattern pieces and then cut out our fabric so
we can start sewing, so go to "My Resources" tab on my class page and then
what you can do is you can find two files
that are under men's and women's
pant patterns and from there there's two
separate file option. There's A4 and AO. This is AO, AO is the
option where you actually download the file and you
send it to a separate site, it's easy to find if you
just look up different sites that print AO pattern files
to actually shipped to me. They'll send you a big one
that's already put together, so large sheet like this, it prints them out
and bigger sheets, so that way you have
to do less taping. The taping is not a big deal, it's really easy, but
if you want to do this, it's probably a lot nicer, so this is what AO is
going to look like. This right here is an A4 file, that's where it prints
out everything in 8.5 by 11 inch sheets of paper and then you have to take
the whole thing together, that's probably a lot easier and more accessible
and obviously a faster option even though
the AO comes pretty fast, I'm going to teach
you how to do this, it's very easy and, I like this option printed home. Ultimately, they're
very similar, just different sizing options but for the men's pant pattern, men's closures go leftover, so on a suit or on a
parent fly, it's leftover, right with the zipper in the
middle on women's closure, it's right over left. This is the A4,
print it out right here 35 eight sheets of paper, pretty much all you need
to do and all you need to know is that when you print normally on the
edge of the paper, there's always just
a little cut-off gap of space, it's annoying, but you just need to do your
best to take these sheets of paper and match them up edge to edge as
clean as possible. You'll be able to eye the lines and make sure the
lines match up, it's very simple, go ahead and do one
for you right now. Match this up here
as best you can see, these different lines tape over it and then
you're good to go, this is ultimately what
it's going to look like. Look at that, all taped together
it's really easy, you just need a good
amount of tape but, this is what you can
do straight from your own printer if you want to. Each pattern comes with the key, there is a layout page, so when you're taping
everything together, you follow this layout page
like it's a map that'll, keep you organized and then there's also
a key for sizing. It says extra small,
medium, large, extra large, each size
has its own line, find your size and then go to the pattern and
find the line that corresponds to the size and only cut that out on
every single one. Certain pieces on here like the pocket or the pocket cover, it's all one size for
every different size, so it's not going to change, but for all the
ones that obviously have different lines on them, just find the corresponding line and you'll be good to go. For me, I'm a size medium, so I'm going to go
ahead and cut off the solid line on all of
these pattern pieces. One more important thing that you have to know
about these patterns is because of that little gap that comes when you print it, you literally just
have to take a ruler and a pencil and
fill in that line, so if there's a little gap
between this line right here, all you have to do is
just connected with a straight ruler and you just have to do the best-fit line
possible that you can do. That's what you do with
all of the little gaps but otherwise it's perfectly
sized and it's ready to go, the only thing
about the AO that's nicer is you also don't
have to do that step. Now we're just going to go
ahead and cut out a piece. I'm going to start
with the waist band, that's what's at the top,
that's what's easy to do, like I said, I'm a size medium, I'm looking for the solid
line so follow along. If these sizes are outside of the right range, I know we're only going from
extra small to extra large, the reason we did
that is because it's expensive to get things graded, so we just tried to keep it to, I guess, some very basic sizing. But hopefully from what you're going to learn
at the end of this, if you're an extra small, you're going to learn
how to size these pants down and if you're
an extra large, you can learn how to size this thing up and
learn how to play around with your pattern and eventually get it
to be your size. The waist band is cut out, I'm going to go ahead and cut out the rest of
the pattern pieces, you go ahead and do the same thing and then we're
going to meet up on the next lesson
and we're going to start actually cutting
the fabric out, so I'll see you then.
4. Prepare and Cut Fabric: Now that you've got
your pattern cutout, we can go ahead
and start getting ready to cut the
actual fabric out. I just want to give you
some information about how these patterns work and what everything on these
things means. First and foremost,
every pattern has a line with the arrows that's showing you
where the grain goes. Normally when you cut fabric, you want it to go along
the length grain. What that means is when you buy fabric, you buy it by the yard. If you buy three
yards of fabric, it'll be a 60-inch to
the 48-inch wide fabric. There are different
shapes and sizes for it, but
generally, it's that. Length three means you want
to go along the yardage, you want to go with the grain. Often a fabric, especially
muslin has a salvage. It's a little
thicker colored part on the end of the actual fabric, that signifies where it
has just been closed off. You want to go along that. With the length grain, some of these things are
marked cut on the bias. What that means is you
cut it on the angle. When you cut fabric on an angle, it has more stretch. For example, you're
going to be one of the waistband
pieces on the bias, so length grain is like this. This is the width, and then the bias is at an
angle between them, which means you're
cutting the underway spanned with some stretch on it. That way when you
put it on when, you put a waistband on, it allows you to fit things
a little bit better, and that way it's
just not too stiff. That's very important to know. On each of these pattern pieces, it's noted how many of
each thing that you need to cut and in which way
you need to cut them. For example here, this
is the back pant. It says men's trousers
sewing pattern three, back pant leg, cut to self. What the word itself means
is your main body fabric. Some of these we'll say
cut one interfacing, cut one pocketing, cut oneself, self is just always the main fabric that you're using for whatever
garment you're making. This is an example. This is the fly guard. It says cut oneself,
cut one interfacing. Interfacing is webbed
material with the glue on it that you iron to another piece of fabric
to make it more sturdy. That's just letting you
know that you're going to be using this pattern not only to just cut one
of the self-fabric pieces, your main fabric, you're also using the
same pattern to cut this to iron to it later on. Other pieces say the same thing. These two are pockets. They say cut pocketing,
like I said, you don't have to use pocketing for this project if
you don't want to. But if you do want to
take that extra step, use these to cut out of
the separate fabric. So this piece right here
is the waistband piece. This is the only piece you're going to be cutting
on the bias today. So just so you know, this arrow right
here is straight, that's to signify
the straight grain, so when you cut one
of these pieces, it's going to be on the straight grain on your main fabric. This diagonal line is
to show you the bias. Let's say this is the length of the actual
fabric that you're cutting on. In order to cut a bias piece, what you need to do
is take this line and make it the new straight
grain by doing this, by shifting it, and making
this angled on the fabric, which is going to
cut out a piece that has a lot more stretch. This is your bias
line right here. This is just a straight-grain
line right here. Now what we're going
to do is we're going to prep our fabric. This is cotton muslin. Get your cotton muslin out. Like I said, you only need
two-and-a-half yards of it. That's still might be
a little bit too much, but it's always good to have
a little extra in case you do just mess up a little
bit or something. But now take your cotton muslin, go ahead and get your
iron out and try and iron out these creases
for the parts you're going to be cutting
out as best you can. Normally when you buy
it, it's folded out, so just try and go iron
these creases out. Doing that is a good idea
because with fabric, especially like wool,
it will shrink, so what we'd like
to do is we love to free steam our fabric, so that way when
you run it through the wash, in case
it does shrink, it's not going to be
as substantial as if you've already
pre-steamed something. Most of you probably
have an ironing board. I've got this ironing
mat saves space. I prefer ironing board, but just for the
sake of making sure you all can see what I'm up to, I've got an ironing mat today. Just place it on top
of your table and then go through these
creases as best you can. Nice to give the fabric
like a little pre-steam. It's also nice to have
everything laying flat for when you cut it because sometimes they can throw things off by a couple of millimeters. It doesn't sound
like a big deal, but it can pay off in the end if you're trying to make sure
everything is very precise. Go ahead and try and
get all the creases out for the parts that you're
going to be cutting on, and then after that, we're
just going to go ahead and lay the pattern pieces down and actually start cutting
out the fabric. But once that's done, go ahead and get your table
space as clear as you can. Lay your fabric out
over the top of it, and we're going to start pinning our pattern pieces and
then cut them out. I'm going to start with
this pant right here. This is the front pant leg. Go ahead, place that down, and like I was talking
about with straight grain, you're cutting this along
the straight grain. As you can see, the length of this thing is how it's
cutting in a long way. Normally width is
from top to bottom, cut along the length
of the fabric with the length of it that
you actually purchased. So if you bought
three yards of it, it's going with the three yards, not along the vertical. Now what you can do is go
ahead and start pinning along the edge of the
pattern pieces. Very simple. What you're going to do is
you're going to pin around as many as you need to do. Generally, you just do whatever
makes you comfortable. If you have a steady
hand when cutting, you don't have to pin as much. If you feel like you've
got a more shaky hand or you're not as confident, you can't pin too much. It's okay. Go ahead
and pin more. That way it holds it
down more sturdy. You're going to make sure
nothing wobbles while you cut. Go ahead and pin all the
way around this piece. You can cut piece by piece and then put
pattern pieces on. What I like to do
is get everything pinned and then cut
it all together. Some things you need
to cut two off, some things you need
to cut three off you can just go
step-by-step after that. But for the first wave, don't be afraid to just
put everything out where you need to and see
it while you cut it. Everything else is
also going to be along the straight grain except
for the waistbands. So you can feel free
to take all the other pattern pieces and pin them along every single part here along the straight grain. I'm just going to
show you really quickly how to do the waistband, so that way you see what I mean by actually
cutting on the bias. So like I said, with the straight
grain of the fabric, this line indicates
straight grain along with the length
of the fabric. So normally, for the first piece when you cut with this fabric, you're cutting like this. But the moment that you
need to cut it on the bias, what you're going to do
is you're going to shift this line to match
the straight grains. This line was initially matching the
straight grain here, and now you're taking this
diagonal line and shifting it so that this
pattern pieces on an angle giving it more stretch. I can show you a
little example of what that actually looks
like really quickly. This is the horizontal. Along the straight edges, the fabric is not as stretchy, but when you do it on an angle, it stretches a lot more. It has a little bit more give, so that's why we're
cutting on the bias. Same thing with this thing. Find a space that you can
fit this pattern piece. Get your pins, and now with this bias
line facing straight, go ahead and start
painting around the edge as well,
along the edge. So you can go ahead and
I'll start painting around all your pattern pieces. Remember, for this
waistband piece, you need to cut one
of this piece of the pattern piece on this fabric along the straight grain, then flip it to do the
bias on the same fabric, and then you're
going to be cutting one piece of interfacing, which is this webby material that I told you
all about earlier. You're cutting this
on the straight grain on the webby material. You just need one. I have these two pieces
pinned right now. I'm going to go ahead
and cut them out. I'm just going to show
you what the interface looks like and the pocketing. But for this main fabric, I don't need you
to sit through me pinning every individual one. I've shown you how to pin, I've shown you how to do the bias, now go ahead and cut everything out and
make sure you follow the instructions on
each pattern piece for how many things you need, and then next, I'm
going to see you after we cut everything
out and then we're going to move on to
the next lesson. Now everything is pinned. Like I said, just make sure
for things that need to be cut twice or three times, make sure you go
back and do that. Sometimes what I like to do
with this fabric because I like to fold it in
half along the length, so that way you can just
cut to pieces at a time. That is totally fine. But just for the
purposes of right now and showing you how everything
should be laid out. We're just going one
layer at a time. Now everything's pinned. Get your scissors, your fabric scissors, not your
paper scissors, and not the pinking shears
that do the jagged edges, the fabric scissors, and you can go ahead and
just start cutting. That's one front pant leg done. You need two, so
you got to go back. Unpin this one and re-pin it again to
cut your second one. Move this out of the way.
Move on to the rest. Go ahead and cut all your other
pattern pieces out. I'm going to move on to
showing you about notches, telling you what notches are. So what notches are they're these little t marks there
on every pattern piece. What you need to do with all of these notches is you need
to go to every single one. There's multiple on this front pattern
piece, there's one here, there's one along the
crotch seam there's one where the knee
point line is. And you need to
take your scissors and go into that notch. Only a quarter of an inch. Your seam allowance
line is at a half inch. A half inches what
you're going to be sewing this thing along. Whenever you match up
these pattern pieces and put it on your machine, you're sewing at a half an inch, so don't pass that half inch or else you're going to have
a cut going into your pin. Only snip into these things, either an eighth of an inch
or a quarter of an inch. And what you're going
to need these there's notches on every pattern piece, so you can match
everything up to make sure everything's
in the right place. Go ahead, snip into
all your notches and then you can unpin this and
move on to the next step. Now we have everything cut just so you know
what everything is. This is the front
pant leg right here. This is the fly guard. This is the interfacing
that's going to be ironed onto this fly guard. This is the fly-facing. This is the interfacing
that's going to be paired with the fly-facing. These are the two
pocket bag pieces. This was cut out in a
different material, like I said you can cut it out in pocketing,
so here they are. This is the pocket
cover right here. This is the back pant leg. And these are the three pieces you need for the waistband, the interfacing that's
going to be ironed onto these self-straight grain
piece that you cut, the straight grain
waistband piece, and then this is the bias waistband piece that
you're going to need, and that's everything for one pattern leg in front
of you right here. What we're going to do next
is we're going to take these pocket bag pieces right
here and the pocket cover, and we're going to go ahead
and sell the pocket bag. We're going to do a French seam. I'm also going to show you how to put the pocket cover up. Go ahead, get everything cut
out and then join me for the next lesson where
we're going to be putting the pocket bag together.
5. Start Pocket Bag: We're about to
dive into pockets. This is the pocket section. The reason we're going
to hit the pockets first is because on the
front pant leg, you can see that there is a little section
that is missing. This is the pant leg right here with this
cutout right here, and what we're doing is we're
creating the pocket bag so that way we can sew it
to the front pattern leg and fill in this gap space
right there so we can attach this whole thing to
the back pant leg. We're getting that ready, and then we can
move on to sewing the actual body of the pant. First thing is first is prepping the front pant leg
with the pocket. We're taking this
cover right here. This is the bottom
pocket bag cover. On the half-inch line, that's where the seam
allowance line is, that's the line that you're
sewing on on all the seams. Take your pencil, take your
ruler and go to a half-inch. Cool. Now you can see
along the half-inch, we've drawn this
line right here. You're going to
take your scissors and you're going to snip
into it along the curve. The tough thing about curves when you're sewing is they
don't naturally fall flat, especially if you're
folding fabric under. Look what happens if you try and fold this
without these snips. It's all wobbly and
not really flat. It's just not really
falling the right way. But what you do with these snips is it
releases tension and it has some give and it
allows you to fold these under individually creating a more smooth curve
along this edge. Only along the curve, not along the straight parts, you snip up to that half-inch
line that we just drew. It's a guide to make things a little easier this
first time around. Snip up to it. Now what we're going to do is we're going to
go get our iron and we're going to
fold these things under using this
half-inch line as a guide for where you need to stop. To get your mat or
you're ironing board, whatever works,
place it on here, get your iron and you're going to go along that half-inch line right here, you're going to fold it under. Don't be afraid to just pinch and create a little crease, and you're going to do
this all the way around. I generally like to do it like
this on the opposite side so that way we can
see where it stops and you're going
to take your iron. Now you just got to go
ahead, use your hands, keep folding down along
that crease line, along that line you've drawn, don't be afraid to steam it
to really set it in place. There we go. All the way. What you're doing is you're creating a clean, finished edge. That way, it's not going to
be all raw when you put it down and sew it to
the actual piece. What you're going to do now
is get rid of this thing, take this under pocket
bag right here. This is the one
that doesn't have this section cut
out right there. You're going to take this thing
you just made, this cover, and you're going to place it and match it along
these edges right here. There's a notch at the top of this pocket bag right here, the little snip you
should have done on it. You're actually matching up this top piece to that
notch on the pocket bag. Match that right there, match the corner here, and then just place the bottom. Now what you're going to
do is you're going to take your pins and you're just
going to pin along here. Cool. Now that this has done, what we're going to
do is we're going to bust our sewing machine out, get rid of your iron. We're going to get
our sewing machine and sew a quarter-inch
from this edge, all the way up. Every sewing machine has a measurement marker
right where the foot is. It'll show you where
a quarter-inch is, we're a half-inch is, find those marks because they're going to be your best
friend in this situation. Take this pinned, put it
under your foot and find where that quarter-inch line
is, put your foot down. For this, technically what we're about to do is we're
about to top stitch. Top stitch is just
a stitch you do along the top to hold
things together. Often it's used as a design or just to hold things
down to give it that extra sturdy sewing
stitch along the top. What we're going
to do now is sew quarter-inch from the edge, put this thing down. Also important thing to
know for a top stitch, it doesn't need to be the small stitch that we usually use. When we do seams, often you're doing a
2-3 length stitch. You often have a
measurement thing on your machine that
allows you to judge how wide you want
your stitches to be. For this, if you can find it, feel free to go three or 3.5. That's just a different
stitch length. For a top stitch, it's not
so crucial to have it be such a tight stitch because it's not holding two pieces
together for a seam. Feel free to make it
a little bit bigger because it's technically
a detailed choice. Now that we're here, what you need to know
when you're starting to sew anything is you need
to start with a back tack. What that means is you
go to stitches forward. Don't be afraid to use
the hand-cranked thing. Go two stitches forward, and then use your reverse
button on your machine. If you don't have a reverse
button on your machine, you might just have
to take your piece and flip it around and
then sew backwards. But if you do, press
the button down, go back three stitches
or two stitches, wherever you've done and then continue
your seam stitching. That's just to hold it in place. What that does is it locks
the end of the thread so that it doesn't unravel
and fall out later on. Now they've back tacked, you can go ahead and sew
along a quarter-inch while pulling out your pins. Not everybody pulls
their pins out, some people don't mind. But usually what happens when you leave your pin in on the piece is you run over it and it bends your
pen and sometimes it opens up a hole
in your fabric that you don't really want so it's good practice just
to be safe about that. But now go ahead. Sew quarter-inch all
the way along the edge. At the end, just like we did at the
beginning of the scene, get to the end of the
line that you're sewing, reverse 2-3 stitches, and then go forward
two stitches again, pull your thread out, get your scissors,
pull this away, and you can cut it away and that's a top stitch
on that piece right here. Now what I like to do
for details sake is do another stitch at an
eighth of an inch, between the edge and that quarter-inch stitch
you just put in there. Take it back to your machine and so align the same exact
way at an eighth of an inch. Remember, make sure you
start with the back tack, two stitches forward,
two stitches back, and then go all the way around. You do not have to go this fast. Get to the end, back
tack 2, 3 stitches, go back forward, 2, 3 stitches, pull it out, snip it away. Always make sure to
clean your threads off by cutting them away, the excess thread that you got. Now, look at that
double top stitch. It's a nice little detail. Anyone who sees that is going
to go, two top stitches. Only specific people might
notice that and care, but it will help
it lasts longer. It makes it more durable and it's also just nice
knowing that you did it. The effort goes a long way when you're trying
to create a piece that's going to
last for a while.
6. Finish Pocket Bag: This is the beginning of
what we call a French seam. This is one of the nicest
things that you do. Like I mentioned today, we're
doing a flat-felled seam, Hong Kong seam, and
we're going to be working on this French seam. This is the first place that you're going to
see a French seam done. You're going to take the
wrong side of the fabric and attach it to the wrong side. The right side in a pocket
would be the inside, it's where you put
your hands in. Right here, you slide
your hand in there. That's the right
side of the inside. What you're doing is you're
taking the wrong side and attaching it
to the wrong side because with the pocket, we're going to flip this
inside out to create it. You've got to start like this. What you're going to
do is you're going to match everything up. There's a notch at this
bottom corner, right here. There you go, and
you can see it. You cut it on both
pocket pieces. You're going to pin
all the way around, make sure you match
up that notch to make sure everything is
where it needs to be. Pin there first and then match up everything else and
pin around the edges. What we're going
to do after this is we're going to sew
along this entire edge at a quarter of an inch,
not a half-inch. I know there's a half
an inch seam allowance, but what we're
going to do is sew a quarter of an inch
first along the edge, flip it inside out, trim some of that excess seam
allowance away, and then so another
quarter of an inch. I'm going to show
you what that looks like just in case you're
a little confused. Check it out. We've got the whole edge pinned. Get your sewing machine again, find that quarter-inch mark
on your sewing machine so you know where
to put everything. Pop this pocket on, line it up at a quarter
of an inch from the edge and per usual, start two stitches forward, two stitches back for that back tack to
lock the thread in. Then you're going
to go a quarter of an inch all the way
around the edge. Since we're doing
a technical scene, we're putting two pieces
together that can pull apart, move back down to a
smaller stitch length. If you did go ahead
and move to that three and 3.5 range, go back down. Stitch, back tack. Now go all the way around at a quarter of an inch. Now at the end, make sure
you back tack two stitches and then come forward two
stitches lock that thread in. Pull this out, get
your scissors, snip away the excess thread. Do the same thing at the top. It's good practice to constantly just keep cleaning up
where you're working on, so that way at the
end, you don't mess anything up or
forget anything. Now, look at that stitch. We've got a stitch
running a quarter of an inch all the way around here. What we're going to do
now is take our scissors and we're going to trim away
around half of what's here. We trim that away. Remember when you do
the other pocket, you're mirroring everything. It's not going to be
exactly like this, it's going to be flipped. Make sure you're
keeping that in mind. Same thing for the pant legs, same thing for everything
that's mirrored on the other pant leg. You get your arm, put this down here. What we're going to do now is we're going to
flip this inside out. Take this, open it up,
flip it inside out. Use your iron to
flatten down the seams. You're going to
have to go in here. Just push it to one side,
that's good enough. Do the same thing at the bottom. You're just flattening it down, getting it ready. You're going to take your
iron and now go back over it, flattening that seam down, making it nice and flat
because you're about to sew another seam at
a quarter of an inch. You're going to catch that excess seam allowance
that you just left out there in this new seam
that you created. There we go. Bring your machine back. Now you're going to do the
same thing along this edge. You're going to
sew a quarter-inch all the way down and
around per usual, make sure you back tack at
the beginning and the end. What you're doing is you're
catching your seam allowance instead of a normal seam where you just sew
it at a half-inch and you iron it down
and it's got raw edges. What you're doing now is you're sewing at a quarter of an inch. The first time you
trimmed away some excess, you folded it inside out and you're sewing at
another quarter of an inch, which is catching that excess in the next quarter of an inch. When I'm done, you're going to see
what I'm talking about. Pop it on the machine. Find that quarter-inch mark so you know where
you're sewing at. Start with a back tack. Now I'm at the end. Make sure to back tack. Same thing, open it
up, get your scissors, cut the excess thread
away at the top or the beginning of the stitch. Now, what you've got
is a French seam. Remember because you initially sew the wrong side
to the wrong side, you had that seam
allowance sticking out. Then you folded it inside out and you put that seam
allowance on the inside, and then you sewed another
line at a quarter of an inch. All of that raw edge is now caught in this seam
you just created. That's a French seam. It's
the best way to do it. Now that we've got this French
seam done on this pocket, this is the pocket bag, that's what you call this. This is done. Now, to finish off the front
pattern leg to get it ready for sewing the actual pant body, you take this pattern leg. As you can see, these two
edges right here match. This is the edge on the
front pattern piece, this is the edge on the
upper pocket bag right here. What we're going to
be doing right now is we're going to attach
these two pieces, which is then going
to fill this gap, creating the full side
seam of this pant leg. What we do now, make
this flap like this. You're going to take this
and you're going to flip it. You're going to attach the
inside pieces to this. You're taking this and
you're doing that. Match them up, take this. Just to clarify, this is the
inside of the pocket bag. You are taking the inside
of the pocket bag, this upper pocket
bag right here, taking it and putting it on the right side of
the front pant leg. What you're going to do
is you're going to sew a half-inch along this
line, flip it over. What it's going to do is it's going to fill
that gap of space that's on the side
seam right here that's going to end up
looking something like this, a lot smaller because obviously we haven't
sewn it properly yet, but it's going to fill
that gap and create a proper full side seam. If you didn't want pockets, all you would have to do on
your pattern is go ahead and just draw that section
in and fill it in. You can use your pocket
to create the gap so you know what the shape
is going to be like, and that's if you
don't want pockets. I personally want
pockets on everything, but if you don't, you
don't have to have them. Here we go. Now that this is pinned, what I like to do with
this bottom section here just because it moves around,
it's a little flimsy, just take an extra pin and just do a little sturdy
pin to keep it in place, now you've got this pinned. You're going to take
this back to your sewing machine and
you're going to sew along this edge
at a half an inch. Find your half-inch
line, per usual. What I always say, make sure you do your back tack. Take that sturdy pen out if it's in the way and
now you're going to go at a half-inch all the
way along this edge. That's your seam allowance here. Back tack, pull this
up, take this out. Go ahead, snip away
that extra thread. Put your sewing
machine to the side, get your ironing mat or board, get your iron, and
then open it up to that clean side over here. What you're going to
do is iron it down. There you go. Now that that's ironed
down like this, now you're going
to take it again with the seam allowance
now on the inside. As you can see here, you've
created a clean edge, the seam allowance
is on the inside because you just flipped it. Now go ahead, take your
iron and sew over this, creating a clean finish. What we're going to do, the last step of
connecting this, you don't have to do it. It's just a nice way
to finish it off. You're going to top stitch at a quarter of an inch
along this edge. What that does is it
holds it together so that way when
the pant is done, this part isn't moving
around and opening. This top stitch keeps it
down and keeps it in place. Now get your sewing
machine again. As you can see, the pocket bag fills into this
space very nicely. That's where your hand
enters into the pocket. What you're going to do
is you're going to sew quarter-inch along this edge. Sometimes, since the pocket
bag is not fully attached, you just want to put a pin
in to keep it in place. Even myself at this point, I still need to make sure
I have a little help. But once you put
that in, go ahead. What you're doing is
along that diagonal line, like I said again, you're doing a
quarter-inch top stitch. Start with a back tack
to lock that thread in. Now sew all the way up
at a quarter of an inch. Finish it off with
the back tack. Pull it out, snip it,
clean up the thread. Pull the pin out or any
pins you may have used. Don't be afraid to over pin
things if it helps you. Just like that, the pocket bag is now attached
to the front pant piece. Look at that gap, it's filled in and we've created a
full proper side seam. This is what the
pocket looks like, your hand can go inside, and that's the front
pant piece done. Now, I'm going to go ahead, finish off the other pant leg. Make sure everything
is ready to go. Then we're going to
meet in the next lesson where we're going to
be actually putting this pant together and learning some really good
finishings for the seams.
7. Prepare Your Waistband: [MUSIC] Now that we just
finished the pockets, we're moving on to putting
the waistband together. I like to get the waistband done now because that way you have
everything put together. You can get some more fabric pattern pieces off the table, so it's not too cluttered
in your space and that way, when you finish the paint
body in the next lesson, we can put it all together. First thing to note here is
you're going to take this, this is the iron-on
interfacing that we cut, and you're going to
be ironing it on to the self-cut straight
grain pattern piece that we cut for the
waistband as well. The third thing that you're
going to need for this, is the underway span, which you cut on the bias. We talked about bias being an
angle you need to cut on to make it just a little bit more stretchy, so it has some give. Also, one thing just to note, on a man's trouser pattern, what we have over here is
the waistband extension. That's what you need to
match up to the fly guard. This piece right here is
considered the fly guard. When we get it all done
and sew it together, it's going to be folded in half. I'm going to be showing you
that in a later lesson. It's very simple, but it needs to match up with this
distance right here. These two pieces match up. For me, I'm cutting
a size medium, so that's why I'm working
with a solid line. If you were doing a size small, you'd be working with this line, and if you're doing
other sizes based on the size key map
that I gave you, it would be these other lines. I'm in medium, so I'm
in the solid line. These are the
notches I'm going to work with today for myself. Now that you know that,
it's important to note that what I'm creating
is a men's waistband, if you're doing a
woman's waistband , everything is flipped. You'll be able to see on
the woman's waistband that these notches all on this side will be on the opposite side because you're doing everything flipped. Now we're going to start
putting this thing together. Get your ironing board
or your ironing mat. Get this straight
grain pattern piece that you cut, not the bias, the bias one is not going to
be ironed on the interface, it's just the
straight-grain piece. You're going to take
this, put it under, use your notches to
match everything up. I'm looking for my
center notches. My center notch on this piece on my straight grain
piece is right there. My center notch on my iron-on interfacing piece is right here so just go ahead
and match those up. Match the rest of the notches
you've clipped as well and then you're good
to go and start ironing these two
pieces together. Take your iron,
and start ironing. Since this is glue, really what you're
doing right now is you're melting the glue. Since the iron is hot
enough, you're melting it, and you're basically bonding it to the actual pattern piece
that you're working with, the straight grain cut
piece of self-fabric, the muslin that you're
working with, the cotton. Take your time and make
sure that is settled. Sometimes it's good to
just really make sure that it's hot and melted on there because I've had times
where I've finished ironing it and I missed
the little corner, and it just stripped away. It's always good to take
your time with these things. You should never be in a rush. Look at that. Here is your waistband
piece now with the iron-on interfacing ironed on. There you can see
in the back, look, move it around,
doesn't fall off, that's because the glue is
now really attached it on. There you go.
Interfacing is now on. Now what you're going to
do is you're going to pin. You're going to
need these notches that you've cut to
match everything up, you're going to get
your underway span, that's the one that
was cut on the bias. You're going to take what
you've just created, the interfacing now bonded
with the self-fabric, and you're going
to match them up. Look for all those notches. Here's my waistband
extension notch, that little two-inch gap
of space that I told you about that you're
going to attach to the fly guard later on. If you don't know what that means or what I'm talking about, we haven't done it yet, so it's okay if you're
a little confused. Right now, you
just have to worry about matching all
these notches up, and then I'm going
to teach you how to sew and create the waistband. Match up your notches, get your pins right here, pin all the way
around the side seam, the top seam, and
the other side seam. But you're going to
be leaving the bottom seam open as well because you're going
to flip this thing inside out when you're done. That bottom seam that's open, you're going to take that and
that's what you're going to attach to the seam
on the pant body. That's why you're leaving the
bottom open for this one. Once again, look for your
notches, here's another notch. Here's the side seam
notch right there, the other side seam
notch, put them together, go ahead and pin [MUSIC] Just so you know, what we want to do
is make sure that this interfacing
is on the outside while we pin so that way when we sew it and flip
it inside out, all of this is going to
move on to the inside, so we can't see it just so
it does its job of just providing structure secretly
inside the waistband. It's not meant to be seen. Since we're pinning right now, make sure it's on the
outside as we pin, and keep in mind that it's
going to fold to the inside. Pinning the last side seam. Like I said, you're just pinning the two sides seams
and the top seam. This is where you should
be all right now. The side seam right
here, pinned, all the way along the top, pinned and the other side
seam over here, pinned. Now this bottom
space is all open. The curve's sloping up
is what should be open, and this curve at the top of
it should be closed [MUSIC]
8. Construct Your Waistband: Now what we're going to do, we're going to get our
sewing machines out. We're going to sew
this public couched. Take your waistband. Pop it on here. I'm going to say it again. I'll say it a million times. Always make sure to
start with a backpack that's two stitches
forward to stitch back. Sometimes you do three, whatever makes you
comfortable, it's fine. It's just about
locking the thread and making it sturdy and strong so it doesn't fall out later on. We're sewing this at a
half-inch seam allowance and we're going to be
doing corners today. Very easy, very fun corners. Now at a half-inch, put your threatened, make sure you're at a
sturdy stitch length. I like to work with 2.5 depending on what
machine you have, even if it's an industrial, you'll be able to gauge that and change that based
on what you like. But right now, we're
working with a strong, tighter stitch length. Two steps forward, two back. One thing you have to keep
in mind right now is that you're about to hit a corner and you're not going to have to turn to continue doing
the same at the top. Take a look at what
we're doing here. You're going to go
slowly, take your time. Don't go with Joe's speed. Take your pins out as you go and if it helps you to draw
a line, you can do that. But right now, what
we're doing is we're not going to go all the
way through on this. Normally, we've just been going all the way through on seams. Right now, we're going to go all the way until half an inch to the end of the
seam because that's where the new seam
starts for the top seam. Watch this. Right here, take your time. What I like to do is
when I get there, I like to turn this thing and just judge if it's
at the right spot. Normally, at least with
my sewing machine, the edge of this foot
signifies a half-inch. That's how I know
I'm sewing along that half-inch seam allowance
line that I've given you. What you're going to do is check there's a little bit
more space here. That means I'm not there yet. Like I said, if you want to draw a pencil at the
top of this thing, just to show where the
half-inch line is, that's totally fine. But since I have a
little space there, I've got one more stitch. Go ahead and use this
hand-cranked to take it slow. Check it again. There, now I'm at a
half-inch from the top. Now we're going to be going
in stitching along here. But the first thing you do
that you always do at corners because corners are
really sensitive spot. When we flip this inside out, I'm going to be taking
any form of like a semi-sharp object and poking that corner out. You need to make sure
the corner is sturdy. At the corner, before you start going along
the top seam here, you're going to
backtrack two again, just like we did at the
beginning of the scene. Go two again, forward
back to where you were. That's creating more sturdiness. You're doing more
stitches on top of one another to make it a
very sturdy corner. Now you're turning it from here, where you've already done
your backpack at the corner. Now you're going
onto the top seam, you're going to do
the same thing, two stitches forward, two stitches back and now we can go ahead
and finish the seam. What you've done is just
created a very strong corner One thing to keep in mind is every time that you're pulling up this foot to pull
a pin out or do whatever, you want to make sure
that the needle is down, holding this in
place so that way, you don't lose your seam. If you were to pull it up and pull this needle out and
then move this around, what it does is it
will take the thread and give it more slack and
it will loosen your seam up. Always make sure
when you're lifting this foot to take a pin out, make sure that the needle
is down in the fabric Just to hammer at home, we're about to hit
another corner. You're doing the
same exact thing. You're going to go
up to that corner. You're not going to go all
the way through the seam. You're going to go
up to a half-inch from the edge of the fabric. Go ahead, start sewing. Get as close as you need
to that half-inch space. Keep the needle in the
fabric so that way, you can pick up the foot and check how far from
the edge you are. That's pretty good right there. It's pretty close to the edge. I'm going to do one more just
to get me a little closer. There we go and now that
you're at this corner piece, you're going to
backtrack two stitches. Go forward again, two stitches. Flip this thing. Now you've done a little
double stitch there. You've made a very
strong and firm. Do the same thing here
before starting this last stitch right
here all the way to the end to finish
out the waistband. Two stitches back and now
go ahead and go forward. Finish this seam out. For good measure and
getting a good habits, go ahead and cut that
dangly least threat at the beginning that you
don't need anymore. Now we're going to
hit some corners and now you're
going to understand why I said you
need to backtrack. Take anything you have. It can be a dull pencil. It can be a little
screwdriver like this. Right here at that
corner we just created, you're going to take
this, take your scissors. What you're going to do is
you're going to cut it to a point just like this. You're not going to cut all
the way to that corner, you're going to cut
just away from it just like around an eighth
of an inch away. You don't want to cut into
it because obviously, if you break the
thread seam here, you're going to
open this thing up and it's not going
to be very nice. You're cutting this
close to that corner and you're going to do the
same exact thing here. Why we do that is because when we fold
this thing inside out, there's not going to
be a whole bunch of bulk of this excess
fabric we just cut away. Take it now, fold it inside out and look at this
corner right here. It's very bulky or
it's a little weird. That's why you got to take
this thing right here. Whatever pointy object you have, not too pointy because you
don't want to rip through it. A knife would definitely
rip through this, something that's
like dull points. As you can see, what I'm using here has
a little flat top to it, so it's not too sharp. You're going to take
it and you're going to really gently push
that corner out. Just like that. Look at that. Just created a corner, a nice little
corner right there, and just so you have the visual and so you know what it
looks like on the side where we haven't cut away
the excess fabric here. Watch what happens when
you fold it inside out. Watch what happens
if I try to poke it. It's not really working. I swear I'm not faking this, it's actually just not working. There's just too much bulk, that excess fabric that we haven't cut away on
this corner yet. I'll get in cotton
bunched up in there. Cutting that away is
what allows you to get that nice sharp corner
when you poke it out. Go back to the inside out and look for the
stitch right here. Take your scissors, same thing, a nice little diagonal line going to that corner space. Move that away. Do the same thing right next to it and take your time and be careful because you don't want to cut through that thread. That'll create problems and it could cause you
to have to start over. Don't feel like
you're in a rush. Take your time. Same thing. Take it, fold it inside out. Look how much easier it is
this time, look at that. Take your little
dog pointy object. Look at that, comes right out. You've got yourself a nice
little corner, look at that. It's the best corner
I've ever seen. Now what you're going to do,
fold it back inside out. Since this is a curved
surface right here, it's not naturally made to fall and be folded inside
out and fall flat. What I like to do is just
give it a couple of snips because it takes
the tension out. One right here at the middle. Do one at the side seam, do one at the other side seam. Then do one between the center back and the side
seam on both sides. Now take it, fold it back
to being inside out. Get your ironing board and
now what we're going to try and do is we're just trying
to get this thing flat. Use your hands to pull
this thing apart. Not too hard. You don't want to rip it. It shouldn't rip because
you did a good stitch, but hold it like
this, put it flat, and then push this seam
allowance to one side and now go over that. Lay it flat. Here we go, we're going to keep doing that
all the way along the seam Now that you've
ironed this down, it's flattened it in a way
that makes it a lot easier. When you folded inside
out completely, it's going to fall a
little bit more flat. It's going to make it easier to, in a more perfect way, iron this seam down. Cool. There we go. Look how clean that looks
now, use your hands. Just keep things in place. Nice, look at that little
corner right there. You got all that excess out. Now you've got yourself
a nice little corner. Look at that soft
flat, so laying nice. In this next lesson,
we're going to go ahead and actually add belt
loops to the waistband. It's totally optional if
you don't want belt loops, but I recommend them. I'm the person who wears a belt with my pants even if they fit. We're going to go
for belt loops now.
9. Add Belt Loops: Now that you've got
the waistband done, we're going to add belt loops. There is a pattern
piece included with this for the belt loops.
It's a little square. You're going to cut
out six of them, six of these little squares and I'm going to show you
how to put them together. Once you cut them, they
should look like this. The same thing, just
a little square, and the seam allowance
on the sides is a quarter of an inch. Now what you're going
to do is you're going to get your belt loops, draw those quarter-inch
seam allowance lines, boom. Here's one more boom, and it's a half-inch at the end. This will all be marked
on that pattern. Boom, it'll look like that. These are the lines that
you're going to iron on, fold along this quarter-inch
line at the edge. Take your iron, iron that down, and do the other one and
you're going to see that they meet and kiss at
the middle right here. Iron it down. Check it out, see, they meet at the
middle right here. This is where you should be
at right now, look at that. You're going to get your
sewing machine again, get that belt loop that
you just put together, and what you're going to do
is from each edge you are going to sew an eighth of
an inch in from that edge. What that does is on the backside where all
this raw stuff is, it's going to hold it down so it doesn't split apart
whenever you're using it. This is how you make
things nice and sturdy. These are the little details
that actually really do pay off and keep
your pants together. From the edge eighth of an inch per usual, pop your needle in. Like I said, start with a
backtack it goes a long way. You're going to repeat this
step six different times. Now you're doing the other
side of the belt loop. Start with the backtack, finish with the backtack. Pull this thing off, snip away the thread. Now, what you should
have is this right here. You still have a half inch of seam allowance on the
top and a half inch on the bottom that you're going
to fold under when you attach it to the
actual waistband. But right here, that's your belt loop and you're
going to do six of these. You're going to
take that half-inch seam allowance at
the top right here. You've got a half-inch up
here, half-inch down there. Just like you can see on this
pattern piece right here, that's a half-inch
of space at the top. Draw in that half-inch line, I'm going to do it once just so we're all on the same page. That's where you're
going to be folding. Fold this over at that line. Get your iron, iron it down. On the other side now, get your iron, iron it down. Do that six times and then your belt loops are ready
and then we're going to attach the belt loops
to the waistband. Because you notched
our center back, that's the middle of the
waistband right here. There's my center back notch. Go ahead and look for yours. What we're going to do
is we're going to start these belt loops a half inch from the center back
of the waistband. You're going to place them snug right at the top of
your waistband here, you're going to do
it on both sides. Use your ruler to find that
half-inch starting spot. Here's the center back, half inch from the center back starting a half inch
from the center back. Here's a half inch
of space between the center back and where
that belt loop starts. Go ahead, take your pen and
pin it just at the top. We're only sewing the top of the belt loops onto this waist now and then we're sewing the bottom of them to
the actual pant body. What we're going to do
is we're going to put all six of these belt loops on so the tops of them and then leave the
bottom of them open, not attached to anything. We're only doing
that at the end. First one is placed
and then we're doing another belt
loop at the side seam. Look for that side seam notch. There we go. Here's my side
seam notch right here. Go ahead, same thing. Place this right in
the middle of that. Snug, right at the top. Check that out. Take a pin. Pin it down. Boom, there you go. Same thing on the other sides. Right here, half-inch
from the side. Pin it down, good to go. I like to place my
belt loops that go at the front by where the zipper or you're hooking eyes will
be at the end of this. Find that space. Find the center front. First thing first, one side, like I said, has
an extension spot. Has an extension to
attach to the fly guard. The center front starts
where that extension starts so we're going to start with the side that doesn't
have that extension. You'll know what side that is by the notch that we
have marked on it. One side of this waistband has a notch marked for
the extension. The other one just is
directly the center front. There's no extension on one
side of this waistband. What we're going to
do from the side that does not have
that notch that shows where the extension is we're going to
take our ruler, put the three-inch mark at the edge so you can find
out where the three inches starts and you're going
to take this belt loop. There we go. See three
inches of space right here. Pin that top right down, cool. Now go to the other side. Take your final belt loop. There's your notch that
shows the extensions there. That's going to be your
center front line. Like on the other side
we went from the edge. Because this is extended, you need to go from
this notch so go ahead, create the visual
of where it is. This is your line from
this notch right here, three inches away because that's your new center
front for this side. Take your belt
loop at the end of that three inches of space. In this case, because we have the extension just so you know, it's going to be five inches
from the actual edge here. Pin that down. There you go. Now all of
your belt loops are pinned. Take your sewing machine. Now what you're going to
do is an eighth of an inch from the top and
you're going to go ahead and sew a little stitch only along the length of
the actual belt loop. You're not going to
continue it on all the way, you're just doing
on the belt loops. Go ahead and sew. Backtack
per usual, backtack again. You want this to be sturdy.
It's the belt loop. It's going to be
holding up the weight of the pant onto your body. Make sure you go ahead and
backtack as much as you feel like you need because
you want to make it sturdy. Cut these little threads away. Snip, now go ahead and sew that eighth of
an inch to the rest of them, all six of them. Then we're going to move on
from the waistband section. Check it out. Now, your waistband is done. You've got the belt loops on. So now we're going to move on to the next lesson
where we're going to start putting this
actual thing together. See you in the next lesson.
10. Add Darts to Pants: [MUSIC] We've made it
to the part where we actually start putting
the pant body together. What you need for this
section is you're going to need your front pant and
your back pant piece. The first thing
we're going to do is we're going to put
these darts together. For those of you who don't
know what darts are, darts are these little
triangular angles that we put into the back pants. Take your back pant
pattern piece, match it up again. You're going to take
your pencil, go to that bottom point right here, and don't be afraid
to get messy. Go ahead and aggressively
just push through here. What I want to do is
create that dart point. Push through here. What you want from that is
to be able to fold this open and then see
these two little dots. It might be a little too fine, but the point is
you want to make a pencil mark right where
those darts are ending. If you haven't done it
yet, take your scissors, go in, snip at the top here, snip at the top there. Same thing with the
other one snip at the top right there. Now you can take this, go ahead. Because this is the
inside of the pant, that's why I'm drawing
the dart lines here. That makes your life
a little bit easier. Find that pencil mark you did here for the bottom of the dart, and find that notch
for the legs. There's two; draw a
little line there, draw a little line there. Go do the same exact
thing to the other dart; draw a little line there, draw a little line there. Now what you're going to do, you're going to pinch this closed and you're
going to do your best to match up those
two lines you drew. What I like to do is I like to take my pin
and just feed it through on one line and then check the
other side to make sure it went through
the line here. I just pinned on this side. Look at the other side. It
made it through that line. That means you know
it's matched up. Go ahead, continue
that all the way down the dart until you
get to the final point. Then what I like to do is the last pin that we're
putting on this dart, I like to put the last pin where I know the dart
is going to end. Here's the endpoint
right there of the dart. Take your pin and
put it through that. That way you know, that as you're sewing down, you're going to a point. At that point, you know this is where you're
going to end. Go ahead, pin both of these. [MUSIC] Get your sewing machine. Now what we're going to do is you always start at
the top of the dart. Start at the top of the dart, backtack two stitches per usual. Now go ahead. All the way
down that line you just drew, you are going to be going
to essentially nothing. You're not sewing a seam,
you're sewing to a point. As you get to that point, you're not going to backtack. What you're going to do is you're going to tie off a knot. As you get to that end point, sew all the way to the end, and when you get to the end, you're going to
lift your needle, you're going to lift
your presser foot, you're going to pull away. Pull this needle
out, that last one. Now that you've pulled away, take your scissors and go
ahead and cut enough of slack. So you have a good amount of slack right here at
the end of the dart. You're going to take
these two pieces of thread right right at the end, and you're going to
go ahead and you're going to tie a knot. There's one, there's two. I like to do three to make sure it's going to last forever. Now that you've tied three off, that's how you
finish off a dart. The reason we do that is because the backtack at
the end of a dart, that's just a very
sensitive spot and it could unravel over time. That's why we always
do a knot here. Go ahead, trim away that excess, throw it away, trim
away that excess. Now go ahead and complete the same thing on
every single dart. Obviously you're mirroring
two back pattern pieces so if you're doing the darts like this
on the inside here, you're going to have
to on the other pant, have them facing inside this way so that way they
mirror and you're going to be able to create two
different pant legs that are obviously
not the same leg. Now your darts are done. Lay this flat, get your iron, and you're just going
to iron those darts flat towards the side seam. Check it out right here,
darts here and here. Not facing this way, facing this way towards
your hips. [MUSIC]
11. Sew Flat Felled Outseam: Got your darts done. What we going to do is
we're going to start sewing the outseam
of this pants. How are we going to do
that is we're doing something called a
flat felled seam. It's a nice finish. It's very sturdy. Often you see it on something
like jeans and denim. What we're going to
do is we're going to take the wrong side
of the fabric, the wrong side of each one. Imagine this is the wrong
side right here, inside. Wrong side right
there on the inside. If you want to mark it
for yourself on this first go around,
feel free to do it. Now what we're going to do is take this outseam right here. This is the outseam of the back. This is the outseam
of the inside, and we're going to go ahead
and match up our notches. First things first,
find your knee notch. That's halfway between
this hip space right here and your hem. There it is for me. There's this one right here, and then there's another
notch right there. Match those up. Then go ahead, go to the hem. Look for the notch right here, another notch there,
match that up. Look at that. The main thing to do with this is make sure your pocket is laying flat because we
haven't fully attached the pocket in outside of just this entrance
seam right here, this entrance point
to the pocket. This is still flowing
freely right here, and this is still flowing
freely right here. To help you out, what
I would like to do, to keep it down is
put a pin in it. That'll keep it sturdy there, keep it in place. Right here on the top as well, throw a pin in right there
to keep this in place there. Next what we're doing, is
we're just going to be pinning all the way
up the side seam, making sure they
meet at the top. Also, just so you know,
normally on a back-part piece, there's a little
bit extra space, there's a little bit
tiny amount more length. That's to create
something called ease. What ease is, it's just
that little bit of give that little extra
bit of space you need to fit into things
that are your size. Check it out. You see this. You see how it
feels like one side has a little bit more slack, just pull it and then it
snug together right there. Now I'm all pinned
along my outseam. Got the half inch
seam allowance. What you're going to do is
you're going to sew down this entire side seam at a half of an inch
seam allowance. You start with your backtack, put your needle in
two stitches forward, two stitches back. Now you're going all the
way up that side seam. Lift your needle up. Pull it out. Snip it here. Now, you're going to have
a lot of fraying here. Just go ahead and trim
away that fraying. Just a little bit, not a lot, literally just these excess
threads that are sticking out that are making
it all messy. Now what we're going to do for the next step of the
flat felled seam, is we're going to cut
away some seam allowance, but not on both pieces
of the pattern, only on the back. There's two seam
allowances here. This over here is the left, that's the front side, and on the right here
is the backside. What we're going to do now is we're going to trim
away on the backside, the back pattern piece. We're going to cut this
down to pretty much half. Essentially you're cutting
away a quarter of an inch. Take your scissors and start
trimming away roughly half. Get your ironing
mat or a board. This is where things start
with the flat felled seam. Check this out. You've got that seam that's been cut down to pretty much half. Now what you're going
to do is you're going to iron this down. What I like to do first
is I like to iron the shorter seam allowance over the longer seam allowance, facing to the right in my case. It depends on the
leg that you're on, but you're putting this
shorter seam allowance, over the longer seam allowance. It's just going to be
some good prep for you. It's going to make your life easier for the next few steps. Now what we're going to do
is you're going to take this long seam allowance side and you're going to fold it over towards the back over
that seam allowance that we just cut down to
a quarter of an inch, and here's what
you're going to do. You're going to iron it down. Nice see. Now it's covered. Fold that over and
do that all the way up along the edge of this thing. Then do one more fold, taking that raw edge away. That's what a flat
felled seam is. We're going to do another
stitch right along the edge, right here, right along that
outer edge to hold it down. For the second fold, you do need to iron. It will make your life
a whole lot easier, and look at that. Very nice, super nice
and clean right there. Just a little example like I was talking about with
those fraying threads, those being the pain,
look right here. You see that little
thread sticking out? If you trim that away, you
won't have to pull it out later or you can just tuck it under. Normally, I'd recommend
just cutting it away. You never know if it's
just going to be a problem because it's in there. The only place that things
might get a little bit more difficult with this is when you get to the pocket section. Because you've had that
pocketing in there, there's a couple of
layers of fabric instead of just two like we've been
doing up to this point, so you're really just
going to have to get comfortable working with
your hands on this part. I know it's going to feel
a little bit awkward, but will make your
life a lot easier. What I like to do is on
the parts where you can, because obviously
when you get up here, the pocket is attached
completely through here. Just to get rid of some bulk, I like to just trim away a
little bit of that pocket. As you can see right here, this white fabric
is the pocketing. It's not the main body fabric. Just trim a little
bit of that excess away to make your life
just a little bit easier. See. Get rid of this. Just at that bottom part, just where the pocket ends on the bottom there's that
little bulky spot. It's just going to
help you a little bit. Now we've done it
all the way up. Take these pins and you're going to pin parallel to this line all the way up, and we just hold it in place. Where we're at right now, is we're going to
stitch this edge right here as close as you
feel like you can get, as comfortable as you are, get it close to that edge. I would call it a
16th of an inch from this outside
edge right here, sew down right there. I'll show you how to do it. If that's too close, just get as close as you
can get to hold this down. We're nearing to that section that I said has the pocket bulk. Just make sure to work with
your hands while you get there and keep that under. For me, it's hard to
get a pin through so many layers of
fabric sometimes, so take your slow little time and work your way through that bulk of fabric
in that section. Backtack to lock that thread in, lift your needle up, pull away, snip it away. Move this bad boy to the side. What I like to do, is just get that iron
mat out one more time and then just do a nice little last
iron run over to flatten things out
to keep it clean. Good practice to
constantly iron things, iron your seams flat. Here we go. You can probably get a
good look at this while I'm ironing over it,
but check it out. This is a flat felled seam. What you've done is you've
caught that seam allowance, all that extra fraying, in this space right here. We're just finishing
off the ironing. One thing I mentioned
at the beginning of the class is something
called the ironing hem. You don't have to have this, but this is why you
should have it. It helps you iron out these
curves a lot more easily. Obviously, ironing
board is flat, hips are not flat. So having something
like this where you can work with all the different
little curves around it. Use this curve on this side. It makes it a little
bit more natural to actually iron this thing. Check it out. Now you're actually
ironing it on a hip shape in place the
way it should be not flat. There you go. It's done. Pull this thing out. This right here is
a flat felled seam. Next, we're going to be
moving on to the inseam where we're going to be doing another French seam. We've already learned
how to do it. We're just going
to hammer it home and try it one more time, this time on a longer seam. Then we're moving
to the crop scene where we're going to do a Hong Kong bound seam finish. Then we're pretty much
done with the pant body and we're going to
hit the zipper. So stay tuned for that
12. Sew Inseams: Now we're moving
on to the inseam. The inseam, we're going to be
doing another French seam. We already did that
on the pocket. This is just a little
bit more practice but this is a nice way to
finish off the inseam. The reason that we're not doing a flat felled seam
on both sides, normally, you can't do two flat felled seams
on a pant like this, is because when we did
the flat felled seam, you needed to be able to open up this pant in order to be able to finish
it off at the top. But when this is sewn closed, you're not going to
be able to stick this on the sewing
machine without getting what's behind it caught in the actual thread under it. That's why you
can't do it twice. That's why normally you will see a flat felled seam
only on the out-seam, and then you have to do
something else for the inseam. Again, we're painting
right side to right side. You want the part of the pant that's going to be showing to be sticking out right now and the part that's not
to be on the inside, just like how we
started last time. As you can see here, I marked the wrong side. Here's an x and here's an
x to show that this is the inside of the pant and
on the outside of the pant, as you can see, you don't see the
dots on the outside. We did the flat felled
seam and you got the pocket on the front
of the pant showing. You want to do wrong
side to wrong sides. Wrong side to wrong side. What you're going to do
is pin down this seam. Per usual, make sure you
match up your notches. Here's a notch here, little notch right there.
That's the knee line. Another little
notch right there. Go ahead match that up first. Go ahead pin all the
way up to the top. Same thing at the bottom. Where the pant is, there's a notch right there. There's a notch right there. We're all pinned
along the inseam, wrong side to wrong side. Just like I talked about before, with the French seam, we're going to go ahead and
we're going to sew this at a quarter inch all the way down. Start with a back
tuck like usual. I'm starting from
the top from where the crotch is. It
doesn't actually matter. Cool, seems done. Pick your needle up, pull
it away, cut the thread. Now what we're going to
do, is we're going to go ahead and trim that
seam allowance down. I would say just under
half of it away. Because then what
we're doing next, is we're flipping it inside out, and then we're
catching that seam allowance in the new stitch that we're about
to do just like we did on that pocket
earlier today. That's trimmed away. Now that we've trimmed, what we're going to do
is you're going to flip this pant inside out. Because I like to finger
press, what I'm going to do, is I'm just going to go
straight to the inside out and use my hands to just finger press this down for when
I can iron it. Here, Check it out. See, I'm just creasing
it as if it was paper. You can roll it. You can slide it and roll it until you get
right to that seam, right where you push it on out. Go ahead and make
sure you do that all the way up this inseam. Now, take your iron,
iron on over it, flatten it down, make
it nice and clean. Now that that's ironed down, put your iron away, keep it handy
because you're going to need it one more time. Bring your sewing machine here. Now, we're going to be sewing again along the inseam
at a quarter of an inch. What that does, is you're catching that excess
seam allowance that you created here that you just
trimmed away in another seam, just like you did
with the pocket. Pull out the thread back tuck at the
end of the stitch. Snip away those long threads
that are left behind, flip it right side out. Start ironing away at this
French seam you just created. Nice. Then iron all the way to the top. Just like that, you just
created another French seam. If you want to take a little
peek at the inside of this thing again, look at that. What you just did with
the French seam is you sewed at a quarter of an inch first and then you trimmed
away that seam allowance. What you just did with
that seam allowance, is you sewed another
quarter of an inch catching that seam allowance in this
little space right here. It's similar to the flat
felled seam except just a little bit different in how you process it and
go through it. But look at this
space right here. Inside of this thing, inside of this little tube
is the seam allowance. You won't get any
fraying out of this. This is one of the nicest
ways to finish off a seam. Now we're going to
be moving on to doing a Hong Kong stitch, Hong Kong seam finish
on the crotch seam. Get ready for that.
Grab your bias tape, that's what we need next
and grab some pins.
13. Create Hong Kong Seam Finish: Get your bias tape. I've got two options here today. I've got a blue bias tape and I've got to white bias tape. The reason I'm going to
use the blue bias tape is because I want you to be
able to see the contrast of what I'm actually doing. The main thing to keep in mind when you're doing one
of these finishes, the Hong Kong specifically, is the crotch seam allowance
is going to fold over and you want to
make sure you see the prettier side of the
work you're about to do. Make sure this pant
is right-side out. This is how the pant should
look when it's on the body. Right here, this is the crotch
that we're working with. All the way around, starts here, goes around, continues up
through the center back. This is the center back here. This is the center
front right here. What we're doing is we're
taking this bias tape, and normally, just a
heads up with bias tape, you can always see that
there's one side that's a little bit longer than the
other in terms of its width. This side right
here, check it out. You can see the
entirety of the width. You only see this side,
but when you flip it, you can see that small, little, little tiny bit
that's poking out on top. That's how you know
that this side, the shorter side, is the side that you're
going to start with. This is how we're
going to do this. This is the crotch seam. You want to make sure that the prettier side is going to be showing facing you, facing up. What you're going to do,
unfold this bias tape. Start with the shorter side. See how one side is a little
bit longer in the back. The side on top here is shorter. Unfold this side right here
to reveal these crease lines. What you're going to do, you're
going to go to this crotch. Give yourself a little bit
of extra space on top, just in case you have
a little mess up or whatever or
something bunches here, it's nice to have a little
extra starting spot to so on. Just go a little bit longer. Let me just show you. Just like a quarter
of an inch is fine. See how that blue is
sticking out beyond the canvas right here. There you go. Now what you're going to do, you're going to start pinning along this first crease
line right here. All the way around the crotch. Pin that. This requires a
little hand work. You'll get used to it. Take your time, don't get frustrated. You're going to pin along that
seam line the entire way. That seam line is pretty
much a quarter of an inch. Once you've got it pinned all the way around on the
right side of the fabric, now what you're going to do is pretty much either at a quarter of an inch or just
following that crease line, you're going to sew all the
way around that crotch. Then we're going to
meet up after that. You go to the next step. Backtrack at the end, pull the needle out, pull
this out, cut the thread. Move this to the side. Now what you're going to do
is where you just sewed, same as before, you're going to trim away that seam allowance. This space right here, we just sew that a
quarter of an inch. Now trim this away
to about half. Just like we've been doing
with a lot of these seams, trim this thing down
to clean it up. Because what you're
about to do again is catch that seam allowance, except you're catching
it this time in this, inside this Hong Kong bias tape. Now that you've
trimmed that away, we're just going to iron around the edge of this bias tape
where it was just sewn on. You just want to flatten
this section right here where it connects to
the actual fabric here. Where the body of the pant is connecting to this bias tape, you just want to iron this down. Just be careful. It's okay if you go
over it a little bit. But yeah, just like that. Here we go. What I like to do is I'd
just like to start here and just push over a tiny bit. It's a good way to do it. Nothing too crazy. This is really going to last. It's going to look really nice. This gives you the tools
to think about the details because this is the mindset
I want to get you into. I'd really like you to think
about what can you add outside of the obvious
to make a pant nicer, and doing this Hong
Kong seam finish is outside of the obvious. It's a really, really
just nice way to do an old-school great
finish on a pant. I recommend it, and
it's something that if anyone did care about
fashion that you met and sew, they would see that
you've got the chops, that you've got a
good set of skills to actually make something nice. Now what we're going to be
doing is we're going to be covering this
stitch right here. We're going to do something
called stitching in the ditch. On this side of the fabric where we had showed
that initial line, we're going to be sewing
between the body of the fabric and this bias tape in that
little line of space here and that's what we call
stitching in the ditch. Between these two
pieces is the ditch. You're going to sew in there. That way that stitch
line you're about to do, it's not going to show up on the side of the pant
that you will see. On the side of the
seam allowance that we're going to see on
the inside of the crotch, it's only going to
pop up back here to catch this other side
of the bias tape here. Now what we're doing,
fold this bias tape over, and cover that, and
hit it with the iron to create a space that you're
comfortable sewing on. Same thing all the
way around per usual. Look for the stitch, take your bias tape, and do your best to
cover that stitch. That way when you
stitch in the ditch, you're going to catch this
side of the fabric on it. Now what you're going to do, now that you've ironed that
down and set it in place, we're going to start pinning
like crazy all the way around here to hold it
down and hold it in place. Make sure you try and keep your threads
that are fraying clean, trim them away so they
don't get caught. Cool. Now you've gone ahead and you've pinned all the
way around the crotch. Get your sewing machine now, and we're going to
finish this off. What you're doing now
is you're going to be sewing in this space, not on the new side
that you just pinned, not on the side
that's free hanging, on the side that you've
already attached the body of the fabric
to the bias tape. You're going to be sewing
in this space right here between the blue and
this base right here. You're sewing between on that little space
of a line to try and catch the blue
bias tape that's on the other side in the back
to hold it all in place. Once it's done, you'll see
what I'm talking about if you don't understand here. Okay, we're at the end, backtrack, pull your needle up, pull this thing out of here, sniff the thread,
now check it out. On this side here, look at that. The entirety of the
stitch it's not here and it's not on this
blue right here. It's between them in that
ditch space right there, and look at the other side. What you've done is you've
caught the other side of this blue tape in that stitch with the white
thread that you just stitched in the ditch width. That is a Hong Kong
pant seam finished.
14. Finish Crotch Seam: Now that we're done with
the Hong Kong seam finish, and you've learned how to
do an outseam and inseam by doing the flat field seam and
doing another French seam, we're going to go
ahead and connect the crotch pieces up
to a certain point. I'm going to tell
you where to stop by referencing your pattern and then that way the pant's
going to be ready to move on to where we put in
the zipper and the fly. To make our lives easier,
what we're doing is, go get your front pattern piece, get the pant you've just sewn, flip it to the front side. What you're going to do
is you're going to take this and we're going
to match it up. This way, you can
mark in your notches. The thing is, we
initially notch this and we did it while that
crotch seam was wrong, before we put this Hong
Kong bias tape in. The only thing is that when
you do it all the way, you do cover up the notches
that you just created. Go ahead, snip them
back in again, the bottom one is where
you're going to be sewing along the
crotch seam up to you. You will stop at this point. You don't go all the way, you need this space to put
the zipper and the flying. You stop at this
point right here. Go ahead and put a little notch. Don't cut all the way in, just do a nice little
eighth of an inch snip just so you can see
where you're going. You're done with your pattern, go ahead and toss that aside. Get your other pant piece. Just start them at the top. Always match at the
top right here. Follow the crotch seam down with them layered
next to each other. Find the notch that
you just marked and copy it onto this
other side right there, just a tiny little snip. Now that that's done, we're going to sew these
crotches together. Here's what you're going to do, make sure one pant leg that you've just sewn
is right-side out, the way you would have
it on your body showing, and then make sure the
other pant leg right here is inside out. Now what you're going to
do is you're going to take this pant leg over here and you're going to slide
it into the pant leg that's inside out until
the crotches meet. So you're literally just
sticking one inside the other. Once you've done that, make sure the crotches
are meeting up. Check it out. This is the inside of this pant and this is the
inside of this pant and now what you're going
to do is pin them together and then sew along the crotch. Go ahead and match up the
center seam right there, go ahead to the front, find those notches on the bias tape that
you just snipped, match those up as well. Once again, just so you know, that's going to be
your stopping point. Here is your stopping
point along the front, this is the space you need
for your zip around the fly. Now go ahead and pin along this entire section
to keep it together, to keep it nice and flat. Go ahead to the top over here, clean off any excess fabric
that you left behind. Go ahead and pin at the
top of the center-back along the crotch,
holding that together. Now pin all the way down,
matching everything up. The pants really starting
to come together now. This is an exciting point
when you're making something. Once we saw this crotch you'll be able to
look at this pant and see the legs put together. It's where you feel like
you're really starting to accomplish actually
making something you're going to wear. Take it, pop it on
the sewing machine, and now, for the first
time in a while, you're going to be selling at
a half-inch sew allowance, which is the normal
seam allowance. We're not doing any other finish because this Hong Kong
bound seam finish cleans up those raw
edges immediately. From the edge of this blue
tape, a half-inch in. We're not going all the
way up to the seam, you marked where we're
supposed to stop with those notches, you're going to sew
right up to that point and you're going to
backtrack there. Get right up to it, backtrack, come back towards the end of the seam
with a couple of stitches. Don't be afraid to make
that spot very sturdy. Pull the pin out,
snip the thread. This is an exciting moment. We're about to move
on to the zipper. But first, let me show
you what we've done. Right now, this
paint is inside out. When we were talking about the Hong Kong
bounce seam finish, this is what I mean by the
right side is showing. Check this out. Open this up, and we're
going to iron this down and pretty much what we're
doing is we're hiding the side that has
that thread showing. What you're only
going to see once you iron this down when
you look in the pant, is the top of this seam with the clean stitch in the
ditch that we've done. Check it out. That's what we do. That's how that works. That's how you make it
look nice and clean on the inside of the crotch. Now, go ahead, grab your ironing mat, if you have an ironing board, it's easy to slide this over
the end of the ironing board because I don't have that today because I'm showing
you all with a mat, I'm going to use my arm
ironing board, my mini one. Get your iron. However you can, the point is just to now
iron this crotch seam flat. This is probably how you're more accustomed to
seeing a seam done. Here we go. Look at that. It's an awkward space, ironing along the crotch
seam because it's curved and it's going to have
all this bunching, but just do your best because iron things out in the future if there's any creases or lines you don't
really like looking at. Here we go. Look at that. Now, the other side. There we go. Put your iron away. Now what you've done, that's
the Hong Kong seam finish. Just for fancies, if you
want to give yourself some validation for all this hard work you've done so far, pull the legs out, right-side
out, look at that, you've got two pant legs
that are now put together, all they're missing is a zip
or a fly and a waist band, and then some details like we're going to do the hook
and eye at the end, we're going to have the pants. Look at that. Thanks for sticking it
out with me so far, now, what we're going to do is we're going to move
on to the next lesson where we're going to put
the zipper in and the fly.
15. Start Constructing the Fly: [MUSIC] Welcome to
the next lesson. Now we're putting the zipper in. This is one of the
more involved parts, but we're going
to make it pretty simple, laid it out for you. First things first,
take the pen, move it to the side, get
your ironing board or matte. Now what you're going to do is you're going to get
your fly facing. This is a fly facing right here, and this is the
interfacing that we got for that fly facing. What we're going to do now
is we're going to iron this interfacing
to the fly facing. What you need to be mindful of, is I'm doing a men's pants. If you're doing a woman's
pant, everything is flipped. That means this fly facing right here would be for the
other side of the pant, which means it would be like
this and you should have cut the pattern for the
interfacing like this so you can iron
it onto this side. But since it's a
men's pant pattern, it's going to be like this. I'm going to be
ironing it right here just so you can see what's going on. Right here is the fly. For a men's closure, you're going to be
attaching the fly facing to the left side. For women's, you'd be attaching the fly facing to
the right side. Now, bust out your iron and lay this interfacing
on the back of this. Try and fit it in
as best you can, and then take your
iron, pop it on top. Let that glue set. You're just adding a little
bit of sturdiness to this fly facing so that
way when you slow it down, it's going to be really
sturdy in that fly area. It's going to be very nice. Now that that's
attached, check it out. This is the self fabric,
the main fabric, that's the interfacing we just attached, now glued to it. It's attached fully stable. Go ahead and get
your zipper guard. That's this piece right here, and get your zipper guard
interfacing that we also cut right here. Pop it on top, same exact thing. You're just going
to iron this down, let that glue set. Sometimes the interfacing can be a little bit wobbly and
be a little bit moving, especially because
the iron is so hot, sometimes the heat attaches itself to a fabric
and moves it around. Don't be afraid to just
place it, not rub it around, just put it on top,
let the heat set and then pull it off. There we go. Sometimes I just like to give it a nice low iron on
the other side. Make sure everything
is ship shape. Now you've got that done. Here's what we're
going to do right now. You're going to take
this fly facing now, and you're going to
draw a half inch line all the way around here. We're going to be doing what we did with that pocket cover, where we sniffed
around to create a clean curve and a
nice on raw edge. There we go. Look at that. Take your scissors and
only along the curve, not along the straight parts, you're snipping up to that line. Don't go past it, just
go right up to it. There we go. Get that
ironing board again. Just start folding it along
this line that you just drew. Now you're going to
iron it on to create a clean edge just like you
did with that pocket cover. [MUSIC] Flip it
over, take a look. Now you've got a clean edge. Move this aside. Now you've got your zipper here. What we're going
to be doing now is we're going to be marking where we need this zipper to
be on this fly facing. Essentially the point of
this fly facing right here is to attach our
zipper to it and then attach this fly facing to
the crotch area so that way the stitch that
you're going to put it on the zipper isn't
going to show. If you don't understand
what I'm saying, you're going to
see once we do it. But this helps hide this zipper behind that crotch area so
that way it's not showing. What we're going
to do right now is three-quarters of an
inch from this edge. I'm only saying
three-quarters of an inch because I'm
keeping in mind that our seam allowance
on this edge right here, is a half-inch. It's a half-inch plus
a quarter inch is where you're going to align
the teeth of the zipper up. Here we go, three-quarters of an inch from this
edge over here. Draw yourself a long low line. Now what you're going to do, is you're going to
find out where you need your zipper to be. Go to your pant, go
to the left side. We're doing a men's closure. For women's closure,
go to the right side. Everything is the same. You're just completely
mirroring it. You're going to take
this part. You just did. You're going to take your fly facing and
I'm going to match up your fly facing along this edge. You're matching the fly facing
along the top right here. Placing it down, matching it there and you're
going to follow it down all the way to where
this fly facing ends. It ends right here
at the bottom. I'm going to take your zipper and this is middle
part on every zipper, the stopper at the
bottom of the zipper, as you can see right here, this is the middle part right there. You want that starting
a quarter of an inch above where this fly
facing ends. Take it. This right here is a
quarter of an inch. Let's just go ahead and mark it. You want this to be a quarter
of an inch above the end. That's where you want
this metal piece to stop. What you're going to do
now is you're going to go ahead and you're
going to follow this all the way up
to the top to see where the zipper intersects
with the top of the pant. What you're going to do
is you're going to take your scissors and
you're going to snip a little notch right here just to mark where that zipper needs
to end at the top. Here we go, See. Now you have a marker for
where that's going to end. Do the same thing on the
other side of the zipper. To me marketing
completely where this super needs to stop
at the top to make sure everything is
matched and lined up so that way you don't get
a weird wonky zipper. All set. You're going
to line up the teeth. Starting at a quarter of an
inch above from the bottom, like I mentioned before. Mark the line if you
need to right there. Now that we've
notched and marked where we want the zipper
to start and end, and we've drawn this
three-quarter inch line on the fly facing, you're going to take the
zipper stopper right here, that little metal
piece that stops the zipper from slipping off, and you're going to place
it right at that point, right at that quarter-inch mark. Take it down there.
Stop it right there. Open up your zipper, and what you're going to do now is you're going to line up the zipper teeth right along this line
that you just drew, and you're going
to start pinning. There we go. Now
what we're going to do is we're going to
get our sewing machine, and we're going to bust
out the zipper foot. Depending on what
machine you have, they all have different
zipper foots. If you're using an
industrial machine, I'm sure some home
sewing machines require different zipper foots. But for the model I'm using, which is a brother CS6000I. This is the zipper foot right
here. That's what you need. Get your sewing
machine, pop it on. Do your best to
get the zipper out of the way because you
don't want it to get too bulky and get
caught. Here we go. Now this thing is placed down. The reason we use
the zipper foot is because it allows
you to get as close to the teeth as you need to without getting too close
or being too far away. If you were to just use
a normal sewing foot, you wouldn't be able
to get close enough to the teeth in a way that
it was just so far away that it would
be very flimsy and your zipper wouldn't lay
flat like you want it to. The zipper foot allows
you to avoid that. The thing you need to know
about this zipper foot is it needs to be pressed
right up against the teeth, there's a little groove and a hole in it that allows
you to put the needle in between the teeth
and the actual foot. It's on every zipper foot, you'll see it line it
up with the teeth. [MUSIC] Back tack at the end. Pull your needle up, cut away that excess thread. Here. Take a look. We just
saw the zipper to the facing. Pop this open right here, along, right there,
along that line. Because now what
we're going to do is we're going to attach this part right here to the actual pant. Get your pants.
Here's your crotch. Like we mentioned, we're
sewing it to the left side. What you're about to do now is you're going to be sewing
this side of the zipper. This way once you
flip it now you can see that this zipper
here is going to be facing towards the center front. Look at this. This is what
we're aiming for right now. This is the left
side of the crotch. Leftover, right for
men. Open it up. There's the teeth right there facing towards the
center front because you want the other teeth on the
other side to face towards the center front so that way
they can meet and zip up. Take this piece, match
it up at the top, get your pins out. Go ahead and start
painting down. In case you're wondering
why I'm leaving this edge of this rod is because when you
flip it and turn it, it's going to get
tucked, which we know the seams and you're
not going to see it. We've got this pin together. This is the fly facing right. You're sewing the raw edge of the fly facing to the
center front crotch thing. Now go back to the machine. Take your zipper foot off, put your normal foot back on. [NOISE] Take the piece
you just pinned, and now we're going to
saw all the way down. We're sewing the fly facing
right here to the pimp body. There's bias tape here. But if you're going
at a half-inch, you're not going to be
hitting this bias tape, half inche is beyond the space. This is about a
quarter of an inch. We're going to be
going beyond it. Sewing this piece, to this piece, not
on the blue tape. Just make sure you're
pulling the zipper away because the zipper is
between these two pieces, you do not want it
to accidentally get caught between indices. Make sure you're constantly checking it and pulling it out so that way it does not
get caught half-inch. All the way down to the end
of the fly facing [MUSIC]. You needle up. Snip
away the thread. Move this out of the way.
Now grab your pants. Go to the crotch area. Like I said, we're working
with the men's pants, so we're going to
be putting this fly facing on the left side. If you're doing a
women's closure, [MUSIC] everything would
be flipped and you're working on the right
side with disputes.
16. Finish Constructing the Fly: As you can see the zipper is now attached to fly facing. Move this out of the way. Now go ahead and pin this
raw side right here, right here that I'm pointing to, to the left side of the crotch. Have them meet at
the top, right here, and then pin down along this edge keeping the
zipper out of this scene. You do not want the zipper
to get caught in the scene. You're just going to have to push it aside with your hands. The fly facing is now pinned to
the left side of the crotch as you
can see right here. Now what we're going
to do is we're going to get the machine. We're going to take
the zipper foot off, put the normal foot back on. We're going to sow along
this to the end of the fly facing at a half
an inch seam allowance. Replace the foot. Back tack at the end. Lift your foot. Pull it off. We have attached our fly
facing to our pant body. What we're going to be doing in a few steps is we're going to
be placing this under here. We're going to sow a J stitch, which will attach the
facing to this pant body, and hold the zipper down without showing a stitch of this
zipper on the pant. If we hit sown this zipper directly to this
side of the pant, you'd see an ugly little stitch that you're not going
to really love. What the fly facing does is it allows you
to hide it behind, keeping this area
relatively clean except for the J stitch
we're going to do. But in my opinion, a J
stich is a lot nicer than just a random stitch
right in the middle. Now, go ahead and
get your fly guard. The one that we ironed
the interfacing onto. What you're going to do is
you're going to fold it in half with the interfacing side
that we ironed on showing out because we're going to
flip it inside out after. Now you're going to take this, and you're going to
sow at a half an inch right along the bottom,
only the bottom. Put it on your sewing machine. Along that seam at
a half an inch. This is it, with the iron our
interfacing side showing. At this half-inch seam
you just created, you're going to cut to a point. You're not going to
cut into the stitch just to the right of
it to a nice point. That way when we flip it like
we've talked about before, it will be a lot
crisper and easier, and cleaner to create
and turn this point out. Take a semi-sharp object
for the dull point and push that corner out. There we go. Get your ironing mat again. Go ahead and just
iron this thing down. You've created a fly guard, get your pant back. Luckily, what we've done when we marked the notches
on the zipper to show where the zipper needs to stop and where it meets
the waistband seem or the top of the pant body. We now know on the other side with a notch where
it stops as well. That's to make sure that
the teeth are lined up on both sides so
that we know that the zipper is sown correctly on both sides so it
can match up cleanly. Take this fly guard. Now what we're going to
do is we're going to sandwich pin and sow. You're going to be sewing
the zipper between the fly guard and between the right side
of the pant crotch. Go ahead, unzip the zipper. Take your ruler. We're going to draw
a little line here, that's to help you match
all of these things up because there's going to
be three different seams that's going to make
your life a lot easier to be able to visualize where everything needs
to go, same thing. Get your fly guard. Also, mark a half-inch in, that's just to line
everything up, flip the zipper over. Like before you want the
teeth facing the body. Find your notch that we cut at the top of the zipper initially, match it up to the
top of the fabric. That's where it's going to stop. What you want to do is you
want to get the zipper teeth. These zipper teeth right here on the right
side of this line, right to the right
of it, not on it. To the right of its slightly because that's the line
we're going to sow on. You don't want your teeth to get caught on this
half-inch sewing line. The zipper is about
half of an inch wide. You want the halfway
point to be lined up along this black
line right here. Constantly, if you need to, make sure you're
looking under to check that it's actually
meaning where it needs to go. With this section it's the
zipper, it's important. Just make sure you
take your time. Go ahead, keep it flat. Pin all the way down. Take the fly guard. You're going to match up the fly
guard right here. You're going to start pinning it and sandwiching that zipper
between the fly guard and the body of the pant. Now, what we've done
is a sandwich pant. This is the body of the fabric. The zipper is in-between. Then we've got the fly
guard on this side. This is what that's
going to look like. Here's the fly
guard at the back. That's what protects
your underwear or whatever from getting caught
in the actual zipper. That's the zipper right here. This is the body of the fabric. When the other side is
done to fold over it, you can actually
close this zipper up, and it's going to
fall just like that, hiding the zipper away. Right now what we
just need to do, sow these three layers together, put the J stitching, and
then we're good to go. Flip it inside out again. Get your sewing machine. Put your zipper foot back on. Right now, the zipper is falling right at
the half-inch mark. The zipper is right
in here between the actual guard and
the actual pant body. There's the teeth. You don't want to hit the teeth with the
actual needle. You don't want to catch
the teeth with the needle. What you're trying to do is so right to the right of the teeth. What you want to do is
use your hands as eyes, and you want to feel around
for where those teeth are. For me, I can feel
where they are. Once you feel like
you've found them, you put your needle in,
place your zipper foot. Start with a back tack and slowly start to sow
down to the right of those teeth to lock
everything together. What I like to do when I get to the bottom half of the zipper while I'm sewing this section, I like to lift the foot
and I actually like to pull the zipper away back up. We have the zipper
currently unzipped. I like to zip it back up. Pop your needle
up, pull it away. We're almost there. What we've got is a fly. The fly guard is good to go. Check it out, open this up, look at the teeth right there. We're going to give this
thing a little iron just to keep the
fabric crisp down. Then we're going to
go to this side, and we're going to
put the J stitching, and then the fly is complete. On the side with the fly guard, sometimes it's a plastic zipper you don't
want to melt it. So just be a little bit careful. Take your iron and just
smooth that section down because there's a nice
little turn right there. Fly guard section done. Then now what you want to
do, open up this piece. Now you want to just flatten
that section as well. Just to the left of the
teeth that seam right there, make sure you flatten that down because it's going to
make it a whole lot easier for you to turn that
section when you go to turn. You get that now, that's done. I'm going to take it,
fold it under like that. Create a much crisper line, here we go, and now iron
that crease at the end. That seam there we go. Check that out. Very clean right here. Now what we've got to do, is we have to do the fly facing. We're going to sow a J stitch. But a J stitch is you're taking this fly facing right on the
left side of the fabric. The first thing that we put on, what you're going to do now
is you're going to pin it down onto the back of this. We're going to sow
a J into this pant, to hold that fly facing
down and finish the zipper. Flip your pant inside out, make your life a little easier. Now take your pants, make sure it's staying flat. You are painting on top
of layers of fabric. Just make sure you're not catching the back of
the paint in here. You're going to pin
this in right there. Then you just going
to bring it up. That way you don't catch everything other than
what you need to. Make sure everything stays flat. Keep working it with
your hands to make sure it's exactly flat like
you need it to be, you don't want
things to be caught. You don't want it
to be all bubbly. You just want to lay nice. Just to clarify, this is
on the inside of the pant. We're not working
on the outside. We're working on the
inside as you can see the pocket interiors and
the zipper on the inside. If at this point you
feel like your curve that you created is just coming
on down a little bit just because we put it there
a little while ago, and we've been fidgeting
around with this pant a lot, just give it a little
steam, threw an iron on it. That'll help you lay it flat. Now let's pin down. Now what we're going to do, we are going to go ahead and
get your sewing machine. Take your zipper foot off, put your normal foot back on. Okay, flip your pant,
right-side out. The width of this J stitch
pattern piece in the back, the fly facing is
an inch and a half. You're going to start up here. Sow down along this curve, right across, maybe like
an eighth of an inch across the body right here. You're going to backtrack along this point to make
it firm and strong. For this point, same thing, you're going to have to
use your hands as eyes, feel out where this ends. You know it's an
inch and a half. But just feel it out to make
sure everything's okay. Sow in an eighth to
a quarter of an inch from that edge to catch that
fly facing in the back. Here we go. Place it down. Feel out where the edge of
that pattern pieces behind it, where the edge of
that fly facing is. I'm going to go for
an eighth of an inch. Place the needle
down, back tack. Keep feeling out where that pattern piece is
under the body of the fabric. Follow it down. Make sure you keep taking your fly guard, on
the other side. Make sure that's not popping
under where you're sewing. You want to make sure
you push that away. You don't want everything to get caught together in the sewing. For this corner, take your time. Really, you're not in a rush. Use your fingers to
feel out where it is. At this corner, you're
not really able to use that inch-and-a-half
dimension that you've been using to
go down the line. Now you've just
got to feel it out and know where you're going. Since it's a thicker piece, you can really feel
it under there. Take your time, go slow. For this section too, if you feel like
you need to draw a line on top of the fabric
to show you where to go. Nothing wrong with that. We just finished the fly. It's a big deal. Take a look at what you've done. We just finished the J stitch. Looks really nice. Take a look at opening
that zipper up. Look at that fly
guard you just did, look how clean that
little fly-facing edges because you folded it over, zip it back close,
make sure it works. I'm sweating a little bit. I'm always nervous
when I do that part. If you were able
to get through it, It's a big deal if you
feel like you already know ruffling a little
bit in certain spots, don't be afraid
to take your time and really, really
tiptoe through it. But congrats, you guys
got through the zipper. Now we're going to go ahead and attach the waist
span to the pant body. I'll see you in the next lesson.
17. Attach Waistband: [MUSIC] We're really close. Be excited. You're almost going to be able to wear your
first pair of pants. But first things first, what we're going to
do is we're going to pin the waist band
to the pant body. Here's how we're
going to do that. Open up your zipper, go to the side that has
your waist band extension. Now, I can finally show you what the extension is for and why we've had
it this whole time. This piece right
here, the fly guard, is an extension from
the center front. This line right here is the original actual
center front of the pant. This is an extension. We had to add this
distance right here from the center front to the end of this fly guard to the waist pant so that way you can reach all the way around. Find that extension notch
that we've had this whole time, split it up, and I'll go to the side that
has the interfacing on it because that's the
side that's going to be showing. That's
the front side. That's the side that's
got the belt loops on it. Take that, find the
notch for the extension, go ahead and pin it right to that point where the zipper is and where the
fly guard starts. Go ahead and pin that. There we go. It's
a little tougher. It's a lot of layers. Now
go to the end, right here. Go ahead and pin
this end part down. You can pin the seam
allowance here. The seam allowance
that's right there. Go ahead, pin it down
to the pant body. Now, we have many notches in different places
but just because this pocket right here
isn't fully attached yet, go ahead graciously throw a little pin in there just
to make sure it stays put. This is just to make
your life a little bit easier. You don't have to do it. If you don't want
to I would though. Now follow around and look
for your side seam notch. There you go. Luckily, we have belt loops at
the side seams. Look for your belt
loop, look under it and you're going to find
your notch right there. Match that up to your side seam. This is your side seam where
we did the flat field. Go ahead and match it up to the seam part
of that flat field. Cool. That's done. Now go back into the space between and start
matching everything up. Also just so you
know, you're not pinning down the bottom
of the belt loops. The belt loops
you're going to keep out out of the way and
we're going to sew those down to the body the pant once the waist band
is fully attached. For now you're just
attaching the waist band, no belt loops to the pant body. [MUSIC] Flip your pan around, look for your center back notch. Right there. Your center back. Find your center back seam. There's something called ease that we spoke about earlier. It's a little bit of extra space that allows you to have
a little bit of give. Right here on the back,
there's a little bit more, there's just a smidge
more space and distance on the
actual waist band compared to the back pant. What you're going to do is when you're spacing
everything out, just give it a little bit of
a pull. Not a heavy pull. It's not a lot of space, but just a tiny bit of a pull to continue relaxing everything in and spacing it out nicely. Generally on most pants, when they have ease, it's just around of a
quarter-inch extra ease. [MUSIC] Now, we're just printing
to the center front. Go all the way to your center
front with a fly facing is. Go ahead and pin that inner
seam allowance down to the actual pant body
on the inside of the waist band. Right there. This is right at the front. Now, just pin the rest
of the space between the side seam and
the center front. Now once this is all pinned, you're going to take it to your machine and you're going to sew at a half of an inch
all the way around. Start with the backtack and with the backpack. It's all pinned. Pull your machine over, you get ready to
start sewing around. It's a little bit weird
because obviously you're starting at something that's already sewn together. It's not laying flat. You really have to
get in there with your hands to open up the space. As you can see, I'm really
pulling it open right here. But once you do get it
onto your presser foot, set that half inch
line up for yourself. Put your needle in. [NOISE] Start with the backtack. Now start sewing all the
way around at a half inch. Just make sure everything
is laying flat. Your pockets. Primarily just your pockets. Make sure your pockets
are laying flat. Make sure everything
is matching up nicely. [MUSIC] You just sewed around. Now it's attached. Now what we're going to do, we're going to get
your ironing board. Now what you're going
to do, is you're going to iron down the seam
that you just created. You're going to iron
your seam allowance up, not down, up into
the wastebasket. What we're aiming to do right now is we're going
to do another stitch in the ditch where we take
this piece right here, this is the waist band, fold this upper half an inch, and within this
half inch of space, you're going to
cover the stitch, just like we did when we
stitch in the ditch last time. You're going to
cover it with this and we're going to stitch
in the ditch in the front. It's going to catch
this down and the waist band is
going to be created. This is a place
we're having one of these would be really nice. It allows you to work on a curve because this
shape is a natural curve. It's not actually
flat and straight. Having this just allows
you to make it just a little bit cleaner and make your life a
little bit easier. Now that you've gone and
ironed all the way around on that seam pushing the seam
allowance right here, up into the waist band, now's the next step. The final step to finish out this waist
band before we put these belt loops on
where we're just selling the bottom of the
belt loops because we've done the top already. What you're doing is
you've got this excess. You have a half inch
seam allowance at the bottom of this inner
waist band right here, folded up a half inch, check where that seam
line is right there, check where that stitches and then use this back part right here to fold over it
and place on top of it. What we're going to
do is we're going to stitch in the ditch, in the front in that
scene and we're going to catch this excess right here. Get your pins and just start
painting down around it. Do what I'm doing right
now all the way around. Then we're going to take it to the sewing machine and
stitch in the ditch. Like I said, you've
got a half inch of space to work with there. Obviously, the goal is
to make it as tight and nice as possible
but like I said, for comfort sake, like with the Hong Kong bounds seam finished that we did when
we use that bias tape. If you want to pull
it just a little bit over more, it's okay. You can do that. It's
a good way to start. [MUSIC] Now we have the whole inside pinned. Take a look. Look
at all those pins. There's, I don't know, maybe 30 pins in here. Don't be afraid to pin a lot. Helps keeps things down. Now what we're going
to do is we're heading to the other side, going back to the front, and we're going to do
what we did before. We're going to
stitch in the ditch. That means the entire way
around this waist band, we're going to stitch in
this seam right here. We're not stitching
on the waist band. We're not stitching
all the pant body. We're going in between in
this section right here, all the way around. As you can see right
here, between them, right in that line. Make sure you got everything
laying flat on the inside, the pockets, all the little
pieces, all the layers. Make sure you just
spread these apart. Have your hand on the pant body, have your other hand on
the waist band while you do this and pull them apart just so you can show yourself that seam that little ditch
that we're sewing in. It helps you spread
it up and see that space a little
bit more easily. [NOISE] Just to keep
everything in place, I like to keep the pins in. The tough thing about stitching in the ditch is you
don't really have a visual of the other side
while you're doing it, which makes things a
little bit more difficult, it's just a better
move because this way it's going to be
way more precise. [MUSIC] We're at the end. Backtack. Pull your needle up. Cut the thread off. Move this out of the way so
you can see what's going on and look at that. Stitch in the ditch.
Everything here is down. The waist band is
completely closed off. You can zip this thing up. You've got a proper fly. The only thing we have to do
right now really quickly is so down the bottoms
of the belt loops. Get your sewing machine again. The belt loops are
already placed. The only thing you have
to know is that they end a half inch below
the waistband seam. Here's a little overhead. It's going to be the
same for all of them. I'm going to show
you one of them, show you how to sew it down and then feel free to go do
the rest by yourself. Then I'm going to do
the rest on my end. Here, take a look. Right here is half an inch below this wasteband seam.
There's the seam. Here's half an inch below. Now so, just like
we did at the top, at an eighth of an
inch from the bottom. All you have to
do is keep all of these things straight.
Put it in [NOISE]. Pull it up, Check it out. Look at that. Now we've
sewn down that belt loop. You're going to repeat that six times on every other belt loop. Now that that's done,
we're going to meet up in the next lesson and
then we're going to get the finishing steps done. That includes the hook
and I were going to hand the pants [MUSIC] because
that's something you're going to need for
any pair of pants. Then we're going
to be able to move on and start feeding
this pant. [MUSIC]
18. Finish Your Pants: We've made it very far. If you made it here, good job, because
this is hardcore. You're making a whole pant and it's a big undertaking
and you should feel very accomplished because it's one of the most satisfying
things you'll ever do. Congrats. In Japanese, we go which is like clap,
clap. Good job. Now what we've got to
do is we've got to put our hook and eyes on. Here's
how we're going to start. Unzip your pant, open it
up on the fly facing side. For the men's that's the left, for the women's
that's the right. Take a ruler, place it at the end of the
waist band right here, and mark a half of an
inch. Mark up here. That's a half of an inch and mark the halfway
point as well. This is roughly about an inch and
three-quarters in height. Mark the halfway point of that. Here we go. Look at
that, that's the middle. Right now you're
taking your hook. This is your hook right here, and you're placing
your hook right at the middle of that middle point along that half
inch right there. That's the goal, this is
where we want this to be. Get your needles out. Especially for
something like this, try and use the smaller
needles that you have, it's going to make it
a lot easier to move your hands around the
holes and sow by hand. Get your thread, get
a decent amount. Usually sometimes
they say there's a certain distance of
thread that you should use. I just like to keep
it a nice low, medium length like this. This is about 18 inches. Almost 18 inches right
here. Take a look at that. Here's how I like to tie
the ends off of things. Take your thread right here. Fold it just in half, not all the way in half, just along this edge right here, because I want them
not to be thick. Take this and you're
going to do and knot with just this
end that's doubled up. Take this and then
pull this closed. Then what you're going to
do, you've got this excess beyond the knot you just
created, just trim it away. Just like that. Now you've got your little knot at
the end of this thing. Even trim a little bit more, clean it up a little bit more. Why not? That's all set. Bring this back. Get your needle. Put your thread through the eye of the needle. Cool. Now that's done. What we're doing
right now is we're going to be sewing
these holes down. You're just going to be
doing these two at one time. You're not going to be
connecting this thread to this hole and the hole
under my finger right here, which matches this one. You're just doing
these two to start. You have got to
keep your fingers firmly on this because this
thing is not sturdy yet, but once you get these two holes done, it should be sturdy. We're going to go methodically from the front to the back. We're going to be
starting right here. You're piercing right
under this hole, piercing the fabric
right under that hole, and you're going to be
pushing up through the hole. Pull it. There we go. We're going to continue
this moving slowly forward towards the
back on the side. Here we go. Continue doing it. You just want to make sure
this is nice and sturdy. I've done about six
loops right now. If you're like me, you
can never do too many. Now it's held in place. See, now I can let go or at
least loosen up my grip. Now what I'm going to do is I'm going to take
this right here. Through those knots
that I just did, I'm going to push the needle through those
little loops I did. Pull it through. Then in this
loop that you have behind, I'm going to push my needle
through and create a knot. It's just like you're tying a knot except with a needle and thread and it's going
to tie off right there. Now I'm going to do
that same process with the same thread tagged in right there and go to the next hole. I'm going to pierce this, pierce the fabric
right below this hole, push it through. There we go. Pull it through, nice, and then keep going
ahead and doing that. You're going to repeat that
seven to eight more times, whatever makes you
feel more comfortable. Sometimes I do more. I never do less because
I just like to make sure it's really going
to last in there. There we go. Keep
on pulling through. Each time, just to clarify, you are piercing
the fabric every single time, right below it. Try not to go too far from the hole because
then you're going to have a stray-looking thread right there. It's
going to pop out. It's going to have
more chance of catching on things and breaking. Keep pulling through.
That's enough. Now go ahead and you're
going to do your final one, but here's what
you're going to do. Push it through just
like the other time. Now you have this O
shape right here, this little O from the
left behind fabric. You're going to pull
this through here. You're going to tie it off. Here is the last thing
that we're going to do. You're going to
push back through all of those little threads, all those little loops. Push this through those
loops you've just accomplished and you're
going to wrap it around 1, 2, 3 times. Then you're going to
get your finger where you just wrapped. You're
going to tug it down. You're going to hold it
firm. Put your finger on top of it a little bit loosely. You don't have to
press down too hard. Now you're going to pull this
needle, pull it through. You're just going to
have to shimmy it just a little bit because
it's a tight space is going through both
the loops you've created and this knot
you're about to create. Don't be afraid to
tug, fit it through. Take your time. Hold
your finger down. Once it's through, hold
your finger down on that knot you just created with that's what's
about to happen. Those three loops are going to create a knot, hold them down, slowly pull this thing
through and check it out. You can probably barely see it. But what we did is
we just tied off a little knot right
at the end there. Now you can take your
scissors. Snip off. Now that's tied off, tied down, and good to go. We're going to repeat that
process here and here. Just to show you, none of those threads are
showing on the other side, you're only sewing on this
fabric piece right here. You're not pushing all the way
through to the other side. The point of the hook and
eye is to keep this clean. Now we're just going
to move on to the eye, where I'm just going to show
you how to place it but the sewing technique
is exactly the same. Right now, close your zipper. Now that you've got
your hook on here, close that zipper, place
it here, open it up. Take a look at where the
edge of that hook is. Right under here. As you can see in that
space, it's peaking out. Draw yourself a little line. This is going to help you
judge where to put that eye. Now that you've marked,
open this backup. Place the eye right to the left of where you
just placed that. That's where your eye goes.
Now you're going to do the same exact sewing
technique method to sew this down
in that position. Now what we're going
to do to finish up last but not least,
having the pants. All you need to know about
having the pants right now is that we have an inch and a half of seam allowance right here. Grab your ruler. What
I want you to do is mark a half-inch up from
the bottom right here, and then go up again and
do it all the way around the pant and mark an inch. Because what we're going
to do is we're going to fold up a half an inch first and then a full inch. Here we go. Cool. Just like
that; half inch, inch. Get your ironing board, turn the pant inside out. Take it to the ironing board. Then here's that half-inch line. Go ahead and iron that
down all the way around. Hit that half-inch line first. We're almost there. All that work, one hem away. We're going to fold
it up an inch. The reason we're doing this, the reason we folded
that half-inch up first is because
that's going to hide the fraying and that seam allowance from fraying
more and getting all messy. Then you fold it up an
inch and then we're going to sew at the top of this line to close it off
and keep it clean. But you're also allowing
yourself to have an extra inch and a half of space
right here to work with if you ever want
to lengthen this pant. Cool. Now that that's
done, here we go. It's the last one. This is it. Take that pant leg that
you just ironed up. You're going to wrap it on here, put it on your sewing machine. Because this is an inch, you're going to sew just under an inch to
close this thing off. The most important thing
that you need to know is to start at the inseam
because that backtack, you don't want to see it
on the front of the pant. If someone looks
down at your paint, that little part is
going to be a little bit thicker and darker with
thread than the rest of it. Make sure you do that starting seam on the inseam so that way it's not visible. Here we go. I'm at the inseam. I'm going to be sewing just
over an eighth of an inch, just under a quarter of an inch, whatever you're
comfortable with, you have a whole half
inch of space to sew on, on that hem to catch
it. Here we go. For the hem, you can
control your stitch length. For a top stitch, like I said, we can do different
stitch lengths. I'm going to make mine three. It doesn't need
that much strength and so much tension
to keep that hem up. If anyone ever goes
back to fix this, the wider you make the stitch, the easier it is
to unravel it to go ahead and fix it and
make it longer or shorter. Ready? Needles in two stitches forward
two stitches back. Now go ahead and go
all the way around. Just like that. My friends, we are
pretty much completed. One last little finishing touch I would love you to do you now have the skill of doing
a Hong Kong bias theme finish anyway you want. What we're going to do here
is we're just going to pink, that's what you call it pinking. Pink the end of the
flyguard right there. You're not catching this. Do not get the bias tape. Fold away the zipper. You are just getting
this fabric right here. The nice thing about pinking
sews is it's a very easy way to lock off the end of this fabric so it
doesn't fray anymore. Check it out, boom. Check it out, boom. Then hold up. That's pinked. Having all these little
jagged edges here, it makes it so it
won't continue to pull off and pull
off little threads. You've separated all of these threads by using
these little points. That's done now. Flip your pant back inside-out. Just like that, you just
finished some pants. Take a look at this
hem you just did. You caught the seam
allowance below. Now you have an inch and a half to work with if you
need to lengthen them. If you have to shorten them,
obviously you take away. You've top stitch here, now you know how to hem pants. Now you know how to sew hook and eye. These pants are done. We're starting to get
ready for the next lesson where we're actually going
to put these pants on. You're going to see what fits, what doesn't work, where it
feels a little bit too tight. Where do you think you
could use some more space, and we're going to actually take that knowledge and
we're going to apply it and learn
how to actually go back to the
pattern you've made, make all of those adjustments on the pattern so that way you own an actual pattern that is accustomed for
pant for your body. That's the next
step. See you then.
19. Fit and Adjust Your Pants: All right, everyone,
we've made our pants. Now what we need
to keep in mind is that these are not the
final pairs of pants. These are based off
of my measurements, how my body is shaped, but who knows the curve might
not be the right curve. The hem might not be
the right length. There's all things
that you can change. Go try your pants on, see what works, see
what feels off, see if the crotch is a
little bit too high, maybe the waste is a
little bit too tight. An easy solution is to start by moving up a size on the
pattern and trying again. But if you're not
having that problem, now what we can start
doing to make things perfectly fit if it's
shaping you nicely, if it's fitting
mostly correctly. The mindset you
need to have is you need to think about
the side seam first. If this pant is too tight, that means you need more
space along the sides. Along these sides right here, you can go ahead add an inch, add a half inch,
add a quarter inch whatever you feel like you need. Remember that whatever you
add to a pattern on one side, you usually need to
do to the other side. If you want to add an inch
of space to this side seam, that means you add
a half-inch to the front and a half inch to the backside seam collectively
that makes one inch. You can add that
to the side seam, literally with a ruler parallel
to that side seam line, draw an entire line
all the way down, and that's going to
be your new line. Just keep in mind, there's
always seam allowance. You draw that half-inch line, make sure you add the
seam allowance to it. Luckily for these patterns, the seam allowance
is already included. If you're just going
to be going based off these measurements
and these patterns, literally all you would
do that I normally do with the side seam, get scrap papers, put it on the side
seam, get some tape, tape it down, get a ruler and a pencil. Go to where the original
side seam is right here. That's your side seam with a seam allowance. Look at this. Sometimes it's good to be mindful of where the
seam allowance was. That's the seam allowance. If you haven't figured it
out yet, the seam allowance, this is all the space that you sewed and played with
inside of the fabric. This is the actual
line when you've sewn things together,
this is where they stop. This right here on the
side seam is the visual. This right here is
this line right here. The seam allowance
is that extra bit that's on the inside that we caught here with all those
raw edges and whatnot. Keep in mind, you've got this seam allowance
if you want to make this a half-inch bigger, because you need to be
adding equidistant amount to the front and the back
at 0.25 to the front. This is the front pattern
piece right here. Go ahead, add 0.25, that's a quarter of an inch. Add that to the
edge right there, and then you have to
re-add your seam allowance in which is that extra
bit you need to be able to catch the fabric
and attach the fabric together. Here we go. Add that half inch of seam
allowance right there. Nice. That will be your
new side seam right there. Right here you just added
0.25 inches to the front and you're going
to add 0.25 inches in the same exact
way to the back. You just added a half
inch of space to that side seam,
making it bigger. If you want to make it smaller, you take away. In this example. Let's say this is your seam. This is the seam allowance. This is that half-inch
space right here. Right now you want to take away a half inch from the side seam. Go ahead. Take away 0.25
here on this front piece. Make sure that you
know that this is that new gap space of
seam allowance that you need. What
you're going to do. Cut this away. Complete this all the
way down the side seam, all the way up and down. Do the same thing on the side
seam for the back piece, you need to mirror everything. Because we have a waist band, you need to apply
whatever you add or take away to the
waist band as well. Let's say you're taking
away a half and here. That means at the waist band. Here's the waist
band. That means at the side seam for the
waist band right here, the notches that signify the side seam for the
waist band pattern pieces, you're going to go in here, draw straight line to make
things easy for yourself. You're going to plan to take away a half of an inch total. Like I said, on the front, you took away a 0.25
inches and on the back, you took away 0.25
inches as well. This space is now a
half-inch collectively. Now what you do is
you can go ahead, fold on this line
that you just created and close away that space. Gets some tape, tape it down. Now you just shrunk your
waist band down and you just shrunk your side seam down to match both
of those things. That is how you
take space away on the side-seams or the out-seams. That's where I recommend you
work on doing something like fitting the sides or
taking out on the sides. I don't recommend you
do it on the in-seam. It's a lot easier on the out-seam when you're trying to make these adjustments. For me, I tried these
pants on recently and I felt like the crotch was it
just a little bit too high. I didn't really love
it. I was like, this should be a lot
more comfortable. I prefer comfortable things, let's drop the
crotch a little bit. Here's the crotch right here. Like I said, you're making
the same adjustments on the back as well
as on the front. You got to do the same thing to both sides. Take your ruler. Just for your own brain sake, mark that seam allowance in. Normally on patterns
that you buy, they don't mark the
seam allowance because they just assume
that you're going to cut out what you need to. I like to go in and just do that just to see how much of
a seam allowance you have. Use whatever scrap paper you
have around. Tape it down. Here's what you're going to
do. This point right here, I'm going to drop an inch. Take this ruler, make sure
that this ruler right now is perpendicular to this middle
line that you have here. Draw a line an inch below. See. That's going to be
your new crotch line. To make things a lot
easier for you right now, draw in your full
seam allowance. You only need to go so
far because there's only a certain point that you're actually making these
adjustments at. You're not going too high up
to actually change anything. All right. Look at that. This is all that
excess sewing space. This is where the seams
actually will land. Now that you have that and
you just drop your point, you don't want to change
the distance on this thing. Mark this parallel,
mark that point. This is the point where
the crotch seam ends. All you're doing is
dropping this point down to here so you know where
the distance actually is. You're going to take what
I mentioned earlier, you're going to get
your French curve out. That's the one that
I said you needed. You're going to take the French curve and
you're just going to do the best fit
line that you can do. You're going to try and mirror this curve that you
already have here, and you're going to drop it down and try and
seamlessly true it, and when I say true,
that means blend. You're seamlessly do
your best to blend it into the seam allowance
line that's already here, and you're literally
just dropping it and matching these two
points all the way down. What you've essentially
done here is you've taken this spot and you've
dropped it down to here. It's the same spot in
terms of the vertical, it's the same vertical position. All that you've done is
dropped this creating a much bigger use
space for you to have more space in your
pants essentially. Then what you're doing is
you're taking this new point, like I said, it's
very easy to draw your seam allowance
and sometimes it helps you visualize things. All you're doing
is you're taking this and you're drawing
a new connection, you're doing your best
to curve it into there, so you took this point right
here to drop the crotch. You drop the crotch an inch, you created a new crotch curve right here to create more space. This is the excess
space you just added to that zone now and now you just took this point and reconnected into the scene
that you already have created. That is how you drop the crotch. Just to get you in a good habit, now that you've done that, go mark your seam allowance at your new seam allowance
space, mark it here. Mark it all the way
up, right there. Go ahead, take your
scissors, chop. Cut away the space that
you don't need anymore. What you just did, is
you dropped the crotch, created a new pattern
and now you have way more space in
that crotch zone. Then the next thing
we're going to do, let's say when you're
standing in your pants, let's say it's too
tight, in the butt area, in the crotch so let's
say you don't have enough space in there as well. You've dropped it,
but now you just want some more give essentially. You want some more
slack in the pants. That means you got to take this crotch line right here and extend it outward
because that's going to give you even more
space in that zone. Same thing, all you're doing is you're taking
this piece of paper, taping scrap paper or whatever you have on hand
and now what you're doing is along
this line you just created this new crotch line, you're extending it out. Let's say you want to
extend it an inch, that's a good amount of
space. There you go. Mark an inch from that point, from your original spot, you're shifting this
over and now what you're doing is you're taking
that French curve again, this one right here and you're doing the same thing again. You're just essentially creating a best fit line
for the situation. You're doing your best
to keep everything clean and blend it all together. Cool? There's the new line. Let me erase a little
bit to make things a little bit visually
easy for everybody. You get rid of this line
below it because you just extended it out and now you got to take this line and do your best to
reconnect it as well, so I need some more scrap paper. I'm going to tape it
down here because I'm going to need to do
the whole side seam. Now I'm going to use this and in this case pair
it with my ruler. Like I said, if it
makes your life easier, draw in that seam allowance, it's easier to help you
visualize everything, and what you're
gonna do is you're going to take this point, create a similar
curve to the one you had prior, just shift it over. Sometimes I like to match it on the ruler and then
just slide it over. Take your ruler if you don't
have the long French curve, which I assume you might
not if you don't want to pay for it, totally reasonable, and what you want do is
you just want to blend it, start drawing this
line and then use this ruler to blend
it back into the leg. Here you go, boom. You essentially just
created a new side seam. You move the crotch over it, you now have more crotch space. That's how you make
that adjustment. The last adjustment
that I imagined you'd want to make is
hemming the pants. To do that, you go back into
the pant, you unstitch, you have that excess
seam allowance of an inch-and-a-half to work
with and on the pattern, literally all you
would have to do is get a piece of paper
like we've been doing, go to the hem of the pant. Let's say you want to extend it. Let's say it's too short. You don't want to wear
Caprice, I guess. This end line is where
my pattern ends. That's my measurement. Let's say I want to
extend it a half-inch. Boom, draw a half
inch line below it, continue this here, continue this down
as well, cut it out. Now you've just extended
your pant pattern down, cut the rest of this out. Those are the adjustments
you need to make. Think about your side seam, think about your crotch depth, think about your crotch width, and you think about
your hem length. Those are the four
things I always think about whenever I make
a pattern and I put my pants on and I'm figuring out how I need to shape
and adjust it. Always make sure, like I said, with the side seam, whenever you're changing your
side seam in or out, those same measurement changes need to be added
to the waist band, either taking away or
adding at the side seam, center back or the
other side seam. That's how you adjust your pants and create
a good pattern. The most important
thing to remember about what we're doing
here today is we're trying to get you on
a path where you can make a pair of pants
that perfectly fit you, that you can constantly change
to anyway that you want, to be custom to you, that you can wear forever
and continue to make. What I'm going to do
now, is I'm going to go start looking through
some fabrics that I like. I've been really wanting to make black trousers for a long time and now with my adjusted pattern where I just adjusted
the crotch depth, the crotch length, the
side seam a little bit, the waist band and the hem, I'm going to go ahead and
apply that to a new pattern, which is this and I'm going to go ahead and take that and make myself a pair of black trousers that I've been wanting
for a long time. Now you've got the tools, I've given you all the tools you need to be able to
make your own pants, to shape them the
way you need to, go out into the world, look
for some cool fabrics, look for something you've
been wanting to make for a while or honestly just
make yourself a staple. Maybe it's time to make
yourself that pair of khakis, that pair of black trousers that you've always
wanted to wear. I know for me, when I make
these black trousers, I'm going to wear them a
lot. That's the point. I want to make
things that I know I'm going to wear all the time. I'm a creature of habit, so go out, pick out a fabric, and now it's time to
move to the next step of actually making
something for yourself.
20. Final Thoughts: You made it. I don't
know how you feel, but, it's a lot you just learned
a whole lot of things. These are the trousers that
I just made. Black trousers. I gave it a nice little
crease line in the front. All the details I taught you are on this pant, top
stitching here. You stitch in the ditch
around the waist band. You've got a zipper here. Look at that. It's got a nice
little hook and I as well. Same thing I used white pocketing because I like
the contrast of it. A lot of the same finishes. You essentially just learned in however much time this is, what I spent four years doing. Right now I hope you
know that you're just at the beginning of a really
great and fun journey. Don't put too much
weight on yourself. Just really try and
enjoy the process of getting better at these
things because it really pays off once you start making
things for yourself that you can wear every day in
front of all your friends. Honestly for the holidays
maybe make for people. That's one of the
coolest things that I get to do as I get to actually make heartfelt presence that I put my time into for people. That's a really great thing that I'm happy that I
get to experience. But now, what you can do is there's a project
gallery here. I would love if you
all could go ahead and take pictures of thing and take pictures of your process, take pictures of the
finished pant on you, and upload it to the
project gallery. That way we can all take a
look at what we're working on. It really makes it a
more fun community, which is what I hope
to be doing here. I hope you really
enjoyed this class and I hope you really continue
to go on this journey. You continue to
develop your skills. Be patient with yourself. Thank you so much
for being here. Continue enjoying
making clothes.
 Joe Ando, Fashion Designer & Content Creator