Transcripts
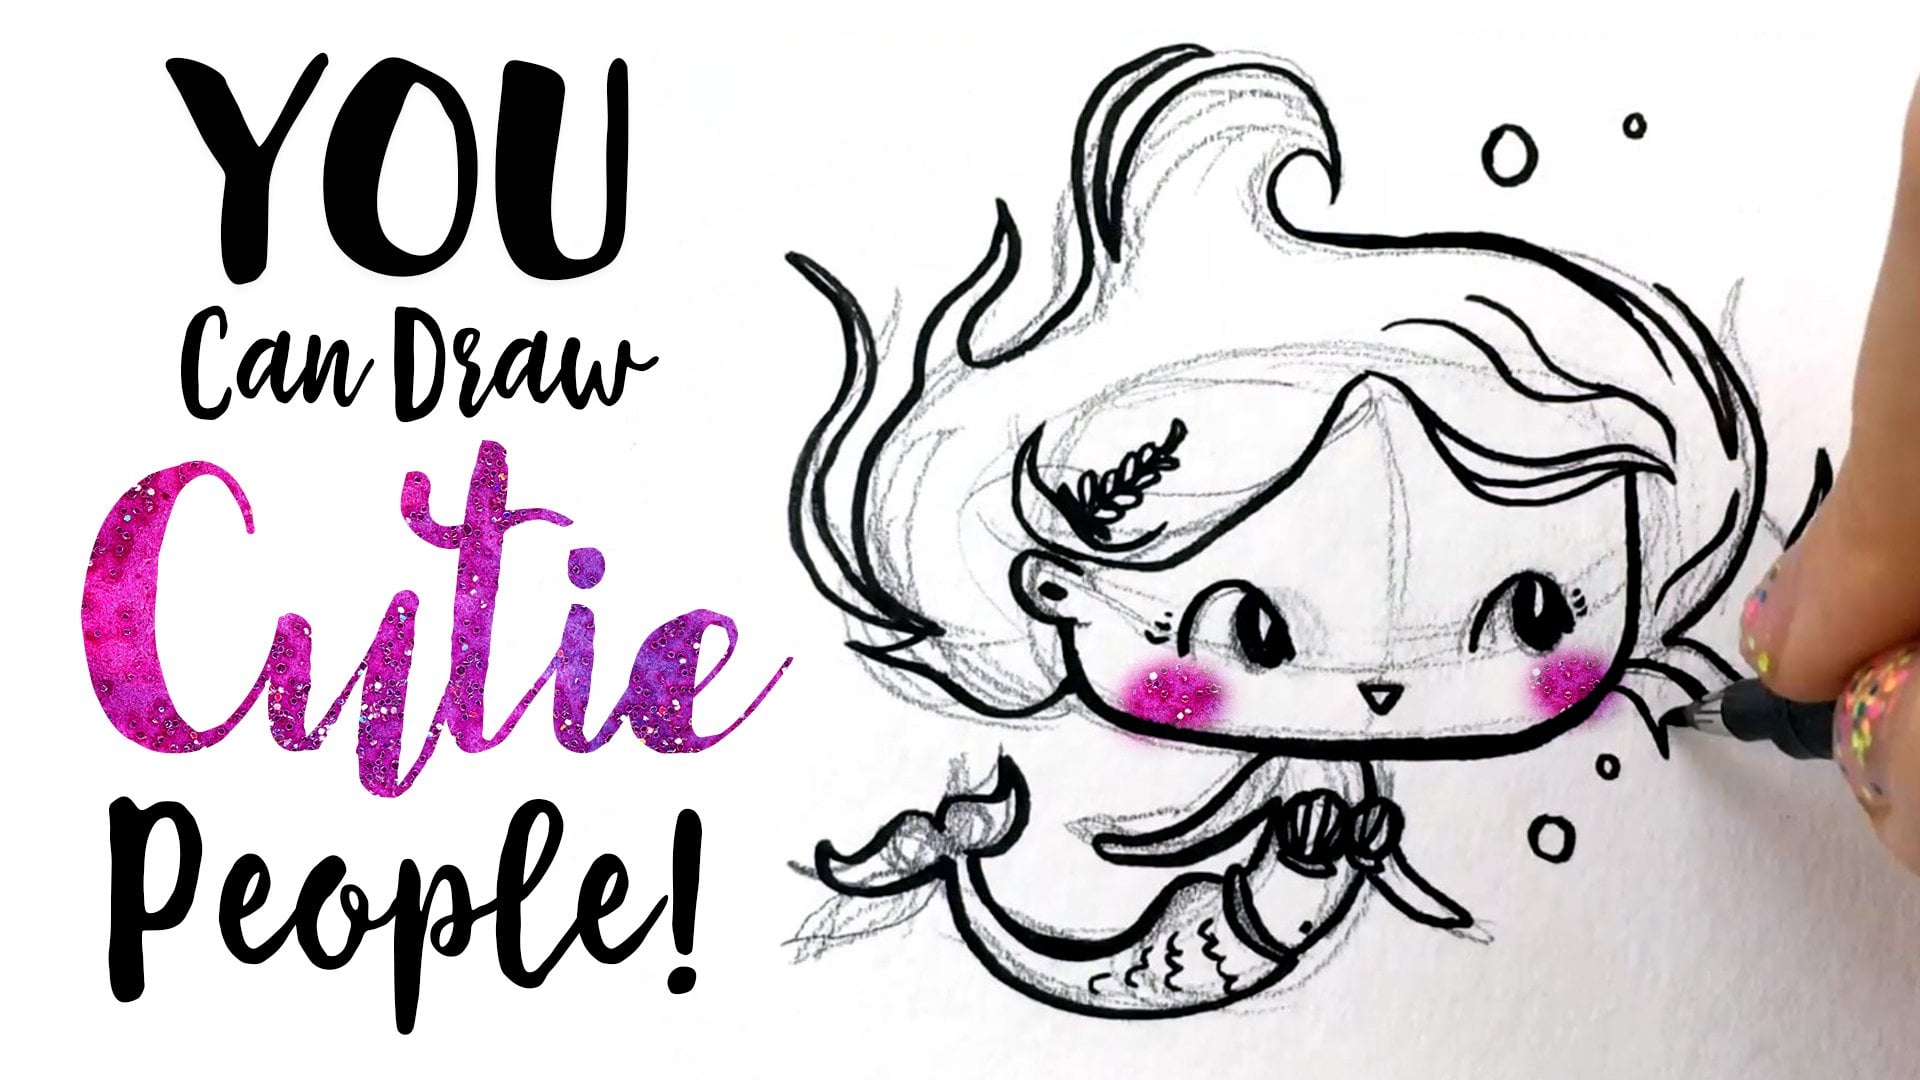
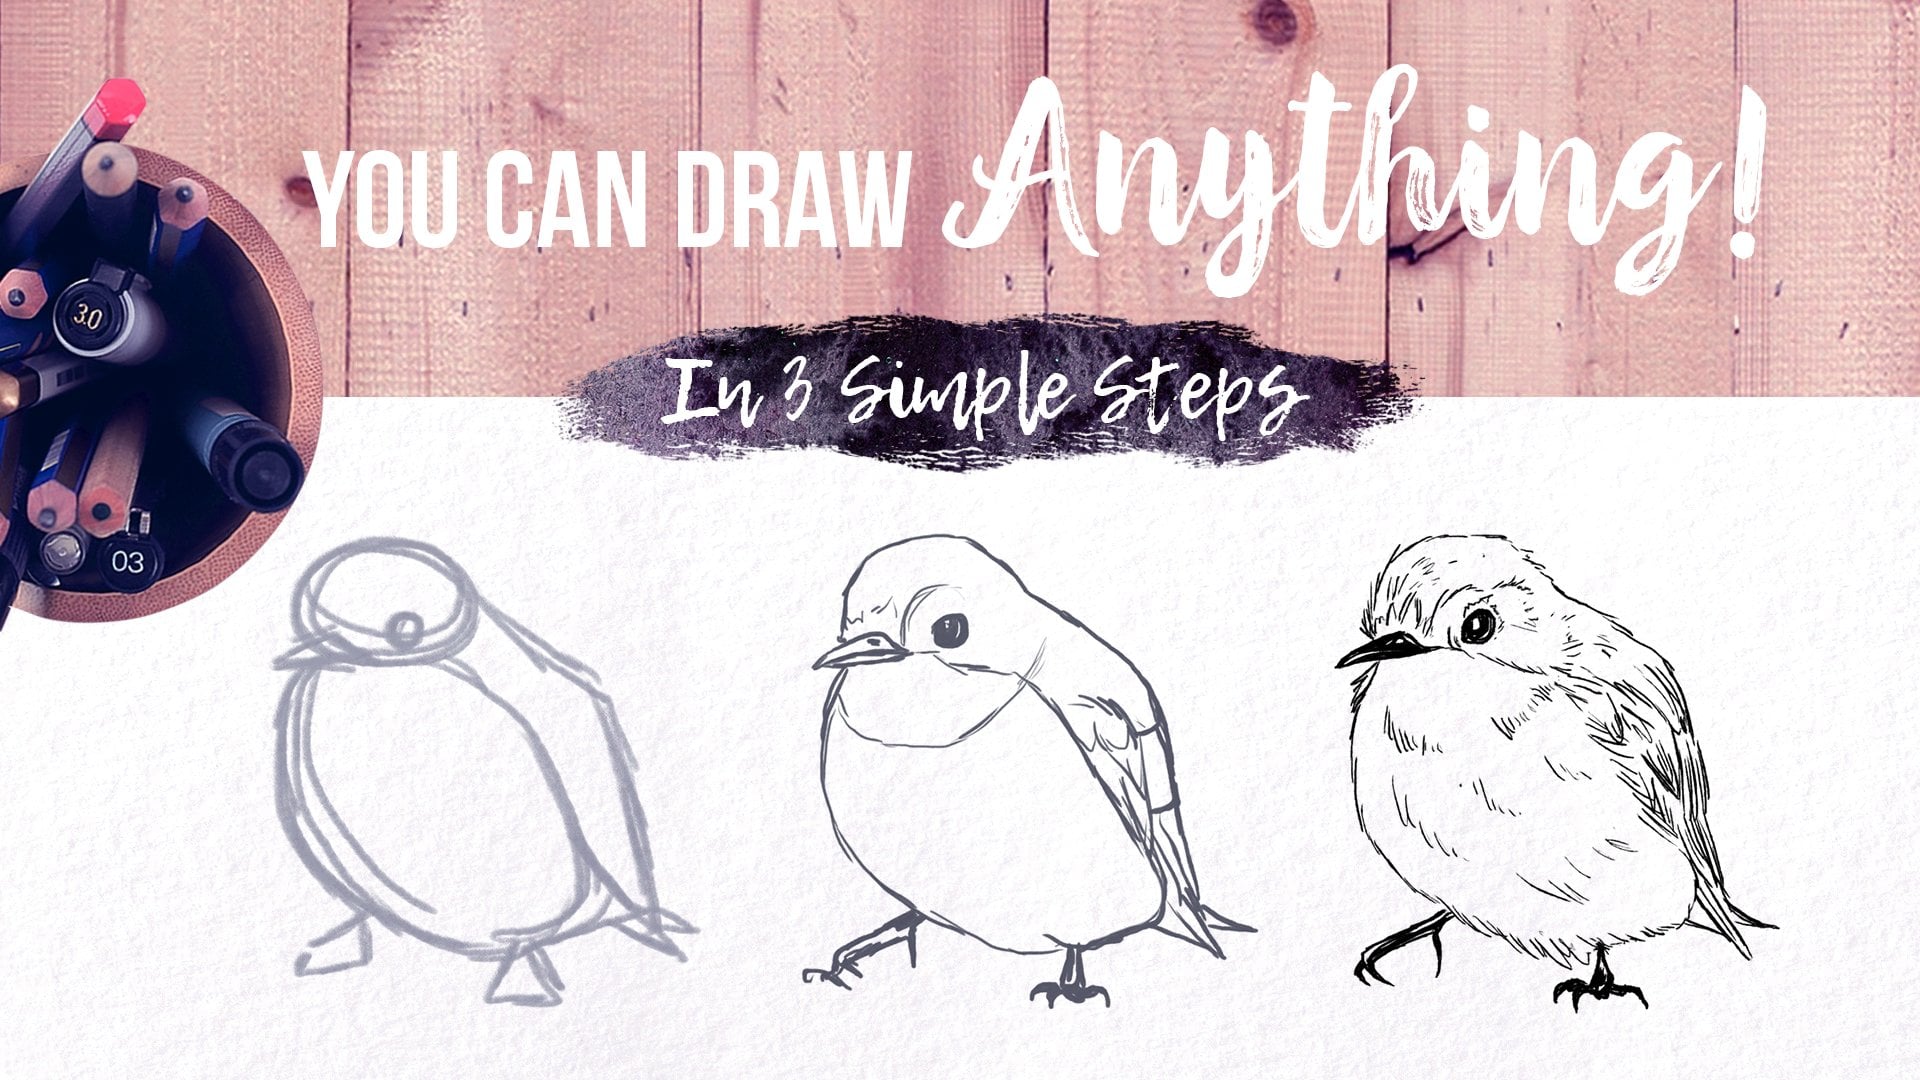
1. Trailer: Drawing is hard. You keep trying and trying and barely make any progress. I know that feeling, I've been there. I know it's so frustrating. But what if I told you that it's not that you don't know how to draw, its just that you don't know how to truly see. Hi. My name is Yasmina. I'm a self-taught, watercolor and other mix media artist. My work is very loose, dreamy and cute. I'm very happy with my style and I don't feel limited in any way. If I want to draw something, I know I can, so I do. But it wasn't always like this. here is some of my beginner work. Very different, isn't it? To get to the level of actually knowing how to draw, I had to do certain exercises that taught me how to see. These exercises aren't that much fun and they can be pretty hard, but they are what a lot of beginner and self-taught artists are missing and need. Without the strong foundation of doing observational drawing, they are very limited in what they can create. No matter how stylish the results are, they will not feel believable or professional without a good foundation in seeing. Every artist has to learn these skills first. When I did my art improved the most and drastically fast, and I want the same for you. In this class we'll tackle observational drawing with many time-tested exercises that will help you to level up your work. In each lesson I'll hold your hand and show you how I do them, and what I'm thinking as I'm doing them. You'll also see that I have weak points and make mistakes all the time. The journey of improvement in practice never ends, you have to take the time to challenge yourself in your art to get better. The great news is, once you know how to truly see, you can deconstruct any subject for perfect proportions every time, and even stylize what you see. I will touch on this at the end of the class, and I know this is probably your end goal, but trust me, the first step is learning how to see like an artist. If you do exercises to learn how to observe deliberately, you will improve so quickly. So if you're serious about taking your art to another level, let's get started.
2. A Little Experiment...: Most art teachers, and I'm one of them, believe observational drawing is the most important skill to learn when it comes to drawing. Seeing is 90 percent of the equation. Without seeing first, you can't draw the world around you. Let me tell you my story so you can see that this is true. Here's my older work, and when I was first starting to draw more, I drew the same stuff over and over again, and I didn't have that drawing foundation of learning to see and studying subjects. So it was doodly and you can see it was just like a lot of people. It was very beginner, and by that I mean, I was just drawn from my imagination and my imagination didn't know what things looked like. Improvement was very slow and I wasn't happy with my drawings, but I could draw basic shapes like circles, squares, triangles, so I should be able to draw anything, I just didn't know what things looked like. I started to do studies of things, and these were random studies of things that interested me, and this was how I was learning to see. This is where my art started to improve, and I did a ton of these, and though they were not original work, they were not a waste of time because these studies are important for a strong foundation. Without them, I will not have the skills to make original work. A couple of years go by of me drawing like this, and then I took a couple of college classes and one of them was drawing. In it, we were all forced to sit and look at one subject and draw it for hours. I've never done something like this, and it really challenged me. It also made me really pay attention and look. I lost most of the work that I did there, but here are some pieces that I saved, and you can see that we did a lot of exercises and observation, and I drew things I didn't think I could. These weren't drawings that were fun to make because I wasn't drawing things I liked, but I really challenged myself. My most proud piece was this Buddha value study that I did in charcoal. I just never thought I could do something like that. Once I made this, I felt like I could draw anything. This is one my art improved the fastest and it's almost like I became a better artist overnight or over a few months of the class. I then took what I learned and practiced with mediums that I liked, in this case, ink. I didn't many studies on my own, and they may not be perfect, but they taught me to really see, and in turn, that gave me a strong foundation and a place to play from and find my own style. It also helped that I was drawing things I liked, which were animals. In fact, I love nature more than anything. The reason I drew so many people before was because I didn't really know how to draw animals. I had to learn how to observe. My style used to have more realistic pieces like these, and these stem from the observational drawing that I learned with my own twist. They would not have possible without me really being able to see. But over time, my style has evolved into being more fun and playful and rarely realistic. But I could not have gone to this level without having a strong foundation in observational drawing first. Because I have this foundation, I can draw anything that I want to draw, I'm not limited by anything. I learned that before you can play with information, you need to understand that information and truly see it. Especially if you want to draw from memory, you have to memorize how things look, but first you have to observe. I'll show you more about deconstruction, stylizing what you see in a later lesson. But for now, just concentrate on really seeing, and you will improve as quickly as I did, you just have to put the time in. To prove how important observational drawing is, I'm going to show you a little experiment I did with my husband as the guinea pig. He was told to draw this lion and no other direction was given. My husband hasn't drawn in years and years, so he doesn't know much about seeing like an artist. So he is the perfect subject. If you want to try out this experiment as well, I encourage you to print out the line that can be found in the project section of the class and trying it out as well. Pause the video here if you want to do this. As you can see, his results aren't the best, but this is completely normal. Don't be discouraged if yours looks wonkier than his, that just means that you'll learn the most from this class. If yours looks great, then congratulations, it looks like you already have a strong foundation in seeing. But like I said before, if it doesn't, don't worry because that means you'll learn the most. Now he's going to try this again upside down, and here's the only direction I gave him. As you draw it, I want you to pay attention to the shapes and lines instead of thinking it is a lion. It's not a lion anymore, it's just a bunch of abstract shapes and lines, and just try to follow the lines as you see them instead of thinking of it as lion. If you're also going to do this experiment, pause the video right now, and draw it upside down as well. How did you do? Better than you thought. You would think you would do a worse job. But just like my husband, you probably did a lot better or had a more accurate drawing. His first attempt took seven minutes and 30 seconds, and the second took six minutes. He spent less time and even though the drawing still looks a bit wonky, look at it overlaid with the original. You can see that the proportions and placement of things is much better in the second drawing. How is that possible? Because in the upside down one, his brain was more quiet. He was just drawing lines and shapes instead of thinking of it as a lion, since he couldn't see the lion, and therefore he silenced his brain from trying to fill in the blanks and warp the information that he was observing. This is what we will work on developing in this class. The art of drawing what we see, not what our brain tries to tell us we see. We need to tell our brain that we're not drawing a lion, but shapes and lines. I know it sounds silly, but this is the barrier that we need to break through to truly draw our surroundings. This is the most important step in becoming a real artist, you have to see like an artist. The exercises in this class are built to strengthen your relationship with your eyes and your hand instead of your brain and your hand. Just remember that you need to do the exercises to improve. So do them, you will only get better with practice, and the more practice, the better. In my college class, I spent hours practicing every week, looking at things and observing them and just sitting there and drawing that same thing. You have to put the time in. But if you don't have the time, don't worry, even 10 minutes a day will make progress. Anything you do will make progress, so just practice whenever you can. I have provided you with a worksheet that you can download in the project section of the class and you should use it as a companion to this class. It will help you remember what all the exercises are when it's your turn to try them. My biggest advice to do what you find the most difficult over and over to improve the fastest. If something is easy, you don't have to practice it as much. I have left an area under each exercise, where you can rate how difficult you found each exercise. This is not a grade, it's just self-evaluation to help you figure out your strong and weak points, so that you know what you need more practice in. As you'll see in the future lessons, I need practice in certain things more than others, and it will be the same. This is completely normal. There's nothing to be ashamed off to have weak points, we all have them. Are you ready to put the hard work in and improve your art? Well then, let's get your pencil sharpened and let's dive in.
3. What to Draw?: For the future exercises, you will need a subject or subjects. You can just do one thing and study it in all the different ways, or you can study all kinds of different things, that's what I'm going to do. Now, you can use anything you want, but a great place for all beginners to start is fruits or vegetables. Even a simple apple like this, you can see the shape is very interesting. It's not just a circle, it has all these lines you have to follow all along the shape to really capture its essence. This seems really simple, you're going to be still training your observational skills by picking a simple subject. So that's why I want to start something simple, because we'll really pay attention to the curves of the shape and the outline, and for contour drawing, that's what we want to do. If you're more of an advanced artist, you can pick something more complex, but something you can hold in your hand like this plant, which is really, really cute. I can hold it in my hand and rotate it and study it in 3D, and that's how I do something that you can hold. That way, you can really twist it around easily and pay attention to it in the 3D world. By doing that, you will improve a very important part of your brain that lets you rotate objects in 3D when you draw. I actually got this really weird-looking radish from my garden. It's winter right now, so I just left it in and forgot about it. It has this really weird shape, I really like it. I think this would be a fun one to study, and even the leaves look gragged and frozen over, but the leaves add a nice touch in more detail. You can pick something really easy like an apple or something a little harder like this radish. If you were going to do like an ink study, something like this plantain would be really cool because it has all these cool textures on it, that you could pay attention to and just see if you can capture it. If you're going to texture study, something [inaudible] and would be awesome as well. But any fruit, vegetable we have lying around, or if you want, you can do a flower whatever you like. Let's start.
4. Warm-Ups!: Hey, guys. Welcome to the class. We're going to start with simple warm-ups and I want to stress the importance of using paper that you don't care about how much you waste of your supplies, so just printing paper is perfect or newsprint or anything you have lying around that you were going to recycle, just get anything like that out and don't worry about the results of any of these techniques or exercises because we're doing these to improve. Not for results, the results won't be that pretty. These are more like workouts for your art. Just have a pile ready like this and just keep drawing. I'm just going to use my graphite pencil. You can use any pencil you want. My favorite is the Blackwing, this is a new one. But it doesn't matter just use your cheapest supplies, whatever you have on hand. We're just practicing. The first one is really, really easy. We're just going to do some scribbles, so scribble away. I like to do this until I fill up the whole page. I'm just loosening up my wrist, my hand, making these beautiful S strokes and gliding lines. There's no rhyme or reason to it. It doesn't matter what it looks like. It's just you using your pencil, using your hand. Just do whatever floats your boat at this moment, you can just work on little area. Whatever you want to do just keep going. I hardly lift my pencil from the page if you realized and this is just really fun, and freeing, and loosening up. I'm done. You can just make this as you need to. Let's move on to the next one. For the second exercise, we are going to be doing figure eights. You just make an eight and you just keep using this motion. You can rotate your paper or rotate your hand or whatever and try doing different angles. We're just getting our muscle memory ready and our hand-eye coordination, by just being repetitive with our movement. It's actually really zen and relaxing. For this next one, we're going to do just swirls. I like to do this. It's like calligraphy. It's just fun. You can also do these kinds. Again, we're doing that swirly motion again and just smooth lines, one line. The thing with beginner artists, is they tend to draw like this because they're not confident in their strokes and that doesn't really look good. It can, you guys do whatever you want, but when you're more confident, it just looks better. We're practicing our confidence and just being bold with our lines and just making this circular little strokes. Very simple. This next one is just going to be circles. We're going to fill up the whole page with circles. We can do big circles. Not perfect as you can see this is a little in, but it's fine just try to do one stroke circles. Notice how quickly I'm doing them. If I want to do a slower one I can, just to practice making more perfect circles, but I'm just getting my hand ready. I like to do these exercises quickly. You can be more slow if you want. It's up to you especially with things like the circle exercise. These are actually two different ways of drawing, but you could do it like me and just do both. If you want to, you can just make it all the same size circle and just do a whole page like that. That's up to you, but circles are really good to practice. Next up is lines. Now you can just do this, which is always a good start. Just making confident straight lines, criss-cross these without meaning to, but just in any direction, any angle. We're just being confident with our lines. This is always a really good one to do or you can challenge yourself and do something like this. You just do little dots and now you have to connect them with one bold line. This will actually really increase your spatial awareness. See, I'm a little off here, and help you to tell distance and where your hand will end and stuff. If this is really hard for you, don't worry about it, it's just a skill you have to develop, so just practice more. But always do one long stroke. That's the point of this exercise. This will help you have bolder strokes. This will just really help your hand-eye coordination. If you get stuck on an exercise, if it's a little too hard for you, my advice is to do it over and over and over again until it becomes easier. A little bit every day. Next, we're going to do squares, triangles, and rectangles, just anything with the straight lines. Let's say I'm going to make the triangle. I have to in my head make every side even and that's really good practice and I failed on this one, so I'll just try again. But I'm not going to judge, I failed. I'm going to say, "Oh, this side was too short." Constructive feedback, not anything else. It's actually hard. Then squares and rectangles. Squares, if you do it like this, you're forced to draw out two parallel lines and then you connect them. You're judging distance, how even the lines are, and also the parallelness. This is also helping a lot. You can do it the traditional way too if you want. Whatever you want to do and you can do rectangles. You have to judge where the line ends, that they're even. All of these I'm doing with confident lines. Very confident. If it's hard for you, if it looks wobbly just do quicker and just practice. That's all. It's just practice. The other reason these are easy for me is because I've been drawing for a very long time. But even then I make mistakes like right here. No big deal, I'm just practicing. These are the main ones that you can do. You can also do 3D shapes if you wanted to if you do more like 3D things. But if you want to make something up, you can go ahead. Just a twist, let's say like this and then I want to go in and maybe go more slow and deliberate and try to follow the line that I made up. See, this is more slow and deliberate and perfect. You could have done any of those slowly or quickly, I tend to work quickly. As you can see, I picked up my pencil here and here, it doesn't look very good. It looks more professional when it's one flowing line, but sometimes you have to pick up your pencil and that's okay. But yeah, I can follow along in these shapes and just challenge myself. That's also is really good for paying attention to how lines curve, which will really come in handy in the future lessons as you'll see. This is also something that's similar to doodling, which would be my next one. For doodling, you can do anything you want. You can do patterns, textures. You could play with darkness, and lightness, and values. Anything you want to do at all. Just fill up the whole page with your play. That's how I usually do it. I just do random stuff. I don't worry about it being perfect or anything. Just get my hand moving. That's all we have to do, we just have to get our hand moving. The more we do it, the more we practice, the better we will be, and the easier it will be. Anything at all that you do with your pencil is a form of practice. Just play, make your own thing up, and fill up the whole page, and have fun. There's no wrong way of doing this. Here are our practice sheets. This took around 10 minutes to do all of these. It's really great to warm up with. If you don't have the time, I would just do other drawing stuff first, but this is great for when you don't know what to do and when you're stuck and if you just want to practice and play and have fun. Or if you're somewhere commuting, you just have a sketchbook and you just want to fill it up with random strokes. All good practice. Okay, let's move on to the next lesson.
5. Blind Contour: For this, I'm going to be using this drawing sketchbook. I told you guys printer paper is best and I still agree with that. I just want to use this because it looks better on camera. That's why I'm using it here. But if I was doing this by myself, I would just use regular printer paper. For this first exercise, we're going to do a blind contour study. That means that we are going to only look at our subject and not the page and we're just going to draw as best as we can without looking at the page. I'm going to put this in front of me, and you can't really see it. But I'm looking at it and I'm just going to do my best and I'm not going to look down at the page. So no cheating. It's not going to look pretty, it's going to be quirky. A contour is when you do the outline, you don't do the values, you're just paying attention to the outline. I'm not going to lift my pencil off the page just because it's easier, and it's also a way of drawing. It's called continuous contour, but you can do blind or not blind. But I'm just studying the root system right now and trying to get that detail. This is teaching me to look, to really see instead of what I think I see, to really pay attention to the way the lines form the shapes, not think root, but instead, just completely be engrossed in the object and getting that eye to brain connection. Now my drawing is going to look really silly. I already know that. It's actually really fun to look at your results at the end. But I'm just warning guys it is going to look silly. Then you go slowly as if you're tracing the outline of the actual object in front of you, there's no reason to rush. If you want, you can capture as much detail as you want. The more detail the better. This radish print detail, it looks so weird. Like I said, I left it in my garden for months. It survived the winter somehow. There's just a lot of detail on this thing. I can just pay attention to that and try to include that to the best of my ability. This is fun because you don't know where you left off. So you have to find your way back. I'm obviously going to be in the wrong place, but it's just a fun thing to do and it really helps improve your observational skills. I tend to draw faster than most people. If you want to draw it even slower than this, go-ahead, completely applaud that that's a great idea. Now I'm at the leaves section and I picked a little harder subject because it has the leaves. The leaves are always a little bit complex. I'm just paying attention to every line and there's a lot of details. This is actually a really good practice to also exclude detail if your subject has a lot of detail, it could take you like hours to do this. You just pay attention to the ones that stick out the most to you and it's good practice for when you stylize your work. There's a leaf sticking out here, goes in, there's some detail on it, some little holes. I'm just doing my best to capture all that. I'm getting lost in the subject of not worrying about if I'm doing it, right. I'm just tracing what I see in the real-world without looking down. I think I'm done. This is what it looked like to me and this is what I drew. I see a lady walking, look. You can see the heel of her foot. Like she's walking and she's wearing a dress and this is her hair it's like a fox on her, or a hand. I don't know. But as you can see, the results definitely look funky. If you have a simpler object, it might look a little better. I love it. That's really cool. What I can do now is I can rotate my subject in the real world and try this again with a different angle if you want or you can watch the next exercise that's up to you. But I think I will try another subject. I want to show you guys what this looks like with something more simple. Here we have a pair. Again, I put it the way I want it to be and it's okay if these overlap. In fact, I can pick a different color pencil just so I can see what I'm drawing. This might make a cool composition, but just, there's no rules with supplies here, just use whatever you have on hand and play with what you have. I'm starting again, going slowly, try to draw a life-size if you can, but it's hard to tell with blind contour because you can't look down, but just think of it that way. We'll pay attention to the curves of the pair. There's slight changes to the line and that's what we need to learn how to do is to pay attention to the slight changes. This is how we shut down our brain, telling us what something looks like. Instead, we can actually see what it really looks like because our brain doesn't really know what it's talking about sometimes. Now I can't lift my pen if I want to, but I won't really know where things are, but I can just put in some little textures that I see, little details and just do my best to put them where I want them to be. That's it. Well, was this that detail? As you can see, my line was really wonky here, so definitely more practice. It was much smoother in the real image. But it's pretty fun. I closed it off here. This was the stem and it was supposed to appear actually. I made this part shorter than this part, but it doesn't matter, it just looks cool. This teaches us to really pay attention to our subject. I'm going to do a couple more with different subjects so you can just see what it looks like, not perfect at all. But that's pretty much the gist of this lesson. Make sure not to look at your paper no matter how much you want to. If you need to cover your page with something and go like this. But really I just hold my subject away from myself where I am not tempted to look down, and I have to look up to see it and just keep watching it. Doesn't matter what the results look like it's all about you building that brain-eye connection to your hand. Let me do a couple more. It is carrot. That's very strange looking as well. I put it a little too close to my page got to put it higher so I can see my paper. No big deal. You just move in on over and we can set it up in front of you somehow that be great as well. Like if you have like a little bookshelf or just a little stand or something that would be really nice. The slower you go the better. Like I said before, I just tend to draw really quick, I'm trying to capture that texture. Try to really see your subject clearly see the shapes, the lines, the textures. Instead of carrot. Instead of carrot, think line, shape, texture, values, color. We're just paying attention to the details, into the overall lines and shapes. Nothing more, now my hand is blocking the end of the leaf, it's okay I don't have to draw it all. When you pick a complex subject, it's okay if you get tired in the middle of it, and you don't want to finish it or you leave some detail out. It's better to draw something than nothing at all. Just do as much as you can. For example, I'm not going to draw all these leaves. There's just a lot of them. But notice how quickly I'm doing it. I'm getting the gist of them, but at the same time if you want to do perfectly go like this slow. That's why simpler subject is better because you don't have to worry about doing it in an hour. But the more practice, the more you practice, the better for you. I'm going to end this one here. All these leaves are beautiful, but that would take me forever to do them all. That looks pretty cool. I like that. That's pretty wild. I want to do this plant because it's beautiful and I love this little pot, it's so cute. Let me try doing this. I think I might do a charcoal pencil this time. Now you can lift your pencil if you want, or you can not do it. Actually, find it easier not to lift my pencil. This is actually really fun to do to see your result it looks so quirky it's like an abstract piece. It looks like I ran out of paper. Pretty cool still I didn't capture these details, but it was fun to just follow with my pencil. I drew a little faster than those like I said before, but I am only looking at my subject and I'm following the curve of the lines. So that's okay, whatever works for you. You can even do a subject that is something more specific, like this cute little baby from my neighbor tutorial. I'm going to put him up here and I'm going to do the same thing. I'm going to guess where this was. I was probably really off, but it look funny. Man, so similar. Look how good I did. This is the blind contour, really fun, really easy to do and it really helps you to pay attention to your subject and to look at things as the way they are. The way your brain thinks they are, which is the biggest boundary for new artists to really draw what they see and to have realistic drawings. Now let's do one when we're not blind.
6. Contour: Now, we're going to do a contour where we can see what we're doing. I encourage you to find a subject that you really like. I love plants so I'm going do this one again. I'm going to be using this brush pen which has ink inside of it. It has really nice line variation to it. If you pick something that has line variation to it, for example, even a pencil, you can draw normally and then you can draw on its side more or darker for that darker area and just play with light to dark, to light to dark. You can really play with the line and get different results. Whatever tool you choose, whether it's just a pencil or you have an ink brush or charcoal or a marker, anything you can play with your line quality. Now, if you don't want to do this, if you don't want to show weight, and play with weight in line to show where the form of the object is which make it look more interesting. You don't have to, you can just do it flat. But if you do decide to do this, just play with it. You're also learning your tool at the same time you're practicing using your tool. Just practice using what you have and you'll see so many results from this just by practicing. I'm going to draw this and I'm going to put maybe my little Kitty Pie next to it and maybe even a crystal. Very cute. I'm just going to start. This time I can look at my subjects and my paper. But take what we learned from last lesson and look at your subject more than your paper. Most people say 90 percent of subject, 10 percent paper. I don't know if I agree with that. Maybe like 30 percent papered 70 percent subjects for me. But find what works for you just make sure you do it more on your subject. Most of your attention has to be on the subject and just look at the paper to see where you are and to see the relationship of things or if you're doing it right. But just pay attention to the lines, the shapes. That's what we're looking at we're not looking at anything else. Contour means outline. We're going to do our best to represent the outline of the drawing. You don't have to do continuous contour either. You don't have to not lift your pen, but if you want to have an extra challenge, you can do that. I just think that works better for blind contours, but when I can see the subject, I'd rather do it my way. Just concentrate and do your best. It's okay if you don't do a perfect job, no one's going to see this but you, this is for practice. The more you practice, the better you'll be. It might look a little wonky as well because you are trying to look at your subject as much as possible. Notice here, I tried to make it thicker on the bottom to show volume more. Here I'm making it thinner on the top and sometimes my lines don't touch all the way and that makes a really cool look. That's what I like to do with my ink. So I'm practicing my actual inking style, but I'm still studying and learning and I am practicing drawing what I see, which is the most important thing you can do as an artist is draw what you really see in front of you instead of what you think you see. We're making a 3D into 2D as well, because we are working from real life. When you work for a picture, your brain doesn't have to do as much work it just draws exactly what the picture is, which is fine. But when you work from 3D, from the real world, you learn how things look at certain angles and you're capturing something 3D on a 2D page, which is pretty challenging to do. It will help you with other things that you draw in the future, even if they're from a reference from a picture which I usually work from. We're just doing our best to outline this. Doesn't have to be perfect. Actually I picked a pretty hard subject. You can pick an easier one, or you can pick a harder one. I really [inaudible] to draw that I've done before is shoes with shoelaces. Those are really fun. I messed up a little bit right here, but no one is the wiser. It's okay. I wasn't paying enough attention. It's my bad, but I'm not going to beat myself up about it or think this is a bad drawing. The point of this is just to work out your drawing muscles. The more mistakes I make, the better I will get because I'm making those mistakes and I'm learning from them. Don't ever shun mistakes, especially when you're studying, even when you're not studying, it's so important to experiment and try different techniques. It's so important to grow in your art and not be stuck and stagnant. The only way to do that is to try something new. I'm also learning where things are in relation to each other. Scale and proportions. Proportions were really hard for me to learn at first. I drew everything, looked so wonky when I started drawing. But it just happens on its own naturally with time. It's not something you can force. I would just practice drawing things more and more and more and drawing from real life really helps because you have to guess, what's this leaf proportion to this leaf and that. Not guess, but just try to get it on paper, which makes you practice that part of your brain much more. I'm not going to lie, I'm not doing the best job here. Maybe that's a good thing because it shows you that everyone has off days and everyone needs to practice. Something like this with leaves is great because things overlap and the scale changes. If you have anything like a flower or succulent or just leaves that you can set in front of you, that would be really good practice. It's actually very challenging because usually when I draw leaves from a reference, I just play with it and make it my own. I don't copy what I see. Here I already messed up, there's a leaf right here and I didn't put it in, so I'm just going to draw it in. Just going to pretend I don't have a line there. But that's why it's also important not to erase because then I'd be spending all my time erasing. Here we're just trying to practice as much as we can, which doesn't require erasing so much. More about just drawing and drawing. Misstep here. This is not supposed to be like this. That's okay. It's not about that. It's not about me doing a perfect job, it's about me practicing. Trying to get all the leaves in now. All the leaves that I have forgotten about. This gap right here is actually really small on the reference. I messed up here and that's actually a really good thing to practice, is negative space or trapped objects in a drawing. For example, I messed this up. I can go here on the side and just draw in the shape of what the actual white space looks like in between my leaves. That's what it actually looks like and I drew this. As you can see, it's very different, but it's a good practice. And I can even go in and look at all the trap shapes. It's very good practice in seeing things and just draw those. Back to my plant. I'm going to start here. Forgot another leaf, didn't even realize it. Very hard, meticulous to draw all the leaves exactly as you see them. It's not my kind of drawing, but the point of this is not to necessarily have the most fun is just to improve the most, has to make you better. We are not painting [inaudible] just outlines. I'm not going to color this or thing. Pay attention to one thing at a time and that way we can really focus on that one subject. We have one leg at the front. But the other one isn't. We are just going to draw that one leg. Looks a little corky, but that's what I see. That's what I'm going to draw. I draw exactly what I see. Then you can see this one just a tiny bit. There's a little thing underneath here. If I wanted to, I can draw the pattern on this. I have to look at where it is relatively to everything else. Do my best of just putting it down. Now, you're drawing may look more childish or elementary, like if you're just starting out. Don't be hard on yourself and just do it. Just practice. Mind you to, when I first started out, you can't compare yourself to me or to anybody else because every artist out there that's better than you just had more practice time than you. That's all it is, nothing else. I wasn't paying attention. This actually ends right here. There is no line there. You got to pay attention. Just do your best. No one has to see this. This is just for your eyes. One thing I've noticed is I'm drawing crooked, I'm drawing like this. But my drawing is supposed to be like this. That's okay. If I do it like this and I look at it, it looks right. So it works. Whatever you do is good enough. Were just practicing. We've got the little tiny guy. He's definitely more simple than the leaves and stuff. But I'm still not paying attention to make it perfect. I am paying attention to just the lines and stuff. It's okay if your proportions are off. It's okay. If it doesn't look exactly how it's supposed to. Just pay attention to the lines and shapes. We're just trying to pay attention. Like I said before, if you get confused about where things are, you can draw the trap shapes. There's a trap shape here that looks like this. This is the leaf and this is the leaf stem and this is his ear. So I'm going to try my the best to just mimic that. I can draw the trap shape instead of thinking about everything else as one thing. His hands supposed to be much higher than this. That's okay. This is why before I draw in real life, I sketch out my drawing with basic shapes just to know where proportions go exactly. If your professional artists and you do amazing work, your stuff like this can look really bad because you can't erase, you can't plan out your composition, you just draw what you see. But that's not the point of this. It's really just to work on our observation skills and hand-eye coordination and things like that. Mostly we just drawing what we see. Don't worry about yours not looking good. It's not about that. Look at his face. Here's the legs. It looks completely off, but it is what it is. We have our crystal. Just a bunch of straight lines. It's very simple because it's geometric. It's good to draw different subjects like this, whether it's a crystal or a tool like a pliers or something. Those things can have a lot of detail and be really fun to draw. Here's my contour drawing, it's just an outline. Definitely looks corky. Now, let's talk a little about cross contour drawing.
7. Cross Contour: So in this lesson we're going to learn about cross-contours. Contour is when we look at the outline and we draw the outline and cross-contour is when you go across our subject to draw the outline as if we're touching it all around. So we're looking at three-dimensionality. We're looking at form instead of detail. We're not going to draw these little details in the crystal, just the form of the sphere. So what does that look like? I start by just drawing a circle, and now I'm going to go in and define its form. Here we're looking right at it, so it looks like a straight line, and then it just starts curving out. Notice they all meet right in the center. This is what the 3Dness of the sphere is. If I was touching it and I put a line on each side, that's what it would look like. We're learning how to see things in 3D. Now, this may be really challenging for you. A fun thing to do is grab a fruit like this apple again, and we're going to use a marker, and we're going do this literally on the fruit so we can see what I'm talking about. If I draw a line across the fruit. You don't have to do this, but it really helps to learn the form of things just if it's not clicking in your head. It will really show you what I'm talking about. Then my lines are a little squiggly, but you can tell what I mean, that when you're looking at it from this angle, this line is curved, but when you move it over, now it's straight. Now this one's curved, when you move it over, this is straight and that's curved. What we're looking at is essentially the form in 3D space. You can add more lines if it makes it easier for you. This might even help you see it even better, to see how they slightly curve as we go out because it's following the form. Inside, you can see they go into it like this because it has that little area. You can see they go inside, but I'm still drawing a straight line. It's just because it's following the form. You can also do it this way, and this way you make a grid. You don't have to make a grid, you can just do one line, but it also can help you see what I'm talking about. If you want to, you can do this with a fruit and you can try drawing it, and then you can try drawing it with a fruit that doesn't have the lines, so you just get used to seeing it. It's as if my finger is tracing the shape of the fruit. That's how I think about it when I draw this. Like what would it feel about touching it? Where would the line go if I touched it like this? This is a really great exercise for learning how to see form. Now I can draw exactly what I see because I have the lines on it. I'm going to first draw the outline or the contour. It doesn't have to be perfect, just do your best, and then I'm going to go in and draw the lines as I see them. This is a great learning technique. If this is something hard for you to understand, I highly recommend you do this. I'm just filling it out with my pencil in 3D. That's it. Very simple. I can even do the other one. If there were any bumps on the apple, the lines would be a little different. If you want to do some more complicated subject, you can, just challenge yourself. Here I'm going to do it with this little cute panda bear. Cute, but you can see it has little shape that goes out here and it's just a little rounded here. Get to know your subject, get familiar with it in 3D, and then you can try drawing it. It's actually a brush holder. Is that cute? I'm going to pick an angle I want him in and I'm just going to draw him. First, the outline like we already learned how to do, doesn't have to be perfect. Just follow the shape with your eyes and do your best and pay attention to all the curves. I'm going to add in the detail, but you don't have to. You could just see the shape, but it helps you think about where things are. You can do this to any contour drawing that you already made. You can just go back in and just add in the lines. Here's our little panda. Now we're going to think about it in 3D. I can see that his cheeks protrude out like this. It goes in a little bit and out, and then this is all curved and this is more flat. Then this is like a straight line and then it curves. I'm pretending I'm touching it with my finger. If you do this exercise, you'll get so good at realizing what things are doing in 3D that you'll be able to rotate things around and just know the form of things, so really help you if you learn things like shading. For this one, I made the lines with some different direction because it was easier for me to fill out the form that way. You can make them all cross. The butt's rounded, but then the back is flat. It doesn't matter what direction you do this in, slow rounded this way but the grid itself really helps you to see things in 3D. As you can see, this is really simple to do. Challenge yourself with something a little harder. You could do something like this, which is actually a cylinder. If I drew a line on this, what would it look like? Just imagine drawing a line. It'll be the same throughout the whole thing. Now with things that are a little more flat like this little Christmas tree, the lines would just go straight and then straight to be at an angle, but it's just going straight. Let's see what that looks like. It's good to try this on geometric shapes because everything is built up of basic geometric shapes. If you understand those, you have a good grasp on everything else in 3D. Here's a little cylinder shape and then I got the rest of the tree. We got the gist of it, the basic shape. Also this is in 3D, so this has these little detail. Now I can go in and see what the form looks like. Since its flat, if I just draw a line, it would look something like this because it's just at an angle. Then this would look something like this because the line, if it keeps going, this is at this angle. Then if the line keeps going, this would be something like this. Just guess, just do your best and you can always touch your object and look at it closer. Then here would be straight this way, but this way it would be curved. Now let me show you why this is so important. If I take the same apple, let's say, let me just do one from imagination. Let's say I shaded this using crosshatching and I did something like this, it would not look very realistic. But if I did the same thing, the same shape and I followed the form when I did the crosshatching, that looks so much more realistic and you can feel the shape more than if it was flat, but it's always good to know what things look like in 3D. So challenge yourself with anything you want. A really fun thing to do is to use your hand because there's just so many curves here, and you could just imagine the line coming across every finger and you can always touch it if you need to because it's right here. This is a very complex subject, but to do all the techniques we learned on your hand would really benefit you, so I definitely suggest you try that. But if this is challenging for you, I recommended practice lots and lots. If something is hard, just do it more and you'll get better and better at it faster and faster. I definitely recommend doing this with a fruit and drawing it like this and trying to draw it before and after and seeing how it looks. Now let's move on to the next lesson.
8. Negative Space: In this lesson we're going to talk about negative space. Negative space is something that you see all the time but you probably don't pay attention to. Our brain is wired to look at an object like this is ink. But really, this is a shape and it's compromised of all kinds of lines and shapes. If we pay attention to the background of this negative space, what's around it, we can really see the lines and just thinking, oh, this is just an ink bottle, which it is, but part of our brain that sees it this way, can draw it very well. We need to learn how to see it as shapes and lines instead. It's always better to draw from life. But I thought you guys benefit a lot from seeing this on a piece of paper, or I can point out the spaces, but if you have something you can draw from life with, that would be even better. Any plant that you have, put it on a white background and pay attention to the space that it makes between the leaves. I'm going to show you guys exactly what I'm talking about here. If I were going to draw this with just negative space, I would ignore the plant, and I would only focus on these trapped shapes and the outline. That's some negative space right here. Anything that isn't the plant. This shape, this shape. If this is hard for you, do print this out as well, I'll leave it in the project section of the class and do exactly what I'm doing, just draw the little trapped shapes. When we're drawing like this, we're actually paying attention to lines and shapes instead of what the object is and we're learning how to do proportions right and how things are relative to each other. Just paying attention to the truth of our subject. This is really good for your observation skills. It's very good for you to also learn placement. We're just following this line around the subject. Looks simple, but it's actually hard because you're forcing your brain to not look at the symbols and to just draw shapes and lines. But surprisingly, your drawing will turn out pretty unrealistic doing this. There will be no detail in this, just the outline of our subject. All of this is negative space. Our negative space is touching the positive space and that's why it looks like the outline. I missed some right here, little tiny specks and right here. That's what we're concentrating on. The spaces between the shapes. Leaves are great for this. But I also got another reference. This is the classic one most people use the chair. I'm going to draw this one, but you can draw it either all, or do something in the real world which would be even better. I can start with the outline up here. You can try to make it the same shape and size. That's up to you. But I'm going to just follow the outline. Now looks like I'm drawing a chair, but I'm not because I'm just going keep going and just pay attention to the outsides of it. It's okay proportions for are off when you do this. We're just practicing really seeing. The slower you go, the more you look at your subject, the better your results will be. The best way to start is to do the main outline, and then go in and fill in the other shapes you see. But that's up to you. You can do it anyway, you want to, as long as you just practice. This is training your eye to be like a ruler. We'll see how well I do. It's a hard skill to have, but it's so invaluable. I'm not thinking chair, I'm just paying attention to outlines. I've already messed up because this line is too long, but there's no erasing. Don't worry about it if you mess up, just keep going and just do your best and draw over anything you mess up. We're not here to fuss over and erase things. We're just here to draw. Messed up again. That's okay. Doing my best. I intend to draw pretty fast, so I'm going to make more mistakes. But I'm still learning the same skill as I have would normally. Here we have a trap shape, goes down, side, up, and then there's a little triangle here. There's another shape here. Just do your best. It's okay. You don't do that good. The harder something is, the more mistakes you make, the more you learn. As you can see, I didn't capture this perfectly because this is supposed to be a straight line and that's okay. I can always go in and try to fix it and try to get the shapes better. But just don't erase no matter what you do. Don't erase because if you do, you're going to spend your whole time erasing and we're just practicing. It's important to just let go and have fun. We're not here to make a beautiful masterpiece, we are here to get better and to get better, just practice. I pay attention to this shape because these shapes are together. I'm looking at the proximity of shapes, how they relate to each other. You're turning off your overthinking brain and instead you're just watching that. Make sure to look at your subject more than your paper, like in all the other exercises that's very important. I made this little too long, that's okay. This one's a little curved. That's okay. I'm doing pretty bad at this and that's okay. That is how you learn. I'm just practicing. I'm in the practicing mindset, but it doesn't matter what it looks like. I really messed up here. This is definitely not what this is, but that's okay. I want to show you guys that we all have weaknesses and we all have things we need to work on more than others and nobody is a master of all things. Everyone can improve and get better. Don't feel like you're a terrible artist and that's the end of it. We all have to grow in our craft. This was actually up to here. Oops, didn't draw the negative space, that's okay. Just keep going. I think that's everything. As you can see, I'm really off right here and right here. I'm okay up here, but this is all messed up. But it's not a failure. It's me doing my best and me learning. I could try this again if I wanted to. The more attempts to make it something the better you'll get. Let's learn from my mistakes. This is a fun one to just pay attention to the shape of things. I love organic shapes way more than geometric shapes. I rarely draw geometric things. I love nature and things like that. This is an easier one for me, but it's good to practice everything. Organic shapes tend to be more forgiving, we can make mistakes. I'm learning where things go. For me this is so much more relaxing than the chair was. But because I'm so bad at the chair, that's what I really should be practicing because I'll have the most improvement with doing things like the chair. If something is easy, that means I've already mastered that skill. There is no need to practice it too much. For me seeing organic shapes is very easy. This one's harder to gauge if you did it right or not. But I think I did way better with this than the chair. This was easier for me, I could just do it quickly, the chair I had to really concentrate and I still made terrible mistakes. That's why I need to do more of. Do whatever is hard for you. Chase whatever is hard because you will improve faster by doing what you haven't mastered yet and don't beat yourself up if you haven't learned something, if you haven't mastered something, we all need to work on certain things. As artists, we're always growing no matter how good you get. Please be nice to yourself and just practice, just practice. We're practicing seeing here, we're not making a finished piece to hang a frame, just do your best and just have fun with it. Let's move on to the next lesson.
9. Gesture: Gesture drawing is actually my favorite way of practicing in drawing. Pick something that you like as well or something you've already done, that's fine. Whatever you want to do. We're going to capture the essence of our subject. Here I have a charcoal pencil, and I'm going to be quick, and I'm going to really study what I'm looking at, and I'm going to just capture it as quickly as possible. You might have heard of this with figure studies. It's like that. But we're just like Sumi painting. Now you're just trying to capture with this little strokes as possible, the feeling of our subject are, this is like a loose drawing. To me this is a gesture drawing. You can also make something simple like this. That's fine too. Whatever you want to do, something loose and fun to use is different mediums for this, someone get on my pastels. I picked two colors of each color that's in our carrot. It's got a nice way of having its leaves. Here, I'm actually getting my style up and I'm being playful with it. Notice that the leaves form a triangle shape. We can see that they all form a little triangle, which is interesting. Then I can go in and maybe blur it a little. Whatever I want to do, this is like an expressive way of studying something. That's how I like to think about it. I love to do this technique, especially with watercolors. It really forces me to have a loose painting. But even ink can be really fun. Let's say I, using your meeting too it's advantage. Like for example, here I want really quick emitted dry brush technique, is really good to do too. I'm just capturing it as quickly as I can, all the detail without actually being detailed. This is definitely my favorite way of practicing. You could use your medium to its advantage, like here I can go like this and it makes it cool. Leaf looking shapes may not be super realistic, but I am being loose with it and I'm just capturing the essence of my subject. Then I can go back and add some cool detail. Just summarizing what I see. Just picking a thing here or there instead of everything, instead of really being like a microscope and seeing every detail, I'm just being really picky with it. There we go. I really like that. It's fun. Another thing you can do is actually mixed media. I can come back in here and do that as well. This will be a good way to practice mixed media techniques in general. You're practicing a lot of skills at once. That's how I like to do it. Some people like to be purists and they just do one thing at a time, but it's up to you, whatever you enjoy. I think it's more fun to really let loose and play. Instead of just being forced to do it a certain way, find the best way that suits your practice and do that. As long as you are doing the observation, the work that you have to do, you can do it any way you want to. Maybe you'll discover a new way of practicing. Alright, so as you can see, gesture drawing is really fun. I actually did a gesture drawing of this earlier. I was doing a really quick watercolor and then I went in with a charcoal on top. I really like how this turned out. It's really cool and pretty. This is how I practice because it might have medium as water color. I just do a wash verse really loosely, then I add in some other medium top. I did pastels and charcoal. It's just quick and loose and not perfect. I love this. This one is well, okay. This one's more fun, but it's just a fun way for me to warm up and just to play with my tools. This is actually really good to do, especially if your goal is to paint loose. Let's just do one more. Remember this little guy, we're going to bring him back and we're going to try to do a gesture of him. I'm going to very quickly capture his essence, take your time in studying the subject if you need to. I'm going to gesture of him in 3D at all angles, just getting better at that. I'm going to very quickly, nothing perfect. Quick strokes. Just getting the essence of our little cutie. I could turn him around, and you can do this slowly if you want to do a spatial studies like this. It's really good to do slowly. But I just wanted to quickly get into it. But like I said, this is a really good thing to do. Really good way to practice. Let's see the back, really quick sketches. I call it gesture sketches because they're just really quick and I'm just getting the essence really fast. I'm still observing and that's important to do. The first ones that teach you, the contours will teach you how to see first, and then when you really see, you can do these things easily and it'll still look like the subject. I'm going to do a bunch of these just to warm up my hand and just because these are fun, this is my most fun exercise, though not too perfect. You can hold your pencil behind like this, more just to get that loose line, force it. That's what I like to do as well. If you're using a brush, if you'd like to paint, the same thing applies, you can hold it further away. Instead of looking at every leaf individually here, like your other time, I'm just going in there and just start drawing in like an idea of it, and just using similar techniques to just do it my way. That include every single detail that I see. Here is a lemon. This is my imagination. It doesn't actually have that. I messed up because I didn't draw what I saw. Let's try this again. Pay attention to the subject. It does have a little bit of a bump, but just a little bit. That's more like it. [inaudible] people look like fish. Then we have our little dots. It doesn't have to be pretty, you're just practicing, observing something really quick and putting it down. Here's another one. Like I said before, keep your eye mostly on your subject. That way you don't make the mistake of drawing what you think you see and instead you'll draw what you'll actually see. That's it. I tend to draw sideways, I've noticed, so I can move my paper like this from where I draw more straight. Anyway, that's it for gesture drawing and you can do this with people as well. With people you find the line of action first. For example, let's say the person is slouched over or their chest is out, that would be the line of action. Then you just draw in the shapes around it. Let's say their head is here and they're reading a book. I'm not the best at drawing people because it's not my thing. But you can tell what I'm trying to say here that the gesture, you can capture a pose really quickly. This is the same concept that you can use for any subject you want to draw. Now let's move on to the next lesson.
10. Value: Now we're going to learn about value. Your best friend for this would be a pencil or charcoal. If you use a pencil, make sure that it's a darker one like 6B because you can get the really dark values. You can achieve value with pen ink, watercolor ink, whatever you have, but pencil is the best practice tool, I think. We're going to do some exercises first. I will go from the darkest I can to the lightest I can by just changing the pressure on my pencil. Here I am going really hard, I'm pressing down and I'm just going the same area to make it really dark, and then I'm going to lighten my hand a little bit, lighten the pressure a little bit. I keep lightening it until I'm barely going to touch the page. You notice I'm doing this with the side of the pencil. I'm going from dark to light. Try the same thing with your other media. Here I have charcoal. This one's really easy to make darks with. I'm just going to lighten the pressure, lighten it, lighten it, lighten it. I could do more mid-tones here. I see that. I'll just go back in and make it look more like a gradual look. You can tell if you're doing it right, if you squint your eyes, that is the best tip I ever heard about drawing with values. If you squint your eyes, you can see how many value changes there are in here. I can also use some more mid-tones. If you squint your eyes, you can see it's from dark to light. When you do this, when you squint your eyes, what it does is it takes areas of your reference that are darker or lighter and merges them together and you can see how many different values are actually in your piece. We have our darkest darks, then we have our mid-tones, and then we have our highlights and the white the page, the lightest light you can go. We have from darkness to lightest. The most common exercise you'll probably hear of is the sphere. Let's do that really quick. We have a circle, that's not too perfect. We're just doing this for learning purposes. Now, we can decide where we're going to have our light source coming from. Let's say it's coming from here. That means this will be the most light and then slowly it'll become darker here. Then we'll also have a cast shadow coming this direction. All we're going to do is just practice doing values like this on a spherical object. Now remember what I showed earlier with the cross contour, it's a sphere so everything we do, we have to follow that shape. I like to start from darkest area. Now, cool thing about light is it will hit here, and it'll also hit all around the object, and usually it'll bounce behind the object. This will be a little bit of light right here. I don't want to make it all dark. I'm just lightly shading behind it, but not all the way. I want this to be the darkest area. This will be my main shadow. We're just following the shape. Then now we're going to have our mid-tone, which is our mid-value. Squint your eyes if you want to check that you're doing your values right, but you want to make the transition also very subtle from one value to the next. I'm going to start lightening my strokes. This will be my highlight right here so I'll just go around that and just very lightly add the rest. Notice I'm following the shape. This needs a little bit more mid-tones. The cool thing about charcoal is I can go in and blend it out. You can also do this with a pencil. You can use the little white things instead like this. You could only use your finger. Here's our lightest part, want to makes sure that stays white. We also got our shadow. Very simple. It's not perfect, but you can tell the value differences. If you squint your eyes, you can see. We have our cast shadow, our darkest parts, which is the main shadow, the core-shadow. Then we got our reflected light is coming off here, it's a little lighter here. We've got our mid-tone, which is the middle part, and then our highlight area with the white highlight right here. It just goes from dark to light. How many different values you have in your piece will define the mood of it? For example, if I just have the darkest dark and then like this, and then the white of the page, that will be a high contrast piece. But from a low contrast piece, I can do something like this, just this and then maybe this, and maybe this. Then the white page, that will be a low contrast. The darker a piece, it tends to be the moodier it is. The higher the contrast, the more impact it has, and the lower the contrast, the more dreamy or washed out it may look. Every value scale that you use will have different effects but we just want to learn how to see value in objects and you can always play with it more later on when you get better at it. I left just one light on and in that way I can get a nice highlight. The light's coming from up there, and I'm going to draw this pear, mess my ability, and I'm just going to squint our eyes at the pair. I see right here where it's bruised is the darkest area, then it's dark right here and right here. There's a little highlight right here coming from my hand reflecting the light and here's the main highlight. This is really subtle, it's okay if you can barely see it, you'll see it also from a different angle than me because of the camera angles. But just pick any object you have and just try drawing the value of it. It doesn't have to be complex object. The simpler the better. We're just trying to understand. I'm just going to do the outline real quick. It doesn't have to be perfect. Now I'm going to go in and I'm going to do just the values of my shape. I'm going to go with the darkest area first, I see that level of skin came off right here and just made it really dark. I'm going to keep squinting my eyes and looking at my subject and I'm going to start with a dark. Right here is our shadow. Don't be scared to add in detail as well. We're paying attention to all the darks and the lights, squint your eyes if you can't see it very well. If it's all light, you might have the same light source. I did where there was light everywhere. You can just find a lamp and just point it at something and draw next to it. Right here there's a bruise, right here to. In comparison, this one is much lighter than this one, so I'm going to do more darks here than I would over there. I'm just doing my best to just observe my subject. This is not to take very long. We're just trying to pay attention to the form, the shape, the lights and the darks. We're not trying to make it perfect. We're just practicing seeing darks and lights. I keep squinting my eyes. This might look a little messy. That's okay. I'm just trying to capture it on my page as I see it in real life. Notice I'm doing the side of my charcoal pencil that really helps you to capture a bigger area. Notice how there's no whiter the page highlights on my subject, but I can leave the white the pages to make it more contrasting to make it the lightest parts seem even lighter. Just get lost in observing your subject and just do your best and don't worry about results too much. Once you master one lighting scenario, try different kinds. You can go outside, you can go somewhere with hard shade, you can just try all kinds of ways of doing things. Now, you can't really see the shadows because I'm holding it, but there's a shadow here on my hand. I'm just going to lightly sketch that in. Its very dark where it touches my hand. When subjects touch something, they make a really hard shadow right where they touch, but then it becomes subtle. Then we also have the bottom of the pear right here. Just a little detail, but it does make a difference. Here's my pear. The light is not as intense as it could be but even with a very mild light like this, you can see how I did a study. Now I'm going to look back one more time and just see if there's anything I missed. I'm looking here and I'm squinting my eyes. I'm seeing that this and this are the same value about and here I did the same thing. Then I'm squinting my eyes and it can be a little darker right here. Squinting my eyes, looking at my subject and my drawing and just checking to see what I did wrong. The more you do this, the more you practice seeing values, the better you'll get at it, the more you can practice seeing light, the better you'll get understanding light. I definitely recommend taking a course on just lighting objects. We want to make up your own lighting scenarios and stuff but if you want to just observe, definitely squinting your eyes is my best tip. It works for me. This got lost right here. I need to make this darker. I'm just adding some little details that I see. I think I'm done. Study whatever subject you want, pick up anything you want, but a fruit is a good place to start, and then you can move on to something more complex and something that's more time-consuming like your hand or a plant or even a scene some scenery, like a landscape. In fact, I love doing small landscapes studies like this. Just small ones of movies or things I really like and I'll just pay attention to the values. I don't look at color because value is extremely important. Let's say right here it's like this and then there is a hill and it's a little lighter. You'll notice little thrills of art as things recede, they become lighter. Let's say the sky is really light, but then there's some dark clouds. Just little tiny thumbnails like this really make a difference and help you to understand composition and values and lines and everything. I definitely recommend you pay attention to the values around you into how things look. Your drawings are not to be perfect. Just do your best and just have fun with it and just practice. The more you practice, the better you'll get and the faster you'll improve. Practice seeing value in everything. When do your studies, you can start doing studies that pay attention to value because in real life, things don't have lines around them. They have values that are around them. This is not outlined in ink, you can just see what it is because of color and value. Just pay attention to value is very advanced skill and this is the key to drawing and painting realistically. The more you practice this, the better you'll get at seeing and the better you'll get at portraying it. Just keep practicing and keep having fun. Now let's move on to the next lesson.
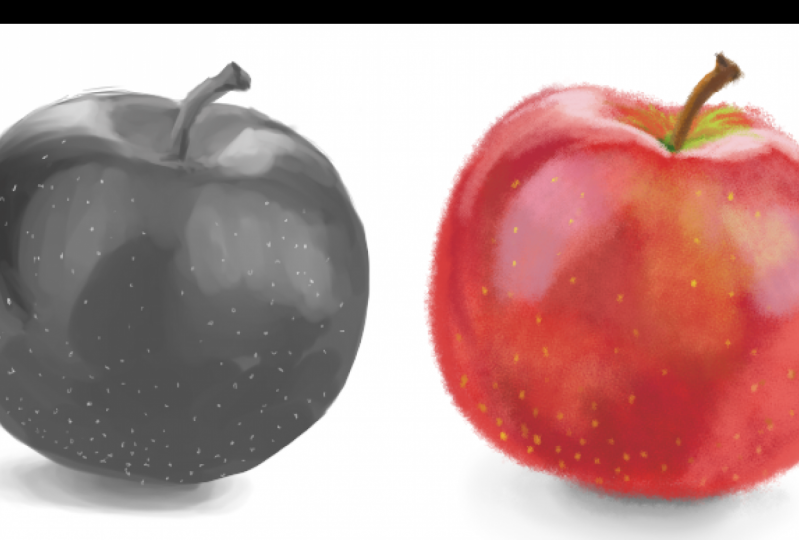
11. Color: We're going to do color studies in this lesson. Get out your favorite medium, mine is watercolor. Whatever you use is fine. Acrylic wash, digital, markers, crayons, pastels, whatever you want to use. We're just going to observe the colors in our subjects and try to mimic those as best we can. My biggest advice is to think of this not as just color study, but as a value study first. Value studies are more important, they're the groundwork, and then the color is just something that we use to make it have a color. But the value of everything is what gives it that realism. If we ignore the value, we're not going to have a realistic study. Always squint your eyes, look at the darks and the lights. The reason I pick the lemon for my first one is because it's one color. I'll show you that there is variation in just one color, just by paying attention to the values. The good thing about using favorite medium is you can test it out, and you can learn how the colors mix and what they look like. For example, this is my lemony yellow. As you can see, there is no color like this on my lemon, my lemon is darker than this. This is the darkest I can make this yellow, so I have to use something else for shading. I have to learn how to mix colors. I like to do these studies quickly, so that way, I can do lots of them not just one. But first, just take out your colors and try to pick out what you see in your subject. What kind of colors do you see, and just put them on the page, let them blend together, or if you're using any other medium, just let them be next to each other. You can make darks and light, for example, I'll pick this color up and this is the darkest version I can make of it. Then if I add water in watercolor, I can make it lighter, I can just see what that looks like. I'm just getting to know my tools, and I'm trying to pick out the colors that I see. I see a bit of red. You can mixture colors, whatever works for you. When you're ready, when you feel like you've picked out the colors that you see, and even if it's a really subtle one, like I see a little bit of green in some parts but just very subtle, I can put that in here. Anything I can observe, I'm going to try to paint. I do this pretty quickly. You don't have to take forever on this. Just try your best to get the likeness of your object and the three-dimensionality and the color as fast as you can, so that way, you can do lots of these instead of just one. When you make a mistake, you can just try again. We're not trying to be super detailed here. We're just trying to get the shape right and the volume and the color, and that's just a skill you have to practice lots and lots. I'm going to do the outline. Watercolor is forgiving, I can go in and smooth out everything I just painted. Here, I have my lightest area and then here, I have a darker area. I'm going to use some brown, but it's like bluish. I don't want to put that here, but it's like a bluish, maybe more of a brownish. Just try to get those subtle color variations. Now, I'm going to mix those. See, this is a little too dark, but that's how you learn by just trying. I'm squinting my eyes to see how it looks on my page versus in reality. The cool thing about watercolor is I can just keep going and blending things as I go, and I can pick up anything. We're not trying to stylize here, we're just learning how to see and how to study color. This one looks pretty good, but it's a little bit too greenish. It's more of this color supposed to be, so I can try again. When you do this, even if you mess up, you'll get pretty cool color combos that you'll remember for next time. We're interpreting what we see, even if we're trying to study it. Don't be hard on yourself and try to make it all perfect, just do your best. All this is in shadow and it gets a little lighter on top. I can leave a highlight, if I want to, and this on the reference just to practice, making things look better. I'm getting the gist of it, I am studying the main colors and the values. I like my second attempt more, it looks more like the lemon. Because you can see, it's not just a yellow color, it's a lot of subtle variations. There are some browns in there on this side, there are some blues on this side. I'm just trying to capture that as best as I can. Now, let's try this again with the peach. The peach has more colors in it. I'm going to get a cool angle for it, and I'm going to do the same thing. Doing simple subjects like this is great, because you can do them quickly and you get that valuable practice time and without too much pressure or stress, so I can see what colors I can see in the peach. It's a little too bright. Yeah, like this one, that's good a little brown. Just whatever I see, I'm just practicing. Observing and then finding that color on my palette. Doesn't have to be perfect, we're just doing our best. Every time you practice, you will get better at it. There's also some yellows and there's also some orange, which I don't really have on this palette. I rarely use orange, but I can mix them. Once I get the gist of the colors, I can go in and paint it. Like I said before, you can use any medium for this, I'm just using watercolor because it's my favorite. But anything you have is just fine. I'm being very observant, I'm paying attention to everything we already learned so far. The shapes, the values, the negative space, the details, just trying my best here. Squint your eyes to see values, like I talked about in the last lesson, that's very important and it's really helpful. Then we have little subtle changes here. Try to capture that essence of your fruit. Don't worry so much on being perfect, because you can see mine aren't perfect, but just do your best. Especially if you're new to any sort of medium, it's going to take you time to learn how to do color in it, that's okay. The cool thing about watercolor is if I make something a little too dark, I can just go in and pick it up, so right here. I'm paying attention to the value of things right now. Then there's a little stem inside and there's a little bit more. Okay, so that's my color study for the peach. As you can see, these are really simple, they're not perfect. They're just me trying to pick up the colors that I see, and still pay attention to value and just put it on the page. It's not all one color, it's not perfect. You have to pay attention to the differences and subtleties, and this is just about paying attention and doing your best to mix the right color for that. Really, it's about paying attention to values and then colors. I think this is the hardest thing for any beginner to do, because we're basically putting everything we learn together, we're doing a real study. Don't worry, if this is hard for you, just take your time with it and get to know your tools better and your suppliers better and just keep trying. The more you do something, the better you get and the faster you get better. Just have fun, guys.
12. Deconstruction & Style: Now that you've done tons of exercises to help you see, let's put those skills to use in playing with what you see. This is the fun part. The first step at any kind of illustration is the deconstruction of your subject. This was the first step in my you can draw anything in three simple steps class, and it's as easy as breaking down anything you see into simple shapes and lines. Anything you see can be simplified. The best part is, there isn't one right way to do this. For example, with this line, I'm first showing how I usually do it. But here's another way you might find more appealing, which is more sketchy and illustratory. This one uses only straight lines. With the sally, for example, I can pay attention to form only, or I can pay attention to each petal, or you can do both. There's all kinds of ways of deconstructing what you see. Find what works for you. You have your own way of doing it. You can't really do it wrong. Just practice. It's just a way for you to make a complicated subject easy to understand. If you find difficulty seeing the shapes, you can use an iPad or tablet and draw straight on the images like this. Or you can use pictures or magazines and a marker to draw over them. Practice deconstructing everything you see into simple shapes and lines. This is a wonderful skill to have. Once you feel like you have the hang of it, you can do this without drawing on the image and instead just sketch them out separately. Really pay attention to proportions and learn to compare and contrast scale and size. You are actually using what we already learned in this class by paying attention. But what you're really doing is getting the proportions down and understanding the form of things. This is always my first step in making a real illustration. Before I go into any detail, I study the form and simplify it with shapes and lines like these. No matter how complex a subject is, you can always do this and don't be scared to erase as much as you need to. My advice is to take your time at the stage. After all, proportions are the hardest, well they were for me. This step is crucial. Once you have the shapes down in the correct relationship to each other, it's like a coloring book page, but you're going in with detail. You can use the power of seeing to add details and you'll know exactly where they're supposed to be, so it'll be believable with the correct proportions. The hardest part is now done and you just draw where you laid things out. It's like you made a map. This is my secret sauce making drawing anything easy. I encourage you to check out my you can draw anything class if this is hard for you to understand. Now, if you don't think you have a style, don't worry, it will naturally start coming out. Just draw more and more. For example, I am drawing the girl and dog here in my cell without really trying to. I love to use outlines and there's a certain way in which I ink. But I also have a way in which I include or exclude detail and a way in which I simplify things. Knowing what to keep in a drawing and what to take out and change is a great tool for every artist. You have that power. You are creating art, not like exact replica, unless you're doing hyper-realistic drawings on purpose. Once you learn to observe, don't be scared to play with your art. For example, to simplify, I didn't draw every blade of grass, I just observed and then made it my own and just put them in certain areas. I just thought that would look better. Same thing with the clouds. I took out some and added others. Since I'm not doing observational super accurate drawings for practice, I can have more freedom to play. This is just for me. This decision-making process is where your style starts to be born, I shaded it very loosely, and as you can see, it also adds a cool look. Then I added in some flowers that weren't in the reference. But the only reason I know how to draw flowers is because I studied them so much before. When you draw something over and over again, you learn how it works and memorize it. Then you can use that knowledge with future pieces. But you first have to observe, I decided to outline the girl and dog with a thicker stroke, which is also a style choice, and I also outlined them in white to make them pop more. If I add a bit of color or make it realistic with color or whatever, that's up to me and my personal style. Anything you do will make it look different. You can play with your art as much as you want to, but learn to see first. For example, I added a sun above the clouds, but that would change how the light behaves, so I'd have to have a knowledge of light and shadow to update my art to be realistic. The more knowledge you have, the more freedom you have, but you don't have to know everything to draw. You should just use references at first until you get to that point. But let me show you a really stylized example too. I can use references very loosely to come up with my own pieces, and that's what I usually do. Here I wanted to have the same scene, but I want to change their poses and where they were, and I would just want to simplify everything. Because if you've seen any of my QD classes, you know that the more simple something is, the cuter it is. I changed the proportions of their heads to be really big. That also helps. Here I've played with what I saw, I made a super key piece. It's very different from the reference. Even though it's the same scene. But you can't really say this is the reference. But no matter how much I stylized it, it's still inspired and based from real life, and observation and that's why it's believable. Essentially, I observe the picture and play with the information. This is a skill that takes a lot of practice, but you can definitely do this too. If you want to learn more about stylizing what you see, I have a class on drawing with style that you can check out. There's tons of examples in there of doing this and exercises to help you get better at it. But just remember, no matter how stylist you want to get, the first step is to learn how to see. Practice that first and then you can play with what you see till your heart's content. I hope you enjoy this lesson and it gives you a sneak peak with what you can do with the power of observation. Now it's time to challenge yourself even more with the final class project.
13. Class Project & Goodbye! :): Great work in finishing the class. Give yourself a high-five. Everything you did so far can be private or shared in the project gallery. That's up to you. But it's time to tackle the real class project. Instead of drawing something simple like fruit, challenge yourself with a more complex subject or better yet, organize a whole still-life scene with things you have lying around the house. The more stuff overlapping and different kinds of subjects and sizes, the better. We are looking for variation. Some other fun things to draw are things like tools or shoes with shoelaces, your hand, our self-portrait is always fun, plants are great because of all the fun leaves that overlap, little statues of things or bigger statues with lots of detail, a crumpled up piece of paper, or a messy blanket, a drawer with all kinds of random things in it or even try drawing outside and just seeing things that you can find in nature. The possibilities are endless. There's all kinds of things you can draw. Just remember that the more you challenge yourself, the faster you will get better. Don't try to just draw what's easy, try to draw something really hard because it forces you to learn how to see. If you truly know how to see you can draw anything, so the more you challenge yourself, the better and the faster you will get better. For the class project, the way you draw it or studied it is up to you. You can even do each exercise again if you're feeling super ambitious or only work on your weakest points based on your self-evaluation on the worksheet or do the traditional still-life study, which is usually done in black and white like a value study, or you can even challenge yourself more and do a realistic color study, which to me is the hardest thing to do because you're doing value and color, and there's no outlines you are really just drawing what you see. That one will make you improve the fastest I think. Whatever you decide to do, make sure it's something that's difficult, and make sure that you spend at least an hour on it. The important thing is to challenge yourself and make studies like this a habit until you feel like you can really draw what you see. Remember any time you put in is good time, so even 10 minutes a day or 30 minutes a week will give you results. These aren't meant to be fun, these are foundational drawing. They are not just things you enjoy drawing, but you can choose subjects that you like to draw and that will help you to enjoy the process more. You will improve so fast from doing these exercises that it's worth it even if they're not as fun as drawing what you like. Then you can use that knowledge you have to draw what you love. A good tip to do is listen to audio books or music to help you to enjoy the process and get into the flow state. The flow state is a place where time goes away and you could really get lost in what you're doing. It's a great place to learn how to truly see because your brain turns off and you're just doing it. But if you're a beginner artist it's harder to get into that state and the more you draw, the easier it will be to get into it and that's where your best work will come from. Oh, and by the way, you can erase now if you want to and even plan out your composition before you start. Unless you're practicing a certain thing like continuous contour, you can do whatever you need to do to make realistic studies. Remember to use your eyes and not your brain. Even if he have to audibly remind yourself that what you're seeing is just lines shapes and values and colors, just do it. Once you do your class project I would love to see it in the project gallery. I'm sure the other students would as well. We can all learn a lot from each other so share your journey, what's been hard for you, what's been easy, they do surprise yourself with what you can do. If you guys have any questions, just leave them in the discussion area of the class and I'll get back to you. I can't wait to see what you make, and I hope you guys enjoy the class. If you want to continue building a strong foundation illustration, I recommend my What Every Artist Should Know class next. It covers all the basic foundation stuff and even has some lessons on what we learned here, but it just covers everything you need to know to be an artist. Also I have a class on drawing anything in three simple steps that might be helpful. It's a really great step in learning how to deconstruct and another one on stylizing what you draw, which is bigger class than the last lesson here. These three tie into this class the best, but I do have lots and lots of other classes, all kinds of mediums, drawing queue and so forth. But remember, just make a strong foundation first and then you can do anything you want. I hope you guys had fun and learned how to draw what you see and I hope you see so much improvement so quickly in your art. But that's it for the class. I'll see you guys in the next one. Great job on completing it. Stay awesome you guys. Have fun drawing.
 Yasmina Creates, Artist & Creativity Cheerleader