Transcripts
2. Materials Required: We, though very few materials to complete the sketchbook excise. We will start with them. It Acer and mine is going need ability, so I am keeping a scale handy with me. Then a ceramic ballot for your paints. And along with that, we will keep one monograph pencil. I'm using a monograph pencil. You can go for any pencil off your choice and the half or teeth, because once you put the tape along the edges of the sketchbook, it looks really neat. There are about five brushes, Barto, basically we will use only fall brushes in each and every painting. The fosters a three by four inch brush. Either you can have this three by four orange black brush auras. You can go for half an inch blank brush, either of them you can use. Then I will go ahead and use my silver black velvet size for size gait and my HIS goddess optimal size six brush. These are the main three brushes which we will use for completing each and every painting in the sketchbook. I have a basket, riches full of pings. Now, these are the different brands which I'm using. One as though would sit on Newton whitewash. You can have any other postdoc allo of your choice, any brand like the white color. And then you will see a mix and match of pains from Sydney layer Magellan mission goal when sudden Newton professional grade, I'm a firm believer that we really do not need any extravagant paints and Paypal or as well as brushes to complete any painting. Whatever is available with you is always good to go. Keep to Joseph water handy, one for the clean supply of water. I will tell you when and where you need. And another one for washing your brushes, as well as deep or one tissue very handy. Those tissues can be either kitchen towel or you can have any other simple towel which you are not using from the suppliers point of view. And before we start a repainting, I will let you know about the colors that you can use.
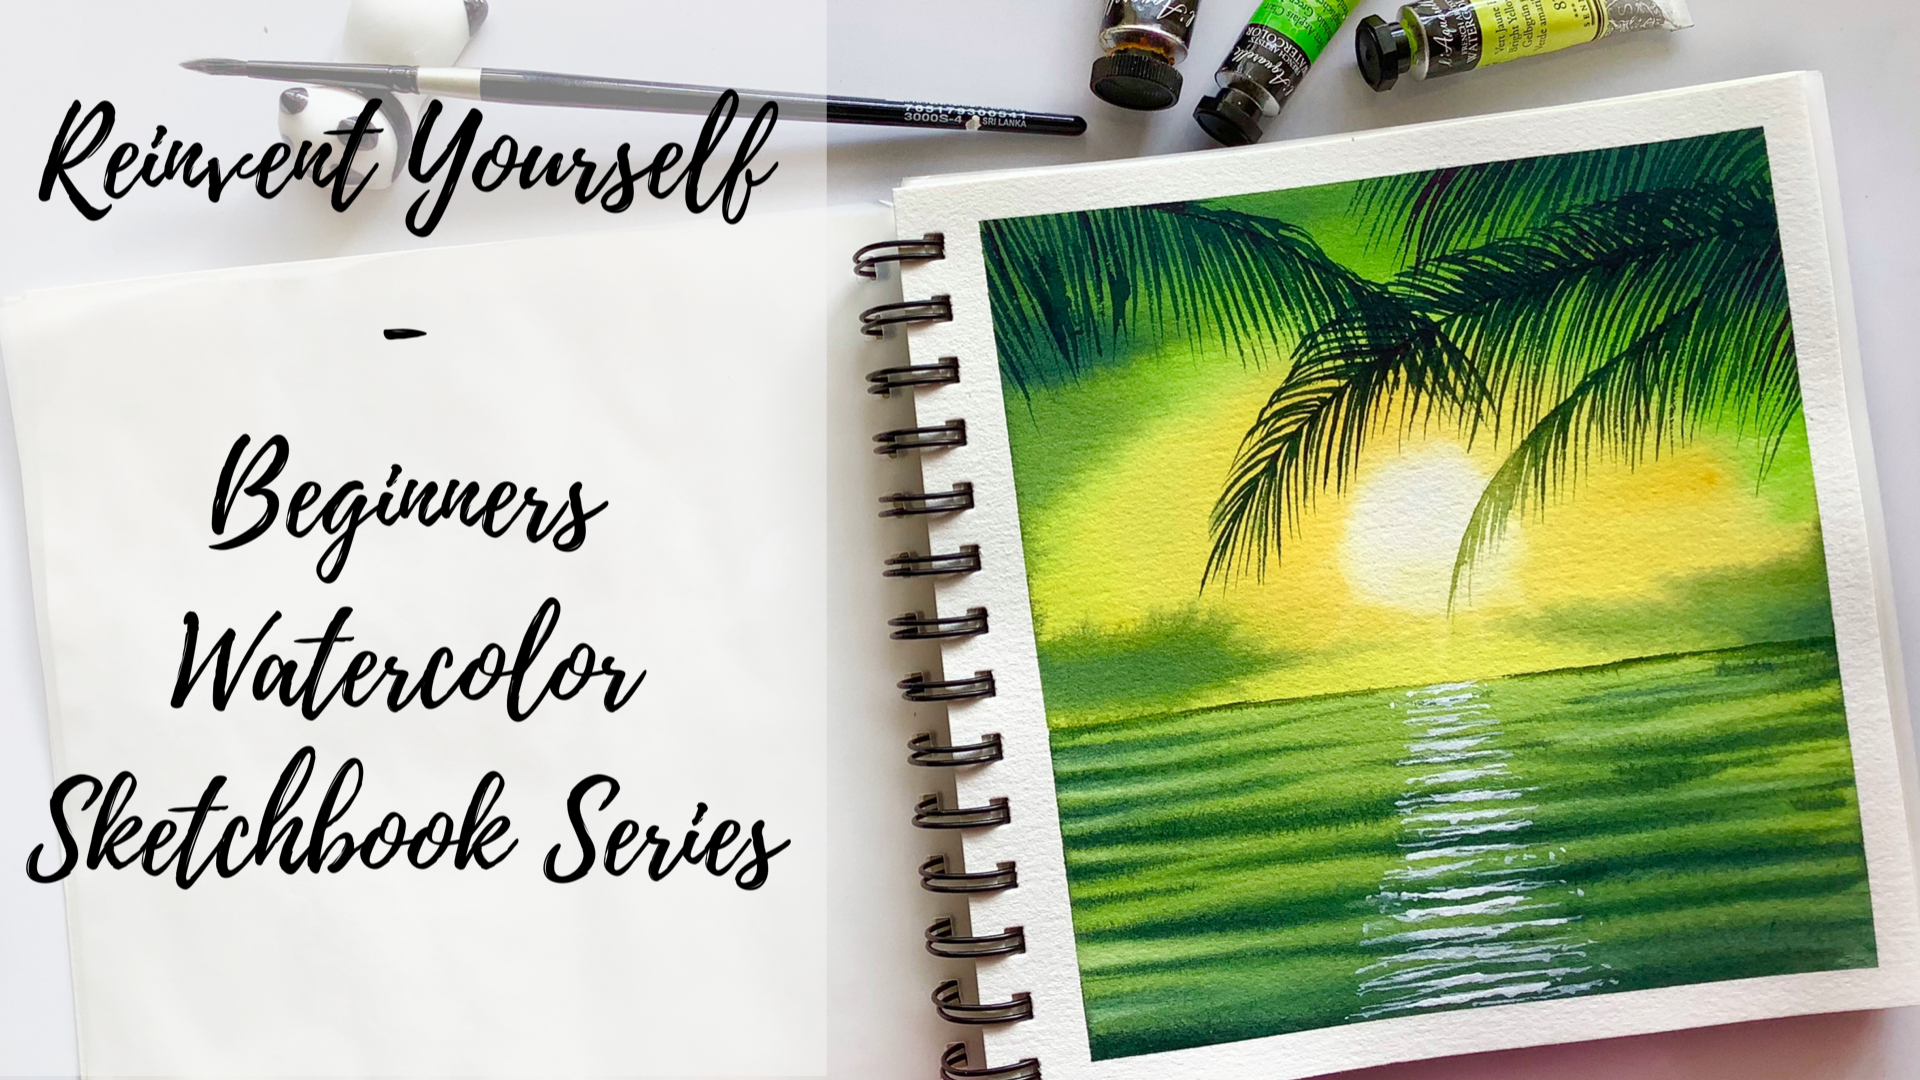
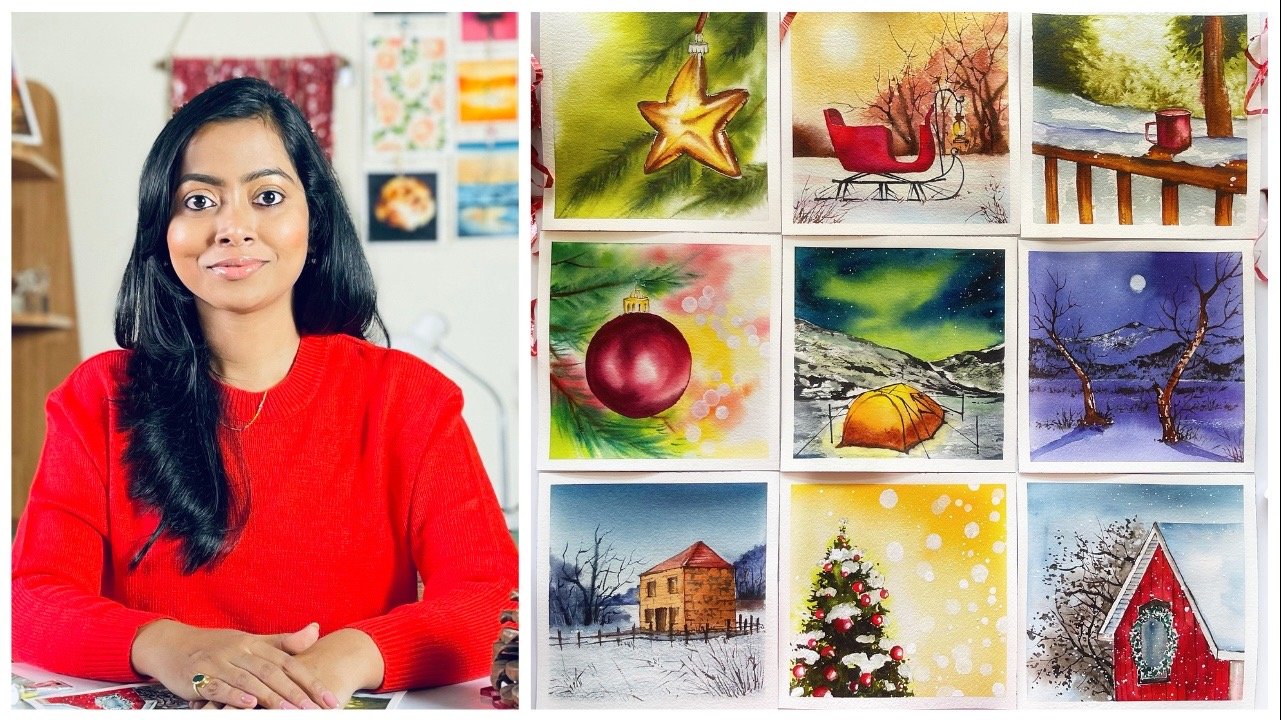
3. Importance of keeping a Sketchbook: Let us discuss about the sketchbooks. I have been keeping sketch books for a few years now and you will have a walkthrough of a few of them very soon. Fosters what kind of sketch books are available in the market? There are sketchbook slide can emulate Fabriano, Ball, Rubens, max goods, and many more from different companies and brands. There are few even local hardbound, which is mostly custom may, you can select the people quality, type of caval which you need. But these are usually more expensive compared to the ones you can get from the market. For brands, which I have mentioned, usually the sketch books I ito cold pressed quality, rough green or hard pressed. And usually it's 200 to 3270 or 300 GSM people, which I have seen. You can't be done both the sides of the Paypal or depending upon the size you choose, you might push to only paint up one side. It's absolutely upon you to decide where you want to paint, how you want to paint. Next is they'll kind of sketchbooks psyche by usually select my people, either it be 300 or 600 GSM. For me, Joseph Fabriano, artistic wallpaper, sketchbooks during Windows and for the summers. When I want my water to stay on the sofas for longer period, it is our trust people. Again, 300 years. I usually insert bottle peoples in between so that I can preserve my paintings Well and then get its battle bounded from outside as these papers are pretty heavy and punching holes of correct size and shape becomes a bit difficult. You might think, why do I keep a customer makes sketchbooks? Because theta majorly five reasons. The Foster's, I can select on the kind of people, either it be hard pressed or press toward her offspring. I can select. The next is about the weight of the people. That would be 300 GSM, 600 GSM. Don't want GSM to Sandy GSM. Whatever I want to select, then pumps the size of the people for my sketchbook exercises. Resolving my paintings in a better way. And lastly, is not thinking much about committing mistakes because I can actually being done both the sides of the people. If I am not happy with the one side which I have been entered, I can go ahead and paint on the other side. What is the importance of keeping sketch books? This is a very important aspect which I want to discuss with you all. You can commit as many mistakes as you want on a sketchbook. Mu1 is going to come and charge you as this is not the final painting document your journey. You will see that that many places I just write down the date or I write down a few things which I have learned through this process. So documenting becomes easy and simple through these sketchbooks. No need to fear the final outcome. We just need to practice in sketchbooks and build up on our skill level. The fourth one is trying out any subject of your choice which you want to give or short, or even just gribble across, just try new shades of your pains which you did recently purchase or practice of you brushstrokes, anything under the sun, whatever you want to do is good to go. Let's discuss the kind of the sketchbook which I am keeping for completing this journey of Sketchbook paintings. It is 7.5 and show on both the sides. Or you can say it's a square sketchbook of 7.5 inch and it has about 24 pages. Now, you can paint on both the sides of these 24 sheets, so it is absolutely 4-bit betas. I would never ask you to keep for less than 20 pages in your sketch book because it would give you with the less opportunity to paint. And each of these pages, again, 300 GSM Arches, paper.
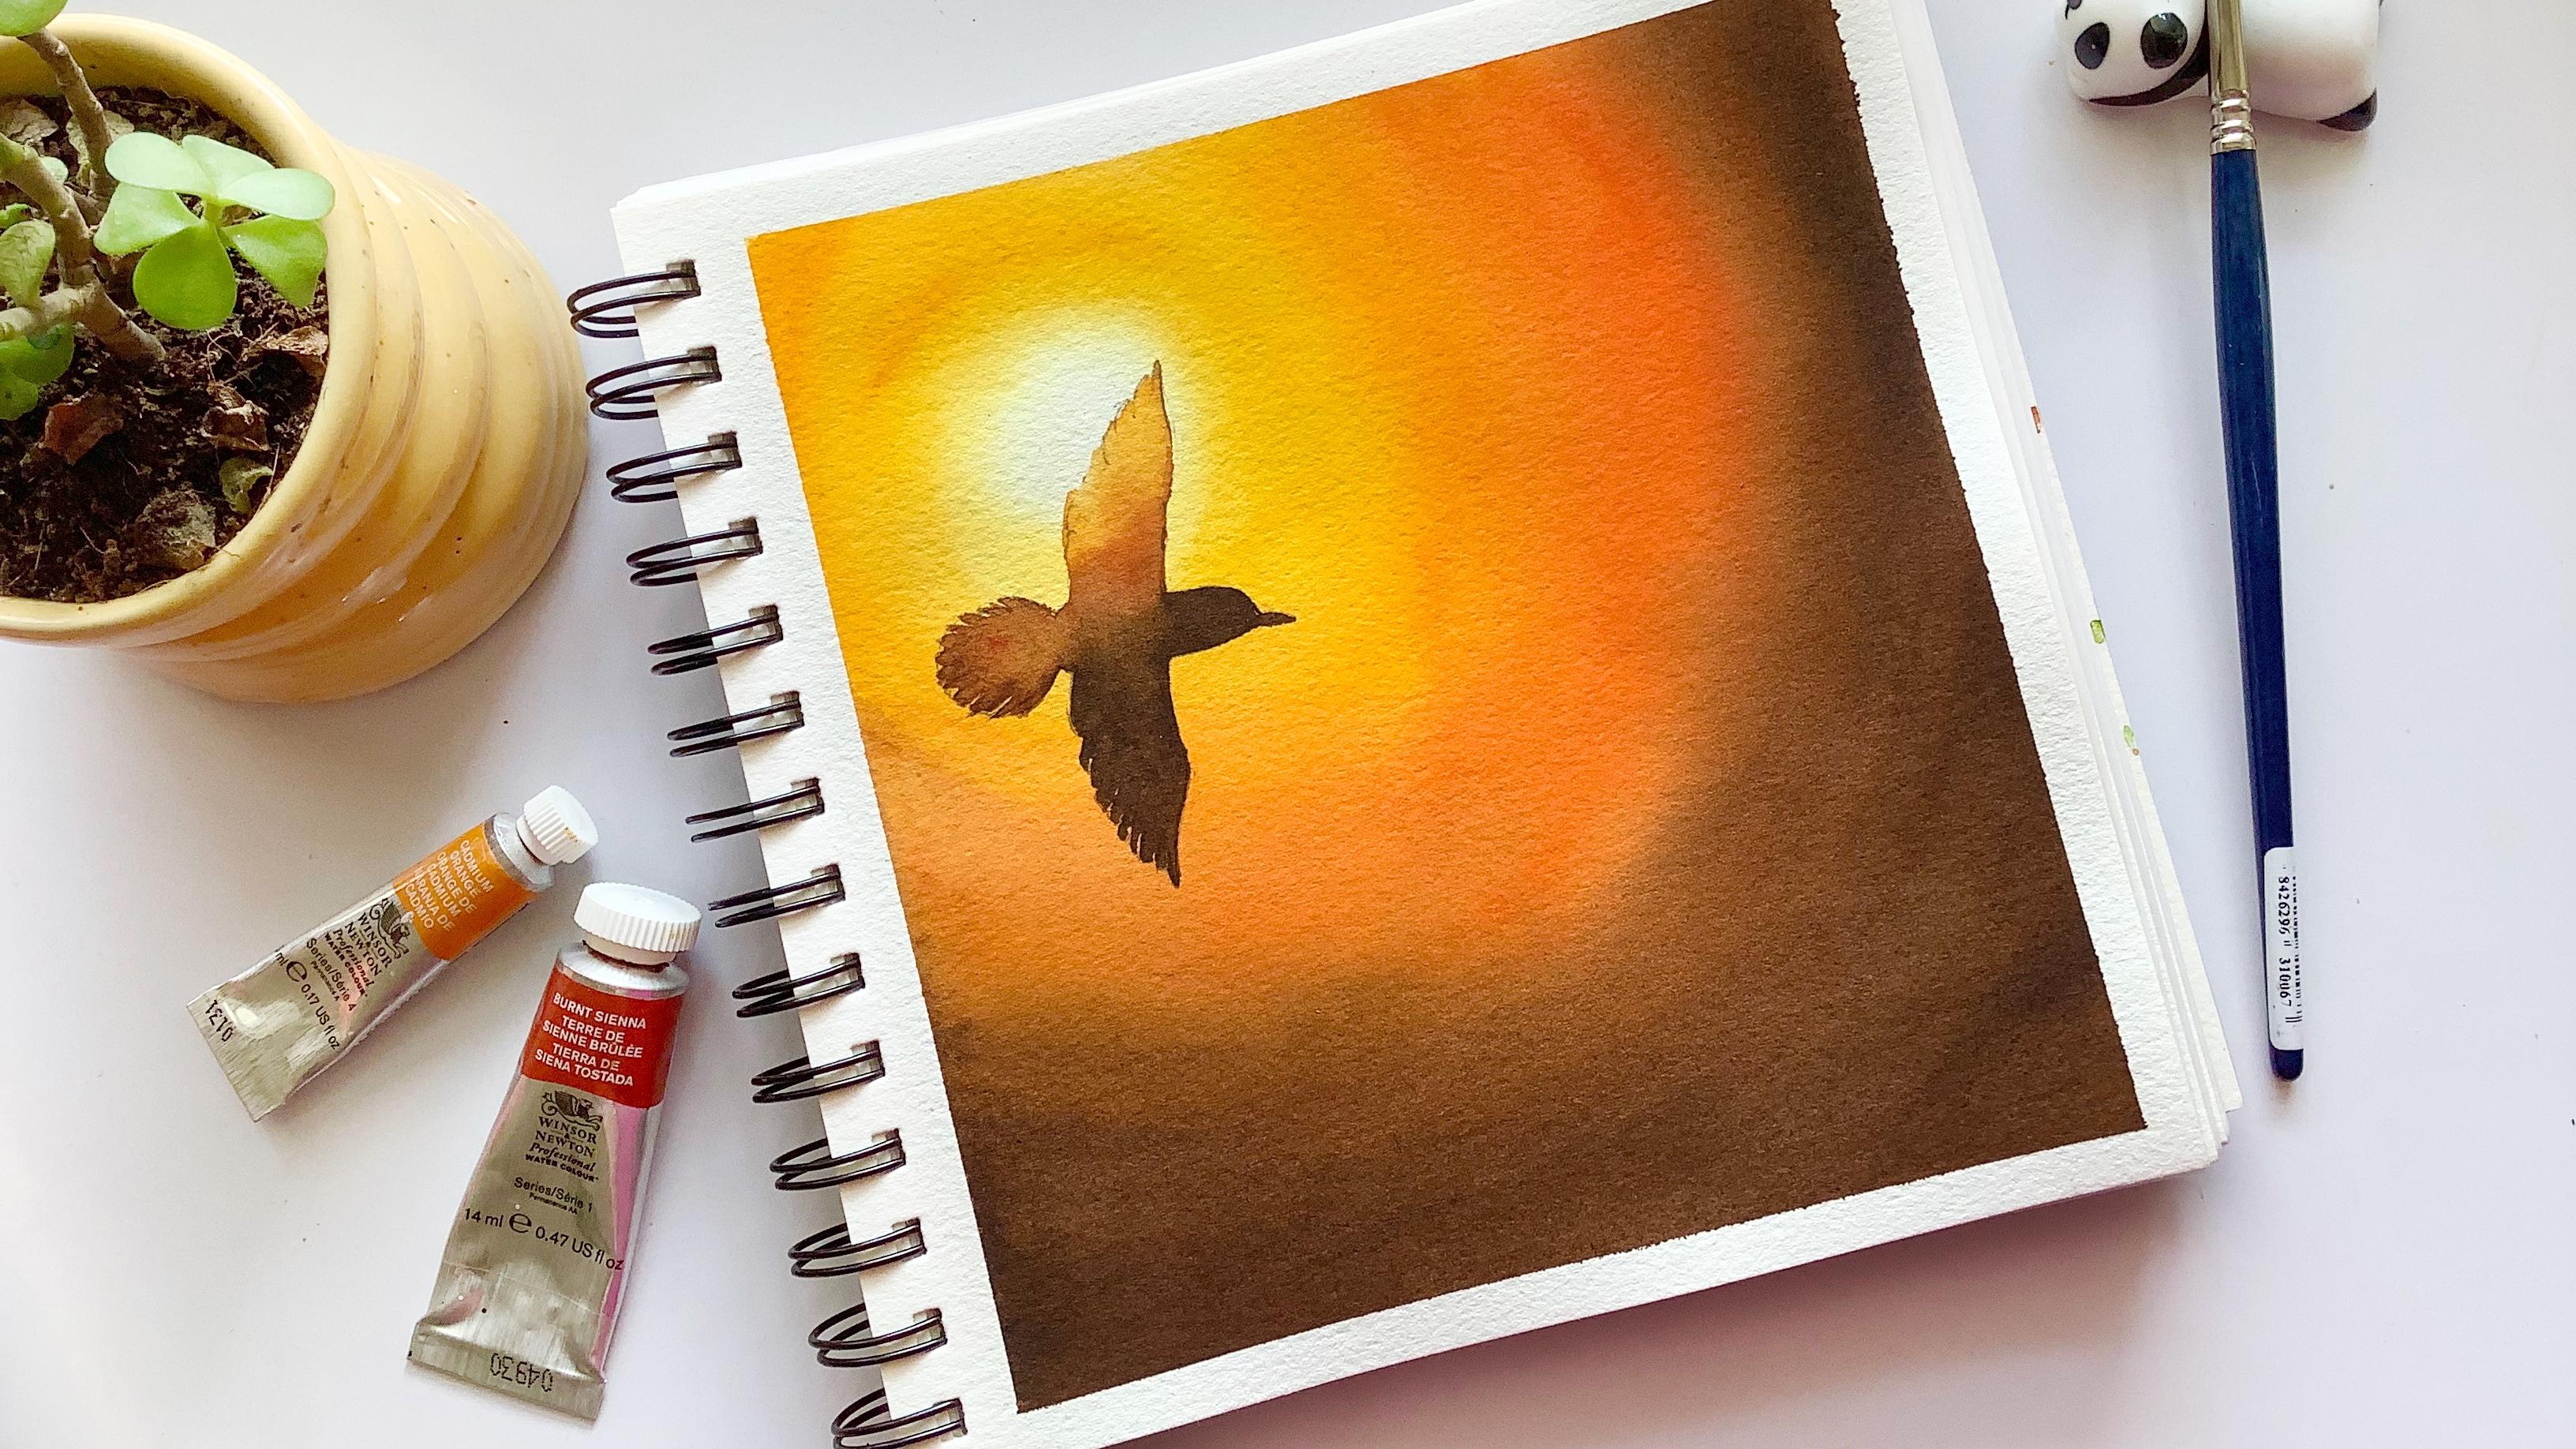
4. Project 1 Wish: Let's discuss the colors that we need for this painting. The first year, Sydney earlier, yellow, Dennis cadmium, orange, orange, burnt sienna, and Fen Di Kay Brown. This is going to be a very simple project which I have named as Risch. I do hope sometime start. We all had wings and could fly like a bird in the vast sky, only enjoying the journey, no need for a destination. I think watercolors is similar way. We need to only enjoy the process and not think much about the destination. So we start by sketching a bird. I am going absolutely random. With the sketching. I would ask you to download the pick from the reference material. Under the resources section, it would actually help you to guide better time using our monograph pencil. Do make this board, and it is z 2.5 MM. You can use any other light pencil. I would ask you not to hold your pencil very strongly or not to have very dark lines because that would shine through when we are done with the final painting. I go absolutely random. Wireless gets too bored, but I start with the wings. And then I make the body of the word on the top with small beak. And this is an absolutely slow process. I'm not trying to actually rushed through because this is the only subject that we would be being taken. The whole of the first sketchbook excites cities. So go slow, slow will always help you to gain a better control over your subjects. Use your, it is all wherever necessary. Drawings, all very important component and forms the base for any painting. Though the idea of the glasses to touch upon subjects which are simple and easy, are absolutely beginner friendly. But as you progress in your water college journey, having a hold on your drawing will definitely help you to sail through the process easily. You draw the wings. It's important to define those feathers a bit because the subject is thought to timing norm. We need to detail at a lot because it is not even huge enough, very need or Lord of mediating like just retailing each and every feathered separately, whereas we just need a Brit offered. You keep drawing this board. I will tell you that it's absolutely fine to make mistakes right now because we are not at the stage where v have completely used the watercolors and that is no way we can get back. It's absolutely fine. You can want draw theories. Then again, draw it. You will see that I am taking a lot of time to draw this board, and I am not actually thinking much about rushing through the subject. And I have been stressing about the spark that we do not mean to rush. We need to take our time and then only draw this board again and again and again. As well as one important aspect of keeping a sketchbook and doing the schedule gets sizes. If you make one mistake, no one is going to actually judge you for the painting because this is not the final painting that we are doing real just doing a practice exercise time. That's one of the best aspects of keeping our sketch books where you can keep on practicing and whichever painting you like, you can finalize it later. Finally, I think I'm at a stage where I can say, yes, the drawing looks more accurate now. And we can do some more changes and then we are good to go. You will see that I have taken out most of the colors on the palette beforehand. That's always a good idea because right now it's Muslims in India, which means the weather, it's moist. Stan, I do have more time to work on the people, but that might not be the condition for you all. So do check your paper in advance for how long it remains where when you apply an even coat of water. I have all been so stressed upon the fact that you should use 300 GSM. Not all the peoples that you get in a sketch book is 300 GSM. So Ido Uganda custom make your sketchbooks with 300 GSM or more. Where time MY papers over roads, you can even use the sketch books that you get in the market. Just checked that they can hold a good quantity of water. While we were discussing about the flat brush or you can say the wash brush. Either you can take three by four. I squat all wash brush which I'm using right now. Or else you can also keep them half an inch wash brush because the people, it is not very huge. I'm using our square people of 7.5 MJ on both the sides. Now, this is just the size which I feel is perfect. You can use any other size of your choice, as well as it might not be the case that you have to do all of these exercises on a sketch book. It's just their daily practice routine, which I wanted to follow. You can use even lose people for these paintings and got it all the same size as I have right now. But I have seen from my personal experience over the years that loose papers are difficult to preserve. And sometimes we even end up losing them. But here, sketchbooks come really handy where we can keep documenting our journey rather than thinking much about preserving. As well as you can use both the sides of the table if required. You have already absorbed what I'm doing. We will keep or one of the ideas so white on the people, which is going to denote the light. We are not going to use any external wide like a whitewash or opaque whitewater Carlo. Denote this area. High, though. Some amount of semi linear yellow falls to always move with the lighter value and then add any other Dakpo values. Secondly, you can use many other alternate colors for yellow, or you can say semilog yellow. Whatever yellow is available on your ballot is good to go. Or else you might have cadmium yellow or any other shade of yellow. And some water or camping modern jam them and the abundancy and amp, anti gay prom. But make sure the blend wealth for that of flight brush is very suitable. Blending becomes really simple in that case. And another point, when you are doing Wet dog with the colors. So we'll try up light oh, at least one or two sheets. So there might be a possibility that you might need to apply to layers, like for this painting, you will absolve. I will let this layer dry and then add another layer on top of it. You might have absorbed or that I have been cleaning the ADL with heads off my flat brush. And initially I have been using hard round brush because I needed more precision. That is, so when I come to the areas which are larger always of flat brush comes more handy. You can use any of the flat brush that you have with yourself or that is available with you. I am using currently three by four inch flat brush. You can even go for one inch or you can go for even half an inch black brush. After applying it upon Sienna on whole of the ADL, I will go ahead and add some more than Di Gai Brown. Now this event I gave now that I'm modeling should be more saturated. But when I go with the first layer, you will always also that it is lighter in value. And then I start adding more saturated version of the same color. Then now we have spent majority or fat time on drawing the Bird rr battle for blind. Carlos's really simple. It's quick. But just be patient. The only trick which I think is very important for watercolors as being patient and that would actually help you do walk out. Even a field painting better than makes binders. Never feel that. You will feel. Each one of us have lot of failed attempts. I have 24 pages in my sketch book, but I might not be in a position to document 15 or 20 of them because the rest might not be up to the mark. That's perfectly fine. We will not make a masterpiece each and every day. In few years, I have realized this very well. And when I paint, I never think about how will this painting don't out. I've just focus on one aspect like either my blending should be perfect. And when I blend the colors, it's like a therapy for me because seeing all the colors moving into each other smoothly and creating this light effect fills my heart with joy. I will go ahead and apply my secondly. And now again, in the same way like we have done our first layer, but this time it is wet on dry. Why I have added weight on dryers? Because last time you have seen that the colors did dry up very light. Do I need some vibrant colors for this painting? And wet and dry is good and quick method to actually achieve it. While we did the first Leo wet on wet, because we needed more precision and we needed to know exactly how the colors should be placed on top of each other or how they need to blend with each other. Here right now we're most often not exactly know how we have to apply the colors. And just go ahead do it and let it dry again. And then we will just go head and being our board. Giving a good drying time to your people is very important. And I always go for natural way of trying, rather than using any Gandalf or bluer or driers for drying up because that sometimes leads to lighter values on other people and your deep might also rebuff. So I started though with the darkest value. Now you can start even with the lighter value. It's up to use instances of very, very small area, which I would be paintings. So I am going ahead and adding the vendor gave Brown. I have a very nice tip of my brush. Psi six as chordal optimal brush. And you can use any other size one, size two, or ten, or brush off your choice. Depot painting, the ADL with Dakpo values. Do you reach though half of board? And then no, just go ahead and Manyuan onto the feathers. Make it a bit more detail than just go head down though deep filling up the space which you have added o for the board. And I hope this idea would be easy and simple for you to learn because we are not doing much just going over the sketching ADL off the board and adding the colors on it. Then you are going from darker values to lighter values though, that might not be the best way to go ahead and paint, but still liable, they are skewed. Do always ski pole, clean jar of water. You just take off all the pillars one-to-one jar and then no, pick up that plane. What o from the other chart or the clean water from the other chart. And just DO that both PR brush on tissue. Once you feel the brushes absolutely clean, just go head and add on some Born Von Sienna and keep adding eight to on the tail of the bird because status so closer to the light and I would like to add the detail of the feathers on the tail of the bird. A simple rule of painting like in any object as when it is near to the light, may get with lighter values am Fnet goes away from the light. Like you are going away from a source of light like sun. Make it with the darker values. For this painting, I have chosen more vibrant and warm colors as I wanted to make myself feel positive and wish that we could also be carefree, just fly and enjoyed the morning sky when no one is Soviet. Still data so much of life and beauty that you can also from the top. What has the ability not only to walk on the old like humans, but also swim in the sea, as well as flying in the sky, which essentially means it can use its power to transform our dean BCE, as well as freedom. It's time to add decennalia yellow. Now, you have to clean your brush very well. Takeoff any extra pins on their tissue. Then again, clean air, clean water, and then only pick up your yellow paints because we are going from darker values to the lighter values. If you are not very confident and you are just starting off. So I would recommend you to go for lighter values and then go for darker values. It is the most suitable way of actually doing any kind of oil painting. Once the BOD is completely drawn, letter ADR dry off and then just take off the tape at an angle. Mu whenever you are taking off the tip, Just be very shot. That whole of the paper is absolutely dry. Orders there is a chance that it might get ripped off. Finally, hide somewhere or touches of buoyancy and on to the tail of the board. And then you're done completely. Just go head and of the tape. And this page of your sketch book is called The ready. You can sign up and you can even put a date because that would help you to even track the progress, how you are doing. We will work on the next painting, which would be about a beach.
5. Project 2 Light: And I will just let you know all the colors that we will be using. Photos, painting the fastest, send a leg here, load. Then next is right here, low cream. The third would be plateaus, green light in Pico, like Ghoshal, titanium white, whichever is available with you. Charles White posed to column. So I have named this project has light because like this great source of motivation, it can give you so much hope when heavy thing is dark. Therefore, we will be painting light and including a beach. In this painting, I will start by marking the horizon line. Hit is about a bit below of half of your paypal. Where does it does not 1 third or together. So just be sure where you are exactly mocking it. And then I start though with my scenario yellow, just load your size KD brush. I have sort of a black color that you can use any other brush off your choice and loaded with your scenario yellow and start painting this idea of the sun. I would use the white that we have on the people for painting this part. And then I will go ahead and use my bright cream. And this is a very beautiful color and I usually have this seeming beard. You might have gathered light green shades of your choice. So do not try to stick to this particular shade itself. You can go ahead with any light green sheet that is available with you. And then add the plateau green, which is again lighter in color. Towards the top of the painting, high, we'll go with some more Indigo in those later half. But the first time just to working with all the lighter colors, keep lending the colors so with each other. And they showed the visualise molt and they should move four into each other completely. We are trying to get smooth outcome finally, and I will go ahead and apply some more yellow towards the middle of the painting. For those sky. While you keep painting the sky, There are so many positive meaning of light that I want to tell you. The first being moving away from dogmas where we feel dark inside us. It's always important to move towards like there is a saying in English, every cloud has a silver lining. Are even you can be occupied with too much of pension and work. And you are somewhere not feeling so positive in whatever is happening around. You might. Even understand that under tremendous pressure of work, there is still a positive part, which is like extra workers always good as you stay relevant that way. So these are the aspects which you have to always think about when they're distinct dimes stopped by adding some more indigo into the background to shoulder seamless blend between the dark and the light parts of this guy. It's always great to show the light from between all the darkness that exist around it. This painting made me feel so positive after I completed that almost get made my day. It brought a smile on my face. I always tried to pick and choose the colors like bright yellow, green, or yellow, which are really warm in nature. And rather than being done and it might not make me feel that positive. I have all Bright Outlook as a person. But once in awhile, we all do feel the doll moment or any sad event can create those moments of negativity or anxiousness. We should exactly know and understand that diamond start to act on it like I find lot of therapy and watercolors because the basic nature of watercolors on certain, just like life, which is ever-changing. Let's get back to DOE painting now and we will start adding some more indigo to the clouds. Just added from the left hand on to the right with the help of your round brush. I'm not using flood Prussian this case, but it's absolutely fine if you have a flat brush and you want to use it, it is basically a half an inch brush that would be more helpful to do it. And then let this dry off completely. Just date go some more yellow, light, yellow, green, and start painting the background for the water. And undoubtedly applying wet or dry because I just want the colors to be brighter. And then I'm going to add some more indigo from the bottom going towards the dog in case so you do not have the scholar. Just go ahead with your live stream that is available with you. And I have some kind of lemon yellow into it. And there would be all Kahlo which you can get something similar to this one. Now, again, never stick to the colors. So which I always say because that's not the intent of the painting. We have to just No-one and understand the techniques that we are learning from each and every sketchbook exercise. And now this is very simple ripples that I am painting. I have taken o darker shade of indigo and have just started making lines while I am towards the bottom, the lines are ticker and while I go towards the dog, the lines will be thinner and smaller. That so how you have to keep painting all the ripples. And then you can always go ahead and add some more smaller ripples towards the top. While you've been the ripples for the first time, you will observe that. It would spread more. Whereas when you paint it and next time you will observe that the colors will spread less as the sheep is also getting dried up bit by bit. Therefore, it's important to go with two layers of repulse. While though papers wet. Overall life, love painting, waters and thinking waters in different styles gives me a lot of peace as well as it helps me to understand how in very, very different ways we can obtain two beat scenes or some kind of a sunset seeing or some light scenes. All of this, I get so much inspired and this as such, a beautiful vibrancy and that summer field. All of it blends together within one single painting. And it's amazing when you will actually finish off the painting with the palm trees and all wherever you feel that the ripples are merging between each other, just take all fresh tissue and use your flat brush to pick up the colors. Your flat brush should be clean enough every time then you weren't picking up your colors. Finally, we will get back to some sketching. Again, it would be simple and easy. Some palm tree leaves, which we are going to paint tau with their indigo color mix, a bit of green and that would actually black with a team better. Most of you will absorb. Till now I'm using three to four colors for both the paintings. The idea is to keep every painting very simple because that's how we should observe any subject. It's easy to just paint anything as you observed, but it's always difficult to pick and choose when you have a complex scene in front of us. Like in this one, we are only focusing on mainly ripples and palm trees. In fact, the detailing only happens in the palm tree leaves. I start by drawing ten line now of the bomb tree. Now this is major, the domain palm tree leaf that we have. And on top of that I start painting the other smaller leaves. Now this is where we are joining the leaves. I'm trying to make it a bit thicker. And while it comes down, we make it better that this processes have absolutely therapeutic. If you start painting the leaves, you will feel so good and the whole process seems to be so simple and easy. Just keep on using the tip of your brush and keeping thing these leaves till you are happy and satisfied with your foster off of the palm trees. This is. Going to be really long and drops off where we keep painting these leaves and we will go up and down with the other leaves too. So be patient enough. This is still, I mean, part of the painting and we are going to detail this bottle lot. Therefore, keep your focus, be steady and the patient, that's my only request to you. Be patient while you paint these leaves, you will observe the branch of the palm tree is basically grouping down, and that's one of 30 thousand. So we have to make these smaller leaves accordingly. Just make sure that either you are using on good tip off the brush or else you have with tin brush for painting these leaves, I'm using my size six as cauda optimal brush for completing this part of the painting. Whereas you can go for any other brush off your choice. I'm really not concerned about what exact brush or what exact followers that you have. Just some mix-and-match and I think you are good to go. He's speaking for the next five to ten minutes. We will only be painting these palm tree leaves. And I know this might look very difficult for you right now, but believe me, the more you start practicing these leaves, you will actually feel really better in terms of therapy that I told you it's a really meditative process, as well as it would even help you to understand how exactly the leafs are placed. Like while I am painting the top part of this palm tree leaf I'm making, though leaves more curvy compared to the leaves which are drooping down right now. And then I'm going ahead and adding one more branch of the palm tree B while it is towards the sun. Therefore, I am mixing a bit of light green with my yellow and then start painting these leaves again because it is near to the sun. And when anything that is near to the sun, we need to take care that they are lighter and value and the light source actually shines through it. Whereas when it goes away from the sun, it would be darker in value compared to the light source that you have already had it. You will now absolve me adding more and more leaves from both the sides of this grouping branch off the palm tree. And there is no exact palm tree that I want to show per se. Just adding these branches as all we're going to do in this painting. What should the cell class on our biggest screen to understand the demonstration bet DO like a laptop, desktop or in my bag. Now this is one of those recommendations which I have. I woke if you'll for Dart. Few recommendations like using water column material that is available with you. Tried to use the kind of artist creator beings or artists rate brushes if possible, Oreos, no problem, go head with anything that is available. Just for the people. I always say try to use 300 years or more. It can be even a handmade paper or archers or any kind of other Fabriano paper, just make sure that it is acid free. Watching the lessons first step, any speed you're comfortable. Then coming back and attempting the painting wire, say watch the lessons both because you know how I am working with my colors, how I'm booking with my brushes, how the strokes are, and all of it. You can understand very easily. You can watch it as 2x speed up to you. This is for the first four, and once you come back, it would be way more easier to pink better. All the projects are uploaded in the resources section for your reference, I would highly recommend you do download the projects before you start painting a door. All the lessons are very detailed and there is no problem in understanding. Still, it's always good to have a reference photo by your side. You do not need to take the glass together. That's another thing which I wanted to highlight. Each and every project is separate. You can either take the projects on a daily basis or you can add them to projects depending on whenever you have some time available with you while you keep painting this palm tree leaves, I will always ask you to go slow and damping because if you pay me how try to go fast, you will be unable to get the exact results. There are no other ways also by which you campaign increase very quickly or beliefs of the boundaries pretty quickly. And that is using a fan brush. Though fan brush is not available with every beginner and that's one of the reasons I did show you how to paint it with Don normal brush that is available with us. Finally, you make the leaves of the boundary is just make sure that they aren't just had to sample each other and theta is not much of a gap. If you find some gaps that has been left, just go over it again and then try to paint it. You will observe some of the other places. I do left some gap, and now I am again going ahead and adding the leaves over done because data is usually hardly any gaps that we observe. So I would like to now actually divert though and important topic which is all about how you hold your brush. Holding of Russia's always very important while you paint. There are many brushes which have gotten nice tip and you can use the tip of the brush cropping thing, just like the current one which I'm using. But you need to be sure exactly how you maintain the tip. And secondly, how much water you have on your brush. So for me, I am not actually adding a lot of water on my brush or I'm not picking up a lot of things on my brush. Wildlife being these leaves because if I apply too, had lot of water, I will not get these thin outlines, as well as how you hold your brush. We cannot hold the brush and absolute mind typically is also matters. We're not holding the brush, had 30 or 40 degrees angle. Also, we have to hold the brush either at 6070 degree angle so that it's easier for us to keep painting these small, small leaves in a better way. And there will be some extra leaves from the top which you will observe me painting now. And they are again had to send to each other this one important aspect that I have been highlighting again and again is keeping those leaves close to each other, even if you miss somebody, just hard some more. And while you are on the top of the leaf or from the venerable US starting from the main branch, the leaf will be tickle. You come towards the bottom, the leaves will become tenured. And that's what you need to observe, as well as being in this painting. Quite satisfied. Now, the way it is turning out dime that I did just a few more here and there, which I need doesn't brush strokes and then we are done. Let your paper dry completely. I have been stressing on this fact then each and every painting that we have been doing, because if you do not allow your row, people do get completely dried. Then you will observe that while you take off your deep, it would rip-off and few of the places see every time if deep rips off, it's not easy to actually fix it back. Therefore, I would always ask you, do just try to be very short when you are taking off your tape. My people will try now and full-stack doll, I would start taking off it. It always take off that depend on angle. If your deepest not coming up, there's a small trick. What you can do, you can use your blow dryer and blow dry on the sides, but do try to blow dry at a distance so that there is no Kahlo which feeds off. So I am very cautious about the fact that I do not want any of the colours to feed off. Take off the day by one to highlight an important aspect which we did miss wildly with painting. So there is a light in the sky models, you can say that is son. And tell us what it did is sun and water present at the same time? There has to be some reflection of the sun onto the water area and that's what we missed. What highway lawyers, I will take some more. Wash on my blush. Pink. You do not have wash. Do not worry. Go ahead. Use your whiteboards. Took alo or your wife Juliet open or titanium white or any kind of opaque white that is available with you. And start painting these sort of bolts. While you are towards the horizon line, though ripples will be smaller. That is, while you come towards the bottom, the ripples will be larger. That's all you need to keep painting your reports. These are few of the important aspects of the painting which you cannot miss. So while I do have this idea that I didn't miss this out, but I want to keep in mind that you guys do not miss this head-on. And before you even take off the deep tried to paint the spawn time, then only they go off the deep at an angle. It would have you do not actually go over the white areas that we have preserved the hypoxic. Dave, for our sketch book. Though some of the ideas right now, I am making a big ticket with the white. Come back. Dalda authored ADLs which ought to not.
6. Project 3 Happiness: Let's understand the colors between me. The first elements are orange and then has brilliant. Thank, thank Shari, chromatin, bonds, Sienna, pride pilot. When I came from whitewash or any other white boast to color available with you. This painting is going to be about happiness. Now why I named it does happinesses because somebody rather aren't. And I feel that within our daily course of work we have stopped being happy. We are busy, we are searching for our goals, we are going after being more successful. But have you ever stopped and realized that he started the real happiness that you need for ourselves. Those are the times where you need to do and introspection and see that can find happiness. Even smaller things like completing or small, being tamed or going out for a small walk, or just having an ice cream that your best friend, having a small chat with your partner over a cup of coffee. So these are the things that we sometimes do miss out and do not give a lot of importance in our lives. And those are the times which you might miss went. That particular person might not be there in your life or they are far off. And these will be the memories that you will always cherish. Thats why the name is happiness on this warping thing is going to be very simple. We are going to draw a small walk over into the sea and the horizon line is a bit above 50% of the people. The upper half is smaller compared to the lower half. And what I'm trying to do is just make this walk over. I have left four centimeters on the left and four centimeters on the right. And while I go towards the drop, I have taken 1 centimeters on the left and 1 centimeters on the right. This is as far what I have in terms of the sheet size. Now you can work out the sheet size as per your choice or Asperger's availability or sketchbook. And then had justice. There is no hard and fast rule that you need to have a square sketchbook or you need to have a rectangular sketchbook to paint this unmade name is to achieve happiness through this painting and feel more enlightened as well as from inside, being very, very optimistic to achieve a small goal of completing one simple painting. You might be thinking, Why am drawing these lines? These are nothing but the wooden these for the bridge that you see or the walk over into the sea, which you see. And then there are the two or three smaller Woods on the sides. Just to provide the stability, you will find these kind of photos may have many points in time. If you walk over into or see or into a lake area, you will come across something similar. And then I guess that's how you can start your process of painting these hormones. You can even follow the small steps that I'm showing you right now and continue painting. It is going to be huge, really, really simple. Only this drawing part might look a bit tough, but I have tried to actually break it down into very, very small steps. We are starting with a brilliant vibrant pink, you can say. And this is again from Magellan mission goal. If you do not have this gallery available with you, just take a bit of Carmine. You can say about 15, 20% or a bit more hand just add some white and do it. And you will get a color which is similar to this. I have even added a bit of orange, rents are orange and do it and I usually take out all the colors on my palette before I start painting. Because that wouldn't give me a lot of confidence in terms of that. I do not need to squeeze out paint in-between whenever I am painting and then the painting my dry up and I would be thinking, oh God, I have to wait till the whole of the sky dries up and then again start applying my colors. So these are the best practices which you can always follow. You will absolve me having very light sheets Initially of this brilliant thing gospel as tokens server orange. And then I would go a bit darker with my art from Irene. You can go for French ultramarine or any other blue that is available with you. Fringe order, Meninas really warm and it gives me those positive vibes. And that's one of the reasons I have been using French art, Romanian for quite some time. You can go ahead and add some more proper towards the top of the painting. Like, I mean, work is to achieve a smooth blending between the colors. And once you achieve this MOOC blending, you will find on top clouds the have done wet or dry method for the sky. So do you remember that there is only less time in terms of given the cloud stack you cannot, because you are people will dry off predict quickly. If you want. You can always go ahead and go for wet on wet. Now, what happens in downs of beta1 betters, your color goes one shade lighter. Therefore, for this painting, I have tried to keep it the wet and dry. I am mixing up a bit of my purple with the pink. And then I'm adding my force layer of clouds. Below that, I'm adding somewhat dark clouds with only purple and French ultramarine mix. There is nothing in particular that I am keeping in mind to have a mix of the scholar, a bit of glue and a bit of purple. I think the ratio can be 50-50 percent and had very, very small clouds. Use the tip of your brush. If you do not have this kind of a brush, go ahead and use any small brush that is available with you. No need to go for it came in kind of an expensive brush. At this point in time because we All right now are trying to only long and has a beginner. There is no point to go after expensive materials. Just have a good set of our discrete watercolors, even or fewer shaders wine compared to a lot of shades which are non-artists rate and a student rate. Some modelling window clouds towards the top of the sky idea. And these anti loose so clouds that are mapping. But do remember that your paypal needs to be wet enough when you, whenever you are having any kind of clouds or else you will get hard edges. And that's what we do not want in our painting. Leave, go with a mix of, again, the pink, brilliant big that we have. Some purple. This is a very, very light sheet that I'm applying right now on the water area. You have to also take it slow and just start adding these areas. But do remember that we will not allow any of the portions to get drive because if it gets dry, then it would be difficult to match the colors as well as it will give me hard edges. Now start adding some more are chromatin onto the water area and decide remedying looks very, very warm. And along with that, I will just add some more purple. Now you have to see that the sky area will reflect onto the water area. As I always see, water doesn't have any color of its own. Whatever you have as a color in the sky will need a flag back into the water, which is calm. The second is how does the reflection happen in water? Why I am adding the purple hand, the French are dropping towards the bottom. And while I go towards the horizon, I'm adding the colours like brilliant thing. Or you can say when server orange, That's how it happens. So whatever appears on the bottom, patents for the horizon may area like just the sky part where you have the clouds and all will exactly get reflected. Where you start painting from the horizon line. So that's how the reflection happens when you are doing your rho water area. And this is for the calm waters. As I've already told you. I have taken this size, half an inch brush, flood brush I have been using till now. Why I have switched to half an inch brush because that gives me more control while I'm doing this kind of painting. But whatever flat brushes available with you, you can always go ahead and use that brush for this painting. There is no hard and fast rule that you have to or need and half an inch brush or three by four inch brush. All of this is just not hit go and mandatory. You can even go further round brush, just that round brush might hold some more water and you might have to squeeze out some Bordeaux and then start blending it or nodes, there's even more status available. You can also use a more brush for finishing these Galileo's. It's time to blend the colors well into all your Lake area. You will observe that there is some amount of hard edges that I was getting. But with the help of water, I did allow it to make it softer in lobe and there is no further harnesses now. And I'm just starting some more on committing to blend the colors well with the background. This is how you have to continue adding your colors. And then I will go ahead and add some clouds because it's absolutely calm water. There would be the reflection of the clouds from the top KVL, which you have added that at this camp up to a horizon line. Some ordre colors into your lake area for the darker clouds. And once the Docker Cloud did, then go head and then you have to add colors on though, ADL, which is basically your bridge. Or you can say the walk over. So I am just adding some more like a values right now of the French royal domain. And then I have a blended with a bit of poeple also into it. You have ordeal so that those are the colors which are for this guy. And I am just using those same kind of colors for even painting by wood, wooden area. We will go out try fresh technique. Now, I'm destroying fish technique. I have talked to for many off my huddle glosses. So just let's face simple, what you do is you pick up some Carlos, whatever is available on your palate. I'm not thinking much while I'm picking up the colors. Sometimes I'm picking up some French at Romney and sometimes I'm going ahead and doing some brilliant pink and do it some more violet. So all these colors, whatever is available. What usually you do is your dab off those extra water off while you pick up, after you pick up your colors onto your tissue and then start adding the dry brush on total. Walk over. That's it that we are going to do. And then instead detailing part, what we do in the detailing partners now since this part is made up of wood and but the perspective, whatever wooden part is far away from us, those will look thinner. Whereas when it comes closer to us, it would become thicker. Batters how perspective works. You can of course, have a look at real photos to find it out absolutely for yourself or else you can also buy a beach and check it out on your own. So these are the things that you need to always keep in mind while you keep doing or keeping any of the important areas like perspective is a very, very important aspect of any painting, or in some order are the way you will. Find its use in every painting. Again, I'm using the tip of my brush to paint these lines. Now, I did already Mounties lines while I was drawing. So it becomes really easy to go over it with the help of the tip of my brush. If you do not have this kind of airbrushed, has repeating again and again, no need to worry, just go ahead and pick up any ten brush off your choice and start making these lines. While you come to Western boredom, the lines will become a bit more tickle compared to what it was earlier. Two other important aspects that I want to highlight. One is precision and perfection. We are not aiming at any artists. We're just trying to make a happy time for painting, which will actually fill our hearts with happiness. So if you can have a very precise or always perfect bridge, it's perfectly fine, oughta walk over. But in case you cannot, do not worry. This is not the final painting that we are doing. We are just trying to achieve a small goal of actually finishing off for painting, which is beautifully done with some soothing colors. Let us outline the borders of the bridge. And then Medieval keeping thing, the wooden log that they're on the sides as well as highlight with our white cosh. So there are a lot of ways you can actually paint or particular subject. And he threw this sketchbook exercise, I think Major do of them I would love to cover. But again, the watercolors is a huge, huge subject. It has got no, and people can actually Voc throughout their lifetime only with watercolors. It is, it has such good robustness in itself. Therefore, even to think about that, we are actually aiming to get the best out of what we have is what is required rest. You can just keep on experimenting with your projects and try to understand how your brushes react, how the colours react, how your people react. All of this you have to explore on your own. I can only guide you through the process, but even exploring each and everything requires thought of patients and a lot of hard work. In terms of practice, I would tell, you know, it's time to add some more bushes on top of the ADL, which is still horizon line. So we will start by adding some bushes with the help of the BOD C, And now that you have on the ballot, and once you add the buoyancy and all, you need to go with some Wen Di Kay Brown. Now, you can either use Wen Di Kay Brown or any under dark color, like your beans gray or indigo or whatever is available with you. There is no hard and fast rule of only using a particular shade. Humans to even under the reflection of the bushes onto the water area. Exactly the way. Adding the bushes on the Dobhoff DO horizon. Now what happens is that below the horizon, then the reflection happens in war dog, the big mod, elongated compared to what you usually absolve in the sky ought deadline behavior that you want to or have depicted. Just keep bending some more area on the top of the horizon line, which is basically show your bushes towards the left. I would have an entire range of bushes, but I just worked on it. My colors between bonds, you know, hand, men, Nike brown or you can say beans, Green, whatever is available with you. And once this is done, we have to go head and Pinto reflection has, I have told earlier the reflections would be very simple. Do not worry, we will just take off large brush and start painting our reflections. Take your half an inch flag crush. It should be absolutely clear, as I always say, while you paint, just take off all the colors of your brush and then start having these kind of brush strokes onto your people. It is very simple, just DRY kind of a brush stroke and pull it down. That's all you need to do for this part and you want to do it. And for the indicted here, as the whole of the area is being covered with the bushes. And the reflection is of course, a bit more elongated than the bushes that you have on the top. I have a small trick by which you can actually show the bushes in albedo V, Or you can show the area above the horizon in a better way. I will put some kind of light onto your water. Ato how I usually do it is with my whitewash, but before we start doing it, we will just add some more highlights onto our walk over area. And once that DO work over Asia is done, then we will move ahead for those lights that I was already telling you. It is very simple in few of the areas. I am just adding a bit of white. That's all. You do not need to add this white here, B, when it's only one not due, areas with the highlights will look better. And that's it you need to add. Ok, I guess I am quite done with the vocal Aboriginal and I will just move towards my horizon line now. I will add like few dots on the top and start adding one elongated line below. Again, I have told that while there is a reflection on water, it looks elongated. And this is again an evening time for this guy that we are painting hits beautiful purple evening sky that we have. And these lights are shining tool. We will have those elongated long lines on our water area. They are not much toward three, add one places, again, three or four at another place. So it would continue to be like this. You have to make sure that once you are done with this part of the painting is complete. And there it is. No way it is width. Because if it is read, even add any of the places that people might report by the remove dirty. Now you start removing your theme pattern angle. Though, removal of the dip is very important. Because if you do not remove the div at the correct angle, it might rip-off.
7. Project 4 Growth: The colors for our painting as when surveillance, Centralia, yellow, orange paint, ego, bright yellow, green, violet, yellow wash and forest screen. Ie. This painting as growth does, this is going to help you paint like a mature data's. In case you have informing me closely, I've released a class and July about bigness guide to reflect in herself a bowl right series. It's closing to 11000 students now and hybrid highly recommend you guys to take the class before you take any of my other classes. Paid would help you to develop a lot of the concepts from a wide range of subjects and you can get better control over the sketchbook CDs painting though the sketch book series painting is again four bigness hand PT's made with four different concept of documenting your journey. As an artist. I will start by us in a big yellow and then I would, and some more Windsor orange indoor. While I go towards the top, I will be using French ultramarine. Now, the colors are pretty light and shade. And once I find with the blending, I would go ahead and add some more orange towards the bottom or towards the horizon area. The blending needs to be really smooth. And for that, I have been using my flat brush in case you are not having any of your plied brush like half an inch. Just go ahead and use the brush that is available with you. No need to think twice before using the brush or you do not need to buy any other supplies. Hidden case, you mix your yellow with your glue, you will get green. So be very sure that while you go towards the top, you need to use your orange. And that's one of the reason I have been using my orange. And this is any orange that is available with you. You do not need any particular Orange Group for the voice available on your palate. And now I'm adding some kind of a clouds onto my horizon area. It is very thin, thin lines that I am adding now. I have used for wet over dry technique for my skull lie. Why I have used a wet Andreas because I firmly believe that the wet or dry colors can become less lipo compared to if I do wet on wet. And I can easily paint my clouds onto it. I have mixed orbitals, ultramarine with my violet, and I'm adding these clouds with my size for silver black velvet brush. You can load any size of brush off your choice, but it needs to have a bit of a tin. The orders you will not be in a position to make these clouds. Why don't I do pinto these public clouds? I have to make sure that I do not actually mess it up. Why am saying mess it up? Because I do not want that both the clouds are near to each other. There should be some gap between the clouds. And what I usually do is I take Paul damn brush, band clean brush, and then just remove those extra colors from the sky and then start adding some more of my bobo color, dodo clouds. Now this is a mix of, of course, bubble-like or Germany. And as I've already told you, I'm starting from the right and I will not extend a lot towards that left. What I have also often that the Lord area of my horizon is becoming dry. So I am going ahead and just blending the background once more with my flat brush. It is just having water, Leonard, I do not have any colors and now I would start hiding my mountain. Not this is a very small mounted. Why I did actually add that Watteau because I wanted old, very, very soft edge for my mountain. In case you are not very confident of adding the salt deserts, no need to worry, lead that area dry and then start painting your mountain. It would only be a bit of hard-edged rest. Everything will look similar. Iphone start adding my bright yellow green after this, not in case you are not having the scholar. Do not worry, just go ahead and add some yellow in Dojo light green or rails. What you can do is just go ahead and take your sap green. Now sapling would be closer to the scholar. It might not be exactly the same color. And that is perfectly fine. We are not here to actually manage all the galleries. We are here to just learn this process of actually painting from top towards the bottom. So you will see this is a continuous painting that I am doing right down from the top and be working. While we go to the bottom, octo, her sketchbook, wildland, go towards the bottom. You know that I would be using only some freshwater. And with my flat brush, I will march. I will go ahead and add some more forest green. Now this forest green edges from semi layer, you can go ahead and use many other green data's available with you. Like who goes green? One might be Wen Di K Green, or else any other green dark is dark enough in case you do not Harvard down green just had someone in Big-O in Dojo Green and you will get a color that is similar to this one. It might not be an exact match, that's perfectly fine. You will see that I am making some straight street, small, small brush strokes now, since they'll be Photos already read, what would happen is that it would become a bit of a bloom and that's perfectly fine. We, anyways need kind of Blum. We will go ahead and just cover the sky area as we will be doing some more. Popup onto the ground. What have done is I have added about 5% of white and then I am adding these bladders on do my ground area. They would have actually had their presents, some lavender flowers. He had you all know that I have a love for lavender flowers and I always love to add these lavender flowers in any kind of a landscape. And this landscape specifically, I wanted to add some live endo flowers because that's the first thing that always comes to my mind. Were then now adding is I am having some more indigo into my purple and then doing this bladders. I always wonder though, do different colors, not this lavender field. What I'm making is absolutely lose in nature. Now, in case you do not want absolutely lose them in new fields. Of course, you can go for the daily, but this particular exercises not about the building, it's just too late you lose and paint a landscape which is easy, simple, and yet it actually signifies the growth that you can achieve through these simple paintings. Now, we will use the brush to add some more flowers and Doo-Wop ground area. These flowers need to be small as they are mostly either distance. I'm using also wore black velvet size for brush to do this exercise. Again, my recommendation is Studios any brush that is available with you, there is no hard and fast rule of using this particular brush to add the flowers. You have to go slow while we're adding these flowers so that you do not splattered a lot of them on any of the areas. Once that we have to add for the greens onto our ground, mix some indigo or some forest green, and then had these areas of green on doodle AD onto the border. You will need to make these small, small Tintin lines. And that would actually help you do shore the stem of the lavender flower fields and then you can mix and match the colors. If you see I'm not using the similar green at every place. Someday, I am actually mixing up the lighter values of green and then I am adding some more darker values of mean. Now, you can even use a Venn Dicey green for adding these darker values. Indiegogo, these lines, they are very easy as well as simple. Someday, I'm using the tip of my brush some bed I'm using my brush after 60 degree angle, so I'm mixing and matching the strokes off my brush for adding these foliage ADR. Or not much complicated, I would say. Just keep in mind the perspective. While you go towards the top, the lines will be smaller. While you walk towards the bottom, the lines will be larger. Now it's time to add the final details. And Ben me of adding the final details, though, only important partners to go slow. You always say to go slow is because read multi left with much of a painting right now. We are just going to add some more lines onto the background area for the 11 the field, and then going towards the top, the village, some shorted lines that so we're going to do in this painting. And then I will go ahead and remove my tissue as well as go some more. Splat goes onto my power violet, lavender field. I think that's it. We are perfectly good to go. When you finish off by painting the sun and bite, I would like to elaborate a bit more on the Project name brute for me, grow tons of vast meaning. It can be in terms of personal development, rising in your carrier. Corals for some people who are going through some stress, just to think positive on a daily basis and reform them. Life might look like growth. It's pretty much subjective to each one of us. For me, when all personal incident left mean grief to move forward and look beyond what had already happened was like a group because I know I can't change the past, but I can surely change the present and might look forward to the future, as well as GAR about something more meaningful. It is not simple to be frack. And through this painting, I just wanted to communicate to each one of you irrespective of any phase that you are in right now. Okay. Now, let's just finish it off and I will let my paper dry and then remove the date. Again. Removing the deep will always be at an angle. Because if it is not at an angle, you might report to people. So be very sure about removing your tape. We will just golf the DE plaza door earlier and then have a final look at the painting though. Find look would be really nice because once you have these clean edges, the Big ten books, even more better, you can always indeed the building outline, the next painting would be all about northern lights. So just be there and hold on.
8. Project 5 Gratitude: Only very few colors which we will be using for our painting when sir aren't scan, may moron scar mine, bright violet, cobalt blue, and CPM. Gratitude is so very important aspect of life. The quality of being thankful, the readiness to show appreciation, appreciation of each and every small thing that we have in life. It can be even having a good meal in a day. It can be going for a walk without a mass at the end of the day because status, their new normal that we have. So being tactful for small things, how appreciating each and every small happiness that we have, as well as return some kindness. A small act of kindness can be even a small thing, like just helping a blind person cross the road, or helping a bop have something good to eat. Just feeding the street dogs, anything or few choice that you wonder do. One act of kindness in our day can actually change a lot in us, as well as it is a huge thing towards changing the world. That's why, I mean this particular project as gratitude, Yes, we have already started adding the colors. Now let's get back to some painting. We have added the first state of fresh water. It is clean fresh water that I've applied on the paper. I have done crosswords and then have started adding. Either you can go for Windsor orange arrows, you can go for permanent yellow deep. So these are the different color names in different brands that you get. So permanent, yellow deep is of course, in magenta machine gold, whereas the Windsor orange will be with the Windsor and Newton or roads. You can also go for cadmium orange, that is also with Windsor and Newton. And Cadmium Orange is similar to them and surrounds that you can have. So first I am applying a light layer upto when sir, orange or permanent yellow deep whatever is available with you. In case you do not have this column, you do not need to worry. Just go ahead and add. Here are my 10W auto color, which is closer to this one. And then start adding some more carmine. So what I'm doing is I'm mixing some amount of Carmine with my when said orange and then adding it onto my Paypal. Initially I have been using my flat brush and then either switch onto my round brush, there would be a lot of switching between the brush and the flag Prussia. And now I'm mixing some of my karma with the vocal, or you can say though, with the bright violet that is available on the ballot. So we do keep mixing and matching these colors and then applying it on the Paypal. Do remember that we are going ahead and adding lots of violet and purple on the sky area because this is a multi-colored Sky and I have actually painted a lot of scars, but this multicolored Sky has not been much explored during my earlier clouds glasses. So I just thought to add it in this particular sketch book exercise because it is easy, simple yet it has lots of impact. While you paint. My people is still wet and I'm adding the Bobo Kahlo eye vein will understand that sometimes the people might try up, go ahead and stop just at that point and time. No need to add any further colors onto the sky. Once your people is completely dry. Then again, go for another layer of Watteau and then add the colors. Because that would give you the soft edge. If you keep painting it over here, it would give you a hard edge and you might not get the exact look and feel that you currently observed on my people everyday that you see me applying the colors, they are white light and they are not very deep because I'm not using a lot of colors. Whereas in dumps of saturated version, where does I'm going ahead and adding the saturated version on top of the colors, which I have already added. Data's though like a values compared to when I'm going ahead and adding the darker values. Now I add in some more fine touches to my sky ADL, This is just to wet my popu Kahlo quark. You can say the bright violet color or any other valid that is available on your palate. And then you can go ahead and even had Carmine in a few places as I'm doing right now. So Carmen survey Beautiful shade for painting multicolored skies. And I have used it for many of my paintings as well as you will find it really useful it down so you can diluted, you can mix it with some yellow or Windsor orange or cadmium orange as you want and you can get any shade of your choice. We have altered between the sheets of Carmine itself, mixing it up with more of yellow. The places where I feel that I do not need violet, I will just go ahead and pick up the colors while you observe that I am adding the colors you have also served that I do pick up the colors. Now this picking up becomes very easy or you can actually remove the colors from the paper pretty quickly and easily. If you have a 100% cotton paper, that's one of the reasons I have always suggested a 100% cotton paper. Many of you might have cellulose, Paypal or any other people from bamboo, et cetera. There's one problem that I have all these founders, the steepness is higher as well as. And you can't pick up the colors so easily. The way you can pick it up from a wall made Paypal finding, I think VR is done and I would ask you to now let your people dry again when your paper dries up, it would be one sheet lidar. What do shade lighter than what you have absorbed. So be very sure of that. And I have already started making my boundary. There is only one boundary that I'm trying to make for my foreground hand, then I will add some boards why I'm making this boundary, because I just want to be very sure where I want to place it. Always a pencil sketch helps in any kind of painting. I'm using CPR now to start painting my palm tree. Using my silver black velvet size for brush bark that you can go ahead and use Canny size brush status available with you. I am even using one of my daughter brushes starters, my Galinsky Sable as SCADA optimal brush, you can use those kind of pressures also, that gives a fine edge actually. And that's one of the reasons while I will be bringing my palm tree leaves, I would prefer using that particular brush. And this is just a loose leaves that I would be painting. There is not much of detailing that I would be doing like you have done earlier in one of the projects. So this would be more loose and simple. If you observe there will be only few strokes, urine, dead hand. More detailing would be done with a thin brush. And this thin brush actually gives nice edges. Most of the work that we did was for the Clouds because this particular painting of the sketchbook exercise is dependent on the clouds. Therefore, I took a lot of time while we did painter clouds, whereas the palm tree is just to support, and it is a supporting kind of a subject that we are adding for a foreground. This also gives me those Beach and some of yields that actually we might be missing in this current quarter dime as well as stay home kind of situation. You can also absorb that. On my palm tree, the center, very detailed. It's only had few places I'm detailing and few of the ideas. I'm just keeping it loose and some strokes that I'm adding, these are broader strokes compared to the tennis tropes that I'm having had a few places. Therefore, you have to do a mix and match off tenon and broader strokes for this particular boundary. While you keep painting this part, I want to tell you a bit more about gratitude. This is a small research which was done by Harvard. And it says that in positive psychology, research and gratitude is so strongly and consistently associated with greater happiness. Gratitude helps people feel more positive. Emotions, relish good experience, improved their health, deal with adverse conditions and their life, and build strong relationship. The people who actually express gratitude, they can feel way better, can multiple number of things that they want to pursue or are currently doing in their lives. So we pinned some birds now, and the birds will have to wait so long with it. It will have a body. This is very common and you must have observed in each kind of photograph or painting. And that's how we will go ahead and pain these now these other flight of birds. So they will be quite a few number of birds that we would be painting in the sky. There is one of the paintings earlier where we did only one single bird flying into the sky. But multiple births and they need to be small. Sum will be having wings or which are moving downwards and few of them will have wings which are moving upwards. That's the kind of way we need to go ahead and ping these birds. I think that's it. And there's nothing much we need to do. Do keep in mind to paint the body otherwise, without the body, the body not look absolutely like a bird and rest, go ahead and let the paper dry completely. All research, try to go ahead and do our follow on natural drying process because natural line always helps to have a good drying as well as it keeps the colors as such, there is no feeling of colors which happens if you are not using or dryer. Sometimes it happens that there is a fading of color if you are using drying and have a family look at the painting, we are done.
9. Project 6 Strength: I will be using the neutral tantrum Winsor Newton to complete the painting, but in case you do not have that available, Moorhead and use Payne's gray CPO, black, or any other color on your palate. So we will do a monochrome painting in the swan. And you know that most of my silly so that I've done till date has one or the other monochrome painting and we will be using neutral kahlo on neutral tend. To do this painting first, you need to mark your horizon line. And after your mark your horizon line, you need to just mark the area where there would be land. And then on top of the line that has to be a tree. I am just marking my line for the tree. It's not that I am going ahead and doing or double line flooded tree. It's just stole basic outline that I am doing that here I need to place my tree and rest everything I would be doing with the help of my brush strokes. We will start by taking a very, very light value of the neutral color that we have. It is called as neutral dent. It's random surround Newton. You can go for any other color of your choice. Either it can be indigo or Payne's gray or any other deep color like sepia. So those all things can also work. You do not need this particular color to do all complete this painting. So go ahead and start dialing the deeper values towards the top. And just always check the colors that you are adding. Because I do have quite some experience, so I am pretty or key while I apply my colors. And in case you are not very sure of how you do this, you can always go ahead and check out my other class about the bigness guy to reflect in ourself or Paul writes eighties, it has number 20 Polaroid though Project which is about monochrome painting. And then there is one more that you can attempt it as the mountains though there are two or three colors that we have used, but you can always order only one single color and also get that particular painting only in blue or in French or from marine, whatever or whichever color you are more comfortable with. Now, I will go ahead and use my round brush size four and start adding the clouds towards the top of this guy. Now this cloud is moving to words though, right from the left. So the clouds that you are painting on the left will be broader while it comes towards the right of the painting, it would become smaller in size and that, so I have tried to put it together throughout the whole of the sky area. The beam of the project is basically strength y and I have named it as strengthens because I know somewhere or the other that even using one single color, you can derive all the strength. That you need to complete a painting. So majorly, you do not need a lot to complete a painting where even the strand that is available within yourself is good enough to support you as well as your thoughts. And whenever you think you are alumina, you are lonely. So just look into yourself, introspect and try to find the strength within yourself. You must be observing that right now I think this one low clouds. And that's how we, you all proceed because during the initial part when you apply this model clouds, it might become more up loomed, whereas after 2-3 minutes have gone into the paper and your water is a bit less compared to what it was earlier on top of the paper. You will get this model clouds counselors used to tip off your brush to paint them. Now it's time to start adding the mountains once we are done with this guy area, because that's the next, but let us come. I drive for us, then only add the mountains because here we do not want soft mountains. We will be going for hard edges and just go ahead and make an outline offers further off mountain with the help of your brush. If you're not very confident, just go ahead and use your pencil first. Made this outline, and then go over it with the help of your brush. And that would actually help you to gain a lot of confidence. Because as a big nervy might feel lost, okay, why do we need to only stock with the branch and not be so happy with the outcome after obviously done. In that case, I will always recommend you to use your pencil. It is as much as you want so that you can get the correct outcome. You cannot keep filling the areas of the mountain that is left out. And then we need to make the reflection into the water. The water seems really cleared, but slowly we will add some more colors and toward the notch, very flat brush just dab off all the extra pins on the paper. And then you have to meet these lines for don't mountain reflection. Once I mean, these lines, I was not very happy. And some of those decisions which I do, they go just on the spot. If I do not, like something, I might go ahead and just to add some more important aspects in Duetto painting. So I will tell you how I will actually improve the spot. Now my umbrella stock having a very light value off by neutral law tend itself and it would start from the bottom. I'm go to words tip-top. You can wash your brush and whatever is left on your brush. You can also use Dart. I will leave that up to you to decide how you want to do it, and then I will end. Somewhat darker sheets towards the horizon line. I mean, once we are below the horizon line because that would actually show the reflection. The most important part of a painting is how simple you can do it. And that's always stayed in my mind when I want to attempt any kind of subjects. So even this idea of adding the reflection below the horizon line is very, very simple because you're going ahead and adding it on vec paper, which would automatically become bloom. And in case the colors are not coming down, just go ahead and add a bit more colors. And you will automatically see that you will get the kind of reflection that you wanted for the mountains. Always know that the deflections out a bit elongated compared to what you usually have on the top. That's, that's how the water behaves and that is important to keep in mind. Now, I will go ahead and add some ripples. The repos are going to be very, very simple, just some straight lines and not going to even DB he lit match because it's not that we this is our main subject, so I'm not going to lead the alert alarm. Very few here and there. And these are just straight lines that I'm going ahead and adding in case you haven't taken one of the projects during the beginning, which was all about the green and scenic bomb trees that we, that we did our, I hope that you can get back to that project and then come back to this project. Because there, I have explained these small, small lines that we add four deflections in a better way. Now's the time to paint the land area. The land area is going to be really simple. We are going ahead and adding those saturated version of neutral tin pan along with it. You have to keep in mind that this should be a flat wash. Flat washes, that you should have equal consistency of the colors and all the places. What you can usually do if you are a big notice, go ahead and mix some colors in one of your wells and then apply it on the paper. Now, this color you can of course keep as a saturated version because we need to also paint the trees along with it. And that's where we will need quite an amount of desaturated version. Which is one of the reasons I have been considering adding it as a pool of color and then it's time to add some more grasses. Now on to the grounds, they will be very simple, small, small lines that I am adding. Or you can say even smarter, more dots with the tip of my brush. Again, if you don't have a thin brush and go ahead and use the brush. Just go head and use any kind of size one or Zai Zhi doors I still brush that has a nice tip which can be your stand. And these small, small Tintin lines as you see. Although current painting. So the NIMA grocers strength. And you know that though this tree is. Still it is standing and that's most important even in the darkest of the time where rehab a storm or something like that, he should have this trend to bend and being more flexible during that point in time. And then when it's time, we should be in a position to make the best use of it and get back whatever we have lost or try to regain any kind of losses that we have. So Storm is one of the thing that comes in to each and every person's type and there is change which is only constant. And we all know about that. But yes, when it comes and hits us, it's difficult to actually face it. But with time, you will always get that strength and understand yourself better. It's easy to always get down and not feel okay. Why is it happening and what went wrong and all of it we can get into that analysis orders. What we can do is we can stand and understand that. Okay. Fine. Now's the time that we need to be quiet and there's nothing much we can do. But with time, I know things will change and when it changes, it will get better. That's, that's one of my one of my own personal experiences which I have seen. And I am just going ahead and adding some more loose leaves onto their trees. These are very few lose this. And you have seen how I have added the history. It is obey simple way. I'm adding it going ahead and using the tip of my brush to paint those ten branches. And using the body of our brush to basically paint your tree trunk. And that's how you should be also using mix-and-match of different strokes to pink. Any of your paintings, some more, find new detailing and then we are close to done. There is not much that we are left with now. It's just a few more road leaves here and there of your mood ranges you had under a bit more detail. We're not going to complicate the subject as such because I have told you that's one of the most important aspect of anything. They never ever tried to complicate the subject. The more you try to complicate the subject, the more difficult it will be for you only or else it would take lot more longer time. As our main objective of the painting is to not only understand the strength that were derived from a single color, but also do get into a habit of sketching on painting on a regular basis. And the sketchbook gig size actually can help you to get into a regular painting practice. There is one more class, of course, which I have mentioned earlier. That is the wall right painting hand that Balrog painting is, again been off the basic classes which you get their kids absolutely beginner friendly. And by the hand of the projects, you would be able to learn so much which you can use in your future. Big things. All of these paintings which we, you are doing and the current sketchbook exercise also will help you in your own projects. That's actually the major Internet of giving any kind of glosses or anytime of exercises, which I always include late your people. Try after this and then not take off the tape at an idle as whole base. I mentioned in each of my paintings, V, rho, close to done. There's nothing much that you can do further. You can either date, as well as your signature on the painting, if you wish to. That would help you to keep a track of how you are progressing in your sketch book journey.
10. Project 7 Confidence: We will be using these following colors to complete this painting. French ultramarine Rossi, annoying, yellow ochre, indigo, burnt sienna, whitewash uncertainly and blue. So guys, today's painting is going to be everything about the summer beach scenario. Now you can always think about those days where we could roam around freely and just enjoy the summer's work this year has been really difficult. And so many of us could not go out enjoy the summer, and we were all in home logged down. But we got we have to appreciate the fact that whatever we have in terms of feedback be painting or either it be watching on TV or whether it be enjoying some good amount of quality time with our family. We should be in a position to do that and we should be happy for those small things I have named this project does confidence because this project is going to be simple and it would actually help you to build up a lot of confidence and domes of watercolors. I'm going ahead and applying a Blaine now. Or you can say, first layer of water, hand suspect on bread. You can also go for radon dry. That's not at all a problem. The first layer was read to the little blue and then I'm going ahead and adding some of those are transmitting. Our drumming is one of the warm colors which I have been really using many of my paintings because that actually helps to give away beautiful outcome. When you are building any skies or when you are being waters, et cetera. Go ahead and use your science. It's over black velvet brushing gets you do not have this brush. Whatever it says, Gosh, you have just had these kind of clouds. And it is very simple stroke. You have already done it in other projects. And this is again a repetition of the same kind of stroll said we are dialing. Initially, I added the friend George Romney, the words of the sky hand when I'm going to watch the bottom my mapping, the civilian blue, white come towards the bottom atrium or the clouds will become smaller. And I'm the, I will use my size for silver black velvet brush to actually add these clouds. And once it's done, we will go ahead and clean up a bit of ideas that are in-between the clouds because we do not want the clouds to mess up with each other. We want them to be individually scene. And you can go ahead and use a damp brush and just remove the extra beans from variable. It is necessity. The way you have also did on my painting. Confidence as a very important aspect of anybody's life. I have seen people who are really confident and even can sail to any kind of difficult time. But the people who are less confident about their work or any other aspect of their life, it becomes difficult for them. So always have that confidence in yourself that you can stand through anything and everything in life. And seriously, that would be all mean. Or a major changing point in your life. Even a few maker small dish, be confident that it would be good. And there is no way it can go back. And if that thought processes there in your mind, actually nothing can go back. Now just Topic one detail and then let your people dry completely. They are not going to move or do any part of the painting. You will always observe that when the people dries off datas for like a value which we get. So be very sure whenever you are applying colors, it has to be a bit darker. In case you are going right on with in case you are going wet, on dry, then it will be almost similar to the shape that you observe. I will start applying the city limb blue color on the areas which are for my ocean. But you do not need to worry in case you do not have city. Liam blue, you can go for any other blew off your choice that is lighter in value. Or else you can even use the chromatin with how very, very light value that a stag muting your paints with lot of water and then using it. So you can always go ahead and do that. Now I will just take some more yellow ochre and start applying from the bottom of the painting. Why? I would say yellow ochre is better suited because yellow ochre actually doesn't react much with the blue and he doesn't give it yellow kind of. I think. Therefore, I always love to use yellow ochre. But in case you do not have this, you can also go for raw sienna and apply it. I am using even a bit off Rossi, you know, for adding colors to Woodstock beach CALEA. When we go towards the top or just below the horizon line, I am making a very, very thin line and it is still on the red area of the ocean. And therefore, you will see very, very soft catch. Mix some indigo with your entrepreneurial. And we will start painting these small, small lines which are one domain. From the left, I will move towards the right. Now this is just to show the ripple water. You do not need to worry much value you're adding it. We are going to lose. And that is nothing much that we actually add just four to five lines that I'm going to add. And then if you see the lines margin, just wait for a bit and then start adding the darker values. You will see that there will be some of the areas which will actually show these darker lines under a per water in a better way. Once this is done, really TO start painting the short line. Now again, this is not going to be really tough because the shore line will be our one not do darker sheets in brown. What are usually the worse I mix some of my Artran marine. In my yellow ochre or burnt sienna, whichever you have, and then start adding it towards my shoreline. So just go ahead and add these lines first and then we will discuss about the shoreline bore in detail. Let's make some bonds CNR with my indigo. And I'm using my size for silver black velvet brush. You can go for any other brush off your choice. No need to use this brush and it has a nice step. So I'm just going ahead and adding these darker lines. And on few of the areas, it is more doubt and few of the areas I'm leaving just like that. So do remember, that's how we will be adding all the colors because few of the ideas will be some Shadow of the waves that will come, whereas the other areas will not have the shadows. I will go ahead and handle one more wave shadow towards just the left of the people and then blended with my blending brush. Or it's what you can do is you can just take off all the colors from your branch. There is a very, very light value of this Brown that we have added. And that will actually be sufficient to show this area. I am again going ahead and adding a bit of blue towards the top. And it is more of civilian blue compared to the ultramarine That we have added earlier. Keep adding, got some more color. So towards the shoreline has you see on the people and then keep lending it. It should be very, very easy, excise for you all and just go with the flow. You do not need to worry how you have to add the colors with the indigo at some brown. And then just the way I am adding some more deeper tones into the shorelines. At these deeper tones, div will automatically blend because the surface on which we are painting is still wet. And then you will take or dry blush. Now how you take a dry brush, you have to just make this brush absolutely dry. Either you can take off the excess color or what is the best way to do is the colors on your brush dab off the extra things that you have on the brush, on a tissue and then start adding these dry brush technique on your people. And this is only for those shoreline area we will be adding. We're not going to add it anywhere else. I am mixing my Brown as well as my Indigo for this spot. Like you all paper dry after this first layer, people go ahead and add one more layer of the sun dry brush technique. Because once it is try, I feel that the colors are a bit dark and I want to go for one more year. But if you are satisfied with your first year, no need to go for another layer. Once you are done with this technique, actually this can be used in many other species, like when you are drawing some kind of third-world or some kind of process, as well as it can be used in mountain space. So this dry brush technique has got a lot of views as well as Hi, I'm using my flat brush to do this, but you can even use your round brush or some more brush to do this before you drive it around. Brash, hold more brushed, do check it out on or Dr. B. So people, which is not the final painting that you are doing because it's always good to have a hang of how doping thing will turn out in case you are adding two colors directly with the help of a brush. I think I will just do some final details that is on my waves. And then I will add some small, small boards on the sky. This bird will be with the help of my white wash. Not in case you do not have white GWAS. You can go for any other white opaque watercolor like titanium white in wind salon Newton. Or you can go for any other boasted scholars were there seems to be available with you. Many people even have a garlic Kahlo. I will not. Dell You do use it in case you do not have anything else, and then only use it. And this is very simple. Some of the birds will flap their wings downwards, and some of the birds will flap their wings upwards. And there will be a small body of the bird. Has we have, while this discussed earlier, while painting any kind of a bird, somebody smaller and some will be larger because it's nature. Again, you cannot decide how the shape and size of the birds will be in nature. They occur naturally, therefore, it is never symmetrical. We have to always keep that in mind. Finally, some more details on the beach area and it would be just scanning s'mores, bladders, sluggers always a good way to show the extra amount of rocks or anything that exist on the surface. I will govern my sky first Witt painting, graft, tissue. I have just taken up separately laughter Shoebridge. I was using two take off the extra colors and then Hi, I'm adding some white wash. And finally it is done. Let your paper to dry off completely and then take off the deep. I hope this was quite a relaxing excise for you because I really felt relaxing as well as I felt confident about this one because there was nothing much that we did, but still we got a very nice, beautiful beach outcome.
11. Project 8 Progress: This is a Northern Lights painting and we will be using very minimal colors. Compost, blue, bright violet, indigo, or paint screen and white wash or any other Y2 pick watercolor. I have named this project as a project progress. While we read to people to our dive would like to tell you a bit more compartmented project, why the name is project progress. And what we would be doing. This is going to be simple night sky that we will be painting. You have to do across swatch. And then we will be going for a limited palette that excites and adding the colours on the paper. The progress name is because we are halfway through our sketch, forgets says, yes guys, almost halfway through. It would be around Duan De Bing. Things are so that we will be doing Hamming depending on if we do not have chickens, Google Ben, you're far other paintings. He might go a bit more far off because I have about 24 sheets where I have painted one and I cannot record that. Barred the rest, all of them and planning to record. But you never know, see all your paintings might not turn out equally good and we might end up only doing a few of them. Then let's go to foster understanding how we are going to apply the colors. I am taking compost blue, knock-on post. Blue is a color from measure low mission goal. You do not need to own the scholar. If you have something close to turquoise, you can add some amount of white, opaque white and red and you would be able to get a color, something closer to this. And then on top you will have a bright violet color, which I am mapping orange. You can go for any other violet color that is available with you. Along with that, I am just mixing and matching some amount drove my indigo or roads. You can even use bean screen. So you, it's up to you what you want to use, either be indigo or either it beeping screen, some more or fewer indigo color towards the right-hand side hand or when you see while I apply my colors, it is from my left and I go towards third right. That's all I have been applying my colors and hitters with my round brush that I've applied for law got correct blending. I would say you can also go for flat brush off your choice mixer some amount of integral with your compost blue and start applying towards the bottom of the area. And then you have to take it to the entire bottom, AGI and Lee and even goto for wash. It would be a very, very light wash that I'm applying because at the end I would be covering the whole area with the Trees, which is towards the bottom, rest of the area you can keep it as such. Many of you might have observed that this is actually our night sky and beer painting northern lights and Northern Lights as kind of painting which you get everywhere. But this particular combination of colors I have not seen much. And that's one of the reason I wanted to bring it as a sketch. Forget size for u1. It's time to add some of the clouds in the sky. And how are we going to add these clouds is going to be very simple. You just go ahead and mix some of your indigo with your poeple. And then you have to apply the clouds over the sky area. But it would be towards the bottom. And you will see how I am actually doing it for stem, trying to just make a few of the clouds urine there. And then I will just go ahead and add a few more just below it. And that's how I would be progressing from the top. Going towards the bottom. Keep adding some clouds towards the bottom area and then extended towards the right. So you would have absorbed a movement that I usually do. I start from the left and then I move on to the right. Now, there will be another scene where you will see that these clouds are merging into each other because we had lot of bordeaux in our brush and people was pretty wet in case something like this happens. You can first go ahead and wait for a while and then on the other clouds. Or else I will show you a quick method. How do actually not have these merging of the clouds and have discrete number of clouds. We will be actually a understanding of video important aspect which is about using or damp brush. Now, damp clean brush can actually do magic in your painting. You can go for a flat brush and you see how high I am actually cleaning few of the Hs. And this cleaning actually helps to show these individual clouds. You can also see that I will actually take off some of my paints from this Northern Lights compost glue part and I will just be using mining dam, clean brush, take-off that paint, wash my brush, Babbitt offline or people. And then again, repeat the same process. This process is very important damping case. You can get this. Well, I think you would be in a position to use it in many of your future other paintings? I am keeping on no, blending my colors, but do not do it if your papers tribe because we have to make sure that our papers not drive envy are doing the blending because it is a soft blending that we are doing. And we do not want to calve hiney hard edges in this case. And I would always recommend you to relieve it at this point in time because you see that we have worked on those guy only for five to six minutes on that's the maximum mu should be also working for the sky. And the stars. Assault for the stars if you do not want to have takers or broader stars and just take off. And some of the extra beans from your brush and it should not be lot watery, it should be bit more saturated and you buy that, you can get these small stars towards the top. And that's majorly the area where I would be actually adding all my stars and some of my stars I will be then I think towards the bottom left side. I think that's enough. One or two big stars I will directly add with my brush. That's it. And then people go ahead and add the trees. The trees will be or mix-and-match binds that we will paint as. It would be some more dry trees because it is usually seen during the winter season. And that's one of the reasons he though, creeping into mountains when we are doing northern lights or rules be paid some pine trees. Because off though winter season where the binds occurs the most. Houses we have already given a lot of paintings where we have done binds. There is an exclusive glass about lightened the Pines. You can go ahead and check that out. If you are not though, very much comfortable with the fines. But what I would say is it's a small line that you need to draw hand. Then there would be exact motions on the left as well as on the right. While you are towards the top, the trees will have lesser leaves. And while you come towards the bottom, they will become broader in a wait time. And these are the loose strokes that I'm applying. If you see, I'm not trying to define each and every line. And that's what you need to also know because we are not going to define each unit v prime. It would be more about the broader look and the completeness of the painting that would come once we have these fine can place. Now, I will go ahead and start adding some more binds while you see that all my signs will not be regular and they will, some will be small, sum will be large, tan, rack the web trying to just to find the areas about how I would go ahead and add my colors for the pines. Not below this, you can just add flat wash off your indigo HOT debates gray color, which ever you have been using. And in few of the ideas, just as I'm moving, you will observe that I am heading smaller, smaller looking pines and making it more Flatow bark. They are more well and easily defined like individual ones. There will be a few which I would be even defining well, but not all of them I would be defining. Ok. It's time to now cover other areas towards the right. While you make the progress and binds, you will observe that if we tried to make some progress, it's not same and you will not be always having perfect attempt chord. It would not please your heart. But it's important to just carry on so many of you sometimes come and tell me that, oh, I tried this painting four times, but it not dawned out exactly the way I wanted it to. I just have one single advice for that. Do not ever beat yourself up. We will only improve over time. And that's the most important thing you have to accept the way of painting. Turns out, it can not be always the best that you get. Finally, the seesaw largest tree that I'm painting, and it is more towards the foreground. While you add though, lose leaves, you have to keep in mind that I am not going to do it everywhere. Only in few of the places. We will be going ahead and adding these loose leaves. Just tried to add it from the top, going to the bottom. The bottom leaves will be a bit more tickle compared to the drop. But still though, whole of the tree is scantily having these leaves because it is the winter season and that's one of the reasons I did not want to actually occupy the whole of the tree with the leaves. While you keep painting these branches with the help of the tip of your, SHE used a tip off your brush for most of the areas while you are adding the loose leaves, you try to use the whole of your brush because they are loosen. It would be more from not defined kind of a structure. And that's what we will keep on painting. And then I want to just focus a bit more about progress. So what kind of progresses important to we always think that progress in terms of money or progress in terms of being happiness or progress in terms of being more successful as important. For me, progress means even making a mistake and learning from them that particular mistake is a progress. If you are actually facing a very difficult time and still you can manage everything dot so progress. There will not be all happy times in your life, as well as there will not be all sat times in your life. So do understand that it could be a mix of happy, undesired times time managing both of this will be our progress in your life. What we become tomorrow is actually going to all these conditions and understanding how we have managed to earlier scenarios better. Finally, I think that we'll move to the response of the painting and discuss a bit more about this painting. And then add a few border dry branches and dry trees, as well as added towards the right and towards the left. It's a very, very simple process. While you are towards the bottom, the trees will have actually tickle trunk, whereas when you go towards the top, there would be more of thinner branches on your trees data you have to add trees and use the tip of your brush. As I always say, if you do not have this particular SCADA optimal brush, and I would ask you to go for any other kind of brush like size one or size to brush whatever is available with you. And once you have these branches, then you have to go on the left and add one more loose tree kind of a structure. I'm just adding it as final details and then you let this whole of people dry off. Because if you actually take off the tape when your paper is not cry, you might rip off the tape. And we have seen that happening when we were doing our Polaroid series in one or two paintings actually read dead, ended up ripping off some parts of our painting. This time we have to be more and more careful. Remove the div at an angle and then have a final look at your painting. Lastly, I would just like to tell you that celebrate life and actually appreciate all the watching these you get.
12. Project 9 Love: Let's have a look at the color palette that we will be using for this painting. Semi-log yellow, permanent yellow, deep red, pilot, cobalt blue, prank world. Why wash or opaque white quarter column. The name of the painting is love because this is one of my favorite paintings from the series. Many of you might have seen me using these colors pretty often in many of the other glasses which I have released till date, like the magical sunsets glass or similar ballot AS being used. Let's start the painting by marking the horizon line. Might now, you all know a lot about the horizon line. It is usually used to mark the line. And this guy areas separately, or might be c and this guy area. We are going to draw the sky larger than to see EDL and above the horizon line, you have to give more space. About 60% of the squares sketchbook area, always use the lighter value first. So going ahead with Saturnalia yellow, trying to make a small sum and then merging that with the color permanent yellow deep as I am using the Magellan Mission Gold colors. Right now, you might be on solving. I'm slowly extending on the right and on the left with the permanent yellow deep and covering up quickly less than 1 third of the space of the sky, while you are at the bottom, had some more red violet as you see along the horizon line I am adding. And then I'm going towards the extreme left-hand two words, even the extreme right. But it is a very, very dilute version of the red violet, which I'm adding as my Magellan Mission Goldwater colors are really saturated and you should exactly know that we are not going to pick up a lot of colors on our brushes oral. So it would become really vibrant in case you want a very vibrant sky. Always go ahead and use it. But when I'm doing my first layer, I always prefer going for a lighter value and then going ahead and adding darker values to it. On the top, I will go ahead and add some of my cobalt blue. If you do not have cobalt blue, you can go for any other blue of your choice, like surrealism, blue, French ultramarine, or any other blue, black, Prussian blue, whatever is available with you. There is no hard and fast rule about using this particular blue and then add some Bordeaux, but they have bought your flat brush blended with this guy alea. Lending is an important aspect of him. Watercolor painting hand, the better you can plan, the better would be the results. But if you see right now, my work looks a bit patchy as well. Acids are not up to the mark. So what do we do? We will go ahead and apply one more layer. Now if I try to make some match my yellow with my blue, you will get a green. And that's one of the reasons I always leave quite some space between the blue and the yellow. There are times where we need to might fix these areas. I haven't even show you how I fix these ideas. But let's first go ahead and add some more red violet on our paper. And then we will add some more blue two-word stepped up of the sky. Love might be extending your heart towards other human beings. But for me, whenever I think about love, which starts with self love, you have to love yourself to understand how much you can spread love for your near and dear ones. And the fourth step is loving yourself. We will expand upon this topic a bit more in detail later, but let's just first concentrate on how to actually add the colors. I am going ahead and forced to having the Windsor and Newton orange or permanent yellow deep, whichever you have available with you around the yellow bought. And then I will go ahead and add the red violet towards the dark handsome book. I'm a margin it well so that I do not get any hydrogens. And while I continue doing it and come towards my horizon line, it would be more of yellow. Every time whenever you manage your colors, do actually keep in mind that you need to take off the extra colors from your brushes by Washington as well as damping adore fauna tissue. Now, some motived violence towards the bottom of the big thing. I hope you like it this way because according to me, while you come towards the bottom, are the opposite of red, violet or a bit of orange makes a lot of difference in the sky. And then we will start painting the side off the areas which were hard towards the sky. Why I blended along with red valid because then there is a symmetry between what I'm applying towards my horizon and what color it is appearing to words though, right AS philos towards the left corner. As discussed earlier, you might have always known that whatever be the reflection of the sky falls on the water. The water doesn't have any colored offered song. Or else what happens is there is an underlying algae or some other kind of corals that are there below the ocean, and that's what gets reflected. Now, these kind of things you need to keep in mind while you paint. But first, let's go ahead and just made some rough outline or far waves. Wherever you are making a mistake, go head and use your AD. So do rectify it. Data three waves. Again, it is the rule of perspective. It would be brought out towards the left. And while I go towards the right, it would become more narrower along with it that just keep adding the colors mix-and-match whom some yellow as the loss of your permanent yellow deep and then with the red violet, you just keep on painting it. Then they'd Violet is towards the top or near the horizon. It is exactly the way your sky appears. And while you come towards the bottom, more of yellow I am applying. Let us understand a bit more about self love. You keep adding some more or fewer permanent yellow deep. Along the ocean area. And what does self-love mean to you? For me, it means that our own well-being and happiness, his anti-drug Brad or d, because we have to take care of a means and we should not be sacrificing everything to actually impressed or please somebody else. Self-love is not about settling for something law. You should always look forward to something that will dissolve and you should be settling for that. Now, I would say once you blend the colors for your water radio, it's important too. Just get a soft does even for those land area that you have all the behavior that you have. What I did was I just took some clean water and just apply that. And now I'm going ahead and applying some more purple or bright violet or any other violent that you have with yourself. This is a combination of violet as well as the blue that are applied, which is majorly cobalt blue. In case you are not using cobalt blue, you can go for any other blue of your choice. As I've already told you, there is no hard and fast rule about using any particular column. As we go down, we will make it more darker towards bottom and make it lighter as we go towards the top. In terms of applying the colors but not very light, it would be kind of similar, shared something in between the purple and the blue that we have applied because we need to keep the cemetery. And I would say that applying the same colors that you have, this guy will give four great effect while you see me painting the water. It is basically using my flat brush because flank brushes better in this case. If you do not have a flat brush, no problem. Go head with your round brush that is available with you. Why do I painted by waves? You will see that I am going to Navy slow. Now going slow is very, very important because there is no way you can get back when you are into watercolors. And that one thing that I have told repeatedly and quite enough, I've stressed about it in all my other classes as well as throughout any class that I gave or any workshop that I give. That once you come to the detailing part of your painting, it becomes very, very important to go slow and take the steps slowly. We are not in a hearty and patients is always to D in a watercolor painting. The better you have patients, the better would be your outcome. And I will keep on adding some stones and rocks that are. Over the beach pad, you see those small, small dots rejoined by applying the first layer of the waves. Now I will go ahead and add some more layer to my waves. Now why am I adding these lives? Because you will see that the waves comes and different, different times and they are like one after another layer that you keep on seeing. One after another. They keep on coming, I would say whenever you are by any beat side, and that's what we want to detect even through this painting. As we go towards the top, you will see the distance between the waves and the corresponding New Wave that is approaching of beach becomes more smaller. Ham, while we go from the left towards the right, the, the work of perspective will actually make it look way more smaller than audio. And that's what you will have to keeping things I'm doing in this project. I will be using more tip of my brush to add any further layers as you will observe, because that's what it is now more importantly, still blended with the background a bit within UDL clean brush, and then Huggins started applying some more layers. Now these layers will be way more tenor and they are at a distance which will make them smaller in size compared to the ones which are closer to us. They're simple, short and small lines, as well as a few dots which I'm adding. In view of the places, I will just make it a bit more broader To give a look of a wave. Just I think you can just go ahead and keep it. As such. There's not much that we would be adding except a few reports of width are Violet and omics off the blue color, which It's called the prepared an appellate. Now this is very important to keep these scholars ready with you. And it is always a good idea to have colors on your ballot because that would actually give you way better time to walk on the people. If you have a wet vapour and then you keep taking out colors on your ballot and then hiding it. You actually lose all the lord on your dime and diamond citizens of any watercolor painting. Now, we will go ahead and add some goulash. Why I'm using a whitewash because I wonder some reflection of the setting sun into my water area. It is a very, very simple process. Use the debug your brush and had two or three shorter lines. If you feel that your son is not exact, and go over this non-avian and some quash. That's the only thing which you need to do. And then why not do? Drops off white here at it. That's it. We are almost done and we are not going to detail or Lord, any further. Because if you keep working on a bending, what happens is that that we tend to overwork them. And now's the time to add some cute and small little pretty birds. It would be very, very simple. Some would be flying on the left, some would be flying on the right. Hank, they would be in the pet on the Sun. That's the only thing which you need to keep in mind is you can go ahead and add these birds as you see. Watching the flight of birds fly in the sky. As well as being think them actually makes me feel so great from inside. I cannot stop myself at the few places where I keep on adding the birds. But we have to make sure that data, like we just do not feel out wall painting with the birds. And there should be a balance that we strike along with it. Meglio people dry now and then just to be loved the deep, while they loved the deep, it has to be at an angle and then have a final look at your painting. I hope you did enjoy painting this particular beach show along with me because one modern leaders as one of my favorite combination of colors for being think of beach park. I did the second time after life last year. And Jose, I have luckily absorbed a lot of difference in terms of my color combination, my brush strokes, and a lot more that I have padded in terms of blending, coloring, etc. So over time, I know that each one of us is going to improve. So don't beat yourself up right now. It's not required. You would be able to make it once or you have her daily practice routine.
13. Project 10 Freedom: Then a majorly three colors which I will be using. One would be cobalt blue secondaries bond, CNR and tada spins query. Okay guys, so this is going to be a very simple and easy painting for today that we will be doing. It is majorly painting the cotton candy clouds. The cotton candy clouds is usually the subject. We will just have one small hero plane in between that. And it would be an absolute pains grade that we would be painting. The name of the project is freedom because I just feel that the flight in which we can sit and we can see the entire sky and enjoy the beauty from the top. That kind of freedom we do not get anywhere else. Or the feeling of being there without any fear is what meets this project has really special to me. So I have applied than human goto of wash of water with the help of my flat brush three by four and she can use any other flat brush that is available with you. And then I'm going ahead and adding one very, very diluted version of cobalt blue if you see. And I'm using my size_t, that is around brush, silver black velvet. And once I have added on the broader area, I'm going ahead and using O saturated make soft My cobalt blue itself. And then having it on few of the ideas, not this is a very Mangum stroke that I'm adding. These are basically cotton candy clouds. And if you even also when photographs, they are usually suspended like cotton balls and Pluto's sky, or just like cotton and the sky. That's what we are planning to do. But whenever you are going ahead and adding the blue, always keep in mind that we do not go with the most saturated version forced. We will go with lesser saturated version that is more diluted version. And then once we are more confident, we will go ahead and hide the saturated version in few Wapta spaces. We're not going to add it everywhere. This is the first layer that we are doing. And once we are done with the first-year, we will go ahead and let this painting dry. And then again go with arsenic. And they will be dual layers that we would be applying. In this case, booleans is really important. In case of the wet over a technique which we will be doing. We are have even done wet over dry technique. But for this particular painting, I would prefer a wet on wet. That would give me all soft edges. And which is the most important aspect that I'm looking forward to, to attain in this particular sketch book, excise tomato, while I notice fainting, is that you'll have to make sure that you only add the clouds. Jovial Paypal is sweat. If you keep on adding the clouds, even after your paper dries up, you will have hot. It's just that you should avoid completely. Now go ahead and add some more water on top of your people. Do make sure that your people is completely dry before you act this layer of water or Rails, the Kahlo from below will actually show up, can then next wash that you are doing right? Now. What you can do for these cotton candy clouds, which are laden with some amount of water. And it can actually produce Raina's just mix some amount of cobalt blue with your buoyancy and all that you have and then had the scholar. But while I was doing it, I was not very satisfied with the color that I was adding and therefore, I just took some amount of Payne's gray on my brush, started adding it in a few places. This is a very, very light version of Payne's gray that I'm adding. And I will even extended in the bottom right-hand corner first. Then I will put it towards the top of the paper. Why do you keep adding the beans? Great. You have to make sure that you're not covering the entire wide area which we have left. We have to use about 60% or 70% of that white area while we covered it with the Payne's gray. And the Payne's gray has to be very diluted version or a very, very light version. Because if the edges are darker version that you add a lot of difficulty to come back in watercolors. And I have been stressing on this blind for quite long and all my classes that it is really, really difficult to come back in the later stage of watercolors. Freedom can be actually described in many ways. So I would like to throw some light about freedom while looky padding the pain screen on top of your paper into the whitespaces. So freedom can be like you can speak freely in front of anyone. And that would be more of freedom of speech. You can say whatever you think. You can think freely. Corals, you can choose a carrier which you love. So it is like choosing freely anything off your choice. It is not having any kind of boundary, or it is going ahead of the boundaries that prevail. And that's one of the aspect which is very, very important to any individual. You should not restrict your taught, at least to start with. That is the most important aspect. It usually always be open to accepting as well as and giving or what you think. Because if you cannot see what you'll take, it will be very, very difficult for you to express yourself in life, right? Okay, so now we are kind of time en vivo. Go ahead and start adding the pencil sketch for the airplane. Now, this is the airplane that we would like to pink. It is very simple and small airplane. You do not need to worry, just make small line and around it. You have to just extend on both the sides of bit. And then you have to make the tail of the flight going to the right as well as to the left. I am not very confident about painting care phase. So do not think that if you are trying any new subject, it would be absolutely perfect. We're not here to attain perfection. And to be frank, this is one of my first two planes that I am painting for this exercise altogether. And therefore you so as much as a razor you want, draw, then again arrays, then again true. But do make sure that you are not using a very dark pencil. Because if you're using a very dark pencil, then though graphite marks will remain and we do not want a graphite mouths to be shown anywhere. It's time to add the wings on the left as well as on the right. We are not going to go for any kind of perfection. If you can have a perfect symmetry and the correct lines, that absolutely good. If you cannot even think that that's also perfectly fine because that's not the intent. And this is just to paint a cotton candy cloud. And in addition to it as the airplane, which will show the freedom that we have, or which will actually emphasize a bit more freedom, but which we are denoting through this particular sketch book, excise. Okay, I guess the odd or close to being done. And then people go ahead and pick up some color on our size for silver black velvet brush, you can also use any other Tim brush off your choice. Even also got black velvet brush size four has a nice tip and I would go ahead and use that to add any of the four the sharp edges on this particular flight that I am painting. So start from the dark Panther then extended towards the bottom. We are going a bit slow. Slow is very important right now because this is just a finer detail that you arriving. And we are not going to have anything further on top of this. While you paint any small objects, there is a small trick. What you can do is we always go head and Pinto borders first and then just fill up the in-between areas. What it will do is it would give you more freedom in terms of your painting. And there would be only less to answers to spoil any kind of painting. Do not worry if you have more graphite maps showing up because you can always use your ISO to just take off those extra graphite monks extend on the left wing of the flight as well as extend on the right wing of the flight. Once you are done with this, I would ask you to lead this people completely dry off. Once your people completely dries off, then you have to take out all these extra graphite monks. And finally, just have a look at your painting. I hope well, you ended like this project because it is simple, easy, and you can practically attended anytime during the day. See sketchbooks are four paintings which are easy, As well as stuff, anything that you want to paint under the Sun. It's not for any particular painting. It can be a failed attempts to. So whatever comes to your mind, you can practice on your sketch book. And there will be no one who will judge you based on the sketchbook exercises that you do. That's the best part of actually keeping a sketchbook. And I have been repeatedly saying it in my other sections to who meet you in the next one where we will be doing our summer afternoon.
14. Project 11 Motivation: Let's discuss the colors. Step will be the minimum colors that we will be using fathers painting. Go back blue, permanent yellow, deep van Sienna. When I keep brown, whitewash are some opaque white water column I have named this project does motivation and motivation is one of the most important aspect of when you think about doing anything in your life, whether it be you are motivated to get up in the morning, you are motivated to work out. You are motivated to go to offer soil. You are motivated to do any small event or any small actions in your life. That's very, very important. Before we start off and get it into motivation, I would like to tell you about what we would be painting. We would be doing actually go dry summer afternoon and it would be drawing or small house along with it, there will be one horizon line. Horizon line is close to about 50, 50%, or you can say about 55% is the sky and the lower area is smaller. As I always say that you cannot have absolute 50-50 ratio. So try to make it more on the sky behavior or tried to make it more on the bottom area. Anywhere where you feel more comfortable. This is going to be pretty simple and easy painting, though. It might look long, but if you can hold on with me, you will be able to see the beauty that you can't paint. Let's start by reading our paper and we would be doing the sky area first. For this kind of idea, I have taken the cobalt blue theater, very minimum colors that I would be using. So do not worry, don't think much about the colors. Just go head and had a very light wash of cobalt blue on only a few ideas with the help of few size_a, silver black welfare brush in case you do not have this particular brush, go with any other size it brush that is available with you. And then now, while you go for the second mirrored or Renu, add some more saturated version of this column. You have to go head and had one she'd darker than this. Always try your colors on your paper before you apply it on the final painting. Keep a rough people by your side. That is always pretty easy. Though. Check the colors and some Monro cobalt blue colors for your sky area. And once you are done with this guy Hadean, then we will go ahead and apply some colors for our boredom. Adl, where there will be fields. Now when we are doing the fields, we will go with the lightest value for status. Either you can go with Ben sooner orange, or permanent yellow deep. For me, I have taken permanent yellow deep because I'm using Magellan machine gold colors. Many of you have been asking me that why or what kind of colors you should be using, what kind of paper you should be using. For me, the most important aspect of a watercolor painting is only the papal, which would be 300 GSM. Or a bit more, if you are using any handmade paper, try to go for higher GSM richness, around 400 or 440. And if you're using a more and more paper than 300 years and Ms. perfectly fine. We will start with the lightest value, as I have told, then we will go with burnt sienna. My bond CNO has an underlying red in it. And it looks very pretty. And along with that, I am adding some more than Guy Kay Brown. This is more lifted thick paint that I will be showing you once you are done with the idea of the field, it would actually help you to denote those lines which appears on the dry field. And it is just going with a clean brush, dabbing off the pins and then again washing your brush, damming of the paints on the tissue, and then applying it on the paper. This is how you will get these white areas. Not lifting out is a very, very different technique and sometimes it works on particular kinds of papal. If your people is cellulose Paypal, sometimes it doesn't work, so don't beat yourself up. It's just another technique that we are learning. All the techniques that you'll learn in any class actually can be used for any of you future paintings. If you are unable to get this, the first goal, that is, no problem. Just go head and try it once more. Still if you are unable to get it, just go ahead and do the next step. We are not here to get a perfect, perfect finished for our painting. We're just here to create one project which would actually giving us some satisfaction towards painting with watercolors. This technique might look overwhelming, not at the beginning, but with time, you will be in a position to get it for sure. Now we will go ahead and just rectify this savior because I am just not like him on that part of ageing go towards over dead. Along with that, you will find that I will start off by adding some of this black girls on the fields. This blight earns will only be two words. The Bordeaux media mostly aware as I will just leave as such, the ADL just below the horizon line and then go ahead and add some more lines while you are going from the bottom to words that up. Now this is Canada. You can always shuffle the rows that you were arriving for the dry fields. And so just, just be sure like how you want to add that there is no hard and fast rule that you need to follow. Some of my B both hands or the dried up and some of my paper is wet. So you can go ahead and do it on a wet people. That would be better if you have some areas which are drying off your blob in the middle, you can just add these black girls and you will get a beautiful texture on the ground. Makes some amount of van dyke EEPROM along with your jaw, bone Sienna hand, then you will start having more textures to our ground. That shows would be very simple. Some of the areas, you know, are red. Do not party, go ahead and apply some colors on top buffer. You will see that I'm making smart, smart dots. Once I have added these are random dots, I would like to go ahead and add some small, small lines. While you go from the bottom, the lines will be longer and you go towards the dog that is just below the horizon line. These lines will be smaller and they will be more towards the bottom or day will be more number of grasses for the wheat fields that you see. Whereas while you go towards the top, they will march. And that's what we would be showing over here. Moderation is so very, very important aspect of our life. Most of the people actually define motivation in terms of their work. But for me, motivation starts from just the morning or the dime right away. In the morning, when I get up from my bed, I have to get up from my bed. I have to make my bed. I have to drink a coffee or tea and start off my day. Now, all these activities and thus require a lot of motivation. Because if you were not motivated to start your day, you will not be in a position to actually enjoy what's coming or what life has to offer you. And that's one of the reasons I always say the motivation is an important or the most important aspect in our lives. I would like to give you another small example for motivation that is, make all of us do have foldRight. And for cooking usually list any breakfast store, any mu that you have. Your minimum time is 15 minutes, or at least half an hour, 45 minutes to two hours. Now, you eat this particular meal within ten minutes or 15 minutes of the time that you have spent on cooking. For some, this might not be a huge motivation to cook, but for some, it might act as a stress relief quark. It might be a goal for the day or it might act as a motivation. So you have to decide like what is your priority and where your motivation lies. Because if you cannot set the moderation in small, small goals during the day, it would be very difficult to actually look at the larger picture in life. The larger picture of what people usually say is how you're performing in your job or how is your work going. But for me they are small, small aspects in life where all of our energy, motivation, and everything lies. I guess cell we have almost finished tanning the classes and now I will let the CDR drier. In the meanwhile, what you can do, you can go ahead and paint the house that you have actually drawn in the beginning. We did a cover up the sky area as well as the house that is above the horizon line with our tissue because we were doing a lot of splattering and all while painting the grounds. So now we'll go ahead and remove that tissue and then start having some colors. Go with a very, very light worship colors like I am doing, had some colors and then just wash your brush and add some water to it. We will be adding one more layer. They will vary, will show how to add the shadows. Dr. Now, it's just adding on but of colors to your house. And take a white pen now to add a warp pictures to my ground because I see that the ground area is actually dried up. And ten now go head and had some long lines like I am adding right now on the paper. They will be not from Lord that I will be adding, but it would not be very less scheme. And so this will actually give you a lot more of extra volume to the fields. If you are beginner and you do not have this white Jelly Roll Band or this wide band. You can always go ahead and use the opaque white watercolor and add these lines with a very ten rationalised size, one or size to brush, which is available with you. And important aspect of actually doing sketchbook exercises, which I have told us that there is so much more room for making mistakes because this is the sketchbook where we are practicing our daily routine exercises. And there is nothing much you can actually do any kind of like you can go for some dabbing off of pains or checking your new paints. You can go for very, very simple exercises of watercolor. You can go for checking your monochrome colors, like either go with a darker wash first, then I will go with lighter wash or I will go with the lighter wash. And then I will go with a darker wash. So you can always go and experimenting with your colors and everything. If you think about the sketchbook firm, MY sketchbook comes in really handy at any point in time in my watercolor journey. You can even keep it for any other purpose that you have, like for drawing or for sketching anything of your choice. And then finalize on oh, people, as well as this reduces or lot of Your people wastage. Because if you want drawing on one side of the people and you do not like it, go ahead and draw on the other side of the paper. And some Warner's platters of whitewash towards the bottom of the painting. Again, of course, covered those sky area before you go have pens plateau, then take some fungi, Kay Brown can against plugin that many of you have been asking me what we should do if we do not have a Nike Brown, just go head, mix some brown in your cobalt, blue or red skin. Any other blue like Indigo, etcetera. And you will get Coca-Cola, which is closer to what you see on the people. You have to go for bonds, Sienna mixing with the cobalt blue or MSN, or mixing with indigo or burnt sienna mixing. But something's growing as you wish and you will see these kind of darker colors appearing on your people. Finally, we are now onto painting our house again. And this is going to be adding some colors onto your Windows. I'm not painting the complete window. I am just adding two lines. One is thicker and one is thinner. And then I'm going ahead and adding some more further lines on the window, which is there on the top of the roof, as well as start having some lines for your outdoor space of the house. Or you can say the borders for your house. I would love to add the shadows now, many of us love to add these shadows and ultramarine, anomic mix of ultramarine and burnt sienna or some other column. But we will go ahead with someone die Kay Brown or some darker shadow shields. And just to add the shadows, it is going to be very simple. Just follow the way I am adding the colors right now you will go with a lighter wash over Tikki Brown had just had it in this way because it's a bright sunny day and that's one of the reasons we should have the shadows. Shadows will actually prominent fish.
15. Project 12 Magical: Let's first understand the colours which we need for this painting. Plateau green, Payne's gray, bright yellow, green from seemingly we're cadmium orange from insulin Newton sending Lear yellow, crimson lake from Magellan, mission goal, and white wash or any other white opaque watercolor. I have learned named this project has magical. And you all might be thinking, how can someone meme project as magical and why is it called as much go legal, explore and do all of it in a bit detail later on. But first let's try to draw or Bobby. Now this is one simple Bobby Florida we would be doing for our Sketchbook. It's size. And then we will start to a painting. This poppy. The whole effect sizes are pretty simple. You need to just draw one part of the poppy flower and then move on to the second and the third part. So poppy will have usually a floral part as well as a stem. But that we have to show. We will take the graphite pencil, which has got the lighter values. I would say the graphite should not be too dark so that after we apply our watercolor, it shows off from the laws. We are not up to that. And the second part that I would like to tell us for whiskey but AD so it handy. You do not need to make perfect goals and perfect lines. That never the intent of CO sketchbook exercise. As you know, sketch books I've kept with you. They are not the final projects. It's just a practice exercise that you do always. Once you are done with this sketching, I would ask you to move ahead and start off with your World Bank ground. We will do our wet on wet background wash for our painting hand though, you have to first apply or clean goto for dough on the outside area. Do make sure that you are actually not touching any part of topography. We are going to paint it later on in the second layer wash. The first layer wash will be only about applying the colors on the outside. This is not exactly all floral class. If you really want to take a floral car class, in particular, I would ask you to go ahead and check out my model class, which is all about what the color flow rules. And there you will be able to actually get an in-depth knowledge about being think floor rules. This one is going to be easy and simple. We will start by applying some seemingly near yellow on the outer behavior around the flower. If you do not have this semilog yellow available with you or with any other yellow like cadmium yellow or any Hadu shade of yellow, it can be even lemon yellow. Do not worry, just go head and he applied. This is one of my own favorite sheets from this ameliorate color companies. So I have been using it for preimage, sometime, apply some Cadmium Orange, mount. This orange again can be of any time. You can go ahead and take any orange that does there on your palette. We will go ahead and apply our bright yellow green color. If you do not have the shape, again, no need to worry. What you can do is you can prepare OK shade which is similar. Just take any of your lighter green that is available on your palate and mix some yellow in it. You will get courtyard which is something similar to this, but do try out that shape on a rough Paypal before you apply it. If you see, whenever I am applying the colors, it's free flowing. I am not thinking much about how I want to apply the colors you go from the top will be more lighter values. And when you go at the bottom, get would be more of darker values. I'm adding some plateaus green. And along with the plateau green, which is from the skimming good family, I am even going ahead and applying some pains three, now, I have been using different kinds of beans from different companies. Whatever you have available, like this particular plateau green Gandy, even replaced with all forest green myth you have, or if you have any vital value compared to the wind IK green or it can be even though hookers green that is available with you. We are mature to actually make an exact match of colors. We are just your to understand how we make this free-flowing were downward background and then paint those poppy. Okay, now let's mix some yellow green with some plateaus Green and you will get a beautiful color that I'm applying towards the right of the bottom area. And this is all mix-and-match of colors, which I am doing actually nothing in particular. I will just to replace her deep and then I will go ahead and apply my other colors because I want my colors to flow down from the top. And wherever I'm applying some Mao wet colors, they have to move downwards. And if you place any gate below it, it just becomes a bit more easier for you. Many of you have been asking me for quite some time that how do I decide on the colors that I want to add for a particular painting? I just go ahead and apply these colors on a people and check whether they will look organic or not. If you go with your yellow, then you go with your orange, then your yellow green, that you have bright yellow green along with it. If you add the plateau as well as the pins gray, you should get something organic in nature, so you have to apply it on a piece of paper one after another, and check how the colors that don't engage with each other, can they actually move together? Those are the ways that I have been applying for myself, but there might be many other ways that other authors have also been following. If you have anything in particular that you have been using, you get called. So go ahead and use that particular method. This is usually my method which I always apply for any of my paintings. So many of you even go by the callow youth theory. You can always go ahead and check how you want to apply your colors as further colonial theory, then you would actually get more of a clear cut idea because you will understand which are the harmonious colors, which are contemporary colors, which of them are analogues colors. So all of this you can understand better with Alcala, we'd now is the time where you see that my Paypal has dried up a bit. It is not very watery. And that's the time where I want to go ahead and add some of the lines. And this is a very simple process, just to pick up some dark green color. How I did add this Dahlgren gallo, I mix some of my pain screen with my plateaus green and I got this men die green kind of Kahlo had now I'm adding it on my Paypal. From the bottom. I'm going towards the top. Just make sure that you are not adding a lot of them. We will go slow in this process, use the tip of our brush to add most of these graphs like structures for the background. Now using my as cauda optimal branch to add these lines so you can go with any other brushes. And secondly, I wanted to talk about the magic, the sea. Sometimes that magic happens. And yes, if you see that magic is happening, it is wonderful. But you have to also see the amount of effort that usually sampling takes to meet that magic happen. Magic is actually constant effort of your positive thoughts, coffee or positive beam of keeping go, open, Outlook. Add. All of this, adds together. Then only you can see a space where magic keeps on happening one after another. That's one of the reviewers which I really wanted to touch upon that you should always try to be open-minded and keep your goals and focus. It can be really small Goldwater day, like getting up and making your bed. That is also gold. It can be just, can be, can be even as far as getting up at the warning, going out for or simple walk, it can be just used 15 minutes walk on it, 20 minutes walk or just going for a yoga exercise. Each and every small things that you do for yourself actually can create magic came your life. Secondly, I want to emphasize a bit more about how you pick these flow roads. We are somehow missing out on that, but we will take a very, very light wash of orange and yellow and then high, we'll start adding my Clemson on top of it. I have been mixing my Clemson with orange and then only applying it. If you have any fed of particular color that is there in mind, go head and applied. I'm using Clemson as per my choice because I just love ironing that color to any of my Floral paintings, and they actually look great together when you applied with some orange or with some yellow, you can get sheets that are closer to red. And in particular you don't need a rich shade. Okay, now have blind some like dream now for your stamp area, this has to be really lighten value because the other areas are darker and lighter value will actually show up for your bobby stem. Makes sure that you are actually not mixing it up with the background. And then go ahead and apply some more, draw zed onto your poppy area. We will go with the bottom of the poppy first and then make some lines on the wet area. Before you add any colors on your puppy, if possible, make sure that your background is completely dry. That would actually help you to get a better edge, or it would be easier for you to apply the colors on your bobby flour and then mix the color of your row. Bobby flower that is orange with the red that you observe over here. That is a very easy method in case your colors are going outside of our particular area of Pompeii because your background is not completely dry, what you can do is take a damn brush and just dab up the extra pins which are going outside. That's very, very easy way to control the colors which you are applying. You will see that by mistake, I've added a burrito cream and it was just on my brush. And you have to make sure that your brushes are always clean and you keep two jars of water handy with you. Always and always. If you have to get some clean water, you can use your clean jar and you want to wash our brushes. You can do it with another Gerardo photo. As a rule of thumb for petals, I always go head and begin to adopt alternate petals While I do paint the alternate petals because tag does gives me a lot of time for each of the petals to dry off. Like your, you saw that high startup with the orange. And then I am applying some amount of red or carmine towards the bottom. And that's all we are doing for this painting. And then I will let this bar to dry off and move to the next battle, which is the first one that I did paint. It has or most dried off. And now I am adding some lines for the poppy flower. If you observe a poppy fly, you would be in a position to understand that it is a bit see-through in sunlight as well as it has some markings on it. Just the way we will be painting right now. And we will be doing just a few of these brush strokes. We're not going to fill up the entire poppy flower with a lot of brush strokes because that's, again, not the intent. We're going to show only few markings and you can't absolve how pi a mapping it onto the flower area. Again, you'll need a very thin brush to these kind of lines. And make sure that your brush is not holding a lot of water or loads. It would be difficult for you to get these thin kind of lines. They are not usually four petals of poppy. And you might be wondering, why do we see only three? What happens is sometimes, so when you observe a photo from a particular angle, or you see a flower from a particular angle. All though, petals are all the AVR salt that particular flower he's not seeing. And that's why there is a possibility that you might go solve only a few of them here. And it, sometimes, when I see flour and made sure it just looks like so magical. And actually I did, I've all my energy for all my motivation from the nature and fluorosis. So one of the bads, rich actually plays a huge role. Sometimes I might not be in a position to show you all the tips and tricks in one single class at that's one of the reasons we have multiple classes where we are gobbling each and every part of the watercolor painting. You can always go ahead and refer to my watercolor flows glass, as I have told you earlier. And now since my boat, the petals have dried off. So I am going ahead and adding the color in the tote bags of cookies. So I am kind of now getting paid close to the finishing line. And you will observe that we are done with the dual of the Bobbi floral battles, as well as we are done with stem. There will be a few detailing that we would be doing. But again, right now is the time where you have to slow down. And you'll have to just keep painting the ADRs which are in white. Resto although huddled things compiled, final detailing and all will be very, very small. Radios on, there should not be anything that you should do in terms of making any mistake. Because a watercolor is less forgiving compared to any hago medium that you might have for actually also due date. And when you are in the final bought off your painting, you have to be very, very sure of how you are having the colours. Like wherever I see that I have padded are lot more Carlos. I usually pick it up with the hub often damn brush. And then on the silhouette sulfur, so neat, I'm trying to add these self walking solar lines, you can say. And that also with the orange, yellow as well as the red color. This painting to me actually looks man to go after we have completed it. And it is really simple. Just you need to keep some patients because it would take you about 18 to 20 minutes and the data is only the time fits your need for painting. Yes, there is some more extra dime Bay you need for drying and I would always ask you to let it dry in the natural rather than time using any kind of Trier, because that's the best way to lead your paper dry off. I am taking some or whitewash on my brush. I'm adding these small, small lines for the detailing part of the stem off my poppy flower. And then we will go ahead and remove 30 pattern angle. While you are removing the tape, you have to make sure that your people is completely dry. We do not want to keep any scope of ripping off the people. And that's all lambda, have a final look at your painting. Okay.
16. Project 13 Harmonious: Let's discuss the colors that we will be using for this painting. It's sending blue, yellow, cadmium orange, French arc remain illegal. Yellow ocher, but CNR, handsome white gosh. Okay guys, we are back to our basic song. Let's just make obey simple painting this time. Because I want you to understand a few things in this particular sketch book exercise so that we can take it forward to the next two exercises, which might be a bit more complicated than the current one. Though the scissor ha, bigness or watercolor sketch book excise but transiently we have been our lifting the level where B where early on and where we are right now. If you are not very comfortable, I would ask you to force tarball look at one of my artwork glasses, which is beginner's guide to reflect in herself or board write series. It has 21 small, poor right paintings and they are organized in an increasing level of difficulty. And once you take that glass, I'm pretty sure about that, that this glass will become a more easier for you to grasp. We will start by making O horizon line. And on top of the horizon line, you will go ahead and add some seemingly are yellow. And then you have to act some cadmium orange. Now this any there yellow, you can use oral scanning yellow that is available on your palette. There is no hard and fast rule that you need to use this particular colored itself and just have this kind of a tonal value on your paper. And that's it we have to keep in mind. On top of that, we will be going ahead and adding our ultramarine. And then with the ultra marine, I would be going ahead either with your indigo or where 6LoWPAN scree, both the colors are absolutely fine. If your Payne's gray has an underlying glue in it, it would be even better in gives you do not have and don't need to worry. Just go ahead and add the pain script. We would be basically understanding the blending section in this whole of the painting. We are not going to actually focus on a lot of things. There are different ways that people apply beans on paper. You could have done this wet on wet. If you would have numb wet on wet, then it might have taken one more layer because our wet on wet actually dries off one sheet or do shade lighter than when you apply the beans on the people. Therefore, I have tried to make it where Don dry images you're not too comfortable with where Don dry and blending with where Don dry. I would ask you to go ahead and try out though wet on wet. I know that all of you know about a wet on wet, but let me just emphasize are bit more. This is a very, very exciting and important watercolor technique. Putting your red color on your web people, which goes AS a wet on wet. And when you do. The web color on her dry people that is wet and dry. And that's what we are using for this particular painting. I'm using competitive purpose and adding on top of the sky. This is the sky either by the way, my sky area is bigger compared to my water area. So keep that in mind. And this is an absolute still water. When the water is completely still, we have to make sure that there is exact reflection of your sky. Kuan yard, water area. Flat brush is always a great way actually do do all wet dry method for your blending. And I have been using 0.075 inch bland branch. If you do not have this particular size, no need to worry, go ahead and use whatever size that is available for you. Many of you have been asking me that Do I need a premium stationary or do we need to have this particular people guys, the main intent of this all of exercises just to have a regular practice and understand how the sketchbook blocks we do not need to always make perfect paintings. This might want me my best paintings, but I still love to appear in one or two important techniques through each of these painting. And that has been always the major idea. Let's splatter some stars. I want those plateaus model starts. If you want those diapers, some smaller stars, you have to make sure that your brush doesn't have a lot of water in it. In this, suppose that your Prussia has lot of water and then what happens is that Los plateau will become bigger and they would become like big, big stars as you are seeing right now. Right inside of the bottom area. Do not worry, just go ahead and use a brush, corals user tissue to dab up that extra paint and try to avoid this situation. That would be the best seat. We all make mistakes and that's perfectly fine. But trying to avoid the mistake or learning from a mistake is the best way to deal with your mistakes. Now go with a color which is yellow. Ako, what I did is I just mixed to put off blue wet my orange and die God, or color something closer to this. But if you are not very comfortable, because I don't mix and match a lot of colors and get something closer. We don't need to worry, just go ahead and use the yellow architect to stay with you and then have some burnt sienna. So this MSU now will be in a few places. Handle yellow ochre will be in Doha, the places to some very, very small horizon line that we are being thin there, there's some foliage on top of it, which is to show that we are actually denote window horizon line in a better way or roads. You see that this guy had the water I'm meeting time, we are unable or even your spectator can not distinguish between your sky as well as the water area. For painting this area, of course, you need a very, very thin rush. So make sure that Either you have co-vary tented off your brush. Ros uses small size push while you are applying paints on the left-hand side by world-class Q2 group with a darker value, often round currents. You can even take things Greek and applied. It would be something like stripped swarm line that we are going to pin. And then we will be painting do small trees. While we'll keep adding these details, I would like to actually throw some more light on why I did mean this project as harmonious, that colors are not actually very harmonious. If you see it is yellow, orange, blue. They are more off contemporary colors that we are using. I would say that I'm pretty happy with the way it is turning out. And that's the major intend to actually tell you that everything in life will not go well, OK? Every time we will not be in a situation where there will be harmonious relationships or there would be all harmonious workplace, or there will be anything which is completely in our favor. So you have to meet whatever best you can with the situation that is given to you? Yes. There will be days where you will be done. There will be days where you will be happy. So make the best use of the happy days rather than just thinking about the side bays and knowing that, oh, why it is not getting over. If they're sad days that you have, there will be happy days that are coming in. So just keep that fate and move on. Do not worry much about what's going on. Just go with the flow. That's, has been by understanding their data about how we should walk or how they should actually go about learning lessons from life. Let us understand a bit more about how we go about painting the trees. We will just make a few branches and there will be a place from which you have to originate the story and then make some loose leaves. C, if you are a beginner and you are an unbelievable group, this simply with the brushstrokes, I would ask you to go ahead and use your pencil. Pencil is one of the best tools that you can have for yourself. And just draw these branches as well as the tree trunk and then go over it and painted. It would become very simple for you to add any kind of beans over graphite mount that you have already added onto your people. Since both degrees are to send to each other. So there is always a possibility that the branches might overlap with each other, as well as ten. Along with that, there might be even the loose leaves which are overlapping with each other. Do not worry, just go, go wetter. Do as you see over here. And I think that you would be in a position to get a great outcome. That's what though we are also aiming ad that you have a beautiful painting by the end of the six size. The one, So are you want faith happy? But though tree, I would say that the more important aspect of this painting would be how you paint the shadows. Now, since this is a still water, there is a necessity to things the shadows, time for the shadows. What I usually do is since my people is called the dry, I would take a very, very light wash of clean water and then start adding these brushstrokes on my paper. Now, your paper should not be Healy or highly red because that would actually make these lines as blooms, which is never the intent of our current painting. Observe how I am going about this painting. Slowly adding all the details in your shadows would be a bit more elongated than the tree that you are painting. And it is actually ASCO, perspective. I'm not going to bombard you with all the rules of perspective and that's one of the reasons so we will be taking, are actually exploring what model under rule in one of the paintings. And then wherever you feel it is necessary to add any further details of the stars and all go head added. That's what would be my suggestion. And go back TO tinted brush so that you'll get those Wallace stars. We are not painting any larger stars onto our papers. So make sure that you also can avoided, but in case you want to be a tutorial together, I would not stop you. Go ahead and do it. And I'll finally, your painting is ready. And I think that it is a very beautiful outcome that we have got with the contemporary colors that we have used for this particular painting. Remove your deep at an angle, as I always say, because we do not want to report the people at any point in time. And then a final look at your painting. I hope you found this painting as easy and simple because I wanted you to take a break from all the paintings that we have been doing. But next to paintings would be more about how you had ripples on the water and how we add shadows, et cetera, in the urban sketching. I hope that he who are ready for a more challenging project that what we have been doing do not worry, I am there. I will guide you through the entire process.
17. Project 14 Empathy: This is a very simple limited palette, x psi, psi, and there are basically three colors, bright yellow, green, plateau green, campaigns gray. If you do not have these colors, you can go for alternative options, which is a French or chromatin, Payne's gray and your Prussian blue. Okay guys, we are going to start with a 40 painting. And I know you all have learned a lot in these Buster 13 no sketchbook exercises. It's time to actually just checkout or something which is a bit more difficult. But it would be easy as I'm here to guide you through the entire step-wise process, we will go about and start drawing a horizon line. Once you draw the horizon line, I would ask you to wet your entire before they head off your any wash brush that is available with you? I'm using my escort out 0.75 inch brush for reading the whole of the surface. Ok guys, so we will be doing a limited valid exercise. What does limited valid means? Limited valid means that you have only two or three colors for in your ballot, and you would be using only those colors to complete your painting. We will start with our yellow green and then is our plateaus Green. And the last that we would be using would be, I'd been scraped. Always start with the lightest value, that is your yellow green. And once you are done with the yellow-green, then you can go ahead and add on the plateau green. Most of you might be still thinking, what are we actually up do? Yes. It might be difficult for you to understand exactly what are we going to pick, but this is basically ripples on the water that you would be painting. And along with it, you have to even understand a bit about perspective. I would like to tell you that our while you are towards the bottom and the bolts are broader, whereas when you go towards the doctor, bolts are smaller and shorter. And that's what you have to keep in mind that under paint this one. Okay. So before we move any forward, what I've done is I have taken not due for those or from an splash. What you cannot understand from yours, how the patterns of the ripples are. And if you see some of the batons or street going up, some of the bad downside diagonal. So you can actually paint any way. What we are going to observe is from the forced photo, where we will go ahead and start painting up patterns from bottom towards the DOP, argued would be straight up. I would suggest you to keep R one brush handy, either a B-flat Prussia, either it be o van dash, doesn't matter. It should be having new coloring with or I should say that you should actually have a clean brush buyer's side, because whenever you need to lift off your colors, it is easier to lift it off with any kind of brush like this. If you don't have these scholars I bought asks you to go ahead with some other Carlos and you're limited bandwidth like Europeans gree, you again go, we're pushing blue and French are combining those three colors will also look very good. You being the sort of boats. And the only thing that you need to keep in mind is that we have to go slow and that's still or leak like daily. If you can go ahead slowly painting these ripples, I'm pretty short about dot-dot. You would be able to get a great result. I would like to throw some light on the problem which I faced while I was painting these ripples. Yes guys, we all face problems. One important aspect, as I was painting, these are the poles where how you can keep your people with Biggest people doesn't remain vet for more than five those seven minutes. And while you see this whole of the painting is for about 19 minutes. So how do you keep it wet? You have to keep on applying the clean water wherever you see that there is no colors that we have applied. We're not going to go over the results which we have already painted. In case you go over the repulse that you have already painted, it might actually take off the colors from below and we'll look really patchy. So wherever you are walking, you have to make sure that your paper is wet. If the paper is no more red that you see or absorbed, you have to relieve your paper right then and there and let it dry completely. We will again walk on it once your people is completely dry. That's the kind of the approach that you should follow if you half that amount of patients. This complete painting would've dawn. Not very pretty. You might be observing that IDAT director's office on the top. And that's what you need to also do. If you are paper that's trying up and on a few of the area. So when I have already applied the pains, I'm going ahead and adding some more Payne's gray. Now this beans Green, I have mixed two with my plateaus. Took lies are bad. And then only I am going ahead and adding it on the paper or else it would be too dark. And now is the time where actually my ripples will be more at distance from each other, which means that all we have to actually leave more gap and they have to be smaller in size and shape. Just a way as I am being Ding Huan You keeping things. I would like to throw some light on the project Empathy. Why I have named this project does empathy. Empathy has got o literally very big meaning. This might not have much fat you do. Each and every person remained in our lives. But empty for me is very, very deep-rooted. There are usually three aspects of empathy. One is that Uganda put yourself in someone else's shoes, but still you are not that emotionally involvement do it. That's the first kind of empathy, which I would say it's majorly called as cognitive empathy. The second kind of empathy that I know is being emotionally involved. And it is more than about emotional empathy that we show, which literally means a Uganda actually feel the pain or distress the other person is going through and understand how the life incidences actually have changed there we have thought process, etc. Emotionally, empathy might not be the best way to actually go about feeling someone else's situation. Because you might also break off and you might also start crying. If you see that someone is facing some difficult situation on default, I would ask you to be more compassionate or you can say having that ability or two, develop their ability to understand someone else's pain, you can't step into their shoes, as well as not break when they are facing a problem. When they need your support and suggesting them with some actionable steps that would help them to solve the problem at an overall level. That's what I think is the most important aspect which I want to focus on in empathy. I think I have doctor a lot about how you sure they're actually connected in emotional level and the empathy perspective. So let's get back to our paintings. If you see, I have started making the smaller bolts to words that dog. And they run more distance with each other compared to the reports that we made are towards the bottom of the painting. You will observe the bottom of the painting. You will see that the ripples are broader and they are interlocking with each other. Whether So while you go towards the top, they would be tenor as velocity would be a big lichen and value compared to the one that we have been did all your do words top-bottom, all the paintings till now, whatever we have done is we are dying and you would be able to get darker because. You can see this creeping along with me, barter. As I always say, it's good to observe a painting at any speed of your choice forced in the beginning. And then what you can do. So just go ahead and paint along with me in the second time. Now, I will go with the sky. Sky is going to be really simple. We will go with a very, very light Washoe Payne's gray. And you can use your flat brush, do the work as well as you can even use your round brush to do it. It's up to you. I'm using my pen stand 0.5 inch flat brush to add though Payne's gray color. But still you will see the sky is vaguely they lived in the value. And that's what I'm going to add and let it dry for this layer. And then you gotta go head down one more layer onto our reports because we have done wet on wet. And you always know whenever we are going ahead and doing a wet on wet, there would be one shade lighter colors so that we will get after the painting dries off. So you have to apply a very, very light wash off Watteau before you add any colours because we do not want the underlying color to come up. And so one of the reasons I have always told you to be very careful while you are applying the second layer of water onto your painting. Your painting needs to be absolutely dry. Before you add this. Again, you will observe that I'm adding some darker values. I'm mixing my plateaus green with my being screened and then adding on top are paper. That's most of the time. While I go towards adopt some of the ideas, I tried to add. Only plateau green. You can go ahead with the other colors, which I have suggested, because battle green might not be available with each one of you. So you can go ahead with other colors like the ultra marine or else you can go with Prussian blue as well as you can go with doping screen, even if you do not have Payne's gray, What I would say is just add a bit of black in your Prussian blue. Don't get this depot value, which I am talking about. And always remember that whatever palette is available with you use that. This is a gloss of for beginners and I do not want that you keep on investing dr. Now on colors or on any ballot that you see, any of your instructors using. Imr. Kind of happy with the outcome now Anglo go head and let the paper dry. Once it is dry, then B will add a few buttons, which we did see during the initial part of our paintings, but also where we did actually check how the patterns look from our real photograph altogether. And now you see me just having a few lines here and dead. It doesn't need to be absolutely very, very detailed one, we are going to make it really simple. These are some simple batons that appeared on water. And they are going to be not much, only a few here and dead. Sometimes when you go towards the top, they are long ago while they are smaller at the bottom, but it all depends on how though photograph which you are observing looks like and that's how you can go about it. For this particular excites, you get followers. I am doing it right now. Keep adding these patterns so just below the horizon line as well as break them out of you places. And that's how we will continue adding them. And I will again see you when you need to actually being these patterns, whether darkest cloud, your doctors, your pins CRE. Now it's time to add the spot dawns goal with any tick brush that is available with you. For me, I have all ten bashed up is my DOM optimal as caught up brush. And it has a lot of very, very thin tip. If you do not have this kind of full brush, go ahead and use size one, sighs toothbrush and keep adding these kind of patterns on the water surface. Finally, I am going ahead and shopping thing the tenor ripples as well as the longer ripples. At some point in time, you will see that I'm breaking these ripples and at some point in time I'm even leaving some white spaces in between these bad on. So you can have actually a different kind of patterns and you can break it or you can leave some spaces. It is up to you how you want to paint or how your photo looks like. And that's all you have to keep on adding these ghost law. This is the finer detail that we are adding to the painting. You do not need to rush, guess a predict some good amount of time. Give that amount of time that is required because painting waters is not so easy. And it takes a lot of patience. It takes a lot of time as well as it takes a lot of understanding of this particular subject. And it is a Su, var stack each and every time whenever I start painting anything, I always feel that, oh, this is again something new that I am doing, what I'm learning, something new. Okay. So you keep one painting, they said Ableton, I hope that you did enjoy this weight on my process. I know it might have looked a bit difficult, but I think that since we have a good go, danger of paintings, which we did for our raw water as well as for our ripples that spread on wet and wet on dry. And this particular painting I wanted to do only wet on wet because so we don't wet is a very, very beautiful way to show any kind of object. And it has all the magic and debt. The more you progress in your watercolors journey. I know you can understand it better. And then once this is done, we will go ahead and hit apply a bit of darker values just below the horizon line. And it is not that mandatory step. But I would like to make it a bit darker compared to what it is as my horizon icon to distinguish properly. And that's one of the reasons. So I will take a light wash off Payne's gray and on top of my horizon line has less below it. I have mostly explained you everything in detail and you can now go ahead and go watch it, as well as painted at your own pace. There is no need to hurry up. Do even now like low people dry off and natural air and then take off the tape at an angle. I will see you in the next TO sketch. Forget size, fair, we will be doing an urban sketching. The urban sketching will be assembled. We are not going to work a lot in terms of perspective, but we will be doing a window which has bougainvillea in an unrounded and there will be shadows. It would be a bright sunny day, high hope that that would be a bit more challenging and folk obligated for you because we are progressing and we will be getting on darpa far 14 painting and buy 21 or 22 painting. This whole sketchbook exercise will, that's read. I want you to get to a level where you get even attempt anything which is tough in terms of the subject. Or you get even understand basic concepts of radon read where Don dry as well as your perspective and many more other things that I will be covering.
18. Project 15 Believe: Let's understand the colours which we will need to complete this painting. Compost blue French art Rometty, plateau blue, yellow, ako, been Sienna when I came to Brown and bright violet. So guys sell via starting with our 15 painting, guess. Yeah, it's 15. Then the sketchbook exercise, again, where we are drawing the horizon line. Horizon line is of course, a bit above that, this 50% of the people. And then now we are just going to make the sky in their top paleo. And in though bought the media, we will be painting these wooden planks, which is basically a walk war on the ocean. You might have seen in many of the places these kind of wacko worse and we think one of them, polio. It is just that this is a bit different compared to the one which we painted earlier. Is going to be really simple, easy, no need to worry. Just forehead. Follow the instructions. All these lines that I'm drawing is asked by the perspective. That is, when you have lines from a particular place just below the horizon, they will become broader When they come towards the bottom. And that's what you need to follow this. So one of the exercises are more focused on how to painter textures and Tech Show. So basically on the wood, it is not going to be very difficult. But data around a few tips and tricks which I would be sharing. And we haven't done much of textures till now. And I guess you would really love to learn something different than what we have been doing in the earlier exercises. I have done a very simple exercise while I draw these lines, it is I have divided whole of the area into eight centimeters on the left-hand, eight centimeters on the right, and then synchronized it to get the same number of lines on the left as on the light. You do not need to be exactly like the spacing and all it should be symmetric because it's nature again, the planks might not be absolutely symmetric and that is perfectly fine. Once that is done, you have to go ahead and add the colors on the sky. I will start with a very light value of stretch our drum memory. It is one of my favorite colors as you have seen from the big NY and extend it a bit towards the bottom. But along with it, I have kept a plateau blue from Somalia. I keep a variety of colors from different brands because I just love to use so colors from different runs. I do not stick to a particular brand. You can go for anything that is available with you on your ballot. It is just the colors which I am using for this particular painting. I will go ahead and add some more vent IK brown on the top to meet the cloud's a bit darker. While we go towards the bottom, we have to use more lighter values. And we should be very clear that while we are at the bottom, there would be very, very lighter. Values which will be used at what you can do is you can wash your brush and use those color that is available on your brush or go about the way I am doing right now. You will observe that I have changed my brush now to size four compared to size eight, which I was using earlier, because I need a smaller brush strokes compared to the one which I was having ordeal. And it would be lighter in values when I go from the bottom towards the top. This, you need to always keep in mind while you paint the clouds towards the bottom. Because whatever we will be using and the white would be often clean people that we have, they are not going to use Kenny wide guage or we are not going to use any kind of opaque white water colors. Go ahead and add some more deeper tones. Are the horizon. And you have to use a bit of your Robin di Kay Brown added towards the horizon just a bit. So that it just gives me a small line. Adding some more fine reductions to my sky. To keep in mind that your sky needs to be read whenever you are adding any kind of colors on the sky area. Because if your cloud is not wet, you will get harder edges. And we wonder really avoid using the heart hedges or even creating those hard adjusts for the spin coating. And then once done, just go ahead with a flat brush. I'm using my Princeton 0.5. inch flat brush. You don't need to have this brush. Go ahead with any flat brush that is available with you, even around brushes fine. But then there will be a problem there while you make the textures, a flat brush actually becomes really easy and comes very handy while you make them. Dry. Tech shows for you wooden planks. Again, I'm starting with the lightest value, which is by yellow ochre. And then I will go ahead and add some bonds Sienna. When I gave Brown, I will show you step-by-step how I added. Now you see the basic use of my flat brush while I add yellow ocher Paolo, I'll go with the depot values and I will start from the bottom, moving to the top and from the top to the bottom. That so I'm going to add it on a few places. It's not that my color will remain the same in terms of saturation level for all the wooden planks, it will be changing as per requirement or ask for what I think would go best for this painting. And then now it's time to add some more bonds. Sienna, my bond Sina, of course has an underlying dreading it. And you will see a very beautiful texture, but it's perfectly fine. Whatever burn CNS available with you. You can go ahead and use that bond CNR to add these kind of textures. Once you have added the bonds CNO in few of the places as described, I would go ahead and add some more Wen Di Kay Brown. Wherever you are adding the textures, you will see that the textures are not similar in all the places. There are yellow in someplace. There are both C and then there is some Mao Van Dyke EEPROM which I'm adding now. So each and every Kahlo is getting added, but not in a synchronized way or not in a particular order. It is just going very, very random with the colors. And then you will go ahead and add more. When I gave down towards the side as well as towards the bottom area, there is some bright violet which I would be adding a long with my then die Kay Brown, as well as adding it to my wooden plank. That needs to be also done. Okay guys, so I have named this project doesn't believe and belief as one of the very important aspects in our everyday life. We should believe on each and every thing that we want to do, like even most of the goals, as I say, getting up in the morning, making your bed, having a cup of coffee, feeling very enthusiastic about life, going out for a walk. Any small event that you do in your day should be our sense of belief on yourself. Because each and every step that you take towards having a positive mindset is actually making your belief goes stronger about yourself. In the meanwhile, we have been discussing about belief. I would like to throw some more light about how you can paint these wooden planks. So mix some Mao violet with your, with Nike brown and then start adding these lines on your wet paper. You need to know that it has to be done wet on wet because then only these lines would spread of it. And wherever there are joins, you would see that it is darker in color compared to wherever it is. Not having any kind of joint because water, et cetera, everything goes into that particular place and it makes it darker. And all the shadows that the absorbed is on that particular space. I am margins to, uh, going ahead with my tennis brash status, might ask God all size six brush it has got a very nice tip on the top. And I'm adding these lines on top of the graphite marks, which we did add during the initial sketching session. If you are unable to actually see those glorified monks, I would ask you to go ahead and again made those graphite mouse one so your paper dries, but do make sure that you have another layer of water on top of it. If you need these kind of soft edges. As I'm thinking dr. Now, this is a more easier way to do it because we are doing this in one single step compared to two steps which we want to avoid. I'm going to do the most of few footstep of mine, Dr. Mal University, some clean water on your brush and dab it with the back of another brush. You will see that there would be small, small sliders and things will move from that place and go to the nearby areas. It really gives a very nice texture to the word. Once that is done, let your paper dry. You will start having this gambles blue for the water area. It is a very, very simple flat wash that I'm adding. Just be a bit slow while having this column because it is in-between the sky as well as the wooden deck show that we have already added. So make sure that you do not actually go over the clouds or else even on top of the wooden texture. That's the only important aspect. And once this is done, you will go ahead and take a mix of Artran many and plateaus blue, as well as start having these small, small lines on this. Wet people. Do make sure that you are adding these lines on the web people. Because it would give us a nice effect in few of the areas. I'm also mixing up some of my van Di Gai brow with my plateaus blue and then adding it, maturity of the bond, I would say you have already covered. And it's just a few more final details for the water ADL that we need to add on. And you can only do the SWOT bill. Your people is wet. I have been telling you that the whole of things sizes are mostly wet on wet. And you have seen that how I did forced use though wet on wet for my sky AVL then hi, how I used that technique, particularly for my wooden plank area. And now I am using the same technique for my water area. All the ideas need to dry up. And once this alea dries up, I will add some more texture to my wooden plank. It would be very simple addition that I could be doing. So do not worry. More of the dry brush technique which we have learned earlier. I know that you are already aware of how to go about this dry brush technique. Just had any colors like earlier IDed with pi bonds CNO. Then dab offered extra pins on your tissue. Once that is done, you will get these kind of dry textures for your blank wooden planks. Once that is done, then you can go ahead and add some more final lines. I will show next. Right. Now it's time to actually hide some board van pipelines to your wooden planks. And that's what I'm going to do. Just absolutely. I'm Melvin domes of how you want to add these lines. You don't need any particular way in which you have to arm these lines. So make painting randomly shorter, smaller lines and breaked in-between. That's how you are showing it. And only on a few of the areas, not that the whole of the wooden area I would cover with these lines. I think I'm kind of satisfied with the way this painting has done. Doubt. That is very important for any artist as well as I would even dare you that always know where you have to stop because we do not want to overdo a painting. Overdoing will actually lead to spoiling off our particular painting. And as big nodes we are never saw dream to know exactly where to stop. That's why I have been telling you, okay. This is the point where you can think of stopping right now. Let your paper dry completely and then take off your tape at an angle. The next painting would be about urban sketching. It is going to be very exciting and I will meet you in the next lesson.
19. Project 16 Determination: Let's discuss the colors which we need to complete this project franchise from adding permanent yellow, deep Carmine, one, Sienna, sap green, cobalt cream, white squash, as well as you can keep any other green like hookers, Green Corps, any darker shade of green. Ok, so we are on to our next project, which is all about the domination. Yes, this project does named us determination because this is not going to be fairly simple as we did earlier. But I really wanted to introduce you to our urban sketching. And competitively it is pretty simple. It's just that we are not using a lot in compared to the perspective and how to use or composition and all of it. I am just drawing a simple window and then I will go head and painter or Bougainville artery by the side. It's one of the very beautiful and common aspects which you see usually, if you have ever been to Greece sand, I would be actually drawing one or two lines for the trees. I rest. My window is four centimeter. How many of you have asked me what is the size of the sketch book and all. You can always go ahead, watch the sketch books section better. I've discussed that this a square sketchbook of 1900 to 19 centimeters. And my window is or four by seven centimeters, so it's a rectangular window. And I will go ahead and forced to wet my paper completely. Again, it is a wet on wet technique that I would be doing, but there would be more like that I wanted to add on to this painting. And hence I am using my permanent yellow deep color. You can go ahead with any other colour, supposedly semilog yellow, you have war, you have Kanye articles, which has a bit of orange in it. Go ahead and use the scholar. I am using some amount of orange now. And I'm randomly adding on top octo wet paper. So of what I'm trying to do is I'm trying to introduce the lighter shades towards the top and towards the bottom. Because if you ever Observatory and where light is falling, you both actually see a lot of light towards the top and deeper tones appearing towards the bottom area because there would be shadows there were believed, et cetera. Take some amount of Oprah, or you can also go head with any other pink, crimson, red, violent, anything that is available with you? I am not very particular about the color that you were using. I'm mixing some amount of burnt sienna with this opera. Or you can go with the Carmine and then get a color which is kind of read wallet and added onto your trees. I'm starting from the bottom. And when I go towards the top, I'm adding very, very lighter values. And lesser than quantity compared to the ones that I've added towards the bottom media most ductile firstly, attack we would be doing is wet on wet too? Why is it better to wait? Because I love these are soft edges that you right now get on the tree and then now you allow your paper to try. Once we are done with the first layer, I'm allowing some amount of green to add on the system Sap Green, or you can make some amount of yellow, green and added onto your paper along with this app green that you have. I am not very particular about the colors that you want to add. Just go ahead and use the colors that is available with you. Just add a bit more of red valid, I have perfected and pilot mixing up some of my Oprah or current pine with my art from any. So you can also do the same. And now I am adding some more cobol cream. Not this combined green is from sandy layer. So if you go with different brands, you will find that their pigments actually differ due to which the color also differs to an extent. And you need to test and try the colors that you want for your painting. There is no hard and fast rule that you need to have this particular color. Go ahead and use any green that is available on your pallet for painting this window. And then while you go to words, decide so to bento adds up burnt sienna. Since it is wet on wet, you will find the colours to be spreading a bit. That's absolutely fine. Led to paper dry after this and keep two brushes handy. One for hunting the colors, and second for blending with the clean brush in few walk the areas. So don't think much while you had these booking Bella flowers or flow rules on your tree. And it is so one of the very important aspect of this painting. So go ahead and do it. You will be quite surprised to know that I had to actually try this painting once on a separate paper and then actually, I did paint for the sketchbook excess. Yes. I have been telling you that you should keep the sketchbook excise for your own practice. But there are times where I'm also not very confident or I am also not very, are happy with the outcomes that I have and hits. So always great to try out few of the subjects on rough piece of people if you want to actually have a great sketchbook it for yourself. But that's absolutely up to you. You do not need to think much before you go ahead and actually being anything on a schedule because it does, again, for practice, you can go ahead, keep your sketch books as you want. Sometimes we will draw and sketch books. Sometimes people had things on sketchbook, sometimes it was more about doing what follows on sketchbook, anything and everything is okay. If you are going ahead and painting on a sketchbook. Kate, now it's time to add my cranes. What I'm doing is I'm just going ahead and loading my size six. Has coanda, optimal brush had adding some who goes green or any other dark green that is available when you want do it. And I mix some amount of ultra Meninas who seem to get the deeper tones you can always of mix-and-match your colors. And that's actually a very good way to, not only long how you get their debug and use, but also as an excise for any big nor It's great. You will keep learning about the new colors. You will keep making new colors for yourself, as well as you will keep experimenting. The hands-on experience which you get by making your own colors, mixing and matching different kind of colors like we are doing with our traumatizing and some amount of hookers green or Sap Green. Or you can directly then go with the vindicate cream for Nike Green would pit the deepest value that you can add. But I have not should be used when Nike Green intentionally, I wanted to show you how you can prepare your own beeper tones and added. These are, again Blues leaves. You will see that in some of the places I'm mapping it, it's not that we're going to add it everywhere on the tree. You have to keep some empty spaces like you see on the left, as well as on the right. The whole painting is done in a very, very loose term. So do not worry, just go ahead and add the colors as you are observing on the paper. Now it's time to add some more deeper towards onto your window. We have all the added of very, very light wash for our window area. And I'm actually changing the values of my cobol green right now if you have so, then I go to what's the right? Am I dig deeper values? Where does ran? I started from the left. It was lighter value. With the values of Kahlo is actually a great way to go head and understand how you want to paint better. Because yes, flat wash, tan b of foundation. But variegated wash will actually help you do add more expression to your painting. And similarly, if you actually change the values of copper to pull a condo, you will get a better fluidity as well as understanding off for watercolors. If you see I am adding some amount of buoyancy and r Now this is bone Sienna. What I've done is I have taken or deeper tone of burnt sienna. I have again, just mix some colors and I'm going ahead and advocate. You can use your blue for doing this. You can use any other Docker don't mix and match to Carlos. I am not going to actually tell you each and every detail. Just go head experiment guys. This is the best way you can actually figure it out. What is required for a particular painting, what colors you would like for a particular painting. And that's all. Hasn't guidance I can down here with that. For my particular Arvind sketching, I always love to mix my thank chart from any web, my buoyancy and outdo kept scholar. But go ahead, experiment with other shades of blue, like you can't even not Prussian blue. You can go for Indigo, you can go for Payne's gray addition during your buns, Sienna, anything that is available width you can work. I did a lot of loose branches if you see and that directly painted it. If you are not very comfortable doing that kind of a walk, just go head and use your pencil to make these planters. And thank goal voted with your deeper Dalton sort of went I keep roundness. You have kind of prepared orders and even Doug Brown that you have available with you, I am adding some more lines onto my van Gogh because so we need to finish off our window asked last time. The shadows upto this. It's going to be simple and easy. I'm just having like three or four lines right now. And I would be moving between now one ModPo subjects here at embedded go there that not much that we have done. The only important aspect is the tree and better for I am now absolving that I have lesser leaves. I'm going ahead and adding those leaves. That's, that's the only thing which I am doing. Just to add some dry brush technique to your wall. You ordering know how to do this dry brush. What I usually do is I pick up some color on my palate, dab it off onto my tissue, and then had these dry brush techniques wore my wall because most of the walls are not up to date and they thought a bit, read God. So that's one of the reasons we add this dry brush techniques. Since anything that you have will go through some veered entity and that wouldn't it as so what we want to show even fought our buildings or for our walls or anything that lead paint. No, you'll complete painting the shadows. Yeah, that that's a very, very tricky bought DOE. And I would actually like you to do some amount of Doc Brown. Or you can say you can go ahead and hide some amount of coupon Sienna, I'm you saved that I could draw my brush. Yes, I keep dropping my brushes and that's when I actually go head and go change a few things onto my window. And these shadows though, had to add it. But yes, this is one of the reasons that you can actually go head and the shadow Do your window or something else you can do. Body about. Ok, why did it happen and how did it happen? All of my painting is spoiled. I will not be in a position to paint after 3u. 3u. Don't get this thing on your mind. If you see, I am going to head with a very, very light wash off my ultramarine and some amount of buoyancy and outreach iPad. Undo it and prepared the scholar, have Hall of the scholar before you go head up big shadows. Because we will need quite an amount of this color to paint these shadows. I am going with absolutely lose strokes though B, I did actually being done my flow rules and booking blood but similarly go head and add it onto your wall because kids try somebody and because it's a dry summer day, I will be getting the shadows on the wall. If my Bogan cannot tree is by the Waller, it's growing along the wall. And similarly, I am drawing the shadow form by. And to solve the ballgame blood tree. We're not going to do. Lot of addition, just go head hand. Bingo shadow also for the branches which are prominent and visible. Don't go think about each and every branch that you'd need to go ahead and show the shadows on that so it can fuel the ideas and just trying to remove those extra calories that I have added on with the help of my dry flat brush in case you do want to do it, go head and adored variable, you feel that there is some amount of extra 042 shadows which you have added. While you keeping these shadows have worked, liked to throw some light about the wine that named this project has to domination. Let me just first tell you about the Court. Failure will never overtake me if my determination to succeed is strong enough. This was set by OLC Mandy normally, I don't unclear, but each and every word of this court and do understand that in every aspect of life, whether it be venue or ceasing or difficult time on fair, newer facing, or good time. You have to be determined. And that actually develops a lot of characters. And you, if you are not determined to do or finish a particular amount of job, it would be really tough on your part to achieve the desired results. And in case you do not achieve their desired results, your soul will not be happy. And that's one of the reasons I would say that focus is very, very important. Component or building block in art directors tick. In the meanwhile, we have for progress to a lot on our painting. Now it's time to add some white highlights. You would observe that I am having some branches as well. Last time I added some white highlights scape and onto my window. I am not very happy with the intensity of the shadow which I have hydrogen HDL window. It looks really lighter and value after it has dried up. And I would like to actually make it a bit more people. So go ahead and just mix some of your are plummeting and add on to this window AD up again on top of the shadows which we have already painted after this. So you will absolve tactile via kind of done. I do not want you to overlook anywhere on this painting because he tests don't Dato daily pretty asked for my understanding. We really believe that you're not adding much. Only a few highlights, core final details. That's pit. And I will actually go ahead and add one or two branches post. And then now mix my white quash to the highlights whitewash. If you mix with any of the carlos like lavender or read pilot, you will observe that you get beautiful highlight for your drum tree, as well as even now for your from the green areas. Often tree leaves. Your can do doc. What do people who do not have this whitewash? You can always go head and USO vita postdoc hollow or any model or pico white. What the color that dusty available with you? Like. I know titanium white is the opaque whitewater Kahlo invents that I'm Milton. So each inhibitory brand that you purchase will have some or the other shade of white, which will be opaque in nature. You might have to experiment a bit to understand quadrats. Just go ahead and clean the whole of WTO. Do that you purchase. Usually that is the pigment that is given along with it. That is the light fastness, as well as the capacity of the column, which is mentioned very clearly. Those things are and other important aspect of any watercolor tool which you purchase. Now make your people dry. Had then go ahead and remove 30 at an angle.
20. Project 17 Recognition: There are only four colors that we will be using to complete this painting. Oneness, the bright yellow green than the cobalt green, blue and Payne's gray along with it. Just keep the white wash for splattering the stars. Okay guys, so the next two paintings that we would be doing, this one has the last and next one is all about painting with northern lights. And why I am doing this not unlike, its not really simple to control the water and the northern lights and understand how much pains you should apply, as well as how much water you should apply so that there is a smooth blend of colors. And secondly, even for the Northern Lights, it's a very tricky subject. Sometimes you get very hard or row sharp edges. And that's what I want to tell you how you can avoid. In the meanwhile low we would be doing as a simple excise, we would be doing one small mountain and then there is an area which is below the horizon line for the line, again, this whole of the area is expected to be somewhere in Iceland. And because you can see metabolites and Norway, Iceland done a few other places. I have considered Iceland as the place where I am watching these not anolytes. And I will just go head. You saw my tape or to cover these areas of the mountains? With the help of my pencil, what I usually do is I go over this 80 after deep and draw the lines which I did. Draw all your flow with the help of my graphite pencil. These are again graphite mugs and have a very, very simple way of actually hiding these mountains. Because I personally love to use the whitespace off the people for drawing or painting my mountains. You can also go head with whitewash if you want. But I can tell you this is the most ideal way by which you can paint your mountains. If you do not have the tape, you can even go for masking fluid. But since so many of us do not have masking fluid as big nurse. So I just had this as an idea. I usually go for masking tapes for many of my other paintings. And it is very, very useful while you want to mask out any of the areas. It simply works wonders just like DO mosque included, you will do the same thing that I have done for the mountain area, even for the line which we have marked below the horizon. And then again, Got it. As well as pasted back on the paper. Do not worry. If you are having a 100% cotton Paypal, then this masking tape will come out very easily. But in case you are using any kind of handmade paypal, always test these masking tapes before you use it. As many of you have complained to me that my masking Dave doesn't come out clearly. So it's always a good idea to test it before you actually do your final painting. This is how your idea would look. And you can go ahead and remove any extra graphite marks that you are observing. Once done, go head, use Kenny flag brush or any other round brush that is available with you. Any wash brash which you want to use for applying the water on the top area. Sky is the most and the most, most important aspect of this painting. As we are doing northern lights. This is the bright yellow green from semilog, which I'm using. Now, if you do not have this green, you can also go for yellow initially. And then some cobalt green. There's again, many of you who might not be having cobalt ring. You might be having voice not in case you are having two acquires, just add a bit of opaque white water column in it and you would get some color that is closer to this. So go bad green. I have been using many colors, like go bartering. Then you can say compost blue. These colors use specific amount of pigments. Each company has a different ratio or a different number that they use us the pigment. So you have to go ahead and test the colors before using it on your paypal. This is a very, very beautiful Kahlo and these auto kalos which you usually absorbed in other real, not on light. But the main idea of the painting is to understand how we paint or not. Unlike, you see that the amount of water that I have on the Paypal, it's not running completely as well as it's not the one that would dry off immediately. So you need to know this optimum amount of water. And that's what I have to focus right now for this painting. So the colors that you see on my Paypal have been already tried and tested on an adult people. And that's usually how I go about it. Now I would go and actually apply some amount of pollution. Low dispersion, blue is from the watercolor tubes of art. Philosophically, the bright yellow green that you were absolving was from say, failure. The cobalt Green was from Magellan mission goal. And you will absorb of variety of colors that I'm using is from different brand. It's not at all healthy to say that you have to stick to one particular brand. Because whatever you like as scholars from different brand, you can always go ahead and use it. There is no granulation of color that I am using form for this particular painting. Guests, there is another aspect of granulation and all I do not want to touch upon and because as beginners, we are not so much in getting into the details of how you actually apply the colour which has granulation. Rest term, let's just understand this is a kind of variegated wash which I am doing, but with multiple colors that I am applying this variegated Bush. I'm moving my people in many directions. And the final darkest layer that I'm applying is with my things great. If you do not have Payne's gray, You can also use Indigo. It's up to you. What's the color choice that you want to make? But before you do anything, always, always. Go ahead, try these scholars on another paper and then only apply on your final painting. Because sometimes what happens is the two colors do not mix properly with each other and do they do not give up beautiful blank of colors the way you are watching right now on my Paypal. Another important aspect of watercolor is background. What do I mean? The background is that if you allow some water to remain on top of your tape that is on the sides, you would observe that there will be what, what are the excess water that would come back on your painting and it would give you a cauliflower effect. And that's not the effect which we are looking forward to. So be very sure while you actually clean the edges, it's so very important to clean your edges while you apply any colors on your painting. It's time to enter reflection. For the reflection I have used again the three colours. That is your Prussian blue, then your bright yellow green, and then next AS your cobalt ring. So all the three colors have been used and it's a very simple reflection, which I have done. You will take some whitewash known for are the stars. Again, the amount of whitewash on your brush should not be very high. Because if you have a lot of whitewash on your brush, what happens is that you will get thicker and bigger stars, which we really do not want. So the saturation level of your whitewash should be higher compared to the water content that you have on your brush. So you will get very small and Like stars compared to what you will get thicker and bigger stars. That's how I do love my stars. But I would again leave it up to you how you want to go ahead and think that I will be adding some more stars even on the water area because it's a gum wattle. And you will get the deflection of the entire sky on the water ADM go head and removed the tape which you did apply earlier? Yes. You will see such clean edges coming out even on the areas which we want to paint for the mountains as well as for your lamp. We will start with ALL very, very light wash of glue. In view of the areas, I will go with the beard saturated version of the Prussian blue and then again, watered down for the clean water that I have. There are always two sets of water or to jostle for though that they keep for myself. You should also get into the habit of keeping to Joseph Watteau. One is the clean water and another is the water where you will wash your bashes. Module, keeping this area of the mountain, I would let you know why I named this project as recognition. Recognition is a very, very important aspect of our lives. We are always dependent on others to recognize us, but isn't that important to get the recognition from others? Or is it important to actually feel that you have a sense of recognition for yourself on your own. And that's where the whole aspect of recognition comes. And according to me, if you have done a great job, sometimes it happens that in your carrier you are being recognized or you have been actually helping at your home, or you have been working on a project or you have been doing something that is out of your way and you have been recognized by other people and that particular set. But is it what we want for ourselves? I would say no. Recognition should be from your inner side. Yes. If you have achieved something, you should feel that, yes, I have achieved this and I wonder, actually recognize it on my own that this is a new aspect which I have discovered. Either a B in my behavior are either a B in my what profile it is okay to feel recognized on your own. And there is no hard and fast rule that you have to be recognized by someone in every aspect of your life. It's okay to not be recognized person van, and only feel that you are being recognized for this particular act of yours on your own. Supposedly that today you have done one act of kindness. The person might not have recognized you, but you yourself know that you have done one act of kindness. Today, that's the change actually which you have brought in, which will take you a long gray. Therefore, just forget about what people say, what people think, and just think about what you can do and how much you can add on. Now, getting back to our painting, Yes, I have talked a lot about recognition. So let's just concentrate on our job painting though, AVS off the mountains as well as the areas below the horizon line. Below the horizon line, I have added some shade of this light, green as well as the cobalt green. So go ahead and add some more Dhaka values of Mainz gray. Because so once you have the spins Gray, I want to show that this Lambdas there and while the land meets the water, there is some amount of depth. And this step can be easily shown that the help off using any Payne's gray, what any darker values are Prussian blue or indigo? Howsoever you want to go about it. Let us now go ahead and add the mountain area. Many of you might know how I paint my mountains. Yes, I have given like one fall flat on painting mountains, as well as I have even taught you how to paint a mountain student, the Polaroid series. I go with all very simple. We offer painting my mountains. I take o saturated the Kahlo on my ten brush and then make a few strokes. You're blending it well with my blending brush. My blending brush usually has clean water and neck and I keep lending this saturated Kahlo, often tennis brush which I've applied on the Papal with this blending technique. This is very, very easy way of actually painting a mountain san. I have used it in many of my Rio paintings and they look fabulous because I am not going strong believer of using I'll colours like white Gosh or opaque white medium venue on doing watercolors, what does us more about Fluor dirty? It's all about using the whitespaces off your paper. Why do we need to reuse these extra colours like white Guo shared on C For a particular aspect like painting your stars and all. Yes, I do understand, but rest of the areas wherever we can avoid, I would like to always avoid using whitewash or opaque white water column. It can be for some kind of highlights and all which is perfectly fine. Barter, rest. Just go ahead and use the whitespace off the people. It looks really amazing when you complete the whole of the painting. While you being these darker areas. So these are major leaders, riches, the shadows and individuals Marlow piece which appear on a mountain that actually gives the complete depth of a mountain. And it completes your painting. If you are a not very confident about painting these mountains, you can always try it on and off people and then go head and painted on your final painting. But then again, what's the use of keeping us sketch book if you are actually drying or if you are a beginner, this whole exercise is to understand how we can paint on a sketch book. No one is coming and actually judging you for keeping a sketch book. It's always that it is for your own use. Keep it. Use it as you wanted. If you don't like the scanner and painting the backside of the people as it is a cotton Paypal and do the same painting. It's okay to not get it at the first time. It's perfectly fine. You might have three or four failures for any painting, but you will get it finally. And that's what the star major important aspect, ping, ping. On a regular basis, each of these paintings will not take you more than 15 to 20 minutes in terms of the painting time, ya and those of the drying time, it is of course, a bit higher compare to what you observe over here. Because drying time Gus varies a lot depending on the people that you are using. Sometimes the Paypal is a 100% cotton, but it still drives faster because it is due Sunday, GSM, 300 GSM. I know Fabriano dries faster compared to arches. So there are different kinds of papers which have or different amount of water holding capacity. And depending on that, you will always find the drying time varying. Finally, I guess I would add some water or shadows on my land area hand. Then novae are the kind of done. I am pretty satisfied with the outcome that I have right now. So I'm not going to overdo this painting any further and leave it here. Let your paper dry completely on dog. Then normally it a more fluidity part-time angle. It has to be at an angle so that we can secure thought touches.
21. Project 18 Focus: We will be using the same colors that we did use earlier for completing the painting. That is our bright yellow green, then our cobalt cream, rapprochement blue, as well as some amount of Payne's gray. Do all the exercises that we are doing them separate from each other. But if you haven't taken hard, hit them, did the last text size, I would actually ask you to first go ahead and append that exercise and then come back to this one house. This one is going to be a bit more doubtful compared to the last one as we are mixing our mountains low another lights as well as some amount of trees that we would be painting. For each one of the component, i would be actually outlining each one of them, like first-time going ahead and marking my mountains and then I'm going ahead and marking my crease. So each one of them is really important as a competent to complete this painting. Major area which I'm leaving this for my sky, because here there will be no reflection on the land and the sky area will be visible. You have to, again, monster mountain area, mass Paula's though, land area. Exactly the way we have done in that last painting. Go over it with the help of your pencil and then got it with those scissors. So this is the easiest way I have actually learned till now how you can save your whitespaces. But if you have masking fluid, always welcome. You can go ahead and mass these areas. Would they help after masking fluid? Most of us have an access to the masking tape. Masking Florida's always not readily available. Sometimes the paper also comes out along with the masking fluid. But whatever, even if you are applying your masking tape, always check it on our rough sheet of people. That is the exact quantity of people you are using for completing this painting. So I haven't been this project does focus while I was growing up, I was being told theory that you need to focus on your studies first. Then while I was actually working and how Orwell's i was doing my college, I was being taught unique to focus on on your carrier. And each and every step of my life was focusing on thanks, which I have to do and pertain and my life. But no one door mean that the real happiness from inside is to also focus on the hobby or those small amount of work that we do for ourselves. It can be just taking care of your mental head that gives your main focus. It can veto paint, just like another artist's rich whom you admire. It can be the focus. You can do small, small things which can come in focus that I have to make a good game. It can be a focus for a moment that has to be smaller, golden like there has to be smaller. Focus areas and life, rather than looking always at the bigger picture, the bigger picture will automatically come in place. Okay, getting back to our revoke now, it's going to be simple. I'm mixing mine bright green with a bit of cobalt green and this bright yellow green of courses or very pretty, but it has got an underlying yellow in it. And I do not one to show that yellow because of which I have added this cobalt green in it. You can always go window and bright green if you wish to do that. But according to Me, you can always mix it with a bit of cobalt green. The way you apply the colors is very important. Again, the optimum amount of water is really important while you complete this painting, we are letting our Kahlo's flow and there is no hard and fast rule that you have to make the particular northern light in this way itself. But what we are trying to achieve this, starting from the right, going further, not unlike and while they reached the bottom, all the mountains are closer to the mountains. You need to make it lighter and value with the green colour. Then I would go ahead and apply my brushing loop. You will see that most of them makes sure that I have done. He's more watery and because it has watery, it can move from your end there, there cannot be a lot of control on the kind of painting that you are doing right now. So let it flow. I would say that you do not need to control the water that you have on the people. But make sure that you have optimum amount of water so that your colors can move. I'm using my sciences silver black velvet brush for applying this scholar. But you can go ahead with any signs of branch status available with you. Preferably if you can get a size eight or a mob brush type would be easier for you. Again, more Brush have got different sizes and unique to take care of that. Sometimes it can be 0's signs are on one size that might be more suitable compared to those larger brushes. And if you see the Prussian blue just goes really well with though cobalt green as well as the bright yellow green, which I have on the people and the mixes. Really beautiful, so dense these scholars, as I always say. So this is just a guideline that I have been using and I have provided you that these colors go well with each other. But sometimes it's a possibility that you might not actually get the correct blend of colors while you do your final painting if you have not tested it on the Papal. Finally, mix some mappings, David, Prussian blue and apply on a few areas like I'm doing right now and make it move a bit here and there. But the amount of water that is available on your paper gives your water is drying up. Don't try to apply any further colors or Roskilde would spoil your painting there if your people are dry off daughters. And then we will start by painting are mountains as velocity though tree. Another important aspect which I did focus in my last painting was to let you know about the background. Yes, the background concept is really important while you're painting the northern lights because there is lot of four dot, dot v or using am in case you do not mean the edges of your IQ or people, you will find that there will be, what do our beans, which we'll come back on to both your people and you will get the volume floor effect. We always want to avoid the scholarly flora effect than that. So one of the reasons I have been actually focusing on the background part a lot, even in the last painting, as well as on the garden painting. Once this painting dries up, you will see there will be a lot of areas so which has changed a bit and it is perfectly fine. Many things can change because the water can move as far its own will and wish. So do not try to controller, do not beat yourself up. It's absolutely fine to go ahead and see the painting the way you are absorbing right now for the mountain. So keep in mind that we are going ahead with a very, very light wash off any Kahlo, either the Bush window that you want to apply or mix of Russian brand Payne's gray or simply being scraped but does agitation level of the color should be very low, high. And that's what you need to keep in mind while you are applying the color on the Beagle. The area is 30, the small. But what we are trying to achieve as a flight washed and washed means you shouldn't have the same saturation level in all the areas where you are painting. If you are not, they okay with the concept of flight rush, it's perfectly fine. You can select those smart people had tried to have an even goat of wash on it once. So you have that even goto for shoe would be in a position to understand exactly what did I mean by those flat wash? I have a mix of being screened and promotion law and I'm applying it on few of the areas where I did the applied my flight wash your paper dry after that. And now's the time that you need to keep dwarf your brushes handy. One here's a smaller brush that is size four, silver black velvet. And can I dont want would be all washed crash or you can keep any kind of blending brush for yourself. You can also do the blending with the help of two carbon brush by washing it every day and now. So I leave it up to you how you want to do it. It's up to you. The concept remains the same as we have understood in the last fainting. There is nothing extra. Or in terms of understanding, there is nothing new that we would be learning in this painting. All hemoglobins. I mean Bach concept to keep in mind while you are doing these, mock them. He thought you'll have bowl or decile values with the half off your blending brush our routes you'll have to orbital value off though. Mom dance with the same brush that you are using for applying the deeper values. Sometimes you will observe that I am adding some deeper values. And in some of the areas I am having, though, lighter values, that's how I am changing the values of my foreground, lambda1, x1, the heat gets so very beautiful aspect in terms of painting the regions or the valleys, or the small, small, darker and lighter areas in terms of shadows. You have to being the background mountains exactly the similar way you are painting the foreground London's that is more befriends saw in Dharamsala though foreground and the background bulb that's only though foreground, Mombasa, way more detail compared to the paragraph mob. That's, that's where the horde, the front saw lies. I'm a strong believer of utilizing the whitespaces of your people. I always try to master areas so weird, I need the lighter values in case I am doing any kind of more water movement or a lot of water is being applied for my sky, which icon control without masking or particular area. Those are though aspects which I always keep in my mind while I been to any of my sketch, forget sizes or any of my final paintings. That's the way you should also take that how we can actually reduce the use of wash on your paper. Because the transparency of watercolor is really pretty and we want to show those transparency are the y's, the flow, fluidity, et cetera. The characteristics of watercolor is to show the transparency, staining, NIS or granulation or any other characteristics of water color which you have in mind. I know that are chromatin will granulate to an extent on paper. And that's one of the reason I did not apply it in any of my Madame lights painting along with the greens. This is just one of the guidelines, so it might not apply for all the paintings. Now I have just two governing by land area. This color is of course, opaque in nature. You have to make sure that you have this opaque white water Carlo for the stars. You can also go head and apply or Jelly Roll Ben, to add the stars. It's up to you what you want to take. For me. I take lot of saturated white wash on my brush and then apply it on the people so that I can get these smaller star said Major V. I do try to apply it on no blue areas. It's up to you how you want to add it. You can add more stars, you can add less taus. But what I usually observe in a painting is that these new areas have some kind of stars which are larger in quantity, but they are very smaller in size. Always observe Oh, photograph. Or if you can travel to a particular place to observe this phenomena. Like either it be Norway or Iceland or any other place in the Northern Hemisphere where these not unlike Star scene, it would give you a first-hand experience and you can actually understand how they dance in the sky completely. They are not gone at all. And it's time to hoping my trees. The trees are also really small. They are not very huge or humungous in shape and size. Do keep in mind that these first one would be foreground tree and the other one would be a background tree. I would be detailing the foreground tree of bit more compared to the background tree. I am using my size six, optimize SCADA brush by which I can get those thinner lines to apply on the tree. Avl always go head quanta above the graphite monks that you did apply while you were sketching and do not go think much while you are making these random tree branches kit. So very, very simple exercise. Just go with the tennis brush that is available with you. Since I have a very thin dip, I, I'm using this size six brush. If you are not having anything like this, go ahead and use size 0, size one, var script liner brush for painting these. In fact, not the most important aspect is to focus. Why do I say focus? It does because you are until the detailing part of the tree. Detailing part has to be very slow and steady PR Don wisdom, HOT OFF doping thing. And this is just to simply adding some branches urine there, as well as completing their tree area. He would not be very tough. But if you mess up this, the whole of our painting, not fallen place. And that's one of the reasons I always say whenever you are actually doing any kind of painting, you have to be very sure about the final steps which you take. Final steps determined a lot in terms of the final outcome of the painting. So many of you asked me that, where can you apply these kind of tips and tricks or these kind of wet on wet method or bet on dry method, which you are learning today in my particular class session. And I have only one answer to it. Each and every painting will have a different requirement. But we do very calmly the washes in it, supposedly you have learned or variegated wash. Variegated Wash means you are using more than total three colours to paint or particular sky area, what particular land area, or any other water, alea, et cetera. Once you learn that variegated gosh, you can easily applied to the Northern Lights just the way we have done it today. It might not be called as validated wash. In particular, someone calls it as control humidity chord. You might call it as adding lots of water ad campaigns on top of it. Every person will have a different aspect in terms of calling it by a different name. But it's not that you will actually do something different in each of these paintings. The basic of the techniques will remain the same only there will be a change in terms of how you applied for your set of ideas or for your set of photograph that you're absorbed. They can painting pro. Anyway, I think I'm kind of done with the final part of the painting that is adding these trees and adding these branches on the libraries. Then high word lacto actually led by paper dry. Do make sure all the parts of your paper dries up before you take out the TPP. And that's really, really important step for watercolor painting.
22. Project 19 Celebrate: Let us discuss the colors which we will need for completing this painting. It's brilliant pink, Naples, Yellow like GAR mine, friend shock, vomiting, white, wash, permanent yellow, deep bonds, Sienna, and then die Kay Brown. And this one is going to be a pretty exciting because we will be doing based tilde skies, water as well as some amount of ground area. What I would ask you to do is just go head and they go one toward quite a bit of higher, like around 40% TO 80 or for the sky hand, divide the next area that does. Therefore your raw water as well as for your land, can do 40% 60 in the similar ratio. Start using don't Naples Yellow, that Naples Yellow is the light Naples Yellow series one from my scenario set that I have. You can also go for any other yellow copies to follow which is available with you. If you do not have a base took hello, no need to worry, just have some opaque wash water Carlo mixer but offered with your row. Yellow. Any yellow that is available with you, that is lemon yellow or a media law. Any other yellow and get dark color, which is something similar to this. Note, dry the colors on the people before you go ahead and finalize it on the painting, you will even watch that I would be using my chromatin and some amount of whitewash to get Alcala is similar to those light shade of the blue or the blue sky that I want to apply on the drop Galea. And finally, I guess I would be applying some more. They still pink color on the sky along with it, I have to actually add some more amount of cultural meaning. Now since the basal being color that I have applied is quite dominant. So whenever I am going ahead and adding this atrocity, it is marching well with though, really think, which I have on top of my people. Now this brilliant thing is of course, the peaceful Bank, which I was referring to it is from the blind Magellan mission goal. Again, if you do not have the scholar, Just go ahead, use any prominent roles, carmine or any other pink color of your choice, and then applied on goal people. Before applying it, the rules remains same. You have to always take the colors on a rough piece of paper. What I'm trying to do now is to pick off some amount of being that as my base still yellow or Naples Yellow, which I have applied. And you will observe that this alia, I am trying to give us the White for the son. It's time to add some clouds now. And I would prefer going for The Color Purple. How I prepared scholars still K10. Think of your choice, either it be carmine or it can be even a bit of red and mix it with the art chromatin blue which you have on the ballot. Then go head and B, these small, small dot with those eyes for brush, if you are more conservative and I'm not sure how to apply them, go head but smaller, brush off your choice. Size two or size one. These clouds needs to be applied on paper, which is weird because we are doing where don't bet for the clouds. After you are done with the cloud, I would go ahead and paint the water for the water. I'm starting with the middle area. Why I'm starting with the middle area, because that is the lightest value which I want. There. I have the Sun and the Sun's reflection will fall under water atrium. Hence, the base to the yellow color would be the dominant one in this area. Along with a little bit still yellow or the nipples yellow, whichever Kahlo is available with, you. Just add those sub more amount of pink on the sides and keep extending it towards the bottom area. This is really important because you will observe that the more you are having a good blend of colors, New York DOT area of the sun, the better would be the result or the final outcome of the water. One Inspector which you need to concentrate on is understanding how you want to actually reflect the color of the sky into your water. This is a very, very important concept and I have been touching upon it in many of our sketchbook exercises because most of us always find it really difficult to paint waters. And I have been trying to actually make it a bit more simple for you. I hope you can understand how the color of the sky, including the pink, as well as the blue, is reflected onto the water area, the middle area, we are trying to leave us yellow because I want to show the sun can that Kavya and the reflection of the sun is seeing into the water. Once you are done with the water, just let the area dry off completely before you apply any colors onto your land area. Again, land area is also going to be really simple. This is one of the compositions where I wanted to actually bring in the water, the sky, as well as the land together. Which actually completes Kenny landscaping day. I'm using Mac has gone up 0.75 inch to start painting the land area. Before that, I have applied or clean layer of water. It is a bit yellow in color, but do not worry since we are going ahead and using our permanent yellow deep. So there should not be any problem. Once you are done, just take some bonds, CNO. On your brush again, the one CNI is very beautiful colour which I am using. It is from the brand when sudden Newton. Or you can even use from the brand Magellan mission goal, watercolors are equally beautiful. If you do not have a color that is similar to this, do not worry. Go head whatever is available on your palate and then take some rent Guy, Kay Brown, how you can prepare this vent IK branches. Take any amount of Payne's gray and mix it in your buoyancy and all, you will get. An Apollo type is similar to the one that you are observing on the people. Applied in few of the ideas, since it is wet on wet. So it will spread coordinate zone. You do not need to body. Once I have applied by Wendy Brown over those whip area, I might find it a bit lighter in value. Or the saturation might be less, because of which I can go ahead and paint over it again. Orders you can even take O saturated version in the first row and add it. Since it is wet on wet, you might find that the colors will spread and the saturation or the level of value which you want to go for the span die, Kay, Brown might not be matching. Not really happy exactly the way I am painting the ripples with this brush. I will go ahead and change my brush to SCADA size six, optimal. You can go for any other Tina, brush off your choice because that would help me to give the exact brushstrokes. Yes guys, I do always reach list that as big nodes. You should not be investing in very expensive brushes. But along with it, I do know that there are a few brushes which give you the exact strokes that you would like to have in your painting. But when you are starting off inner journey of watercolors, you should not be investing a lot on this applies as you do not know whether you would be following it as a passion or might like to pursue it further. Hence, investing might not be a great idea at this stage. Go head and paint some more ripples while you go towards the top. You would observe that I am actually leaving a lot of spaces in between the repo area. This is really important because when you're ripples are close to you, they need to be larger and venue or ripples at far away from you. They need to be smaller in size. That's how perspective works. Let's plateau some water has you have absorbed earlier, had ten. What I'm doing right now is using the backoff my Princeton brush, which is the flat brush, campy tassel, gotta nice edge. I'm using that edge to actually make some grasses. You can always do it with all palette knife. If you do not have a brush and dressed, I think wherever it is a bit wet, they're only these kind of marks can be made. You need to keep that in mind before going ahead and trying to add these on your people. Your Delbruck's show with a mix of Van Guy, Kay Brown, hands-on Sienna. Then add these tenor, hang shorter lines along the place where you have will be applied of NDI Kay, Brown kit would actually look like grasses dough. You might feel that this is kind of complete. Now add the painting looks perfectly fine. It's okay if you want to even leave the painting at this stage, what I want to gestures, go head and look at the Hadoop techniques which we will be exploring in this sketchbook excites and because they are equally important, then it can actually help you. In your future project. You will even absorbed that. I am now adding some more grasses with the help of my back of the brush. That is Princeton now, half an inch brush. It has got all nice edge, as well as add some more lines in the foreground, grasses. Why are you keeping thing this ADI, I would like to throw some light on the name of the project data. Celebrate why I have named the project. I celebrate. Each and every small moment in your life needs to be a celebration. Life all together is a celebration. If you have got life that store most valuable thing which we have in case you are not valuing it right now. There might be a time where it would become really difficult for you to value it anymore. Each and we have these moral goal that you achieve should be celebrated. Every small boat, this should be celebrated every small walk with your loved one should be celebrated. A coffee with your best friend should be celebrated. An outing with your friends should be celebrated. Each and every moment in your life should be celebrated. Because moments are the only things, are memories are the only things that we make in our lifetime. Rest, going after our goal, our carrier. Everything will stay here and no one will remember that much. What they will remember us is how we read as proportion in our life. So I would request you all to start celebrating these smaller moments in life. Along with it, let's get back to some painting. You will observe that I am trying to paint some amount of wheat fields. It can be read fields are a, can be grasses that are growing. I go with a very simple strategy. Just make a few dots together and then join it with the line while you go towards the bottom. The foreground grasses would be longer and the background browsers will be smaller as we have done earlier. That's the only point which i keep in mind while I paint any of my grasses. We will go up to the top area of the line and start applying some more amount of Van Dyke EEPROM and been Sienna. This is very, very small in quantity and then you'll have to blend it with your blending brush. If you're blending brush must have clean water so that there are no colors that you will be also going on. The people as your background is pretty light in value. And I will go for one more layer. This layer is a bit heavier, or you get saved that as a bit longer compared to the one which I did paint towards the top of the horizon. There is Canada a method by which you can go just apply some more water with your blending brush. And few of the ideas go over it with the same pains that as you open die Kay Brown hand, you urban Sienna mix, you will again find Capgras kind of they're appearing. That's Canada. We do just paint the scene. I will make two small mountains to actually denote though horizon and I'm Beethoven. You can call them mountain, you can call them hills, you can call them dogs. Go as you wish to call him. Then I will get back to some more finer details. I would say this is the time where you need to slow down because we are not going to actually add a lot of things any further. Our painting looks quite complete. Only a few things like if you are not happy with the whitespace off the sun, I'm using some whitewash to add for the sun alea. You can also go ahead and add it. It's up to you. And I would say it's completely your choice. Right. Some more row further detail. So which I'm adding going ahead, I'm mixing more of pink and less of our chromatin and then adding it just below the reflection of the sun to show that they had a 100 even some darker ripples which are present. There will be some amount of wash, which you need to use for showing some details onto your grassy area. This is a very simple with respect to how you want to go ahead and paint it. I am just adding a few lines, one or two dots on top of it. You can completely go ahead and use our Jelly Roll pen to add this. I am using the white gore. She, There is a wide postal Kahlo. Then there is opaque white watercolor. Any of these are suitable for painting. The final details. I am quite satisfied with the way this whole painting has dumped out. It's so peaceful sky. And along with it, I have this beautiful grassland. And this is the last part, adding some more slackers in white towards the bottom of the KVL. For the land. You can even avoided if you do not want to add this step, go head and let your paper dry completely before you start removing your tape. Again, that's one of the important step. Quarrels. You might rip off your paypal and which we have already absorbed in one of the earlier classes, signals guide to reflect it herself up or write CD.
23. Project 20 Appreciate: The colors we will be using for this painting is brilliant thing, Naples, yellow light, Prussian blue, blue, white wash or any other opaque white watercolor, permanent yellow, deep bond Sienna. And when I gave around and we are onto 120th painting, that does a sketchbook excise. The upper half is the sky, which is the maturity of the area that I have kept. And it is going to be a lovely B. So I'm blue sky. The lower half is basically the water area as well as the Beach area that I would be painting. This is a very important exercise in terms of those guy that we would be painting, as well as the Beach area dressed. Most of the techniques I have already covered in my previous exercises. We have practically covered a lot in terms of wet on wet, wet on Dr. advocated Bosch's. How you actually work with different kinds of pigments. Which pigments sometimes granulate. Which pigments makes Well, all of it we have done and there are a variety of subjects that we have covered, starting with Alban sketching, don't northern lights to sunset, sunrise. And hence, this one is going to be a bit different than, although earlier ones. We will start with Naples Yellow. Naples Yellow has got a beautiful property that it will not mix up with the colors like blue and gave us a green. And that's one of the reasons I love to use Naples Yellow whenever I am using my blue along with it, I'm using my brilliant thing to apply on the sky. The brilliant paint looks very vibrant and beautiful. I'm mix it with a bit of parallely maroon. But if you do not have the scholar go head and use any other pink that is available on your palette, that is car, mine, or roads, anything, opera, anything will do. Now. Just take some amount of Bush and Lou on your brush and apply it towards the bottom of the horizon. Whenever you are applying your first wash, it needs to be lighter in value compared to the wash that they would be doing after this. Or comparatively, if we go over it with one more layer. Now, that's one of the things that you should always keep in mind while you paint your skies over any kind of water area. Because it is difficult in watercolors to get back. As I always say, we are starting with this guy, area Baptists, that topmost part. And it is the compost flu which I am using from Magellan Mission Gold, control the saturation level of your beans, but do make sure that your area doesn't dry up easily. Here what are control is a very important aspect. If you see, while I applied the water in a way that it is too much or too little in my first layer, you need to strike the correct balance. We don't need a lot of water that it leads to background like we explored in the Northern Lights are or rubbery alice project nor we are going for wet on dry. I'm going ahead and mixing some amount of compost glue along with ablution blue towards the sky area. And then this is one layer darker compared to what we did paint earlier. You can thoroughly absorbed it. Along with that, there are a few areas where I do feel my they still think is not seen clearly. So I am going ahead once more over it and painting it. This is a very, very tricky position right now because we have to actually achieve the correct balance. Whether applying more of Persian rule will give me a better sky or just going ahead with what I have on the people will give me a better sky. It would only come with practice and a lot of experimentation. To be frank, No one can exactly tell you what would look good on people. The only thing which I can tell you is that whenever you are painting wet on wet, the shape that you will get finally will be one or two steps lighter than what you're observing right now on the people. It is different compared to the wet or dry method which we have explored earlier and saw that most of the colors are actually remained the same. The saturation level, I mean, mix some amount of pollution Lou and compost flew again and then not paint a few areas. The way I'm making my clouds right now, though there are not major study of the clouds which we will be doing. It's only the blending exercise which should be smooth in this case. And I think you can go ahead with any kind of diagonal clouds that you wish to paint. I do not do a one to show Cloud separately or together. And that's one of the reasons I am trying to have very limited or minimal clouds. It's time to add the water. You can still absorb that my sky is wet. And that's one of the reasons you can say if I start painting by water, some of the beans from below will go towards the baby up. Because of that reason. Now what you can do is always pleased for deep underneath that would actually help to move the beans from the top towards the bottom and do clean with the head of your Princeton, flat brush size, half inch. Along the horizon line. And then I guess we are kind of good to go for the flag wash of the water idea. Along with that, you always know that any of those Cabo will come with some amount of movement in water. Movement in water means waves. And that's one of the reasons you have to draw a few lines which is wet on wet. Now, these lines will actually spread. And that's one of the reasons we will go head on top of it once more. Once this layer dries up to add some more waves, It's timed TO paint a BJT. And all we are going to stop when dominant yellow deep, dive bombing. Yellow Deep is all very beautiful. Kahlo, though, if you do not have the scholar no need to body wonderful yellow you have available with you. Our incase, you have a light orange color like when suramin stack can also solve the purpose. In case you do not have any of these choices. Go head and mix a bit of orange in your yellow that is available on your palette and get the payload that is similar to the one which you are observing. Now I am going ahead and adding some amount of burnt sienna. You can actually see that my bond CNI is how beautiful reddish color. If you do not have, again, the scholar, don't worry news anyone's CNR that is available with you. There is no mandate of having this particular color on your ballot. While you paint. Let us go ahead and add some more darker values. Now, your darker values can be added either with the blue deck, you have orbitals. I have taken vent IK plan in case you do not have this scholar just a mix of some bones, sienna and a bit of black or Payne's gray can give you or darker shade and that's what you need to apply. This is wet on wet technique. You will see the pain spreading. Whenever I feel that the colors have gone darker than what I need for my particular painting. I always grew haired, wash my brush, and then go along the lines as you will observe now, I am again Washington my brush and going along a few ideas on the beach now, this is where don't bet. So I have already applied the colors. The colors will become one she glyco than what it is if I tried to lift it at this point in time. Once you are done, I drink some water on your people and they have both your brush like this area dry off completely. And then only we will go ahead and add the next clear. It would be wet and dry method that we will be applying right now. Always check your people before you go ahead and apply your colors for wet or dry method. I am going ahead with the Docker mix of Brown. And this makes us basically the red Nike Brown and the burnt sienna, which I have on my palette. There are a lot of colors which we have used. The colors of the sky gets reflected in the water and the land will remain as the sand because it is the beach area I have used majorly the brown and the yellow bow shoulder line the area. The second layer, of course, is more about adding textures. Do DOE land? How do you add textures to any area so that shirt you can only add while it is wet on wet or wait on try though, we could have actually done some splattering oil for the wet on wet technique. But sensors, the beach idea, we do not want to do that. And hence, I am actually applying the wet and dry method to add some more dots and lines which are pretty random. We do not need to actually think about how you want to go ahead and do it. Just make sure that they are originating from 1 that is outside the people, and then they lead to one single direction. You cannot have actually multiple directions because that would be against the rule of perspective. Those are the important aspects that you need to take care of while you are painting any Wolf your are been sketching or your beads sketching or any composition. Now, I am mixing some amount of my quash with my yellow as well as I will add some more compost blue to get polite value of this green and stop hiding my grasses. They had autofill grasses, which I've dry add dots. Ronald, $0.30 that followed that I'm using is not exactly equity. It is somebody in between the green and the brown. They are usually very, very Dr. Amy Beach stadio. While I paint my glasses, I do observe that it would not be each and every bear. It would be only at a few places because usually they are scattered when you observe it on a beach. I will go ahead with one more darker value to add on to my grasses as they look really. And the color is not giving that kind of extra impact. For that either. You can have the darker value of Brown that as your van died, Kay, Brown, as I'm doing it now, Arles, you can even go with some amount of green so that you get grasses which do not look completely flat and have some texture in it. Go ahead and add some more onto the other areas too. And remember that we are now in a position where they are actually going to end the painting. I'm kind of happy with the way it has dawned out, but there is a bit more that I'm going to add. But slowdown, slowdown is always the thing that I have told you while you are at a stage where just do three minutes of the painting is left or we are just dealing it. Or adding some more wide GWAS Shonda up offered so that it looks better. Or we can add some more texture to the ground or to the sky. Or we are adding some birds, something or the other we are doing, which is just the last stage of your painting. The last part is to add some more waves to darker area of the water. And it is only going to be some Prussian blue added on top of the areas where you have all the painter, the waves go with the flow. You do not need to worry much PR kind of done. The last part where I would like to explain you why I did though, had to rename this project does appreciate yes guys, appreciating life is very, very important. I do appreciate each and every morning because heat is a gift that I can see. I can get up in the morning and see the sun. Appreciating life to the smallest possible extent is really important for each and every person that weighs, you would be a much heavy, happier yourself compared to anyone else. Most of the problem that I have seen is without thoughts. You can actually appreciate life and understand your thoughts better. You would have a more fulfilling life in your future. And removed the tape at an angle. And you will observe that you can get nice clean edges per data times where I too don't get that clean edges. It is ok. They are not here to get everything to perfection. If he can get that's the best. Iffy cannot. It's perfectly fine as it is. Again, a sketchbook. Its size.
24. Project 21 Priority: The colors that I would be using locally, red-brown, burnt sienna, red dye, Kay Brown or CPM, orange, Hermitian semi via yellow, white cosh. But you might have alternative colors that you want to use. So go ahead and use those corners. If you do not have anything from this particular ballot available with you. We just have to do three more projects because most of our pages are not filled. I will do a walk-through of the sketchbook very soon. I hope you are. You have been keeping up with the sketchbook exercise and it's been a pleasure actually painting all of these one after another. Let's do a simple sketch. What type I am right now doing is about 35% of the people I have kept for my water and the land area. The rest is the sky area which I have doping along with it. It's a very simple painting where we would be doing some loose leaves. Hundreds out of the area will be beautiful orange sunset and some leaves of our tree. Here they will. Peter's son, which I would be painting. Let's start with yellow. You can use any yellow off your choice trying not to use the lemon yellow rest in yellow is fine with it. I have taken something alea yellow. You can go with any other yellow that is available on your palette. Just do all wet on wet or wet over dry technique. Depending on with soever metal you are more comfortable. See wet on wet, you just need two layers and wet and dry. You need one player. That's one of the reasons I have gone with wet and dry for this one, because we will only need one layer while we are painting. But if you want not very happy with the blending and all, go ahead and do wet on wet technique. The next. Any other color like you can go with permanent yellow deep, or you can even go with a light shade of orange that will blend very nicely with the yellow which you have on the people. I'm going with all very light shade of orange right now. And then I will go with war maybe on warming enormous in-between the red handle orange that I have, because I would be even adding words CNI along with it. If you are not very comfortable with these colors or you do not have these colors on your pirate. Go ahead and use a new color that is available with you. Though. Meaning the end of this painting is to learn something new. And this is again a sunset painting. Yeah, sunsets are one of my favorites and that's one of the reasons I do come up with some other, other color combination for my sunsets. Yours, it is more of wetter, burnt sienna, yellow, orange, red. That actually is very bright, vibrant on in caves or very, very rich and nice feeling. To be frank time not thinking much about the blending part of my sky in this particular painting because I know that my psi will be at least 30% or 40% covered with the leaves that I would be painting. That's one of the reasons I am going ahead with the wet over dry technique. But if you are not comfortable, always use the techniques that you are more comfortable whit. Once you have applied the Romanian go head and add the burnt sienna towards the side of the painting, blended well with a flat brush. Flood brushes always better for blending compared to the round brush. If you do not have a flat brush, we'll both go ahead with the round brush that is available with you. We are going to learn a new trick and this painting where you will actually understand how I paint with water. Yes, it is going to be something different that I would be teaching for this particular landscaping thing. And that is a lot of learning in terms of how, when, and what way you can actually paint wet water, as well as how it can turn up very expressive. Once you're done with this guy, go ahead with the same colors for you. What though? The walker is nothing very different and hence, you have to apply those same colors except the middle part where it would be more of yellow and orange that I would be keeping. There is some portion of those area where we will keep it as white. Why I have kept it as white? Again, you'll notice as the water area and the reflection of the sun will fall on the water around it. We have to paint it with yellow as well as the orange rest or all the paths will be, has spurred what gets reflected from the top. More of Valmy Leon handle been CNO which you have applied for this guy. I think I'm quite happy and satisfied with the blending of those. Adr, him though lower half of the horizon languages majorly the Brown as well as the orange that you see right now. If you are not very happy with her, you can, of course, go ahead and use the other technique that I have told you. Now it's time to go with the alight wash. And your brush should be absolute pickling. Though I see that my brushes and Hartley. What do you usually do in this case is always keep the tissue handy with me. And I would take off all the extra pins onto the tissue. The tissue and how extra jar of water is always, always mandatory whenever you are doing a watercolor painting, it would actually come as a rescue in majority of the areas. I think I'm quite happy and satisfied and lead this paper dry off completely. Once it is dry. Now, you have to actually load some clean water. Absolutely clean water or at your sides ache silver black velvet brush. If you do not have this brush, I would ask you to go ahead with any size six suicides for while you walk towards the right, you would actually see that when I paint with what out there is a light sheen. And that xin is very, very important. We will leave of your spaces in between when we are painting with the water. Why you come towards the middle of the painting? You will observe that I am actually making longer strokes. And they are few in numbers compared to while I was making. Because strokes, ticker strokes towards the top right hand corner. Now this is majorly apart of the tree which has leaves which are hanging. The leaves are in the loose style. So even if you're blending is not perfect, it would actually not matter much because most of the area will get covered in this whole author, Leif part that we will be painting. Do make sure that your water is there in all the parts are the y's, the pins will not move freely and it would not actually become a bloom. Why do you come near the sun? Of course, it has to be on mic's off your red, brown, and orange, which we have on the ballot. Whereas while we are towards the top right hand corner, it has to be either van dike, EEPROM or sepia. Along with that, you can even use some amount of red plan. Most of the painting is actually dominated with the colors of red and orange. So all the colors which you are observing are from that family. If you do not have these particular colors, just go ahead and add a bit of black about five to 7% in your read. And try to see if you are getting color, which is similar to the one which anyone can see right now, close to the sun area. If you cannot actually get Alcala similar to this, no need to worry, again, hits a practice exercise. We are not here to create perfect paintings. It is a sketchbook, and sketchbook is for our practice. And hence, there is not much requirement in terms of perfection, which we have to achieve. This might glocal picked off factor first ballpark. And I can tell you with ductile once you actually try it and don't try to bake with the water, you would find it really fascinating. Just the way always I'd go. What is all about water and its flow? If we are not allowed to experiment with water itself, then there is not much fun which is left than what the colors. I have named this painting as priority. But I already might not be though, most important aspect in terms of the positive words that we have been discussing. But priority in life is very important. And I have discovered that a lot during this particular time, which i have faced. Because if you do not glide or dice where you want to spend your time, it becomes really difficult. There were times where I was very, very diverse, stated I felt really sad. I was healing, but still I could not get out of it. And that was the time where I wanted to give was spent some time with myself and paint. It was difficult to pick up the brush and paint. But still, if you name your brain that OK. Today is the time. Right now in the morning, supposedly at ten AM. I will start my day and I will start my day. On a positive note, I will prioritize myself and I will start painting. Painting is one of the things which I love. That's one of the reason why high started off with this sketchbook exercise or together. The second aspect of priority, which I have learned from my own experiences, making way for your own thoughts. Either it be Oh, sad day, either it be a good day, whatever it is. You have to actually snap out some time for yourself and make yourself feel better. That's one of the things which I would always try to teach each email, everyone who joins my class, because all of us do have only 24 hours in a day. And within that 24 hours, you will find many people who are working, who are even following their passion, who have family. And we're even looking after that gets, therefore, if they can do it, I know that all of us can do it. It's just about prioritizing and how you distribute your diet. So I'll get back to our painting and it's time to go slow. Again. Why? I do say it's time to go slow because we are or do the last part of our being being very, are just dropping things. Some amount of trees. On our horizon, you can even be mountains, but for me, I just don't want it to go with the trees. And they would be the land area at the bottom of the sketch book. That's all we would be doing. There would be a bit of reflection into dot-com borders. Now, this is not absolutely calm. That's one of the reasons I will have a bit of reflection which I would show right now you will observe Howard showing this reflection. These adjust shorter and smaller lines which I am going to paint them that would look like reflection. Finally, I feel that the odd throw onto the ending part and you will have more of darker values that you would be using. So if you do not have, then die Kay Brown on your ballot. Many of you do have CPR and you can go ahead with CPR audios just make some amount of black in your bond CNR and use it. Finally, the line now. And go ahead with any color that is available on your ballot. Do not take up much of extra colors now because we are on dodo final part of our painting. And though we are not going to actually extended any further, try to use as much pains as it is available on the pilot. And then only a few letters just to 5-4. Neil foss to actually say that though we did a good painting where we are finishing off the pains from our palate. If you are not using this kind of a ballot or you're using already was a bot Ballard. It's perfectly fine. If you are taking out paints like me onto your ballot and then not reusing it. Try to use as much as you have in the current painting itself. Whenever you are left with the writ of paints, you can try some smaller paintings like a Polaroid or something else, tan finish off. And that amount of pins, there is a bit of reflection of the land which you see. It's a vein, a smaller part of land that is there on the water just to up laughs data, but of clean water onto this leaves ADR, though I don't think that there would be a lot of texture that you will be getting because most of the area is dry right now, some of the bottom area you might get a bit of texture, but that too would be less as the areas of the very small. If the area would have been a bit more larger, you will have gotten a better texture. Stein Dolby Laughter, Dave, bottom angle. But do make sure that your people is completely dry. Before you be loved any deep orders, you will actually rip off the paper. And we somehow do not want to report the paper at all. That's one basic aspect of painting. And I know that by this time you all are very good with putting, as well as removing their tape. As we have done a lot of Sketchbook exercises.
25. Project 22 Mindfulness: Let us check out the colors which we need. Permanent yellow, deep, burnt sienna city, Liam blue, Prussian blue, and CPR for completing this painting. Okay. And this is our second last project. Yes, guys, so we are going to finish off the sketchbook and the I hope you have been having a great time along with me painting this. It is coming to an end and I have mixed feelings like now to be flanked somewhere or the other. I am happy because so we could actually successfully finished one of the sketch books. And I will show you even who feared painting in that sketchbook, Arles we would have had during T4 paintings and total red is what would be ending up would be only around 23 paintings. That's ok. Anyways, I always say that sketchbook is for your own use and you do not need to actually have all successful paintings in your sketch book. It's called vaso practice exercise. And if your practice excess goes Well, you can show it. If your practice excess doesn't go well, then also it's no problem and you can go ahead and keep Doctor Singh. Many new techniques are many new color combinations. Anything that you want to do, I would go ahead and add some water. Oh god, my paper. It is a wet on wet technique that I am doing right now. These are the clouds which I'm painting. Again, one of my favorite combination is to use permanent yellow deep. I'm using this from the brand Magellan Mission Gold non-words didn't I would be adding some amount of burnt sienna mixed. So your bones here now with the permanent yellow deep. And you will find that collar similar to this one. If you do not have this kind of a Kahlo for first permanent yellow deep, you need to add a bit of orange in daughters in English, yellow or any other yellow that you have with yourself. And then go head Ananda, someone seer not, don't get Apollo similar to this one. Then next scholar which I'm adding on his city and blue sitting in him lose a beautiful color. And you will observe that how beautifully the whole of the painting would do. And now because of this particular city, Liam blue, do test your surrealism law before you applied on the final People. Just to check, it is actually not reacting with the gear load that you have applied. If it reacts with the yellow and gives you a green, it would not actually give you the clouds which you observe right now on the people had. Hence, it would be always a good way to experiment with your colors on a rough people, rather than going ahead and painting directly. The next column, which I'm picking up on my brush size four is my Prussian blue. Prussian blue again, is a very, very beautiful colored. You have used it in Northern Lights pretty extensively while we were doing to war far projects. Now, again, I wouldn't apply this Prussian blue in few of the areas for the Clouds. This is not going to actually be A-flat wash. Why? Because Clouds do appear in pockets, and that's one of the reasons you will never find a particular kind of cloud supposedly on a clear blue skies. A clear blue sky. If there is a cloud Dennett, there would be some water droplets or there would be some darker shades, or there would be some other yellow shade and door it, you will figure out that there are many sheets of clouds that do appear on the sky. Whereas if you are painting us day where there's a clear blue sky, it would be only one or two colors of blue that you observe. While you've been Docklands always made sure as a thumb rule that you can only apply the colors. Tell your people to sweat. If your paper is not wet, we will get hard edges. And for this particular painting, we do not want any hard edges. Do make sure that if your paper is drying up, let it dry completely. Then apply one more layer of water. Again. Go ahead and apply the deeper Don't, or more saturated version of color. This is how you should always go about the process. Since my people is still wet, I can keep working on it. And I am going ahead and applying some amount of pollution blue here ended. Let your people dry. Once it is done, you will observe that I have a very cold, saturated version of colors on my people or on my sketch book. But if you're not getting that, you can always go ahead with a second layer. There is no hard and fast rule that you have to only go head with one lived after you are done with this layer, one or two layers, depending on which kind of color you have. If you have a student grade color, it would require too washes. If you have artists great color. It might happen that with only one wash you can get the effects which you are observing on the people. There are a few branches that we would be actually drawing. Now, with the help of our monograph pencil, you can have any pencil that is available with you. There is no hard and fast rule of owning up any expensive pencil or any expensive Gallo which you absorbed during any of my instructions, whatever is available on your ballot, always go ahead with that and use it for your paintings. There are two words that I would be actually drawing. It is very, very simple sketch that I am doing. I always go ahead with a pencil sketch before I go over with the CPR color. As I feel, if you have a pencil sketch, it's a guideline which you can follow easily and paint over it as a big nor I have always followed it. And it has literally hurt me a lot during the whole process or during the whole journey of my watercolors till now. Using the CPO column to add dot-dot Dhaka values for my branches as well as for the boards that I would be painting. But you can use Payne's gray, black, dog, Brown. Are any onto Kahlo like gambit goal, whichever you feel is more suitable or available with you for doing this, are completing this painting while you paint over these branches and see how I am going over it? Yes. There are times where we do not get a full control with the brush and you would absorbed vague laws theory right now though, I have been painting with size, war brush, but I'm not very happy with the control that I have with those silver black node, which size war brush, I would pick quickly switching it over to size six, his cauda optimal brush. You can have any of your thin brushes for the branches font because it does help a lot in terms of gaining a lot more confidence as well as control. Each and every one of us have some particular brush which our favorite to us. And this SCADA is one of those brushes which are really important as well as it is really favourite to me, as well as have gained so much fun to over that brush, that painting without that particular brush seems to be a bit difficult. In the areas which are really thin. Like we're painting these tin tin branches and on. Why do you keep painting the branches? I would request you all to register. Actually listened to this topic of being mindful. I think that this topic is being read pretty often and all of us know why is it important being mindful is being aware that so one of the most important aspects in our life, knowing what is going in your thoughts, how emotionally you are feeling, what is going on in your physical as well as mental balance of life. If you actually are not aware of how you're feeling or what is your thought process, it would become really difficult to sail through any aspect of your life. I always know that being mindful is not about being right or wrong. It's only about being what you are feeling right now as a person. It's never about oh, I am not feeling well today. So I'm am I on the wrong track? Am I on the right track? No. It's just that you're not feeling well. That's the fact and you are aware of it. If you're feeling really happy, that might be again for a reason you were feeling happy or you have made yourself a priority because of which you might be feeling happy. Or you want to accomplishing small, small goals which you have made a priority in your life. Cells have illnesses are very important. And that's what is the whole idea of being mindful. I think that's how I do sum it up completely and let's get back to the painting now. There are these small, small details which I am adding right now. It is some amount of darker shades for my board. And I am doing hotline with messy feel forced, going well watered, and making these details. Finally, I think that I will go ahead and ping does some more branches in fuel the areas where I did not even tell graphite months. I have to make a few branches, take her out of few branches, tenor. Why? Because that's how it is aperiodic in nature and you should not always have a consistency while you are painting nature. Painting on nature would be more irregular. And there will be lot of shapes and sizes which do not go well with each other to keeping things all these branches. So one after another. Few of them will be intersecting each other and few of them will not be intersecting each other. There would be loose and they would just end anywhere. These are Dr. branches and I'm not showing much of leaves in it. It's again samadhi. So the feeling that you have to keep while you paint this particular scenery is the somewhere has begun or the summer is going on and you have some beautiful clouds which are prevailing in the sky. Along with it, you get these Dr branches on which do boats are sitting. We have all come to dog. Last part, auto painting by nu will be just all concentrating more on how to actually and the details for the branches and beyond. Not going to think much. Though only aspect which I would ask you to follow is to go slow. There is a lot of patients that you always need while you are doing watercolors. And this is one of the places where you actually need Lord of patients because you will need the amount of time that is required to paint the smalls more details. Irrespective of incase, you want to go fast. It might actually not give you the best result after so much of effort that you have put into. Now, I would ask you, do not hurry up, kit coil. Just go ahead, make these branches, some of them intersecting, some of them interlocking, Some of them arising from each other and just absolutely random. You do not need to follow the only style and way which I have done. If you have something else in mind, you can always go ahead and add a few here and there that, that will not make much of a difference. Finally, I guess so close to being done. And there is not much that I am going to add only a few leaves here and there are a few dots and one or two lines. That's it. I'm not going to touch much because I'm pretty happy with what I have as an output V W1 closely at just one or two lines here and there, which you want to add. And let the paper dry triangle, the vapor is one of them. Very, very important things that you must follow. Or it is an important Tom rule that you must follow. I have been stressing about drying off the paper in each and every Sketchbook, it's size or in each and every class that I have been giving till now. Because you can see that how people rips off a few, do not give their time to let it dry as this, as I've gotten Paypal. And if it drips off from one area, it might rub off or continue to report from the other radius, which is not what we want after so much of effort that you have given. I think you can see those clean edges, but there are a few times when I might not get even these green edges. It is perfectly fine. Again, it's a sketchbook, excited, so do not worry at all. Go head anti, peel off your tape. And then you can see how beautifully you are painting has turned out.
26. Project 23: We are going to use our limited politics size to complete this painting. Bond and yellow light operand and bright violet, either three colors which we will use to complete the whole of this last sketchbook, excise. Okay, we are on the last painting and we will be doing a very simple landscape this time. That is not done much of complex city. I wanted to end this with one of my favorite color combination. It is permanent yellow light opera, and bright violet. You can go for any other combination of your choice. But it's good to go with something similar, then you will get the outcome. Also similar to the one that I'm painting. I have drawn on beach landscape. And for the beach landscape you have to draw force though horizon line hand after the horizon line. You have to just make or too small shapes and sizes for though waves and along with it, there are two small mountain so that we can, or Hills would have to denote the horizon line, of course, in a better way, I'm going with the combination of this permanent yellow light as well as Oprah. If you do not have or para go head and use car mine as an other option. C, There are many colours which we might not have and it's not essential to have this particular overall color for this painting, you can go for any other violet or deep red. Violet is another option which you can dry and explore. It might give you something similar in terms of the result, as we are not focused on creating the combinations. In particular, there is learning the skill set from this particular exercise. I would be painting a lot with clean water for the sky. Right now what we are trying to get is a gradient Skype. But this gradient sky will change a lot. Kinda next few steps which you will absorb. I have kept or two brushes to flat brushes of course, one is three by four wrench, which is the SCADA brush, and another is half an inch. I do not want to mix up the colors that so one of the reasons I have kept these two brushes using more of bright valid or towards the top of two people. And while I go down, I am using more of yellow. And hopefully you will see, of course, ingredients guy, or you can even call it any other kind of multiple colored sky. Slowly, you will see the change in the galleries and how clean water actually helps us to change this gradient into or different kind of outcome altogether. Keep painting those Chi till you are satisfied with the gradient or there are no patchy edges that is left. Why aren't all paper to sweat to hit saw time those stock your work or wet. Some clean water? Yes. Now, this guy is to be painted, but some clean water. For this, you always need one change out Ofwat doll readily available with you. And that's what I have always done for most of my paintings. I'm going ahead cleaning my brush on a white tissue. Or you can have any auto clean tissue or also a toggle that you have been using and then takeoff on liftoff. The extra mapping which you have on the people with the help of your size. For our size, eight psi six brush, whichever is available with you. Once you are done clean thing that clean water. I wouldn't ask you to go ahead and paint some popular cloud Central the sky. Yes, it's the evening sunset. As always. It's just a bit different compared to the ones that we have painted earlier. I am going ahead with my size. So for silver black velvet brush, you can go ahead with any further Latino brushing if you want though. And they don't only few strokes that we would be doing. That's all we need. And hence, once this Leodes becomes a bit more dry, I might go ahead and add one more row. Round off your clouds. So do not worry if right now just start painting the waters. We are not going to have any hard edges in this painting. That's one of the reasons I'm going with the colors of the sky right away for the water also. And in the similar way you have painted the sky. You need to paint the water. Most of the work that I have done this, so using mice, half an inch brush, and you would observe that it is flat brush because the blending is very smooth with a flat brush. I'm Dan DO some model or darker value. So while we are painting The Watteau towards my right, I am adding some bright violet as well as wildlife being the shoreline. I would go head with a very saturated version of my right violet, as well as start painting it along the edge of the shoreline. We are adding the darkest value. Because anyhow, there should not be any kind of hard edges. That's the challenge of which I have taken up for this particular schedule gets size. Every time we do have some hard edges, autos, we are painting wet on dry. This time it has to be more smooth and we will be doing more of wet on wet, eval clean off any excess violated for HI actually figured out that I have either done the papers for my short line, that they help off my flat brush. I'm everytime taking off this extra pain campaign, cleaning off the brush on her soft tissue. You can also do it on a toggle, as I have said earlier. Go ahead and blend in a few areas where you think you did pick up a lot more than required. Looky painting, not ADRs, till you are satisfied and you reach the horizon line. It is very soft if you see the whole of the appearance. And that's what though, It's important for completing the spot. Once this is done, I will go ahead and though hog some leaves, which is just an auto withdrawal from the right and it would move towards the left. It would be a combination of my bright wildlife as well as the open. While I added it. Let your people dry now. And once the paper is dry, we will start painting the hills, which would help us to denote the horizon as I have told earlier, it is going to be very simple and easy. You have already done our rough sketch of the hills. It has some amount of foliage and hence, you will not find an exact the curve. Or you might not find an exact kind of a hilly nature. Kind of more random, you can say. And there are less Hoff peaks and troughs in the complete hills, whereas that is mod of loose strokes. There is a bigger Hill which I have painted already, and there would be a smaller hill which I'm going to paint now with the help of the same color, that is the bright violet. Go head and completed till you reach the middle of the horizon line. And then now you have to, again let your people try start off with the set of waves after this. Again now, the waves that we would be painting will be majorly with bright violet, might be a bit of opera in it. If required. Hbar omega d, it would be the bright valid, which would be the dominant column. The whole painting actually is being dominated by one single color, which is so bright violet. That is a very limited politics size, which we are doing. The Rumi, three colors which we are using. The one is the yellow. Daniel Burnham died while it in limited color palette, the beauties that you do not need to worry much. There would be very less colors being used as well as you would have really less in terms of the confusion within the colors, the more would be you will actually make your own followers your combination, and then applying it on the paper. That is a bit of a challenge, which is one of the reasons this painting is kept at the last, rather than it being towards the start off, those sketchbook excise. There, we have used too many individual colors rather than playing a lot with only two or three colors and making a lot of color combinations with that keeping thing are these ADRs and start making some loose strokes as you observe with the help of my size six, brush in few of the areas, I'm even softening it a bit because I do not want these hard edges much as I have told you. It's more of where don't read that I want to keep. And lastly, I will go ahead and add the sum of these boats. The birds are really simple and they are small. View of them will flap their wings towards the top few of them though, club dopings towards the bottom. There has to be of middle body part. And that's a large project of a sketchbook exercise that one often eastern side did not name the project. It is just the final one that we aren't painting. Whatever you do feel like naming this project. Go ahead and name it. Because again, it's positive thought that came to my mind. But I was painting it. Staying positive. It's like all continuous exercise and in one need to do it or practice it on a regular basis to stay healthy, either mentally potted, be physically. Now, the last part is to add these small, small lines. What I have done is I have a blender though, the colors of the hills and then whatever was left on my brush, I did use that domain, these shorter and smaller lines. One stamp like your paper dry completely and then peel off the tape.
27. Conclusion: I hope you did like this sketch book series. Overall. We have about 23 paintings, which we did in the whole of the sketch book series. Along with it, there is a variety of subjects that we have captured. Starting from r, see those guys too beautiful London lights. And some of the urban sketching concepts to each of this painting will not take you more than 13 minutes, including the drying time. Usually the maximum length of each of the painting is about 20 minutes. And that's exclusive of the drying time. I'm telling you. Most of them are done in two different layers. And because of only two layers, it doesn't take you much of a time to execute. Venule, start painting it. When you paint, it helps you to relax, meditate. It's therapeutic. You would love to have a beautiful final outcome. And if you weren't doing it finally on her sketchbook, the whole of the series will help you to get about 23 beautiful paintings which you can have a look together. This is a class where we have captured maximum natural elements, but not concentrating on one single aspect. If you want to go ahead and capture only a single element like seascape or what the escape. I have specific glasses like ocean waves as one of the classes where you learn how to paint, see skips, not own lights, have another class. So you can always go ahead and check out those classes give you specifically want to load a particular subject. This is a sunset. And if you want to, again learn at sunset dare magical sunset class, which gives you detailed information about how are you being sunsets. Finally, a big thank you to each and every one of you who have joined this class and made this class so special for me. I did have regular pinging session and hope that you will develop the same kind of a habit which I have tanks and meet you soon guys.
 Dhritikana Nath, Watercolor Artist and Instructor