Transcripts
1. Let's do this!: Have you ever wondered
how artists make those overhead art demo videos? You know, the kind
where their cameras positioned somewhere above them, and you can see
their workstation, their desk, and they're
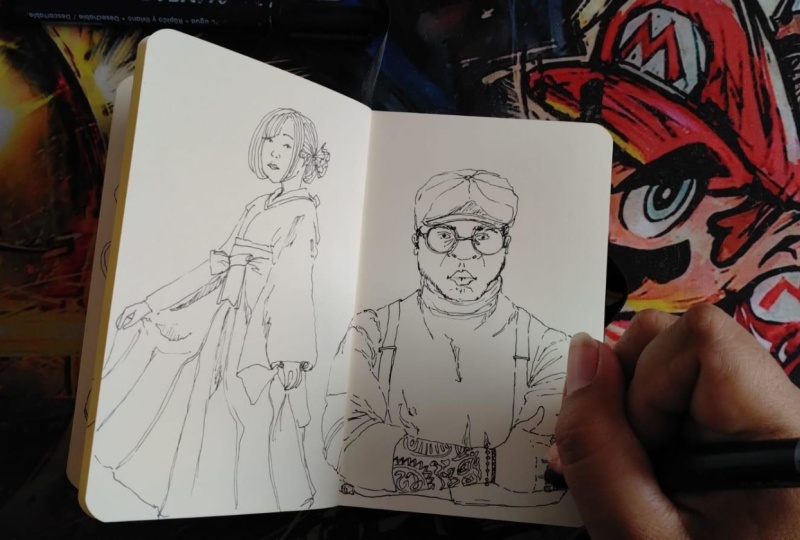
showing off Asa sketchbook or maybe some art project that they've
been working on. Well, I'm author
and illustrator, and Avid sketchbook
keeper Mike Lowry. And in this class, I'm going to show
you exactly how to make an overhead art demo video. This class doesn't use
any fancy equipment? We're not going to
use a fancy camera. In fact, we're going
to do everything right inside of your phone
from the very beginning? All the way through
shooting it, setting it up. I'm even going to
show you how to edit your video directly
in your phone. I've been keeping a sketchbook
for about 20 years now. And sometimes I like to show people what I've
been working on. And so I figured out a way a few years ago on how to make a really inexpensive,
easy to make, overhead art demo video that
I could set up and just walk people through my sketchbooks or even show maybe
a time lapsed, you know, a sped
up version of me working on a drawing or
any kind of art project. And I'm going to show you in just a very few quick lessons, how I set up a camera and I make an overhead art demo video. And by the end of the class, you'll have your
own art demo video that's edited and ready to post. These overhead art
demo video things are such a great way for you to just show off
your sketch books. Maybe you're showing your
watercolor technique or a process that
you've been working on. It's a really great way for
you to just engage with people who like your work and to show the kind of
work that you may. You make work in a unique way, and these overhead
art demo video things are a great way to show that. All right? If you're ready, let's do it. Let's get started. It's time to make an overhead
art demo Sketchbook thing for creatives with me, author, Illustrator,
Mike Cloud. Let's do it.
2. Lesson One: Tools: So this is just a very
quick introduction to three things that you're
going to need for this class. So the first, the main thing, the primary thing that
you're going to be using for this class
is your phone. Now, you'll notice I'm not
showing that to you right now because I'm using
my phone to film, so it would be kind of anyway, I could hold up a phone, but you know what
I'm talking about. Anyway, so you're going
to use your phone. It doesn't have to be
the nicest newest one, but you do want to make sure that there's a lot of memory. There's a lot of
storage available because the video that you make, it might take up a lot of space. So, the materials list that
we've got started here, number one, your phone. Number two, I use a boom stand. This is just a
microphone boom stand. I already had a boom stand back from my days of, you know, back when I was cool and
played music and stuff, but those days are over. I I don't know what
happened to me. Anyway. So I have this boom
stand. In a boom stand. What makes it a boom microphone
stand is that it has this one section that
kind of goes up like this and one section that
goes over like this. I'm gonna put some links in the, you know area where
you can put links. So don't worry about trying
to figure it out just yet. You can see that
down in the links. I'm gonna show you an
inexpensive one to buy. This is something
that I use a lot. Then the other thing, this
is a really cheap piece. This is a clip that your iPhone, your galaxy, your nexus G one. I don't know any
other phone names. Anyway, but that your phone can sit on this little clip.
It's got a little clip here. I'm going to show you how that works in just a little bit. Those are my two main pieces. So number one, your phone. Number two is this boom stand that you're I would
suggest ordering it. And then number three, the third really crucial
thing in all of this is going to be this clip that's going to go at the end
of the boom stand. I have taken off the little cup thing that
holds the microphone. This is a big microphone
stand. I took that off. And I instead have now fixed this clip on it that
will hold line pub. Okay, now I have shown
you some things to get. Now I'm going to tell
you some things that I don't recommend getting. A lot of times when there are overhead tripods and things like that that are meant
to be taken overhead, all of them will clip to your desk to the actual work station
where you're working. I don't recommend it. And
the reason I don't recommend it is because if it's clipped to your desk
and you're working, it will be constantly shaking. The way that this is
set up right now, you're going to see it later
when I show you my desk, when I show my work space, This microphone
doesn't touch my desk. So as much as I
move my sketchbook or the thing that
I'm working on, this thing is not moving at all. This only moves when
two things happen. One, I bump it with my face, which has happened before, or if I don't tighten it enough, which I'm going to
show you that later. That hasn't happened very much. So I recommend not
getting one of those tripods or little
clips. It seems easy. It seems so much easier, but to have it
clip to your desk, unless you're working
on some you know, perfectly concrete table
or something like that. That's not going to
be moving in any way. Then, I guess, in that
case, it's probably fine. But I would stick to the two pieces that
I suggest ordering. A later video, I'm going to show you some optional supplies, things like lights, maybe some other things that
you might consider using, maybe another type of tripod. And that's all
advanced mode stuff. I absolutely don't think it's
necessary for this lesson, but I'm going to show some
of those things later. Now, before we move on
to the next lesson, the one other thing that
I would recommend you grabbing would be a sketchbook
or a piece of paper, something that you can
make some art with, because we're going to make
our own time lapse video starting already here
in the next lesson. So grab your supplies, and I'll see you in
the next lesson.
3. Lesson Two: Set up: Alright, now that
you've gathered all of your supplies, in this lesson, I'm going to show you exactly
how I set up my workspace, my desktop, and
I'm going to show you how I set up and
position my camera. Let's switch views now so you can see what
I'm talking about. The first thing, the
most important thing, you need your
sketchbook or whatever art piece thing that
you're going to be using and some art supplies. Now, for this lesson, I recommend not overthinking it. The first video that you make. It's only for the sake
of testing this out. So don't let the process of making the art get in the way
of you making these videos. So it just Just try it. Okay? So I'm going
to just use a pen. I'm going to go
right on, you know, into my sketchbook,
but you can use whatever art supplies
that you like to use. Next, you'll notice
the lighting on mine. Let's see if I can kind
of show you right here. This is just a natural daylight. You know, find a nice, well lit spot where
there's not maybe too many shadows coming
in from your hand. So, number one, you
need your art supplies. Number two, you need to
find a nice, well lit spot. Number three, I'm using
a wooden desk here. And it is a little
wobbly, that's okay. It's not going to be
that big of a deal, but you'll notice,
I picked something. This is something that I bought specifically for my drawing
disc at some point, that it's not glossy at all. The problem is if
something's glossy, it's going to reflect all of the light that's in
your background, it's going to be kind of
distracting and not look great. So if you don't
have a mat table. Maybe your kitchen table
could be mat finished, so it's not glossy or maybe even one of your dressers, I don't
know, something like that. You could also grab something like a cutting mat
like this can be good. Mine's a little dirty,
so I don't use this a lot for any videos, but you could use a cutting mat or something else like that. And then once you find
a good well lit spot, you've got your
sketchbook ready to go, you've got your art
supplies ready to go. Then I'm going to pull
over my boom stand. Now, this is my boom microphone stand that I suggested
that you get. Now, look, this can be wobbly. It doesn't matter. It's not
connected to the table. I've got my clip on it. Again, that's all in the links. And then I'm going to
take my camera here. Now, look at this. I'm going to put it
right on that clip. Okay. Now, depending on what
you want to use this for, that will determine
the orientation of how you put this on there. So right now, this is something. You know this, but I want to make sure that I
say this out loud. The numbers are across the top. That means that this is a
horizontal video right now. It's a landscape video. And so if I start recording, the video will be horizontal. Reason I'm saying
that is, that's really good for YouTube, or if you later want to make a square format
video that you can post onto Instagram or
something like that. But just as a reminder, if you want to make
something more for reals or
something like that, you're going to want to
turn your camera like this. Oh, look at this, and position it that way so that you can make
a vertical video, and you want to
make sure that the numbers changed up here. And then I can hit record. And this is when I'm going
to start my drawing process. I'll hit record. You'll
see that it's recording. You guys know how video works. And then I can actually
start recording the process. I have mind set up to only
show a certain section of the drawing surface right
here of my sketchbook. You'll notice I cropped
it to where you're not seeing something like this,
where there's some edge, you know, of the table, where you can see
the floor or you can't see my feet or
something like that. Alright, we did it. We
set up our workspace. We've got our camera ready
to go. Everything's ready. Now all we need to do is hit record and start our project. I'll see you in the next lesson where we're going
to do just that.
4. Lesson Three: Record: Alright, we've got all of
our supplies together. Our camera is positioned
just how we want it. Now it's time in
this lesson to hit record and do our drawing. Take your time with it. There's
no need to rush on this. We're going to speed it
up later in our phone. When we go to edit it, we're going to take out all the sound. So, you know, if one of
your friends is walking by and they yell out something about, we're out of spaghetti. We need more spaghetti.
Don't worry about it. You don't have to pause and
start over or whatever. Because we're going to
cut out all of the audio. We will never even hear about
you being out of spaghetti. So, take your time,
do the drawing, and I'll see you. Let's do this. I'm
gonna switch views here so you can
see my work space. Let's do it. Alright,
I've got mine set up now to where my sketchbook is here. I've got the phone set up. As a reminder, I've got
the numbers across the top because I want this to
be a landscape video. I also I'm only
going to be drawing on this side of my sketchbook. So I'm centering that part of my sketchbook because this
side, I'm not going to use it. If you want to do a
wider thing, you know, that you're going to
use the whole thing, you can slide it over, draw all the way across
the spread like that. But for this one, I'm
going to kind of center it up here so that
you can see that. And here's my big tip. Before you start drawing, this is something that
I tend to forget a lot. What happens is that right now this phone is set to
where it'll auto focus. That means if something
is close up like this, it will focus on what's
close up, and then down. So that means that sometimes
when you're drawing, what can happen is that you will have it in focus
when you're drawing, you'll move it, and it'll focus on the pin
or something like that. So here's what I
recommend doing. Put your pen down, make
sure that you are in focus. Let me see. Let
me get mine here. What's in focus.
Okay. You see that? You tap it to make sure
that it's in focus. And then what I'm going to
do is I'm going to hold this down until you see this
little A E AF lock. And then that is going to keep the actual drawing part
in focus the entire time. If you kind of missed
that or whatever, I'm going to put that down
in the notes at the bottom, but this is a really
important thing to do. Otherwise, while you're drawing, your camera will be
going in and out of focus for the entire video. So you want to go ahead and
make sure that you have this locked so that it's not
constantly refocusing. Okay, what I'm gonna do now
is I'm going to switch to my other camera because it
makes it a lot easier to draw, and it seems kind of
nicer to look at. Once you have your setup, then you're going to hit record. You know where that
button is, but you're going to make sure that the
recording actually starts. I've done this before,
where I've hit record. I wasn't checking the camera. Something happened and
it wasn't recording. It's kind of a bummer. So
we're going to ahead and make sure that we're hitting
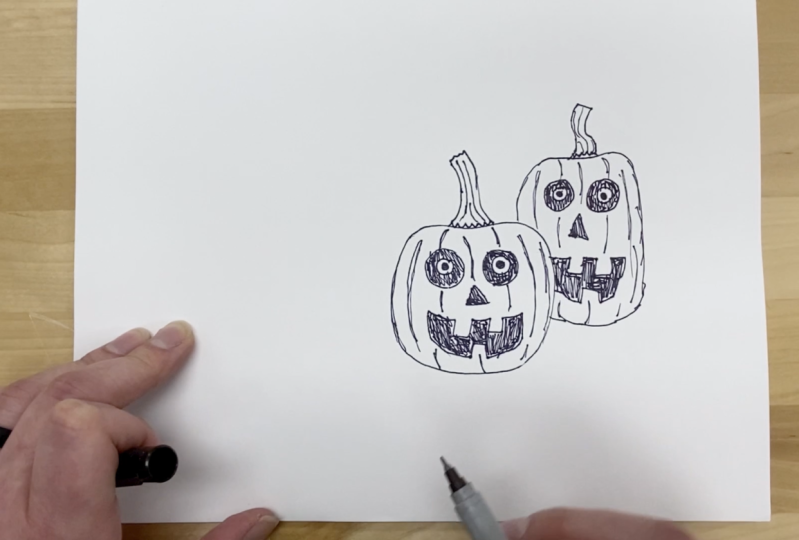
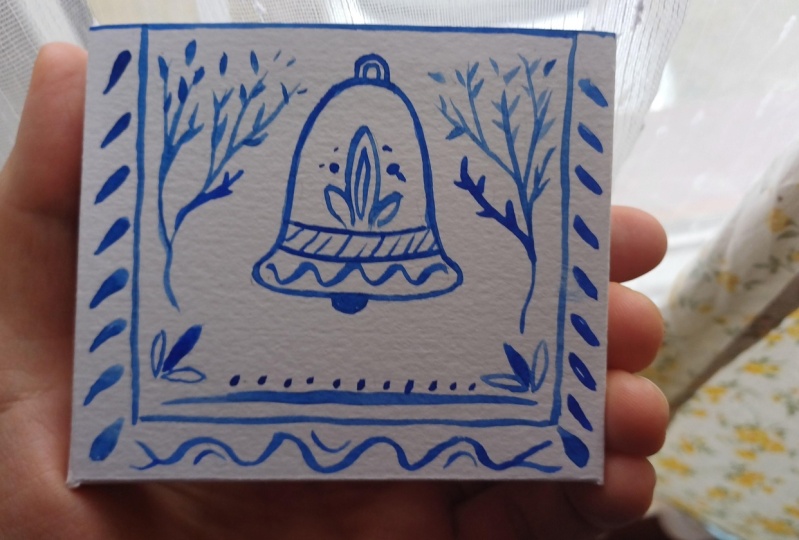
record, and let's do it. Okay. I'm going to draw some kind of
astronaut thing from mine. I've switched to this
other camera now because I feel like it
makes it a lot easier. And let's see here. I'll draw some sort
of rabbit in space. Now, normally, I
speed this part up. So I think what I'll do is, I'll draw for here
for a little bit, and then I'll kind of
fast forward to the end. And then I'm going to
show you how I do that. You know, I don't want
you just hanging out. While I'm sitting here drawing. I don't know. Maybe
that's interesting. Maybe like just watching
somebody else draw in real time. I tend to like to
speed it up, right? That's the whole point of
the time lapse aspect of it. But you can also consider using this method if you want to do
something on, you know, doing something live where you're actually
showing your process, your drawing process, or talking about your process
while you're drawing. And You know, I think that this is a
good method for that, too. You don't have to speed it up. And here we go. So I'm going to draw
a little bit more, and then I'm going
to fast forward and I'll show you what the
rest of it looks like. Alright, I've done
pen ink stuff here. And now I'm gonna
use some inkh which is just India ink
mixed with water. And I'm gonna paint and U U And anyway, this is one of my
favorite parts of the entire process of
making art is adding inkwh. That's totally true. And I think a lot of art people when they're making
their videos, right? They always have to
say something like, you know, this is my
favorite thing or whatever, but I really do like making these overhead art demo videos, because I feel like
it's a lot of fun. And once you kind of
get used to doing them, the stress of getting it perfect each time
kind of goes away. But All that to say that adding the ink
wash is always one of my favorite spots because it's just kind of I'm not really thinking
about it that much. It's real loose. You see
that I'm not trying to be very deliberate with
where the ink goes. So I'm just kind of I don't know just having a
good time with it. And painting this stuff in. Again, this is just a
little bit of India ink. I can put that
down in the links. I can put it down on the inks. You get it? You get
the little joke. So anyway, I'm going to
put that down on the link, but I really like
doing inkwh like this. I do this in my sketchbook every day because I find it
to be very relaxing. And And then once you're done with your drawing, you should have a video file, a pretty large video file. And in the next lesson, I'm going to show you how we
can take that video file, make it a lot shorter, cut it down, using your phone. Okay. We did it. We
finished a drawing. We took your time. It doesn't
have to be a masterpiece, if this isn't
perfect. It's fine. Right now we're just learning
how to do the process. And in our next lesson, I'm going to show you how to edit this video that we've
made that's now in your phone. I'm gonna show you how to
edit it in your phone.
5. Lesson Four: Editing: Okay, I love this lesson. This lesson is a lot of fun. Maybe this is something you've experimented with
before. Maybe it's not. But in this lesson,
we're going to edit this entire video
that we've made. We're going to shorten it down. We're going to make
it a lot faster. We're going to make
it easier to watch. We're gonna cut out
all of the audio, and we're going to do all of that right inside of your phone. So the best way to do this, I'm going to show you an
app that I like to use. There's a lot of different types of apps that you can use. You can use Movie and your
computer or premiere or whatever final cut
or whatever you like to use for
your video editing. But for this one,
I'm going to show you an app on my phone. So I'm gonna switch views here, so you're going to see my phone and you're gonna follow along, and I'll show you
exactly what I'm doing. Now we're going to take that
long video that we've made. We're going to edit it down, and I'm going to use a
app called CAP cut for this video and it's free and
it's pretty easy to use, and so we're going to use that. I have also used I Movie. I've used premiere if
it's on my laptop, but for this one, for it to be right in the phone,
let's use CAP cut. What you're going to
do is you're going to select CAP Cut, and then you're going to click this plus symbol at the top
to start a new project. Then you're going to tap the
video that you want to use. I'm going to say Ad. It opens it up here
into the project, and we've got one long video. Now, I made two videos for mine because I made a separate
video for the watercolor part, but I'll show you
that just a second. Right now, if we play this, you can see this
is regular speed. What I'm going to
do is, I'm going to go ahead and
adjust this here. Until just when my pen starts. Then I'm going to tap down
on here where it says speed, going to tap on speed there, and I'll say normal. Then here this is one
of the reasons that I use CAP cut more than movie. I movie only lets you speed
up your video a little bit. This one lets you
speed it up a lot. Then you'll see right
across the top initially, I think it was around 8 minutes. If I speed it up like this, I can drop it all
the way down to. I can make it a five
second, four second video. I'm going to make
this one around let's say 20 some seconds. Then we can play that up here to see what
that looks like. You'll notice it's still playing the sound
from me speaking. While I'm drawing, I'm
going to take that out. I want to get rid of that. We're going to do that
here in just a second. But this seems
like a good speed. I'm going to go ahead
and pause that here. I'm going to hit this checkmark. And then we'll tap
this video again. You'll see you've got
these options here for all of the different
filters that you can use, your audio and things like that. Let's tap this. I'm going to go over here towards
volume on mine, and I'm going to turn my
volume all the way off so that you don't hear me
speaking like a chip monk for the entire video. I'm going to hit the
checkmark. Now we've got a great sped up video, and there's no sound to it. You can add in
other audio later, which I can show you
here in a second. This part I don't
know, maybe it's a little cheesy. I'm
going to tap it again. I'm going to hit audio here, and then we can go to sounds. Then there's these
different. Again, this is we're trying to do
this the quick way. Let's try travel. Let's
see what we've got here. You can add some music to yours if you want to add
some music to yours. I'm going to skip
that part of it for mine and I might add
some music to it later. Now again, on mine, I made mine in two videos, so I'm going to show you
something really quickly. The one thing about CP cut, it automatically adds
this logo at the end, but you can select that and then just hit delete
and it gets rid of it. I'm going to add another
video, which is this one here. You can see that this then transitions from really
quickly doing the line art, and then you'll see slowly, I start doing the watercolor. This one is now not sped up. I'm dragging this over until I actually start painting,
and then it goes here. Then for this one, I'm actually
going to tap it again. I'll hit speed, I'll hit normal, and then speed this
one up as well. And say play. Then you'll
see that happening as well. Now I've got a full video. Again, you can add music on
yours before you post it. But once I do all this, then it ends and right
up here at the very top, you can hit Export. Ex, when you tap it, it automatically
saves it to your. You'll see that it
loads for a second. You're going to
see that it saves it directly to your camera roll. Okay. Then this will pop
up and you're going to get an option to share it
on TikTok or whatever, and then all these
other options. But then it says that
it's already saved. That means that it's
actually now saved in your camera roll so
you can hit done. And we've done it. We've
created our first project. We've got the video is
ready to go in our phone, and it's ready to show off. And there you go. See,
it's not that hard, right? I took that long
video that we made. It was all about positioning the camera and then taking it, making a video, doing your
drawing. Now we've sped it up. I added some music, and I do feel like
it's ready to post. So join me in my next lesson, where we're going to take
this video that we made, and we're gonna
keep going with it.
6. Lesson Five: Advanced Mode!: In the last lesson,
I showed you how to edit these videos
that we've made. We added some music. What I'm going to show you
in this lesson, this is a totally
a bonus lesson. You can just watch it.
You can try this later. You might not have all
of the stuff to do this. In this bonus lesson, I want to talk to you about
something that you can do. This is an advanced mode. And there's two
things that I want to show you in advanced vote. The first thing is lighting. So if you start doing a lot
of these videos and you find that light is changing too much, let's
talk about lighting. I'm going to show you exactly the lights that I like to use. And then what I'll do is I'll put links down below so that you can if you want to buy the same ones as me, or
you can keep looking. But first, let me show you the
lights that I like to use. Off to the side of here, I have this large lamp that
diffuses the light. Look, it's kind of nice
if you want to make some, like, really dramatic lighting. Something that you should know about lighting your videos. Anyway, these are good because they help
diffuse the light. They've got this plastic
surface on it inside. It's just a small bulb. It's kind of hard to show you with these lights right now. But it's got a
bulb inside of it, and that sheet in
front of it helps diffuse the light and
makes it a soft light. Using extra lights is not
necessary for this project. I just wanted to show it to you because sometimes if
you're making a lot of these, it's a nice way to help make a soft even light
over your workspace. The second thing that
we're going to talk about here in this
advanced lesson, something that you can do later. You don't have to
do it right now, but it is adding B roll footage. B roll footage is adding
a second angle using another camera that you can then cut between while you're
working on your drawing. Now, the way that you do this is that you set up two cameras. One is the one that's on the
boom stand. Directly above. And the second would
be on another tripod, you've got another camera set up from a different angle
that you can then, when you're editing the
footage, you can cut between. I'm going to show you an example now of what it looked like when I had two cameras set up and I'm cutting between them. This was a really
easy thing to do. All I did was, I used my
phone for the overhead shot, and I used my wife's phone for a second shot
that I just set up on a real cheap tripod using one of those clips like
I showed you before. Only thing that makes
B roll footage stuff more difficult is number one, you have to find a
friend or a loved one or a loved friend that you
can borrow their phone. Luckily, my wife said that
I could borrow her phone. The second thing that makes
it more difficult is editing. You drop them in,
you have to make sure that they line up
when you're editing, and that's something
that just takes a little bit more
advanced skills with the actual editing process. You can still do
it in your phone, but it is a lot easier if
you are then editing with a video editing program in
your computer. That's it. That's it for this quick
bonus Extra lesson here, which is the advanced
mode of your video. These are not things
that you necessarily need to experiment with now, but they are things that I just wanted you to know about in case you really
fall in love with making these overhead
art demo videos, and you want to do
more of them later. And now it's time to go to our very last lesson
where we're going to wrap everything up and we're going to show
off our videos.
7. Lesson Six: Post Your Video!: Folks, We did it. And we made our own
overhead art demo video, and it really wasn't
as difficult as we might have thought it would
be before we got started. We gathered the materials
that we needed, we set up our camera, we made our overhead
art demo video, and then we even
edited that video. And now it's time
for you to post videos that you've made. I want to see what
you've been working on. I love this kind of way of showing off a
sketchbook or a project, something that you've
been working on. And it's why I made
this whole class, because I want to see the kinds of things that you come up with. Maybe you don't even make
an overhead art demo. Maybe you're just showing off a collection of sharp
teeth that you've found. Maybe it's your
way of showing off some strange way of making art that I've
never even thought of. I would love to see it. The
best way to show these things is in your own social
media account. Make sure that you tag me,
so I'm able to see it. I would love to see
what you're working on. And then another way is
in the project section so that we can all see the projects that
you've been working on. And now it's time for me to
get back to my sketchbook. So I'd like to say, thanks
so much for watching this. I really hope that the class helped a lot with making this. I think it was done in a
pretty quick and easy way. I tried to keep everything really inexpensive because it's exactly the way
that I like to make these videos, and I
hope that it helped. I can't wait to see
what you've been doing. And with that, I'll say, I've been author, Illustrator, Avid Sketchook
keeper, Mike Lowry, and I cannot wait to see what you've been working on.
See you guys next time.
 Mike Lowery, Illustrator and Author