Transcripts
1. Introduction: Welcome to the React hook class. In this class, you will
learn all React Hooks in simple and easy language
that anyone can understand. So first of all, we will see what are hooks and
why we need it. After that, we will start with the most useful hook,
which is used it. And some more hooks
like use effect, use contexts and so on. Also, we will see
the access library for fetching data from API, handling palms, one
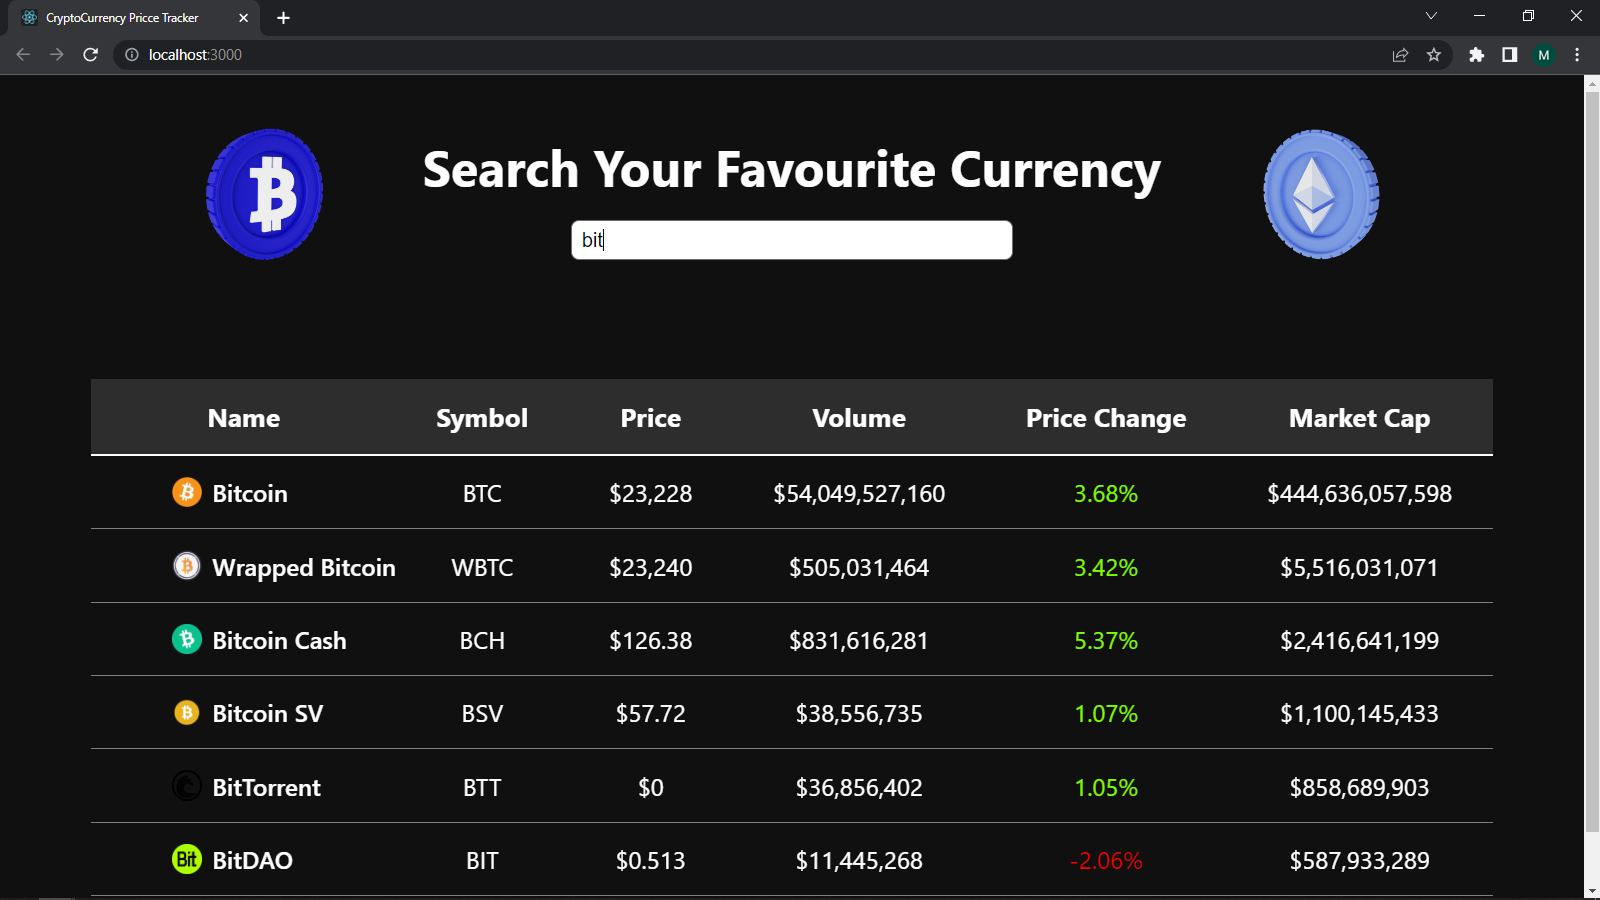
validation and much more. After completing this class, I will give you one project, which is cryptocurrency
price tracker. You will get all instruction
in project section. I'm very excited about this
class and hope you are too. So let's get started.
2. What are Hooks?: Before we dive into usted hook, let's understand
first, what is hooks? If you already
know, you can skip this part and directly
jump on usted hook. So what is hooks? Hooks are the functions to use some react preachers in
functional components. In other words, we can
say that hooks are functions that make
functional components work like class component. I know this sounds
complicated, but it's not. Let's understand with one story. Before react launched hooks. There is only one way to use state and lifecycle methods by using the class components. Now, developers had some
problems with glass components. So take some time to develop special functions
that we can use in functional
components and that special functions
are called hooks. So I think now you understand
what is React Hooks, which are functions that make functional components work
live class components. Let's start with our first
hook, which is used it.
3. Most Important Hook - useState: What is used? It used it hook is a function to add state
in functional component. Now you might ask what is state? So state is nothing but just values or variables
of your component. In other words, all variables in your component are called
as state of the component. Whenever you want to
create a variable, then you have to use usted
hook, simple as that. Let's understand
with the example. Here, I have new
React application and I deleted all
unnecessary files from this. So first, let me create a functional component
by using a FCE. This is the image for creating
the functional components. But you need to install this ESL and react
extension first. I loved this extension. It boost my
productivity in React. Now here I'm going to
create one simple counter, displays the counter value and one button called in Greece. When we click on this button, counter value will
increase by one. Now, this is where I want to display the value
of the counter. We need state. And this is where we
use, used it hooks. To use any hook. First, we need to
import that from React library,
right here, usted. Okay, here we are going to
call you state function. And we give our counter
initial value like 0. Now this function is
going to return an array. So let's consolidate. See. This area has two elements. The first element is
our original value, which is 0, and the second
element is one function. So let's do this
first element in the counter-variable
and displayed here by using curly brackets. Save the changes,
and take a look, we get our counter. Now the second element of this
array returns a function. By using this function, we can update our state values. So let's store this element in variable called state counter. Now whatever value we pass in this function will be the value
of this counter variable. Let me show you that. Here. We want to increase
the counter by one. When we click on this button, Add function in onClick
increase counter. Now we need to define
this function. And inside this function
we write set counter. What is known value, which is counter plus one. Save it and take a look. See, it works. And when we refresh the page, it again start with 0, which we pass in that
function of your state. Now here our code looks
a little bit ugly. So we always use the shortcut
for these three lines, which is called
Edit restructuring. So here at the place of
LA, add square brackets. And inside that, right, the post variable name, which is counter, and
then write function name, which is the set counter. Now, we don't need
these two lines. It works the same as before. And our code looks clean. And you can use
multiple usted hooks in a single component. Now, let's see how we can use the US state to get
value from the input. So let's create one
input with a type text. Here, we need to handle
the onchange event. And we pass the exploration
an arrow function. And we use target dot value
to update state variable. So type used it here. And here, we can give our
variable initial value, in this case empty string. Now whenever the value of
this input field changes, we call setName function and
bass e dot target dot value. We call setName and
pass this value. Now let's change our label to
variable name, has clicked. Variable counter times, save
the changes and take a look. Here, we have textbox and
when we write name gold, It's immediately updates here and also counter
updates onclick. Now let's see how
to use usted hook when we have object
as a state variable. So here we create two state variable which are
counter and name. Now we can do same with one state variable,
which is object. So create new usted
and pass object as initial value counter to
0 and name2 empty string. Now define its name by using edit restructuring
details and set details. Now delete these two
lines. We don't need them. Instead of writing name, right? Details dot name and
details dot counter. Here in increase
counter function, I remove this and guess what should we have
to add? Right? We have to add set details function for
update that counter value. So I write Site Details. And remember, whatever value you pass inside this function, it will be updated with
the original value. So object counter, Carlin
details dot counter plus one. Save it and take a look. Yep, it works. But there is a one big
problem that we don't have our name element
inside this object. Let me show you that. So I simply write here
console.log details and save it. Now refresh the page and see
how two elements in object. Now when I click on
this increased button, the name element is
removed from our object. So why does that happen? It happens because
we directly pass the object without
add other old values. So the solution is, first we add all other
values of that object name here and just update that counter element
with a new value. So inside details function, we can pass another
function and that function can return
the previous value of our state variables. Don't get confused
just to see this. So these previous is same
as this details variable. Let me show you that my console it and add some text here. See, we get all values when
we click on this button with error because we can't write
console inside dysfunction. So remove that. And now we use the
spread operator by using three dots previous. This will add all previous
values of the state variable. Now we replace counter
with the old value, which is previous dot
counter plus one. Save the changes
and take a look. See it perfectly works
with the name element. So whenever you work with
an object or an array, we have to first add all
previous values by using this method and then update
whatever we want to update. Let's recap what we learned. So usted is used to create state variables in
functional components. So to use usted hook, we need to first import that and use it inside the
functional component. Here, you can pass any type
of data like boolean, number, text, object at anything, and then store it by using
addEdge restructuring. The first variable is
its current value. And the second one is the function for our
breeding that value. Simple as that. Some people can get a
little confused here. And I was also confused when I learned usted who
for the first time. But with practice, I learned this concept and use
that in my projects.
4. Handle Multiple Inputs (Shortcut): Let's see how to
handle multiple inputs which are single onto
the handler in React, it's very useful when you have multiple input fields,
like sign up form. In USDA tutorial, we see how to handle one or
two form fields. But imagine if you have five to six fields and you create state variable
for each input, and that makes our code
messy and hard to manage. So let's see how to handle multiple inputs using
single onChange function. Here we have press F component. And this component, I want to take user details like name, email, password, and address. So let's create form. I know some developers don't use this form tag and directly
create input elements, but it's not a good practice. Now inside this form, I want S3 tag and pass
name input type text. Now I duplicate this
code three more times by using C Plus Plus down arrow and change second pill as e-mail
and type to email. Next for password
and type password. And the last one is address. And for that we need text area. So I remove this input tag
and create one text area. And at the end we
need one button, type submit, and
name it submit form. Now save the changes
and take a look. See, we get our form
with all pills. Now in previous lesson, we create individual
state variable inputs. And then in the onchange, we set that value to
our state variable. But in this method, we create only one state
variable for all input fields. So fast, I import usted
from React library. And in our functional component, we use usted and destructure it like details and set details. Now I want to pass an
object and that object, we have multiple fields like name and its initial
value as empty string, E-mail, empty string,
password, empty string. And last one, address
empty string. Now let's create our
handle change function. And we will call
this function on every inputs onchange event. So here I write on change and pass handle
change function. Now copy this and paste
it in all fields. So whenever we type in
any of these fields, only this function will run. Now, most important step, and without this step, Our, this method will not work. So the step is we have
to add all pills name as its input name attribute
from our state object. Let me show you this. So for name input, we want to store its input
value in this name property. So we add name attribute
equals to name. Now for e-mail, we want to set this e-mail value in
this email property. We add in email input
name attribute to email. Now for password, be passed name equals to password
and port address. We pass name equals to address. Make sure you write same name as you
write in that object. Now, inside this handle
change function, we write our main logic. So I use this e as event
object for all these pills. And let's console dot target. Save it and take a look. See, when we type
our name input, we get this name input. And when we type in other input, we get that input. So our logic is when we
type in input field, we get that input
filename and value. And with that name, which will be same as our
details object properties, we replace its value
by current value. I know this sounds
complicated, but it's not. Let's see this. And after that are all
doubts will clear. I create one name variable
for E dot target dot name, and value variable for
E dot target dot value. And let's console
both variables. C. We get fullName and its value when we type
in these input fields. Now we just have to set this value inside
our state variable. Let it do its name. So right side details. And in callback function, we pass previous parameter,
what previous value? So first of all, we return It's all previous values by
using spread operator. Now we have to update
property with this value. So we know we can access object property by using square bracket and pass this name
variable inside it and colon its value. So if we write anything
inside email input, then first this will return
all previous properties. And then we find property
email and replace its value with that email
field value symbol as that. Let's un-solo this
data's variable and see if we get
values are not. So save the changes
and take a look. See, when we update any field, we get its value in
our state object. Now we can make this code even sort by using
object destruction. So I write E dot target and using object
data structuring, we store name and
value in a variable. So these two lines, same as this one line. So I remove these two lines. Now I want to consult this Details object when we
click on the submit button. So I create a new
function called handle submit and guns all
these details object. Now in form tag onsubmit event, we call this function. Now save the changes
and take a look. Let me write all details. And then I click on
the submit button. See, for just 1
second, it's printed. And then our form gets repressed because it's the default
behavior of form. Whenever we submit the form, this function will run and
then it represses the page. So we have to stop this. We use this e as event object and write E dot
prevent default function. This will prevent palms
default behavior. So save the changes
and take a look. See, we get details in console. In your project. You
can call the API in this function and send
all details to server. So I hope you like this method. If you have any confusion. Was this tutorial one more time. And try to apply this method on your project that will
clear your doubts.
5. useEffect in Depth: Use the peg is used to perform side-effects
in our component. So what is side effects? Side effects, our actions which are performed
with the outside world. We perform a side-effect
when we need to reach outside of React components
and do something. What example, fetching
data from API, directly updating
the DOM in which we use document
or window object, and timer functions like
setTimeout or set interval. These are most common
side effects in React. So to perform any
kind of side effects, we need to use,
use effect Hooke. Let's see an example. Here. I created one state variable and its value will
increase by one. When we click on this
button to use any hook, we need to first import
data from React library. So I write here, use effect, and now we can use it in
functional component. So use a vector
except two arguments. Callback, which is a function in which we write our
side effect logic. This function is executed whenever something
in this component. And second,
dependencies, which is an area of variables and
it's an optional argument. In simple terms, first
argument is what to run, and second one is when to run. User effect runs
on every render, which means that when the count changes or
when that happens, we can control that
by dependencies. If you're familiar
with class components, use effect is a combination
of component did mount, component data update and
component will mount. Let's see variation
of use effect hooks that are only three
variation of user vector. First, use it without
any dependencies. Second, user effect
with an empty array, and third user with variables. Let's see first variation
of user vector hook. Right? Use it and pass only
callback function. And in that function, I want to update our web
title with this same method. So right, document dot title
equals two in backticks, dollar account new
messages and save it. Refresh the page and see
whenever this component render, use if x r1 and our title gets
updated with our message. Now when something changing this component means we click on this button and it runs use a vector book entitled
change with counter. So when we use user back to hook without any dependencies, use effect will run on every single change
in that component. In this case, it's app component because we'd ideas
effect in app component. Now let's see use effect
with an empty array. So in this same example, we pass an empty array
end-user fact dependencies. And let's see what happened. So save it and take a look, refresh the page, and see us if Exelon when component render. Now, when we click
on this button, which means counter
is going to change, but the title is not
operating on that change. When we pass an empty
at independencies, use effect will
run only one time. When our component gets
rendered first time. After that, we'll never run. It's useful when we used
to fetch data from API or server that will fetch data when component gets
rendered first time. By the way of us did hook is
available in description. Now let's see the last
variation of user effect, which is which variables. So to understand this concept, I create another state
variable name or the Account button that will increase that
countered by Phi. Now I want to change
title when we only change other count state
or that we need to pass other count variable
in that dependency LA. And I change this count
variable with other account. Save the changes
and take a look, refresh the page, and see it
perfectly works on Render. Now when I click on this
other count state variable, title is updating
with this tape. But when we click
on this old button, it will not work because we pass our new variable
independency array. So use it only runs when
these state variables value will change and you can pass more variables by using comma. Now the final part of this use effect hook
is cleanup function. And it's little
confusing for beginners. Let's understand with
another example. So everyone can understand. Here I have used setInterval function
called countdown timer. That interval will not stop unless we use the clear
interval function. If we're setting state
using setInterval and that side effect is not cleaned up when our
components on mounds, or we are no longer to use it, the state is destroyed
with the component, but does trade interval
function will keep running. And that's make our applications slow and low in performance. So it's important to
clean up these functions. So to use cleanup function, we need to run written
function in use effect. Let me show you that here. In this use, if i'd, I'd written arrow function. And inside this function, iodide clear interval and pass the variable name of setInterval function,
which is timer. Now cleanup function will be called when the
component is unmounted. It's difficult to
see in this example, I created one counter
and then update that counter on
buttonClicked by one. Now I create a new
user vector function which count dependency and write console.log around
effect with count variable. So when the count
variable will change, user runs and now I
write return function. Inside this function, I simply
console dot log clean up. Also with count variable. We're just getting the idea when cleanup function will work. So save the changes
and take a look, refresh the page, and it's
working on post render. Now whenever these use, if I could run, again, all the clean up function
will run paused, and then this callback
function will run. Let's see this slide. Here,
it about proposed render. And when we click on
this increased button, which means this user will run so far as clean up
with 0 value will run. And then callback function
print for value one. Now again, we click
on this button was previous cleanup function will run and then call background. So cleanup function is not
required in every case. It is only required
in a few cases, such as when you need to stop a repeated side effect when
your component on mounts. Simple as that. Let's recap. What we learned. I use effect is used to
perform side effects like patching data manipulation
with document and window. Timer events like
setInterval and setTimeout. Use it. Accept two arguments. Cost is per callback function and second
is for dependencies, which is optional
in simple terms, what to run and when to run. There are three
variation of use if I cope without dependencies, which means it runs
with post render and also run on anything
changes in that component. Second, with an empty array, which means it runs only on post render and it's useful
for patching data. Third, state and props, which means it runs
on post render. And then any variable that we
pass independencies change. It will run simple as that. Timeouts, subscriptions,
event listener, and other effects
that are no longer needed should be disposed with the help of
cleanup function.
6. Fetch data using AXIOS: In this tutorial, we are
going to learn what is ICOs, why we needed how to pass data using some mistakes to avoid. And my favorite trick
to use axioms in React, basically complete
tutorial on z OS. So let's don't waste
time and get started. So first of all, what is Axioms? Axiom is a package used to
make an HTTP request from the browser in an easy and better way
patch in JavaScript, we can say axioms is the
upgraded version of it because XES provide better facilities
making HTTP request, almost 70% of users use x equals to make HTTP requests
for back-end like NodeJS. Here are some advantages
of using z OS in React. If you use Bayes method, we have to first pass data into JSON format and
then we can use it. But SEOs is by default
to use jason format, which means X years
automatically converts data into JSON format when we
get data from the server. And that's why we need to
use only one then method. And that makes our code clean
and easy to understand. Seo's provide all types
of HTTP methods like GET, post, PUT, elite, and many more. We can do better at
handling by using x years. So that's a lot for theories. Now, let's see how to
use XES in reactant. So here I create a new React application and
remove all unnecessary files. Now head over to
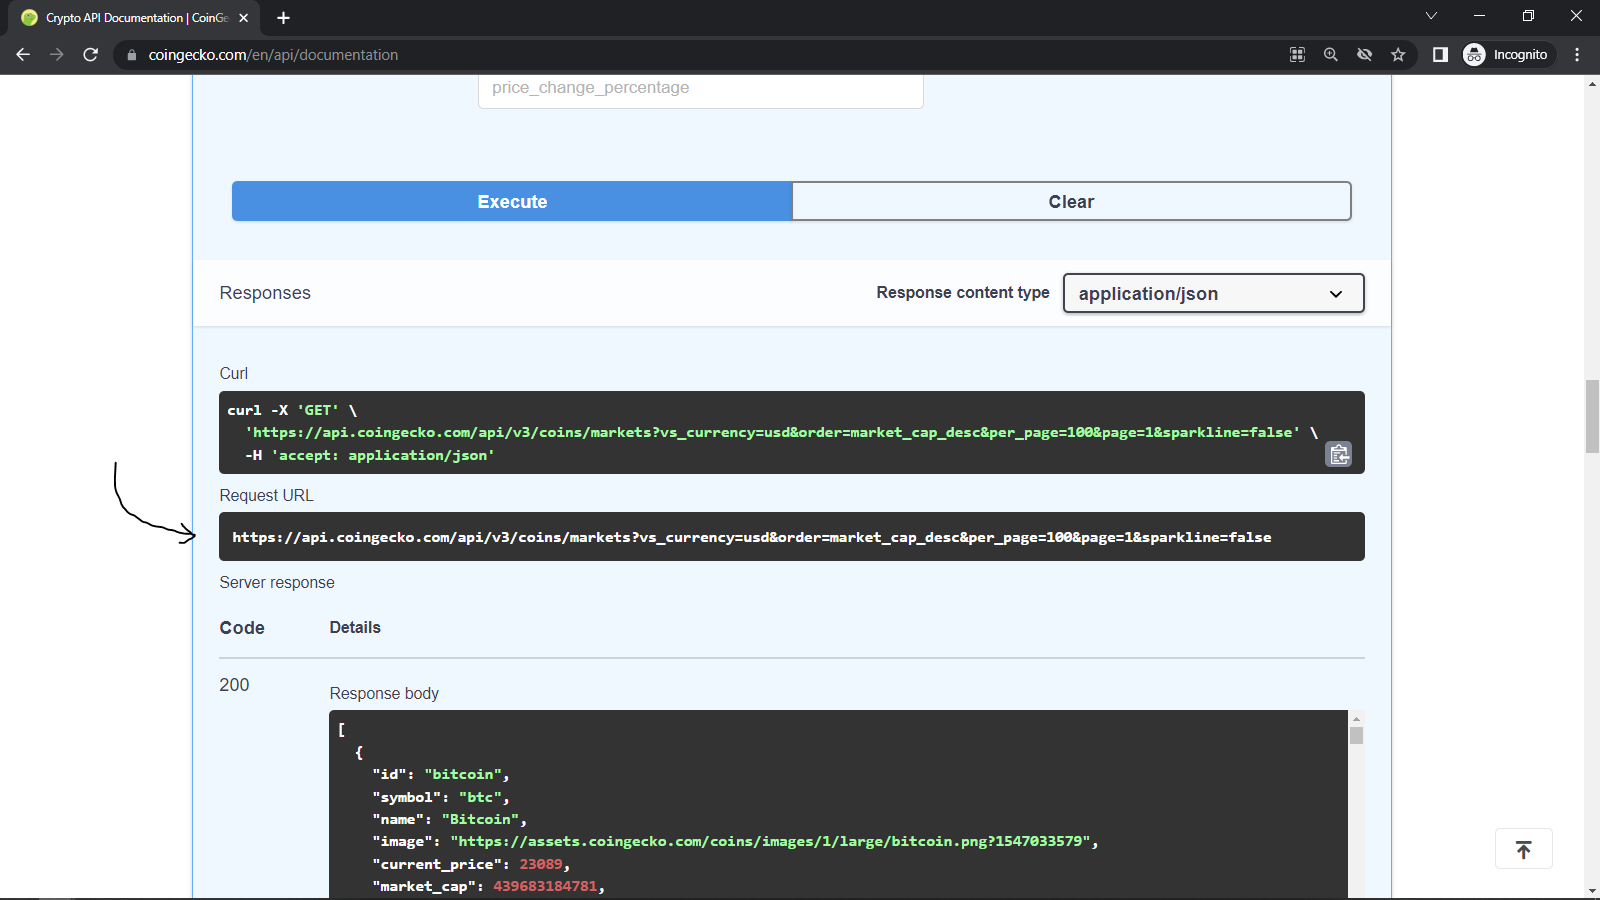
damages and.com. This is one of my
favorite API for testing. Here we can read its
documentation if you want to. Now scroll down to Resources. And here you can see different
data like product details, guards, users, post, etc. So I opened this product link. Now you might not see this
data in JSON format like this, because I'm using these
JSON format or extension. This is very handy tool to
see JSon data in the browser. You're going to install
it from Chrome Web Store. Here we can get the dummy data
of products from this API. We use XES to call the API and display that
data using the map method. So first of all, open the
zeros back as in NPM, and see it has 2.4 million weekly downloads,
which is insane. So let's copy this
npm command and paste it into VS Code
Terminal and hit Enter. So it's installed successfully. We can verify it by package.json file C. We get x
years independencies. Now I close this
file and in app.js, whilst I import axes goes
from x equals package. So we can use zeros
in this component. Here, I want to pass data
on components render first time against
which we need, right? It's used effect. So I write use effect. And first argument is
callback function. And second argument is
a dependency array. So I just wanted to
pass data one time. When components gets rendered, I pass an empty array
without any dependencies. Now, in the callback function, we fetch data from API. Suppose right, x dot here we type method like GET,
post, PUT, delete. So I write it. Now in this parenthesis,
we pass API. So I copy this API
and paste it here. Now same as the fetch method. We use them and use the arrow function and pass
the response as a parameter. And then console this response variable to just
see what we get. So save the changes
and take a look. So we get one
object with config, data, status code, etc. So in the data object, we get the products. So we have to store this
array in the state variable. So back to VS Code,
and at the top, I create one state variable
called products and pass an empty array as initial value and import
usted hook from React. Now in this then we use side products and pass
response.data dot products. Now we get this product's
value in product's variable. In the written, we display the product name and its price. So in curly brackets,
products dot map. And inside this, we pass
callback function and pass parameters like product for an individual product and index. Forget the index value of this current product
and return the h3 tag. And inside we pass
in curly brackets, product dot title and
dollar, product dot price. And we pass the index
as a key value. Now save the changes
and take a look. See, we get product
names with their price. You can add your styles
and make them cooler. For now, I'm okay with these tiles because we
are learning axioms. And that's our main focus. So you will see how easy and simple to make an HTTP request. Now, if you want to
make a post request, you have to simply
chain this method to post and genes than 0.48. And then if we
want to send data, you can pass that variable as the second parameter after
the API, simple as that. I will give you all
types of methods, examples in my XES
Ultimate Guide. You can download it from
the description box. Now let's see how can we perform error
handling using z OS. So after these ten method, we write the cash method. This method will only run
when something went wrong. In this then method, we can say that if any error occurs only then and then
these guys method will run. So we pass the error as a parameter and console
this error variable. Now save it and take a look. So we get nothing in console
because there is no error. Now I make one typo
in this API spelling. Now save the changes
and take a look. See, here we get error object with error
code, error message, etc. Now we will display the error
message on the browser. So we create another
state variable called error and pass empty
string as default value. Now in the cage, set error, error message and print
this error on the browser. Here, we can set conditions like if an error is not equal
to an empty string, only then and then print error. So save the changes
and take a look. See, we get an error message. And if I remove the typo, then it will not show
an error message. Now let me show you my
trick to use axioms. So here you can see
we have to write the full URL of our
API when we call it. In real-world, you
have the same origin for all your APIs
in one project. So I'm very lazy in
writing duplicate code. It's not a good practice. So I make a reusable variable
and use it in my project. So let's make one new
file called XES dot js. And in this file,
I input x years. Now create a new variable
called instance. You can call it
whatever you want to. It doesn't matter. And export default
this variable. Here, I write X
years dot create. And in this create function, we can pass one object. And in that object
we add base URL. And in inverted comma, I got this base URL
and paste it here. Now save the changes. And in our app component, I remove this SEOs and import our new axioms from
the zeros dot js file. Now save the changes
and take a look. It works the same as before. So now we don't need to write that base URL again and again. But remember that
you have to import X years from our
new x equals five. If your imported from
original axioms package, then you have to write the
endpoint with base URL. So if you get an
error in this method just from where you
import X years. Now, last and final part, XES with async await, which makes it super cool. So async await is the best way to handle promises
in JavaScript. Let me explain you insert
in our app component, I create a new function
for patch products, data function get products. And inside this function, we want to use
await for response. So we have to add
async function, and only then we can use
await inside this function. So right, of eight zeros
dot get products and store this value in
one variable called response and console
that response. So basically, when we
call this function plus this API will call and
until we get data, it will not execute. Next line. Now I comment out these axioms from music and call our new
function inside it. Now save the changes
and take a look. We get the same object that
we get in then method. So let's set products,
response dot data, dot products, and we get
data printed in our browser. Now some of you might ask, how can we handle
error in this matter? So the solution is we have
to use try and catch method. So I write dry and select
the second suggestion. And that will generate,
try and catch boilerplate. Now in dry, we write our
all logic and engage. We write code for
error handling. I move these three lines inside, try block and engage. I said adder and use
this error message. So if we get adder in this try block only then and
then this sketch will run. Otherwise, JavaScript
will ignore this for. Now, Let's make dipole again. Save the changes. Take a look, see, we get adder at the
top and it works well. So back to VS code. And see this postcard
looks a little confusing and our new code looks pretty clean and
easy to understand. So try to use async
await with x years. It will make a
good impression on your boss and your
client as well. If you want to quick
revision about SCOs, you're going to download
my ultimate axioms guide from the description box. In that guide, I write all examples of different
methods and use cases. And as a bonus, you get how
to use XES with async await.
7. useContext: What is used context. Use contexts hook is used to manage global data in
React application, like global state, Team, Services, users settings, etc. Let's understand why we
need to use contexts hook. So here is a situation. Imagine you create
an application with this type of
component structure. So main component is app, and then it has for
child components. And j components have also
some genetic component. So it's like a hierarchy
of components. Now, imagine we
have user details, this app component, and we need user details in
this single post. If you use props for
sharing that details, we have to first pass
in main component, then pass in feed,
then following post. And then we get user details
in single post component. So it's very annoying
and hard to maintain. Use contexts will
help us to create global data for our
React application. And we don't have to pass that data through all
these components. Began to access that data
in all component we needed. Now let's see how
to create contexts. So to create contexts in React requires
three simple steps. First, creating the
context, second, providing the context, and
third, consuming the context. So let's start with step number one, creating the contexts. We are creating the
global state for user logging in both create contexts function
from React library. This function is used
to create contexts. Now right before your
functional component, create context and store that in a variable called
login contexts, you can take whatever
you want to. Now for step number two, which is providing the context. So after creating the context, we need to define in which components we want to
access these contexts. So again, in that hierarchy, if you want to pass data to
a single post component, we just need to
provide the data to main component and that can be accessible in all their
child components. So in our example, we want to access that
data into main component. And it has child
component single post, right login contexts
dot provider, and add debt component between
these contexts provider, whatever component you pass
between this provider, it and it's child component can access these contexts value. Now we can pass value by
using value attribute. So right, value equals
to in curly brackets, I simply pass through here. Now let's see how to access this variable inside our
single post component. So open that component in which you want to
use that variable. To use login contexts variable, we need to use,
use contexts hook. So important use contexts
hook from React library. And inside this
functional component, right, use contexts. And it accepts one argument, which is that login contexts. So we need to import that login contexts
from our app component. So let's first export
that from app component, and then import login
contexts from app component. Now pass this login contexts
inside the US context hook. And we store this value in
a variable called login. So let's console it, save the changes
and take a look. See, we get through. So whatever value you pass
in this context provider, an excess that value by
using use contexts hook. If you understand
these three steps, congratulation, you understand
the use contexts hook. Let's quick recap
what we learned. Use contexts is used to
manage global data in React. So we don't need to pass
that data through props from first parent component
to last child component. If we want to pass data
just for child component, then you can use props. Don't use contexts everywhere. Just use it when you need it. Now to use use contexts, you need to just
follow three steps. First, create the context, using create context and give name that contexts like
we did login contexts. Now second unit to decide
which components can access these contexts with the use
of contexts dot, provider, and pass other
components between this provider tag
in value attribute, pass value inside
curly brackets. And last step, you need to
import that contexts from your file and pass that context
inside you use contexts, hook and store it in
variable, simple as that. Now you'll see our app component
looks a little bit ugly, but it's a simple one. Contexts. Imagine if we
have phi or six contexts, then you just don't like
to code in that project. And if you are working
for a company, they also don't like
unorganized code. So let's make organized
structure for creating contexts. So first of all, I create one new folder in source
folder called contexts. We create all contexts
here in this folder. Now create a new file in that folder called login
contexts provided ab.js. And in this file, we save our
old login contexts logic. So first, I create an
image by using a FCE. Now I just copy these
create contexts from app component
and paste it here. Now in return, we
have to set provider. So add login contexts
dot provider, and inside debt provider. We have to pass all children, right in props children and pass the children
inside provider. Now give a value
attribute in provider. And I want to pass date
value for these contexts. So I create user details and
pass default value true. You can pass any type of data and pass that state
variable in value. Now back to our app component, An important that login
contexts provider and replace provider with
login contexts provider. Because we pass children inside debt provider and remove unnecessary things
from this component. Now, last and final step, genes these contexts path
from app to our contexts. It's less login
contexts provider. And that's it. We organized that ugly
code into organized code.
8. useRef: So what is user? User F allows us to access
DOM elements and also for creating mutable variables which will not re-render
the component. These are two most common
use cases of user if hook. Let me show you how to
create a mutable variable. So in this example, I created one input field
and onchange event, I update this name state with the current input value
and display the name here. Now, imagine we want to count how many vendors happen
when we input the name. When I teach this
to my students, they asked me why we can't use, used it for this. And I think you might
have the same question. So let's see this live. Why we don't use usted
hook what count renders. So first, I create one more
state variable and given name count and pass 0
as the default value. Now in use effect, I will update the count
by one for each render. Iodide said Count previous, arrow function,
previous plus one. And after name, I will
display count variable. Now save it. Take a look. See, count is constantly updating because when this component is rendered, it will update discount
variable by one. And because that state
variable is updated, the component is rendered
again and again. So we're stuck in an infinite loop because
we use use date. So let's solve this
with a user app hook. So I remove this state
variable and use effect and import user
f from React library. Now right, user f. And here we can give a default
value same as you state. Now, this function returns an object with one
property that is current. So let's store it in
a variable count. And let's console
this variable c, We get object with
one current property. We can update or
show this value by using count dot
current property here, right, count dark current
and save the changes. Now let's update this value when component rendered, right, use a pet count equals to
count dot current plus one. Save it and take a look. When we type in input box, count is updating by one. So first use case
of user F is to create a mutable variable
without causing re-render. Now, let's see the second
use case of user app, which is accessing
the DOM elements. In React, we can add a href attribute to element,
access it directly. Let's understand
with the example. So here we have one
input box and button. When we click on this button, this function will execute. Now, I want to change
the width of this input. When we click on this button. We can do that in Vanilla
JavaScript by using document.getElementByID
or by class name. But in React, we don't
need to do that. We directly use, use rep and we get that
element in variable. Let me show you that. So far
most important, use rep, hook and write user and
store that in variable. Now give this input one property that f equals to input element, which is the name of
our ref variable. Now let's consult current value C. We get that input fill
in the current property. Now I am going to change
this input with 2300 pixel. So as we're doing vanilla
JavaScript, right? Input element dot current, dot style, dot width
equals to 300 pixel. Here, input element dot
current is our input pill. So save it and take a look. See, when we click
on this button, input width is
increased to 300 pixel. Now let's focus on this input when we
click on this button. So back to VS code. And in the same function, I have to add, guess what? Right? Input element dot
current dot pocus. So save the changes
and take a look. When we click on this button, input width will increase
and input is in focus. It's the same as we do
in Vanilla JavaScript, just to use input
element dot current. And after that, you can access all JavaScript methods
for the element. Now some of you might ask, how can we know which
methods we can use with elements and how
can we remember it? So the answer is, you don't have to
remember any method name. Let me show you my trick to see all the methods we can
use with elements. Here. Simply removed this current
property and save it. Now in console, you can see this input element object
with current property. Now click on this little arrow, and again click on this arrow. Here you can see all methods which we can
apply on this element. What example we want
to apply style. So scroll down to the bottom and click on this
icon to see more property. Here you can see style property. Click on it and you can see all styles property,
simple as that. So let's recap what we learned. Use rep is allow us to create mutable variables which
don't cause re render. And it is very useful to
access DOM elements without writing document.getElementByID
or by class name. So here is the syntax
of user app hook. Here we can pass the default
value of this variable, and it is optional. This variable has one object, and that object contains only one property
which is current. If we want to access or updated, we have to use
variable dot current. We can also access elements
by using their app attribute. Remember my trick, with
the help of console, we can see all methods.
9. useReducer: So what is use? The reducer. Reducer is used to manage state
in our React application. In other words, use reducer works like a
statement is meant to. Now you might ask, what is state management? So state management
is used to manage all states of application
in a simpler way. To write simple and clean coal for all states and always use the user reducer
hook when you have a lot of states and
methods to handle. So let's understand use
reducer with the example. Here, I created one simple
counter application using the US did hook. So we have one
counter variable and two buttons, increase
and decrease. So when we click on
increase button, counting increased by one. And if we click
on degrees beta1, count decreased by one. Very simple example. Now let's apply use
reducer in this example. So first of all, let me
clean this state variable. Now, important to use
reducer hook React library in functional
component, right? Use reducer. Reducer accepts two arguments. The first one is
reducer function, which will manage all states. And the second one is
our default state. For now, forget about
this reducer function. We will see this
after explanation. Now, let's first define
our default state. So I'm going to create one object in which we can
define our all states. So write initial state
equals to object. We won't count variable. So count colon 0. Now pass this
initial state here. This user reducer returns an
array same as you did hook, which means first element
will return current state, and second element will return a function which will help
us to update that state. So let's use additive
restructuring. Storing this variable, we
call post element as state. And second one is dispatch. It is the most common
name for use reducer. If we want to take another name, you're going to take that. It's totally up to you. Now, let's define our
reducer function, which is the most important
part of us, reduce our hook. So inside this function, we will write our own logic
for this user reducer. Reducer function
has two parameters. The first parameter is state, which means where our
application is currently at. And second parameter is action, which means which action
we have to perform. Example, increase,
decrease, etc. I know this is a
little confusing. But after completing
pull example, you will understand it properly. Now this function will
return the updated state. So for now, I'm just returning the object with count
and current count, which is this state
dot count plus one. Now to call this function, we will use dispatch function. Here. In increase count function. I just call dispatch and
pass nothing inside it. Now I'm deleting this set count, and here I write
state dot count. Now save the changes
and take a look. See, when we click on
this increase button, count is increased by one. Now let's see how to call different actions like
increase and decrease. So first we pass object in dispatch function with type
property colon in Greece. Now we have to handle this
type in this reducer function. So let's lock this action
parameter so we know what we can save the changes
and take a look. When we click on this
increased button, we get object with the property. So whatever we pass in
this spread function, we can access it by
this action parameter. So let's use a switch gears to manage different,
different actions. You can use if else, if. But I like switch
case, right, sweet. And pass here, exon dot
type and inside it, right? First case, which is
increase in these. I'd written this. Now for second case, which is decreased, rewritten
same count but minus one. And at last, we pass a default case and
return the same state. So if we pass any other type except increase and decrease, this default value will run
in decreased count function. We write, guess what, right? Dispatch in object type, decrease, save the
changes, and take a look. See, it's working fine. So let's recap what we learned. Use reducer is used to manage complex states in
React application. So here is the syntax
of user reducer hook. It takes two arguments. First one is reducer function, in which we write our own logic. And second argument
is initial state, which is object
of all variables. Now this hook returns an
array with two elements. So we use added is structuring. First element is for
excess current state, reduce our initial state. And second element is dispatched by updating that
straight, simple as that. Now redefined reducer function, which has two parameters. First one is used to
access current state, and second is an action reduced to get different,
different actions. Whatever we pass in this
dispersed function, we can access it in reducer function by
this action parameter. And then with the
use of switch case, we can perform different tasks. That's it. Now, in this example, I did little mistake by
using type in string. So we have to take care of its spelling mistakes in
two different places. So instead of this, we can create one object
with name action. And we always use all uppercase
for this action object. So whenever we see that, we know it's for reducer. So in this object, first, I create Increase, Increase, and decrease or decrease. Now at displays, I replace
it with actions that increase and decrease
in dispersed. Also rewrite action increase
and action dot degrees. So now there are no chances
for spelling mistakes. And if we want to
change by name, we can directly update
in this object and in other places, it
updates automatically. Now, I want to cut these three variables and paste it at the end
of this component. So our code looks clean
and easy to read.
10. useLayoutEffect: So what is used? Layout effect? They use layout effect works exactly the same
as Hughes effect, but the difference
is when it's run. So use the fact runs after the dome is printed
on the browser. But usually out effect runs before the dome is
printed on the browser. So whenever we want to run code before the dome is printed, like we want to measure
an element's height, width, or anything
related to layout. We can use use layout effect. And it runs synchronously, which means it runs the
first line and only move to second line if first-line
execution is completed. The most common use case of use layout effect is to get
the dimension of the layout. And that's why
it's name is used. Layout effect. Let me show you when it runs. So in this example, there is one toggle
button is toggled this text and one use effect
with dependency toggle. This user will run
when this toggle state will change and print
uses effect in console. First, I import a huge layout
effect from React library, and now I duplicate
this code and replace use effect with
use layout effect. Now save the changes
and take a look. See when component
gets rendered, both hook will run. Now when I click on
this toggle button, again, both hook will run. But focus here. Use layout effect is
always runs first. Now you think it's because we
write it before you state. So I move use
layout effect after the use of vector
hook and take a look, see, use layout effect
will always run post. So the workflow is
clostridia calculate all these component and then
use layered effect will run, then react prints all
elements on the dome. And at last use a
vector will run. But this process is very fast. That's why we can see it live. Ninety-nine percent time. We use, use effect
in our project. If the project is not
working as we want, only then we try
use layout effect. Now, let's see most
common use case, obviously out effect. In the same example. I want to get the
dimension of this text and then we add padding
top as much as its height. So for access DOM elements, what should we have to use? Right? It's user. So I create one user, F and VS code, auto important use
ref from React. And that's why I love
this ESL and extension. It's a great productivity tool. What React developers. Now we store this user have in constant called text wrap and pass the href
attribute to this text. Now, we first tried to use, use effect and comment out
this use layout effect. So in use effect, rewrite, tax ref dot current, dot, get bounding client racked. By using this function, we can get all dimension
of this element. Let me show you real quick. So first of all, store
this invariable dimension. Now let's consolidate
and take a look. And we get, because
we have to add one condition to check if
this text wrap is not null. Only then we have
to run this code. So right, if x ref
dot current not equals to null and move
this code inside it. Save the changes
and take a look. See, we get the dimension
object with all properties. Now I want to add
padding top for this text as much as its height. So write x ref dot
current dot style dot padding top equals to invective dollar
dimension dot height. Fix it, and save it. See, when we click on
this toggle button, post this text here, and then it moves to the bottom. See in the slow motion. Now this is the problem
with the US effect. We see this friction in output. Now I replace the u's effect
with use layout effect. Save the changes
and take a look. See, we didn't see
that friction because use layout effect runs before the dome printed.
So let's recap. Usage layout effect. Use layout effect is the same
as the user effect hook. But the only difference
is when they run the workflow is posterity. I calculate all mutations, then use layout effect will run, and then re-add prints
all elements on DOM. And after that use, the effect will run. And the second difference is
that use layout effect is synchronous and use
effect is asynchronous. So 99 per cent time we use
user effect in our project. But if that use effect
will not work properly, only then we use
use layout effect. And I show you the most common use case abuse layout effect.
11. useMemo: What is used memo. Use memo hook is used to
apply memoization and react. What is memorization? Memoization is a technique for improving the
performance of code. And it is useful to avoid
expensive calculation on every render when
the returned value is not going to change. Let's understand
what the example. So in this example, I create two state variables, number, and that
number is for input. And pass that number in
this expensive function, which I declared
after the component. Basically this function will
return the same number. But after running
this unwanted loop, which I created just for
explanation, in real world, it can be any long calculation
or anything that takes more time and then store its return value in
calculation variable. Now this dark state is for
toggle dark and light mode. And according to
this dark variable, we changed the background
color and text color. Let me show you. So whenever we increase
the value of this input, that expensive function
will run and returns a new value in calculation
and print it here. And when I click on
this toggle button, background color and
text color will change. Now focus on this calculation. Whenever we change this number, we are calling that
expensive function and console this loop started, but it takes 0.5 or 0.3
seconds delay for updating. That's because of our unwanted
loop inexpensive function. But when we click on
this toggle button, it also takes some seconds
to update the theme. And UC console. Again, Prince loop
started and that's why we paste this
delay interval team. So when we click
on toggle button, react is re-rendering
the component. First, this line will run and it calls this
expensive function. And that takes extra work. And we can't immediately
toggle the team. So the solution is, we will only run this function when this
number is changed. So we use the use
memo hook for that. And the good news is use memos syntax is same
as Hughes effect hook. So fast, I imported
use memo from React library and add it
in functional component. Use memo will take
two arguments. First one is for
callback function, and second one is
for dependencies. So whenever any variable from this dependency
will change, only then and then this
callback function will run. So I pass number in
this dependency LA. And inside this
callback function, we call this expensive function and pass number as parameter. Now you think what
is the difference between user and use memo? Use effect and use memo is same. But the difference is in user, we can return the value and we can store
it in a variable. We have to create one
more state variable. And then with the
set value function, we can update debt. But in use memo, we can return the value and we can store this value
in a variable. So I store this value
in mammal calculation. Now I remove this line and
at the place of calculation, we call memo calculation. Now save the changes
and take a look. When we change the number, it takes some seconds. And that's obvious because
we add unwanted loop. But when we click on
this toggle button, It's not taking
the extra seconds. And we can immediately
toggle themes. And this technique improve the performance of
our application, which is very important
thing in today's world. Let's recap what we learned. Use memo is used to improve performance of our
React application. We can stop running unwanted
functions on re-rendering. So here is the syntax
of used memo hook. It takes two arguments. First one is callback function, which will return the value. And here we will store
this value in variable. Now second argument
is dependency array, in which we can add variables when this
variable will change, only then and then this
callback will run. With this variable. We print the return value. We perform all
side-effects in use effect Hooke and all
expensive functions, calculation in use memo
hook, simple as that.
12. useCallback: What is used callback. Use callback is used to
return memo wise function. And it's also useful
for preventing functions being recreated
on the rendering. I know this sounds a little
confusing, but it's not. Let's understand
with the example. So in this example, I create two state variables. First one is the number
for number input, and second one is
for toggle team. And according to that, our background color and
text color will change. Now we have one function
called calculate table, and it returns the first five
rows of that number stable. In real-world, it can be
anything like calling API. Now here I created one simple component called a print table for
printing the table. And I pass this
function as props. So in this component, I create state rows and in the user icon solve this line and pass this
calculate table function. Insert rows function. So that values of Eddie
sat in rows variable. And then print this row's array using this map method,
simple as that. Let's see this slide. Here. We have one input number. And after that, I print this table using bring
table component. And at last we have toggle
button will toggle team. So when we click on toggle
button, theme will change. When we change number, we see it's table below. Now, I will show
you the problem. First of all, let me open the console and
refresh the page. See when I bring double
component will render first-time it console
this print table runs. Now I changed the number and that calculate table
function will change. And it's read and print table component ended again console this
print table runs, which is working fine. Now when I toggle team it again, consult this printable runs, which means printable component
gets re-rendered you. And if we toggle the team, and that's the performance issue because when we change any
state in this component, this function will recalculate. And even if our number is same, it will return the
same value with new instance soviet things, it's a new result. And then it rerender the
printable component. Now we have to stop this
unwanted function recreation. And that's why we use,
use callback hook. And the good news
is use callback is exact same as
they use memo hook. So that is a little
difference in use callback and use memo hook. So use memory returns
the memorize value and use callback returns a memoir
is function simple as that. So first of all, I imported
use called back from React and add here,
use callback. Now it accepts two parameters, like use memo and use effect. First one is callback function, and second one is Dependencies. Dependencies, I write number. In callback, I simply copy and paste this
return statement. Now we can store
this function in variable called calculate table. And I remove these old function. So here, if we use use memo, we get only this value
in this variable. But if we use use callback, then we get this full
function in this variable. And if we want to
run this function, we have to write like this. So whenever we
change the number, only then and then this
function will run. Now save the changes
and take a look. When we increase number. It can solve this
print table runs. And now I click
on toggle button. It will not console
this print table runs. So we fix this issue with
the help of use callback. Now, we can pass value as
parameter in this function. For example, I pass to hear, I store that in value variable and you can use it
in this function. I create a new variable, nu number equals to
number plus value. And instead of this number, we pass new number. So we get double of
original number plus two. It depends on you how you
can use this parameter. Remember, any use memo, you can do that. Now, let's recap
what we learned. So use callback is used
to return memorize function and improve
the performance of our React application. Use callbacks syntax is
same as used memo hook, but use memory returns the memorize value and use callback returns
some MY is function, and then use callback, we can pass value as parameter, but in use memo, we can do that simple as that. I hope you understand
use callback, hook and difference between
use callback and use memo.
13. Custom Hooks (useFetch): So what is custom hook? Custom hooks are basically reusable functions
in simple towns. Custom hooks at your own hooks that you create
for your own use. And you can use them multiple
times in your project. For example, you have
some logic in which you use one or multiple
built-in React Hooks. And you need to use that logic multiple times in your project. So instead of writing the same
long logic in every place, you create your own
hook or function, which is a custom hook. And you use it just like we use other React build in
hooks, simple as that. Let's create one of the
most useful custom hook for fetching data from API. I love this custom because I
use it a lot in my projects. So here I create one simple
example in which we call API or random users details and display their
names with the ID. So first of all, I create
one state variable called responses and pass an empty
array as its initial value. After that, I use use effect
hook with MDMA dependencies. So it runs only when component
gets rendered first time. In US effect, I pass data from this API and convert
it into JSON format, and then set that data
inside responses. And after all that, I display that data
using map method. Now, imagine you
want to fetch data from API intend
to 12 components. So you have to write this code in all of
those components, which is not a good
practice in React. So we will create custom
hook for fetching data. So first of all, I create
one folder, custom hooks. We will store all our custom hooks in that folder
to organize our code, which is a good practice
for developers. In this folder, we create a new file called
use fetch NodeJS. Always start your custom hook
name with a use keyword, which is a common convention. Now I write add a FCE for functional boilerplate by using this ESL and react extension. So first of all, I got this date and use a vector from
this component and pasted into use patch and import user and use data
from React library. Now we accept one parameter in this function called a URL. We use this URL variable
at the place of API. So whenever we use, use phage, we just have to pass
API in this function. Here, rewritten this responses state
variable, and save it. Now back to our app component. And we just tried to
use phage and react Auto Import debt from
our custom hooks folder. So in this used
for its function, we can pass any API and we can store that value
in data variable. And at last, reaching these
responses with data variable. Now I remove, use it
and used it from here. We don't need them. Now save
the changes and take a look. We get our data. We successfully
created our post and most useful custom hope you can see are called
looks neat and clean. So this is just one example. Now, it's on you how to use your logic for
different use cases. So try to think and apply
your logic and create custom hooks which will help
you in your future projects. Let's recap what we learned. Custom hooks are your logic, which you created as
reusable function. And in that, you can use
multiple hooks and create something that will help you to skip repeated tasks
in your project. Also, you can simply use that custom hooks in your
different projects.
14. Form Validation with FORMIK & YUP: In today's video, we are
going to see form validation, which is very important
topic in React. So far. Form handling, we use formic
and for Form Validation, we use Yup library because it made form validation
a lot easier. I'm very excited for that
and hope you are too. So let's get started. First of all, we will see how to handle our own form
using pandemic. First, let's install the library open up terminal by
using Control plus back take for Windows and
Command Plus back tick for Mac and write npm
installed for me. Or if you are using Yan, then write Yan, add
formic and press Enter. Now close the terminal,
we don't need it. And let's create
basic form first. So I create form and give it
a class name sign-up form. Now let's add label or
name and pathname here. And one input type, text, and name equals to name. Now I duplicate these two
lines three more times. So second label
for the email and also input type to email
and name to email as well. Next, I want a
label for password, input type to passer and name, also password and last level
or country and password. Input type to password
and name to see password. And finally, we add button type, submit, save the changes,
and take a look. See, we get this clean poem
and some basic styles. So I've Guam looks good. You can also get
this palm style by just copy and pasting the
CSS code in your file. Now let's handle this form
using pattern make library. So first of all, I import
used for make function from forming these use bombing is
basically a custom hooks. Managing States and
handling events. Don't get confused. Just see this one time and you are
all doubts will solve. So in our component was derived, use formic and we pass object. First property of this object is initial values of our poem. So here we have to pass four values because we want
to handle this pore inputs. So we create a new variable at outside of this function
for our initial values. And we write object. Now pay attention here. We have to use this
exact same name as we pass our input names. So first property is name, because here we pass
name empty string. Next we have email,
empty string, then we have password, empty string. And last one. Guess what way, right? Right. It's the password
because we pass last input named see password
and also empty string. Now here we pass
our initial values. So in JavaScript object, if the property name and
value variable name is same, then we can remove
this value variable. So I remove this and
it works the same. So that's why I create
variable with the same name. Now in this object, we have to pass one more
property, which is onsubmit. Here we pass arrow
function and we can access values of our form and print
these values in console. Log and press Tab. And we get console.log. These are little
tricks which will help you to write code fast. So we pass values. Now, let's store this in
a variable called formic. And let's console this
forming variable and see what we get saved the
changes, and take a look, see this form of
variable, values, errors and a lot of other
methods like handled, blur, handle, change,
handle, submit, etc. Let's use these methods. I'm going to structure this object because I
don't want to write formic dot values and formic dot handle change because it will make
our code messy. So first, we want values which stores all
values of this form. Next, we want to handle blur, handle change, and
handle submit. These all are
predefined functions. So we don't need to
define any of them. And that's why formic is so
popular for form handling. You don't need to write
all of these functions. Now, in our form, was I pass value for
this name input, which is value dot name. Next, I want to
add onblur event, which runs when we
live input box. Here, we simply
pass handle blur. And last I add onchange
and pass handle change. Now I simply copy these three attributes and
paste it in all input tags. We have to only
change these values. So here I write email. Next parser, and
last see parser. Now last event which is
handled submit in form tag, we add new attribute
on submit and pass handle submit method
and remove this line. Save the changes
and take a look. Let's fill the form and
click on Submit button. See, we get all pill values. So in this onsubmit function, we can write our
Submit Form logic. How simple and easy form
handling becomes using forming. And also our code looks very clean and easy
to understand. Now, let's see how to validate this form using library bus. Let's install the
library open terminal and write npm install
yup and hit Enter. So yup library will
help us to validate values of our input
pill and return errors. And then with the
help of poor me, we will display the
error as simple as that. So let's close this terminal. Now let's create our validation Schema post by using Yup library valid JSON schema is basically conditions that we check
perform validation. For that, I create a new
folder in SRC called schemas. And in this folder, I create a new file
called index.js. I will explain you later why I create a file with
name index.js. So in this file, first, I import all as yup
from your library. Now I create a variable
called sign-up schema. You can call it whatever
you want to hear. We use yup dot object
and inside it, we pass our validation object. So fast I add name. Make sure you use the same name as we mentioned in
our initial values. So add name, Garland, yup, dot string, which we'll check our inputted value
is string or not. Then dot mean three, which means minimum
three characters needed. And last dot required, which will make sure this
bill will not empty. If we want to know from where
I am writing these methods, you can check yup
documentation on NPM. Now we add our next
field called email. And again was to reject string. Then we have e-mail method
to validate email address. And last one is required. Now, one more thing here, in almost all functions, we can pass our
custom error message, which we want to
display in our form. For example, in this
required function, I want please enter your name. Now. Same in this email function. I want please enter
validate email. And then required I write, please enter your email. Now our next bill is password. First, recheck string. Now here, you can add a condition
related to your choice, minimum six, maximum 15. But I suggest you to use regular expression
for validation. You can search on Google and Google exploration or password. And I give you this
regular expression link in description box. You can copy from that. Here we have regular
expression for password. So copy that. And in our schema file, I create a new variable called password rejects
and paste it here. Now here we added one more
method called matches. And first argument is
our password rejects. Then we pass our error message. Please enter valid password. And last, we pass required
function with message. Please enter your password. Now, last property,
which is C password, colon, yup dot string. Now we have to check
this C password, same as this password. So for that, we
have another method called an in-depth was
to expression is LA. And for getting these
password value, we write yep dot ref, then pass our filename,
which is password. And second argument
is our error message, which is password, do not match. And last, we add required
function with message. Please enter confirm password. Now we export this schema
from our file and save it. Now or component. First we import that sign-up
schema from schema folder. And here we don't have to write this index file because React takes index.js file as default file if we only
write folder name. And that's why I named
this file as index.js. Now, in this use formic, we have one property to validate that schema, validation Schema. And here we pass sign-up schema. Now we get all errors
in adults variable. So let's add this here. And guns all these errors. Save the changes
and take a look. See West we have empty object. Now I click on the
submit button and z, we get this all errors. Now I write name and see
our name error is gone. Now let's add e-mail
and password. One capital letter,
one small letter, one number, and one
special character c. Our password error is also gone. Now let's add
different password. So we get this password, do not match error. And if we write same password, then all errors are gone. So we get adders in console. And now we have to show
that errors in our form. For display error, I add one DU and give it a class
name at our container. And in that, we will
display our error. Now I simply add one condition, which is if errors dot
name is available, then display the error. I use paragraph with
className form error, and then print errors dot name, save the changes
and take a look. Now I don't write anything
and click on Submit button. See, we get our name error. But one little bug here, which is when we
don't even touch name input and writing
any other fields, we also get the error,
which is not good. Let's fix this, this use Wyoming has one more
property called us. So let's console this, save the changes
and take a look. First, we get empty object. Now I click on this email
field and nothing happens. But when we left
that input field, then email, we'll
add in this object. Now we are in password field. And when we left this bill by click on other pill
or pressing Tab, then we get password
in this object. So in our palm I add
another condition, this dot name and n. Now save the changes
and take a look. Now I click on this email
field and then Leptis input, then we don't get
that name error. If we click on Submit button or live that name input blank, only then and then
we get this error. So let's copy this
error container and paste it after
all input pills. Now for email, we
change address, e-mail. This e-mail. And brained errors dot email. What password we change
errors dot password, does dot password and
print errors dot password. And last one for
confirm password. We change era's. See password, does not see password and print
errors dot c password. And I remove these console, save the changes
and take a look. Now click on the submit
button and we get all Aaron's name and z, we get different error. And I write three
or more character. It's gone now. So I feel all pills. And then click on the submit button and we
get all values in console. Now we can clear all input pills after
we submit the form. So in onsubmit property, we have actions method. And after console, we write
excellence dot reset, form. Save it and take a look. I feel all the details. And when I click on
the submit button, are all input fields get clear. Now, we can make this cold solder by using
one make components, which is the second method
to handle palm using comic. I import for me form
and build component. Now I just select out pull
form and press Control plus Shift plus P in Windows and
command plus plus P in Mac. And write, wrap enter and right. And hit enter. Now we pass initial values
equals two initial values. Well listen, schema
equals to sign-up schema. And for onsubmit, we
create new function called onsubmit and copy this
code and paste it here. So we pass on submit
equals to on Submit. Now this bombing use render props method to render the poem. So write curly brackets
and we have prompts, arrow function, and we
move our palm inside it. So these probes has all
methods which we get here. So we will destructor
it after all changes. I know it sounds
complicated, but it's not. After completing this tutorial, you will understand it properly. Now, let's replace our form tag. Which form component? Make sure you update
closing tag also. Now remove this onsubmit. We don't need it. So now
we have failed component, which is the replacement
of our input fields. So I write here, we'll pass type equals to
text and name equals to name. And close this field component. Make sure you write the same name as we
pass in initial values. This field component works
the same as this input field. We don't need to pass
these three attributes. Form it does that by itself. And that's the power of forming. Here, you can pass as many attributes you want to
pass in an input field. For example, placeholder
equals to enter your name, save the changes,
and take a look. See, we get inputField, same as this name input. So let's remove our input pill and also remove
this placeholder. I don't want it. Now I copy this field component and replace with
all input fields. Now for email, I pass
type to email and name. Email. Now for password, high-pass
type to password and name, also password and
confirm password. I pass type to password
and name, see password. Now final step, we have
to destructure at Rs, enters the pill
from these prompts. So I write object comma test. Now remove this
used for make and also remove used for
omega from important. Save the changes
and take a look. It works the same as before. You can use whatever
method you want to. It's totally up to you. Here. You can add Jack box and other inputs using
this field property. If we wanted to know
how to do that, you can read format
documentation. Here. In example section, you'll get the examples of
all types of form.
15. BONUS : React Router v6: In this tutorial,
we are going to see React router from scratch. So let's don't waste
time and get started. Here, I create
this new React app by using NP x Create React app, and then remove all
unnecessary files. Now first we install
React router library, open up terminal by pressing
Control plus bacteria and type npm install
React router down. If you are using Yan, then type Yan had React
router dome and hit Enter. So we use React router dom or creating different routes
in our application. Basically, we are
defining on which path, which components
should be displayed. For example, we are
making a request of www dot code plus u.com. Then we want to show
home component. And if we request www
dot code bless you.com, it's less about, then we want
to display about component. Now let's see the
implementation. So first of all,
if you want to use React router dom
in your project, how to grab full obligation
with one component. So you know what app
component we import some components from
React router, dom, right? Browser router as Router, and wrap our JSX with
this router component. Remember, without this
React router will not work. Now to define it out, We have two more components. So important routes,
which is used to define in which part you want to show you
are all routings. I will explain you in a second. And another route,
which is used to define our actual routing
name and component details. Let's add our routes component before React
router version six, these routes is known as switch. Now inside it, we add our route. Now we have to pass
two prompts here. First one is bad, and between this double quotes, we write our path name. So for home, we add
only forwards less. We know that when we only write google.com or any of the
website and we add slurs. Italy dido goes on
that website homepage. So that's why we write
only forward slash here. And then we have element
equals two in curly brackets. We add our components. First, let's create some pages. So I create new folder
in SRC called pages. In this folder we create
one file called home dot js and write RFC for React boilerplate and
add here homepage. Now create a new file
called profiled or JS, and use this boilerplate and also replace the
text profile page. And we create one last
page with name users.js. Add boilerplate, and replace
the text user's page. Now back to our app component. And in element, I add our home
component and close this. Now, duplicate this
line two more times. 19 is the path which is less profile and pass
our profile component. And at last, but slash users and bias our
users component. Save the changes
and take a look. See, this is our homepage. Now in URL, I passed less profile and we
get profile page. Or if we pass less users, then we get users page. Now let's create one more page
called northbound dot js. And we add boilerplate and
write 404 page not found. We will solve this page when
someone pass something else, but which we don't define. So back to app component
and we add another route and path to start an element
not found component. So it's basically
means if we pass any other path which is
not from these paths, then display this
not found component. And make sure I always
write these not found route at the
end of all routes. Sometimes it mess
up with others. If we declare it at the top, save the changes,
and take a look. If we pass here something else, then we get this
northbound page. Now let's see some
more useful property of React router dom. Let's create a simple navbar. Let me close this other files. So I create one new
folder called components. In that I create a new
file called nearby ab.js. Now type at AFC and hit Enter. Now I remove these and add no
tag with the class nearby. And inside it, we create a tag, an additive to homepage,
which is less. And bus home here. Now duplicate this
line two more times. And second but to profile
and ride profile here. Now, last path is for
users and right users. Now save this. And in our app component, we add our Navbar component
at the top of routes. So this now bar is fixed at top. And below that we
see all routes. So we don't need to add now, but in all components, save the changes
and take a look. See, we get all links. Now when we click on any of
these links out to that path. But can you see our
application gets repressed? Not we wanted, right? So for that, we have one
component in React router dom, which is linked in
Navbar component. We import link
from React router, dom, and remove this a
tag and right link to. Now here we write path
which is for worthless, same as with this profile. And same is with these users. Save it and take a look. See, now when we
click on this link, our page not get repressed
and routing works smooth. Now we can make this more good by highlight
the current route. I add some basic styles to our Nerva and hover
effect on a tag. You can copy the styles
from my GitHub repository. Now I want to make
current route links background to black and
change its font color. So we need to know which
is the active link here. For that, we have one
component which is now link. This link is advanced version of this link component.
Import that. And now I select one
link and press control plus D in Windows and
Command plus d in Mac. With that, we create multiple cursor and replace
this link with nav link. Now this nibbling give us the active class
added in our links. Save the changes
and take a look. Now right-click on any of
these links and go to Inspect. See now link at active
class to our users link. If we change to profile, then it's removed
active class from users link and then
add to profiling. Now back to nail bar CSS
file and add navbar space, a dot active, and
in curly brackets, add background, color and
color to f, f, e, 400. Agendas. Take a look. See, we get this
nice active link. Now we have some important hooks which is very useful
in our application. First one is used navigate. In previous version
of React router. This hook is known
as US history. So in this profile component, I create one button
called a C, other users. So when someone click
on this button, it should be redirect on userspace that we have
used navigate hook. So important, use navigate
from React, router, dom. And in our component, first we write use navigate and store its value variable
called navigate. Now I create new function
called redirect to users. And in curly brackets,
we write navigate. And we pass our path here, which is slash users. And if you don't write
these four words less than it redirect to
pays nested path, which will be
profile slash users. If we want to read
directly to another page, then add a forward
slash before path. Now in button onclick event, we pass this render
to users function, save the changes
and take a look. See, it works. Now last, we have
used params hook. So in this example, we have our user's
route in which we can display all users
details or profiles. Then if someone click
on one particular user, then we have to show that
users retails in other page. So a route becomes
user's last one, which is the user ID. Now we pass data of users from
backend by using this ID. So how can we define this
route that I create new route? But two users, it's
less colon user ID. And for element, Let's
create a new page. So create a new file in
pages called user details. And write our AFC and save it. Now back to app component. Here we pass user's
details component. So if someone redirect
to users only, then it renders these
users component. And if someone redirect
to users less something, then it renders user details
component, simple as that. Now let's see how to pass this
user ID in that component. So go to user details component. And here I embody, use params from
React router dome. Now in component, right, use params and store it in a
variable called parameters. These parameters has all values
of our route parameters. Let's console this sales
attendees and take a look. See, when we redirect
to users less one, we get UserID to one. So we can destructure
it and write user ID. Remember, this is the
exact same variable as we pass in our route. And I display here user
details of user ID. David, and take a look. See, we get our id. Now we can pass data from your
back-end by using this ID. So I hope you understand
React router dom. If we want to know
that in depth, you're going to check
its documentation. Link is down in the description. If you have some doubts, you can ask me and I see
you in the next tutorial. Goodbye.
 Code Bless You, Make Coding Easy To Learn