Transcripts
1. Intro: Hi, My name is Brian adorn. I begin sewing as a hobby to keep my mind occupied and then had discovered costly. Well, let's just say my ambition, screw and I am Besten. More time into learning about sewing. One day I decided to implement sewing into my work life. To my surprise, people started to like what I was making, so I decided to open a Nancy shop, and nowadays I own a business in which I sold products to happy customers and all while enjoying what I'm doing, which is something. But all of this began with just a simple project. If you're enrolled in my class, I'll show you a quick and easy way to learn the basics of Sign. Oh well, making a small product. You'll learn about basic swing terms and techniques. You'll learn about same allowance on how to hand stitch, seam and much more Holah making a cushion along with asleep cover for it. I hope to see you soon in my class. And remember all of this started with just a simple project
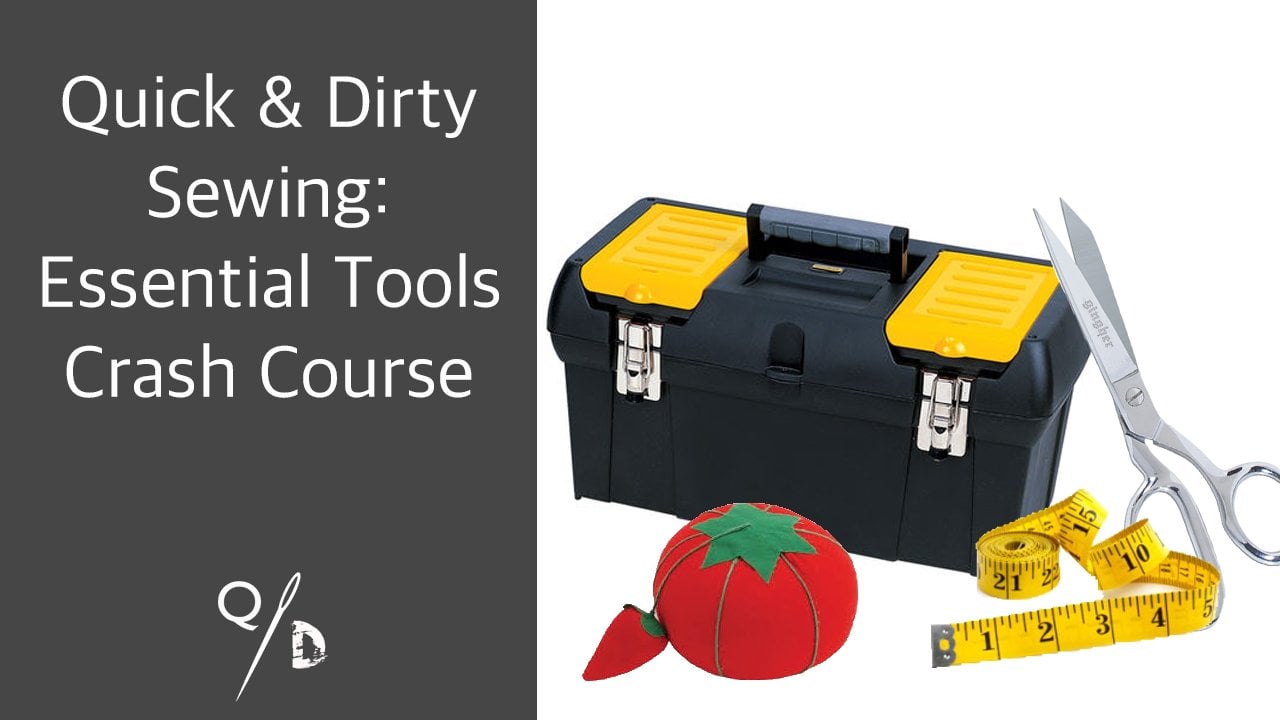
2. Tools and Materials: This will be the following materials needed for this project. First of fabric. In my case, I have two different kinds of fabrics. Ones for the sleeve cover and the other for the cushion. You would just need half a yard for this leaf covered in half a charge for the cushion cover. If you want to make both projects with the same design, you would just need one jarred of fabric. You would also need pins. Sisters needle and thread optional a seam ripper for you make any mistakes paper to make the sewing patterns, a ruler and polyester stuffing or any other kind of stuff, and so you can feel the inside of the cushion and, of course, a sewing machine.
3. Bobbins & Thread: for development entrant. I recommend that students to use old purpose threat because of a couple of reasons for self . It's really coming, so we can still be found on any make a store that carries craft supplies. And, of course, any day to get this story will have it. These older school of tread I'm using it for demonstration purposes. I ruin wreck Amendment students using for this project because his main applications for finishing raw ends of fabrics and it's not actually meant for holding fabric together. And it breaks much easier than regular old purpose trip now for the bobbins. I'm not gonna go too much into detail on how to wind them, because depending on the model of your sewing machine in my require different steps Now. In practice, all machines have to say basic functions on how to one developments. But like I mentioned before, some of that differ on the steps. So I recommended students to search online House of Wine, the bombing on their specific soy machine model
4. Fabric sides: when you're working with fabric, first thing you got to know is the fabric has a wrong side in a right side. For example, this is a fabric that I'm going to use for the slave Cushion Cup. If you notice there's a pattern design on this site and another on this one, this will be the right side with this design, and this will be the wrong side now, of course, with fabric, it would all depend on the style that you want to give your finish Project design, for instance, you might be working on a project in which you want to showcase this side of the fabric. Or maybe you want to show off the design of the fabric. This is another example of how Rhone site and right side of a fabric may look. This is a license cutting print fabric with character, the signs from the Legend of Zelda now on the backside and so wide and fade out because it's not meant to be used as a right side on a case like this. It would be a really questionable artistic shows to use this side for your project.
5. Seam Allowance: when your swing two pieces of fabric together, you always have to make sure that both sides me right side to right side. In the case of this fabric that I'm using economic sample with this, a matter which side is which, because they're basically the same. But when you're working with fabric has a certain this sign or a pattern, you should always make sure that both right size are meeting face to face another round sides are on the outside. Now I'm going to talk to you about seam allowance. Seam allowances. The area between the fabric edge and the stitching line on two or more pieces of fabric ever been sewn together. Seam allowances can range from 1/4 inch wide to as much as several inches. Commercial patterns for home swords have seam allowances ranging from 1/4 inch all the way to 5/8 of an inch. A good way to measure the seam allowance that you have is by looking at the plate on your sewing machine. Sometimes they will have these sort of grooves so they could be used as markers to see what single hours you'll be using with the fabric. Now to measure how much seam allowance you were working with. You need to take a ruler and measured from the point of the needle all the way to the group . In this case, this group would be 1/4 inch. This one will be three eggs of an inch, and this one would be 5/8 of an inch. And this one right here will be one inch. Ah, helpful accessory that can be used for seem allows. It's a magnet like this one. You simply put it right here on the plate where you need to. Obviously, you need to measure first to see how much allowance you got. And then you put the magnet in this case, I'm gonna go for half an inch.
6. Seam Ripper and Back Stitch: No, let's talk about back stitch. Some people refer to his bark tacking or reversed stitching. Start by making a couple of regular stitches and then do a couple of stitches in perverse and essentially. What that does is that it secures the previous stitching in place and preventing us from, or Raveling. Now that we're done, our backs, teaching or fabric is secure. But let's imagine we made a mistake, while so in the fabric, maybe we saw the right side with roadside or something similar. First of all, don't be discouraged by this. It happens to all of us at some point. Even if you have years of experience like myself, it would still happen. I sometimes make mistakes, and I have to correct them. I'm using countries threat with this fabric so you can clearly see what I'm doing now with the same ripper in hand. Carefully insert the point of the soon river in between the loops of threat on the scene and cut the threat with the singing ripper, the extra careful that you don't cut the fabric, the extra careful with the loops of tread that were made with reverse stitch. There are more difficult to cut. If we're not careful, you might rip open the fabric. If done properly, you will see that the fabric it's still okay. And you can do the same again. And just between us, no one would even know.
7. Raw Fabric Ends & Alternatives: when you cut a piece of fabric the fabric. I'm afraid like this. Now, in order to stop this, there are multiple alternatives. They can be used. For instance, you can just use a six X stitch, or you could use an over locker if you have access to one. There's also multiple different. Seems that can be done in order to achieve a clean seem that won't fray when you finish your Gartman or your project. If you have access to pinking cheers like this ones, they have these triangle dents on the inside of the blade that can be used to stuff ring on the fabric. No, after you finish your scene, you can just use the pinking cheers to cut close to the scene, but not so close that you cut the same open like this. If you have access to a machine like this, one of a number locker, by all means use it to make finishing and the advantage of using an over locker machines that it will give you a clue. Finished the one Frey, and it will also have the added benefit of giving your garment or project sewing seams that professionally made the examples that I've shown you are tools that can be used to stop fabric front frame. But most beginners don't have access to tools like this. So don't you worry. I'm gonna show you a solution that can help you stop the fabric from frame. After you've done your normal scene, you could do a six sacks. Stick close to the first scene, but you can overlap the first scene. A six x stitch. It's a stitch that goes from left to right or right to left in a sex act. Panter. Most standards home sewing machines have a six X stitch, so make yourself familiar with the six at Stitch on your sewing machine model. And be sure to shake that you have the correct Sell your foot for the six X stitch. After you're done, the six accident. You're going to do another regular stitch on top of the points off the six text itches there are farthest from the original scene. When you're finished doing that seem, use your sisters to cut close to the station line and without final step, you're done
8. Pattern Cover and Cushion: we're going to be making a 12 by 12 inch cushion, and the cover sleeve is going to be the same size. But like I mentioned on the seam allowance lesson, we're going to add half a niche allowance to the pattern. So that means we need to draw a square that starting inches by 13 inches. As you can see on this graphic, the main center square represents of final size. Off the cushion the general line represents the half inch seam allowance that we must add to each side of the square. When you add it all together ends up being a 13 by 13 inch square. Don't you worry if you feel a little confused. This follow the instructions and you'll see that your project went up looking great or the square pattern just cut to pieces for the cushion and just one piece for this leaf cover. This other Panelists were the backside of this leaf cover, and it's going to be turning inches wide by 10 inches long. The reason for this is because we're not going to add seam allowance to one of the sides because we're going to be making a him a hem is used to hide the raw ends of fabrics and to give it a finished look. An example of this will be the end sleeves off the shirt or the handcuffs off jeans or pants. I'll explain how to make a him when we sold asleep cover. So for now, just focus on cutting the fabrics on the dimensions that I just provided.
9. Sewing Cushion: before we start sowing the Christian pieces together, we need to mark two points three inches apart. We're not going to so in between those points. Instead, we're going to start on one point, and so all across and stop on the other point. The drainage gap is going to be our opening so that we're able to flip the pieces inside out and fill the cushion with stuffing. Remember to reverse stitch on the beginning point and on the end point when you're close to a corner, check to see if the needle was getting close to the distance off half an inch from the corner. Put the needle down and stuff. Lift a presser foot and pivot the fabric. Check if the fabric matches the half inch, seem allows. If so, then put the presser down and continue until you reach the next corner. When reached the end point stuff and reverse stitch and then cut the threat before we flip the pieces, we need to cut the corners close to the stitching. Be careful that you don't cut the threat. The recent we're cutting the corners is because when we flip the pieces inside out and push the corners, you're going to end up looking straight. If we don't cut the corners, they're going to end up looking round. Let the pieces inside out. If you have something that can help you push the corners, then by all means use it. Just make your diet doesn't have any sharp edges. And when you're pushing the corners, do not use a lot of force or you might end up ripping the fabric apart.
10. Stuffing and Slip stitch: there are a couple of ways to close up a cushion. You could use a sipper or use binding tape to sew up the Ryans. You can so close to the fold an example. This will be the cushion that came with a silver that about for my living room as you can see where the three inch gap would be. It just folded the fabric and ran a top stitch from one point to the other and called it a day. And if you want, you can actually do that. But if you want your seems to match all sides, then you need to hand stitch the opening gap with a slip stitch, which is what I'm going to be teaching you. So let's feel the cushion up so that we can start doing the hand stitch part. A good reason to learn how the hand stitches because it will be possible for you to close up garments for project seems and be able to match is as close as possible to the seems that you already made with a sewing machine. Before we start doing the slip stitch, I recommend that you put pins in the full well that the folds hold together, and that will be easier for you to focus on the hand stitching part. Hand sewing is an easy skill to learn, but it acquires practice and patients when you were beginning. So don't get this first by just practice and keep doing it and eventually will be great at it. I'm using Contra straight so that you can see what I'm doing, but I recommend that you use a matching threat on your products. So that way you were able to conceal the final scene as much as possible. In order to begin doing the slip stitch, we need to insert the needle from inside the opening gap and make the needle point come out from in between the middle of one of the folds. Keep in mind that you must do this right at the beginning of the opening. After you bring the needle out from the middle of one of the folds, you're going to insert the needle at the same spot in the middle of the other hold and then take just a small bite from the fabric and repeat the same step. But on the other, full and again take a small bite and repeat the step and again take a small bite and repeat the step. I'm going to leave the recording play out in real time, so that way you can see the entire process and so you can follow along. If you wish to skip to the next step, just skip the video. The seven minutes and 45 seconds mark and yeah, - when you're getting close to the end of the opening, make a couple of more stitches till the opening is fully close. And then we're going to make a couple of whips stitches. Insert the needle on one side of the cushion close to the fold and have a needle. Come out the other side again. Insert the needle on the other side and repeat the step 3 to 4 times. After that, insert a needle in between the fools and have a come out at least one inch damn from either side. Bring all the extra Fred out and cut the threat. As you can see, the hand stitched seam was close to the scene we made with a sewing machine, but again, I'm using Contra straight for this example. But if you use matching threat. The scene will be concealed and be able to match. And with that, I must congratulate you, my wonderful students, because you have just completed the first part off the project.
11. Sewing Sleeve Cover and Hem: we finally made it to the final part of the project. For now, we can put domains for a piece aside because we're not going to be working on it right now . Instead, we're going to focus, making him off this other to pieces. Keep in mind that these two pieces are turning into his wide by 10 inches long, and we're going to make the him on one of the sides of the 10 inches part. To make a him, we need to fold the fabric twice and so on top. Usually, you will need to measure how much fabric you're folding and use in Iran to press the fabric . But I'm going to teach you a trick I normally use, which doesn't require for you to measure how much fabric you're folding, and you will necessarily need an iron. Suppress the fabric. So to start off, we need to sew a running stitch that's one inch away from Ryan's of the Side that we're going to fold it. Running stitch is the same as a regular stitch. The only difference will be that you need to change the stitch limp, so the longest possible by your sewing machine irregular stitch length will be 2.5 again sugar sewing machine model and select the longest stitch like possible. After we finished doing the running stitch, remember to change the stitch limped back to the regular amount. Otherwise, you're seems are not going to be strong. After doing the running stitch, we need to fold the fabric towards around side and make sure that the stitching we just did . It's right in the middle of the fault. Now we fold it again right where the Ryans meets your own side off the fabric. After you have folded it twice, you can either press the fold with an iron or use pens to hold the folds while we so it. Now we're going to seal the him. And for that we need to put the fabric with full upside up, and we need to do a normal stitch close to the foot. When you're getting close to the pin, stop and remove it before you continue sewing. Otherwise, the needle might break if it comes in contact with the pins. Also, remember to reverse stitch at the beginning and at the end of the him now that we've done to him on both back pieces. We're going to assemble the sleeve cover, put one back piece on the main square piece. Be sure to put the him side toward the middle of the square and remembered that we're going to be sewing right sites with right sites. Pin across the two pieces and remember to so with 1/2 inch seam allowance. Now we're going to pin the other back peace. Make sure that the him overlaps with him off the other piece that we already sown. Take your time sewing the pieces together, especially when you reach the part where the hems overlap. Also again, remember to reverse stitch at the beginning and at the end of the seams afterward, done with oldest seems or we need to do is flip the cover. Sleep inside out, and this time we don't have to cut the corners because this is just a cover for the cushion , and once we put the cushion inside, it will push all the corners in place
12. Final Project Look: No we need to do is put the cushion inside the sleeve cover and we're done. I want to congratulate all of my students and made it till the end of the class and finish your very own cushion. I'm proud of all of you. And this is just the beginning of the things that you could make if you keep learning and growing your skills. This class was just about the building blocks off basic sewing construction, arrest a shorter. This is just the beginning, and I'm going to be teaching you how to make bigger and better things. My next couple of classes are going to be on the different kinds of sewing seams that we can make on how to sew sippers and my personal favorite. So far, I'm going to be teaching you how to make your very own messenger back. So be sure to follow my teachers courses on skill share. And if you want, you can follow me on my instagram page where I mainly post tips on sewing projects that I'm making and pictures of products that I saw on my Etsy page. I hope that you have fun in this class and that you were able to learn the basics of sewing . It would be an honor to have you on my next class til then. I'll see you soon.
 Bryan Adorno