Transcripts
1. Introduction: Hey, guys. Welcome.
In this course, we're diving straight
into how generative AI is transforming the way visual
and video content gets made. If you've ever spent
hours editing footage, hunting for the perfect image, or managing endless
campaign version, this is your game changer, because now genitive
AI can help you to do all of that way
faster, way smarter. At a scale that was unthinkable
just a few years ago, from generating
staning visuals from a single prompt to
turning scripts into dynamic animations to localizing campaigns for
audiences around the world. Generative AI is reshaping the creative process from
concept to the final cut. And in this course, I'll show
you exactly how to use it. Why this course matters? The creative world is evolving
fast, faster than ever. Brams want more content in more formats for more platforms, and that's where
generative AI comes in. And that's not to replace
creativity but to amplify it. You see, in this training, you'll learn what
generative AI actually is, how it works, and how it's already changing industries
around the globe, from advertising to
entertainment to education, we'll break down
how to work with generative AI to
speed up production, enhance storytelling,
and free up your time to focus on
what really matters to creative ideas that you and only you can bring,
what you'll learn. Here's what's ahead. I'll
start with the fundamentals, what generative AI is, how it fits into modern
content workflows, and how to write
powerful prompts that deliver real results fast. Then we'll move into hands on creation, generating visuals, converting scripts into
videos and animations, and mastering generative
AI assisted editing. So you'll be able to
move way, way faster. Also learn how to scale
your content globally with smart localization tools
and best practices for maintaining brand
consistency across every market. By the end, you won't just
understand generative AI. You'll know how to harness it
confidently to supercharge your creative output and make your production
process unstoppable. So buckle up, this
is where creativity meets cutting edge technology
with generative AI. So let's start
building the future of content together, and
let's get started.
2. The Birth of Generative AI: So to understand why we even
need prompt engineering, we need to understand
where it came from and how it relates to AI, the birth of chat,
G, PT, and LLMs. From the simple rule
based programs of the 1980s to today's
smart creative chatbots, one thing has stayed the same. Our goal to make computers understand and respond
similar to humans. The story of chat, GPT, and large language models, LLMs is really the story of
how that dream became real. How we went from
basic machines to powerful tools that can think and write using
everyday language. Although it feels
new, artificial intelligence AI has actually
been around for decades. To understand where
Chat GPT came from, let's take a quick look at
how AI evolved over time. It all began in the 1950s when computer scientist Alan Turing
asked a famous question. Can machines think?
That one question started the entire field of AI. In the 1960s, a
simple program called Eliza was created at MIT. Would hold short conversations by matching patterns in text. It wasn't truly intelligent, but it was the first step toward computers that could use
language to communicate. In the 1980s, AI was used mostly for what were
called expert systems, programs that followed
rules written by humans. These systems could
give medical advice, approved loans, or
help design products. They were useful, but
they had one big problem. Couldn't learn or adapt. If something changed, you had to rewrite the rules yourself. The 1990s and 2000
brought a big shift, the rise of machine learning. Instead of being told
exactly what to do, computers started to learn
from examples and data. This approach quietly powered many products we all use today. Spam filters learned
which emails were junk. Google search got smarter
at finding the right pages. Amazon began recommending
products you might like while Google Maps learned to predict the fastest routes
based on live traffic. Came alexa and other
voice assistants, which could recognize speech and answer questions out loud, something that felt almost
magical at the time. Computers were now
learning from experience, not just following
rules, but even then AI couldn't really
create things. It could predict and categorize, but not write,
imagine, or explain. That changed in 2017 when researchers at Google developed a new system called
the transformer. It helped computers
understand how words relate to each
other in a sentence, not just one word at a time, but in full context. This was a huge breakthrough
and laid the foundation for the next big step in AI,
large language models. A large language model, LLM is an AI trained to understand and
generate human language. It learns from massive amounts
of text, books, articles, and online content by spotting patterns in how words
and ideas connect. After the transformer
architecture was introduced in 2017, models could finally understand
context and meaning. This led to powerful
systems like GPT, capable of writing, summarizing, reasoning, and chatting in
natural human like ways. That next step
came from Open AI, the company behind Chat GPT. They built on Google's
work and created something called the GPT series, generative pre
trained transformers. The first version GPT one showed that a computer
could learn to write readable text by studying
huge amounts of online data. Then came GPT two in 2019, which could write
essays, stories, and even news articles
that sounded human. A few years later, GPT three
made an even bigger leap. With 175 billion
parameters or neurons, it could write, translate, answer questions, and even code. There was just one thing
missing, natural conversation. GPT three could give answers, but it couldn't
chat as fluently. So Open AI improved it using
feedback from real people, teaching it how to respond
more naturally and politely. The result was chat GPT, a version that could
hold a conversation. Remember what you said and reply in a way that felt personal. That was when AI truly became something
everyone could use, and this is where
prompting came in. The word prompt originally
came from early computers. It was the line on the screen
where you typed a command. The computer was
waiting for your input. Over time, the meaning changed. Now, a prompt means the
message or question. You give an AI a system like chat GPT to tell
it what you want. At first, prompts
were very simple. Things like write an email, summarize this text or explain
this to me like I'm five, but people soon notice
something interesting. The way you wrote your prompt completely changed the answer. A detailed prompt gave
a detailed result, a clear question, got
a clearer answer. The better your prompt, the
better the AI's performance. This turned the act
of prompting into both an art and a science. Today we call this art and
science prompt engineer.
3. What is Prompt Engineering (and why do we need it?): Okay, guys, after learning how large language
ubbles came to life, the next step is understanding
how to tarp to them. And that's where prompt
engineering comes in. If LLMs are the engines of AI, prompts are the steering wheel. They allow you to
control the direction, quality, and creativity
of what AI produces. At its core, prompt
engineering means writing clear structured instructions
but guide an AI model, chat GPT, Claude
Gemini, or others. To produce useful,
high quality results. A prompt could be as simple as write an email or as detailed as act as a marketing expert and design a campaign
for my new product. The better you describe
what you want, the better the AI's
output will be. But how did this idea begin? Prompt engineering
emerged as people started using AI
tools like Chachi PT, Mid Journey, and Bendali
more creatively. Users quickly discovered
that two people could ask the same question and it
completely different answers. And the difference came down to how they phrased the prompt. This led researchers, creators, and educators to study the patterns behind
effective prompting. Early thought these
was like Ethan Malik, Andre Carpathi and
Seth Dobrin along with OpenAI's research teams began to share techniques that
worked consistently. These evolved into the core
prompt patterns used today, frameworks that help users think and write
more strategically. Among them are the
instruction pattern, giving clear direct demands, chain of thought pattern, guiding the model to reason step by step, persona pattern, assigning the AIA specific role or perspective,
template pattern, creating reusable
prompt structures, and the iterative
refinement pattern, collaboratively
improving the output. Patterns became the backbone of prompt engineering, a
way to get predictable. Powerful results
from any AI system. Prompt engineering
has since become the bridge between human creativity and
machine intelligence. It's powerful because it gives anyone, not just programmers, the ability to direct AI systems to perform
complex or creative tasks. In short, it turns you into
a kind of AI conductor, guiding the output you want. And it's not just
for chat GP two, same skill applies
to a wide range of AI tools used across
different industries, Canva, create marketing designs
and social posts from simple text prompt,
Photoshop firefly, generate or edit high quality images
using natural language, motion AI, draft reports, sunrise notes, and
automate documentation. Runway ML, turn written scene descriptions
into professional videos. Microsoft 365 copilot,
write emails, analyze spreadsheets, and prepare presentations
from prompt. Prompting is now a
universal AI skill. Whether you're a marketer,
teacher, designer, developer, entrepreneur
or project manager. Learning to prompt effectively
will help you work faster, automate tasks, and unlock new opportunities is also a
practical way to earn more. At work, prompt engineering
can save hours, automating emails, reports,
and customer interactions. Entrepreneurs use it
to scale content, analyze data, and generate business ideas without
hiring large teens. Freelancers now sell
AI based services from writing and design to
strategy and automation. People who know how to
communicate with AI are already leading the way in
productivity and creativity. Here's what I want
you to do first. Imagine you've just
been asked to use AI to make your
current role faster, smarter or more effective, or maybe even to help you
land a new role entirely. Think about your
day to day work. Are you managing projects, designing presentations,
writing reports, planning lessons,
selling products, or building marketing campaigns? We'll be using chat
EPT throughout this training to show you
exactly how it's done. But remember, what
you'll learn applies to all large language models and many of the other AI tools
we mentioned earlier. Like Canva, Notion and
Microsoft copilot. The goal is for you to
think in terms of how AI it can assist you no matter
your role or industry. If you're a project manager, imagine AI helping you
summarize project updates, create meeting agendas, and
identify risks in seconds. If you're a marketer, think about how it could draft, add, copy, analyze competitors,
and plime social media posts. A teacher could
use it to generate quizzes and lesson plans. A business analyst
could interpret data and find patterns. A freelancer could
create proposals, automate admin work, and
deliver projects faster. Make it practical, we'll use an example of
someone running the day to day for an
ecommerce business because it applies
to so many roles. So take a moment to
think about how an AI, I can help you in your role because by
the end of this course, you'll know exactly how to make that happen. So
let's get started.
4. How to Generate Images from Prompts with Adobe Firefly: So let's get into a demo. Here we're going to start
creating visuals for our passion sports
tracksuit ad campaign. And the goal is to
create a set of branded visuals
using Adobe Firefly. So the first thing
we're gonna do is we're going to open up firefly, and then we're going
to get to work. So the first thing
to notice is this is the area that we're focused on. We want to make sure that
this drop down is on image because you can
also generate videos, but we haven't got
to that stage yet. This is the particular model that's going to use to
generate the image. And Adobe has a number of different ones that we
can use, and they all, you know, were created
at different times, and they have different levels of features that they can apply. So in this case, we're going
to pick FireFlerimage three. Because I've used it before, and I know it will produce
exactly what I want. In this case, for
the hero image, we're going to go for a square, something that we could
show on Instagram. We'll leave these
settings at the moment. Haven't decided yet if we want to be three D
animated cartoon. We're just going to see what the AI is going to come up with. So once that's all
set up in here, this is where we're going
to type our prompt. And so here's one I
prepared earlier. So we've said we want a sleek black and gold
athletic track suit displayed on a mannequin in
a modern studio setting, soft shadows, premium brand aesthetic, realistic
photography style. And that's about all we
need to say to the AI. So, click Generate.
So at this point, it will ask you to log in if you don't already
have a login. So now that I've logged in, it's gonna set about actually
generating our images. So we'll give that some time, and then we'll come back to it. And there we go.
So, as you can see, we've got four generated
images, exactly what we said. So we said we want
it to be sleek. You can tell from
the fit that it is a sleek black and gold. It's definitely that
athletic track suit. You can see that, and it's
displayed on a mannequin. In a modern studio
setting, soft shadows, and it's got a premium brand aesthetic, realistic
photography style. I think that looks very
realistic and very premium. So I'm definitely
happy with that. So now the next thing
to do is actually refine the prompt for our
brand and for our brand style. So the way we're
going to do that is, well, we know our brands
called passion sports. We know it's black
and gold branding. So we want to edit
the brand slightly. We also want to put it
in a different setting. Like so so now it's going
to generate us four more, which are a black and gold premium sports track
suit displayed in a clean modern gym
this time with metallic gold accents
and dynamic lighting, professional product
photography style. So there you go.
Got the same items in a completely
different setting now, and that might bring it
to life a little bit more for our potential customer. Now what we can do is show it in some different scenarios. So we've said the track suit
displayed neatly folded on a reflective black surface
with high end retail lighting. Let's generate that.
So there you go. It's not the colors
exactly right there, but you can see
that it's got them stacked up, well folded. So if we now go back and we
choose any one of these, what we can do is we can go to the next level for this
specific image type. If I paste in the exact same
prompt and click Generate, colors came out a lot better. It's a lot more realistic and it matches with the
original design. So that's the benefit
of actually going in and editing one
particular image. Now, what if we actually want
to see a lifestyle shop? Now we're saying we want
to see an athlete wearing the track suit mid run
on an urban track, sunrise light, energetic
and empowering mood. Let's click Generate.
And the beauty is now we know that we're fully focused on this version of the track suit.
And here we go. So now we've got an image that matches exactly what we
asked for in our prompt. Obviously, there are
various different things we can do to give the person the kind of actions and the
character that we want. Next, let's create
a storyboard frame for later video use. So here's the prompt. We want a dynamic composition of
a sprinter in motion, wearing a gold trimmed
black track suit, cinematic lighting,
and motion blur. So let's generate
that. So there you go. That's what was created
from this prompt. So now we have an image of the track suit in a gym
setting, futuristic. We have it folded. We
have someone in mid jog, someone in sprinter motion. What we can do now is
we can download all of these different
versions of the image. So click Download.
So there you go. We've now downloaded the images. Now, let's go back
to the main page. Another thing that we can
do is we can always use a reference image to influence
one of our other images. So if we've got a few images
together and we see that there's something we like
about one of those images, we can now go back to
our original concepts and influence those based on this new image
that we've got. So let's do that for a second. Okay, so what we're going
to do now is we're going to use one of our previous
images as a reference. So what you can see here is
that um, for every image, you can choose either
the composition or the style to use a
reference image. And so what we're going to
use is we're going to create a new image and base it on
one of our existing images. So first of all, I'll choose as reference from our device. We'll go to my
desktop and find it. Let's use this Mannequin
one, upload that. So what that says is that we're going to use as a reference, we're going to type in a prompt, and that prompt will use
this image as a reference. So the prompt we're gonna put in is we want an
image of the same style, different pose in an outdoor
sports court setting. So what's done here
is it hasn't exactly created them with
exact same colors. If we add it into style, There you go. So now that
we've added it into style, we can see there's the
exact same colors, but just in different settings. And what we want to do now is we want to make
it region specific. First of all, we can edit one. So let's say we go into here. We want to pick this one,
paste in our prompt, which says the same black and gold tracksuit
photographed in a minimalist Tokyo gym with clean white walls
and soft daylight. We get a message
here saying that Adobe's using something
called partner models. So in other words, they're
using other models with companies that
they partner with, so I'm going to say, Okay,
on that one. Fine by me. And now we're just waiting
for it to generate. So, again, we said we were focusing the
minimalist Tokyo gym with clean white walls
and soft daylight. Then we can say the
same track suit on an athlete jogging behind
the sein at sunset. The seine is a place in France, a river in France. And we are saying that
the mood should be elegant and modern. So let's go. Go. The next one we want
to do is for Brazil. So let's say an athlete
wearing the same track suit, running on a Rio
beach at sunrise, vibrant and warm
tone. Generate that. So there you go. Now we've got someone
running on the beach, wearing the exact
same track suit. We've now got a person
also in the track suit, which is helpful because we
started from a mannequin. We then went to the mannequin in more of a minimalist
setting and then a real person in France to a real person
on a beach in Brazil. So I could change this
to I could change just to say during the day,
see what it comes up with. So let's go over
what you've learned. So to wrap up, you've
now created your first AI generated hero product shot. You've produced multiple visual
styles for one campaign. You've used prompt engineering
for brand consistency. You can generate images for a specific locale,
a specific country. You've built the
visual foundation of your upcoming video ad, and you've got some
shots that you can use on social media
if you want to or just literally to show your concepts to people
in your organization. And that's that. You see
you in the next lesson.
5. How to Generate Videos from scripts & images with Runway ML: Welcome to this module where
now that you've created strong visuals for the Passion sports
tracksuit launch campaign, it's time to bring them to life through motion,
through video. So in this lesson, we'll use Runway MLs video
generation tools to convert your static image into a short branded video clip. In the old world, producing a video campaign meant filming, lighting, editing, a
long expensive process. But with generative AI, you can write a script,
feed in a reference image, and generate your
video in minutes. The first thing we're gonna
do is we're going to log in, and then I'll take you
through. Okay, here we go. Now the thing to
remember is that I know that many of you won't have
paid for the subscription, so I'm going to do this all
using the free version. But when you do upgrade, you'll get many more models and many more ways to
use the software. So we can just drag
this to one side. So first of all, let's start
off on the left hand side. You can see this menu here. So let's just quickly
go through this. Chat essentially allows
you to type in prompts and to generate images and do anything you need to do
simply by using prompts. And it gives you a little bit of a clue here as to what to do. Hello, I'm Runway's
creative assistant. Describe what you want, and I'll write a prompt
to generate it. What would you like to
create? So you can actually tell it what you want to do and it will create
a prompt for you. So that's in chat mode. In tools mode, you actually get two tabs here,
image and video. If you want to do anything
to manipulate images, you can do it with prompts and more features here,
which we'll go through. And if you want to do
anything to manipulate video, you can do it here by
uploading an image. Typing in your prompt here and you've got some
other options here. These are all of the different
models that you can use. So they all have their
various pros and cons. In the free mode,
you get access to Gen four Turbo and previous
model Gen three Alpha Turbo. Now, just from my experience, the turbo versions are usually quicker but
slightly less powerful. And if you were to go
for the equivalent, which wasn't turbo, it's slightly more powerful
but not as quick. So that's the trade off. There. And so I'll be demonstrating
that. And that's it, really. So, for the most part, I mean, there is so much that you
can do with Runway ML. So if you go to apps, you'll see all the
things you can do create a mockup, a vary ad. You can create an ad, expand an image into
different dimensions. This is examples of different types of video
that you can have at weather related one time of the
day, lighting, backdrop. You can stylize images. I mean, there's so
much that you can do. And obviously, we want to be very targeted in this lesson. So we'll come back to
that at a later date. Then there's workflows.
Workflows allow you to string together all of the
different types of ways that you can manipulate images and videos and put them
all together so that instead of you having to go through the same
set of steps every single time with
images and videos, as it says here, you can
actually chain together multiple modules and
intermediary steps. And what that does is it
essentially makes you more efficient if you're
doing the same thing all the time in your production. That's what workflows
do. Open assets will show you actually
opens a new down. I'll show you all the
assets you've uploaded, but we haven't uploaded any yet, so any images, videos
all in one place. And learn essentially is
where you can go to get help to see examples of
how to use workflows, how to build your own workflow,
how to change voices. So there are various videos here that will allow you
to get some help if you're not quite sure how to use RunwayML because it
is very powerful and there's really so
much you could do and some quite cool
examples here as well. And that's pretty much it. The session is
like your project, so it's already created
a session for us called Untitled Session and that's what we're going to be using
to do our work today. So let's get started.
Let's get into. So today, because we want
slightly more control, rather than using
chat mode, we're going to go into tools mode. So let's click on Tools here. And as I say, there's two
tabs, image and video. So our goal today is to produce
a ten second motion clip, video for the
tracksuit campaign. What we want to do is we want to upload a reference visual. If we click here, that allows
us to upload a visual. So let's choose
one that's already got our guy wearing
our black and gold. I think that one looks
great, but let's have a quick look through. That's a good starting
point, I think, yes. Let's open that one up. So this will anchor the look and
branding of our video. So then the next thing to do is to enter the scene prompt, and that's what we want runway to actually do with the image. So here's one I made earlier. And this one says, an athlete wearing a black and gold
track suit jogs through a modern city at sunrise with the camera tracking alongside in slow motion, gold trim catching the light, final frame shows, brand
logo, passion sports. So that's the prompt. That's
what we want it to do. And here you can see we've
got prompt selected, meaning it's going
to read from here. Act two is another tool
which we'll go through at a later date that
allows us to model our face movements or
various movements. In our video, but we
don't need that just yet. We're going to keep it looking
widescreen at 16 by nine. And if we go here, there's various settings
if you click on that, and you can go and see the
settings that we've got. We're not using any of
this at the moment, so I won't go through just yet, but it's good for you to know
you have settings in here. It's going to be in
720 P resolution. Down here, as I said,
you can set the model. If we want to go for speed, this is the latest and
greatest Gen four turbo. And if you go to
previous models, you can go to Gen
three Alpha turbo, which is the quickest
using the previous model, Gen three, and they all
have their pros and cons. But essentially, we'll stay
with Gen four for now. So now that we've set the
parameters to our liking, what we simply need to do is click Generate button and
watch it do its thing. So that will go into
a queue and we'll wait for that to complete
and see what it gives us. There it is. So let's
see what we got. So it's a start. It's not
exactly what we want. It got the logo. We're not actually running
through a street. But let's try some
other things now. Let's try it step by step. One thing I found that works
really well is when you guide the AI step by step
through what you want. So first thing we're going to do is we're going
to say to remove the background or replace the background with city street. There you go. So look at that. We've gone from the
gym to outside. Now, for what we want, we actually need to
do that in the image. And then what we can do is
bring that image in and then manipulate the
video based on that. If we ask it to do
too much, sometimes, that's why we got the previous action
where it was actually running through a gym instead of running through
these streets. And we need to be very careful that we tell it every
single step along the way. So if we go back to image mode, and then we add that
image reference, we can pick the exact
same one. Double click. And that's our reference. And
we can be really specific. So let's replace
the background with a New York city street and say exactly where
are our guys standing. So we're now going
to make this image. The Man stands on a modern New York
City sidewalk walk in Manhattan. Let's
generate that. There you go. That's
a lot better. So what we're now going to
do is we're going to use this as the reference for our video or the
input for our video. So if we switch to
the video tab and say input for video,
that appears here. And now we can go on
and we can be a bit more detailed with what
we want to do with that. We're actually
splitting the prompt up slightly just so we can
be really accurate. So now we're going
to say the man jogs through a modern
city at sunrise, camera tracking alongside
in slow motion. So let's see what we
got. The beginning of a man jogging through. We haven't been specific
about how he looks like he's jumping slightly
rather than jogging. And we are using the
turbo mode as well. So what you'll realize is
if you start to use some of the other models like the
exact same generation, but not the turbo mode, you'll start to get
different results, as well. So now what we can
do is we can further enhance it and say
use as reference. And so now it's using this video as a reference
for what we say next, and we can just continue
to build upon it. So let's take this to
the next level now. Let's say he's got an audience as he walks through the streets. So So we're going to say a group of 25 to 30-year-old ladies
gaze as he jogs past them. He looks like he's somewhere
in the age bracket, so I might as well
make them the same age. Let's see what that says. And I've just noticed
I was looking at the image tab there when
we should have been in video. And so that's why we
got a still image. But what we can do now is we can import that image into here
and use that as reference. So now making sure that
we're on the video tab, we can go again and
say input for video. So that's what we should
have done before. So now we can take this
still that we've created and we can give some character
to these ladies. So we've said the ladies smile, laugh, and point at the
man as he jogs past them. They are dressed casually in
jeans and casualty shirts. So let's see what we got. H So we didn't get so
much going on with the different change of
attire for the ladies, but they are clapping. I look like they're
cheering him on just about, but he looks like he's
cheering his self on. But you can start to see
how he's taking shape, and it takes work to get
the exact correct prompts. But as you can see, with a
little bit of perseverance, you're going to start
to get something that actually looks very much like the kind of ad
that you would want. What we can do is we
can always download things when we're ready is over here on the
right hand side, click download. And there it is. Not bad. Excellent
quality with the video. A lot more we can do with this. We're just getting started, but this is the
beginnings of our video.
6. How to Lip Sync a Voice to a Face in Runway ML: And now we're going to
look into how we can use Runway ML to do our lip sync. So if we go to the homepage, and then we can search
for Generate Audio, and what we can do
go to Lipsync video. We can select from assets. We can find our image, or we can find even this video,
which has been uploaded. What we do there is we click on a microphone and we choose
an appropriate voice. Here's an example of
one. I'm not gonna lie. I am super excited to be here. I don't think that's
right. Let's go. I don't think that's
right, either. So let's just go through
until we find one. Let's try Clint,
see how that goes. We're not seeing you. The other thing we need to do is select the face that's
going to go with. So we're going to
go with face four. So there it goes. So now it's generating takes a little
while to generate. So that didn't quite work. It said, The lighting changes
too much in this content. Your credits have been refunded. Please try different input. Lip sync works best with a
single human face that is medium close and front on
avoiding extreme angles. So I can see why
that didn't work. We had about four faces in here. So what we really
want to do is we want to create a
version that is a lot more close up and we want to really cut to that frame, and then we can go from there. So let's think of a
different way to do this. So I've just uploaded a different image,
the studio image, and it's detecting the face in the image, and there we go. So now we've got one face that should meet the
requirement perfectly, and it's going to still
say passion sports, move with power, train with
precision in Clint's voice. So let's generate that
and see how we go. So there you go. Let's see
how we got on with that. Passion sports move with
power, train with precision. Not bad at all, so it's definitely given
us some lip sync, which is exactly what we want, and it's perfect for an ad. So we can now stitch
together those scenes. We could animate
this so that he's walking into the gym or
walking out onto the street, walking back into the gym. So that's the next stage
of our ad campaign.
7. How to Add Motion to Images in Runway ML: So let's see if we can
get him to walk into the gym and walk to the front exactly how we want him to be to make an
entrance in this ad. Okay, so we've got
the gym starts empty. The man opens a door at the back of the gym, the sun beams in. The man The man walks to the front of the
gym where he's now standing. Okay, so let's see
what it came up with. Let's see if we can get it to start from the point
of an empty gym.
8. How to Brand and Edit Video on the Timeline in Runway ML: Okay, so now we've created
our individual video clips. What we want to do is
we want to string this together into an ad. Now, what I want
to do is I want to have an ad where at the end, however we put it together, we actually have the
brand logo here. So what I did was I went over to chat because chat
allows us to do things that sometimes we're not sure exactly how to do it. I know that we can
generate images, but I want to do a few
things at the same time. So what I did here was I went to chat and then I if I show
you what I've put in, then it would show you
exactly how you could generate the same
image I generated. So first of all, I'll go here. So here's the session where
I generated the image. Generate an image
from my sports brand called Passion
Sports in black and gold that I can overlay over this image and
matches this brand. And so if I now add media, I can add media by getting stuff from my desktop or just select the asset from within runway. I like to do Add Media because I know exactly
where the file is, and there's less looking around. If you look inside here,
there's various folders, and sometimes it
takes me a while. But assuming you've got it here, wherever you've got, so I'll go back and
I'll do it my way. So assuming you find the image, go to Add Media, find it on your desktop. That's
the one I want. That's going to be
in our final scene. So now runway ML is going to use this to
generate me an image. And so there you go.
So here's the image. You can see it's nice, black
and gold passion sports. Let's close that out. And what
you want to do is you want to create a timeline,
a video timeline. So if you go to home,
and then you go down here to more and video
editor projects, I've actually started
creating some already, and I'm going to show you
exactly how I did that. So let's create a new project. And in here, we've
got the timeline. And what that
allows you to do is down here will be the timeline, and we'll be able to
drag various assets on. So the first scene I want is the scene outside
with our runner, just with three ladies watching
him run to our assets. Let's find the exact
video that we want. If this isn't arranged
and sorted properly, I often like to upload them, so I'm going
to do it that way. So I want this video. Outside. Just check
it's the right one. I also want And now, what we're going to
do is we're going to add them to our timeline. So the first one we want is this. We'll
just double click. The next one we want is
him walking into the gym. Click the arrow
to go to the end, double click. And that's that. Add it in here now. And then the final one that we want
is the lip syncing one. And another way to
add it in after we've clicked to the end is to
just add it to the timeline. So now let's try out. Let's
see the way this plays out. Ahi on sports, move with
power, train with precision. That's our mini ad. We can see that he starts off
on the street. A few ladies clapping for him. He then walks into the gym, walks to the front
of the camera, and then he lip syncs and
says, Passion sports. So that's pretty good, but I think he's
made an entrance. We want him to make an exit. So what I actually did was created a reverse
clip of that video. And so now what I'm going
to do is I'm going to add that reverse clip in so we can actually see him walking away. So let's find that.
And there you go. That's the one we want
with him walking away. So let's add that to the end of the timeline. Here's
what we've got. Y Now we're going to
introduce the brand. We're going to put the brand logo in this final
scene as he walks off. I think that will look
very cool. There it is. So we're going to
now add that to the right part of the timeline
by double clicking again. So now we've got a
nice transparent image as he walks off. However, it's not very visible. So what we're going to
do is add background. Let's go here where
it says solid. We're going to start at the
beginning of the scene. Add a solid background. And these are actually layers so you can change the order. So if you want something
above, something else, you just drag that to the
top, drag this underneath. And that's sort of what we want. It is nice to add a
little bit of opacity. So if I go to animate
and inhere opacity, and I'm going to
reduce that down. I think 50% should
be about right. And also, if we now go
back to the timeline, I think when he's turned his back would be a
great point to bring us in. So let's start from here. Play that through. So now let's play that
through from the beginning. Basham sports move with power,
trained with precision. Excellent. That's our
ad. Obviously, we've got some cleanup to do
around the way he walks, because of the way that was
generated when he walks in, isn't exactly where
we want it to be. But as I say, there are some tricks up our sleeve
to be able to do that. So now that we're
happy with that, we simply go up to the top, click export in 720
P in free mode, and you can go up to higher
resolutions in pay plans, MP four, export the video. And it says that you can view
them in your assets page. So the way to do that is to
go back and go back to home. And down here in assets, it says, In private assets. You can see that it's
loading up here. Press play to check
it's all there. As sports move with power,
train with precision. Awesome. Obviously, a
lot more we can do. It's simply a concept, but
I'm happy to download that, so let's download and
save that to my desktop. And there it is. That's our
first all done in runway. Now, obviously
there's a lot more that we can do to perfect this. We can perfect the way he walks. We can put more people on here. We can change the way
that they're dressed. Obviously, the way he
walks is a priority. As I said, there's some tricks up our
sleeve for doing that. We could also add some fades
to the way this pops up, add some text in
relevant places. But at the moment, I
think that's excellent. If you look at the video
quality, it's very realistic. We could use different
images for him. He looks very slight slightly
unrealistic in his face, nonetheless a very good image. And obviously, we need
to get rid of that, get rid of any branding. But this is a first
look at exactly how you can achieve
your result in runway and it's
really excellent.
9. How to Remove Objects and Correct Issues in Runway ML: Now, we're going to
further edit our ad, so we're going to
clean up the fact that as this guy is walking in, he actually looks like
he's walking backwards. And the way we're going
to do that is I'm going to use it as an excuse
to show you two things. First of all, how we can totally remove him
out of the frame, and then second of
all, how can we have him coming
back into the room. So in our chat, essentially, we tell the AI to do whatever
it is we want to do. So what I want to do is I
want to upload a still, and then I want to actually remove the person
from the still, and then we'll use
that still to put that person back in but
walking into the room. So let's add media. I like to do it this
way, add media. And then let's find our still. Perfect. Remove Really simple instruction
there, remove the man. So let's let that play out. And there we go. Completely
gone, completely removed. No blemishes. It's really clear that the person's been removed and we've got
a nice background. Now, we're going to say, show the man walking in from the back and ends up
in the same position. So, show the man walking in from the back and ending up
in the same position. And to be clear. As before,
so let's go for it. Here we go. Excited.
Excited to see. The way he's walking
looks really fluid. There's no more strange
backward motion. Okay, so let's download that. Awesome. So now the next step, we're going to go
back to the timeline and then make sure that we
put this in the right place, and now we'll have a
really fluid looking ad.
10. How to Replace Video Segments in the Timeline in Runway ML: Okay, so, here we are
back in the video editor. We're going to replace
this piece of video. Let's play it where you can see he's obviously got some kind of
problem with his legs. So we're gonna
replace that piece of video with our new
piece of video. So let's first of all, bring in again,
I'm doing it this way I find it really easy to
find what I'm looking for. So there's our video. What we want to do is
remove this piece of video, and we want to go right to the end
of the first piece or the second piece,
I should say. And we want to slot in this
piece of video. There you go. So hopefully now we've
got someone who walks in so with power. Train with precision.
Well, obviously, there's more sound that we could put in at different places. Pashun sports move with
power, train with precision. I think that's a
really awesome start. Obviously, some things
we can do there. We can add music to every
scenario with the footsteps, all that good stuff, more
people on the streets. We can have it blend
a lot more neatly from this scene into this scene. We can then when
he's walking off, we could have music and
footsteps in this part as well. And we could blend in the passion sports
a lot better there. But ultimately, I think it's a really high quality
production there. And I think it's good for an
ad campaign. So there you
11. How to do Color Grading & Post Production in Runway ML: Okay, so once you've got your ad to a level that
you're happy with, it's time to do some
post production and some color grading
and things like that. Now, the way you do that is here right here in
the very same timeline. So let's take, for
example, this first clip, if we select that, and then
we go over to the right here, and then we go over to
effects and filters. And if you just go into this
dropdown, and pick color. You'll see a whole
bunch of color options. Now, brightness and contrast allows us to change
exactly that. We've got exposure
and black level, hue saturation and lightness. Usually it's brightness, but
hue saturation and lightness and invert and a whole bunch
of different options here. So, for example, I can go
into brightness and contrast. And down here underneath
effects and filters, you can see that we've got
brightness and contrast here, the effect settings.
There you go. So we can then set the levels I really do like it
almost how it was, to be honest, so I'm
gonna leave it there. And then contrast, they
really are very drastic, so you only need a very
small amount of change. So you can slightly
change your contrast there if you want to. Again, I like it pretty
much how it is for now. And then if you want
to add another effect, you simply go to the top, click the plus button and choose
what you want to go for. One thing I often like
doing is changing the, the black level
and the exposure. So you can see it down
here. Click on settings. And I like changing
the Black level more a lot of the time. Today, I don't think
we need to do so much. I think it's pretty
good, but, you know, the professionals will tell you exactly how it
needs to be set. But it's good to know that we've essentially got all
of these options. So feel free to play around with these settings all on
the right hand side, to change as many
things as you think is necessary to get it to
look exactly as you want. But it's good to know that
we have the ability to do all our post production all in the same place and get it
looking exactly spot on.
12. How to Localize Video with Synthesia: Now you've already created strong visuals and
a motion clip, a video clip for Passion
sports tracksuit launch. So we've got our ad or at least
the beginnings of our ad. Now we're going to
take those assets and make them globally ready. So another way of saying
that is localized and personalized for
different markets, languages, and audiences. We're going to use Synthesia
for multilingual video, so creating video in
different languages. So first of all, our
goal here is to produce a Spanish localized version
of the ad campaign, and the video should be
dubbed into Spanish. The visual should also be adapted for a Spanish
speaking market. So first of all, let's
log into Synthesia And the first thing we
need to do when we're in synthesia is we need to go
over here into dubbing. Now, you can see here it
says, Translate any video into 32 languages with
the original voice. The next thing we're going
to do is we're going to grab our video that
has the speech in it. So now that's dragged in fine. I'm going to leave the
project name the same. I like the fact that
it's got 720 B three, because if we create
different versions, at least we know the resolution and that this was
the third version. Original languages English
autodtected, that's fine. And then we're going to choose Spanish because we want to localize this for
our Spanish market. We could choose more languages. Dubbing options, we're
going to have lip sync on. And then we see that you need to upgrade for lip sync movements. So for now, we'll leave it off. In case you're using
a free version, you'll see what it
will look like. Remove Watermark. We can
also see a premium option, so we'll leave that off for now. And video duration, you can
choose either adaptive, which means that the
dub video speed will be adjusted to fit translation, and that's best for
instructional content, or you can keep it original, which means the dub
video will keep the same duration
as the original, and that's best for fast
paced dynamic videos. I'll leave it adaptive. So now click Generate. In case you were
wondering, there are two versions of the video. It actually has uploaded
the English version, so that's what we see on
the right, and it's now generating the Spanish
version as we speak. You can see that there's
28 minutes remaining, so we'll come back
when that's done.
13. How Video is Translated with Synthesia: So we can see now that both
our videos are finish. On the right, we have English,
the original version. On the left, we have
our Spanish version. So let's see what
it came up with. Phone sports. Ready for our Spanish market. Notice how it left the passion sports alone,
didn't do anything to that. It left it in English. We would probably want sports to remain English because
it's part of our brand, but it translated
everything else. The other thing of
note is that you can change you can switch
between this version and the English
version if you want to compare simply by
changing up here. So that's nice and
convenient for you. This is our first version,
so there's nothing more to do there, do that. There's an area on the right,
we can add a description. So I can say So just some text to say it's the passion sports
tracks you add concept, Spanish localized,
localized Spanish. And then if there's
any other comments, they can go here in case I've
shared this with someone and maybe an editor or someone that needs to
leave some comments, they can leave them down here, and then they end up
on the right here. That's pretty handy.
So at this point, we can download
our Spanish video, and we can include that in the runway ML timeline in
place of the English one. And that would be job
done, nice and easy.
14. How to Localize the Visuals in Adobe Firefly: Okay, so now our next step is to actually localize the
video, the visuals. So we've localized the video
in terms of the audio part, so that is in Spanish. But what if we want
the background and the surroundings to actually look like somewhere in Spain? Well, that's why
we're in Chat CPT. The reason we're
in Chat ChiPT is because soon we're going
to go over to Firefly, and we're gonna tell Firefly
to localize the background, so make it look like
we're in Spain in Madrid. Before we do that, we're going to knock up a prompt in Spanish. And the reason we do that is
because my research showed me that when you actually
type in a prompt in English, there's a chance that some
things get misinterpreted. For example, if you're
talking about a rooftop, it may put in a certain type of rooftop that doesn't look
particularly Spanish, or it may use some
kind of backdrop or interpret some kind of imagery that don't
match with that locale, that don't match
with that country. Pedo, if you actually ask
the question in Spanish, that way, it assumes
your Spanish, and it models everything after Spanish the Spanish
characterization. The first thing I'm
going to do is I'm going to put in a
prompt for what I want, and then I'm going to get
Chachi Pit translate it for me. So the first one is So I've asked Chachi PT to
translate to Spanish, an athlete wearing
a black and gold passion sports track
suit running through a modern gym in Madrid with warm sunset lighting,
premium commercial style. So let's run that Okay, so that's the first translation, and we're going to use
these plus our imagery to translate some new images
that are localized to Spain. So let's go. So now
we're at Firefly. We're going to paste
in our prompt. And this is the one saying
we want to generate an image of An athlete wearing a black and gold
passion sports tracksuit running through a modern gym in Madrid in a warm sunset with warm sunset lighting in
a premium commercial star. So that's what that means.
And what we're going to do is we're going to
upload an image. We'll leave it Firefly five. There are a number
of models here that you can choose from. We'll leave it at the latest
and greatest for now. We want it to be 16 by nine. And so now we're going to
upload the reference image. So now it's got a
reference image. It knows the kind of
scenario that we want, but it should just localize
it to Spain. So let's go. Okay. Awesome. So it looks pretty much the same as
before, which we like. It has shown the nice
warm sunset light, but there's nothing
about it that looks particularly like Madrid. So at least what we
should do is it does look as if maybe there's some buildings or
something outside. Let's tell it that the building should clearly be
showing through. So let's say we can clearly
see some Spanish buildings through the windows or some Spanish buildings
are showing through the windows. Let's
translate that. So let's say this says, So Spanish buildings and trees are clearly visible
through the windows of the gym. And let's translate that. Awesome. So now we're
going to take this. And we're going to add
it into firefly at the end. Same reference image. Go. But There you go. So now, if we look behind, we can clearly see there's
some imagery there. We can see that
there's some trees, not so clear what they are. So let's change this
again slightly, and let's say some Spanish palm trees are clearly visible. So I'm going to get rid
of what I put in before. I'm going to go back to hachPT and I'm going to ask
it to translate. Some Spanish buildings and some Spanish palm trees are clearly visible through
the windows of the gym. Let's add that on the
end. And generate. There you go. So now
we've got the buildings, but we've also got some palm
trees in the background. Excellent. So now we can use this as a starting
point for our video. And so now when our guy
runs out or runs in, we could use some
of the same scenery coming into the gym,
and when he goes out, if he does go out, use some of the same
scenery going out, and it could all start
from this one image. This would be enough context
for the AI to know to preserve some of the outdoors or we could tell it to
preserve some of the outdoors. Those look a little
bit more like coconut trees, to
me, to be fair, but you know, seems to have understood what
we were trying to do, and we can always
refine it further. This also kept the sunlight coming through just
as we asked it to.
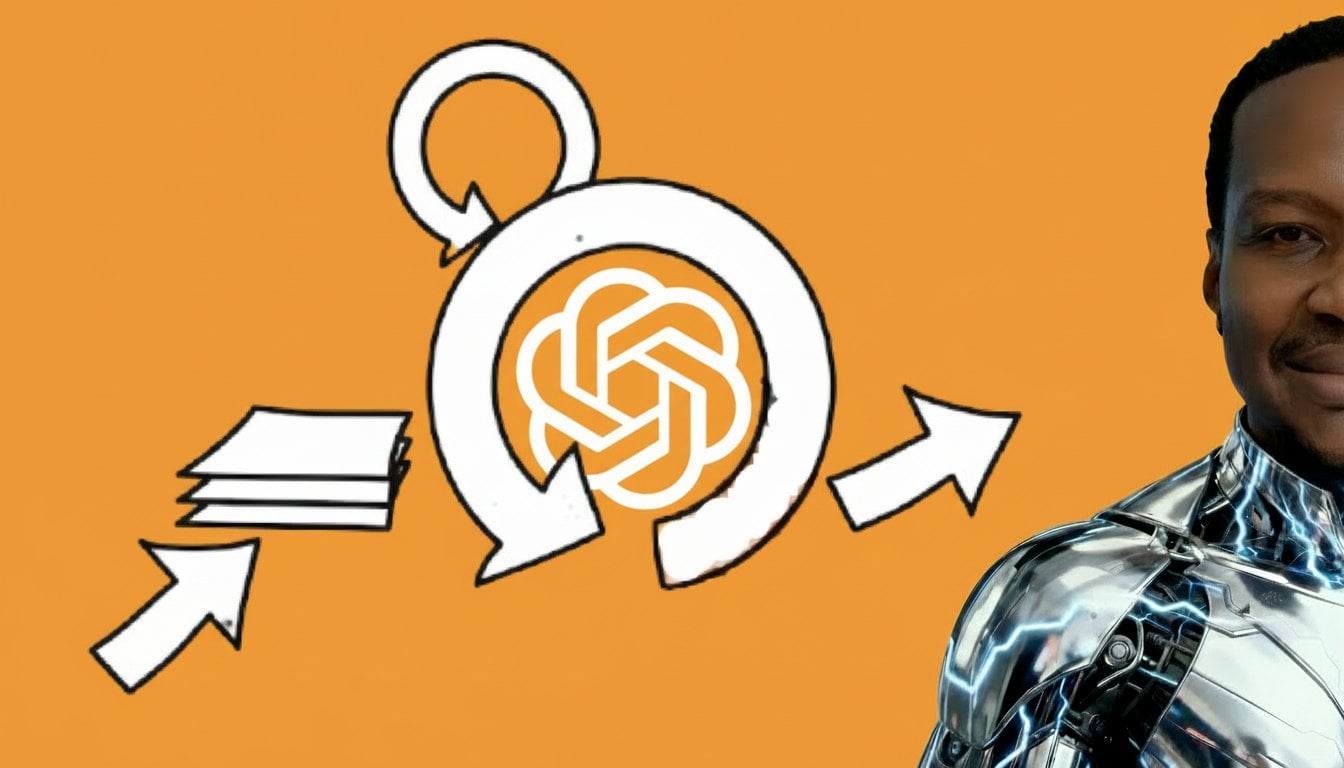
15. Introducing Automated Workflows with Make: Hey, guys. Welcome
to this module on AI powered Workflows. This module really is going to bring everything we've done together and tell you how
we can speed things up. So, to understand workflows, let's recap our workflow. First of all, we
create our prompt. We might come into Chat
EPT and create our prompt. Then we go into Firefly. We drop our prompt into
Firefly and create an image. Then we'd go into Runway EML, drop in our image as a reference image and
create our video, bring it into Synthesia where
we can localize. Like so. And then we would end up
with assets, as we see here, and our final video
may be residing in Dropbox in our asset folder. So now the thing to realize is that seems pretty quick,
and it can be quite fun. But this is the manual workflow. So in a true industry situation, imagine doing all of that, but manually for
every single asset. Imagine creating 20 images, 15 videos, ten localized
versions for eight markets, plus all the variants
for social platforms, and imagine having to
reimagine all of that and obviously have to put
things on the timeline. That's hundreds and
sometimes thousands of small creative assets. Nobody really wants
to generate 1,000 images one by one,
download them, rename them, and upload them, and then convert them
and then localize them. And this is where automation
enters the picture. See, AI doesn't just
create content. It also allows you to manage the workflow around the content. And you can use generative AI to trigger the asset creation, pass the outputs, which
are images or videos, et cetera, between
different tools. Even quality check the results and deliver the final assets to wherever you want Dropbox or
Google Docs or Air table, wherever you want them to be. And so the way we do that
is using some kind of workflow automation tool or
automation tools in general. This is where a tool
like make comes in, make.com, and it becomes
incredibly powerful. And that's what we're
going to go over here is how to automate with make.com. So what is make.com? Let's explain it really simply. Make is a visual workflow
automation platform. Think of it as a
digital assistant that connects all your
creative tools together, and it can connect
many tools, in fact, but in this case, we're
using it for creative tools. We can use it to move files
from one place to another. Talks to generative
AI tools like runway, and it runs task automatically. You don't have to do anything
except set it up and then it can be set and forget until you need to
change something. And the best part is you don't need to be
technical to use it. Everything's dragon drop, and it's like building a storyboard, for example, of your workflow. How does it make use of AI? Well, M can trigger AI models
and things like runway and even Chat GPT and lots of other apps through
simple modules. For example, you can create
an automation that says, Whenever an image
drops into Dropbox or Google Sheets or Google
Doc, send it to Runway. When Runway finishes generating whatever you want it to
generate, a video or an image, you can get it to upload it
automatically to Dropbox or upload it to Synthesia for translation and then
drop it into Dropbox. So that's a fully
automated pipeline, meaning that AI does all the work and with
the automation does all the work of transferring it from one app to the other. So what we're going to do is
we're going to do a demo, even though we could actually automate everything all
the way up to Synthesia. Let's start with
something really simple. So in this lesson, what we're going to do is we're going to automate creating an image using runway based on a reference
image from Dropbox. So let's get started.
16. How to create a Scenario with Make: Okay, so we're going to
get started with make so that we can automate
our whole workflow. So let's get ready.
Let's get started. First of all, let's log in. So here we are in M. This
is a brand new scenario. I'm going to go quickly over the interface
and how it works, and then I'm going to show
you an existing scenario that I created before in
my existing account. So the way make works is essentially you put
together a bunch of components that all work together that allow you
to reach your end goal. So you click this plus button, and then you can choose from various apps
that you can string together that will work together to create your end product. So in here, for example,
We were using runway. You can click on Runway.
Then within that, you've got generate image, generate a video from images, generate a video from a
video, make an API call. There's a number of things
you can do with that. And the same goes for all
of the other apps as well. So for example, there's
an email app built in. We've got What's up
Business Cloud built in. We have Dropbox built in, and so we can essentially pick
a number of different apps and send information between those apps and get
various outputs we want. And we can also access
our own file system. So you can already
see how this is really powerful for being able to create workflows and be able to send information
from one app to another. So the way it works is
you would string together your components and then tell them where you
want the output to go. And then when you're
ready to test something, down here, there's the run
once button that you can hit. And so it would start sending your data from one
place to another, from one component to another,
which I'll show you soon. You've also got anytime you run a scenario,
this is a scenario. You can re run and replay scenarios
that you've run before. They were not in
there at the moment. You can schedule it.
So every 15 minutes, for example, at the moment,
it says, every 15 minutes, you can turn that on
and schedule so that you can keep running
the same workflow. And then you can
save your session in then there are
basically various things, various bits and pieces
down here that allow you to show all your inputs and outputs when you've
arranged them on here. You've got some notes and
you've got the ability to undo. You've got some
various settings in here for your scenario as well. Flow control, aggregators
and all kinds of different bits and pieces and components you can
string together in here. You've got tools like
the base trigger. And these are things
you can access from the plus button here
for convenience. Base triggers allow you to essentially just start
off the whole process, a basic trigger.
Text parser in here. These are things that get
content from various elements. And this is the equivalent
of this ad button here. When you hit it, it
allows you to find all the different apps that
you can string together. There really is a lot that you can do with M.
It's really powerful. You can send things to your mobile phone or
other mobile phones, and it's really as powerful
as you want it to be. So just to demonstrate,
I'm going to show you the kind of
scenario we would build for our campaign or for generating any kind of multimedia
that I've built before. And then I'm going to
show you how to build it. So in here, I've
got two scenarios. One is runway image
from a prompt. So we can basically
type in an AI prompt, generate an image
through runway and upload it to Dropbox. So
let's have a look at that.
17. How to Connect Runway ML with Make: Have a look at our
documentation. So this documentation is telling us how to
connect runway and make. Requirements. To use
the runway app in M, you must have a runway account, which we do have.
Connect runway and make. To get started, you must first create a connection
between runway and make, allowing the two
services to communicate. To create a connection, you need to obtain your
API key in runway. So let's first so we're
actually looking in. We're looking into
dev.runwaml.com, and that's where we usually
access things like API keys so that we can make contact with the API rather than through the front user interface
that most people use that we've been using
till now. So we're here. So let's Log in. Now, it says, create your organization,
organize I'm a single user. So I'm going to name
my organization and create So to get started, you must first create a connection between
runway and make, allowing the two
services to communicate. To create the
connection, you need to obtain your API key in Runway. So let's do that first. Click CR. So it says, API key created, API keys are secret and should not be shared
with others. Right. So this is the key. It's
just a very long number that identifies our account. Securely copy the key above
and store it in a safe place. Once you close this model, the key will not be
displayed again. So I'm going to copy that. I'm going to store
it somewhere safe. Name filled, so we've done that into the name and click Create. Copy the API key value as shown and stored
in a safe place. We've done that. So you'll see this value in the
APIkey field in Make. Create the connection in M. So once you have your
runway API key, you're ready to create
the connection in M. So to create the
connection, first of all, log into your M account, add a runway module to your scenario and click
Create a connection. And we're going to
build from scratch. So we've got a runway module. Generation. We
generate an image. So I've pasted in the key there. And I'm going to click Save.
18. How to Create a Text to Image workflow with Runway ML and Make: So here we are at
my Assets folder. This is the assets
folder with all of the assets that we've
already created. So what we want to do
is we want to look at a reference image as we've
done previously in Runway. So the reference image
has been this one. And so we want to take
that reference image and we want to generate videos. Before we get to that point, we obviously need to experiment
with how would we even get to the point of generating this reference image
or any other image. And so what we're going to
do is we're going to use prompts using automation
to generate images, and we can use this reference
image as a basis for our new images and then use our new images as
a basis for video. So the first thing
is to generate new images based on
this as a reference. So let's go into M and we're going to go over
exactly how to do that. This is the end game, and I'm going to show you
exactly how we get here. What we're going to do is
going to go from Dropbox, where we're going to download
a file from Dropbox. We're going to send
it into runway. And then from runway, we're going to process the
image using text to image. In other words, using a prompt. It's going to
reference the image and Dropbox that I
just showed you. And then it's going
to send it via HTTP, the same protocol we
use for the Internet. It's going to send it
to Dropbox and store it in our images received folder. So that's this folder here, and here are some images
where I've done this already. So let's build
this step by step. Now, the key thing here is
these are apps or modules. And the key thing is
every time we create one of these modules, we need to test it before
we go into the next one. The reason is that the
way make works is it understands what
it's able to receive based on what you create here, and only after you run it does it know what
it could receive. So let's get started setting up this workflow and then
we'll see very quickly how we can automate
our lives really and make our lives
a lot simpler. So, first of all, what
we're going to do, as you can see here, there
are many different options. The one we're
concentrating on is the scenarios menu item. And scenarios are
essentially going to be the set of steps
in our automation, and you can see some already
that we've got here. So let's create a new scenario, and we'll do it
all from scratch. So this is our scenario. And so what we want
to do is we want to create the exact set of
steps to get us from our Dropbox asset
folder to creating our new image and
then dropping that back into our Dropbox
receive folder. So the first thing is to we're going to
click Create there. Open up Dropbox. And what
we want to do is we want to do it whenever
we actually run it. As you can see down here,
there's a run button. So that's the only
time we want it to start the process of
transferring the files. So let's look for we're going to download a file whenever we click
the Run button. So let's click Download a file. And then in here, you need
a Dropbox connection, so this is essentially
logging into Dropbox so that make
can use that login. So if you click Add here, and the way of selecting files, now, there are two
ways to do this. One is to actually
manually select a file, and then you can go into the
file system on Dropbox and say which file it is
that you want to select. And the other way to
do it is a file path, so you can tell
it where the file sits and get it to
pick out from there. I'm going to choose a
file because I know the exact reference image
that I want it to pick. So we'll go to select a file. Then if we click into
here, that'll allow us to select a
file from Dropbox. There it is. So we're going to take this as a
reference image and click Save. So now Dropbox will
download this file, and then we can send that now. If we move that aside, we
can send that to Runway. So let's just run this module
only because as I said, the way make works is the information
that comes out of this module will go
into the next one, and we just get a
lot less problems when we run the module first. There you go. So what you can
see here when you run it, if you click here, you can
always see the output. You see the input, you
can also see the output. So what you can see here is that it's taking passion consulting, generative AI assets, and then passion track
suit mannequin. And then the output, if
we look here in data, this is basically a
hex representation of the actual image. But the important thing is, what comes out is the actual image. So it's downloading the
image. From Dropbox. So what do we want to do
next in our workflow? The next thing we want to do
is send this reference image to runway dot ml, so we can generate a new image. So if we click plus
and then search for runway. There it is. So under here, we can see all the different things we
can do with our API calls. And actually, what we want to do is we want to
generate an image, and you can see it
down here, it says, generate an image based on a
text prompt that we'll say. And that's exactly what we
want. So let's click on that. And in here again, you'll need to if you haven't
connected to runway yet, you'll need to do that, but
I've already connected. So we'll keep that my
runway connection. Model, we're going to
use Jen four Image turbo just like we did in
the demonstration. Now, reference
Images input method. There are two ways to
do that. Again, you can have a URL or a link
directly to it. Or you can input a file. We're going to do a
file in this case because we're getting the
file directly from Dropbox. So that's why we've
picked this one. So now the way to grab
the file is to click Add Image, and in here, it's already selected
Dropbox download file, so it knows that we're
actually using this module. We can give the image a tag, and that allows
us to refer to it later as you'll see, so
let's give it a tag. So that's going to
be our way to refer to the file that
we get from here. And that's it. So that's
our reference image. And then in our promptex, we can actually put in a prompt
to create our new image. So let's do something cool. Let's do an image of style. So an image of
a man on Mars with two guys and three girls behind him all are wearing
passion track suit. The man in front suit is branded passion sports in gold across the
front of the chest. The image is in a
cinematic style. And just so it doesn't get
confused about which image All in a cinematic style. So let's leave it at that.
So that's our prompt. The thing to remember here is we can't have more
than 1,000 characters, but we're well under that. The ratio, so this
is the aspet ratio. Let's go for what we
usually go for 1280 by 720. So 16 by nine. And that's that. There are some advanced
settings down here, but these aren't
things that we're interested in right now.
So let's click Save. And we've got two warnings. Two things must not be empty. So let's have a look
at what they are. I believe we've got
everything filled out, so let's just save Awesome. So that's worked. So
as we can see here, everything's filled in Passion track suit is
referenced in here. It can now generate an image
based on a reference image. So the next step is
to send it on to Dropbox in our image
receive folder. Now, ordinarily you would
think that we could just attach another
Dropbox module here. But when we're
uploading to Dropbox, the way it works is it
needs the raw image file. However, this is going to send the link the URL, and
that's not appropriate. So what we need to do is convert that URL into the raw image file by actually downloading it. The way we do that is
to use the HTTP module. So it's very similar to how
a browser works using HTTP. Click on here. Going
to choose HTTP, and within there, what we
need is a MAT request. And don't worry if this
seems foreign to you. It is a little bit code related, so developers will
know how to do this. And anyone configuring
this who's done this before we understand
what we're doing here, but I'll talk
through it just for the purposes of this lesson. So we don't need to worry about evaluating all stages.
That's fine as it is. For the URL, this is the link. And where we're going
to grab that from is we're going to grab
that from runway. Now, in here, you can
see when I go over this, you can see runway pulsating. That means that all
this information is what's going to
come from runway, and that's why we
had to actually run these modules first. And so we'll go in and we'll go into the generated
image object. So we'll click on
that. You can see when we click on that
it populates the URL. What we need to do is
put a one in there. And that means
we're going to grab the first image in this list, which is this image, the only one generated.
So that's fine. And the method we're
using for this request is G. So we're going
to get that image, link using the G method. We don't need to worry about the headers and query string. For body type, we do
need to consider that. So what we want to do is turn that link into a
raw binary image, so we will click raw
as the body type. And content type, we
actually need to set again, the main thing is
we want this to be the raw binary image. So I happen to know
that what we need is application octet string
as the content type. And the way we'll
do that is if we go to custom because none
of these fit the bill, click on Custom and
the value will B There you go. So that tells Make that this is
going to be a binary file, and it's going to
be the raw binary that we can send onto Dropbox. Request content can be blank, and pass response will leave
it no because we don't need this to be Jason or
XML. So there you go. This tells Make that we're going to take the link to
an image and turn it into a raw binary for Dropbox because that's what Dropbox needs
is the raw file itself. So click Save. There you go. Now, let's run it end to end and just check that
everything works. Dropboxes worked.
Runways running. That's worked. And this
has worked as well. So that means it's successfully grabbed the file from Runway. Remember every time you
run you are using credits, but this is what we
need to do to make sure it runs every
step of the way. Okay, now now on
to our final step. So what we want to do now is
we want to drop our file, which we've got from Dropbox. We've actually got from Runway, so we've got a reference
file from Dropbox. We've created an image based
on that reference file. We've grabbed that
image based on HTTP, and we want to drop
it in our folder. So, if you remember, this is our image receive folder where we're going to actually
receive the new file. So what we want to
do is click here. We're going to pick
Dropbox again. But this time, so
we're going to click Upload File. And this
is the important part. So if we move this
in a little bit, so we can see everything, we can actually shrink it
down a little bit. So what we're going
to do is we're going to use the
same connection, and we're going to
choose the folder that we're going to
put that image in. Click folder. Let's
search for it. In our image receive
folder. There you go. So that's where we're putting
it. In terms of the file, we're not going to download it directly from Dropbox.
That's what this would do. We're going to click Map.
And what that does is it allows us to map
the file name and the data to grabbing the information from
one of these objects. We want to, of course, grab
it from this HTTP module. So we're going to
double check it. I think it is correct,
but we're going to double check it by
deleting it out. And if you click in file name, you can see here if we move everything
along a little bit. If I hover over this, you can see the HTTP
module pulsating, so we know we're looking
at the right module. And what we're going to do
here is we're going to go down to the data, and then you can see that's
the data we're going to grab. But before we do that, we
need to name the file name. So what I'm going to do
is I'm going to name the file name based on the ID of the file in runway because I know that will change every single time. So let's grab the ID,
put that in there. We can give it an
extension like dot PNG. And that'll be the
funding. So now what we're gonna do is we're
gonna grab the raw data from our HD HTTP module.
And that's that. There are some
advanced settings, but there's nothing that
we need to worry about. We can say overwrite
existing file. I'm going to say no
for now because we should have a different
name every time anyway. So I'm going to click off on advanced settings.
And that's it. We've named the file an ID
that we get from Runway, and we're grabbing the
raw data that we've got from Runway via HTTP. So the raw data is the
actual image. Click Save. And let's run that end to end. So this is now full end to end. It's gone from Dropbox,
the reference file. It's using our prompt
to generate an image. Then it'll go to
HTTP to actually grab that image and
send it onto Dropbox. Here we go. It's sending it
to Dropbox, and it's done it. So let's go and look in Dropbox, but before we do, let's remind
ourselves of our prompt. So we said we wanted to
use Passion tracksuit, which is our reference image. Let's go and have a look
at that reference image. So this is a reference
image, so we're using that. And we're also using the prompt. An image of a man on
Mars with two guys and three girls behind him all
wearing passion tracksuit. The man in the front suit is branded Passion Sports in gold across the
front of the chest, all in cinematic style. So that's what we
said we wanted. And now this is it, exciting. So it should have dropped it in our images Receive.
There you go. I can see the time is correct. Let's click on it and
see what happens. There you go. So that's
the first stab at it. Obviously, we would have
liked a different font. But two guys, yeah, I think it's got the wrong wrong number
of people on there. It's got two guys and two girls. Maybe it's an equality thing. But we have got something that
looks very much like Mars. We've got a group of people
standing to the front, and we've got passion
sports on there. And obviously, we can work on this to make the font better. In fact, why don't
we do that now? And we go to our prompt. We can further say,
the brand name should be in a futuristic yet readable font with the logo. Let's see how that changes
things. Run it again. I made the HTTP request, and it should now be in Dropbox. Let's flick back.
See what happens. Go back to our folder. One has just landed in. There you go. So
it's actually given all of them the brand,
which I don't mind. It says Passion sports. You've got people
of different races, which is always nice. I think that looks really good. That's nice for an ad campaign. I can't wait to see this
in video. Hint, hint. That's what's coming
next. So as you can see, that is a really nice, easy way to get stuff done. Our workflow now
is really simple. All we need to do is go in and change a prompt and
we get a new image. Can't wait to do the next step.
19. How to Create a Text to Video workflow with Runway ML and Make: Okay, so now we've got this
workflow working for images. What we're going to
do is we're going to actually make a copy
of this workflow, and we're going to extend it to generate a video
from our new image. So let's rename this Go back to our scenarios,
all our scenarios. Safe changes first.
Prompt image runway. And let's duplicate this one. To do that, we'll look
at the three dots. Click Clone and we're
going to call this So this is prompt to image
to video for runway. Click Save. There you go. So we'll start off by
remembering what we did. So what we did was we got a
reference file from Dropbox. We sent it to runway
to generate an image, and then we sent that
via HTTP to Dropbox. Now what we want to
do is extend this. So we're actually going
to do two things at once, but we want to do them
in the right order. So what this will
do is it will drop our newly generated image in
our image receive folder. With this HTTP file, we're actually going
to grab the data, and we're going to use that
to generate our video file. And we're going to do that
using a new runway module. So let's create it now. Add module. Runway. And this time, what we're
going to do is we're going to pick video from image, and this is going to complain that it needs to be connected. So let's connect
it to this HTTP. Now, you'll see a router
pops up because what we're going to do
is we're going to transfer the raw
data to Dropbox, but we're also going to transfer it to this runway module. And because it's going
to two different places, we need a router, so it's put that there for
us automatically. So now we can get rid of this actually because
it's connected. There you go. That
error should go away. It says the modules not set up, but we're about to do that. Okay, cool, so we're using
the same runway connection, and we're going to pick Gen four turbo because we've used
that so many times before. The method we're going to
use is file because we're getting the raw data from HTDP. So we're going to map
it to HTTPs output. So you click Map.
The image file name, we're going to use
the same ID from runway because it's a unique ID, and it's going
to be the same thing. Dot PNG. The image data is going to come from our HTTP module,
same as before. It's gonna be the raw data. And now the promptex. So what
we want to do is we want to turn that image into a video. So we've said the scene
starts from space. The people in the image
are wearing jet packs and land on Mars from space
with the jet pack firing, they end up in the same
position as the image. So there's quite a
lot going on there, so let's see how well it does. Let's make sure that runs
to run it all at once. So it will still deliver
an image file to Dropbox, and it will get
as far as runway. So sends it across. There you go. So
if we look here, we can always see the
output and just check. Generated video. There
you go. There's the URL. We could even put
that in the browser, but I don't want to
spoil the surprise. So the next part is we want to now do this exact same
thing, create an HTTP. We won't need a
router, but create an HTTP request to grab the raw image and then put it in Dropbox but in a
different folder, so we'll still use the upload. So now create HTTP Me request. And it's the same as before URL. We're going to grab
the URRL from. We're going to grab
it from runway, and it will be
generated video one, we're using method G. The
body type will be raw again. The content type,
custom value again. Application OctexStream. We don't need request content and a pass response is still no. So let's run that,
make sure that works. That's worked excellently. And again, we can see our
output here if we go to output and then click on this data and you can
see the raw file here. So we're a step closer. Again, I won't spoil the surprise. And now the final step is to
add in our Dropbox module, and we're going to
upload the file we got from generating
a video from image. We're going to upload
this file to Dropbox. So we'll click Plus Dropbox. Upload File. It's complaining
because we're not complete, but we're going
to pick a folder. File we're downloading, we're
actually going to map it. The file name
actually is going to come again, from the ID. I want to actually call it. I want to call it the same
ID as the image allows us to know which image relates to which video.
So let's do that. And this time, we're
going to call it dot mp four because
it's a video. And the data is going to come
actually from this HTTP. So we're just going to
click on data here. And there's nothing to do
in the advanced settings, and that's that. So click Save. So now let's run it.
So what we've got now is we use a reference image. We pass it to runway to generate a new image from a prompt
and this reference image. It uses HDDP to send it
to grab the raw image, and it uploads it to Dropbox. And at the same time, that
raw image gets routed to a different runway
module that will generate a video from
that image and a prompt. And it will transfer it
via HTTP to Dropbox. And the prompt it's using this time is the scene
starts from space. The people in the image
are wearing jet packs and land on Mars from space
with the JetPack firing. They end up in the same
position as the image. Let's see how we get
on. And there you go. A green. So that means
we should now have an image sitting on Dropbox
in our video received folder. New video not quite. They are definitely
landing in Mars, but they look like they're starting from a
standing position. Now, we did try and do a lot
to be fair in that video. So what would be easier is if we get them to take off
from a standing position. AI has a problem
trying to do too much. So if there are people
there, and I'm telling it to start from essentially space, which is a completely
different scene, and then land on Mars,
that's quite difficult. But if I tell them
to start off in this position and then fly out from Mars,
that's a lot easier. So let's change our
prompt and do that. The position they're already in. So the people in the
image are wearing jet packs on their
backs and take off from Mars and propel up into space with
the jet pack firing. We see the stars behind them. And in fact, I'm
going to say we see the stars moving behind them. So let's save that. So what we should get is
a very similar image, but the video will
be different because they'll be starting from
a standing position. Let's go. Okay, that's done. Excited
to see what's happened. So let's first of
all, go to our images receive and see
what image we got. I'm kind of sad to
see the old image, become a thing of the past,
but let's see our new image. So a new image looks like that. Very similar. Passion
sports now says fashion sports and it's
got two Ts. Never mind. That's AI for you.
Got three ladies and a guy in the
background and one guy. I like it. Looks good.
Looks space aged. Looks like it's Mars,
so that's good. Now let's go and
look at our video. So I see there's a new
video that's popped in here. Let's have a look? Wow. So this is the new video, let's just hit Play. There you go. So it's one or two stars, but this is only a
five second video. But again, these can
all be extended, put together on timelines, amalgamated together
using the API. What this demonstrates
is that we can just generate all of this at the touch of a button
just from a prompt. Great. So there you go. We have created a workflow that takes a
reference image from Dropbox, passes it to runway, generates an image, and by HTTP, sends that into Dropbox, image receive folder,
and at the same time, it roots that same generated
image to another instance of runway running the video
from image and a prompt. Sends that via HDDP to
our video receipt folder. Now, hopefully you can
see how powerful this is. Imagine if you had 1,000 images, we could have
different scenarios, each one generating a different
variation of the image, all from the touch of a button. You can link together all
these different scenarios. And so therefore, you don't
have to go into Dropbox, get the file, go into
runway, generate it, play around, and then send it to all these different
places to another instance, go and play with it in
the image to video tab. None of that needs to be done. On top of that, this
is just the beginning. From here, we can send
this across to Synthesia, translate it into
different languages. So you can get 1,000
more translations or I'm using 1,000 as an example, but
as many as you want. So hopefully, you can see
how powerful this is, and it brings it all
together for you. There's so much more you can do. There are other apps that
you can add on here, apart from synthesia and
runway and those kind of apps. So really have fun with this, and I hope you've seen
how easy it is to use AI, not only to generate content
using generative AI, but also to automate
your workflow. Make life so much easier. So go forth and have fun with generative AI for
content and multimedia.
20. How to Create a Text to Image workflow with Runway ML and Make: Okay, so we're going to
get started with make so that we can automate
our whole workflow. So let's get ready.
Let's get started. First of all, let's log in. So here we are in M. This
is a brand new scenario. I'm going to go quickly over the interface
and how it works, and then I'm going to show
you an existing scenario that I created before in
my existing account. So the way make works is essentially you put
together a bunch of components that all work together that allow you
to reach your end goal. So you click this plus button, and then you can choose from various apps
that you can string together that will work together to create your end product. So in here, for example,
We were using runway. You can click on Runway.
Then within that, you've got generate image, generate a video from images, generate a video from a
video, make an API call. There's a number of things
you can do with that. And the same goes for all
of the other apps as well. So for example, there's
an email app built in. We've got What's up
Business Cloud built in. We have Dropbox built in, and so we can essentially pick
a number of different apps and send information between those apps and get
various outputs we want. And we can also access
our own file system. So you can already
see how this is really powerful for being able to create workflows and be able to send information
from one app to another. So the way it works is
you would string together your components and then tell them where you
want the output to go. And then when you're
ready to test something, down here, there's the run
once button that you can hit. And so it would start sending your data from one
place to another, from one component to another,
which I'll show you soon. You've also got anytime you run a scenario,
this is a scenario. You can re run and replay scenarios
that you've run before. They were not in
there at the moment. You can schedule it.
So every 15 minutes, for example, at the moment,
it says, every 15 minutes, you can turn that on
and schedule so that you can keep running
the same workflow. And then you can
save your session in then there are
basically various things, various bits and pieces
down here that allow you to show all your inputs and outputs when you've
arranged them on here. You've got some notes and
you've got the ability to undo. You've got some
various settings in here for your scenario as well. Flow control, aggregators
and all kinds of different bits and pieces and components you can
string together in here. You've got tools like
the base trigger. And these are things
you can access from the plus button here
for convenience. Base triggers allow you to essentially just start
off the whole process, a basic trigger.
Text parser in here. These are things that get
content from various elements. And this is the equivalent
of this ad button here. When you hit it, it
allows you to find all the different apps that
you can string together. There really is a lot that you can do with M.
It's really powerful. You can send things to your mobile phone or
other mobile phones, and it's really as powerful
as you want it to be. So just to demonstrate,
I'm going to show you the kind of
scenario we would build for our campaign or for generating any kind of multimedia
that I've built before. And then I'm going to
show you how to build it. So in here, I've
got two scenarios. One is runway image
from a prompt. So we can basically
type in an AI prompt, generate an image
through runway and upload it to Dropbox. So
let's have a look at that.
21. How to create a Scenario with Make: Have a look at our
documentation. So this documentation is telling us how to
connect runway and make. Requirements. To use
the runway app in M, you must have a runway account, which we do have.
Connect runway and make. To get started, you must first create a connection
between runway and make, allowing the two
services to communicate. To create a connection, you need to obtain your
API key in runway. So let's first so we're
actually looking in. We're looking into
dev.runwaml.com, and that's where we usually
access things like API keys so that we can make contact with the API rather than through the front user interface
that most people use that we've been using
till now. So we're here. So let's Log in. Now, it says, create your organization,
organize I'm a single user. So I'm going to name
my organization and create So to get started, you must first create a connection between
runway and make, allowing the two
services to communicate. To create the
connection, you need to obtain your API key in Runway. So let's do that first. Click CR. So it says, API key created, API keys are secret and should not be shared
with others. Right. So this is the key. It's
just a very long number that identifies our account. Securely copy the key above
and store it in a safe place. Once you close this model, the key will not be
displayed again. So I'm going to copy that. I'm going to store
it somewhere safe. Name filled, so we've done that into the name and click Create. Copy the API key value as shown and stored
in a safe place. We've done that. So you'll see this value in the
APIkey field in Make. Create the connection in M. So once you have your
runway API key, you're ready to create
the connection in M. So to create the
connection, first of all, log into your M account, add a runway module to your scenario and click
Create a connection. And we're going to
build from scratch. So we've got a runway module. Generation. We
generate an image. So I've pasted in the key there. And I'm going to click Save.
 Paul Ashun, Deliver Projects On Time with AI Agile & Scrum