Transcripts
1. Course Introduction: Are you a web developer? Yes, then let me
ask you something. Does coding feel
too slow sometimes? Do you spend hours
at stack or flow? Do you want to build
faster, much faster? Yes. Then I've got
something for you. Introducing prompt, build ship, AI for web Devs, built three times faster. A new course designed to
help you code faster. In this course, I'll teach
you solid AI foundations. Five ways AI can help you. The types of AI coding tools. We'll build a small
web app following the web dev workflow with AI. Plus, you'll take on two challenges where you
build web apps on your own. Who's this for? Web developers
of all skill levels. Anyone who writes code
even outside of webdv. Imagine spending less time stuck on bugs and more time
actually building. This course will
help you to ship your project three times faster. Been teaching AI for web
developers since 2023, and I can confidently say, if you're not using AI for your everyday workflow,
you are behind. But don't worry. I'll
show you everything and teach you everything
that you need to get ahead. I will be happy to
see you in my course.
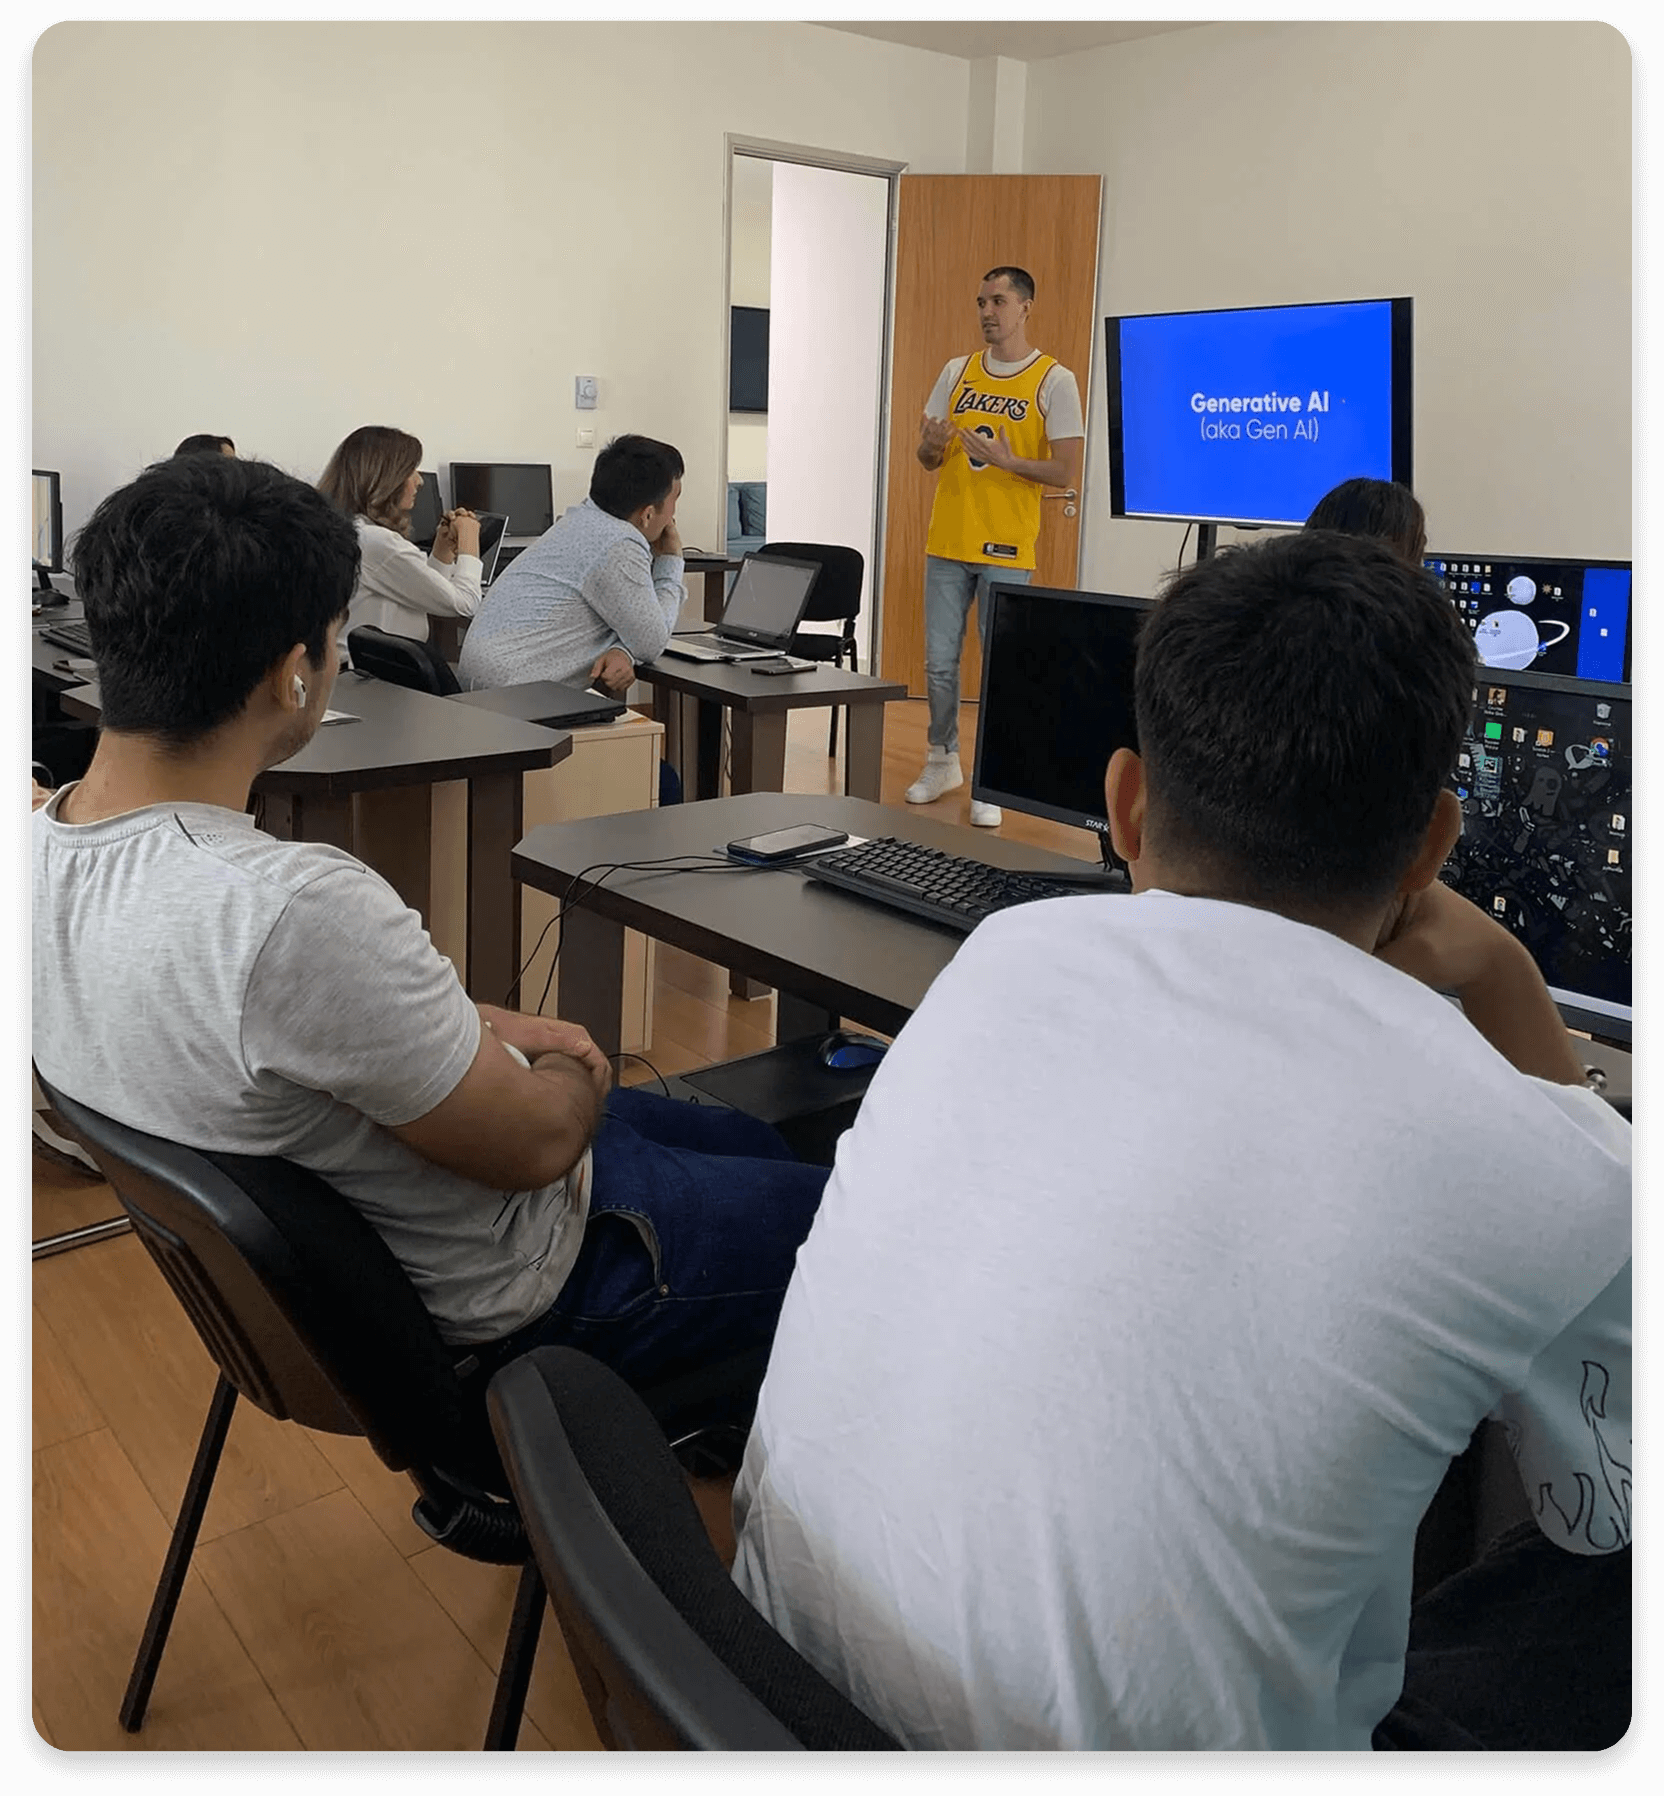
2. Module 2: Generative AI Foundations: Hello, and welcome to
the module number two. In this module, we will
explore the following things. We will start with generative
AI basics and how it works. Then we will go to the
popular general purpose AIs. We'll discuss in details
each one of those. Next, we will move to the four ways of
interaction with AI, and we will finish with
a prompt architecture. So let's go and get started.
3. What Is Generative AI and How It Works: Hello, and welcome to
the lesson number one. In this lesson, we're
going to talk about how General vI is
actually working. And of course, we're
going to focus on a text based general vI
because code is text, okay? Well, let me show
you a couple of slides from official
Google explanation. As Google explains, so generative
language models, text. These models learn about patterns in the language
through the training data. So it means the engineer
feed the machine, the big, big terabytes
of text data. And then machine learns on
this big chunks of text. And the responses that come from this machine
are actually predicted, not calculated by
some kind of formula, but most like predicted. So again, let me
stress this thing. It's prediction, but
not exact calculation. So again, the
example from Google. So let's see this sentence. I'm making a sandwich with peanut butter, and
as you can see, there are different options, variations like jelly, jam, banana, so on and so forth. So it means when you go to ask this prompt to the machine, you could get any
of these answers. It's important.
That's the thing. Okay? So let me show
you one more example. I asked Chat GPT to list all variations that
person can respond to. Hello. And as you can see, we've got casual responses, one, two, three, four, five,
six, seven, eight. We have friendly
responses, formal, funny, energetic,
sarcastic, short. And as you can see, several
dozen of different answers. As you can see, if you will prompt some text
generate A with hello, you could potentially get
some of these answers. Again, it's not a calculation, but it's a prediction. So we have different
variations that you can get. Okay, so why it's important
to understand, I mean, the foundational
principle of how language generative
language models work. Because later when you will
become more experienced, you could potentially build your own language generative AI with your custom data set. Why would you want to
do something like that? Because maybe you could build you would like to
build a chat board for some company or maybe you would like to build some, for example, like code generation web
application for yourself, which you would like
to produce answers for like Nx Js or NextGs
or C plus plus, and you would like
the answers to be as precise as possible. So in this case, you have
to train your machine with a specific data set for
that domain, I would say. So it would be like documentations for the language, the programming language. It could be like books, the books on that language
and, you know, examples. So it's important to understand.
4. Popular General Purpose AIs: Hello. Welcome to the
lesson number two. In this lesson, we're
going to explore the popular general purpose AIs. By general purpose, I
mean that these AIs can solve different kind of tasks and not just
the coding ones. In the first one and the
famous one is the chat GPT, and the Chat GPT was probably the first
one on the market, and that's why it's so famous. So welcome to the chat GPT. In the center, we usually have the input
field where we can enter our prompt and then some additional
things like upload files, search the web,
reasoning models for more advanced stuff in using the voice mode for
voice recognition. So let's try something
with chat GPT. So we will ask hATGPT to code
the basic HTML boilerplate. And as you can see, it
successfully has done a job. So we see the basic
HTML boilerplate, and we can actually
copy that if we need. And it also usually gives
some comments down there. Cloud is known for be the best option for web developers and other
coding professionals, and many of the
coding assistants and AI code editors use
the Cloud under the hood. So we are in Cloud, and as you can see, again, the UI is very closely
resembles the AGBT. We have the input
field in the center. Then you can, for example,
choose the model. Here is the free models,
the pro moodels. You could choose the
style of the language. As I have previously mentioned, so it's basically best choice
for the web developers, and that's why they have
integrated the Github. So you could connect your
Github account here, and it will probably
do some things with your code from your Github. Again, you could capture
screenshot or add a file. So let's check how Cloud works. So as you can see, we
have prompt Claude to list CSS text properties. And you have probably noticed that it's a little bit
different from hat GBT. Yes, that's correct because Claude gives us something
called artifacts, and those are kind
of the documents. And as you can see
in this document, we have very nice answer because it has some
groupings for fun, text formatting, shadow,
so on and so forth, and small example which, of course, you can
copy just like that. So that was Claude. Let's
go to the next one. So number three is Gemini. Google Gemini was developed
and produced by Google. So welcome inside of the Gemini
and as you can see again, we have the input field and additional things
like adding files. You could add this
from Google Drive, from local computer,
and just an image. And of course, you could use the your microphone for voice recognition. So
let's straight out. So we have asked Gemini to explain if else construction
in JavaScript. Let's see. As you can see, it's
reasoning, it's thinking, and we have the basic
explanation right here. We have the basic code, which we can copy. And one of the things
that Gemini does, it sometimes give
you the link to the actual article where
it got its knowledge. So more examples and
some more examples. So let's go to the next. And the last two
we're going to take a look at is a Deep Sik. Deep sik was invented
couple of months ago, it was invented in China, and it basically goes as very
similar thing to hat GPT, but it's known for
its free APIs. As you can see, it looks
pretty much like a Chat GPT, where we have the input box, the DepthkRasoning model,
searching the web and files. So let's write out right now. So we have asked Deepsk to list popular Jazz
frameworks. Let's see. So it has done job, but as you probably noticed, it took some time, some more time than other tools to actually give the answer, but it's still pretty good. Conclusion. So the best one for the general purpose AI is
including coding is HAGPT. Why? Because it has unlimited
number of messages, and the quality of answers
and speed is pretty good. And for the coding stuff, the clot is the way to go. Have in mind that it has some limitations in terms of number of messages
that you can use.
5. Four Ways of Interaction with AI: Hello, and welcome to
the lesson number three. In this lesson,
we're going to talk about four ways of
interaction with AI. By interaction, I simply mean how you can convey
your information, your prom to the AI. So the first one and the
most probably obvious, the most popular way
you can talk with AI, you can interact
with AI is text. We have already
seen that when you just simply write something, prompt something,
and AI answers you. So let's just take a quick look. So we are in chat, GPT, UI, and again, let's make a simple prompt. So we have prompted
the following things. Explain what is CSS
mentioned with examples. As you can see, the ha
GPT started responding. So here we got the definition. Now we got the basic
CSS animation, the color change
example with code. Explanation. Second example with moving element and
even a third example. And at the end, as you can see, we're still getting the CSS
animation properties like a table with a description
for each property. So the second way you can
interact with AI is audio. To be able to do that, you will have to
have a microphone on your phone or your computer. We are on chat, GPT,
and as you can see, it has this icon use voice mode. So let's click.
And at the moment, as you can see, our mic
icon is turned off. So simply we are
inside of audio mode. So let's turn it on.
Hello, Chad GBT. Hey there, how's it going? Good. Thank you. Could you please explain
the difference between React JS and Next Gs
in a simple words, of course, ReactJS is a JavaScript library for
building user interfaces, mainly for single
page applications. It helps you create components that manage their own state. NextJS on the other hand, is a framework built
on top of React. It adds features like
server side rendering, static site generation, and easy routing, making it more suitable for building production
ready web applications. So ReactJS is like
the foundation, and NextS is like an enhanced tool kit
built on top of it. Thank you so much. You're welcome. If you have any more questions,
feel free to ask. As you can see, we just have tried talking with chat, GPT, and we even have short results with our speech
and the response. Even though you can
use the audio channel, but it's not so
suitable for coding. So the next way we can
interact with EI is image. It means you can
upload some image to NAI and ask or prompt
to do something. So this time we
will use the Cloud. All right. So we're going to upload an image, which
looks like this. It's like, as you can
see, simple contact form. So we just uploaded the image file using
this icon write here. Now Cloud has this image. So we have to write the prompt. So the prompt is code the form on the image I have
uploaded. So let's see. As you can see, it
started the code artifact with HDL and tail
wing CSS classes. And you also have the content as a form image. It
looks like this. So let's try something else. Let's prompt to Cloud. I asked Cloud to make a
preview of this form. So as you can see, Cloud
has this preview mode, code mode, and preview mode. And in preview mode, you can actually sometimes see the ready component in action. Again, it's not it
doesn't work every time, but sometimes you
could ask Cloud, something like, can you make
a preview of this form? Sometimes it does it almost
automatically as you can see, because this is the react code and when we try to do this, just with HTML and CSS form,
it didn't really work, but with a react component, you could sometimes have a
preview of your final result. And the last way you can prompt the EI is
a video channel. So previously we were
uploading the image, and of course, you
can upload the video, but the thing is it's not so popular way of prompting at the moment,
because, of course, as you probably understand, it's very expensive way to
use an AI, but it's possible. For example, you could
upload the video and ask AI specialized AI for video
operations, you know, to recreate the video
with some changes or take the main hero of the
video and make something, you know, using this character. It's not so common
in the coding world. So the conclusion, my friend, what's the best for coding? What's the best way? Of course, it's text and sometimes images.
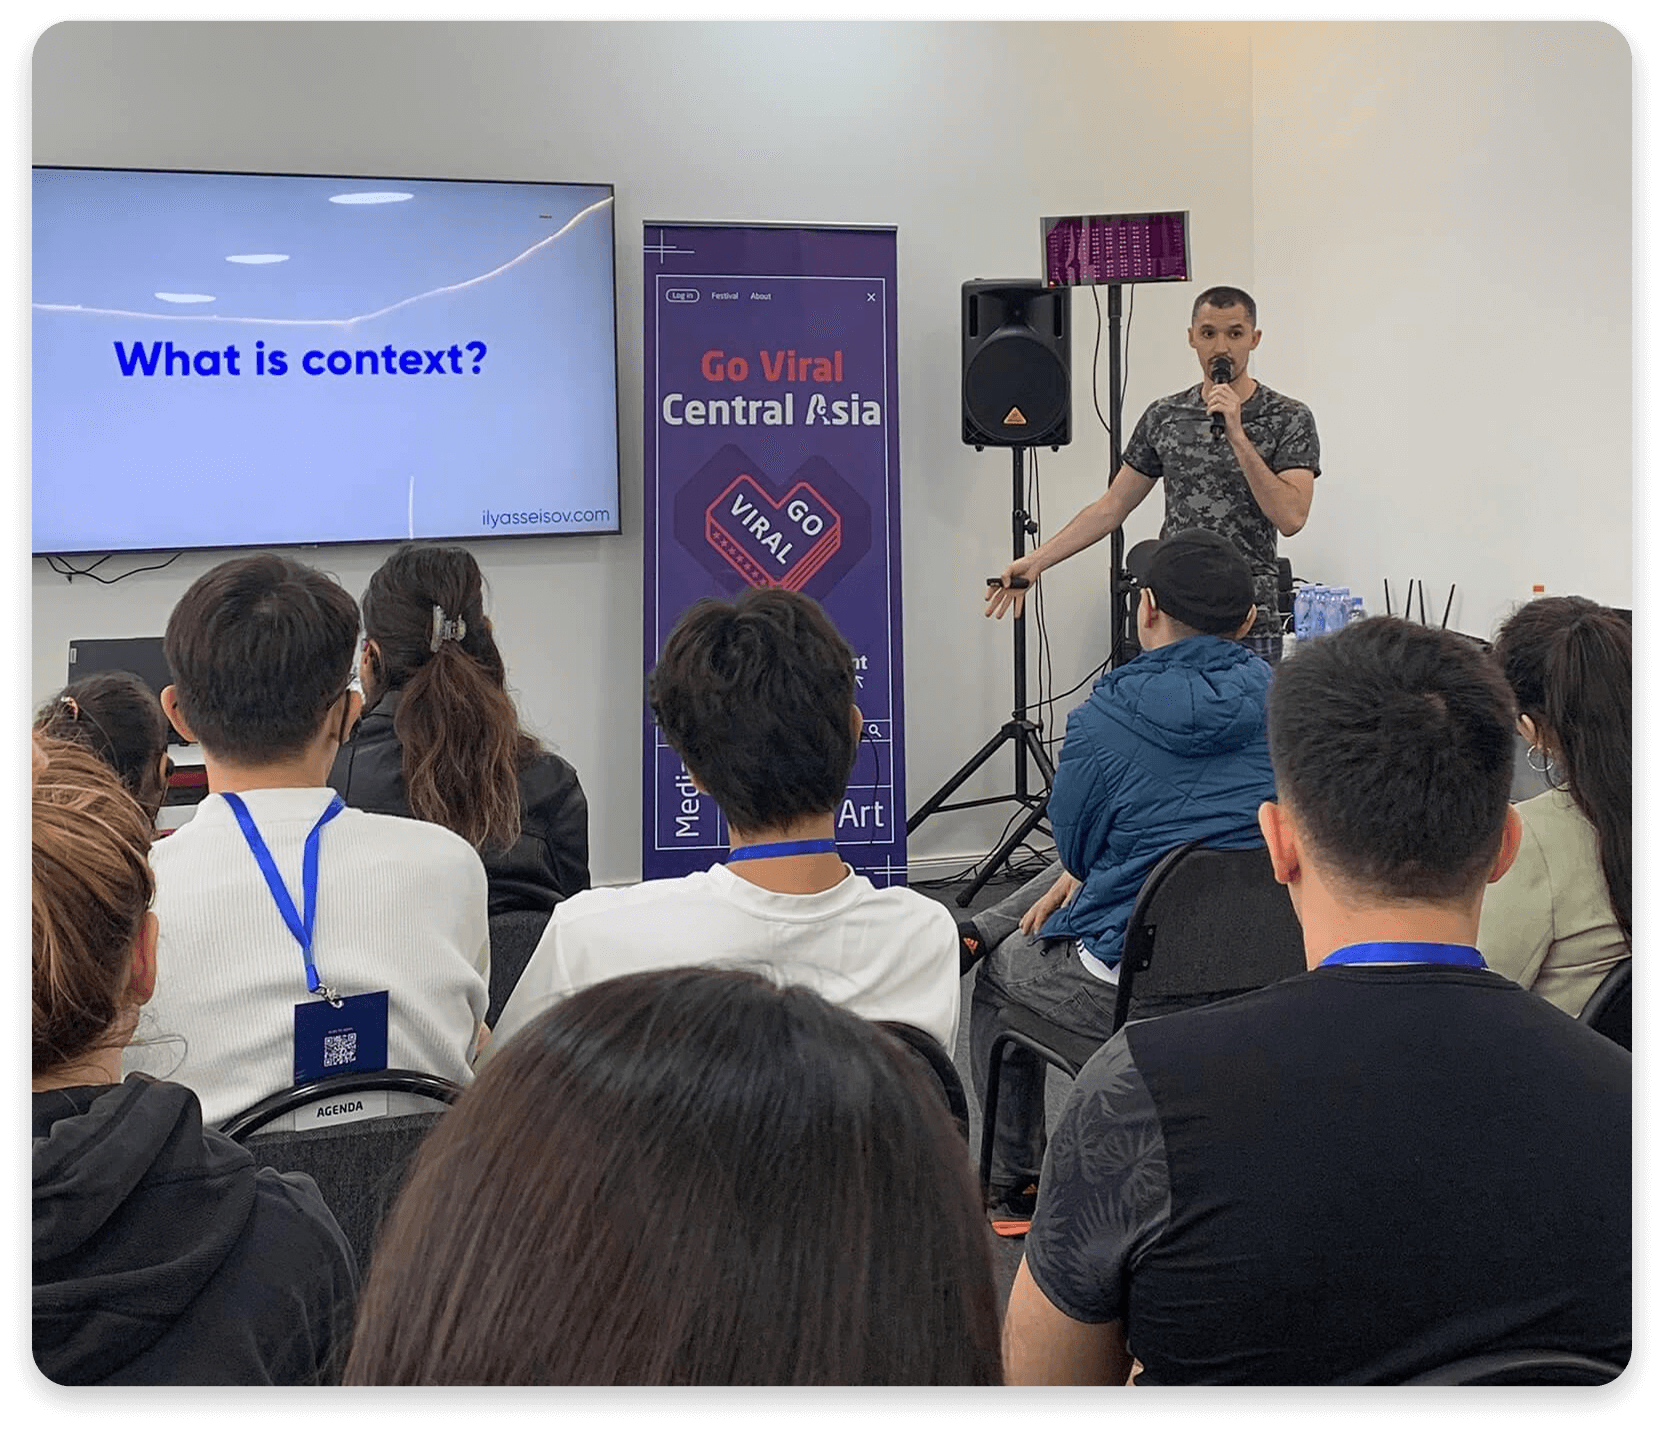
6. Prompt Architecture: I Hello, and welcome to the lesson number four prompt architecture. In this lesson, I'm going
to explain you the basics of prompt design and
prompt architecturing. The basic prompt
consists of three parts. The first one is task. The second part is context, and third one is an exemplar. The task is a mandatory part of the prompt because
without the task, the whole prompt is useless. And the example of
prompt consisting just of the task could
be named fruits. And it will name you any fruits
like apple, pear, banana. It could take some, you know, fruits from the northern
countries, southern countries, African countries,
European countries, Australia and New
Zealand, for example. So it's going to be
all sorts of fruits. Now the second
part is a context, and as you can see, I put
it as a good to have. Why? Because it
sets a direction. Here we say tropical ones. So name fruits, tropical ones. Now, your prompt has some
constraints in some direction. And in that case, AI will name only fruits that are considered to
be a tropical, right? And the third part
is an exemplar. And as you can see,
it's an optional part. It means without exemplar, it still is a good prom, but exemplar could make it
a little bit more focus. And here we give it an example, specific example as a mango. Combined is going to sound like name fruits, tropical ones. Example is mango. So here's my personal
evaluations. So task goes for 50% from
100 for the importance. Context go for the 40, and exemplar goes for 10%. So let's see one more example. So the task is to build a city. Of course, the AI is going to
build you any kind of city, for example, something
from existing cities, something from old
ancient cities which are not presented anymore, or like imaginary city from its own imagination or
from some game or book. And now city context,
for example, we could say, it should
have many trees, cloudy, rainy and cool climate. And now, of course, we are not going to
see some cities from very warm countries in some
from very cold countries. And here we could actually
add the city should be like like a real city
from our planet. An exemplar, for
example, Seattle, and now it has, you know, like specific
direction to go to. So let's take one more example
from the coding world. So the task could
be to build a form. And now we understand
that the form could be very long form or
very short form. It could be styled
in different ways, different fonts, colors, sizes. With our context, we
set some constraints. For example, we should
have a tailwind CSS. Font should be pop ins, colors from the Google logo, and fields should be
name, email, and fo. And now we also add an exemplar
that we kind of direct Aish so he could get an inspiration from the
image we have uploaded. So I think, my friends, now you have a
good understanding of how to architect a prompt. And again, you could use it
in not just coding but in your real life and
different kind of tasks.
7. Exercise: Prompting Practice: This practice style.
And for this module, you will have a very small task, which is to construct a simple prompt using
the proper architecture, and then test this prompt in four different geneightee
that we have covered. So the goal of this
task for you to understand the
mechanics of prompting. And so to make it a little
bit easier for you, let me decompose the
task into small steps. So the step number one is
to create a simple prompt, and it doesn't
have to be coding, even though the coding is going
to be a little bit better because it's still the
course for coding. The step number two
is to apply the rule, the 504010 that we have covered
in the previous lessons. Remember task,
context, exemplar, and step number three, you go to the different AIs. Again, Chad, ZEPT, Cloud
Deep seek and Gemini and try using this prompt and to see the result
for yourselves. So again, in this module, our goal is to understand
the mechanics, so you feel comfortable using AI in general.
So, good luck.
8. Module 2: Summary: Congratulations with
completing module number two. In this lesson, you have learned very important foundations,
such as GNAIFoundations, and how it works, popular
general purpose AIs such as Claude,
HATGBT and others. Also, you have learned the four ways how you
can interact with AI. It means text, audio,
image and video. Last but not least is
a prompt architecture. So you have learned how
to properly architect and create prompt to get the best results that
suits your project. So again, congratulations and
see you in the next module.
9. Module 3: Gen AI in Coding Process: Hello, and welcome to
the module number three, the generative AI in
a coding process. So, my friends, now the fund begins because we are getting
into the coding zone. Welcome. In Module number two, you have covered the vital
and very important basics of using generative AI. But now we're going to
go into the mid part. In module number three, we will start by discussing what role JNAI plays
in a web Dev process. Then we will go to and see the best parts of AI and
the weak parts of AI. And lastly, the big section of the module will
be dedicated to the tools overview and
specifically for code generation. We will look at the general
purpose chats for coding, specialized chats
for web development, coding assistants and AI
code editors. So let's go.
10. What Role Gen AI Plays in Web Dev Process: Welcome to the
lesson number one. So in this lesson,
we will explore what role GNAI plays
in a web dev process. We will see some cases, examples, and things
you have to understand. So the first and
very important fact that you have to grasp is that AI is a nice to have
addition to your process. It's not a mandatory thing
that you have to have. Why? Because you still can
write code without AI, as we have been doing
all these years? It's important because
if you understand this, then you will be
very safe from FOMO, the fear of missing out because in recent
days and months, we can see almost every day
new AI comes into the scene, and we sometimes think, Oh, I probably must use it
because it will do something. Yes, probably, but still, it's important to understand it's only nice to have addition. Now, we have the question. So what role it plays
in our process, how exactly it helps us? And the answer is simple. It only saves energy and time. That's it. It's saving. It's not adding something new or something that is necessary. It only saves energy and time. Yes, it does some
thinking for us. It writes code for
us. Yes, it does. But still, we can
do this ourselves. Again, I'm going to stress
this because it's important. It's only helps us to
write our code faster. No replaces us. So let's do some observation. So before the AI era,
we as developers, coders, we were looking
for the answers manually. So we would Google, go to the stack orflow,
read some articles, watch some YouTube videos, then we would summarize
that information and try to implement our project. So we would basically
think and then write code. So what's changed? In AI era, now we ask AI to come
up with solution. So let's say we say,
we have this app, we would like that feature. How should we do that. And then of course, we give AIO files
or documentation of third party library and
ask to give us a code. So basically, to summarize, so now we prompt
and check the code. So before AI, we would
think and write, and now we prompt and check. So here, let's see
some interesting fact. So as you can see, it's
from Google's CEO. He says that over 25% of new code at Google is
now generated by AI. And my friends, it's
very important to understand because
it's the trend, it's the direction that
the industry is going. And to be a successful
developer in a modern era, we have to be part of this
direction, part of this trend. And what it means for us. So it means that the tempo
of the work has increased. Again, it's important to understand the speed
has increased, not the foundational stuff. Again, as I said before, we could write code ourselves, but AI helps us to
write it faster, right? In these times, it's even more important to have
basic coding skills. Why? Because, yes,
at a first glance, AI can create some new
features, debug something. But if we won't understand
what exactly AI did, then it becomes useless. But if you have a
solid coding skills, the basic ones foundational. So you see the connections
between elements, you know, the best practices
yourself without AI, then when AI gives
you some code, you can check this code and find some not so perfect
parts of code, some better solutions
you can propose. That's the thing. So first goes the solid basic
coding skills. So first, we have to
master the coding skills. And second, after that, we go to the coding with AI. It's important, my friends. If you want to be
a good developer, coder, to summarize this lesson. You are the leader and
AI is your copilot. You still can be a very
productive developer, but AI can make your journey
a little bit more pleasant.
11. Where AI Shines and Where It Doesn’t: Hello, and welcome to
the lesson number two. In this lesson, we will explore the strong sides of AI and
weak sides of AI for coding. So let's start. So my friends, AI does its best job for
formalized subjects. What is formalized subject? So formalized subject is
the subject, the task, the problem that has
a specific solution, for example, one plus
one always equals two. It's formalized. So
in coding world, the most formalized tasks
are algorithms because you enter some specific
input and you will always get the
specific output. That's why for the
computers and machines, it's always been easier to
solve this kind of the tasks. And as algorithms also has been in existence
for many years, and many of the tasks has been solved in
many different ways, and these are known solutions. That's why in algorithms, you will get the best
possible AI work. So let me please
show you an exam. So right now we are in clad, and I will share how I usually practice the
algorithms myself. So there was a simple task
to practice algorithms, which is to write a
function that will return the number of
words in a string. And I was thinking
for a little bit, practicing a little bit
by myself with no AI, and I have came up
with a function that, as you can see, receives a string parameter and returns finally the number of
words in this string. And then what I usually
do is to go to Cloud or Chat GBT and say the
following things. Check my solution and give feed back and giving the
task in the solution. And as you can see, it
has successfully given me a feedback, so few
considerations, your function handles
basic case as well, but also gives me possible improvements
and testing suggestions. Then as you can see, I'm
giving another prompt which is give me other possible
solutions to this problem. And as you can see,
it comes with one, two, three, four,
five solutions. That's the thing because
it's an algorithm and the machine is very
good at handling them. That's why if you
are to work with something formalized
like algorithms or very specific problems, you will get the best
results with AI. Second thing which AI is pretty good to work with is well known
libraries and frameworks. In that particular case, you get a good results because as these libraries and frameworks are
pretty popular, it means there are many
examples in different articles, other sources plus
its documentation. And it means the AI has
a pretty rich context, and that's why it's probably going to give you
pretty good solutions. For example, if you take
react, angular view, these are very well known
libraries in framework, and that's why you're going
to get pretty good solutions. Next. So now let's talk about
the word AI not so good. So AI does okay job with
less formalized subjects. And in my particular experience, the first one is CSS in web development CSS styles
and especially layout. So let's think for a moment, why is it so First off, because CSS is not
so formalized, it's not a programming language. That's why it's not so
formalized. So there's no. So let's say in CSS, when you will make an error, some kind of error, I mean, in terms of not
the grammar error, but in terms of logical error, let's say you use the
same property twice, and the second one will
override the first one, so you're not going to get
any error that's the thing. So CSS is not so strict. And if we talk about layout, if you've been in web
development for some time, you probably know
that you can do layout in I'm not really sure, but it could be like eight, ten, 12 different ways
for the same thing. You could use Flexbox. You could use grid, you could
use even some, for example, if you have you would like
to have several the columns, you could use just
display inline block, and it still be
working solution. That's why for
styles, it's okay. You still should have a
very solid background. I would say if you want to use it specifically for styling, because you still probably
would like to clean it up. But it's so. And, again, I would say it does pretty poor job with
cast and visual effects. Like complex CSS animations, effects like hover effects and libraries like
GSP or framer motion. Again, because when you
do something custom, visual effect in the web, it's probably something you came up with from
like inspiration. So it's not something common. That's why AI doesn't
really have, again, the rich context to
solve this problem effectively because I myself, you know, were pretty lot
with GSAP for web design, doing some complex
animations and interactions, and it's been giving
me results so so. And I usually, visit
forums, you know, to talk with the real people on helping me with the issue. So again, just to recap, it does the best job in
something very strict, formalized like algorithms
or well known libraries or frameworks and okay job with styling and some
custom visual effects.
12. Tools Overview: Welcome to the lesson number
three, Tools Overview. It's a very short
lesson of my friends. We will just take
a very brief look at what we are going to
cover in the next lessons. So tools overview
for code generation. So we will start with general
purpose chats for coding. Specifically, this is going
to be JAGBT and Cloud. Then we will move into specialized chess
for web development, specifically UI, and
this is a V zero. From Versll, then we will
convert the coding assistance. You probably heard about Github
copilot or maybe Codeon. And lastly, we will see one
of the AI code editors. So let's go.
13. 1st: General Purpose Chats: Welcome to lesson number four. In this lesson, we're going to discuss and take
a closer look at general purpose chats AI
encoding perspective. We're going to talk about Cloud and chat GPT and we're
going to start with Cloud. So first, let's take a look at the web
Devina letter boards. Web Devina, as you can see,
AI coding competition, so where the web
developers sort of rate the LLMs for the
best results in coding. And as you can see,
the Cloud 3.7 and 3.5, they both take first
and second place. So first, let's take a look
at the pros at the good side, strong sides of clot. So first of, it's free meal. You have some number of free messages every
day that you can use. Second, as you saw previously at the letter booard as I showed you in a
preview of the clot, it's considered top for coding, and it has the
Github integration, even though it's in
better mode right now. Third, it has a preview mode, so it means you can ask
to preview the code, which also makes it a little bit more convenient for the process. And the last feature that
we haven't covered yet, it's a projects feature. It's only allowed
in pro version, and later, I'm going to
quickly talk about that. So the cons of Cloud
probably one of the biggest and the
only con that I could come up with it's that
it has a low limit of messages in a free
tier because again, you could use not really sure, maybe it's 810 messages, and then you have to wait until the new
messages will come. So quickly, let's take a look
at the project's feature. As you can see, it's
available only for version. So basically, it allows you to add your own knowledge base, as you can see here on a
screenshot from their article. So for example, it's PDF
document, another PDF document, and a third PDF document with a different
information that then will be used in a
as a chat context. And it's very, very amazing feature because
then your answers become more precise as they take into consideration the documents you have provided. The second feature in a project is that you can
set a custom instructions. Again, it's an amazing
feature because you kind of direct the AI into
direction that you need. So here we're in Claude, as you probably remember from previous lessons that I showed you that it's very
good with algorithms, and we talked about
and discussed how it showed an analyzed solution
for our algorithm tasks. In this example, as you can see, I asked to design a notes a dashboard in
react. Why in react? Because it allows us
to see a preview. Yes, and as you can see, it has done a pretty good job. Here's our code, and
we also can see it. We have a sidebar, the notes bar and the
actual note itself. I mean, again, it's pretty convenient to have
this functionality. So the second player of our
game is our beloved chat GBT. And as you can see
on a web dev arena, it shares the fourth
place with a grog, which is still pretty good. All right. And about
the pros of chat GPT, I think the number
one is that it is the unlimited number
of free messages. Yeah, sometimes when it
uses its top 04 model, sometimes in a chat, you could get a um warning that you are out of free
messages in that model, but it still works
in a simpler model, which is pretty good because sometimes you might
need more messages. Yes. And the second pro that it has a decent
quality of code, steel code, maybe not
as good as clade is, but still it's good. In the cons of ha GPT, that code quality, of course, could be better
because I remember from some of my works sometimes, especially with some
complex projects that involves react next. Well, it didn't really do the best job and the clothe did. And of course,
there's no preview. So it's a con, yes, but it's important, again, to understand that
we are now covering the general purpose chats and hat GPD is not tool for coding. But still, it's
something to consider.
14. 2nd: Specialized Chats for Web Dev: Hello, my friends and welcome
to the lesson number five. In this lesson, we're going to explore the specialized chat for web development and AI
web chat, which is zero. So the zero, what is it? It's a very powerful
tool for generating high quality UIs and code. It's a premium tool, it's free, but it has some free messages, but then you also have a limit. And after you have reached
the finish of your limit, you will have to wait
some time either or buy a pro version. Of course, the V
zero was produced by Versll which is also a
developer of next Gs. That's why NextGs and react is their most preferred technology, but it's not only react and next Js because they support
other technologies, too. So let's quickly explore the UI. So again, as in
other basic chats, you have the UI input field with file uploading tool
with some AI enhancement. And also, there is
some clone screenshot, importing Figma, even
uploading the project. So it means you can upload
the whole project and ask to debug or find some inconsistencies or maybe
to offer some new features. And there's some plate holders, build the landing
page or sign up for. So let's quickly go about
the prompting at Vzero. So to get the best results, you have to craft
input prompts well. Actually, it's not something dedicated specifically
to V zero. As you probably remember, it's specific rules for getting the best results
in all AI chats. So the better you guide
Vzero the best and more accurate and relevant
results, you're going to get. So there are some
recommendations from V zero documentation. So you should include desired functionality of
specific components. So let's say you're building some color picker and you understand the
color picker could be as simple as just
entering a hex code or as advanced as a
Photoshop color picker. So also, it's important to
specify design preferences. Well, it's a little bit simpler. So you specify the
sizes, the font, the colors, the border radius, so on and so forth. Next, it's good if you
mention any libraries. It means third party libraries or frameworks that
you want to use. So it uses the context
of that documentation. And also to describe the
context or use case, it means how exactly
you're planning to use the component
because it's actually not something
super specific for Vzero I just good and
appropriate prompt engineering. So the strong size, as V zero says in
their documentation, it's a UI generation. They do it with hat CNuI and the recommended third
party libraries are react three fiber, framer motion, and others. Again, you can still
use your libraries, but this is more preferred. It means their network
neural network is more familiar with those. Now, a little bit more
about technology support. As I previously showed you, it's not only next GS because they say it's swelled, remix, even though with
slightly less confidence compared to expertise in
reacting next because again, the zero aors the same
people who develop next JS. And also, as you can
see, there's a Python, Rust, SQL, so on and so forth. So my friends, if you develop something else, you still cover. So zero for developers. Again, from their documentation, they say you can write clean
React code from scratch, Dbag issues, implement
your features, remember, you can upload
the project, for example. Also, it can provide
code suggestions, and again, they state that
Nexs is always up to date. So for designers, again, you could add your Figma file. It's like advanced feature,
it's paid feature, but as a free feature, which we're going to
explore very soon, you can add your screenshot.
15. 2nd: Specialized Chats for Web Dev (Practice): My friends, and it's a
practice time of V zero. First, we're going
to explore how to use the text based chat and then we will practice
with images. So let's go. Welcome to the Zero application. And as you can see,
in the center, we have the input field, as you have already seen
in Cloud and chat GBT. Here you can enter your prompt. You also can upload your Figma project or
screenshot from your computer. Down there, we have
some pre made functions such as cloning screenshot, again, importing Figma file. You can even upload
your project and also some pre made prompts as a creative landing
page or sign up form. So first, let's try
with a simple prompt, such as building modern
drop down Element. So my friends, as
you can see here, we can either create the pmt right before we are
planning to use it zero, and let's say your prawn
is not so well polished, then you can use this little
button enhanced prompt. So let's try it out. As you can see, with
a couple of seconds, our simple prom
became fully premade, well structured and
thought out prompt. So let's try it.
So as you can see, this does the thinking process, also expanding our prompt
a little bit further. As you can see here, it
made a project structures, styling rules, images and media, formatting frameworks
and libraries and some even more caveats. And at the moment, it does
its code writing process, and now we are in preview mode. Tara so we got our small form where we can select the
country and as you can see, even, I think we should have some filtering
functionality, which is pretty great. Mexico. So we have
chosen Mexico. For example, I have
chosen Brazil and was Brazil and the same
with the language. For the first version,
it's pretty good. As you can see, my
friend, at the top, we have the preview
tab where we can see the actual project outlooks in a browser and
also the code tab. Here we have some files. The main one is probably
the searchable dropdown. So it's our component, and we have the
page TSX where we actually populate the content with countries and languages. And here if you understand the code and you
know what you want to do, you can actually make some
changes writing the code. So let's do something
very simple just to understand the
mechanics of how it works. So let's try to add one
more country. Okay? So we're going to add, as you can see here,
let's add Korea. Okay? So because we
have Korea here, so let's the Ko
and make it Korea. So now we have to save and
go to the preview tab. So let's see. T we have Korea. As you can see. So
that's how you can do simple changes in a code. I also want to show you another way how can you make changes? It's through the prompt. So as you can see, I've
entered the prompt, change fun to mono. And again, it expanded our prompt to make it a
little bit more specific, and it has done its job, as you can see here in
our main component, our phone has changed to mono. A quick tip that
sometimes when you use some messages in your
prompting to do some changes, your version, the output might be not as
you have desired. So either you have to make sure that
your prompt is pretty specific or you have to use some more prompt to
explain something better. So again, as you
probably remembered from our lessons from the
prompting foundations. Now, another very, very
useful feature of V zero it's very easy and convenient way to go to navigate in
between versions. So at the moment,
as you can see, it says Version two latest. And up here, it says Version
one, view and restore. So let's see what's
going to happen if we click Restore button. Done. As you can see, it
has reverted back to the previous San Serif font. And now if you will
pay your attention, it's now Version three, but it says the three was created by
restoring Version one. So again, it's one of
the ways how you can navigate in between
versions in case you didn't like something
or this branch of your updates hasn't
went very well. Let's go to the second part
of this practice session. So let's say we have this
screenshot of the UI. You remember the Figma to import the Figma
project is a paid version. So let's say you have your UI Figma and
your version is free, you can simply download
a screenshot and then use a screenshot as
available in free version. So we will use this screenshot to ask V zero to recreate it. So we are in V zero, and you can do two
things from here. So here, as you can see, there's a clone screenshot. Button. After you
press this button, you will be prompted
to add your image, and then right after it will
start doing the process, so it won't lead you
to add your prompt. And let's say you have
your own instructions. So in that case,
you would probably better to use a
plot from computer, and then you could
add your prompt. So we're going to
go right now for the clone screenshot button. So as you can see, we have
uploaded a screenshot. It does its thinking. And as I have
previously told you, it just takes your screenshot and start working right away. So as you can see,
it's pretty simple. Prompt, please recreate the UI shown on the
attached screenshot. So it's working. So my friends, the zero has finished its job, and as you can see, it recreated
our image pretty well. It has all the components. Icons, search fields, the sidebar and the main
part with the user names. And I think for the
first iteration, it has done pretty good job. And as you can see, let's see, it's even fully responsive. Okay. No better. So again, also, you
can see the code. So it has created the CSS
plus TO WIN configure the main actually file
with page that we see and even inside components like
sidebar and user card, which it's using right there. And the I think again, for the first iteration, it has done a pretty good job. Again, one very important
thing to consider, as I have previously
mentioned in the very beginning
of our course, that is not calculating, it's generating, like
version after version. That's why each iteration will be different than
the previous one. Why it's important
because if you will prompt five times with
the same user image, you will get probably five different
variations of your code. And it's not necessarily the
best in terms of code usage. For example, right
now, as we can see, the user card has
name, username, and image source, and I
think it's pretty good. But let me share the first
time I have done this before. As you can see, it's a
little bit different. So it has name, user name, okay, the Avatar UO, but now it has Avatar position, and each user card has a
different avatar position. And in my opinion,
because, you know, I have a pretty good
CSS experience, it's a very very bad
practice to have, you know, such, you know, strict values in a grid because
when you use grid, you have to use you know, control this by columns and not the specific
values like that because it's very
confusing, you know? And what if you have, you know, some known number of
child elements in a grid? So again, it's one thing that
you have to be aware of. And that's why, again,
the second thing I told you about have to master the solid foundations
or instruments you use. Because when you know CSS, you probably know
that this is, again, the position, you know, hard coded position values is not so good for dynamic grids. That's why you either
going to ask to redo this job again or
find some other way, for example, manual changing
of the code things. And my friends, the last
thing we're going to take a quick look at in this
session is the projects. As you can see, we have the
projects tab right here, and I have created just one
template of that project. And as you can see here,
we have the same UI. But what's important here is this little
thing right there, the project setting.
So let's see inside. As you can see, it
has several sections. So first is a ver CL project, it means you can connect
a VersL project and then deploy whatever you
have created right away. Good one because you
can quickly show this, your prototype to your
client or your colleagues. So the second thing, we have environmental variables. It means if you
have some database connections or API keys, which you can aim at right here. But the main character
of this game is this. It's a sources. It means here, you can
add any sources you would like in the
context of the project. So it could be documentation. It could be some image files, it could be some inspirations, which then this a project
we use as a context. It means your
answers will be more accurate and closer
to the end result. So it's a gold, my friends. I really like when and if you remember when we
talked about Claude, Claude as in the paid
version of Claude, in the projects, you can
also add your sources. It's the same. So it's very
good thing, my friends. The last one also, which is very pretty good,
it's instructions. Again, you could set some specific things
you would like to have, which is also very good. So my friends, this is
the end of this lesson. I hope you have enjoyed.
See you in the next one.
16. 3rd: Coding Assistants: Hello, and welcome to the lesson number six
Coding Assistance. So what is a coding assistant? So it's basically your
copilot, your helper, your assistant in your
ID or code editor. So what exactly it
can help you with? So the first probably one of the most go to features
is a autocomplete, where the assistant gives you
suggestions of your coding. How exactly it works, it learns about your coding
context and then tries to suggest as any other AI do. Second, you can
choose your part of your code and ask to
refactor or improve it. Also, the bugs helping
with you with the bugs, and you can also ask some
questions or explanations about your code and some other
features as you can see. This coding assistant usually go as extensions in your ID. As you can see, here's a small screenshot
from the VS code, so you see extensions, tab and we see coding installed. We're going to talk about
the most popular ones. So the first one
is Github copilot, Github copilot was the first probably most
at least the known ones, the popular one extension, and it used to be paid one, but now it's premium. Even though it's premium, it still has very
generous free tier. I think it's about
2000 autocompletes per month and 50 messages
that you can ask. And the second one is a codium which is a
free extension that you can install and use it
in your coding environment. So in the next part, we will explore
how they function.
17. 3rd: Coding Assistants (Practice): Hello, and welcome to the practice session with
the coding assistance. In this lesson, we
will use the Codem. But you can also use the Github copilot because
they pretty much the same. We're going to explore some of the popular functionalities and we can start with auto complete. So first, as you can see, we have reverse
words in a string. So writing a function that will reverse all of
the words within the string passed in the words separated by exactly one space, and there are no leading
trailing spaces. Example, those stress stress, those Uo as you can see, it has immediately started
to suggesting some solution, and all you have to do is
click tab, then another tab, and you could even, go to the next string, and as you can see, it has
suggested as a console log. So the next step you
can do is to go and try your solution in the terminal and do
the other things. So let's go to the next
thing that it can do. So let's say now
you already have some code that you
are happy with. So now what you can do is to highlight the code,
click the right button. As you can see, here we
have a couple of things. The first one is CodemRfactor,
selected code block. So if we click it, we
get some suggestions. So let's start with
something simple, add comments and
docstring to the code. So as you can see, it's working and it has
done something. I created like a pen
as a string format, the string reversed
and the return format, also a string, reversed string. And now what you can do is
either accept or reject. If you click Accept
as you can see, now you have the code with
what coding has done to you. So let's remove
this for a moment. All right, save and
try one more time. So again, refactor and
let's go for them. Make this faster and more
efficient. Let's try this. So as you can see, Ed has done some suggested some
other solution. I'm not really sure, is it
faster or not because it's so small piece of
code, but in general, it has done something
and maybe on a bigger algorithm or
some kind of code, it will definitely suggest
something that is faster. So again, you can either
accept or reject. So let's just reject,
in that case. So next, what you can do again, let's highlight the text and ask Cdim to explain
selected code block. Now, as you can see, it has opened a chat where
it gives an explanation. So it says it's a
JavaScript function that takes a string as an
input, splits into array. Words using spaces as
separators reverses the order and joins back
with the spaces in between. As you can see, it's a
pretty correct definition of what is happening. So again, as you remember, it's a chat that uses AI, some AI model under the hood. Probably it's clot because it's the most popular
for this kind of tools. And now what we can do
is to ask something, for example, suggest
a different solution. Let's And as you can
see here in the chat, it has presented three
solutions, one, two, and three, and it's up to you whatever you want to
do with this information. So let's try one more time. So I'm asking our tool to convert the code to
typescript. So let's see. And as you can see, it has
given us some variations. So, my friend, it was a
practice session with CM, and the same thing goes
for the Github copilot. And if you're using the VS code, you can see right
here on the top, you can start using
it from here.
18. 4th: AI Code Editors: Hello, and welcome to
the lesson number seven. In this lesson, we're
going to review the AI code editors, and it's going to be
the last category of tools that we're going
to cover in this module. So what is the AI code editor? As you has probably
already concluded is a code editor with
built in AI features. Built in AI engine. Imagine you have a VS code, but inside of it, built in AI machine
that helps you to code. And we're going to explore
the only one in this course. The most popular one
nowadays is cursor. So let's quickly take a look. So my friend, as we're going
to go through features, you will definitely
recognize everything, all the functionalities that we have been covering so far, but combine again,
inside the code editor. So the first one is agent, and as you can see, Agent mode can complete tasks end to end. It means from the beginning to finish sort of independently. And do you remember the V zero? It's exactly what
V zero has done, but now you can do
something like this inside of the code editor
without leaving it. Second, a tab, and
as you can see, it's a auto complete feature. There's even a screenshot here, and this is the same thing as the codium that we have seen
in the previous lesson. Next, chat, and this is
a chat GPT or cloud. And the last one, as
you can see, command K, let's edit and write your
code with AI, again, the same thing that we
have done in codim lesson. But what's important to understand that let's
look at pricing. There is a free tier,
and as you can see, it has two week trial, and during this trial, you can use 2000 completions
and 50 premium requests. And after that, you either has some small free quota or you
have to go to the pro tier, which is paid one,
as you can see, to get full advantage of cursor. And it's for you to decide. You either can use some
free tools or if you would like to add some more speed and some more convenience
to your process, then you can go and
purchase cursor. So in the next lesson, we will see some functionalities
of this interesting
19. 4th: AI Code Editors (Practice): My friends, before we
dive into the lesson, I just want to quickly
mention one little thing that the thing is that technology change
very fast nowadays, and the UI of the cursor editor, which we're going to look at has changed right after I
recorded the lesson. So I just want to
clear things out for you so you do not have any
worries during the lesson. So my friends, when you're
going to see the lesson, you will see the chat tab and a composer tab inside
of the lesson. But most likely, if you have downloaded or
updated your cursor, editor, your UI is going
to look like this. So you're going to have an
agent and ask drop down items. So it's the same things. So the chat in the old
version is the same as ask a new version and
the composer in the old version is the same thing as an
agent in a new version. So, my friends, again, it's the same things only they named
a little bit differently. So let's go inside
of the lesson. Hello, and welcome
to the next lesson. In this lesson, we're
going to explore the cursor AI and its
features in the action. So first thing, I
would like to say that it's a VS code fork that means you will face the pretty seamless
transition from VS code into the cursor AI. For example, when I
was installing this, it also has installed all the extensions that I
had in my VS code editor, which is very convenient. So the first thing we're going to take a
look at is a settings. So you click cursor settings and you go to the
cursor settings. And specifically, we are
interested in this rules for AI. As you can see here
as a placeholder, you can see some examp rules. Always use functional
react components, so on and so forth. Here you want to add your
global rules because these rules will apply
to all the projects you will work on inside
of this cursor. So you have to think it a
little bit more carefully. So the next thing
we're going to talk about is continuation
of cursor rules. And specifically, what you
would want to do is to create the dot
cursor rules files. This file is pretty important if you would like
to get accurate answers, responses, and solutions
to your coding project. There's actually a specific dedicated resource
on the Internet. Let's take a quick look. So as you can see, the name of this project is a
cursor directory. And here, you can see
different type of rules. So let's take the First one, as you can see here, it's
a Acument with the rules. As your senior front in
developer expert in react next, JavaScript, TypeScript,
so on and so forth. Then it says, for
example, follow the user requirements
Scalf to the letter, right, and now it
sets the rules. Now the coding environment, the coding implementations
guidelines. So what you can do
here, as you can see, there's a different categories, TypeScript, Python react next. And you can go
ahead and just take a look at whatever you
are more interested in. All right, so you
just can click react and see different variations. Then you just can copy that, as this in your cursor rules. And then when you're
going to use the cursor, these rules will be applied
as a context for your tasks. Let's go and take a
look at its features. So if you will click Command I, you will get, as you
can see, a composer. And again, a composer
is an agent. So it means it will
do some tasks. We will ask to do something. As you can see, we are asking, build an arithmetic calculator with four basic math operations. Use HTML, CSS, and Vanila JS. So now we click
Submit, and let's see. As you can see here, it
says index HTML generating. That's why what agent does. So it actually does
something on your behalf. Now it's generating a style CSS. And now it's time
of a script Jazz. So, as you can see, it has done its job
and also has submitted a short conclusion
of what it has done. So for now, let's accept
let's see the result. As you can see, we have a calculator and it
looks pretty good. Nice Hover Effects.
It's pretty modern. And let's try the functionality, seven plus six, 13. Awesome. Let's delete.
Let's make it zero. As you can see, from
the first iteration, it has done a pretty
nice job. Night. So let's try to add some
functionality using composer. So now we will ask to add for new operations
such as queer Root, second powers, Sinas,
and customers. Let's see. As you can see, it has started working, working on a index
HTML right now. As you can see, we
see the update. Now it has done some job in
the styles and script time. As you can see, we have
some new things in script, and at the end, we get
the If conclusion. So now we can review the
changes, but for the moment, we would like to accept them and see the result
for ourselves. So as you can see here, it
even grouped them by color because it's sort of
like new category of operations. So let's try. It works. Let's try
again. It works back. So as you can see, it has done a pretty good job. All right. So let's go and see some
next type of functionality, which is the chat. So let's highlight
this function, append number, and
as you can see, it has offered us this chat
and also gave us a shortcut. So let's click in here, you see it has as its context, the script file, and
also the specific lines, so we can even, exclude. The whole file and try to
ask it to do something. Which is, could you come up
with a simpler solution? So let's try. And
as you can see, it has at least has provided
us with another code. And here, as you can see,
we could click Apply. And then in a Git manner, it shows us the applied
code and deleted code, and here we can either
reject it or accept it. So let's accept for a second, and the new code has been added with a chat functionality. So there's also a familiar
auto complete functionality. Let's click. The new line, as you can see, we get some suggestion. And with the tab, we can
edit or just skip this. Shri inst here, for example, yes, for example, here, it suggests as adding some comment and then
some piece of code. So the last thing we're
going to take a look at is a command. So if we highlight some
code and click Command, we get this inline input
chat functionality. And here, for example,
we could say, explain the And as you can see, we get an explanation
in terms of C, which is pretty good. So my friends, in a very
brief and short lesson, I hope I have given you the main primary tools that you can use
inside of cursor AI.
20. Exercise: Play Once With Every Tool: So finally, we are at
the end of the module, and it's time for you
to do the exercise. So the exercise will
be pretty easy. You have to play once, test once every two that we
have covered in this module. The goal of this exercise
is for you to get the basic understanding
and feel of each tool. Here's a simple go to NAP. So the first, you plan
your action for each tool. For example, I'm going to
do A in Cloud and chat GBT, B in V zero, C, encoding and D in cursor. Navigate to this tool
or download the tool or extensions and try to
perform the tasks.
21. Module 3: Summary: So let's recap
module number three. You've learned a
lot in this module. Specifically, you have touched
every tool that you could possibly need in
your coding career in your coding processes. But I'll give you a
couple of important tips. First, again, please focus first and always on developing
solid coding skills, no matter what level you are. Because solid coding skills, it means understanding
the architecture, understanding the
patterns, best practices, some ways of organizing code, some ways of solving
specific things, understanding those make
you a very good developer. And AI, even if AI gives
you not a good solution, you could either ask to redo it or somehow edit
to the good word. After that, go and
learn the basics. Again, the basics
of AI encoding. That's specifically what you
are doing in this course. What do I mean by basics? The basics, I mean the
foundational principles. It's like alphabet in reading because if
you know letters, you can make up words,
then sentences, then chapters, and
then the whole book. And you can destructure the book into smaller and
smaller elements because you know how it's
structured and you know the connections of
the systems elements. Same thing. If you
know how to do the simple task just
in cloud or chat GPT, then you could take
this one level up and use it in Cdium and
then let's say cursor. And then by doing these
basic operations, you going to get to develop your own style of using
AI in your process. And the next step to combine solid coding skills and the
basics of using AI encoding, and then you can go
into advanced things. It means creating some
crazy combinations or how you can do this. Because I've seen some
people on YouTube, you know, how they use different
these tools, and some of them, you know, their workflow is just not
really understandable to me. And then I was thinking whites
like this because, again, they finally came up to this personal
preference of how they can combine the elements of AI in their coding
because some people, you know, may be fine just
using just codium sometimes, you know, outsourcing
some things to Cloud. And some people need cursor with all these cursor file
rules, you know, always context, having in
context the entire database, sorry, code base and documentation
and everything else. Some people prefer to,
for example, myself, I prefer to plan out
my code first and then give the small tasks
AI, you know, to do. And other guys, you know, even the good ones,
professional ones, they say that they
start with AI and let the composer in
cursor do the work. So, again, it's advanced thing. It's a personal preferences. But to be able to
come to this point, you have to master coding
foundations and basics of AI. And the last thing I would
like to mention is to be careful with pit of death. So as you can see, pit of death is something metaphorical. What this is, I've seen some
people, you know, again, trying to build the entire app sometimes without
planning, sometimes, maybe even with planning, but relying entirely on AI. And then they do the
first iteration. It looks good. Then
they add up something. It goes good, good, good, good until the point
where different errors, different mismatches
in file organization, structure, maybe some
third party libraries. So the number of conflicts
and errors become so huge that AI is not capable
of solving all of them. That's the thing. So it's if you do not have
good coding skills. Again, I would
share my approach, so plan out your project. And then piece by
piece, bit by bit, go and ask AI to
help you to sell me. So I hope it was useful.
22. Module 4: Five Ways AI Can Help Web Developer: Hello, and welcome to
the module number four. In this module,
you're going to learn the five ways AI can help you to become a better web
developer and code faster. So let's quickly recall what we have learned in
the previous modules. So in the module number two, you have learned the
foundations of AI. So basically, how to
properly use the AI chats, how to properly
construct a prompt, in the module number. Three, you have covered the AI coding tools
such as chats, V zero, Codium,
decoding assistant, and the AI code editor. So it means you have all the necessary tools and
the skills to use them. So in that module, module number four, we're going to go into
application part. So we will cover five
ways AI can help you to boost your workflow and become a stronger web developer. And it's important that I say in the five ways because
I've been thinking a lot. And those are five primary
ways you can use AI. It means there is no more thinking about,
is there something else? Is there anything else I can do? So it's five ways
and everything else, it just goes under one
of these five ways. So we're going to cover them and you hopefully learn
how to use them.
23. General Overview: Welcome to the
lesson number one. In this lesson,
we're going to take a quick overview which we're going to learn
in this module. So in module number four, we're going to cover
the five ways plus. I have prepared some
bonus for you too. So the first thing how AI can help you is to
build new features. And probably if you remember
what we covered in a cursor, AI editor when we asked the cursor to build some features
for the calculator. Second, is refactor existing
code because sometimes, again, in cursor,
we covered that we took some function and
ask to simplify that. Because it's very
often when you need to make your code
simpler or sometimes, let's say it has coded some
not so familiar to you, like a structure, for example, again, in a calculator, it coded a JavaScript in class manner and not everyone
is familiar with classes, and maybe you just want to
have some separate functions. Third is a very common
one is a fixing bugs, different kind of bugs. You know, no comments here. Number four, is
suggesting solutions. For example, again, you
would like to implement something like
let's say you have some feature on your
mind and you say, Oh, I would like to build it. But I'm not really sure what
is the best approach or I'm even don't really
understand how to do this. So you could ask AI, it could be both conceptual
solution, for example, in terms of explanation, basic explanation of
what you have to do, or it could be a
coding solution. And number five and
plus a bonus one, it's a category of learning, learning as a web developer. So number five is
explaining code. Let's say, again, AI have
generated some code, or you have taken code
from some website like Github or maybe code pen and you are not really
sure what it does, so you could ask to explain it. And bonus one, the
personal mentor, we're going to cover this
chapter specifically. I really like it. It's
where you will ask AI to be your personal mentor in terms of create
a training program. And then when you have a
implemented some solution, ask to review this solution. If you may remember when we were covering
module number two, I was showing you the task with counting number
of words in a string, JS task, and actually
that specific thing. It was like a personal
mentoring from AI. So it's going to be pretty
interesting module.
24. 1st: Build New Features: Hello, and welcome to
the lesson number two. In this lesson, we will
explore the first way of AAA can help us is
building new features. So for this entire module, we're going to take
as an example, project, simple ecommerce page. So let's go and see. So my friends, we're inside of the cursor, and as you can see, the interesting
part of modern era is that everything
changes super fast. In the previous module, which I have recorded, very recently, the UI has been, as you remember, here on
the top, we had chat, composer and bug finder, and now the new update
has been released, and now we have chat. Only chat here, as you can see, and the agent, which
was previously composer is here and ask
and edited also below that. Oh, my friends, in the
beginning of the lesson, we will quickly explore and recap how the agent
in cursor Works will, which is also very
helpful to you. So I have prepared a
very simple prompt is to build a commerce. Product page of books, page should consist two parts. Product list and filters, product list is just
a grid of cards, some conditions for cards
about image, name, category, and price, the categories here and some conditions for filters. So it's a category
filter for three items, price range, and availability. So there's also a simple
text tag that we use in this course is HTML CSS and Manila JS. So
let's go and see. Styles are generating now. Now, as you can see
the file with data, data GS is being generated, and the last thing
is a script JS. So my friends, it has
finished its generation. So let's click Accept A and see the project in the live
browser environment. So my friends, we are in browser and we can
see that it has done its first
iteration where we see the cards with an image, name, category, and price, and filters on that side. So let's try the filter. We click fiction, and
we see the fiction. Now, we see all. Let's
go for children. We see children. Let's go out of stock. We see out of stock. As you can see, here
we have some bug. You know, again, that
we talked about, it's totally okay to have bugs. Now let's go for the price. Let's go for I don't
know, like $16, $16 to 30 and we can see we
have books in this range. So let's go and
start working with the part where we can add some features or
make some changes. So at first, as we
add only six items, let's add some more items. Let's make add six more items. And as you probably remember, there are contact stuff, and we can choose
Data JS because data comes from this file. So let's go so my friends, let's explore the file. And as you can see, we
have item number seven, eight, nine, and
everything through 12. So six plus more items. So as you can see here, we have 12 books. So via prompting,
we have done some, in this case, adding
some content. So my friends, we are
in a lesson where we are asking AI to
build some features. So I have come up with
a prompt. Let's see. So add a search by title input filter
at the top of the page. The filtering must happen
on each key stroke. And as you can see,
it has done some job, it some HTML, CSS, and of course, JavaScript. So let's see the final result. As you can see, we have the Search by Title input
field at the top of the page. Let's see. P also, the power of habit.
Okay, let's go. So just P, and it shows us every book that has a
P letter inside of it. So we're trying to see 1984, and we are seeing
this right now. So my friends, I think you've got the main idea that you can prompt your AI
tool in this case, it's a cursor to add some stuff. And again, what's
important to understand that AI does its
job not perfectly, but as a first draft. So next, you can
use your knowledge of coding to do some changes. For example, if you would
like to change the width of this search field
or maybe you would like to make it just as an icon, and then when you click it
expands, so on and so forth, you can do it
yourself or ask AI. I hope you got the main
idea of how to do this.
25. 2nd: Refactor Existing Code: Welcome to the
lesson number three. In this lesson, we're going
to explore the second way, which is refactoring
existing code. So let's go. So right now, when we take a
look at our product cards, we see that out of stock is
a little bit non obvious. So the way we see
out of stock is with a little muted
colors of the card. But what if we would
like to have out of stock in the same place where we have other things
like name category and price. So let's see how we
can achieve this. So we are in cursor right now, and let's take a quick
look at the code. And, you know, by just a little
bit looking at our code, I could see that the
product in stock and out of stock status is being
generated right here and other things like name category and
price right there. So I've just selected this line, you can see through
25 through 43. So right there, script 25 43, and I asked a simple prom. So I would like to
have in Stock out of stock status inside the
class product info. So it's right there. So let's go and see
what it's going to do. So the cursor has
done its thinking, and now we can see
in a difference. So it has removed the in stock out of stock from up
here and put it right there. So for this moment, let's accept the
changes here and there. Press it here and see the
result in the browser. Voila. And as you can see, we have in stock and out
of stock right there, which looks pretty good with no annoyance and everything
is pretty clear right now. So let's check the filter. So in stock, we see the
Istock and now out of stock. So again, important thing
to notice right here is that still it's good if you understand the
code because first, I looked into the code and asked a specific change
in a specific place. And for AIs, the more
specific you are, the better quality answers and responses you're
going to get, which will again, save you
lots of time and effort. And this is one of the
things how you can build faster twice or
even three times.
26. 3rd: Fix Bugs: Welcome to the
lesson number four. In this lesson, we're
going to explore the third way that
AI can help us. Is bug fixing. So let's go. So we are in our
bookstore application, and as you can see, when we hover over the books
which are out of stock, we get this message. For some reason, we have a
very hungry caterpillar book. For some reason, we
see the Arista here, and as you can see here, when I hover over that, we get the very weird behavior. Our goal to do something
with it so fix this bug. It's important to state that as you saw from the
beginning of this module, that AI has created the code with this bug
from the very beginning, and now we are kind
seeing live action. How can you work with this? So my friends, we are in cursor. And again, we're coming back to what I was
talking to you about the whole course that
the first thing that goes first is solid
coding skills. It's understanding
how the project is built, understanding
the connections. And behavioral patterns of
each part of your application. And so, of course, I understand that the hover action
comes from CSS. So first, what I'm
going to try to do is to look for the hover things. And as you can see, we have to hover behaviors in our style. The first one is filters, and we know that's not it. And the second one,
the product card, and we can see here, it just
does simple translating. Means it goes up or down. So that's not it. So next. So where do we get this then? So probably as we
do not have this in our programmatically
generated HDML, it should be here in CSS. And that's probably
either before, which we do not have or
after our puta element. And VoalA we get our after. And that's exactly
what we've been looking for because
it says of stock, and it has the reddish color. So let's do the common thing, so to remove this code from compiling to the
browser and see the result. And as we can see,
it has done the job. We do not see this out of stock. So again, it's about
knowing your craft, and now we're going
to go to the AI part. So we are back in our
editor, and as you can see, I have uncommented the
after pseuda element. So we have this bug back. So let's go to AI for help. And as you can see, I'm
not setting any context, no file, no nothing
because let's assume we do not know where
this error comes from. And I set the prompt
with a natural language. I say, when I hover over the card with
out of stock status, I see the block
stating this status. Remove it. I must see
nothing on hovered. So my friends, pretty
simple natural language. So let's see what
it's going to do. My friends, it has done the job, and as you can see, right now, before we accepting the change, it has removed this exact block that we have done ourselves. So let's accept it. It's gone, and let's see the result. We are in our
bookstore and there is no out of stock status. Again, my friends, as you
can see, when you know code, it's much easier to navigate
actions of your AI.
27. 4th: Suggesting Solutions and Best Practices: Come to the lesson number five. In this lesson, we're
going to explore the fourth way AI can help us. So it's a suggesting
solutions and best practices. So let's go and
see how it works. So we are in our eCom page, and the very common
functionality that modern stores have is a button or add to wish list button
somewhere on a card. And let's say we want to
add something like this, we're not sure what's the best way or we're
not sure in general. And we would like to get a solution suggestion
from AI. Let's go. So we are inside of
the cursor in SAI, and what's important to know. So before we were using an agent mode for
generating files in code. And in this particular case, we would like to get a
sort of consultation. So we have to go
to the ask mode. Okay? And before we go, it's a good practice to set
a context to code base. And when your project
is pretty big, sometimes you're not very sure how exactly you're
going to do something, so it's better AI to
get the whole picture, which is your code base. So it's pretty simple
prompt, which is saying, I would like to add
the wishlist button on the card should
be SVG hard icon. What would be the
proper approach? Give me the implementation
roadmap of this feature. Again, it's not
an implementation of the code functionality. It's sort of the consulting. Let's go. So the AI
has finished its job, and now we have
some explanation. And it explains that
you can add new set. It gives you some markup, styles, event
handling, and some, you know, steps to
implement that. Again, as I said before, it was a consulting practice. So it's up to you whatever you would like
to do from this step. If you kind of it and you would like to do it
yourself, you can go. But for example,
you're feeling lazy or something you're not sure that you can do
this by yourself, you can go back to the
agent mode and do that. So my friends, let's say
I liked its suggestion, and then I just went to the agent mode and said
something like this. I like suggestion, go
ahead and implement that. So it has implemented the code as we have
previously seen. I have accepted that, and
let's see the final result. We are in our bookstore, and it has amazing functionality
as you have asked it. And what's important to
understand that in the case of asking solution suggestions
or the best practices, sometimes you can just use, clade or chat GPT, especially if it's
something common. Let's say you would like to ask the authentication
on your application, then you could just ask
about specific case. So in general words, I'm using the Next Jazz, what would be the best
authentication for SAS, like 100 to 1,000 users. And you could also state
your budget, for example. So again, even the Cloud or
Cha GPT going to give you, you know, some suggestions on picking the right technology. The same with the best
practices, for example, you're planning to add some
imagery on your website. You could go and ask
for the best practices. Let's say you has
building a landing page, what kind of graphics
is the best way to use Web PP and GJPG SVG
combination of that, or rendering
strategies and nets. So it's kind of like
this, my friend. So you have to choose echo AI technology
depending on your task.
28. 5th: Explain Code: Hello, and welcome to
the lesson number six. In this lesson, we're going
to explore the fifth way how AI can help us is to
explain our code. So let's get started. So we are in cursor
in our project that we has been doing
throughout this module. And let's say we would like to get explanation for our script. It's pretty easy,
as you can see, you just ask command, I and you get your chat. It's important to go for the ask option because we just would like to get some information of the explanation. And as a context, yes, we have specifically select the script z because
we would like to get explanation for that
particular file and just let's enter is simple. Prompt very simple, actually, explain code, and
let's press Enter. As you can see, I has started
to give us an explanation. And of course, you can go
through these explanations one by one and start to understand
and get your insights. So another way we can ask AI to help us to explain the code
is through the following. Let's say we get the function, we highlight that and
we just click Command, and we get this
little input field. So it's kind of like local way of getting some
AI to do for you. So in here, again, we ask it explain code
then just click Enter. And as you can see,
it gives us sort of inline comments which
we can read through. Honestly, both of these
ways they work and the same actually
thing you can do with a codium extension, which we have
covered previously. But my personal preference, when I usually ask
to explain the code, if it's something very quick, then I could use this
inline functionality. But mostly when I try
to understand the code, I would like to get some
more attention to it, and I prefer to use chat GPT. Oh, my friends, we are
inside of the chat GPT. And again, here, when
you do the prompt, you can be explicit with your prompt or you could
use very short prompts, which I usually do
explain the code. The lower for example, right now, I asked to explain the code
below for a beginner. Sometimes I could say explain code below in explicit manner,
something like this. So usually it's enough because as we previously
talked about, if you have an experience, sometimes you understand
the whole picture and maybe you need the details. So let's see what
it's going to do. As I previously mentioned, what I really like
about Chad GPT for this specific task
because as you can see, it's dividing our
code in pieces. You see the very
convenient code highlights which you can go
through, and then you, you know, just can ask
some additional questions about some specific things
you haven't understood well. So again, it's just a
personal preference. I just would like it
to share with you.
29. Bonus: Personal AI Mentor: Hello, my friends,
and welcome to the Lesson Number seven. And in this lesson, I
would like you to share the bonus way of how you can use AI that can help you to become a better and more
effective developer. So I'm going to show you how can you use AI as your
personal AI mentor. So just quick note
that remember, if you remember the
times before the AI, sometimes when you do some project or you're
learning some new material, you would probably many times have some specific
questions about some details of because
you would like to understand something or maybe some
implementation details. And it's not very clear
for a beginner in some new topic to get the whole picture to
understand these details. And, uh, like previously, I would use some forums, some private coding groups where I would ask questions and get the answers
from real people. And again, it could be some very small thing or
even, like, a preference. So not something
specific where you will get an opiniated answer, not like something specific. And now, with the time of AI, this has been a game changer for us because now you could have senior web developer with
many years of experience with a huge code base and
it's sort of like brain. That could answer many, many of your questions. So let's take a look. So for this, I prefer to use chat GPT because,
again, it's free. It has unlimited messages, and it's usually enough
when I would like to use a mentoring opportunity. So as you can see here, I
would like to show you. The starting prompt
is pretty basic. So please list beginner project to practice CSS
positioning and box model. So let's say it's a new
topic where you have just, like, read a perio, you know, like a chapter at MDN Docs
and a couple of articles, and the you would
like to practice to understand it a
little bit deeper. And that's why I'm
asking to list, you know, a project for beginner
to practice this thing. And now we could even, you know, go one step back and ask to improve this prompt for us using the prompt formula that
we learned previously, the task context
exemplar, and I'm asking. So the first step of the prompt is using
formula for prompting, test contexts and exemplar, rewrite the below prompt
according to that formula, and I'm stating my prompt. And as you can see, it does some expansion for task
contacts and exemplar, and now we get the final prompt. So it looks now pretty expanded. So can you suggest
beginner friendly project that help practice CSS positioning and box
model? Examples could be. So let's try together,
use this prompt. So let's copy that. This and see what
it's going to do. Awesome. It has finished its
job, and as you can see, we have some project
ideas as card layout, simple navbar, sticky footer, so on and so forth. So not bad, really not
bad ideas to practice. Now, let's say, for example, we picked some of
them, and again, we are not really sure how
to go from that point. So the next thing
comes into play. Now, I'm going to show you the second prom that
I use very often, and the basic version
looks like this. Create a step by
step tutorial with explicit instructions
and explanations for name of the project
to the List app in Jazz and I also very often
state that I'm a beginner. All right. And again, it has rewritten that, and now we get the pretty
much banded prompt for AI. So now we can use, this very well structured prompt and use it with a combination of projects that we would
like to practice. So let's see the final version. So the front looks like that, create a beginner friendly
step by step tutorial with explicit instructions
and explanations for building CSS only tooltip. So this is a project
that it has suggested. And the second part,
the tutorial should cover setting up
the HTML structure, styling with CSS, and anything else what you
think is important. Please ensure each step
is clearly explained. So let's see what
it's going to do. So Chat GBT has done its
job, and as you can see, we got the step
by step tutorial, which we can start
practicing right away. So we'll get the step
one, the HTML code, and explanations, step two with CSS. Again, with comments. Step three, explanational,
CSS and step four, how to test that. And also, it has given
you the next steps. I think overall, it's a pretty good system
to practice something. And the last thing I would
like to share with you in this lesson is that
the following thing. So let's say you have been
learning some subject, and the new concept was covered, and you got some
understanding of this. So for example, very recently, I've been learning about rendering strategies
in next has. So after I have read, you know, the documentation,
watch some tutorials, some explanation videos, I try to get I
would like to check my understanding of how correctly I understood
these concepts. And that's what I usually do. So here how I check my
understanding of the subject. So for example, as I previously said about the next es
rendering strategies. So there's four main ones. So let's say I write my summary. SSR is a default one, CSR NAS climb, da da, da, and then what I usually ask. At the end is, am
I correct or just, you know, short form, correct. And then I see the
response of the AI. So as you can see, it
you're mostly correct, but small clarification
regarding SSR. And it start giving
you its comments, and then you can chat
with it, you know, ask some additional questions until until you get the
material in the right way. So I hope this was helpful.
30. Exercise: Play Once with Every Way of Using AI: My friends, it's
an exercise time. It's time to you to
practice what we have covered in this module.
You've learned a lot. The task is pretty
straightforward. So your goal is to go and test each of the ways that we
have learned at least once, my friends, at least once, so you get the basic
understanding and feel. So first, go ahead and
come up with a project. Again, I suggest you
to use chat GPT, for example, and to ask to
give you some project ideas. Ideally, if it's something
small, because again, your main task is to
practice the mechanics, to understand the
principles and foundations, and then you can apply
that on something bigger. After that, your goal is to plan out the interactions
that you're going to use. Let me give you an example. So the first step could be after you have come up with an
app that you want to build, for example, again, we
use the E commerce page. So you could ask AI to build an app as a beginner
web developer, and for that, you
could use cursor. Then you could ask
it at some features, whatever is more
convenient to you. Then you could ask to refactor the code as a senior
web developer because, again, previously it
was as a beginner. Then you could make some bugs
and ask to fix that bug, or if you spot some box, try to, you know, maybe think out of some creative ways of
how you can handle that. Then you could ask
it to advise you some features you can
add to that project, and at the end, you could practice with
explaining the code. And my friends, I really suggest you to use
a different tools. So again, because the
main idea is you to find your own sort of style, something that fits you. So go in and start the exercise.
31. Module 4: Summary: Congratulations on finishing
with a module number four. And by that point, you are equipped with everything
you need to successfully go and build projects
with AI because firstly, you have learned AI tools you can use in your
work such as chats, coding assistants
and AI code editors. And also, you have
learned the specific ways you can use these tools
in your projects, and now it's time to go
and actually practice.
32. Module 5: Two Speeds of Code Generation: Hello, and welcome to
the module number five. In this module, we're
going to export two speeds of code generation. So my friends, in the
previous lessons, you have successfully learned
the foundations of AI. Next, you learn the AI
coding tools like chats, code editors, specialized
chats, coding assistants. And in the previous module, you have covered the five
ways to use AI for coding. It means now you
have instruments, and you know exactly
how to use them. Well, it's time to go and explore how fast
you can use them. So in Module five, we're going to cover the
first and second speed so called of using AI and
which one to choose.
33. Overview: Welcome to the
lesson number one. In this lesson,
we're going to take a quick overview of what we're going to
cover in the module. So basically, the
first speed what I call is when you have the
copy and pasting process. It means, let's
say you generating some code in Cloud or chat GBT, and then go and paste
it in your code editor. Then you've got some error. Again, you go ahead and paste
this code in the chat or maybe VzeroEplore something and then go ahead and past it back. And the second speed, what
I call is no copy pasting. It's when you're using something inside of
your code editor, for example, something
like coding assistant or even the AI code editor. In this module, we're going to talk different sides of first
speed and the second speed, pros and cons because
whatever you're going to choose is your
personal preference depending on your
certain conditions.
34. 1st Speed: Welcome to the
lesson number two. In this lesson, we're going
to explore the first speed. So as we previously stated, the first speed is where you basically copy and pasting
code back and forth, going to the chat, doing some
code generation, analysis, and then going to your
code editor and pasting it there and checking is
everything working. So first, let's cover some
good sides, strong sides. Of course, there is a greater
control in understanding because you are doing each
specific task one at a time. It's great for learning, again, because there is
a granular approach, and in every step of the way, you could stop, think, test, and then go further. Next good side is that you can use pretty much
any chat you would like, Chat GPT, Claude, or even
Gemini or Deep seek. So you're sort of independent
of your tool choice. Of course, again, because
this is a granular approach, there's less risk that something unexpected will
happen as you check every step, every modification of your code. Now the weak side, the cons. So of course, the
workflow will be a little slow because you have
to go to the chat, paste, generate the
code, copy, go back. Also, it requires more attention
from your side, again, because every little bit of
code, you have to check it, paste it, make sure that
every little character, including brackets, square
brackets are included, and nothing is being missed. And again, because it
requires more attention from you and lots of movements, there's more chance
of making errors. So to conclude,
this first speed is a best fit for beginners in coding and
especially beginners in AI. So again, even if you are
experienced developer but not so experienced in AI, go ahead and start
with speed one. And the second thing, if you
have a budget or no budget, it's a very good place to start as they pretty much are free.
35. 2nd Speed: Lesson, we're going to
explore the second speed. So basically, as we
previously stated, the second speed is where you have no copy
pasting process. Everything happens inside
of your code editor. Remember Cdium or cursor, then you probably understand
what I'm talking about. First, let's start with
the strong size again. The main thing is
a faster workflow because everything happens
inside of your code editor. You could immediately
refactor code, use agent if you're cursor. Of course, you have a good
auto complete feature because, again, the codium or cursor, they know the context of your
project and may immediately suggest something in
your styles or script. Again, talking about the
error fixing process, it's easier because it
knows your code base and it may suggest some proper solution much
faster because of that. And you make less mistakes because lots of things
happened on AI side. Now the weak sides. So again, if you like to be in control
of every piece of your code, then you will feel a little
bit uncomfortable because AI that's pretty good
coverage of your code, as you probably remember
from our course of essens. Next thing, if you're
doing too much of AI coding in your
process in general, you may start your skill level because AI does
everything for yourself. Next, of course, you can get some unexpected code
changes because again, especially if
you're using agent, it could rewrite lots
of parts of your code. And the last thing, so you're starting dependent on some
specific tool like cursor, which is maybe good
and maybe not so good. It's up to you to decide, but it's the reality. So to recap, the second speed is more for experienced
coders and to experienced in using
AI and also have a budget because those are paid, especially if you're
writing lots of code.
36. Which One to Choose: Welcome to the
lesson number four. In this lesson,
we're going to talk a little bit about
which speed to choose because
sometimes it's still not really clear what and how. So just to quickly recap, as we previously stated, it's more like canonical
statement that the first speed is better suited for beginners
and coding in AI, and if you have some
budget constraints, and the second speed is best
for experienced coders and AI users who have some
budget for those tools. In the end, I would
again underline that. Even when you will become experienced developer and
experienced AI user coding, it's still matter of the personal preferences that will be based on your
exploration of those tools, your approaches in coding in general, and your experience. Because again, as
I previously told, there are experienced developers
who are totally relying on a cursor to build almost entire project
for them as they say, 90% of the code is written
by AI and then they just check and do some and other
experienced developer, they might use
only, for example, Cdium and they feel
it's enough for them, maybe just with a
little bit of clod. So again, both of them are experienced, successful
mature developers, but approach to the tools and using AI could be very
different because again, it's very important
to understand that sometimes maybe
on the first glance, when you are not so
experienced with AI, on the first look, AI might be very quick to
create some code features, and you say, like, Wow, I'm like, moving so fast. But then you might come to some problem in code or some connection
between your modules, sub systems which are not
really understanding why it's occurred and some
potential coding issues, and you will spend many hours on trying to understand
and resolve that issue, which will neglect the time that has been won in the
code generation part. Again, you have
to be careful and let me share my
personal approach, how I do at least these days. So as you can see, this
square with a thick border, let's say it's a project. It's a small excess or web
application that I'm building. And the small squares
inside of it, it's some parts of
that application, for example, some
authentication part, routes, API, so on and so forth. So I usually will plan out
my project in some parts. And, of course, you cannot plan the whole project from the very beginning
because it's impossible. I mean, that's why it's some
kind of flexible planning. I'm sort of no like
in the beginning, I need like authentication, I need some front end for a
couple of pages and couple of the APIs to fetch the data. And then I start, you know, then my project is already
has some structure, there's some division
of the concerns. And functionality. And then
I can say, for example, this part, I'm going to use AI, and that part, I'm going
to do it myself because, for example, from the last
one of my last projects, I could have some
pretty quality code and some solution that has
already been implemented, which is the case, for example, with authentication or like stripe for payment systems. Yes. And for some new
things, you know, you could say, I
usually say that. Okay, let's try this with AI. And again, I prefer
more granular approach. It means I could divide
even this, you know, some part of the project into sub parts and try to solve
them piece by piece. In that case, I have always this control over my
code and project. And also one of the good recommendations
as you probably know, even when you do
the small change, it's good to go and
check it in the browser. How is it working in
an appropriate way? Because if you do, let's say, ten changes, then in something, it's not working, you have to go and debug all ten changes, which is not very efficient. So again, as you can say, it's a combination
of approaches. I hope you find
something on your own. And again, it's good sometimes, you know, just to talk
to your colleagues, especially more experienced than you and see how
they approaching, you know, on using those tools. And then you can, you
know, copy some parts, test some parts, and see
whether they fit you.
37. Module 5: Summary: Congratulations on finishing
with a module number five. And I hope that you have already decided with which speed you would like to go for
coding practices. And since the next module, we are starting the practice
sessions. See you there.
38. Module 6: Basic Web Dev Workflow with AI: Welcome to the
module number six. In this module, we're going to consolidate all the
knowledge you have gained throughout the course by building a simple
web app using AI, and we're going to go through
this workflow step by step.
39. Simple Project to Practice Mechanics: Welcome to the
lesson number one. In this lesson, we're
going to go through a quick overview of
what we're going to do. So my friends, we're
going to build something very simple
because our main goal is to practice
mechanics of using AI in your web application
building workflow. We're going to build
a simple counter app with a little bit
of functionality. Because in that case, it's familiar to you, and then you could focus on things specifically
dedicated to workflow of using AI in your code
and not how to implement a specific thing regarding
the application itself. As I previously said, I really prefer the
progressive enhancement in everything I build because if you go from
something very simple, two more advanced step by step, then you understand the whole
chain of your operations, and you can always debug or go to something simpler
than was before. So when are we going
to practice this? Basics in integrating
AI in your workflow, then later, you could practice
one, two, three times, and then you're going to see some things that work
specifically for you, and then later you could advance in something more complex.
40. Plan Functionality: Welcome to the
lesson number two. And here's our step number
one in our AI worklow. The step number one is planning a functionality of
your web application. My number one tip
for you is always do your planning on a paper
with a pencil or pen. Why? Because it's
the simplest and the most quickest way of how
you can start the project. Because in that case, you
don't really focus on technological part of how
to make things beautiful. You just your writing
your sketching to make the basic version of what you would like
to have in your project. So in our specific example, so we are building
a counter app, and we're going to plan
our functionality. So we're going to have
some usual things. So we have a functionality
like a button two plus one, minus one, then
plus ten minus ten, and then also plus
and minus random. So that's pretty it. And in that step, we already have some things we would like to our app to do. And the same things would apply to all your other projects. You just again, take your pen and paper and start, you know, just envisioning
what you would like your app to do and just write
it down in simple words.
41. Plan UI and Lyout: Welcome to the
lesson number three. So the second step of our
workflow is to plan our UI and the layout of our
components and some elements. So again, as in previous step, do your first sketching
on a paper because again, you're just going to be
focused on how to quickly do the core thing that you have to do and
you're not going to think about colors, you know, typography and, you know, beautiful elements. You're just going to
do the basics that you actually need
in your project. So in our case, again, we're using the
pencil and paper. So as in most of
the counter apps, we have the value. Then as usual, we have plus
and minus buttons nearby, and then some buttons
just down there, plus ten minus ten plus
random and minus random. So this is pretty much it. And so we basically
took our functionality, what we have done in the part, step one, and then we
just thought out of our UI and has implemented
this on a paper. The same would apply to any other project
you're going to do. Just do this in simplest way
possible at your first step.
42. Choose Tech Stack and 3rd Party Packages: Welcome to the
lesson number four. So the third step
of our workflow is to choose our textag and
third party packages. So my friends, as you can see, this part comes not in
the very beginning, but a little bit along the way, because the implementation
part is very specific to what you prefer, which technologies
you can work with. But again, the most
important part is the functionality
of your app and, of course, layout,
it comes first. So in that step, what you can do is to
choose your textag. It could be some a
ramming languages, styling technologies, frameworks, yes, then also
third party libraries, and even some people could
think about the apps. So the place they would
like to host their app, maybe some CICD processes, but again, it's up to
you at that point. So in our case, again, as I previously mentioned, we're just going
to use HTML, CSS, and J Script for the
simplicity reasons. And also what's important to
mention, for example, again, taking in consideration the progressive
enhancement framework, let's say, GainUR
would like to use. I would like to build
the counter application, and then let's say, there's like a library
that could make the app could make
the numbers change, not just the changing the
text input text content, sorry, but in some
effective way. Then you could add this
library to your project, but implement it later. So first, you implement
still the basic version, and then you could progress it, enhance it to some
fancy version. It's going to be a little
bit easier because, again, the functionality comes first
and the effects come later.
43. Prompting: Oh, welcome to the
lesson number five. So the step number four in our workflow is
a prompting part. So previously, we have
defined functionality, UI and layout, the text stack, and now it's time to
go to choose AI tools. Again, now you have already
came to that point, so you kind of know
what kind of tools we have and in which situation
you may want to use what? So for that particular
project, again, we could use Cloud as a chat and then copy and paste
code in our DE, and we could use the
V zero or cursor. In that particular case, we would go with zero. But again, you could choose
anything you would like. And it's important to
mention that in that stage, you could think, for example, you could either go
with a text prompting, you could go with adding
your image of your UI to the AI or some combination
of these two approaches. As you remember from
step number two, where we were creating
our UI and layout, it looks something like that. All I did is to save it as a image to make it sort
of like screenshot. And this screenshot, we're
going to be adding to V zero, asking to recreate that. So my friends, we
are inside of zero. As you can see, I have uploaded a screenshot from
our application, and then I have prompted
a simple thing, create a counter app, use a ploadedimage
as referenced, Textag HTML, CSS,
and Vanilla JS. So let's see what
it's going to do. So the V Zero have
finished its thinking, and our mockup image for UI is pretty much recreated
as we have asked. So let's check the
functionality. So as you can see, my friends, it works pretty good, especially taking
in consideration that it's our first iteration. And just to add again, you could use clot for that. And for example, clot sometimes not able to
deliver a preview, so you could just
simply go and copy and paste the code in your
ID and check it there, or you could use your
cursor if you're using cursor to get pretty
much the same result.
44. Editing and Tweaking: Welcome to the lesson number
six and the last step, which is part of the
iteration is editing and tweaking the output that you
have gotten from your AI. So let's say we would like to add a reset button
to our application. Let's see how it's
going to be done. So we are back in the zero. Again, as in previous lesson, I have just downloaded the screenshot with
a reset button, and I just prompt a simple thing such as at a reset button at
the bottom of the ad, use a screenshot as a reference. So let's see what
it's going to do. So the VZO has done its
job, and as you can see, it's saying that now
counter includes reset button at the
bottom of the app. But the thing is, for example, as you can see, VZ cannot
preview this file. So again, it's happening, and that's the process
of tweaking and editing. And here, again,
I was previously explaining that by using
these different instruments, different AIs, finally, you will come with something
that suits you. And this kind of situations, sort of like road blocks
that you will encounter during your way will make
you more experienced. And again, the solutions, you will make them
more tailored to your specific situations
and style of working. So let's see what
we can do here. As you can see, I've
played with the zero prompting back and forth a couple of
times, as you can see, the V two created by restoring V one and the same stuff
with Version three, but preview is still closed. Then I also trying to say
that I can see preview, but still no luck with that. So let me think of
some other solution. So what I have decided to
do is to create a new chat, but upload my second
version where we have a reset button and having the same probe as at
the very beginning. So let's try it. I my friends, this approach actually worked
because I have a preview working with all my functionality
from a previous thing, but as you can see, with a working reset button. And I think it's a very good example of that
how AI actually works, you know, and all these hurdles that you can
encounter along the way. And you should be
familiar with, you know, these situations because um, you know, what stands on
the way becomes the way. And by going through these
different situations, you're going to be
becoming more experienced. And also, what you
could have been done. For example, let's
say you are using a free version of V zero, and let's say your messages
have went to the end, so you could actually, you know, take the code as it's
actually working at to your ID and
then let's say, the last part of functionality, which was a reset
button, you know, go to a clot or chat
GPT and ask, you know, to edit if it hasn't been edited with Vz
something like this, my friends, you have
to be flexible.
45. Module 6: Summary: Welcome to the summary
of Module six. My friends, I really hope that you have experienced and learned something from this
practical module where we learn the workflow, working with AI, and
remember my friends. So it starts with planning, planning your functionality,
planning your UI, and textC. Then the second part, you go to your AI and prompt
whatever you have planned, and then just tweak it until
you get the working version. One thing I would say that
it's good if you work in a small chunk of your app because as you probably
seen in this course, previously, sometimes, AI could give the
code which is not really best practice of creating some
functions or styles. And then when you get this
small part of working code, you could use your
experience and then actually clean up the code
and structurize that before you go
to the next part. So the next question
that comes up, so what we can do if our
application is more than just a counter and it has
multiple parts to it. The answer here
is pretty simple. So if you probably remember this diagram from a
previous lessons, what you have to do is to
split decompose your project into small sub parts and
then do part by part. It's a proven way of
building any system, not just the web application, and it will make your
job much, much easier. That case, again, if you
remember the pit of death, you could easily not be going in that direction
and save yourself hours of refactoring and
debugging some errors that could be created by
using AI only approach.
46. Module 7: Class Project: So congratulations. You have actually arrived to the last module of the course. And this module is
totally dedicated for you to practice and consolidate all the knowledge you have
gained in the course. So quickly recap of
the AI workflow. So step number one is
to plan functionality. Remember, we have to
do it on the paper. Second step is to plan UI
and LL again on the paper. Third step is a text
stack and libraries. Step number four is prompting, and the last step is
tweaking and editing. This module will consist
of two challenges. One by one, after
each challenge, you will get a solution video with my explanations.
So good luck.
47. Challenge: Basic Stopwatch App: Welcome to the
challenge number one. In this challenge,
your goal is to build a basic stopwatch app, and here's how the
UI might look like. So on the top, you have the
actual time so minutes, seconds and milliseconds,
and down there, you have three buttons the
start pause and reset. So the start button actually
starts the stopwatch, so the numbers start going up, the pause, the time
will pause and reset all the time is
going back to zero. But it's only one example, you can build
something on your own.
48. Solution: Basic Stopwatch App: Welcome to the solution part
of challenge number one. So let's quickly
recap the steps. Number one is the
plan functionality. Number two is UI and layout, textag prompting, and
tweaking and editing. So let's start with
a step number one. So function that we
would like to have. So start, pause, reset, then we would like
to have minutes, seconds, and milliseconds. So UI is pretty simple. We're having a minutes
seconds, milliseconds, and three buttons
that we have planned. At the text stack again, HDL CSS and JS, and for this specific task, we are choosing to use
Cloud to practice it too. Again, as you can see, the
prompt is pretty simple. Build a basic stopwatch
webapp functions start pause resetting
minutes seconds, milliseconds and text
stack that we have chosen. As you can see,
everything that you've been doing in the planning stage finally comes into your prompt. And for that specific case, let's not use the screenshot. Let's try just using text. So we are in Cloud. We have pasted our prompt, and let's see what
it's going to do. So as you can see, Claude has finished its job, and we are having a good
result from our prawn. So let's test it. Looks like it's working as we want. And let's go and try to do
a little bit of tweaking. For example, we would
love to have, let's say, two zeros at milliseconds
and three as it now. So I decided to use
the following prom. Could you please make
the format from asi now? So I use the 70 to six zeros. So let's see what
it's going to do. Walla as you can see, it has done what we ask. So let's try again. Looks
like it's working very fine. So let's take a
look at the code. And again, as we were talking in the very beginning and
throughout the course, that you should first acquire
the good coding skills. And right now, as you can see, what it has done is that everything is
located in one file. It means HTML, CSS and JS, everything in one file, no
separation of concerns. And then, for
example, if you know even the basics of a JavaScript, you will be able to use your knowledge to
separate those into three different
files and use it as a final project that
you would like to have. So I think this video
was pretty good, and we had this final
result in this case, even without the screenshot.
49. Challenge: Random Quote Generator: Welcome to the
challenge number two. In this challenge,
your goal is to build a random quote generator. So here's how the
UI might look like. In a top, we have vote itself, then the author's name, and then this button
with new quote label. When you click this button, the new information
should be fetched. So then you quote in
the new author's name. And I'll give you a
little hint if you would like to make this challenge
a little bit easier, you should use the local data and not the data from Internet. So without the FIC request to the external API. Good luck.
50. Solution: Random Quote Generator: Come to the second solution for random code generator app. So again, quick recap
on the steps for the workflow, working with AI. So again, functionality,
UI and Layout, text stack, prompting, and
then tweaking and editing. Functionality that we
would like to have is to show the random code
on buttomClick. We would like to see the code, and author and data
should be hosted locally. It means we're not going to use any API for that specific case. Next step is UI, as you can see, we
have the quote. We have author name, and we have the
new quote button. In terms of stack, HTML, CSS and JS, and in terms of AI choice, we're going to use
cursor to practice, and prompt looks like this. Build a random quote
generator app functions. Display a new quote on a button, click, display quote and author. Data should be stored locally, Textag HTML CSS, and Vanilla JS. So again, if you have done
the proper preparation stage, then your final prompt
will be in enough context and quality to give it to
AI to get your first draft. So let's see this in action. So my friends, we are in cursor, and I have pasted the
prompt into the chat. Remember, when we
are using cursor, we would like to
use the aging mode because we would like
our files to be built, and let's try what it's
going to come up with. And again, we're not going to use any image for
that specific case because our design is
pretty super basic, just a sketch, and
we would like to see maybe it can come up with
something more interesting. So let's go and see So it's
generating index HTML. The work is in progress. So now it's time of styles,
the work in progress, data, and now it's working on an app JS file for
JS functionality. As you can see, it has
decided to even add some CSS transitions
for smooth interaction. So the agent doing by
itself, it's agent's idea. So it has finished its job, and it gives us a quick, brief explanation of
what it has done. So let's read it a little bit. As you can see, it says, clean modern UI with a
gradient background, smooth transitions,
responsive design, Her effects, local storage dM. You see, it's pretty cool. So prevention of
dupes animations. All right. So let's see how it's going to
look in a real browser. So first, let's accept all. So we are in browser, and as you can see, we've
got this nice UI, so nice. Color felt. And let's try it. Wow. As you can see, it looks pretty good and
works as we expected. You can see, my friends, we have followed very
simple AI workflow, and when you set
a specific task, it works pretty well. So my friends, in terms of the last step in terms
of tweaking and editing, I have asked AI, cursory AI, specifically to
use a Sera font for a quote, and as you can see
it has done its job, let's accept the change
and see the final result. And well, as you can see, it has changed the phone, and like, in my opinion, it looks pretty good. So I hope you learn something
new from this lesson.
51. Submit Projects and Ask Questions: Congratulations, my friend. So up to this point, you have done a major job. You've gone through
an entire course, done some exercises, and in this module, you have actually completed some specific
challenges by yourself. Great job. I'm really
proud of you, my friend, and I wish you
like, good luck in taking this knowledge
to the next level. So what I would ask
you to do now is to share your project
little case study, little explanations
shares some details of how you build these web apps. Maybe you have experimented and done something
extracurricular. So you also could
share this with me. And if you have some
questions, it's totally fine, please ask these questions, and I will do my best to
answer them. Again, good luck.
52. Summary: Now You’ve a First Hand Experience Build Web App With: Welcome to the finish of
the module number seven. My friend, in this module, you have gone through two very interesting
challenges where you've built two simple web
applications by yourself. It means now you have a
first hand experience of building web apps
using AI. So good job.
53. Thank You!: Friend, I just want to say
a huge, huge thank you. I really appreciate that
you have found your time to take the scores and
going till the very end. And I really hope that
this knowledge will take your coding process
to the next level. You're indeed going to
build the apps much, much faster and going to
outsource the tedious work, the boring work to
your copilot AI. So good luck, my friend, and thank you very
much. See you.
 Ilyas Seisov, Help web devs to build 3 times faster ⚡️