Transcripts
1. Introduction: This is going to be a fun class. Now, we're going to capture water, emotion. You might have seen these kind of images in cosmetics and skincare brands. They look super cool and she and very used to communicate the moisturizing properties of products, and they also look super glamorous. In this class, I will walk you through the steps for picturing ripples and waves, along with photographing the products. Along with taking you through the material that is required for this kind of shot and setting up the products for this kind of shot. This class covers three different lighting setups for three different shots. It also gives you a peek into how I brought this industry gather important shopping. So let's not wait and more, and let's get to work.
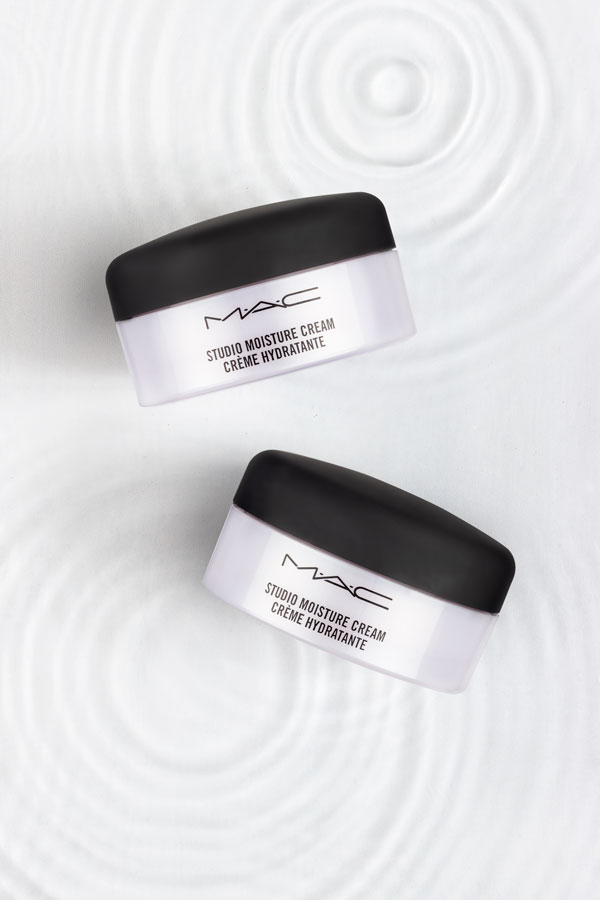
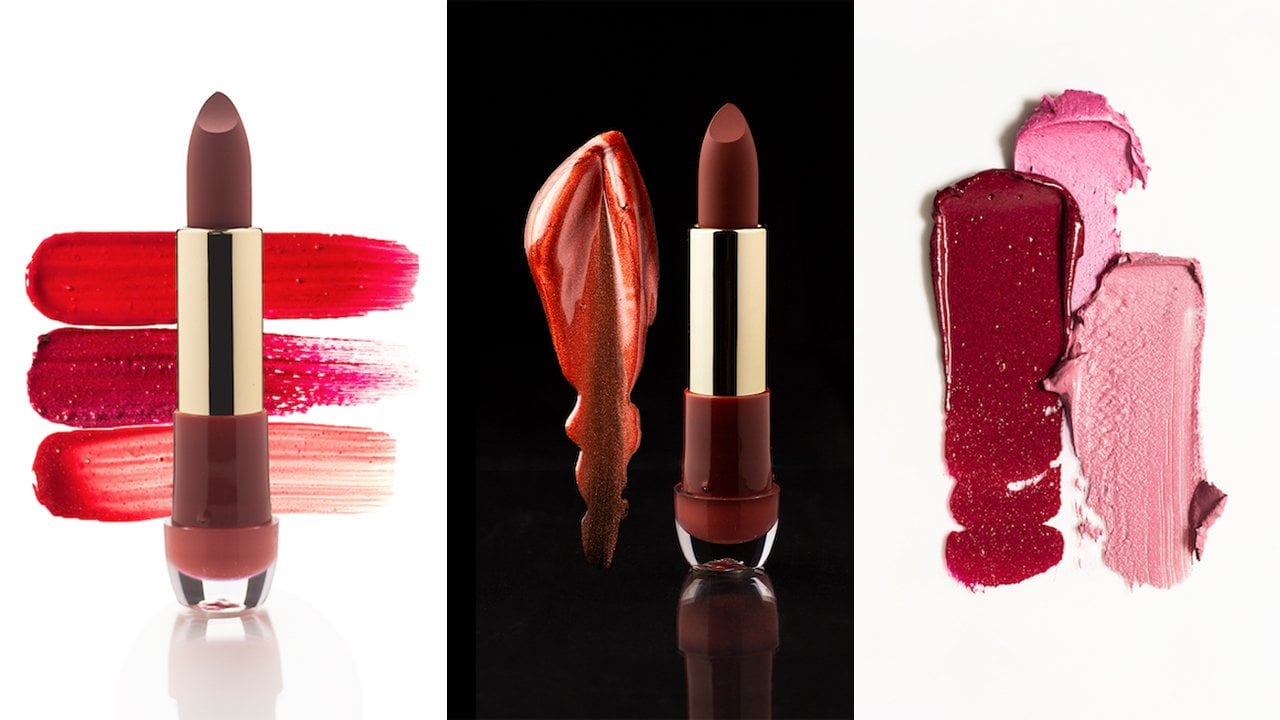
2. Material: A transparent glass sheet. You can also use acrylic sheet here, but acrylic sheets tend to scratch pretty easily. And then those scratches become very invisible in the shot, especially when using hard light, and then they have to be removed in post-production. And I'm trying to avoid that unnecessary step. And so use glass sheets, clusters, and scratch that easily as a credit. Now, how big or small the glass sheets should be depends on the size of the product and how many products you are incorporating in one single shot, the Xij should be big enough to be able to hold the products and still have breathing space around it. Transparent acrylic, our glass trace. Let's talk about the dimension of the tree a little bit. The tree should be larger in size than your sheet. By size, I mean the length and the breadth of the tree and not necessarily the height. Sometimes the height can interfere with the shadows a little bit. For this shot, we don't necessarily need a deep tree enemies. And one nice strong shadows of the water ripples. Which means I will be using only a little bit of water, not too much. So it's okay to use a shallow tree. If you don't find acrylic or glass tree or you don't have it ready in your house, or don't want to spend any money on buying one. Then what you can do is you can use a hot glue gun and build edges around your acrylic sheet, layered a couple of times to give it some height and check for any gaps that might have been left, which can potentially cause the water to seep out for a few teaspoons of water in the tree and then the tray in all directions to check for leaks. Then we need some blue dots. These will be used to stick and whole milk bottles in place on my class. Then we need some colored backgrounds. I recommend using white or light colored backgrounds as the shadows won't be that clearly visible on darker backgrounds or backgrounds. You can use any material, really acrylic fabric, et cetera. Just make sure that the material that you use is smooth and doesn't have a lot of texture as the texture of the background interfere with her shadow. The smoother the background, better and cleaner the shadows will be. If you, you're going to use a fabric background that I recommend using maybe satin. I'm using foam core boards that I have painted them myself, that my desired shades, that waterproof pens. This is actually just a simple mixture of what paint and acrylic bay warping gives my foam core board a matte finish quality white acrylic paint gives it the quality of being waterproof. Suggesting case, if I spill some water, I can just wipe it off and I will be good to go. And acrylic rod or these little plastic rings to hold our products. These are just a couple of plastic rings that come under the caps on modules. Then we will require a couple of three or black strips. Ideally waterproof, a straw, a few cups of water, and a cup ideally with the spout so that we can have a good thin stream by pouring the water. A couple of cotton kitchen napkins because we're working with water, I'm pretty sure it's going to spill. Napkins are more convenient and easier to use. Also, paper napkins have a tendency to leave behind a little bit of dust and the residue on the glass. These Marks and Spencer perfumes and these map moisturizer jars are my hero products for today. I have not been paid my Marks and Spencer or Mac to use their products. By the way, I simply decided to use these because they look good. I like the packaging and the sides, it's skewed and the color of the liquid is transparent. And most importantly, the complement our concept of moisture and freshness perfectly products I have both matte and glossy textures, which is always a good challenge to have and practicing product photography, strong sturdy table, a strong sturdy clamp that fiber attachment then of course, a speed light DSLR and a remote trigger.
3. Lighting : Now this is a flat lay shots, so the camera is set at a 90 degree angle on top. The leg modifier is 55 centimeter ArcToolbox, a smaller light source will give me strongest shadows. The diffusers are coming off because I want sharps shadows. So the light will direct the light I'm using as a Goldilocks V1's be like you only need one light for the shot to begin with. At least I'm placing my light in the opposite direction of my tripod. We can adjust it later. And then I'm going to do some test shots. Now this is the best shot that I took. There are a couple of problems with this lighting. You're first of all, the exposure is low. It is underexposed the details on the product that should be clearly visible, especially since they are in a smaller font, are actually hidden in the shadow. And lastly, the shadow of what it says is pretty big in size. It is closer to the bottom. It is closer to the camera. At the same time. It is also commanding more attention. I am not particularly happy with that, so I'm going to try and work on that and make some changes to my lighting. First and foremost, I have brought the light around to the other side of the table. Then I'm adjusting my product such a way that all the detail or the product is clearly visible, clearly in-focus on my camera lens. At this point, I'm also sticking my other two bottles on the class and taking the test shot. I preferred the sliding for a couple of reasons. Firstly, the shape of the shadow is in sync with the shape of the bottles. The shadows here also are communicated. That is, the transparency of the bottles is clearly visible, urine the shadows. This adds an interesting texture to the overall aesthetic of the visual. And finally the written content on the labels. It's clean, crisp, and very legible, and very visible. For photographing my mock jurors, I've used two different lighting setups. Force lighting setup. I've used a photograph, just the jars. And the second lighting setup I have used to photograph the water ripples and the water droplets. I want to talk a little bit about why I chose to use two different lighting setups. And what's that? Let me show you the image I shot using a single light and with the reflector. This signal light setup gave me decent water shots. However, the products were a bit problematic. Firstly, the edges of the jars for blending into the background. Whereas I wanted clean, clear separation between the product and the background. Then I was getting a fairly peculiar and dominant hotspot which was competing with the product name and cis product photography, the names have to be clearly visible. So that was a problem. The highlight on the left was almost altering the shape of the jar. The jar looks like it's cropped. It looks smaller than it is in the sense that there was an illusion of dropping. The lid of the jar looks larger than the jerk. My solution was to add the small negative fills to the tree. Just make sure that these little black strips are great strips of the jars. Don't touch the jars. It's not a very big issue if the black strips Dutch the jars, it's just that you're moving them in post-production then becomes a little bit more work. The black strips give the product my max chars darker edges ends by clearly separating them from the background. I also wanted to create a more balanced lighting, balanced light setup. Hence, I went ahead and use two lights for the shot. The light from the right is 120 centimeter ArcToolbox umbrella with one diffusion layer. And there's also a diffuser in between the umbrella and the products. And from the left and abuse of 55 centimeter ArcToolbox, again with one diffusion layer. And of course, and there is an extra diffuser pleased in between the ArcToolbox and products for capturing the what ripples. I have used two lights, again, similarly to the first shot, but in this case I wanted stronger shadows compared to the shadows that were in my jars shot. So what I've done is I have kept my word right side lighting my key lighting my 120 centimeter Okta Box. I have used the Okta Box umbrella without any diffusion, without a diffuser or any diffusion material. What I've done is I've simply turn the light around to face the inside of the umbrella. And from the left I have used my 55 centimeter ArcToolbox, which is W diffused along with a diffuser. So basically it's tripled, diffused, and it is just working as a fill.
4. Setup : To begin with, as always, I'll begin by facing my sturdy table in the setter and my setup will be on and around the table. Next I have here is a clamp that a tripod attachment. This clamp will be holding my gosh sheet and my products. The product will be pleased as close to the edge of the table as possible and as close to the surface of the table as possible, the painted foam core board will go under the clamp. Then comes my makeshift acrylic tree, which I am keeping directly on the background. I don't want any space between my tree and the background as I want to capture nice clear, sharp shadows. And then climbed the glass or the acrylic sheet. Adjust the angle of the clamp and the height of the tripod so that this glass sheet is parallel to the acrylic, which is going to hold the water and the rise. What is going to happen is the shadows of the bottles want to be, even. Some of them will be sharp, some of them will be softer if the glass gets planted than the bottles stuck on the low side will have stronger crispier shadows as compared to the other Tibetans. And the glass sheet, I will be sticking my hero products, that is my Marks and Spencer frequencies using two blue dots here, one near the top of the bottle, under the cap, and the other near the bottom of the bottle, makes sure the bottle isn't moving and it's fixed in place. I don't want it to roll off and fall into the water or worse, fall over, break when sticking the bottom of the glass, I am going to make sure that the label that is the name of the fragments is up and clearly in-focus of my camera. You can use the same setup for photographing packaged box of the bottles. Glass bottles can go in the water tree, but packaging can be put in the water trip because that would totally damage the packaging and we can't have that happening. To photograph my map jars. I have used an acrylic tree now to set those mag jars. And three, there are two ways. One is that an acrylic rod that I've inserted through the handles of the tree. And my Mac jars are stuck on the acrylic rod. Another way is to use those rings under the Mac. Charles says simply please those rings under the jar and put the jar on the ring. And that's it. It will be stable. So really it's a matter of preference how you want to hold your jobs and products in place.
5. Photographing : Let's begin by foreign some water in the bottom trig. And what I usually do is then I am pouring water. I still keep on taking pictures with my remote trigger just engaged if I happen to capture an interesting shot. Next step is to lock the focus of the camera. This is extremely important than yours out to do it. First put your lens in autofocus, then focus on the products by half clicking the shutter release button. And then finally, very carefully move the focus. But nonetheless to manual, this locks your focus on the remote trigger. Make sure the button is on immediate release mode and not on 2 second delay. Now using drinking straw, I'm going to start to create ripples over the water. Now one thing to consider when making ripples is at what angle to hold the straw. If you hold the straw a bit too perpendicular to the water or say like at 45 degrees, then rather than making ripples on the water, straw is actually going to move the water apart. It's going to move the water side. So to make ripples, hold the straw at say, around 25 degrees angle a little bit, a little, I guess, to the surface of the water, but completely battle. And of course, at this point I recommend taking as many pictures as you can of different builds. And then we can easily bring all those reports together in post-production in Photoshop. For my Mac just shot, I decided to take three different shots. In this shot, instead of using, say, a hairdryer are drinking straw, I use drops of water to create ripples. So I have rounded triples in the shot. As you can see your distance instruments shaped the water differently to make these water drops. Just decided to use my hand and I was holding the water in my fist and letting it seep through the gaps between my fingers because it gave me a better control over how many drops were falling out, et cetera. And when they will find falling out, whichever way you will decide to make these drops. Just make sure that your tool or your hand is out of your camera's view.
6. One More Demo : In this video, we are going to focus on photographing the Marks and Spencer deodorant shot. Originally I had decided to only cover these two images in this class. But later on it occurred to me that both of these shots are flatly shots. They have been shot in from one angle only. And what if someone needed help photographing a product for a client from a different angle. So I wanted to help my students with that. And I decided to create this video separately as a standalone shoot from the beginning to end. This short, I'm using a lid that I took off of plastic container that I had at home. It's nothing fancy. I just wanted to show you that you could actually use a need for more transparent free as your base, we will be shooting the short from 45 degree angle. And for that reason, I recommend you that you please your bottle towards the front edge, very close to the front edge of the tree. The edge of the tree, the end of the trade at as close to the camera. So it does as far away from the end of the tree as possible. For lighting. I have used two flashlights for the shot. As you can see that is one flashlight on the left. This flashlight is for the backlight, the backlight for the product that is and it is also the light for the water in the tree. The second flashlight is from the front left of the product. As you can see, your I decided to add a little bit of fill from the right-hand side of the product. But even after adding the film, the white fill, I wasn't too happy with how the short looked with the film. So I decided to go ahead and replace the white board with a mirror. Next, I filled up the tree that water pretty much up to the brim and manually created clashes and reverse as i event on taking pictures with my remote trigger. To make the short interesting, I decided to add some roses, some flowers and leaves. Also compliments the concept of my product, which is the deodorant that is in the floral collection. After that, I once again started creating slashes and ripples manually with my left hand, moving around the petals little bit in the foreground and background, and went on clicking with my remote trigger till I captured and shocked that I was happy with.
7. Photoshopping : Now this is my final image opened up in Photoshop. Let me walk you through my editing process in reverse. Let me show you what I've done. I usually prefer not to color correct my images in Photoshop. Too much. My preference in using Photoshop as the two is just to improve the image that I have already shot and not change it completely. So I use it to enhance the details and push the colors and contrast a little bit, but not more than that in this image, I have used Photoshop also to combine multiple ripples because I was shooting alone. I didn't have help. As you can see right away, you can notice that there are three parts to this image. The topmost group is the Charles group. The second group consists of the shadows that I added separately. The bottom-most group is the base, which includes the repo on the DHAP, the tuple that is on the top right-hand side corner. And it also includes the ripple on the bottom. When I expand my jars folder, Madras group, you can see that there are three different layers inside that group. The top two layers are of the lens that I added on top of my jars image, the jazz stimulus that we shot separately using the black strips. When I turn the layer mask off, you can see that I have masked out the black strips. Now let me zoom in on the lids a little bit to show you why I decided to add just a little separately. As you can see here, there are a lot of stains on the Learn, which makes them look not dirty per se, but it definitely look clean. It doesn't look professional. If you haven't looked at any professional images, they are spotless, they are super clean and that's what I wanted here as well. Same thing applies to the left of the bottom jar as well. If I turn all the other layers of you will see that the two leads our chest by themselves floating on top of my image. Now, let's come to the next group that is the shadow's group, which is placed under the group of jars. As you can see here, I have added two separate shadows under the jars. Now this wasn't necessary, but I prefer to do it. So now let me walk you through how I created the shadows. It's very, very easy for us create a new layer and, and keep that layer under the jars layers. This layer is going to be called shadows demo for the purpose of this class. Then take the brush tool, select the brush tool in the toolbox, and adjust the size of the brush a little bit, depending how big you want your shadows to be. Then using black as your food, just make a giant dot on your layer, selected dot. And then from the Effects panel, use caution though, as your effect. Play around with the amount of a little bit. Adjust the blur a little bit to get an even bluer. I'm happy with this much amount of blur, so let me go ahead and hit. Okay. Then next, the next step is to change the blending mode to multiply and lower the opacity of the shadow to 20%. That's pretty much it. It's very simple. Then you can move around the shadow whichever way you want. You can place it under whichever jar you need. Similarly for the shot, I haven't used a ton of Photoshop. I've added a couple of layers of levels just to increase the exposure a little bit and push the contrast for little bit. Basically just brightening up the image a little bit as far as retouching goes. All I've done in this short is I've added an extra ripple and I have cleaned up the image, gotten rid of those teams that were on the glass surface. And as you can see, the class edge is visible in the shot that has been removed in post-production. But other than that, there aren't any immediate lighting changes that have been made in Photoshop for the deal emerge? I didn't use Photoshop at all. I opened the image in my row because I've shorted draw and then tweet very tiny little bit changes in draw itself. As you can see, I have increased the clarity, the vibrance, and adjusted the contrast a little bit, and that was about it for the shot.
8. Thankyou: Thank you for taking my class. I really, really appreciate it. I hope you liked it, and I hope that I managed to share with you some information that would be very useful to you now or maybe sometime in the future, do share your feedback with me. I would merely happened to your from if you have any questions for me, then please do not hesitate. I would be really happy to hear from you. And also if you have any suggestions on what topics I should cover in my future classes, Then you are, please more than welcome to share those with me as well. Thank you so much.
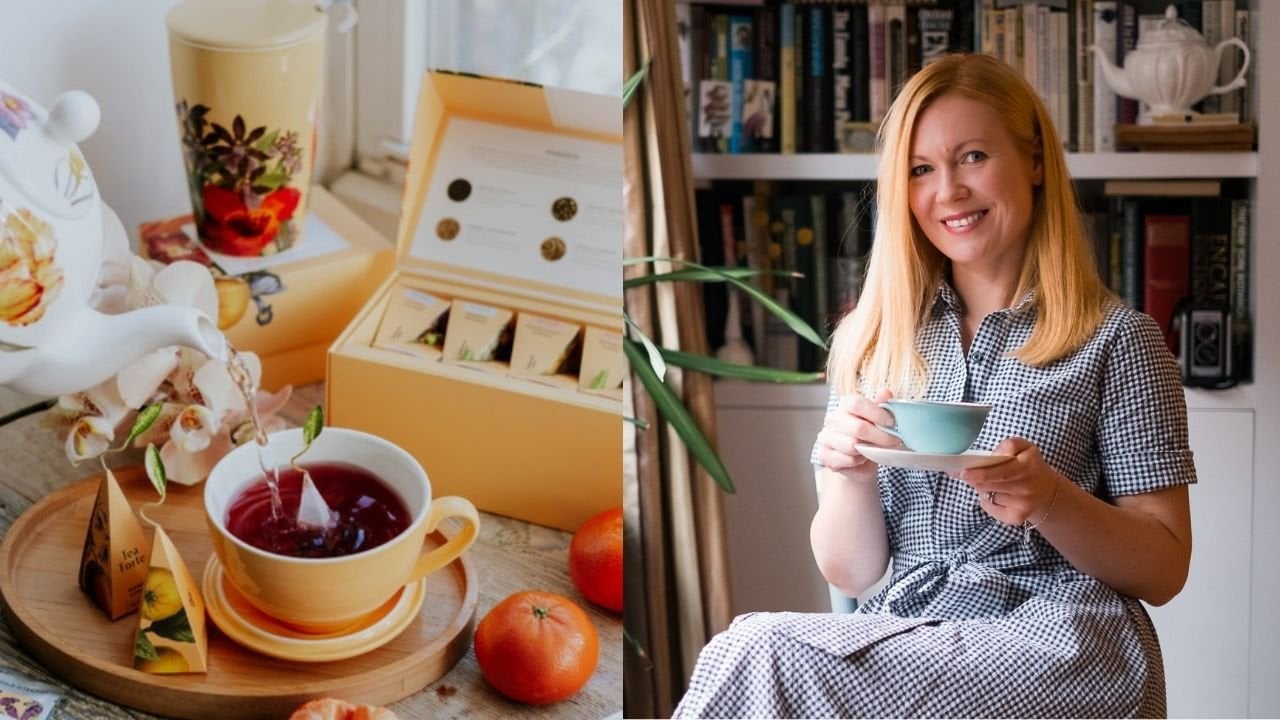
 Nehha Deshmukh, Ad Creative, Photographer, Owner