Transcripts
1. Intro: Hi, there. Imagine diving right into the world
of printable art, crafting pieces that anyone anywhere can download and
display in their homes. I Amata, and I, like you, decided to give Printable art a try and ended up
turning my passion for one line illustrations into a thriving
printable art business. No shipping hassles, just art that's accessible and
above all affordable. In this course, we'll explore every angle of setting up
your own principal art shop. We'll cover everything from
sizing your pieces perfectly, choosing the best formats, to figuring out where
and how to sell them. Best part, you'll learn
by actually doing. We're going to create a one
line art piece together, get it ready for
sale and launch it so that it can keep on selling
without any extra fuss. This course is for anyone and everyone interested
in printable art. So if that is you,
let's get started.
2. Project: For our class project, we're going to take a
simple one line drawing and transform it into a
standout principle product. Here's how we're going to do it. First, we'll start by
discussing the essentials, what you need to think
about before you even create your drawing. This means considering
your inspiration, your theme, and getting
your workspace ready. Once we have that sorted, we'll move on to talking
about sizing and ratios. It's crucial to get this
right because you'll need different ratios and
sizes depending on each use. After our art is
sized correctly, we'll focused on how to present it attractively
using Muck ups. This step is all about making your artwork look
professional and enticing, showing potential buyers just how great it can
look in their space. Next, we'll create all additional material
for your listing. This includes instructions, troubleshooting documentation, and possible printing
scenarios that help the buyer better understand how to use what they have
just purchased. Finally, we'll wrap up by learning how to list your
principle on various platforms. I'll guide you through
how to set it up on Etsy specifically in a
way that it stands out, drawing in buyers
from everywhere. Let's get right to
our first lesson.
3. Why Printables: Why sell printables? First off, it cuts down so many costs. There's no need to worry about inventory, printing,
or shipping. You create your
artwork digitally, and once that's done, it's ready to sell over and over again without
any additional costs. This means you can start selling and scaling your
business right away even if your budget is
Another huge benefit for artists is avoiding the
complexities of shipping. There's no need to
deal with packaging, figuring out shipping costs or worrying about
damage in transit. Selling principles means your artwork can
effortlessly reach a global audience by passing physical barriers and expanding your market significantly. From the buyer's perspective, Printables offer
incredible flexibility. Buyers can choose how they
want the art printed, the type of paper, the size, and even framing options. This flexibility makes your art accessible to a wider audience, including those who might
not usually splurge an art due to the costs
of prints or shipping. Plus for buyers is instant
gratification, too. They purchase your art, download it and can have it hanging on the
wall on the same day. This ease of access and
quick delivery makes printis an attractive option
for art lovers everywhere. Picture this. When I
started doing printables. I didn't know anything
about shipping, didn't know anything about
how to print properly, how to select good
printing options. I had to Make sure I educated myself in order to self prints. And even when I educated
myself about prints, I only realized how
complex prints can be. Prints cost a lot of money, and good paper costs
a lot of money, and that should be an option for the buyer when all
they want is your art. One other thing I
noticed is that shipping information
or shipping to different places was
keeping me from selling. A lot of people don't necessarily want to pay
for incredible shipping. They might love your
artwork, but you're so far, or you live in a place where those art
buyers cannot reach your products because
they simply can't afford your art being shipped
halfway across the globe.
4. Before you Draw: Choosing a piece
for printable art requires careful consideration, especially when it comes
to these three main parts. Theme, scam quality,
and resolution. The first one, theme is
about what you're drawing portrays when thinking about
what to draw for sale. I often go online to search
for what people want. There is art I
create for myself, and there is art that I create
specifically for selling. This is the latter. When I am
about to create principles, I go on T, Pinterest, and websites like
answer the public and chat TPT in order to
know what to draw. I try to know from
my followers on social media what they would buy and make drawings
around that. I also take into consideration
holidays and celebrations. So if it's Christmas, I draw
something for Christmas. If it's summer holidays, I draw something for
summer holidays, Halloween, something
creepy, and so on. The second one is scan quality. If you create art
traditionally over paper, the size of the
paper you created in does not influence
your work too much. When drawing on paper, the quality of
your scan photo or photo is what will matter. So how well your
colors and lines were scanned or photographed is
what is important here. Creating principles
from traditional art, it's quite complex in itself, and it involves many
other moving parts, which is why we will
only focus this time on works that were
created digitally. The third one is resolution, and this one is about
digital artwork. It's about the size of the
file when you create your art, and the size that
you decide to use in your art will determine where
and how it can be used. The bigger the resolution
your art is created in, the more options you and
your buyer will have. This is how I set up my file
resolution appropriate. On foolproof way of creating
files that are not too small or that will then pixelate for your clients is before
you create a drawing, always, create files that are
above the 1,000 pixel line. On procreate, you
can create, I think, up to 7,000 by
7,000 pixel files, and that's I norms. You can print at 600 DPI and you can create
an incredible amount of sizes from that ratio. I strongly recommend that
you do create your drawings, your illustrations on
huge files like this because then you can adapt it
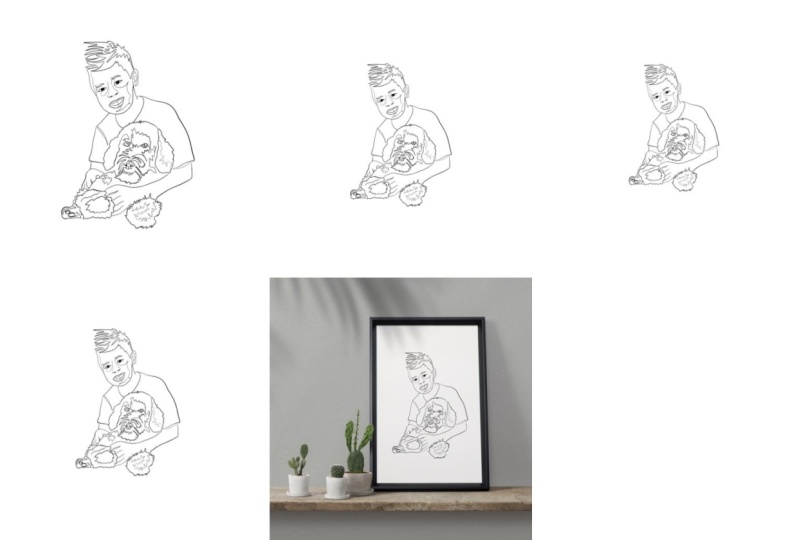
to everything and anything. I've used my previous
experience with commissions for O line art and the type
of client that I usually get to choose what I'm doing my next printable
collection in on. So I've put together board that has a bunch of
inspirational images of what the yoga aesthetic looks like to me
and drawings that I could put together
and things that I could possibly sell
as printables. And so I've put
that together into an inspiration board and
from that inspiration board, I've put together
three drawings. As you can see,
I've created them in in a canvas that was genorms. The one I created for you
guys was 4,000 by 4,000, but you can even go
larger than that -8,000 something by
6,000 something. Because I am working
on Procreate, again, which is a aster file program, and I just feel more
comfortable drawing on Procreate because of the nature of the line art that I do. I've created this one,
I've created this one, and I've created this one. Now, if you want
to learn how to do one line art and how to create this type of illustrations, I'm not going to go into
detail into this class. I'm not going to go into detail about that in this
class because I have many other classes here on Skillshare that I
teach how to do that. So I'm just skipping right
to the um printable part, not so much the
creation of the art. I want to work with this one specifically.
I'm going to click on it. I'm going to remove the
background because for me, it's important that
I have no background that I can use this as clean as possible in my different
ratios and different sizes. You're going to see that
next. I'm just going to export that as a PNG with
no background again, and I'm going to drop
it on my computer. Now that you have that in your computer that
you've sent it to yourself, we can get started. The easiest way to guarantee you're working on
the best sizing possible is by vectorizing your work or creating vector
files from the get go. Unfortunately, procreate does
not create vector files. It only works with raster files. If you draw in any
other drawing platforms such as Illustrator or vinator, then those create the
vector file from the start. Now we're moving into aspect
ratio in our next lesson. If you guys have any questions about this particular part, make sure you pause your video, go to the comment section
in this course and ask your question just so that we have those cleared
before we move on.
5. Ratios: Ratios are a tedious part
of the printable process, but it really saves you and
your client's frustrations. Ratios guarantee that your buyer has different file
sizes to work with regardless of what shape their printer paper has or
what frame they choose to use. For example, my printi product will work for a
person trying to put in put it in a square frame as much as for a person trying to put it
in a rectangular frame. Here's how to
calculate the size of your canvas based on
different ratios. Once you have different
template canvas for each ratio, include your drawing in each of the sizes you'll
provide. Like so. When you have your drawing, when you have selected the
drawing you want to draw, when you have drawn it in
the biggest canvas that you could possibly have drawn
it if you drew it on procreate or have it
as a vector file, then you want to import
that into I'll be express. This is where I do it. And this is where
we're going to take advantage of their multi pages. They have something
called multi pages, which allows us to create
several sizes in one. But for this particular task, I am not going to be using social media sizes because
they're really small. I am going to go to custom size. And I am going to create this. Sorry, one more
time. Custom size. And I'm going to do
this, 4,000 by 4,000. That's pretty big, okay? And I'm going to pixels. I'm going to create a new file. And that's going to be
my one to one ratio. Now, as I explained in the
beginning of this lesson, we're going to be providing several ratios so
that the client already has the file that they need for printing so that they don't
have to do that. You're doing you're going
the extra mile for them. So within this file
that I created, I'm going to upload my drawing. That I just created. And as you can see, my drawing is transparent has
a transparent background. You really want to create your drawing with a
transparent background because it makes it
easier, I would say, in it makes it easier in terms of getting
your work done faster, and it makes it easier also
because you don't have to remove the background
artificially here in the app. Sometimes it works
sometimes it doesn't. Um, especially with in
lines like my one line art, that makes it even harder for the system to do
that automatically. Now, if you notice, I am leaving a lot of white
space around my drawing. That's for several reasons. In my opinion, it looks a
bit more sophisticated when I leave that much
white space around it. But also, if they're
using a thick frame, I think it also allows the
frame to kind of breathe. It's not the drawing to breathe. It's not completely stuck to the frame when they frame it. Okay, so I have a I have
a squared squared image, which means it's a
one to one ratio. And then I'm going to go
super simple on this. And it's going to be, I guess, as simple as you can do it. This is a really foolproof of creating your
different ratios. I'm going to go to at a page, I'm going to go to custom size. And if the height, this
is one to one, right? And if I want it to
be two to three, then I'm going to
make it 4,000, 6,000. And then this is 2000. Sorry, 2000 3,000. That will be like the
most foolproof way because it's a two
to three ratio. So at a page, and this is my 2000 by 3,000. I want you to stay I
want to stay within the thousands because it allows my clients to do more
with my drawing. Again, I'm going to
go back to here. I'm going to my image, my first photo in my first file, my first page, and I already
have my two to three ratio. So I have a one to one ratio, and I have a two to three ratio. And then I'm going
to add another file, and I'm going to customize it. Now I don't need a
two to three ratio. I need a three to four ratio.
So I'm going to go three Thousand 24000. And then not three or four, I want a four to
five. I'm sorry. I want to 4,000 5,000, and that's going
to look like this. And again, I'm just going
to paste there my image. And this is already
allowing my client to have several different versions. And then the last
version I'm going to do, I usually include four sizes. So I have one to one. I have two to three, and I have three, I have four to five. And the last size
I'm going to do is, I think it's three to four. So I'm just going to
do three to four. So I'm going to go to add, and I'm going to custom sizes, siz it, and I'm gonna go
three, two, four ratio. So I have two to three. I have what size is this? This one is four to five,
and I need three to four. Exactly. So I'm just
going to do one to one, two, three, three to four ratio. And then four to five. And that's my last one.
I'm going to paste it. And I don't know if
you guys notice, but ratios really
make me nervous. I think I'm not a maths person,
if you can call it that. And they really make me anxious. But I do know that
going that little bit over my possibilities kind of or going a little bit out of my way to make my clients
happy goes a long way. So this is, you know, just four files. In
different shapes. If you go here on
the little four with the you can see that
they're all different. I think these two look oddly similar, but they're
still different. So this one is a little
bit thinner than this one. And there you go.
You have four sizes that you can provide
to your customer. This is not centered. Just
let me Okay. There we go. Now, all you have to do
is click on download, and you're going to download all the pages and
PNG, definitely. And then you're
going to download, and it's going to download
your information. And then you're going
to save it as Yoga. P files. Of course, this is all going to be yoga, so I'm going to call
it sitting Lady. And then you guys will
see that this is m it's ready. I'm going to sip it. I'm going to open it. I'm going to rename it because it sitting I'm going to
call it sitting not Lady. Printable files. And I always like to call it printable files because when
the clients see this folder, they're going to
know that those are the files that they
have to print. So rename, I'm going
to rename this 121. I'm going to rename this 22, three, and I'm going
to rename this. Four, two, five, and I'm going
to rename this three, 24. So I have four sizes here to please my clients to make it easier for them
to decide what to print, depending on how they're
going to frame their work. Thing I did forget to
include when you download, when you have your versions is that you also want
to include a version. I always do one to
one ratio, extra one. So I go to custom size and
I go 4,000 by 4,000 like our first just 1121 ratio. And you want to have that. You want to have want to have a version that
doesn't have a background. Why? Well, some people do want to change the
background of your drawing. They don't necessarily want to have white behind your drawing, and you want to give them
that option as well. So I go always to
background color. I remove the background
colors or no fill. And then that way, they're going to get they
get four ratios. So they get one, to one, two, to three, three to
four and four to five. But then additionally, they
also get a no background, no background version that
they can put in any ratio, really, because you don't see
that white box in the back. So, this one is no background, and it allows the client to purchase the person
purchasing your work. It allows them to change the
color of the background. It allows them to
print over off white or over green or over. So I go to download
this selected page, transparent PNG, which
is exactly what we want, and I'm going to download it. And then I'm just going to
transparent background. Want to call it
transparent background, and I'm going to save it in the printable files,
so it's saved. Now, if you want to go
the extra mile, like, even more than that, you can actually do
inverted version, so a white line version. But I only do those for people
who requested PI messages. So for me, it's not a standard. You can make it a
standard if you want. But I would also if I wanted
to go the extra mile, I would include a
line that's white, so they can put it actually into on top of black if
they wanted to, as well. Now that we have our
versions generated, let's move on to mockups.
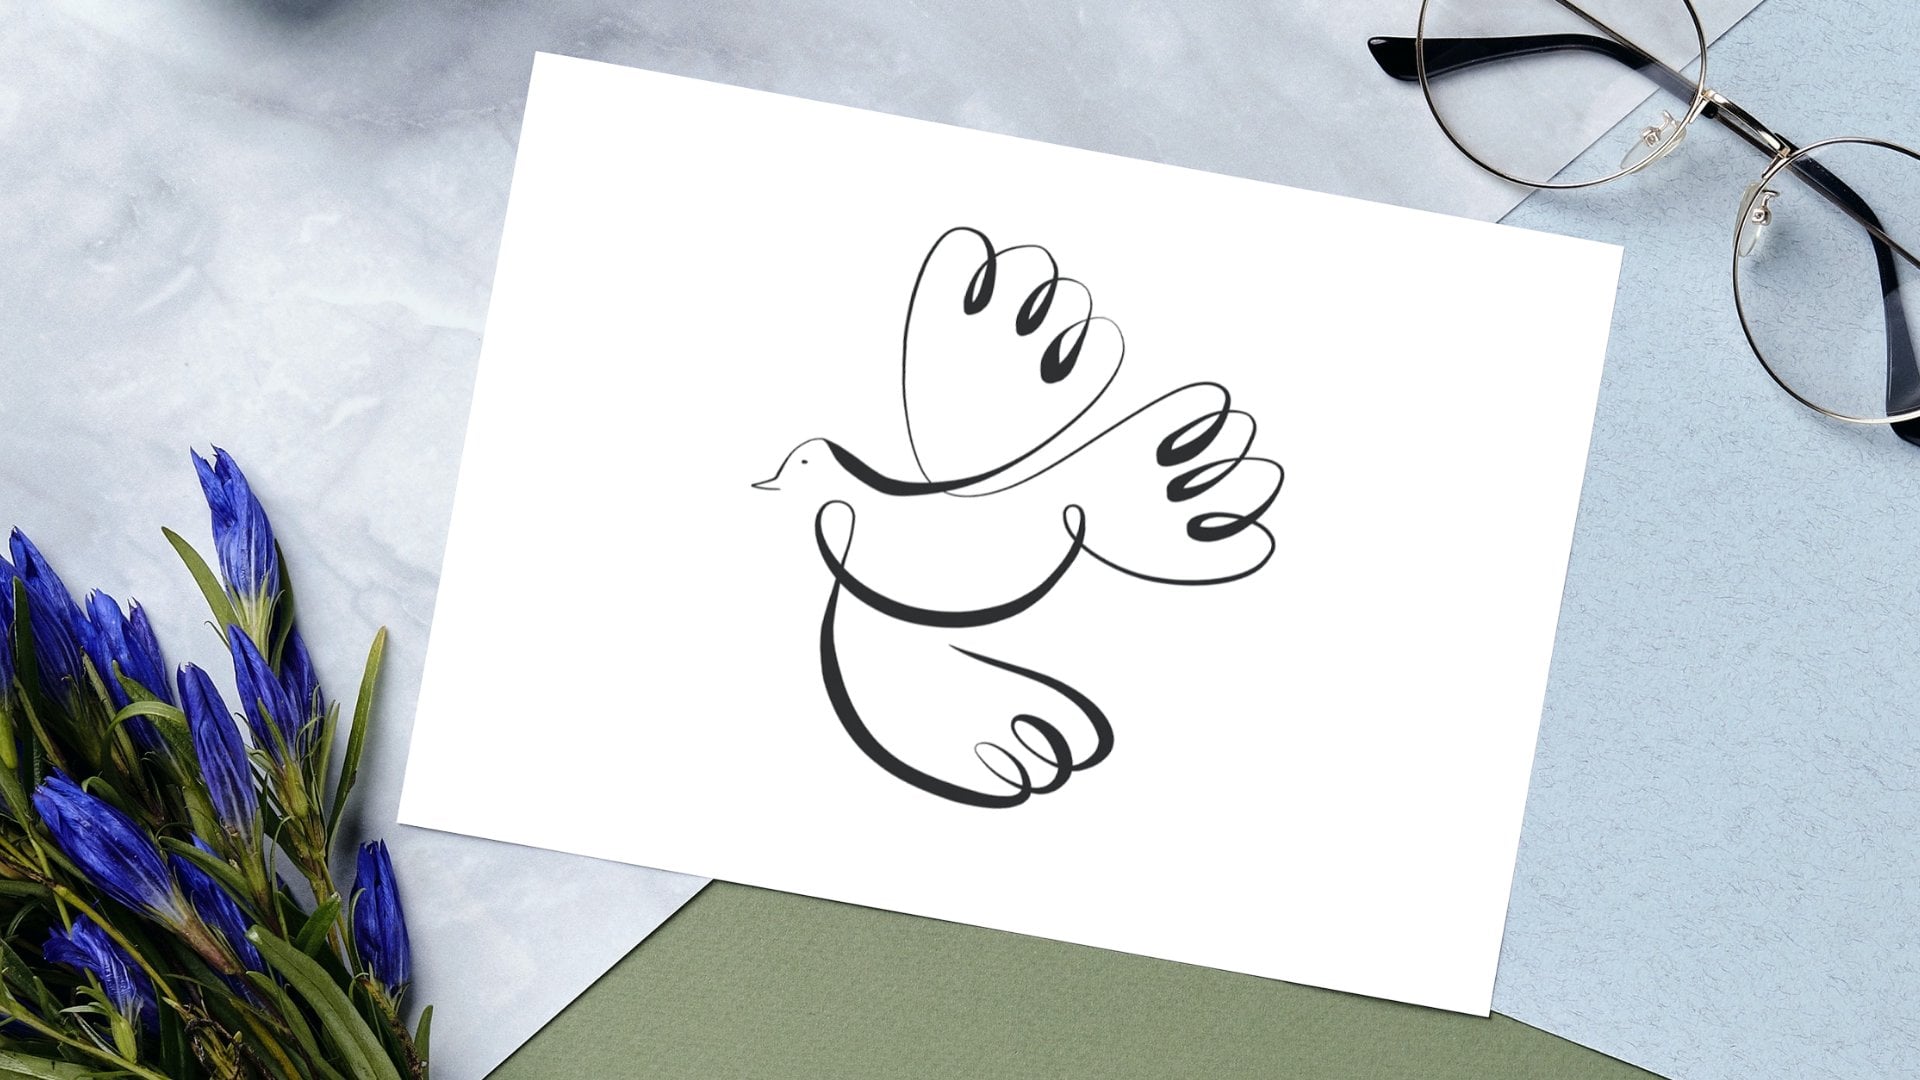
6. Mockups: Mockups are important
because they show your potential buyer
what your drawing can look like in frames or printed in an invitation or on a T shirt. It shows your works
versatility and potential. Here's how I create my
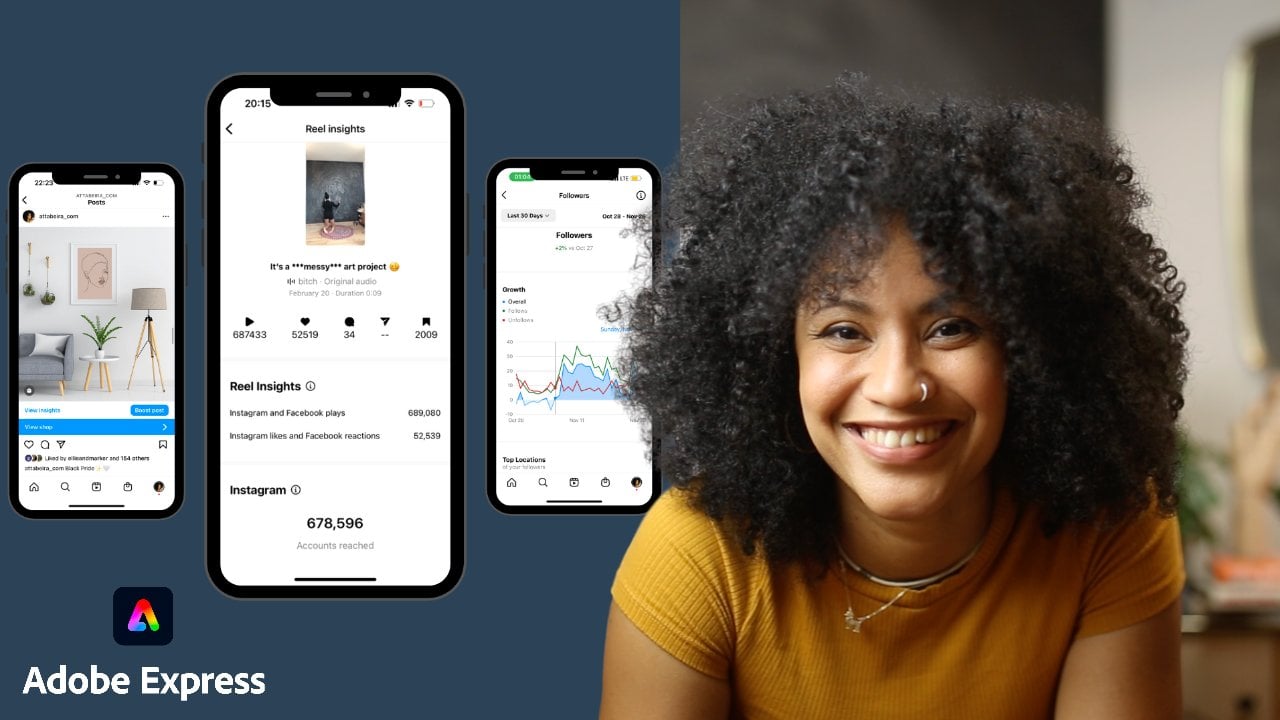
mockups using Adobe Express. As for mockups, I work with
an Adobe Express as well. They have really nice mockups. I like what can be done
within this platform. So you're going to
go to the plus sign, and what I do is that I just go for social media
sizes because that's where I am going to promote
my um my artwork. And so remember that muck
ups are just a way of showing the potential
that your artwork has. And I used to just focus on printable
art and think about, Oh, people would like to
maybe put this in their wall. But I've opened up to thinking that I want people to use my
drawing for anything. Do they want to use
it on a notebook? Do they want to use
it on a T shirt? Do they want to use it for
their social media posts? So I want to give them
the option of buying my file my printable file, which is not just printable, but my digital file. And then they can download
it and they can use it. So I'm going to go
to a square shot? And I am going to this
is just Instagram, which is the size
I want to use in all my different use cases. I'm going to go to media, and
I'm going to go to mockup. Mock. Mock up T shirt. So I want
to just click on mockups, and it shows me a bunch of different use cases in
which I can use this. But let's start with this girl. She has a top back. So it's not necessarily a framed
piece of work. I'm just going to go
here into uploads. I'm going to sorry. I am going to go to uploads. I'm going to find my drawing. And I'm going to place it where I would imagine someone would use
it in this to pad. Imagine if you're serving
your buyer is a yoga trainer, a yoga teacher, and she
has a little studio, and she has a little merge
for her students to buy. And or she wants to use
this as a little logo. So there you go. This is
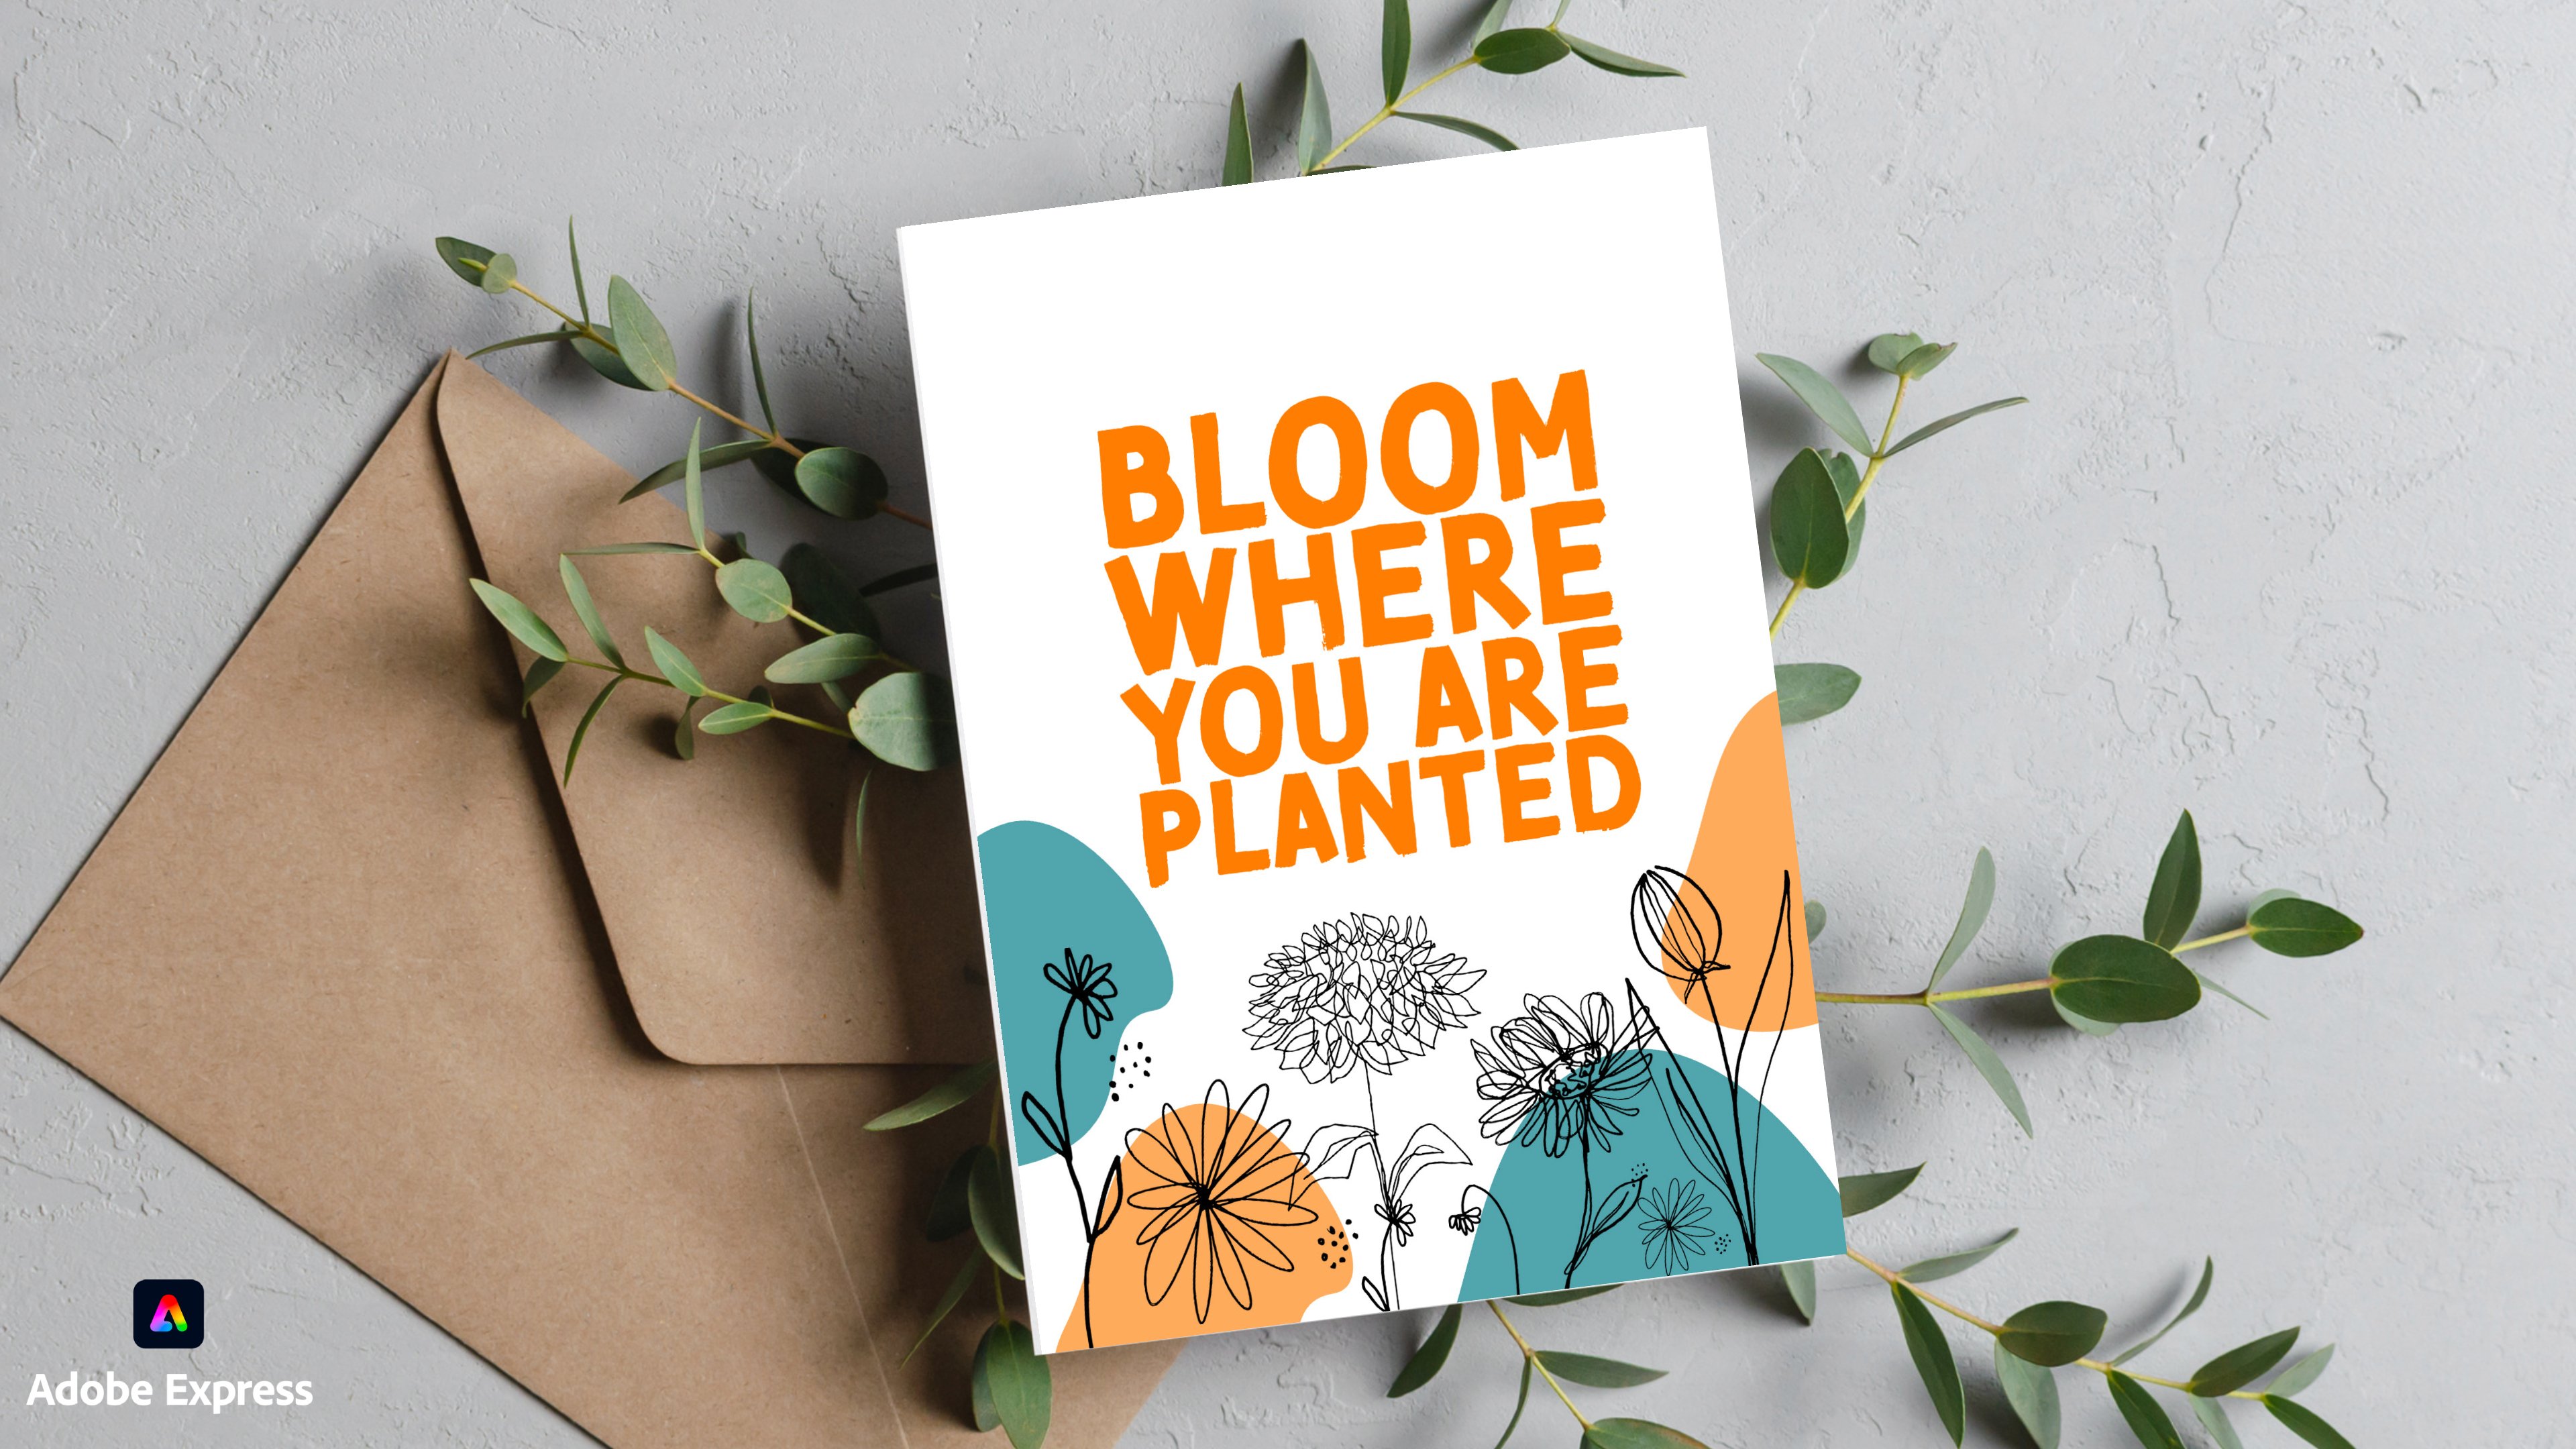
what it would look like. Next page, same size. I'm going to take wall art in this case, and
I love this one. Just I'm going to extend
it all the way here, and I'm going to center that. And again, I'm going to go back, take my drawing, copy paste it. And then on the next page, I'm going to paste it in a
way that it fits this frame. If you are at a yoga studio, and this drawing is on a wall. That's what you want to
show. And then You want to show how this looks on some
bags or anything of the sort. Let me say go back.
Yep, Yoga, yoga. I'm going to go here
at a page, same size. And I want to show how that
would look on not a T shirt. I already use a tote. There's plenty to work
with in this example. I will go with Maybe a T shirt. Yes, let's go here. Let's make this bigger. Okay, and I'm going to
just paste my drawing there and making sure
that this t shirt is. Now, I have three nice mockups of what my product could
be like, could be used as. I'm also going to
go the extra mile, and I'm going to go here. And I'm going to go to search, and I'm going to
go to templates. I'm going to go to
Yoga todo Logo. I want people who might be
interested in buying it. So I don't have a
template for logo here, but I can actually go
to the Adobe Express, and I can go to Okay. And I'm going to go to here. I'm going to write Logo Maker. And I'm going to
use the logo maker, and I'm going to go to Just giving Yoga studio. I'm going to show the client
that they can do this. I'm going to just
say healthcare. No slogan. I don't
want a slogan. Okay, fine. Let's
leave a slogan. And then I want
something very elegant. Yeah. I'm going for elegant. I want to use That's just whatever
because I want to use my drawing for that. And then I want to go
for something like this. And then it's going to
make a logo for me, okay? And then I'm going
to open an editor. And I'm just going to take this, and I'm going to paste my logo. I'm going to make
that you want to give people the idea that they can maybe use it as
a logo. Yoga studio. Here we go. And then
all you have to do is copy everything
from this copy, and then maybe go back to your file that had your mockups. Sorry, that's. This
is my mockup file. And I want to use that background color that they had that was nice and cute, and then paste here. Yep, it worked. And
so I'm going to put this yoga studio
sort of logo here. For people to understand
that they can use this also for their own
own little endeavors. So it's just that they have to accept that they might
share it with someone because it's a non
exclusivity thing. You have to start
thinking about what rules you want to make
people follow for their u for their the way
they use your drawings. Yeah. We have one, two, three, four use cases. You're going to download, you're going to
select all pages, PNG, and then you're
going to download that. Then you're going to
call that doesn't matter because it's it's better
to name it afterwards. Then you're going to
click on that title sip. I'm going to just put this on the screen so you
guys can see what I'm doing. I'm going to open it, and I'm
going to name this rename. And let's call this mockups. So I already have mockups
for my sitting not Lady. Let's make a folder
to organize our work called sitting Not Lady. And I already have the
printable files in there, and I already have
the rename mockups. Mockups. And I'm going
to put that in here. So I have my mockups. I have my printables
and moving on. Great job creating your mockups. See you guys soon.
In the next lesson. T.
7. Instructions & Policy: You sell a principle, you're not just selling a piece of art. You're providing a product
that requires some guidance. These are the documents you should include
alongside your drawing. First, including a detailed instruction
document helps ensure that your customers can easily understand how to best
print and use your artwork. This could include
tips on paper types, printing settings,
and suggestions for framing and display. This guidance can greatly
enhance their experience, ensuring that they get the best possible outcome
from their purchase. And you know what it means? It means that healthy customers are going to be
returning to you. They're more likely to recommend your work to others as well. Secondly, a clear policy
document is equally important. This should outline what customers can and cannot
do with your printable. For example, can they use
it for commercial purposes, or is it strictly
for personal use? What about refunds or exchanges, if they're not satisfied? Clear policies
protect both you and your customer by setting the right expectations
from the start? Including these
documents, not only adds I would say
professionalism to your work, but it also builds trust. Customers appreciate
transparency and guidance. They love guidance. And when you provide something that sets you
apart from the crowd, it makes you stand out
in the marketplace. So remember, a little
extra effort in preparing thorough instructional and
policy documents can go a long way in securing customer
satisfaction and loyalty. These documents, you don't
have to write alone. I write them with
the help of Chat PT, and this is how I do it. So for creating my
bad before printing, as in my instructions
and my policy documents, for my printable
product, I use Chat DPT. And I write something like Please create a
text for my read before printing file with
instructions for my principal product
buyers about how to best print the
work they purchased. Make sure you say thank you for your purchased purchase and make it easy to
read and precise. Make sure to include frame sizes that can be
printed with each ratio. You don't want this
to be super long, you don't want this
to be complicated. People don't like to read. Let's see what
Chetip does for us. Read before printing. Thank
you for your purchase. To ensure your printi product
looks at does this best, please follow the simple steps. Printing instructions.
So choose correct ratio. Our printable files come
in various aspect ratios to fit different franchises. Select the ratio that matches
your desired frame size. So, here are the
recommended sizes for the frames. I
love this part. So printing tips, use high quality paper or card
stock for the best results, sure your printer settings
are adjusted to match your choose aspect
ratio and print size. So choose frame that matches the print size and aspect ratio, nsure the frame
includes Matt I desired to enhance presentation of
your print. Car instructions. Avoid exposure to direct
sun light rent fading. Handle with clean, dry hands, to avoid magest
damage. Thank you. We appreciate the purchase and hope you enjoy
your new artwork. If you have any questions
or any further assistance, please don't hesitate
to conduct us. Happy printing and framing. So this is great. I would include this
in my document. So I go now to I'm
going to minimize this. I'm going to just open um my this and I'm just
going to go to Google Docs. This is, like, as simple
as it gets, guys. This doesn't have to be
anything fancy, anything fancy. I'm just going to go
here, and I'm going to paste whatever Chat Pat said. So I'm going to go here. I'm going to make mis bigger
because it's a bit ball. That works. So I'm just
going to title take this. And this is really good. This is for printing. So I'm going to go here. No here. Sorry. I'm
going to go to Chrome. I'm going to paste
this. There you go. So I'm going to call
this re before printing. Nothing special,
nothing. Of course, you can go into like Ao Express and make it into
a very nice file. But If you're trying to do the bare minimum to get
your site hustle going, then you want to just
stick to this, right? Really simple, one page, read before printing, nothing
more, nothing less, right? Beautiful. So you're
going to call this a read before printing.
I'm going to file. I'm going to export export
share download. Here we go. As a PDF so that they
don't change it, and then you're going to go back and in your
sitting Not Lady, you're going to call this
read before printing PDF. You're going to save it
there, you already have it. Now, you go back to Ca GPT,
and now you're going to Now please create policy usage and policy document where it states
that people can use the digital file for personal
and professional use, but they do not own fo rights. Don't own. Let's
call it exclusivity exclusive rights to
this piece of art. So I want people
to use it, right? But I don't want
people to think like, Oh, I bought it, so
it's actually mine. I don't want any
other yoga studio to have the same drawing
for their logo. No. They can use it, but
they need to understand that this is for
anyone who buys it. They cannot sell it as
a digital file forward. And that they cannot claim it as theirs because
that would be plagiarism. And so now we wait.
Usage in Pina. Thank you for purchasing
your digital artwork. Please read the following
us permitted uses. Personal use, you may printed in display artwork in your home,
office or personal space, professional use business
space, such as offices, shops or restaurants or for promotional material
related to your business. Restrictions, no
exclusive rights, purchasing this digital file does not grant you exclusive
rights to the artwork. The artist retains
all copy rights and intellectual
property rights, no resee digital files, so they cannot sell it. No claiming it as your own intellectual property
rights, modifications, you may resize or cruft the artwork to fit
your framing needs, but may not alter the artwork in any significant way that changes the original
integrity or intent. If you have any questions by purchasing them you
agree to comply. This is great. Love
it. Love it, love it. So you're going to
make sure that you let Chad DPT know what your
expectations are of what you want people
to use your artwork as because it does
make a big difference. So It's going to generate a policy document based
on what you require, what you deem important. So I'm going to
make this a title. I'm going to center it. Again, super simple
down to Earth. I'm not even going to
design it on Adobe Express. I'm going to just download it. I'm going to save it as a PDF so that it
cannot be altered. And then I'm just
going to go and call it usage and
policy document. I'm going to save that. Ta, and we have our documents ready.
8. Template file: Creating many principal products
can become very tiring. A way to guarantee that you keep the same standards from
product to product is to include the same parts in the same way in each
one of those files. One of those products.
One way to achieve that is by creating what
I call a template file. That will help you
create a product files swiftly and properly.
This is how I do it. One thing that I like
to do to optimize my work is that I want
to make the creation of each printable file or each printable product as
swift and as easy as possible. So for that, I have
several ways to do this in a way so that I don't have to go through all this
process every single time. There are things that
repeat. Like what. If you take our file of
sitting not lady here, our policy and instruction
files stay the same, pretty much every
single time, right? So I'm going to go back, and I'm going to rename copy
this file, this document. I'm going to copy and
paste it this folder. And I am going to rename it
printables Telit folder. So I'm going to take my mockups.
I'm going to delete it. No, I'm not going to I'm
just going to go here, mockups, and I'm going to
delete everything that's here. Delete. I'll move to
trash, here we go. And I'm going to rename
this printable files. And I'm going to
delete this as well. Now, when I create
a new printable, all I have to do is
duplicate this folder. If I have a new printable, I just have to go
to Template folder, I'm going to duplicate it, and then I just have to put in my mockups and my printable files with
the different ratios. And then that's it.
The file is ready. All I have to do when I
have it ready is How do I Compress it so that it's easier to put in a as
a purchasable file. And then this is
what I'm going to upload when I create my product. Listing in the next
lesson. Next lesson. Now that we have our file, let's move on to
creating a listing.
9. Creating a Listing: Now it's time to upload your
product into a listing. There are many places where
you can sell your printiles. But for this particular project, we will be uploading
our product on EtS. EtS is a top choice for artists looking to enter the
digital marketplace. It's particularly
great because it has a massive global audience. They actively are researching, as in the audience, the people, the buyers, are actively looking for
unique digital items as well. It's also very user friendly, and it's really easy to set up a shop,
quite straightforward. Es Community is also
super supportive. It offers resources
and forums where you can connect with other
sellers for tips and support. EtS does take a small
listing fee for each item. I think if I remember
wrong, it's like $0.20, but there is no upfront
cost to open up your shop. You can also sell your printables on Gum Road
or on creative market, or even on social
media, one to one. I use CA GPT to help me
generate the content I need to put into
my listing disc. I am going to be
showing you guys the common traits that all the listings throughout
many selling platforms have. You're going to have to
come up with a name, you're going to have to
come up with a description. Some of them have different
I would say, parts, but all of them have
very similar layout, if you want to call it that. I'm going with Etsy
because I do have an an Etsy store where I do have the vast majority
of my, printables. And this is where
I sell the most. You can sell wherever you want. If you don't want to
have an ET account shop, if you want to do it through Instagram messages
where someone just ve moles you the money or just pay piles you the
money, that's up to you. But in all cases, whenever you have your product listed in some sort
of selling platform, you're going to be
needing these steps and these steps Uh, I'm going to be
discussing here today. I'm going to be selling
a digital file, right? I I made it, so this
is easy. What is it? Is a finished product? When did you make it? I made it. Now. Now, I don't have
any production partners. I did this myself. And let's call this. How did we call it?
How did we call it? We called it. Sitting No Lady. That's what we call
it. Sitting Not Lady. So I go to go back
to my listing, and I'm going to call her
sitting not Um Yoga post. And so one way to
improve your titles so that they're
easily found on Etsy or anywhere is
going to chat GPT. And depending on the platform, I'm going to just
open a new chat. Depending on the platform
that you're using, I'm going to go I have
a printable product. I called and then I'm
going to paste that. And I am selling it on Etsy. Give Chachi T as much
information as you can. Can you help me name it better? So it is found by more buyers. Now. One thing Cha GPT does not know is that you want to
have as many keywords. It does say it does know it. You want to have as many
keywords in the name of your yoga in the name
of your principal file? Sorry. So I'm just going to go ahead and
use all of these. Can you make version
with several of these separate by Homa, please. Also, I don't want it to
focus only on printable file. I wanted to focus on
digital download. Um. While is thinking. 1 second. Let it finish. But also Can you
please edit it so that it is not only focused on wall art
and digital download, but also on logo design or royalty free as a keyword I want people to know that it's not just a digital download, that it is not just wall art. I want it to have
that whole sort of scope that people can
use it in many ways. So here we go, Serene, sitting Nat yoga, whatever. There's a lot of keywords
here, which I love. I'm going to copy
that. I'm going to go to Chrome,
Cro, not this one. I'm going to go to this one. And I'm going to paste
that. It's too many. And then it's too
many characters, so I'm just going to
go ahead and tell Chatti Pet make it
only 140 characters. See, I use Cha DPT
to help me make the most out of my titles,
out of everything. So here we go. I like the word clip art. So I'm going to copy
it, and I'm going to change one of those words with clipart because a lot of people, I think, use the word clip art, so I'm just assuming here.
Trust your instinct. Serene sitting yoga printable
art, meditation print, Yoga post local design, royalty free yoga graphic,
digital download. I'm going to get rid of serene. And I'm going to add clip art. And then I'm going to
add my sorry, downloads. I'm going to go to
sitting Not Lady. I'm going to go to my mockups, and I'm going to add
these four mockups. Open. I could do
around ten for tie, and I do recommend that
you use all ten of them for the sake of this lesson
and for the sake of brevity, I only did four, but you can go crazy and do more than four. I'm going to just take this
tote as my main photo. And I'm going to just put
it here. This is nice. And then I'm going to
adjust my thumbnail. I'm going to put that up,
and I'm going to click done. Close this. Keep editing. Of these cartoons. Okay. And now, I'm going to add the files that
people would get. So in this case, I'm going to go to my sipped version of
the City Lady SIP file. And then I'm going to have
to write a description. So I'm going to go to my
good friend Chachi BT. Need to write a product. This encryption. That helps buyers not only
know what I am selling, but know how they
can use it too. So here we go. Elevate your space and projects
with our serene sitting, go post principal art,
tile, digital download. It's wonderful. You want to go here, what you'll get, Hydro
solution file and here. See here. Transform your space in projects with this beautiful ami Yoga
pose illustration, download it today and start
experiencing the Tkt brings. Okay. Bit too fancy. I usually take
more time on this, but just moving on for
the sake of the lesson. And pace description. Now, I want to set a price. Because this is a principle
that is not just for WAR. This is actually
giving the right for people to use it in any way, except for selling and
claiming it as theirs. I'm going to price this at 25 euro. I'm going to quantity. You want to put the full
quantity that they can have because it
doesn't have an end. And then you want
to move on to tags. This is how people find you.
Again, I do this with Chat. And and you want to have them separated
by a coma because that's how you put it in. So I'm going to take that. I'm going to go to my listing, and I am going to I want to put the restrictions
that the platform gives me because then it's just
easier to copy paste. And I'm going to
just do that here. Okay. This is too many
tags. Let's keep it at. Let me make it clear.
No more than the tags. Maximum 20 ter per
tag. Now it sh work. Let's see. It did look a little long
before and then paste. There you go, Tara. And then now, you know, there's no returns or exchanges. You want to say that subsection, I want to put it into printables and renewal options automatic. Now I'm just going
to publish that. Where's my problem here? Oh, category, sorry. Printers. Digital
prints, here we go. And then I'm going
to publish that. Publish. And that's
how you do it. One other thing I
wanted to mention is that once you've moved
into printables, it's really easy to move
into print on demand, which is a completely
different idea. There's a ton of courses on print on demand
here on skill share. But If you guys already have digital products
for printing printables, it will be very easy
for you to open up a shop on red bubble
or on Society six, or even on print on demand platforms such
as printf, for example.
10. Last thoughts: Now, I know some of you might be thinking about what if
someone steals might work? Yeah, that can happen.
It has happened to me. But let me tell you, the
benefits of jumping into the world of principles
totally outweighs those risks. First of all, principles are an amazing way to kick
start your art business. Why? Well, Because
they're super accessible. You create your artwork once, upload it, and boom. It can be sold over
and over again, without any extra
sle no shipping, no inventory, just pure
creative goodness, going straight to your buyers. And yeah, about the
whole stealing thing. It's a bummer when it happens. But I think If you think
about it this way, your art is getting noticed, and that's a big
deal on its own. Plus most platforms have
protections in place, and there are ways to
safeguard your work, like watermarks or low
resolution previews. You can actually flag work
that has been stolen. So despite those risks, selling principles is still
a fantastic place to start. It's pretty low
risk financially, and it does get your name out there in the creative world. You'll learn a lot, build your brand, and hey, you probably make some
sales along the way. In short, don't let
the fear of someone swiping your work stop you
from getting out there. The digital work and
the digital world, especially the digital
art world is vast. And there's a spot just
for you and your art. So give it a shot, and let's see where
this will take you. I hope to see you guys
soon in the next lesson. Please please please share
your projects with me. If you have any questions, you can find me using my social media channels.
Here are all of them. I'm going to leave them on the description of
this class as well, and be sure to be on the lookout and
follow my profile to know when I put out
more courses like this. See you guys so. Bye bye.
 Attabeira German, One-Line Illustrator