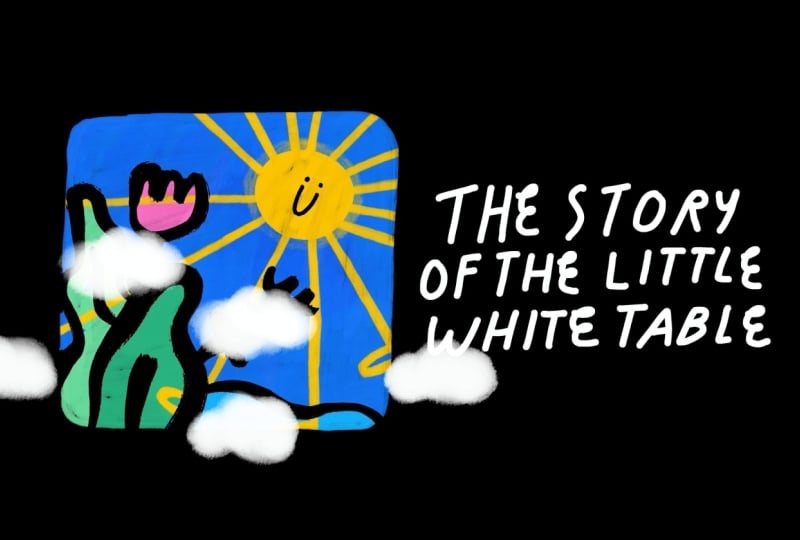
Transcripts
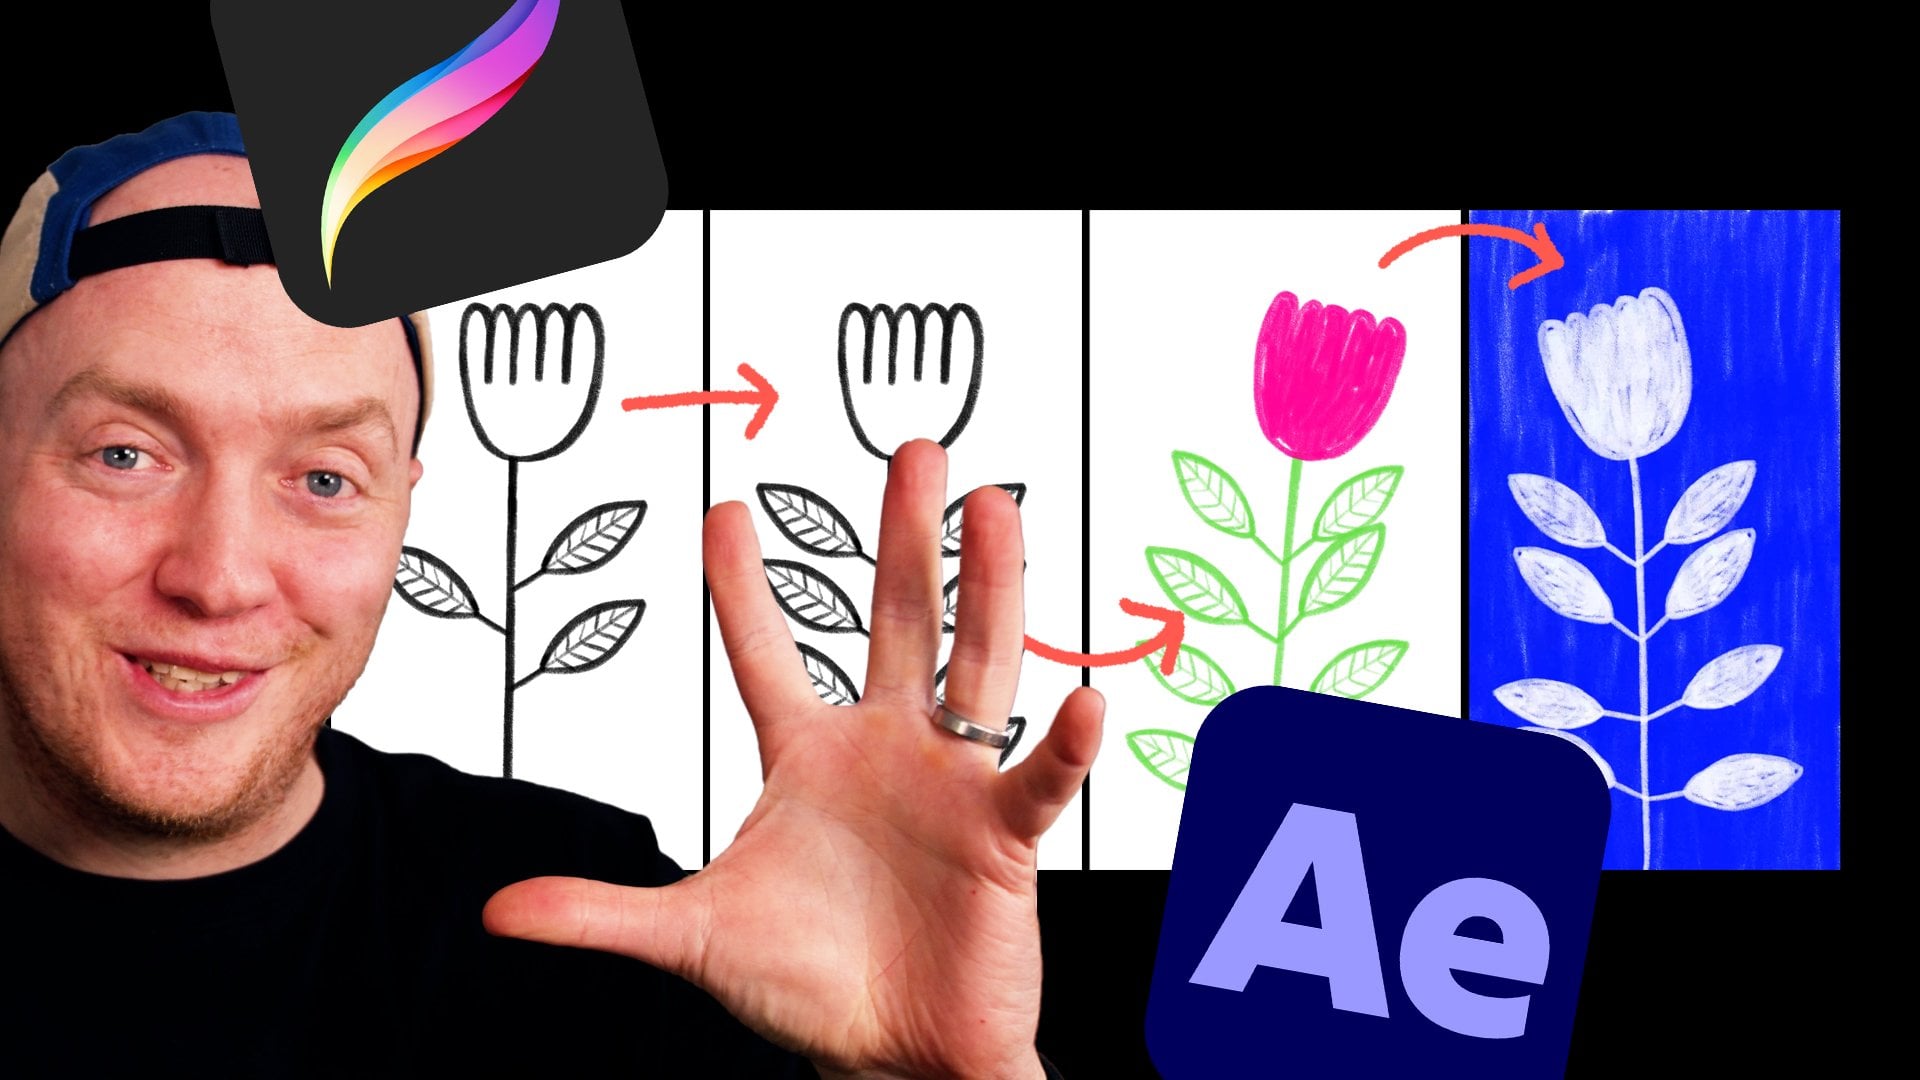
1. Intro: Hey, if you've got an iPad and haven't used Procreate
Dreams yet, now's the time. Animation in itself is awesome, but animating and
Procreate Dreams makes me feel like a kid again. It's tactile, it's flexible, and the animation features
are super powerful. You can animate frame by
frame using flipbooks. You can animate without drawing each frame
using keyframes, and then you can
hand animate content using perform feature. If you've used Procreate to draw or animate
with in the past, you'll feel at home really
quickly with Procreate Dreams. Has a lot of familiar tools, and you can import your artwork, your brushes, and
your color palettes. My name is Rich Armstrong. I'm an artist and have
been animating since 2006, and never before
has it been this easy and fun to create
hand drawn animations. In this class, I'm going
to show you how to create a short animation in
Procreate Dreams, using flipbooks, performing
and keyframes features. By the end of the class, you'll be ready to
create all kinds of fun animations inside
of Procreate Dreams. If you're ready to
have fun learning how to animate and
procreate dreams, then come take this class.
2. Class Project: Alright. In this lesson, I'm going to cover
your class project, and we're going to get into
storyboarding your animation. So for your class project, I want you to animate
something in from nothing, have it stick around on
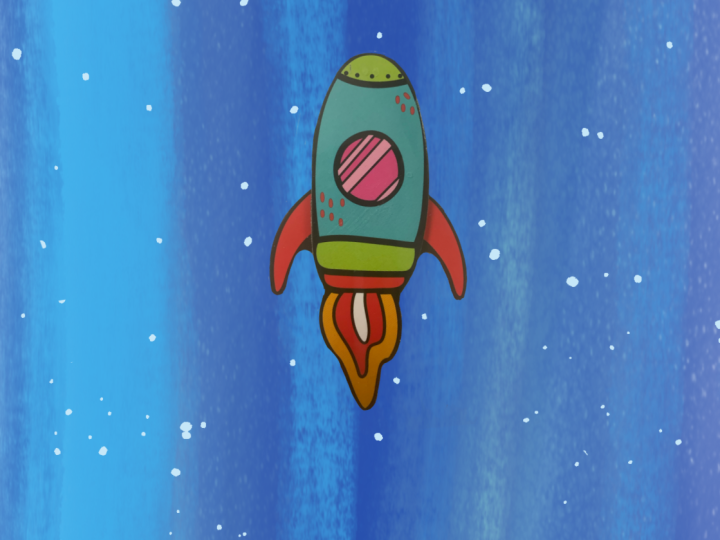
screen for a few seconds, and then animate it out. So what I'm going to do is I'm going to animate
this rocket or spaceship in kind of like it's just appeared
out of hyperspace, like Boom. Like that. It's then going to turn
its rocket thrusters on, like and start moving forward, but it's not
going to move forward. The stars in the background are gonna move down to make it appear like the rocket ship or spaceship is moving forward. But then the spaceship is going to get really
close to the sun, and it's gonna
melt it all along. And that's going to be
how it animates out. So now you don't have to do a
rocket ship or a spaceship. You could choose a flower
or a boat or a car or a monster or an animal or a face or anything
that you're like, Oh, that would be pretty
cool to animate in. If you're stuck and
if you're like, I don't know what just do
a spaceship or a rocket. And then once you've
got the hang of it, you can choose something
else or your brain might start spinning
with all kinds of ideas. Okay, so let's jump
into Procreate Dreams, and I'm going to
create a storyboard. And the reason we do this is because animating does
take a long time. And sometimes, it's
frustrating if you animate for a long time and you get something wrong because
the timing is off. Ah, you didn't quite
think of something. So, the more planning
that you do beforehand, the better your animation
is going to be, the less frustrated
you're gonna be. Now, what we're going to
do is we're going to do the storyboard and our
animation in the same file. So, let's do it
Procreate Dreams. This is your theater. This is where all of your
animations exist. And I'm going to
create a new file. There's a couple of different options that
you can choose from here. You can change these later inside of your
animation document. But for now, I'm going
to go for a wide screen. You can tap on four K and you
can change the dimensions. I would suggest going
as big as possible because once you have
something that's big, you can always make it smaller. But if you have something that's small it's difficult
to make it bigger. Things get blurry and
pixelated and just bh. So go big, if possible. And then, the other thing
is tap on these three dots. I want to change my frames per second to ten frames per second, because I like this handmade
wiggly kind of animation. And it also means
I only need to do ten frames inside of 1 second. To get a nice kind of
animation rather than 24 frames or 60 frames. That's a lot of drawing, a lot of work, man or man. So ten frames makes for nice
cool handmade animations. And then duration, I'm going
to do it for 30 seconds. We can change just later
on, shorter, longer, but it gives us a
nice amount of time, and it doesn't mean that our timelines, like, swoop along. Okay. Later on, you can probably start with a flipbook
if you know that you're going to be doing a
flipbook style animation, but I want to show you
where to get that if you don't let's start with
an empty timeline. And this is your file. You've
got your stage on top, your timeline at the bottom, and I'm going to
add a new track, and I'm going to
go for flipbook, and you can see
there's a whole bunch of different options here. When I add a flipbook, it's going to add a
track by default. So let's go for flipbook. And this is your canvas
where you get to draw. So what I'm going
to do is start out by drawing a couple of stars. I really don't want
you guys to spend a long time perfecting your
drawings at this stage. This is purely planning. We're going to see how
things fit together and really use a storyboard
to get the timing right. Okay, so these are the stars. I want the stars to persist for the length of the animation. So what I'm going to do is
hold down on this frame. I'm going to change
the frame duration to let's say 40 frames.
That would be 4 seconds. But right now, it
only goes up to ten, and it's like, Oh,
what the heck? So let's go out of
here, finish drawing. And I want to change this to
the length of the animation. Well, maybe let's change
it to 10 seconds. So just hold down
on the edge here, and let's go for around
about 10 seconds. There we go. Okay. We can then go back and
edit the flipbook. Or what we can do here is we can change our
background color. So let's go for background
color over here. Make sure you're
on the stage tab. C go for, like, a beige. Beige is quite nice. But hey, whatever color you
want your background to be, go for that color. We can change this later on. Okay. So there we go
and edit our flipbook. What I don't like
right now is that I can't really see the
border too well, so I'm going to go
back out of there and then change this back to white. Okay. Edit flipbook. If you don't see
the dit flipbook, you might see
something different, like a little squiggle
line. That's okay. You can still tap
on it to edit it. And now we have got
a lot of frames, and it goes all the way
up to 40 frames here. Okay, so if I hold
on this again, I'll change my frame
duration to 100, which should take me to about
10 seconds, which is great. So we have one track which
has one frame which has a duration of 100
frames or 10 seconds. On each frame, you
can also go into the layers and add
new drawing layers. I typically don't use this because each one of these
things over here is called the track and
kind of acts the same as layers do inside
of an illustration. So I'm not going to
use drawing layers, but maybe you would like to. Instead, I'm going to
add a track over here. And the first stage of my animation, there's
going to be nothing. There's nothing there. My rocket ship
hasn't appeared yet. The second stage, my rocket
ship begins to appear, third stage, he's kind
of beginning to form. Like this fourth stage, he has completely appeared. You can see he's got a
little bit more detail here. Something like that. Okay. Then over here, I don't want to redraw what
I don't need to redraw. So what I'm gonna do here
is duplicate that and then add some thrusters or some
fire, that kind of stuff. And then I'll duplicate that again and then just put
an arrow to indicate the direction of my rocket
or my spaceship and also the fact that it should be wobbling like
Whip poop, weep poop. Something like that. We could actually perhaps
transform it like this, like that and then
duplicate again, transform just to make it
seem like it's wobbling. And then what am I
going to do here? Cool is duplicate that again, transform, and there we go. Now, all of these other layers
that you kind of see here, there's like purple, light
purple kind of color. These under settings
are called onion skins. You can turn them off if
they're irritating you. You can change the opacity and also how many frames
into the past, you see, so maybe one or none, but you can also see four
frames into the past. And if we go to number four, you can see you can also see
the frames into the future. Okay. So you can
change that as you go. I don't keep it the
same all the time. Sometimes I turn it off,
sometimes I turn it on. Sometimes I just
want to see like one frame into the future
or one frame into the past. Okay, so we've got
we're over there, and at this stage, I'm going
to duplicate this one. So instead of duplicating
it, I'm going to say copy, and Paste. There we go. Now it doesn't have
an arrow anymore, but it begins to melt here. So I could use the eraser
tool, but instead, I'm going to say select and
begin just selecting areas. Three fingers pull down.
I'm going to cut that. Then do a little bit
of drawing like that. Okay. And then I'm going
to duplicate that, go for select again. Same thing here, three
fingers down and cut it, then do a little bit of drawing, and then maybe one
more or two more. Let's go for slets and
all that's left before the end frame are these
little thrusters over here. And then boop, it disappears. But if we have to play this now, it happens really quickly. So it's like, Well, that
just happened too fast. So one way to do
this would be to decrease the frame rate of
the entire project down to, like, one frame per second. But because I want
to animate inside the same project or inside the same file that I'm
doing the storyboard, I want the frame rate to
be ten frames per second. So, let's go change This frame duration. Let's go for F frames. Let's see how that feels. So maybe a little bit slow. Alright, I'm going
to fast forward here because what I'm
doing is adjusting the frame duration of individual
frames and then having a look at what it looks like relative to the
entire animation. And I just keep on doing this. I keep on adjusting
frame duration to kind of make sure that everything looks right together. So I think once these get on, I think it could be doing
this for a little bit longer. So what I'm going
to try to do here is use this multi select tool, select these frames, and then I'm going
to duplicate them. Okay. Okay, let's maybe
duplicate them once more. So I'm going to
say multi select. B to B to be the boop. Okay, hold down and
then duplicate. Alright. You can see it's
not quite 10 seconds. So maybe we just
swipe back like that. Okay, and that
happens quite fast. So maybe we can increase the frame duration
of these to three. Okay, I'm gonna fuss
forward here again. If you change this back
to something like two, you'll notice there's a
bunch of empty frames here. What you can do is you can
select them either one by one or not using that tool, one by one, and
just hold it down and say remove empty selection, and then just like removes all of the frames
that are empty. Pretty cool. Or if you undo, either with two fingers
or three fingers for redo or using
these tools over here, W you can do as
well, is just hold down a frame and move it. But this is quite
nice. Just remove empty section or remove
single frame. Whoop. There we go. Okay,
let's play again. Okay, I'm gonna fast
forward here again, too. Okay, I really like that.
So it's about 7 seconds, and we could add something like the end or some kind of text
at the end if we wanted to. Okay, so that is how I would storyboard
in Procreate Dreams. If you go back to
your timeline now, you've got a track with
a flipbook on top of it. What we can do now is create a new flipbook over
here, finish drawing. It adds it on the track above, and you can see it's just
got that squiggily line, which if you tap it goes
into the edit flipbook. So we can move this back
here like that and just increase the duration just by holding the edge
down. There we go. And then we use this
flipbook as a reference or the storyboard as a reference for the actual animation
that we begin to do. Now, we don't have to
do the whole animation inside of one flipbook. We can add different tracks,
different flipbooks. We can duplicate. We can do
a bunch of different stuff, which I'll show you in
the rest of the class. Right now, I'm just going
to hold down over here. I'm going to rename this
as storyboard and apply. That just means that I now have a name for
it over here. Okay. So what I want you
to do now is to create your storyboard
of your animation. Just kind of feel how
it looks on screen, what it looks like at different
stages of the animation, how the timing works, does each part of the animation stay on screen for enough time, but also make sure that it
doesn't stay too long so that, you know, it might get
boring if it does that. So at this stage, you're
really just trying to work on how things
look on screen, on the timing so that you
don't spend unnecessary time animating and making these decisions when
it takes a lot longer. Okay. I'll see you
in the next lesson.
3. Animate using Flipbook: Alright, in this lesson, we're going to
animate our rocket. Well, I'm going to
animate my rocket. Whatever you're animating,
you get to animate that, too. And we're going to base
it on the storyboard that we did in the
previous lesson. So I'm going to animate it in. I'm going to animate it
while it's on screen, and then I'm going
to animate it out. That part where I'm just
animating it on screen, I'm just going to
get a few frames, and then in the next lesson, I'll show you how to duplicate those few frames
so that it feels like it goes on and on and on for however long we
need it to go on for. And then while it's going on, then we can actually
animate it using keyframes and the
performance mode, which I'll get to
later on in the class. So right now, if you don't have a new
flipbook layer or track, perhaps we can just
delete that for now. You just press this plus icon
up for flipbook like that. Let's go back to finish drawing
or the actual timeline. And instead of
changing the duration, let's just pop it there right at the start of our animation, and then D A 10 seconds. There we go. Then
the storyboard, what I want to do here
is hold down on it, and then go for track
options. Not track options. Yeah, this opacity. Let's just drop that to, like, 27, 30, something
around there. Okay, so this is what
we've got so far. If you want to make it
a little bit bigger, you can tap four screens, four screens, four
fingers on the screen. You're going to tap on
back, or you could just adjust the size of the
timeline or the stage. All right, so play Alright. So it's roughly about 7 seconds. So what I'm going to do
here is I'm going to change the duration of the project to let's go for 8
seconds. Alright. You see here the actual the flipbooks go off
screen. That's right. All right, so it's
just nice if it loops. If we zoom in a bit, it's only going to play
the zoomed in part. It's gonna keep
on looping there. Okay. Whoop. Let's
edit this flipbook. Gonna go all the way
to frame number one. Okay, so what I want
to do here is Okay, so around frame 12, that's where I want my
rocket ship to appear. I'm gonna go for
this moonlineEeter. Again, I like
drawing. In moonline. I don't really like
changing the width of my pencil or the brush as
I change the pressure. Sometimes I do for
abstract kind of stuff. For this project for animation, I prefer single line
moonline kind of stuff. Color, I'm going to go for black black, black, Black black. So I've got a color palette that I've got in from Procreate. You can just drag and drop that or export it and import it. I'll show you how to do
that later in the class, or you can just go to value
and pop in a value here. So RGB, 000 or hexadecimal
value of 000, 0006 zeros. Okay. So 12, what I've got
here is around 36 or 37. Let's go for 37. D, d, d. Okay. I just want to use
the plus icon. Okay. Let's go for 38 plus. Then I've got a little bookmark that I can always snap to. Okay. And now here I'm going to try be a little bit more perfect. But still, it's a really
rough, fun animation. Think of it like you're a kid who's just
exploring, playing, having fun. It's all about the motion
rather than a perfect drawing. So what I'm doing here on
frame 12 is getting to this rocket that is fully
formed, that's fully there. It's like, Mom. It's there. It's ready to go. But bow but boom Okay. No. Okay. Maybe I can
try that one again. Circles or perfect circles
aren't really my strong point. Okay. There we go,
something like that. Oh. Hm. Really not doing good here. Come on, yeah. Okay, so
that looks pretty good. Okay. And then I also
want to put, like, a little guy in
here. Boop, boop. And he's got a smile. Okay, so this is my rocket. So I 12 frames, I wanted to go Wow Okay. Sometimes the onion skin doesn't really show
for whatever reason. So you might just need to drag or scrub back and forth
to get it to show. And here, it's like,
Okay, I can see it, but I can also see
a whole bunch of other blue stuff. What do we do? So I'm going to go
back to over here and just toggle the
visibility of that storyboard and then
edit the flipbook. Okay. So from frame two, I want this to kind of, like, appear like that. So in between frame two
and frame six or seven, I'm going to draw
it like halfway. So maybe like that. And this way, you get a really
good understanding of how your animation works rather than just going from frame
one to two to three, four, five, frame after frame. I'm actually going to go like, in between two key
points or two keyframes. And here, oh. Perhaps I'm just gonna
have one circle, and his face is not
gonna be there just yet. I will just have one
set of these, like, thrusters and a little bit. Off the wings. Mm. And then perhaps a
little bit of this Bob. Bop. And yeah. Okay. So it's gonna go from
there to there to there. Then after that, we've got some thruster things
coming about. Okay. So let's do in between
these two now. Now, right now, I've got
like two sets of yellow, and that's going yellow there, yellow there, and one
little piece of purple. So what I'm going
to change here is go to onion skins,
frame forwards. Gonna go for one frame. Alright. There we go. So in between these two, I've kind of got like a d. I'm gonna fast forward here because
it's quite tedious, animating the rocket in or
watching me animated in. I'm basically going from nothing all the way to something
frame by frame. I'm going back and
forth, adjusting, tweaking, slowly making it
bigger and more detailed. Okay, let's have a play. Let's
see what that looks like. Okay, I think that looks
really, really nice. I'm going to go back to here and just put my storyboard back
on. Let's go and edit that. So it sticks around
for a little while, and then the boosters come on. So one, two, three,
four, five, frames, and then the boosters come on, and then it starts to move. Alright. I want to go just turn off the
storyboard layer again. Just edit this flipbook. And here, what I want
to do is actually use this particular frame as the
reference for the next five, because I want to reuse these next five frames
over and over and over. And if I keep on
using onion skins, what tends to happen is
that you get this, like, broken down telephone effect where you're referencing
the last frame, and then when it goes and
loops back to the first frame, it's a little bit like gut Gato. You can clearly see
that it's looping, whereas I don't really want
to see that it's looping. What I'm going to do
here is I'm going to copy this frame. I'm going to add a new track. I'm then going to paste that. And here, I'm going
to hold that down, go to track options and drop
the opacity to 20% or 21%. And then I'm going to hold down this track like that and then just move
the whole track down. And then on the side of this or perhaps I can just
hold this down and go to frame duration. I'm going to go for five or six. Like so. And so
then I'm using this instead of onion skins to
base the drawings on top of. And because I'm not going to draw things exactly the same, it's gonna have this, like,
wiggly handmade feel, but it's still going
to be pretty static. So I'm gonna take onion skin
visibility off. Like so. I'm gonna fast forward here
again because I'm just tracing this single reference
frame five or six times, which, again, is quite
tedious for you to watch. Normally, I find that five frames is pretty
good for a loop. You could get away with
three frames, maybe two, like if you're feeling lazy, but, you know, ten frames
would be pretty luxurious. That's like one whole second of looping if you're ten
frames per second. Okay, I'm gonna fast
forward here again, too. Mm hmm. M. Okay, so now we have I want
to just hide that layer. Nice little like
animation that comes in. There's still a couple of
things that we need to do like color it and maybe
add some effects, like hm L as if it,
you know, just, like, warped in from hyperspace, but we'll get to that
in future lessons. But yeah, I think
that looks really, really good right now. We've got six frames of
looping animation that we can then use in the
rest of the animation. It's great. Okay.
So there we go. I do not need this
track anymore, so I'm going to hold
down on that go for Track options, delete Track. Okay. So I'm gonna tap on
flipbook and go finish drawing and then hold this down. Where is this rename? There we go and call
this Rocket in Apple. Okay, so we've got
our storyboard. The next thing that
we're going to do is do the rocket boosters. And then once the rocket
boosters have done their thing, then we're going to make it lift off or not
necessarily lift off, but start moving forward
and wobbling about. Okay, so in the next lesson, I'll do the rocket boosters and coloring the actual space
rocket. I'll see there.
4. Adding Color: Alright, so in this lesson, we've already got a little
bit of an animation. If you wanted to, just go all the way back
to the beginning, you can just flick it like that. It's a little playhead,
like flick it, and it'll then start playing. We won't get to that,
but what we will get to is do d dot coloring this. So it's not just black on white. It actually is a
color animation. And then we also need
to add a little bit of rocket boosters or fire, something like that that then happens for next
couple of seconds. Okay, so let's do some coloring. First of all, I'm going
to hide my storyboard, edit my flipbook. Okay. Actually, a very
clever thing to do here would be to
just duplicate this. So hold down, and
duplicate after. It then puts it after
the current flipbook. I'm going to pop it up
here and then rename this as rocket in Linework. Okay, apply. Hide that. That means that I can use it again later if I need to, or if I mess something
up in this flipbook. Okay, let's edit this. Now, there are always going
to be a lot of ways to do something in Procreate,
the drawing app, what you can do
is use a layer as a reference layer
and then use a layer underneath that to
then apply fills to. So you have two layers. You could do that,
but there is no way to use a reference layer
and Procreate Dreams. So you could up to use this track as your color track and
kind of just fill this. So let's say I was
going with a gray. Um, like, let's just color
this in a little bit, maybe a little bit thicker,
something like that. But there's no way
to be like, Hey, let's just drag it
in like that unless you're actually dragging it in onto the top layer like this. Boop, which is so much
quicker than coloring. Okay? So that's what
we're going to do. But the downside to
this is that now that color is on that
layer with those lines. So that's why I made a duplicate of this rocket in animation. So I'm going to just
delete this track and color in on
this actual track. And this is really
cool and really fast. I say, continue filling, and just go and perhaps those
can be a different color. So I'll just do all of
the main rocket body. And yeah, this is super fast. The other way is super not fast. So maybe in time, they will Procreate Dreams
will introduce, like, a reference
layer kind of feature. But for now, there is not. Okay, let's go to the disc. Let's make this a
little bit darker. Or maybe, yeah, dark is good. Okay, there we go. Bopp. I'm gonna
fuss forward here. So I'm not gonna
make those ones red. Ooh. So that's a
bit of a problem. So, I wonder if we
can change this. Yeah, the threshold.
Let's just drop it. Fantastic. I'm gonna
fast forward here. Okay. This is a
little bit tricky. If you're like, Oh, how
the heck do I do this? What you can do here
is add a new layer, and then just reorder it and do a little
bit of drawing there. I don't use layers at all except for
situations like that. Okay, let's play this. There's a weird little
glitch over there. Okay, that looks super fun. Okay, let's get rid of that. And anything else?
Couch. Alright. So we have this
really cool animating in or this rocket
that animates in. I like it. So now what we're going to do is add some flames. So we've got six
frames, one, two, three, four, five, six, six frames that are
roughly the same. So I'm going to add
a new track here, just drag that track beneath. One, two, three,
four, five, six, so on frame 12, there we go. From here, what I can do
is select these ones. Hold down on number 12,
and then duplicate. Okay, what I'm going to do
is just add them beneath, so it kind of reminds me that these are a duplicate and then take off that multi select
tool and add this below. Now I'm going to build in
the flames, so it goes like, like it looks like it's starting the rocket propulsion engines, and then a loop of those frames. So let's see how long it
takes to build this out. What I'm going to do here
is not use lines per se, but actually just three
colors to create the flames. Okay. So it's going
to be yellow, and I'm going to start
off. Let's go for that. Hi, ich. Something like that
looks pretty cool. Okay. And the reason why
I'm going to use lines and not fill it right away is
because when I use onion skins, then it's easier to see lines as opposed to lines and fills. Okay. Let's turn on onions. Okay, and then this is gonna
be a little bit smaller. A little bit smaller again. A little bit smaller again. And the last little bit. Okay, and then we can
just fill this in. Gonna change onion skin
visibility to be none. Okay, I don't need to
do any filling here. I mean, I can if I want to, but it's such a small space. Okay. Okay. So maybe here I would, so I'm just gonna take those
off and just like that. Boop. Boop. Okay, done. Okay, so it begins the rock
of propulsion, like that. Um Okay, maybe I
shouldn't have done that. Okay. There we go. I'll
show you why in a mo. Um, because for the next
five frames or six frames, which I'm going to duplicate. I want this to be an onion skin. He. This does not need to be
exact 'cause it's like fire, so sometimes it can
be a little bit more, sometimes a little bit less, sometimes a little bit more
crazy 'cause it's fire, you know, It's not meant to
be the same the whole time. Oops. Okay. Okay. There we go. Let's Whoa. Let's pop that into there. Okay. Turn that back on. Now we
can do the next layer, which can be a red. And then I think that the
other layer can be a blue. Okay. So here, maybe a little bit of
red starts to appear. Cam on a fast forward here. A Okay. That looks pretty cool. Let's have a quick look. Okay. That's great. And now the dot from about here, we can add some blue 'cause
it's like super hot. The blue super hot. Okay. And then those final
like six frames, we can keep on looping
and looping and looping. So one, two, three,
four, five, six. Cool. There we go. We will make this loop, and I'll show you how
to kind of separate this loop from the rest of the animation in
the next lesson. And once we've got that, then we can start
playing around with performance mode
and keyframes mode. And then once we've got that, we can do some stars,
and once we've got that, then we can create the
end of our animation, which kind of just
everything melts away. Alright. I'll see you
in the next lesson.
5. Reuse an Animation: This lesson, what we're
going to do is we're going to trim our rocket in animation once we've
copied it so that we can re use the looping
part of the animation, this rocket that has
the rocket thrusters and this kind of
static rocket ship. And then once we've
duplicated it, we can group it and
use it to perform, use it to do keyframes,
that kind of stuff. Okay, let's do it. So I'm going to go back to my
flipbook, finished drawing. We've only got one like
flipbook thing here now. Got our storyboard over here, which we'll reference in a moment or maybe
in the next lesson. But right now, we've got this. Let's go into it and go to the last 6 seconds or
the last six frames. So three. There we go, 24, 25, 26, seven, 229. Okay, so let's go
finish drawing. Once we've got this,
we can then hold down and then split content. So this is Rocket N, and
this is our flipbook, which will then go to one, two, three, four, five, six. Okay, let's split it
at number nine here. No. Over here. Split content. Okay, maybe let's split it in
number ten, then. Split content. We will
then delete this. And then edit this. I just got six frames. That's great. And then we can
rename this as rocket loop. Okay, and maybe we can also then highlight this to be
like pink or something. Okay, so we've got the rocket in, we've got the rocket loop. And what we can do now is
select this duplicate After. Do this a couple of times
because it's only six frames. So duplicate After duplicate
after keep on doing this. Okay, duplicate, After
duplicate After. Okay, so that lasts until
the end of the animation. We may not need it
until the end of the animation, but
that's perfect. I'm gonna go for my
multiselect tool and then select all of these guys. Hold down on the first one, and then go group them. And then I'm going to change the name of this or maybe
I'll take that off first. Change the name of this too. Rocket loops. A play. And you can
see now it looks very different to this flipbook.
This is now a group. If I tap on that
little drop down, you can see all of those
rocket loops inside of there. So let's have a look at this. Okay, so now it just
looks like he's flying, which is perfect. So if we zoom in
here a little bit, Yeah, it looks really, really, really, really good. Okay. So the rocket loops are in. And yeah, what's great about
this is that you can then multi select these two
and group them too. And let's just undo that. Rename this to be rocket. Okay. Now we've got this rocket. It. But maybe you want to move
it up just smishi bits. There we go. And it moves up this rocket, but all of the
other frames, too. So it's not just the one frame. Wow. Okay. There we go. Now, in the next lesson, what we're going to do is
we're going to start making this rocket look like it's
rocking a little bit. So as the thrusters come out, we're going to make it rotate a little bit back and forth
using the perform tool. And then in the
video after that, we're going to create some stars and use key framing
to make it look like the rocket is
actually moving forward by making the stars move
downwards or backwards. Alright. I'll see you
in the next lesson.
6. Animate Using Perform: Okay, so in this lesson, what we're going to
be doing is using the perform feature
in Procreate Dreams. And what this does
is it allows you to animate using your
hands, which is really fun, and it automatically
adds these keyframes, which you can then manipulate and change after performing. It's just a really fun way to animate inside of
Procreate Dreams. So there are two things that
I want to do using perform. One is, once these rocket
boosters do their thing, I want this guy to wiggle
left and right a little bit, almost like the rocket booster is like the one on
the left is going, too much and the one
on the right, it's going too much to
overcompensate. And then when it comes in, like, Bow maybe here to do a
little bit of, like, swing. Kind of like I don't know, like a glow or a shimmer
or something like that. Okay, let's turn on the storyboard. Let's
just have a quick look. It's gonna do a little bit
of wiggle wiggle wobble, wiggle wobble over there, and then get eaten over here. So let's go down into here. It's going to start when
the rocket starts to loop, so over here. Whoop. And then
continue to about here. So maybe like 5 seconds. Okay, so make sure you've got
the rocket group selected. That's the one that I
want to perform on. So I'm going to tap on perform. And what's important
here is that you get your anchor point lined up, so tap on these three dots
and then edit your anchor. So I'm going to put that,
like, in the middle. And that's where
it rotates from. Just tap on this checkmark. And here, what you got
to do is just perform and it'll automatically
add the keyframes. You don't need to
do anything else. So tap on one of these for, you know, corners
or little circles. And you see this little noodle, that allows you to rotate. So I'm going to go from
here until 5 seconds and just weep weep weep. Like that. And you can see here, it's added these rotation keyframes. I'm gonna go to keyframes
and just tap on this one. This one's a little bit
far, so I'm going to hold down and delete
that keyframes. Okay, let's just hide
the storyboard and play. So wing. Okay, that's great, but it kind of ends
a little bit skew. So let's tap on this one,
and let's go for zero. Okay. So we'll go back to compose and the keyframes will disappear. If you want to edit
the keyframes, you got to be on this
keyframes feature mode. Okay, that's perfect.
Now, in the beginning, once it goes ping like that, what I want to do is you know, it's just come from hyperspace. So maybe it's like glowing
or super hot or something. So maybe the size changes as well because
it's just been in another dimension or something. So in the next video,
I'll do some key framing, which will adjust
the colors of it. But right now, I'm going
to go for the size. So go for perform. I'm going to zoom
in a little bit. So Bu Li from here, I probably want the scale
to change a little bit. So I'm just going to go for B. Something like that, and then
Bou something like that. Let's see how that looks. It might be too much.
Yeah, probably too much. Um, so here, I'm gonna
delete this one, change the value of this. Scale X and Y. Let's go for, like, 1.2
scale X, 1.2 scale Y. Okay. So it goes Zoom. So like arrives in style. So, I don't think we
need these other ones. But yeah, I think
it looks great. Alright. Epic. So that
is the perform feature. I love using it. It
feels very playful, very much like I'm a kid, I'm a child just playing
and animating in a way that I've never
been able to before, especially not on an iPad. And even in something like
After Effects or something, it's just almost impossible
to animate like this. So yeah, have some
fun with that. And the next lesson,
what I'm going to do is go do some
keyframes animation. We're going to create
some stars that make it look like our
rocket is moving, and we're also going
to do a little bit of keyframes animation for
this like Shing in. I just like using sound effects. Alright. I'll see you
in the next lesson.
7. Animate Using Keyframes: Okay. So we've got now is
a really nice animation. It, like, scales in whoop. And then it does a little
bit of wibble wobbling, and we still need to finish it. But what I want to
do in this video is use some keyframes animations. And specifically in the start, I want this
to kind of, like, shimmer or turn white or
something because it's just come from some
other kind of realm. It's been through
hyperspace to kind of like. Okay. And then over here, when the thrusters come on, I want the stars to you know, move downwards to make it appear like the rocket
is moving forward. Now, we don't have any stars, so I'm going to create that
after I do this little shing. But before I do the swing, I want to go and change
my background color. And if I go for,
like, a pure black, it kind of looks like, you know, the lines look like it's I
don't know, it's just weird. Kind of looks like there's just shapes in the
middle of nowhere. So I'm gonna go for,
like, a dark blue or purple to make it look
like dark ish sky, but then we can
still see the black outlines, which is great. And then over here, I'm going to go and do
some keyframes animating. So make sure you're on the
keyframes tab over here, and around this area is like the peak of the
keyframes animation. So make sure you're
on the rocket group, not on one of the pieces of content inside the rocket group, and then tap on
this clapperboard. You can go and
animate move things, motion things like moving
scale, warp, distort, or you can then
animate live filters. So what I'm going to
go for here is HSB. And you'll notice,
as I select that, it adds a keyframes at the
start, which is great. And I'm going to change
the saturation quite high. The brightness is quite
high, but not too high. Still want a little
bit of color in there. Okay. And then once
he gets back to, you know, normal kind of size, I'm going to then
change this back to 50%, brightness, 50%. Okay. And this keyframe, I'm going to move
him over there. So he goes Shing, maybe a little bit to the left. So ching. You know, he's just come from hyperspace, so he's kind of like, Whoa. Okay, let's have a look at that. Swing. Alright,
that looks great. Really simple, fantastic. If you want to change
any of the easing, so how, you know, the animation actually
appears, hold down here. You can say set all easings. Or what you can do is
you can say expand, hue, saturation brightness, and then in between each
one of the properties, you can then change the easing. Okay, so I'm not going to do anything with that right now. I'm just going to
undo. Boop, boop. Oh, it's actually Hmm. Interesting. Okay. So let's collapse hue saturation
brightness. Okay. I thought if I undid it would undo the uncollapse
or the expand. Okay, so we're back
here, fantastic. Now what I want to do
is create some stars. So I'm going to go all the
way to frame number zero, and I'm going to
create a flipbook because if I create a drawing, it's very difficult to convert
a drawing into a flipbook. But with a flipbook,
you can basically create a drawing inside
of it that's very static. And the stars that
I want to create are actually very static, but they still have
like a five frame or a three frame
like wiggle wobble. It must feel like it's,
you know, hand animated. So let's go for that I'm going to change
my color to white, just pure white for the stars. Brush, same brush that
I've been using. Okay. And here I want to make
sure that my stars kind of, like, expand from
here upwards because I'm gonna be moving
the stars downwards. So there needs to be lots
of stars everywhere. Okay, let's fast
forward this part. Okay, if you're
feeling a bit lazy, you can then say
select, select it all, and then we can duplicate
and move it up. Something like that. Okay,
then do a little bit more down here. Whew. That's a lot. Alright, which is great. So now what I want to do is
create five replicas of this, which you might be like, Wow, that's a lot of
work. Don't worry. I'm going to speed
this up. If you want, you can keep it static. You can just hold
down this and say frame duration and go for, like, 40, 100, whatever
amount of frames you want. Or what you can do is, let's
create a new track here. I'm going to hold this
down, frame duration. Just go for three. Okay. And then on this track, I'm gonna decrease the opacity. And then let's fast forward
this part where I'm just recreating these stars
on three frames. Mm hmm. Okay, there we go. We've
got all the stars. I'm gonna change this
frame duration to one and then just
bring it up here. That should do the trick.
Boop pop pop boot it up. Okay. Then hold down here
track options, delete track. Okay. So yeah, I think that
works really well. I think if you wanted bonus points for
the star animation, you could add, you know, five frames or six frames. But that is fantastic. So let's go back to
our animation here. It's really only
three frames long. So zero, two, three. Okay, boom, boop boop, boop. Okay, now, hold this down, and then we're going to
say duplicate After, duplicate after duplicate
after a couple of times, we're basically now
looping this star content. Okay. Show. Duplicate After. If you wanted to be a little
bit lazy here, you could go for
your multi select. And when I say lazy, you
could also be like clever. And then you just hold
down and you say Group, and then you say
duplicate After. Now you've got two groups
full of stars Ops there. There we go, duplicate After. Okay, there we go, and then I'll group
these guys. Okay. Okay, so this whole
thing is stars. And then perhaps over
here, I can ungroup these. D, da, da, da, d, ungroup. Here we go ungroup, da da, da, da di, ungroup. And this one, we can
rename two stars. Okay, but obviously
it's on top now, so I want to bring it
down to the bottom. It's got to compose. Okay, let's see. Maybe we'll just do this. And there we go
right at the start. And let's go whoop
or whoop. Okay. That is looking good. Okay, so the next thing that
we need to do now is animate these stars to make it look like the rocket is moving
forward or upwards. So let's go for our stars. Let's go to keyframes, and you can see the rocket
has a bunch of keyframes. Now for the stars, once this comes in, the
rocket boosters kick in. And so this is where I want
to at a move and scale. And from here, I want Whoops. I was moving the keyframes. Here it goes until check
out the storyboard. It starts to get eaten up. I'm going to add the storyboard
a little bit higher so I can see it Ooh. Mm hmm. Okay. Do do. Does wobbling, and
then it starts to get eaten from here or starts
to melt from here. Okay, so I think
perhaps at this point, once it starts to get eaten, um, maybe over here on the once the whole rocket has been eaten and the
boosters have disappeared, then we can actually
stop moving. Okay, so keyframes,
what I'm going to do is just go for moving scale, and then I'm going
to move this down. I'm gonna hold down
on the screen, so with my other finger, so it kind of kind of snaps. I'm going to do that. Okay,
let's turn off let's see. Let's turn off the storyboard,
and it goes showing. Okay, does it kind of look
like it's going sideways? I think so. So what you
can do here is hold down on a keyframe and
select, expand and scale. I don't want to move my Xs, so I'm just going to delete that keyframes and
delete that keyframe. The only thing I
want to do is move my Y, so I'm just
going to, like, delete, dilute, dilute, delete. Delete. Okay. Okay, there we go. And then it begins to get eaten around this
point, I think. Okay, we've got a
spare track here, delete that track.
Okay. Around here. Around 7 seconds or five. Let's carry on until
6 seconds maybe. Okay, 6 seconds, then
things will start to melt. Mult melt, melt, melt. Okay, so here, this easing, what I want to do is set easing, ease in and ease out. So it's going to start gently. Cruise, and then choo because it will have
started to melt. So maybe we can change
that to start over there. Okay, maybe we can
change this to a little bit later. Okay. And around 5.7 or six,
let's go for 5.7. We can then animate it out. Okay, so we've done
some key framing. Things look great.
In the next lesson, what I'm going to do is I'm
going to animate this out. It's gonna melt because
it's getting too close to the sun.
I'll see there.
8. Finish Off Your Animation: Alright, so now we need
to end off our animation. So it kind of gets
to 5.76 seconds, and it begins to melt. Okay, so instead of keyframes, I'm going to go for
compose, scroll up a bit. Let's get into
rocket rocket loops. Let's go into here. And all
of these are rocket loops. So let's zoom in
here a little bit. Rocket loop, rocket loop. What I'm going to do
is combine these two. So I'm gonna go for
my multi select. Right. Group it like that. Undo the multi select, and then I'm going to
convert to flipbook. Okay. We probably don't
need these ones after that. If we do again, then we
can just copy and paste, and we can rename this one to rocket melt or Rocket out
or something like that. Okay. Yep, looks good. Edit. And let's just double
check where we are here. 6 seconds. Yeah, I
think that's great. If we need to, we can adjust it to the right a little bit. Okay, Edit the flipbook. Okay, frame nine. Let's do this. So
it begins to melt. I'm going to go for
my select tool. And just select a
ch and cut. Okay. Now, if you go and have a look at what onion skin
visibility looks like, you can't really see anything, you know, backwards or forwards that well because
it's all solid. So that's why we work in lines when we're doing onion
skins as much as possible. So it's nice to kind
of see where it is. But I'm going to turn that
off and just go by feel. So it's up there. The next
one, maybe let's do that. Just cut it. And this
one we can do that. Cut. Still got to do a
little bit of work on these. Cut. Okay. Then
duplicate Obscene. So here, it duplicated, but there wasn't another
frame, so I'm just gonna add a few
more frames here. Okay. Duplicate. I'm
going to delete this one. So pop, pop, pop, pop. Okay, select Okay, cut,
duplicate, select. Really, like last
little bits here. And cut. Perhaps
we can just erase that too. Something like that. And finally, there
would be nothing left. Perhaps these would also maybe let's go for
duplicate this. There we go. These would
get a little bit less. So let's increase the
eraser size there. Okay. And then we can probably
also erase this Yeah, like that and begin
to make them less, less, less, less, less. Okay. I'm gonna add just one new track here
and bring it underneath, like so, and then go
for some colors here. Well, okay, I want
to go for yellow. There we go. Bump, bump. Okay. And then it gets
a little bit smaller. Kind of like it's petering out. What are we gonna go for red. True like so. And then this frame over
here, let's duplicate this. Bam, bam. Let's go for yellow. Last little bit, maybe a little bit of red.
And then it's gone. So. And yeah, maybe we can
move this one frame over, one frame over, and
delete this frame. And here we can erase
these flames, too. Okay. Okay, so it's like Alright. And then let's do some
line work over here. Okay, let's fast forward here. Okay, so does that. Be. Okay. Perhaps on top, once
it begins melting, we can add a little bit of, like, molten lava goo. So I'm going to
create a new track here and just do this on top. I'm gonna fuss
forward here again. Okay. And then the
color can be like red. Let's continue filling. Okay. Here we go. So it's just like a little. Okay. And then my little sun guy over here is probably not
too happy about this. So I'm going to create
a new track here. And as this begins to happen, he's gonna lose his happy face. I don't want layers. I just
want to close that, thanks. Okay. And then he's gone. Boop. Okay, so
let's go for here. Okay, so it's a little
touch, little, like, two frames. And it's done. Okay, so what's really important here is that you finish
off your animation. Maybe it's something clever, maybe it helps it loop
something that is really nice. You don't have to make it loop. This is an experimentation. It's a piece of play,
but it's really fun to animate your object, your thing out in a cool way. So we animated it in, or I animated my rocket
in with a shing. It came in from hyperspace, and now it's getting
too close to the sun, so it's melting, just like that made a mistake.
Wrong direction. So, have a look at this. Let's go, all the way back. Let's have a look. Right. I
think that looks pretty cool. And now you can start
tweaking some things. I think it starts
off really nicely. And I think, yeah, it kind of, like, stops
moving before it melts. So I think I should
change that a little bit. So let's get on to the
stars, the keyframes here. I'm going to move this
out all the way to there. So it's still going
when it does that. Okay. I think we can
change it even more. Wait out of here. Okay, let's go for a keyframes. What I want to do here is
perhaps add, not a filter. Let's go for move or actually
just Whoop. There we go. Just delete this one. And then I'll move this a little bit like this and change this
easing to ease in, and this one to ease out. Something like this. Okay, so it takes a while to get going and then it just
stops all of a sudden. So let's move this a
little bit to the right. This one a little bit
to the right, too. So, kind of, like,
stops all of a sudden, like, gets going. Who, let's go. And then, Oh. Whoops. Okay. Alright. And finally, once you've completed
your animation, you're gonna want to export it, share it, get it
onto your phone, get it onto your computer,
get it onto YouTube, social media, basically
get it off your iPad. How do we do that? Well,
over here under preferences, you just go to share, and then you could go
for an animated GIF. It is if not gift, by the way, although I don't judge
you if you say gift. Frames as images, a whole
bunch of other things, but most importantly,
let's go for a video. There we go. And then you can
send it to your computer, add it to some kind
of cloud storage, save it to files, save
the video. There we go. So now I'm got to the
end of my animation. You could add sound effects. You could add more objects. You could, you know, play around keyframes with
more performing. Who, there's just so much. I've only covered,
like, a sliver sliver, slither of what Procreate
Dreams is capable of. I'm really loving how cool
this flipbook animation is. It feels so tactile, like, I don't know I just feel like
a kid when I'm using it. Now in the next two lessons, what I'm going to cover is importing stuff from Procreate, which is like the
drawing side of Procreate into Procreate Dreams, things like layers,
files, brushes, things like that, as well as
another video on gestures. There's quite a few
cool gestures that you can use inside
of Procreate Dreams. See you in those two lessons.
9. Importing From Procreate: Alright, so Procreate
Dreams is amazing, but it's for animation. And you may have got some
awesome stuff in Procreate, which you can also,
you know, animate in, but Procreate Dreams is
amazing for animating. So how do you get some of your awesome things that
you've already created inside of Procreate
into Procreate Dreams? So I'm going to cover a couple
of things in this lesson. One is how to import a file from Procreate into
Procreate Dreams, how to import a color palette
and how to import a brush. Let's go for a
file, first of all. The first thing that
you need to do is to create a Procreate
Dreams animation file. So I'm going to go for a four K widescreen empty,
which is great. And what you don't want to do here or maybe you do want to do it is import a
file as a drawing. So let's go to Procreate. I've got this file over here, which is a happy sign
with some clouds. So I'm just going to hold
it down so I can drag it and then really
try to drag up a bit, then go into Procreate Dreams
and drop it on the stage. Makes it a drawing, which is quite hard to turn
into a flipbook animation. So you can go to edit
drawing like that. And over here, all of the
drawing layers are there, but a drawing doesn't have
this really cool timeline with all the tracks
and the frames. So let's finish drawing.
I'm going to hide that. I'm then going to
create a flipbook. There we go. Let's
go back to Come on. Let's go back to Procreate. And over here, I'm going
to drag this again. There we go. Procreate
Dreams, pop it in here. I imports. I am going
to tap on transform. Okay, all of the
layers are there, and it is frame number one. Perfect. So from here, you can then add more frames. You can cut and paste these if you want to,
whatever you like. Okay, the next thing that I
want to show you how to do is, come on, there we go. Let's go to Procreate
inside of here. Let's say I have a
really cool brush. Perhaps it is this crazy one called soft blend
or maybe random color. So I'm going to just hold this
down like that, swipe up. Come on. Here we go. And then just pop it in
there, I imports it. And then under brushes,
under classic library, you'll see an imported group, and random color is there. If you don't see that, maybe
you're in animation brushes. You can either pinch or you
can tap on this dropdown, go back to libraries, go
into classic library, and then you've got
your random color. Which can do some
pretty cool stuff. Okay, so that is a brush. What about a color palette? Let's go to Procreate. Okay, so palettes, maybe
I want Frankly Doodle. So I'm just going
to hold this down. Let's go to Procreate
Dreams and pop it in there, and then Frankie Doodle
appears at the bottom. Alright, so that is how
to import a couple of things from Procreate
and to Procreate Dreams. Sometimes it works
fantastically well. Sometimes it's a little bit frustrating and you
need to, you know, cut and paste or rejig a few things. Depends
on what you want to do.
10. Gestures: Alright. In this video, I'm
going to cover some gestures. Some of them we have
used in the class. Some of them we haven't. Depends on your animation, depends on how you use things, depends on a lot of things. So I'm going to cover
a couple of them. Okay, the first one is panning. So here, it's pretty easy. You go with two fingers, you
can rotate, you can pinch. You can move things left
and right up and down. It's the same thing
on your timeline. Just like that, pinch and pull. You can also do it
with one finger left and right and up and down. And horizontally diagonally on your timeline. Really cool. If you're like,
really zoomed in, what you can do is just
do a quick oop or a op, a pinch, and it kind of just recens zooms in or
zooms out your content. If you're pretty far out, you can go, hoop Oop. And it just kind of resets it really nice,
just a quick pinch. You've got your undo, whoa and your redo. And so that's with two tap on the screen or three
taps on the screen to redo, which is pretty handy. If at any point, you're like, zoomed in and you want to replay or play
the whole animation, you just go to flick
your timeline like that, and then it plays,
flick it and it plays. And then if you're zoomed
out and you want to get into one of these clips,
you just double tap. It zooms in, double tap, zooms in some more,
and there we go. It's on that frame. So if you want to zoom in,
just double tap, double tap, double tap, keep on going
until you're right zoomed in. If you want to adjust
the time scale with three fingers
on the screen, just go to the left
and to the right. And if you want to adjust
the size of your content, use three fingers
and up and down. If at any stage, you want
to preview or animation, just tap four fingers on
the screen like that. Right now, it's not
playing, so just tap four fingers to
get out of that. Over here, under movie
settings or timeline, you can choose a loop like that. And then when you press or tap four fingers, it should play. There we go. Now I'll keep
on playing, keep on looping. And then four fingers again
will bring you out of that. Alright, there we go. Those are the gestures or a
couple of them. Some of them I use
all the time. Some of them I don't use at all. So if you're, you
know, wondering, is there an easier way to
do this? There probably is. If you want to see
all the gestures and everything that's possible, you can go check out the
Procreate Dreams documentation. Here's the link.
11. Conclusion: Okay, it is the
end of this class. I hope you've had fun
and learned a lot. Of course, there's always
going to be more to learn. And the best way
to do this is to play and experiment and
create more animations. Now, I would love to see what you've animated
during this class, whether it's a rocket
or something else, please upload it to
your project gallery. I'll give you feedback.
I would love to see it. And if you have any questions, ask them in the class discussion
section of this class. I would love to help you out. And if you would be so kind, please, could you leave
a review of this class? It means a lot to me and helps students decide whether to
take this class or not. And to stay in touch with me
and the classes I'm making, follow me on social media. I'm at Rich Armstrong and sign up to my newsletter
on my website, which is Rich armstrong.net. Okay, happy animating, and I'll see you in the next
class. Bye for now.
 Rich Armstrong, Multi-hyphenate Artist