Transcripts
1. Introduction: Do you want to become a video
editor in just one month? Then you are in the right place. Hello, my name is joseph Adam. I have been a video editor and a graphic designer for
more than ten years. I have worked with
more than 600 clients and company with more than 145,000 students
subscribing to my classes. In this class, I will
teach you how semester the Adobe Premiere Pro
software in just one month, even if you have not
experienced at all, because I will start
with you from scratch, this class is divided
to four weeks. In the first week you will learn the basics of the premiere pro, like the Timeline and
the software tools. Tools like the selection tool, the razor tool to cut clips, the split tool, and
the shapes tool. You will also learn
how to add video clips in geometrical shapes
and how to add video transitions between
the clips to make the transition process between the clips look more
professional and smoother, you will learn to add text to your videos and helped edit it. You will see how to add
Lower thirds to your videos. And I will show you
some tips and tricks, like have to speed
and slow your videos. It's create cinematic shots. You will also see how to reverse your videos and how to separate the audio from videos and replacing it with any
other audio you like. You will learn how to stabilize
shaking videos and help to enhance the quality if your videos by
removing the noise. Finally, you will
learn how to remove any unwanted objects
from your videos. In the second week, you
will learn animation. As you will learn how to
animate your videos, images, and the texts using
various techniques like 3D animation and
type in animation, you will learn to animate
logos to use them in intros for your videos or
on your YouTube channel. You will also learn to create an animated slideshow
for your images. Then you will learn to
create multiple effects. Effects like the double
exposure effect, the color shifter effect, the tint effect,
ink Droop effect, and a lot more effects
that will make your videos look cool
and professional. In the third week,
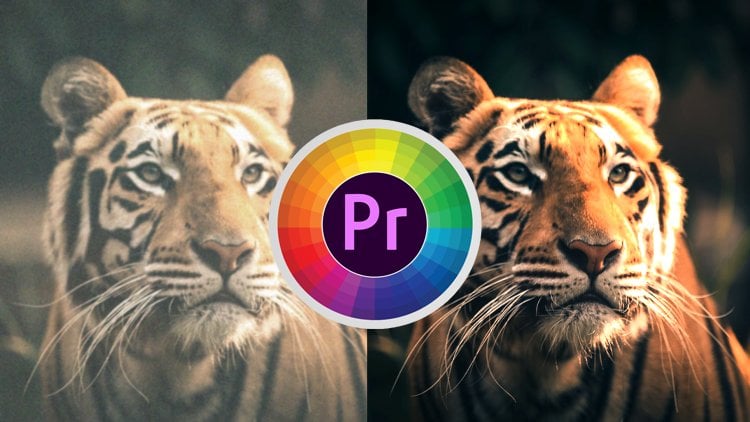
you will learn color correction
and color grading, which allows you to
edit the lighting and the colors in your videos to make them look more attractive. We will start with
the lumetri scoops, which are a bunch of
histograms that we use to measure colors and
lighting in the videos, which helps us to set the
right amount for them. Next, we move to
the lumetri menu, which we used balance
the colors in our videos and edit
their saturation. We will see how to edit skin
color and how to change the color of any
object in our videos using the curves
menu and the mask, we will also see how
to turn colored clips into black and white and help to match the colors of
multiple clips to get multiple scenes with the
same color and shape. How to change clips
that were filmed by Day to look like they
were filmed by night. And how to add Luts to our videos to save
time and efforts. We will also see how to
create our own Luts. Then we will see how
to deal with chroma or the green screen and
how to remove it and replace it with any
background we want. And how to add effects
using the green screen. And finally, how to make other adjustments to make our
videos look professional. In the fourth and final week, you will learn to add
multiple plugins to the software to make
things easier for you. Plugins like the premiere
Composer Plugin, which contains multiple
presets that you can add to your videos in a single
click and AEjuice Plugin, which contains a large number
of effects, transitions, and animate it texts
that you can add to your videos to make them
look more professional. Then we will move to
the audio section in which you will learn
different ways to edit audio, like how to enhance
the sound quality, remove background noise, and how to record
your own audio. Then we move to
the last section, as we will work on
multiple projects, you will learn to create
commercial projects from scratch in Saudi. And this includes planning for
the project from the start and executing every step of
the plan until the finish. When you export your projects, you will learn to create
videos to publish on social media platforms
like TikTok, Instagram, and others to get a great number of
likes and followers. By the end of this class, you will be a video
editor ready to create different projects using
all that you have learned. And let me tell you, learning Premiere Pro and Video Editing can change your
life to the better, both socially and artistically as you will be able to work as a video editor for
companies or as a freelancer and improve your
commercial or arts work. One more step left to success. Balance will be late and joined the class I will
be waiting for you
2. download files : Hello and welcome to this video. In this video we will see how to download the classes media files so that you can use
them to walk with me step-by-step in the videos. So to download the media Files, click on projects and resources. You will see here
download Class Files. Click on it. You are
taken to Google Drive. Now click on Download.
Then download. Anyway. You are the
download started. After it's finished,
you will get zip file. If you are using Windows, use when rare to unzip the file. If you are using Mac,
just double-click on the file and it
will be unzipped. After you unzip the file, you will get this
folder here, open it. Here we are. We have multiple folders here. Each folder corresponds
with a video, and each folder contains the media files used in
its correspondent video. The files are named
after the videos, so this everything is
organized perfectly. Now you may notice
that some videos do not have a folder here. That's because we do not use any media files in those videos, or because we use the media
files of the previous video. So that's it. Thanks for watching. See you in the next video.
3. How to set and edit your workspace: Hello and welcome to this video. This is the first
video and in which we will see how to
create a new project. When you open the software, you get this page here. In here, you will find the
recent projects you created. Since this is the first
time you open the software, this page will be empty. Now it's create a new project. You click on new project. You get this window. You can name your projects from here. Let's call this
one first project. From here you
select the location where you want to save
your projects at. You click on Choose
location and disliked the location you want. From me. I will save it here. We click on Choose to
choose the location. Now, the projects will be saved
at the selected location. Then you click on Create, it creates the project. This is the software
is interface. Now. Now we add the media files. These files will be
included for you in the Resources folder to use. You can use them or use your
own media files to add them. You select them, then you drag
them to the project panel. Now, you need to add them to the Timeline to
show and edit them. It's very simple. You click on the video and
drag it to the Timeline here. Here we are. The Timeline is created and the
video is edit to it. You click play to
play the video. This is how you create a
new project and how to add media file is to the software
and to the Timeline. Now we take a look at
the software interface. As you can see, the interface consists of multiple panels. We have here at the source. The effects controls,
the audio clip mixer. And finally, the metadata. We have multiple
panels here as well. We have the project
media browser, the libraries, the NFO, the effects, and the markers. We can click on the
double arrow icon to see all the panels here. We can edit these panels. For example, we have the
effects controls panel. We can change its position
and put it anywhere we want. We can hold it and drag
it to put it here. As you can see in a simple way, remove the effects controls
from here to here. Same thing for the
media browser. We can change its position
and move it up here. When we select a panel, we see this three
lines icon here. We can look on it and
we get this menu. We select Close Panel to
close and remove the banner. Same thing for the
media data panel. This way we could remove any unwanted Panel
from the interface. Now if replace the mouse here, we can see the mouse
icon has changed. Now we can collect, interrupt any site that the
width of the panel. Same thing here. We can set the width of
all the panels to set the best view of
the emperor face. As you can see, some
panels are big jumped. To reset the interface
to its default view. We go to Window workspaces and we select reset
to saved layouts. And here are the interface is
back to its default block. The software that gives
us different interfaces. We go to Window
workspaces and we have here multiple interfaces or
workspace is to choose from. For example, we slept
the color workspace. Here we are, the interface
changed and we have here all the color gradient and color correction
tools that we need. We will take a look at
this interface later. Now select the captions
and Graphics Workspace. Take a look at it. Next to take a look at
the production Workspace. Like I said, you can select
any of these workspaces. And of course, we can customize the workspace to create
our own workspace. For example, like this. Now to save this customized
workspace, to reuse it, we go to Window workspaces and we slept save
as new workspace. We get this window. We named the workspace
and we click Okay. Now we go back to
Window workspaces and we will find the new
workspace that we just saved. It. It is right here. It's called My Workspace. So this is how you can create your own workspace and save it. Now we selected editing workspace because this is
the one that we will use. This if this video,
thanks for watching, and I'll see you
in the next video.
4. media player: Hello and welcome to this video. In this video we will take
a look at the media player. This is the media player here, and these are its tools. We have the Blade tool to
play and stop the media. Here we have the
stuff back tool. We use it to go back
frame by frame. Here we have the
step forward tool. We use it to go forward
frame by frame. Next we have Goto and tool to
go to the end of the video. And here we have Goto start tool to go to the
start of the video. These are the media
player tools. Next we have here
the zoom level. We select the video
zoom level from here. For example, we select
100% and as you can see, we zoomed on the video. We can zoom in or
out on the video. For example, like this. To set the video to the
whole screen, we select Fit. Next we have here the
select playback resolution. We have here three options, full health and the quarter. If you have a strong
and powerful computer, you can show your videos
in full resolution here. If you have a medium computer, you SelectHealth to show the videos in a
medium resolution. And finally, we have here the quarter option
for low resolution. This does not mean
that you will export your videos in low or
medium resolution. This is just to show your
video in the media player with the selected
resolution and to show it in a smooth way and
not effect your device. If you have a strong device,
select full resolution. But like I said, this is
just to keep things smooth. Select the resolution based on the strength of your device. I think health is a good
resolution to show the video. And when you export the video, you will export it
in full resolution. So this is all about the
media player in the software. Whatever you create
in the Timeline will show in the media player. That's it for this video.
Thanks for watching, and I'll see you
in the next video.
5. Source Panel: Hello and welcome to this video. This video, we'll take a
look at the source Panel. The source Panel allows
us to see a preview of the video before adding
it to the Timeline. For example, we delete this
video from the Timeline. Now, before we add
it to the Timeline, we double-click on it to
see it in the source Panel. Click play to play the video. You can fast forward
It's frame-by-frame. And we can go directly
to its end or it starts. And we have here the mark
and mark, all tools. We use them to mark the
start and the end of the parts of the video
that we want to use. We can navigate the
video using this cursor. Now we play the video and we crop the parts of the
video that we want. We set the cursor to
the start of the part. We will leave this part here. We click on the mark in tool to mark the
start of the clip. The clip that we will crop
starts from this spot. We put the cursor at the
end of the clip and we collect on the L2
to mark its end. The selected clip starts
from here and ends here. Of course, we can
always increase or decrease the selected part. Now this is the
part that we want. Now to add the video with
its audio to the Timeline. We click on the video into source Panel and we drag
it to the Timeline. Here we are, the
selected parts of the video is added
to the Timeline. Now to add the video to
the Timeline without its audio recollect on
the drag video only icon, and we drag it to the Timeline. The video is added now
without the audio. The audio of the selected
parts only right-click on the drug audio only and we
drag it to the Timeline. We drag the video from
the source Panel to the Timeline to add the
video with its audio, we drag it from the Video only icon to add
video without audio. And we drag it from
the audio only icon to add the selected
parts audio only. So this is the source Panel
and what we use it for. Now just lift all
these three clips and we click delete,
remove them. To unselect this part, right-click on it and we
select Clear in and out. Let's take a look at this video. Double-click on it, edit
to the source Panel. We put the cursor
at the start point. We click on the mark M
to mark the start point. We put the cursor
at the end point, and we click on the mark
to mark the end point. This is the selected part. Would grab it a video
from the screen to edit alongside its audio. This is the same video
here on the Timeline, but this is the whole video and this is the selected
parts we chose. The source Panel allows
us to crop a part of the video even before
adding it to the Timeline. That's it for this video. Thanks for watching and I'll
see you in the next video.
6. the Timeline: Hello and welcome to this video. In this video we will take
a look at the Timeline. As you can see, we have multiple
effects on the Timeline. And we can add media
files to these tracks. We have here the video cracks. We can add videos and
images in these bags. And we have here audio tracks. We can add only
audio files, do it. As you can see, we have this
video here in the Timeline. The video is edit
to the video track and it's audio is edit
to the audio track. We have the letter a on audio tracks and V
on Video cracks. We can edit the
length of the drugs. For example, here
the video looks so small and we can
see it's details. So we use this cursor here to edit the length of the Timeline. We click and drag to the left to increase the length
of the Timeline. We click and drag to the left, increase the length
of the Timeline. Now we can see more details and we can edit the
length of the drug. From here. We click and drag up to
increase the track length. We can increase or decrease
the track length very easily. Like I said, now we can see more details in the video track. You can do the same
two audio tracks. We can increase their
length and width as well. This way we can see
the audio track clearly and we can see
its details and edit it. We will see how to
edit the ODU files later in the coming videos. Now, if you take a close look, when we increase the
length of the drag, we increase the length of all
the tracks in the Timeline. Now what if we want to increase
the length of this track only without affecting the
other text in the Timeline. Let's put the tracks back to
their default size first. The size of this track only. We put the mouse on the top line of the drug to get this icon. Then we collect and drag up to increase the size of the track. Now as you can see, we increase
the size of this track. Only. Now we increase the size of
this audio track as well. This is how we can increase the size of the text
in the Timeline. We increase their
length and width. Will set the track
size like this. That's better. We have here the toggled
track output tool. We use it to hide the track. We hide any media file
that's on the track. We click on it, and here we
are in the video is gone. If we edit the video to
another object, it will show. But this track is hidden alone
with any media file on it. And we can always click on the toggled track output
tool to show it back. We have here the log tool
on the video tracks. We use it to look the track. We click on it and
as you can see, we have these diagonal
lines on the track. Now we can't add any
media files so that drag. This way we make
sure that we don't add anything by
mistake to detect. And of course we can
unlock it if we want. And on the audio tracks we
have the Mu crack tool. It's kinda like the
toggled track output tool, individual tracks. We use the MMU tool to
mute the audio track. Now when we play the video, you can see the video, but it's Sound is muted. Sometimes you will have
more than one audio file in the Timeline and you use the mutual to mute one and
listen to the other. We have muted the whole track. That means all the audio files in that track
will be muted. And of course we can click on the Mu tool again
to unmute dread. Next wave here, the
solo track tool. If we have multiple audio
files in the Timeline, we click on the solo
track tool to mute all the other texts and only
leave this track unmuted. When we have multiple
audio files, we click on the solid
crack tool to hear the audio in
dyslexic track only. This is how we set and
edit the timeline. That's it for this
video. Thanks for watching and I'll see
you in the next video.
7. Setting the Timeline: Hello and welcome to this video. In this video we'll
take a look at the Timeline settings
and tools we have here, the snap in Timeline tool. We add a video to the Timeline. Now when I tried
to drag the video and put it next to
the other video, it's like a magnet that
pulls the videos together. And this allows us to put the two videos next to
each other very easily. But if we deactivate this
net and Timeline tool, when we drag the video next
to the other, it's normal. And we can make a
mistake leaving some space between
the two videos. When we play the videos, it's will be obvious. And then we can even put
one video over the other. With the snap in
Timeline tool activated. The video is put
directly next to the other without any issues. This feature allows us
to set videos next to each other without
any overlap or space. Now, if we click on this video, it's selected
alongside its audio. Same thing for this video. But if we deactivate the
length selection tool, when we click on the video,
it's selected alone. And we can select the
audio separately as well. We can put the audio and
video anywhere we want. With the Linked Selection
Tool deactivated. All the videos in the Timeline will be separated
from their audio. This tool links the audio
and video together. It's very important to
activate this tool to make sure to select the
video alongside its audio. Next, we have the
addMarker tool. For example, we put
the cursor here and we want to add filters that
this spot here, but not now. We use the addMarker tool to
add a marker at this spot. Here we are, this is our marker. We click on the addMarker tool. Again. We get this window. We named the marker. For
example, we name It's filter. And we type a comment. We type reminder. For example, we
write add filter. We select a color
for our marker. And we click Okay. Are, we
have an orange marker here? When we hover over it, we can see the
comments we typed. To remove the marker. We put the cursor on it. We collect on the
addMarker tool. We get this window
and we'll select, delete at the macro
to the video. We select the video, then we click on Add Marker. Now the marker is not
added to the Timeline, but instead it's
edit to the video. Wherever we put the video, the marker moves with it. Unlike the marker
on the Timeline, move into video, we've
changed the max points. We put the cursor on the marker and we click on Add Marker. We get the macro window. We named the marker. We add comments and we select
color for the marker. Then we click, Okay.
Remove the marker, we click on Add Marker
and we select delete. These are some of the
most important features, are tools in the Timeline. That's it for this video. Thanks for watching, and I'll
see you in the next video.
8. selection tool: Hello and welcome to this video. In this video we'll talk
about the selection tool. We start by removing
this clip from the Timeline we selected and we click Delete
from the keyboard. Now, double-click on
the project panel. And we add these clips. They are included for you to
use in the Resources folder. We can select multiple clips
and add them all at once. Now we drag this club
to the Timeline. As you can see, we've
got this warning clip, mismatch warming. The software is telling
us that the clip does not match the
sequence settings. And it's asking us
if we want to change the sequences settings
to fit with the clip. We will keep the
current settings now. Are the club is edit
to the Timeline. Now we have the
selection tool here. When you open the software, you will see that the tool
is selected automatically. We have here multiple tools, but the selection
tool is in blue, which means it's the selected or activated
tool right now. We select it and under tool, it won't be in blue and
the selection tool is in white to indicate that
it's not currently selected. Now when we select
the selection tool, we just did Timeline
slightly like this. We use the selection tool to select the clips
in the Timeline. And we can put them anywhere
we want and the Timeline. We can put it in different
track if we like. If we hover over the edge of the clip like this,
we get this icon. Now we can click and drag left to delete this
part of the clip. We can do the same
from the start. We hover over the edge. We get this icon. We click and drag to the right to delete this part of the clip. And of course we can reverse the process and bring
the deleted parts back. You put this clip back to
the start of the Timeline. And we add this glove
to the Timeline. We put it next to
the first clip. Now, if we selected this clip and deleted this part of it, we will leave this empty
space between the two clips. We can simply select
the next clip and drag it next
to the first clip. But if we have too many
clubs and the Timeline, this will take a lot
of time and efforts. So the easy way is to select the empty space and we click Delete from the
keyboard to delete it. Now after the lead
and the empty space, but to clips are placed
next to each other. It's very simple. We just select the empty space between
the videos and we click Delete from the
keyboard to remove it and print the videos
next to each other. The last thing we use
the Selection tool for selecting the videos. We just click on the
video to select it. We select the first
video, or the second. We select a video
and we click on the Add Marker tool to add a marker inside the
selected video. We can select the second video. We put the cursor
at the point where we want add the marker ads. Then we click on the market
tool to add the marker. You can click on
Command plus Z for Mac users or Control plus
Z for Windows users. To undo the last move with it, we keep clicking until
we go back to the move. We want this all about
the selection tool. That's it for this video.
Thanks for watching, and I'll see you
in the next video.
9. Razor tool: Hello and welcome to this video. In this video we'll take
a look at the razor tool. We use the razor tool to
cut clips in the Timeline. We have here two clips
in the Timeline. Here today are now we want to cut each clip into three parts and
merge them together. So we use the razor tool. We select the razor tool. Now when we hover over the
video in the Timeline, you can see that we
have this white line. The white line represents the point where we will
cut the video act. We can the first video
into three parts. We select the selection tool. It's shortcut is V
from the keyboard. As you can see, we
get the video into three parts and we can
edit each part separately. Now we use the razor tool to cut the second video into
three parts as well. The razor tool shortcut
is see from the keyboard. Here we are. We have
six parts here. Now we can shuffle them. We decrease the Timeline. And we pull the
video parts here. Then we shuffled them like this. We put apart from
the first video, then another from the
second video, and so on. Now we click Play.
And here we are. This is how we can cut and
merge videos together. So we use the razor
tool to cut videos. Now we delete all these parts. We add the first clip here, and we add the second
video on top of the first video on the
track, on top of it. We can adjust the tracks like this to get a good look at them. Now we select the
razor tool hold shift. And now as you can see, the razor tool icon is doubled. Now we can cut all
the videos that are on top of each other
at the same time. We hold shift and the week
at the videos from here. Same thing we hold shift and the week at the videos
from here as well. So this is how we can cut multiple videos
at the same time. Just a reminder, if you put two videos on
top of each other, the media player will only
show the video on top. Just keep this in mind. This is how we use the
razor tool to cut videos. That's it for this video.
Thanks for watching, and I'll see you
in the next video.
10. Split tool: Hello and welcome to this video. This video, we'll take a
look at the Slip tool. We start by removing these
videos from the Timeline. And we add these
two videos here. The two videos are included for you and the resources
folder to use. Add them to the Timeline. The second video has no audio. In the first video we
have to merge scenes. Now I want to start
the video from here and remove the
first part of the video. I put the cursor here and I use the ripple edit tool
like we saw before. I click on the start
of the video and I drag until I get to the
point where I want to start. The video ends. Here we are. The unwanted parts
of the video is removed and I got
the video I want. Now what if I have
a whole projects here with a lot of
editing and work? And I finally notice that I don't want this
part of the video. Instead, I want the part
that I have deleted. It will take lot of
work to bring it back, which may ruin the project. This is where the slip
tool becomes very useful. So I click on the slip tool. I select the video, I click on it, and I
grab to the right. You can see the parts
of the video that I have removed on
the media player. This way, I am replacing this video with the one
that I have removed. When I release the mouse, as you can see, the
video is replaced. And I can click on the video
and drag to the left to reverse the process and replace
this part with the other. As you can see on the media
player, we have two scenes. We can see the
start of the video and it's end this
week and saves us a lot of time and
efforts if we made a mistake or change our minds. So that's if there's video. Thanks for watching, and I'll
see you in the next video.
11. Adding shapes: Hello and welcome to this video. In this video we'll take
a look at the shapes and see how to add
them to our videos. We have here the rectangle tool. We click and hold on
it. We get three tools. The Rectangle tool,
the Ellipse tool, and the polygon tool. We select the Rectangle Tool. We go to the media player and we click and drag to draw
a rectangle here. Like this. We select the selection tool and we can place it
anywhere we want. We can click on the shapes
edge and adjust its size. You can see on the corners of the shape we have
these dots here. We click on any of
them and drag to the inside to make the
corners of the shape rounded. And like I said, we can
look on the edge of the shape and drag
to adjust its size. Is just the shifts
size like this, for example. And we put it here. Now, it did the shapes, color, and other settings. We go to the Effects
Controls panel. We opened the shapes
Settings menu, and we have here It's settings. We use the fill setting to
change the shapes color. We can select any color we want. And we click Okay. We can add a stroke
to the shape. We set its size, its color. Again, we can select
any color we like. For example, we
painted in yellow. We set the stroke type. We have outer, inner and center. We have here at the
shadows setting. We use it at shadow
to the shape. We select the shadows color. We painted in black. We increase its opacity. We set its orientation
from here. We set its distance from here. This is our shadow
behind the sheep. Like I said, we set its
orientation from here. And then we have
some other settings here to remove the shadow
with simply uncheck it. So this is how we add
and edit our shape. And we can also add
a text to our shape. This is how we add
and edit our shape. And then we can also add
a text to our shapes. We select the shape from
the Timeline and we click Delete from the
keyboard to remove it. Now we'll take a look
at the Ellipse tool. We use it to draw a circle. In our video, we click and
drag to add an uneven circle. We click Command Z to go back
and to edit even circle. We hold shift and didn't we click and drag to
draw the circle. Here we are. The
circle is perfect. The circle is drawn
like this because the settings of the
last shapes are still saved and are applied
directly to this shape. To adjust the shape, we go to the Effects Controls panel
to the Shapes Settings menu. And do we make our adjustments? Remove the stroke, for example, and we change the shapes, color, or whatever we want. Now we take a look
at the polygon tool. We select it. And we'd draw a triangle here. Same thing. We go to the
Effects Controls panel. We opened the shapes
Settings menu, and we have the same
settings as before. Now we delete the shape and
we select the Pen tool. We use the Pen Tool to
draw a free shapes. We set the first dot here, another here, and we keep
going to draw this shape. And we can click
on each dots and adjust its positioned
to adjust the shape. Just that, that's to
get the shape we want. We click on the dots
and then we move it. Now we delete this shape. We add the first dot here. We add the second here, and we click and drag to add a curved line instead
of straight one. This is how we draw curved lines to draw any shape we want. So this is how we can add geometrical shapes and
reshapes to our videos. That's it for this video.
Thanks for watching, and I'll see you the next video.
12. Adding videos inside shapes: Hello and welcome to this video. In this video we will see how to add our videos inside shape. We have this video
in the Timeline. Now right-click on
the rectangle tool. We get the shapes menu and
we select the ellipse tool. Hold shift and
withdraw circle here. We use the selection
tool to put the circle here over the character's face. Now we go to effects and we
locate the Track Matte key. Here it is. Now we
added to the video. Next we go to effects controls. We have here the Track
Matte key settings. We have here the Track
Matte key settings. We have the med setting. We have three options here. None. Video tree and Video to the
shape is in-video to drag. So we select Video two. And here we are. Our
video is added inside the circle with live play. And who we are. This is how we can add our
videos inside shapes. We can draw any shape we want
and add our videos to it. That's it for this video.
Thanks for watching, and I'll see you
in the next video.
13. First Homework: Hello and welcome to this video. It's time for a simple homework. We saw how to create
a new project in the premiere pro software. And how to add media
files to the Timeline, and even how to edit
and emerge media files. Now, I would like you to
create this simple homework. You will find these three
videos in the homework folder. And I would like you to add
these videos to the software, then cut and emerge them like we saw in the former videos. It's very simple. So that's it for this video, and I will see you
in the next video to create this Homework together
14. Create First Homework: Hello and welcome to this video. In this video, we will create
our homework together. We start by closing
this project. We go to File and we
select close project. Now we go back to
File and select New. Then we select projects. We named our project. For example, we name
it's First Homework. We choose the location where
we want to save our project. And I will save the
projects in it. Now we click Create. Let's create our project. Let's click on the projects
panel and we select Import. Go to the first Homework folder. It's included for you. And the resources folder. We select these three clips and we import them
to the software. We add the first video to the Timeline to
start the sequence. We named the sequence
First Homework as well. We add other two clips
to the Timeline. Increase the
Timeline with a bit. The first video is a bit long, so we use the ripple edit tool to crop this part of the video. We keep only this short
clip of the video. Go back to the start
and we click blade. This is our clip. This
is the second video. We use the ripple edit tool
to crop this video as well. We keep this short clip. Next we move to the third video. Again, we crop it. We keep the beginning
of the video. Perfect. We go back to the start
and we click Play. These are our create clips. I'll decrease the
first globin bit more. Just to make all three
clips in the same duration. We go back, we click
Play, and here we are. So this is how we
can crop videos and merge them together
and the Timeline. It's very easy and simple. That's if this video, thanks for watching and I'll see
you in the next video to move to the next level and learn new things
in the software.
15. Video transitions: Hello and welcome to this video. In the former video, we
created this simple homework. We merge these two videos together to create
this video here. Now, in this video we will add video transitions to
make the video better. It's add video transitions. We go to this panel here. Click on the double arrow icon here to see the
whole panel's menu. Then select the effects panel. We have here the Effects menu. And at the end we have
the video transitions. We opened the video
transitions folder, and we have here multiple
transitions to choose from. For example, the dissolve folder here contains seven transitions. The immersive video
contains a transitions, and each folder contains multiple transitions
that we can choose from. We can add the transitions, increased parts at the start, and add the end of
the clip or between two clips will increase the Timeline length so that
you can take a good luck. We have here three clips. We can add the transitions
between the clips or at the start of the
first clip and it's end. Let's choose one of the
dissolved transitions. For example, the edit of result. To add the transitions, we click on it and we
drag it to the Timeline. We get this brown area highlighting where we
will add a transition. We can add a transition at
the end of the clip or edit starts or between the two clips. We released the mouse
to add the transition. Here we are, the transition is added between the two clips. We put the cursor here
and we click Play. Are we click on space from the keyboard to play the video. We are. This is the transition. I will delete the transitions so that you can see
the Video width. And without the transition, to delete the transition we selected and right-click
Delete from the keyboard, or we right-click on it
and we select Clear. This is the video
without the transition. And this is the video after
we added the transition, would take a look at
number transition. For example, we open the slide folder and we
add this slide transition. Same thing. We put it here
between the two clips. Replay the video,
and here we are. Like I said, you can use
any of these transitions. We can edit the duration of the transition,
increases or decreases. With the mouse. At the end of the transition, we get this icon here. Same thing if we put the mouse at the start of the transition. Now we're going to
click on the transition and breadth to the side. Now we can increase the duration of the transition like this. We collect plane,
and here we are. So the longer its duration, the slower it's will be. Now we decrease its duration. We click plane, and here we are. It's very simple. We have the Timeline
duration here, and we can increase or decrease the duration of the transition
based on what we want. Now we select the
video transition. Then we go to Effect Controls. If you can see effects
controls here, go to Window and check it. Like I said, we click on effects controls and we can
see the transition settings. This panel is for effects only. We have here are the
effects direction. When we play the video, you can see the transition
starts from west to east. And we can switch it to
start from east to west. Same thing. We can start it from
north to south. Same thing we can start
it from north to south. And from South and North. Or even from the
northwest corner, or even from the
northwest corner. We can edit the start and
the end of the transition. And we can edit the transition duration from here as well. The only difference is that
we can edit defect duration from one side only,
not like before. Same thing. We can edit its duration from
this side as well. If we hover over
duration at the middle, we get this icon here. Now we can change the
transition effects position between the two clips like this. We can edit its duration
and position very easily. We have here the transition
alignments setting. We have here the transition
alignments setting We have here the customer starts because we unlined
this manually. We select center etiquette to center the transition
between the two clips. We select Start, It's got
to online ad like this, and end, it's got to align
the transition at the end. We can align its
any way we like. And end. It's got to align the
transition at the end. We can align it any way we live. Now we add the additive dissolve transition between
the two clips. Here. We click Play, and here it is. Now when we select
it, you can see that it has different settings. Take a look. Each transition
has different settings. We can edit the start
and the end like this. We'd looked plane. The transition looks
a bit different. Now. We can edit the start and the end of the transition to give
the results we want. We add another transition
at the start of the first clip and another
at the end of the last clip. Now when we click Play, we get this message here. Failure can apply
to a single clip. So we replace this
transition because it can be edit at
the start of a clip. We replace it with the
iris box transition. We click play. Here it is. Replace this transition
at the end as well. We click Play, perfect. Some transitions can be placed at the start score at
the end of a video. That's why you may get similar
message to the one we got. Just replace it
with one that works at the start and
you're good to go. We played all video.
And here we are. This is how we add and edit
our transition effects. Now if you take a close look at the transitions in
the dissolved folder, all the transitions are known, but the cross
dissolve transition has this blue line here. That means it's
the one activated. For example, we delete
this transition here. We have here a feature to add the transition effects
automatically. Software already selected
this transition. Now to add the selected
transition automatically, you just click
Command plus D for Mac users and Control
plus T for Windows users. So we select where we want
to add the transition. In this case here, Andrew click Control or Command plus D. Here we are. The cross dissolve
transition is the one edit. Same thing. We select this
area between these two clips, we click Control
or Command plus D. Here we are. The transition is replaced with the cross
dissolve transition. And you can set the selected
transition yourself. For example, the dip
to white transition. Let's click on it and click on Set Selected as
default transition. Now the dip to white transition
has the blue line on it. Now we select where
we want to edit and do click Control
or Command plus D. This is how we add an
edit transition effects. That's it for this video. Thanks for watching, and I'll
see you in the next video.
16. Adding text: Hello and welcome to this video. In the former video,
we saw how to add and edit transition effects. Now, in this video
we will see how to add text to our videos. So it's a text to our video. We select the Type Tool. Then we go to the media
player and we click, that's where we want to
add the text. Here we are. We get this icon here. And we have a text
layer at the Timeline. Now we type a text here. For example, we type
the wonder of nature. Of course you can type
whatever you like. Now we go to effects
controls and we open the text settings menu. We have here, the text we tight did the texts we need just let it first because we can't edit the
text without selecting it. We can select the
font type from here. For example, we
selected Arial font. We select the font
style from here. We have regular
italic, bold and bold. Italic, select the
one you like we said, the text size from here. We can increase it or decreases. Next we have here the
paragraph settings. Later we will type
a paragraph and comeback to take a look
at these settings. Next we have the
appearance settings. We have default setting
to select the text color. We click on the color
box and we select the color we like from
the color picker window. After selecting the
color, we click Okay. We select the color green. When we play the video, you can see the
text is in green. We select the text. Again. Just select the whole text
hold Control plus a for Windows users or Command
plus a for Mac users. Next we have the
stroke settings. We check it to add a
stroke to the text. Then we select the stroke color and we click Okay to light. We can change this
stroke type from here. We have outer, inner and center. Select the type you like. The stroke is a
bit old-fashioned and I don't like to use it, but feel free to use it if you'd like it and think it's cool. We set the stroke
size from here. Next we have the
background setting. We check it at a
background to the text. We select the background color. For example, we
painted in black. We can edit the texts
background opacity from here. We click plane. Here is
the text background. We said that sex
background size from here. We increase its size a bit. And we edit its
corners from here. We can make them
straight around. And we can always remove the texts background
by unchecking it. Next we have the shadow setting. We use it at shadow to the text. We painted in black. We can set its size from here. We can set its
position from here. And we can edit
its sharpness from here to make it sharp or blurry. Next, we have the
transform settings. We use the position setting
to set the text position. For example, we put it here. I'll remove the texts joke. We click Play. And here we are. As you can see, when
the Video reaches this point, the
texts disappears. And it starts from this point. We put the mouse on the
edge of the text layer. We get this icon and
we'd grab it all the way to start with the video so
that it starts with the Video. Same thing. If we wanted
to end with the video. We drag it to the end. We click Play, and here we are. The text starts with the
video and ENSO edit. Let's select the texts
and change its color. Remove its stroke. We've painted in white We click Play. And here we are. Of course, you can paint
it in any color you like. To remove the texts. We slept its layer and we click, Delete from the keyboard. We click and hold on the
type tool to get this list, and we select the
vertical type tool. We go to the MediaPlayer. We click where we
want to type text at. And we type Premiere
Pro for example. You can see the
text is Vertical. We click Command or Control plus a to select the whole text. We go to the text settings menu. Same thing. We can edit the text
size from here. And all the other
settings we saw before. We can put the texts
anywhere we want. We delete this text. Now we will see how
to type a paragraph. To write a paragraph, we
select the Type Tool. We go to the media player, then we click and drag
like this to get this box. This box or rectangle is where we will type
our paragraph. We release the mouse. Now we type our text. I have this text here. It's included for you to use. So we copy the text. Now right-click inside
the shape and do it based the texts are this
is our paragraph. We select the text
manually or by clicking Control
or Command plus a. We opened that sex
settings menu. Same thing. We select the font
type from here. We said the text size, the font style, and here we have the alignment settings
that we skipped before. We can align the
text to the left, to the center, or to the right. We can align the text
to the left line of the shape except the last
line of the paragraph. We can use the
alignment settings to align the text in
different ways. And we can align the
text to the top, the middle, and the
bottom of the shape. We alignment to the
dub and to the left. Next we use this setting to set the space between the words. For example, in Greece, the
space between the words, we click and drag to the right, and we click and
drag to the left to decrease the space
between the words. Next we have the space
between the lines setting. We hover over the setting. We get this icon and
we click and drag to the right to increase
the space between lines. And we'd drag to the
left to decrease it. Next we have the full board setting to set the
texts involved. And we have the italics to
set the text in italics. We have the all caps setting. To set the whole text and gaps. We have the small cap setting and the rest of the settings. To remove setting, you
just click on it again. Blue means the
setting is activated, and white means
it's not activated. Same thing. We changed the text color. We have here the stroke and
the text background settings. We already talked about
all these settings. We can change the text
position from here. And we have here some
more settings that we will talk about in
the coming videos. So that's it for this video. Thanks for watching and I'll
see you in the next video.
17. Adding Lower thirds: Hello and welcome to this video. In this video we
will see how to add Lower thirds to our videos. We started by going
into the Window menu and we check essential graphics. Here we have the essential
graphics menu here. We have multiple
Lower thirds that we can add to our videos. We take a look at
difference Lower Third, we click on it and we'll
drag it to the Timeline. We place it on top of the video. We click Play. And here we are. Let's increase the size
of the media player so that we get a good
look at the video. We've looked plane,
and here we are. Just the graphic we selected. And we get its settings here. We select the second
bar. Here it is. We use the fill setting
to change its color. We select any color we like. For example, sky blue.
We click OK game. We played the video,
and here it is. We changed the second bar color. Now we select the first bar. Here it is. We've means it's
in yellow. Reach lift plane. Here we are. Now misled. Transition. Here
is the transition. We've painted in black. We go back week slip
plane, and here we are. We can add a stroke
or shadow to it. If we want to
remove the graphic, we select it and we collect, delete from the keyboard. We go back to the browse menu. And we select another graphic. For example, the angle
Lower Third, iridescence. We edit to the Timeline. We go back to the start. We click play. Here it is. Same thing. With selected. We get its settings here. We select the text and the wildtype wherever
we want in here. For example, I will
type joseph Adam. You can type whatever
you like in here. We have here the alignment
transform settings. We can align the
text to the left. The middle. We have here at the position setting to position the text manually. We change the text
font from here. We select the text,
then we blows the fonts we have here and
select the one we like. We talked about the
text settings before. We said the text size from here. We go back, you can
play, and here we are. Now we'd leave this Lower Third. We select the gaming
Lower Third left. We edit to the Timeline. We put it over the video. We click play. Here it is. We select the lower third and
we get its settings here. This Lower Third is different
than the one before. We type our text here. For example, we
type video editing. We have here the subtitle text. For example, we type
learn Adobe premiere pro. Of course you can type
whatever you want in here. We select the title is
font type from here. We said the font
style from here. We can select bold,
italics, etcetera. Same thing for the
subtitle text. We select its font
type from here, and we slept its font
style from here. Next we have the animation speed setting. Who played a video? This is the animation. We increase its speed. We click play. Here we are. We use the animation speed setting to set the
animation speed. We have here the
styling settings. We change the main
color from here. We select the dark
pink, for example. This is how we add the
Lower thirds to our videos. We have multiple
graphics to choose from in the essentials
graphics menu. We add the one we
like and we adjust it using the settings to
get the results we like. So that's F for this video. Thanks for watching and I'll
see you in the next video.
18. speed and slowmotion: Hello and welcome to this video. In this video we'll see how
to speed and slow our videos. We don't need this video, so I'll remove it
from the Timeline, and I will add this one instead. This video is included
for you to use. After we add the video to the Timeline, we
get this window. This window appears when the new Video Settings does not match the sequence settings. So we select Change
sequence settings to match them with
the Video Settings. Here we are, this is our video. Now right-click on the video in the Timeline and we select Speed Duration. We
get this window. Here we have the speed rate
in older normal videos, the speed is set to 100%. When we increase it, the
video becomes faster. And when we decrease it, the video becomes slower. Speed, we can
increase it manually, or we can click on the setting in black to
the right to increase it with drafted
right to increase the speed and rejected
left to decrease it. Now we said the speed
at 150 per cent. Then we click Okay. You can see the video
is now shorter. Replay the video.
As you can see, the video is now faster. Right-click on the video again
and select Speed Duration. We increase the speed, for example, to 187, 178. But if you increase
the speed too much, there will be some issues, especially if the video is
filmed with a low number of frames. Now click Okay. Replay the video.
And here we are. The video is very fast. Again, right-click on the video, we select speed, duration. We said speed back to 100%. This is the normal speed. Now to slow the video, we need to decrease this rate. So we set it to 50 per cent. For example. We click Okay. As you can see, the video is no longer. The slower the video, the longer it will be. The faster it is,
the shorter it will be replayed the video. And here we are. The
video is in slow motion, so this is one way to
speed and slow our videos. We have another way to do that. We take a look at it. We put the video back to its normal speed
to 100 per cent. Increase the size slightly. Now, if you take a close
look at the video track, you will see this icon here. So right-click on it. We go to time remapping
and we select speed. We get this line in
the middle here. If we pulled the lead up to
increase the Video Speed, we get this line in
the middle here. We're bolder line up to
increase the video speed. And we lower it down to degrees the Video Speed we collect on
the line and we pull it up. You can see the speed rate
increasing below the deck. After we released the mouse, the video becomes shorter. The video is faster. Now when we lower the line, the video becomes longer. And when we play it, you
can see it's slower now, to under our last move, we can click on Command plus Z, or we can go to Edit
and we select undo. The video is back
to normal speed. Now what if we want to speed a certain part of the video
and slow another part. It's very simple. When we
get this line on the track, we get the keyframe tool here. Now let's say that
we want to speed the first part with the video
and slow the other part. We started by setting
keyframe here. After set and the keyframe
we get this line here. It's like we split the video. Now when we pulled the line
up to increase the speed, we only speed this part. And we lower this part to
decrease speed. We can explain. And here are the video starts fast and then it slows down. We can add another
keyframe here. And we increase the
speed of this part. We go back, we click plane, and here are the
video starts fast, then slow, then fast again. This way we can speed or slow any parts of the
video that we want. Now, if you take a close look at the transition between the
speeds, it happens suddenly. So we need to smoothen
the transition. We select the keyframe
and drag it to the right. Now you can see the
line looks like this. We have a straight line here. But here we have a tilted line, which indicates
that the transition between the speeds
is now smoother. We can use the
keyframe tool to make the line corners a bit curvatures more than
the transition process, even more. Neglect plane. And here we are. The transition between
the speeds is now smaller. Same thing here. We select the keyframe
and we drag it to the right to tell
the speed line. And we make its
corners a bit curvy to smooth transition process
at this point as well. So this is how we can edit
the speed of our videos. Now we'll move this video
and we add another one. We take only this
part of the video. We want to keep the
Video Speed normal up until the points where the
character does the backflip. Then we slow it down right here. Now right-click on the
icon at the video track. We go to time remapping
and we select speed. We add a keyframe. At this point. We will slow this
part of the video. We select the keyframe. We drag it to the right to tilt the speed line and smooth
the transition process. We just the lines corners
to be a bit curvier. We go back quickly, plane. And who are the video is a normal speed and then
it slows down like this. It did disputes lately. That's better. We can set the Video Speed
back to normal at this point. We add a keyframe and we
put blind to the middle. We smooth transition process. We go back, we click
plane, and here we are. Normal speed, slow, and
then back to normal speed. This is how we can speed or slow our videos. That's
it for this video. Thanks for watching and I'll
see you in the next video.
19. reverse video: Hello and welcome to this video. In the former video,
we sell how to speed and slow our videos. Now, in this video, we will
see how diverse our videos. It's very simple.
We have this video here. Take a look at it. The characters are
walking forward. Now we will reverse
the video to make them look like they are
walking backgrounds. So let's click on the video
track and a select speed and duration. We get this window. Now we check reverse speed. We click Okay. We played
the video. And here we are. The characters look like they
are walking backgrounds. This is how we can reverse our videos and add some
cool effects them. That's it for this video.
Thanks for watching, and I'll see you
in the next video.
20. unlink video and audio: Hello and welcome to this video. In this video we'll see how to unlink the audio
from our videos. We have this video
here with audio. If remove the video, the audio moves with
it. So let's say this. We want to remove the
audio in this video and replace it with another
one. It's very easy. Let's click on the video track. And we select unlink. Now the audio and
video are unlinked, and we can select
each one separately. When we move the video, the audio file stays put and does not
move with the video. Now we can remove
the audio file, we select it and we collect
the lead from the keyboard. Now we can replace it
with another audio file. We go to the Resources folder
and we add this audio file. It's included for you to use. We imported and we add
it to the Timeline. We use the razor tool to cut the audio file because
it's too long. We remove the extra part. The audio and video are
in the same duration now. But the audio and video
are still separated. So we need to link
them together. We select both of them. Right-click and select link. Or they are linked. When we move the video, the audio moves with it. This is how we unlink audio
from videos and replace them. That's if this video,
thanks for watching, and I'll see you
in the next video.
21. split screen: Hello and welcome to this video. In this video we will see
how to split the screen and show multiple videos
at the same time. We start by adding the first
video to the Timeline. Now we add another video. It's the same character, just a different
angle in each video. Now we will see how to show
both videos at the same time. We put one video on
top of the other. We select the top video. We go to the effects panel. You can see the effects
panel go to Window and check effects. We type crop. This is the crop effect with
drag it to the top video. We select the
second video and we add the crop effect
to it as well. We go to effects controls. We have here, the
crop effect settings. We select that video. We go to the crop
effect settings and recap the video
from the left. Same thing from the right. Now we use the position setting to put the video, to direct. Select the second video. We grab it from the left. We'd drag it to the left
so this we can see it. We crop it from
the left, slightly like this to cover the
rest of the screen. You grab it from the
rights as well. Perfect. We go back to the start, we click Play, and here we are. We are showing two
videos at the same time. We have a normal shot and the close-up shots
of the same video. We can split the screen
and show three videos. We select the first video and
we crop, it's from the top. We crop and slightly
from the bottom as well. We use the position setting
to place the video down here. Just the video
slightly like this. That's better. Now we
add another video. Here it is. We add
it on the top. We add the crop effect to it, and we crop it from the top. We grab it from the
bottom as well. Then we use the position setting to place it on the
top right corner. You crop it from the left first. Then like I said, we place it on the top-right corner. Perfect. We click Play. And here we are. We are showing three
videos at the same time. This is how we can
split the screen and show multiple videos
at the same time. That's it for this video.
Thanks for watching and I'll see you
in the next video.
22. Stabilize shaking videos: Hello and welcome to this video. In this video we'll see how
to stabilize our videos. We have this video here. And as you can
see, the camera is shaken and the video
does not look good. So we will see how
to stabilize it. We go to the effects panel. We type warp. We get the
Warp Stabilizer effect here. We drag it to the
video in the Timeline. The software is analyzing
the background. Who waits for a bit.
Here, it's done. We click play. Here, are the video is stable and
there is no more shaking. Take a look here. This
is the video before, and this is the video
after we stabilized, it would take a look
at another video. We added to the Timeline. Here it is, take a look at it. It's shaken as well. So we add the Warp
Stabilizer effect to it. We wait for a bit. The software is analyzing the background. Now, it's done. We click Play. And here are the
video is stabilized. If you take a close
look, you will notice that the video is stable, but it still moves. Now if we want to fix the video so that it does
not move anymore, we go to the Effects
Controls panel. We have here, the Warp
Stabilizer effect settings. We go to the stabilization menu, to the results setting, and we select no motion. We wait for a bit
to, the software, is stabilizing the video. It is. Now we collect plane. And here we are. The
video is stable. So this is how we
stabilize our videos. That's it for this
video. Thanks for watching and I'll see
you in the next video.
23. remove noise: Hello and welcome to this video. In this video we'll see how
to remove the noise from our videos. We played the video. You may not see
the noise clearly, so we zoom in on the video. Here we are. As you can see, we have too much noise here. Now we will see
how to remove it. We select the video, go to the effects panel
and we take noise. We selected the
VRD noise effect. We edit to the video. We have its settings here in
the Effects Controls panel. We have here the
noise level setting. After adding the
effect of the video, the software remove
the most directly. Who paused the
effect. Here we are. This is the video
without the effect. And this is the video
after we edit the effect, the noise is gone now. And we can set the
noise level to maintain the proper resolution. We zoom out. So this is how we can remove the
noise from our videos. Just pay attention to the
noise level in the video. So that's it for this
video. Thanks for watching and I'll see
you in the next video.
24. remove object from video: Hello and welcome to this video. In this video we will
see how to remove any moving object
from our videos. We have this video here
with this character moving. Now we will see how to remove this character
from the video. First thing to know
is what we will do now only works for
stabilize videos. Now we start by
duplicating the video. We put it on top. We hide the lower video for now. Next we go to effects controls. Now we click on
Create ellipse mask. Here we are. This is
the ellipse mask. We put it on the character
before adding the Mask, Make sure to select the top
video and not the lower one. Now it just the mask based
on the character shape. We increase the mask feather
too soft and damask edges. Now we click on Mask
Path to add a keyframe. We use this keyframe
to move the mask. Now we select the mask so
this we can see damask edges. You can see the keyframe here. Next we move the cursor here. And we drag the Mask to
track the character. When we move the mask, new
keyframe was added here. Again, we move the cursor and we move the mask to
drag the character. And to keep going like this
until the end of the video. We are done. We go
back, we click play. Here we add the mask
cracks the objects or the character movement,
and follows it. Now we click on inverted,
reverse the process. The whole video is visible
and the character is hidden. We click play. Here we are. Now we shall the
Lord crack back. We select the razor tool. We can select it or use the shortcut see
from the keyboard. Now we split this video. We reverse the position
of the two parts. We go back, we click
Play. And here we are. The character is gone and
removed from the video. And of course now you can
replace the character or the objects with another
character or object if you want. And like I said, this technique
we used works only with stabilize videos and without any other objects or character is moving
in the background. So that's it for this video. Thanks for watching, and I'll
see you in the next video.
25. Second Homework: Hello and welcome to this video. It's homework time. We have this video here. And as you can see,
the camera is shaking. I would like you
to stabilize it. It's very easy and simple and we already saw
how to do that. So that's it. And
I will see you in the next video to correct
the homework together.
26. Create Second Homework: Hello and welcome to this video. In the former
video, I have asked you to stabilize
this video here. Now we will do that together. So we go back to the
start of the video. We go to effects and we
locate the Warp Stabilizer. We just type warp and
we get the effect here. Now we add the
effect of the video. The software analyzes the video, then it will stabilize it. We are, go back, we click play. The video is now stable. All the shaking is gone. This is the video before. And this is the video now. This is how we
stabilize our videos. That's it for this
video. Thanks for watching and I'll see
you in the next video.
27. how to animate objects: Hello and welcome to this video. In this video we will
see how to create an animation with the
Adobe Premiere Pro. We will start by
adding a background. So we click on new item. We get this menu, and
we select Color Matte. We get this window. We have here, the
Video settings, it changed nothing here. We just click, Okay, we select the background color. For example, we select the
color white and we click, Okay, we named the background
and we click Okay. Here we are. This
is our background. Here. We drag the background
to the Timeline. We increase its duration. This is our background. Now double-click on
the projects panel. We add the logo. This logo is included for you to
use. We click Import. Here it is. We edit to the Timeline
and we increase its duration to match the
duration of the background. We have here, the
background and the logo. To start our animation, we select the object
that we want to animate. In this case the logo. So we select it. Then we go to effects controls. We have here the
motion settings. If the motion menu is closed, you open it to see the settings. We have here, the
position setting. We use it to move the logo from right to left and
from top to bottom. Next we have the scale
setting, the object size. Next we have the rotation
setting to rotate the object. And we have here the
opacity setting. We use it at the d.school
opacity of the object. Of course, we can apply
these settings to images, texts, or anything that
we want to animate. We have here at the
animation timeline. It's the same as the
Timeline we have down here. As you can see, when we move
the cursor in this timeline, It's moves in the other
Timeline as well. We use the cursor to set the start point
of our animation. For example, we want to start our animation at this point. So we set the cursor here. We go to the position setting and we click on
Toggle animation. As you can see, the toggle
animation icon is in blue. We have a dot on the Timeline. We call this dots a key-frame. Key-frame determines
the starting point and the end points
of an animation. Now we put the cursor at
the point where we want the animation to end.
For example, here. Now click on the position
setting and we'd drag to the right to
place the logo here. After we release the mouse, you can see a new
keyframe added here. This keyframe marks the
end of the animation. We put the cursor back
here and we click play. Here we are. This is our simple animation. It started at the first keyframe and ended on the second one. We want to increase the
duration of the animation. We've just click on
the end keyframe. Then we'd drag it and put it at the new points where we
want the animation to end. The animation is slope
because it's long. We can speed it up by decreasing
its duration like this. We can change the starting
keyframe position as well. For example, we put
it at the start. We click plane, and here we are. Add another animation.
For example, we put the logo back to
its original position. We set the cursor here. Who put the logo back here
using the position setting. We have a new keyframe. We click Play, and here we are. The logo starts here, moves and comes back.
More than the animation. We slept all three keyframes. Then right-click on
them and we go to temporal interpolation and
we slept easy in, easy out. I will select Easy out. You can see the
keyframe icons changed. We can play, and you can see the animation is
smaller than before. Now we delete these keyframes. Who put the cursor at the start. After deleting
keyframes, we can click on Toggle animation to
add a new keyframe. Instead, we click on
Add keyframe to edit. This is animation
starts keyframe. Now we put the cursor here. We can move the logo
from right to left here. And we can move the logo
from top to bottom here. We drag right to lower the logo, and we drag left two bullets up. We will do logo all the
way up until it's gone. We go back to the start. We collect plane. And here are the logo
starts at the middle, then it goes up until it's gone. We delete these keyframes and
we reverse the animation. We add a keyframe at the start. We pulled the logo
up until it's gone. We put the cursor here. We add a keyframe and we pulled the logo
back to the middle. We go back to the start, we click Play, and here we are. Logo comes down
from top to middle This is useful to create
a simple intro to your YouTube channel or
your social media videos. Just the animation
and give them, you need to select it. Just let a keyframe. You can put the cursor on it, or you can use the keyframe
arrow to navigate through the keyframes and select
the keyframe you want. Then you can make
the adjustments you want your animation. We use the keyframe arrows to navigate through two
keyframes back and forth. With delete these keyframes. We click on the
position setting, toggle animation
icons on select it, and we click on Toggle animation and scale setting to select it. Now we scaled the
logo down to zero. We can click and drag to
the left until it's zero. Or we can double-click on the setting and we
type zero manually. Add the logo is gone. Now we set the cursor at the animation endpoints and we put the logo scale
back to 100 per cent. We click Play, and here we are. It's like the logo
comes from nowhere. We put the cursor here and
we scale the logo to zero. Again. We can explain,
and here we are. The logo comes from nowhere. Then it disappears again. With lead, these keyframes. Remove to the rotation setting. We click on Toggle animation. We put the cursor at the
animation end points and we rotate the logo. We can save 360 to rotate
the logo for 360 degrees. We go back to the start. We click Play, and here we are. The logo rotates
for 360 degrees. With lead these keyframes. We click on Toggle animation
on the opacity setting. To add a keyframe here, we set the opacity to zero. We put the cursor
at the end point, and we put the
opacity back, 200. We go back, we click Play, and here are the logo appear
to slowly out of nowhere. Increase the animations
duration to slow it down. And we decrease its
duration to speed it up. Like this. Now we
put the cursor here. We click on Toggle animation
on the position setting. Who put the cursor here and we change the position
of the logo to hear. We click on Toggle animation
on the rotation setting. We put the cursor here. We rotate the logo and we use the opacity
setting to hide the logo. Go back to the start. We click Play, and here we are. The logo moves, then rotates, and then it disappears. This is how we can create
multiple animations as once. So that's if there's video, thanks for watching and I'll
see you in the next video.
28. Anchor point tool: Hello and welcome to this video. This video we'll take a look
at the anchor point tool. Now, if we rotate the logo, it rotates like this. From the center. A quick note, you can
always reset setting by clicking on the reset icon
of the selected setting. Like I said, when
we rotate the logo, it rotates from the center. Now we select the
anchor point tool. We see this shapes around them, the logo, and we have anchor
points at the middle here. The anchor point is the point that the logo rotates around. For example, if we
put it right here, when we rotate the logo, it rotates like this. Like I said, the logo rotates
around the anchor points. No matter where we put it. We reset the setting and we
put the anchor point here. Same thing. We rotate the logo. Now, it rotates like this. Now we put the cursor here. We can look on the rotation setting toggle animation icon. We put the cursor here and we
rotate the logo like this. We go back, we click
Play, and here we are. The anchor point
is the point that the selected object
rotates around. And we can put it
anywhere we want. And we will take
a further look at this tool in the coming videos. So that's it for this
video. Thanks for watching, and I'll see you
in the next video.
29. Text animation: Hello and welcome to this video. In this video we'll see
how to animate text. I have this video here. It's included for you and
the resources folder to use. We select the type tool. We type our text here. For example, with type
the word editing. We select the text. We go to the Effects
Controls panel. We opened the text
settings menu. We already talked about all
the settings in this menu. Now we increase the text size. We change the font
style to bold. We change the font type, we select the fear a sense font. We increase the text
size a bit more. We positioned the
text at the middle. We close the text settings menu. We start animating our text. We put the text at the
middle of the video. Who put the cursor at the
starting point of the text. We click on Toggle animation
to add a scale keyframe. Then we set the
text scale to zero. Now we jumped three
frames forward. To do so, we click on the right arrow on the
keyboard three times. Or we can use the cursor. Of course, it's fine
with either way. Now we put the
text scale at 120. I will adjust the Timeline so that you can see the keyframes. Here they are. We jump forward
three frames again. And we set the text
scale to 100 per cent. We go back, we click
Play, and here we are. The animation is so fast, so we increase its
duration, so slow it down. Like I said before, the
longer the animation, the slower it will be. Now we'll click plane,
and here we are. We can smoothen the animation by selecting all the keyframes. Then right-click and
we select Easy out. We go back, we can explain. And here we are. The animation looks
smoother than before. So that's it for this
video. Thanks for watching, and I'll see you
in the next video.
30. animate text in 3D: Hello and welcome to this video. This video we will see how
to animate it 3D text. We start by selecting the type
tool and we type 3D text. Of course, you can type
whatever you like. Never go to the effects panel. And we search for basic
3D. Here's the effect. We drag it to the text on
the Timeline to edit to it. And we can see in the
Effects Controls panel, the basic 3D settings. We have this level setting. We use it to rotate
the text like this. You take a look at it. We set the cursor at the start. We click on Toggle animation. Now we put the cursor here. We rotate the texts
by 360 degrees. We go back to the start, we click plane, and here we are. The texts levels like this. We delete these keyframes. Now. We click on Toggle animation
on the tilt setting. Same thing. We tell the text. Go back, we click
Play, and here we are. The text is animated in 3D. We remove the keyframes. Now we'll take a look at the
distance to image setting. We use it, added the
text to make it look so far or so close
from the screen. We use it, edit the text to make it look far or close
from the screen. So we click on its
toggle animation icon. We put the cursor here. The max distance is -100, so we set it to -100. But we have a problem. At the end of the animation. The text stays like this
and covers the screen. To fix that, we
go back slightly. We click on the
animation settings, toggle animation icon. We keep it as 100%. We put the cursor at
the end points of the distance to image animation. And we set the opacity to zero. Now we go back, we click play and who we are problem-solved. The text looks like it
goes through the screen. This is how we can
animate our texts in 3D. That's it for this video.
Thanks for watching, and I'll see you
in the next video.
31. text type animation: Hello and welcome to this video. In this video we will see new and different
text animation. Starts by clicking
with the type tool. But we don't type anything. We opened the text
settings menu. We click on Toggle animation
on the source text setting. It gets out keyframe. Now we put the cursor here. We go to the same spot
we selected before, and we type the first
letter. For example, a. We put the cursor here. We type the second letter, N. We put the cursor here. And we type the next letter. We keep going until the
way type the whole text. We type the word animation. We are. We go back to the start, we click Play, and here we are. The text looks like it's being typed one letter at a time. We decrease the duration between the keyframes to make
the animation faster. We go back, we click
Play, and here we are. The animation is faster now. This is how we make
the texts look like. It's type one letter at a time. We can reverse the animation. We delete all the keyframes. We go back to the start and
we keep the text tight. We add a keyframe at the start. We move the cursor and we
delete the last letter. Again. We move the cursor and
we delete the last letter. We keep going like this until with leads,
all the letters. Here we are. We go back. You can lay, and here it is. The text is deleted
one letter at a time. So this is another texts
animation that we can create. It's very cool and simple. That's if this video,
thanks for watching, and I'll see you
in the next video.
32. Third Homework: Hello and welcome to this
video. It's homework time. After all that you have
learned in the former videos, I would like you to create
this simple anchor. All the media files used are included for you in
the Resources folder. You have the logo
and the audio file. So go ahead and
create this intro, and I will see you
in the next video to create it together.
33. Create Third Homework: Hello and welcome to this video. In the former video, I have asked you to create
a simple anchor. Now in this video, we
will create it together. We started by creating
the background. So we click on new item, we select Color Matte, we get this window. We don't change
anything and we click. Okay, we paint the
background and White. We click Okay, we can name
our background and we click, Okay, here is our background. Now we drag it to the
Timeline important logo, and the audio file. We add the logo to the Timeline. You put it on top
of the background. We select the logo and do we go to the Effects
Controls panel? We click on Toggle
animation in scale setting. We scale the logo to zero. To make it appear
out of nowhere. We put the cursor here. We scaled the logo to 110%. We put the cursor here, and we set the scale
back to 100 per cent. We click Play. This is the animation. We select the keyframes, then right-click and
we select Bezier. More than the
animation like this. We put the cursor slightly after the first
animation keyframe. We go to the Effects
panel and we search for basic 3D effect. It is. We used this before. We'd drag it to the
logo in the Timeline. We have its settings here at
the effects controls panel. We click on the swivel setting
toggle animation icon. You put the cursor on top
of the last keyframe. We use the keyframe arrows
to select the last keyframe. Then we swivel the
logo by 360 degrees. We go back to the start. We click plane, and here we are. We select the keyframes, right-click on them,
then we select Bezier. Here we are. The animation is smaller. Now. That's it for the logo. Now we add the text. We put the cursor
here so this we can see the final
position of the logo. We use the Type Tool
to type space digital. This is just an example. We select the word space. We go to the text settings menu. We said the texts time to light. The first word is light and
the second word is bold. You can change that if you want. We use the selection tool to put the text below the logo here. Now we animate the text. Pupils at texts a bit. We select the texts
in the Timeline. We go to the text settings menu. We click on Toggle animation
in the position setting. We put the cursor here and we lower the texts
all the way down. We go back, we click
Play, and here we are. We selected texts keyframes. Right-click. We go to temporal interpolation
and we select Bezier. We go back. We can play. And here we are. The animation is smaller. Now at the audio file to the
Timeline, we put it below. We click Play, and here we are. This is our simple intro. We can use it for
our YouTube videos or our social media videos. We use the razor tool to cut this part of all
the media files. And we delete them
to keep the intro. And then you can add your
videos after the integral. That's it for this video.
Thanks for watching, and I'll see you
in the next video.
34. crop animation: Hello and welcome to this video. In this video we'll take a
look at the crop animation. The club used here
is included for you to use the logo as well. Now we add the logo
to the Timeline. We put it on top of the video. We will apply the crop
animation to this logo. We go to the Effects panel and we search for the crop effect. Here it is. We drag it to the logo
and the Timeline. Here we have the crop settings in the Effects Controls panel. We need to set the crop corners. We set its left corner to
set it exactly to the logo. Same thing from top corner, from the right as well. And finally from the bottom. Perfect. I pulled the crop
inside the logo so that I get a good look at
the edge of the logo. Then I said the crop. The crop is set
from all corners. Now. Now we can't animate the logo using
the position setting. It's will not work.
So we go back to the Effects panel and we serve for the transform effect. This is the transform effect. We add it to the logo
in the Timeline. We have its settings here. We hide the transform
and the club settings, and we will look
transform below the crop. We opened it transform
settings menu. Now we use it transforms position setting
to move the text. Now we can create
the crop animation. We put the cursor at the
animation and point. We add a position keyframe. Who put the cursor
back to the start. And we use the
position setting to lower the texts until it's gone. You can explain.
And here we are. We decrease the animations
duration to split it up a bit. We click Play, and here we are. We select the keyframes
and with lead them. We put the cursor here. We add a position keyframe. You put the cursor back to the start and we hide
the logo to the left. We go back, we click
Play, and here we are. Logo Buddhist from
nowhere like this. So this is the crop
animation and how to create it. That's
it for this video. Thanks for watching, and I'll
see you in the next video.
35. images animation: Hello and welcome to this video. In this video we'll see
how to animate images. We stamps by adding
these three images. The images are included
for you to use. Feel free to use them
or your own images. We add images to the Timeline. Decrease the duration slightly. Make sure that they
have the same duration. That's perfect. We said them in this order. That's better. We already know how to animate. Now we only applied
that to the images. We use the position setting
to move the images. But if we move the image
using the position setting, we get this black space here. So first we scale the image. We said it's scaled to 120%. Then we move the image to the left using the
position setting. Now we click on Toggle animation
on the position setting. Then we put the cursor
at the end of the image. Now we move the image
back to the right. We go back, we click
Play, and here we are. This is our animation. That's better. Now we animate the second image. We put the cursor at the
start of the second image. We click on Toggle animation
on the scale setting. On the rotation setting. We put the cursor at
the end of the image. We scale the image
and we rotate it. We go back, we click
Play, and here we are. These are the two first images. Now we put the cursor at the
start of the third image. We select the image and we
put the cursor at the start, we click on Toggle animation
on the opacity setting. We set the opacity
to 50 per cent. Now we put the cursor at
the end of the image. And we put the opacity
back to 100 per cent. We go back, we click
play, and who are. We can scale the image as well. Now we'd go back.
We can look Blaine, and here are these are the
three animated images. This is how we can
animate images. That's it for this video. Thanks for watching, and I'll
see you in the next video.
36. black bar animation : Hello and welcome to this video. In this video, we'll take a look at the black bar animation. We have this video here. It's included for you to use. Now we'll click on new
item and we select adjustment layer.
We get this window. These are the sequence settings. We keep them as they are. We click Okay. Then we add the adjustment layer to the Timeline. On
top of the video. Go to the effects panel
and we search for the crop effect. Here it is. We drag it to the adjustment
layer in the Timeline. Whenever we edit an effect, we find its settings in the
Effects Controls panel. We set the cursor to
the start of the video. You click on Toggle animation
of the top setting. And the bottom setting. We set both settings
to 50 per cent. You can see the whole
screen is black. Now, we put the cursor at the point where we want
to open the bar ads. If we put zero here at the bar opens and disappears entirely. If we want to keep
a portion of it, we set it to ten per
cent, for example. Same thing for the
bottom setting, 10%. We put the cursor
back to the start. We clicked plane,
and here we are. This is the black bar animation. We select the keyframes, then right-click and we select Bezier to smoothen
the animation. We click Play, and here we are. This is how we can create the black bar animation.
That's it for this video. Thanks for watching, and I'll
see you in the next video.
37. animate images in 3D: Hello and welcome to this video. In this video we'll
see how to animate images using the
basic 3D effect. Already edit the background. Now I add this image. You can add a single image
or a multiple images. Now we put the cursor at
the start of the image. We go to the effects
panel and we locate the basic 3D effects. Here it is. We edit to the
image in the Timeline. This image is too big, so we scale it down a
bit. That's better. We click on Toggle animation on the swivel setting
and itself setting. Now we put the cursor
at the middle. We swivel the image and
we tilted like this. Now we put the cursor at
the end of the image. And we said the swivel and
it tells back to zero. We go back. We can explain. And here we are. This
is our animation. Now let's, let's
all the keyframes. Right-click and select
Bezier. We click Play. And here are the animation
is now smoother. Now we delete the keyframes. It creates a
difference animation. We add swivel keyframe at
the start of the image. We put the cursor at the
middle of the image. And we rotate the
image is 360 degrees. We put the cursor at
the end of the image. And we put this
level back to zero. We go back, we can
play, and here we are. This is another animation we can create using the
basic 3D effect. This is another animation we can create using the
basic 3D effect. That's it for this video. Thanks for watching, and I'll
see you in the next video.
38. Create Slideshow: Hello and welcome to this video. In this video we'll see how to create an animated Slideshow. We have these three images here. They are included
for you to use. Of course, you can use your own images if you prefer that. We add images to the Timeline. Images duration is a bit long. So we need to decrease it. We put the images on top of each other to make
sure that we set them to the same duration
are perfect. Now we'll put them back. We select the images
and we duplicate them. We hold Alt and drag them
up to duplicate them. Now we hide the top drag and we add a blur
effect to these images. These images will
serve as a background. So it's I blur in the
effects search bar. We select the
Gaussian blur effect and we added to the first image. We said the balloonist 100%. Let's click on the Gaussian Blur setting and we select Copy. Select the second image, then right-click and
we paste the settings, apply the same effects
settings, the second image. Now we slept the third image. Again, right-click and
paste the settings. Now we showed the top pack back. We select the first
image and we set its scale at 65 per cent. Same thing for the
other two images. Here we are the images already. Now we add a border
to the images. We search for radial
shadow effect. Here it is, we add it
to the first image. We select the image to see
the effects settings here. Now we check Resize layer.
Here is the border. We painted in white. We set its opacity
to 100 per cent. We use light source setting to set the border sides like this. And we'll use the
projections distance setting to set the border size. Now right-click on
the radial shadow setting and we copy it. We select the second image and we paste the settings here. We select the third image and we paste the
settings as well. All the three images
have the same settings. Now we animate them. We look for the slight effect. Here it is. We added between the images on the top
track and the bottom one. Here is the slight effect. Now we'd go back. We click Play. And here's our Slideshow. To change this
Slideshow direction, we click on the slide
effect in the Timeline, and we select north to south. Same thing for
this slide effect. We click Play and here we are. And we can change the direction
of each slide effect. To make it look like this. I only edit we images. And of course you can add as many images as
you want in here. And you can add
multiple effects. Do it. Now we
animate the images. We select the first image. We click on Toggle animation
on the scale setting. We put the cursor here and we
scale the image like this. We go back. We can play. And
here is the image. We select the second image. We click on Toggle animation
on the rotation setting. We put the cursor here and we
rotate the image like this. Now we select the third image. We click on Toggle animation
on the position setting. We put the cursor at
the end of the image. And we lower the image
slightly like this. We go back to the start. We click Play, and here we are. This is our Slideshow. This is how we can create
an animated Slideshow. That's if there's video,
thanks for watching, and I'll see you
in the next video.
39. banner animation: Hello and welcome to this video. In this video we will see how to create an animated banner. This is the banner
that we will use. I designed this myself using the Photoshop software and I
exported it in PSD format. Now we go to Premiere Pro. First we see how to
import a PSD files. We go to File Import. We select the file and
we click on Import. Next we get this window here. We have here multiple options. First we have the
merged all layers. If we selected this option, the whole design
will be imported as a single layer and we will
not be able to animate it. So instead, we select individual layers,
each layer separately. So now we click Okay. We have the design folder
in the projects Panel. Double-click on its, open it. Here we are. These are the design layers. We start by adding
the background layer. Then the bottle necks,
the fruits effect. Next the text background. And finally the text on top. We can assign a different color to each layer to separate them, right-click on the layer
and we select label. Then we select the
color, we want. A different color
for each layer. Are the layers are separated. Now we start the
animation process. We hide all these layers, do not get distracted. We keep the background
and the bottle only. We select the bud layer. We go to effects controls. We set a position
keyframe at the start. Then we drag the bundle to
the left Intel, it's gone. Next we'll put the cursor here. We bring the bottle
back and password. It was originally, we put
it nearly in the middle. Next week with the cursor here. And we reset the
position key frame to put the bottle in
its original place. Here we are. Now we go
back, we click Play. This is our animation so far. Now we animate the
fruits effect. So we show its layer. We select the bud layer. This is where the
bottle animation ends, and that's where we will start
the fruits animation at. So we select the
fruits effect layer, we go to effects controls. We add an opacity keyframe. And we lower the
opacity to zero. We put the cursor here, and we reset the opacity
setting to set it back to 100. Go back, we click Play. This is our animation now. Now we put the cursor
at the exact frame, the fruits effects animation and we show back the
texts background. We go to effects controls. We add a position keyframe, and we drag the text background to the right until it's gone. Now we put the cursor
here and we reset the position keyframe to bring the text background to
its original place. We go back, we click
play and who we are. Perfect. Again, we put the cursor at the exact framed less
animation ended at, we showed the text layer back. We got to effects controls. We add an opacity keyframe. We lower the opacity to zero. We put the cursor here and we
reset the opacity setting. We go back, we click
Play. And here we are. This is our animation. This is a simple
animation for our banner. Now it's like the bud layer. We select all the
keyframes of that layer. Right-click. We go to
temporal interpolation and we select ease in just
more than the animation. We click Play, and here we are. So this is how we can animate
each layer separately, animate our banner design. That's it for this
video. Thanks for watching and I'll see
you in the next video.
40. Double exposer effect: Hello and welcome to this video. In this video we will
see how to create the double exposure effect. We have this video here. Now we will add
the effect to it. All the media files
that we use here are included for you and the
resources folder to use them. Now we add this effect
video over the video in the Timeline defect Video size is smaller than
that of the video, so increase its scale until
it covers the whole screen. Now, how do we merge the
effects with the video? It's very simple. We start by selecting
the effect video. And do we go to the
Effects Controls menu? We have the blend
mode setting here. We have a lawn menu. Now we select the
Screen blend mode. Here we are defects, black background is gone. And we get this effect
on the video here. Now we go back. One important thing to merge
the effect with the video. In this way, the effect has
to have a black background. The Screen blend mode removes the blood background
to get this result. It removes the black
background and keeps the rest to
get this effect. Now we'll remove the two videos. We add this video
to the Timeline. We change the sequence settings, and we add the effect
video on top of it. And same thing, we select
the effects video. We go to Effect Controls blend
mode and we select screen. This is the video before and
after we add the defect. This is one way to add
effects to our videos. Remove the videos. And we add these two
videos to the Timeline. As you can see, the
R2 different videos of the same character. Each video is taken
from a different angle. Now we will merge them. We see this effects lot
in movies and series. It gives the impression
that the character is thinking or imagining himself
in a certain situation. Same thing. We select the top video. It's necessary that you apply the change
to the top layer. Now we select the
Screen blend mode. We click Play, and here we are. The two videos are merged. To make this video looks better. We drag the character's
face to the site. So we use the position
setting to drag it here. As you can see, when we drag it the characters to the side, we left this black area here. So to fix that, we go to
the opacity setting and we select the free drug Bezier
tools create a mask. Then we draw a rectangle
over the video. The mask we created a selected. Now we're just damask
pattern setting like this to add a gradient to
the edge of the video. We click Play. And here we are. We can decrease its
opacity as well like this. We adjust the mask
feather a bit more. We adjust the mask
slightly like this. And we adjust the mask
feather a bit more. That's better. We click
play and who we are. The two videos are
merged together. This is how we create an
effects by immersion videos together. That's
it for this video. Thanks for watching, and I'll
see you in the next video.
41. Flicker effect: Hello and welcome to this video. In this video we will see how
to create a flicker effect. We have this value here. It's a video of a person doing a backflip will start
defects from this moment. So we select the razor
tool or with Lexi from the keyboard to cut the
video at dyslexic moment. Now we extend the Timeline and we got the video
frame by frame. You put the cursor at
the moment where we will stop cutting here. And we got the video frame
by frame, like I said. Perfect. Now we select
the selection tool. We delete each second frame. We leave a frame and we
delete the one after it. We keep going like
this until the end. Perfect. We go back, we click play and who we are. This is the flicker effect. We can add more effects. We pull this video
to the upper drag. Then we add the same video
in detract below it. Now we go to effects and
we search for the black and whites effect. Here it is. We add it to the bottom video. Now we've looked plane.
And here we are. Now we search for the
Horizontal flip effect. We add it to the
bottom video as well. We click play and who we are. This is our effect. So this is how we can
create the flicker effect. That's it for this video.
Thanks for watching, and I'll see you
in the next video.
42. Color shifter effect: Hello and welcome to this video. In this video we will see how to create the color shifter effect. We have this video here that
we will apply the effect to. Now we go to effects and we search for the pro camp effect. Here it is. We
edit to the video. Now we go to the US
setting and we can take on Toggle animation
to add a keyframe. Next we'll put the cursor here. And we just do to change
the video colors. Next, we'll put the cursor here. And we changed the
video colors again. Perfect. We go back
to the start of the video play. And who we are. The video colors
change every time. This is how we create the
color shifter effect. We can decrease
the space between the keyframes to speed
the process up a bit. Like this. We can add
more adjustments. We select the first keyframe. We click on Toggle animation
in the contrast setting. Now we select the
second keyframe. We decrease the
contrast like this. Next we select the
third keyframe. And we change the contrast
back to 100 per cent. We go back to the start. We click play. And who we are. We can adjust
the saturation as well. We add a saturation keyframe. We decrease the saturation. Here. We select the
third keyframe. And we increase the
saturation back. Now we click Play.
And here we are. This is our effect. So this is how we
create this effect. That's it for this video.
Thanks for watching, and I'll see you
in the next video.
43. Reverse effect: Hello and welcome to this video. In this video we will see how to create the reverse effect. We have this video here, and we would add the effect to it to make it look even better. First we select the
effect starting point. For example here. Now we use the
razor tool or week taxi from the keyboard
to split the video here. Next we'll put the
cursor at this point. We split the video here as well. So now we have three parts. We pulled the third part here and we duplicate
the middle part. We hold Alt and we drag
it here to duplicate it. We duplicate it again. Now we have create
copies. They are. We select the middle copy, right-click on it and we
slept speed duration. We get this window and we
activate the reverse speed. We click, Okay, we go
back, we click Play. And here we are. This is a very cool effects that
you can add to your videos. Especially for sports
and action videos. We can add a slowmotion
effect to this part. We selected, right-click on it, then we select speed duration. Now we decrease its speed. We put the videos back
here. We click Play. And here we are. We can select this part. We go to the Effects menu
and we search for the black and whites effect images. We edit to this part, only. Go back. We click
Play, and here we are. So this is a very
good effects that you can create an
add to your videos. That's it for this
video. Thanks for watching and I'll see
you in the next video.
44. Ink Droop effect: Hello and welcome to this video. In this video we'll see how it's created ink Droop effect. This is the video that we
will use and as usual, it's included for you in the
Resources folder to use. Now we go to the
Resources folder and we add the end video. You put it on top
of the main Video. One important thing
is that the ink needs to be in black
for this to work. As we will show the
video inside Dn. Now we go to effects and we search for the Luma Key effect. Here it is. We add it to the end video. Go back, we click
Play, and here we are. The video is shown inside D ink. I said this for this to work, the ink needs to be in black. Now whatever the ink is not
in black and we want to apply this effect to
which we shall see. We start by removing the black ink video and we
go to the Resources folder. Then we add the colored
ink video we have here. Right at the Luma
Key effect to it, it will look like this. The effect is applied only to the black background
and not to DM. Let's click on it
and we select Clear, or we click Delete
from the keyboard. Now we go to effects and we search for the black
and whites effect. Here it is. We edited video. This is to make the ink
in black and white. But now we need to reverse
the colors we have here. We want ink to be in black
and background in white. We go to effects
and we search for the inverse effect we have
here to invert effects, we will add the second one, the one with this icon here are, the background is in white, but the ink is in gray and
it needs to be in black. So now we serve for the
lumetri color effects. We go all the way down here. Here it is. We edit
to the end video. Now we're good. It's settings. We
opened the basics menu. We decrease the
highlights to -150. Same thing with the shadow. You will add. Ink is in black now. Now we search for
the lumetri effect. We edit to the end.
And here we are. The video is shown
inside the end. We scale the ink like this
to better show the video. Clip play. Here we are. This is how to create
the ink Droop effect. That's it for this
video. Thanks for watching and I'll see
you in the next video.
45. Add video inside text: Hello and welcome to this video. In this video we
will see how to add and show videos inside the text. We have this video
here that we will use. Now we select the Type Tool and we type anywhere
we want in here. For example, I will
type the word new. We put it in the middle and
we increase its size a bit. That's better. We increase the text duration to match the duration
of the video. The video does not
have any audio yet. We can see the audio here. So we remove it. Right-click on the video
and we select unlink. Then we'll remove the audio. Now we select the video. We go to effects and we search for the Track Matte key effect. It is. We edit to the video. Now we go to the med setting. We have here Video 3.2. And these are the video
tracks in the Timeline. The text is in the
video to drag. So we slept video to. The video is now shown
inside the text. As you can see, we have here a black background here
and we want to change it. We pull the video
ended text up here, leaving the track below them empty so that we put
the background in it. As you can see when
we move the drugs, the video is no
longer shown inside the text because now the text
is in the video treat drag. We go back to the med setting
and we select Video tree. Are the video is
shown inside text. Again. Now we go to
the project window, you click on new item and
we select color mate. We change nothing.
We just click Okay. And now we select the
background color we want. For example, we select the
color red. We click Okay. We select name,
then we click Okay. We edited Jack and we match its duration with the
video and the text. We click Play, and here we are. Double-click on the
background crack and we get the color picker
window to change the background
color very easily. For example, we selected
the color blue or yellow. This is how we can
show our videos inside the text with any
background color we want. We can set the background
color to gradient. We go to effects
and we searched for the ramp effect. Here it is. We add it to the background. The background is in gradients. We go to the start
color setting. We selected the
color that we want. For example, sky blue. Now it's like the second
color. And here we are. The background is in gradients. We select the ramp effect. We can see this dot here. We drag it and put it anywhere. We want to adjust the
gradients like this. We can animate the
background colors as well. You put the cursor at
the start of the video. We add starts color keyframe, and the end color keyframe. Now we put the cursor here. We change the color from
blue to purple, for example. Same thing with the end color. We change it to orange. We go back to the start. We click Play, and here we are. The background color changes. So we can set a solid
color gradients color, and we can also animate
the background colors. That's it for this video.
Thanks for watching, and I'll see you the next video.
46. Offset effect: Hello and welcome to this video. In this video we will see how to create the offset effect. Now we add different
video to the Timeline. We got the video from this part. We use the razor tool or we
click see from the keyboard. We delete this part. Now we add the second video. Same thing, we cut it from here. We delete this part. So we
have two short videos here. Now we click on new item and
we slept adjustment layer. We click Okay. And we add the
layer on top of the videos. We adjust the layer duration
and we put it here to serve as a transition effect
between the two videos. Now we go to effects and we
search for the offset effect. Here it is. We edit to the adjustment layer. We have its settings here. Now we put the cursor here. We click on the shifts
centers to setting, toggle animation
to add a keyframe. Now we put the
cursor here and we adjust the shift center
to setting like this. We go back, we click
Play, and here we are. We remove the keyframes. We add a new keyframe here. You put the cursor here. And this time we adjust the
video vertically like this. Now we go back, we click
Play, and here we are. So this is how we create the offset effect
horizontally and vertically. That's it for this video.
Thanks for watching, and I'll see you
in the next video.
47. Imagination effect: Hello and welcome to this video. In this video we will see how to create the imagination effect. We have this video
of a character trying to think of or
imagined something. We split the video from here. We use the razor
tool or week Lexi from the keyboard.
We delete this part. Now we add the second
video to the Timeline. It's like the
character is trying to imagine what we see
in the second video. Now click on new
item and we select adjustment layer.
We get this window. We change nothing
and we click, Okay. We put the adjustment
layer on top of the videos. Right between them. We put the cursor at the start
of the adjustment layer. We go to effects and we search for the turbulent
displace effect. We edit to the adjustment layer. We get its settings here. Now we add a announced
setting keyframe. Double-click on
the email setting, and we set it to zero. You put the cursor at
the transition spot between the two videos. And we increase the
amount like this. We put the cursor at the end of the adjustment layer and we
set the melt back to zero. We go back, we click play. Here. This is our imagination effect. This is how we create the imagination effect
to give the impression that a character is imagining something or trying to
think of something. And we see this effect a
lot in movies and series. We have more settings
here to adjust the effect furthermore,
if we want. So that's it for this video. Thanks for watching, and I'll
see you in the next video.
48. tint effect: Hello and welcome to this video. In this video we'll see how
to create the 10th effect. This is the video
that we will use. Now go to effects and we
searched for the tense effect. Here it is. We edited the video. After we added the tint
effect to the video, it became in black
and white because we have the colors black
and white selected here, we change the color black,
orange for example. And the color white
to blue for example. We are, the video looks like
it's in thermal vision. We change the colors again. For example, like this. Select any colors you like. And we can adjust the
tint amounts from here. We can animate the effect. We go to the amount
to ten setting and we click on Toggle animation
to add a keyframe here. We said the mail to zero. Then we put the cursor here. And we increase the
amount to 100 per cent. We click Play and here we are. Video starts normal, then
it changes like this. This is how we create
the tint effect. That's it for this video. Thanks for watching, and I'll
see you in the next video.
49. mosaic effect: Hello and welcome to this video. In this video we will talk
about the mosaic effect. Sometimes in interviews there are some people that do not want their faces appear to protect their identity for
whatever reason. And we see that their faces
covered within effect, that's the mosaic effect. We have this video here, now go to effects, and we searched for
the mosaic effect. Here it is. We edited video. Now, the effect is applied
to the whole video, but we only want to apply
to the character's face. We go to effects controls, to the mosaic effect settings. We select the ellipse mask. And here we are. We have a circle here. You put it over the
character's face. And we adjust its
size to match it. Perfect. Now we increase the horizontal and
vertical blocks. We click Play, and here we are. The character's face is hidden. We can increase the
mask expansion. We adjust the mask to
better fit the face. We click plane and here we are. If you pay attention,
you can see the damask does not follow
the character's face. We go to domestic settings. We put the cursor at the
start and we click on track selected mask forward.
Wait for a bit. Here we are. The keyframes are set. You click play. And here we add the mask is tracking the character's face. When the character's face moves, the mask moves with it. So this is how we use
the mosaic effect to hide character faces in
interviews or shows. That's it for this video.
Thanks for watching, and I'll see you
in the next video.
50. Typing a text message effect: Hello and welcome to this video. In this video we'll
see how it's created a text messaging effects like we see in movies and series. We have this character
texting and we will display the text messages so that
the audience can read them. We start by selecting
the rectangle tool. And we draw a rectangle here. Now we go to Window and we
select Essential Graphics. We just the media player size so that we get a better
view of the video. Just the rectangle
edges to be curvy. And we select the
rectangle color. I will set it to blue. You can select any
color you like. Now we use the Pen Tool
to draw a triangle here. Here we are. Our shape is ready. Now we type the text message, we select the type tool, we draw a rectangle here, and we start typing
inside of it. For example, we type
hello, how are you? We use the selection tool to put the texts inside the blue shape. Now we select the text. We go to effects controls. We open the text settings menu and we decrease the text size. You can change the
text font if you want. But for me, I will
leave it as it is. Now we add an effect to make it look like the
character is typing the text with lead the texts leaving only the
first letter, the letter H. We already saw how to
create this effect before. Now we close the
source text setting menu and we click on Toggle
animation to add a keyframe. You put the cursor here. And we type the second letter, the letter E. We drag the cursor here and
we type the next letter, the letter L. And we keep going like this
until we type whole text. The word hello is completed. We click Enter to go
down to the lower line. And we type the
rest of the texts. Will add the text
message is completed. We can adjust the space between
the keyframes if we want. Now we can hit Play,
and here we are. The character is typing a text message and we can
see what is being typed. This is how we can create
a text message effect. That's it for this video.
Thanks for watching, and I'll see you
in the next video.
51. Freeze effect: Hello and welcome to this video. In this video we will see how to create the freeze frame effect. We have this video here in the Timeline and we will
use it as an example. We start by selecting the frame that we want to
apply the effect to, for example, this frame here. Now we need to
take a screenshot. So we click on the
exports frame button in case you can find it
here, click on the button, edit icon, and select
the exports frame, but here it is. Then drag it to the buttons
Panel to edit. Then click. Okay. So like I said, we click on exports frame. We get this window.
We named the frame, and we select the format. We select the PNG format or the JPEG format.
It's your choice. Make sure to check imports into projects to add the image
into the projects panel. Now, click Okay. Here we are. The frame image is here. We add it to the Timeline. On top of the video. We set it and at the
frame we selected. Now it's like the image
layer is zoom in. We mask the character. We go to effects controls. Now we use the free
base year tool to draw the mask
around the character. This way we separate the
character from the background. There is an easier way
to select the character, but it requires the
Adobe Photoshop. So I will show you this
way in the coming videos. Now we keep going until we
fully select the character. We are, the character is fully selected and damask is set. We zoom out. Now. This is the
character we just added. We click Play, and
this is our effect. We can add the effect
in another place. For example, here we
click on exports frame, we select the PNG format, we check imports into project. Then we click Okay. Here we add the image is added
to the project's panel. Now we edit to the Timeline. On top. Same thing. We set it to
end at the selected frame. We select the image layer, we zoom into, select the
character perfectly. We go to effects controls, and we use the free
drug Bezier tool to draw the mask
around the character. And we start selecting
our character. Who we add the character is
fully selected. We zoom out. We go back, we click play. Here we are. This is the
freeze frame effect. So this is how we create
the freeze frame effect. That's it for this video.
Thanks for watching, and I'll see you
in the next video.
52. Shake effect: Hello and welcome to this video. In this video we will see how to create the direction
blur effect. We have this video here. We duplicate it. We hold
Alt and drag it up here. Now we go to effects
and we searched for the direction blur effect. Here it is. We edit
to the top video. Now we set the
blur length to 50. And we can use the direction setting to set the
blur direction. We keep it as it is now. Now we select the
razor tool and week at the video multiple
times like this. The parts need to be even perfect. We'd leave this part. And now we delete every other
second part. Like this. Perfect. This is the result. Now we collect plane
and here we are. This is our direction
blur effect. We keep only six parts. We click Play, and here we are. You can apply this effect your videos to get a
really cool result. So this is how we create
the direction blur effect. That's it for this video.
Thanks for watching, and I'll see you
in the next video.
53. Offset effect using mask: Hello and welcome to this video. In this video we'll see how
to create the offset effect. We have this video
of a super car. Now we duplicate it. We go to Effect Controls and we select the free
drug Bezier tool. Then we select the
car like this. Here we are. We click
on saddled crack else but to hide this layer and we adjust the mask
feather like this. We showed the layer back. Now we hold Alt and we drag the video up here to
duplicate it again. Now we have three layers. We select the top
layer, we hold shift, and we select the middle
layer to select them both. Then right-click and
select nest to merge them, we get this window. We click. Okay. Now we put the cursor
at the start of the video. Go to effects, and we search
for the offset effect. Here it is. We edit
to the top track. We have the offset
effect settings here. We adjust the shifts
centers dissenting. It's will look like this. Now we'll put the cursor at
the effect ending point. For example here. And now we add a shift
simpler to keyframe. We put the cursor back to
the start of the video. And we adjust the shift to
center setting as we want. Until we put the car
back to its position. Like this. We click
plane, and here we are. We cut the video at this point. And with lead the second
part. This is the effect. Now, we can spit
it up if we want, by decreasing the distance
between the keyframes. We go back, we click
Play, and here we are. The effect is faster now. We can even decrease
its opacity like this. Now we select the top video and we put the cursor at the start. Then we add scale keyframe. We select the second
layer and we add a scale keyframe at
the start as well. We put the cursor here, and we scale both layers. We put the cursor a
defect and then point. And we put the scale back
to 100% for both layers. Now we go back, we click
Play, and here we are. This is how we create
the offset effect and how to apply to our videos. That's it for this video,
thanks for watching and I'll see you the next video.
54. mirror effect: Hello and welcome to this video. In this video we
will see how it's created the mirror effect. We have this video here and we will apply the
mirror effect to it. We go to effects and we
searched for the mirror effect. Here it is. We edited the video. Now we go to effects
controls and we adjust the reflection
angle setting like this. The edge is not visible, so it just the reflection centers setting to
show it like this. I set it to 136 and
you can set it anyway, you like we said, the reflection angle like this. We click Play and here we are. This is the mirror effect. It's a cool effect
that you can apply to your videos to make
them look like this. So this is how we create
the mirror effect. It's a very simple
and cool effect. That's it for this video.
Thanks for watching, and I'll see you
in the next video.
55. snow effect: Hello and welcome to this video. In this video we
will see how it's create the snow effect. This is the video
that we will use. Now we add the
snow effect video. You will find it in
the Resources folder. We put it on top of
the video in Timeline. We got it from here to be in the same duration
as the main video. This is the snow effect that we will add to the main video. It's very simple. We
select this now video. We go to effects controls. We go to the blending mode and we select the Screen blend mode. If we have an effect
with a black background, but we use the Screen blend mode to remove the black background, we click Play, and here we are. This is the snow effect. We can increase its size. So this we can see it's better. We pull it down here. Now we
click Play, and here we are. This is the video before and after we added the snow effect. This is a very cool
and easy effects that you can add to your videos. That's it for this
video. Thanks for watching and I'll see
you in the next video.
56. growing building effect: Hello and welcome to this video. In this video we will see how to create the building grow effect. To create this effect,
we will need to use the Adobe
Photoshop software. It will be very simple, so you don't need to have a prior knowledge with
the Photoshop software. And if you don't like
to use the Photoshop, you can skip this lesson. We have this video here. First, we need to stabilize
this video because we can apply the building grow
effects to move in video. So we go to effects
and we search for the Warp Stabilizer effect. Here it is. We edited the video
in the timeline. We wait for a bit for the
video to be stabilized. Here it is. This is
only for moving videos. If you have a stable video, you can skip this
step. Here we are. Now we go to Effects Controls, stabilization results,
and we select no motion. Here we are at the video
is stabilized now. The software skills the
video a bit to stabilize it. Now we need to take
a shot of the video. So we'll click on
exports frame button. When we click on Export
frame, we get this window. We select the location where we want to export the image to. For me, it's here.
Then we click Okay. We go to the location and we
selected. Here is the image. We open it with Adobe
Photoshop software. And of course to do this, you need to have
the Adobe Photoshop software on your computer. First thing we do is to remove this building
from the image. So we use the Lasso tool to select the building like this. Here we are. Now we go to Edit and
select Content Aware, Fill out the software, remove the building
automatically in the output to we
select New Layer. Then we click Okay, we are, the building is gone. Now we go to File Export, Quick Export as PNG. We select locations to
export the image to. Then we click Save. Now we go back to Premier
Pro and we add image. We just saved to the timeline. We put it over the video. Here we are, the
building is gone. Only this part here is left. But when we played the video, the characters in that move. To fix that, we
select the image. Then we go to
Effect Controls are best D and we select the
free drug Bezier tool. And we select this
part here to mask it. Now when we click Play, you can see the characters
are moving normally. Now we go back to the Photoshop. The layer we added using the Content Aware Fill is
here. Now we delete it. If you already closed
the Photoshop, you can just add image. Again. We will select
the building again, this time using the
object selection tool. The tool is right here. Now we click on
the building using the object selection
tool to select it. The building is selected. Now we click on the Mask icon
here. Here is the building. Now we go to File Export, Quick Export as PNG. We named the image,
then we save it. We go back to Premier Pro and we add image
to the timeline. We put it on top. Now the building is
back to its place. And now we will start
the animation process. We drag the built-in image here. So this at the start of the
video, there is no building. And then it appears. Now we search for the
transform effect. Here it is. We edited image. Now we set the cursor at
the start of the image. And we add a position keyframe. Now we lowered the
building down here. We put the cursor here. Then we click here to
bring the building that we go back to the
start of the video, we click Play, and here we are. Now let's select
these two keyframes. Right-click on them. And we go to temporal
interpolation. And we select ease in. We go back to the
start of the video. We click Play, and here we are. We decrease the space between the two keyframes to
speed up the animation. Perfect. Now, the building
appears from the bottom. But we want it to appear
from this point here. We select the image, we go to opacity and we select the
free drug Bezier tool. And we mask the building. We go back, we click
Play, and here we are. The building appears
out of nowhere. We drag the image to
the left, slightly. Good. We decrease the space between the two keyframes to speed
up the animation even more. We click Play. Perfect. Now we select all layers. Right-click and select Next. We get this window. We click. Okay. And now the whole
video is a single layer. We go to Effect
Controls and we add a scale keyframe at the
start of the video. Next, we put the cursor here
and we scale the video like this to animate the video and have the building glow
effect at the same time. So this is how we create the building effect.
That's it for this video. Thanks for watching, and I'll
see you in the next video.
57. Closing door animation: Hello and welcome to this video. In this video we'll see how to create the closing door effect. We have this video here. I already added it
to the Timeline. Now we add this image. It's an image of a door. It's the door that
we will animate. Now we duplicate
this image twice. We hold Alt and drag the
image up to duplicate it. We hide the two images for now, leaving only the original one. Resuming on the door. Now we will mask one
side of the door. We go to effects controls, opacity, and we select the
free draw Bezier tool. Now we select the right
side of the door. We put a dot here. Then here. We set the dot here and we add a curve to match
the door shape. Another dot here. We adjust the curved line
to match with the door. We go back to the first
dot, close the shape. Here we are. The right side of the
door is selected. Now we decrease the
mask feather to zero. The first part of the door
is selected perfectly. Now we showed the second
image. We selected. Same thing. We select the free
draw Bezier tool. And this time we select
the left side of the door. In the same way we
selected the right side. We close the shape. Perfect. Again, we degrees the
mask feather to zero. Now we showed the last image
and we hide the other two. This time we select
the whole door. Again. We select the free
TO Bezier tool, and we start selecting the door. Here we are. Now we want to remove the
door and keep the walls. So we check inverted. Here we are. Perfect. So this is the top layer. This is the middle layer, the left side of the door. And this is the first layer, right side of the door. We show all layers. So each part of the
image has its own layer. The top layer for the walls, the second layer for
the doors left side, and the third layer is
for the doors right side. Now right-click on
the lower layer. We select nest. We click Okay, Right-click on the middle layer and we select nest as well. We click Okay. We select the lower layer. And we searched for
the transform effect. Here it is, we added
to the lower layer. Now we put the cursor here. We add a position keyframe. We drag the door to the
right until it's gone. We put the cursor here now, and we reset the settings
to bring the door back. Here is our animation so far. Now we selected two keyframes.
Right-click on them. We go to temporal
interpolation and we select is N. To smoothen the animation. We put the cursor exactly
over the keyframe. Now we select the middle layer. We add the transform
effect to it as well. Next we add a position keyframe. We select the lower layer
and we put the cursor over the first keyframe
to make sure that the two sides move
at the same time. Since we selected the
right starting time, we select the middle
layer again and we drag the door to the
left until it's gone. Now we select the two
keyframes, right-click on them. We go to temporal interpolation
and we select 0s, N. We go back, we click
play. Here we are. The animation is so fast, so we increase the space between the two
keyframes to slow it down. Same thing here. Now, it's better. Now we select Alt V layers, right-click and we select nest. We click Okay, here we are. The layers are now merged
into a single layer. We put the layer
over the video in the Timeline so that the door closes. At
the end of the video. We select the layer. We put the cursor at its beginning and we scale the
image like this. We add a scale keyframe. We put the cursor here, and we reset the
setting to bring the image back to
its original look. We go back, we click
Play, and here we are. We select the keyframes, right-click on them and we
select is N. We go back, we click Play, and here we are. That's better. Here we are. This is how we create the closing door effect. That's it for this video.
Thanks for watching, and I'll see you
in the next video.
58. Freeze frame animation: Hello and welcome to this video. In this video we will see how to create the freeze frame effect. We have this video
in the Timeline. Now we need to select
the frame that we will apply the
freeze effect to. For example, this frame. Now we export this frame. So we click on the
exports screen button. We checked important
to projects so that it's added to
the project's panel. We select PNG format
and we click, Okay. The image is edited
project panel. Now we select the razor tool. We split the video here. We put the second part here, and we add image
between the two parts. Now we need to mask
with the character because we don't
need the background. So first we duplicate the image. We hold Alt and we drag the
image up to duplicate it. We select the top image. We zoom in by 150 per cent so that we can see
the details clearly. We select the
federal Bezier tool and we start masking
the character. This process takes some time, so I will fast-forward
the video. Here we add the mask is done. We zoom out. Now we
hide the background. The character is masked. Now we select the lower layer. We locate the
Gaussian blur effects and we edit to the layer. And we increase
the blurriness to make the background
look like this. We put the cursor at
the start of the image. We select the top image. We add a scale and a
position keyframe. Who put the cursor here? We scaled character like this. And we lower it to
put it at the center. Perfect. We go back,
we click Play. This is our animation so far. We decrease the space between
the keyframes to speed up the animation that was
left of keyframes. Right-click, we go to temporal interpolation
and we select is N. Now it's perfect. Next we put the cursor here. We add a position
and scale keyframe. We put the cursor at
the end of the image, and we reset the scale
and position settings to bring the character
image to its original look. We click play. And who we are. Perfect. We put the cursor here. At the moment where
the animation ends. Then we select the
background image. We select the razor tool, and we split the background. We search for the black
and white effect. Here it is. Edit to the second part of
the background image. Here we are. The background
is in black and white. Now, we select the
character image and we lowered the
mask feather to zero. Remove the noise around
the character image. Perfect. Now we select the
character image layer. Right-click on it.
We select nest. We click. Okay. Now we locate
the radial shadow effect. Here it is. We add it
to the character image. We change the effects
color to white. We set the opacity to 100%
or to any rate you like. We said, the light
source like this. We decrease the projection
distance effect. We go back, we click Play. And here we are. We have
one more thing to add. We select the Type Tool and
we type the character name. For example. We name is Chris. This is just an example. We select the text. We set its size from here. We rotated like
this. We center it. We decrease its duration. We go back with live
play, and here we are. This is our freeze frame effect. It's a very cool effect. You may have seen it before. So this is how we create
the freeze frame effect. That's it for this video.
Thanks for watching, and I'll see you
in the next video.
59. Ghost effect: Hello and welcome to this video. In this video we will see how
to create the ghost effect. We have this video
in the Timeline. Now we need to select
the part that we want to apply defect to right here. So we click on exports frame. We make sure to check
and ports project. We select the PNG format
and we click Okay, here we add the image is
edit to the project's panel. Now to remove the background, we can use the
Photoshop software or we use the mask
in Premiere Pro. So for any of you that does
not have the Photoshop, we will use the
premiere pro Mask, although it takes more time, unlike the Photoshop,
which makes things easier. So we start with zoom
in on the character. We use the feet draw Bezier
tool to mask the character. We start selecting
the character. Here we are, the mask is ready. We zoom out. Now right-click on the image layer
and we select nest. Here is the masks character. Now we add the transform
effect to the image. We hold Alt and drag the
image up to duplicate it. We select the lower layer. We add a position keyframe here. We move the cursor here, and we drag the character to
the right until it's gone. Now we select the top layer
and add a position keyframe. Then we'd grab the character
to the left until it's gone. We go back to the
start of the layers, reset the Position settings. We go back with look
plane, and here we are. We still need to make
some adjustments. We increase the shutter
angle to 50 per cent. When we increase
the shutter angle, we get this Motion effect here. We select the top
layer and same thing. We increase the shutter
angle to 53 per cent. And we select the color
dodge blend mode. We select the lower layer, and we select the color dodge
blend mode here as well. We have multiple blend modes here that you can select from. Select the one that you like. For me, I will go
with the Color Dodge. Now we select the
first keyframe. Let's click and we go to temporal interpolation
and we select ECM. Same thing for the
second keyframe. Right-click and we go to
temporal interpolation. But this time we
select ease out. Now we'll select the top layer. We select the first
keyframe, right-click, and we go to temporal
interpolation and we select is N. Now, the second keyframe,
right-click, we go to temporal interpolation
and do select, ease out. We'd go back with live
play and who we are. Since the character
is still moving, we can recreate the effect
here in the same way. You just change its position from right and left,
two up and down. That's it for this video. Thanks for watching, and I'll
see you in the next video.
60. Zoom effect: Hello and welcome to this video. In this video we
will see how to make a photo animation in a different way than
what we saw before. The media that we will use is included for you in
the Resources folder. As always, we have to
images and a video. Add them to the project panel at the background image
to the Timeline first. Then we add character image. Now we start our
animation process. We select the background layer. We go to effects controls, and we add a scale
keyframe. At the start. We said the scale
at 110 per cent. Now we select the
character layer and do add a scale keyframe. We keep the scale at 100%. We select the background layer. We put the cursor at the end. We reset the scale to 100%. We select the character layer, and we set the scale at 110. We said the character
image scale to 110 at the end and to
100-percent at the start. And for the background
image scale, we set it to 110 at the
start and to 100 at the end. We go back, we click Play. This is our animation. We select the background layer, then right-click on the first
keyframe and we select is N. Now it's like the
second keyframe. And we slept ease out with like the character
layer. And same thing. We right-click on the first
keyframe and we select is N. Next we right-click on the second keyframe and
we select ease out. Perfect. Now at the effect, we put it onto up. And we select the
Screen blend mode to remove the effects
black background. We click play. Here we are. Now we use the razor
tool to split defects, or we can use the shortcut. See from the keyboard. We split the effects
from here to match the length
of the two images. We delete the second part. We put the character image
on top of the effect. We put the effect
between the two images. We go back, we click
play. And who are. This is our animation. You can create Slideshow
using this animation here. So that's it for this video. Thanks for watching, and I'll
see you in the next video.
61. Create Slideshow: Hello and welcome to this video. In this video we will see how to create an advanced slider. These are all the media files that we will use in this video. They are included for you and the resources folder as usual. Now we add them to
the project's panel. We add the background
image to the Timeline. Next we add the character image on top of the background image. Then we add the splash image
over the character image. Now we want to show
the character image inside the splash. We select the character image. We locate the Track
Matte key effect. Here it is. We edit to the character image. We go to effects, controls, the med setting, and
we select Video tree. Because the splash image is incorrect green so
far there's nothing. So we go to composite
using and we select Matte Luma. And here we are. The character image
is inside the splash. Now we add a simple effect. Select the splash image. Then we add a position keyframe. Now we drag this
blush to the left. We put the cursor here. And we drag this
pledge to the right. We go back week live play. And here we go back
to the project panel. We add the effect
to the Timeline. We select the Screen
blend mode, perfect. Now we scale the
effect like this. And we decrease its opacity
slightly. We can hit Play. And here we are. We use the position setting to lower the effect slightly like this. We decrease the
opacity a bit more. Perfect. We click Play. And here we are. Now we add the brush
to the Timeline. We put it on top. We use the position
setting to put it here. I put the cursor here
just so that I can see how the brush look with
the character image shown. We put the brush here and we decrease its size
a bit. That's better. Now we put the
cursor at the start. We add a position keyframe will already down
until it's gone. We put the cursor here and we put the brush
back to its position. Now we click Play.
And here we are. We put the cursor
here to add a text. After the brush animation ends. We select the type tool. For example, we type Happy
birthday on the brush. We centered the text on
the brush like this. We select the text and
we decrease its size. We centered again. You can change the font
size if you want. We select this
font, for example. Now we'll go back. We can
hit play and who we are. The brush animation is too slow, so we need to speed it up a bit. That's better. We use the razor tool to cut
these extra parts and we delete them to keep the same duration for all
files. And here we are. This is our slider. We can animate the
effect as well. We selected, we put the
cursor at the start, and we add a scale keyframe. We put the cursor at the end. And we decrease the scale a bit. We go back, we click Play. And here we are. The effect
is animated as well. So this is how we
create our slider. It's very cool and simple. It works for birthday parties
and for any other event. So that's it for this video. Thanks for watching, and I'll
see you in the next video.
62. Logo animation: Hello and welcome to this video. In this video we will see how to create a fire logo anchor. The media files that we use
are in the Resources folder. So now we add them to
the project's panel. We start by adding
the fire effect to the Timeline. Here it is. Now, add the logo on
top of the fire effect. We said the logo scale to 45% so that the fire look
like it's circling around it. Now we duplicate
the fire effect. We hold Alt and drag it up. We put it on top of the logo. We select the effect. We go to Effect Controls, and we select the Hard
Light blend mode. We go back, we click Play, and here is our logo. Now. Now we add
the second effect. We put it on top. And we select the
Screen blend mode. We can see from the keyboard to split the media
files at this point. And we delete the extra part to keep all files
in the same length. Now we start animating our logo. We put the cursor here to
start the animation process. We set a scale keyframe. We set the scale to zero. We put the cursor at the end
of the first fire effect. And we said the logo scale
back to 45 per cent. And at the same point, we set a rotation keyframe. Now we go back to the
animation starting point and we rotate
the logo like this. We go back, we click Play, and here is the logo. Now we put the cursor here
and we duplicate the logo. We put it on top and
we cut its first spot. We keep it's only from
this point to the end. We go back, we click play. Here, we add the logo
starts like this, and then it appears perfectly. We select the fire
splash effect. We put the cursor here and
we set an opacity keyframe. Next we move the cursor here. And we set the opacity to zero. We go back, we click
plane, and here we are. This is our animation. Now we add the second
logo, the orange one. We put it on top
of the other logo. We set its length like this. We said it's scaled
at 45 per cent. To show it on top
of the white logo. We put the cursor at the start of the logo appearance time. We search for the crop effect. Here it is. We added to the orange logo and we
add a left keyframe. And we said the left 100%. We put the cursor here and we
set the left back to zero. And here we are. We go
back, we click Play. And this is our file,
logo animation. This is how we can create
an intro like this. That's it for this video.
Thanks for watching, and I'll see you
in the next video.
63. Hologram effect: Hello and welcome to this video. In this video we will see how to create the hologram effect. We have this video of a
character wearing VR glasses. So we will add a hologram
of what he sees. Now we add these two effect
images to the software. These images are
included for you to use in the Resources folder. As always. Now we add the first
image to the Timeline. We put it on top of the video. We cut the image to match
its length with the video. Now we select the image layer. We go to effects controls, and we select the Screen
blend mode, recollect plane. And this is our first effect. Now we add the
second image on top. Again, we select the
Screen blend mode. And here we are. We can scale the effect to
look like this. We click Play. That's better. So this is our hologram
effect and how to create. That's it for this video.
Thanks for watching, and I'll see you
in the next video.
64. Color workspace: Hello and welcome to this video. In this video we will talk about color correction
and color grading. We will see how to
color grade and correct our videos in
Adobe Premiere Pro, we use color gradient
and corrections, edit the colors, the lighting in our images, and a lot more. Now to start to kinda
gradient and correcting, we need to use the
proper workspace. So we go to Window workspaces and we select the
color workspace. Here it is. It's not very different from
the editing workspace. We have the lumetri color
window with multiple menus. We have the basic
correction menu, Creative menu, the curves, the color wheels and
match, HSL secondary. And finally, we
have the vignette. We will take a look
at all these menus in the coming videos. We have here the
Lumetri Scopes window. We click on it to show it. We use the lumetri scopes to see the range of lighting
and colors in the videos and to color correct the videos in case
you can see it here. Go to Window and
check lumetri scopes. Same thing for the
lumetri colors. Check it so that you can
see it's on the right here, right to collect on
the lumetri scopes. And we get multiple scopes
here we have the parade, RGB, the histogram, and
the vector scope YUV. We use all these scopes to set the colors and the
lighting in the videos. We will see how to use
it in the coming videos. So this here is
the workspace for color grading and
color correction. We have the Timeline here and the projects window as well. So that's it for this video. Thanks for watching, and I'll
see you in the next video.
65. Lumetri scoops: Hello and welcome to this video. In this video we'll take a
look at the lumetri scopes. First, we'll right-click
and we hide the histogram, the parade RGB and the wave form luma will give
only the vector scope YUV. Now, the vector scope YUV helps
us to monitor the colors, hue, and saturation
levels. In the video. We have the color yellow
here and the color red here. Since the general color of
the video is more yellow, we can see that here. So like I said, we use
the vector scope YUV to monitor the hue and saturation
levels in the video. Next, we have the histogram. The histogram helps us
to evaluate the shadows, the mid tones, and highlights. Next we have the parade RGB. We use the parade
RGB to measure and balance the level of the
colors in the video. Next we have the waveform luma. There are several waveform
types that we can use. We mostly use the RGB
or the Loma waveform. We use the waveform no, to analyze the brightness and shadows and measure the
contrast of the image. Make sure nuts cross 100 so that the video
is not too bright. And also don't go below zero because the video
will be too dark. So stay in the range 0-100. So these are the
scopes that we use. Most important to our the
waveform and the parade RGB. Like I said, we use
the waveform no, to measure the contrast and
shadows and the brightness. And we use the parade RGB to measure and balanced the
color levels in the video. So these are the lumetri
scopes in the software, and we will see how to use them practically in the
coming videos. This video, thanks for watching, and I'll see you
in the next video.
66. Exposure: Hello and welcome to this video. In this video, we
will see how to set the exposure and our videos. Like I said before, we use the waveform luma to set the
brightness and our videos, we hide the parade RGB and we leave only
the waveform, no. And like I said before, we deem the waveform
to be close to 100, but not more than hundred. And also close to zero, but not below it. As you can see, the light
exposure is only at the metal. The video needs some
light and shadow. So now we will set it. We go to the basic
correction menu and we go down to the
light settings menu. We have multiple settings here. When we want to
set the exposure, there are three
important things to set. First, the highlights. The highlights control the
bright spots in the video. Next is the shadows. It's controls the gray
spots in the video. And finally, the black setting. And it controls the dark
spots in the video. We have here the white
setting as well. It's controls the brighter
spots in the video. Now to set the videos exposure, we increase the highlights. You can see the
waveform goes up. Next we decrease the shadows. Now the video looks better. Now pay attention to the dark
spots in the video here. When we decrease the Black Sea, you can see the change. We increase the whites slightly. That's good. We uncheck basic correction. This is the video before. Now we check it, and
this is the video after we click play, the video looks way better. Now. Don't increase the exposure too much with the
waveform surpassing 100 because the video
will look better. Understand what
I'm talking about. We will see a video with overexposure and we
will see how to fix it. Now we delete this video. Here's the next video. We edited the Timeline. This video here has
too much exposure. You can see the water
looks white and you can see the
waveform is over 100. So to fix this, we
decrease the highlights. We decrease the whites as well. Are the waveform is below 100 now and the
video looks better. We decrease the shadows as well. Add the video looks way better now and the waveform
is within range. So problem-solved. This is the video before. And this is the video after. Even the sky looks white here. But after the
adjustments we made, the sky is back to the
natural color of Sundown. So this is how we
fix videos with too much exposure and with
low exposure as well. That's it for this video.
Thanks for watching, and I'll see you
in the next video.
67. Color balance: Hello and welcome to this video. In this video we will see how to balance the colors
in our videos. We have this video here. As you can see, the background
has too much blue in it. So we need to balance debt. We have here the
white balance tool. We use it to balance the
colors automatically. First, we showed the parade
RGB and we hide the waveform. Like I said, the video
has too much blue in it. And you can see that
here in the parade RGB. So we select the white
balance picker tool and we click on a white
objects in the video. For example, this car here are the colors are
balanced automatically. The color blue level in
the video is moderate. Now, we can decrease the color red level
slightly as well. That's perfect. So this is the video
before and after. The color white appeared
as blue before. But now it's normal. We click on the Reset button to reset the adjustments we made. Now we will balance
the colors manually. We have here the temperature
and the ten settings. Since the background
is too blue, we simply reverse the color. We keep going until the
colors are balanced. This is the color
before and after. And you can see the color
level in the parade RGB. We can adjust the color
green slightly as well. Perfect. You can see the
color white looks clearer. Now. This is how we color balance our videos.
That's it for this video. Thanks for watching and I'll
see you in the next video.
68. Saturation: Hello and welcome to this video. In this video we'll talk about the saturation and how
to set it in videos. We have this video here
and as you can see, the colors in the
video look very pale. Setting the saturation
is very easy and simple. We go to the lumetri
color window in the basic correction menu, we find the saturation setting. And we can increase the
saturation in the video like this, or decrease it. When we decrease it to zero, the video looks in
black and white. And when we increase it, the colors are coming back. We can increase the
contrast as well. Who are? This is the video
before and after. So this is how we
can increase and decrease the saturation
in our videos. Now we'll move this video and
we add this video instead. You can see this video has
multiple colors in it. We have yellow, red, and green. Now let's say that we want just the saturation
of a single color. For example, the color red. We go to the curves menu. We opened the hue
saturation curves. We have here U, V saturation. We select the picker tool
and we select the color red. After we selected the color red, we got these three dots here. The dots on the
right and the one on the left select the
range of the color. All the color red grades, and shades are selected
between these two dots. Now this is an automatic
way to select the color. The manual way is that we
set the dots ourselves. We said two dots to
select the color range. And we said the
middle dot that we use to adjust the
colors saturation. We lowered the dot to decrease
the colors saturation if the color range
selected is not wide enough and we decrease
the saturation, the color will still look
the same because we did not select all its
shapes and grades. So make sure to widen
the color range, to select all its
shades and grades. Then adjust the saturation. Here we are all the colors
shade and grades are selected. Now we can increase the colors
saturation or decrease it. We increase the saturation. And here we are. This is
the color before and after. Same thing. If we want to just the
yellow color saturation, we use the picker to select the color range automatically, then adjust its saturation. Increases or decrease it. Let's increase it. You are, this is before and after. Same thing for the color green. We selected using the picker. Then we increase its saturation. We adjust the color red
saturation slightly. That's better. Take a look at the video. So this is how we can adjust
the color saturation in our videos for all the colors at the same time and for
each one separately. That's it for this video. Thanks for watching and I'll
see you in the next video.
69. Fourth Homework: Hello and welcome to this video. It's homework time. After all that we saw
in the former videos, I would like you to color
correct this video here. So that's it. And I will see you
in the next video to color correct
this video together
70. Create Fourth Homework: Hello and welcome to this video. In the former video, I
gave you a small homework. Now, in this video we
will create it together. So first we go to
Basic Correction menu and we start with
setting the exposure. We select the waveform luma
to analyze the brightness. You can see the shadows are high and the highlights are low. And the whites are
very high as well. So we decrease the whites, we increase the highlights, and we decrease the shadows. We need to balance
the white color. So we select the
white balance picker and we click on spot in white. For example here.
Now it's better. Here we are. The whites color is balanced and the
brightness as well. We can increase the
saturation slightly. Perfect. This is the
video before and after. We can decrease the
black slightly. Perfect. Here we are.
This is our video. This is how we can
set the exposure and the whites balance
in our videos. That's it for this video.
Thanks for watching, and I'll see you
in the next video.
71. Change objects color: Hello and welcome to this video. In this video we will see
how to change colors. In our videos. We have this video of a red car, and we'll see how to
change the cars color. It's very simple. We go
to the curves, menu. Hue, Saturation curves. We already saw how
to use the UV is set to change the
colors saturation. Now we will use the UV
SU to change the colors. We use the picker to
select the color. You are, the color is selected. Now we use the middle
dot to change the color. For example, we change
the color to green. We go back, we click
Play, and here we are. The car is now in green. Like I said, we
use the middle dot to select the color we like. For example, we
change it to purple. But if you pay attention
when we change the colors, color the color of this
fence here change as well. That's because the fence was in the same color as the car. And we did not change
the colors color only. Instead, we change
the color itself. So any objects painted with the selected color will change. Now in the coming videos, I will show you how to change the color of a certain objects, even if we have other objects
painted in the same color. So that's it for this video. Thanks for watching, and I'll
see you in the next video.
72. Select objects using Mask: Hello and welcome to this video. In this video we
will see how to use the mask to adjust certain
parts of our video. We have this video here. And let's say this. We want to adjust the background only without affecting
the character. If we go straight and
adjust the highlights, the adjustments will be
made to the whole video, including the character's face. So we use the mask. We start by
duplicating the video. We hold alt and drag
up to duplicate it. Now we select the top video. We go to effects controls. Now is let the free
draw Bezier tool. And we draw a mask around
the character's face. Mask does not need
to be precise. Now close the Mask. We click on tracking
method and we select position,
scale and rotation. Then we collect on
track selected mask forward to track the
character's face. We wait for the Dragon
to be completed. Here we are. The tracking
process is very easy in videos with characters
that do not move quickly. If the video has a character
that moves quickly, you will need to track
the mask manually. I will show you how to do
that in the coming video. Now we select the lower video and we start adjusting
the background. For example, we decrease
the highlights and shadows. That's enough. Now, if you've
take a close look, you will notice that there is a halo around the
character's face. To fix it, we select the top video and we
increase the mask feather. Next, we decrease
the mask expansion. Here we are, the halo around
the character is gone. We can play, and here we are. We select the lower
video and we change the background color like this. We go back and we decrease
the mask expansion a bit. And we increase the
Mask Feather slightly. We go back, we click
Play, and here we are. This way we can adjust the background without
affecting the character. We can change the
backgrounds color. If we hide the top trap, the character that
looks like this. But with the mask, the
face stays intact. This is used in movies
and series also to give an impression of a
dramatic or set atmosphere, we can make adjustments
to the character's face. We select the top layer and we adjust the contrast
or the exposure, the shadows, or any
other adjustments. This is how we create
a mask and use it just the characters separately and the background
separately as well. So that's it for this video. Thanks for watching, and I'll
see you in the next video.
73. Manual Mask: Hello and welcome to this video. In this video we'll talk
about damask, for example. We have this character
in this video and we want to change the
color of his Shirts. We go to Curves, hue
saturation curves, UV as Hugh. And we use the color picker
to select the Shirts color. And then we change it
to green, for example. Now, if you pay a close look, you will see the color of this street sign change as well. And the character is
hand change as well. Now when we change
the Shirts color, all the objects with the same
color are affected as well. So to fix that, we need to mask the t-shirt or the Shirts. But this time we will
mask it manually. So we duplicate the video. We put it on top. We go to effects controls, opacity, and we select the
free draw Bezier tool. Then we draw the mask
around the Shirts. Perfect. We increase the
Mask Feather slightly. Perfect. Now we will not track
the Shirts automatically. Instead, we will
trap It's manually. We set a mask path keyframe
at the start of the video. Then we click on Mask and we
started tracking process. We keep going frame by frame. And when we see that
the Shirts is moving outside the mask,
we adjust the mask. For example here, double
damask up slightly. We can even adjust
the mask shape using these dots if we need to. We keep going. If you take a close look, you will notice that
whenever we move the mask and new
keyframe is set, we keep going until
the end of the video. Cracking domestic
manually is very hard. It takes a lot of
time and effort. We use it just in case when
the automatic tracking can track an object because
it moves very fast. Perfect. We go back, we click Play, and here we are. The mask cracks the
Shirts wherever it goes. These are the
keyframes that we set. Now we go to View vs. Hill. We use the color picker to
select the Shirts color, and we change the color
to any color we want. We increase the mask expansion. We click Play. And here are the Shirts color is
changed successfully without effecting this
sign or any other objects. So we use the mask to
change the color of a certain objects without affecting other objects
with the same color. So this is how we
create the mask and how to track
objects manually. That's it for this video.
Thanks for watching, and I'll see you
in the next video.
74. Edit skin color: Hello and welcome to this video. In this video we will see
how to adjust the skin. We have this video
of a character and we would use
it as an example. Edit the skin. We need to select the skin color so that the adjustments are applied
to the whole video. We'd go to the HSL
secondary menu. We have here the key settings. We have here the color
picker to select the color. In the middle, we have to
add picker to add colors, and we have to subtract
picker to remove colors. Now we use the color picker
to select the skin color. Here we add the skin
color is selected. Now we check color gray. You see the selected
color and area. The character's skin
is not fully selected, but we will fix that. We have color gray and we
have color black in here, and we have whites and black. This way the selected color is selected in black and white. Now we go back to color gray. Like I said before,
the character's skin is not fully selected. And that's because when
I selected the color, I selected a single color shade. And as you can see, the
skin color has many shades. We have bright spots
and dark spots as well. So many color shades
are not selected. And we use the add
picker to select them. We check color gray. We
selected the picker, and we select the shades that we have not
selected before. To add them to the selection. We keep going like this. Good. Now as you can see, the hair
color is selected as well. So we use the subtract
picker to remove it. We still haven't fully
selected the color. We have the saturation
tool here and we use it to set the saturation
of the selected color. And we can use this cursor to select the range of
the selected color. So we set it like this. Good. Now here we have the
lightness setting. It helps us to select
the color as well. We said the required
lightness range. Just like the color,
as perfect as we can. Here we are. That's good. Now the skin color is selected. We go down to the
correction settings. We have here in the mid tones, the highlights and shadows. If we increase the mid tones, the skin looks like this. And if we decrease it, the skin looks like this. Double-click on the
setting to reset it. Same thing for the shadows. We can increase them
or decrease them. And finally the highlights. It's the same thing. We can increase
them are degrees. The next we have
the temperature. We use it just the
skin like this. Same thing for the tint. After these adjustments,
take a look. This is the skin before and
after. We played the video. Here we are. We can adjust the contrast sharpen to make
an image sharper. And finally, the saturation. We can increase
it or decrease it dependent on the
results we like. And we double-click on
any setting to reset it. This is the video before
and after we play it. And here it is. You can use these settings to make the
adjustments that you like. We use them to adjust
any objects color, and for skin color as well. So this is how we
adjust skin color. That's it for this
video. Thanks for watching and I'll see
you in the next video.
75. Adjustment layers: Hello and welcome to this video. In this video we will talk
about the adjustment layer. We already saw how to color correct and color grade videos
in the Adobe Premiere Pro. For example, we have these
three videos in the Timeline. We select any of them. We'd go to the lumetri
color window and we start color correcting
and gradient our video. But if we have
multiple videos in the Timeline and we
want to adjust them, we can select each video
and adjusted separately. That will take a lot
of time and effort, especially if I'm going to apply the same adjustments
to all the videos. So to fix that, we right-click
on the projects panel. We go to new item and we
slept adjustment layer. We get this window. We have here the adjustment
layer settings, same as the Project Settings. Now click Okay. We have the adjustment layer
here in the projects panel. We drag it to the Timeline and we put it on
top of the video. Now, any adjustment
that we will make, we will apply it to the adjustment layer
and not the video. Now we select the
adjustment layer and this is just
random adjustment. We adjust the saturation,
contrast, the tint, the temperature and
the shadow. Good. Now all these adjustments
are applied to the adjustment layer
and not do the video. If we move the adjustment layer, the video look like this. You put it back, the
video look like this. Now the other two videos
are normal and untouched. So now we increase the
adjustment layer length to include the other two videos. And here we are. The
adjustments are now applied to all three
videos at once. We can always hide the
adjustment layer and now we can adjust all
videos at the same time. Now what if we want to apply the adjustments
to the two videos on the side only skipping
the middle of video. It's very simple. We selected the razor tool. We split the adjustment layer. We select the parts covering the middle video and we deleted. Now the adjustments are made to the first video and the third. While the middle
video is intact. Of course we can
delete any parts of the adjustment layer we just selected and click
Delete to remove it. And we can increase
the length of the adjustment layer to
include any video we want. So you can use the
adjustment layer to apply adjustments to multiple
videos at once, which saves you a lot
of time and effort. So that's it for this video. Thanks for watching and I'll
see you in the next video.
76. Comparison view: Hello and welcome to this video. In this video we'll see how to match the colors are videos. We have these two
videos in the Timeline. And as you can see there, colors are very different. And we want to
adjust the colors of the second video to match them with those of
the first video. First thing we do is
to show both videos in the media player so that we
can compare their colors. So we go to Color
Wheels and Match, and we select comparison view. Here we are, the two
videos are shown here. We have side-by-side view
to show both videos. We have Vertical split to show both videos in the same screen. And we can adjust the
space of each video. And finally, we have the
horizontal split to split the screen horizontally and show the two videos like this. Now we select the
side-by-side view. Now there are two ways to match the videos colors and
automatic way and manual one, manually, we adjust the colors until we get the
results. We like. For example, it
just the mid-tones, the temperature, tint, and
the rest of the settings. Like I said, until we
get the results, we like the manual way is good, but like I said, there is
an automatic way as well. Reset the settings to remove the adjustments
we just made. We go back to color
wheels and match. We select the video
we want to adjust and we click on Apply match. And you do videos are matched automatically
and instantly. And now we can make
some more adjustments manually if we want. That's it for this
video. Thanks for watching and I'll see
you in the next video.
77. Black and White style: Hello and welcome to this video. In this video we will see how to turn our videos into
black and white. Now, to do that,
there are two ways. The first way is to decrease
in the videos saturation to zero are the video is
in black and white. Now, you reset the
saturation setting. Now, the second way is by using the black
and whites effect. We go to effects panel. Now we searched for the
black and whites effect. Here it is. Now we
edit to the video. Here. The video is
in black and white. We go to effects controls. We have here, the black
and whites effect. We can activate it or the
activated if we want. And we can use the
basic correction menu to adjust our Video. If we want. We can adjust its exposure. Contrast, etcetera. This is how we turn our
videos into black and white. That's it for this
video. Thanks for watching and I'll see
you in the next video.
78. Add Luts to Premiere pro: Hello and welcome to this video. In this video we will
see how to use Luts in color correcting
and color grading. The Luts are some
ready to go looks or styles that we
add to our videos. Now we have this video and
we will add some Luts to it. So we go to the basic
correction menu and we go to the Input LUT. We have here multiple
lots to choose from. Each one depends
on the US camera. We have Alexa V3 and dr.
universal and so on. For example, we
select the Alexa V3. Are we got this type? We select another. Like I said, each one gives us
a different style. We can also buy lots online
or download some free ones, then add them to the
software and use them. One more thing, we have to add Luts of the camera at
this we filmed with. For example, I have a
video that I have filmed. Here it is. I filled it with the Fuji IX as ten using the low-profile. And as you can see, the
video is without colors. So now we go to the
Fujifilm website and we can download
the cameras Luts. Are these add Luts that we
downloaded. We extract them. These Luts are included for you to use in the Resources folder. Now we select the Luts that
match the camera we used. Since I used the excess, then I will select it. These are the Luts. Now
we go to Input LUT. We select Browse. We locate
the Luts. Here they are. We select any of them
and we click Open. Here we are. This is the video before and after we added the lead to it. And of course we can adjust
the Luts if we want. We can adjust the shadows,
the highlights, etcetera. This is how we add
Luts to our videos. We can use the Luts provided by the Adobe Premiere
Pro software and we can download free Luts
or buy them online. And finally, you can download the specific Luts for the camera that you use to
film your videos. When you film a video
using the log profile, that's when you frame your
videos row without any colors. You download the Luts for your camera and you add
them to the software and apply them to your videos instead of color grading
your videos from scratch. So that's it. This
video, thanks for watching and I'll see
you in the next video.
79. Change Day to night: Hello and welcome to this video. In this video we'll
see how to turn day into night and our videos. We have this video
here in the Timeline. The video is filmed by day, but we will turn it into night. We started by going
through the Creative menu. We have here, the look setting. We have multiple logs
here to choose from. We will choose the SL
blue Day for Night. Are the video looks
like this now. But we still need to
make some adjustments. We go to basic reaction menu. We decrease the
highlights and shadows. We increase the
contrast slightly. We decrease the whites. Who are the video looks
like it's filmed by Don. This is the video before. And after. We can adjust the
temperature slightly to remove the blue
color from the video. To make it look like this. And we can make some
more adjustments. We can decrease the
blacks, the whites. We set the settings dependent
on the results we like. We adjust the settings
to make the video look darker and to look like
it will stand by night. So this is how we turn
videos from Day to night. That's if this video, thanks for watching and I'll see
you in the next video.
80. Vignette: Hello and welcome to this video. In this video we will see how to add a vignette to our videos. We have this video
in the Timeline. Now we go to the
lumetri color window. We have the vignette
at the bottom of the menu. We select it. We have here the amount setting. We increase it to get
a white vignette, and we decrease it to
get a black vignette. Next we have the
midpoint setting. We use it to set the
vignettes midpoints. Next we have the
roundness setting. We use it to set the
vignettes roundness. And finally, we have
the feathers setting. We use it to soften or
sharpen the vignettes edges. We increase it too soft
and vignettes edges, and we decrease it to
sharpen the vignettes edges. And like I said before, you can set a white
vignette or a black one. This is the video before and after without
vignette and with it. This is how we add a
vignette to our videos. That's it for this video. Thanks for watching and I'll
see you in the next video.
81. Fifth Homework: Hello and welcome to this
video. It's homework time. We have two videos
in the Timeline. This is the first video, and this is the second one. So I would like you to
match the colors of the second video to the
colors of the first video. It's very easy and simple. The two videos are included for you and the resources
folder to use them. So that's it. And I will see you
in the next video to correct the
homework together.
82. Create Fifth Homework: Hello and welcome to this video. In this video we will create
our homework together. We start by setting
a comparison view so that we can see both
videos at the same time. We go to Color Wheels and Match, and we collect on
comparison view. We put the cursor
on the second video so that we can see it here. Now we select the second video and we click on Apply match. We are the software
matched to videos. But as you can see, the
left video is a bit pale. The colors on the
right video or darker. So we need to fix debt. We go to the basic
correction menu. We decrease the highlights, the shadows, and blacks as well. We increase the
contrast slightly. Perfect. Here we are. The two videos are matched. Now. This is the video before. This is the video after. This is how we can match
the colors of two videos. Here, take a look at the video. So that's it for this
video. Thanks for watching, and I'll see you
in the next video.
83. How to change Green screen background: Hello and welcome to this video. In this video we will see how to replace the green
screen in our videos. I have this video
here, this I films using the green screen. Now we will replace it. Before we start. I have
some tips for you. When you want to film clip
with the green screen, make sure to set good lighting
for the green screen. Because if the green
screen is too dark, you will find this
hard to remove and replace it here
in the software. The second tip is try
to remove any wrinkles from the green screen
before you start filming. Because these wrinkles at a different shade
of the green color. Like here, the wrinkled
parts look darker. So always make sure that you're Green screen is flat
and wrinkle-free. Now we start removing
the green screen. We go to effects and we locate the ultra key
effect. Here it is. Now editor the video. Get the ultra key
effects settings here in the effects
controls window. Now we go to the
key colors setting. We select the eyedropper tool, and then we select
any color we want, and the software will remove it. We want to remove
the green screen, so we select the color green. Like I said, we can
remove any color, but as we know, the green screen is usually in green or blue. One more tip. When you film a video
using the green screen, do not wear anything in green. Because when you want to
remove the green screen, anything else in green
will be removed as well. So we select the
eyedropper tool and we click on the green screen
to select its color. Here we are, the green
screen is removed, but it's still not fully
removed as you can see. So we'd go to setting and
we select aggressive. Who are more leftovers
are removed. But it was still need
to remove. The rest. Will go to the output setting, and we select the Alpha channel. This setting during
the character or the object to whites and
the background to black. Now all we have to
do is make sure that the character is in white and
the background is in black. To do so, we use the mat generation and the
MacLean upsetting menus. Now, if we increase
the transparency, we can see the background
is turning into black. But if we increase it too much, the character is
affected as well. So we set it moderately. Now we decrease the
highlights to zero. And here we are. The whitespace is removed
from the background. Now we decrease the shadow
to remove this part here. Perfect. Now we go to outputs
and we slept composite. We have a small problem here to see is clearly we need
to add a background. We pull the video
to the upper crack. We go to the projects panel and we add this
background image. This image is included
for you to use. Now we set the background
length to match the videos. Are, you can see some parts of the character
are missing here. We go back to the mat
generation setting menu. We increase the
shadows slightly. That's good. But when we increase the shadow, this part of the
background was affected. We increase the pedestal to 100. We bring the background back. That's perfect. We replace the green
screen successfully. Now we go to the
mescaline upselling menu. We increase the softness lately. That's better. So this is how we remove and
replace the green screen. Now there are no specific rules. Always do remove
the green screen. You just use these settings
to get the results you want. As you can see, we have
here all these settings that we use to get
the results we like. Now we click Play and
this is our video. As you may have
noticed, YouTubers use a background like this one
here for their videos. Instead of having to use a real background with
a desk and a computer. Now, now we will make some adjustments
to the background to make it look more real. We scaled the
background slightly, will already down a bit. Because effects will locate
the Gaussian blur effect. And we added to the background. We increase the
backgrounds blurriness slightly to separate the
character from the background. Because when we filmed a video without a green screen
using a camera, the camera separates
the background from the main object or a
character to focus on it. That's why we added
a blur effect to the video to make
it look more real. So this is our video, and this is how we remove and
replace the green screen in our videos. That's
it for this video. Thanks for watching and I'll
see you in the next video.
84. Replace Green screen background: Hello and welcome to this video. In this video we will
see how to replace the green screen with
another background. So it goes effects and we
select the old rocky effect. We edited video. Now we select the
eyedropper tool and we click on
the green screen. Are the green screen is gone. But it was still have some
leftovers at the edges. Open demand generation
setting menu. And we increase the
pedestal. Perfect. Now we decrease the
highlights slightly. We pull the video
to the upper Greg. We drag the background
at the Timeline. You put it below the video. We click Play, and here we are. The green screen is replaced
with this background. This is how we can replace a computer or phones background. Now we remove these two files and we take a look
at another example. We add these two files. All the media file is
used in this video, are included for you in the
Resources folder to use. We add the first video. It's a video of a blame. And we will add a
background to it. So we add the old cranky
effect to the video. And we use the eyedropper tool to select the green screen. We don't need to clean
any leftovers because this background is in
solid green color. So we change it
with a single clip. Now we add the background image. The background can be
a video or an image. We mentioned the duration of the two files we've looked
play, and here we are. You can scale the background slightly to make it look better. Perfect. Who are the background
is changed very easily. So this is how we can replace the green screen with
any background we want. That's it for this video. Thanks for watching and I'll
see you in the next video.
85. Rain effect: Hello and welcome to this video. In this video we will add a rain effect to
this video here. We have the rain
effect here with the green screen we added on top of the video
in the Timeline, we match their duration. This is our rain effect. Now we merge it with the Video. We go to effects, we select the ultra key effects and we add it to the
rain effect video. And we use the eyedropper tool to select the green screen. We click Play, and here we are. This is our rain effect
merged with the video. To make it look more realistic, we select the color
dodge blend mode. And we decrease its
opacity slightly. We click Plane. Perfect. This is how we can add effects with green screen to our videos. That's it for this
video. Thanks for watching and I'll see
you in the next video.
86. create a scene using the green screen: Hello and welcome to this video. In this video we'll talk about
Green screen compositing. We have this video here
that I found myself. And now we start by
removing the green screen. Because effects will locate the ultra key effect and
we add it to the video. We go to effects controls. We select the eyedropper tool and do click on
the green screen. I'll click on the dark parts of the green screen to remove
the whole green screen. Next, we select aggressive
in the setting. Perfect. We selected Alpha channel to get a good look at
the background. We have to fix this
small part here. So we'd go back to composite. We pulled the video up to
add a background below it. Now will go to the project panel and we add the
background image below the video in the
Timeline. Glick play. Here we are. We pulled a video
to the upper track. We add this image
below the video. We match it to
duration or the video. Now we mask the
character to make it look like it's
sitting on the edge. Zoom in by 50 per cent. We go to the opacity setting and we select the free
draw Bezier tool. We mask this part of
the character first. We zoom out. Now we mask
the whole character. We scale down the character. And we put it here. Like I said, to look like it's
sitting on the edge. Blain. Perfect. The
background is shaking a bit, so we need to stabilize it. We go effect. We locate the
Warp Stabilizer effect. We added to the
background image. Because if the
background is moving, the character needs to
move with it as well. So we need to stabilize
the background. We wait for a bit. Here we are. The background is stabilized. Now we go to result
and we select know Motion to stabilize the
background even more. Here we are. We click Play.
This is our video. It looks like the character is sitting and enjoying
the sun down. We use the razor tool
to cut the image from here to match the
duration of the video. Now we select all the layers, right-click and do select
nest tumors, all the layers. We get this window, we click. Okay. Now we add
a scale keyframe. At the start of the video. We put the cursor at
the end of the video. We scale the video
slightly like this. That's better. This is a small
animation for the video. So this is our video and helped create videos like it's
using the green screen. That's it for this video. Thanks for watching and I'll
see you in the next video.
87. Premiere Composer: Hello and welcome to this video. In this video we will see how to add the premiere
Composer Plugin. The premiere Composer is a plugin that we can add
to the premiere Pro. So first thing is we
go to Mr. horst.com. We go to products and we select products
for Premiere Pro. Here we are. Now we click on plugins. And here we have the
premiere Composer Plugin. The Plugin has a free
version and a paid version. We go to pricing.
As you can see, we have a free version
with over 1,000 assets and the paid version
has more than 6,000 acids. You can work with the
free version because it does provide a lot of assets. Just make sure to read the license and the
copyrights first. Now we go back. We click on
Learn more and download. If you have a neck click
on download for Mac. If you have Windows, click on download for Windows, you will. Are the download started. We wait for the
download to finish. Here we are. Now we'll click on Open
Folder. We get this file. We double-click on it and we
start installing the plugin. We add the Mr. Horst products
managers to the EPS folder. Here it is. Now, double-click on
it. We get this window. We click Next. Now
to use the plugin, we need to create an account. So we click on
Create new account. We go to the website. We type our email. We said the best word
for our account. We confirm the best word. We agree to the terms of using. Of course, make sure to read the terms before
agreeing to them. And then we click
on Create Account. Here we are. A confirmation
link was sent to our email. So we access our email. Here it is. Now we click
on confirm my account. And here we are. We are. The e-mail is confirmed
successfully. We go back to the Plugin, we type our email
and we click on Login. We get this page. We have here After
Effects and Premier Pro. With less Premiere Pro. And we click on install. Wait for the Plugin to be
downloaded and installed. We are, it's installed
successfully. So we close this window, opened the premiere
pro software. We add this video
to the Timeline. This is just an example. Now we go to Window Extensions. And we slept premiere Composer. We get this window. This
window is seperates, but we can edit beside the
effects controls panel. We click on premiere
Composer and we drag it. Besides effects controls,
we get this blue bar, then will release
the mouse button. Here it is, right beside
the effects controls panel. We have the starter pack folder. We open it. We have
multiple folders here. We selected text boxes folder. We have here multiple
texts animations. At any of these texts
animations we selected. We put the cursor at the
point where we want to edit. Then we collect, add are the
texts animation is edit. We select the animation
on the Timeline, we get its settings here. We type the text
we want in here. For example, video
editing or anything else. We change the font
type from here. And the font style from here. We set the text
position from here. It's scaled from here. We have this Q setting to
skew the texts like this. We can always reset the setting to undo the changes we made. Next we have the
color texts setting. We use it to change
the text color. We selected the color
and we click Okay. Here we are. The color is applied to the text We have here the color
container stroke. We can change it. And we have here the color
container fill. We change it as well. We have more texts
settings here. We have the position. We have the position
of production setting. We use it to set
the text position inside the text container. So these are the text settings and we can put the
texts anywhere we want. Now we delete this animation. As you can see, we have multiple animations
here to choose from. We just select the one-way
like and we click add, for example, this one here. Then we use the text
settings to adjust the text. We take a look at the texts
presets folder. Same thing. We select the texts P set. We have top, bottom, left, and right position. We can select anyone we
want. Then we click Add. Here it is. Same thing. We select
the text layer and we adjusted, change the text. It's Font, Scale, color,
speed, opacity, etcetera. We take a look at the
transitions folder. We have two videos
in the Timeline. Here. We sit the cursor
rights between them. Extended timeline to set the
cursor perfectly right here. And we select the
transition we want. When we hover over
the transition, we can see a preview of it. Now we select this transition. We click Add. Here it is. We click Play. This is the
transition we selected. We get the transition
with its Sound effects. If you want to edit transition
without its Sound effect, you select the transition
and you uncheck add Sound. Now we add this without sound. To keep the sound,
you check add Sound. We can add our, the transition is added
without any Sound effect. As you can see, we have here multiple transitions
that we can choose from. These transitions
saves us a lot of time and efforts into
video editing process. Now we take a look at
the social media folder. We have here the like icon, the disliked icon, the
suscribe icon, etcetera. We have here multiple icons for different social media
platforms that we can use. We take a look at the
leg icon for example. We selected and we
click Add. Here it is. You can add this icon to your YouTube videos if you
are a content creator. For example, we have
here the subscribe icon. We can select the icon layer and use these settings
here to adjust it. For example, we changed
the buttons color. We continue to texts color. The text itself. We just select the icon layer and we use the
settings to adjust it. As you can see, we have here multiple icons to choose from. We just add the icon and use
the settings to adjust it. Now we'll take a look at
the shape elements folder. We just select the elements
we want and we click add. We click play. Here it is. And of course we select
its layer and we use the settings to adjust
its color scale, ecetera. For example, we can
scale up like this. And like I said before, we can reset the setting to
undo the changes we made. And in case we made changes
with multiple settings, for example, like this. We just click on
reset all this way. We reset all the settings
in a single click instead of resetting
each one separately. So like I said, we have here multiple shape elements
to choose from. Next we have here
this Sound folder. We have here multiple effects
to choose from as well. We can use any of
them in our videos. This is the free version of
the premiere Composer Plugin. It has multiple and different
assets that we can use. If this is not enough for you, you can always choose
the paid version. So this is all about the
premiere Composer Plugin. That's it for this video. Thanks for watching, and I'll
see you in the next video.
88. How to install AEjuice Plugin: Hello and welcome to this video. In this video we
will see how to add another plugin for
the premiere pro. We have this website,
it's called aejuice.com. The website contains
multiple plugins that we can add to
the premiere Pro. The websites
contains plugins for After Effects and
final cuts as well. We have here obeyed
backs that you can buy and add to the software. We also have some free plugins. To get them. We click on free plugins. Are these are the free plugins
provided by the websites. Before we download any of them, we click on Login and we
click on Create an Account. We enter our email. We set the password
for our account. We confirm we are not robots. Then we click on Create Account or the account is created. So we go to free plugins. We select the operating system, we have Windows or Mac. I use max, so I will
select download for Mac. Here we are the download started after the
download is completed, we get the zip
file we extracted. Now double-click on
the back manager. We get this window,
we click Continue. We select the language. You read the using terms because we have to agree to
them before proceeding. We click on Agree. We have here a list of the
packages that we will get. We have a back for
After Effects. We unselected because
we don't need it. We have the premiere pro back. That's what we want. We unselect the Final
Cut Pro as well. We don't need the
stand-alone package as well. So we unselect it. We keep only the
premiere pro back. If you want the other
bags, keep them. Now we'll click Continue. Then install. We wait for
the bank to be installed. Here we are. Now we go to the premiere pro. We get this AEjuice back Manager window. We wait for a bit. Here we are. If you are not logged
in on the website, you will be asked to
do that from here. We have here all the bags. The free bags are on top. We select the first pack. As you can see, we have here multiple effects
that we can use. Will take a look at
them in the next video. So it for this video, thanks for watching and I'll see
you in the next video.
89. How to use starter pack: Hello and welcome to this video. In the former video,
we downloaded and installed the AEjuice plugins. Now in this video, we will
take a look at the effects. So we select the starter pack. These are the effects that
the starter pack contains. We have multiple effects
that we can use. We have a folder as
many on the left. And each folder containing multiple effects
that we can use. As you can see, we have a
huge amount of effects. Take a look at each folder and see the effects
that we have here. We can click here to change
the view if we want. We can also adjust the size
of the effects from here. Now as you can see, we have
here multiple effects. Each effect has
this download icon on the top-right corner. We click on it to
download the effect. We wait for it to be downloaded. Here it is. It's downloaded and edit
directly to the Timeline. We click play. Here it is. We go back and we take a
look at another effect. Same thing with download effect. First. After the effect is downloaded, it's added directly to the Timeline at the point
selected by the cursor. Here's the effect. We click Delete to remove
the effects from the Timeline. We go back. We have here gradients,
background effect. We download it. Here it is. It's an animated
gradients background. When we add an effect, we can adjust it. Of course. For example, we select this
background effect and we have here the graphic parameters
setting menu, open it. And we change the
background colors. For example. We
change both colors. Here we are. We have here the
animation speed setting. We can increase the
animation speed like this. Take a look. The animation is faster now. Of course, we can decrease
its speed as well. Like this. We can increase or decrease
the animation speed. We delete effect. We go back. We have here the titles. We download this title. Here it is. We have
its settings here. We use them to adjust the text. We type the text we
want to show in here. For example, we type
Video Editing here. Here we are. We change its font. We change the font
style as well. We set the text size. We have here the text to settings to adjust
the second text. Same thing. We type the
text we want to show. I will type joseph
Adam for example. Same thing for the
text numbers green. We change the texts and
all its other settings. We change the text
one color from here. For example, we painted in red. We change the text
box color from here. We painted in
green, for example. Like I said, we have
all these settings here and we can change the text color, size,
position, etcetera. Same settings that
we saw before. We go back, we click play. Here is our tidal effect. Now we've learned. We go back, select this interface
effects for example. We download it. Here it is. We have its
settings here as well. We can change the effects color. We can increase its size
to make it look like this. Like I said, we
have here a lot of effects that we can choose from. Take a look at each
effect, download it, and then you can adjust it
if you want and use it. For example, we take a look at this effect with download it. Here it is. It's like a
camera recording a video. Like I said, we use these settings to adjust
the effect to our liking. For example, we change
this text here, which change the font style, and all the other changes
that we can make. So these are the effects
we get into starter back. That's it for this video
and I will see you in the next video to take a look
at the starter pack VFX. So go ahead and download it before moving to the next video.
90. VFX AEjuice: Hello and welcome to this video. In the former video, I
asked you to download the starter pack VFX so that we can take a look
at it and this video. So after we took a look
at the starts of back, now we move to the
starter pack VFX. After downloading
it, we open it. We have here multiple
effects that we can use. For example, we have this
bullet foreign effect. We have some explosion effects. Now it's the same thing to use any of these
effects. We download it. These effects are too large. I already downloaded
this effects, so we will take a
look at it instead of waiting for another
one to be downloaded. Here we are. It's a smoke effect. Now we can easily remove the black background from
the effects that has one. We go to effects
controls and we select the Screen blend
mode. We click play. Here we are. This is the smoke effects
with this example video. This is one of the
effects that we can use as we have a lot of
effects to choose from. Like you see here. There are obeyed effects as well that you can buy and use. We have here this
Sound effects back. Same thing with download it and we use the Sound
effects we have in there. So this is all about
the AEjuice Plugin. That's it for this video. Thanks for watching, and I'll
see you in the next video.
91. Audio Workspace: Hello and welcome to this video. In this video we
will see how to edit Sound with the
Adobe Premiere Pro. So first we go to
Window workspaces, and we select the
audio Workspace. The Timeline hasn't changed. And we have here the
audio track mixer window. In case you can see it, go to Window and check
audio track mixer. In here we have
the project panel, and on the right we
have the media player. Now we add an audio
file folder to use. We put it here. We can put it anywhere. For me. I will put it at the beginning. Now we play it. The woman's soon realized
that the cats had a very, as you can see when
we played the audio, we get to the green bar here. That's bar represents
the sound level. We can set the Sound
level from here. But as you can see, we
have here for cracks. These are similar to the tracks
we have in the Timeline. We have A1, A2, and A3. And finally, we have
the mixed drag. We use the mixed track to set the Sound level of all
the audio files we have. With the other drugs.
We set the Sound level of the audio file that's
in that track only. For the A1 track, we
said the sound of the files that are
in A1 track only, no matter the number of
audio files into track. Same thing with the a to
drag and a three-track. We said the sound of
the audio files into a two-track only and
a tweet Greg, only. Now when we click Play, we can see the Sound
level A1 track. Now we add another audio
file to the a, to Greg. We've looked play soon, soon realized that the
cat had a very Who are. You can see the Sound
level A1 and A2 cracks. Now, if we want to
edit the Sound level of the audio files in A1 track, we go to the A1 track and we lowered the Sound
level like this. We click play. Here
we assume some realized that the cats had
a very, we increase it now. Here we are. Soon realized
that we have two sounds. Let's say that we
have the main Sound and the background sound. For example, the
background sound is higher than the main Sound. So we simply lower the Sound
level of the background. We lowered the sound of
the background audio, which is in the a to drag. We go back, we click Play. Woman soon realized that the cat had a very
special tenants. That's better if you
have an audio file and you want to add a
background sound to it, you add it and you lower the
background sounds slightly. This way, the background sound does not cover the main Sound. You have. One more thing. We don't want to increase
the sound level too much. For example, here, when we
increase the SAM too much, we get this red bar here, which means that
the sound is too high and will not Sound good. So always make sure to
keep the sound level in moderation to give
the Sound clear. So that's it for this
video. Thanks for watching, and I'll see you
in the next video.
92. Edit Sound level: Hello and welcome to this video. In the former video,
we saw how to set the Sound level
in each cracked. Now in this video we will see how to set the Sound level of the single audio file in a track that's contains
multiple audio files. Now, in case you
have multiple tracks and you might get
confused between them. You can name each
crap to organize everything and keep
things easy and simple. For example, we double-click on the A1 track name and
we change its name. For example, we name it's voice. Same thing for the A2 track. We named this one
background or whatever. When we changed the names here, they change in the
Timeline as well. Now we know which
track is which. Like I said in the former video, we saw how to set
the Sound level of all the audio files
in detract at once. Now what if we want to
edit the Sound level of a single audio
file in that track, we will see how first
we mute the track with the background sound
because we don't need it to me as any track. We just click on the
mute icon on that track. Now we add this audio
file to the first track. Now we have two audio
files in the same track. Now, let's say this we want edit the Sound level of the
second audio file alone. Just detract to get a good look. If you bet a close look
at the audio file, you can see line in the middle. We use this line to edit this Sound level of
debt audio file. We pulled the line up
to increase the volume and we lower it down
too deep is the volume. First, we put the line
back so that we can hear the normal Sound
of the audio file, but then it will be 45. And finally, here it is. Now we lowered line, we click Play, then
it would be 45. And finally, here we are. The Sound level is decreased. If we put a line up, but then it will be 45. And finally, the sound
level is now increased. So we use this line, just hit the Sound level of the
selected audio file. Now what if we want to
edit the Sound level of a certain part of the audio file and not the whole audio file. For example, just a line
or award is very simple. First week, just
the Timeline to get a closer look at the audio file. For example, we want to adjust the Sound level of
this part here. We need just let it
first to select it. We put the cursor here. Then we add a keyframe. We move the cursor slightly
and we add another keyframe. Now we put the cursor here. We add a keyframe. We move the cursor slightly
and we add another keyframe. Now the outside keyframes
guarantee that the rest of the track does not get affected with the adjustments
we will make. And we use the
inside keyframes to adjust the Sound
level of debt part. Here, take a look at the
Sound level of this part, then it will be four. Now we lowered this keyframe. We click play. The
sound starts low, then it goes up,
then it would be. For, now we'll lower the
other keyframe as well. Are the Sound level is decreased
in the selected parts, then it will be four. This works if we have a part
of our audio that is quiet, we can increase its sound. And if we have allowed parts, we can decrease its Sound level. So this is how we can
adjust the sound level in certain parts of
our audio files. To remove any of the keyframes, right-click on it
and select Delete. We can use the keyframes
to add a cool effect. We make the sound goes up gradually at the start
of the audio file, and go down gradually at
the end of the audio file, we put the cursor at the start. We add a keyframe. We can
add a keyframe like this. Or using the pen tool. We select the Pen tool and
we add a keyframe here. We add another here. And we lowered the
first keyframe like this. We click Play. Then it will be 45. Here we are. The sound goes up gradually.
Now we go to the end. This is the sound now, but now it is a star. Now we add a keyframe here
and another at the end. The keyframe that we
sit here guarantees that we do not effect
the rest of the track. Now we lowered the
keyframe at the end. We go back, we click play, but now it is a star. The sound goes down gradually
at the end of the track. This way we can adjust
the sound anyway, we like, that's it
for this video. Thanks for watching and I'll
see you in the next video.
93. Adding Sound effects: Hello and welcome to this video. In this video we will see
how to add sound effects. First we select the track
where we want a defective. I will select the voice drag. This drug is called voice because I named this
voice, of course. Then we collect one-shot
effects and sounds. We get these Luts here. We click on effect selection, and we get this menu of effects
provided by the software. We select the light and echo. Let's analogue delay. We select the effect
type from here. For example, we select delay. We can increase or
decrease the effects. From here. We can activate or deactivate
the effects from here. Now we played the audio
without the effect, but then it will be 45 and
finally 6 ft, here it is. But then dense was
really four or five. And finally, and this is the audio with the
effects activated. And like I said, we can choose
the effect type from here. To remove the effect
we collect on effect selection
and we select none. Now we add another effect. For example, this to
the reverb effect. We click play, but then it
will be 45. Here's the effect. This is a cool effect. We have the same
effect settings here. We said defect rate type, and we can activate
or deactivate it. We can add multiple effects, not just a single one. For example, here, like I said, we select none to
remove the effects. And remember when we add sound
effects to a certain Greg, Sound effects will be applied to all the audio file is
in the selected Greg. Now what if we want to add the Sound effect to
certain audio file alone? For example, this one here. It's simple. We select the audio file. We go to effects. We opened the Audio
Effects folder. These are the same effects. We selected the late
and echo folder. We select the analogue
delay effect, and we drag it to
the audio file. Here are the effect is
added to this audio file only the Sound and the
second audio file is known. Now we select the audio file. We go to Window and the whistler
check effects controls. And here we have the
effect settings. We adjust these settings
to adjust the effect. We click on Edit and we adjust the settings
to set the effect. You can play the audio file and make your adjustments
at the same time. This way you can hear
your audio and make your adjustments to get
the results you want. But then dense was
really four or five and finally 6 ft. And we can always deactivate
the effect from here. To remove the effect, we
select it and we collect, delete from the keyboard. And then we add another effect. We get its settings and we
click on Edit, then adjust it. We have here presets menu
that we can choose from. And this applies to all
the Sound effects we have. So that's it for this
video. Thanks for watching, and I'll see you
in the next video.
94. Remove Noise: Hello and welcome to this video. In this video we will see how to remove noise from audio files. We have this audio
file in the Timeline, which contains too
much noise and we will see how to remove
the noise from it. Cats set new Guinness
World Record. And it's also choose
the USA with its owner. The audio file is included for you in the Resources
folder to use. It's called voice tree. As you heard, this audio
file has too much noise. So to remove the noise, we go to effects, audio effects, Noise
Reduction and restoration. And we select the
de-noise effect. We'd drag it to the audio file. We get its settings here. In the effects controls window. We click on Edit. Now we select the light
Noise Reduction P set. We click Play, new
Guinness World Record. It's also choose the USA. Here we are. The audio is noise-free. We have here the
process and focus. We use it to select
the frequency that we want to focus at. We can focus on all frequencies, lower frequencies,
mid-frequencies, and higher ones. We select all frequencies to remove noise from
the whole audio. Now we said the amount to
zero. We hear the audio. Cats set new Guinness
world record. The audio has some noise. Now the more we increase the amount lower
than noise will be. But be careful if we
decrease the noise too much, We will affect some parts
of the audio as well. So make sure to
decrease the noise moderately so that you don't
effect the sound, the audio. We increase the
amounts moderately. Cat sets new Guinness
World Record. And it's also choose
the USA with its owner. This amount here is perfect. The noise is gone completely, but the sound does
not sound normal. So like I said, make sure to
set the amounts reasonably. Now, if we have
multiple audio files in the same track and we want to remove the mice in
all of them at once. You go to the Audio Track Mixer and we select the
Dino is effect. And now the effect is applied
to all the audio files in the selected black cat sets
new Guinness World Record. And it's also choose
the USA with its owner. When you want to
remove or reduce the noise from multiple
audios at once, make sure that all
the audio files have the same noise level. Because if the noise level is different in each audio file, the results will be
different for each one. And you will have
to set them noise for each audio file separately. So that's it for this video. Thanks for watching, and I'll
see you in the next video.
95. Voice Recording: Hello and welcome to this video. In this video we will
see how to record sound. It creates voice overs
in such as you can see, each track has this
mic icon here. We click on it to start
recording our voice over. But before we do that, we need to set some settings. First, we go to Premiere
Pro Preferences, and we select Audio Hardware. We get this window here. For the default inputs, we select the mic we are using. So first, we need to connect
our mic to our computer. Then we select the
microphone here. This is the mic I'm using, so I will select it. Now, if you have headphones, the voice will come back to you. You go to audio and check mute input during the
Timeline recording. Then click Okay. Now if we want to
record in this track, we click on the mic icon. Now it reads second
countdown starts. Now we can start recording. As you can see, we have
this Recording icon here, which indicates that we
are currently recording. What I'm saying now
is being recorded. And here we are. This is how we can record
any voice over that we want. And you can set the
cursor at any point where you want the
stem to start at. And of course, you can record
using any crack you want. This is how we record sound
with the Adobe Premiere Pro. That's it for this video.
Thanks for watching, and I'll see you
in the next video.
96. Frames rate: Hello and welcome to this video. Before we start
with the software, there's one important thing
that we need to talk about. It's the frame rate. Firstly, we need to understand the difference between
the image and the video. The image is just a single
image that does not move. But the video consists
of multiple images. And each video has a
different amount of images. And these images are played one after the other to
give us a video, call this images frames. And in editing softwares, you will find FPS, which means frames per second. That represents the number
of frames in each second. For example, this video here
has 24 frames per second. The second has 30
frames per second, and last has 60
frames per second. This means that every second, the first video has 24 images. The second video shows
30 images per second. And the last one has
60 images per second. And the most videos
on YouTube are filled with 24
frames per second. And of course, you can
Film your videos in 30 or 60 frames per second. The more frames per
second we have, the better the quality
of the video will be. We have videos with
120 frames per second. We filmed a video
with 120 frames per second when we want to
add a slowmotion to it. If you want to slow your videos, it's better to film them
with 120 frames per second so that it
has good quality. Because for example,
if you filmed a video, which ones you for frames per
second and you slowed it, the video will break. In any camera. You can set the frames per
second for your videos, like we have here, for example. Set the frames per second
that will suit you. I hope that everything is clear. That's it for this video, and I will see you in the
next video to see how to create a new project with the Adobe Premiere Pro software, in which we will set the frames per second of our project.
97. Create new project: Hello and welcome to this video. In this video, we'll
start creating a new project with the
Adobe Premiere Pro, using what we have learned
in the former videos. This is the project
that we would create. We will go step-by-step until
we get this result here. Now first thing we do is
we create a storyboard. Now for this projects, I
use some ready to go clips. But in the future when we want to create our own projects, we may have to film
our own videos or hire someone to
film them for us. So before we start, we need to have a
plan for our videos. And this is why we
need story board. These are all the
media files that we will use to
create our projects. They are included for you in
the Resources folder to use. You will find a folder
named storyboard. Here we are. This is our storyboard
roadmap to our projects. These are the scenes
of our project. We have 14 scenes in total. Of course, for your projects, you don't have to draw each
scene if you don't want to. Like I said, you
just need to have a picture for what
you want to create. Because you can't
create something without having a plan or at least small mental image
of what you want to create. It's a process of
trial and error, but you just can't
do random actions and expect a logical result. Now after we covered this
story board, we go back, like I said, we have
here all the media file is that we will use
in this project. I would close this project so
that we can start our own. So we create a new project. We name it's called project. Of course you can name
it whatever you like. And we click on Create. Now we add all the media files. We already saw how to add
files to the Timeline. Now that we are creating
a professional design, we create a sequence that
matches the media files. So we select any of the
videos, right-click on it. We go to properties. And we have here
the Video Details. This is the image size, and this is the frame rate. 24 frames per second. These are the details
that we need, the image size and
the frame rate. So we close this window. We go to File New and we slept sequence. We
get this window. We have here some presets. We go to digital SLR
at pixel resolution, and we select the 24
frames per second. We are, this is
the same number we saw on the videos properties. Now click Okay. Now when we add a
video to the Timeline, we will not be asked to change
the sequence properties. So we add the first
video. Here we are. Now we will start
creating our projects. So that's it for this video. Thanks for watching,
and I'll see you in the next video to
start our project.
98. first scene: Hello and welcome to this video. In this video, we start
creating our projects. We extend the Timeline
so that we get a good look at the
video and the Timeline. This is the first
video we added. This video is a bit long, so we will take
only a part of it. First, the video is a bit slow, so we need to split
it up a little. So right-click on it and
we slept speed duration. We said this B22 100. We click Okay. The
speed is good. Now, we extend the
timeline a bit more. Now we split the video
using the razor tool. We put the cursor here and we
can see from the keyboard, that's the shortcut
for the razor tool. We split it from here as well. We delete these two parts
and keep them in Luan. Now we select this space and right-click
Delete to remove it. So this is the video that
we open our projects width. But we want the videos appear out of nowhere
at the start. So we put the cursor
at the start. We select the video, we
go to effects controls, and we add an opacity
keyframe at the start. Then we'll lower the opacity
to zero to hide the video. Now we put the
cursor here and we reset the opacity setting to bring it back to 100 per cent. We go back, we click
Play, and here we are. The screen starts in black, then the Video appearance, we increase the space
between the keyframes slightly to smooth
this animation. Right-click on the video
and we slept is in perfect. Now we add the second video. All the videos are numbered to keep things
organized for you. You put the video here.
Wycliffe blain. Perfect. We will take a part of
this video as well. So we split the video from
here. And from here as well. We keep the middle
part and we delete the other two parts with lead the space to put the
videos next to each other. This video has a sound
that we don't mean. So let's click on it
and with less unlink, select the audio.
And we deleted. Same thing for the first video. Because later we will add
our own audio. We go back. Look blain. Perfect. Now we'll
select the second video. We go to effects controls. We set the cursor
at the start of the video and we add
a scale keyframe. Now we've put the cursor
at the end of the video. And we set the scale
to 120 per cent. It's create a small animation. We go back, we click play. The animation is a bit too fast, so we change the scale
to 110 per cent. That's better. So our
project starts like this. Then we move to the next video. These are the two first videos. So that's it for this video. Thanks for watching,
and I'll see you in the next video to
continue our project.
99. second scene: Hello and welcome to this video. We keep working on our project. Now we will add the third video. Here it is. We'll take the parts of
the video that suits us. We take the parts where
the backlight starts. So we put the cursor here. We can split that apart or
we just hide it like this. Now, the video starts like this and ends like
this. Perfect. When remove the audio
from this video as well. We put the video next
to the other videos. The video is a bit too fast. We slow it down,
right-click on it, and we select speed duration. We set the speed to 75%. Click Okay, we go
back, leg lift blain. Perfect. We just hide this
small part at the end. That's good. Now we
add the fourth video. Again. We will take only
the parts that we need. We split the video from here. And here. We delete the parts
that we no longer need. We remove the audio from
this video as well. We remove the space
between the videos. We slow this video as well. So right-click, we select speed duration and
we set the speed to 75%. We click Play. Perfect. We need to add a
transition effect between these two videos. We go to effects. Video
transitions, dissolve. And we add the cross dissolve
transition effect between the two videos. We click blain. Perfect. So these are the two
videos that we edit now. That's it for this video. Thanks for watching and I'll
see you in the next video.
100. third scene: Hello and welcome to this video. We keep working on our projects. We add the fifth video. The video is over 1080 pixels. That's why we can see
the whole picture. And I intentionally
chose it like this. Now we take a part of the video, the parts where the
car is turned on. We split the video here. And here as well. We delete
the parts so we don't need. We put the video
here. We click Play. Perfect. As you can
see this value here, it looks a bit too
much in orange. So we need to adjust its colors to match it with
the other videos. To do so, we go to
Window workspaces, and we select the
color workspace. We go to lumetri color, the basic correction menu. We select the white
balance picker and we click on the
white color in the car. Here we are. This is the
video before and after. The colors of the two
videos are nearly matched. Will order the video saturation. Perfect. We did this to match the
colors of the videos. There was a big difference
between these two videos, but now there are gloves. We go back to the editing
workspace. We click Play. Perfect. Now we add the sixth video. It's a video or the character
shifting the car gear. And the next video after this one will show the
card drive invest. Now we will take this part of the video to give a sense that things are
about to get serious. We split the video here. And here. We keep the parts we want and
we delete the rest. We delete the spaced,
but the two videos next to each other,
we click blain. Perfect. I downloaded this video online. It has these edges here. But that's okay because we will add the same edges to
the whole project. So this is our projects so far. That's it for this video.
Thanks for watching, and I'll see you
in the next video.
101. fourth scene: Hello and welcome to this video. We keep working on our project. We add the seventh video. As always, we take the parts
we want from the video. This part here. We
split the video here. And here, we delete the rest.
Who put the video here? After the gear shift scene, we see the car speeding
here. Perfect. Now we add H video. Here it is. We speed up this video. Right-click Speed
Duration, and we set the speed to 300%. Blain. Perfect. We split the video from here. We delete this part to
start it like this. That's better. We need to adjust the color of
this video as well. So we go to the color workspace and we adjust the temperature. Perfect. We go back to the
editing workspace. Remove this part of this
video to make it shorter. Perfect. So this is our projects so
far. That's it for this video. Thanks for watching, and I'll
see you in the next video.
102. fifth scene: Hello and welcome to this video. We keep working on our project. We add the ninth video. Here it is. It's a video of a car dashboard showing the speed increasing. This is the exact parts we want. So we split the video
here. And here. We keep the parts we want
and we delete the rest. Now we remove the audio
from all these videos. Perfect. If you pay
attention to this video, you can see that
it's not stable. So we stabilize it. We go to effects and we locate the Warp
Stabilizer effect. We edited the video.
We wait for a bit. Now we go to the results setting
and we select no motion. We click plane. Are the
video is stabilized. Now we add the next
video, the tenth video. Here it is. We take this part of the video
and we delete the rest. Remove the audio as well. Go back quick look
blain. Perfect. Now we duplicate the video
number seven. We put it here. We decrease its duration
slightly and we scale it. To focus on the car front. We go back quickly, explain. Who are these are the
videos we added now. Perfect. That's it for this video.
Thanks for watching, and I'll see you
in the next video.
103. sixth scene: Hello and welcome to this video. We keep working on our projects. This is less video we added. We extended slightly. Now we add an opacity keyframe. Here. We put the cursor at the end of the video and
we set the opacity to zero. Close the video like this. This is our whole
projects so far. Perfect. Now we leave an
empty space here. And we add the next
video, the 11th one. We take this part of the video. When to move it's audio. Who put the video
here? Like I said, we keep a small space
between these two videos. We put the cursor at
the start of the video. We set the opacity to zero. We put the cursor here, and we reset the opacity to 100% to get this
transition effect between the two videos. Now we add the Video number 12. We put it here. It's the
last video in the projects. We take the parts of it, this part here, we put
the video here. We remove its audio as well. To smoothen the transition
between these two videos, we go to effects and we add the cross dissolve
transition effects between them with lip blain. Perfect. So these are all
the videos of our project. That's it for this video.
Thanks for watching, and I'll see you
in the next video.
104. Adding Sound effect: Hello and welcome to this video. In this video we will add the Sound effects
to our projects. I have these Sound
effects that I will use. You can use them
or use your own. Now we add the first Odeo. Odeo will serve as a background sound to the whole project. Now add the second
audio at the start. We want to set it and here
we decrease its duration. Now in this video with
the car is turned on. So we add an engine Sound. We lowered this
audio file here and we add audio number three here. Hide this part of the
audio at the start. We hide this part
at the end as well. And the audio here, because we will add the gear
shift Sound effect next, this is the engine Sound. Now add audio number
four. We put it here. We hide this part.
We click Play. Perfect. Now at ODU number five, these audio files
are not random. It took me awhile to get them to set the perfect Sound
effect each video. Like I said, you can use them or use your own Sound effects. We put the audio here. We hide this part at the beginning. We slip plane, is too long, so we split it here.
We delete this part. The audio stops at
the end of the video. So we reduce the
audio at this part. We put the cursor here. We set a keyframe here, and a keyframe at the
end of the audio. Then we lower the
keyframe down here. This way the audio
Sound level goes down gradually until it stops. Like we did with
the videos opacity. Now add the next audio. Just DoD iteration like this. And we put it here.
We can look blain. Perfect. The background sound
audio file is too long, so we cut it from here to match the length
of the projects. Go back. We click Play. Add this as our project. This video, thanks for watching, and I'll see you
in the next video.
105. Crop effect: Hello and welcome to this video. We are about to
finish our projects. We just have one more effect at, as you can see, we
have a black bar at the top and bottom
of this video. Now we will add this bar
to the whole projects. So right-click on
the project panel. We select new item,
adjustment layer. We get this window. We click Okay. We add the adjustment layer
to the Timeline. We put it on top. We adjust its length to
cover the whole project. Now we go to effect. Will locate the crop effect. Here it is. We edit to the Adjustment Layer. We go to Effect Controls. And we crop the video
from the top like this. We crop it from the
bottom as well. We said both of them
to 11 per cent. We go back, we click Play. And this is the final
look of our project. So this is how we create
the small and cool video. That's it for this video.
Thanks for watching, and I'll see you
in the next video to start another project.
106. Story board: Hello and welcome to this video. In this video we will start
working on new project. It's a potato chips
commercial add. Here it is. This is the video that we will create together in
the coming videos. Same as the former projects we have here, our story board. Again, I drew each scene separately and we have
the full story board. These are all the media files used to create this project. You will find them
in the Resources folder so that you can use them. So that's if there's video,
thanks for watching, and I'll see you
in the next video.
107. First Scene: Hello and welcome to this video. In this video, we will start
creating our second project. We click on new project. We named our project, you can name it
whatever you want. We click Create. Now we go to the Resources
folder we have here. The media file is
for the project. We opened the part one folder and we add these images
to the project's panel. We add the first image
to the Timeline. Who put the image in this drag. And we add the background
image below it. Now we need to remove
this green screen. We select the top image. We go to effects, and we add the ultra key
effect to the image. Now we use the eyedropper tool to select the green
screen color. Are the green screen is removed. We pulled this image
to the upper track, and we'll leave an empty
track between the two images. We will add an effect
in this track later. Now we start our
animation process. We put the cursor here. We add a position keyframe. We put the cursor
back to the start, and we pull the can until
it's gone. We click Blaine. Good. Now we decrease
the space between the keyframes to increase
the animation speed. That's better. Now we select both keyframes. Right-click. Go to temporal interpolation, and we select is N. We
go back with glibly. Perfect. We opened the position and we start adjusting
the keyframes. We select both keyframes. We lowered this dot here, and we drag it to
the right like this. We'd rather the other
keyframe to the right. To get this curve here.
We go back quickly, lay. Perfect. It's like the can
is dropped from above. This is the Timeline. We adjust the keyframes until we
get this curved line. To get this mode animation. Now we will add an effect
here at the London point. We already lifted
drag empty for it. Now we go to the project panel and we add the
broken effect image. We select the image
and we adjust its position to put the effect below the can. Perfect. Now, this effect needs appear after
the cannons, Natalie. Now this effect needs to
appear after decans lending. So we'd go to the start. So we'd drag the
effect image to start. At this moment, we click play. Here we are. We drag it here slightly. Perfect. It's like when the
can is dropped, it breaks the surface. We decrease the
duration of the scene. That's better. So this
is the first scene. We still need the background
so we increase its duration. But again, image and the
effects image or set perfectly. That's it for this video.
Thanks for watching, and I'll see you
in the next video to add the second scene.
108. second scene: Hello and welcome to this video. In this video we will create
the second scene of our add. We start by duplicating
this image. We put it here and we remove the animation applied to it in
the former video. Now we duplicate
defects image as well. We put it here. Now in the second scene, our can is still. So we duplicate the image twice. We put each one on
top of the other. And to assign a different color to each layer to separate them. Here we are. The layers are on top of each other with a different
color for each one. Now let's take the green layer. Will go to Window
Workspaces, color. We go to the course menu. We go to UV as hue. And we use the color picker
tool to select the can color. And we change it to green. We widen the
selected color range to select the color
in a better way. You add the color green is set. Now we hide the drug
contained in the green layer. We select the second layer, and we change the
cans color to purple. Perfect. Now we showed
the top track back. We have here weekends, each one with the
difference color. We go back to the
editing workspace. And we started our animation. We put the cursor at
the start of the scene. And we select the top layer. We set a position keyframe. Next we put the cursor here. And we'll move
again to the right. Next, we'll put the cursor here. And we reset the position setting to bring the camera
back to its original spot. This is the animation
was created so far. The animation is a bit too fast, so we decrease its speed by increasing the space
between the two keyframes. Now it's good. Now we select the middle layer. We set a position keyframe. At the start of the scene, we put the cursor
at the exact spots of the top layers
second keyframe. And we drag it again to
the left, right here. Now with the cursor at
the end of the scene. And we reset the position setting to bring the
camera back to the middle. We go back with look blain. Perfect. We increase the duration
of the third can layer and the effect
layer as well. Now we pull the
lower can layer to the top and we bring all
the layers down here. The candidate was at the
bottom, is now on top. We'd go back, we click plane. These are the two scenes. Now we select the
middle can layer. We select it's keyframes. Right-click. We go to
temporal interpolation and we select is N. Same
thing for the lower. Again. We go back, we click Play, and here we are. This is our project so far. That's it for this video. Thanks for watching,
and I'll see you in the next video to
create the third scene.
109. third scene: Hello and welcome to this video. We keep working on our design. In this video, we will create the third scene of our design. We increase the duration of the background and the effect. We go to the Resources folder. We open the part three folder and we add these two images
to the project's panel. We add this image
to the Timeline. It's an image of the
can without slip. We put it down here with the parts of it's below
the top can layer. Now we add all
Gracchi effect to it. And we use the
eyedropper tool to select the green
screen to remove it. We extend the top
can layer to hear. You mentioned the end of
these two layers like this. And we'll split the top
can layer from here. We have two cans, one closed and the one
below it is opened. Now we will mask the can lead. So we zoom in on it. We select the free
door Bezier tool. And we draw the mask
around the lid. We zoom out. Now we
pull the lid layer up. We will add the chips
images in here. We select the lid layer and
we add a position keyframe. At the start of the scene. We put the cursor here. We add a position keyframe. Now we will to live up
here. We move the cursor. We add another keyframe here. Next week with the cursor here. And we reset the position setting to put the
lid back on the can. Here we are. We increase the space between the keyframes to stop the
lid in the air a bit. Now we select the keyframes. Right-click, select
temporal interpolation. And we slept is N.
With look blain. Perfect. Extend the background layer. And the breaking effect. Now add the potato
chip image here. We add ultra key effect to it. And we use the
eyedropper tool to select the green
screen and remove it. We scale down the chip to
fit with the can sides. And we put it up here. Now we duplicate the
chip image twice. We pull the lid layer up here to leave space for the
other two chip images. We duplicate the chip layer. We put it here. We use the position setting to
pull the chip up here. We duplicate the
chip image again. And we pull the chip up here. We tried to set the same
space between the chips. Now we select the chip layers. Right-click and select
nest to merge them. Click Okay, here we are. We pull the lid layer down here. This is our animation. Now we need to move the
chips with the lip. We set the cursor at
the start of the scene. We select the chips layer, and we add a position keyframe. First, we need to pull the
chips layer down here. So this when we lowered them, there will be behind the camera. Now we lowered the chips
down until the argon. We put the cursor here
and we pull the chips up. We move the cursor here. Now we add another
position keyframe here to let the chips hang
in the air for a bit. Remove the cursor here, and we lower the
chips to hide them. We go back quickly, blain. Perfect. We increase the space
between these two keyframes to make the chips stay a
bit longer in the year. Same thing for the
lid keyframes. We wanted to stay in the
air a bit longer as well. We go back with look blain. Perfect. We select
the chips keyframes, right-click and with left
temporal interpolation. Then we slept is
N. We click Play. Perfect. This is our third scene. We decrease the duration of
all the latest, slightly. Perfect. This is
our project so far. That's it for this video. Thanks for watching, and I'll
see you in the next video. It's creates the next scene
110. fourth scene: Hello and welcome to this video. We are still working
on our project. Now in this video,
we will create the fourth scene of our add. We go to the Resources folder, to the part four folder. And we add this video
to the Timeline. I found this video myself. Now we need to remove
the green screen. But first, we need to remove
the parts of the video around the green screen as
we don't need any of them. So we select the free
drug Bezier tool. And we select this part of
the video. Here we are. Now we add all Gracchi
effect to the video. And we use the
eyedropper tool to select and remove
the green screen. Open demand generation menu. We decrease the highlights. And to increase the beta cell until the white spots are gone. We decrease the
pedestal slightly. We decrease the
tolerance to zero. Now we add the background
image. We put it down here. We put the video layer here. Now, this is our scene so far. We will duplicate
these chips here. First, we put the chips at the middle using the
position setting. Now we duplicate them. We put them at the top left corner. We duplicate them again. We put them at the
lower left corner. We duplicate them again. We put them at the
lower right corner. We duplicate them on less time. And we put them at the top
right corner with like blain. Perfect. So this is
the fourth scene. We matched the background
duration to the scene. We go back plane. This is our ads so far. That's it for this video.
Thanks for watching, and I'll see you in the next
video to add the next scene.
111. fifth scene: Hello and welcome to this video. In this video we will create
the next scene of our add. We go to the Resources folder, to the part file folder. And we add this video
to the Timeline. This is the video,
the can is rotating. Now we add the ultra key
effect to the video. And we use the
eyedropper tool to select and remove
the green screen. Open demand generation
setting menu. We increase the pedestal. We open the mescaline
upsetting menu, and we increase the contrast. Now we remove this
part of the video. So we zoom in on it. We select the free
draw Bezier tool. And we draw the
mask around again. Here we are. We have
only the can left. We lowered the video here. We rotate the camera like
this and we center it. Now we duplicate it. And we
put the second GAN here. We duplicate again, again.
We put it down here. We duplicate the
can. Again. We will change the color of this one. As you can see, we have
three cans in here, each one in a different color, red, green, and purple. So we need to set
the same colors. Here. We go to the
color workspace, curves, UV, SU, and we use the color picker
to select the can color. Then we change it to green. Perfect. Now we
put the can here. We duplicate the green.
Can. We put it here? We duplicate it one more
time. We put it here. Duplicate again,
again. We put it here. Now we change the color
of this cancer purple. We put the gain here. We duplicate it. We put it here. Duplicate it again one
last time. We put it here. Perfect. You can add more cans in here and in any empty
spots if you like. Now we add the background image. We put it here. We split it from here to match its duration with debts
of the scene. And here we are.
This is our scene. We go back plane. Here we are. That's
if there's video. Thanks for watching,
and I'll see you in the next video to
add the last scene.
112. sixth scene: Hello and welcome to this video. In this video we will create
the last scene of our add. We go to the Resources folder, to the part sex folder. And we add these images
to the project's panel. We add the background
image to the Timeline. We put it here. Next, we
add the fire effect image. We put it here.
And finally we add the third image.
You put it on top. We scale down the
image like this. Perfect. The scene
will look like this. We select the products image and we add a scale keyframe.
At the start of the scene. We put the cursor here and we increase the image
scale slightly. We go back. We click Play. And here are, this
is the final scene. We go back to the start. We click Play. This
is our whole add. Now we'll go to the
Resources folder, to the Sounds folder. And you will find, hear
some sound effects that you can add to the project. Or you can use your own
Sound effects if you like. So that's it for this video. In case you have any
question or an inquiry, feel free to contact me and I will be more
than happy to help. That's it for this video.
Thanks for watching
113. Change Horizontal videos to Vertical: Hello and welcome to this video. In this video we
will see how to turn normal videos into
Vertical videos for social media platforms like
TikTok, Instagram, etcetera. We have this video
in the Timeline. Now we go to Window workspaces and we select the
vertical workspace. This workspace is designed
to create a vertical videos. Now we go to sequence. We slept sequence settings, and we reverse the
videos frame size. We said 1082 Horizontal
and 1920s to Vertical. Now we'll click OK, OK again. And here we are. We have a vertical
video that we can upload to TikTok,
Instagram, etc. but we still have a problem. We can see the whole video as the character is
out of the frame. So we go to effects and we locate the auto
reframe effect. It is. We edited the video
in the Timeline. Here we are with lip playing. The video is now in Vertical and the camera tracks and follows the character
automatically. So this is how we
turn normal videos into Vertical videos, upload them into social
media platforms. So that's it for this
video. Thanks for watching, and I'll see you
in the next video.
114. Change Shirts color: Hello and welcome to this very, in this video we will see
how to add a cool effect to our videos that we want to upload into social
media platforms. We delete this value here. We don't need this anymore
and we add this one. This video is included
for your views. Or of course you can
use your own videos. It's totally up to you. This is the video I would use. Now we will change
the character is Shirts color with
every finger snap. First thing, we
split the video at every finger snap Here. And here. We split the video here as well. And with lead less parts
as we will not need it. Now it's like the mental part. We go to effects and we locate
the lumetri color effect. Here it is. We edit
to the middle part. We go to effects controls. We go to the curves menu. We go to hue versus hue. And we use the color picker to select the color
of the Shirts. Are the color green is selected. Now we use the middle data
to change the Shirts color. Go up to you via saturation. We use the color
picker to select the Shirts color is selected. Now we increase its saturation
to make it look better. Of course, we can change
the color to any color we like. Now we go back. We click plane. Are
the Shirts color changed after the snap? Now it's like less part. Same thing. We add the
lumetri color effect to it. We go to effects
controls, curves. We go down to hue vs. hue. We select the Shirts
color, and we change it. Now we go to View
vs. saturation. We select the color and we
increase its saturation. Perfect. We go that you click play. Here we are. This is an example
effects that we can add our social media videos
using the premiere Pro. So that's it
for this video. Thanks for watching, and I'll
see you in the next video.
115. Stop Motion effect: Hello and welcome to this video. In this video we will
see how to create stop Motion effect for our
social media videos. I have here some
pictures of myself. I will use them as an example. You can use them or
use your own images. Now we add images
to the Timeline. As you can see, with each image, I changed the head
position on my head. And so it makes a full circle. Now we select all the
images, right-click on them. We select speed duration. And we set the duration
of each image to 0.5 s. We click Okay. Here we are. Each image is set to 0.5 second. And we have a space
between each image. To remove all these
spaces at once. We go to sequence and
we select close gap. Here we are, the gap between
each image is closed. We extend the timeline to see
the images layers properly. Now with live plane,
and here we are. We slept all the images. Right-click and select
nest to merge them. We get this window
and we'll click. Okay. Now let's
click on the layer. We select speed, duration, and we set the speed to
120 per cent. We are. Now we smooth the
animation a bit. We go to effects and we locate
the Posterize Time effect. We edited image. We set the frame rate from here. The more frames we have here, this model, they animation. Like I said, we set the
frame rate from here. We click blain. Perfect. Now we duplicate the layer. We put it here,
right-click on it, and we select speed, duration. Then we check reverse speed. We click Okay, we'll
play the video. Here we are. We duplicate
the first layer again. We put it here. Who
played the video? And this is the final look
of our stop Motion effect. It's cool and simple. So that's it for this
video. Thanks for watching, and I'll see you
in the next video.
116. export files skillshare: Hello and welcome to this video. In this video we will
see how to export our project after the editing
process and everything. Now we want to export it. To export the projects. We go to export. We want to export the
project as a video. We named the project from here. We name it to my
projects, for example. Now we choose the
location that we want to export the project to. For example, here, we
select the format. I will keep it at H.264. Next we have here
the video settings. The software sets
the Video settings automatically based on
the sequence settings. But if we want to
change the settings, we uncheck the setting
and we change it. We select the frame
size from here, the frame rates from here. And the rest of the settings. As you can see, the video
and audio and activated, which means that we will
export the video with audio. We can take a look at the video
here before exporting it. Now with everything said, we click on export.
We wait for bids. We go to the location and we selected. And here's the video. Perfect. Now we go
back to exports. If we want to export the
video without audio, we uncheck audio from here. We named the project
and we click on Export. Here we are. The video is
exported without any audio. Now we'll go back. If we want
to export the audio only, we uncheck video and we
select the MP3 format. We click on Export. First, we changed
the project name. This is just because
I'm exploiting everything to the same location. We are. This is the audio file. So this is how we extract the project as a
video with audio, without audio and
as an audio-only. Now we have this
projects and we want to export a part of it only. We set the cursor at
the start of the part. Right-click on the cursor, and we select Marc N. Now we put the cursor at
the end of the parts. We want to select.
Right-click on the cursor and we
select mark out. Here we are, this is
the part selected. Now we go to export. We select H.264 format. We check audio and video. And we select source in, out from the range setting. You are, the selected
part is showed here. And we can adjust it,
increases or decreases. We named the project
and we click on Export. Take a look at the start
of the projects here. And this is the start
of the exported video. The video started
from this scene because this was this letter. But the part we selected, the parts we selected
has 7 s in total. While the whole project has 18 s. We can adjust the selected
path from here as well. And to remove it,
we right-click on it and we select
Clear in and out. Now there is no specific parts selected and we can
export the whole project. Now, this is the
end of our class. If you have any
question or inquiry, feel free to contact me and
I will be glad to help you. And you can take a look at my other classes for other
software like Photoshop, illustrator and a lot more. So that's it. Thanks for watching.
 Joseph Adam, Graphic Designer