Transcripts
1. What's Plein Air Painting?: Plein air painting is all about leaving the four walls of your studio, stepping out into the elements and capturing your experience. Hey guys, I'm Trupikal Jagni. A watercolor artist and paint maker from India. You can find out more about me on my sketching profile. Painting on plein air is the French expression for painting in the open air. If you've primarily worked from photographs, half your work is already done because your subject is already abstracted into a 2D format and it's already composed for you. All you got to do is paint it. When you first step out to do plein air, it can be a bit overwhelming because so much is going on. It's the whole wide world around you. What to capture, what to paint, what to leave out of the composition? It can just be really confusing and overwhelming. In this two part of the class, I'm here to expel all of the confusion, the hesitancy and the apprehension you might feel when you first step out to do plein air painting. In this class, which is part one, I'm going to walk you through the biggest confusion that I personally faced when I first started plein air painting. What supplies do I need to use? I'll walk you through all the supplies and tools that I'm using and I'll show you my entire plein air setup, so it can be a guide for you to set up your plein air gear. Although plein air painting is about being spontaneous and keeping it fresh. One of the ways that you're going to nail it is by being organized and deliberate. We're going to do that by being closely acquainted with our tools and supplies and our plein air setup. There's so much to do, so much to learn, so much to experience. Let's dive in right into the class.
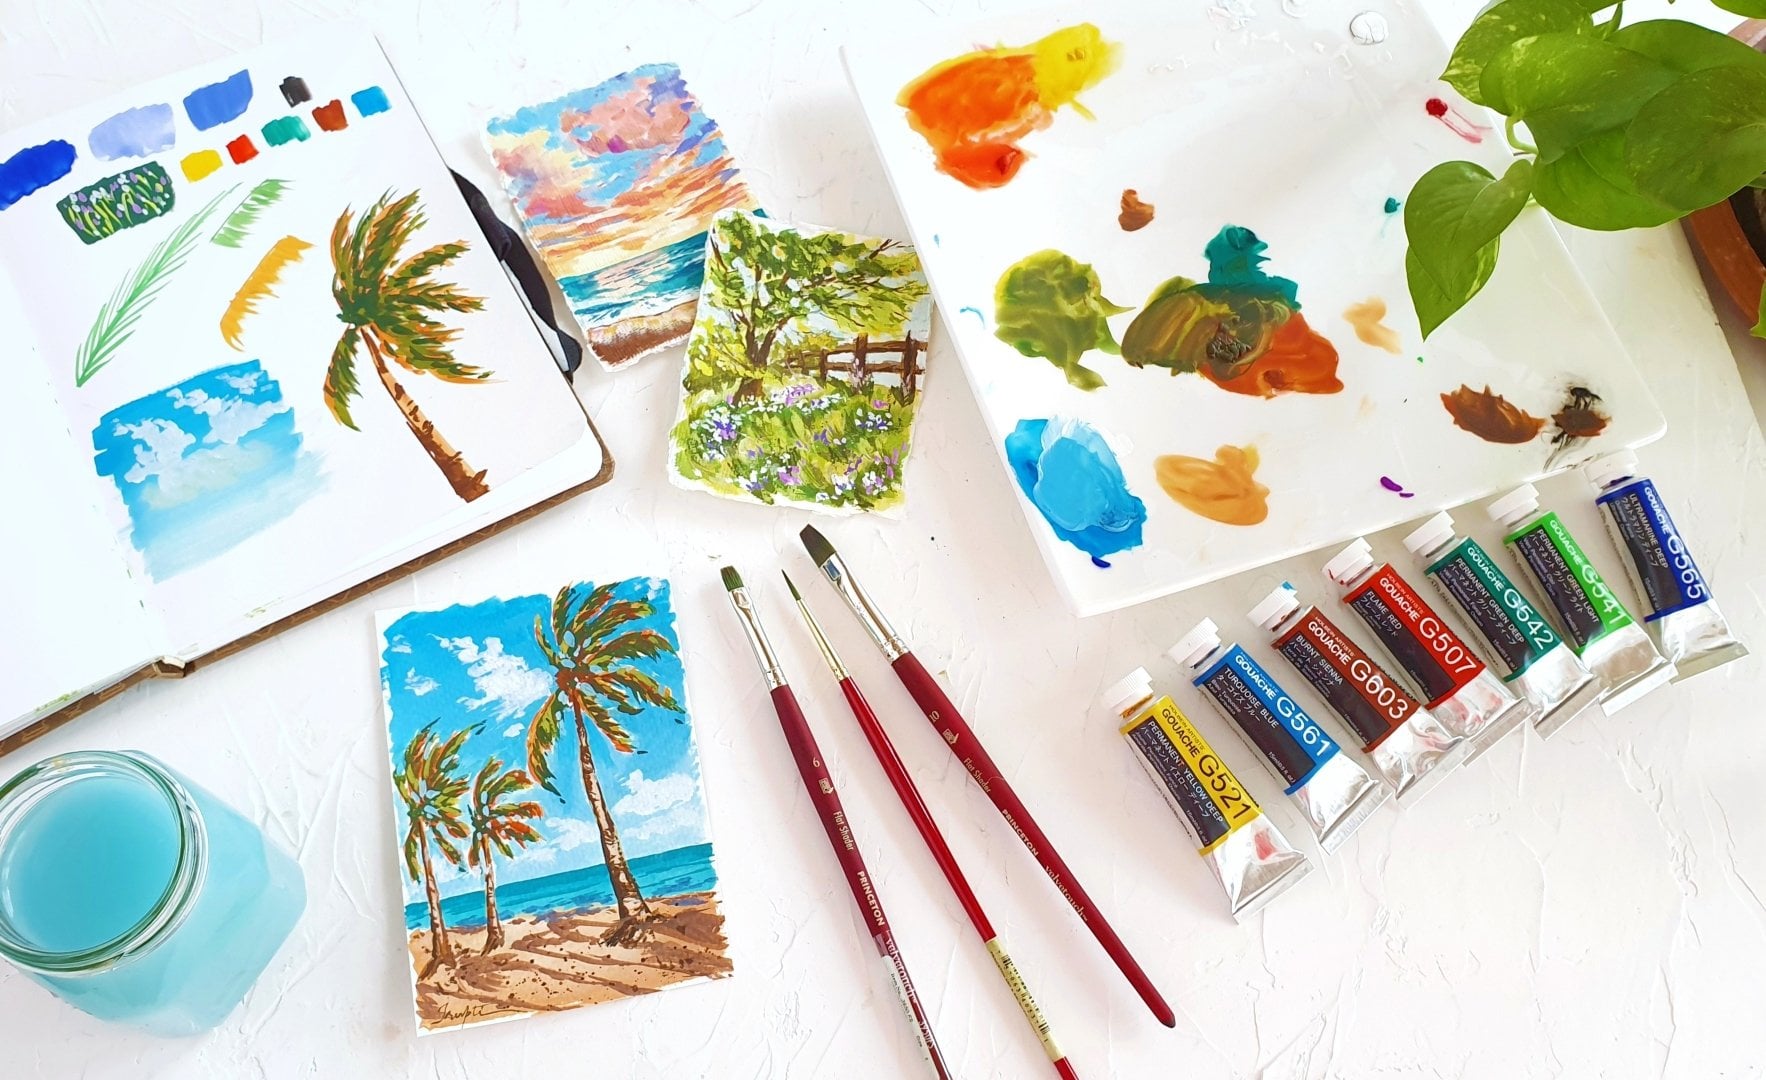
2. Palette: I've got the color palette. This is another aspect of plein air painting that really confused me a lot when I first started art because the options are pretty much endless. This is the palette that I use a lot for my plein air works and I really swear by this model. This is the Mijello fusion air-tight palette. It's the same palette that I used in my planner trip to Italy last year and I'm using it right now here in Italy as well. And I swear by this palette because I love the design of this and the built quality of it. You can see that it has 18 wells, really deep and wide wells are on this palette and it has a lot of mixing areas. We have two big ones over here and then you have this detachable, another tray that comes out, that you can use for mixing as well and you also have this area. You have three really big areas for a lot of color mixing and I think that it's really valuable. Especially if you are the person who uses a lot of area in color mixing like I do. Another great thing that I really like about this palette is that you can actually fit full bands and half bands in here. If you have a band in tube colors, you can glue back them like how I have done over here. I've just stuck this half band here with the double-sided dip and not only can you put half bands and full bands in the wells or in this space over here. You can also even squeeze some paint in these areas over here. The design of this palette really allows you to be fairly flexible with your color arrangement and with your color mixing. I really love that about this palette. This Mijello fusion air-tight palette is really affordable. It's great for watercolors and gouache. I've been using this for gouache as well except that to squeeze my gouache paint fresh from my tube but I'm considering buying another same palette like this one for my gouache because what it does is, like it says in its name, it's an air-tight palette. When I close this, if the paints are wet they stay wet. It doesn't dry at all and I think it's really valuable especially if you are a gouache painter who likes their paints fresh and wet when you're painting. Yeah, this is a really great palette and I really swear by it. As you can see, I have more than the 18 colors over here and I can have more if I want to. But apart from this palette you can also carry it in boxes with half bands. You can carry anything that you want as long as it's a portable container for storing your watercolors and I recommend going for something that's light and it's not really heavy. This one is really light because it's made of plastic but I find that the big tin boxes which house 48 half bands can be a bit heavy in terms of carrying it in my bags so definitely recommend this palette. Another tip that I would like to give you when it comes to your watercolor palette is that have your colors in the same order each time you step out of the house to paint with that particular palette, because that is going to create familiarity and you're not going to spend much time going back and forth guessing your colors or having those swatcher colors to test them before you start painting it. Having a palette with the same placement of the color is going to be really beneficial when it comes to plein air painting. This is just a swatch card that I need for this palette. As you can see, these are the color placements that I have swatched out. But sometimes like I don't even carry a swatch card because I'm so intimate with these colors. I already know how they look on paper and how they behave but if you needed a reminder before you started painting, you can have a swatch card. I found it really useful to just put it at the bottom well here and then put this transparent tray on top of it. So I can just use this area to mix the colors in.
3. Color List: Coming to the part of what other colors that one needs when they step outside and they want to do plenar painting. I'm not going to suggest the exact same color palette for your plenar painting because it completely depends on you. It depends on what you choose to paint, what subject really attract to you, what places that you want to visit and you want to travel to. What are the experiences that you want to paint? It completely depends on that. This is the palette that I had put together for my trip to Italy and also for my workshop with my teacher sir Corbato. I find that this setup works really great for me. I might change just a few colors in the future. The whole point is that your plenar palette can be flexible. You can choose any colors that you want. But if you are going to largely paint landscapes like I do, then I recommend having a combination of warm and cool colors in each primary color. From this row over here, I'm going to go down like this and list out all the colors that are there on my palette. This one is cadmium yellow light, which is like a lemony light yellow color. This one here is Naples yellow, which is a beautiful, warm, opaque arty yellow. This one here is yellow ocher. While they both might look the same, they don't behave, and they don't mix in the same way as each other. But you're going to of course have only one warm or autumn yellow if that's what you want on your palette. This one is Cadmium Orange, cadmium red light. This is quinacridone rose, ultramarine blue, cerulean. Now this is a very beautiful version of cerulean blue from White Nights and almost all of these colors are from White Nights. Cerulean for that beautiful light shade of it. Our cobalt blue because it's just an amazing color to have on plenar palette, or even a landscape palette for that matter. This one here is Chrome oxide Green, which is a fairy take very opaque green water color but you can of course make it transparent by lightning it. Sap Green, olive green. This is a version of olive green by Old Holland. But I've got another olive green over here by White Nights. Just because this is such a beautiful green color. This one here is Indian red chili by Blue Pine Arts. Burnt Cnr, burnt umber. This is, I think it's wine-like brown, but it's just a very deep, dark, cool brown color. This here is indigo from Blue Pine Arts, and this one turqouise gray from Blue Pine Arts. Apart from these colors, I have a couple of other colors here in the pallet. That one is cobalt blue from White Nights, olive green from White Nights. This is a very nice fresh green color coil may green from White Nights and this one here is hookers green by Roman Small Paints. As you can see, I don't have like a hard and fast rule when it comes to my plenar palette. I don't - it's not like I stick by a particular brand for it. What I'm trying to tell you is that I have a good combination of a couple of yellows and orange f just some small work. I don't use a lot of orange in my work. Cadmium red light because it's really a beautiful, fresh, bright red, a warm red and it's opaque, so that comes in very handy. A couple of blues, cobalt blue for that, you know, fresh bluish green shade. A cobalt thin color. Then have quite a few greens as you can see, because I'm a landscape painter and I don't want to be mixing my greens all the time so I like having a good variety of greens and a couple of Auden colors and two neutrals, indigo and turqouise green. Customize your palette based on the subject that you want to paint. One thing that I ever 100 percent recommend having on your plenar palette is whitewash and now this is my tube I haven't squeezed it somewhere, but I usually squeeze out a little bit of whitewash on one of the corners of this mixing palette here and this can be dead useful in painting plenar painting. I will demonstrate that to you in the next class where we will actually step out and we're going to be in a beautiful field and we're going to print a beautiful painting. You will see the importance of having whitewash pad. This is something that I strongly recommend. That's about it, about the watercolor palette. Choose your colors based on what draws you, what you wish to really paint when you're out in the, in the world.
4. Palette Setup: I know I already demonstrated just how many mixing areas this amazing palette has, but I learned plenty of painting from my teacher, [inaudible] , and he uses an almost similar palette and then he also uses this plastic mixing palette separately when he is doing plein air painting. That's how I have learned it, it's the same practice that I have inculcated from my teacher. I always use this plastic palette like this over here. When I'm painting, I pick up my colors over here, I mix it either here or in these wells over here, and the reason why I do that is because this palette has really deep wells over here and it is really useful when you need to mix a lot of quantity of the colors for large washes in large plein air pieces. You don't need this palette unless you are painting really large pieces. But I have gotten so accustomed to the practice of having this palette, I open my palette like this, and then I put this palette right over here, and I've just become so used to the motions of mixing the color either here or on this palette that I continue using this setup, no matter what size of painting I'm painting when I'm doing plein air. So this is one thing that I wanted to show you, this is not a compulsion. You don't really need to have it. But I think it's really neat and it's really convenient to hold my palette like this. The width of this palette is just right enough for it to balance on this side over here and I can use both of these mixing surfaces. Find a palette combination or a palette that works for you, for your movement, your hand movement, and go with it, you don't really need to have the exact same setup that I have.
5. Brushes and Brush Safety: Now this here is my absolute favorite brush roll that I designed for my own planar practice at my brand Blue Pine Arts. I want to start off by giving a little demo of it. So I'm going to hold this and shake really, really hard. Okay, I'm going to be really rough with it, just toss it around, and I'm going to show you that the reason why I designed it like this is because no matter how badly this is shaken and thrown around, my brushes inside can be completely safe and can be damage free. I designed it to have a lot of different widths in the pockets so it can hold multiple brushes of different handles as well. This is thicker than this brush handle. I can carry a lot of different kinds of brushes and different lengths as well. I could carry a really tall hockey brush inside of this and it could still be wrapped up safely. I obviously have a lot more brushes, but that is only because when I'm traveling, I am painting with a lot of different mediums. But you don't need to have as many brushes as I do over here. In this brush roll, I have brushes for watercolors, for gouache, and for oils. For watercolors I usually recommend having a small or a big flat brush of this kind. This is my Princeton Neptune Flat Brush of size one, and it's really amazing because I can get large washes done with this brush and it's a beautiful flat brush. I also have a couple of different mops and round brushes in different sizes. For example, this is a big mop brush which I can use for large backgrounds if I want to. At the same time I have smaller brushes in size. This is a size two [inaudible] mop brush, but it is almost the same as a size ten brush or the size eight brush in the round variety. So these are my Princeton brushes and Neptune brushes. Just to having a couple of these, maybe having a smaller size brush, this is a size two Princeton head edge brush for fine deals is also really important. Another amazing thing that's great for painting is having travel brushes like this. So this is my favorite travel brush. It's my Princeton Neptune round number eight brush and it's so collapse with brush C. It turns into a full-fledged brush, and when you're done with it, you just put it back in it's sleeve, very carefully, be careful not to damage the hairs. Then you have very portable, a really good brush in a really good size. Size eight is a very good size in watercolor brushes. Anyway, so I have a couple of watercolor brushes. These bushes here, I use exclusively for my gouache, my Princeton flat shade of brushes from the velvet dutch series. These are the two flats and this small round brush that I use for details. My gouache brushes are these, and these here are my oil brushes, these over here. So you can see that in this brush roll I can also fit in a couple of pallet knives and just different kinds of brushes for oils. In this larger pocket over here, I can fit in a pencil, a pen. This is that absorbant sponge kitchen counter cleaner but it absorbs water so well that I use it to get the excess water from my brush and stuff when I'm painting, really useful thing. I can also put in an eraser. I can also fit a small sketchbook in this pocket if I want to. Just having a brush roll to transport your brushes can be very valuable, trust me. I have really good brush rolls. I can also carry a few tubes of paint in a different one. These are all my brushes that I have brought on this travel, but I also brought so many brushes just so I could demonstrate all of this to you. I'm filming this class in Thailand, but you definitely do not need a lot of brushes for planar painting. You also don't need perfect new brushes for planar painting. Just pick the ones that are maybe a little bit freed, which maybe a little bit less perfect. So even if they get damaged in transit, you won't feel the pinch as much.
6. Papers and Sketchbooks: When it comes to papers, I use a lot of different formats when I go out for plein air painting. One is of course, a sketchbook. I always carry a sketchbook with me even if I don't have loose sheets of paper because it's a great place to just makes quick sketches, have different ideas when you're traveling. You can also sit it at your hotel, and make some quick sketches based on your observations and experiences. You can see here that I've made a quick painting of the site that we were going to film the next two parts of the class. I love this sketchbook because it has different kinds of paper inside this and different sizes. This black paper is a 100 percent cotton handmade paper, great for painting with gouache. I'm dying to use these sheets, some Fabriano Artistico papers and some cotton paper with malleable petals in them. I have a lot of pages that I can experiment with if I'm off on a really long travel. So definitely carry a sketchbook. But along with the sketchbook, I also carry some loose sheets of paper because I like making big paintings on loose sheets. I just have this plastic sleeve with some Fabriano Artistico papers inside of it. Sometimes I carry bigger sheets of paper as well. Just go with what you have and whatever you feel comfortable with. One thing I would recommend is that I always travel with a 100 percent cotton paper because it just takes the stress away from all the spontaneity and the unpredictability of painting with watercolors outside. Yeah, that's my preference. I also wanted to show you this little pad of paper that I got from Thailand. You can see that I've already made a gouache plein air sketch of a waterfall that we visited. This is just a very handy,I think four by six inches format that you can tear out like I've done over here. Love this format.
7. Portable Easel Setup: My panel easel has two components. One is a lightweight tripod and the other one is a drawing board that can be attached to the tripod. This is a really beautiful collapsible setup and I'll show you how the tripod and this drawing board, work together to make it into an easel. This is a very simple, lightweight tripod and the brand is Simplex. I got this from Amazon, India for around 800 rupees, that's less than $12. It's very lightweight because I don't want to carry around a really heavy tripod, professionally built to support very heavy camera equipment because we're not going to put a lot of weight on this, so just a very simple, lightweight tripod, and it opens up like this. Each of these legs extend quite a bit, you can adjust the height to your liking however much you want. The main thing that's really important here is this head. My tripod has this lever here which I can open up like this and pull out this attachment. This attachment is really important with this screw and I will show you why in just a few moments. I'm going to take this out and set this aside. Another thing that I find really helpful in my tripod is this lever over here. When my tripod is on the ground, if my board is attached over here, this lever here allows me to tilt my board up and down like this. I use this quite a lot in my own practice because I really like it when my board is tilted so that the watercolors flow down with the help of gravity. Adjusting the levers is really important and I'll show you how it works in just a few moments. That's the tripod. This is an acrylic board that actors are drawing and a painting board that I got from artlifehack.com. I really love it because at the back of it, it has this standard size screw thread over here, which attaches to any tripod as long as it has this attachment. This screws onto this and then once you attach it to the tripod, it converts your tripod into an easel. You align this tripod head to the screw here and then you hold this as a handle and start turning it around. Once it's tight and it's screwed into the place, you can then pull this lever down and insert this and let go of this. Once you tighten the screw here at the bottom, it becomes an easel. Because I have this drawing board mounted onto tripod, I can rotate this like this and then I can also loosen this and tilt my board whichever way I want it to tilt. This is a really great contraption and it's so versatile for use. It's really stable as well. One thing I would like to say is that this acrylic board is actually quite heavy to travel with. Even if you don't buy the specific board from this website, you can still make a board like this from a piece of cardboard, a piece of Masonite, anything, and just stick it onto your tripod.
8. Seating Arrangement: All right. Now that we have set up our easel, you need something to sit on. You can choose to either sit on the ground or in a rock. But this contraption here, I really like it. It's a portable camping stool. It is also like a tripod setup and it unfolds like this. That's your seat for your easel. When you want to fold it back up, you just pick it up. Fold it back. You usually have a belt. Then you can sling it across your shoulder like this.
9. Other Paraphernalia: I always carry this cotton bag full of stuff, which I'm going to show you. First one is of course masking tape. One thing you definitely want to remember that you don't want to go on a planner watercolor painting trip without the masking tape. Trust me, I did it, I came to Thailand without a masking tape and I just could not shoot the next two parts of this class. So I had to go to a Tesco and buy this tapes so definitely carrying a masking tape can be smaller than this tool. I carry some binder clips. So these are also really, really important, especially if you're carrying the sketchbook that doesn't lie open flat. So I blew plein air sketch books a saddle stitched so they can stay open flat. But you know like this. But sometimes you want the paper to just stay put when you're making washes. So binder clips are really important when you're sketching in a sketchbook. Apart from that, I have paint refill tubes. If I ran out of my paint in my planner palette, I always have backup tubes. So I never run out of paint really. But on this trip, I have my gouache paint tubes. Remember I said, I want to buy Mijello fusion airtight palette for my gouache colors, but I don't have one right now, so I'm just forced to carry these tubes. But yeah, I am looking for a container to carry my gouache paint, so I don't have to carry all these tubes all the time. As for the water container, I really want this silicone foldable cup that you get which you can just like open up fill it water. Then once you're done painting you can collapse it down to a disk which is like really portable and excellent for plenary painting. But since I don't have that on hand, I just reused a plastic bottle, I cut it up in half. What I'm going to do is punch a hole in the side over here and then use one of these little tips to just insert that. Then I can hang this on my bag in which I carry my pen as a base. This is really light where it's really portable, and it's not a big deal. Just use whatever container you have, for water as long as it's light and portable.
10. BONUS - Compact Toolkit For Light Travel: Another plain art kit that I really wanted to show you is this art toolkit clinic put together by expeditionary art. It works great for small plain area and also urban sketching. I love the design of this kit where there are pockets to hold your water brushes, micron bends, collapsible brushes, an extra tube of quash, a syringe tool, put water in your water brush. What I really love about this setup is this pocket palette that she designs. Her name is Maria and she's from Expeditionary Art. This is the most compact palette that I have ever seen in my life. I have filled it with my blue pine arts watercolors. They're are 14 times, many times of watercolors and they can last me enough for a short trip. You can see I have a really versatile palette with all the colors in here. I just love this palette so much. That goes in this one pocket. In the other pocket you have a mole skin sketchbook. This is the mole skin sketchbook that I used in my travels to Amsterdam. These are my open sketches from Amsterdam and I just love it. I could just do so much because this would just fit in my handbag or my backpack. I love this palette so much. It's just an amazing setup, very well thought of, really compact and well-designed. If you're the person who doesn't want to travel with all the big contractions that I showed you, you might want to go for something as amazing as this art toolkit palette. This is not sponsored. She's just a very good friend and an amazing artist. Maybe you can go check this out.
11. Class Project:
12. Final Thoughts: Pack and re-pack your supplies over and over again, take your suppliers outside, setup your place through your and just make some swatches even if you don't make a full-blown landscaper or full-blown sprinting, and just make some mass of the paints. Have fun, pack up your supplies back again and then come back. The idea is to get really comfortable with going outside and setting up. This is the only thing that's going to make you familiar with your own set up and it's going to take over the fear and the confusion that most people associate with linear painting. I'll see you in the next class where we going to go outside and paint a beautiful tide countryside scene.
 Trupti Karjinni, Artist, Paintmaker, Entrepreneur