Transcripts
1. About the Class: If you want holiday
cards that feel light, pretty and a little different from the usual red and green, then this pink and bow theme
class is perfect for you. Hi, welcome to my yearly
holiday watercolor class. My name is Joly, and I'm a watercolor artist, content creator, and a
Skillshare top teacher. I have been painting
for over a decade. My art revolves around painting watercolor flowers in a
loose and expressive style. In my classes, I
simplify challenging techniques into beginner
friendly steps. In this class, we'll
be painting a pig inspired holiday collection
filled with bows, dainty trees, and a
touch of sparkle. You learn fun and
practical techniques, such as using a jar to trace a circle for
a Christmas bubble, adding snowy texture and icing details with
white gouache, enhancing your designs with gold accents for that
extra holiday glow. Using a tape to create a tree and balancing pinks and greens to keep your
paintings soft yet festive. Well paid a set of holiday
cards all in soft pink tones. By the end of the class,
you will be able to create ribbon top
Christmas trees, a floral bubble ornament. A sweet gingerbread house and a pink gingham
pattern with bows. Each project blends
playful details with elegant touches that you
can easily customize. The best part is
that you can finish each card within
ten to 15 minutes. Class is perfect
for beginners and watercolor enthusiasts who
want to bring a fresh, pretty twist to their
holiday paintings. So grab your pink palette, and let's paint these bow filled holiday
cards together. And
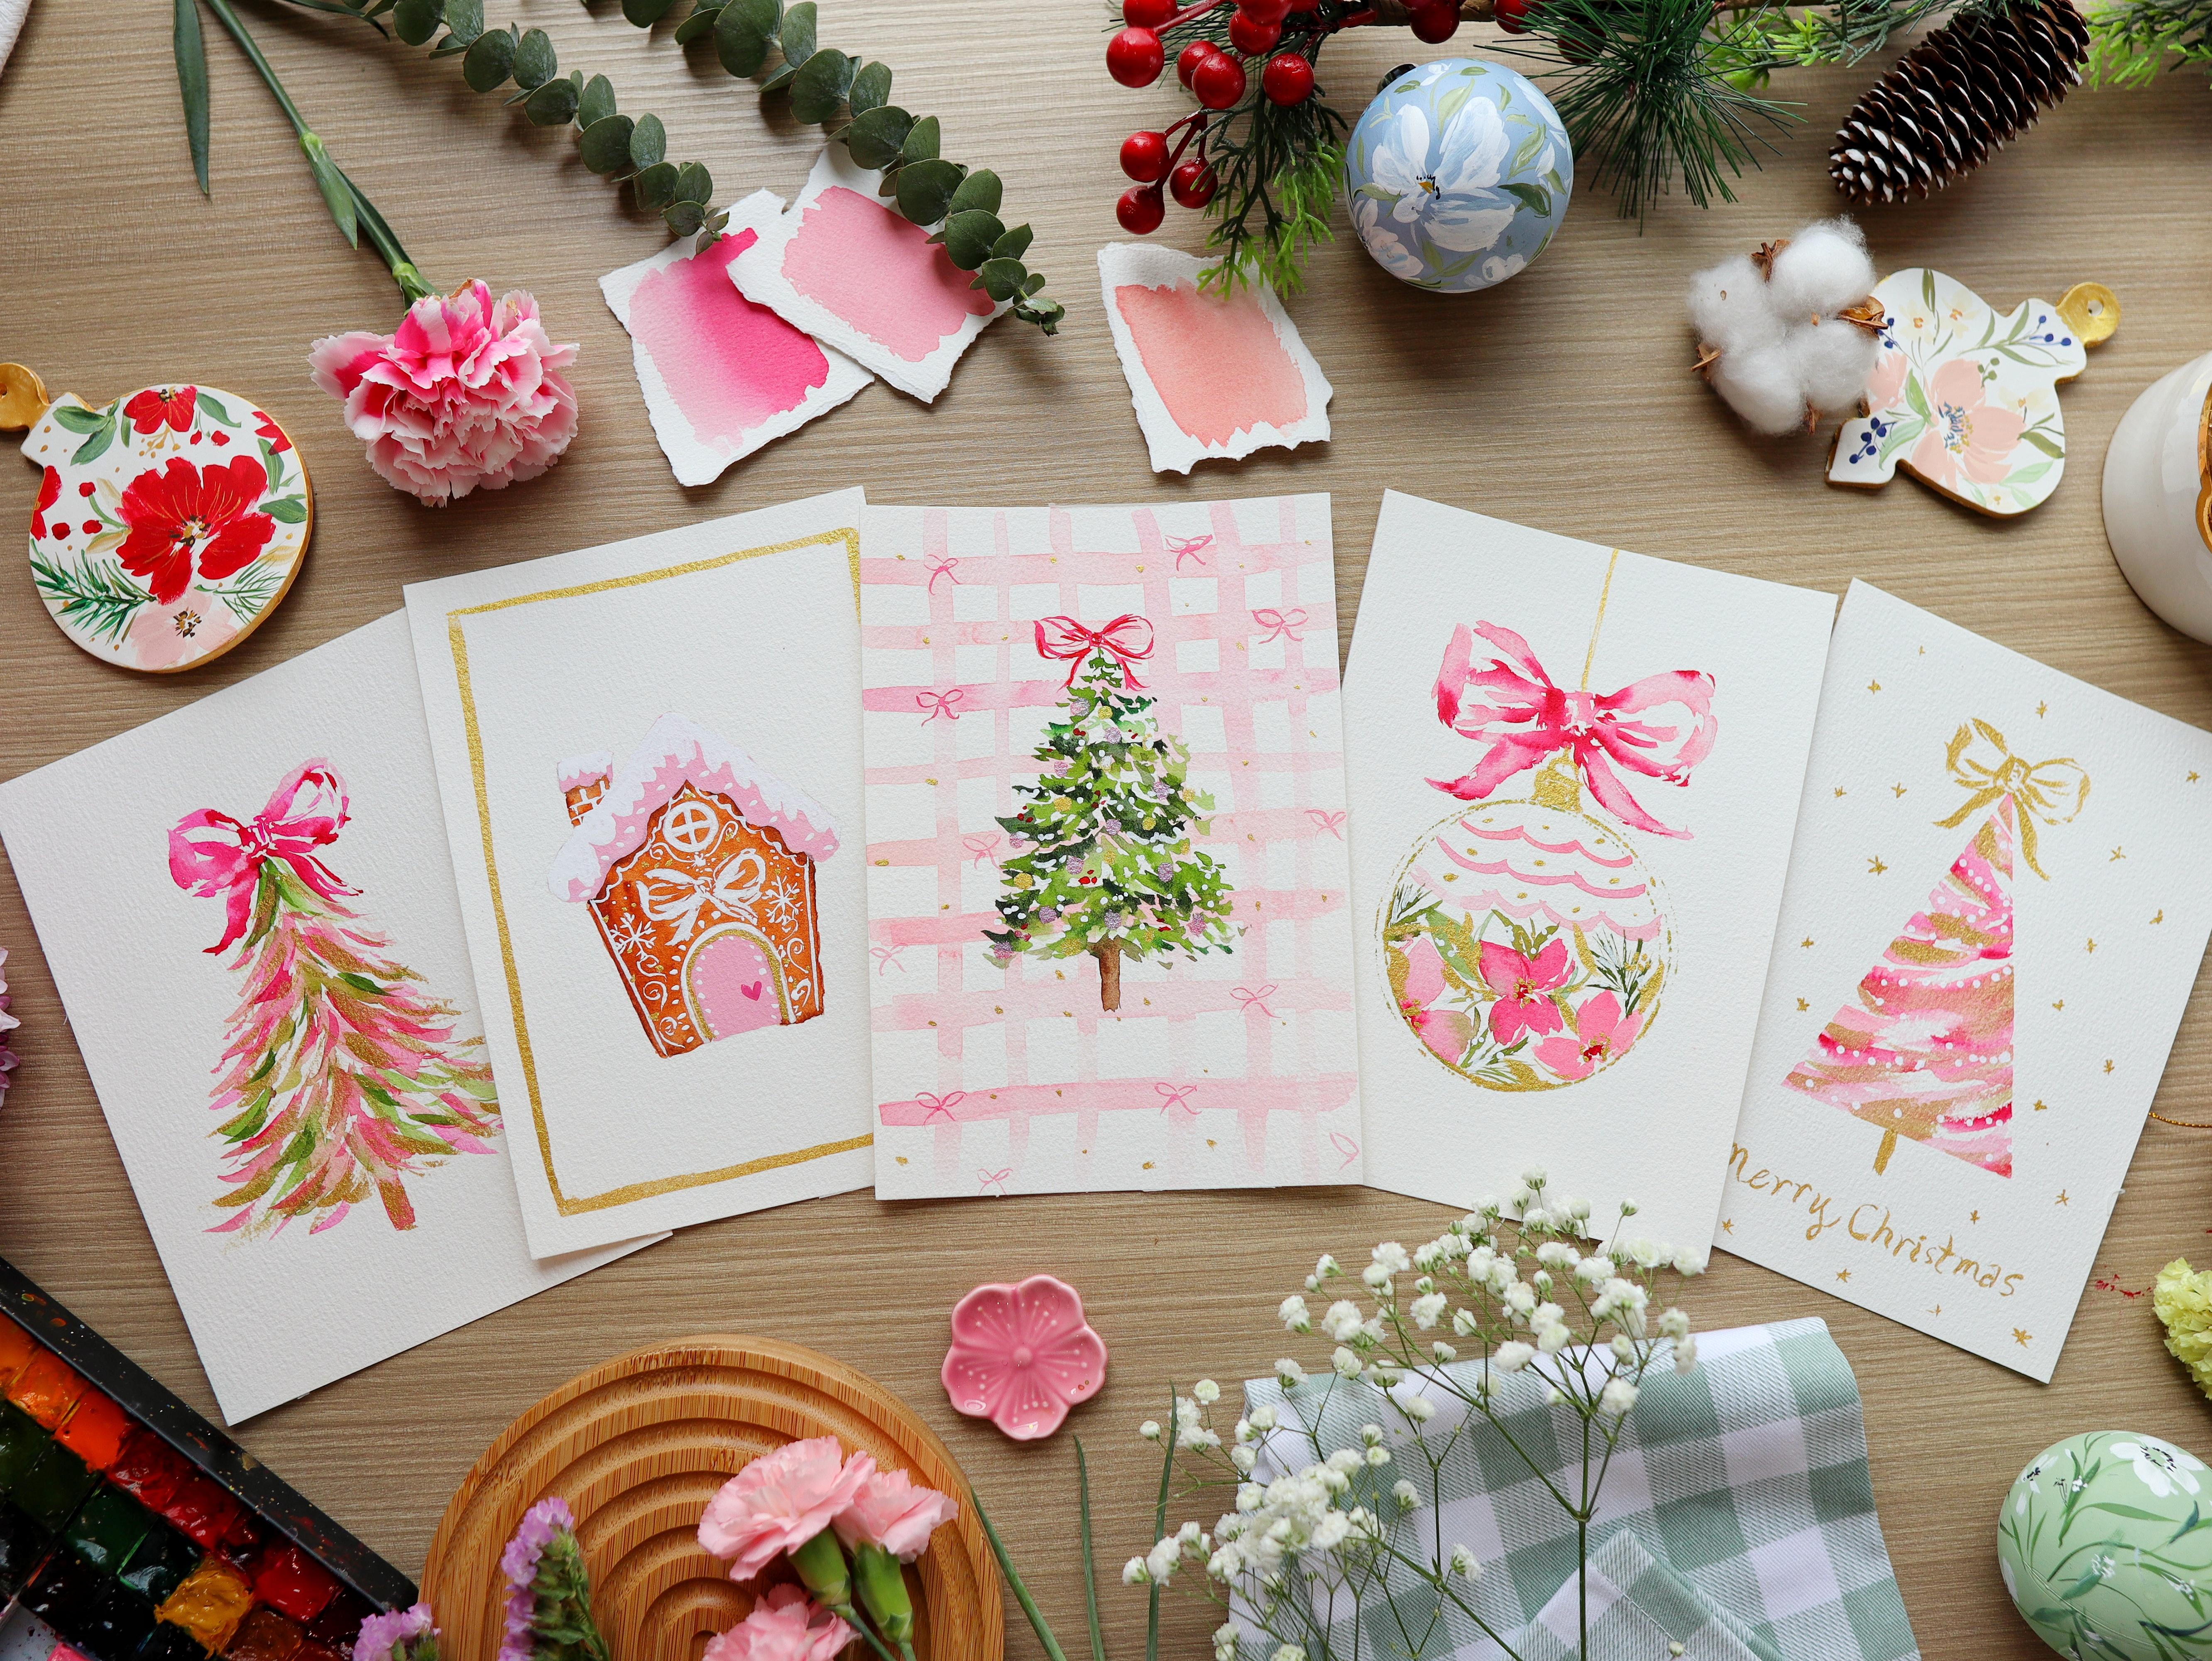
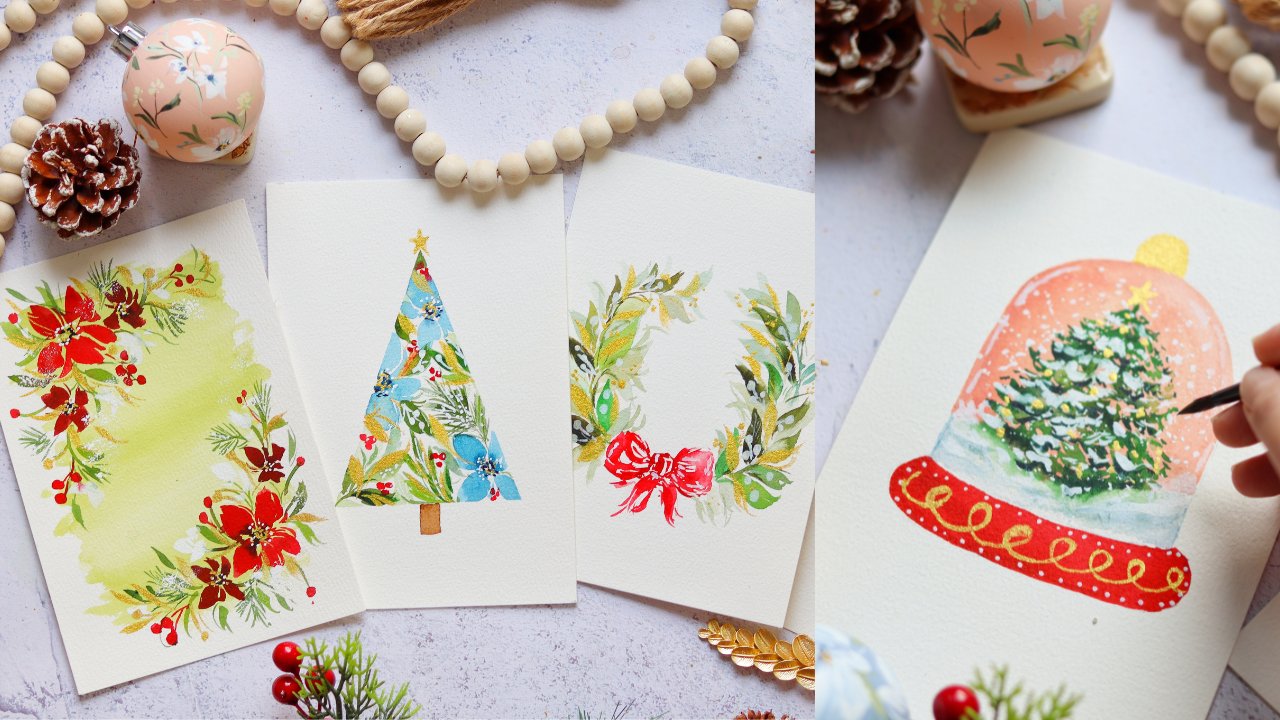
2. Class Overview: M Welcome to the class overview. Let's quickly go through
all the projects, so you have an idea of what holiday cards we're
going to be painting. So for the first one,
we are going to paint this Christmas tree
using leaf like strokes. So this is going
to be super easy, and then we're going to put
a large bow at the top. Next is another pink
tree, and this time, we are going to use a washi tape so that we
have a nice clean border. And I really enjoyed peeling off the tape to see that
nice clean border. We're also going to
use some gold paint. Right, so the third project is this beautiful
Christmas bubble using a jar to create that
nice circle outline. We're going to paint
some beautiful florals and some scallop design, and also this big bow that
looks very, very pretty. Alright, so I know we
have a lot of trees, but I really enjoyed
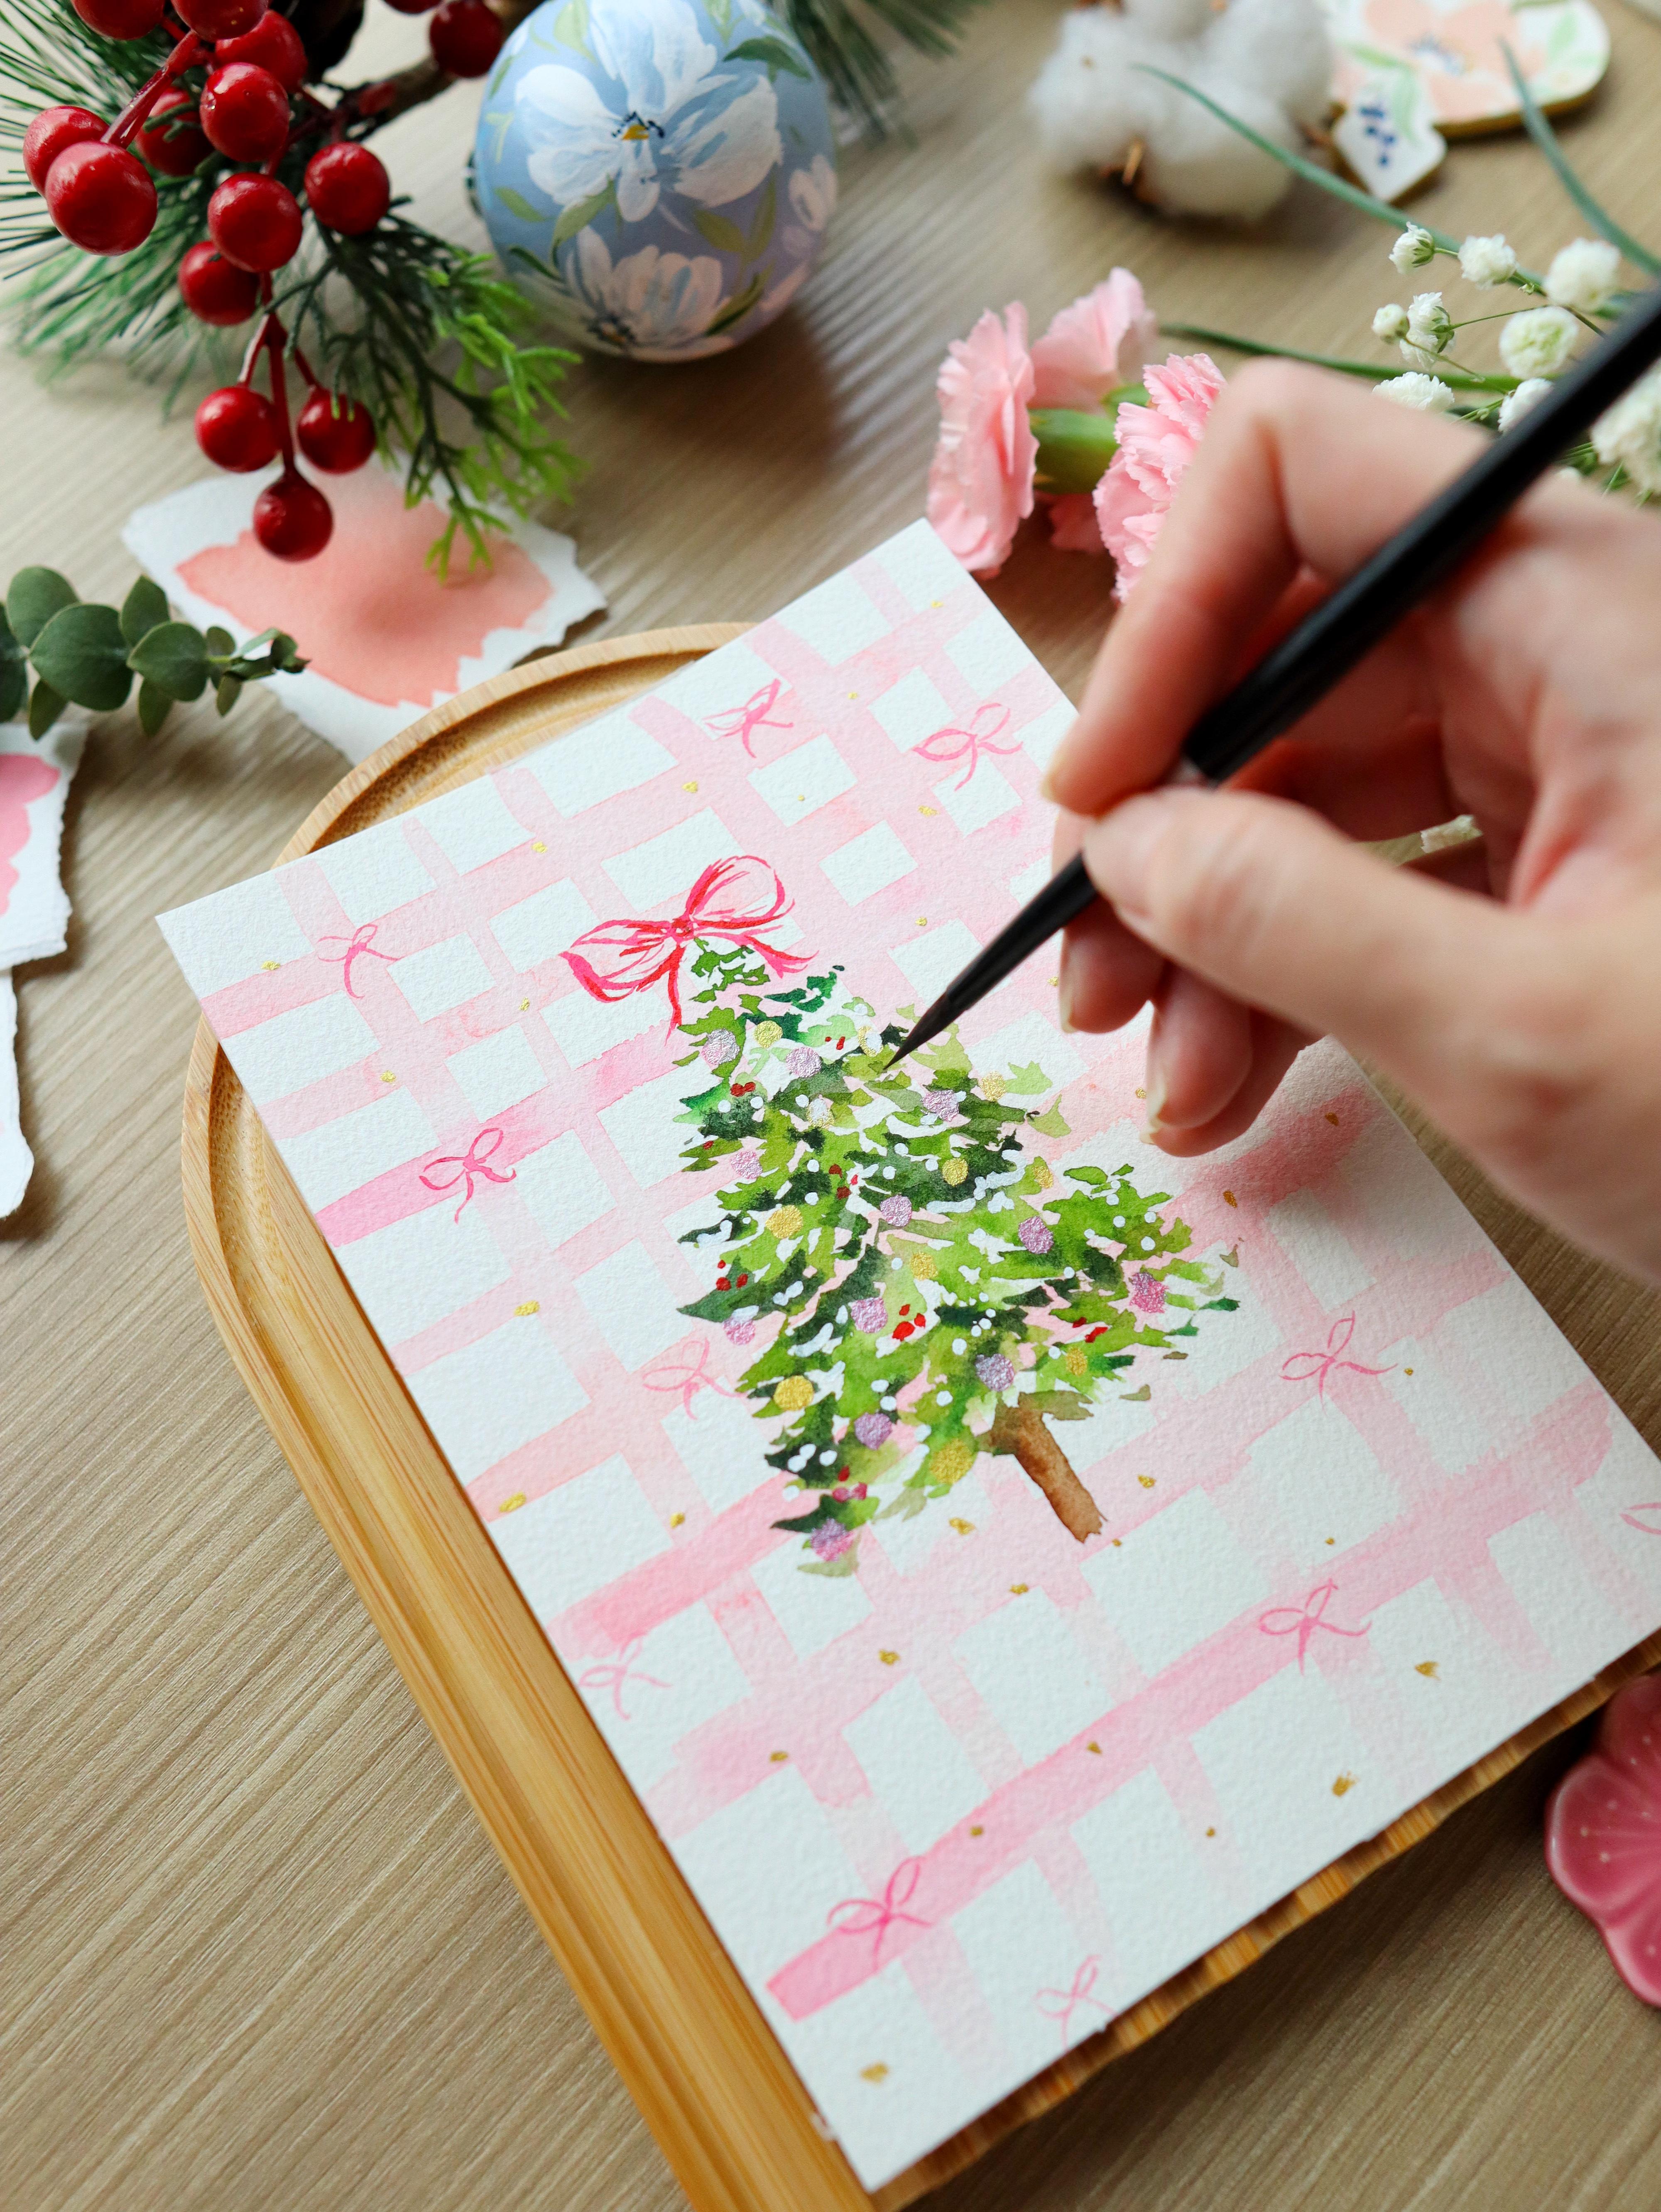
creating them. So this one is a gingham
pattern in the background, and then you have
a green tree with some gold metallic balls
and also a lot of ribbons. Lastly, let's paint this
beautiful gingerbread house. Don't worry. It's
gonna be very easy. We're going to mix
white gouache and some pink colors to create
that nice pink icing. We're also using white pen
and some white gouache also for the details on the
gingerbread house. Alright, so that's it
for our five projects. So now let's move on
to the next video to discuss the materials
that we need for the class.
3. Materials: Now, let's talk about the
materials that we need. So first, we need paper. This is Bao Hong Academy, and the size is five by 7 ". This is cold press paper, and it comes in a block form. You can see. All
the sides are glued except for this part
right here at the top. So you can use a
spatula or a ruler to slide off one sheet once
you are done painting. So this is the texture
of the cold press paper, which is really good for
loose style of painting. And of course, you can
use any paper that you have to make some
Christmas cards. Next, we need some brushes. So because we're
painting quite small, I'm using size two and
size six round brushes, and this is the silver
brush, black velvet. So you want to choose a brush
that can keep its point, even if you dip it
in a lot of what. Next, I have this one
fourth inch flat brush. So I use this for
the Ginga pattern, but if you don't
have this, you can simply use a round brush. Right, so for the paints, I am using my machine hand PWC. It's a Korean
artist grade paint, and they come in
tubes like this. I just pour them into
little half pans so that it's easier to use. It's more convenient.
But of course, you can use any
other paint brand. We also need a mixing palette, so I am just using the
lid of my metal tin, but you can also use a ceramic plate or even a
plastic mixing palette. Of course, we need some
gold in our holiday cards. I am using the
Kuretake gold mica. This is actually ink, and I love it because it's
in a liquid form. So just make sure you shake
it before you use it. And next, if you
don't have this, you can also try the
Kuretake starry colors. So this one is a watercolor, and this set comes in
different shades of gold. I love using the
one in the center. I think that's number 903, but you can use other gold
paint brands as well. For metallic paints, I usually put a little bit of
water and let it sit for a few minutes before I use it so that it's
nice and creamy. Now this is another
metallic set. It's the Cure take pearl colors. But if you don't have
this, it's okay. You can use regular watercolor for the Christmas balls
that we are going to paint. Now, to add some snowy effect
like these little dots, we can use the
Posca acrylic pen. You can also use the UI
Bol signal white pen, or even just white
gouache or poster paint. So we're going to be using
this for the snow effect, and also for the icing on
the gingerbread house. For the white gouache, I'm using the color permanent white. And of course, we need
some tissue paper to blot out the excess moisture in our paint and a jar of
water to rinse our brush. Lastly, of course,
we need some tape. This is the washi tape
that I bought in Japan. I use this for the
Christmas tree project. You can use other regular
printed washi tape as well. I just like using washi tape because it's very
gentle on the paper. Just make sure to peel
the tape at an angle on the paper so that you
don't damage your painting. Alright, that's it
for the materials. Now let's move on to painting, some warm up exercises before
we start the projects.
4. Warm Up Exercises: Alright, so in this lesson, we are going to do some warm up exercises for some of the elements
in the holiday cards. Alright, let's do the first one. So I am using my size
six round brush, and you're going to
grab a green paint. This is just a leftover
paint on my palette so you can use any color
for these exercises. So for the first project, we are going to paint
this beautiful tree, and we're going to do
some leaf like strokes. So let's just try to practice. Going to start at the top, and you just slowly press your brush and do a
little flick like this. All right, so you can do it from different directions and just try to vary the speed and
the pressure in each stroke. You can do little checkmark
strokes like this. So when you're
building this tree, just make sure that
you have some spaces in between your strokes. We can add more pressure
like this so that we can vary the leaves
that we're painting. You can see some are thin, some are thick, some are a
bit shorter, some are longer. Okay, so let's move
on to the next tree. So we're going to try
and practice this one. Use any color for this tree. I'm going to use the
tip of my brush and lightly tap it on the paper. So when we're painting
the top part of the tree, we want the strokes
to be smaller. We want it to have,
like, smaller leaves. So just gently tap your brush, and some strokes might
overlap. That's okay. As you go further down the tree, you want the strokes to be a little bit thicker or bigger. That means you just need to put more pressure on your strokes. And you'll notice that
the strokes we're doing here are from side to side. So we're doing
horizontal strokes, as opposed to the
first tree with it. It has more diagonal strokes. Right, so the key to painting
a beautiful tree is to really vary the size
of the strokes. So you need to vary the
pressure in your brush. So you can also rinse
your brush to create some lighter green colors and make sure you have
some white spaces in between your strokes. Now we can grab a darker green. This is shadow green. So I'm dropping it on some
of the branches while they are still wet so that we have a beautiful
blending of two colors. Next, let's just practice
this four petal flour, and I'm just going to
grab some pink paint, and I'm going to slowly press
our brush to create one petal like this and just add
some thin strokes around it. So if you have been painting
with my classes for a while, you probably know how
to paint this already. So you can do so many
variations with this flower. You can add some darker pink in the center or indigo or
maybe some gold paint. Next, let's do a
simple pine needle. So we're just going to paint a very thin stem
like this and add some short strokes on each
side of this thin stem. So you want the strokes
to be really thin. I'm going to switch to
a size two round brush. It's easier if you use a smaller brush to create
some fine details. So we are going to paint this
in different directions. So it looks more natural. You can also vary the green tones in this
pine needle Alright, let's switch back to a
size six round brush and grab some pink paint. Let's paint a simple bow. So I usually start
at the center. I just lightly sketch
using my brush, a square shape, and you
can just dab your brush, create some nice short strokes. So it looks very uneven. It's going to look
something like this. So we're going to paint some
short strokes on the right. And I'm not going to
fill in this side. We just want some nice
painterly strokes and just create some
negative space. Let's do another
one on the left. So now you can add some short strokes that will look like the folds
of the ribbon. Let's grab some clean water
and lightly fade away some of the strokes so that
they look a little bit more loose and not
too structured. So you can start painting
the tail as well. So just lightly drag your brush. It looks like an S stroke. Okay, now, if you want to
add some more contrast, you can grab a deeper color. This is just purple. And I'm going to add it in
the center of this ribbon. Just where the folds meet because that's where
the shadows will be. Now let's paint some cute, small bows using a
size two round brush. So we want to paint some loops. You can also think of
it as a number eight, and then we're going
to add the tails. So you can do
different variations. You can make it
bigger or smaller. And we're going to add this
all throughout our paintings. So you can see them in
this gingham pattern. It's gonna add a lovely
pink holiday magic. Alright, so I think
we are ready, and I'm pretty sure excited. So now let's move on to the next video as we
start our first project.
5. Whimsical Pink Tree: Before we start, here are
the colors that you need. So welcome to the first project. This is going to be the
easiest out of the five. So think of it as
a warm up for you. And we're going to paint
these simple strokes that will create a tree. And now let's start
mixing our colors. I'm going to grab some pinks. I'm using brilliant
pink, permanent rose. Let's grab some olive green, and also a little bit
of that sap green. You can definitely use any greens or pinks
in your own palette. Now you can also sketch a triangle as a guide for
the shape of the tree, but we can also free hand,
like what I'm doing here. So let's just grab a green paint and do some short flicks. This is what we
practiced earlier. You can rinse your brush to
create a lighter green tone. Alright, so now let's
grab some brilliant pink, and we are going to
do the same strokes, making sure that we are leaving some white spaces
in between the strokes. I also like grabbing
a deeper pink. This is permanent rose, and I'm painting it
near the lighter pink, letting them bleed into each other because all the
strokes are still wet. Okay, now I'm grabbing
some olive green, and I'm lightly touching
some of the pinks. So here I'm doing some
checkmark strokes so you can just mix and match
the green and pink leaves. There's no hard rule about
how to paint this tree, have some fun, and of course, you can do different color
combinations as well. So my tip is to keep it light and make sure to leave
some spaces in between your strokes because
you can always come back later on if you need
to fill in some gaps. And this will also help keep your painting loose. All right. So try to paint your strokes
in different directions. So I usually try
to flick my brush towards the edges of this tree, so it has a little
bit of movement. So while this is still wet, I'm going to grab a
more pigmented pink, a more pigmented permanent rose, and just drop it in some areas
just to add some contrast. And because our theme
is pink holiday magic, I'm going to paint a pink
trunk because why not, right? So if you don't like this,
you can definitely go with a brown one or even a gold colour. So to save time, while
this is still wet, we're going to move on
to painting the ribbon. I am using the
color bright ruse, but you can also use red. So you want a nice
pigmented mixture. I'm going to start in the
center of the ribbon. So just try to lightly sketch a square using
the tip of your brush. You can see it's comprised
of several thin strokes. It's very imperfect. So now let's do the right side, and just going to do sort
of an outline and maybe add some folds near the
center of the ribbon. You can vary your strokes. Some are longer,
some are shorter. Now let's do the left side, and going to do
the outline again, then close it off here and add some thin strokes near
the square center. If you want more
color to your ribbon, you can add more strokes, just like what I did, but make sure to still leave
some white spaces. So now we're just
adding the tail like an S curve. All right? You can grab a more pigmented, bright rose and just put
it where the folds meet. It's usually near the center. So that's where the shadows are. All right. So once the leaf
strokes that we did are dry, we can move on to
adding a second layer, which will give it more depth. So I'm just grabbing some
sap green and creating the same strokes that we
did for the first layer. So just do some quick flicks
and some check mark strokes. I'm going to alternate it. Now I'm going to use some pink, and we're going to do the same so paint some nice
strokes over there, just to add some
depth to this tree. Just be mindful not to
overcrowd your strokes. So I would always say just keep it light and it's better to add few strokes in the
beginning and just add more later on if you feel
like it's a bit lacking. Now, once you are done, just let it dry. You can add another
layer this time we're going to be using
our gold paint. This is the Cure
take starry colors. And make sure to add some
water to your paint, let it sit for about a
few minutes to soften it so that you have a nice creamy gold paint
just like this. So you can do this technique for all the other metallic brands
of paint that you have. Right, so we're going to
add some gold leaves. I'm using my size
six round brush. So just paint in between
some of the strokes. You can fill in some
of the white gaps. And don't be afraid to also paint over some of the
leaves. That's okay. Alright, this is looking great. At the last minute, I felt
like I wanted a gold trunk. So I just painted
over the pink trunk that we did earlier,
and that's okay. We just follow our instincts. Sometimes our plans just
change along the way. So yeah, we're done. You can see the beautiful
shimmer on this card. It's very easy to do. And again, you can also do
different color combinations. So you can also write
a greeting below. Congratulations for
finishing this project. I hope you enjoyed your first
holiday card in this class. Now let's move on to
the second project.
6. Pink and Gold Ribbon Tree: Before we start, here are
the colors that we need. For our second project, we are going to paint this
pink and gold ribbon tree using a washi tape. So we have a nice clean border, and we're also going to put a nice greeting at the bottom. Okay? So let's start
with our washi tape, and we are going to tape
it into a triangle shape. Make sure to press
the tape really well to make sure that
the paint will not seep under the tape so that we can achieve
a nice clean border. Alright, let's mix our pinks. I have here some brilliant pink. I have some permanent rose. So we're going to use
all pink for this tree. And now I'm just going to sway my brush and create
some sweeping strokes. So you don't really have
to do it in one direction. You can mix the direction
of your strokes. So make sure to leave
some spaces in between your strokes and come back to fill in some
of the gaps later on. You can also vary the pink
tones in your palette. You can do a deeper
pink, a lighter pink. And now I'm just
trying to fill in some of the white
spaces and making sure that I'm also
touching the edges of this tree so that we have
a nice triangle shape. And while it's wet,
you can grab a more pigmented permanent rose and put it on top of the existing strokes that you did while everything
is still wet. So we want the colors to sort of blend in
with each other. And before you know it, you
already have this pink tree, but you want to add
some sparkle to it. So I'm going to
grab my gold paint. This is the Cure
take Sari colors. I'm using the gold paint here. I think it's number 903, and we are going to just paint the same sweeping
strokes on top. So some of the pink strokes
are still wet and you'll see that the gold paint will blend in with the pink color. I actually liked it that way. But if you want a
more defined gold, then you have to wait
for the pink layer to be fully dry before you
add the gold strokes. And try to leave some white
spaces in between some of the strokes so that this
tree doesn't look too heavy. Right. You can use a hair dryer to quickly dry this layer. And once it is fully dry, you can start to
peel off your tape. Just make sure that you peel
at an angle a little bit close to the surface so that
you don't tear the paper. Okay, so it's now time
to decorate this tree. I'm using this Kura take
gold Mica to add the trunk, but you can also
use the Kuretake estari colors that
we used earlier. Next, let's start with
the center of the ribbon. I'm going to paint a square with some strokes on the inside, and then I'm going to
paint the right side. So it's like an outline. So we're not going to
fill in the shape. So let me just move my paper
so you can see it better. So you can see I'm doing the outline first
and just adding those lines near the
center of the ribbon, just to make it look like
there are folds in the ribbon. And now let's just add the tail, create an S curve stroke. So while waiting for
everything to dry, we can slowly write a message or a greeting at the
bottom part of this card. So I'm not really so good
with brush lettering. So what I did was to write the greeting with a pencil
first so that I have a guide, and later on when
everything is dry, I can just erase
the pencil guide. Another idea is to use a stamp to put some letters
on your card. Now, I'm just going to paint
some cute stars all around. You can also just put some small gold dots
all around your card, just to add some sparkly effect. Now, this is such a
fun card to make. You can even put some
rhinstones, some pearls, just flat back pearls, some extra beads that
you have at home, glue it on. This card. It's going to look very pretty. Okay, now you can add something
like a string of pearls. So I'm just using my Posca acrtic pen and just putting in some
dots on this tree. And I feel like it's just
adding more volume and texture on this tree so that
it doesn't look too flat. If you don't have this pen, you can use white
gouache or poster paint, so you just paint some
small round dots. All right, so that's it. I can't believe we finished this in about six to 7 minutes. I'm pretty sure you can create a beautiful version
of your own card. With this design, you can also
change the colors as well, but pink is really,
really so cute. Alright. Congratulations for
finishing this project. Let's move on to the next one.
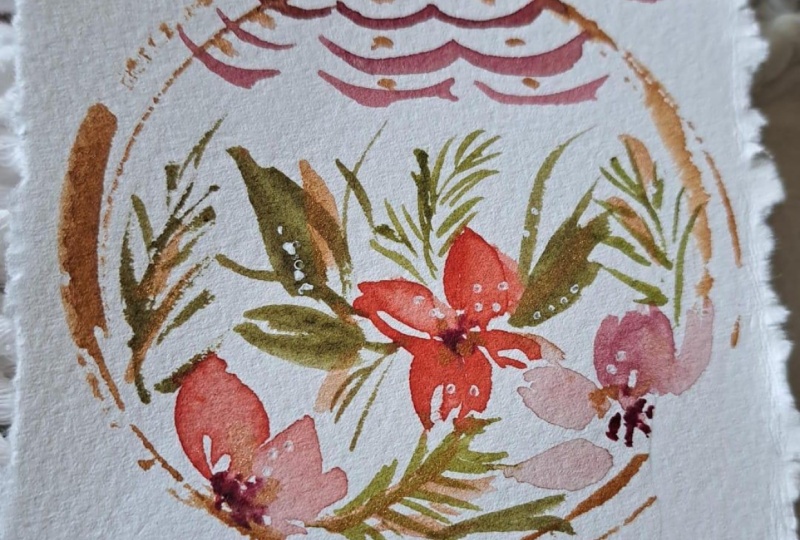
7. Floral Christmas Ornament: So before we start, here are
the colors that you need. For our third project,
we are going to paint this floral Christmas ornament. I love how dainty this looks, so we are going to create a
nice round shape using a jar. Okay, so let's start. So I have here my
five by 7 " paper, and I'm just going to
grab my gold paint. I'm using the orotakeGld mica. I love this because it's
very convenient to use. It's in a liquid form. Now I'm going to use my jar. This is roughly around
three to 4 " in diameter, but you can also use a small
bowl to stamp your circle. Okay, so when you
stamp your jar, it's okay if it looks imperfect. I actually like it that way, and you can see some
of the broken lines. That's completely fine. It gives a more rustic
feel to your painting. Now's grab some pinks. I'm using brilliant pink and
also some permanent rose. I'm also going to
grab some greens. So this is olive green. Alright, let's decorate
this Christmas ornament. I'm going to mix
my brilliant pink with a little bit of
that permanent rose. But you can definitely
use any pink color, and we're just going to
paint some scallop design. I'm using my size
for round brush. So you can use a
smaller brush for this. And you can also change the
color of your scallops. You can see that some of the scallop lines are
lighter, some are darker. Alright, that looks good. And now let's move on to
painting the small flowers. I'm using my brilliant pink, and I'm going to paint a simple four petal flower right here on the edge of
this Christmas ball. Let's leave a white
space in the center so that we can add
some details later on. Now I'm going to
add a deeper pink. So this is permanent rose. I'm going to put it here in
the center and just paint some four petal flowers and making sure I'm trying
to vary my strokes. Now, we can rinse
our brush and maybe paint two petals
here so that we have an illusion that somewhere of the petals are behind
this Christmas bubble. So because we have
a small space, we're not going to be able
to paint a lot of flowers, and the key here is really to vary the pink tones so
that it doesn't look flat. So you can do this in other
color variations as well. I'm going to grab
my green and paint some pine needles using
the tip of my brush. So it's best to use a size two round brush if you want some really thin lines. And adding these pine
needles really adds a more Christmas feel
to your holiday card. So you can also paint some ordinary or the
usual leaf shapes. I'm using my olive green paint. If some of the leaves touch
the flower, that's okay. So I'm just going
around and looking for some white spaces
where I can fill it in with some pine
needles or some leaves. Alright, so to add some
depth to the flowers, we're going to grab a more
pigmented permanent rose. I'm going to add it in the
center of the flowers. If you want it to be darker, you can also use indigo. So I can see that green
paint on one of the petals. I think I'm going to
take it out, so I'm going to use my damp brush, and I will just dab
it on that area, let my brush absorb
that green paint. Okay, so for this project, we are going to make
a more painterly, loose ribbon, and I'm going
to show you how to do that. First, we're going to do
a wet on wet technique. So you can draw the shape of
the ribbon to have a guide. Now what I'm doing is
I'm getting some water. This is just clean water, and I'm painting the
shape of the ribbon. We do want it fairly wet and just make sure
that you still leave some spaces where there's no water because we don't want this to end up
into a blob of paint. Okay, so now I'm going
to add some color, and you can see that the color is going into the
wet areas only, not in the dry areas. And I'm using my
brilliant pink color. You can add some permanent rose. I'm adding a deeper
pink in the center. So I'm trying to tilt
the paper so you can see the wet areas on this paper. You can go back in and fix
the shape of the ribbon. You can also move the pigment. So right here, I'm trying to
fix the tail of this ribbon. And now I'm going to grab
a deeper permanent rose. Let's add it right here in the center where there
will be more shadows, more creases and more folds. So we're adding this because
we want more contrast so that the ribbon
doesn't look too flat. Now just using the
tip of the brush, you can paint some
small strokes that looks a little bit
detached from the ribbon. It's going to add a
very nice effect. With a clean brush, I'm
going to lift some of the color because
it's a bit dark. I want to lighten some areas. Alright, I think it's
looking really, really good. Now let's move on to adding
some more gold details. I'm going to use my
Kuretake gold Mica. So when you're using
this urataGldmka, use a brush that is synthetic. Don't use your nice brushes, your soft brushes for the gold paint because it
might ruin the bristles. Okay, so I'm just
going to add the cap of the ornament
and add a string. We can also add some
dots in the center of the flowers and also on the leaves or all
around this ornament. You can add some
gold leaves as well. Now, if you have other
metallic paints, you can use it in
this project, too. Now, I think I want to
add some small gold dots here just to fill in this space. Alright, we're going to add some snowy effect using the
posca acrylic pen and just adding some small dots and adding some veins on
some of the leaves. Now, you can skip
this part if you don't like to add
the white details. Alright, you're done
in under 10 minutes. Congratulations for
finishing this project. You can also skip
the scallop pattern if you want more florals
on the ornament. I hope you enjoy this project. Now let's move on
to the next one.
8. Gingham Christmas Tree: This is our fourth project. We're going to do a gingham
pattern for the background and add this beautiful tree in front and add some
bows. So let's start. Alright, so let's
just mix some pinks. I'm going to grab
some brilliant pink. So we want some nice
pastel pink colors. If you don't have a
light pink color, just add some white
to your reds or to your permanent rose to create some lighter pink
or a pastel pink color. I'm going to grab
some shell pink, and I'm adding some more water into my mixture
to keep it light. So my brush is a
one fourth inch, a flat brush, and you can
also use a round brush. So we want something like
a checkered pattern. And I'm just mixing
my pinks here. We're not too strict with the colors that we're
going to be using. So I don't have a
pencil guide also, so I'm just going to
free hand this one. And don't worry.
It doesn't have to be very straight lines. It doesn't have
to be super even. It being in perfect really adds some charm to this holiday card. So you can see right there,
I added a thinner line, and then I have this wonky line, so that's very much okay. Don't need to be
strict about it. So we just want to really
enjoy creating this pattern. All right. Again, you can use a round brush that's
completely fine. And you can see I'm
trying to change the pink tones of the lines. Some are darker pink,
some are lighter. Now, it's best if you could
wait for this to dry so that you get a nicer
glazed pattern. But because I'm impatient, I just decided to add
the vertical lines. So right here, we're adding
some more pink lines, and I'm changing the thickness
or the width of the lines. We are using some light
pink colors here for the background
because we are going to add a tree in the middle. And I don't want the background
to be too distracting. I just want it to complement
the main star of the show, which is the Christmas tree. Alright, at this point,
you can quickly dry this gingham pattern using a hair dryer or a
small handheld fan. You have to make sure
that it's completely dry before you add the tree. Right, I'm just mixing
some of my greens. I'm using sap green and some olive green
and hookers green. And you can use any
green in your palette. If there are some imperfections on your pattern, that's
completely fine. It adds to the charm
of this painting. Now using the tip of my brush, I'm going to stipple my brush
to create these leaves. This is what we
practiced earlier. We're going to start at the top. So we want some tiny
leaves at the top, and then we can just add more pressure to our brush as we go further down the tree. I'm going to rinse my brush to create a lighter green color. You can switch to a
different green tone, just to add some interest to your tree so that it
doesn't look too flat. And if you notice, we're leaving some white spaces in
between our strokes, so we can just go back in and add some more details later on. Right here, I'm going to
press my brush a little bit more to create
broader strokes, and I'm going to combine it with some tiny strokes by
lightly tapping my brush. Alright, so while this
tree is still wet, we're going to tab in
some shadow green. This is a deeper green, and I'm going to add it under some of the leaves
just to add some shadow. So just use the
tip of your brush and lightly touch
it on the paper. And because the
tree is still wet, you can see that beautiful
bleeding between the dark green and the
lighter green color. For the trunk, you can use burnt umber or any brown
color in your palette. Then you can just
go over this part right here where the trunk
and the leaves meet. You can add some more
leaves so that they blend better so that the trunk
doesn't look detached. Now, you can just add some more finishing
touches on the tree. Alright, so it looks good. The background is also dry. I'm going to quickly draw
a small bow right here, and I'm using a pencil because I don't want to
free hand this part. I don't want to
make any mistakes. So I'm using a size
two round brush, and we're using permanent rows. You can use red. I'm
just going to fill in this bow and follow
the traced outline. We want a nice thin
bow for this one. We want it to look very dainty, and this is the
opposite of the big, huge bows that we did earlier
in the other projects. So I'm just going
to use the tip of my brush to create
some more lines, just to add some
folds to this bow. Alright, now we're going to add some little bows all
over the background, and I'm just going
to add it randomly, you can just scatter it
all over the background. You want it to be quite small so that it doesn't take
too much attention, and yet it still gives a little bit of
detail on your card. Now, if you don't
want this pattern, you can completely
skip this part. So I always start
with the loop for the shape of the bow or
like an infinity shape, then add some tails. Alright, this looks really good. Now let's add some Christmas
balls on the tree. I'm using this metallic paint from the Core tack
and pearl colors. You can use other brands. If you don't have
metallic paints, then you can just
grab a red paint or pink paint and add
these little balls. And before you add
these details, make sure that the Christmas
tree is already dry. And to add more sparkle, we can add some
little gold balls. I'm using the CoretakeGld mica. So just paint some
little circles there. And this is optional, but if you want a more sparkly effect, you can add some small dots all over the
background, scatter it. H. Okay, so I also like adding
these white dots that look like snow or it could
be Christmas lights, and using this
posca acrylic pen, I just feel like it's just adding some more
texture on this tree. But if you don't
have this white pen, you can skip this part as well. And what I really like about these projects is that they
are fully customizable. You can add your own design. You can change some
of the colors. So this is just a guide for you to create your holiday cards. Using a small round brush, I'm adding some small berries because I think this needed
a little bit of contrast. So I'm using a very pigmented permanent red color
for the berries. Alright, congratulations
for finishing this project. I hope you enjoyed
painting this. I really love the background. I think it's such a
beautiful design, and you can also add a
greeting under the tree. Feel free to explore other
color combinations as well. Alright. So now let's move
on to our last project.
9. Gingerbead House Delight: Before we start, here are
the colors that you need. Welcome to the last project. This is one of my favorites. It's a dainty gingerbread house. And don't worry, it
looks difficult, but it's actually
very easy to paint, and we will be using white
wash to mix with watercolor. So first, we do need to sketch the shape of
the gingerbread house. You can, of course,
change the shape, depending on how you
want it to look like. But here I am going to
start with my base, draw a straight line. I'm using a regular pencil, so nothing fancy here. Then we want to draw the sides, just a slanted line. And then we can draw the roof. So it's going the whole shape looks like a pentagon shape. All right. And then next, I'm going to just quickly draw
some wavy lines that will look like the icing on the top part of this
gingerbread house. You can use a needed eraser to erase some of the lines
that you don't need. I'm also going to try to
lighten my sketch right now because once you paint on top of a pencil sketch
using watercolor, you won't be able to
erase it anymore. So we just want a
very light sketch, and then we can draw a simple door right
here and you can, of course, change the shape. And I'm going to draw a bow right here.
This is just a guide. Eventually, I will
be covering it up, but at least I know the
design that I'm going for. So you can also try to do this. We're also going to paint
or draw this window, so you can add more
windows if you want. Alright, this is
looking really good. I'm going to use my
needed eraser to lighten my pencil sketch again. Alright, now let's mix some
of the colors that we need. I'm going to use burnt sienna, raw umber, and burnt umber. So when you're painting food, I realize that you need to
choose colors that look yummy. So for example, you're
painting a cookie, then you need to look for
a nice golden brown color that looks similar to how a
real cookie would look like. So I'm using a small
round brush to fill in this cookie part of
the gingerbread house. So I'm just going to
avoid painting the door because we're going to paint it with a different color later on. So if you have some ugly
patches on this painting, that's okay. Don't
worry about it. It's okay to have
these imperfections because we are going to cover up this brown area with some
icing designs later on. All right, so we're
just going to follow the wavy
lines right here. I'm also going to avoid
painting on the rooftop area. Now to add some depth, we are going to add a darker brown just right
here under the roof, just to add some shadow so
you can use burnt umber. And I'm doing this while the
base layer is still wet. All right. Let's grab a
more pigmented burnt umber. I think we need to
add a darker line. So I'm just going to go over the same areas and you can
see the nice dark line. Alright, so I'm feeling like this color is a
little bit light, so I'm going to grab
more burnt sienna and just paint on top of the gingerbread cookie
because I want it a bit more brown or more toasted. I also added more color
because I wanted the white icing to pop up because you need a
darker background. So now we're just going to use
this fan to dry this area. You can use a hair dryer, as well, or just wait
for it to dry naturally. Okay, so I just squeeze
some white gouache and adding some permanent
rose to my paint. So I wanted a nice pastel pink. So you can also add
a little bit of red. And here I think
it's a bit light, so we're adding more color. So let's fill in this space
with some pink color. And if you have a pink gouache, you can actually just use that. I just didn't have one
when I was painting this, so I decided to just
mix white gouache with some watercolor because
we want a nice, creamy pastel pink color. All right, so we are
also going to add it on the roof part of this
gingerbread house. So we want to make sure that is creamy but not too thick because we want to be able to glide
smoothly on the paper. This is looking
good. We can also add some pink icing
on the chimney. While waiting for
the icing to dry, we can add some details on
the gingerbread cookie. I'm using this
posca acrylic pen, and you can still see some of my pencil outlines
from a while ago. I'm going to just
draw this window. And then we can
draw an outline for the door just to highlight it. So if you don't have this Posca
acrylic pen, don't worry. You can use simple
white gouache as well. So I'm going to show you guys what it looks like if
you use a white gouache. So I'm using a size
six round brush. So make sure that you still
have a nice thick mixture. Don't put too much water
or else you will dilute the gouache and it's not
going to look opaque, right? So we're just painting
this simple bow at the top of this door. And then you can paint
some lines that will look like bricks on the chimney. It's now time to add
some small details. I'm switching to a
size two round brush to do these swirly lines. You can add some dots as well. So we really just
want to fill in some of the spaces in
the gingerbread cookie. And I also realized that
adding a border like this makes a huge difference
on the design of the cookie. Let's try to highlight the door. So we're going to just tap some small dots all
around the door. We can also add some
snowflake designs. I usually try to keep it simple. So you can just do maybe just six arms and then add some tiny or short
strokes towards the end, maybe add some dots. And then let's just
fill in this part with some swirly designs that
we also did earlier. It's looking really good. Now let's add some
icing on the rooftop, and I'm using just squash and I'm doing some swirly lines. So it looks like it's dripping. Okay, now we're done, and I'm just adding
some small dots just to fill in that space. I think the door looks
a little bit plain, so we can go back in and add
some more icing designs. Again, I'm just
keeping it simple. Just adding small dots really
makes a huge difference. So think of it as designing your own
giterbeadhuse with real icing. And then I think we can add
a cute heart as a door knob. If you're having a
hard time thinking of the patterns for this
gingerbread house, you can try to search for real gingerbread house cookies and look for the same
patterns that they use, like swirly lines, some
dots, some scallops. So you can incorporate
that to your own design. So now I'm just adding this gold border so that this card doesn't
look too plain. I just love it when we add some sparkle to
our holiday cards. You can also use a flat brush, but I decided to use a regular
round brush for this card. So it doesn't have to
be a straight line. You can see right
here, I actually made a small mistake towards the end. Just when you're
about to finish, sometimes that's when
you kind of mess up. So I'm just going to quickly
fill in this space just to make it look more
straight, but that's okay. I think it adds a little bit of charm to this holiday card. Now, if you want to add
more sparkly effect, you can add some small gold dots on the gingerbread house. And I think we can add a
gold border on the door. Alright, so that's
it. I hope you enjoyed painting this card, and also you can write a small coat or a greeting
under this gingerbread house. Let's now go to
the next video as I share my final
thoughts with you.
10. Final Thoughts: We have reached the
end of the class. Thank you so much for
painting with me today. I hope you enjoyed painting all these soft pink
holiday cards and adding all those little
details from tracing your bubble with a jar to
adding a snow and icing effect with white gouache to finishing everything with
a touch of gold sparkle. I would love to
see your projects, so don't forget
to upload them in the project gallery
section of the class. Under the Projects
and Resources tab, just click Submit Project to upload the photo
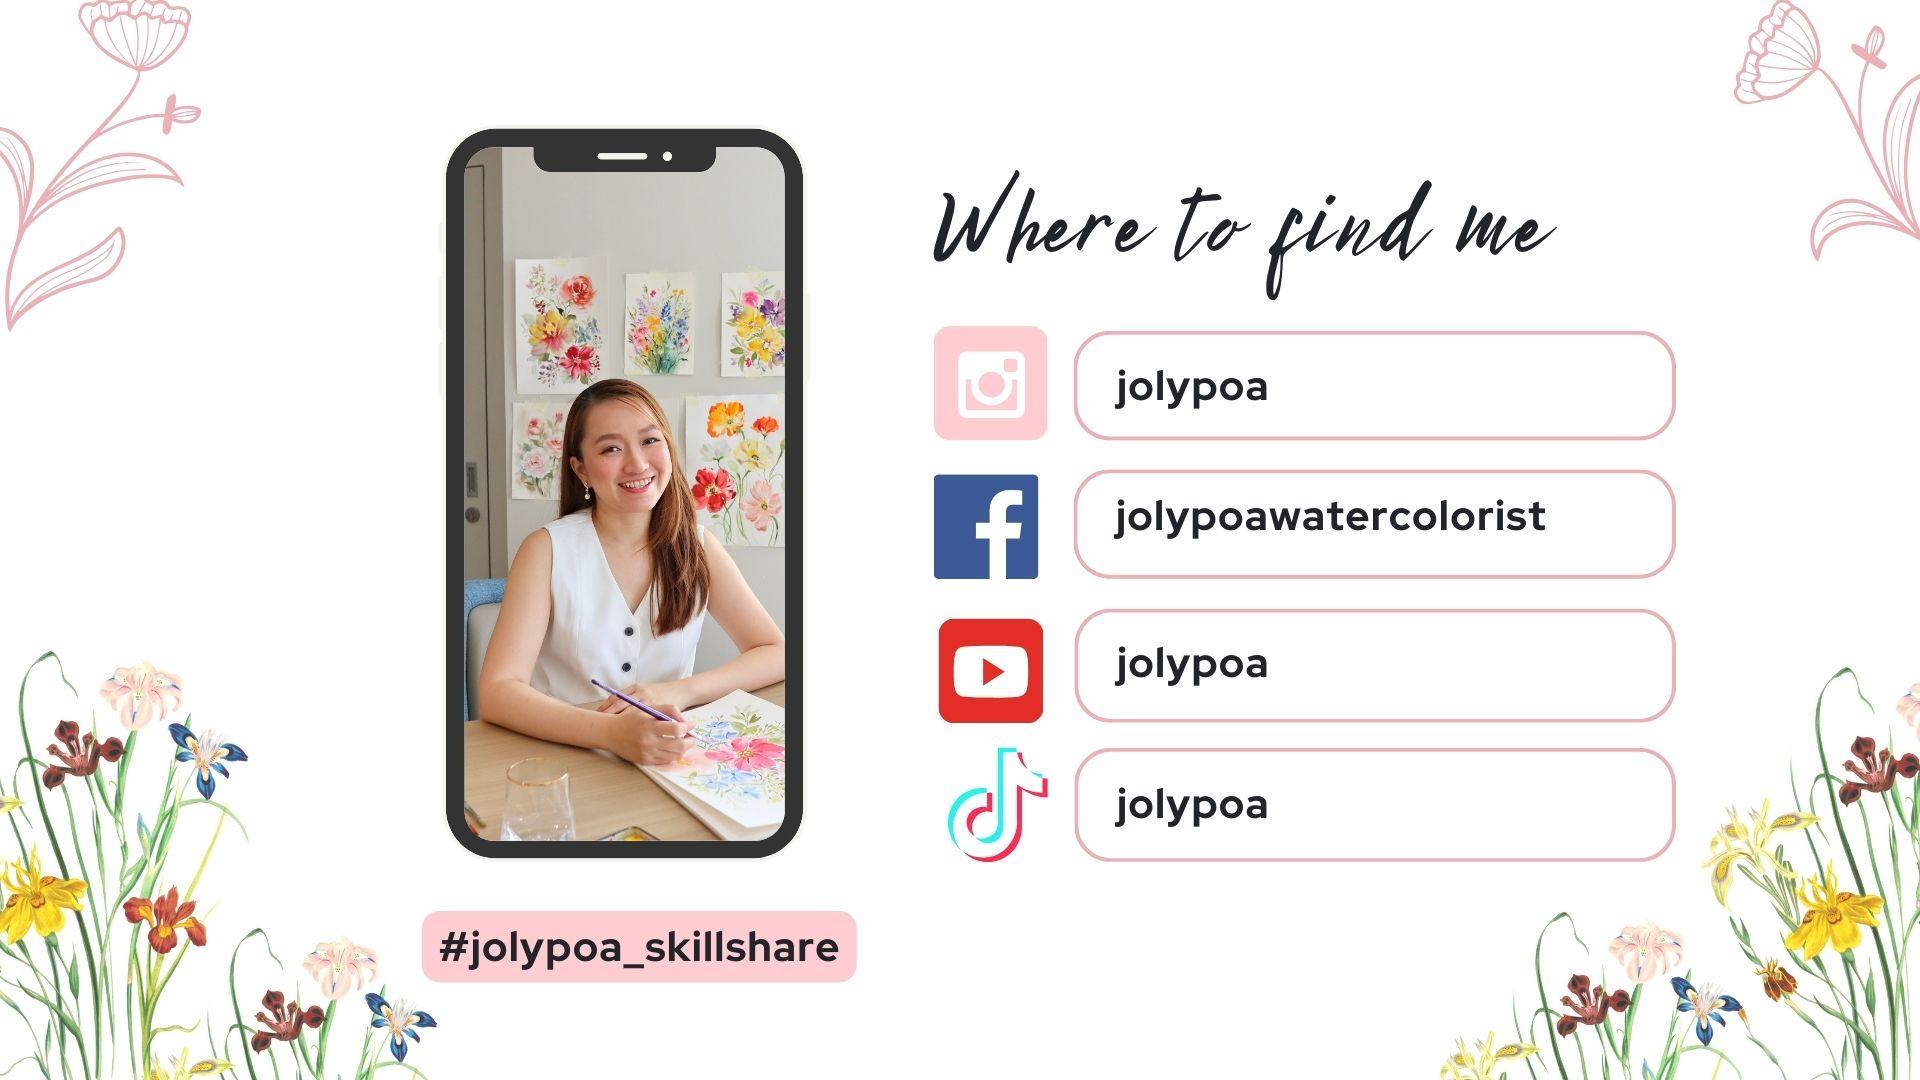
of your card. You can also tag me on Instagram
so I can see your work. If you enjoy this class, feel free to browse
through my other classes for more floral and
holiday inspired projects. It will also truly mean a lot if you can leave a review
for the class so that others may know how this class help you in
your watercolor journey. And don't forget to follow me here on Skillshare
so that you'll be notified every time I release a new class or announce
a new giveaway. Thank you for joining me. I hope this class brought a pig holiday magic to your day. See you at my next class. Bye. M.