Transcripts
1. Intro: Hey guys, My name is Jacob Lam. I'm a musician and a music teacher. Thank you so much for looking at my intro to music theory class. Now, very can be kind of an ugly word, but I've had so many students start progressing so well. And then kind of plateau or start losing the motivation. They're not really connecting with what their planes. And I think with a little bit of theory that can all turn around and you can progress into being this well rounded musician. Here we're going to start from the very basics, from the names of the notes in the musical alphabet. But by the end, we're going to be talking about building keys and relative minors and different types of corals. This isn't so much how to play piano. It is a little bit of that. But it's more of the theory side of learning piano, which is kind of the math of music. But try to make it as simple and concise as possible. So if you started learning piano and you're finding yourself just a little bit lost, the theory can be the glue to kind of bring all these different concepts together. I hope that this course is able to help you. And if you have any questions during this, please send them my way. I would love to answer them. Let's get started.
2. Notes and Octaves: So we start with our musical alphabet. Now we start with a, just like in the real alphabet, and go through all the way to g where we start back over with a. Now we go from a to G and start over again. All of music is these seven notes repeated. And what we have here if from a to a is called an octave. Now it doesn't have to be a to a. If we continued our a up to c, We could play from C to C. That is an octave as well. And so we can jump up an octave or we can move down an octave. We can see this on our piano. Here. We have a C right here. We have another C right here. That would be one octave. We have another C here. And so from this first see, that would be two octaves right there. There's me two octaves up or two octaves down.
3. Half and Whole Steps: Now the most important thing that we can grasp that we're going to use through this whole course has to do with two kinds of steps on the piano. And we have half-steps. And we have whole steps. Now a half step is the smallest amount or down that you can go on the piano. This is including white and black keys. So looking at our piano here, a half-step would be from this key over to this key because there's nothing in between them that's a half step. Now, from this C right here, a half-step could be down to your b, or you could go up a half step to this black key right here, which is a C sharp. A whole step then is to half-steps put together. So skipping a key in between. Now on our piano here that would look like this, C, skipping over this black key and going up to this D right here. If we were to go up a whole step from something like an E over here, we can't move up to the f because that is a half-step. There's no note between them. What we need to do is we need to jump our way up to this F sharp is black key up here, that is a whole step. Or we can move from this black key here up a whole step over to this key as well. Something really important to remember is this pretty simple rule here, is that every single note is a whole step apart except for two sets of notes. And we call these our natural half-steps. Now our natural half-steps are a, B to a C note, and an E to an F. And if we look at our piano, we can see that pretty clearly. You'll notice that every key here, every white key has a black key between it, except two sets. And of course that's our b to R, C, there's no note between and our e to our F. There's no note between every other set of two keys, has a black key between it. And so these are naturally half-steps. These two whole letters are natural half-steps from one to the next. Now the reason that's important is we're going to count half-steps and whole-steps a lot as we figure out more advanced music theory.
4. Sharps and Flats: Now we have our musical alphabet, a through G, and we know our natural half-steps don't have an O between them. But what about the whole steps that do have a note between them, like a to B or F to G. What note is between them? Where do we put there? Well, that's where we come into sharps and flats. Now, sharps are shown with this little pound sign or hashtag. And sharps are a half-step up from a whole letter. And what that means is an a note could become an a sharp before it becomes a B. Now on the keys here, what that looks like is we have our a note and we have our B over here. And so this black key between them could be called an a. Sharp. Flat keys go the other way. Flats are shown by kind of this squished little b. And instead of being a half-step up, we're actually looking at a half step down this time. And so, for example, your GI before it moves down a whole step to B and F could move down a half-step to be a G flat. Now what this looks like on our piano is we have our g and a full, whole step below it we have our F. But there's a note between and so this black key, a half-step lower than G, is our G flat. Now, you may notice something here. You may notice that sometimes we're calling a black key a sharp, sometimes we're calling a blank key a flat. And so how do we differentiate what's sharp and what's flat? Well, the black keys actually could be called either one. So for example, let's take a look at this black key right here. It's between a C and a D note. And so if we move our C up a half-step, we have a C sharp on that black key. If we move our D down a half-step, we have a D flat. Now this single note shares these two names depending on which direction you come at it from. If I take my C and I'm moving it up a half step, I wouldn't call it a D flat, I'd call it a C sharp. And then the same way if I take a D and I move it down a half-step, I wouldn't call it a C sharp, I call it a D flat. And as we see these sharps and flats used more in music and in context, we'll see how that kind of works together.
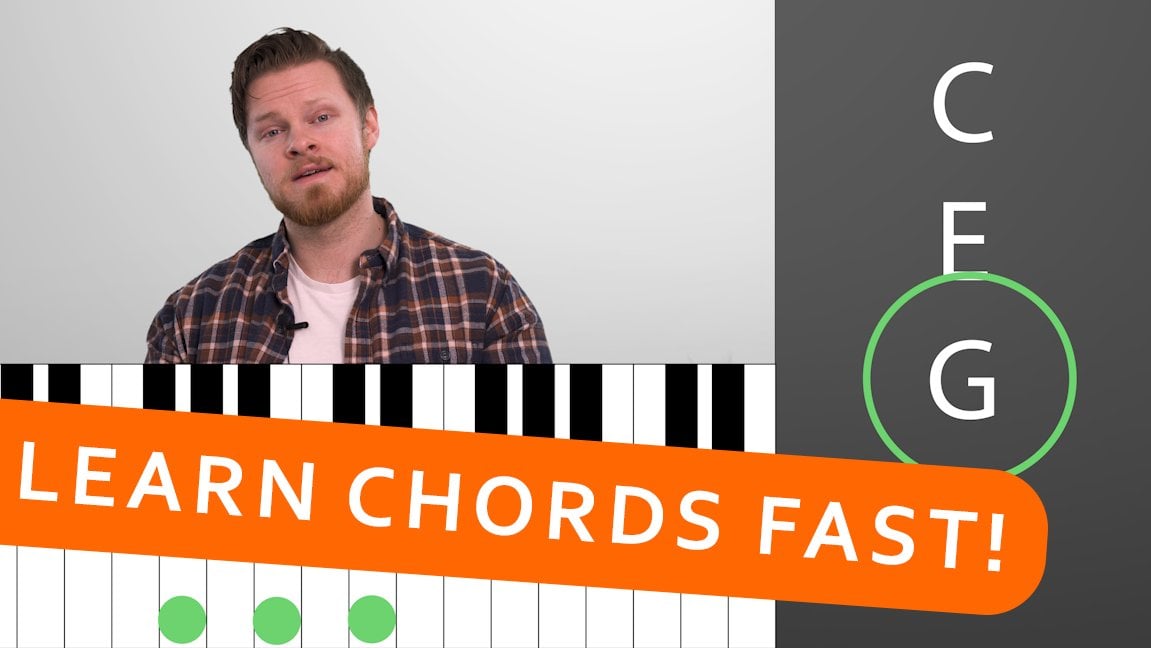
5. Intro to Chords: So we've got our single notes and our half-steps and whole-steps and sharps and flats, more comfortable. Now we're going to look at chords, what they are and how to construct them using sharps and flats. So cords are any three or more notes that we played together at the same time. Now, typically with basic chords, we're going to play every other note, 1, 3, and 5, skipping over 2 and 4. What that looks like on the keys is playing one. For example, skip two and play 3, skip 4, and play five. Now in this case, that's a, C, an E, and a G. Now chords are always called by the first note. In that 135 sequence. We also call the one of a chord the root. And so cords are often called by their roots. So for example, this chord here would be called a C chord. Could replaying 1, 3, and 5 starting from a C note. Now we can change that root note and we can play 135 from maybe an F 135, and we have F, a and C. And this would be an F chord. Now, something that's important. And here I'll erase this. And let's play 135 maybe from an E note. And so here we have E, G, and B. Now this is a kind of E chord, but it's actually called an E minor chord. And so a minor chord is in contrast to the other chords we just learned, called major chords. So if you have a chord name that's just a letter, C or G or F, those are assumed to be major chords. If you have a chord that's minor, we're going to specify C minor or G minor. Now what makes a chord major or minor? And one of those two things mean? Well, to talk about mood before theory, major chords tend to be more happy in sound like this. And minor chords tend to be a little more sad, something like this. So majors happy and Meyer is sad and you put major and minor chords together to make a song. Now, Fieri wise, why is it chord major and y is a chord minor? Well, that actually has to do with half-steps and how many we put together to make a kind of chord.
6. Building Chords 1: So for our major happy cord, we have three notes, 1, 3, and 5. Now between 13, we're moving up 4.5 steps. And between 35, we're moving up three half-steps. So if we come over to our piano here, and we'll use our C again as an example. We'll start with our C chord. Again, that's our one. And then we'll count up 1, 2, 3, 4 half-steps. So from C to C sharp to D to D-sharp to E is going to be four half-steps, and E is going to be our three. Now, from the middle note to the end note, we're counting up 3.5 steps. So one to f, to F sharp, and three to G, which is going to be our fifth note. So we have a wider gap between the first two notes and a smaller gap between the second two notes. And this is what makes a major chord four on the bottom, three on the top. Now in contrast, if we're talking about a sad minor chord, it's reversed and flips. So we have 3.5 steps on the bottom between the root and the third note. And we have four half-steps on top between the third note and the fifth note. And so when we come over to our piano, if we start from an e, like that E minor chord that we just looked at, we have an E which is r one, and then we count up 1, 2, 3 half steps to a G, which is our third. Then we'll count up from G, 1234 half-steps to a B. Or I suppose I should write that as five to keep in line with the others. So we have a smaller gap between the root and the third, and a larger gap between the third and the fifth for a minor sad, chord. Now this rule applies no matter what note you're starting from. So if I wanted to start from a B, and maybe I wanted a B major chord. Well, I can start from B and count up four half-steps, B to C. C sharp, D, D sharp. Now 4.5 steps From be on your piano is a D sharp. And so that right there is going to be our third. Now if I want to count up to my fifth, I'm going to add three half-steps for the second half, the backend of a major chord. So from D-sharp, I have E, F, and F sharp. And that will be my fifth. So I know by counting up with half-steps, that a B major chord is going to be B, D-sharp, an F sharp. Now we talked about notes being sharp and flat, but chords can be sharp or flat to, instead of C-sharp note, we can have a C-Sharp chord. So let's try something a little crazy. We're going to try making and constructing a C sharp minor chord. Now it's actually not that difficult when you remember the rules because it's a C-Sharp chord. We want our root node are one to start on the same letter. So we're going to start with a C sharp note. Now it's a minor chord. So from the root to the third, we want three half-steps. So we're going to count up from C sharp. D is one, D sharp is two, E is three. And so E will be our third tone. We have the root, the third. Now we want to count up four half-steps for the backend of our minor chord, that bigger gap in the second half. So we're going to count up from E to F, two to F sharp, three to G, and four to G sharp. And G sharp is going to be our five. And so C-sharp, E, and G sharp are the three notes we need for a C sharp minor chord. And so even though cords can seem daunting, starting from a sharp or a flat, they're not that bad to construct. If you remember the rules that we just talked about. 4 over 3 for a major chord, or 34 half-steps for a minor chord.
7. Intervals: Now we've got single notes and we've got chords. We're going to talk about something called intervals. Now, intervals are just measuring the distance between two notes. And we count intervals with numbers like seconds. Third interval, fourth, fifth, and so on. If we look at the piano, It's pretty simple. A second interval is just taking your starting note and jumping up to the next note. That's saying you're going from one to two or your second interval. My can play them together to play a second interval. Or you can go from one to two and you've raised it up a second interval. Now, if we want to move up a third interval, we're going to start from our one and we're going to move it up over the second two, the third. And you play these together and you've got a third interval. And so it continues in this pattern. You could jump from one over to your fourth or your fifth. And so if someone asks you to play a fifth interval on the piano, you start from your root node number 1. And you count the notes 1, 2, 3, 4, 5. And you can play these two together to play a fifth interval all at once. Or you can play a root note. And if someone says raise that a fifth, you can jump up from a C, moving up to a G. From a D note, you'd be moving up to an a. And so this fifth shape, kind of like bookends moves together, they're locked together. That interval will always move together. Now, just like you have major and minor chords, you have some major and minor intervals, but they're very easy to remember. For example, you have your second interval as a whole step away. That's going to be a major second interval. A minor second interval is going to be just a half step away. It's smaller, shorter than the major interval. So a minor second is a half step away from your route. A major second is a whole step away from your route. Now in the same way, a major third interval is two whole steps away from your route. And a minor third interval is just a half-step below the major third. Those major and minor intervals are really the most important ones. There are other variations of fifths, sixths, sevenths, different intervals. But the major and minor second, third interval are the most important to us. Because just like we used half and whole-steps to build a chord, we can also use major and minor intervals to build major or minor chords.
8. Building Chords 2: So we're not doing anything new right now. We already know how to build chords from our half and our whole-steps. What we are doing right now is just looking at a different way to build chords, a different method. So if I wanted to build a major chord, I'm going to put a major third interval first at the bottom. So my major chord is built on a major interval, and I'll use a capital M to show that. Now a major interval is two steps away, two whole steps away, or four half-steps, right? Now the second half of my, my major chord is going to be a minor third, or three half-steps away, right? A step and a half away. And so my major chord is built on four half-steps and then 3.5 steps. Or another way to say that is a major third and then a minor third. In the same way, a minor chord flips and reverses that. So if I wanna make a C minor chord, I start from S0 and I go up a minor third, which is a step and a half, to an E flat note. From there I'll go up a major third interval, which is to whole-steps, which lands me again on a G note. So my minor chord is built on three half-steps, and then four half-steps, or a minor third interval. And a major third interval on the backend.
9. Building a Key: Now when we're playing or writing a song, you may hear musicians talk about playing or writing in a key. Now a key is just a set of notes or chords that work well and compliment each other. So when you play out of qi, you may be playing something that doesn't sound quite right or fit in with the rest of the song. Or you might be playing jazz. So if we're looking at keys, what we want to know is how to build a key, how to find notes and chords that work well together. And of course, believe it or not, we use half and whole-steps for this process as well. And there's a little rule that's going to be incredibly helpful for you to remember. And the rule is this whole, whole half, whole, whole, whole half, whole, whole half, whole, whole, whole half. Now here's why that rule is important. When you're building a major key. This is going to tell you what notes you need in that key. Now for example, let's talk about the key of a, right? We'll start with an a. All we do is start with a and we work our way through the notes until we come back to a one full octave. These are the notes in our key. Now we're going to take this pattern, these whole, whole halves. And these are going to be the space between each note. So a to B, we're going to write a whole. You see whole, C to D half, whole, whole, whole half. Now, if you remember earlier in the lesson, we talked about natural half-steps. And our natural half-steps were B to C and E to F. Which means that B to C is not a whole step. And E to F is not a whole step. But according to our rule up here, it has to be a whole step or a half-step. And so to find the notes in the key of a, we have to manipulate these notes to fit the rule. The rule is king. And so we're going to make these notes fit that rule. Here's how we do that. We look at a to B, which is a whole step, and so we're good there. We look at B to C, which is not a whole step, but according to our rule, it has to be. And so we need to widen the gap from B to C. And the way we do that, since B to C is a whole step, and I'll show you on the keys here. B to C is a whole step and we're moving forward this way. We need to widen the gap by bringing that C out a little bit. And we're going to bring it right up to C sharp. Now you'll notice b to C sharp is a whole step. You've got a note in between them. So we come over to our rule. We add a sharp to that C. Now, C to D is a whole step. I'll show you on the keys again. C to D is a whole step. But now that we've changed to C-sharp, C-sharp to D is a half-step. When we look at our rule, That's what we want it to be. So that fits perfectly a, B, and B to C sharp, and C sharp to D fits our rule so far. So we'll keep going. From D to E is a whole step. From E to F is a half-step and we want it to be a whole step. So we're again, we're going to make that F sharp. F sharp to G is a half-step, right? F to G would normally be a whole step. But now we're looking at F sharp to G. So we're going to move our G up as well. So F sharp to G sharp is a whole step. And that fits the rule. And then finally, G-sharp to a is a half-step because we're moving from G sharp, not irregular G. Now, everything on this screen fits our rule perfectly. Which means that in the key of a, you have a C-sharp, an F sharp, and a G sharp. Note. That means that if you played a regular see notes, a regular F note, or a regular G note playing in the key of a, It's going sound wrong, it's going to sound off a little bit. Let's try this with another key and we'll make an important point here. We're going to use the key of C. So we'll go from C, D, E, F, G, a, B, and back to C. And we're going to apply our rule, whole, whole half, whole, whole, whole half between the notes. Now C to D is a whole step. D to E is a whole step, and we want it to be according to the rule. E to F is a half-step. F to G is already a whole step. G to a is a whole step. A to B is a whole step, and B to C is a half-step, which means in the key of C, there are no sharps or flats in that key. If you played from a C note and play it all the white keys up without any sharps or flats, you would have a perfect major key. And it would sound similar to if you played a to a using those three sharps we talked about.
10. Finding Chords in a Key: Now that we know how to find the notes in a key so that we can play in any key properly. We're going to talk about how to turn these notes into chords so that we know what chords are in a key and we can write songs using the right courts. There's another rule like whole, whole half, but this time it uses majors and minors. So for this rule, we have major, minor, minor. Major, major. Minor. Minor. Looks like you just had a really good meal. The first fourth, fifth are major, and the second, third, sixth, seventh are minor. Now, we have seven notes in our key, and we have seven M's for our rule. And that means that number one is major. Number 2, it's going to be minor, signify with a little m. Number 3 is also going to be minor. Number 4 is going to be major. Number 5 is going to be major. Number six is going to be minor. Number seven is going to be Meyer. And then you're back to your Octave, right? A to a, which means that in the key of a, we have an a chord, a, B minor, a C-sharp minor, a, D, and E. An F sharp minor, and a G sharp minor. These are all our chords in the key of a. So to find notes in any key, do you use whole, whole half? Whole, whole, whole, half. And then once you've got the sharps for your key, you use major minor, minor, major, major, minor, minor to figure out if the chords should be a major chord or a minor chord. And now you can build and use notes or chords for any musical key.
11. Roman Numerals: We've got our chords for our key. Now, one way that we notate chord progressions is by writing out these chords like you'll see in a chord sheet if you look up chords for a song online. Another way you may come across these chords ring out as with Roman numerals, very frequently you may see 1234567. Now to make chord progressions, people will write out chords or out Roman numerals go from 1, 5, 4 to 6. The reason that this is helpful is that someone may want to change the key, but keep the chord progression and the intervals between chords the same. So 1546 in this key of a would be a, E, D, and an F sharp minor. But now let's say that we want to play in the key of C, but we want to keep the chords relatively the same. Well, we know that the key of C doesn't have any sharps or flats. And so we can just write out the letters C, D, E, F, G, a, B, and you're back to C and we'll number them as well. 1234567. Now 15, 4, 6. Same chord progression is different in the key of C because we're playing in a whole different key. We can be playing C, G, F, and a minor. Forgot to add them minors in. So 1546 can be different chords in different keys. And this is an easy way to transpose to a different key using Roman numerals. If you've written a song in the key of C and you want to move it to the key of F. If you know the Roman numerals, then you can easily move to the key of F and borrow those same Roman numerals out of your new key that you're transposing two.
12. Minor Keys and Relative Minor: Here we have our two rules for building a major key. Now what if we wanted to play in a minor key with a sadder tone to it? Well, it's important to recognize and learn something called the relative minor. The relative minor is a minor key that shares all the same notes as its relative major key. Now the relative minor starts on the sixth note of the major key. Let me say that again. The relative minor starts from the sixth note of the major key. Which means if I'm in the key of C, If you play from C to C, you've got a major key. And it follows the whole, whole half, whole, whole, whole half rule. If I want to play in a minor key, the relative minor shares all the same notes, which means our relative minor of the key of C won't have any sharps or flats in it, because it shares the notes of the key of C. Starting on the sixth tone, then 1, 2, 3, 4, 5, 6, or relative minor for the key of C as the key of a minor. So if I wrote a, B, C, D, E, F, G, back to a. If you play a to a, just like we did see, to see without any sharps or flats. You're going to have a much different, much more somber sound. It's going to be a minor key. And so remember really the key of a. And we found three sharps in. There was a C-sharp, an F sharp, and G sharp. Well, if we played the relative minor from the F sharp node to the next F-sharp and octave up. And we kept those same three sharps, C sharp, F sharp, and G sharp. Well then we'd have an F sharp minor key. See the relative minor borrows the notes from the major key, and it always starts from the six tone. Now that also means that we can manipulate our rules just a little bit. If our major rule is whole, whole half, whole, whole, whole half. And then the relative minor starts from the sixths tone. That also means that a rule for building minor keys can start from the six tone of our rule here. So starting right here, we have whole half, and then we jump to the beginning. Whole, whole, half, whole, whole. This hole right here. Is this, this is the one in our major key. But we're starting back to from the six for our minor key. Which means if you start with a note and build out a key using this new rule, you'll have a minor key. And in the same way, we can start right here with the chords and go minor, minor, major, minor, minor, major major. And these are our minor chords for a minor key.
13. Circle of Fifths: Being able to build a key is a wonderful skill to have. But there's another way to do it if you're more comfortable with memorizing rather than building every time. And this is called the circle of fifths. Now you may have heard musician friends talk about the circle of fifths and it's kind of incredibly handy. Here's how it works. First, we build a circle. Now at the top of our circle we put a C. Remember that C doesn't have any sharps or flats right? Now, every time we move down the right of the circle of fifths, we go up a fifth. So if we look back at our piano, we can start from S0 and move up 12345. This is a fifth, and this note here is a GI. Our next note in the circle of fifths is a G. Now every time we go up a fifth, we add a sharp. What that means is the key of C has 0 sharps. The key of G has one sharp. Every time you move up a fifth in the circle of fifths, you add a sharp to your key. And so if you remember the order of the circle of fifths, it can be really easy to remember how many sharps are in each key and eventually memorize which sharps those are. Now here's our new row. The sharp for every new key is a half-step below that new note. Now I'm going to say that again. The new sharp we add for every key is a half-step below the new key. What that means is we just moved up to the key of G. Now if we look at our keyboard, a half-step before G is an F sharp. Which means that our one sharp in the key of G would be an F sharp. Now we're going to move it up another fifth. We've gone 1 fifth, now, another fifth. So here's g, and we go 12345, which is now the key of D. So we'll add in a d. We know because we add one sharp every time D has two sharps. Now we carry the f. So one of those two sharps will be an f. The other sharp will be a half-step below the new key, which in this case will be a C sharp. So we've got F and C as our sharps. Now we can keep going with this all the way up to b. And then we can go down the left on the other side. But for right now, let's do one more together and then you can finish the circle of fifths on your own. We're going to bring that D up a fifth. So from our Piano 1, 2, 3, 4, 5 to an a. Now because we add a sharp every time, we know that a has three sharps. We carry over the F and the C. We bring our sharps every time and add a new one. We're looking for a half-step below our new key, and a half step below a is going to be a G sharp. So we have F sharp, C sharp, and G sharp. Now after a, we can go to E, and from E we can go to be four sharps and five sharps. This is the sharp side of the circle of fifths. You can go down a flat side on the left. We're not going to do that today. We're going to talk about sharp keys and stay on the right side.
14. Inversions: Now we're going to talk about one of my favorite lessons to teach, which is inversions, chord inversions. I think they're really fun and really interesting. Now in inversion is taking a chord and playing leapfrog with it. Here's what I mean. We know that accord is 1, 3, and 5 on the piano. And I'll write that out for you. 135. This is called root position. Every other node right in a row. But for record to be a chord, we only need the three notes. We don't necessarily need them to be in order. So what if we took our one and leapfrogged it to the front? All of a sudden, we would have three at the beginning, five, and then one at the end. Now this is called a first inversion. If we look at this on the piano, we still have 3 and 5. But we're taking our one away from the bottom and moving it to the top. So from a C, we're going to jump it up to the next. See up here. Now this is still a C chord. The elements we need for a C chord or a C note, an E note, and a G note. And we've still got that. We've just moved our C to the top. Now what if we took it a step further? What if we took our three and leap frog that to the top? We'll then we would have five at the bottom, one in the middle, and three at the very top. And this is called a second inversion. Now, if we look at our route, again, we're going C, E, and G. For a C chord. Our first inversion is going E, G, and C. Our second inversion is going G, C, and E. The three elements we need for a C quarter all ways there. And so here we're keeping our g and RC. We're taking away our E from the bottom and bringing it up to the top. This is a second inversion, C squared. Now why are these important and useful? Well, if we're playing a chord progression and we have, we'll say a C chord to an F chord, to a G chord. We could play C, jump all of those up to an F, and then jump all of those up to maybe a G. But that's a lot of jumping around and not necessarily the easiest thing for our fingers to do so quickly. With inversions, we can keep chord progressions nice and tight, and there's a lot of overlap with letters. For example, if I wrote out the notes for a C chord and an F chord and a G chord. You'd notice connections. Gs overlap and sees overlap. When we come down and want to play our chords nice and tight, we can use inversion shape. So for example, we have a C chord. I'll write it up here, C, E, and G. If we want to move to an F chord, we need F, a, and C, which connects. We can keep that C and play F, C and a like that. Then if we want to move to our G chord, we can play or G, or D. And R, B maybe has a second inversion. Now, I understand that all of this is hitting you very fast and very sudden. All I want you to see on this little chart is how much closer these notes are from our first example of the progression using only route chords. This way, we need to pay attention to our right hand on the piano, much less when we're playing. And that's always a good thing to find easy ways to play the same thing. Different inversions also have a different feel to them and it's important to be able to use these and manipulate these to make your song have the feel or vibe that you want. If I were to paint out a C chord on the piano, all the way up the piano. I have my C, E, G. See the G in different octaves, and there's a G down here as well. And so these three nodes in any order, from here to here, here to here, here to here. These are all absolutely fine examples of see courts. And so we're able to play around with the piano much more fluidly using inversions.
15. 7th Chords: Now we're going to talk about seventh chords. And seventh chords are actually not that difficult. Thankfully, we know our chords are built out of 135 right? Now. Seventh chords, just take that a step further. So far we've got all odd numbers, 1, 3, 5, seven. If we look at this on the piano and we want to make a C chord, we have 1357. We're taking it a step further from our root basic chords. Seventh chords can be beautiful or jazzy, or major or minor, or resolve at the end of the song really nicely. Now, how do we find the seven? We've talked about intervals and we've talked about half and whole-steps, but how do we find the seventh of the chord? Well, the easiest way I found to do it, actually with octaves when we come across a major chord, like 1, 3, and 5. So we'll say we have four half-steps and three half-steps major chord. The seventh is a half step below the octave, half-step below the octave. So we look at our C chord. We have a C, we have octave c up here, and the seventh is a half-step below it. Now let's say we have a minor chord. So three half-steps and four half-steps on top. Your seventh in a minor chord is one step below the octave, not a half-step, but a whole step. So we have our C to C octave. And your whole step is going to be right down here. That is your seventh, a whole step below the octave. So a major seventh for a major chord is a half-step below the octave, but a minor seven over a minor chord will be a full step below the octave of the root node.
16. Suspended Chords: We're going to talk about two more types of chords on the piano, and then we're going to call it done. Our first is a sus chord, short for sustained. And you can have a SUS 2 or a sus4 chord. And these are probably the easiest type of chord we're going to talk about. We know very well by now that cords are 1, 3, and 5. When a sus chord does is it takes the three and it moves it to one of the two notes we've been skipping so far. The two are the four. So for a SUS 2 instead of 1, 3, and 5, we're going to have 125. So if we look at our C chord, reuse to it being C, E and G, 1, 3, and 5. Now however, we're going to play C, D, and G, 1, 2, and 5. Likewise, the SUS 4 chord takes your three and moves it up 145. So if we look on our piano set of 1, 3, and 5, we're moving it up to one, 45. If you're moving from a major chord, which is 1, 3, and 5, you're going to move your three down a full step, or up a half-step. If you're changing from a minor chord where the three is a half-step below. You're going to be moving down a half-step or up a full step. The two and the four don't change when you're making a chord major or minor. What makes a chord major or minor is the three. So you can play a C sus to wear something calls for a C chord. Or you can play a C sus to when something calls for a C minor chord. The benefit of sus chords is maybe to add some flair before you land on a C or any chord you're playing a SaaS width. Or also if you're staying on the same chord for a long period of time in a song. Throwing in a SUS 2 and a SaaS for instead of just the root c over and over, can really mix up a song that might otherwise have sort of a boring section. So SaaS chords can add flare or sus chords can keep a chord from being too repetitive over a length of time.
17. Slash Chords: The other kind of chord we're going to talk about, it's called a slash chord. Now with all of the chords we've been learning, we can play them with something called a root note. And a root note is just the root of your chord, played an octave lower. So if I wanted to play a C chord, I can play my 1, 3, and 5 with my right hand. And if I wanted to add depth to it, I can play a C, an octave below with my left hand. This extends the range of the piano. And as you move your chord, you move your root node with it. I play a C chord. I play a C root note. I play a G chord, I play a G root node. Slash chords change that form a little bit. You may see something like this. Now, on your left side here, you have your chord. On your right side over here, you have your new root node. You're not changing the root note in the right hand. You're still sticking to the 1, 3, 5 form or any inversion that you wanna do. What you're doing is you're changing your left hand root. So I can have a C chord over an E root with the left-hand. Typically root notes, we'll stick to different tones of a chord. Which means if I'm playing a, C, an E, and a G and my chord, my root node will probably be, probably be a C, But if it's a slash chord, it will probably change to either an E or maybe a GI.
18. Final Project/Outro - Congratulations!: Thank you so much for watching through my beginner music theory for piano class. For a final project, I'd love for you to pick a key, build the notes in it, and figure out the chords if their major or a minor. And then make your own chord progression mixing Roman numerals. You can write them down in the chat or if you're ambitious and you can play those chords as well. Again, thank you so much and if you enjoyed it, please leave a good review and always send me a message. I'm happy to hear stories or have questions from you guys I can answer as well.
 Jacob Lamb, Musician, photographer and videographer