Transcripts
1. Introduction & What This Course Is About: Hello, guys. This is a most all music YouTube's leading individuals step by Step Piano Channel, with over 400,000 subscribers and 100 million views with over 15 years of piano experience in playing by ER, improvisation and diplomas and classical piano. I'm here to assist you in your journey to piano mastery, and in this piano course I'm gonna teach you or the fundamentals to the piano so that you can develop a strong musical foundation in music theory and technique. By the end of the course, you will learn how to easily navigate between or the black and white notes on the piano. Great posture control over the body, hands and fingers and how to efficiently read and count sheet music notation. Okay, there are practical exercise after every single main lesson, because I believe application is the most important thing for improving. As at worst, say, you can't become a tennis master simply by reading a tennis book, you must actually stepped onto the court and practice your swings to get better. And this is exactly what you must do for the piano, too. So get started with my piano course now, and I would take you with me on this musical journey with step by step instructional videos such that anyone, even with no music experience, can join along. See you in the next lesson.
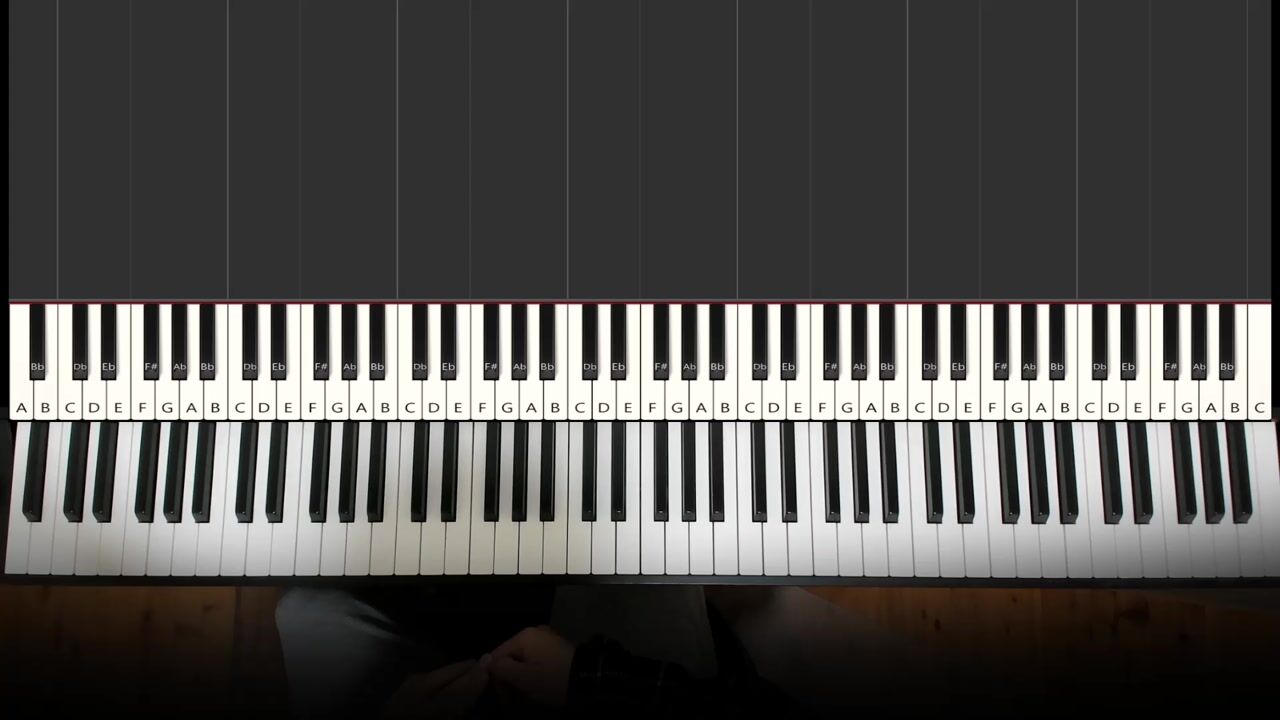
2. How to learn ALL the keys on the piano without actually learning ALL of them: guys, this is a milestone music. And in today's lesson, I'm gonna give you a few easy to remember tricks so that you would know all of the keys on the piano without actually needing to know each key one by one. So let's get started. There are many keys on the piano. 88 keys to be exact for standard pianos. So there are black keys and there are also white keys. Don't let all these keys put you off. You actually don't have to memorize or the keys because the black and white keys repeat itself over and over again across the whole piano. Now let me give you your first short cut. Can you see that the black keys are grouped together in twos, then threes than to 3 to 3 to three and so on? If you can. Great. Because all you need to do now is take the white key to the left off. Any group of two black keys and wila. You have now discovered the first short cut in fighting or the sea keys on the piano. Look, it works for all of them. So why key to the left off the group? of two black keys. Seeing why keys to the left off a group of to back He's seeing to Blackie's See Blackie's see etcetera, etcetera. But remember, this Seiki trick applies to only the group of two black notes and not the group of three black nuts now taking note that see is the white key. You made an awesome me. What are the other white keys on the piano? And what does this Seiki that you just learn? Stanfel. Well, do you know your alphabets if you do? As simple as it may sound see is just part off the seven letter musical alphabet cycle off A B C D E f G. In order. It is a cycle because in the musical outfit a boo C D E f g on after g there is actually no hey H as it goes back to a and then it repeats the continuous cycle off a basically the G, ABC, the FDA, etcetera, etcetera. And guess what? You have just learned all of the white keys on the piano. Now that you know, or the white keys on the piano, let's move on to the Black Keys. The Black Keys accord flats and shops, and they are based on the White Keys. Flat is marked with a symbol. This which kind of looks like a small lower case be. And it is marked after a letter to indicate you have to play the black key to the left of the Waikiki, for example, de front E flat G floods a flat B flat. On the other hand, sharp is marked with the symbol of this, which kind of looks like a small hashtag. And it is marked after a letter to indicate that you play the Blackie to the right off the white key. For example, see sure d shown f shop G shutem and a show. Take note. There are four very special situations where a flat or sharp off a Waikiki is actually another Waikiki, and these are the gaps between each group of two and three black keys where there are no black notes in between these four specific white notes off E n f being sued you. Nothing being see etcetera. So in these four exceptions, e shop is F f flat. Izzy. The same thing applies to be shop you see and see flat is be. Here's another helpful trick for you to easily remember the difference between a flat and a shock. Okay, so just remember that flats has letter ill in it, which stands for left and shop. Has the exclusive letter are in it, Which stands for Right. Okay. So make sure you revised through this lesson thoroughly because all these basic things will then become assumed knowledge as you advance in music. Just like the same way. How spelling and grammar is assumed. Knowledge for advance essay writing. Finally, here is a summarized list on what we learned in this lesson. Number one, All my keys to the left off the group of two black keys is the sea number two. The White Keys cycles on the seven lead on musical alphabet a B number three, Blackie's Accord Flats and shop number four. And finally remember, flat left and sharp, right
3. Exercise 1: Look, guys, this is a most own music. And here are some things that you can apply and practice to make yourself a better musician . So remember, pause after each exercise to try it out for yourself. Okay? Number one using the two fingers that you do for a peace sign in photo, Zia Press or the group of two Blackie's from the bottom to top with your left. 10. Like this. Okay, now try it for your right hand like this. Okay, Number two using your second finger. So this finger in your letter and this finger in your right hand, fine and press or the sea keys for me on the piano using the left to the to Blackie trick that I taught you in the previous lesson from bottom to top with your left hand like this. Okay, then try for your right hand like this. Number three. Using your second finger with any hand, sir. Same thes fingers start on the lowest Seiki that you can find on your piano and go up each white note all the way up the piano saying the correct letter names for you to practice on how the musical alphabet cycle works okay for my lower Seiki. It is all the way down here. You can really see on the count of you, but you can hear it before your own piano. It may be different, so just check it out. Using the excited to that we just did. OK, so your goal is to do it as quickly as possible while saying out what you are playing correctly. So time yourself using a stopwatch. Okay, so I have my stop. What's right here? Okay, Ready? Sits a B C D E f g ABC, ABC. Okay, those 12 seconds and 50 milliseconds. Yeah. Okay, so that's recent. This okay, Number four. Okay, So, saying the letters upwards for the musical Albert is the easiest part. Like what we did in the previous exercise. Because everyone knows the alphabets, right? However, saying it in reverse troubles a lot of people. So now I want you to start on the high sea on the piano and then go down each white note all the way down piano, saying the crack led names. Yeah. Before we start there, here is a useful tip. Break it up into CB a These three letters followed by G f e d These four letters so repeat after me a few times C b a g f e d c b a g f e d And then make a foster C b a g f e d c b a g f e d Xetra! Okay, for my highest Seiki, it is all the way up here. You can see it on the camera view. So once again, let's tell ourselves and play the notes while saying the letters out loud like this. See the CBO? Okay. Once again, there was a little bit slower because it's harder. So it's 14 seconds. All right. Anyway, so now number five se flat left shop, right? A few times for me because we're going to use it. Well, practice examples right now. So flat. Left sharp, right flat, left sharp. Right fast on flat. Last shot, right flat, left shut. Right flower. You're right. It's like tongue twister. Anyway, this exercise requires you to play flat version followed by the sharp version off each whitener, going up the piano, starting with see you press the white nuts with your left hand second finger and then your right hand comes in we play in the sea flat the shop now for the d E flat d shot, uh, now for e e flat on the shop. Remember this one? Because people get mixed up with this one. But the shop is any deaky right above it. Right here. Okay, moving on f guys, it is a flat. Remember? Shop G G flat G shot, huh? Not a flood and shop. It's B B flat B shot. Didn't get tripped for this one as well. And then keep going if you get confused. Exist. Yeah, it goes to keep it really quick and think very quickly. And so so keep going up the piano to practice so that you're never mix up the flats and sharps for particular notes later on.
4. The 2 Most Important Measuring Units For Notes, Melodies & Chords: all the guys. This is a most all music, and in today's lesson I'll be going through a very important clarification and demonstration on the two terms, half step and four step, which you would see it being used again and again throughout all kinds of music endeavors. Conversely, let's talk about the half step. Have you heard people saying that a specific interval is a specific number off half steps apart or the same question? But how many semi tones apart? How about have you wondered what it meant? When a vocalist tells a producer or Ben to change the song half a key, higher or lower? Okay, to clear this up for you, all these mean the exact same thing. Ah, half step is also known as 1/2 tone, also known as half a key and also known as a semi tone. To put this in one simple application to the piano ah, half step above or below a white key is mostly a black note, but with two exceptions, this is the notes NF on B and C around the piano, where there are no black notes in between them, you see, which therefore makes that the half step above a is F on the half step above B is C moving on to the second term off full step, also known as one or whole tone, also known as one or whole key and also known as a tone or two semi tones. Okay, so after understanding the half step, ah, full step is simply the distance off to half steps. So what does this mean on the piano, for example? Ah, four step above sea is one to huff steps, which is d ah, full step below F shop is one to off steps, which is eight. Right? So understanding these terms clearly will help you a lot later on, such as mastering intervals, for example. Confusions can be eliminated. So knowing the interval between like see Jeff can be either 1234 5/2 steps apart Or you can just chop it in half that being too and 1/2 4 steps So sick. 14 step two step and 1/2 to 2.5 steps
5. Exercise 2: Look, guys, this is a most all music And here are some things that you can apply and practice to become a better musician. So remember to paws off the each exercise to try it out for yourself. A lot of people get mixed up between half step and full step distance between nuts. So here are some great exercises to not only clear up this confusion, but it also trains your mind, eyes and hand coordination. Another one this exercise trains you to think 1/2 step above for a white keys to start by pressing Seiki with your left 12th thing going on and then the right hand second finger follows after impresses the key that it's half a step above, which is, in this case, see shop that we continue to the next white No, with your left hand, which is D on the right hand is the same. The rest of it goes like this. Okay, Number two, this exercise trains you to think 1/2 step below for all the white keys. Okay, so this time, with your right hand second finger pressing on the white nuts starting on C and you're left 10 follows after impresses the key that is half step blood, which is big. Wait, continue to the next whitener Follow and continue on the rest. Like this. Zetra number three. Now this exercise is a little harder because it requires you to think a whole step above for all white keys. So basically you're counting up to half steps. Does. That's why you're going to think a bit longer some for some of the keys. So the same concept pressing the Seiki with your left hand second finger on the right hand follows and press the key a whole step above which is D because it's too Hafsat was above 12 The rest of it goes like this D Trump So number four similar to exercise number three. This exercise trains you to think a whole step below for all the white keys. So basically, you're counting down to half steps, having the same concept, press the seeking now with your right hand second finger on your left and follows and presses a key holding below, which to help set below, which is want to be flat. The rest of it goes like this. I want to
6. My Best Handpicked Body Postures Which Stabilizes Future Advanced Techniques: well, the guys. This is a milestone music, and in today's lesson, I'll be going through one of the most important things in piano before you even touch one. And this important thing is posture. So many times have I taught a new student who had known from another teacher before and that they have shown me bad posture of some sort while it's playing the piano in that very first lesson, they also find it difficult to change when I correct them because they've got into a bad habit with using that bad posture and also the fact that the previous teacher did not reinforce the importance of it. As you are now learning from me, I do no want you to fall into the same trap in developing bad habits that will bite back at you in the long run. Let me give you three main reasons for good posture. Firstly, having the correct posture in piano is the same as having the proper form for professional sports. It helps preventing and minimizing damage and stress to the body that might occur while sitting through the long hours of piano playing and practicing secondly, allows you to produce greater amount of power with minimal stress when playing loud and passionate songs. Okay also allows you to produce smooth, rounded and flowing tones when playing soft and melodious songs. Okay, sadly, not only does it help you to play with MAWR, sensitivity have better touch, but the proper posture makes you look like a professional as well, even if you only just started piano. So without any more reasons, let's kick it off and start with the lowest part of our body and eventually talk our way up the body. So starting with the seat and feet placement at the piano. So one big problem that I see when students come to my lessons or if someone is getting ready to perform on stage, is that they don't adjust the chair to their most comfortable position. Because you see everyone is different. The length off their arms and legs all contribute to this important factor. Okay, so my quickest method is to put your hands on the piano and what's keeping in there. Move them back until your arm joints the part of your forearm and your upper arm, the elbow, part forms and obtuse angle from your body to your hands on the piano. So not 90 degrees angle and also not 180 degrees straight arm because both of them, you won't be able to use your full strength to the maximum potential. Okay, when you have found that obtuse angle of your arms, put your chair there and let's now move on to your steps. Good stance means good balance when playing, so both feet are to be flat on the ground, not wrapped around the legs off the chair like this and not on your tippy toes. If this is the case, just adjust the height of state until both feet are solid, flat on the ground. How the For most young Children who can't reach the floor from 2 to 6 years old, you can put a box or stack thick yellow pages books in front of the seat and underneath the legs so they can put it on top and solve this very problem. Now both legs are to be shoulder with a pot not too wide and not fully together. Like what some girls do because both you won't have good balance when you're a movie, where on the piano, Okay, your kneecaps should just line up under the piano and not next and above to it for some tour people. If this is the case of justice, see onto your knees are in the right position. Okay, let's now move up. Tol mid Region. This is my favorite part because there is a golden rule that applies to both this piano and my favorite other favorite hobby, which is exercising at the gym. I want to repeat this golden rule back at me, sir. Ready? Back straight, Chest out. Do it again. Back straight, Chest out. Okay. How the Do not over our straighten or hyper extend your back because the stress it creates is also bad. Okay, this is really, really important because if you don't do this, you will not only hurt your back, but you might want to develop hunchback in the future, which will make you look like that. You're constantly taking a bow. Okay, so the next thing is the shoulders keep them relaxed down and slightly backwards, never to shrug upwards or forwards and tensed up like what some players do when they encountered with faster or more difficult passage. Now we get to the top part of your body in this discussion, which is your neck. Just remember that your neck has to be long. Okay, that sounds a little bit weird, right? But what it means is that your neck is not curved, but straight up with the chin relaxed, slightly downwards. So just imagine that you are a marionette puppet that is pulled up straight by imaginary string with everything else relaxed. Okay, all of these things are extremely important, so make sure you revised for this lesson because you don't want to form any bad habits in the long run. So here is a summarize checklist that I want you to go through when you are getting ready to practice or when you're about to play another unfamiliar piano elsewhere or before you perform, said number one chair distance measured from the obtuse arm angle. Number two feet are to be flat on the ground, and his shoulder with apart three knees are just underneath the piano. Full back straight, chest out, five shoulders relax and slightly backwards. Number six. Finally, its neck up straight and chin is slightly downwards.
7. Exercise 3: Look, guys, this is a milestone music. And here are some things that you can apply and practice to become a better musician. So remember to pause the video off the rich exercise to try it out for yourself. Number one, Some of you may have siblings to share the piano with or have a habit off putting back the piano. Cheer to say space at home, Learning your own personal crack Chur distance The piano is very important because advanced techniques later on requires it. So put your chair for the back first. Now measure the distance. Using my obtuse on anguish so produces this. Okay, remember, it is not nine degrees like this because you're all the way up here and not straight. I'm like this because it will be very hard to play like that. Looks like a robot. Okay, now, once you get it, pull your chair closer, but not too close because you do not actually want to sit on the chair with your full and whole bottom. Your bottom should only be sitting at approximately about 1/3 and to see if this was a seat . OK, so number two feet flat on the ground and showed up with a pot for good balance. I'll show you what would actually happen if you don't do this. So now let's try it out the wrong way by putting your legs stuck closely together, just like what girls do for class group school photos. Now with this wrong stunts, try reaching for the lowest keys or the highest keys on the piano while is keeping your feet flat on the ground and without moving your bottom on the sea with two hands like this as well, it is very hard, right? It feels like you're gonna fall off like you're really inclined to actually move your bottom or your 10 stop and stress on your upper leg muscles and abs because you're trying so hard to balance. OK, so what's the bottle of this? That is why we need to have our legs shoulder width apart to have great balance when we are flying around the piano while it's keeping our bomb always on the chair later on, on the best techniques and songs, maybe. Okay, number three back straight chest up and then shoulder relaxed and slightly backwards and next straight okay, supports it and make sure you achieve all of us. It is extremely important to not only look pro but be able to play longer and difficult songs without strain. Later on, you play bending over the piano, but this will be paying for in its on on sound you produce is not good as well.
8. The Killer Hand Shape Mistakes That Prevent You From Achieving Better Techniques: Hello, guys. This is a most doll music, and in today's lesson, I'm gonna go through all the basics about the most important part in the body for piano, which you can already guess it is your arm. So you may say, Amos, there's nothing to learn from this or you need to know is to move your fingers and you can actually play piano like that. Well, I'm very sorry to tell you, but this is absolutely wrong. There is a lot more than just moving your fingers around if you want to become the best piano player that you can ever be. Since we have already talked about the shoulders being relaxed downwards and slightly backwards, let's firstly talk about the joints elbows. Hey, so some teachers tell the students to play with their arms and elbows stuck to the side of the body. This is absolutely wrong. Your elbows are not supposed to be stuck to your body, but rather they are slightly flared out to the side like this. So everything is relaxed. But remember, they're not too flat out like a crab. Okay, now to your wrist, your wrist has to be relaxed at all times. Just imagine that your hands is floppy like jelly, so that your risk can make your hand move up and down. And just like this up, down, up, down and mobile. Okay. Ah, good way to understand how your whole arm should feel when playing the piano is a Mexican wave oil, elbow and wrist joints have to be relaxed in order for the wave to look circular. You can't do it with stiff arms because you'll just look like a robot with straight arms moving up and down. Okay, once you can control your arms to be easily relaxed whenever you want, let's move on to what your hand ship should be like. Okay, at all times when you're playing the piano in the shape of your hand should resemble a spider. Oil fingers are curved with fleshy part of your fingertip, this bit on top of the key. Remember to make sure that the mental part of your finger is playing the keys and not your fingernail tip or your finger. Now this applies to all fingers, except for the thumb, which is actually played on the side with the little fleshy part to the right on the left hand thumb now. Right here. Yeah, and vice versa for the left. Off the right hand thumb. Nail left. Answer off this here. Some of you may have heard off the grabbing apple or tennis ball method for the handshake. I personally don't like this at all. I don't like this method or because it gives the wrong concept. If you 40 following. So grabbing a bull like a normal would look something like this. Yeah, and then we apply it to piano. It is wrong because we will be playing without nails. And as you have just learned, this is no good because we need to play with a fleshy part off our fingertips instead. Okay? Also, keep in mind that most of the time the topic of wrists should be slightly higher than the rest of your arm like this. Such at the top of your hand, which is the opposite side of your palm is relatively flat when you play. Okay, The last important thing is the finger joints, which is overlooked by many, many, many people. So excluding your thumb. If you look at your fingers, let's say our second finger. We have three joints. One joins the finger to your hand. Yeah, one in the middle. Yeah, and one just before the nail. Right here. Okay. So a common mistake that many beginner and even intermediate piano players make is that one of these joints collapse when they're pressing into the key. So many people might have curve. Thing is that they say before they press into the key like this have unprecedented to Kenya is all curve right. But they collapsed during when they press into the key, Most commonly the joint before the now like this look, it collapse, clubs collapse. Even the other thing is, well, the curved before. But when the press it collapse, so you must keep all joints strong and Kurt both before and after you press into key like this. Okay? So as you can see, there are already many, many little things that add up to mastering such a simple and basic arm and hand movement. So it is actually very important for you to revise for this lesson because I don't want any of you to form any bad habits or worse, being unable to learn more advanced techniques in the future because the basics are not even secured. So here is a summarize checklist for all the basic requirements you need to know about the arm when playing the piano. So number one, your elbow and risk should always be relaxed like jelly number two spider hand. Shit. Meaning Kurth fingers both before and after you press the key. Number three. Play with only the mitt off your fingertips and not the nail. If you play the nail, Klink, you can hear it. I see. Okay, so number four wrist should be slightly higher than your arm. So the risk part a bit higher than your arm like this and not the other way around. Number five is the top of your hand. Should stay relatively flat most of the time, okay?
9. Exercise 4: Look, guys, this is a most old music. And here are some things that you can apply and practice to to become a better musician. So remember to pause the video after each exercise to try it out for yourself. Number one, your whole arm, particularly your elbow. And your wrist joints should always be relaxed like jelly. Think of it as if your whole arm is made out of water and that you have extremely flexible bones. Like as if you have no bones. So wobble your left arm like this and just feel very relaxed, including your shoulders. Nice and loose. Okay. And then once you get it, same for your right arm. Like this Feeling very. Relax. Including your shoulders. Nice and loose. What we little about. Okay, now number two spider handshake. Okay. I'm playing with the meat of your fingertips right here and not your nails on the note. C d E, f and G cases, starting with your left hand. Pinky on C four, finger on D said finger on a second finger on F on thumb on G slowly go up each note in the exercise, making sure that you are only pressing one key at a time. Smoothly. Okay, The best way is to think off the action like a playground Sesil, where one goes down and the other comes up like this. Uh, then go back down on. Repeat it a little faster if you hear that it is already smooth, clear and controlled. And training foster and foster until you physically cannot handle it. So take note. Go at a speed that only you can handle. There is no point in playing fast, but very messily. Okay, so after that, try it for your right hand. So first single on C second finger D third finger on a four finger on F on pinky on G slowly like this and then increased the speed gradually to what you can handle. So all of the notes are to be always smooth even though when it is fast and very even like what you just saw. I came. So number three No, this exercise is similar to the previous, but this specifically trains your steadiness off your hand by a needing to keep a flat hand at the top by being able to balance something on top of it. While it's playing okay to start off easier, but balancing with smaller objects with a flat surface, like a coin or a razor like this for the left. 10. Okay. So I can't really find a coin here, but I can find this small kind of flat marble kind of thing. Okay, so right at the middle of your hand like this, start off slow and steadily and try to increase the spear without the object falling off. Okay, So make sure you don't cheat and have the object placed at your like wrist here because it actually come early. Fall off when it's at your wrist part here. It should always be in the middle part of the hand at the top like this. Okay. And there same thing goes for your right hand. So your right hand and place the right of the middle, starting off very slowly and try to increase the speed gradually without this object falling off this. Yeah. Okay. So if you can easily do this, increase the difficulty by balancing a heavy object like a pen as well, Like penance. Harder. Because there are two sides of it. Okay. So I can find a highlighter here so like this for the left hand. Okay, U S force. Okay, Okay. And then like this for the right hand at the start. A lot of times are students do this and they will fall off like this. Like their hands are moving side to side like this. Obviously, when your hand move side to side, your top of the hand is going like this, then, like natural physics, who make the objectives for look like what just happened. So make sure your top is always relatively flat so that you can always balance the object, okay?
10. Know Exactly What The Piano Can Do (And What It Can't Do): guys. This is a milestone music, and in today's lesson I'll be briefly going through how the piano is built, especially on what is happening inside the piano when you were pressing into a key. This is very important because what it sounds like when you are playing depends solely on how you press into a key. If you understand the mechanics of the piano and you will be able to control the sound and turn that you want when you are pressing into the keys in simpler words before you play the instrument, you have got to know the instruments. If you own an electric keyboard, no problem. There are many other important things for you, which I will also cover in this lesson that will also affect the sound that should produce , such as the uses of the three different foot pedals on the piano. Okay, so let's get started. If you open up the double VP, ETA was just look inside a grand piano. Then you will see that the piano is made up of a complicated arrangement off strings, hammers and other supporting things. I won't get into too much detail because I need you to know is that when you press into a key, will mechanically trigger the hammer to hit this string, which causes the string to vibrate. The vibration off the string is a sound that you hear when you play the piano. So the piano is quite an interesting instrument because it is both ah percussion instrument because the hammer is hitting onto something to produce sound. Yeah, and also it is a string instrument because of the fact it has strings. This amazing invention was created at around the 17 hundreds from Italy. In fact, the word piano is the Italian shortened form off the word pianoforte, which directly translates to soft, loud, where piano means soft and forte means loud. The name pianoforte truly reflects the variations involving meaning loud and soft that can be produced in response to how you touch onto the keys. For example, the greater force you press into the key, the greater the force of the hammer hits onto the strings on the louder the sound or the notes produce, for example, and likewise, the lights are your persons of the key. The lights of the hammer hits onto the strings on the softer off the sound of the note is produced. All of this is very important because you need to get used to how much force you need to press into the key on your piano in order to create a nice sounding tone. There are two common problems faced by people who are new to the piano number one. You are not pressing all the way down into the key or you are pressing it too lightly such that the hammers don't connect and no sound is coming up just like this, Okay, number, etc. You're pressing the keys way too hard or you are almost hitting the key. Such of the hammers are overloaded so badly, making the sound too loud, distorted and unpleasant to hear such like this break unpleasant right? Have a beginner solution for these two problems that you can instantly apply right now to see the results. Do you remember the flexible Julie wrist I mentioned in another lesson? Okay, so find a note. Let's say middle C case, and it's still with right hand first keeping or your fingers curved. I want you to line your third finger above the sea key with your wrists slightly higher than arm like this, then nicely dropped all the way down into the key with your risk going down during the motion like this dropping down. Wait, let's do it so drop. Okay, so let's do it with the left hand as well. A drop truck. Okay, so think about the action as if someone is pouring your wrist down. But at the same time, your fingers must stay strong and curb to counter that downward dropping action that your risk is dropping down. Okay. To do this many times for all thing is because this action is extremely important to develop as a foundation for many other advanced techniques in the future. So let's try it for now. Say the second finger for right hand for us. Appear first. Keep all the fingers curved the hallway and then truck drunk. Drop. Tried the left out of second thing up. Truck Stop the wrists Drug there is keeping your fingers killed away. Now try the fourth finger. The left hand drop in curved Try the other hand. Right hand forefinger, dropping curved, dropping kids. Lastly, the 15 there's a bit more harder to curving and do it, but it's good practice dropping, curved, dropping, right hand dropping, curved trump and curved also. Okay, So finally, I'm gonna briefly tell you the uses and functions off the three foot pedals below the piano . So most electric keyboards only have one pedal. And this is the pedal on the furthest right on a riel standard piano as what you're doing right now. So this is cord, the sustaining pedal and the word sustain means to hold on make longer when you press into a note and press into the sustaining pedal with your foot at the same time. Then, while escaping your foot pedal still held down the hallway, release your finger off the key that you were pressing. I look no hands. You realize that the note is sustained by this pedal for as long as you hold it until the stream stops vibrating inside your piano. Now, the furthest pedal to the left of your piano is the soft pedal, and it is pretty much self explanatory. When you hold down this panel with your foot, I say hold it down and then you press into a note. It was sound softer than what it normally produces because this pedal shifts the positions off all the hammers inside the piano such that it always hit less off the strings. Okay. Lastly, the middle pedal is caught the practice pedal and it works the same way as a soft pedal. But it is even softer. However, he can push it down and clip it onto the side. Then you let go of your foot so you can actually play extremely softly without needing to press down onto the pedal anymore until you unclip it. Ah, highly. Do not recommend using this pedal unless you are softly practicing your fingers without wanting to disturb the people around you because the sound is extremely distorted and muffled when it is in use. Okay, My final word of advice is do not even bother touching these pedals for now because number one master the coordination in both your hands and oil fingers first before you add the feeding to avoid confusion and number two, there is actually a proper form and method on how to use the sustaining and soft pedal and that is covered in my later advanced courses. So please don't be silly on developed a bad habit and using it incorrectly before I even teach it to you later.
11. Exercise 5: guys, this is a milestone music. And here are some things that you can apply and practice to become a better musician. So remember to pause the video after each exercise to try it out for yourself. Okay, so a lot of people remain as amateur musicians for a long time because they cannot properly controlled differences between loud and soft bullion. So the sound of the produce is very monotonous. Just like in public speaking, there are, like some people like talking like this. Hello. My name is Bob, and my argument today is going to be like, That's very boring and not interesting at all to listen like in class. Maybe you were just so no. And just like maybe do something else. Yeah, so you don't be like that. And obviously you don't want to be like that in pianos. So here are some exercises which trains your ability to control your fingers too nicely. Produce loud. And SoftKey's scoffs soft sounds. I mean, at your own will when pressing into the keys. Okay. It's the number one play C D E f dream up and down loudly, keeping the same volume for every night. Okay. Like you see, meaning that some notes shouldn't be louder or softer and the other so not like this Sounds like some limping person. Okay, so firstly, let's try it for our left hand like this, just do it continuously keeping oil fingers strong and curved on more times lower but not forcefully hitting the keys. What forcibly hitting the keys mean? It is just like that's hitting the case. You don't want to do that or you still want to keep a curved and the nice hand shape that we learned. Okay, then let's try it for our right hand. But this way. Okay, so really feel the pressure on your fingers pressing into the key. That is what you want to do. You don't want to just hit it. Okay, so number two now play C d e f g up and down softly, keeping the same bolding for every notes like something like this, meaning that some notes shouldn't be louder or softer than the other Demonstrate before that. But be very careful for this one and pressed down hke Fully because you do not want any blank notes to happen like these which happens by present you softly look. Oh, I got that one like that. No. Like this. Okay, pressing into it, but no sounds coming out. You don't want any help that to happen, Okay? So instead, let's firstly try it for your left temp like this? Yeah. Okay. So even though it is soft, that's what you heard. Or your fingers just still be strong and curved, okay? At all times, for great control. And they should not be brushing the keys like this. None of this. This is even though it's soft, but it's wrong technique, and you won't be able to play like this later for processing. Wait, brushing facet. It's just random rhythm. And you don't want that to happen. Okay? So instead, try like this. Okay, then let's try it for your right hand like this. Okay, now number three. Yes. It is great to be able to play loudly and softly separately, but it is more important to be able to change from lab to soft in a very controlled manner . So this next exercise would be going up and down C d E f g once loudly, then repeat, but continue the next one software, then alternate. Teoh loudly again. On alternate softly, Lally. Okay, so now let's just try it for our left hand like this. Loud. Soft. Now soft down soft. You should really check. Like you can really feel the change in pressure and your fingers because, like changing from little pressure for soft notes to a lot of pressure for loudness. Okay. And then let's try file right hand like this. Now soft, soft, soft. Okay. Another thing is for the loud keys. You should really feel that your forearm and also your tricep, like, really just kind of, like, correct using strength. And what's it like? Just flexing your muscle? Because, like, you want to put the force in your whole arm so that you can actually play it louder, because only your thing is alone cannot produce a very loud
12. The One Trick To Play Faster, Smoother & Clearer: Hello, guys. This is a milestone music, and in today's lesson, I'm gonna go through one of the most important basics for piano playing. And this is piano fingering things. So you may ask, What are piano fingering finger rings? About which fingers are the best and most optimal to use when playing it is the secret to the advance piano players. You see how they seemingly glide all over the piano while still keeping everything sounding very smooth despite the fact that they only have 10 fingers. Okay, speaking off fingers, piano fingering are labeled as numbers being the same for both fence, with one being the thumb to being the index finger, three being the middle finger, four being the fourth and ring finger and five being the fifth and the pinkie little finger to make sure that you learn this properly because mastering good fingering is the one secret to massively increase your skills in playing smoother, clearer and also faster. Let me show you what I mean. I'll play two of the same lines on I want you to tell me which one is smoother. Okay, so number one Okay, Number two, I think the answer that should be pretty obvious option to was not only smoother, but it was also a lot more easier to play faster than option number one wish. I really actually tried very hard to play really fast as well for number one. So now here are my top three Golden rules for you to remember about piano fingering Number one. Avoid using the same thing. Go repeatedly across different notes when you have better alternatives. So don't do what I just did using the same finger. Same phone booth. Yeah, don't do any of that, and it's hard to actually hit the right note as well. Saw maybe sometimes nearly slipped on some of the notes. So here is number two include oil fingers when you're playing, because this makes the movement of the hand and the sound that you produce much mawr smooth . For example, Follow me. Let's play the basic say position, going up and going down, using the best fingering for your right hand. In this case, first finger starting on sick. Second thing got on D third finger on E forefinger on F on fifth Finger J and back down for finger on F their finger on E second thing on D on first finger on C. Now for your left hand, you'll be fifth finger starting on C four thing on D third finger on E. Second finger on F first finger on G on back down. Second finger on F 13 gone. E forefinger on D on fifth finger on sick. Try this a few times for yourself on each hand. A sit it would take to actually some time to develop this good habit into using or your fingers because we don't normally do this a real life. Okay, in the next lesson, I'll be teaching you the core turning hand trick that you saw in some of the advanced demonstrations on piano fingering earlier in this lesson.
13. Exercise 6: Look, guys, this is a milestone music. And here are some things that you can apply and practice to become a better musician. Remember to pause the video after each exercise so that you can try it for yourself. Okay, In order to play good piano, we need to be able to use or five or all fingers with equal strength. In this lesson. There are two song melodies that we are going to go through and play that use or five of our fingers on the same position. Okay, just to recap this position for your left hand, this is the pinky on C four finger on D third finger on a second finger on F Aunt Thumb on G on. Ask for your right head. It is the first thing on C second finger on D. Third thing going 1/4 thing gone F on pinky on g. Okay, So remember the specific notes are corresponding to those specific fingering numbers. And don't try to move out of the sea position and use different fingers. Maybe like this, don't you? It's not even it's not good. Okay? Because you are just tricking yourself into your not only using less fingers, but also wrong technique. And you won't improve later on for harder fingering techniques, stuff like this. Okay, anyway, so the first song is a traditional tune that I can't remember the name on the top of my head anyway, but containing the notes in disorder say C f e f g g g s a t e. Okay. I hope this tune rings a bell to you. Okay. Anyway, check out the notes in the book or wine and write it down if you forgot. But as for now, we are going to start with the right hand like this. Say F e f j T j f e d e a f Okay, let's do it again. Say out the numbers on the fingering whilst we're playing like this one full three full 5 to 543234 Try now. Now let's try it for the left. 10 in a C position like this. So the notes are C F E f g d g f e d e. This may require some coordination because he switched from one hand to the other and might require some thinking is what anyway. But let's do it again. But now we say the numbers on the fingering lost. We're playing it like this. 5 to 3214123432 OK, now we're really working out brain. Anyway, Now, the second song is a catchy pot from a famous Christmas coward cord Jingle Bells containing the notes in this order. So it's a eight threes and then on threes and then a c and we have five efs. 123453 of four. He's e A and then two days day, day and a Okay, so this was a bit longer to check out the notes in the book or why in the video and write it down if you forgot. But as for now, we are going to start with the right hand like this. A a a a a a. This is a Okay, Now let's do it again. But now say out the numbers off finger rings whilst we're playing it like this. Hey, this be a tiny bit of challenge, but you'd be able to do it. Okay. 333 33335123 33332 to 3 to five. Okay. To slow it down if you cannot handle that speed. But as for now, we're now gonna try for our left. 10 in the sea. Position like this of the notes are a a a a a a a C S e a t o. Okay, now let's do it again. Workout brain a bit harder. But now also say the numbers off fingering whilst we're playing it like this. Time to work out a brain. 3333333153 Thio, Thio 2 to 333331 Okay, so make sure you say all the numbers out correctly because that's the point of the exercise to train. You want your thinking for your fingering? Okay. Anyway, so remember to do these two songs that we did today following the fingering, using or five fingers on top in the same position because we don't want to play with one thing like this. There's no point. That's just booting the exercise. Okay, so we actually want to train ability to use all our fingers with the same strength so that the harder events techniques in the future went troubled us at all
14. How To Do The Turning Technique Properly: Hello, guys. This is a milestone music, and in today's lesson, I'll be teaching you a very important hand movement technique that you'll be constantly using as you advance on your piano journey. This is the turning hand technique. When this technique is used correctly with good fingering, it will allow you to play up and down the piano very smoothly despite the fact that you only have five fingers on each hand. So let me show you what I mean. Let's take a look at be left town on the sea position as you recall, this is having your fifth finger on C four finger on D third finger on E second finger on F on first finger on G. Now, since we have no more fingers were to have 1/6 finger. So what do you think we need to do if we want to continue onto a and up the piano smoothly ? Okay, So do you keep using your thumb to go up like this? No, because it is not smooth. And as you may recall, one of the Golden rule says that you shouldn't use the same finger repetitive Lee. Okay, how about do you jump onto a with your fifth finger and continue on like this? No, because there is too big off a hand movement and is very risky to hit the wrong note, and that the sudden jerky movement will also cause an unsmiling bump into sound like this eyes like sun loud town, which you don't want it to happen because you want everything to be smooth. So the best way that all the other advanced piano plays do it, and it specifically for this example and also many other future examples, is the turning hand technique like this. Don't worry. If you didn't catch that, I'll be teaching you very slowly and showing you exactly how it works for both hands right now. So there are two versions off this turning hand technique that you'll keep seeing it being used again and again for this technique. Not only that, the movement on the Left 10 is slightly different to the right hand, but it is also different when going up as to going down. So to avoid confusion, let's just start with what we use Elia in the lesson, which is the left 10. Okay, The first version is called the 13 turn, also known as the thumb to middle finger turn. And this is the one that you actually saw in the same position demonstration earlier in this lesson, if you actually caught it. So right now, I want you to practice this turn, starting with your third finger on your left hand on E second thing going, If first finger g on look and listen very carefully. Now, keep your thumb held down as a pivot point that only your hand, your risk, your third finger and all your other fingers should all move to the right off the piano, allowing your third finger to turn over your thumb. Only when your third finger reaches impresses onto the next key is when you should actually let go of your thumb and then you move back your whole hand into normal position again. In this case, it is a okay, see or into non position. Now, after that, I want you to finish with your second thing. Go on being then we go back down. We have third finger on a on right now we do the reverse keeping your third finger held down as a pivot point made the hand and wrist to the left of the piano, allowing a thumb to turn under your third finger, and only when your thumb presses on to the next key is when you should let go your third finger to move your whole hand back to the normal position again. And in this case it is G. Then your second thing got on death on third finger, honey, no practice. This and all the upcoming example was a few times because you must master this technique to do many more advanced tricks in the future. Okay, the second version is the 14 turn, also known as the thumb to ring finger 10. For this turn, I want you to start practicing by going on your third finger on a second finger on B first finger see on similar to our 13 turn, but a little bit different this time because stretches bigger. Why was keeping your thumb held down? As a pivot point, we retain our hand and risk to the right of the piano, allowing your forefinger to turn over your thumb. And when you press on to day with your forefinger, that is when you move your whole hand back into the normal position again like that. And now we finish on your third finger at the top on E. Now we go back down with the forefinger on D in our thumb, Turn under your forefinger onto C second finger on be on, finishing with the third finger on a after you have mastered the left hand. The right hand has actually the same concept, but has everything actually reversed? This means that you turn under when you're going up the piano and you turn over when you're going down. Piana. So let's practice with 13 Turn for the right hand, starting with your second finger on ding third finger on a and after this return Ah, thumb underneath the third finger onto F Theun second finger on G third finger, but a back down second oncology first finger on if third finger turns over your Thor Monte E and then finish with your second thing going on. Finally, as practice with 14 turn for the right hand, starting with your third finger on a forefinger on B and turn your thumb under your forefinger and reach on to see. Then the second thing on D third finger on a on going back down, second finger on D first finger on sea on 10. Your fourth finger over your thumb reaching to be on finished with your third finger on a thing.
15. Exercise 7: Hello guys. This is a one stone music and here are some things that you can apply and practice to become a better musician. So remember to pause the video after each exercise to try it out for yourself. In this lesson, you are going to learn your first type off finger exercise drill that you will be doing in many, many more variations of these in different keys and the such in the future. And these drills accord scales. For this lesson, there is only one scale that I specifically pick for you called the C major scale. Because not only that, this is the easiest scale, but this also implements both the thumb to third finger turn Onda also a thumb to forefinger turn in one single scale excites awesome, Right? To make this a little easier, we are only going to do the scale ascending, which means going up only Okay, In order to have both type of turns in the scale, we are going to play the scale for two actives. And since C Major has no black notes, this means that we start on sea on There we go up the white notes to the next. See that being one octave CTC's one elective. And then we'd go up another set of white nose onto the next seat, being too actives because there are two more seasons after that. Okay, if you didn't understand that, that's okay. Before we do the scale with proper fingering here other notes. So C d E f g babe a scene that's one active in a d e f g a B C two octaves. Okay, so number one Now that you know, the notes here are the finger rings off the C major too. Active scale for the left hand starting on five on 433 being the left 10 ascending Once return where you turn your third finger over your thumb on to the next night on then too one and then full being the left 10 ascending one full turn where you turn your forefinger over your fun on to the next night in the three to one and then three being the left and ascending 13 Turn again like this over to one, which is double the skill. Okay, let's do the whole scale again. A little foster with the number finger rings set out loud like this. 53232143213 Teoh. Okay, Number two. As you may have guessed, we're now going to do the right hand burden paying close attention to where the turns are because they're located at different positions than the left. 10 starting on 123 and then one being the right hand ascending once return where you turn your first finger under your third finger like this on to the next night. Three on and then one being the right hand ascending 1 14 Will you turn your first finger under but no. Onto the next night like this. And then 23 And then one being the right hand of sending 13 Turn again. This under. Okay. And then 234 and then Fine, Which is top of the scale. So let's do the whole scale again. A little foster with numbered fingering set out now like this. 123345 Okay, to remember to say out the finger rings out loud because this is the main purpose off this lesson. To be able to know what fingering is depressed for the left and on the right hand. When we're turning
16. Understanding Rhythmic Meter, Time Signature & Bars Made Simple: Hello, guys. This is a most all music and in today's lesson, I'm going to introduce you to what I think, in my opinion and to my experience on one of the most important element to all music will that you are playing any instrument singing, composing or even listening to music. Maybe some of you may have guessed it. This is the concept off rhythm. Okay, so rhythm is the time that a note is played in relation to all the other notes around it. Okay, you might have some questions, but just remember this following favorite quote of mine feel the rhythm where I can actually teach you everything that you need to know from basic to advanced on the essentials off quit the rhythm. But after that, you were more importantly, need to quote, feel it to truly monster it. Okay. Firstly, when it comes to rhythm in music, we must begin by talking about musical beats. An easy way to understand the concept of beats is to steady, strong posters that you feel when you're listening to a catchy song and it makes you naturally clap your hands, have your feet and even head Bob to it. However, simply feeling the big cannot turn you into an advanced musician. In order to know how to measure the time that notice played, we must learn how to count and group up those beats in music. This concept off measuring counting and grouping off the beats is known as Mita. Okay, so Mehta is notated at the beginning of a composition with something called a time signature. And a time signature basically tells you how Maney beats are in each group. Okay, To avoid you from getting lost in all that jargon, let me go through an example of that recaps everything that we have just learned. Okay, here we have the most common meter off the time Signature 44 which in most basic terms for now means four beats per bar in music a bar. It's the division between each group of beats that we count as required by the time signature, and each bar is separated with a vertical bar line. In this case, we count one to 34 one to 34 one to three full one to 34 etcetera. To take note, you don't continue counting to 5678 after the first bar because the bar line tells you to reset the counting according to the time signature. In this case, we reset after counting to four and on cycle again from one. There are other time signatures that are frequently used the music, But I would not go into them in this lesson because I need you to master everything in this lesson. First. Without these basics, you would just make your life a lot more harder when we learn about the advance rhythm Parents on Subdivision of Beats on a lot More Anyway, here is a checklist for you to revise for on this lesson. No, but one Bates of a steady, strong posters that you feel Number two, you must count and group up debates in music number three. This is known as Mita and time signature, with time signature telling you how many beats are in this group before the most common time Signature is 44 which means four beats per group get number five. Each group of beats is called bars, where each bar is counted in numbers. According to the time signature number six. Each bar is divided by a bar line, and this indicates that we re start out counting after H bar line
17. Exercise 8: Look, guys, this is a milestone music. And here are some things that you can apply and practice to become a better musician. So remember to pause the video after each exercise to try it out for yourself. Okay, so in today's lesson, we are going to practice. Really make counting, because this is one off the most important element in music that I always always strips. Okay, Many people get so overwhelmed by playing both hands when they just think of two hands, they're like, no so scared. I'm gonna stuff up or something. Or maybe that reading sheet music at the same time. So they're constantly looking up and down or looking up and down so they completely ignore the most important counting and river. Okay, so this is the reason why I need to train you the proper way so you won't fall into the same trap as there's many, many other people who do this incorrectly. Okay, By the end of this, you should be able to multi task by playing piano notes while counting out now like 12341234 etcetera, and feeling the steady beat with another body action like tapping a leg clicking or not in your head? Yes, it is kind of like head banging and rock music. So anyway, number one, let's start off easy by just counting out loud repeating Lee in the time off. 44 like this one to three full one to three full, one to three full, one to three for keeping in mind that all the counts are as equal and as evenly spaced in duration as possible. So not randomly, faster and slower like this. One, 23412341234 to none of that. OK, but very even like this one to drink full one to three full, one to three. So one to three four. Okay, so number two now keeping everything the same in number one. Let's add in a body action, let's say, slapping your leg with your left hand on each count. OK? So as you can't see my head on the camera for this lesson, I'll just tap the piano like this. Okay, so like this, you want to count and say the numbers out as what? Intact? Okay, one to three. Cool. One to three full one to three. Cool one to three. So remember, everything is even. And the taps must match the counted number beats So the taps shouldn't be before or after your verbal counts. So it is not like this. 1234 Yeah, this type of stuff is bad. You must count on beats very on big like this One to three. Cool one to three. Cool. One to three. Oh, one to three. So it's all in one. Okay, so number three OK, so the multi tart a little escalates. And now keeping everything the same in number one and number two. I want you to use your right hand to play. Couto going up and back down as well. F a day six a. Repeat the F at the top while still matching those notes equally with a steady available count and body action like this. Okay, ready? 1231 Thio Thio. Make sure all those three actions are fully aligned up onto the same big because this is the main Fergus office exercise. Okay, so one more time and continue for longer until your mind has entire control over the musical multi tasks like this 123123 You can increase the speed, but you must be able to have all three of those exercise sink together like this. Okay. Hope you succeeded in that multi task exercises.
18. How To Properly Count The Most Common Noteheads In Under 10 Minutes: Hello, guys. This is a most all music, so after that you have learned the basics off counting beats in the common meter off 44 In the previous lessons, I am now going to teach you the three basic note lengths that I use here and there in music . So basically different note links indicate the specific amount of time that you hold the note down. And these differences are represented through the different symbols that you will learn throughout the courses. For the best of this lesson, we will do everything in the common time off. 44 The first note length that you will learn about is called a whole note, also known as a semi breathe. This kind of looks like an open circle, and these open circles are worth four counts. So if we put these notes one after the other in the context off 44 there will be one off this notes per bar because it takes up the 44 counts in each bar. And since there are no specific ations on what note to play, as I haven't taught you yet that supply all these note legs counting concepts on the Sea Key for this lesson. So these whole notes Emery's will be played and counted like this. 1234 1234 123 Full 12 three Full to take Note all of the secrets that only pressed down in the first count of each bar. Okay, the second note length that you will learn about is court. 1/2 note wasn't known as a minute, and these ones look similar to the previous blood. Very brief, like the open circle, but with an extra stem added to it. And these open circles of a stem are worth two counts, which is half the valley off the semi brief. So if we put these notes one after the other in the context off for four, there will be two of these notes per bar because two times to make up the full four counts in each bar. Yes, there is mathematics in music, and here is a potential reason on why some people say that there is some kind of common correlation in being good in both mathematics and music. Yes, anyway, these half note minimums would be played encountered like this, taking note that you hold Ishmael him down for two counts. Okay, so 12 34123412 34 12 three Full. Okay, Now, the third note length that you will learn about is cord. 1/4 wasn't known as a crutch. It and these ones look similar to the minimums in the previous, like the open circle of a stem, but with the inside of the circled colored in and these filled in circles with stems are worth one camp, which is half the value off that minimum. So if we put these notes one after the other in the context of 44 there will be four of these notes per bar because four times one make up the 44 counts in each. But so these quarter, no crutch, it's would be played and counted like this. One, 23412341234123 Now that you know, or these three basic note lengths, some of you may be very creative or mathematical and may have already be thinking about possible combinations. Okay, So, apart from the ones talking, this lesson you may have got these possibilities. Okay, so you may have got to crutches. Followed by one minute like this. 1234 Or maybe one minute, followed by two Clutch. It's like this 123 or maybe one crutch. It followed by one minute and followed by one crutch. It like this. 1234 Okay, so if you thought off any of these combinations than you are on the right track, these combinations allow songs to sound like the way that they're meant to sound. Let me give you an example. I want you to play these set of notes and this following order a d c d a a a d d d a j g e d c d e a d d e a d See all of these with no proper accounting. So, for example, just do it in all crutch. It's so like this. So you can sort of pick out that this song is Mary had a little lamb, but it doesn't really sound right, doesn't it is because the rhythm is wrong. But if you play in the correct rhythm with the note length combinations as shown above 123412341234123412341234123 12 34 See then it would sound a lot better and recognizable because you have fulfilled not only the correct notes but also applied Good rhythm. The reason why I said to you you did good rhythm and not perfect will be explained in the next lesson way. I'm going to show you exactly how you can achieve near perfect rhythm with a specific tool that will be your best friend for the rest of your music journey.
19. Exercise 9: Look, guys, this is a most all music And here are some things that you can apply and practice to become a better musician. Okay, remember to pause the video after each exercise to try it out for yourself. Okay, Now that you have learned, the individual differences between how many counts is in a semi brave being full counts and how many councils in a minimum being two counts and how many counters in a crutch, it being one count. It is also very, very important to know how to play and count them when they are mixed up one after the other. Because these rhythm it combination parents are used again and again in many songs that you actually hear on the radio or anyway else. So another one keeping out multi task game up where we need to count out loud on 234 while is tapping the beat out. Yeah, I want you to play this following rhythmic pattern repeatedly on the Seiki Middle Seiki, where there is the first bar off one semi brief, which is a full bar. Four counts followed by a second bar off two minutes, which is two counts each and followed by the third bar off. Four crutches being one count each. Okay, then repeat from the start. Okay, so let's firstly do it for your left hand like this. Use the 15 gunplay, the Seiki. Ready and right hand to tap. Okay. 12 three, four. 1234 one to repeat. 12 full. One C 3412312 three. 12 three, one To repeat. 12 three, 12 Okay. Were to exaggerate Xetra. Okay, so make sure all of those things are combined and as one. Okay, now let's do it for your right hand. Like it's because the right hand first finger thumb on C and then you're left. How will be tabling OK, so 12 three. So 12 3412 Repeat, 12 three, 4123412 Day. Repeat, 12 three for 1 to 4124 Repeat, 12 three, 1 to 1 To exaggerate. Set up. Okay. That multi task level is pretty hard. But when you get it, nothing would be even harder than that. I guarantee if you can count Very good. Your ground foundations. Very well. And later on, everything would seem so easy for you. Okay, Anyway, it's a number two. Here we do the following three bars, off structure and minimum combinations. Repeatedly. Where the first bar is One minute, followed by to crunch. It's the second bar is one coach. It followed by one minute, followed by one Cratchit. And the third bar is to crotch. It's followed by one minute. And then you repeat those three bars from the stuff. Okay, so let's do it. Firstly, without left hand on the Seiki like this case, right? How will be tapping 12 12341234 Repeat, 1231231234 Feet. 12 12341234 people. 121231234 Exaggerate, etcetera. Okay, this is in a bit hot out because every bar is kind of different within as what? Okay, then let's do our right hand. So right hand were first, we're going to see again. And the left hand tapping this time. Ready? Okay. 123123412341234123412 34 People. 123412341234 People most on 0.234123412 34 Exactly, etcetera. Okay, so make sure you focus on making or the counts as equal and as even as possible, because we're trying to count the beats as perfectly as humanly possible.
20. How To Develop A Near-Perfect Counting System: Hello, guys. This is a most all music. And in today's lesson, I'm gonna teach you exactly how to develop a near perfect really Mick counting system using a tool that will be your best friend for the rest of your music journey. And this awesome to is called the Metro. In the previous lessons, we learned how to count beats and hold notes for specific note legs. But the problem is, each of the beats that we have attempted counting is not consistent. For example, if I asked you to count 1234 slowly and evenly, meaning that all accounts are the same length. Some of you may face these following problems. Okay, so, problem on the one. Some of the accounts maybe a fraction of a second longer or shorter than each other like this. One, 23 four. Okay, so this is normal for anyone. He has just started music because they would need to take a while to develop a strong sense of counting. Because you don't normally count like this anywhere else. In real life, it's a problem. Number two, I said, count slowly, but you actually don't know how slow do I mean for quote slowly, you may ask, Does his main one second each beat consular, or maybe two seconds per be, Or maybe 2.5 seconds, 2.4 seconds each beat. Okay, so you can say that this is actually very ambiguous because without any guidance, we would need to imagine and feel the beat. But how can we actually imagine and feel the bait when we don't even have any reference to an ideal and near perfect sense off beat? This is the same as telling a painter who has never seen you in real life or senior picture before. To paint a realistic portrait of you without any reference doesn't work, does it? There is no magic to develop a concept from nothing, but luckily, the Metrodome will be a rhythmic reference. A Metrodome is a device for musicians that provides a fixed regular ticking bit. Whether length off each fixed beat can be varied by adjusting the speed function on the metro, which is measured in beats per minute, also known as bpm. Very simple. The lower the BPM number, the less number of beats per minute, which means the slower the speed and vice versa. The higher the BPM number, the more number of beats per minute. Which means the faster the speed. Now, before I teach you how to use the Metrodome to improve your rhythm and counting skills, let me tell you where you can actually get one of these if you don't already have one. So there are two physical metro names that you can get in any music store. Okay, Option number one is a wind up mechanical block that has the clock like ticking stick. And yes, that is the same type as my penguin Metrodome that you see in or my piano covers. Okay, so option number two is a digital Metrodome that runs on batteries and has an electronic clicking or would block kind of sound for the beat. If you don't have any of these yet, I have a few free alternatives for you to temporarily use free option. Number one is Metrodome online dot com For you to use whenever you have Internet access free option number two is the Metrodome inside the GarageBand app that comes free with any apple IOS phone, tablet or computer. I use this when I'm outside or at a music school station because it's very handy. You can bring a phone along with you. And if not, you can just search the term Metro on your smartphones app store. And I'm pretty sure that you can find one that is usable. Okay, Another free option is the inbuilt match known function for some of you who have an electronic keyboard. Okay, so have a play around with the mesh name. If you already have one by setting a relatively slow speed or around 40 to 60 bpm, then listen. Feel and anticipate each tick by trying to match each beat with the body action such as head noting clapping your hands tapping your foot. Yeah, my final word over vices. Do not look at the ticking movement off your mention it because we want you to develop your musical ear for river and not your ability to be hypnotized from your eyes. Looking at the pendulum movement off the ticking metronome
21. Exercise 10: Look, guys, this is a milestone music. And here are some things that you can apply and practice to become a better musician. Remember to pause the video after each exercise to try it out for yourself. So similar to the previous counting exercise, this lesson would have our additional handy tour, which is the mentioning helping us to perfect our training in achieving a near perfect counting system. Okay, so this time we don't really have to tap our hands because the Metro is pretty much tapping for us. Right? Number one, Let's set the Metrodome to a moderate bpm off. Let's say 80. Okay, then wanted to play and count four bars off. Four semi breathes on the Seiki. Let's do it for the left hand first. So I said it. Okay, what I'm doing right now before you start anything with the mesh. Oh, you don't want to start instantly. You want to listen for the 1st 2 parts. 1234123 and and stuff. 1234123123 41234 Okay, let's turn it off a bit. Then let's do it for the right hand like this. I got a right hand thumb. Let's turn it on again. Listen to the festivals. It's got 123! 12341231234 Get set off. Okay, you can pretty much see that my left hand is kind of like conducting because I'm actually tapping the air instead of tapping something. So this is a good tour to use. If you don't want to do this year, bob your head. Anything you'll work because if your body feels the music, you will be able to play the music, That's what. OK, so let's go on Number two. Let's then keep the same speed on the mesh name off 80 beats per minute, 80 bpm then and play and count four bars off to minimums in each bar on the Seiki. So, firstly, for the left hand like this turned on to mention again, listen to the to Buzz. 341234123412341234 Exaggerate, etcetera. OK, so make sure that your minimum is always under first speeds. And also on the third bit offish four note count. Yeah. Okay, then let's do it for the right hand. Like this. Turn it on. First, you Buzz! Stop! 1234123412341234 Okay, Tenet health. Okay, so number three keeping the same speed on the Metrodome off 80 bpm. Then play and count four bars off four crotches in each bar on the Seiki. So, firstly, start with the left hand like this. Turn on the merchandise. Count the bones. 34121231231234 etcetera. Okay, so let's go to the right hand like this jumps right into it. One to stop. 1212123123 Okay, enough now. Number four. Mixing it up. Now, just like the previous lessons. Excises. I want you to play this following rhythmic pattern repeatedly on the Seiki where the first bar off. One semi brave, followed by the second bar off to minimums as you remember. And then followed by the third bar off full crutches. And then you repeat these three bars from the start with the BPM off a so Let's firstly do it for the left hand. Turn on the match name like this account before you start. 1234 1234 Repeat, 123412341234 b, 12 12341234 Movie 1 to 412 for one to exaggerate, etcetera. Okay, now for your right hand. So like this. So listen to measure them again, buddy. What to forget? 12 412341212 4123412 Repeat, 12 day 412 341234123 Corby, 1 to 41 to exaggerate Xetra! Okay, so to keep repeating If you can't really get it and make sure it's always kind of smooth. Let's turn this special or if it's a bit annoy. Okay, so make sure you keep everything smooth. And other counting is as accurate as possible to the mission home because we always have some human era like we can't be perfect. So that's why we rely on something to make us near perfect, which is the mentioning Okay, Cinema five. Finally. Here we do the following three bars off Cratchit and minimum combinations repeatedly, where the first bar is. One minute, followed by two crutch. It's and then the second bar is one. Cratchit followed by one minute and then followed by one crutch it and then the third bar is to clutch. It's followed by one minute, and then you repeat it from Start with a BPM off 80. Okay, firstly, with your left hand like this. Not to mention it again. Count the first few bars, but to okay. 12312341234122341234 of it. 12 12341234 Repeat, 123412341234 Etcetera, etcetera. OK, then let's go straight into the right hand like this with your thumb on. C may count. The three bars start one. Teoh 1234123412 But 23412 3412 123 But 234 to 12341234 Exactly, Etcetera, if you want to continue. Okay. So let's turn this off. Okay, So for this lesson, make sure that your focus on making all the counts as equal and as even as possible by matching the counts with your ear, listening to the ideal perfect beats set by the ministry.
22. How To Read Sheet Music Made Easy (Part 1): Hello, guys. This is a most all music, and in today's lesson, I'm gonna teach you the part one off all my best tricks for reading sheet music so that you have one less problem to worry about, and you can actually focus more on playing the rial music. So take note. I agree that sheet music is the best tool for learning traditional art music, which are songs mostly from the 16 hundreds to 19 hundreds like bark, Beethoven, Moser and Chopin. I think this is because it requires you to play exactly what the composer wants in order to respect and preserve the arts originality. However, I do not use sheet music for my everyday piano covers on the modern songs I do on YouTube, in fact, or the 600 plus songs are posted onto YouTube or use my advance handwritten templates like this, which I would not go through today anyway, I only utilize sheet music as a secondary tour for two main things in my playing by ear and improvisational courses that I teach number one. It allows you to understand the note patterns on the piano a lot better. Number two it is a great tool to help you learn advance rhythmic patterns that you can use in your improvisational playing later. Okay, so let's get started. Once upon a time, near the 13 hundreds to the 14 hundreds, musical notes off a song were written down onto manuscripts sheets so that any instrument can play it using this universal sheet in order to tell which note is which. The notes were assembled into a Siri's off 11 lines with spaces in between them, and this fancy thing was called The Grand stuff. The line in the middle represents the middle C, so even note was placed in that line. Then you have to play the middle C on the piano back then to help people know where the middle C is. There was also an indicator sign at the beginning off the staff cord, the sea cliff that points to the middle C or the other notes for into place in order off the musical alphabet. Okay, so just remember these following two things. Number one remember going up the staff means to pitch. All the notes are going up, too, which means that you're going up the piano to your right and vice versa. Going down the staff means the pitch of the notes are also going down to, which means that you're going down to the piano on your left. Okay, Number two. Remember to always alternate from counting from line, followed by space to line to space, etcetera. When you're ascending the musical alphabet, for example, middle C is on the line. So by ascending the musical alphabet and going up to the space just above that line would be D and the line that caps that previous space would then be etcetera, etcetera, etcetera. Now that you remembered those two handy tips, I would have finished off this lesson by giving you my best trick to know or the notes in this grand stuff. Okay, say G B D, followed by spelling face very quickly and repeating Lee for me as if you are actually saying Djibouti face Djibouti, face Djibouti, face as a tongue twister but spelling out the letters whenever it is time to say face of F A C in this pattern. So repeat with me, say G b d Ben's bill face F a ce, then just practice going faster and faster and keep repeating it just like this G b d f A c e g b d f A c e g b d f a c e g b d f A c etcetera. The reason why I told you to do this is because this is actually the easy secret code for reading or the lines off the grand staff from the lowest to the highest look from the bottom line. Okay, so we have G B thing after e it just goes back to G B de and then f at the top line. But wait, this actually works for or the spaces to since you know that the space after lowest line from G is followed by a as according to the musical alphabet, take a look at this. Continue spelling face from the letter A. Then you see that the next base is see on then next bases E bond. We just repeat the cycle. Everything cycles against Jim B. D. F A. C and A a two very top space. Super easy, right? Okay. In the next lesson, I will show you how this grand staff is adapted specifically for the keyboard instruments. A few 100 years later, which also eventually became what we use in the modern day sheet music. Now
23. Exercise 11: Look, guys, this is a milestone music. And here are some things that you can apply and practice to become a better musician. Remember to pause the video after each exercise to try it out for yourself. Here are some exercises that trains your ability to visualize what you have learned about the 11 line grand staff in your head into the practical side off where those lines and space actually cross bonds to on the piano keys as what you see and what you touch. Okay, so before we stop, every exercise revolves on the trick that I've told you before to memorize, which is the jib d face trick. So let's say it out loud a few times. First Djibouti, face Djibouti Face Jiminy Face Djibouti, Face Judy face. Okay, Now spell the letters properly where Djibouti is G B, D and face is F A C E. So the problem order is G B D F A C E g B D F A c e g b D f A c e g b D f A c e. Okay, once that is nail right into your head. Let's begin number one. In this exercise, we are going to count or the lines from the lowest line at the bottom to the top. OK, so, as you know, there are 11 lines in total. And the first line at the bottom is G as a record from the Djibouti face trick. But which Jesus? No problem. I will tell you right now it is the G that is mawr than one octave below middle C. So here's what I mean, Middle c is here. So go find your middle c on your piano, and then we go down to the sea. Okay, So what I wanted below to see is this. And then that g that you want to know is the G below that. See? So not this one, but this one. But this man s thing. This is the G on the lowest light to familiarize yourself with this view. So this is middle C on. This is the G, the lowest line. Remember this. Okay, Now, for each note, I want you to say the letter name and play, then say the number. So you know which note you are up to in the total off 11 lines. So starting with the first note. G. I just taught you it is the first light. Before we continue up the Djibouti face cycle, let me give you an awesome pattern trick that helps you blitz through these notes on all these lines. OK, the trick is that every next line note is worked out by skipping the next white key on the piano like this. Here's what I mean. So this is Gina. First way Skip the next white note on. Then we go into this next white knight, which is B, which is the second night in the line cycle. Okay, continue this trick. We have skipped. It's not deep. Three skip look F for a five skippers. No c six skippers. No e seven Thailand. It as that was the end off the G B D f A c E cycle. Because that was the letter e continuing this trick. We just need to restart the cycle. Okay, so we restart from Skip this note to G, which is the eighth note. Ok, skip this nut, be nine, skip this not D test, and then skip this note, which is f where she is the 11th and the highest line note because we know there are 11 lights. OK, now that we know that we need to stop right after the second incomplete G B D F A c E cycle right when it tries to spell out the word face for the second time as the letter f being the note on the highest line, we can now do it faster without counting the numbers like this. Remember, this is the G were stopped because the middle c active g wait Do like this now So g using tricks being dio see e g t remembering the tricks. Okay, so basically we could combine a lot of tricks. Together. We combine the Djibouti face cycle thing and we combine the skip no trick. So let's try a few more times because your ability to read sheet music or manuscript quickly is determined by how fast you can match this trick with all the other tricks physically on your piano keys. Okay, two more times, but faster G variety. So number two the same trick where we skip one Wittner to get to the next line as what we learned previously also works for the notes in the 10 spaces from bottom to top, but just that we start on the letter A because we know that one night above the lowest line G yeah, is a according to the musical alphabet. So here goes. There's a one C two three men. That's the end of the cycle, because e. R A much a B D F a c c end of cycle. So we restart the cycle on to skip No G four be 56 F seven a eight Skip C nine skip E 10 which is the highest space, the top because there are 10 spaces. Okay, now that we know that after the first mini cycle off a sing then fully completes 14 cycle off the tee, ending at the on the top space, we can now do it faster without counting. The numbers like this year is not cycle. Get two more times, but faster
24. How To Read Sheet Music Made Easy (Part 2): Hello, guys. This is a most all music, and in today's lesson it is part to continuing on from where I will show you how the universal grand staff from the 13 hundreds that you learn in the previous lesson is then eventually adapted specifically for the piano and keyboard instruments a few 100 years later, which is also what piano sheet music looks like now. So let's get started. As the years went by, there were two main problems that piano players faced when reading sheet music. Using the universal Grand Stuff Problem number one people realized that the Piano Instruments ability to play multiple of notes at once made interpreting sheet music a lot harder because the manuscript became very messily written as multiple of notes are stacked on top of each other, Problem number two. Additionally, people would notice that it can be also very confusing to know which hand plays what note marked on the 11 line grand stuff, so eventually to fix these problems. While it's keeping everything still the same, the Grand Staffs Middle C line and Sea Cliff is deleted, and now the grand staff is then split into two equal five line assortments, where in the most cases, the top five lines represent the higher half of the piano to the right, which is played by the right hand on the bottom. Five lines represent the lower half off the piano to the left, which is played by the left 10. And since the sea cliff is gone, there are now two new cliffs introduced for these two assortments, where the higher five lions are represented by something called Be Trouble. Cliff and the lower five lines are represented by the other club Chord, the bass cliff. Okay, this is super easy to remember, because trouble means high, and the higher notes is always up to the right hand side of the piano and vice versa. The word base, like bass guitar or bass voice, means low, and the lower notes is always down to the left hand side off the piano. Now, you may ask, since the sea lion is gone, what happens to the middle? C. Very good question. The Middle C is actually still there in the same position, but now it is on something called a ledger line. Ledger lines are short. Extra lines draw only with those notes that exceed lower or higher than the standard five lines for trouble or bass clef. So that way, the gym et face trick that I talked previously still applies to all these legend lines To see why this is the case. Firstly, take a look at the notes for the troll clef, including the extra legend lines above and below the standard five lines. Okay, still the same thing. And then the same concept also applies for the bass clef with extra alleged lines above and below the standard five lines. Okay, See, is actually very easy once you know how everything works. So after all these tricks in this two part less and you now know exactly which key out off or the 88 keys on the piano depressing to despite wherever it can be possibly marked on ship music.
25. Exercise 12: Hello, guys. This is a most old music and here are some things that you can apply in practice to become a better musician. Remember to pause the video after each exercise to try it out for yourself. In this lesson, we continue on what we had in the previous Listen where we know all the line notes from the bottom line being G minus a middle C I don't see G right hit then being f here at the top. Okay, so number one, however, to tweak this 11 line grand staff to the newly separated treble and bass clef Grand staff as what we see in modern shape music today, where there are five lines in each to trouble Cliff and five lions in the base cliff, it is actually still similar. Where we have the five lines in the bass player from the bottom to the top as G B D. B is followed by the middle seed elated line off See now on the ledge lined. Then we continue out G B d f A c E cycle. So after the sea middle C, we have a some noticed line in the five lines off the trouble Cliff followed by G E D F five lines on the top line at the top of the treble clef. Okay, so now do it two more times a little bit faster to get used to this tweak. Okay, here we go. Jeanne The ISS the bass clef. Five lines. Then we have the middle saline on. And then we have E g b d f as the trouble clef five lines. OK, so all the time, G b t based Cliff Middle C E T F trouble Cliff. Okay, Number two. Now you be asking what about the other legend line notes, which are through the lines. Okay, very easy. Let's start with the legend line notes above the highest line on the trouble, Cliff. So the highest line on the shovel club is f hit. All you have to do now is continue the G B D f A c E cycle. So that after if is a on the ledger light and then we have C e g b d f A c exaggerates, actually kind of and see my handle the piano, but yeah, using the trick that we learn to the previous lesson where you just skip a note skipping, No skipping note. You can find all of the ledger line notes like that. Okay, Now, under the lowest first line on the bass clef or you got to do is reverse the Jimmy D. F. A. C. Cycle to work out all those legend lines below because you are now counting downwards instead of upwards. OK, note it is even easier if you have the G b d f A c written in front of you because you can actually just read the order backwards. Okay, so following this trip. So we know that the lowest line on the baseball G on below that we know it is and then see and in a on f t b exist, Xetra, you kind of see my hand again because to look OK anyway, number three Now for the spaces. Despite the fact that there are only four spaces each in the trouble and in the bass clef, everything else, including the Legend line concept, works the exact same way. Okay, the four spaces in the bass clef Former lower space is as remember a full of by sea by a restart. The order G fourth space. So we have all spaces here and then just above the A line and just below the middle C line . We have this peanut. Okay, now we move on to the trouble, Cliff. So after the be continuing the cycle we have de, which is just above the middle C line and just below the eel lion in the trouble Cliff. Okay. And after that, we have regular for trouble. Cliff space nuts off at the top. Space he being the highest space. No. Okay, so let's go ahead and do it once more. OK? So the four regular spaces in the base Clough way have be on trouble. Cliff, dear. On that, we have the four regular space notes of Okay, one more time for us and bass clef way be just below middle C way have d on the treble clef just above middle C on four less statements. Okay. Make sure you familiarize yourself with that. Okay, Now number four and similar to what we did for the other ledger line. Notes in exercise number two, we just continue the Jimmy D. F A. C e cycle after the highest space in the trouble. Cliff so after e is the g hanging just above the f line. Okay, then after that, we just use our tricks. We have be see exact kind of see my hand again. And now in the bass clef, we just reverse the cycle off G B d f A c once again. Since we are counting down words so below the lowest space for the bass clef A is then just below the G line. Okay, then is followed by doing the truth. D b see exactly etcetera so low you can't even see my hand. Okay, So make sure you familiarize yourself with all this because once you get it, you can read anything on sheet music.
26. How To Properly Write Out Notehead Tails: other guys. This is a most all music, and in today's lesson, I'm gonna teach you to very useful tricks that I have talked to all of my past students who had made similar mistakes in this very area in order to help you remember how to correctly right out musical notes with stems on ministry paper so that you would never, ever be confused on where to correctly place the stem on a note anymore. So the basic notes that has a stem and that you know of right now is yes, the quarter crutch it note and the half minimum note. So let's begin check number one. Just remember the image of the two letters P d. In lower case, because when the stem is pointing down, the stem is to the left of the note, just like the letter p in lower case. And when the stem is pointing up, the stem is to the right off the note, just like the letter D in lower case. Okay, So trick number two, Whether you were in trouble, Clough or base Cliff, this following trick works exactly the same for both cliffs. Remember this in both five line cliffs the stem off the note is always trying to point to the middle line off the five lines, also known as the third line. What this means is that the stem of any note that is lower than the middle line off the cliff in this case or the notes lower, then the be on the trouble. Cliff and D on the base cliff all points upwards like this, and vice versa. The stem of any note that is higher in the middle line of the clef. In this case, all the notes higher than to be on the trouble. Cliff and D on the bass clef all points downwards like this. The only exception is the very middle note itself for Be on the Trunk, left and D on the bass clef as they can point either upwards or downwards because the stem is on the middle line regardless
27. 2 Simple Tricks To Know ALL Key Signatures: guys, this is a most don't music, and in today's lesson, I'm gonna teach you about the concept off key signatures in musical notation. And then I'll give you four awesome tricks of mine on key signatures which help you easily no, or the major and minor keys without even playing them. Okay, so a kiss nature is a set. Order off shops or a set order off flat symbols place together at the front of age stuff line to indicate the specific major or minor key that the piece of music is in. Hey, key signatures are generally written immediately after the cliff, on every new line and before the time signature, right at the start of the musical piece, just like this in this example. Okay, however, they can also appear again in other parts of a score, notably after a double byline to indicate a key change, which I would go into detail in another lesson anyway, the main purpose is off. A key signature is not only to indicate what Kia pieces in, but it also prevents the over excessive number off flats and sharps placed everywhere in the musical score. In regards to those notes, that need to be marked for that specific key. OK, here is what I mean. For example, here is D flat Major written without any clues in its shell. So with all the flats in place with the notes in front of lips like this d flood, even if G flood a flood a flood see day flood see, based on a flawed, uh, chief, let f Hey, Flood do. Okay, I was going to see It's very messy. And here is D Flat Major, written with a key signature which is placed at the start off Burba. And it has played the exact same way way must need right now. We know that a piece and see major has no sharps or flats in the Keys picture because it contains all white nuts. However, for other keys, just like the d flat major example, without, we just did in this lesson, we don't write the flat in any random position for any Q signature. There is a specific order off Sharps and a specific order of flat that you need to remember . But don't worry. I am now going to tell you my full awesome tricks so that you can easily rember the order of flattened or of shops as lettuce first. Then in the next lesson our teaching how to properly place it on the trouble club and in the base club. Anyway, let's get right to it. Trick number one. Remember the order off the flats as big e a D g cf, where specifically b e a. D spells the word bead. It's the little things that you put around a string bracelet. And then you only need to remember the free flats following it G cf after the word bead. Okay, Trick number two. If you can't remember which is the first flat in the order of flats, then just remember that the symbol of a flat kind of looks like a lower case. Be okay so that you can always remember that B flat is the first flat in the order of flats . Once you remember that, say the be let out. And then trick number one should flow back into your head because the sound off the letter B shall flow into it with the word bead. Okay, so trick number three. If neither of those two tricks helped here is 100% guarantee trick that you can actually remember all of them. OK, so all you need to do is to add 5/2 steps on top of the previous flat to work out the order of flats. So this is how we do it. So we start in B flat plus 5 +12345 If one was 512345 is a flat assed 512345 D flat plus 5 +12345 is G flat plus 5 +12345 This is C flat. Okay. Plus 5 +12345 And this is F flat. Okay, now trick number four. Now, you may be asking Amos, what about the order off shops? Okay. My fourth trick right here is simply reverse the order of flats. And now, boom, You have your order of shops. F c g d E b. Yeah. Can you see it? So make sure you remember all these four tricks, because in the next lesson, I would teach you how to know all the major and minor keys, using the to order off shops and the order of flats that you have just learnt
28. Exercise 14: Look, guys, this is a most all music And here are some things that you can apply and practice to become a better musician. So remember to pause the video after each exercise to try it out for yourself. Here are some useful exercises for you to easily no, the order off flats with the visual aid or piano right in front of you. So the order off flats, as you may recall, is the plus half step method from the first flat being B flat key A. So I taught you previously. The +1234512345812345 d flat. Exaggerate. Exaggerate that one. However, here is a better and easier trick. Specifically using the visual design off white keys on the piano to our advantage number one when in depth on the order of flat. But if you are at a piano, fear not, you can actually work it out simply by looking only at the white notes on the piano. OK, here is what to do. So you go up and skip to white notes in between each white key following the white key be representing the B flat. OK? And you will instantly work out the complete order of flats with the visual aid off the white keys on the piano. So this is what I mean. Check it out to be the 1st 1 Go up, Skip to AKI's, eat up to a two d 02 g. Skip to six. Skip to F That's it. Which is the order off flats being a de gene. See? Awesome. Right. Okay, so I start to get pressing into the case, but try to do it faster. Already being G C. This number two after you have locked into your head this time, don't press into the key. But simply look at the keys using the going up skipped to a trick that we just learned Starting on B and hopefully you can very quickly visualize the order of flats as b e a D j c. If simply by looking at the White Keys without actually pressing into any of the keys. Okay, for this lesson, I'm just gonna point at the keys for the purpose of replicating your thought process and looking at it. So here we go B e to a to do D to G skip to see Let's get to F. Okay, so let's do it once more, but faster. Look at the keys, but don't press B e a T g c. Yes. Okay, now I was three. As you may have guessed, when in doubt on the order of shops. But if you're at a piano, just reverse the skip to white notes trick. And instead of going upwards, we now go downwards from F as the first shop representative and the order of shops. Okay, so let's firstly do it by pressing into the case. Press the what if go down and skipped two Iraqis want to see skip to Gene Skipped to get to a Teoh Skip to there. I lost one, Which is the order off the shops. Look, f c g dio Okay, Awesome! Ok, number four After you have lock that into your head this time, don't press into the key. But simply look at the white keys using the going down Skip to white key trick starting on the F and hopefully you can very quickly visualize the order of shots as f c g d a e b simply by local lackeys without actually pressing into any of the keys. Okay, for this lesson, I'm just gonna point at the keys for the purpose of replicating your thought process in looking at it. Okay, so it's not an F skip to see Skip to G. Get to Dick. Let's get to Hey, Skip to eight. Let's get to and big. Okay, now let's do it once more, but little faster. Look at the keys, but don't press F c J Day A a big
29. How To Use Key Signatures To Work Out ANY Major Or Minor Scale: look, eyes, this is a most or music. And now that we have learned the order of flats B A, D, g, c f and the order off shops F c g d A b in this. Listen, I'm gonna teach you the proper placement off the order off flats and the order off shops on both the trouble on the base cliff. And after that, I'm gonna teach you my useful tricks to work out all the major and minor keys using those two orders. So let's begin. This is the correct placement on the order off flats when writing a key signature for the trouble. Cliff starting on the B flat on the middle line off the five lines. And this is the correct placement on the order of flats when riding a key signature for the base cliff starting on the B flat on the second line from the bottom. Okay, the placement order off flats is the easiest to learn because just remember this following pattern trick that works the same way for both the trouble and the bass clef. It is a capital M shapes zigzag where the b flat. It follows the ultimate pattern off, up, down, up, down, up and down Pretty easy right now. This is the correct placement on the order of shops when writing a key signature for the treble clef starting on the F sharp at the highest line right here. And this is the order placement on the order of the shops when writing a key signature for the bass clef starting on the F sharp at the second highest line right here the placement or off the sharps is a little different to the order of the flats. But just remember my extended W trick that works the same way for both the trouble and the base cliff where it is a capital W letter shaped zigzag where after f sharp, it goes down, up, down, down, up, down. So take note that the two down down in the middle is what I mean by extended, because if you treat the three shops as a game off, join the dots. It is pretty much like an extended line going down. Now Here are my easy to remember tables for you to practice writing out for yourself so that you would know all of the notes from every single major and minor key and the key signatures. This is how it works. The green represents the order of the shops on the order of flats and then the yellow represents the scales that start on a white key, following the same pattern off the respective order off Sharps or the order of flats way. You know that C major and a minor is always at the top of the table with no sharps or flats . Okay, The red represents the scales that start on a Blackie, where you can see that every starts with the same pattern off the respective order off shops or the order of flats after the yellow pattern is completed. But it has a sharp or flat marked after the letter, depending on which table you are in. Now, once you have written out these tables, here are some examples to demonstrate how to use it. Example one say, if you want to find out what be major has you go to the major column and fine be major. You realize it is only in the shop table. Then you match it to the shops column saying that the order stops at a this means that be major has all the shops going up to a shop that being f C G d and a assuming or notes a white at the start to play it or you need to do is replace those five notes F c g d a into blackness thes ones on there. You have the major. Okay, example number two using the same trick. If we want to find C sharp minor, then we know it contains. Or the shops up to the shop that being f c g and dig. Okay, moving one example three. If you want to find f major, then we look at the table again and we see that F major is early in the order of flats table. Then we know it contains all the flats up to be flat, that only being b flat. Then we moved to example for if you want B flat minor, then we know it contains all the flats up to G flat. That being b e A, D and G
30. Exercise 15a: Hello, guys. This is a milestone music, and here are some things that you can apply and practice to become a better musician. Remember to pause the video after each exercise to try it out for itself. In this lesson, I'll be giving you a few easy exercises on the White Keys only for you to practice playing the piano. To that, you will remember the proper placement off key signatures for the order off flats and the order off shops placed at the start off both the trouble and the bass clef. Okay, so before we start, I believe things that you learn stick into your head the best way if you can physically experience it just like how you can improve your forehand and backhand by practice swinging your tennis racket in court after being coached the credit form. So that is why I turned the Order of Flats and the Order of Sharp's for the trouble in the based club into playable note exercises so that you can remember exactly where it is located in the sheet music. Okay, number one, using the white keys only and your right hand because we are on the trouble. Clough the order off flat placements for the trouble. Cliff, start on the B just above middle C Right here. So middle sees here is something to be here. So I want you to use the first finger and we go up skipping to what keys in between two e with your full finger and we go down skipping three white kids in between downwards. 123 onto a for your first finger. Then we go up, skipping two keys in between onto de with your full finger. Then we go down, skipping three white keys in between 1 to 3 onto jig with your first finger on, we go up again, skipping to accuse in between 12 on to see with your forefinger. Finally, we go down skipping three white keys in between 1 to 3 on two F with your first finger eso After doing it a few times, the proper fingering make it increases Spio eyes. Do you do it that many times? You should get faster as you notice. The pattern is actually up. Skip to downs. Get three upscale to down. Skip three obscure down. Do you notice that pattern and you get it really quickly Now number two to the base clip for the order of flats. It is the exact same thing. But remember, it is two octaves below the trouble clef version, meaning that since we started on the bay up here on the troubled left for the bass clef version, it was thought on the B, which is to be Here's one active and the one more down is too active to be right down here using a four finger. Okay, forefinger, then using the repetitive pattern off up. Skipped two and down Skip three. We would then know that it goes like this. Okay, so be with the forefinger as well. We're pressing right now. Okay. Up. Skip to T E with first finger down. Skip three to a four. Finger up. Skip to D. First finger down. Skip three G four finger to I want to see first finger on down. Skip three on two F four finger. Last one. Make sure you lock it into your brain by doing it a few times. E number three. Now for the order off. Sharp placement on the trouble clef. And for the bass clef, it is a little bit more harder. But luckily, the distance between the trouble and the bass clef version is also two octaves apart. So that I can remember that more easier. Okay. For the treble clef version using your right hand, it starts on the F on the highest line, using the full finger. So where this F is located on middle C is here. We've got one active to see here. That f is located that. Okay, so, starting with the fourth thing on this f we go down to see with your first finger. Then we go up to G with your fifth finger, then down Teoh de with your second finger, then down to a with your first finger. Theun up Teoh e with your third finger and then down to be with your first finger asses. The last shot, representative. Okay, so since it is a bit more difficult, you have to just repeat it a few more times to lock into your head. Ready? Okay, C g. Okay. So remember to do of the proper fingering as what I suggested in this lesson, because it will make your life a lot more easier, because with the right fingering it just locked into your head a bit more because every time you do it is the same. And not like different fingering. It will be a lot harder. You forget easier like that. Okay, so anyway, let's do it. Day number four now to the bass clef. Placement off the order of shops, which is the exact same thing as the exercise number three. But we start two octaves below the trouble clef f a case of Central Cliff F. We started here, so basically version would be would go down one active, not this f. This is only the first active. So we go down the second time. Second active, we start on the f, right hit. So we started with your first finger thing. Then we go down to see with your third finger here, and then we go back up to G with your first finger on down to deal with your second finger way. Don't go up. Go down to a with your finger, then up tea with first England down to be with your forefinger. Okay, Just pay attention to the coordination off the left hand because sometimes a lot of people get confused between each hat. But remember, just do over the correct fingering and you'll get a correct OK, So since it is a little bit more difficult, remember to repeat it a few more times to look into your head. So, like this with the proper finger, remember, first finger. First, you realize that there will be a lot more easier. After a few more repetitions. Go ahead and China for yourself.
31. Exercise 15b: Look, guys, this is a milestone music. And here are some things that you can apply and practice to become a better musician. So remember to pause the video after each exercise to try it out for yourself. In today's exercisers, I'll go through the number one most common mistake made by people who feel just started learning about key signatures or have not learned to properly at all. Okay, so this number one mistake is that they apply the flat or sharp version off a note only to the one note that corresponds to the respective sharp or flat, as specified by the Kissinger in the trouble or the bass clef. Okay, so here's what I mean. Number one, if we have a key signature off one flat and that we know this is B flat and the order flats , and a lot of people only play the one B flat located on the B flat line, as marked by the keys in each other. For example, the treble clef. It is the one here, the one above middle C. And they think that or the other be on the piano are normal by case like this. Uh huh. appear up there, etcetera. Okay, well, this is the ultimate mistake. Because, in fact, the B flat in the key signature really means that. Or let me emphasize again it is, or and every be keys on the piano. All of them are to be played as b flat. We replace it and to be flat, including the one in the treble clef keys nature, including the one in the B flat for the kidding, sir, on the bass clef on including this one, etcetera. So go ahead and pause the video and press all of the correct black notes on your very own piano that are required by the one flat B flat key signature. Okay, so go ahead. Number two. Now, this is the same as shop key signatures. Let's say for Casey nature off three shops, we know that the three shops must be f sharp, c sharp and dish up as we learn from the order of shops and also from the placement off the shops using the y que tricky thing. So anyway, this means that or the F on the piano, all these or now turns into have shot because they're replaced into these a lot of these are now if shops also or the sea on the piano turns into see shop. So we place or these scenes into see shops all these ones okay. And also now we move on to the third like sharpen the key signature is notifying that G or the G's on Pierre Thes turned into g shop. It'll replacing the G shops. These ones. Okay, so number three This is also the reason for scales that got the piano for many actives, Let's say Gee, Major has always the same shop as we go up the octave and never change. Okay, So since it has one shop in the Kissinger that being f sharp, as you know from the order of shops, this means that we start on G Waikiki way. Go up all the white notes, the G next year as one active, ongoing or the whiteness that she as a second activity, etcetera. But keeping in mind that you need to replace all the efs into F shops of the replace and to have shops, you know, playing it any more at play of shops on the piano as you go up the scale. Okay, So it goes like this. You play with white notes and you replace the F and you have shops like this place a metre as you go up the octaves. So this is exactly the same for every single other scale can, let's say, for the major scale off three shots, as we briefly mentioned in this lesson. So we know that the Sharps is F sharp, C sharp and to shop. So all off F c and G white nuts now replaced into deeds over the piano. So if we go up the scale, a sailor stolen a here. A lot of notes of white except for those three. We replaced them into these notes like this for price for place. Exaggerate Zetra. Super simple, right. But remember to try it out for yourself and use that table. We had the major minor table for the keys niches and test it out for yourself because as much as it is easily said than done, you do not want to be one off those many people who make this number one most common mistake on key signatures
32. Walking Worm Fingering Technique: guys, this is a most all music in today's lesson. I'm gonna teach you another fingering technique, which allows you to move from one position, like the same position to another position on the piano without needing to turn your hand or create any bump in the South. I call this the walking worm technique because the motion of the hands and fingers replicate that off a worm or caterpillar walking. Okay, this technique is based off the action in making your fingers go closer together but not implementing a 13 or a 14 hand turn that we have learned before. So it is pretty much crawling up the piano to next notes for the left hand like this and crawling down the piano to the next notes. Full right hand like this. Hey, to make everything easier, well based the first position that we are in as C position moving into another position and let's focus on the right hand first, because this is the hand that uses this technique the most for jumping around the positions throughout melodies. Okay, for example, were firstly in the same position pressing, see with the first finger on then e with the third finger. Then we want to switch to the D position. So we need to crawl our first finger thumb up and closer to the E on deep. Now we line out five fingers back into the new D position. OK, so one more time like this. See? Position presents way. Want to change the D position? So we made a thumb close. Saw two D. Now we switch it back to new D position wear. We have full control of the new D position. Okay? Another example. A little bit harder, maybe that we start on the sea position firstly, playing D with the second finger, followed by f with forefinger. The G with the fifth finger on. If we want to switch the F position, we need to crawl out first finger thumb up to F 1234 Bunching a hand very close like a worm so that we have full control of the new position. Now position. Anyway, let's try out all the possible variations as exercises now where you can pause the video after h one to try it out for yourself. I'll play each exercise twice once saying that note letters and once saying the walking worm fingering. Okay, number one. See position up to the D position for this one. See, E G. Make sure at the end you need to be at the ending position with all your fingers line on top of the white Keys. Like what I'm doing right now on the deposition. Okay, So 131 line it up. Okay. Good number to see. Position up to the D position for this one. 11 Number three seed position up to the day position for this one. C t size one. Number four C. Position up to now. The e position for this one. See if a minor thing is up on the position. 11 Okay, number five, see? Position up to the E position for this one. C t one size one A six C position now up to the F position. So C. G s final one size one. Now. Off course. We can also move up from let's say, G position, toe high position, like the B position. Like this G c. They move up to the beef is right here, like this one. And also we can move down from C position to a lower position. Like a position like this. G sing 51 fun because the fifth finger on a makes the first finger note on a If we correctly put all our fingers consecutively down the white keys from E thing is the opposition. Likewise, The same concept applies to the left hand, but it is just the opposite. Fingering where number one see position up to D. Position goes like this for this version. See a team into position. So 53 fun number to see. Position up to division for this version. See position 5 to 1. Number three, See, Position up the D position for this version. C g position size one. Number four C Position up to a position for this version. See into a position 5 to 5. Number six C position up to F position for this one. C g. Hey, this one. You really need to get closer to actually reached the next edition. Okay, so 515 again. Off course. We can also move up from Let's say, G position to a higher position like this. OK, so we Andrzej positions starting with G on D C B today. Position Fine way can also move down from the sea. Bishan Toa Low position. Like a position like this. Okay, G c A. It's a new position one.
33. Walking Worm Fingering Technique Exercise Do A Deer: Hello, guys. This is a milestone music. And here are some things that you can apply and practice to become a better musician. Remember to pause the video after each exercise to try it out for itself. In this lesson, I will teach you how to practice using the walking world fingering technique in a soul that requires it for the benefit off, making the melody sound more smooth. Okay, so this is the first part off the song Doe A deer. The ones sound like this video that one. Okay. And for the purpose of practicing this walking worm fingering technique, we will learn how to play the melody on both hands. So we play full right hand and also playing for the right here. That's not the usual case, but we do it for this lesson. Okay, so let's start off with the right hand. Since it is the hand that does most off the melody playing for the purpose of this fingering exercise, let's just focus on the nose and fingering numbers. I'll play it once saying that notes out and then once more again saying the fingering numbers and where and how the walking worm technique is done in detail. Okay, here it is. For the first time, C e c A scene be t B s f a day e a f g a g a g s a g a g f a. Okay, now, here it is for the second time with the fingering technique explanation starting in the same position. So one, 23 1313 And after this Now we used the walking worm technique to move our first finger thumb closer to the third finger on two D As we commence the next pot off the melody in the deposition. Then 23321 on again. We used the walking Weren't technique to bail out. First finger, closer to the third finger onto E as we commenced the next part of the melody in the position. One, 31313 Then after this, we used a walking worm technique again to move our first finger closer. The third finger on two F one followed by 233213 Okay, so one last time. A little faster. Starting on the sea position. Okay. So, 1231313 Change D position One, 233213 Changed a position. 1231313 Changed F position 1233213 All right, now, let's do it for our left. 10. Here is for the first time. So on the sea position So sing, sing, sing t being best d e g e g g a g s A. Now here is for the second time with the fingering technique explanation starting on the sea vision on five, 43 5353 And now we use the walking Wim technique to move our fifth single closer to the third finger on two d as we commence the next part ability in D position five, 43353 on again We used to you walking worm technique to me The fifth finger closer to the third finger onto E as we commenced the next one of the melody in key positions five. So three, 5353 Then after that, we used the walking worm technique again to me about 15 or closer to the said finger on two F as we followed by your finger on then 433453 Okay, one last time. Ah, little faster. Starting on the sea position, it's ready. 543 53 Fine. Three changed D position 5433453 Changed a position. Signs 435353 changed deposition. 5433453 Okay, if you're very also minute you can try for the offense is a challenge with the popular fingering.
34. What To Do Next?: Look, guys, this is a milestone music. And after you have thoroughly practice and mastered order theory and exercises in the skill share beginner's course, it can then proceed onto my intermediate course and other piano mastery courses for playing by ear improvisation, classical piano playing and see me and many more on my main websites premium piano membership. And since it's not many people actually finished a course at the very end as a reward for finishing, you can also have this very special coupon code to try out my membership for 30 days for only $1. Okay, what you need to do is go to Best piano method dot com forward slash premium dash membership. You can see this whole thing on the screen right now and then at the check out page into the coupon code. Skill share 579 Okay, this will be up on the screen as well to make sure it is skill share 579 and then you can get that very special $1 deal to try it out for itself. And that's pretty much yet, as for now, enjoyed time with my musical content and see you next time
 Amosdoll Music, To inspire you to grow in piano