Transcripts
1. Course Overview: Hello and welcome to this course on working with Marx in Photoshop. My name is Nancy and damage digital designer and tutor. I've been using photocopy to make digital art and graphics and jQuery assets for social media, motion graphics and animation. Photo P, like Adobe Photoshop, is a design software. The main difference is that photo P is available in your browser and it's totally free. Batch, right? No need to pay anything for it unless you want to get rid of a few adverts. So it's perfect for you if you're on a budget. And what's also great is that it mirrors of photoshops interface and you're able to do the things that she wants to use Photoshop for. So the skills you learn on this course can be applied to whether you're using photo P or Photoshop. This course focuses on working with layer masks. One of the most important aspects of professional image and photo editing. You'll learn a ton of things, including how to remove the backgrounds, even when fur or hair is involved. Change the color of clothing with the aid of the Penzu. Add shadows to an image. Learn how to mask and proper photo into different shapes to use as social media avatars and icons. Periods, amazing looking text effects. Get information on where to find copyright-free images to use in your designs. And we'll look at how to create some fantastic looking creative effects using masks. So if you're excited to learn all of these professional techniques, then join me in the course where I'll take you step-by-step through each process. And knowledge of layer masking is going to open up a world of creativity that you can use in a variety of jobs and careers. Whether your freelancing or working for an employer to get you started, I provide you with all the images that you can also obviously use your own to create unique look in our work and graphics for yourself and your clients. For now, I'll see you in the first lesson. And I hope to see you in the rest of the course, which once you enroll, is yours to keep forever.
2. Getting Photopea: Hello. This is just a quick video to make sure you know that you can access via API simply by going into a search engine like Google. And it should be the first result, photo p.com. And a quick note on the resources for this course. Just click on the course lesson. Click on the drop-down box and you'll see the resource is here. Once downloaded, open them up in Photoshop p by going to File, then Open. Great, Well, that was just to make sure that you're all set for the course. See you soon.
3. Layer Masks vs Eraser Tool: Hello and welcome to our first lesson where we'll take a look at why we should want to use masks to erase non-destructively as opposed to the eraser tool. Let's jump right in and have a look at how this works. First, let's have a look at the eraser tool. It's a tool that most beginners are familiar and comfortable with. In photo P, you'll find it here in the toolbar. Imagine we're working with this image and see what happens when we use the eraser to erase the background. It seems like it's doing a great job at doing what we wanted to do. But just like using an eraser in traditional out, this process is very destructive. There's two main ways to undo an action made with the eraser tool. You could either one. You use the undo command to reverse the change to step back in time using the history panel. However, a much better option is using masks. This is a much more efficient way of erasing or technically just hiding parts of your image. Just like if you put a mask on your face, is just hide in it, but your actual face underneath hasn't changed. Mosques are overlays that can be added onto a layer to control what to hide and watch a show on that specific layer. So they enable us to work with images non-destructively. In the layers panel, you'll see that the image comes in as a background. Head down to the bottom here and select raster mask. Roster mass is the same as layer mask. And now you'll see another thumbnail in the layers panel next to the image indicating that a layer mask has been added. The thumbnail will be y because it means that the moment all of our image is being shown with layer masks, we use white to reveal and black to hide. So instead of erasing, we're going to be just brushing. Let's head over to the toolbox until we find the brush tool. At the top here in the Options bar, we can also adjust the size of our brush. Coming back to the toolbox section, we need to make sure that in our color books is here, we have the colors white and black. We need to have Mike in the foreground and at the top of a color box. If you use Ashoka x, this will allow us to switch between white and black when we need to. Now, let's use a brush to brush over the image. And as you can see, some of it is disappearing or being hidden. If you look over in the Layers panel, now you see that as you make your strokes with a brush, this is reflected back in the thumbnail. So now to reveal the parts again, press X on your keyboard so you can have white as the foreground and brush over the image again. And this is how you can review your image if you change your mind and decide that you want to reveal it. Or sometimes if you made the mistake and hit the part that you didn't mean to. So with a mask, we're not destroying our image. Like when we use the eraser tool. Using the master, simply hide and show those parts that we want. If you only work on one layer, you may consider using the eraser tool. But for the most part, we're working with more than one. They are in photo P. And for this reason, using mass is the best way of working. So that's been an introduction to lemmas and their benefits. I look forward to seeing you in the next lessons where we will dive even deeper into how Layer Mask and help us work more efficiently and creatively, whether we're doing work for ourselves or for clients.
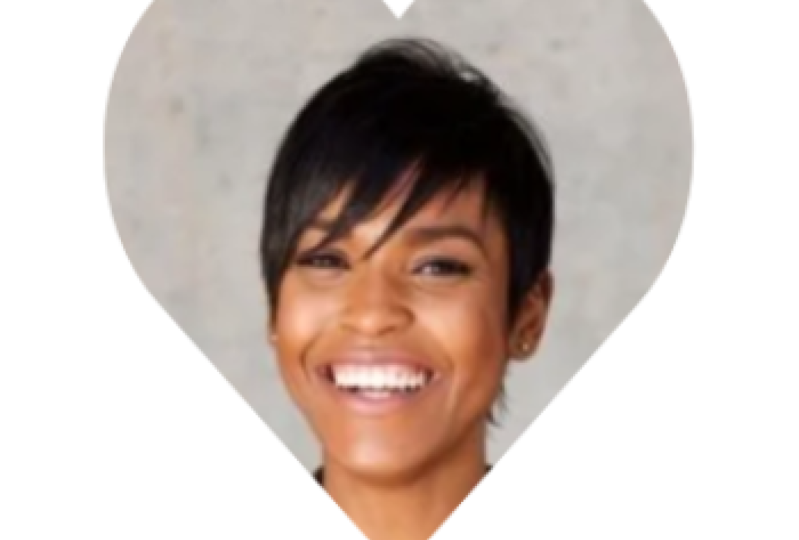
4. Social Media Crop & Mask: Hello, it's nice to have you back. In this lesson, we will look at how we can use mouse to great photographs cropped into a circle or other shape that you can use for thumbnails on social media, websites and elsewhere. After that, I'll show you how to soften the edges of the shape. Here, I've got a whole picture of someone and I want to use just the face in the photo and remove most of the background. This is a quick and easy process. Once you have your image loaded, choose the Ellipse, select tool from the toolbar. Then hold down the Shift key as you click and drag. This will create a circle selection around the part of the filter you wanted to crop. If you make a mistake with your selection, just click Control or Command Z to undo it. Now you're going to see just how quick this processes using a simple mask. Select the raster mask icon in the bottom menu here. And a mask is immediately applied hiding the part of the image we didn't select. You can see the Muslim now in the layers panel. But now we're left with a large transparent area. In order to crop this further, let's go to the toolbar again. This time choose rectangle, select. Then go up to image and choose crop. You can just as easily crop this photo into a rectangle shape by using the rectangle select tool and following the same process. If you want to soften the edges, you need to double-click on the mask thumbnail. This will open up the feather slider. And if we increase that, you can see how the edges are being softened. This can give a really nice effect. And this is how it looks on a circle crop. Well, what if you wanted to crop this into another shape other than a circle or a square. That's also easily done. We'll try a slightly different method this time. Go to the toolbar and select the shapes. Choose custom shape. If we click on the shape menu drop-down box, we can see there's a lot of different shapes here. Some of them won't look that great when we crop a face into them. But there's quite a few that could be useful. For example, if you wanted to create a special icon for Valentine's Day or designed for a friend's birthday. We can use some of the shapes. You can use the search field here to find a particular shape. I'll type in heart. And we see that there are three different styles to choose from. Let's choose this one and draw out the shape. So now we have this wonderful read Hall on this woman's face will get halfway showing through in a minute. The good thing about this method is that we can easily move the shape around and also resize it. Next, we need to reorganize the layers. So move the woman's layer so she's at the top. Next, we'll use another type of mask. Right-click the layer and choose clipping mask. This will make the layer take on the shape of the layer beneath it, which in this case is the heart shape. And there we have it. Her beautiful smiling face inside the heart. We can also use the move tool and reposition her if we want. How great is the hat? Finally, let's crop this. Then click the tick to confirm, and that's it. Now you know how to use mass spin and crop in to create avatars or icons like this for yourself and for your clients. I look forward to seeing you in the next lesson.
5. Mask with Quick Selection & Refine Edge: Hi, I'm going to show you how to easily remove the background from this picture of a shaggy dog will use the Quick Selection Tool and then refine the edges. This process is useful if you have images like this, where is involved and you want to try and keep this small hairs within your picture. First, go to the toolbar and click on this icon here. Choose the Quick Selection Tool. Next, click on the part of the furniture that you want to keep. So I will click on the dog. The Quick Selection Tool puts a highlight or marquee around the dog. Let's zoom in to take a closer look. So over in the toolbar, let's click on the magnifying glass, then the plus sign, then click on the image. We can see that it's done quite a good job at selecting most of it. But sometimes you see that the selection doesn't cover all the image. So we need to fix that. It's a good idea to zoom in so you can get a really good close up and be able to see what you're doing. Make sure you're on the Quick Selection tool again. Now here to move the selection closer to the dogs pose, we'll use a shortcut. If you're using a PC, hold down the Alt key, then click and drag. If you're on a Mac, hold down the option key and click and drag. Keep dragging until you can get the selections closer to your image. It looks pretty good here, but it's not going to be perfect. So next we'll go up to the menu bar where it says Refine Edge. Click on that. And you'll see the cut out of the background done with the Quick Selection Tool. You'll also see here that a bit of the background has come through as well. Let me just introduce you to the area at the top here. Here, we can use this drop-down to change the size of our brush, and we can also change the hardness of our brush. First, let's zoom in on our image by clicking the plus sign. As you can see, most of the backgrounds has gone from our image. So the idea now is to paint over the edges of our image to refine it. This will allow the Fed to show through clearly and not have the orange background coming through. Now, let's look at these colors here. The black is used to paint an hide the background, like so. And say, I made a mistake with the black and hit some of my image. I can unhide it by just choosing the white to paint over the area. And that's going to bring it back again. We'll use the gray to paint over the edges of the dog. And virtual people automatically detect the edges, making sure that the fine has on the dog come through. Now to see the background more clearly, let's temporarily change it to black so that we can see things more easily. Now, let's go back to our gray and begin to paint again. As you can see photo P is doing a great job of hiding the background and bring into the foreground that we want to see. Take your time with this and be as accurate as you can. Let's move our pitches so we can see the rest of it. Go up and select the hand tool. And we can use that to move our picture again back to the gray color. As you refine the edges, keep an eye on the image on the right to see the changes are taking place. Once you are happy with your image, go to the menu and click Okay to return to the original workspace. You can see in the layers panel that we have our original pitch and a layer with a background removed. Click on the eye of the background layer and we can see that the background has gone. Let me just zoom back so we can get a better look. There you go. That's how to use the Quick Selection Tool and refine edge to remove the background from a picture. I hope you found that helpful. See you next time.
6. Change the color of clothing: Hello and welcome back. In this section, we'll look at how we can change colors with the use of masks. This is a method that's especially used in the area of fashion. For example, here we'll use the pen tool to change the skirts of this model. Now, if you haven't used the pen tool before, it can be quite intimidating. And it's a tool that does require practice. However, is one of the most flexible and professional selection tools within photocopy and other design software. So it's really worth trying to learn it well. Here, we'll use it to just select and mask out this models skirt from the rest of her. And then we'll use an adjustment layer to change the skirts color. In this case, using the pen tool is quite easy. The selection of the image we wanted to select is not too difficult. So let's get started. The pen tool is located here in the toolbar. The shortcut for it is the letter P. In the menu at the top, the default is set to shape, so we need to change it to path. Fortunately, for this exercise, we don't need to be too precise, but we do need to make sure that we select all of the skirt. Let's zoom in so we can see everything better. To start selecting. We will click in a corner like here. And you'll see that the pen tool has created what's called an anchor point. The pen tool creates a visible path which is straight and as you click along, you set more anchors. So that's keep clicking. This part where we get to her hair, which is on a curve, means we need to adjust our path to create a curved path. Hold the mouse and drag. This is obviously a bit more tricky. So if you make a mistake and you want to correct the path, just press backspace once and you delete the last point. When you click and drag, you get these two long lines. These are direction handles and they help you to understand how the power 4 be affected in your next step. When we click, we can use them to curve to the right or to the left. I'll exaggerate there so you can see better what's happening. Use the direction handles to control where you place the curve. We want to make sure all of us is inside. So I won't go right up to the line. And if you were to by accident, click away out here for example. Or you need to do is click on the point and hold the Space bar while you hold onto the anchor and reposition it where you want it to be. You can also make the path shorter if you need to. Let's now continue selecting where her arm is and then downwards. So let's continue to click. When you click on the starting point again, the path will be completed. And you see that in the history panel it says closed path. Right now that we've done that because we only want the skirt to change, we need to make sure we select only those pixels in the image. So go to the menu and choose Selection. Click Okay, on the dialog box here. And in our history panel, we see that the pixels have been selected. Now for more of the fun part, changing the color of this skirt. Click on the Adjustment Layer icon and choose Hue and Saturation. Now, we can use the sliders here to adjust the colors. Move the hue slider, and watch how these colors magically come through. Isn't that so cool? Click up here to open up the menu so we can see the hole that lets see what colors we get sliding down. We have plenty of choices. Of course, if you have settled on a color, you can also use the saturation slider to make further adjustments. If you saturate it too much, things can begin to the qubit on natural. And going the other way, takes the color out. So just play around and see what different colors you can get. You may also want to tweak things using the lightness slider. Okay, that's great. Now let's close this by clicking on the arrows here. All in all it looks like a really good selection. Now, let's zoom in a bit. We can see that just a little bit of the color has gone into the models arm here. So we need to fix that. Well, that shouldn't be too difficult because our adjustment layer comes with a mask is automatically been curated and we can see it in the thumbnail over here. So makes sure we select the mask. Then we need to choose the brush tool selected here from the toolbar or just press the BP. So right-click and we can make it smaller. For pixels should do it. Because we want to hide the color. We need our brush to be black. At the moment, I have white as the foreground color. So let's use the shortcut key X to swap the colors around. Now, let's use the brush to hij the pink on her. Just go gently. Okay, that's looking good. Let's zoom out so we can see the new outfit. If you decide you want to change the color of the sketch again, that's easy because we have the adjustment layer. You can then simply click on the thumbnail and change the color. If you wanted to have this debt in a range of colors, for example, to show a client, you can do that by selecting another hue and saturation layer and just create another color. That way, it's easy to decide on the preferred color just by clicking the eyes and the panel here on an off. And we can compare them with the original scared. So that's it for our first method. Using the pen tool to create selections and using the mask area to change colors. Keep practicing, and I'll see you in the next lesson.
7. Add a Shadow: Hello. In this lesson, we're going to look at how we can add shadows to an image by using masks. Sometimes when you cut a personal object out of a background and then you want to put them in a new background. It can sometimes look a bit unnatural. The edges can sometimes not blend in very well and look a bit too sharp. So let's get started. How we can add shadows will be using this image of this man. First, hold Control or Command on the main layer. This will select the pixels. You'll see in the history panel that it says select pixels. Now we need to add a mask. So click on the Add Mask icon here, and we can see the thumbnail here. Next, we need to click and open up the mask, select the icon here, and you'll see that we have our properties for the mosque. At the moment, the feather is on 0 pixels. So let's increase it. You can see that as we drag the slider, it gets more softer and perhaps a little bit blurry. So we don't want to drag it too much. We want it to look as natural as possible. The best way to see what's really going on is to zoom in on the image. If you want to move the image around, we can use the hand tool, or we can temporarily access the hand tool just by clicking on this baseball. Move it around, and then we can see everything that we wanted to. So maybe here at the side that might be too much feathering. Yes. It's gone into his face and pull that down a bit. So I'm thinking that maybe something like a vowed to 0.3 pixels. Let's check the other areas. Yes. Now the man looks nice. People ended in against the background. Let's see him in his entirety. Double-click here to close the books. The benefit of this method is that we can adjust or remove the feather at any point to suit the image requirements just by double-clicking on the properties box again. Also, if you wanted to disable the feathering, we select the mask and right-click on it. And we can easily reverse the process by using mass. It allows us to be flexible and experiment with different looks. It's also a professional to use them. So now that we have softened up the image against the background, Let's move on to the next stage. We can add a soft shadow using the same technique. First, make a new layer by clicking on the icon here, which looks like a blank sheet of paper with a fold. We need to fill it with black. So click X on the keyboard to change the foreground colors around. Select the paint bucket tool, and click on the canvas. Now drag Layer one below the man layer. Next, while holding Alt, drag the man's layer one mask onto layer 1 to duplicate it. That's double-click on Layer 1 and we name this shadow. Now, we're going to move and offset the shadow layer slightly by dragging it down and to the right. It might be easier to do this if we turn off the top layer at this stage. And now we can just see the shadow underneath. So let's make sure we're on the move tool. And select that shadow. And then just use it or the arrow keys to shift the shadow a little bit to the right. Then just check it by turning the eye back on again. Now it's easier to see what we're doing. Use the right arrow key on your keyboard to keep shifting the shadow. And we can move it down a bit. And now we have the shadow right behind the man. The shadow of the moment is to stock and to dock. So what we need to do is to soften it up to make it more natural. Again, by feathering the mass, we can soften it as much as we like. So again, let's make sure that we're just on the shadow layer. And let's open up the properties for that layer. Now we've got our properties. We can play around with the feathering and make it less shop. Open this box so you can see clearly what's going on. I think I'll go with about six pixels also. That looks quite good. So close that the shadow is still quite dark. So to make it lighter, we can lower its layer opacity. You'll see the opacity here. So click on the arrow and the slider will open up. And then we can just lower it so that it really looks nice and natural. So I think about 45 percent is quite good now. Now let's just zoom out so we can have a good look of the picture. That's looking great. So that's how easy it is to make a shadow behind someone. So keep practicing. And I'll see you in the next lesson.
8. Clipping Mask Text Effect: So we've spent some time using images and photographs to create mass defects. Now it's time to look at how we can get creative with texts and mosques. When we create a mask with text, we use what's called a clipping mask because it uses the content of one layer to mask the layer above it. So we can have effects like this, where the image appears through the letters. This is an effect that's popular in web and graphic design. So without further ado, let's have a look at how to do it. We'll create the effect with this photograph as our background image. Once you've loaded the image onto the canvas, you need to go to the toolbar and select the type tool for this effect to work best. It's a good idea to choose a wide and chunky text. So we have enough of our photo showing through search for good sized text, avoiding those are too thin. For example, this one, like able isn't going to show enough of the photo. So let's go for something else. Alpha slab one is quite big, so I'll go for that one. But feel free to choose whatever one catches your eye. It's a good idea to type the word in capitals or uppercase. I'm going to type the word city. Adjust the size here. And if you reach the limit of the slider, then just double-click and type in a number that you want. You can also adjust the look of the text using the font properties is not important what the color of our text is, because we will be showing some of this image through the outline of the letters. Spend a bit of time resizing and reposition in the text so that the transform controls. If you can't see the sizing handles, hold the Shift key to maintain the aspect ratio and prevent the word from going out of shape. If at anytime you decide you want to change the look of your text, just highlight it by double-clicking on the TI of a thumbnail to select everything and then change it to another font. Next, move the text layer below the image. Then select the image. Right-click on it, and choose clipping mask. And it's easy as that we have our image loss within the word. If you select the text layer, you can reposition and resize it to your liking. You can also move it around to capture different parts of the photo. If you wanted more of the sky to come through, we can just move it up here. So it's a flexible and creative way of working. And also if you wanted to change the text to something different, just click on the T of the thumbnail to highlight the word and retype what you want. I'll go for London. Isn't as effect, so cool. I love it. At the moment. We have a transparent background. But if you didn't want that, we can add a new layer, then add some color to it. So click on the New Layer icon, move it underneath a text layer. Next, click on the color swatch and choose a color you like. I think I'll go for this blue color. Then go to the Paint Bucket Tool. Click on the canvas and the CUDA is applied everywhere. If you decided you wanted to change the color, double-click on the layer to open up the layer style menu. Click on Color Overlay. The default is red. So click on the color swatch. And as you can see, as I change colors and design move around, you can see the color changing in real time. So it's an easy way to choose a color that you think goes well with your text. To finish off, That's crop, this. It's a really great technique to have in your design toolbox. So see you in the next lesson.
9. Stencil Text Effect: Hello and welcome to this lesson where I'll show you how to create this creative stencil or cutout text effect. This is a really nice effect that you can use on things like posters, magazine covers, flyers, websites, wherever your imagination can think of. With this, it's best to use a form that has some weight to it. But it really depends on the look you want. So experiment, because we have a lot of font choices here and elsewhere. We'll use it to cut out from any shape that you like. It can be a rectangle, circle, oval, whatever you want. So let's get to it. For this lesson here, I'm going to use this beautiful image of a waterfall available in the resources. And why don't we just type the word waterfall over it? Great idea. Once you've loaded up the image, the next thing to do is choose a shape. I'm going to keep things simple and choose a rectangle. Usually the default for the fill of the shape is red. But I'd like mine to be white. So I'm going to head up to the field area here. Click on that and choose white. Now, let's move this rectangle into the center. When we see those two red lines with the cross in the middle, we know that we have it perfectly centered. Great. Now it's time to choose our text. So go to the toolbar so that the Type Tool and benches whatever font you want. As I said, something with a bit of weight to it or something quite chunky might be a good idea. When you go to type your text. For this effect to work, you need to actually not type on the white box yet. You need to type outside of it. Otherwise, like I said, it just won't work. So let's type the word waterfall. Type it in capitals because it looks better. Resize it to make it bigger. Then use the move tool to put the text onto the white rectangle. And you can use these red lines again, which gives you a guideline to your texts being centered. Once that's done, go to the text layer and use control or command. Then click on the T of the text layer. This will select the pixels of the text, which you can see reflected in the history panel up here. Now, this is the important part, whereas some people can go wrong when trying to create this effect. Next, we need to select the Shape Layer. Then go up to where it says layer in the menu. Click on that, go to raster mask and hide selection. Now we can go and turn the eye of our text. And we see that we have that stencil effect. And we can move it around wherever we want and change the shape of the rectangle a little bit. We can also experiment with the capacity. So we get more of a waterfall coming through in the background. And that's how you can get a really interesting cut-out stencil effect. I hope you enjoyed this lesson and then something today. See you in the next one.
10. Finding Images: Hello and welcome to this lesson on finding free images to use in your personal projects. Whether you're working on a blog or doing some wild for a client. So let's jump in and have a look at the first one. Pixabay. You'll find a lot of high-quality images. Let's see what the search for London gives us. There's a lot of choices here with various photographic styles. And you can download them in a variety of sizes, as you can see here. The pixabay license shows it's free for commercial purposes and no attribution is required. If you can afford it. She compiled the person who uploaded the PIT share a cup of coffee to say thank you. Another way of getting into Pixabay foetus is when you photocopy. If we click on the gallery, this opens up access to the pixabay images. Let me type London again. Hey, there's the image I opened earlier when I was on the actual site. So using this feature can really save time because you don't need to leave photo P to open up Pixabay on the New Search tab. Okay, the next place for really nice free images is Unsplash. And I use this site a lot for curiosity. Let's see how different the images off or search on London again. Yes, we also have some nice ones here. Again, you can download images in a variety of sizes. And the image is free to use under the Unsplash license and can be used for commercial and non-commercial purposes and no attribution is required. Moving on now to number three, free pig. On this side, as well as photographs, E can find vector images and PSD files that can be used in photo P. I'll put in a search for computer. And so we have our photos and vectors. The free pick license here states that you can use the images for personal and commercial uses, but you need to provide attribution. As it says here, if you're going to use it in various ways such as websites and social media. You need to copy the link and paste it in. Okay, number four, MOOC file. This is a community-based free photo site. All images are totally free to use. It doesn't have as many images as some of the other places we've looked chat. And many of them are not as professional, but it's well worth exploring. Especially if you're looking for an image that is probably more lifelike, authentic, and not overproduced. Let's check out this cat photo. When you click on Download, you get this message to agree to the license terms. But as I said, all the photos on the site are totally free. And MOOC fall encourages you to become part of the community and upload your own photos so others can benefit from them too. Let's now have a look at our last site in this quick overview and a bat, pixels. Pixels has an interest in and nicely curated photographs and also video is you can see, Let's do a search for beach. Again, photos here of free, but you're encouraged to thank the person who created and uploaded it by donating or following them on social media. So these are my recommendations of where to find some great photos that are absolutely free. T is be sure to check them out and I'll see you in the next lesson.
11. Surreal Art Effect: Hello again. There are some really creative things that you can do with masks. And we'll have a look at curating a few techniques in this section. The first one in this lesson is using this rather ordinary picture we have here of a cup of coffee and Apple and some notes where someone has written, I love coffee and good morning. And then they've gone off somewhere. But I'm sure that the vaccine. So why did we do them a surprise by changing the senior level will go from this to this. Well, I don't know about you, but I do like to play a trick or two sometimes. When is this one might be a step too far, but let's give it a go anyway. Once you've opened up this image, go ahead and open up the picture of the surreal, I get another layer. You can use any image that you want. But I'm going to go with this one just to demonstrate. So what we need to do is to create a circle section adds of this image. Select the Ellipse, select tool, and hold down the Shift key. So you drag out a perfect circle. Once that's done, then go and click on the Mask icon. And now we have the background hidden and just our perfect circle with the eye image. Now, we need to open up both of our images in the same layer. So click on the layer and drag a copy of it up to the coffee cup tab. We want to put the I in the cup, but at the moment it's too big, so we need to resize it. Make sure to zoom in. Select the move tool. You may need to check the transform controls bots, and holding down the Shift key, make the eye smaller until it looks like it might be the same size as the coffee. Then let's lower its opacity so we can see things better. Resize and reposition it again. That looks quite good. Let's bring the opacity backup. Now, the outline is looking a little bit sharp, so let's go and further it. This will soften the edges. Click on the mask and go up to the properties, open up the box and move the feather slider. I'm going to adjust it to about 3.40 pixels. That's looking quite nice. And then if you want, you can have a go at using one of the blending options for a more dramatic look. Click on the down arrow here. And you can click on these to check the different effects you can get. We don't see much change with Dissolve. Doctrine is quite interesting. Multiply is too dark. Let's try screen. Not sure. Color Dodge. That's quite dramatic, but I don't think it fits in here. Let's try one more vivid life. Wow. Yeah, that is vivid. It's kind of cool. I'm not sure about any of these blending options, but I'll leave you to get through and experiment with a different mix you can get with the others. I'm going to go back to normal. But in this case, I'll lower the opacity just so that we can get a bit more of that coffee liquid coming through. And it just looks a little bit more surreal, but hopefully not too frightening. Well, I show would like to see the person's reaction when they come back and see some mistake I inside the coffee cup. Anyway, have some creative fun with this. It could be a good post on social media like Instagram or Pinterest. Quite eye-catching. Do you think? See you in the next class?
12. Double Exposure Composition: Hello and welcome back. We'll continue getting creative with masks. And in this lesson, I'm going to show you how to create a striking double exposure poetry defect. We need two photos. One is a photo of a face and another that we'll use to blend into it. This can be something like a landscape of local bads or anything that you think cool little goods coming out with someone's head. With this effect. It's best if you work with a picture of the past and from the side or a profile picture. For this one, we'll use this other picture of a river scene with birds flying around. We can create a more dramatic look by having some of the birds fly out of his head. With a profile picture on the canvas. We can simply load the second picture here also. So go to File Open and place. Make a copy of the river scene with Control or Command J. Then turn the visibility of the copy, select the original, and increase the size of the picture. Ten on the transform controls. If you have two and position the picture over the man's head. Next, go to the toolbar and choose the Select tool. We'll use it to trace around these beds. Zoom in and just make a rough selection. Like so. Copy these buds onto a new layer. Make sure that you're on the selection with the birds we just copied over. Then go up to Select and magic. Zoom in and we can see that magic has done a really good job. So click Okay. Then click on this bottom layer two and delete it. We wanted to get rid of it because it still has some of the sky attached to it. And we only want the birds double-click and rename this layer as birds. Then use the move tool to move those birds to the right somewhere. Then turn off the visibility and de-select the transform controls. Let's also delete the copy of the river scene because we don't need it now. Zoom out a bit. Now, move the remaining really seem so that it's on top of the man layer. And now let's lower the opacity. 70 percent should be good enough. Turn the transform controls back on. Now we can move the image more accurately and see where we want the two photos to blend together. Now it's time to add a mosque. This is going to help us blend the edges of the photo. So make a new layer mass with the river scene. By going to the menu, choose their rest of mosque and add hide. All. This completely hides the river scene. Next, go to the toolbar and select the brush tool or use a shortcut, be lower the hardness to 0 and increase the brush size. And make sure you have white as the foreground. Right-click to increase the size of the brush if you need to. And now let's use it to paint on the mask. And inside the head area. We read in the beds and building up our image in stages. Remember, if you want to clean up the outside edges, you can always switch to black to hide those areas. Spend some time tweaking the picture to your liking by switching back and forth between the black and white brushes. Now, turn on the beds layer. We can add to the amount of birds by making another copy of the bird layer again. So let's do just that. Then. Use the move tool to reveal them. Then we can resize the upper beds so they look a little different and position them around another part of the man's head. In this case, I don't want an exact copy. So here we can use another mask. I'll use this bird layer. Then submits the Mask icon, and then we can use the black paint brush to get rid of this bid. For example. We can then reposition and resize to the remaining bud here. If you right-click, you can have these options as to what position to place it. And you can just keep making as many copies of the beds as you want. Now see this bit of the sky. And the man said, if we hide that, we can get an even more dramatic effect with our composition. Let's do that. So that the river layer, right-click and go to the blending options here where it says Blend. If click the drop down box and choose blue. Then hold Alt or Option key as you drag the right hand triangle in the college last slider to the left. Holding this key will split the slider into, resulting in a smooth fade between what's visible and what's hidden. Rather than brushing the sky out without a mask. We can also use this method just to temporarily hide the sky. And if you decide you want to back, you can simply drag the slider back to its original position. We can experiment with the opacity to get the look we want. I think I'm quite happy with that. I'm also going to bring back some of the river down here by his neck. This quite a lot of whitespace here. So to finish off, you may want to crop it. But for me, I'll leave it as it is. I think a quite like the whitespace. Let's compare the two versions. I think that both intriguing. Well, I hope you enjoy using this creative Moscow method with some of your own photos and seeing what affects you can create. Have fun, and see you in the next lesson.
13. Ink Splash Effect: Hello, I hope you're doing well. In this lesson. Let's make another creative effect. This time, this ink splash, photographic creation. It makes a dramatic statement and it's quite an easy effect to make using masks. We need two photos, one of an ink splash and the other a close-up of someone's face. You need to upload this image is in the resources. Then we need to remove the background. So let's use the magic cut method for this. Zoom in to make sure we can clearly see what's being taken away from the image. That's done a really great job. Click, Okay. Now let's add the image of the man that will be used in here. Go to File Open and place to put them on the canvas. Again, he's on a background, so we're going to need to cut the amount of that. And like before, the quickest way to do that is by using magic Kurt. Things look quite good. But let's zoom in for a closer look. And we can see that the white part of his color is gone. And also some of his shirt. Select the green paint. And you see in the stand in another lesson, just click where there's missing parts are. Okay, it's not perfect, but nearly there might be the hint of a few background pixels, but that won't matter with the effect we're creating here. And we can also clean it up later. This time, instead of accepting the new layer default, click the drop-down arrow and output this as a raster mask. Click Okay, we have the marks there. So now we can use it to paint the missing pixels in his shirt, back in. Select the brush tool and white is the foreground. And then just spend some time painting his Connor back in and use black to clean up any over spill. And then make adjustments to the size of the man. So he kind of matches up with the size of the splash. Now let's clip the man so he's inside the splash. Right-click the man layer and choose clipping mask. And you see we have our smash effect. We can move him around and see what areas of the splashy looks good in. You can have I was a fun here. He looks pretty good wherever you put him, but I think I'd like him to be here. And you can also resize the smashed image. To enhance the effect. You can put a photo filter on the Splash layer. Make sure to select the layer. Then click on the photo filter adjustment layer. The default color is this orange. But you can also click on the box here and choose a different color if you like. You can also change the density of how much of the color comes through. I think that actually do like the orange color, so I'm going to stick with that default. Next, let's suppose a change and enhance the man's layer. We can also put a photo filter effect on it. Select the layer and go over to the filter menu at the top here. Choose Filter Gallery. We have an effective immediately, but it's not the one we'll use. The one we're going to go for is posted edges. Zoom in. And here we have the sliders. We can change the edge of the thickness of the poster effect. And we have other slide is here and you can see what happens as we move things along. Be careful with the edge intensity. I think I'll go for three pixels for the poster. Once you're happy, select OK. And there we have our effect. I can see this being used on a poster, a flyer, or the front cover of an album or a book. So have fun with this experiment and enjoy. Bye for now.
14. Next Steps : Hi Mark.
 Nancy Sealy, AI & Digital Skills Instructor