Transcripts
1. Welcome to Photomator: Well, hello, hello and welcome. I'm Alex, a photographer, a creator, and a photo
editing enthusiast. If you ever wanted to edit your photos without the
complexity of light room, Photoshop, or other
complex softwares, then you are in the right place. In this class, I'm
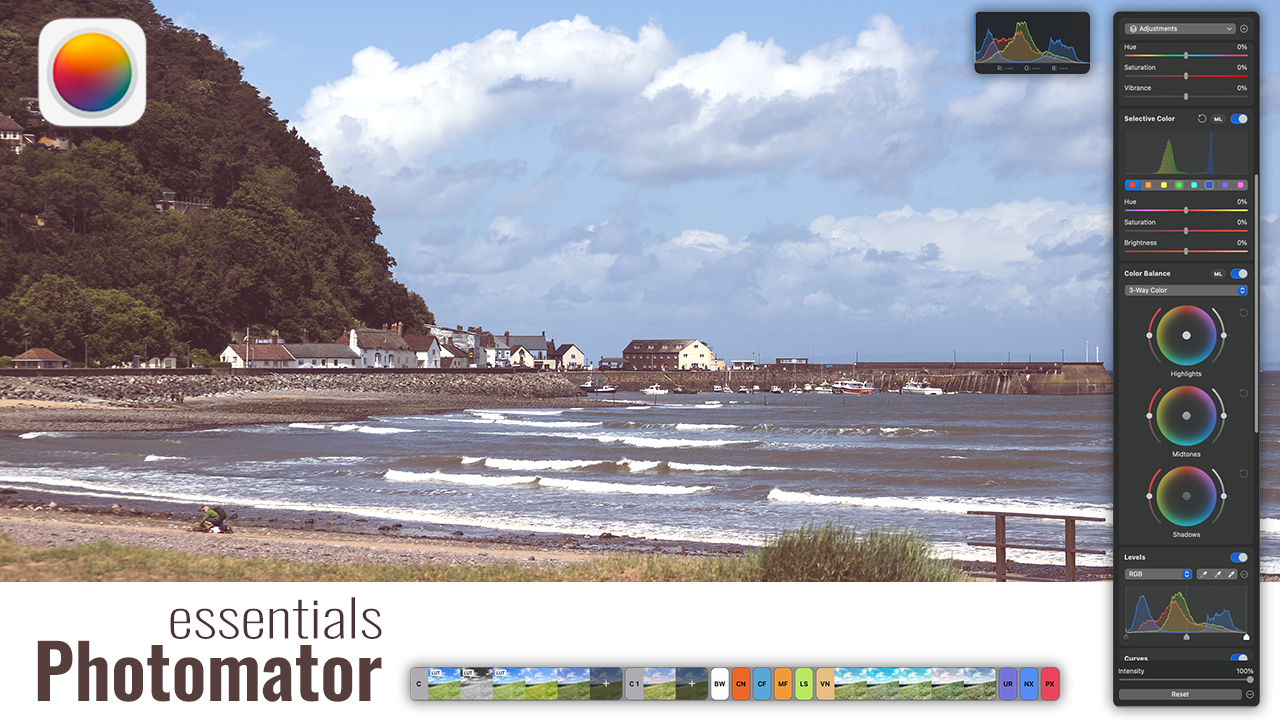
going to teach you how to master photometer, one of the most powerful
and easy to use photo editing for Mac,
iPad, and iPhone. We'll go step by step in editing real photos together
so you can see exactly how each tool works and how to create your own
efficient editing workflow. In this class, you learn how to import and organize your photos, how to fix exposure, color, and wild balance, how to use
to curves to create depths, how to apply selective
edits using AI masks, how to edit your raw images, and after that, how to export
your work for social media, for your print or
for your portfolio. Every lesson is short
under 10 minutes so you can learn quickly and
practice right away. By the end of this
course, you'll be able to take any photo, whether it is a travel snapshot, a portrait or a landscape, and turn it into
something beautiful, polished, vibrant,
and professional. You'll also discover
how powerful photometer is as a lightweight, fast alternative to more
complicated software. We have a project as well. So for your class project, you'll edit one of
your own photos using the techniques you
learn in the lessons. Then share your project as a before and after in
the project gallery. I cannot wait to see what you create and give you
a bit of feedback. If you're ready to build
your editing skills and unlock your full
potential of photometer, let's jump into the first
lesson, seeing the class.
2. Intalling and organizing your images: Hello, and welcome
to Lesson one on photometer is about
installing the software and having a first glance on our interface and also we
will import some photos. We'll try to organize them. Let's get started by installing the software and open
it for the first time. You can go to your lunch
pad and from here, you scroll to your app store. And I already search
for photometer, but you can go ahead and get it. Now is downloading
and one thing, photometer is a paid app, so you can use it as a
trial for seven days. If you like it,
you can purchase, I think it's per year or a lifetime license which is around 100 and
something pounds. But depending on your country, the price can differ. Now, photometer is
installed and you will be able to find it
here. I'll open it. Welcome to photometer. Adjust Color and lighting, remove objects, Magically increase resolution,
powerful photo browser. Let's start editing. This is how photometer looks. I know it's not a big
deal at the moment, but let's go through the menu. We have the file where
you create new album, new folder, import your images, share your images, close all. You have your edit image, where we have rotate, autostrate and all
these tools you will have available on
your interface. You have it as tools
inside your photometer. So let's import our first
images. You have two options. It's either you import into this window where you have all these
categories and you can take advantage of albums
and folders and you can create different types of
categories on your images, or you can work inside
the folder that you created for your images.
I'll give you an example. Let's go to the photos
first and we have here imports and we
can import our images. And I will select
all the images and I will import them.
Into photometer. Now this is going
to take a bit of time mostly because
it's going to read all the images
and it's going to create the sidecar files. Sidecar files is basically the XMP the information about the photo and also the edits that
you're going to do. This is going to be a
non destructive edit. All the edits are basically
in let's say text file, XMP file, and when you open photometer,
that is going to be red. As you can see, I've already
started to go through these images and I flagged
a few images as selected. I've rejected a few images. Also, you have them
here in the utilities. These are flagged,
these are rejected. I have some five stars. This is a four star image, two star image, one star image, and you have all
the imports here. The same time, you
have media types. This is when you
synchronize your phone with photometer and you'll have all your images the same
structure as your phone has. If you have, of course,
an Apple phone. Then we have albums
where you can create folders and albums
inside the folders and we're going to create
this now you can create here a folder can say Poland
in my case from here, we can create an album saying
that this is Craco trip. And here I can add my files. But at the same time
in the Craco trip, I want to add, well, not in the album, but in this folder, I want to create some
files like cafe pictures. I'm going to show you in
a bit how to do this. Let's go to imports.
I've imported my files. I don't have any hidden ones. Hidden basically is going to synchronize with
your phone and you'll have a hidden
folder inside your phone. This is where you get them. Go to Import and let's
see what we have. Let me show you how to select
your images as flagged or rejected or give a five
star rating on them. Let's take this example here. You have your options
here to reject or flag, add to favorites,
or Set ratings. You can see here
the shortcut keys, Z X is unflaged. If you're not sure, you
can leave it unflaged. Set ratings 1-50 for unrate. You can easily go through Z, Z. I like this one, I like this one, I like
this one. I like this. I don't understand this one, so I can select multiple and
I didn't actually want them. Now, this is a great image. I can select it. I can again select all
this. It's enough. I can click X. I like this too. I can click Set. I don't like this ones. But this is how to do
a very fast calling. If you want to actually
see the image, you hit space and you open this bigger view here and you can go through all
your images like this. I'm going to hit escape
so we can go back to our column view. I like this ones, and this
is abandoned cafe place. I hold Shift and I selected the entire images and I
want this ones to go here. So basically, all my images goes in into my cafe pictures. Now, you can also
do the reverse, select your images,
and of course, you're not going to create a folder just for three images, but as an example, you
can add as an album and you can put here and
put it back in here. Now you have all this
very quick to access. Let's go back to all photos. When you hit all photos, it's going to show you
all the images that you have inside your library. If you go on your folder, you're going to see all the
images that you selected. Of course, the ones
that are flagged, you can go here and this is
the one that we selected. These are the ones
that were rejected and I didn't put
any ratings on it. So let's go back to
photos and we can put some ratings like
this one is a five star. This one, it's up to
you how you want to set up your star rating. I said that we have
another way of working with images in the
original files. You can see here, it's
nothing imported. It's different from
the first window from the first option where you have here all your pictures. You can go to files and here, you're going to
actually work and select a folder
on your computer. If you go Import, you select
only the folder and click Import and this imports all your images inside
your photometer. You have the same here,
you have the cafe, but now you don't
have the option to actually create
albums and folders. Everything that
you're going to do, you're going to do inside
your folder that you created on your computer. This is quickly how you edit, how you import your images. And of course, before we
go to lesson number two, here, you can
actually do the same. You can pick your images. You can reject them
and you can give them five stars rating or
four or three or one, or you can just ignore
the star rating. Now that we have all
the images imported, let's go in to lesson number two and actually
start editing our images.
3. Crop and basic Adjustments: Come to lesson number two. In this lesson, I
will show you how to crop an image or
straighten an image, how to adjust the
exposure, the brightness, the contrast of the image, and how to do the white
balance and auto adjustments. This software has an
automated adjustment. If you click on this ML here, you can see that it tries to automatically adjust
the white balance, the contrast, the colors. It will not out of
crop and level, but it will try to use what it thinks that your
image should look like. Sometimes it works,
but most of the time, it's a bit over the top. And I really don't use this. Mostly because when
I took the photo, I knew exactly how the
white balance was. It was a nice sunny day, but here it was a bit
shaded as you can see, and the colors were more warm. So this auto adjustment
didn't make it right. So let's have our first edit. Now crop and
straighten the image. First, what I want to do, you have autostraten, actually this did a
very, very good job. Let's crop the
image. I don't use autocrop mostly
because I have yeah. Actually, this is not
bad. This is not bad. I put the chair into the center. But what I want to
do is take this. I want to keep the
name of the business, so we can do a four by five
and try something like this. Hit Enter, and we cropped
and straighten the image. Now, let's do exposure, brightness and
contrast adjustment. This is in our panel here, or you can go to
color adjustment and you can have white
balance, basic. If you click on Basic,
you'll open the same tab. Let's go to Basic and we
have the exposure here. And we can make
it a bit lighter. This helps. We have the
histogram here and by the way, you can move your histogram. Also you can change
it by right click, can change to luminescence. Always show histogram and
we have the brightness. We can make it. This and also the contrast, we can make the image
contrast or less contrasting. When I'm trying a new
software, what I do, I tend to go 100% to the right, 100% to the left, and just see how this tool
interacts with my image. I do this for all
the sliders here, mostly because let's say the difference between
photometer and the other software is like
Lightroom or affinity photo, they have different
adjustment properties, even though it's
the same exposure. Software interprets
exposure a bit differently. I want to see how this software affects the image and
how accurate is it. So after adjusting this, I'm happy can also play
the texture and clarity. Now, I'm not going to explain each individual option
like exposure highlights, shadows brightness contrast,
what they are doing. I think it's a bit
self explanatory, but at the same time, if you want to know
more about it, hover your mouse on the
slider and you'll get a short description of
what this tool is doing. For example, texture
is adjusting the overall sharpness and
focus of fine details in. Clarity, adjusting
the overall structure and contrast of fine
details in an image. You can see that is very
intuitive and of course, we can go to the white balance, which we have here first, and we can adjust it. As I said, it was a sunny
day, it was a warm day, so we can add a bit more
warmth to the color. And I don't usually
go and play with a tint because I think it's enough with 10% warmth in this. If we're happy with this,
we can save it now. In the next lesson, we will go over the vibrance, we will go over
selective colors, levels, curves, and
all the other options. Let's jump into
lesson number three.
4. Color adjutments: Right. So before starting
lesson number three, what I wanted to show you is how to see a before and after. Let's see if you maybe
overdid it with your editing. So in order to do
that, just click here, you have an option, click and hold to show the
photos without any edits. So if I click on it, I
will still have the crop, but it will wash all my edits. It will disable all my edit. So this is my original
photo and this is after, which Uh, looks
better, my opinion. Let's jump and see
vibrant saturation, adjust of tones
and color balance, and making an image pop. But for this, we're going
to choose another image. Let's choose another
image from here. Let's choose this one. To be honest, I really
liked this abandoned cafe. It was literally in in
a corner of a building, and as you can see in the image, everything we have cobwebs
here, nice, palm colors. Let's edit this using the same tools that
we've done before, so we can adjust the exposure and when
I adjust the exposure, I look at the histograms, well, we can do the highlights. Shadows. We can bring
the shadows up a bit. Brightness, we can tie the
brightness down a bit. We can add a bit
of clarity here, see the details here pop and maybe it will take your
eye off the reflections. Let's do human
saturations where we have vibrant now I
think a few years back, all the images on Instagram, they were vibrant
100% and saturation, oversaturated images, something
like this, which again, don't get me wrong, looks good, but I think it's
oversaturated and the vibrance is too much. So yeah, let's use
the saturation. I think ten, 15% saturation
should work here, and vibrance is the
same, put like 30%. And now, again, if
you want to know, so saturation adjusts the
saturation of every color, and vibrance is adjust the saturation of the
less vibrant colors. So let's say around here, you can see that it adds more amp or if you want less vibrant in the less
vibrant color, keep it 30% here. Another thing that
you can do is you can manipulate the
colors in the image. This color histogram is really nice because it
analyzes the amount of colors that it has in
your image and you can see which colors have the
most impact in your image. Let's say this is mostly yellow. So if I want to
influence only yellow, if I lower the saturation, which makes this image mostly black and white,
it's really nice. It's really, really
nice. So you can make this yellow more saturated or have
the yellow more bright and you can see
how you can start. Let's say, I'm over
exaggerating here, but you can see this is
before and this is after. Before, after. Basically, your
entire image pops. But I don't want to go so much. What I want to do is just
saturate a bit yellows. Again, this will go hand in hand with your temperature,
your white balance. Of course, we have a bit of
green here in the window, which we can
desaturate if we want, or we can actually
leave it as this. Next tools that we can use here are the color
balance tools, and we have the
master color balance which affect the entire image, or we have three way color, which basically allows you to edit the highlights,
the mid tones, and the shadows and you can
have here the saturation of the colors and also the
intensity of the colors as well. And you can add a tint. Let's say the highlights, you want to be let's say cold, you add a blue tint to it. From here, you can add
more, and of course, we can see before and after. You can do also like
this before and after. You can see here how
the highlights are changed to bluish
color very cold. If you want, you can
also add more colors, more warm ones, have a sunset, even though it was
around 10:00 A.M. Here and see how easy you can give another
feeling of the image, which is really cool. I want to add a tint of color to my shadows and this will appear here in the
middle of the image. And you can make it brighter
or darker using this, or you can add more color using this slider,
which is really cool. If you want to reset,
just click on this, which is going to reset this
wheel or if you're here, double click on the
handle and we'll reset only the
handle on the left. Or let's say you are here, double click and we'll reset the and that's enough
for this lesson. We're going to cover the
rest of the tools later on. But for the moment, let's jump in
lesson number four, where we're going to do
some selective editing, and we're going to
use some AI tools for very quick sky selection
and background adjustments. So let's go.
5. Part 1 Advance editing - Using Masks in Photomator: Well, in this lesson, we're going to look at masks and how masks are working
inside photometer, how to edit quickly the
sky or the background, and we're going to
do some retouching and try to remove some
elements from an image. Let's start with the
first image here. It's not a great image, but I want to show you
how masks are working. To do this, we can go here
in our tools bar or tab bar, to be honest, I don't even know what color adjustment,
bar, and so on. We can see that if we press
here on the raw layer, we can add more layers. Click on the plus and
you can see you can add adjustments Select Subject, select sky, select
background, brush, linear gradient, radial
gradient, and color range. Let's take one by one. In my case, I don't have
any subject in place, but we can select the sky. Let's see how this
is going to work. And it did a very good job. It selected the sky very
well and if I zoom in, you can see that also did a very good job
with this tree here as well. Now with my sky selected, what I can do is adjust
the exposure of the sky. I can make it lower
the highlights, shadows, I can lower
them down a bit as well. Contrast, of course,
as you can see, the sky doesn't have
that much detail, so we can do another
thing. Let's invert. Let's duplicate
this. To duplicate, just click on this three
dots and duplicate. And at the same time, we can invert mask. You had an option
there to duplicate invert as well, it's
very intuitive. Here we can actually reset this on the sky copy
and we can brighten. We can go contrast, add more contrast here. And as you can see, it looks way better clarity and more clarity and this
image starts to pop. It's really cool. Let's
do another thing here. Let's add another layer. Let's let's adjustment
and adjustment it it will add the same adjustments that we've added so far but as a layer. Let's say I don't know, I can go nuts with this. At some point, I think that actually these adjustments suck and I want to reset everything. But instead of deleting or going one by one
and just resetting it, what you can do is
uncheck the adjustment. That's it. That's very cool. You can use layers for
your adjustments as well. The previous lesson, we went and we added the vibrance,
saturation, color correction. You could add this in a layer. You can have multiple edits, multiple adjustments
on the same image, but on different layers and
you can turn off on and off different adjustments,
which is very cool. Let's see what other
items we can add here. We can have a brush. Of course, this is
self explanatory. You can paint with the brush where you want
to have the adjustment. Let's say this guy, we want temperature to go down. It is really cool. This is before and this is
after. Why not? We can do it. Let's see if it selects the
background properly. Although we've done already, selecting the sky and
see the background, it didn't select that well. Our first selection
was way better. We managed to select the
sky and invert the image, which was way way
better than this. Let's delete it.
I don't need it. Let's see what else. We
have linear gradient. It creates this gradient. Linear gradient is used when you want to dial
down, for example, a sunset or sunrise
and you want to lower the intensity of the sun but
also keep the foreground. You can use this bit here,
this linear gradient. Again, we can take this and
let's say for the sake of this conversation and
take these highlights and create a different color
of the highlights. Notice that this sliders
here are working very low. Now we can see this is
before and this is after. It's let's say mid tones, add the same and I
think this will add more add the colors. You can see you can
mimic again the sunset. Of course, you can
rotate this gradient. Again, it's
exaggerated, but it's just for you to see
how this tool works. You can minimize the
gradient here by pulling on this handles and also
you can reverse it. Let's say you want to have
a more gradient here. If you bring your mouse in the mouse is going to
change, you can rotate. Actually, you know what
this here looks very good. This is linear gradient. Let's see what
else we have here. We have radial
gradient, which again, it's a very good tool when you want to have
a localized edit. Let's say here you want to
do exposure a bit lower. You have a shadow in this
tree, you can do it. Anything else, we
have color range. Clicking on this, you can select the color.
Now it's working. Let's say I want to
just only this colors and most of the
bricks, which is okay. We can do temperature. We can change the
color of the bricks. We can add the exposure. And you can see how this works, or we can go and choose the greens and this is
going to affect the leaves. Let's click once on this
and go on this green. There you go. You
changed very quickly, you change the color
of your leaves. This is how basically
the layers are working. It's a really good
non destructive way of editing your images, and by doing this, you will be able to
always come back to the original image and do more Part one of
this lesson is done. Let's go to part two, where we're going
to look at removing some elements from
an image using AI.
6. Part 2 Advance editing - Object removal and color changing: Okay. Now, let's jump into another image and try to
remove some elements from it. Another image that I want
to edit is this one. And what I want to do is I want to remove
some of the elements here, which are a bit
disturbing in the image. But first of all, let's crop it. I will do I will do I will do I want
a five by four. So you go custom here, and you go four here, five here. And let's edit this. I think we can A
it's aligned. Okay. This is a very rudimentary way of editing and try to see
if your line is straight. So let's remove
that and hit enter. Now I said, I want to remove this camera and this lead here. The way to do it, you
have repair tool. Click on Repair tool. I will use my to
do a smaller brush here and just paint over. And it disappeared like magic. Let's see this, how this
will work. Disappeared. Now, let's get rid
of this sign here. It did a good job. Well, I'm a bit surprised, but to be honest, at
the first glance, you can see that this is
the pattern is disrupted, but still it's very good. It removed the post and
the sign here and also it removed the webcam or the surveillance camera
and also the lead here, don't have any artifacts. I really like it. Now, once you have done this, click Done. We can go and edit
the image as normal. Let's see what else
we didn't cover here, Let's cover the levels and curves and replace some colors. Let's see how this
background is going to look if it has another
color and not yellow. First of all, these are
the levels, and of course, we can adjust them
just like you do in any other software. I love this. I really
love the handles. So the way levels are working. You have here the shadow
area, the dark area, and here you have the light
area and you just move these handles until you are happy and satisfied
with your edit. Of course, you have these
handles which are between. I think this is a
I don't know, 50%, this is 50% gray, 25% gray, 75% and 100% white
or something like that. Let's see, curve adjustment. Now, curve adjustment is
using the same information. On this side here, you have the shadows. Here you have the dark. You can adjust the RGB, the luminant or just the reds
or the green or the blues. But normally what
I do is I go here, it's either I keep on RGB or
you can use the luminance. But this is a bit more advanced. For your sake, use RGB and you will see
people on the Internet doing an S curve to bring the highlights and
lower the shadows. Okay. Now this is
exaggerated here, so I will reset it, and maybe just a gentler
curve like this. Let's replace a color. Again, we can replace
this color to Red. It's too much too much too much. Yes, it's too much. This is cool, of course, you have the intensity
which you can lower, lower, lower and try to bring another there you easy
as that, easy as that. Of course, you can adjust it if you want the range and you can see here
if the range is lower, you're going to basically adjust only the small
color picked here. If you go range, it's going to add more ranges that color, more tones to that color, and you need to find a sweet spot until
you will be able to add more stuff and fade you
have blacks, whites here. I don't really use fade.
It's just something. I will create another lesson
where we can go through black and white color monochrome
and also how to do lots. But this is going to be
on our next lessons. Let's jump into the
next lesson where we are going to look at how to edit large files and if it's going
to handle large files like a panel and how to edit it.
See in the next lesson.
7. Using big files: Right. I've opened
three panels here. Unfortunately,
Photomator doesn't have the option for you to generate the panels if
you have a split images. So in that case, you need to use an
external panel editor like Affinity Photo, Photoshop or they are web
based panels stitches, just Google and you'll
be able to find a few. Now, these three
panels were created, two of them with my drone and the other one
with my iPhone. It's perfect for
photometer to go inside and just
edit these photos. Let's grab the first image. Let's start editing. Let's try to use automatic
enhance of the photo. It's an AI tool that
will analyze the photo and we'll try to enhance
and edit your photos. And what this time
is not that bad. Enhanced my foreground. I have my background
really nice, the sky colors are
really good as well. So it's really nice. Let's see what it did.
If you want to see what edit this
automatic enhance did, you can click here on the color adjustment and you can see the
edit that it took. If you want to adjust
it, just go ahead. It didn't create any layers, so let's create another layer with adjustments with
our adjustments. If you click click adjustments, now everything that
you're doing is going to be on this
adjustment layer. From here, we can drop a bit exposure because I
think it's a bit overexposed. This looks very good. Highlights. We can see here on the histogram that on
this right side here, we have a bit of clipping. Let's see if we can
dial that down. If we go highlights, brightness and here you can see if you go
brightness, if you go down, that clipping goes away, this actually with the
highlights and go this contrast. You need to keep an
eye on this histogram every time you edit your photos. You don't want to go here
because you can see that this doesn't look good
and also you have a lot of details that
are in the shadow. You don't want to go too
much because you already see how this is clipped
and overexposed. Let's go. I was -10%. Let's do background
brightness on green part. This selective color
editing is really cool because as I said in
the previous lesson, we can actually pinpoint
what we want to edit. You can see we have a lot of blues and this is
marked by the sky. If I go brightness down, you can see how quickly
we can edit this image. Color balance, I'm
not going there. I said I want to go and edit a bit this I'm not going
to use black and white. Although this image looks very good in black
and white as well, I'm going to use another
image in the next lessons to change it to a black and
white and edit that one. Color monochrome,
this is nice as well. Again, it goes hand in hand with black and white if
you want to use it. Although you can give
only a tint of it. Let's say you want
to change Lutes, this again are something
that we will do in the next lessons because
I want to show you how you can create
your own lutes. You can see here
that I created a few that mimics some
of the film stock, some better, some worse, but also you have these
different types of lots here. You have an option to use it. Until you reach that lesson. Vignette. You have the
options to add vignetting or act to take it off with
minus the sharpen option, you can see it creates a really, really sharp image, so
basically more contrasty. But this is again exaggerated. We can use this radius like this and we can see before and after, but I'm not going to use it. I like it a bit more
soft. We can use grain. There are people who
likes grain in the image. Basically the noise that
you can add into an image, there are some people
who really hate it. It's really divided
we went through all the adjustments and
because this is a layer, you can enable it. This is the original,
well, not the original, but this is the image that photometer adjusted
for you when we first edited the image and this is the adjusted image
with our adjustments. Which is pretty good. Let's
jump in to another image. Let's see what edits we
can do to this image. Again, it's a very big image. We can do again an
auto adjustment, but to be honest, I don't
really like it to disable it, you just go back
and click on this. Let's zoom in a bit and we can see that we have
a lot of animal pull around. I'm not going to
remove everything, but let's see how this repair
tool is going to work here. Again, this is a very
big image and I'm trying to see not now. I'm I'm not going to spend
too much time on it. I just want to show you
how this tool is working. Is doing a really, really
good job identifying the textures around the elements
that you want to remove. Let's make this brush bigger
and let's do a bigger thing. Loving it. You can see that it removes the things from
the photo, really nicely. I have one more. I
want to remove this. From here, let's
go into our panel. This time, what I'm going to do is actually selecting one of
the presets for the image. On the bottom here, you can see you have
different types of presets and they are
in this catalogs. If you want to know more, just hover a bit on them. Cinematic, classic films, modern films,
landscapes, vintage, urban, night, and Pixel meter P. If
you click on this one, you have different types. Let's click on some landscape. Click on this and it's so green. I think this one could do. But at the same time, we need to up the exposure. A bit, something like this, which works. It's nice. It's not bad and as you can see, it handled the image
very very well, and I like the colors as well, so I can hit done. And I finish with this image. Let's go to the next one. This is an image that
I took with my phone. It's a panel that you can
easily do with your phone. It doesn't matter what
type of phone you have 9,342 by 3,848, I think I've already cropped
this image a bit and again, looks amazing, and
this works very well I recognized the profile and applied the
color correction. That's about it on this lesson. I just wanted to show
you how photometer is handling large files. From here, we will go
into our next lesson. We're going to look
closer on presets, how to do your own preset, and how to import presets.
8. AI in photomator: In this lesson, we're
going to look at what AI tools Photomator has. So we have Auto Enhance, super resolution, smart D band, denise repair, automatic crop, select background, select
Sky, and select subject. I've selected a few images here, and let's go to
Auto Enhance first. Auto Enhance is here. So you can see automatically
enhance Photos. If you click on it, going
to take a few seconds and boom. Did a very good job. I'm zooming in really nice. Nice skin tones, nice eyes, and the background
looks good as well. See, I have a few spots
on the sensor there. The rest looks very, very good. I really like it. Of course, from here, you can
go and adjust the colors, see what the auto
adjustment did, and work from there. Right, so let's go
to our next AI tool, which is super resolution. I will double click
on this image. I will apply an automatic
adjustment just for fun. And if you click on
these three points, you'll have super
resolution here. Click on it. And
what this will do basically will multiply
the pixels in the image, so that will increase. But it's a more complex
calculation on this one. Now we can see we have 5,616
and if we take a look now, we have 11,232, which
is really cool. Now, we can have a
look at before and after And to be honest, did a very good job, didn't lose any details. So we can have a look
here in the image. And here we can see
a bit softness, but just a bit. So I am happy with
this. I'll click done. Right. So let's go
to Smart D Band, and let's open this image, and we can see we have
some bending around. And to be honest, this is an artificial bending as this image didn't have any. I had to introduce it
just for this lesson. It's not a common error, but it can occur
from time to time. So let's go again on this
three little dots here, click on it and we
have Smart DBnd. Click on the Smart D bend. This will take a bit. It
will analyze the image, and hopefully it will
remove the bending. Right. So if we have
a look at before and after we can see let me
zoom in a bit for you. So we can see here where
actually it did a very good job. It's a bit soft, so let me zoom in
a bit on the eyes. Again, the resolution
also it's very low. This is how I got the
bending done on the image. You can see that the
image becomes a bit soft, but again, it's
expected for this tool. You can recuperate part of
the information later on with contrast and
maybe a bit of dehaze. I'm happy with this.
I'll click Done. I will zoom out and
this is really cool. So this is after,
and this is before. You can clearly see that
the bending disappeared. Really, really good job. Let's go to Denise. And again, I had to take a shot have a bit of introduce a bit of
noise in the image. So let's zoom in on
the little kid here. And we can see that
it has some noise. And to denoise, we can go again here on
these three points, Denise. Click on it. Let me zoom in for you. The image is very soft, but what we can do is
here on the bottom, you have denoise intensity. Let's drop that like this. We have a bit of noise, but it's not going
to be that obvious. Click Done. The next one, we're going to use repair, and I'm going to double click on this
image again with Sami, and I will use this repair tool. You can find it here next to the auto enhance,
click on the repair. You have the brush tool here, the brush size can create like a big brush
or a small brush, and let's remove quickly
this uh Then here, click here and click here. Now, we can zoom. Again, this is a
very small image, but it's doing a very great job, and I'm using just my mouse. And let's remove this as well. And there you go. Let's go. So this is before, and this is after repair tool. Let's go to our next image, which is ML Crop. So this will try to crop
our image automatically. I don't really trust it, but so we have here
the crop tool, click on it, and then we
can select the Auto tool. So again, crop Auto Crop
and did a very good job. Like it. Click Done,
and there you go. Your image is cropped.
We have three more. Select Subject, select Sky
and select Background. Let's go to Select Subject. So I'm going to open
another image here, and I will go here on
the color adjustment. I'm going to add plus,
and I'm going to use Select Subject and amazing. We can increase the exposure,
the highlights, shadows. So basically, from here, we can start doing our editing. I am happy with this. I'll click Done. We
can go to select Sky, and we're going to
use this image. As you can see, it's a very
complex image, to be honest. So let's go again and
click on this tool here. Click on the Plus, and
we again select the sky. And if we zoom in, we can see that it did
a very good job again. We can go up or down, can create like this really dark and moody image contrast. It was a bit of a
storm, to be honest, so and I love it. Good job selecting the sky. Let's click Done, and we
can open another image and see because she
has the hair there. Let's see how the
sky is going to be selected. Select sky. Oh, wow, look at
this. So the sky is perfectly selected even through her hair.
Very, very good. Moving on. All right. I forgot to mention that when you use the automatic selection, if we go here and let's
say we select the subject, and as you can see it didn't select her right arm as well. What we can do is
because this is a mask, we can click here on the three points next
to the mask and we can add a brush and we can start painting and this will
add to the selection. From here, of course, we can exposure to
our regular edit. Hopefully, this will clear
up how this tool works. Let's get back into the lesson. What else we have? We selected the subject, we
selected the sky. Now we need to select
the background. For this selecting background, let's open the image
with artemis again and go here plus and
select background. Again, really good job. Really nice. We can go Black point. Shadows. I love it. That's it. That's
the entire overview of the AI tools that
Photomator has. Let's jump into our next lesson.
9. Presets and workflows: Okay, so in this lesson, we're going to look at presets
and how to apply them, how to make new presets. And at the end, I'm going to show
you how to edit multiple images using workflows. So I've opened here
a bunch of images. And let's take this
one, for example. So from here, we'll
go into adjustments, and then on the
bottom of the screen, you can see the presets
for Photomator. So if we bring our cursor
our mouse on top of it, we can see black and white,
cinematic, classic films, modern films, landscape,
vintage, urban, night, and pixel meter P. So
if you click on this, click on the black and white, and we have a few presets here, which looks very good. And in my opinion, there are some people who
don't want to use presets. They say that it will kill your originality or
something like that. But for beginner photographers, presets are starting point. Nobody says that if you
go here, for example, you apply a black
and white preset, then you can go and fiddle
with it, fiddle with exposure. Go ahead and adjust
the brightness. Maybe you want a bit more. And this you'll make
your own preset, your own image, right? You're not using the stock
presets, which again, my opinion, nothing
wrong of using presets. So we have black and white. We have the cinematic, which again, they
look very good. Let's see, the film presets, they look really good as well. Then we have modern films. This is landscape. Oh, this is a nice
separation of colors. And again, it's really nice. You can go and learn how
this was achieved by seeing what edits was
applied to the image. You can see some curves here. They use the channel mixer, 100% red, desaturated,
which is really nice. Cool. L et's see some
vintage. Looking good. Hopefully on your screens
will look as good as mine. Urban. Let's close a few. If you click on the name, you can close the patch. What was NIC? Night.
This is nighttime. This is cool. Nice colors. Nice
experiments, to be honest. Just go ahead and This is Pixelmator P. I think
this is these are the presets from the other
software that Apple created. It's called Pixelmator. Oh, really nice.
I really like it. Now, let's start
creating our own preset. So left top corner
of the screen, you have reverted to original, and then we can apply our own. So let me choose another image. Let me use this one, and we'll click on the
adjustments and we'll start. Our edits. I'm going quickly
through the adjustments. I want more contrast,
black point. I want to be a bit darker, a bit textured, clarity, as well, you can see how this
affects, is really nice. You can be more fuzzy
or more claret. Just at 5% should be
more than enough. Hue saturation. I
don't want to go over. Let's do the ladybug
to be saturated. We can do that. The greens,
they look really good. Yellow, lot of yellow in this. The selective color is really
nice because in this graph, you can see what
colors are predominant in your image and you
can influence that. So they look really good. Levels. Let's adjust the levels. I really like the
handles in the levels. You can bring up
something like this. And yeah, I don't want to No, I don't want to turn it
into a black and white, channel mixer,
vignette, sharpen. Let's add a bit of grain. I like this film look into it. Alrighty. And let's say we are happy
with this edit, right? In order for us
to save all this, what we've done so
far, you can come here and you just click Plus. And this created
your own preset, and you can see preset
one in customs. Yeah. And if you right click on it, you can rename it,
give it a name. I'll put ladybugs and
you can export as a LUT or as a lot,
and that's it. If we click Done, and we go to our let's
say, find another image. This one or this one. Okay, let's say, this one. Really cool. Same thing. We can go into our adjustment panels and hit on the ladybug.
And there you go. I showed you how to create a custom preset and
how to save it. So you can see I have
multiple images, and I want to apply
the same preset, but I don't want to
go one by one by one. So here, Photomator
created workflows, and we're going to create
the workflows as well. So let's select
everything that has this ladybug in focus. So I hold shift, and I selected all of it. Then right click Workflows, more workflows, so we can have a look and
see what we have here. Now, we have some AI stuff
where we have enhanced crop. So if you want to
add your preset, so we have custom here, let's find our ladybug. So we have ladybug preset. Then we can rotate if we want, we can crop, and
this is going to be machine learning crops. We don't we want to export. So we can export the images
as well in this workflow, and you can see JPEG, PNGs HDR, then we have JPEG, PNG, TIFs or photometer. Increase resolution, so we can increase the
resolution if we want, but we don't want at the
moment reduce noise. We don't have that much
noise in the image. We don't have any
bending in the image. I want to preserve the edits. Should we give it a try? Okay, but before I hit Apply, let's have a look and see
what else we have here. Again, we can adjust the
colors and do all the same. We can auto crop only. So yeah, this is
just enabling and disabling some of these
options here. Apply urban. So this will apply an urban
preset, and that's it. Auto straight, rotate
left, rotate right, rotate 180, export JPEG
PNGs, scale to 50%. Yeah, so a lot of
batch editing here. You can create your own
custom workflow as well. So if you hit here plus, you'll see custom workflow. We can adjust the colors. We can add ladybug. Let's say we want to crop it, use the auto crop free form. Let's see how it works.
Let's export JPEGs, and I want them 70% because I
want to post on my website. Let's reduce noise
as an example. We don't have any bending,
so let's keep it as it is. So I'm going to apply. Alright, now, it asks me where
I want this to be saved. Yeah, it's cool. It took a while. Now,
if you downloaded some presets and you have a
folder somewhere on your PC, you can go into the
color adjustment Luts and choose lute. And from here, you can
import your presets. So this is what I tried
to make with Chat GPT. I told him, Look, create a few film presets that were popular and export them
as cubes for photometer. And let's say we have
Kodak Actor 100. If I choose this one, it's good. It's really nice. What can I say? I have
here another one. And if you want to see more, you can go here in the stab
and you can select them. As you can see, I have Cintll, Fuji film Pro, HP five,
which doesn't work. This should have been
a black and white one, HB plus through Hector
and Portrao hundred. Oh, no, to be honest
Portrao hundred looks very good. And that's about it. Let's jump into our next lesson where we're going to
look on how to export your images for web or for print and have the best quality.
10. Export your work: Here we are at our final lesson on this photometer course. And after we worked so
much on our images, we want to export them and
share them with the people. We want to print them, and we want to put
them on Instagram, Facebook, or wherever
you want to share them. So in order to do that,
we have two options. Either we're going to do full
size export of the image or we're going to
do a resize image if you're going to put say, on your website, you don't want a full resolution picture. So let's see what options
Photomator has for doing this. If you go here in the menu, you can see we have export or
we have very quick export. We're not going to
use Quick Export mostly because this is going to export PNG or JPEG full. That's it. No other options, no other bells or whistles. So we can go into
Export and you can get this option from this little tab here or you can go
to File Export. So the first option here
is to change the format. Usually, if you want
to print something, I would go with TIF because
this will allow me to export as much information
possible in this extension. You go with eight bits, it's okay, scale, original. If you want to add a frame, you have the options
to add a white frame, which you can customize. You can do the thickness. So let's say you have 150%, and if you want to
make your photo with the radiuses here, and we have a preview, which is really nice
or a translucent one. Let's have a preview of
this. I is really cool. It's something that photometer
is doing instantly, and it will take you at least a few minutes
to do this in Photoshop, for example, or Affinity Photo. So this looks very good as well. It's ready to print,
to be honest. And if you have a small
shelfi print camera, this will look very, very good. You have 35 millimeter film, which I'm guessing, yeah, you have the sprockets here, the sprockets holes, some
information about the film, which again, looks really nice. I've seen this type of
export on Instagram. I don't know, love it or
hate it. It's up to you. You had this viewfinder
frame, which, again, everything like the ones
like the translucent one, again, you can
customize the corners, you can customize the
blurriness of the image. I didn't go on this too much because I don't
really use them. I think the most what we
can use is solid color, which gives you a really
nice border for your image. Let's say you want to print
and have a border around, this is really nice. So you can have
are four by five, five by four and nine by 16. But in my case, we go even. Basically, we're going to follow the aspect
ratio of the photo. I don't like the
rounded corners. We can choose the
colors, of course, of this frame, but
I like it white. Let's juice white. You
can add a watermark. Again, I don't use so
much this option here. So if you know, you can add as a watermark. Let's say, your name.
So we can put here. Let's say, if you want
to print it and use it as a marketing thing.
You can add shadow. You can change the
position of your text. Depending on your text, it's going to be easier
to read or not. I can change the size,
change the opacity. And I think this is going
to be nice if you have multiple images and you are
working for a customer, for example, and
you want to send some nice previews
of your image. What you can do is do I
don't know, 50%, big size, choose I don't know, choose another color white
or yellow. Let's say, white. Put this one in the middle. And there you go. You have it as a tile, spacing angle, and boom, let's see a preview. And this is how you add a copyrighted image for
the customer to review, and if they like the
photo, they can pay, and you will give them the
image without the copyright. Makes sense. From here, the only thing that we
can do is click Next. This will open our working
folder, hit Export. And there you go.
That's exported. So that's 100% the image. If you want to, let's say, resize your image and compress and you can rescale your image, let's say, 50% or 25%, and this will give
you a smaller image if you want to publish
for a website. It doesn't make sense to do the original where
you can see 62 megs. Yeah, versus 25% scale,
which is, again, 1031 pixels, which is a pretty good resolution
even for your phone. So you can use it as this. So this is the image. 3.9 megs. Still big for this resolution, but bear in mind that is a TIF. If we change it with a JPAG, this is going to be 375 kilos. So actually, I recommend
for web to use JPAGO PNG, let's see, 1.4 meg. And from here, you click
Export and there you go. Another thing that we can do is basically share it
straight from this image. Again, I don't do this, but you have the option
to share your image via AirDrop messages and various other apps
that you might use. That's about it. Let's go to our next video
where we're going to have a quick review of what we've done so
far. See you there.
11. Thank you: Thank you so much for taking this photomato
class with me. I really hope you
enjoyed it and picked up new editing techniques
along the way. By now, you should
feel confident importing photos, making
clean adjustments, using AI Power masks, editing row files, and creating styles that match
your personal vision. Automator is a simple tool on the surface but powerful
behind the scenes, and now you know how it works. If you haven't already,
don't forget to upload your before and after photos
in the project gallery. I love to see what
you've created, and I'll be giving
feedback there. It's also a great way to see how other students
approach their edits. If you found this class helpful, it will mean a lot if you could leave a quick
review or thumbs up. It really helps the class reach more learners and
supports future content. And if you want to learn
more about photo editing, digital creativity,
or workflow tips, feel free to follow me
here on Skillshare. Thanks again for joining.
Keep experimenting, keep editing, and most
importantly, enjoy the process. It's really nice. I'll see you in the next class. Bye bye.
 Alexandru Taradaciuc, Photographer