Photo to Watercolor: Easy Flower Line Drawing | Irina Trzaskos | Skillshare

Playback Speed


1.0x


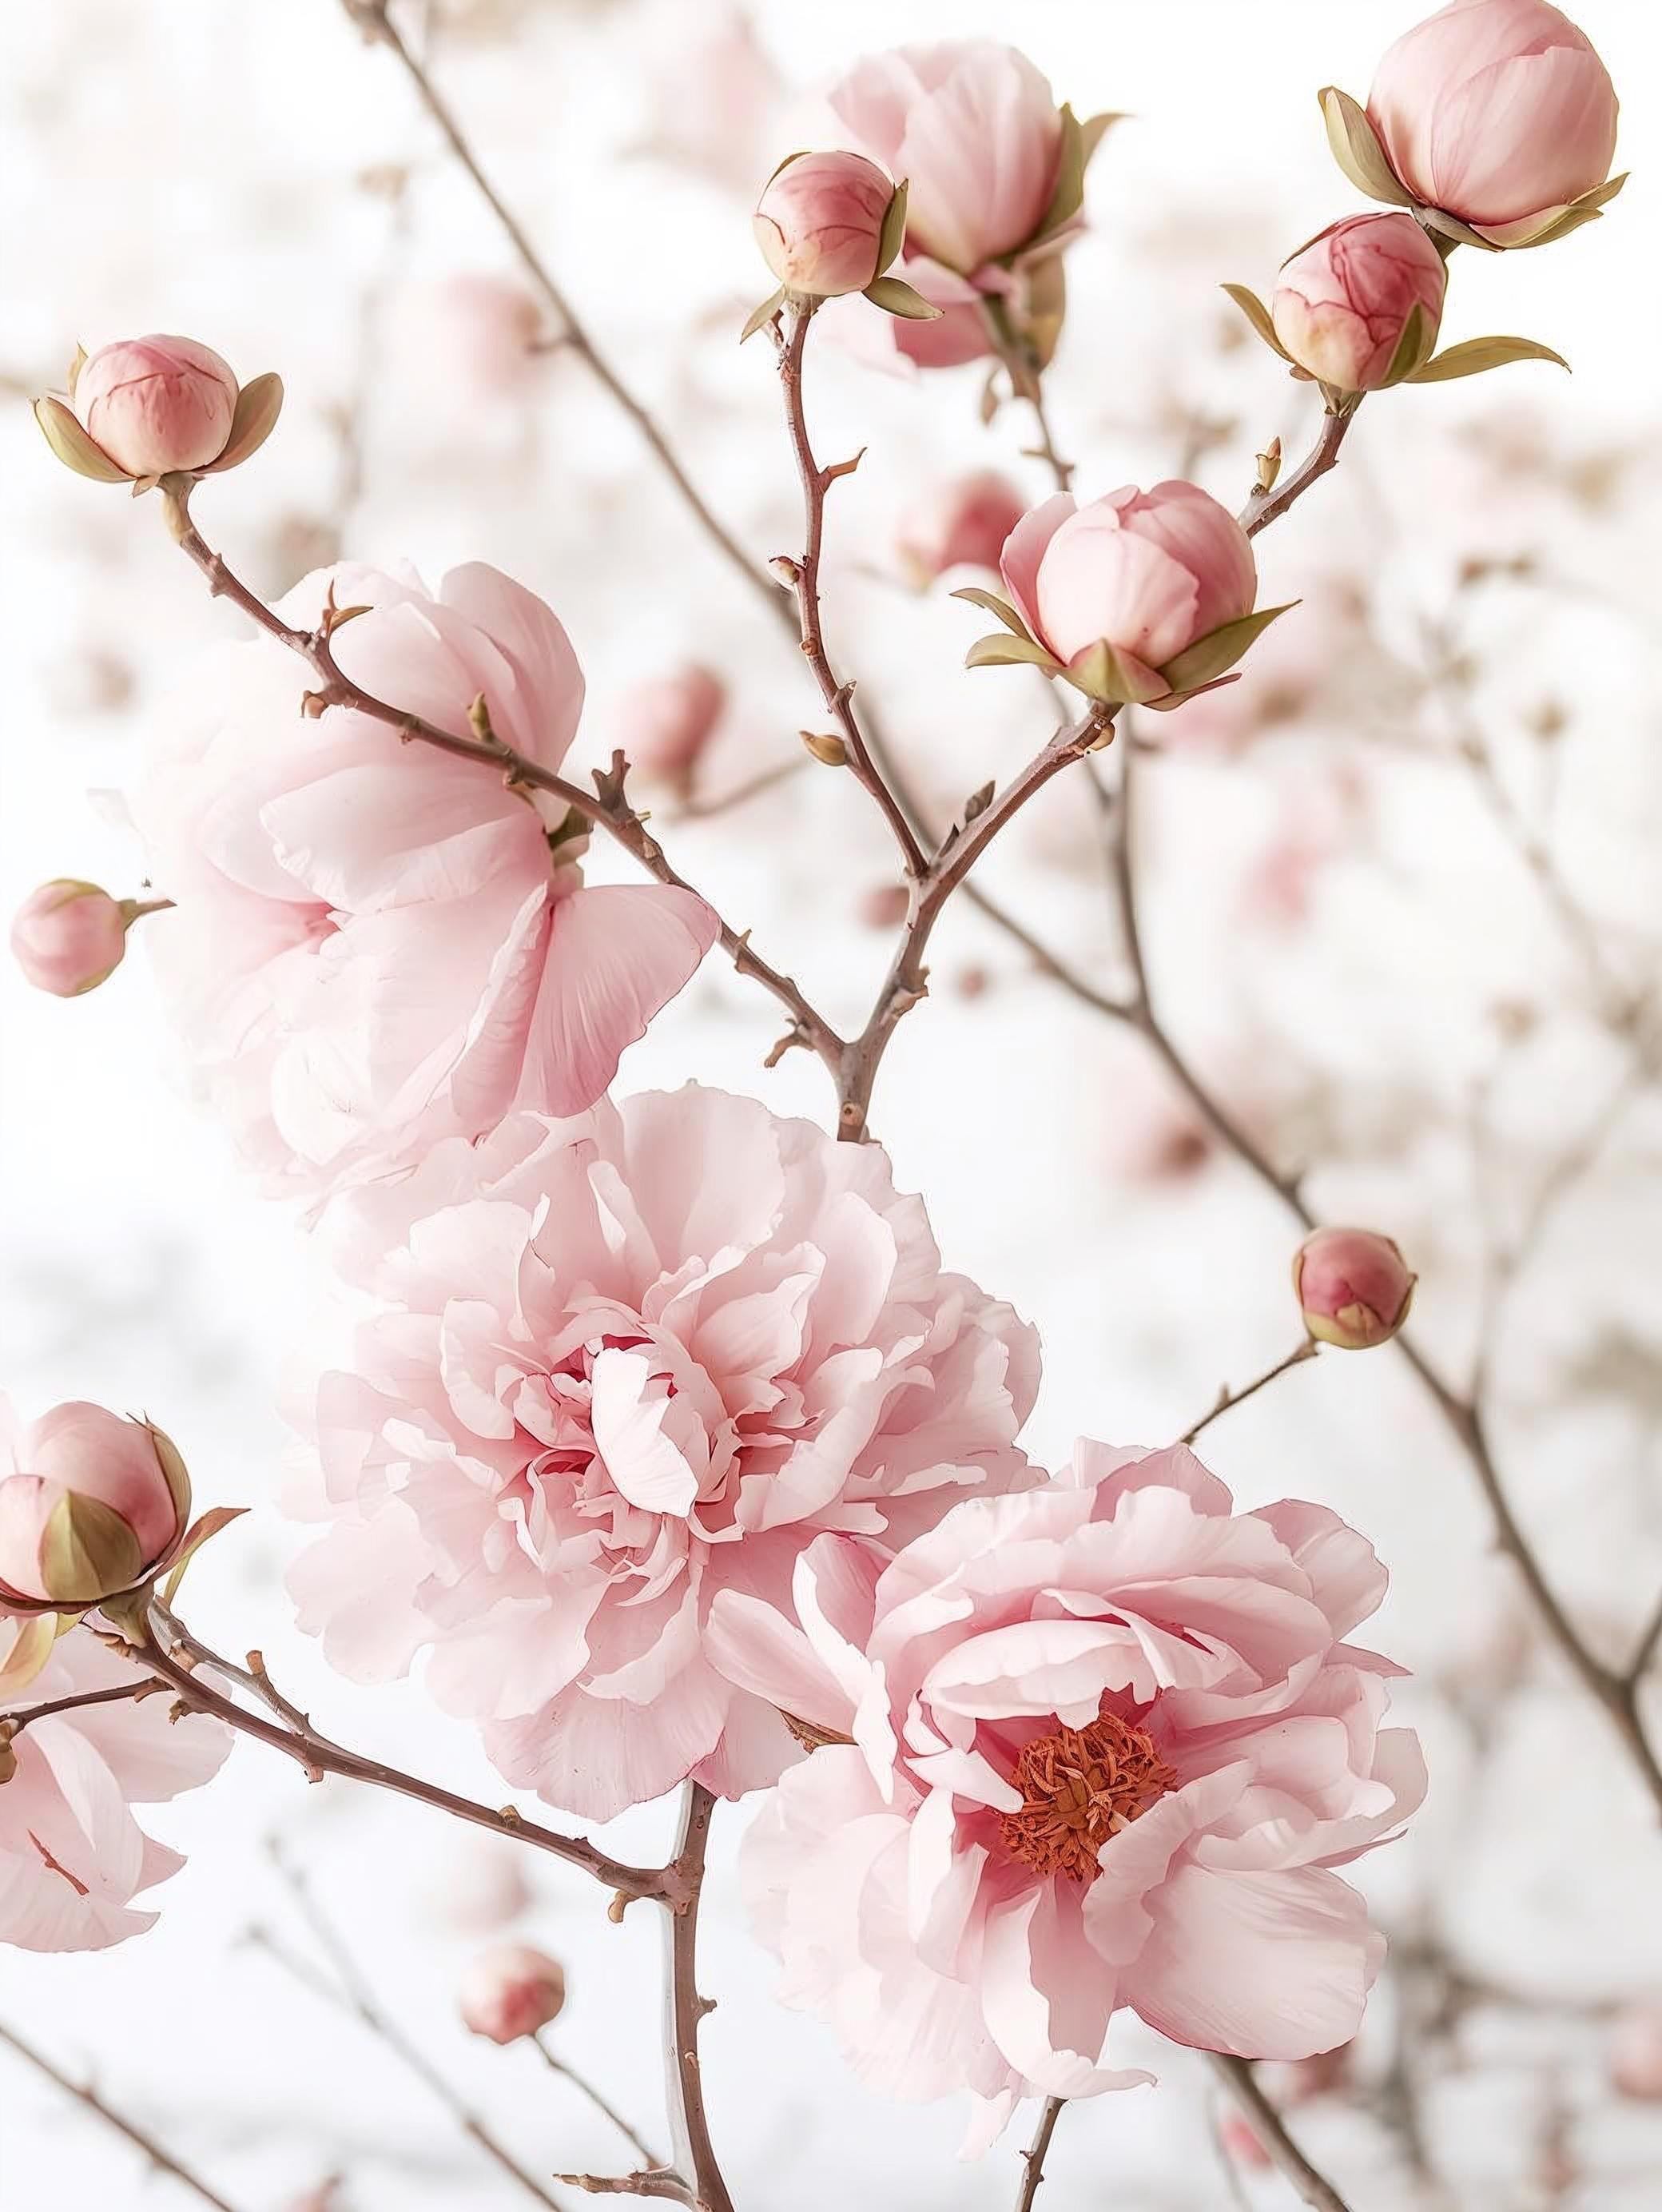
  • 0.5x
  • 0.75x
  • 1x (Normal)
  • 1.25x
  • 1.5x
  • 1.75x
  • 2x

Photo to Watercolor: Easy Flower Line Drawing

teacher avatar Irina Trzaskos, Watercolor Artist & Illustrator

Watch this class and thousands more

Get unlimited access to every class
Taught by industry leaders & working professionals
Topics include illustration, design, photography, and more

Watch this class and thousands more

Get unlimited access to every class
Taught by industry leaders & working professionals
Topics include illustration, design, photography, and more

Lessons in This Class

    • 1.

      Introduction

      1:08

    • 2.

      Supplies

      1:07

    • 3.

      Step 1 - Outlining the Petals

      3:49

    • 4.

      Step 2 - Transferring the Outlines

      2:52

    • 5.

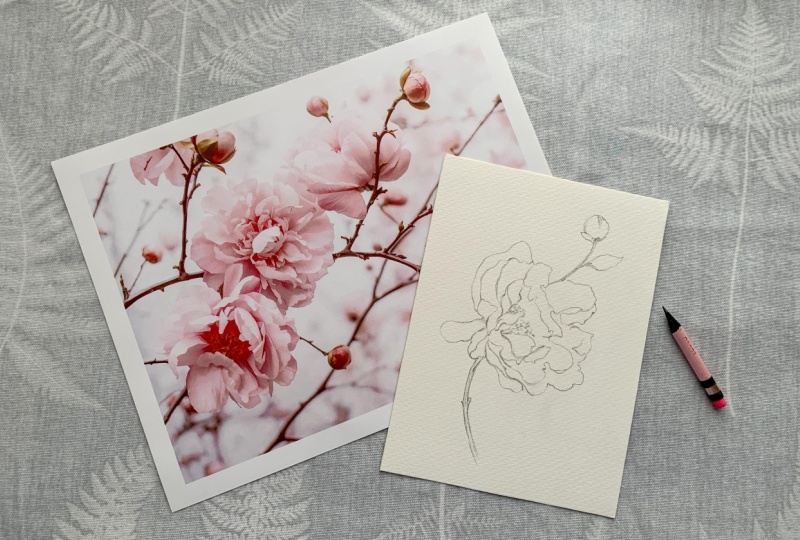
      Step 3 - Refining the Composition

      4:16

    • 6.

      Step 4 - Final Drawing

      6:15

    • 7.

      Final Thoughts

      0:50

  • --
  • Beginner level
  • Intermediate level
  • Advanced level
  • All levels

Community Generated

The level is determined by a majority opinion of students who have reviewed this class. The teacher's recommendation is shown until at least 5 student responses are collected.

118

Students

1

Project

About This Class

In this beginner-friendly class, you’ll learn a simple method for turning a flower photo into a clean, elegant line drawing that is perfect for watercolor painting.

Many watercolor beginners struggle not with the painting itself, but with the very first step — how to simplify a photo into a sketch that works well for watercolor. Complex petals and too many details can quickly become overwhelming.

In this class, I’ll guide you through an easy process for translating a flower photograph into a light, graceful drawing that captures the movement and structure of the petals without unnecessary detail.

Using a beautiful blossom as our reference, we’ll explore:

• how to simplify complex petals into flowing shapes
• how to identify the most important lines in a flower
• how to avoid over-drawing details that make watercolor difficult
• how to create a balanced and elegant flower sketch

By the end of the class, you’ll have your own finished flower drawing ready for watercolor painting, and you’ll be able to use this technique with any flower photo you love.

This class pairs perfectly with my other class “Watercolor Petals Made Simple: Paint Stunning Flowers in 3 Easy Steps” where I show how to bring these drawings to life with watercolor.

This class is perfect for:

  • watercolor beginners

  • artists who want to improve their flower drawings

  • anyone who wants to paint flowers with more confidence and ease

Grab a pencil, a piece of watercolor paper, and your favorite flower photo — and let’s start drawing.

Meet Your Teacher

Teacher Profile Image

Irina Trzaskos

Watercolor Artist & Illustrator

Top Teacher

Hello, I'm Irina Trzaskos, a watercolor artist, illustrator, and educator passionate about capturing whimsy, beauty, and storytelling through vibrant, dreamy paintings. Originally from Moldova, a small and beautiful country in Eastern Europe, I now call Coventry, Connecticut home.

I've been painting and drawing since I can remember--so much so that as a child, I often found myself in trouble for sketching on anything I could find, from books and photo albums to furniture! That early passion never faded, and today, I bring my love for artistic storytelling and watercolor magic to students worldwide.

On Skillshare, I am teaching watercolor techniques that help artists of all levels create captivating illustrations, dreamy landscapes, and enchanting compositions infused with ... See full profile

Level: Beginner

Class Ratings

Expectations Met?
    Exceeded!
  • 0%
  • Yes
  • 0%
  • Somewhat
  • 0%
  • Not really
  • 0%

Why Join Skillshare?

Take award-winning Skillshare Original Classes

Each class has short lessons, hands-on projects

Your membership supports Skillshare teachers

Learn From Anywhere

Take classes on the go with the Skillshare app. Stream or download to watch on the plane, the subway, or wherever you learn best.

Transcripts

1. Introduction: Hi, I'm Irina Traskas, watercolor artist and illustrator. In my previous class, I'll show you how to paint petals in three easy steps. However, a lot of my in person students said that they don't know how to draw flowers, so it stops them from practicing of painting of the petals. So today, I wanted to show you how to transform your photos of flowers into drawings for your watercolor practice. So those two classes, today's class and previous class would go great together. Um, you can take a photo of a flower. You like and I'll show you how to transform it into a drawing in very easy steps. And then you can practice your petal painting, thank you so much for being here. And the next idea I'll show you the supplies you'll be using. And let's get started. 2. Supplies: So for this class, we won't need a lot of supplies because we'll be drawing we'll be doing just with drawing, not with painting. So we'll need a picture a printed picture of the flowers. I will provide the photo in a project section of class, and for the best result, it's very cheap printed. It doesn't have to be a fancy printer, can be just any printer even black and white, but it's very chip printed. And then we'll need a tracing paper. A piece of watercolor paper, the one you decide to transfer your flour drawing onto. So I decided on a five by seven size when we'll need a micron pen, an ink pen, any black pen, and graphite pencil, this is three B, so it's on the softer side, but any graphite pencil would work. And two colored pencils. I picked a blue and a pink one. And that's it, let's get started. 3. Step 1 - Outlining the Petals: So for the first step of creating our drawing from the photo, I highly recommend you printing the photo of the flowers you took. And for the purposes of this class, we'll do just one flower. I decided on this one, and for the first step, we'll take a sharpie or any kind of ink pen and we'll use it to define the petals of this flower. So I'm just going over the printed photo. And I printed it in a fancy printer, but you can use like any home printer or even black and white. So you can see that some parts of these petals are not too visible. That's why we're using a sharpie pen to define and even guess in some places which petals are where. Especially this part is not too visible, so we're just going over and defining these petals. So this is a pretty easy and quite relaxing process. So at this point, we're just outlining everything we can see. In a project section of a class, you can find this photo and a few more photos of a flowers to practice on. You can also use a flower catalog if it's for your own personal purposes and just for educational works. So we got our flower and also I like to define the middle like this, some wavy lines. So this is our first step in creating a drawing for our watercolor. 4. Step 2 - Transferring the Outlines: For the second step of creating a drawing for our watercolor, we'll take a tracing paper, a big piece of tracing paper bigger than our drawing, and I'll place it the way the flower is kind of in the middle of the paper. So we have room for designing the composition later. When we take a color pencil, I picked a pink one for this stage and we outline our lines once again. Unlike simple graphite pencil, the color pencil won't leave marks if you smudge it. At least it shouldn't for the second step, we're just outlining exactly the same lines with a color pencil. So if you're not using a printed photo, you can skip to this step right away and outline this on your laptop, placing the tracing paper on top of a laptop. Just make sure not to damage your laptop surface. So as a result, we have this pink flower at the moment. And I'll show you what's the last step of creating a drawing. 5. Step 3 - Refining the Composition: So in the last step of creating a drawing for our Waagar painting, first, we have to decide on the size of the painting. For this flower, I decided on five by 7 ". So I cut the paper of 5.5 and 7.5 ". After I did so, we can feel the composition. So what we do need to clip out a flour and somehow place it where it should be in a composition on a white paper, on a watercolor paper. So I think I'd love it to be this way. Next, I take a blue pencil or another color pencil different from pink, and I start refining this drawing, where th flour. For example, if I don't like this petal to go like that, but I would love it to go a little different than this is the stage where I would decide that So with the blue lines, I would have a final drawing how I want it on a dressing paper. And some parts I would simplify the drawing. And some parts I would leave it the same. This one I'd la a little longer like this. And this one a little smaller. This seems like it needs to be connected here. So just play with it and make it your own at this stage. And this is a stage where we complete the composition by looking at the paper. And we see we have some empty space here. So maybe want to make a little stem or a brinch and the little one coming here maybe a little leaf and the bud. Here I'm leaving the space for the signature. And the last step will be transferring this into watercolor paper. 6. Step 4 - Final Drawing: So in order to transfer this to watercolor paper, with drawing into watercolor paper which we have underneath, we'll use a graphite pencil. This is a pretty soft pencil, three B, but really any pencil would work. So we put aside with paper and we just trace everything with graphite pencil. On the tracing paper. On the pink part, but we're following the blue lines because those are the composition lines which we can see on anoside. So we did the composition on a tracing paper to keep our watercolor paper as undamaged as possible. I took a more complex flower in purpose so you can see that it's nothing to be scared of. You can take the flower of any complexity, take a picture of it, and just follow the lines. So I'm following just the blue lines with a graphite pencil. Outlining every, every line. And, of course, including a little branch and the bud. So here we have our middle of a flower. And the last step we do We'll see this with graphite on paper. Place it exactly where we want our painting to be. So we see white the white paper underneath. So that's our composition. Make sure you have enough margins on all the sides, and then we'll take a pink pencil again and we'll go over all graphite lines. Mm hm. So graphite is touching the watercolor paper. We're just going over on another side. So we're using another color paper and pencil, not paper to see where we're going. You can use a Ford color two to make it even clearer. Let's check. Almost done. My son needs more precision. And this is the outline for our watercolor painting. So in a class where I teach you how to paint petals, you can see how to paint a flower. And in this class, I showed you how to use your photos to create drawings of the flower. And, of course, after you can still help with a little bit of pencil, however, I prefer drawings to be as light as possible. And I hope you give them some too. Then, of course, you can use your photo to see where the dark parts go and where the light parts go to create the petals and also paint painted after. 7. Final Thoughts: Thank you so much for practicing transforming photos into drawings with me. And I hope this is a helpful class for you to create more flowers, more petals. And if you like to class, please leave a review and upload the project to project section of the class. And if you are loading your artwork to Instagram, please tag me so I can see and I'll see you in my next class.