Transcripts
1. Introduction: Is there anything more timeless than a classic stripe pattern? If you ask me, stripes look
good on just about anything. If you put stripes on it,
it's going to look amazing. If you're also a fan
of stripes and want to learn how to create your own stripe patterns in Procreate, then this is the class for you. Hi, my name's Chelsea, and I am a surface
pattern designer based in Brisbane Australia. In this class, I'm going to make the process so simple that you'll be able
to follow along, even if this is your
very first time making a pattern Procreate. But don't get me wrong. You might also learn
something new, even if you're already
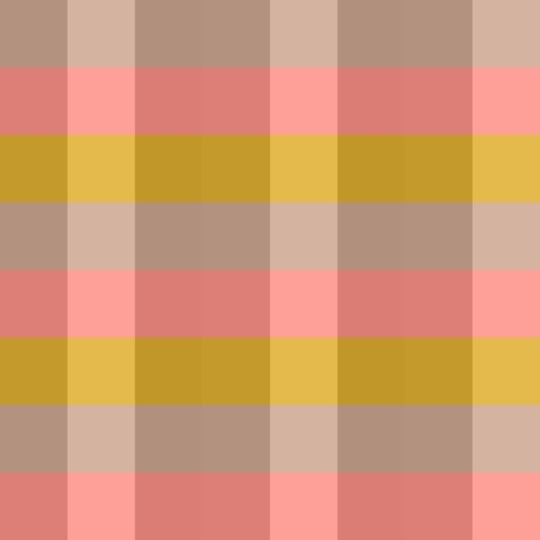
experienced in prorocreate because we're not just making one simple stripe pattern today. No, no, no. Together,
we'll be making four different pattern templates designed to save you a whole
bunch of time in the future. By the end of this class,
you will have created your own vertical and
horizontal versions of both a classic two
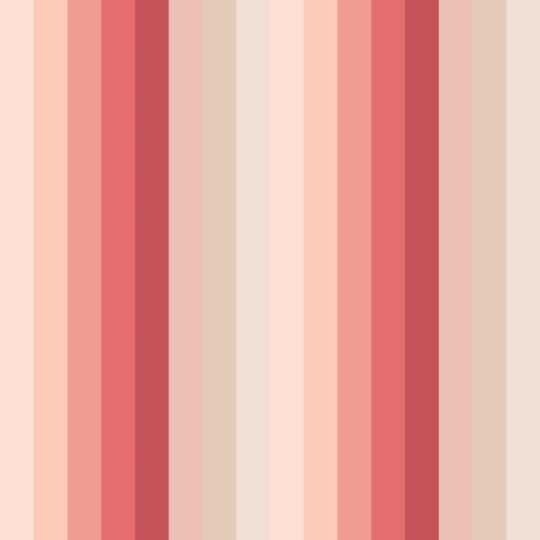
color stripe and a multi colored stripe featuring up to eight
different colors. I'm even going to demonstrate how I use these templates myself to create a brand
new stripe pattern in about 5 seconds flat. So, if you're ready to get addicted to creating stripe
patterns in Procreate, grab your iPad and Apple pencil, and I'll see you in class.
2. Class Project: Project for this class
is super simple. Just follow along with the
steps in class to create at least one stripe
pattern templates and then upload an image of your finished pattern into
the Project Gallery. You can upload as many
versions as you like, whether that's just your
one favorite pattern, or if you like me and get super
carried away with colors, you can upload as many
versions as you like. Go ahead till your
heart's content. I can't wait to see
the Project Gallery just full of all your
fun striped patterns.
3. Stripe Template 1: Okay. First things first. Let's start by
creating a new canvas. I'm going to be using an
eight by eight inch canvas and 300 DPI. And for my color profile, I'll be using this
top RGB option. The first step is to select your first color. It can
be any color you want. I'll be using this pink. And we're just going
to click and drag that color to color drop
and fill the whole canvas. Click on the arrow tool and then click on the top left node, this little blue.in
the top left corner. Uncheck the chain in
the middle so that the XmY axis are able
to move independently. And then in the first
box, the X axis, we're going to enter half of the dimension of your canvas. So for me, that's 1,200 pixels. You can see that
the square snaps into a rectangle over
on the left hand side. An important thing
to note here is that whenever you have a
selection in Procreate, you should always use the
buttons at the top to deselect. You don't want to be
tapping anywhere around the canvas while you've
got anything selected. That's a really common
and easy way to get the dreaded white pixel
line in your patterns. So it doesn't matter if you
can't see the arrow tool. You can use any of the
buttons at the top, like the layers or
the brush tool. So click on any button until the thing is
no longer selected. Okay, so technically, this right here is
a stripe pattern. If you exported this as
it is and repeated it, you would have a
two color stripe, but it's not
particularly versatile, and I'm a huge fan of putting
in a little bit more work upfront to make things easier
for myself in the future. So I'm going to show you how to create a really
versatile template that allows you to
have up to eight different colors in
your stripe patterns. So to do that, click on the Layers panel and
make a new layer, and then color drop a different
color onto the canvas. This time, click on the arrow tool and then
click on the top right node. Uncheck that chain in the middle and enter half of
the dimensions. So again, for me,
that's 1,200 pixels. That snaps over to
the right this time. And now, in the interest
of staying organized, I'm going to go to the
layers panel and drag to rearrange the layers so that they're in
the right order. So pink is on the left, I'm going to drag it to the top. And then to make
recoloring super easy, I'm going to use two fingers and swipe to the right to
Alpha lock each layer. You'll know that it's
worked when you can see the checkerboard
behind the rectangle in your layer preview. The other way that you can turn on Alpha lock is to
click on the layer. You might need to click
twice to bring out the flyout menu and
then select Alpha lock. Now, swipe to the right to
select both layers at once so that they're
both highlighted in blue and then click group. Swipe to the left
on the new group and then click Duplicate. So you'll now have two groups
with two layers in each. Select the top group, and we're going to follow
that same process again. Click on the arrow tool and then click on the top left node, uncheck the chain into
half of the size. So 1,200 again,
it'll snap over to the left and then use one of
the top buttons to deselect. Now go back to your las panel, click on the bottom group,
click on the arrow tool, and then the top right node, uncheck that chain into
half the dimensions, and it snaps over to the right. Before we go on, this is a
good time to double check your dimensions and make sure that everything is
working as it should be. So if you pick any
one of the layers, click on the arrow tool and then click on one of the nodes, and just double
check that you've got the right dimensions here. So if you're using the
same size canvas as me, this should now be 600
pixels by 2,400 pixels. If it's anything different, like if it's 599 pixels here, you basically want
to go back and start again and make absolutely sure that you don't
accidentally tap around the canvas while you
have anything selected. The dimensions are off
by even a single pixel, it's a really common way to end up with that dreaded white pixel
line in your pattern. So there's no point
continuing if your pixels are not exactly what they need to be at this point. Okay, so if your
pixels are correct, the next thing we're
going to do is follow that same
process one more time so that we end up with
eight 1 " stripes on this eight inch canvas. I'm going to tidy up the
layers first by clicking and dragging to the right to highlight each individual
layer in blue. Click and hold and drag
them up to the top, and then click Group. Swipe to the left
on the empty groups down the bottom
and click Delete. Now swipe to the left on the new group and
click Duplicate, then follow that same
process one more time. So click on the top
group, arrow tool, click on the top left node, uncheck the chain and
enter half the dimensions. Then back to layers,
select the bottom group, arrow tool, uncheck the chain
and half of the dimensions. And here is our
eight 1 " stripes. We'll tidy up our
layers one more time by selecting
all the layers, swiping to the right, and
dragging them to the top, and then click group, and then delete the empty
groups at the bottom. Now, if you follow it in the
exact same order that I did, you should be able to go
along and check that each of the stripes is in the correct order in
the layers panel, which is going to make
it really easy to know which ones you're going
to recolor in the future. Now, the reason we've set up our pattern this way
is to make it super usable so that we don't
have to go through the whole process each time
we want a stripe pattern. So we're going to pause
here and turn this canvas into two templates that we
can use over and over again. So go back out to the
Procreate gallery, swipe to the left on that
canvas and hit Duplicate. I'm going to rename this one
to multi stripe template. And then go back
into that canvas, and I'm going to quickly recolor this one into a pretty
rainbow palette. Because we used Alphaoc and our layers while we were
creating this template, my favorite way to recolor is just to pick
the color I want, and then click on the layer
and click Fill layer. And then just go through and recolor all the other
stripes that same way. Obviously, the possibilities
are truly endless here. So pause the video if you like, so that you can
take your time and have a play around
with the colors. And then when you've landed
on something you like, come back and join me
in the next lesson, where I'll show you
how we're going to alter the second template.
4. Stripe Template 2: Okay, so as fun as the
rainbow palette is. In reality, when I
make a stripe pattern, it's almost always just
a two color stripe. So if you come back out
to the Procreate gallery and open the other
copy of that canvas, I'm going to show you how I tidy this template up to make it even easier to recolor
as quickly as possible. So we're going to condense this one down into
just two layers. We'll have the background
color and the stripes. To do that, we'll go to
the layers panel and swipe to the right to
select every second layer. So all the ones
called layer one. When they're all blue,
click to group them, and then click on the new
group twice to bring out the flyout menu
and click flatten. Your layer preview should
now show the four straps. So just click and drag
it up to the top. And now you can delete
all the other layers by swiping to the left on the
group and clicking Delete. And then the beauty
of recoloring this way is that you can pick
your first stripe color. I'm just going to
keep minus this pink, and then you can easily preview the background color by clicking on background
in the layers panel. And then you can either select a specific color from a palette or you can just drag and play around with the color and
watch it update in real time. So it's a really fun way to play with the colors for
a two color stripe. Now, to show you an example of how quickly you can
use this template, I often create
striped patterns to match my larger
pattern collections, and I'll often use a
creamy white background with just a single
colored strip. So let's say I want to create a few different versions from
that rainbow color palette. All I have to do is
swipe to the left and duplicate my template
canvas a couple of times. Open the first canvas and go to the color palette and
I'll select my new color. Open layers, click on the layer, and then click Fill Layer,
and that's it done. I'll go back to the gallery, open the second canvas, pick a new color,
and fill the layer. And that's another one done
in about 5 seconds flat. So I'm hoping you
can see just how worthwhile it is to put in a
little bit of extra work to set up your templates
so that you can create super quick stripe patterns
whenever you need one. Join me in the next lesson where I'm going to show you
how to quickly turn these two templates into two horizontal
stripes as well. It
5. Stripe Template 3 & 4: If you're wanting to create horizontal stripes, don't worry. You don't have to go through
the whole process again. We're going to reuse
these templates and save them as horizontal
versions as well. So swipe to the left and duplicate both
of your templates. Open up one of the canvases, and then you're
going to pinch to rotate the canvas to
the right clockwise. And then you do this kind
of quick pinch action, and it should sort of set your
canvas in that direction. If you open the layers panel, it should be in the same
order from top to bottom, so recoloring will
be easy again. And now you can come back out to your Procreate Gallery and rename that to
whatever you like. Now, if you get back here and your Canvas preview is still
showing a vertical stripe, you might need to go
into your iPad settings. Go down to Apps and
find Procreate. And then find where it says Canvas orientation memory and toggle it on so that it's green. You also might need to close and reopen the
Procreate up so that that change sort of takes place and then go back into your
canvas and try again. And then you can just
do the same thing for your other strap
template as well. So open up the copy,
pinch to rotate, pinch again to set the change, and then come back out
to the Procreate Gallery and rename your canvas. The final step that I like to do is to tidy up my
Procreate Gallery. So you can see here that I
have a stack called templates. So I'm just going
to select all of my new templates and drag
them into this stack. If you don't already
have a templates folder, you can just hit stack at
the top to create one. If you'd like to
see how I create my stacks and organize my
Procreate gallery like this, I already have a quick
nine minute class that walks you through
that whole process. It's called Procreate
Organization Tips, three steps to
organize your files, and I'll link it in the
class description below.
6. Final Steps: So there you have it four new stripe pattern
templates that you can use over and over again to create endless
stripe combinations. Once you've had a play around and landed on some
patterns that you like, I'd love for you to upload your stripe pattern to
the Project Gallery. To do that, all
you need to do is click on the rent tool and then share and select
JPEG to export your file, and then you can just upload that straight into
the Project Gallery. Feel free to upload
as many versions as you like. I know it
can be hard to pick. So upload just your one favorite or ten different versions.
It's totally up to you. If you enjoyed this
class, I would be so grateful if you could
leave a quick review, as reviews really help other
students to find my classes. I'm also planning
to release a series of classes along the
same lines as this one. So feel free to reach
out and let me know what type of pattern you'd
like to learn from me next. And don't forget to follow
me here on Skillshare if you'd like to be notified
when I publish a new class. Thank you so much for joining
me and Happy Creating.
 Chelsea Jay, Surface Pattern Designer & Illustrator