Transcripts
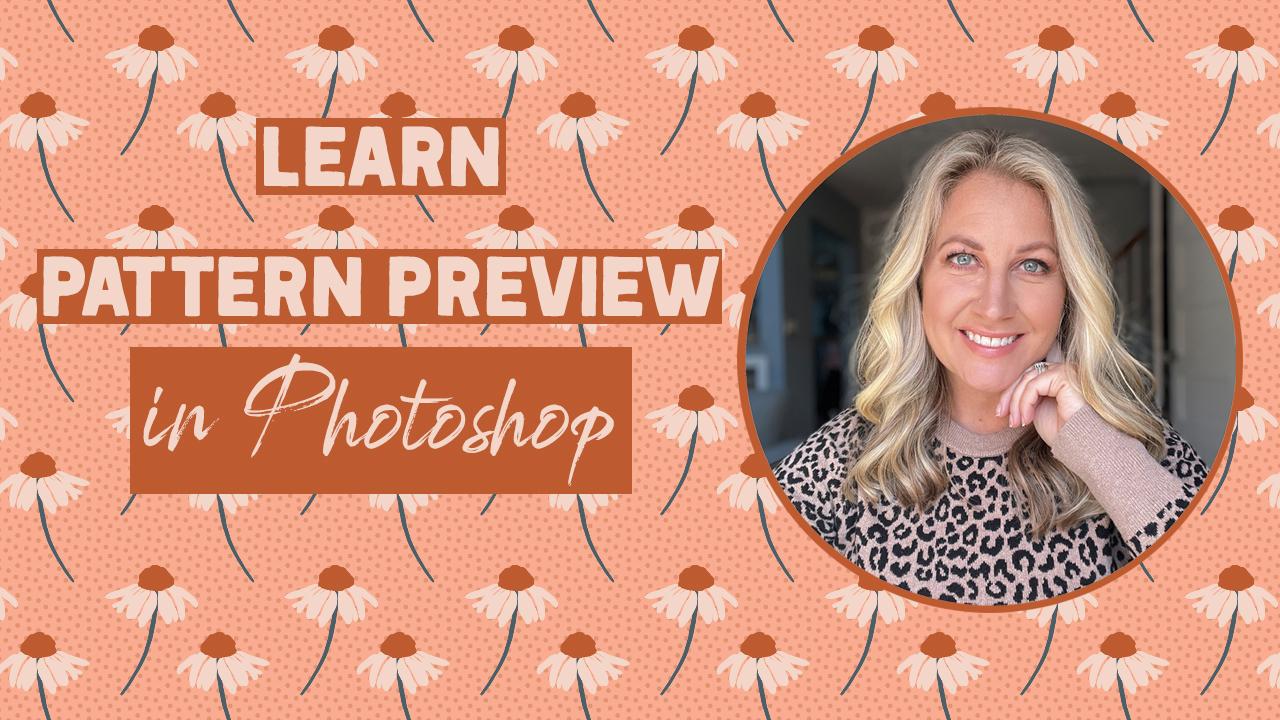
1. PP Intro : Hi, my name is Tonya Brown and I'm a
surface pattern designer. I have over ten years of
industry experience creating seamless repeat
patterns that are used in the fashion
industry on fabric, home textiles, wallpaper, and even license my work under
the name schottky brown. In this class, I'm going
to teach you how to use the pattern preview feature in Adobe Photoshop to create
seamless pattern repeats. It's a great tool to have. And this class is
beginner friendly. If you have some experience creating repeat
patterns or aren't sure how to use the
pattern preview or smart objects within
pattern preview. This class is for you. If you have experienced creating repeat patterns in
Adobe Illustrator, but aren't sure where to get
started in Adobe Photoshop. This class can also be helpful. I'm excited that you
chose to learn with me. So let's get started. See you in Photoshop.
2. PP Class Project: The class project for this class is to create a
seamless repeating pattern using the pattern preview feature
in Adobe Photoshop. In 2021, Adobe Photoshop added the pattern
preview feature. What you will need for
this class is a desktop or laptop with the Adobe
Photoshop software installed. Version 2021 or later. The class was filmed using the current 2023 Adobe
Photoshop version. Please note that the
iPad app Photoshop will not work for this class. The iPad app does not have all the features that the
desktop software has in it. Have the pattern preview
feature just yet. So you'll be able to follow along as long as you have
the desktop software. I'll see you in Photoshop.
3. Lesson 1 Tour my PS Interface: In this lesson, we will
just quickly review how I set up my Photoshop interface. You can choose to keep your interface the
way that you like it, that works for your
preferences and workflow. Or you can choose to match
your interface to mine. On the right side here we have the toolbar and I like to keep my toolbar and condensed mode if you want to keep
it in a single row, just use the double
white arrows. Over here on the left side. I always keep my
history panel and my layers panel open
and to a wider display. Then I have additional panels open that I keep
to the collapsed. Many icons. I have my brushes, settings, adjustments, color picker, color swatches,
and the patterns. You can add or delete
these as you feel. It works for your workflow
or your current project. To change. You can always come to Window and add in extra panels here. Or change your workspace here.
4. Lesson 2 Create A new Document: In this lesson,
we're going to go ahead and create a new document. Let's come over to File New. And we're going to
label this polka dot. We're going to work
in inches for today, and we're going to make it a four inch by four inch 300 DPI. Keep it in RGB color. Hit create. So here I
have my rulers displayed. That's another thing that I keep continuous in my interface. And if you want to
have them displayed, you can always come to
view and click rulers or use the keyboard shortcut Command R to take
your rulers away, Command R to add them back in. You can also change the
units to centimeters pixels, or a unit of measure that works for your workflow
or your country. So here we are with a
four-by-four inch document. Let's just take a
quick look here. We have the name of
the document and that it's new in my history panel. And we have one layer, which is the background default
layer, and it's locked. We're now going to add
an additional layer. There are a few ways to add
a layer to your pattern. One of the, one of the ways
to add a layer is to come over into your layer panel and simply click the small plus. Here where we have
a blank layer. It's transparent. If we turn off the
background layer, we see this checkerboard effect, which lets us know that
that layer is transparent. Another way to add layer
is from the Layer menu. If you come up to layer
and you come to New, you can add a layer
from here as well. You can use the keyboard
shortcut, Shift Command, end, Command N. And you will get this dialog box to tell you to name your layer or just hit. Okay, so now I have the original
layer that I added with the plus an additional layer I added with my
keyboard shortcut. I'm just gonna go ahead and
delete that layer for now. Join me in the next
lesson when we get ready to dive right in to
Pattern Preview.
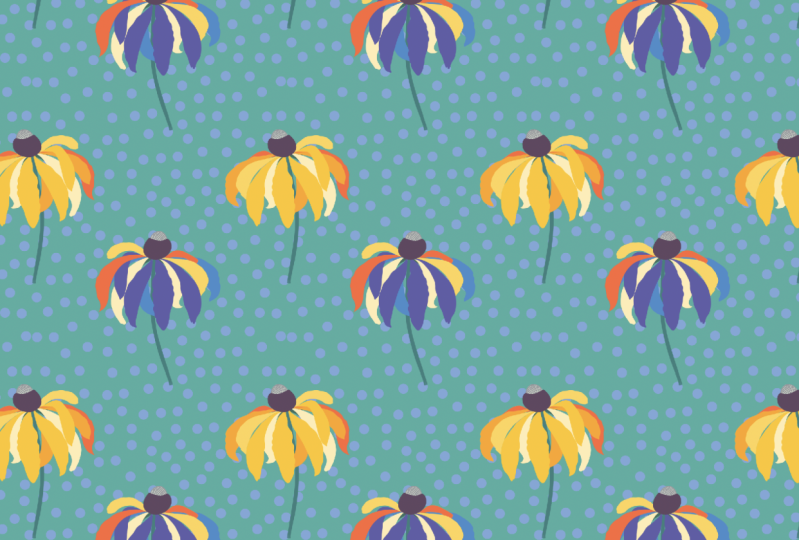
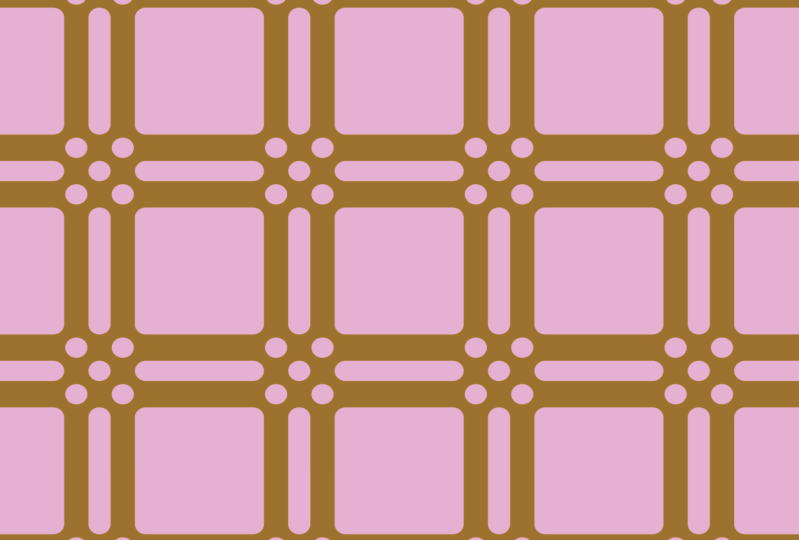
5. Lesson 3 Make a Basic Polka Dot: The first thing we're
gonna do is start super-simple and create
a polka dot pattern. I like to teach students
in the beginning using simple shapes just to get the
concept of repeat patterns. So I'm going to use the marquee tool to
make a perfect circle. So let's go ahead and hit m. That gives me the
Marquee Tool and I have my elliptical selected here. I'm going to come over
and I'm going to hold the Shift click and drag. And if I hold the Shift button, it gives me a perfect
circle release. And I have a circle selected. I can see that I'm on my
layer that I created. And I'm gonna go ahead and
fill that layer with black. So Option Delete. It's going to fill it with black because that's my
foreground color. Now I have a perfect circle, but I want it to be centered. So I'm gonna go back
to my move tool M and C that I can
move this around. As we also see these pink lines
flashing up on my screen. Those are the smart guides. I tend to keep
those up because I like to use them to line
things up in this program. And you can go to view,
Show, smart guides. And those will give
you those lines that flash up when you're
using the Move tool. But to make sure that
I have this circle perfectly centered
in my document, I am also going to go ahead
and use my alignment. So I'm going to select this
layer, which is great. I'm going to hold the Shift,
select to the second layer. Make sure I have my move
tool, de-select the marquee. And now I'm going to
make sure that my circle is perfectly aligned,
vertical and horizontal. So just click, click, and now we know the
circle is perfectly aligned and it come back over and just
highlight this layer. Let's go up to View
Pattern Preview. Now, we can see that
this dot that we made in the middle is repeating itself perfectly over and over again. If I were to save this
document as a repeating tile, this is what it would look like. Let's zoom out a little bit. It would be a perfect
polka dot repeat. This repeat is a brick
repeat or square. So we see that it's
square like this. Let's come out of
pattern preview. Now I want to make a
half-drop polka dots. So I'm going to take this layer. I'm gonna come over here and
I'm going to duplicate it. Again. There's multiple ways to
duplicate your layer. You can do it from the Layer
menu, duplicate layer. Or you can come over here and you can right-click
over in the gray. And you're going to get
a list of options here. With my right-click. I can go over, then click again,
duplicate layer it. Okay? And now I have two
copies of my circle. They pasted right on
top of each other. So I'm gonna go ahead and hit V and grab that Move tool again. And I want to move
it over so I can see that I do have two circles. If I were to move my circle
past the edge of my paper, it looks like it's being cut or past the edge of my document. It looks like it's
being cut off here. But if I were to come
into Pattern Preview, it's cut off that circle, right? So let's come out of that. If I go ahead and grab it again, it's actually still there. So when you have something that you're moving
off the edge of your paper, if it isn't cropped, Photoshop will still
maintain what it is. So in order to not
have Pattern Preview, crop your motif or your
circle in the middle, what you're going to do
is you're going to go to View Pattern Preview. Then we're going to grab
our layer and move it here. And I'm looking for
those smart guides to center my circle. Can see when they light up. Good. So now I have one circle
here and one on my edges. If I zoom back out, I can see that I now have
this half-drop polka dot, and my repeat is
slightly different. If I turn this layer off
and back to my original, turn this on and I have my basic half-drop or
polka dot pattern. We're going to come
out a pattern preview. You come out of pattern preview. We see here that we have our perfect repeat tile
that we can then save. And we know that this polka
dot will repeat seamlessly.
6. Lesson 4 Scatter Polka Dot: In this lesson, we're going
to make another polka dot, but this time we're
going to make a more scattered layout. So I'm gonna start the same way and add a layer to work on. I have my blank layer, it's
automatically highlighted. I'm gonna go ahead and use
that marquee tool again. I'm going to hold
Shift and drag, and I have a perfect
circle again. I'm going to use my black, which is my foreground
color and fill that circle. Select. And now I have this perfect
round circle to work with. I want to use this and create a pattern that fills this space with all
kinds of circles. So the first thing I'm
going to do is duplicate my circle motif, my
little polka dot. I'm going to do it
from the side panel. So Duplicate Layer,
Duplicate Layer, Duplicate Layer,
duplicate layer. So now I have 1234 copies
of my little polka dot. Grab that move tool and start moving them around
so that I can see it. So just to point out that my
move tool is highlighted. And up here I have auto
select with layer, because I'm working
in single layers, I'm going to keep this on. And when I'm hovering over the pixels that
Photoshop is reading, it's going to automatically
highlight that layer. So that automatically
highlighted the second one. So watch over here as
I come over and grab, see how it
automatically moved to this layer because that's
what is selecting. Just watch this
panel for a second. As I walk around and
select the dots. You can see that every time I'm hovering over the pixels
that Photoshop can lead, it is changing and automatically selecting that layer
that that dot is on. It's a pretty cool feature and make your workflow a little bit faster to not always have to go back and forth to
your layers panel. What I want to do is
create even more dots. So I'm going to do this
quickly by highlighting this top layer holding Shift
and selecting all of them. Go over here to
duplicate layers. And it's going to say, okay, and now I have all these copies. So again, if I click over here, it de-selected my layers and I can start finding all
of my polka dots. I think we have 12345678. I have eight polka dots. That's about right. Now. I want to take all of
these polka dots and I'm going to start to push them
to the edges of my document. But if we remember from
the lesson before, if I move it over like this
and go into Pattern Preview, it isn't going to read
it on both sides. So it's important
that if we have our motifs in the middle, we want to come to view
Pattern Preview first. Then we can start moving
our motifs to the edge to create a more scattered
layout of our dots. And this is super fun using pattern preview
because it's in real time and you can watch your elements create
this repeat pattern. It's such a neat feature for
surface pattern designers. Let's zoom out and take
a look at our dots. I'm going back to
my move tool and I can really see maybe
I want to do this, and then maybe I want to fill in that space a little bit there. I'm going to come out
of pattern preview. Just to come back to looking
at my overall repeat. We're going to come back
over to that move tool, and I'm going to
come to this one. So I've clicked on top of
it and you can see it's this particular polka
dot layer one, copy six. I'm going to hover
over it and I'm going to hit the Alt key. When I hit the Alt
or Option key. And you can see I get
that double arrow. If I hold it down,
click and drag. It's going to give me
an additional copies. And drop. Here we go. There's the extra copy
of that polka dot. So it's an easy and
fast way to work. Come back over to
Pattern Preview and I can see how my
overall pattern is working. If I'm happy with that, and I want to save
this pattern swatch, I'm going to come out
of pattern preview. And I have this pattern
swatch that I can save. I can keep it in layers. I can take all of these
layers and put them together. So let's go ahead
and do that now. I'm happy with my layout
and I don't want to edit. These are move
them individually. I can always condense them. So right-click with all of your layers selected
and hit Merge Layers. Notice I didn't
include my background, so I can still
manipulate the color of the background and my
polka dots on top. I can go ahead and save this. Save will save the
document as it is an override the original
file that you made. Save As we'll save and
additional copy of it. If you change the name and save, a copy will give you
additional file formats. So this is where you can find a JPEG or a GIF or another file format other than Photoshop or the layered files
and save and save it.
7. Lesson 5 Color Changes with PP: In this lesson, we're going
to go over how to simply change colors in a simple
pattern like this. But before we get there, I just want to note that creating a simple
graphic pattern like this can easily be done
in Illustrator as well. The main difference,
an advantage to using simple
shapes like this in Illustrator is
that your patterns swatch would be scalable. You'd be able to take the simple polka dot pattern and scale it infinitely up or down. That is not the case in Photoshop because we're
working in pixels. It is not infinitely scalable. You can scale down, but not up. And that's the general
rule in Photoshop. It doesn't mean that this won't print or display in a crisp way, because we started with
300 pixels per inch DPI. If we zoom in, we can
see the edges here of our polka dots and we can
see those pixelated edges. If you were working
in Adobe Illustrator, you would have a
smooth, clean line. So I just wanted to
point that out and let's get started with
changing the color. Since we condense all of our
polka dots to one layer. In the last lesson, I like to use a quick way of changing the whole
layer at one time. And that is using the
pixel lock feature. If I have this layer highlighted and I
click the pixel lock, I can go ahead and choose a different color so
that the tutor color picker, choose this pinkish red color. It's also now displayed
as my foreground color. And all I need to do
is my quick fill, which is Option
Delete or Alt Delete. And I have a new color. I can do the same thing
for the background color. Grab a different color, and make sure that layer
is higher highlighted. And the same thing. I'll have this pink polka dot. And it's exactly
the same repeat. And I can save it as a
different swatch or file. Let's go back into
pattern preview. And we see it's displayed
exactly the same. The particular color changing
feature does work well. You are alive and
Pattern Preview as well. So I can do exactly
the same thing. Keeping my pattern preview open, change the color of this layer, but let's change it
in a different way. Instead of using just
a straight color and filling the
layer or the pixels, let's try doing an adjustment so we can play with the colors. So Image Adjustment,
Hue Saturation. We get this additional
dialogue box and we can sort of play with
what the color looks like. We can go down or up
and it's lightness. We can add saturation
or take it away. So let's make this yellow. Okay, Let's come over to our Puppet out layer
and do the same thing. Again, it's image adjustments,
hue and saturation. And the quick key is Command U. So command, you will bring
up the same dialogue box. And again, I'm going to
adjust those polka dots. And if I want them
to be pure white, I can just take it up to white. Take it down to black,
somewhere in the middle. Take up the saturation
and change this. Let's do this. Sort of fun pastel, pink and yellow polka dot. And we can see our pattern
displaying and how it works. So changing color
in that aspect will work while you're in
Pattern Preview or not. Again, we can come back
out of pattern preview and we have a seamless
repeat tile here.
8. Lesson 6 Creating Pattern Swatches: In this next lesson, we're going to explore
creating patterns, swatches out of these
little seamless tiles of polka dots that
we've just created. So here is my patterns
swatch panel. If I click this open, I have displayed here, I created some patterns, swatches already of the
original polka dots. We made the box repeat
in the half-drop repeat. And I'm going to show
you how to create pattern swatches from this tile. There's a few ways, again
that we can do this. Again in this panel open, we see this little plus
symbol. It is available. If I simply click the Plus, it's going to add
exactly what I have displayed in my
document as a repeat. Whether that is in
repeat correctly or not, that is what
Photoshop is reading. It is reading your
document. It okay. And we see our new polka
dot is displayed there. Another way to add a pattern swatch into your panel is to
do it from your Layers menu. But first, I'm
going to just point out that I have two of each. And what I've done
here is I've included the background and I've included a transparent
background, white background and
transparent background. And this one is a
white background. Because when you add
the swatch in here, photoshop is automatically
flattening what it sees as if it is saving
a little tiny JPEG. It's a flattened file. So if I go to use this swatch, which I will show you
in the next lesson. It is going to be
a flat version. It is not going to be
used with these layers. The next swatch
I'm going to save, I'm going to turn off the
background layer and I now have a transparent background and
my little black polka dots. I'm gonna come over to edit and come down
to Define Pattern. Click this, and you will get a, another dialog box the
same as before and hit, Okay, and there it is. So you can do it from
here or your menu. Now I have all of these individual patterns,
swatches displayed. So come join me in
the next lesson and I'll show you how
we will use those.
9. Lesson 7 Using your Pattern Swatches: We're gonna go ahead and create an additional document so that I can show you how using those
patterns swatches will work. Let's go to New Command, Enter on your keyboard. And we're going to
name this, repeats. This time. I'm going to make sure that this document is bigger
than the 4 " by 4 ". And we'll see why
in just a minute. So let's create an eight
by eight inch document. It's double the size
of my first document. What I'm gonna do is
keep the background. Keep the background
white, keep it locked, and just go ahead and click
that plus add another layer. In general, when we're
working in Photoshop, layers are such a pillar
of the program that I tend to always have a
background layer that IV, IV, that is a background color to the patterns that I'm making. It's good practice to always add a layer and not
work on that layer. So there's a few
ways that we can add our pattern swatches
to this document. Always a few ways to do the
same thing in Photoshop, ads, in Adobe Illustrator or many of the Adobe
software programs. Let's come over to here. And if I click over here on this layer and I
go ahead and click this, what it did was it added
an adjustment layer. It added an adjustment
pattern fill layer. I have my pattern
repeated right here. Let's see what that
looks like if I go to View Pattern Preview. So Pattern Preview
is going to display this pattern fill that
I added onto my screen. And it's going to look exactly
the way it did before in our original polka dot that
we made first in this course. It's the square. Repeat this brick repeat. But my document is
eight by eight. So that little blue square, that bounding box that you
see is my document size. It's 8 " by 8 " and
if you remember, my pattern was 4 " by 4 ". So what it did was it
fit perfectly into that document where it was four by four within an
eight by eight. Alright. Let's go and delete that layer. Add a new fresh layer, and let's come over to the
other way to use pattern fill. So now we're going
to come up to Edit. And we're gonna go to
fill and click on Fill. And I get this dialogue
box from this dialog box, I actually have a
few options of how I want to fill this layer. I can fill it with a pattern. I can fill it with
black, white, gray. I can fill it with
my foreground color. So if I hit foreground
color and hit OK, it's just going to make it black and step it back command Z. But as you can see, I did have the option to
fill it with pattern, which is what I use
that for the most. So if I go head
and I use pattern, and then I have this, I click on this, and I see the exact same
library that I saved over here. Here's the library
here, and here it is. Here. If I go ahead and
click that first one, that dot and hit, Okay. I see my patterns show
up in that first layer, but note the difference that
it doesn't say pattern, fill it, fill this layer
with just the flat pattern, and let's look at it
and pattern preview, but it looks exactly the same. There are differences between the pattern fill in
the pattern layer. We'll review that in a moment, but I wanted to
note the difference that this is the entire layer filled with a pattern versus
a pattern fill layer, which is more of an
adjustment layer. Delete that. And let's repeat the process with the transparent pattern. Here my pattern fill. Now let's use this one. This one is the
transparent background. And I go ahead and
add the pattern fill. But this time if I turn
off that background, I see that I do have a
transparent background. So even though it's
a pattern fill, it is displaying only the pixels that were defined by that, which were the polka dots and leaving my background empty. And if I wanted to add a
color, I can add a color. And you will see that it
is in fact transparent. That feature of adding
a pattern fill layer, I want you to hold
onto that thought and save it for later for
more complicated patterns. And know that if you have
transparency to your pattern, that it will hold in using
this pattern fill feature. Let's step it back. I'm gonna delete that
and then just show you exactly the same
thing from the menu. Edit Fill. Let's go ahead and grab that same one with the
transparent background hit. Okay. And again, I have the
same thing only this time. I have a filled to the layer
and I still have this. Now the difference between
using it fill from my menu versus the
pattern fill layer is that I can edit
them differently. And I'm going to show you in the next lesson the
difference between editing. And then we'll be diving into more complicated motifs
for Pattern Preview.
10. Lesson 8 Differece in Edits fo Fill Pattern VS Pattern FIll: In this lesson, we will go over the differences
between editing the pattern Fill
Adjustment layer versus the fill the layer with
a pattern from the menu. So let's start here. When we filled this
layer from the menu, Edit Fill, we were telling it to put
the pixels in that layer. If we do that, we have the option to edit that layer exactly
the way that we would that we did with
changing the color. And you have the flexibility
to edit these elements. So let's grab this. And we're just going to select
that individual polka dot. And you can see that I
can move this around and edit because the pixels are
being read on this layer. I can also edit the
color the same way I did by pixel locking it or adding, doing an adjustment
with the color. So let's say I want to, I have that one selected. I wanted to do the whole thing, so I'm sorry, de-select. I just have the layer selected. Let's add, let's add
some color first, let's pixel lock it and
grab a color and fill it. And then we can always adjust the color or pick a different
color and fill it again. Right? So I'm able to edit
this whole thing. My pattern is seamless. It's important that
the original pattern fit exactly two times
into this document. Now, let's look at the
audibility, the pattern fill. So I have no options
to change the color. I cannot edit the
individual pieces. I can move them
around like this. So I can move it. I can move where
the pattern lands. That's something I can
edit in this layer. I'm going to show
you other things that can be edited
in this layer. So if I double-click right in this side of
the window, so click, click and give this
pattern fill dialog box. And I have some
more choices here. I can scale this pattern. I want to bring it down to 50%. So I just made it smaller. So remember we're in pixels, I can go smaller but not larger. I can also change the angle. Now, you can see that
when I change the angle, the repeat change in
that does not work. In Pattern Preview. It didn't hold my diagonal. So that is not an option in Pattern Preview, but scale is. And we can still move where the pattern lands
within my box here. So that's basically the idea that you have to understand
what you can change within this pattern
fill layer versus the pattern being
filled into the layer. And it's from the menu. I want you to really grasp this concept because
this becomes important and more complicated. Designs. And knowing that the pattern
fill layer is really just a flattened version
of your file versus something that you can
manipulate is important to know the distinct distinction between those two things and
when you might use them.
11. Lesson 9 Multilayers & Grouped Motifs: In this lesson, we're
going to start to dive into using pattern preview with multi-layered or
more complicated motifs. And let's take a
look at this file. I created this
little flower motif in the iPad app, Procreate. While I was drawing, I consciously made
the decision that each different color
was going to be created on a separate layer
to create this flower. So let's come over
here to look at that. Here is my middle, here are my petals, and here is my stem. I created this file. I imported it from procreate into my desktop or
a Cloud service, and I saved it as a PSD file. This way, I can open it
in Adobe Photoshop and have my layers preserved exactly how I created them in
the Procreate happens. You don't have to work
in the Procreate app. There are many apps to work in and there are
many ways to work. So the first thing
we're gonna do is take this flower and
group it together. I'm gonna go ahead and
highlight or select each layer. So hold the Shift,
click, click, click, and then I'm going to
right-click to create a group. And again, we can do that by either right-clicking
and creating a group, group from layers. Or we can come over here and
click that little folder. When I click that folder, it takes all of my highlighted layers and
puts them into one group. If I expand, I can see that all of my layers
are right there. So I'm going to double-click
on this to change the name, mean it, flower one. So a few things about
grouping a motif together. I still have the
individual layers. But in terms of editing
and manipulating, it makes it a little bit
easier to not have to move each layer at a time. So let's condense that. And I have flour one. Let's grab that move tool. So V and the shortcut. But now I want to show you
the difference of what happens if I have
Layer selected. If I come over here, photoshop is still
reading that I only want to grab a layer and
move it with my move tool. So there's the highlighted
later in ETE layer. And even though it
was in a group, it's still grabbed that layer. But that's not what
we want because now my flower is all deconstructed. We want to keep it together. So let's step it back. And you can see why I
keep my history Open. Easy step back. If I want to use this move tool and grab the
entire group at a time, what I need to do is come
over to auto select and simply tell it that I want to
work with a group instead. Now when I come over, I'm moving the whole
group at a time. So we're going to take this
same concept of having this group and use pattern preview to create
a half drop repeat, which means I need
this whole group duplicated and pushed
to my corners. So let's take this group and the same way we can duplicate
an individual layer, we can also duplicate the group. Let's right-click. Make sure you're on
the gray part and you get this side menu here. And I'm going to
duplicate group. It's going to ask
sname, it, hit. Okay. And now I have my copy. The same way I was able to grab whatever was on top and move it and see
that it was there. I can do the same
thing with the groups because I have auto
select group highlighted. Now let's bring it over
to Pattern Preview. You're in pattern preview. I can see my flower and I know that I wanted
more of a half-drop. So I'm going to drag this
whole thing up here. And let's come out. And now I can see this cool half-drop that I created super-fast and
pattern preview with my groups. And I've got this
really pretty pattern. For the sake of
making my pattern, I can keep the motifs all
going the same direction, but I always like to create
a little bit of movement. So I'm going to come over here
while it Pattern Preview, so you can see what
types of editing you can do and cannot do in
Pattern Preview. I'm going to make sure that I have this
group highlighted. I can always turn
that on and off to see which one I am working with. And I'm gonna come
over to my menu here, edit, transform,
flip horizontal. And that's an edit
that we can do. Well. Pattern P views open
and it's really cool because now I can see this
movement and how it's working. Maybe I want this one to come up here or this one to come over. And it's just such a
great feature to see these edits live in your repeat. Come out a pattern
preview and we can see what the seamless
repeat tile looks like. If we were to save
it just as it is.
12. Lesson 10 Editing Options With Layers: Now that we've created this new seamless repeat
using various layers, we have lots of options
about how we can go forward to edit this file. So bear with me as I go over all of the
choices that you have. Bear in mind that each, each of these choices
is going to be a personal preference on how you like to work
and your workflow. So if we dive deep a little
bit into the layers, Let's display this
a little bit more. I have my first flower
and my second flower. I have my first stem, and my second stem, and my petals, and my petals. Now, you can keep
your file with all of these layers and go in
and edit each layer. Perhaps you want to
change the colors a bit. Have the ability of changing each single element in
your repeat design. That is a possibility. And one way to work,
the more you do this, the more you will find
the workflow that you want to use and what's going
to work best for your style. And you just have to
play around with it. See, I did not have
that pixel off. That mistake was good, so it filled the entire
layer with the color. In order to pixel lock it. I want to do that to only have Photoshop
or read those pixels. So now if I go into
my pattern preview, I have two different
color floral motifs. And if I pull out, we can see my pattern changing. So that's one way to work
is to keep everything on a separate layer so that each layer you can
edit on its own. You still have the Move ability. Let me take off the pixel locks. And if I tell it to
move this layer only, I can still manipulate
one thing at a time. Maybe I want to command T rotate this a little bit and have it display
a bit differently. So keeping things
in separate layers gives you the maximum stability. So this is one option. Let's come out of our pattern
preview for a second, and let's step it
back to our repeat. Another option is to condense
the motifs into one layer. So we can do that
very quickly and easily by right-click
and Merge Group. Right-click and merge group. So what this is doing
is taking all three of these pieces and colors and
putting it onto one layer. Now, I can edit it still. I can edit as a group
so I can do Command T. I get my bounding box. I can scale from here. I can rotate. But it has it all on
one layer and together. So editing the colors might
be a little bit trickier. I'd have to edit it
as an adjustment or an adjustment layer and
change the colors this way. And that is another
option for working. And let's just see what
that looks like can help to Pattern Preview and we can see what it's looking like here. Step it back, and now we're
back in these groups. Another way to do
this is to condense the colors that are the
same to the same layer. So that process is a
little bit more lengthy, especially if you have a ton of motifs and a ton of layers. But here's the simple version so that you understand
the concept. Should you want to do that? If I want all of my flower
middle's on one layer, I'm going to select that. I'm going to hold the command
key and select the other. So it's middle,
middle is selected. You can see it's light
gray highlighted. And again, that's
the Command key. If I am selecting things
all next to each other, it's the Shift key. But if I want to select
things that aren't right next to each other
or on top of each other. I use the command. I can then right-click
and merge those layers. So what it did was take my orange pieces and put
them on the same layer. Let's go ahead and do that
in Pattern Preview so you can really see the
pattern coming together. Now. I have my pink petals
and my pink petals, so they're separate right now. But I am happy with my layout. I'm going to keep it as it is. I don't want to edit it anymore, so I'm going to condense
my pink petals together. So select command,
right-click Merge layers. Now I have my orange on one layer and my
pink on one layer. And let's get those stems. Select and command, and go
ahead and merge layers. And I now have them all
in this one folder. This folder is now empty just to make sure I
click it on and off and I can just put it in
the trash right there now. But I have is my middles, my petals and my stems, each on their own layer. And I can continue to edit this in a way and
change the colors. And let's do that real quick. And we'll make them purple
or in bluish purple flowers. And there we go, and that's
how quick it can be. So those are just some
options of manipulating, condensing your layers to make your workflow a
little bit easy or not. Remember, you can always
keep many layers up if that helps you with
the ability of your file.
13. Lesson 11 Using an adjustent layer in PP: Yet another option for editing in Pattern Preview is
adjustment layers. So you can use adjustment layers in a document that you're not doing pattern
preview, that's fine, but just also know that an adjustment layer will work
in Pattern Preview as well. So we had added an
a layer that was a pattern fill adjustment
to our document before, but this time we're going to add an adjustment layer to these. And instead of using
pixel lock to color, we're going to use the
adjustment layers. So whichever layer
I have highlighted, if I come down here to this little black and white
symbol, and I click on it. These are the various adjustment
layers that I can add. And it will add above that
layer that's selected. So let's add a. There's our pattern one that we added before and
the other document, Let's add a hue and saturation because that will work on color. So again, you see this little
chain link and this symbol, and this is going to
affect the layer below it. And we can use the
adjustments which are the same adjustments
that you can get from here from
Image Adjustments, except this is non-destructive and we'll see why in a minute. So if I sort of swing here over and I've now
got yellow patterns, it changed this layer below it. If I click off, it's affecting all
the ones below it. So it's also affecting
the stem turn blue, but it didn't affect this one. Adjustment layers
are a great way to play with color and adjust things in a more
non-destructive way or a less permanent way. So if I turn this off, I'm back to my
pink and my green. Let's see what happens if I pull this layer and put
it on the stems. So you can see it's now left
the pink as is unchanged, but the stem to blue. Let's see what
happens if I pull it all the way up and
on top of here, it's changed all three layers. And you can use all kinds
of layers to adjust. You double-click here,
you got this one. And now we can adjust here, but it's still affecting
the one below it. So there are amazing things about using adjustment layers, but also know that there
are some limitations to it. Let's see if we take this away, we can see that our
original colors are there. So it's a way to
play with color and see about fixing it and
not making it permanent. And you can always
take these away and pixel lock something and
change the color of that. So there's a lot of options for changing and different
reasons for using adjustment layers versus an
adjustment from your menus. Again, same end result here, but different way to do it. Doing it from your menu
is more of a permanent. And doing it here is more
of a non-destructive, non-permanent way of editing. Lots of choices. Again, you have to choose what works best for you
and your art work. And you'll know after playing with these
different choices, which one's going to work better and which one that
you like better.
14. Lesson 12 Creating and Using Smart Objects: The next thing we're going
to dive into for using Pattern Preview is the use of smart objects and
Pattern Preview. So smart objects can be made from a single
layer or from a group. And here I have my
original group. And let's expand. I have
my middle petals and stem. And what I want to do is take this entire group and make
it into a smart object. I have my group selected. I'm going to go to
right-click and go to Convert to Smart Object. Hit. Okay, and we can see that
the thumbnail has changed. I have this little
smart object symbol, and I can see the entire motif that I don't see the
individual pieces anymore. I can even grab my Move tool and move it around altogether. I don't have to worry
about auto select on layer because it's reading the
smart object as one layer. But I still have the ability of the
middle pedal and stems because if I click
on my smart object and you have to click directly
on that little tiny icon. You can click over
here or over here. It has to be right on top
of their double-click. And it's going to open
a new document window. And it's my smart object. So it has this filename, PSB, and that's the
filename for smart objects. So here we have my original
of my middle pedal and stem. Here is where I can do my
editing in my smart object. So if I wanted to change the color of those
petals too blue, I can do that here. Then I'm gonna come
over and close. It's going to ask me if I
want to save, hit Save. And then we see that here it changed in the master document. So there's my smart object. Now here is the great
part about working with smart objects
in Pattern Preview. So we are going to
duplicate the Smart Object. So duplicate layer, hit. Okay, and we can see that I have to smart object layers
that are identical. Come over to pattern
preview and get that move tool and
drag it on over. Make my little
half-drop repeat here. And we can see that I
have these two layers. Now, I'm going to click Okay, and I don't, sorry, I didn't need to hit Return. It's just going to go there. Now, watch what happens if I
come out of pattern preview. All of a sudden, all the
pieces over here get clipped off and you're
thinking, oh, that's not good. Where did my my pattern go? I still see it here. It is still there. But for whatever reason, Adobe Photoshop and
their pattern preview aren't reading the other pieces, but it doesn't mean
that they aren't there. If you go back into
Pattern Preview mode, There's your motif
and it is there. Now, that does take some getting used to if you're going to
work with smart objects. And you might be
wondering, Well, if I can't really tell
where my things are, if I come out of
pattern preview, that can get confusing. However, I'm going to show
you what does work with using smart objects and
why you may want to consider doing this
with your work. So let's go to
this original one, and I'm gonna go into my motif here and I
can edit in here. So let's do an adjustment. I'm gonna do an adjustment from here and not an
adjustment layer. And we'll change that to yellow. Maybe we will switch this and I'll put white
and my foreground will make it a true
Daisy and hip. Okay? Actually, no, I want it to
be able to see those petals. So let's get like a pale pink. There we go. I have my pale pink and let's even change the
stem a little bit. Just change it to maybe
that bluish color. Now I've changed this in my
smart object layer here. Then I'll click Close, hit Save, and it
changed the other one. So that's another
way to adjust all of your light motifs
that you created Smart Objects and have them
changed all at the same time. So it changed this one, but also changed the
additional Smart Object because I made a copy from this. So if I had another
layer and I just added some motifs there that we're not in
that smart object. I changed this smart object and it's not going to affect anything that
isn't a smart object. See, it only changed this because that was
the smart object. And any smart object that's duplicated from
the original will change. That can be a great, great editing tool for certain types of patterns
in certain instances. Let's get rid of this. So just know that using
smart objects is an option. Again, if I come out of pattern
preview, I'm losing this. So if I go to save
my file like this, if I save it as a
Photoshop layered file, it's going to preserve all of my smart objects,
the smart layers. The smart objects and those layers will still
be there and editable. But I can't create a
flattened JPEG file to save, maybe upload onto a POD site. So what I need to do is I need
to rasterize these layers. So let's come into
Pattern Preview, and let's go ahead and rasterize the layer and
rasterize the layer. So let's right-click rasterize. And now I can see them. And if I come out
of pattern preview, there it is, my layers
are rasterized. Know that if you're going to
save a JPEG version of this, you must rasterize your
layers first and then save. If you were in not smart
object layers like this, you'd be able to save a JPEG as long as
all of your things are showing your motifs or whatever you've created
illustrations, drawings. But know the difference between if you have
smart objects, you will not be able to save a flattened file from
the smart object file. So my advice would be to
save one smart object file, rasterize your layers,
save that file, save a flat file. It's always a good idea to have more copies and different
file formats than not. You would hate to save a
flattened file of this and then not be able to come back and edit it
the way you like. So always save your very
layered or smart object file and then a
flattened version or a more simplified
condensed version.
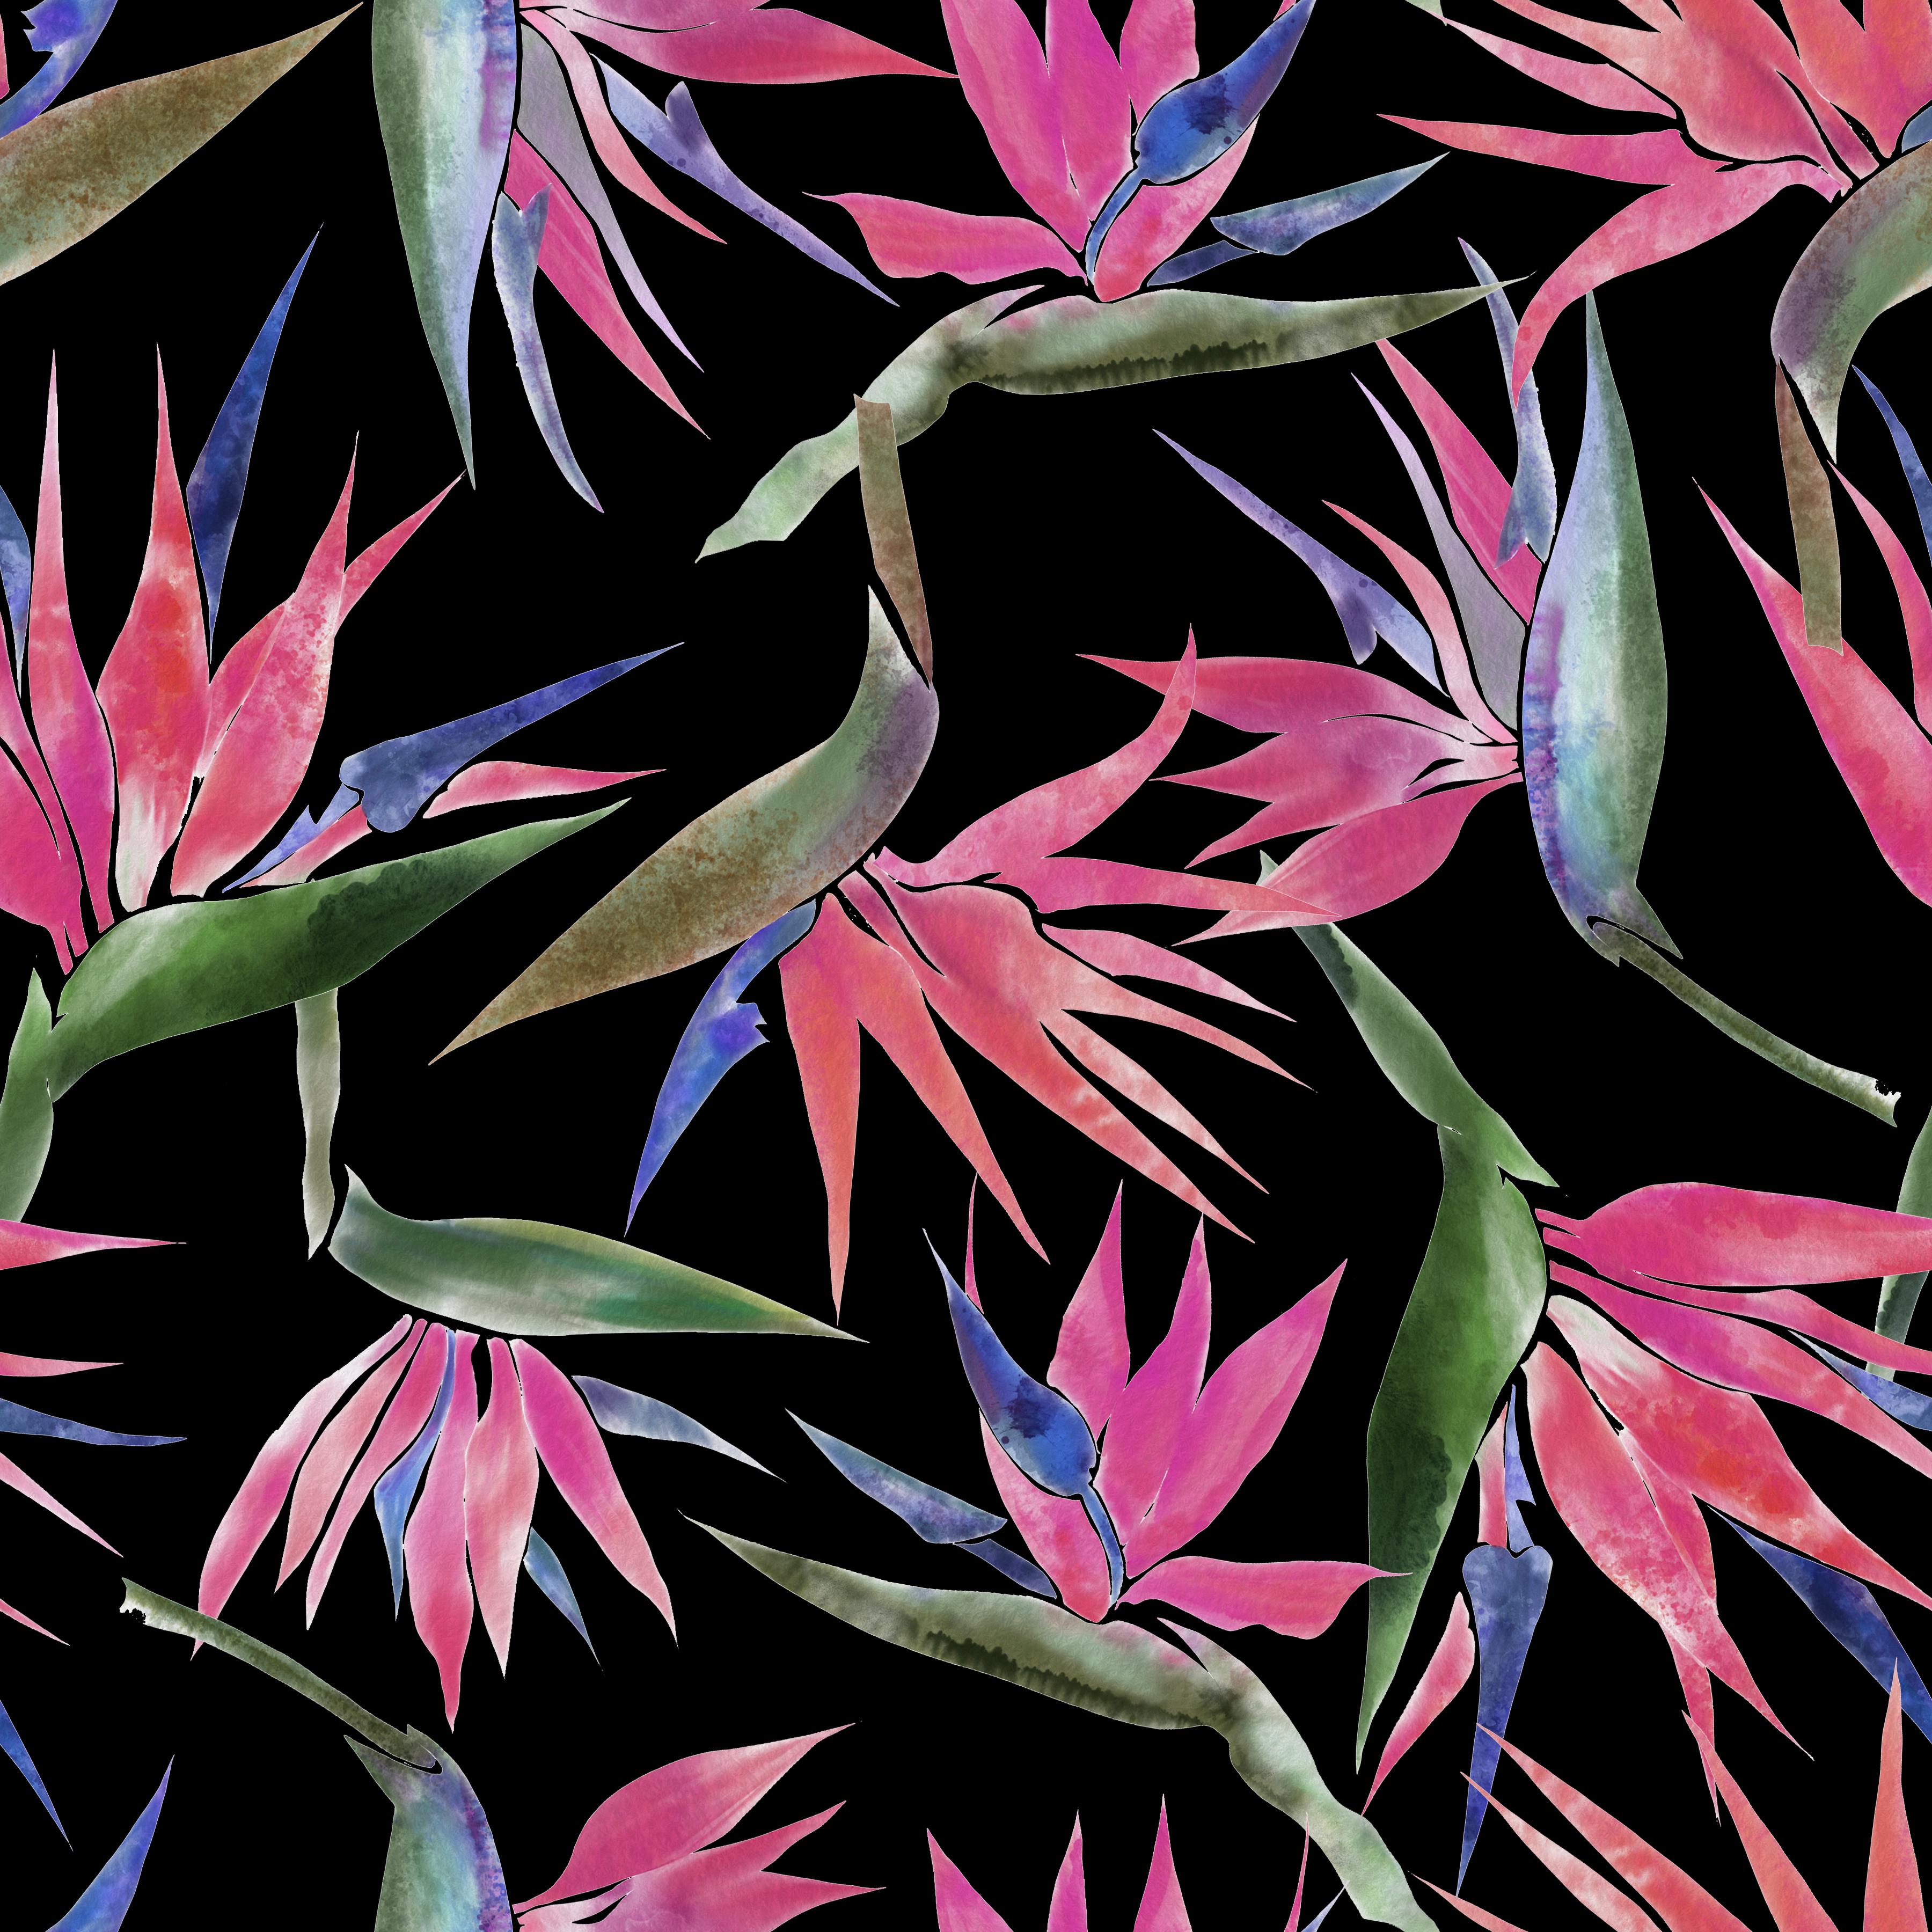
15. Lesson 13 Watercolor Motifs & Smart Objects: In this next lesson,
we're going to review some very important things to know about using pattern preview to create patterns and
using smart objects and when it's a good idea to use smart objects and when
you don't need to. And here we're going to be using this artwork
that I created. It's Bird of Paradise
watercolor paintings. And I'm using this on purpose because there are
a lot of artists out there that really start their art process
painting by hand, either with watercolors or acrylic paint or
gouache on paper. And then we scan
our artwork in and we attempt to digitize it. And then this is a way
that we can digitize our work and then turn
it into a pattern. And that's why I'm using this particular
watercolor piece. So I'm just going to note
that I've already gone ahead and removed the background
of these watercolors. It's not something I'm
going to review in this course just because it's a completely
separate skill. There are several ways to do it, and there are a ton
of great classes here on Skillshare and other
resources on YouTube and from Adobe Photoshop
that you can learn to remove the background of
your watercolor or gouache or ink paintings that
you've created on paper. So let's go ahead and talk about ways that we can
create this into a repeat. If I go ahead and go
into pattern preview, I can see that it's going to make a repeat out of
whatever's on my canvas. But I need to have some of my
elements start pushing over into my bounding box
to create that repeat, I'm going to grab my Lasso
Tool, L on the keyboard. And I love using the Lasso selection tool because it's really just
like a drawing tool, but it makes us selection. So it's really, really
great and organic. And once you release, it, selects this piece. And you can see, because
I'm in Pattern Preview, it is kinda selecting a little funky and it's cutting
it off at those lines. If I hit V and I go
to move this element, I had the wrong
layer background. It's going to move my element
up here to the corner. And I can see the
selections are over here. But if I want to transform it, and I go to Transform, it's doing this funky thing. And it's wanting to select the entire document size and bounding box and we
don't want that to happen. Let's come out of pattern preview mode and
let's step it back to open. So now I'm gonna come over
and grab my Lasso tool again. And I'm going to select this. And it's going to select it. Now I'm going to come
to pattern review. And if I go ahead and
hit the transform, you see how because I was
not in Pattern Preview, it's just selecting what
I told it to within the confines of the bounding
box or document size. So I have my arrows here
and if I want no, sorry. Let's go back to
make sure I have that right layer selected command T to select
this for transform. And I'm able to manipulate it. And I can even move
it to the corner, right, which is great. And as long as I have it selected before I go
into Pattern Preview, it will go seamlessly
to that area. So it would be select
and transform. Then go into Pattern
Preview in that order. However, once I hit
return and a de-select, if I want to come back and
manipulate this again. Now that I have it
crossing my bounding box, it is going to do the
same thing it did before because I am
in Pattern Preview. And if I try to hit Command
T to rotate it again, it is going to select
my entire box. So that isn't great for
working fluidly and creating repeat patterns because it's going to chop this off. And if I come out of it, you will see the error. And that error is in fact, they're unlike the smart objects that disappear and reappear. So a way to combat that is
to use your smart objects. And since this watercolor is all the variation is
in the one motif. This is when using
smart objects really is a great idea because you don't have to worry about all of the layers and you can
just worry about the motifs. So let's go ahead and select that and make sure I'm on the right
layer this time. Select this motif again, and this time I'm
going to copy it. And just for ease
of this lesson, we're gonna go into a
brand new blank document. And I'm going to paste
my watercolor here. But this time I'm going to
turn it into a Smart Object. Convert to Smart Object. So there we got that
little icon again, and now I have a smart object. Let's come over to
Pattern Preview. Grab my Move tool
and move it on over. And let's duplicate
that smart object. We want to duplicate layer. Okay, I have another one. Let me just move the
other one back on over. And now I have this
middle one selected. I'm gonna hit Command
T, and I'm just going to turn this one around just
to create some variety. And you can see the difference
of the selection when I hit command T for transform, my bounding box is
around just the motif. It's not selecting
this whole thing even though I'm in
Pattern Preview. So when you're working with these painted motifs
where it's not in layers. The smart objects are really, really great to use
in Pattern Preview. So let's see this one and then
remember if I click on it, it's going to automatically
select that layer. I have auto select layer, and I can even
manipulate this one. Now I can turn this one all around and it's not
going to cut it off because it's a smart object
layer in the pattern preview. So basically, the premise
is that if you're using a single layer Smart
Object in Pattern Preview, it works absolutely beautifully. If you want to use groups and multilayers and change
them into smart objects, so just know that it's a
slightly different path. So personally, I tend to use smart objects in a
situation like this, where it's one motif per layer as opposed to a group
in a Smart Object, but they are both
absolutely options. So let's come out
of pattern preview. And now we're going to see
that same thing happened where the smart objects
still disappear. But you know what to do and
you know that you need to rasterize those layers in Pattern Preview to
make them appear. But let's also look at
changing the motif. We have our smart object
layer here that comes up in the individual file with
the PSB file format, we can make some adjustments. So let's add an adjustment
layer on top of this. And again, all of my
colors are on one layer. So this is as a potential way to edit your watercolors and play with what you want the
watercolor to look like. So I'm gonna hit Okay, and
again, it's non-destructive. So if I turn this off, it's still going to
look by the original. I'm gonna hit OK. Save. And then we're going to see
that all of my motifs changed and it changed each individual. Let's grab a different bird of paradise and add
it to our design to make it a little
more complicated. So there's my other element. I can add this one in, and I'm gonna convert this
one to a smart object. And I'm gonna duplicate
it this time. I'm just going to hold, I'm going to hover over it and hold my Option Alt key and drag and, and copying that smart layer, I'm going to transform
and transform over here. So let's just put this
one over here, okay? Then maybe move this
one up here just for some variety in the
motifs and then come back to this one and
just change the direction. So now I have these motifs
playing with each other. If I want to change
the color of this one. The reason why it's giving me so many pixels here is
because when it pasted, it added the rest of that. But at the moment we don't
have to worry about it. We could go ahead and clip it. And hopefully it
will not change. Let's just add in, let's just adjust from the menu. So again, this is
more permanent. And that just so we can
see crazy about that, let's add a different,
Let's add color balance. Let's add some yellows, red. Maybe we change the highlights
just a different way to manipulate color
in Photoshop, something to play with it, Okay, see if it actually
did clip my design. Let's step it back. And we're going to
just go into that one and we're going to
leave that space because Photoshop needs that space. And just quickly adjust so
you can see the difference. Okay, So it changed all of them. So if you're working in
watercolor or painted motifs, this could be a really
great workflow for you. Again, if we come out
of the pattern preview, we're going to see that
all of that's getting chopped off and it's
difficult to see. And in order to bring it back, if I were to just
condense all of these, you're going to see
that it stays chopped off and I come back
to Pattern Preview. That is a problem. So that is why it is
important to be in Pattern Preview first and
to rasterize each layer. If you don't do that. And you condense the layers
without rasterizing, which is basically saying it's undoing the smart object layer. You're going to
lose your objects. And then you can go ahead and condense all of
these to one layer. Now you have all of your
pattern on one layer. You can save that version, save the smart object version for maximum, maximum
adjustments. If you wanted to adjust the overall feeling of
the pattern like this, you can do an adjustment there. You can add an
adjustment layers, lots of ways to work, and lots of options. And now you know
what you can and can't do in Pattern Preview.
16. Lesson 14 Finalize Pattern & Saving Options: Here we are getting
ready to finalize the design using
Pattern Preview, smart objects, and all
of the tricks that we have to make a repeat
pattern in Photoshop. I've gone ahead and created several layers of these bird of paradise watercolor flowers. And I've gone ahead and make each layer a smart object layer. When I come into
pattern preview, I can see all of my smart
objects that are here. Here's the blue line
from my bounding box. Now I have flour 11a4, that's meant to be
for a 33, a 2.5. So really I have five flowers, but I've repeated some of
them to create this repeat. So I know that if I'm going to change the colors
in this pattern, I need to change five of them, but I have 123-45-6789 layers plus my background to make ten. To make the color changes, I'm gonna go ahead and
start with flower one. Come into my smart object layer. For this color change, I'm just going to use an adjustment from
the adjustment menu. And I'm going to just
make some changes. And I'm gonna change my flowers to more of this pink color. I see that it's
negative 41 on the hue. And I'm gonna hit, Okay, then I'm going to save it. And we'll see flour
1.1 a change. Then. Let's just rename that. For. Now. I'm going to come
to flower for a and I want a similar
adjustments. So I'm going to come up to my adjustments and then
my smart object layer. And I'm just going to
now type negative 41. And it's gonna give
me this sort of pink color that I'm going
for with this repeat. Click that smart
object layer close, and then 4.4 a
will have changed. Now, next flower three. Same thing. Hue Saturation. Negative 41. And go ahead and save. And 3.3 a change now I just have to Touche
and flour five, so two more changes to make. So let's double-click and we're going to do my adjustment. Command Hue brings up this
dialogue, negative 41, okay. And close. One more to go. And that flower doesn't
have any sort of copies. So it's just this one. And we're going to do
you command to, sorry, Command U and bring up my dialog box and negative
quoting one and hit. Okay, and there we go. Now those color changes, and I'm going to
add a background. I think I'm gonna go
for more of a dramatic and add this dark
black background. I can also play around
with the colors here, but we get the idea of
how to then finalize your repeat pattern,
which is your projects. So now if I come out of
pattern, Pattern Preview, we're going to remember that all of my smart objects that are hanging off the end
will not be visible. But I'm going to save this
file as a master copy. So I'm gonna go to Save As
bird of paradise master. And I know that my
master copy or however you want to label your
files, will be labeled. That that's my
smart object layer. Or you can just play a
role in smart objects or master of layers
or whatever you think is appropriate
that you'll remember and find the appropriate
place in your files. But now I need to save a repeat tile that
shows my motifs. So we're gonna go back into Pattern Preview to
finalize these motifs. I have to go ahead and
rasterize each layer, which is basically
undoing the smart object. So Rasterize Layer,
right-click Rasterize. Now when I come out
of pattern preview, I can see all of my
motifs on the edge. I can do a few things. I can save an additional
copy that's still gives me the ability of
having each one of these elements on
their own layer. That's always a good practice. And that's probably
what I would do if I were saving a
using this file. Then an additional thing
you can do is condense your layers into one layer. Merge visible. Now I have my motifs on one layer and my background on another layer. And I can play around with
the black background color. I can edit all of these
at the same time. And I can play with
the saturation, maybe make it a
little bit moodier. And say, I like this, I can go ahead and
go to Save a Copy. And when I go to Save a Copy, I'm going to get
this JPEG option. If I click, JPEG, is going to save a
flattened file tile. I can also throw a
pattern tile in here. I have a seamless repeat. And remember that the
repeat tile that comes into this panel is a
flattened file of that. Say I want to save it with just my flowers and apply
this to another pattern. And I can do this well and save an additional one with
a transparent background. And we can also apply
different layers of patterns. So there's a lot of things that you can do
here once you are getting your pattern ready to be a complete pattern that
you're going to upload and use somewhere
either in a pitch to a company or a
print on-demand. Perhaps you're
getting ready to load this to Spoonflower or society six or any of the other companies you
might be working with. And those are just some
ways to save your work. And I advise always
saving some sort of edible or maximal edible
copy and a flat file. The flat JPEG is going to
have a lot less heaviness to it and the file will just
be simpler to transport. You can save a tiff, you can save a JPEG, you can save a Photoshop
file, lots of options. I can't wait to see what you
make using Pattern Preview.
17. Lesson 15 Combing Patterns Together: An additional thought is to combine some of your
patterns together. So since we've
learned about using the pattern fill option here
on the pattern swatches. And we've collected these
swatches throughout the class. What I'd like to do is to take this little daisy flower here, and I'd like to add a polka
dot background to it. So I have my file setup where the middle petals and stem
are all on the correct layer. I want to add polka dots. And the key to adding
pattern within pattern is making sure that the dimensions of your document, which is that blue
bounding line, they're fit within each other or are divisible
by each other. So I have a 12 inch by 12
inch document at 300 DPI. Check that here in age size. So here it's 12 " by 12 ", 300 pixels per inch. And I had made this little
scattered dot pattern, which if we hover and
leave our cursor over it, it tells us the dimensions, which was 1,200 by 1,200 pixels. So I know that that
1,200 by 1,200 pixels can be divided within
the pixels of this box. So I'm gonna go up
here and go to Fill. And I'm going to select
this one and hit. Okay? And because the
repeat of that fits within the bounding box and it's divisible
by the outside. I have this repeat, this repeat now layered because I use the
transparent polka dot. I can change the color of my background and
the polka dots. So I can pixel lock this layer and pick
a color that maybe goes with the artwork a little bit better or something
that I'm trying to create. And change my dots. And then go ahead and pick background color
to make those dots stand out and create a repeat pattern with
two layers of pattern. So the top layer is my flowers and the
bottom layer is my dots. They both have seamless
repeats that fit into each other correctly into
the outer layer. So let's come out. So that is the important thing
about layering patterns. If you have two different
dimensions and they aren't divisible by the
outside of your document. The patterns will not line up.
18. PP Thank you: They use so much for taking
the time to learn with me. I hope that you learned a lot. I hope you enjoyed
this deep dive into using the pattern preview
feature in Adobe Photoshop. I love using this feature. I use it all the time as well as some other additional methods to create seamless repeat patterns. I would love to see your work so please share your project in this class so that I can see it and others can follow
along your journey. If you create a
seamless repeat pattern with the pattern
preview and you'd like me to see it on social media. You can always use the hashtag. Skillshare, Shots see brown. And this way I will be able
to find your work and you can find me on Instagram
at Schottky Brown. And also my portfolio site
is under the same name. I can't wait to
connect with you and thank you so much for
learning with me.
 Tanya Brown, Surface and Textile Designer