Transcripts
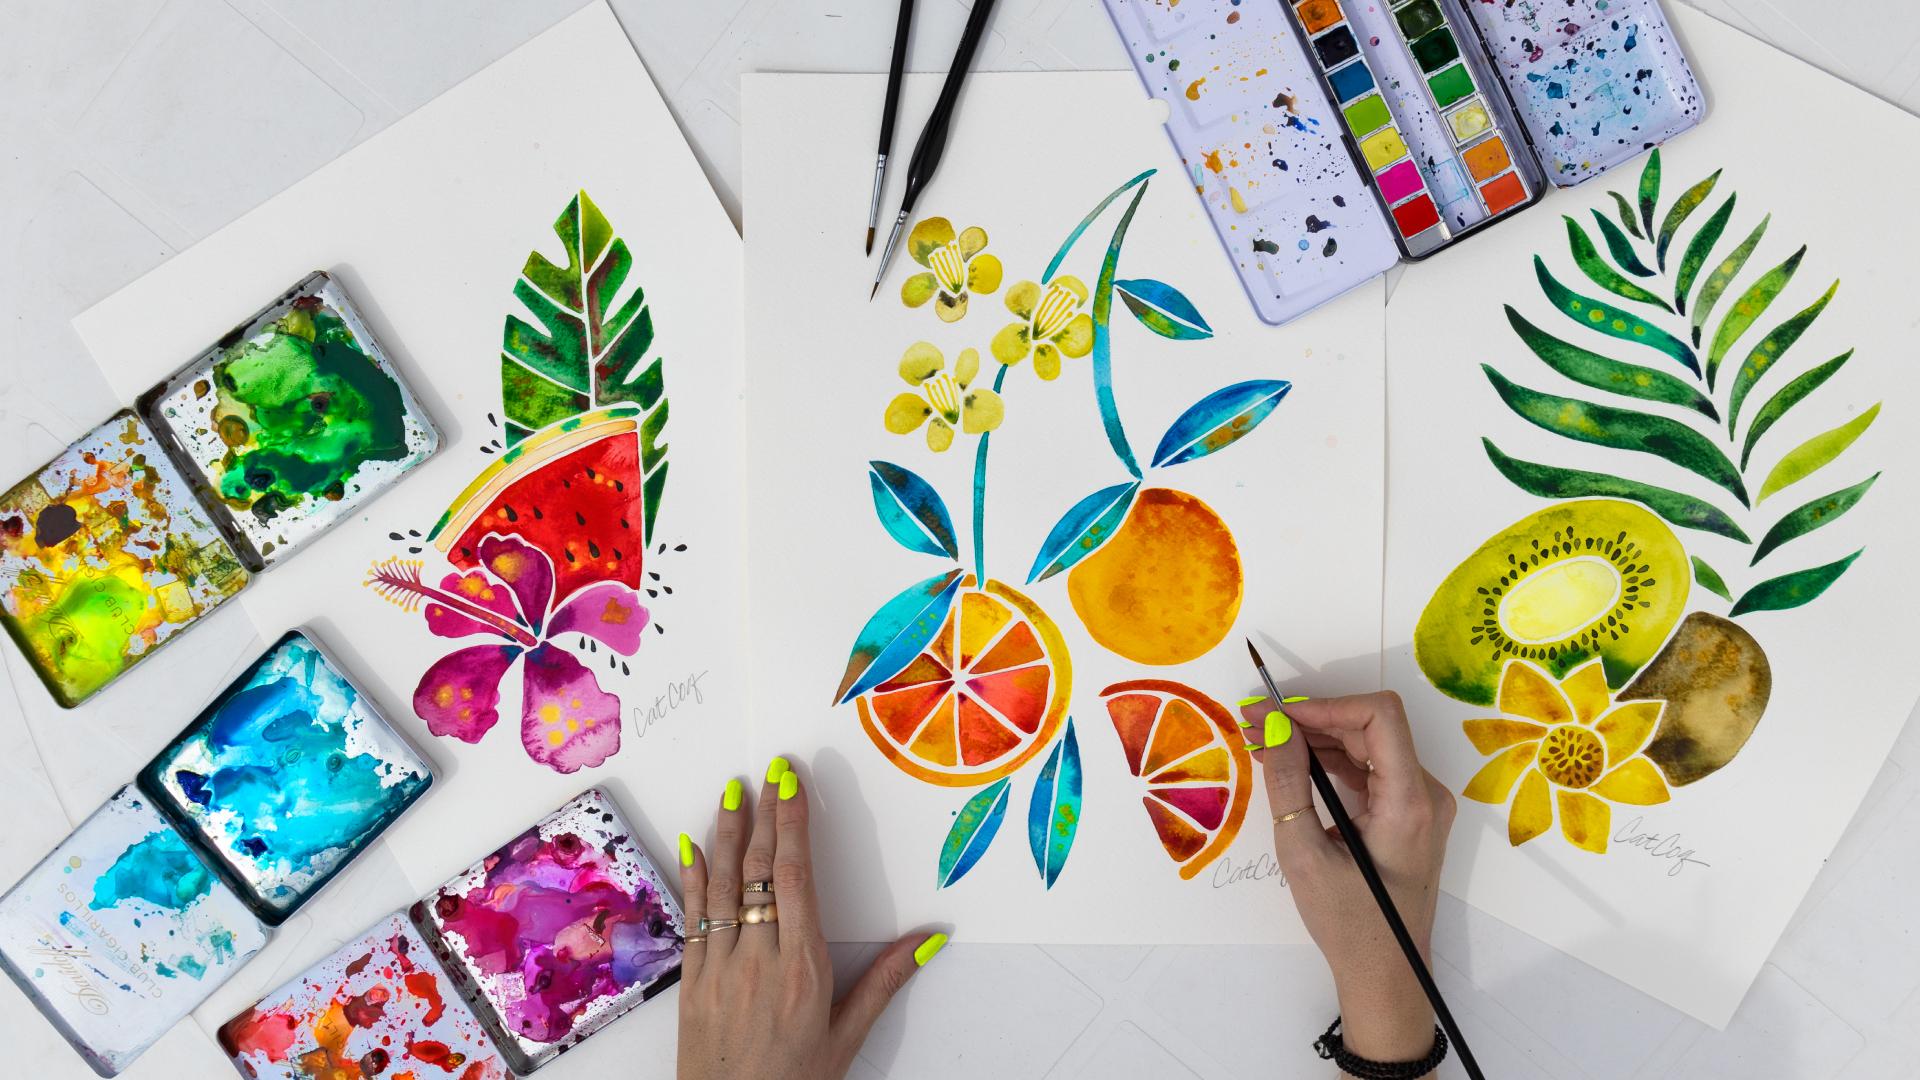
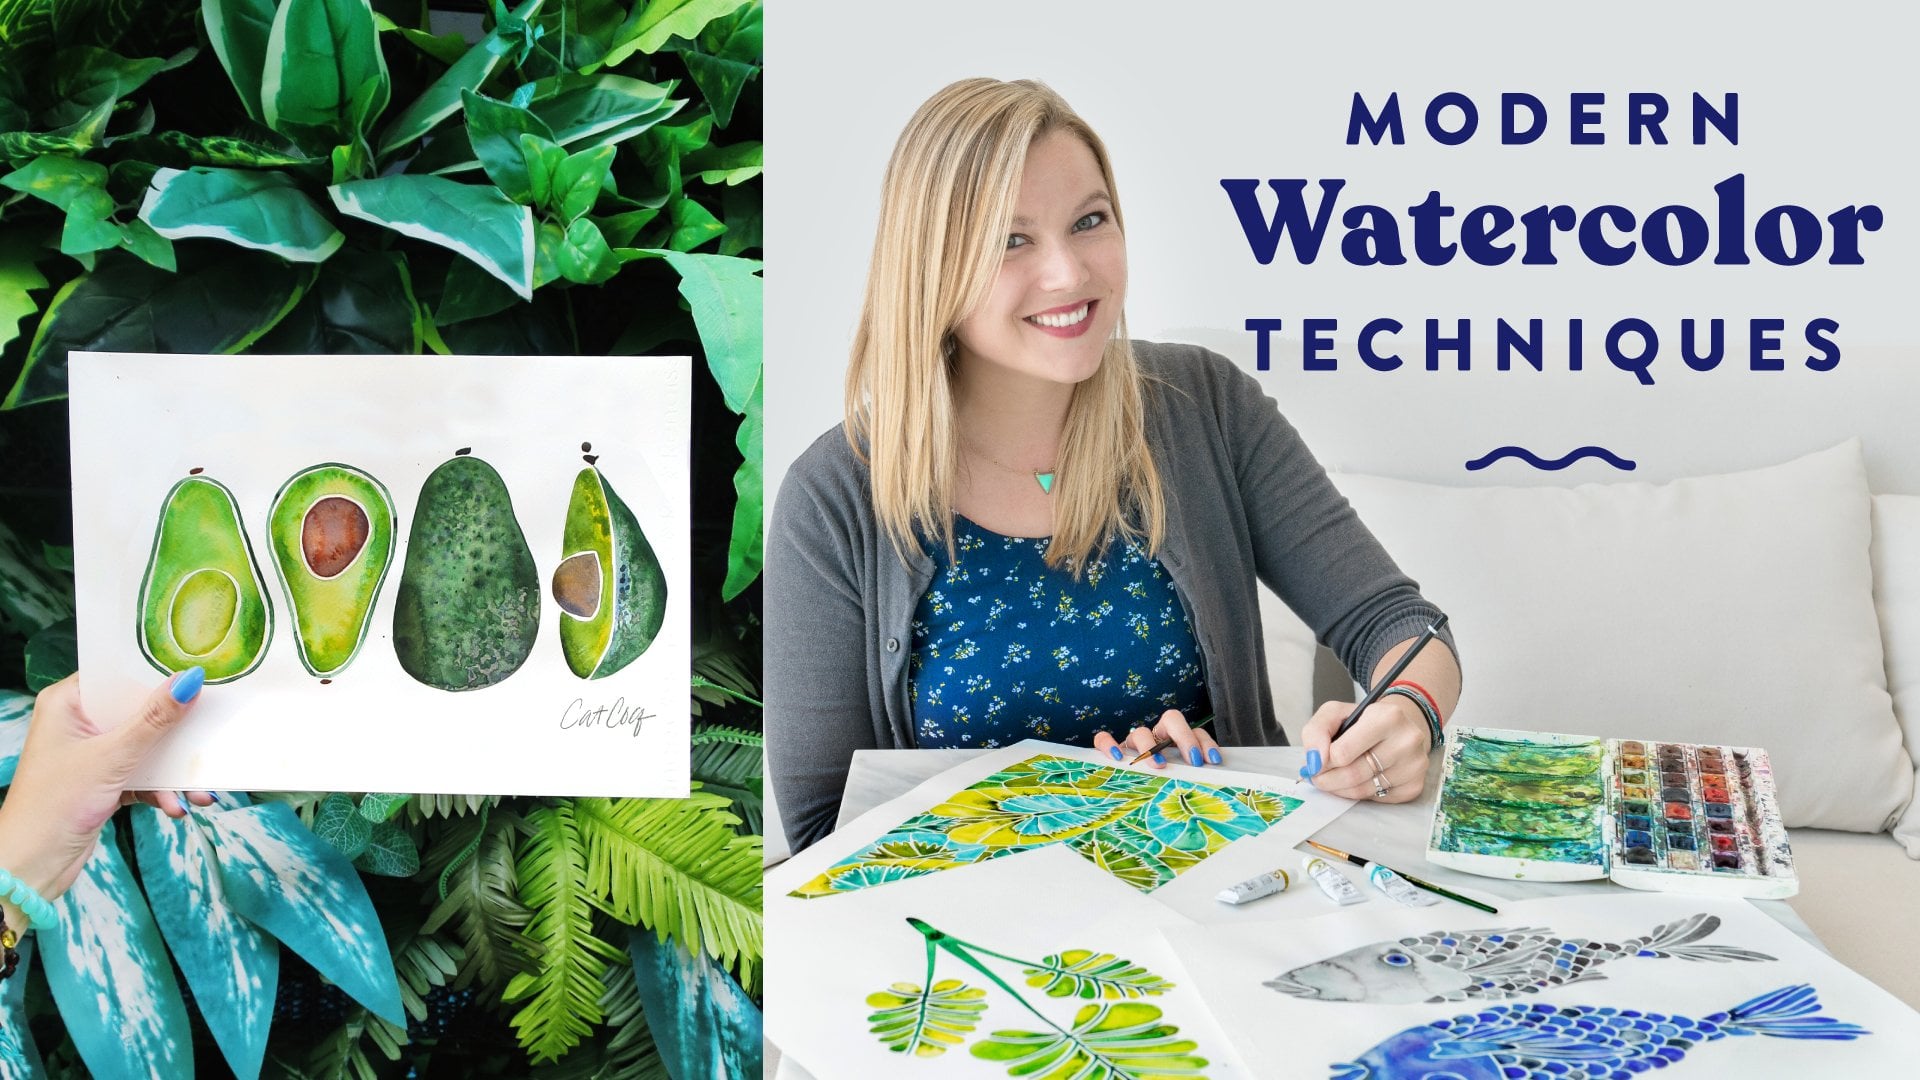
1. Let's Go!: Welcome to fruits and florals with watercolor. In this class, you're going to learn how to paint your own fruity florals with a modern twist. This is a hands-on class. So you're going to be learning some of my favorite watercolor techniques as we go. You'll pick up tips for color blooming, and you'll start infusing modern styles like whitespace. This class is for all levels. So whether you're an experienced artist or brand new to watercolor, you'll be able to follow along and grow your paintings skills. And since we're diving into a modern approach with watercolor, you're going to learn how to simplify the watercolor process to create vibrant on trend artwork. My name is Cat Coquillette, and this is my 21st Skillshare class. In addition to teaching here on Skillshare, I also run a surface design and art licensing business called CatCoq. I actually started my brand with watercolors way back in 2014. And today, you can find my artwork in stores like Target, Urban Outfitters, HomeGoods, and more. I also travel the world full-time as a digital nomad artist, And I paint the things that inspire me on my travels. My art licensing portfolio is essentially a diary of where I've been around the globe. One of my favorite aspects of watercolor are the fun surprises. You can use techniques like color blooming, and mixing colors on paper to create some truly unique outcomes. No other medium is quite like watercolor. I like painting with white space, which gives a modern and minimal vibe to my artwork. And just like all my other classes, in this class, I will be breaking everything down into bite-size chunks. So it's going to be easy to follow along and paint alongside me. And by the end of this class, you are going to have a stack of four watercolor illustrations that you painted yourself. And in the process, you're going to be learning some pretty cool techniques and my best advice for watercolor painters. All right, Last but not least, please don't forget to follow me on Skillshare by clicking the Follow button up top. I frequently surprise my followers with freebies, and give out a handful of Skillshare Premium memberships each year, Just my followers, which means an entire year of Skillshare for free. Plus when you follow me, that means that you'll be the first to know as soon as I launch my next class or have any sort of announcement to share with my students. And you can get in the loop by hitting follow up top. All right, ready to dive in and create your own watercolor originals? Let's get started.
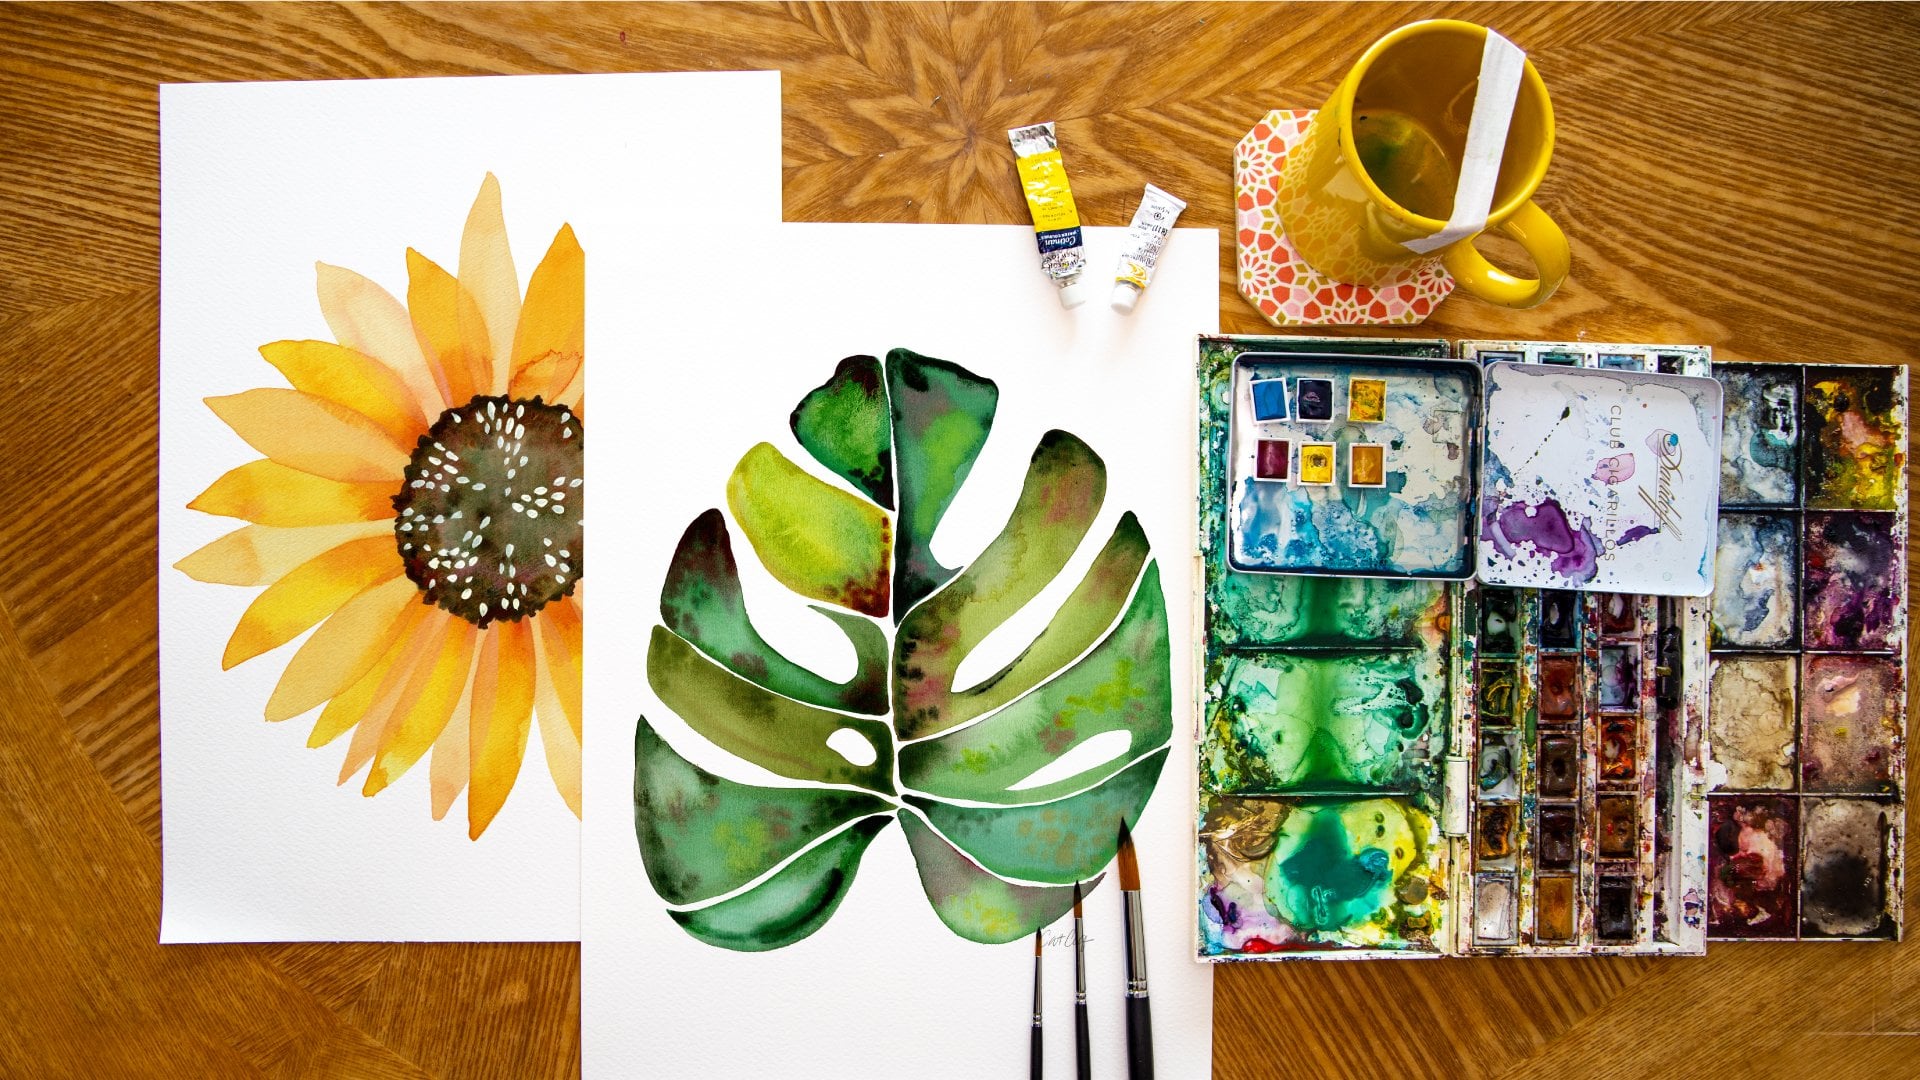
2. Supplies: Okay, so before I dive into all of the supplies that we're going to be using today, I have a feeling that some of you might skip ahead because you came from my other Botanical Watercolors class. So before you skip this and dive right into the first painting, I want to let you know that I've included a stack of reference photos for you to use today as well. You can find them under the Projects and Resources tab on the right-hand side under the column called Resources. I use reference photos all the time when I'm painting. They help me figure out how I want to take this complex motif and then simplify it into its most basic stylized form. So you are more than welcome to download the reference photos that I've included in this class. And I pulled all of these images from Unsplash.com. Unsplash is a stock photography website, that I personally use all the time because you can use their imagery for free even on commercial projects. And like all of my other classes, you have two options here. You can either follow along step-by-step with every brush stroke that I'm doing. Or you can create your own composition. So while I'm painting kiwi fruits and ferns, you could be doing papayas and tropical leaves. So feel free to establish your own composition or follow along with the one that I'm going to be sketching out. All right, onwards to the physical supplies. So let's start with the most basic: watercolor paints. So over here, I have my pans. I use a mixture of pans and tubes, even though one is dry and the other is wet, they both do the exact same thing and you can mix and match these together. So oftentimes as I'm painting, I'll mix pan paint with to paint to create a really nice complex color. And once the tube paint dries, it actually becomes pan paint. So these globs on my palette over here are actually just dried tube areas that now are essentially pans. And in terms of the brands I use for watercolors, I prefer to use Winsor & Newton. So this one right here is the Professional Series. I actually just started using this a few months ago. So my entire career before that I was using the Cotman series and on a whim I decided to upgrade to this one. So the Cotman series is a little bit cheaper. It's the student grade and the artist grade is the professional grade. And it's a little bit more expensive. But to be totally honest with you, I've used the Cotman grades since I was about 16 and I'm 33 now. So I only just switch to the Artist Series a few months ago. It's not so much about the brand of the paint you use. It's how you use that paint. And you know what, for example, a lot of my tube paints are these really cheap tubes that I picked up over the years while traveling. Some of these I bought in Indonesia, others I bought in Thailand, and at most a paid a few dollars for each tube. I also have some fancier tubes like the Winsor & Newton Cotman series. So I just use a mixture of really cheap paint and then much nicer paints. So if you're in the process of buying new watercolor paints and you're trying to decide what to save money on and what to splurge on. Here's my recommendation. When it comes to the primary colors, which is blue, red, and yellow, these are the paints that we'll spend a little bit more money on. These are all Winsor and Newton. And these primary colors are the most important because you mix these three colors together to create just about every color on the rainbow. So I will splurge on these and then I find fun cheap colors like mint green that I only spend a few dollars on. So if you're in the process of deciding, usually the primary colors are a little bit more expensive, and then all the other secondary colors are a little bit cheaper. I just want to emphasize one more time. It is not about the brand of paint, It's about how you use it. So if you don't have the most up-to-date professional series, Winsor Newton Cotman, whatever it is, That's okay. You can still follow along with this class just fine. Even if you're using a five-dollar palette. This class is about having fun, embracing our creativity and painting some beautiful things. Alright, next up, let's chat palettes. So I use a lot of real estate when I'm painting. So what I found that works really well for me is to have separate palettes. So I use the palettes that are built in with my paint set like this. But then I also have these other metal boxes open and shut like this so that I can store my paint and take it with me. When watercolor dries, it's not ruined. You can just dip your brush in water, re-wet those areas, and start using this paint all over again. So for that reason, I like using tins like this. So I can store my paints, pack it up, take it away, and then open it up again later to reuse when I'm ready to start my next painting. So these tins here are actually cigar packaging. I went to a cigar shop in Tbilisi, Georgia and I asked if they had any extra tins and they said yes and gave me some. Which is great because they make really good makeshift palettes. If you don't have a local Georgian cigar shop to go into, you can also use Altoid containers or any sort of metal box that's going to open and close. For me, these just worked out perfectly and I'm able to segment my palettes. So I have my reds and pinks, my oranges, yellows, greens, blues and so forth. It just helps me stay a little bit more organized. Next up, brushes. So when it comes to my watercolor brushes, I'm not actually super brand loyal. Instead, I just look for a few attributes that make up a good brush. So for watercolor, the things to look for are soft bristle brushes that can hold a lot of water. So oil painting brushes and acrylic brushes, those are a little bit stiffer with their bristles and they don't work super well for watercolor. Instead, you want to look for brushes that are specifically labeled as watercolor brushes because that means that they're bristles are going to be very soft and hold a lot of water. And when it comes to the shape of the brush, There's a lot of different sizes out there, but one thing I prefer are round brushes with a tapered tip. And that way with a tapered tip, I can paint really fine details when I need to. So this style of these brushes are round brushes. The other style I use are these little guys right here. These are detailed brushes. So these come in sizes like triple 0, 1. They're very, very small. And I use these when I went to get really, really fine lines or really detailed areas within my illustrations. So for this class, I'm not going to be using more than these five styles of brushes. And the sizes here range from 12, which is about the largest that I'll use, down to triple 0, which is my detail brush. And again, in terms of brands, I just buy these off Amazon. They're pretty cheap. There are about a dollar a brush. So if I end up using this one to death then having to throw it away at the end of the week or the month. Not the end of the world's because it was a low investment to begin with. And if you're wondering what this bad boy is, this is the biggest brush I own and I don't even use it for painting. I use this for removing the pencil marks from my page after I finish erasing. And if you think that sounds completely over the top and extra, it kind of is. But the reason I do that is because if I were to brush off my pencil marks with my bare hands, sometimes that graphite is going to smear when it mixes with the oils on my fingers. So rather than having smearing pencil marks on my page, I just use this brush to remove those pencil marks. I think at an alternate life, I was probably digging up dinosaur bones. Okay. Time for paper. When it comes to paper, I primarily use Strathmore watercolor paper. Now, there are a million brands of watercolor paper out there. So rather than just throwing that brand name out and stopping, I'm going to talk about some of the attributes I look for in a really good watercolor paper. The first thing I look for is the weight, and that's usually indicated by a series. So with Strathmore, they range from 100 to 500 series with 100 being the thinnest and 500 being that thickest. So 500 is considered their most professional watercolor paper. But I'm a professional watercolor artist and I only use the 300 series because I found that, that bulk, that weight actually works really well for me. So there's not really a need to upgrade to the thicker paper. However, if you are painting and you find that your paper is beginning to buckle and bend a little bit and feels really heavy with that water, then that might be a cue that it's time to upgrade to a higher series. So if you're the type of watercolor artist that covers your entire page with a lot of water, a lot of pigment, then maybe the 500 series is going to be better for you. But for me, I don't cover the whole page. I usually just cover a portion of it. So the 300 works just fine. Okay, more things to look for in a good watercolor paper. I prefer cold press instead of hot press. So simply put, cold press means that that paper is going to be bumpy and textured. And hot press means it's going to be a little bit smoother. So I like having that texture in my paintings. So I always go for cold press. A few other things to look for. Acid free is really important. So what that means is over time, because it's acid free paper, it's not going to get really brittle or yellow, especially if it's in indirect sunlight. So acid free essentially means that your paper will stay preserved and stay crisp and white for much longer than it otherwise would if it didn't have that label. I also want to make sure that it says heavyweight somewhere on the packaging. Again, 300 series indicates that this is a heavyweight paper that you'll want to look for it as well. And remember, you can find all of these attributes with a lot of different watercolor brands. My personal favorite happens to be Strathmore, but you can get there with a lot of other brands as well. All right, now that we've got the staples out of the way, let's dive into some of the extras, starting with your sketching pencils. So when it comes to watercolor and sketching, it's best to sketch with a very hard lead pencil. So the two different types of pencil lead are hard lead and soft lead. And with hard lead, when you draw on the page, it barely makes a mark because that lead is so hard, it doesn't release onto the paper very easily. With soft lead, it crumbles much easier, and so it'll make it very dark marks on the page. So with watercolor, because it's a transparent medium, if you paint over your pencil marks, those pencil marks will permanently stay there on that page. So the lighter you can make your marks the better. And if you want to make really light marks, use a very hard lead pencil. And you can tell it's a hard led by the designation of H. So this one right here is a 3H, which is what I usually use for sketching. Anything that says B means that it's going to be a soft lead pencil. So because soft lead is darker, I usually avoid B when I can and I prefer H instead. But actually for today's class, I'm going to be using a soft lead pencil. Because I want you to actually be able to see on camera the marks I'm making on page. So I'll be drawing pretty dark in today's class so that you can actually see on camera. But as you follow along, remember to sketch very, very lightly. And if you don't have these specific pencils, you can also use a mechanical pencil or any pencil you have on hand. Just sketch really lightly as you go. And when it comes to erasers, I am pretty obsessed with these click erasers because it's like drawing as you erase. And because as I sketch, I make really fine-tuned adjustments to my sketches by erasing. So I like using this to have more precision. I also use kneaded erasers like this to lift my sketch up off the paper and make it a little bit lighter. So if you have a kneaded eraser on hand, That's really good for lightening your sketch before you start painting. Another thing every good painter has on hand is a roll of paper towels. I use these all the time because they're really easy for lifting mistakes up off your page as you make them. So even if you drip paint water on your page, you can simply use these paper towels to lift it right back up and it's like nothing happened. So the faster you get to your mistakes, the cleaner they're going to be when you remove it from the page. So it's good to always have these on hand. And last but not least, your water dish. We are after all, watercoloring, so it's good to have a watercolor dish on hands. Now, I dump this out frequently. So usually if I'm painting with a lot of green and then I'm going to be switching to a red. I'll dump my dish so I can start with clean water. So I am always getting up, changing the water, coming back with clean water as I go and that keeps my colors from getting muddy. So whenever you can work with clean water, you'll have crisper colors. And if your water gets muddy, your colors are going to become a little bit more desaturated. If you're wondering why I have this piece of masking tape on my dish. The only reason is that is here to remind me not to accidentally drink my paint water. So usually when I'm painting, I'm drinking tea or coffee and it's really easy to be in the zone you're painting and grab the wrong cup to drink out of. It's really gross. Nobody wants to drink paint water. So by putting a little piece of masking tape on top, it reminds me, don't drink this water. This is for paint only. Alright, I think that is it in terms of supplies that we'll be using today. So without further ado, let's go ahead and jump right in.
3. Sketching the First Scene: For our first illustration today, we're going to be painting this tropical hibiscus watermelon banana leaf combination. Basically what I was looking for is all of these tropical essences I could think of and then combining them together into one composition. So let's go ahead and get started with our sketch. So the materials you'll need for this lesson are your click eraser, a pencil to sketch with. And remember, I recommend using hard lead pencils. So that's anything that has an H on it. And the higher number the H, the harder the lead. But for me, I'm going to be switching to this soft lead pencil. And the reason I'm doing that is I want you up here on camera to actually be able to see what I'm sketching on screen. So in every other instance with watercolor, I would always use a very hard lead to sketch because that way my sketch is very light on paper. But in this situation, we'll be using a soft lead pencil so that as I draw, you'll be able to see on screen exactly what I'm doing. It's not going to be too faint to actually be able to make out. So if you're following along with me as we do this sketch, just remember, use much lighter pressure than I'm actually using it on paper. The thing with watercolor is, once that paint is dry, it is dry. Anything that's underneath it, including pencil marks, are going to be permanent. So the lighter you can make those pencil marks, the more beautiful your painting will be. All right, other things to have on hand for this lesson, we have three reference photos, watermelon, banana leaf, and hibiscus. So I like having my iPad off to the side just to use as a reference. But if you want to pull this up on your phone or your screen just to kind of take a look, That's absolutely fine as well. But I'm going to start here with the watermelon. And the final thing you actually need is a blank piece of paper. So with those four things in mind, pencil, eraser, paper and reference photos, Let's go ahead and dive right in. So the first thing I'm going to do is do this upper curve of the watermelon. Pretty simple. It's just a very slight curve, pretty much right in the center of my paper. And then I'm going to bring it down to a point like this. So that I have my nice abstract watermelon shape. Then it looks like the barrier for the rind is just about here. So we have our watermelon shape down. Let's go to the next reference photo, which is the banana leaf. So in order to create this lockup, I think what I'm going to do is stack these images. So for the banana leaf, it's really dark green, It's very dominant. I think I want to have that in the background. So the watermelon is going to be in front of that banana leaf. So let's go ahead and sketch what that looks like. I'm going to start just by doing this line straightforward. And that's going to represent the central veining of that banana leaf. So pretty easy, just starting with the line. And next up, I'm going to look at the outer edges of this leaf. So banana leaves are fairly narrow. They're not very wide like a monstera, but they have this elongated form. So this is a cropped photo so we can't see the entirety of it, but that's fine because actually the bottom of this leaf will be hidden down here behind the watermelon. So I'm gonna go ahead and sketch out what I think that bottom might look like. And last but not least, I'm going to draw in a little bit of veining to match what's happening here. So real quick, for sketches, especially with watercolor, it's not important. It's actually detrimental to draw every single little detail before you get going. It's much better to get the basic forms down and then you start filling in with water. And the reason I say that is because if I were going to sketch every single little detail out with pencil first, then that graphite is just going to show through what I have my final painting on top of it. Because remember, watercolor is a transparent medium. So if you paint on top of something, that bottom layer is probably going to show through. So it's not like acrylic, not like gouache, not even like oil. Watercolor is very, very transparent. And that's one of the reasons I really love it, because you have a lot of light showing through and a lot of opportunities to mix colors together. But in this case, we want to keep that in mind for sketching. So as light as we can make our sketches and as less detailed as we can make our sketches as possible are going to be in your favor. All right, so I'm just going to draw a few of those lines so that I get an idea of the direction of how that veining goes. I'm not drawing every single little one that you see here on this reference photo. Instead, I'm just going to be drawing a few. And one thing I love about this banana leaf are these divots that happen, It's where these leaves aren't totally touching together. Instead they start to spread out and you have this nice negative space. So in my sketch, I'm going to create a couple areas like that as well. So maybe we're going to have one right here, maybe another bigger divot here, then a few on this side as well. And because I love asymmetry, I'm going to add one more. So it's three divot on this end and one on this end. And as I sketch, I like to erase out the parts that are no longer necessary as I go. And in this case, I no longer need to have these lines here that represent the divots. I don't want to get confused later when I'm painting and accidentally paint this in. So I'm just gonna go ahead and erase it out. And if you remember in the supplies video, I have a massive brush that I use. Not exactly for painting, but for erasing out the pencil marks like this. I don't like using my grubby hands to be smearing all over that paper because I'm going to end up smearing the pencil marks and making it all gray and gross. Instead, I use a nice soft, clean brush to remove those pencil marks. Now, this is not absolutely necessary and I'm the only painter I know of that actually does this. But trust me, it's made a really, really big difference for me. So if you ever feel like investing in a brush that you've never used for painting, but just use for archaeology, then this is the time to go for it. All right, and last but not least, to polish off this composition, I'd like to add a big blooming hibiscus right about here. So it's already feeling pretty tropical. We have watermelon, we have a banana leaf. Let's go ahead and just bring that up to the max and add in a tropical flower as well. So over here on my reference photos, I have this big, beautiful hibiscus bloom. So I'm going to go ahead and draw this in. Now if you're looking at this photo and you're thinking that looks way too complex to actually draw and paint. I'm going to show you how you can simplify it to make it a lot easier to understand. So the first thing I'm going to look at with this hibiscus is this big overarching shape. So imagine a circle drawn around this hibiscus and then where I want that circle to appear on my paper. So in this case, I think I want to have my hibiscus nice and big right about here. So I'm going to have it be overlapping my watermelon to push really that concept of depth in here. So the hibiscus will be the most front-and-center in the foreground, the watermelon will be in the midground, and then this banana leaf will be in the background. Let's go ahead and finish flushing out the rest of this hibiscus. So after I have this general space, I like to define the midpoint. So I'm just going to make a little circle right here in the middle to represent where the middle of the hibiscus is. And next up, I'm going to look at this pistil, the center long bar coming out from the middle. And so we have our banana leaf shooting off this way. I think I'd like to have that pistil shooting off this way in an opposite direction. So for that, I'm just going to draw a line. So next up, let's address some of these blooms that are coming out from the center of the hibiscus. I usually like to start with the simplest form, which looks like this one right here in the foreground. So I'm going to kind of mimic that shape by drawing a semicircle to represent this area right here. And then I'm just going to draw a bloom that looks like this. Again, it's a really rough, we can get into those details later. But for right now, it's about establishing form. So we have our first bloom right here already on paper. And now let's look at the second bloom. And it's this wild thing over here that shoots off to the right. And remember I've already drawn this circle to kind of establish the area. It looks like I'm off shooting it a little bit with these blooms. So they might wind up being a little bigger than I expected, but that's no problem. So let's go ahead and look at this guy. And it looks like it shoots off this way and then circles back around. So pretty simple, it's just once swoop to the right and then connecting it back to the center. Next up, let's go with this one up here. So it looks like it shoots off and then comes back down. And now we'll go with the one on the left. It kind of mimics what's going on on the right over here, where it shoots out. Then comes back in. And last but not least, this guy down here in the foreground. Perfect. So very, very simple shapes. We began with a circle. We defined the center point, and then we drew a line to represent the pistil. And then we made some very gestural blobby shapes to represent those petals. So at this point, I'm going to go ahead and erase out the unnecessary areas. So because this hibiscus is overtaking the watermelon, because it's in front of that watermelon, I can go ahead and erase out these watermelon lines because they'll no longer be needed. I can also go ahead and erase out this circle line that I used to get the positioning of my hibiscus correct. All right. Back to my archaeology brush to get rid of those eraser nubs. Alright, so if we take a look at our hibiscus and then take a look at our sketch. You can see that our sketch is a much, much simpler version of all the complexities that are happening here. And that is totally fine. So when it comes to some of these details like the fact that the edges of the petals aren't smooth. They kind of have these divots that go back and forth. We can actually address that as we paint. So remember with that whitespace technique, the idea is that we're not going to be going over the pencil marks. So as we begin to paint this in, what we can do is just kind of make up how those divots happen on our paper as we go. So we don't necessarily need to be sketching in every little bump and dip on the edge of those petals. We can address that as we paint. And it's going to be extra helpful because we'll have the reference photo right here to the side. Same thing up here with all these little pollen areas that kind of shoot off of that pistil on the top. We don't need to draw all of those then we can just paint that as we go by looking at our reference photo and seeing what they look like. So again, with watercolor, the more minimal that you can keep your sketch, the better your painting is going to be. So at this point, we have our sketch completed. Let's go ahead and move on to painting the first layer of our new composition.
4. Painting the Hibiscus: So now that our sketch is completely finished, it is time for the fun part, which is actually painting. So let's take a look at what we're working with here. I'm going to start with the image that's most in the foreground, which is this hibiscus. So this is going to be my starting point and I'm actually going to be using my very chaotic warm palette. So I've got a lot of oranges and yellows and this segment, and then a lot of fuchsias and reds and pinks over here on the bottom. So what I'd like to do is first consider the overall color palette of the composition. So I know the watermelon is going to be bright red. I know I want my banana leaf to be somewhere in the green category. And so I need to start considering now what would be a good color for that hibiscus. So rather than add a brand new color like yellow or orange, which might make it a little bit too chaotic of a composition, I think what I'm going to do is stick with this red idea except take it a little bit further and make it pink. And that way we have two colors, red and pink. They go along pretty well together with the contrasting color of green in those leaves behind it. So just talking through this, I have a much better idea of what I want this color story to be for the overall composition. So I want to draw attention to a few colors that I pulled aside. So I have my Cotman watercolor series tube. This is the color mauve. So I'll be using that. I have the same thing and a cadmium red. They've already been squirted out onto my palette here. And what I'm going to do now is wet my brush and start wetting my palette and getting these colors ready to go. And as you can see, I'm not too concerned about pigments pooling together. It's nice to have everything in its own designated area so that I can just mix slight amounts together if I'd like to. But watercolor is not a perfect science. It's about exploring and experimenting and seeing what happens when different tonalities begin to mix together. And then even more exciting, seeing what happens when that paint begins to dry because you can never really predict what that final outcome might be. Alright, so I've got a lot of cool stuff happening on here. This very nice abstract art blend. Let's go ahead and start filling in, beginning with this center pistil that comes out with all these little bits of pollen on the top. So that's what I'm going to start with here. And I think for this one I'm going to use a nice vibrant magenta, even though on here it's almost white. I think I'd like something with a little bit more contrast, especially since I'm going to be painting over that line that I drew. So in a lot of cases when we do the negative space, we end up erasing the pencil marks out when we're finished, assuming that we didn't paint over them. But for this, because I'm literally going to be painting on top of the pencil marks. I'm going to go with a little bit more of a vibrant color for that to hide that pencil marks from the bottom showing through. So I think I can just do this in one movement. Perfect. And just to add some fun and complexity, I think what I'm going to do is get my brush nice and wet. Pull in a little bit of this yellow and just dip it in in a few random places. And it's going to be a pretty fun time to see how this begins to blend and dry. So now that I'm actually on my detailed brush, it's my number one. I'm going to address these little bits of pollen that shoot outwards from the top. So since the top of that pistil is still wet with paint, what I can do is just pull it outwards like this. I don't even have that much paint on my brush. So that I am working with the existing paint that's already in that area. And last but not least, I think I'm going to add some little bright yellow balls to the very tips of those pollen areas. And again, I'm using my very minuscule detail brush to add these in. If you feel like your brush may be getting too dry. Go ahead and dip it in water, grab a little bit more pigment, and then go ahead and keep going. And real quick, I can see that I dropped a little bit of paint water on my paper. No problem because I have my paper towels. So it'll just be one quick blot and it is removed. So thank you, Paper towels yet again. Alright, so now that we have that center pistil of the flower already established, let's go ahead and start working on the petals. I'm going to switch to one of my round detail brushes. It's a number 4. And I'm going to mix a color together that I think would be a really nice compliment to a really bright red watermelon. So I think really emphasizing that fuchsia is going to be the way to go here. So I've got some nice colors happening here, and my brush is fully loaded with water, with paint and it's pretty evenly coated. So what I'm gonna do is just start Pulling outwards. And then like I mentioned before, always get more water on your paper if you need to. I'm just going to kind of define what those edges look like as I begin to paint. And remember, the more water you have on your paper, the easier it's probably going to be for you in terms of brush control. So let's go ahead and get that nice and close. These nice, wobbly edges. And I like how there's a lot of water coming through in that center area. So it feels a lot more white. And then we have it a lot more dense up here. But I always like adding a lot of contrast and depth when I can. So what I'm gonna do is pull in some of this really deep dark magenta over here. And just make a few little dips towards the center of that flower to suggest some depth. And just like we added a little bit of yellow into that pistil, I'm going to do the same thing here. And just drop a few little bits of yellow onto that petal to see what it creates, to see how that begins to blend together. All right, time for the next petal. So same thing. Except this time I'm going to pull more of this pastel pink in. And same thing. Let's grab some of this really deep, dark, really luscious magenta. Just do a few taps right here in the middle to see how it blends. Now one thing you might be noticing is this is much more opaque than this petal. So what that means is it's less transparent. This petal is more transparent because you can see that paper texture showing through. But on this one, it's more opaque, which means you can't really see that texture coming through of the paper. It really covers that surface. And the reason that's happening is because I'm using this pastel pink. And so anytime you're working with a pastel in watercolor, it's going to have a lot more white built into it. And what happens when you mix white with watercolor is you're losing that transparency. It's becoming much more opaque just like this. So it's not necessarily bad, it's not necessarily good. It just depends on the look that you're trying to achieve. So just know that when you're working with the pastel, you're going to get a more opaque appearance versus working with a true watercolor. You're going to have those transparencies coming through. But for me, I kind of like the blend of having this opaque area, this transparent area. I think it's pretty interesting. Alright, same thing. What if I add a few more little yellow drops in here? You'd be even some of this yellow orange. To see what happens. Let's pull from this really nice red fuchsia area and see how that next petal may look. You, I can already tell this is going to be really vibrant. So same thing. I'm going to use my detail brush, grab a little bit of that yellow, drop it into, see what happens. Inevitably wind up using my paper towel to clean up my messes and continue. All right, now for this one, it's already pretty dark. It's actually more saturated than the other petals. So if I were going to add to that same magenta to the center, you really wouldn't be able to tell so much. So what I'm gonna do instead is break some rules, bring my blue in here and get a nice saturated blue. Maybe a little little turquoise in there as well. And just do a few little drops. Maybe I'll add some to this one as well. Of turquoise right in the center. Perfect. So it's little details like that that really make a big difference with watercolor, especially when you're exploring color and blending pigments together and seeing how far you can go with the suggested depth of that painting. All right, two more petals. For this one. Let's do another opaque blend. So gotta be a little careful here to mind that pistil and don't want to paint over it. I just want to maintain that whitespace that we've been doing throughout the rest of this composition. And same thing as before. Let's add some fun pops of yellow and add in some of that nice darker blue right here at the tips to really establish that depth. All right, last petal. Yeah, and I'll add a little bit of yellow – woof! That one really bloomed, and a little bit of that really deep dark turquoise. Perfect. And voila, we have our completed hibiscus. It doesn't look like a photorealistic hibiscus like you see here on my iPad screen. Instead, it's our own interpretation of taking a complex motifs and then simplifying it into its most basic forms. So in this hibiscus, I don't really see any yellow coming through except to maybe up here on the pollen areas. But that doesn't necessarily mean that I can't infuse some yellow into those petals just to give it a more artistic touch. See what happens with color blending and infuse a little bit of my own artistic voice into this painting. So next up, let's go ahead and work from front to back. So the next step is going to be filling in this watermelon.
5. Adding the Watermelon: So at this point, my hibiscus is completely finished. I just have to wait for it to dry and it's time to work on the second layer, which is going to be this watermelon peeking out from behind the hibiscus. So let's take a look at our watermelon inspiration. So very bright red. And then we have a little peak of that green on the rind right here. But it also looks like there are some really fun whitespace happening as well, which we can be incorporating into our painting as well. Alright, so first things first got my water dish. My chaotic warm palette with the magenta is here and the oranges here. And I think what I'm going to do is pull from my brightest red, which is right here. It's my pan red. It's actually let me double check. Yeah, It's Windsor red, so it's going to be very vibrant, very in your face. Think like a very bold lipstick. So I'm gonna get a lot of that Winsor red on my palette and blending it over here in any little space I can find at this point. Adding a lot of water, careful not to touch this pink area because they don't want it to get too opaque. I really want to have that transparency show through. Alright, so it's got a lot of water on it. And now I'm going to switch to one of my larger detail brushes. This is the size 4 again. So I've got it nice and wet. And I am just going to start filling it in. And I'm going to start with these tighter whitespace areas just to make sure that I'm getting those whitespace lines nice and crisp along where the hibiscus is. And remember, watercolor dries very quickly. So anything you're working with like this that has a lot of surface area, Time is ticking. All right, so I think I'm going to go up to about where that pencil mark is to represent that whitespace line. And if you're painting this and you're thinking, Oh man, this is so boring that we're just doing one color. It's never just one color. We're going to be mixing in some colors as well. Once we get this first layer down, I'm going to switch to a slightly tinier detail brush to get some of those nice edges along where those petals meet the watermelon. As always, I'm going to blot up my mistakes as I went. And now as the paint is still very, very wet, I'm going to pull some of that same yellow and look for opportunistic areas to kind of drop it in so that it blends with that watermelon. And I want to do the same thing with this really deep, vibrant fuchsia. And just look for areas, maybe down here at the corners where it's shadowed behind that hibiscus leaf. And just pepper in some of those darker colors. Cool. And as you can see, I accidentally bridged that whitespace area and blended that hibiscus with the watermelon. So it's not perfect, but who is? So I'm not really too concerned about it. That's one of those things about watercolor. It's never going to be absolutely perfect. And if you accidentally bleed two areas together, just roll with it. That can be part of the fun thing about watercolor. It's those unexpected surprises. Okay, watermelon has been pretty simple. The only other thing we need to do is going to be the rind, which looks like it's a really nice, there we go. Really nice, vibrant green. One thing I might do for this is really exaggerate the yellow. And that way it can tie in with these little yellow blobs that I've been dipping in throughout for the florals and for the fruit. All right, so I'm going to use a pretty tiny detail brush and it's already got some red on it because I didn't clean it out super well. But that's okay because I'm kinda looking for a desaturated green anyway. And then just grab that right across the top of the watermelon. And so as you can see, my brush started with a lot of water but then it ended pretty dry. But I can just go over it a few times to get it exactly the way I like it. And now I'm going to go back to some of that turquoise that I have a feeling I'll be using in this banana leaf. And I'm just going to dip some of that turquoise into the edges of this rind. For no other reason than just making it a little bit more visually appealing. And last but not least, I want to address this white area of the rind. So I know in our reference photo it looks really pure white. But I think what I wanna do is instead of having that really strong contrast between paints and then white. I mean, we're doing it enough with our whitespace. I think I'm going to fill in this area with a really, really subtle greenish cream kind of hue. So I'm going to go back to my yellow palette. Just start mixing some things around. It's okay if it gets a little bit muddy. And very carefully, I'm going to bring more water onto my paper so it's not too bright. I'm just going to kind of paint in this in-between stripe to reflect that it's also part of the rind. And if you ever feel like your paint is getting a little bit too vibrant, like in this area, we want it to be a little bit more subtle. Just go ahead and add more water to your brush and just carefully dip it in like this into that segment. And it'll begin to even out a little bit. And we'll actually see some pretty fantastic things with water color blooming as it dries. Alright, so we have our hibiscus, we have our watermelon. And the final step is going to be painting this banana leaf that's peeking out from behind the watermelon. So let's go ahead and get started with that.
6. Banana Leaf: All right, so now that we have our flower, our fruit, it is time for the coup de grâce, which is going to be at this banana leaf behind it. All right, The first thing I'm gonna do is bring over my nice and messy yellow and green combination palette. And I'm going to see what happens if I start to blend some of these colors together. Oh, and real quick: I've gone ahead and cleaned out my paint water. So anytime you're going from one dominant color to a completely opposite dominant color, in this case, red and green. A good idea to toss out that old water, start with fresh water and that way your pigments aren't going to be muddy just because the water was bright red when you're trying to work with its complimentary color, which is green. So let's start mixing some of these together and see what we come up with. I'm going to grab this blue palette over here. It's that turquoise. Just see what happens if I mix in here. So this green is really nice, It's vibrant. It looks like a really beautiful kelly. I want this to feel a little bit more desaturated and toned down. And one way that you can get there is by mixing two complimentary colors together. In fact, that's how I make black, usually when I'm painting. So I either mix orange and blue together because they're opposite on the color wheel, or yellow and purple, or my favorite red and green. I've got this red over here. So I think what I might do is just grab a little bit from that, mix it in and you can already see that's beginning to suck out a lot of that vibrancy from this green and make it a little bit more neutral. It feels a little bit deeper and darker and a lot less saturated. So this feels like a pretty good place to start. Let's go ahead and see what happens. So I'm going to temporarily switch to one of my detail brushes. This is my number one. Grab a little bit from this palette and start with this little triangle here that's closest to that rind of the watermelon. Beautiful. And like I mentioned, I love color mixing. So what I'm going to do is grab a little bit of that red from my palette. Dip it right here into the corner. Really subtle, but it's going to begin to blend with the rest of that green. And maybe some interesting things might happen. Alright, so for my next leaf, I'm gonna bring in a little bit more of this yellow, still using this desaturated green I created, but just adding a little bit of a different hue to it for some more visual interest. And I'm doing the bulk of this with my larger brush. And then I'm going to switch to my detail brush to go ahead and finalize those nice edges. And for this one, I'm gonna dip in a little bit of that yellow just to see what happens as it dries. And then bring in some more of the desaturated red to drop in here at these edges. All right, next up, see what happens if I just sort of play around with my palette, mixing these different areas together and seeing what comes out of it. Color mixing is one of the most therapeutic, meditative things you can do. It's just swirling different pigments together and finding some really creative combinations. So when I do detail areas like this, it's kind of that constant balance between brushes. I use my slightly larger brush to get the larger spaces. And then I switch to my detail brush to finish it out and get those edges. And that way it's really, really nice and crisp. Alright, same thing here. I'm going to add in little bits of red. Maybe pull in some of this yellow as well. Awesome. And let's go up here on my palette. There's this kind of muddy green. It looks a little bit chalky. See what happens if I add this in with some of that desaturated green we created earlier. Yeah, you can definitely tell right off the bat that that's a lot more pastel. Just kinda nice. Blending that pastel with the transparency of watercolor. I actually used to use gouache quite often. For that same reason, Gouache is really similar to painting with watercolor. Except the main difference is that it dries with a lot of opacity behind it. So it's not going to be transparent like watercolor is. It's going to be very flat on the page. And if you're looking for a really good Gouache class to take on Skillshare. I have got to recommend Ann Shen's. It is amazing. She teaches, well, she was the master of gouache, but she has some really fun gouache classes on Skillshare. It's portraits, it's flowers. A lot of really cool stuff. Alright, so we have the left-hand side of that banana leaf completed. Let's go ahead and do the same thing on the right. And with these dark greens, I'm actually way less concerned about going outside the lines and hitting my pencil marks. And the reason is pretty simple. It's I'm using much darker colors. So if those pencil marks do wind up showing through, it's going to be pretty subtle. So it's not like over here where if you see the pencil marks coming through on that really light purple, it's going to be pretty evident. But if you see the pencil marks coming through on a really dark green, you're not going to be able to tell as much. It's going to be kind of masked by the deepness of that color. All right, so that is it. We are finally finished with our very first fruit and floral mockup. So there's actually one more step to this, and that is adding seeds into our watermelon. But I will tell you from personal experience, don't attempt this today. Don't even attempt to this tonight or even if you're certain that this is dry because I can't tell you how many times I've thought that my paint was completely dry. I felt it and it felt dry to the touch. But then when I tried to add that extra detail, especially in this case, since it's adding black on top of red, it'll start to seep in a little bit. So when I have really dominant details like that to add, especially black on top of red. What I typically do is I wait until the next day. So I literally let my watercolors sleep overnight, and then the next day I'll go ahead and add in those details. So as you're drawing those black seeds, you can either use black straight out of the pan or you can mix your own black, which is my favorite thing to do. So you can get there by mixing red and green watercolor together to create a really nice, complex and bold black. So by combining red and green together, you're combining two complimentary colors. And as a bonus, those are also the two colors we're using on this illustration. So red and green together make your own black. Add some seeds, not today. Definitely do it tomorrow, do it a week from now. Just getting in tomorrow will be fine. And that will go ahead and wrap up the first botanical fruit lockup. So let's go ahead and move on to our next illustration.
7. Sketching the Citrus: Let's go ahead and dive in with the orange blooms composition. So here's a little sneak peek of what the final painting is going to look like. But before we get there, we're going to start with the sketch. So the things I have in front of me, I have my reference photos, starting with the orange branches. I have my sketching pencil. Remember a hard lead will be better for you. So anything that's in the H range, but I'm going to be sketching really hard so that you can actually see on camera. And I've also got my eraser and a blank piece of paper. And the first thing I'm actually going to use is my water dish because I want to start this composition by getting the primary part of the composition down, which is going to be those oranges. So rather than stress over trying to draw a perfect circle, I'm going to use this little shortcut which is tracing around my water dish to create that circle. If your water dish is too big or too small, you can look for plates or bowls, really anything you have on hand that's going to get you a circle in the size that you're looking for. But for me, this mug is going to be perfect. So the first thing I'm gonna do is just kinda position it in this bottom left-hand corner of the paper. And I'll just start like so. So again, it my pencil marks are really dark on paper. And if you're following along, try to do yours a little bit lighter than mine. All right. For the second orange, I think I want to have it be a little bit of an upper diagonal from that first one. So same thing. I'm just going to sketch around my mug. Perfect. And for this composition I think I want to do two normal oranges were you see the rind But with citrus that magic is happening when you slice it open, like over here in our reference photo. So I think I want to have one of my oranges be a half slice. So I'm going to put that half slice down here at this bottom corner. And instead of tracing a full circle, I'm just going to trace a half circle. Like this. Perfect. Okay, we're done with our water dish until we start painting. I'm going to set that off to the side and start thinking about the rest of my sketch. So the first thing I'm gonna do is pretty easy. It's just completing that half circle. So now I have my two oranges and a little half slice off to the side. Let's go back here and see what this orange branch looks like. So I think for me I want to start thinking about the stem or the branch where those oranges are coming off. So let's do like a curve like this, maybe connects both of them. So they kinda feel like a pair of cherries right now. And next up, I want to think about where those orange blossoms are going to go. So I like doing things in sets of three, as you can tell, I have my two oranges and then the slice. So let's go ahead and kind of mimic that and then do three flower petals up here on the top left corner. So the way that I like to start flowers is pretty simple. It's just drawing a circle. And in this case, I went three flowers. So I'm going to draw three circles. And the reason that I'm not tracing an absolutely perfect circle here is because this circle isn't going to be the final shape. This is just going to kind of be a guideline for me as I fill in what those petals look like. So let me show you how. So first of all, we're going to start here and look at these reference photos for what orange blooms look like. And it looks like they all kind of have this center part that kind of comes out like a trumpet. And so I'm going to start with that. So it looks like two or kinda pointing off to the top left. And one's kind of going in the direction of the right. And draw petal 1, petal 2, petal 3, petal 4 and petal 5. And then just repeat that for the rest. So I'm just kind of having it come off from the center kind of trumpet area so that it feels a little bit more dimensional. So 1, 2, 3, 4, 5. Cool. So at this point, you can still see those circles that I drew originally to kind of get the shape of these flowers down. So right now I can go ahead and set aside my pencil, get out my eraser. And I'm just going to erase those unnecessary lines because I no longer need that reference. I've already drawn in the flowers and I've positioned them the way I'd like to. All right, so now I can get my big fat brush out and just brush away those pencil marks. All right, Perfect. Let's go ahead and finish out this composition by adding in some leaves for those branches. So I've got a reference photo. Let's use this one right here. And I'm just going to look for areas where I can tuck in some leaves that feel nice and natural. Maybe there's some kind of obscuring over the top of the orange. Maybe there's one down here that kind of fills in the space. Maybe another floating one. And then one connected to the branch. And I'll do a few more little tiny details. So this looks like a really good starting point. I'm just going to use my eraser to erase a few more unnecessary marks, starting with the side of my orange, since we have the leaves overlapping right here. And same thing. Archaeologist brush to brush away those unnecessary pencil marks. All right, so at this point, your sketch should look pretty finalized. You don't have any unnecessary marks or lines. We've erased out everything that's no longer needed. And before we move on with our painting, I encourage you to either pull out your kneaded eraser to lift up from your sketch to make it a little bit lighter. Or if you don't have the kneaded eraser, you can use any eraser and just erase lightly like this right over your pencil marks so that your sketch becomes even lighter. So either way you have the lightest possible sketch on your paper. Don't do what I'm doing and make it really dark. And all of those unnecessary lines are erased out and we are ready to start painting.
8. Citrus Flowers: Now that we're finished with the sketch, it is time to start our first layer of painting. We're going to start over here with these orange blue florals. Let's go ahead, take a look at our reference photo, over here to the left. It looks like orange blooms or white petals with yellow centers. White can be a tricky thing to paint in with watercolor but I'm going to show you how I work around that. First things first, we're going to be working with two of my detail brushes for this, I've got a number 0 and a number 1. I'm going to start with these two because the florals up here are pretty small and detailed. First things first, I'm going to bring over my yellow slash cream palette over here and I'm also going to find my white watercolor pen and set it down here so that everything's in the same area. The way that I'm going to fill these in is by mixing white and yellow together maybe with a little touch of blue to make a cream color. The first thing I'm going to do, get my brush nice and wet and bring it out here on the palette to mix in, you can grab some of that white and mix it in as well. I don't want it to be super vibrant so I'm mixing it with some of these desaturated tones that are already on my palette, looks like a little bit of brown, maybe a touch of blue in here to make it more desaturated, and then right now, I'm going to start with the center bloom right here. Now that I've mixed it with that medium detail brush, I'm going to switch to my finer detail brush, mix it in with that really bright yellow and then start painting in some of these pistons coming out from the center then I'm going to do little dots on top of each one. As you can see, I'm not painting over my pencil marks instead I'm using the negative space that those pencil marks creates and drawing within that space so that once this paint is completely dry, like dry as in tomorrow dry, I'll be able to go ahead and erase out this shape that's around these pistons and it'll be like it never existed. That's the way that I use white space when I paint with watercolor, it's to create these barriers that I can then erase once the paint is dry and have these beautiful white boundaries in between the segments of paints. Let's go ahead and do the same for the others. When I watercolor, I rarely just use one color, I like to blend different colors together so I'm going to do the same thing here with these little segments coming out from the center of the flower. The rest of my composition is going to have a lot of greens and blues and oranges in it so I think what I'm going to do is pull some green over here from my palette, get a little bit of green on my brush and then just dip that green into that center point where all of these little segments connect. I'm going to let it naturally bleed upwards into those segments so that it adds a little bit more depth and I'll just let that darker hue begin to creep up the yellow. At this point, it is all up to the paints to see how it mixes when it dries but now that we've gone ahead and finished these central areas within the flower, let's go ahead and do the petals. For these petals, I'm going to rely pretty heavily on my white pen so I'm mixing the whites with that existing yellow and it's blending in with some other colors on my palette to get a little bit muddier which is actually what I want here. Then I'm going to switch back to my medium detail brush and start with that first petal. As I'm painting, it looks a little bit too dark for my taste so I'm just going to mix in a lot more water to bring that really hyperpigmentation into a more neutral space so it gets a lot lighter. I can switch to my even tinier detail brush to get right up close to those pencil mark edges but not going over the pencil if I can help it. Same thing for some of my other blooms, I'm just going to paint with in that pencil marked area and altering how much pigment I'm loading on my brush. If you ever feel it's getting really bright, just go ahead and mix more water onto your brush and try spreading it out a little bit. As you can see, we're not doing pure white blossoms, instead, we're adding a little bit of a yellow tinge to it and that's just one of the compromises that you make sometimes with watercolor. Same thing, I want to add a little bit more depth to some of these petals so I think I'm going to pull some of that same green that we just used and tried dipping it in just here in the corners. Few little tips like that and then it will naturally begin to spread out as the paint dries. Other two, if you ever hear that sound of your brush scratching on the paper, that means it's probably too dry, go ahead and load it with a little bit more water. Same thing I'm going to pull a little bit of that green and dip it into the center of those petals so that it adds some depth as it begins to bloom outwards. Let's go ahead and do the same thing and fill in the petals of the other two flowers. Loading my brush up with a lot of white and some yellow, I'm going to switch to my slightly larger brush to get the bulk of that area. Sometimes what I'll do if I have a lot of water within each segment is I'll get the main areas of those segments first and then I'll switch to my detail brush to get the edges and remember I want to line it up close to those pencil marks without going over. Right now these sections are really wet so instead of adding that green in right now, I'm going to give it a little bit of time to get a little bit drier before I do the same thing that I did here where I dip in that green at the corners. Maybe by the time that I finish these other two petals, it will be slightly drier and I'll start dipping in that green to add some depth. Same thing, paper towels, they come in handy all the time. I dropped a little bit of water here, all I have to do is take my paper towel, press on the paper, pull it upwards, and it is completely fixed. Whoever says watercolor is unforgiving, doesn't use that paper towel trick. Same thing, I'm going to fill in the main section of those petals with a lot of water on my brush and then switch to my more detailed brush to get those fine edges and get it as close to those pencil marks as possible without overlapping if I can help it. Cool, now I'm going to switch back to my desaturated green to add a little bit more depth into these petals. Onto the last sets. Same thing, I'm going to switch to my medium detailed brush and get the gist of these petals down with a few strokes, and then I'll switch to my finer detail brush to polish out those edges. Last but not least, I'll pull in some of that dark green, dip it into the corner of these petals, and let it bleed through the rest, just to add some variation in depth. We're finished with the first step which is adding these petals in the top left-hand corner. Let's move on to the next step which is going to be painting in those stems and leaves.
9. Leaves & Stem: All right, For the next stage, now that we've completed our sketch and our three florals, it is time to move on to the next step, which is going to be these really beautiful leaves. So let's go ahead and get started. The supplies I'll be using for this are some brushes. I've got two round brushes and two detail brushes. So the details are size one and triple 0. And the round brushes are size 0 and 4. And the way I like to get started is by considering the color. So we know that we're going to have some really bright orange, maybe a little bit of red in these citrus areas. So I want to think about a color that's going to work really well with those bright oranges and yellows and corals. And one thing I really like combining orange width is blue. And that's because blue is a complimentary color to orange. And anytime you combine complimentary colors together, it creates a really dynamic color palettes. So let's go ahead and start there. So I have my very lovely blue palette over here. So as you can see, it's a mixture of paints that I pulled in literally over here just from my pans. I've even pulled those separate pan out and set it on my palette. And then I also have a few areas where I've squeezed in some tube paint as well. And the tube paint I'm using is both Winsor and Newton Cotman series. One is Intense Blue and the other one is Cobalt Blue. And again, I bought these two days ago, so they are brand new. So I've gone ahead and squeezed them onto my palette here and here. And then I also had a little bit of leftover turquoise from one of my tubes that just kind of remains on this palette. So I might pull from that as well. Alright, so first things first, I'm going to get my brush nice and wet and just start adding some water into this palette because it's pretty dry at this point. I like this pan up here because it's a really nice turquoise. Let's see what the name of it is. Windsor green blue. So it's getting me a really nice turquoise. And I think that that's a nice balance between having all blue leaves by using something like a turquoise, you can bring a little bit more green in there to feel a bit more natural. And as you can see, I have already gotten my paint on my paper. So I'm going to do that same thing. Get my paper towel a tiny bit wet. This is brand new water by the way. So in-between every layer I always dump out my old water dish and put new fresh water in. So this is clean water. So I'm just going to press and hold, then lift up some of those spots. Basically magic. All right, so let's go ahead and start with some of these leaves. So I'm going to start with this really nice bright turquoise. Maybe dump a little bit of that dark blue in there, just to make it more interesting. I'm going to start by segmenting that leaf in half and filling in half of it. And the reason I'm doing that is just to make my composition a little bit more dynamic. I think it's going to be interesting to have these leaves divided right down the middle. So next up, I'm going to pull one of my detail brushes. This is the size 1. And I'm going to look for kind of an orangey brown to dip in there. And the reason I'm looking at orange is because we know that we're going to have a lot of oranges repeating in these rinds. So if I choose a little bit of orange now, dip it into those corners. It might create some really cool effects. All right, now for the other half of this leaf, I don't just want to repeat that exact same turquoise and want to try something a little bit different. So let's see what happens if I mix some of these blues together and give this a shot. Really careful with that line. And connecting the rest of the leaf. And I'm going over my pencil marks here. It's not the end of the world, it's definitely going to happen at some point. Back to a detail brush. And for this, I think I'm going to dip in some of that really intense blue into my corners. And then just kind of see how it begins to pool and pull outwards and mix with the rest of that pigment as it dries. And you know what? Just for fun, let's go ahead and grab some of this yellow over here and see what happens if I dip in a few little dots of really bright yellow. All right, so I have that first leaf completed, and now I just have a few more to go. So I'm going to be using those same techniques to fill in the other leaves. Starting with using my larger brush, kind of creating this custom color. Maybe mixing it up a little bit more green. Slicing that leaf right down the middle and filling in one half of it. And then same thing for the other side. Since that one's pretty heavy on the blue, I may add a little bit more turquoise for the second side. For this one. I'm going to switch to one of my smaller detail brushes to get as close to that other side as possible without blending the two colors together. But if you overlap segments together, again, it's not the end of the world. That's one of the fun things with watercolor. Those little mistakes can have really interesting consequences. All right, so I'm going to dip in and get a little bit more blue on this one, just right here on those corners. And then for that really dark blue, I'm actually going to pull some orange. It's kind of this really, really desaturated, burnt sienna orange. And I'm going to dip that into the corners of that really bright blue. Just so that it's not all vibrant colors. It's kind of nice to have a mix of really poppy bright colors and then toned down with some neutrals in there as well. All right, so let's move on to the next leaf. And remember: when in doubt, always add more water to your brush. Again, same thing here, and I'm going to switch to one of my detail brushes pull in some really bright yellow, just kinda dip it in and see what happens as that begins to blend against that turquoise. And on the corners of this blue, I'm going to dip in some really, really deep turquoise. Cool. Let's try this one right here. When it comes to color within watercolor, There's really no wrong answers. It's just about experimenting with the pigments and seeing what color combinations are working really well together. And there's a lot of happy accidents that always tend up happening. All right, let's get this leaf up here. And turquoise to those corners. And then maybe do a really bright turquoise in this second area. And as you can see when I paint with my brush, I'm using a really, really light strokes when I get to these tapered points. But then when I get to the main body of that leaf and really pushing my brush down on the page to get a nice variety of stroke, really hammering in those thicks and thins. Alright, let's add some yellow in here. Maybe just one of these corners has that bright brown. All right, a few more to go. Let's bring that bright turquoise back into the mix. So that was an example as well. When I did that first stroke, it was very light. But then when I filled in the bulk of the leaf, I really pushed my paintbrush down hard on that paper to cover even more surface area. So as you paint, consider how light to your brush is going on the paper versus how heavy you are pushing down. And that's a really good way to really master and have an awareness of your brush control. And same thing. I'm going to try to bring in a little bit of orange into this one. You gave us some really dark blue tips. All right, perfect. So now that we have our leaves entirely finished, Let's go ahead and add in those stems since they'll be using the same color palette. So for this, I'll be using my medium size number 4 round brush. So I'm just going to mix together a little bit of this turquoise, little bit of this blue, get a lot of water on here. Really load my brush up so it's nice and evenly coated with water. And then I'm going to find the beginning of that stem. Pull it upwards and stop where that flower begins. And I'll continue along the same path. And then finish it out up here in the corner. Now if you want to add some more visual interest, I recommend bringing some of that brown or orange back in and just kind of peppering in along that line you just drew. And there is a timestamp on this because when we do lines like this, they tend to dry a lot faster. So when you start adding in color, when you do a long stroke, your window is really short. So as quickly as you can add those other colors in the better, otherwise it's going to dry very quickly. All right, let's do the stem on the other side, which I think I want mine to be a little bit more blue. Like so. Now I'll be dabbling in a little bit of green down here, working really quickly because watercolor dries very quickly. Add a little yellow to this part of the stem. Maybe some brown up top. Perfect. So as you can see, instead of just one flat stem, it's actually two stems that have a lot of color variation with them. So I'll be really interested to see how this begins to dry. All right, so at this point, we only have one more piece of the puzzle to fill in, and I'm saving the best for last, and that is going to be these citrus slices. So let's go ahead and get started.
10. Painting the Citrus: At this point, we are ready for the final step of our orange citrus botanical illustration. And that is going to be filling in these citrus areas. So before I start with us, I want to point something out. There are obviously a lot of different types of citrus fruits. So there's oranges, lemons, grapefruits. And what I encourage you to do is not necessarily follow along for every single color that I'm doing. But if something else is speaking to you instead, if you would like to turn these into grapefruits or blood oranges or just standard oranges. Please feel free to follow your own direction and illustrate something that really speaks to you. But for me, I'm going to make these into oranges. And, you know, as I'm looking at this sketch, one thing I'm realizing that I'd like to do is, you know how we have this split orange over here with this reference photo to look back on. I really like how this looks over here, especially juxtaposed against the orange rind. So I think what I'm going to do is turn one of these oranges into a sliced orange. And so for that, I've got my sketching pencil out real quick. I'm just going to make a little dot right in the center of that orange and then very lightly or hard in my case. So you can see draw some segmented lines like this so that I can decide where those individual triangles should be. So perfect. That is it. I can now put my sketching pencil away and we can begin our watercolor. Alright, so I've got a palette over here, and this is my chaotic warm palette. So I've got a lot of magentas and red, oranges, yellows. Really everything I have on this palette I'll be using on this illustration to complete the orange set. So if you're curious about what these actual colors are, It's a lot of Winsor and Newton Cotman series from the tubes, I have cadmium red, cadmium yellow, mauve, permanent magenta. Ooh, this is actually from the professional series, so that one's a little bit fancier. And I have this cherry red that I don't know what the brand name is because I bought it in Thailand or maybe Indonesia. Anyway, it's not in English. So again, I'm not super picky about what tubes and paints I use. It's more about what you do with that paint than what the brand name is. Okay, so that's kind of what I'm working with here. It's a combination of these pans, some squeezed into paint, some to paint that I squeezed in probably years ago and I don't even know what that color is anymore. But again, mixing the correct color, it's not this professional science. It's more about being intuitive and seeing what sorts of blends you're most leaning in towards. Alright, so let's go ahead and kick this off. So I've got my little handheld palette here. I'm going to add some water and just start getting my palette a little bit more saturated. Some of these areas have been bone-dry for quite a long time. So I'm just going to add in a little bit more water to get started. So the first thing I'm going to get started with is going to be the rinds of the oranges. So the peels over here, or in this case, this little sliver of a peal. And for that, I'm going to carefully rotate my palette so it doesn't dump all over my paper. And start getting a little bit of this orange mixed in with this yellow over here and get it to a nice medium consistency. So that brush has a lot of water on it, but it's also very evenly coated with that paint. And now I'm going to paint outside the line. See if I can do this in as few strokes as possible. Maybe as we get closer to the edge, we get more of a yellow to that rind, to kind of blend in with that orange. And now I'll switch to one of my finer detail brushes to really get it close to that stem, but not overlapping. And then just fill in a little bit of the negative space over here. And I like adding a little bit of texture to rinds. So I'm going to do that by pulling in some of this really nice bright kinda maroon-y pink. And I'm just going to have a few little segments where I dip it into the peel like this. Just to add some nice contrast. All right, so we have one rind finished. Let's go ahead and do the whole rind right here. And for that, I'm going to switch to one of my larger round brushes. So this one is actually a size 12. It's a watercolor brush, so it's going to hold a lot of water and pigment, which is great because I have a lot of surface area to fill over here. Alright, so let's pull up our palate, get that brush nice and wet and really evenly coated with this kind of yellowy orange. In fact, I'm going to dip a little bit more orange into that. Alright, so I'm gonna start by following along the stem, which creates that nice whitespace. Now continuing to pull that pigment from my palette, not a more water as needed. I'm going to go ahead and fill in the rest of that orange next up. Let's go ahead and break up the monotony of this a little bit and add in some more complex hues. So I think what I wanna do is start with this orange. Maybe mix it in a little bit with this red that's over here. And find a few spots where I can just kind of drop it in. I think yellow might be pretty interesting. So let's see what happens if I drop in some yellow. And what if we mix these kinds of reds and oranges together to create a little bit more depth. So it almost looks like this side of the orange is a bit in shadow and kind of tapering off those dots so that they're very heavy on the right-hand side. And then they just kind of fade into that pure orange on the left. Perfect. All right, Last but not least, let's go ahead and do this half rind for this slice over here. So same thing. I'm going to mix in a lot of this yellow. Let me pull in a little bit more orange. Being careful not to touch that pencil line, switch it to yellow. Now, pull it all the way through. Now we can do those fun things where we smooth out those edges and maybe add a few unexpected colors in some areas, like maybe a bright red up here at the tip. All right, so we have the peels or rinds of the citrus fruits established. Let's go ahead and fill in and that really juicy center part right here. So we have our half segment and our whole segment. I think I'm going to do a variety of colors that kind of range in this warm series. So basically everything you're seeing here on my palette, I want to have this represented within these slices over here on the left and on the right. So I'm going to start over here with this really nice bright magenta hue. And let's just see what happens. So again, I'm being pretty careful to avoid those pencil marks and just use those as my whitespace boundaries so that once that paint is dry, I can erase them and it'll be like they never existed. First triangle accomplished. Let's go ahead and I'm going to switch to one of my detail brushes and find an opportunity to add in some unexpected contrast into this. So maybe I make a drop right in the middle like this and let it begin to flood outwards. For this, I think I'd actually like to see some yellow in here as well. So I'm gonna do the same thing. Again, getting a nice and even coating on my brush. And then just doing maybe a few drops here and there of that yellow. All right, next up, maybe something that has little bit more yellow to it. So this next segment, again, I'm being really careful to avoid those other sections and the pencil marks. But again, if you go over, it's not the end of the world. So now I'm going to use that detail brush to even out those spaces. And I'm kind of getting a two for one here: I'm getting to add some different tonalities because it's a detail brush. And I'm also able to clarify that line work a little bit more. All right. Next up it's getting a little too dark. So I think I'm going to switch to a bright yellow. And this one I'm actually going to pull from my palette. It is called lemon yellow, which is perfect because we're doing citrus illustrations. Same thing as before. Really nice delicate brush strokes filling in that main section. Before we begin pooling other tones into this little piece though, I want to give it a minute to dry because right now it's really, really saturated. And for that next section, let's do the same thing and use that yellow again and pull straight from the center outwards and then fill it in. Now let's switch it up and try something a little bit more of an orange hue like this over here is looking pretty nice. And pull out the few careful brushstrokes and then filling in that center area. And now I want to kind of consider what other colors I can drop into these segments. So I'm going to switch to one of my tinier detail brushes and see what happens if I bring this really nice, kind of berry color in and drop it right at the center of this yellow. Now that's pretty fun. And what if they I something like more of a magenta and drop it into the center of that orange. Ooh, that's really nice. I'm actually going to use that same magenta. Right here for that lemon yellow section. And you don't just have to drop those areas into the tips. You can also play with adding little spots of color and other areas within those segments as well. What happens if I bring some bright pink up here? Woo, that's getting pretty interesting. Alright, I'm gonna go ahead and fill in the other three sections. All right, now as you can see here, we have this really nice blend of tonalities. So it's not just an orange, that's orange. It's got some yellows, it's got some magenta, has some nice pinks. And these colors are really blending together. And as that paint begins to dry, we're going to see some really cool things happening with the color blooming and these kind of squiggle effects that happens as pigments blend together and then dry in place. So fun surprises are coming up as this paint begins to dry. But last but not least, let's go ahead and finish out our very last section. So real quick, I realized that I forgot to draw some lines in here. And you don't have to draw them in. But for me, I always appreciate a little bit of extra guidance. So I'm gonna go ahead, use my pencil and then just do that same thing I did before, where I segment out the shapes into what each triangle is going to represent. So if you're comfortable just free painting and not drawing it out in advance, go for it. But if you want to add some guidance lines, that's totally fine as well. Alright, so I have my lines in place. Let's go ahead and get started with the painting. All right, so at this point, you should be entirely finished with your composition of the oranges and blooms and leaves and branches. I hope you're really happy with how it turned out. Let's go ahead and move on with the next composition.
11. Sketching the Cherry Blossoms: For our next composition, we are going to be painting these cherry blossom branches. Now, I Google searched and I can't find any examples of full-grown juicy cherries hanging off of blooming cherry blossom branches. So this is going to be a little bit of a make-believe composition. But we're artists, were painters and we can make the world whatever we want it to be on our paper. So in this illustration, I'm going to be combining fully bloomed cherry blossoms alongside fully plump and juicy cherries. So let's go ahead and get started with our sketch. So we have a few supplies over here, starting with our reference photos. So we have a branch photo with a cherry blossoms, a close-up shots so that we can really see those nice petals and the inner parts of those flowers. And then this nice bunch of cherries on a white background. And in addition to the reference photos, I have my sketching pencil, eraser, my archaeologist brush, and then a blank piece of paper. So for this first step, which is just sketching, this is all we'll need. So let's go ahead and get started. So the first thing I'm going to do is establish what that branch looks like. Maybe it kind of juts off to the left. Then maybe there's this primary branch that comes down a little bit further. You can just make up what these branches might look like. But for me, I think I want to keep it pretty simple and just have a few stems like this. So in essence, it's just a series of curved lines. And again, I know I say this every time, but please remember to draw very lightly on your paper. It should not be this dark, but I want you guys to see what I'm doing, keeping it pretty dark so the branches can be really simple. This is just 12345, It's only five marks and it's going to be the starting base for the illustration. So consider this the skeleton. And remember, yours does not have to look exactly like mine. They're branches, they can grow in any direction any way possible. So don't feel like it has to look exactly like this. It can just look similar. All right, so once I have the branches down, I want to find the places to put the blooms. So I think what I wanna do for this illustration is have three separate areas where we have those cherry blossoms and big bursting petals. So I'm going to start by putting one right here. And again, I'm just going to be drawing the circle for now to give me a baseline point of how that flower is going to be fitting in the composition. Later on, we'll refine this and add petals. But for now, that circle indicates the space that the flower is going to take up. This looks like another good spot right here. And then maybe we do one right here as well. So three separate blossoms. And next, I want to find the spaces for the cherries to be hanging off. Maybe I'll put two right here. Maybe I'll have two hanging down pretty low at the very bottom. And then maybe two more right about here. It's a nice staggering between smaller circles for the cherries and then the larger areas for the blossoms. All right, so now that we have the basic skeleton established for what this composition is going to look like. Let's go ahead and finesse it a little bit and add in a little bit more details, starting with the three blossoms. So the first thing I always like to do is make a little mark to define the center points for each petal. And if we look over here on our reference photo, it looks like cherry blossoms have five separate petals. And then this nice kind of star-shaped inward area. So I'm going to start with the center area, which is, it's kind of a repetition of the petals. It's a five pointed star. So let's go ahead and start there. 1, 2, 3, 4, 5. And again, it does not have to be perfect whatsoever. So 12345. Remember, very, very light and gentle pencil marks. Alright, so we have the center points done. Let's go ahead and do those petals. So I'm gonna do 12345 12345. And as you can see, I'm pretty loose with this. Doesn't have to be absolutely perfect. Alright, so we have our three cherry blossoms fleshed out and ready to go. Let's go ahead and refine these cherries a little bit, starting with thinking about where those stems are connecting. So the first thing I actually want to do is erase this line right here. Because I want to move it down a little bit so that it can connect these two cherries together. So now we have the two cherries connected to the branch. And then same thing here. I'm going to connect them to the branch and connect them to this branch. And last but not least, in terms of making pencil marks on this paper. I'm going to add in a few areas like this where we have these buds coming up that aren't full blooms yet, but they soon will be. So I'm just going to look for some areas like this Where I can add some little off shooting areas that I'll be turning into cherry blossom buds. Perfect. So it doesn't need to be too many. And if we want to add more as we're painting, that's totally fine to do as well. So now that I have my sketch completed, I'm going to switch over to my click eraser and erase out some of those unnecessary lines, starting with the cherry blossoms over here. So remember we started by drawing a circle to establish the space. Let's go ahead and erase that circle because it's no longer necessary. And I can also erase those branches that are being overlapped by those cherry blossom petals because there is going to be a little bit of layering happening here. The cherry blossoms are in the foreground and the petals are in the background. All right, and as a final touch, I'm going to use my fancy brush and remove all of those little eraser nibs. All right, so at this point, we should have a polished sketch, that is ready to go. And as a final step, here it is, you can go ahead and use your kneaded eraser to lift off those pencil marks a bit more from the page just to make your sketch even lighter. If you don't have a kneaded eraser, you can use a standard eraser and then just erase very, very lightly along those marks so that you can still see it, but just barely. So. Again, watercolor is a very transparent medium. So whenever you paint on top of the pencil marks, once that paint dries, those pencil marks will be permanent. But the good news is for these branches, I want to keep them pretty dark. So it, since I'm going to be painting dark branches, the pencil marks won't be so much of an issue. However, these blossoms are going to be light pink. So I want to make sure that those blossoms especially are as light as they can possibly be in theory. But in practice, I'm going to keep it pretty dark here so that you can see what I'm doing. Alright, so let's go ahead and move on to the next step.
12. Detailing the Petals : Okay. The first step is going to be painting
in these blooms. So we have three really
beautiful cherry blossom blooms, and I'm going to be painting
those in with a lot of really light pinks and maybe a little bit of yellow
at the center as well. So the materials I have for
this are my reference photos, piece of paper with
my sketch on it, a variety of round
and detail brushes, and I've got my palettes
over here as well. So I think what I'm going to do is start with the center of these blooms using my
number one detail brush. So I've got fresh
clean paint water. I'm just going to
mix together on my palette to get a nice yellow, maybe bring in a little
bit of that orange as well because I like what's happening here
with that palette. Again, as you can see, this color mixing is
not a precise science. A lot of the colors
that I'm working with are just blobs that were already existing on my palette here that I'm just kind
of blending together, seeing what happens when I
make these combinations. So it doesn't have to
look exactly perfect, like one specific color. You can just kind of
play around and see what happens as you naturally begin to mix them together. All right. I like this kind of desaturated yellow orange that's
happening here. I'm just going to go
through and fill in the center stars for
these cherry blossoms. And I'm trying not to overlap
with the pencil marks, but I still am, so it's
not that big of a deal. If you're going to go
over your pencil marks a little bit, it
will always happen. Cool. And just to add a little
bit more visual interest. I think I'm going to mix in
a little bit of this red. Maybe pull this maroon
actually instead. And then just maybe add a few
drops towards the center in a totally different color to just kind of see what happens as that paint and pigment
begins to blend together. So it's this maroon
blending with the yellow. We'll just see where
it goes. All right. So we have the centers
of the flowers finished. Let's go ahead and do these
big beautiful blossoms. So, on my chaotic, warm palette over here, I've got a lot of
different hues. I've got some yellows reds. I have this really
nice pastel pink that's pretty cool as well. It actually matches
in really well. But remember, with pastels, remember that anytime you mix white with a
watercolor paint, it's going to
become more opaque, which means you won't see the paper texture
coming through. The opposite of opaque
is transparent and transparent means you can do layers upon
layers upon layers, and that deepest layer will still show
through to the top. But with opaque paint, you're going to have
much less of that. So again, it's not
bad, it's not good. It's just something to keep
in mind as you're painting. So if you want to have
more of that really light airy transparency,
don't mix in white. But if you wanted to
feel more opaque, like a guash or an acrylic, then mixing in white or using a pastel watercolor is going
to give you that effect. So, for me, I think I'm going to use a little
bit of this light pink, but primarily rely on some of these other magenta shades that I'm just going to mix
in with a lot of water. All right, so I have
switched to my round brush. It's my number four,
and I'm just going to designate this area of my
palette for my new color. So as you can see, I'm
just kind of pulling in from some other
areas on my palette, a little yellow in
there as well to create this new custom
color that I want to use for these
cherry blossoms. I'm going to pull in some of
that opaque pink as well. Wow, that really makes a
difference, as you can tell. That pink because
of the white in there is going to be
very overpowering. But actually, you know what, in this case, I kind like it. So I'm going to use
this as my base, maybe bring a little more yellow in and a bit more
of that magenta. Perfect. So I have my brush nice and evenly
coated with this pigment. I'm going to add even more water and go ahead and get started
with that first petal. I can already tell this
brush is going to be way too big for what
I need to achieve. I'm going to switch back to
my little detail brush and just start carefully filling in around those pencil marks. I want to the second petal
to be a little bit lighter. I'm just going to add
even more water to my brush to bring that white paper texture
through in the background. It's not as dominant as
this first petal I did. Oh, that's really beautiful. Now I can even grab some of this deep maroon and do a few little drops over
here in the center. I'm going to do the
same thing on this one. Cool. Keeping that
in mind that I want to have a lot more water and
less pigment on my brush. I'm just going to go through and carefully with my detail brush, flesh out the rest
of these petals. And being careful here to
avoid the pencil marks, since this will be the lightest
area of our composition. The cherries are going
to be a dark red. The stems are going
to be pretty dark. It's really these petals
that are going to be the very light and delicate
part of the composition. Same thing, I'm dipping
in a little bit of that maroon and just having a few little dips and drops to add a suggestion of
depth within those petals. And for the final petal, I'm painting mostly with
water at this point. It's a lot of water
loaded on my brush with just a tiny bit of
pigment touched in there. And I've always found that when you're doing detail
areas like this, the more water you
have on your brush, the more control
you're going to have. So if you ever feel like
it's not really turning out the way you're looking
for it to turn out or it's getting really
difficult to paint with, just add more water
to your brush and nine to ten times that's
going to solve the problem. Alright, so I have my
first blossom finished, and I think it
looks pretty good. That first petal that I did, it was a little bit too dark, but I was able to
correct for that in the other petals and make
them a little bit lighter. So, you know, the way
that I look at a lot of my watercolor paintings is that it's this constant
learning curve. So wherever I started painting versus where I
finished that painting, it's going to have
a lot of changes to it because I've evolved and adapted and changed my technique to optimize it as
I've been going. And so you'll find
the same thing as you paint with
watercolors as well. It's okay to have
those imperfections. Yes, this petal is a little
bit darker than the others. But watercolor isn't about
being absolutely perfect. It's about exploring
with the medium, having fun and embracing those imperfections that are
just part of watercolor. Alright, let's go ahead and paint in those
other two blossoms. When in doubt, always
just add more water to your brush and bring it
straight onto the paper. And you can remix as needed. And I'm going to do the same
thing and just dip it into the center areas to make it a little bit
more complex and fun. Perfect. All right. So I have finished
the three blossoms that I'm doing for my
cherry blossom branches. And I already cannot wait for this to dry
because I really want to erase out all these
pencil marks that are those in between
lines for my segments. But again, I will be patient. I will wait till tomorrow. And yeah, it'll look
a lot less dark once you're able to remove
those pencil mark lines. But that's not for right now. For right now, we're going
to move on to the next step, which is going to be painting in these big bursting cherries.
13. Adding Cherries: So now that we have our blossoms completed, let's go ahead and do the next step, which is filling in these cherries. So I've got my cherry reference photo somewhere. There we go. So pretty simple. But the one thing that I really want to keep in mind with these cherries is allowing room for that light to shine through. After all, when you think of the surface of a cherry, it's very smooth, it's very reflective. And I went those qualities to come through in my watercolor. So let's go ahead and get started. So I'm back to my warm palette. So I'm gonna go ahead and load it up with some water and start mixing together some colors that I think could be a really, really nice, juicy cherry color. So a lot of reds and maybe some of this magenta coming in. Again, it is not a perfect science. I'm just kind of eyeballing it and see what I think looks good together. I think I'm going to bring some of this blue from my palette as well to just add in a touch of so that it gets a little bit deeper and richer and more purple. Ooh, that's looking really nice. Alright, so I have my base color established just by playing around with some different colors. I mean, I've literally mixed the existing colors that are on my palette with a few of these pans and some squeeze tubes that were already here. Alright, so let's go ahead and start filling a men and real quick. So on our sketch, we drew these perfect circles for cherries. But as you can see, they kind of have this heart shaped like a really round, smooth heart, where they dip in here at the middle, where the stem connects, they go bulbous and outwards, and then they come down to this more tapered point than their upper edges. So that kind of form is what I want to keep in mind as I paint this. So again, that's the importance of having a really, really light sketch so that if you end up painting over those pencil marks, as long as they're really light, it won't be so noticeable. Alright, so here we go. I'm going to make a little dip. Kind of comes around like so. And then I'ma leave an extra little whitespace in the middle here that represents the shine of that cherry. And I'm just going to really pool that pigment in here. And maybe for a little bit of an unexpected touch, we have this really nice yellow in the center of our flowers. Let's just see what happens if I grab some of that yellow and do a few little bits and pieces of it in here. Ah! have an air bubble. So when you get air bubbles in your paints, that means that you did not rinse the soap out completely. So it is the bane of my existence with watercolor. Sometimes they're really tricky to pop. Okay, Got it. So if you ever see air bubbles as you're painting, that just means that there's still some residual soap on the bristles of your brush and you need to do a better job rinsing it out. So reprimanding you, because I do that all the time, but just something to keep aware of. All right, so I'm going to add a little bit of these darker colors down here at this bottom edge. And maybe kind of redefine a little bit what that upper area looks like. Perfect. So there's a lot of complex hues happening here. We have that really deep red. We have some blue down here at the bottom for shading. And then I popped in a little bit of yellow for some unexpected touches. All right, let's go ahead and do our second cherry. So this time I'm going to do the whole thing with my detail brush, since I want to get really close to the edge of that other cherry. And also thinking about where I want the highlights to be hitting. And same thing. I'm going to add a little bit of yellow up here into that cherry to mix in. And then grab some of that blue and just pop it down here at the bottom. Perfect. So those are already looking really juicy. And to get those highlights, it's only a matter of leaving space in the paint and letting that paper show through to suggest the highlights. All right, so I'm going to switch back to my number 0 brush, load it up up nice and evenly with that custom tone. And do the same thing. Switch to my detail brush to really get the nice form of that cherry. And then add some nice little suggestions of yellow at the top and maybe a little bit of blue at the bottom for some depth. Perfect. And now for its twin, I'm going to start by defining that line next to it. And then just start filling in that shape. Maybe for this one, I'll give it two separate sheens just to break it up a little bit and give it some more interest. Alright, same thing. I'm going to add a touch of yellow in there. And then a little bit of navy blue down here at the bottom for some nice depth. All right, our last bunch. So I'm gonna start by getting that basic form down, filling it in and keeping some room there for the shine. Adding in a little bit of the yellow. And some of that nice navy at the bottom. And last but not least, I'm going to start with that connecting edge. And making sure to leave a space for that light shine coming through. We'll just begin filling it in. Same thing. Little touch of yellow in there. And a little suggestion of blue at the bottom for some depth. All right, awesome. So we are almost there. We have our cherry blossoms, we have our cherries. The final step is going to be creating the stems and the branches and a few little embellishments. So let's go ahead and get started with that.
14. Painting Branches & Details: Now, it's time for the very last step for our cherry blossoms painting. That is going to be filling in the branches along with some fun little buds and details. For this, I'm still going to be working off of this warm palette here, but what I want to do is that same trick to get some nice really desaturated tones, almost black, but not quite. Remember, the way that I get there is by mixing two complementary colors together. Because I have a lot of reds and pinks in here, I want red to be one of the complementary colors I use and of course, its opposite on the color wheel is green. Over here, I have a really nice green. What I'm going to be doing is mixing these two palettes together to create a really nice dark and deep maroon red. Let me show you how I mix those. I'm going to designate this bottom corner of my palette for the desaturated tones. The first thing I'm going to do is get a lot of green on my brush and a lot of red, and then just start mixing these together. One of the reasons I like creating my own black tone by mixing two complementary colors together is because I'm going to have a lot more control over the tonality of that black. It can be a lot more interesting if it maybe skews green or skews warm. You can control that by mixing these two colors together and deciding which one is going to be a little bit more dominance. In this case, I'm really liking how this is turning out. It looks like a really deep dark purple. I'm going to add in a little blue, just for fun to see what happens. Give it a little bit more of a cool tone. I really like where this is heading, I think this is going to be pretty interesting. First things first, I'm going to switch to my number 1 detail brush to get a little bit of a finer tip for the cherry stems. I'm to start with these two and just pull that stem upwards until it hits that flower petal, and then do the same thing with the other stem. I really like this color that we did. It looks like a really nice deep dark desaturated maroon, which is nice because it plays off of the blues and the fuchsia colors in these cherries. Maybe the stem branches off this way, and as I'm doing these stems, I'm using a much lighter stroke for the beginning, and then as I pull it through, I'm adding a little bit more pressure so that we get a variation in size. The very beginning of that brushstroke, that tip, is going to be very fine, and then by the time I'm finished, it's gotten a little bit thicker. By varying the pressure that I use with my brush, I'm getting a nice tapered edge. I'll do the same thing here. Light stroke to begin with and then push down a little bit heavier so it gets a little bit fatter towards the ends. Remember it'll always be easier for you if you have more water on your brush, more water equals more control. What also we're doing, got this stem coming down, that gets interrupted by the petal here, and another one shooting off from this direction. Sometimes you've got to turn your body or turn your paper to accommodate for those directions as well. If your brush begins to dry out as you're going, no big deal, just go ahead and add more water and more pigments. You can do this in several different layers. I'm going to add a little bit more water here onto my palette and do the same thing with these cherries. It's really at this point all about angling, and the brush pressure that you're using. For this one, mid stem, I'm actually going to switch to a slightly larger brush to go ahead and finish that out. I wanted the beginning of that stem to be very light and the end to be thicker, so you can change your brushes up as well. Just adding a few more detailed branches in here. Same thing here, I'm going to switch to a slightly larger brush. Last but not least, the final angle. It looks like I can connect it a little bit like this. Perfect. Those branches are really just a series of light pressure, heavy pressure as you bend at that angle and start painting. It's not always going to be perfect. If you look up here, it gets a little bit blobby, my thicks and thins aren't perfect, and that's okay. This is watercolor, this isn't digital illustration. We're painting by hand, so there should be room for error. I'm going to add a few more details now that I've got these branches established. One thing that I really liked in these reference photos were these buds that come outwards, so they're not fully formed flowers yet, but they have the potential to be. I'm going to go ahead and paint some of those in using the same color that I established for the cherries. I'm going to mix this together and add these little teardrop shapes at the ends of some of my branches. Maybe I'll mix it up a little bit and do some of the teardrop shapes in the same light pink that I did for the blossoms, just to give us some more variety, that's cool. I'm going to do some light pink and then some dark pink. You know what? I'm going to add some yellow ones in here too to match the center of these flowers that we did. This is one of my favorite things about watercolor, you can really improvise as you go. I actually really like this variation in the buds, they're not all just pink or all just yellow. It's a nice combination and opportunity to pull in colors that are used in other parts of the painting and reuse them elsewhere, so altogether, this color story ties in really well. I was going to call it a day, but I think I'm going to add one more little detail and that's something I do from time to time in my illustrations. I add little tiny detail circles. It works really well with flowers because it almost looks like pollen coming out of the flowers. I'm going to stop talking about it and just show you what it actually looks like. I'm going to make some pinks in here, and just find some opportunities to add a few little circles in. Same thing here, I'm going to vary up the color. We've got some light pink, some dark pink, let's even pull some of that yellow and orange in as well. As you can see, the way I like to do this is by clustering them together so it's a few little areas of clusters. I'm not going to overdo it and do the entire composition that way but I'm just going to add a few choice little clusters to add a little bit more visual interest. As you can see, every watercolor artist will deal with this at some point. I have a little bit of paint on my hand and it's been smearing on the paper so I'm going to show you how to take care of that. I have the paper towel off to the side here and it has clean water on it, so not dirty paint water but brand new clean water. I keep this around in case of emergencies. What I can do for this area is push it against the paper and gently wipe away these areas where my hand smudged against the paper with paint on my hands. As long as that watercolor paint is still relatively wet, you'll be able to remove most mistakes. Last but not least, don't forget to clean your hand where you have the paint smeared in, otherwise, it's just going to keep happening. Let's finish a few more of those detailed dots and then call it a day. Perfect. I'm going to go ahead and call this a completed illustration. Out of all the compositions that we're water coloring today, this one was definitely the most complex in terms of details. We did a lot of very fine brushwork, we worked on brush control when we painted those stems especially working on those tapered edges going from thin to thick, and then we added really teeny tiny details like these buds here coming off of the branches, even these little dots circles as embellishments. In terms of technicality, this is going to be the most technical and complex illustration you've done today. Based on student feedback that I've heard before, you either absolutely loved doing all of these little details and technical illustrations within this project or it was a big challenge for you. Either way, I hope that this helped you learn what types of illustration styles you're into when it comes to watercolor painting. But the very last one that we're doing today, the next illustration, is not going to be so technical and detailed, it's going to be a little bit more fluid and fun. Let's go ahead and get that one started.
15. Sketching the Kiwi Composition: All right, For our final composition of today's class, we are going to be painting this kiwi, fern, floral composition. So just like all of the others, we're going to break this down into a step-by-step process, beginning with the sketch. So at this point, the things you will need are your reference photos. We have the kiwis, the fern, and then a very nice juicy floral. I also have a blank piece of watercolor paper, my sketching pencil, eraser, archaeologist brush, and my kneaded eraser. So with these things on hand, Let's go ahead and begin our sketch. So for this composition, I want to have these kiwis in the foreground and have this fern kind of back behind the kiwis maybe weaving through in the background. And then I want this big beautiful flower to be front and center. So let's go ahead and sketch with these components in mind. By thinking of the placement of the kiwis. And I'm going to start that by using this kiwi right here. So when you break it down to its most basic shape, this is just an oval. So I'm going to start by drawing an oval. Down here towards the bottom of my page. Like so. And so this is going to be my open kiwi, the one that's sliced in half. And then I want to use a full kiwi behind it. So this guy right here, so maybe that is hanging out just about here. And that way I have two overlapping shapes. I have the sliced in half kiwi. And then I'm going to have the brown fuzzy section of the kiwi as well. And next up, I want to decide where this fern is coming through. So I think what I'm going to do is have it kind of coming off diagonally from this edge, since we have a diagonal pull here with this oval, Let's go ahead and have the firm make an opposite diagonal. And then I'm just going to draw these edges as a visual guide so that I know how far out these leaves should go. So similar to how I always start flowers with a circle, I do the same thing with ferns and foliage in general. I draw the basic shape first and then I start filling in some of those details and then I can erase those guiding lines that I've drawn in. So in this case, I know that the edge of the shape is as far as I want those leaves to go out. Alright, let's do the second leaf, maybe to here. Third, remember draw very, very light on your paper. Do not do what I'm doing. And then maybe the second leaf kind of gets hidden behind this foreground kiwi, like so. And now at this point, we can go ahead and erase out these guiding lines since we no longer need them. They've done what they were here to do, which is tell me how far out to the point of each stem should go. So I'm gonna go ahead and use my click eraser. And use my number 30 mega brush to remove out all of those little nibs. Alright, now, and for the final part of the sketch, I went to put a big blooming flower right here in the center. So my reference photo is right here. Really nice luscious flower. So same thing as before. I'm going to start by drawing a circle and define that center point of the circle. Now before I start drawing in the petals, I'm gonna go back to my eraser and erase out those unnecessary lines. Since this flower is in the foreground, these kiwis aren't going to be showing through. So I can go ahead and get them deleted. Alright, so time to add in the petals. So I'm taking a look over here at this reference photo. It looks like the center of the flower is pretty substantial. So I'm going to draw that in first. And it has a lot of these really beautiful petals, one overlapping the other. So I'm going to do the same thing and just draw on these petals like this as if they were overlapping. So I'm starting from the midpoint of one petal hitting the edge of my circle and then bringing it back to the center. So midpoint, edge of the circle, back to the center. Like so. And again, it doesn't have to line up perfectly. Alright, same thing, I've got my eraser. I'm going to erase out that circle that I drew. I no longer need that reference since the petals are now in place. And I almost forgot. Don't forget to erase out that little center point of your flower. Perfect. All right, so at this point we have our sketch established. Again, it is very minimal, but that is perfect for watercolor. So now we can get going with the fun stuff, which is the actual painting.
16. Painting the Flower: All right, now just like all of the other paintings that we did today, we are going to work from foreground to background. So the thing in this composition that is most forward is this flower right here. So this is exactly where I'm going to start. So I've got a reference photo over here of this nice, beautiful flower. I have my orange swatch over here. I've got a yellow. I'm actually going to grab another yellow red out of my palette. And what I'm going to do is just kind of mix these together within my palette until I find a tone I like to use for the center of this flower. So I've got my very clean water dish. If you haven't already, go ahead and dump out your old paint water so we can start with a brand new fresh palette that won't get muddied by having dirty paint water. Alright, so I'm going to get my palette nice and wet, all these individual pans. And maybe mix it in over here as well. So I want to find like a nice bright yellowy orange to use for the center of this flower. And I think that's looking pretty good. All right, so I've got this nice tone. And already spilled my paint water, so got my paper towels just to lift up straight from the paper like that. Alright, so I've got this nice little bit desaturated orangey yellow tonality. And I'm just going to fill that in here to the center part of this flower, trying to avoid the pencil marks if I can. But again, if I go over them a little bit, it's no big deal. I've got a nice yellow palette up here as well. So I might pull a little bit from in here and just do some nice little dribs and drabs. And just to make it a little more interesting, I'm gonna see what happens if I pull some of this melon peachy pink and dip it in a little bit on these corners just to see what happens as it begins to dry. All right, and now for the color of these petals, I'm going to switch over here to my other palette. Bring those yellows along with me. And I want these petals to be really bright and yellow. And then of course we're going to be mixing them some fun tones as well. But I want that bright yellow to be the base. So if you're following along and you're really drawn to the bright magenta. These flowers, go ahead and go with bright magenta. You could also go with bright blue. Any color you want really, but for me, I'm going to stick with yellow simply because I haven't done a yellow flower yet for this class. All right, so I'm going to mix around, find a tonality that's working pretty well and make sure that my palette is getting nice and wet and that my brush is getting evenly coated with pigment. Alright, I'm gonna go ahead and dive right in. So again, being careful to try to avoid those pencil marks if I can. I'm just gonna go through and start filling in these petals with the pigments. So now that I've got about three petals done, the paint has begun to dry as I go. So I'm going to move on with one of my detail brushes and add some sort of contrasting color down here to the center of the petals to suggest some depth. So keeping in mind that my fern is probably going to be a bright green. The center of the kiwi will be this lime, greenish, yellow, and then the rind over here will be brown. I don't want to introduce too many colors because then it might get a little bit chaotic. So instead, I'm going to think about the colors that I'll be using for the kiwi and then use those as the center points. So one color I know I'll be using is brown for the rind of the kiwi. So I think that's one that I'm going to start peppering in here. So I actually have a nice warm brown in my pan. So I think I'll get that nice and saturated and just slowly begin to dip it in. Just here to the centers of my leaves. I might try this slightly darker brown as well, just to add a little bit more contrast. And then I'm just going to let the paint dry and see how those colors begin to mix together. Onwards with some more petals. So same thing here. I'm going to switch to my detail brush, grab some of those brown tones, and then just dip them in right here at the center of these petals to suggest a little bit of depth. And a couple more petals. Same thing, and grab a little bit of that brown and dip it in and just see how that begins to dry. All right, so at this point, we have our flower completed and we just have two more steps: the kiwis and then the fern itself. So let's go ahead and move on.
17. Kiwis!: Alright, now that we're finished with the floral, Let's go ahead and dive right into the kiwi. Remember we're working from front to back and that kiwi is smack dab in the middle. So that's what we're going to hit up next. So I'm gonna go through my reference photos and pull this guy up right here. And I have a palette exactly mixed with greens and yellows. And what I wanna do is mix a really nice and perfect palette that could match what a kiwi looks like. As you can see, there is a lot of chaos happening on my palette right here. But that's no problem. At this point, I'm just kind of winging it as I go mixing in colors that happen to already be on my palette, look for opportunities to bring in some of these pans. And it's not a perfect science. It's about mixing color. It's kind of therapeutic in a way and finding something that really resonates with you. But I'm really liking this green right here. As you can see, it's not a direct match to this neon green on the kiwi, but I think it's a really pretty shade. So I'm gonna go with that. All right, now I'm going to start on these outer edges and the name of the game here, since it's so much real estate to keep your brush as wet as possible. So I'm constantly going to be switching between loading my brush up with pigment and then also grabbing water at the same time. So I'm just keeping that paper and that area nice and wet as I go. And one thing I want to keep in mind here is this center area: I want to do something similar with whitespace. So I'm going to leave a hole in the center here to be that white area that we see in the reference photo. So lots of water, lots of pigment. And let's see what begins to happen here. It gets a little bit tighter when we get close to those flower leaves. Because I don't want to accidentally blend my green paint in with that existing yellow paint. This will be a little bit gentler and careful around those areas. Perfect. So I have the bulk of the kiwi filled in. And now it's time for the fun part, which is mixing a little bit of a darker color and peppering that in to create the illusion of some shadow and depth in this area. After all, this flower in the foreground and the kiwi is behind it. So we can add some depth in there just by using a slightly darker green. Because I like keeping it interesting. I'm just going to dip some yellow areas in randomly as well. Perfect. And as you can see, I splattered a little bit, but all I have to do is be careful with that paper towel and lift it right up. Alright, nice. So I'm going to smooth out this edge a little bit. And I think that first green area is pretty good to go. So now what I'm going to do is switch to my lighter yellow. And I'm going to fill in this area with a lot of water and just a tiny bit of pigment. So it's almost like a suggestion of watercolor. And I'm still keeping in mind that there's that whitespace around. And if I touch these two areas together, I know they're going to bleed together. So I want to be really, really careful with that whitespace. So it's pretty fine. You can probably barely see it on my paper. But what I've done is filled in a really, really light watercolor oval in the center of this kiwi to represent this shape right here. Alright, let's go ahead and tackle this kiwi rind while we're at it. So I'm going to find a nice area on my green palette. If there is one. And mix in some of these browns. Since I'm working on a green palette, there's a lot of greens that are blending in here. So what I'm gonna do is grab some red, because red is the complementary color of green. Add some red in there, and that's going to go ahead and desaturate it for me. All right. I think this is a really nice desaturated brown that still has some nice warmth into it. And I'm going to start filling it in. Same thing. I want to keep my brush nice and wet as I go. And one nice thing here are, there are a lot of different tonalities at play. We have some darker brown areas beginning to mix with some of these tans up here at the top. And I can just go ahead and dip in some additional colors just to make it more interesting and vibrant. And at this point, I have my flower finished. I have my open kiwi, my closed kiwi. And the next step is going to be painting in the fern.
18. Tropical Fern Leaf: It's time for the final step, which is going to be painting in this giant fern. So I have my fern reference photo over here. It's not going to look exactly like this, but that's the beauty of reference photos. You can kind of interpret them as you'd like. So the first thing I'm going to do is grab my green palette over here. And I actually have two tubes that I recently purchased that I'm gonna go ahead and squeeze onto my palette. So this first one is called a viridian hue. Just squeeze a little bit on right there. And the second one is sap green. So let's see how this looks. Beautiful. But let's be honest, what's really going to happen is I'm going to mix a bunch of colors together. And it won't necessarily be matching exactly what I had had in the tube in the first place. All right, so I'm just going to start mixing some stuff together and see what I think looks nice. I really like the intensity of this green. It could be nice to pair over here. So I have a saturated version and then a more desaturated version. All right, I'm gonna go ahead and start with the top of the fern. And this is a size 0 detailed brush. So it looks like we're going to have this leaf swoop inwards like so. And one thing I love doing as I paint greenery is to introduce contrasting tones. So in this case, I'm gonna pull a little bit of red, smooth it out on my palette a little bit. Maybe mix it with a tad bit of blue. And then pop that in right here at the edge so that that darker tone begins to blend outwards against that green. And if you want to take it a step further, which why not? You can add some yellow in as well, just a few dips. And then just see how this begins to dry as we go. Alright, since that leaf was that pretty saturated green over here, I'm going to go for something a little bit more desaturated for the leaf underneath it. And for this, I'm not following my sketch in its entirety. I'm using it more of as a suggestion for how I do the placement of these leaves. I'm going to dip in a little bit of yellow and then bring that blue back in. Right about there. Cool. So I'm alternating left to right as I go. And the reason I'm doing that is I simply just don't want to smear the paint. So if I were to work on the right-hand side of the page and move to the left because I'm right-handed, I might end up smearing that paint a little bit. But if I work from left to right, there's less of a chance of that happening. So as you can see, it's this balancing act between brushes I use, I use my round number 0 to get the bulk of that leaf down. And then I'll switch to my detail brushes to pepper in some other hues and colors. So this is my detail brush that I've been using for yellow. So I'll do some dips in. And then I have a separate detailed brush that I've been using for this blue and red combo, which I'll hit in separately as well. All right, let's try something a little different. Let's see what's going on over here with the screen. Mix it in with a little bit more yellow. And let's see how it looks on the page. This is another instance where I'm varying the pressure of my brush and keeping a really light pressure if I want the tips to be finer. And then I do a heavier pressure when I want more surface area to be covered. Remember, when in doubt, always add more water. It's kind of nice playing with different tonalities as I go. It's not all just the exact same green for every leaf. Instead, there's a little bit of variance. Some are darker, some are lighter, some are more desaturated, and some are a little bit more vibrant. I kinda wanna try a yellow green leaf too, to complement what's going on over here with the center of the kiwi. So in addition to using these detail brushes to pepper in those yellows and reds, you can also use them to smooth out your tips a little bit and give it some more precise detail and linework. So here, the bottom of this gets a little bit too blobby. So I can just taper it out nicely with my detail brush as a good solution. Let's try adding a little bit more blue into here to get more of a blue-green. Ah! Paper towel to the rescue. Two places. And of course, for areas like this where you have a lot of real estate to cover, always add more water and I'll make it a lot easier for you. And this is another situation where I can use my detailed brush to finesse this point a little bit and make it less sloppy, and little bit more smooth and graceful. Alright, let's get some yellow in here. Maybe some bright red. Let's try another yellow leaf. And now this is another situation where I have to be pretty careful because the edge of this leaf is getting really close to that kiwi. So you can be more loose and gestural with the leaves up top. But then when it gets to areas like this, where I don't want the paint to mix together. It takes a much more careful stroke. All right, beautiful. So the final touch we have to make to this composition is adding in those seeds. So just like with the watermelon, I'm not going to add the seeds in right now. I'm probably going to give it a night and then do it in the morning because I want this area to dry and its entirety before I add those in. So go ahead and set this in a safe place somewhere where your cat can't walk over it because that has happened to me before and wait for it to dry. And then in the morning you can add in these seeds. So it's going to be very similar to the way that we added the watermelon seeds in. You can use the reference photo if you'd like to establish your positioning. For me, I prefer mixing the red and green together to create a really beautiful black. And then I use my finest detail brush to very delicately paint those seeds in. And I'll be following the same orientation and direction as my reference photo. So they all begin stemming out from the center of the kiwi. But remember, wait until tomorrow. And that way you're not going to have any chances of that black accidentally bleeding into this really light green. Alright, so now that we have wrapped up all four of our botanical fruit watercolor illustrations, I have a few final tips to share with you guys coming up in the next video.
19. Your Project: Congratulations on making it through all four of our compositions today. At this point, once that paint is completely dry, it's a great time to erase out all of those pencil marks. My personal preference is to let my paintings rest. They need their beauty sleep and that way the next morning they are going to be completely dry, and the reason I do it this way is I have had one too many accidental paint smears because I got impatient and I started erasing before that paint was completely dry. If you want to be 100 percent sure, just give it a night and then the next morning, you can erase out all of those marks. One of the most important parts of being an artist is you want to get credit for your work, so don't forget to go ahead and sign all of your beautiful creations. I usually sign in pencil on the right-hand corner, and I sign with my brand's name, which is CatCoq instead of my full name, which is Cat Coquillette. But different artists have different ways of adding in their signatures, so feel free to do whatever suits you best. I would love to see what you made in today's class. Once you finish your paintings, go ahead and snap some photos and share them in the student project gallery. You can find the gallery under that same Projects and Resources tab down at the bottom. Then on the right, you'll see a green button that says Create Project. Click that, and once you're there, you'll have the option to upload a cover photo, add a title, and write a little description if you'd like to. You can include both text and images in this form. If you feel like sharing, I'd love to hear a little bit about your process and which painting you enjoyed most today. Once your project is uploaded, it will appear in the student project gallery. You can browse through this gallery and view other students artwork as well, and I encourage you to like and comment on other projects too. Now that you know how to share your project in the student project gallery, I have a few more final words of wisdom to share with you today.
20. Final Thoughts: Congratulations on making it to the end of the class. Now that you have four beautiful botanical and fruit illustrations completed, the real fun begins. Since I make a living by licensing my artwork, it is vital for me to get these hand-painted illustrations onto my computer. I do this with my scanner and I scan at a pretty high resolution, like around 1,200 DPI. The reason that I scan in my work at such a large DPI, is so that I can take paintings like this that I did at this size and enlarge them to fit much bigger products like tapestries or bedding. By scanning at a large resolution, I can make this a lot bigger without it getting blurry. However, if you don't have a scanner and you want to practice digitizing just for fun you can also snap a photo with your phone. Then you can bring that image into Photoshop and do the essentials. The first thing I always do is remove that paper texture background. That way my design can be printed on things with a transparent background, on a parallel or kiss cut stickers. Another thing I like to do with my artwork in Photoshop is enhance the color and saturation. I usually bump it up a little bit to become even more vivid than it was in real life. I also like creating entirely new palettes out of the exact same piece of artwork. Personally, I love turning single motifs into repeat patterns so that I can stretch the possibilities even further. Patterns work really well on products like home decor, a parallel, phone cases, wallpaper, fabrics, and a bunch more. If you want to learn exactly how I do this, check out my other Skillshare class, Digitize Your Art to Sell Online: Prep Your Paintings for Print-On-Demand. If you don't have Photoshop, no problem. I link to a free trial down below in the class description. If you've never used Photoshop before, no problem. It's a beginner-level course, you'll be able to follow along. Next up, if you enjoyed this class today and you want to dive even deeper into watercolor, I recommend checking out my previous class. Learn to Paint Watercolor Botanicals with a Modern Twist. It compliments this class but instead of fruits, you'll be painting four unique botanicals. A monstera leaf, a rosette, succulents, a blooming sunflower, and a hibiscus. If you want to learn even more about pattern design, including learning how to take illustrations like this and turn them into patterns on the computer, I recommend my class, Modern Patterns: From Sketch to Screen. In that class, you take your existing artwork and turn it into a bunch of fun patterns plus create new illustrations to patternize as well. Last but not least, I get a lot of questions from fellow artists asking how they can successfully market themselves on social media, especially Instagram. If you want my inside scoop, check out my class, Growing Your Creative Business Through Instagram. In just under an hour and a half, I pack in all of my best strategies for growing a successful Instagram presence as a creative person. You can find all of these classes by clicking my name up top and scrolling down my profile. While you're there, please don't forget to click, ''Follow'' right above this video. This means that you'll get an email notification as soon as I launch my next class. Plus I'll occasionally send messages directly to my followers with announcements like giving away a free Skillshare membership or announcing free goodies that I have available on my website or just other Skillshare classes that I've watched, love, and recommend. You can get access to all of this by following me on Skillshare, by clicking that Follow button up top. If you enjoyed my class today, please leave a review. I read each and every single one of them and I really appreciate all the kind words you leave, so thank you. Also, I frequently highlight student projects on my Instagram account, in my emails, and in my Skillshare announcements. When you're uploading your class projects, please don't forget to include your Instagram handle so that I can tag you if I share your work on my social media. After all, we artists have to stick together and support one another. If you want to share your project on Instagram, please go ahead and tag me @catcoq and Skillshare, @skillshare. That way we can like and comment on social media as well. If you share your work in your Instagram stories and tag me @catcoq, I can reshare your story to my own audience as well which means even more eyes on your artwork. Thank you so much for joining me today and I cannot wait to see the artwork that you've created. Until next time, take care.
 Cat Coquillette, Artist + Entrepreneur + Educator