Transcripts
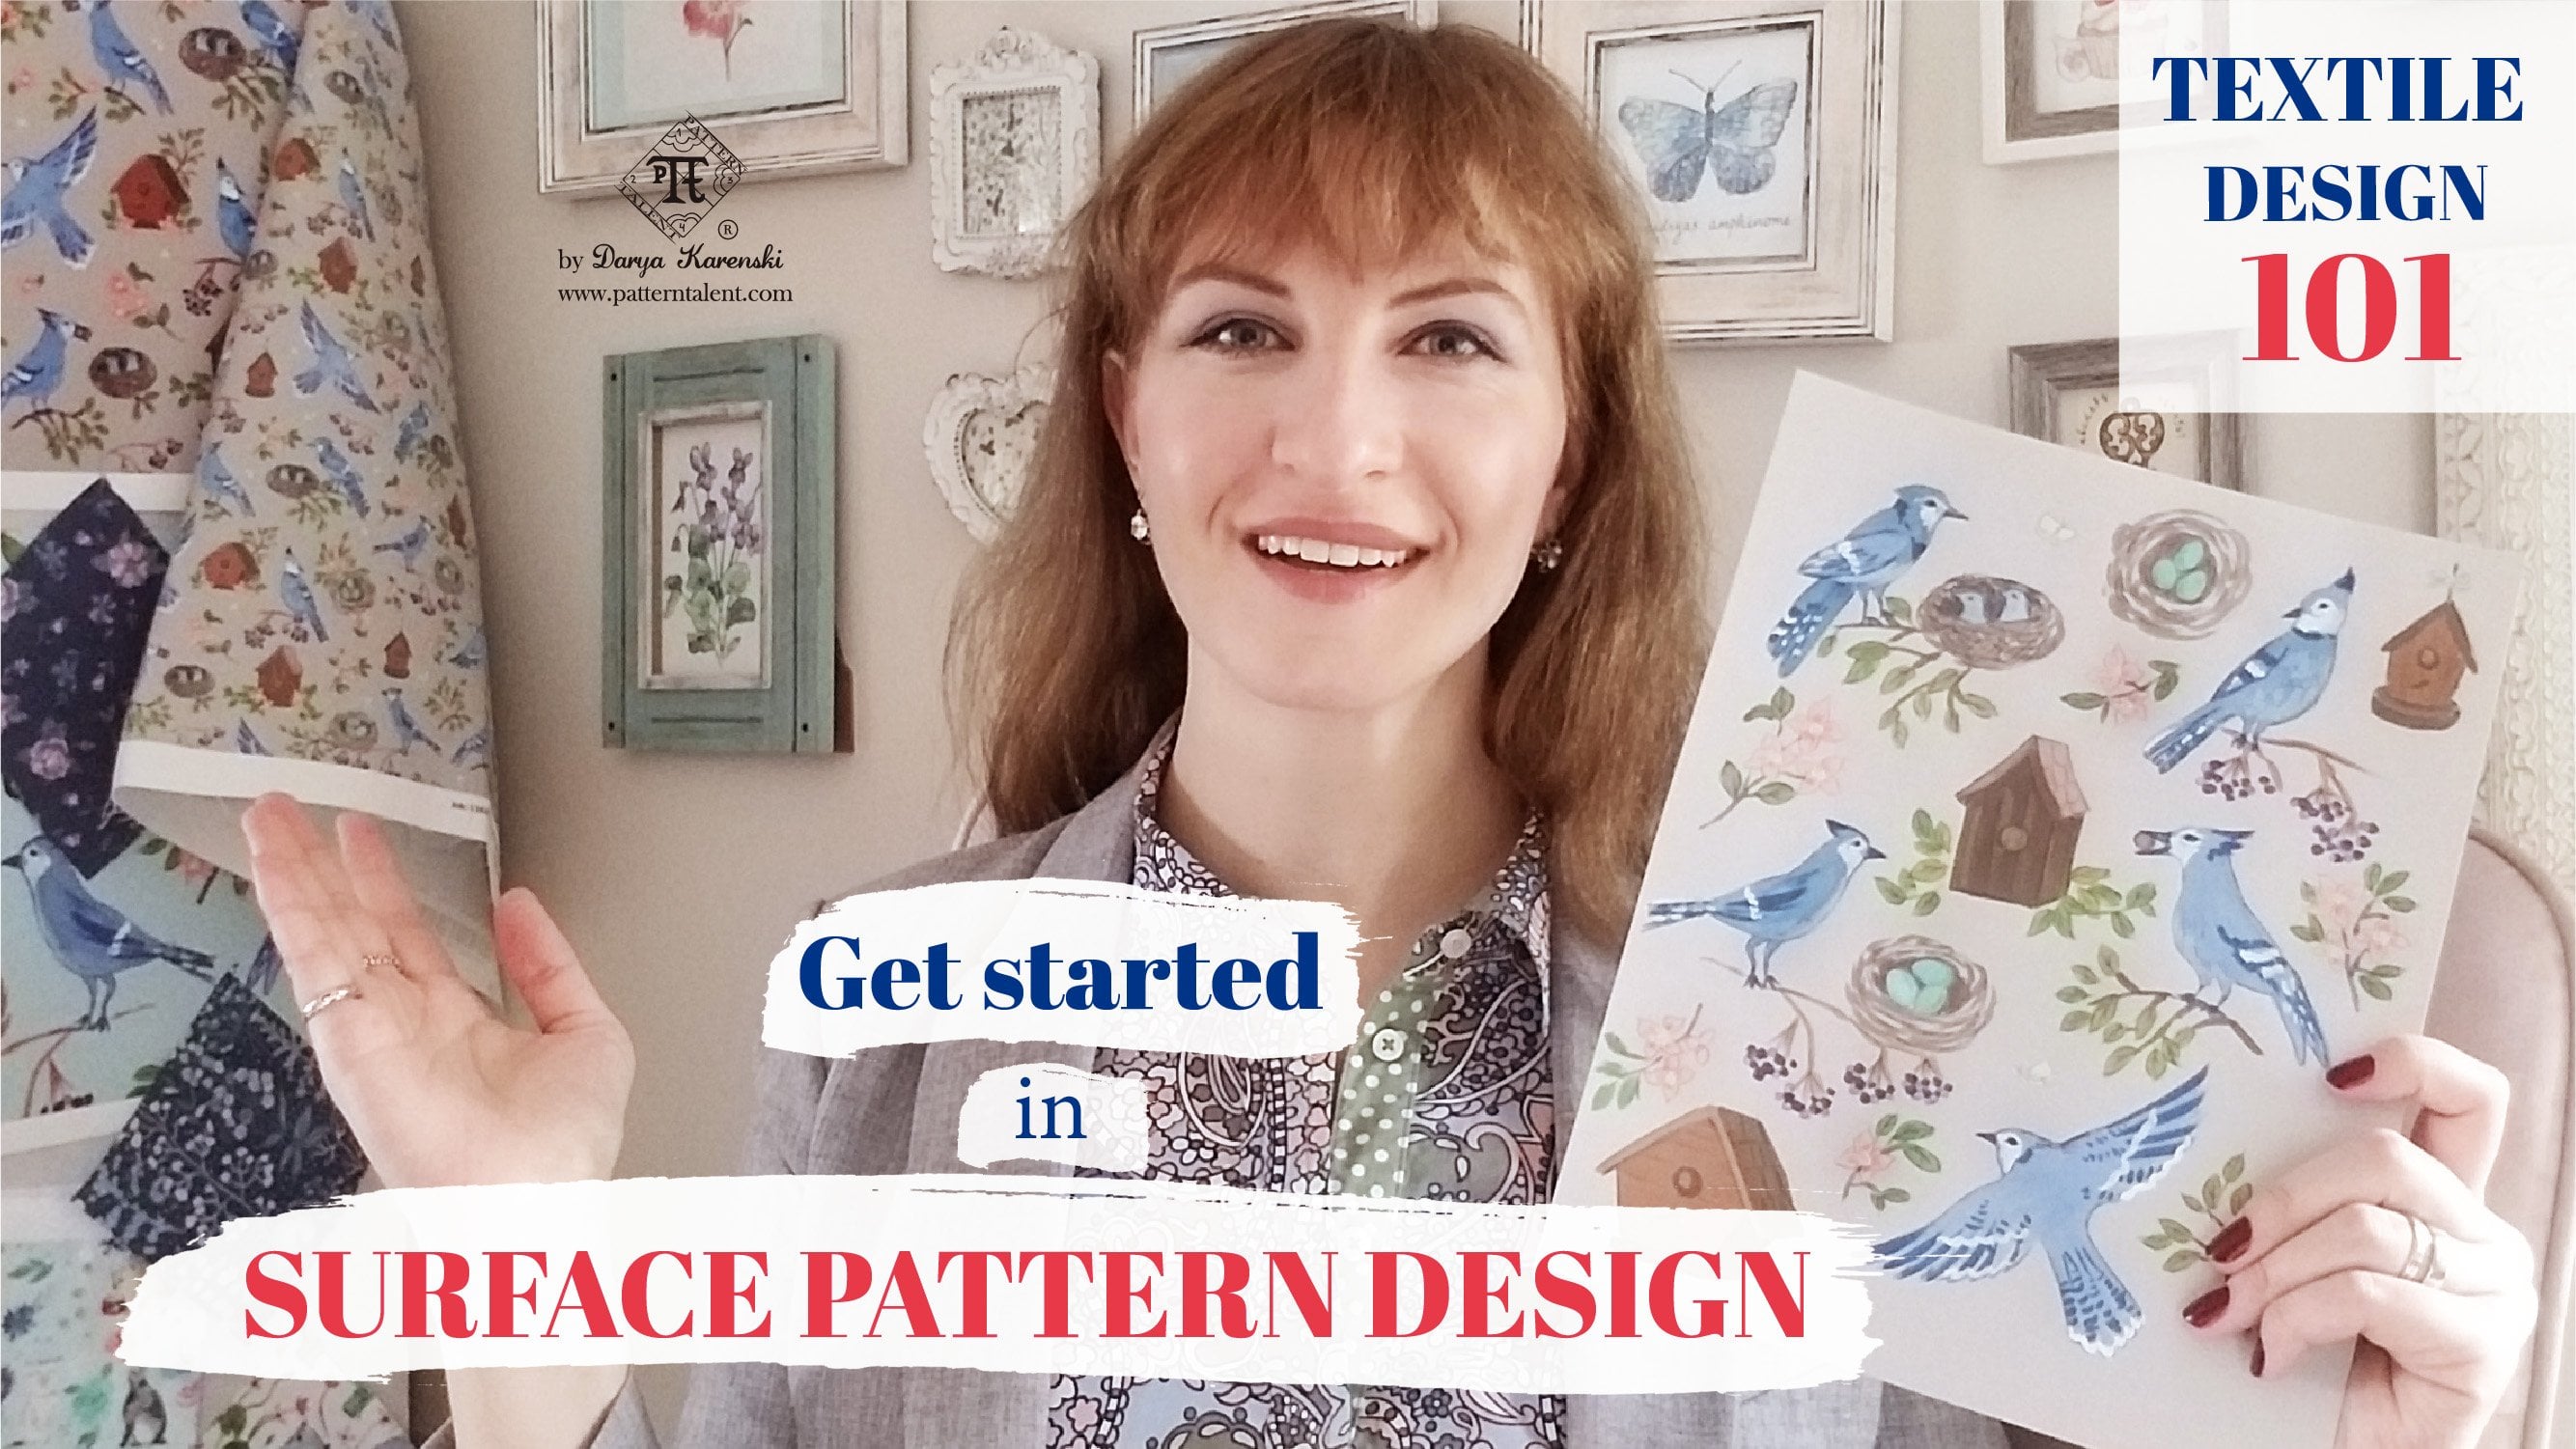
1. Lesson 1 - Intro: Hi, my name is Darya Karenski. I'm a United States based professional textile and
surface pattern designer, educator and painter. I turn illustrations like this into fabric and wallpaper
designs like this. I live in the Boston
area, Massachusetts, where I went to college for
textile design and have over nine years of experience as a full time surface
pattern designer, Illustrator, and fine artist. You might have watched
my first class called Introduction to
Surface Pattern Design. Your unique path where I laid out all the
possible career options, ways to make
patterns, and so on. In this course, I
would like to focus specifically on painting
for textile design. You might think painting. In this digital world.
Yes, you heard it right. Traditional media are still alive and well in
textile design. Of course, we do eventually take our creations to
Photoshop Illustrator or other computer
applications to prep artwork for production
and build the repeat. There is nothing wrong
with starting out on paper with good
old paint or ink. Hand painted artwork has a particular beloved
and recognizable feel to it that still cannot be 100% emulated with
digital tools. Traditionally
painted artwork can be used in all
kinds of categories of surface pattern
and textile design from women's and
children's apparel, including swimwear,
home textiles, such as table linens, wallpaper, computer and phone
cases, and much more. Who is this class? Anybody who prefers traditional
painting over digital art for any reason. Perhaps you are a
painter who would like to learn about
the nuances of painting specifically for
textiles or someone who just prefers to keep their hands dirty with real paint and ink. You're in the right
place. There is special magic and
commercial appeal that comes from
hand painted art. We will go over three most
popular media for painting, ink, gouache, and watercolor, the right brushes for them, and variations in their use that can produce different
visual impact. Will also show you
how to work with different kinds of
references for inspiration, such as magazines, books, and online resources like
Pinterest and Instagram, and how to not breach
copyright when doing so. I will walk you through my sketching and
planning process, touch on different
pattern layouts, and outline what kind of products can the painted
artwork be applied to. We will explore a variety
of popular topics, such as loose
watercolor florals, inky abstract designs,
hazly Christmas designs, and do you have to know how
to paint to take this course? You will most benefit
from it if you have some experience
working with art materials, but most of the techniques I'll demonstrate are super easy
and beginner friendly. An important note is that
this course does not include info on how to put
patterns and repeat yet. We will focus on the first
stage of textile design, painting motifs and croquet. Croque is the future
repeating pattern. Grab your notebook, prepare
your paints and brushes, and I hope to see you in class.
2. Lesson 2 - Paper and palettes: Welcome to the class. I'm so
excited that you are here. We will start
painting very soon, just to give you a
general idea of how paintings turn into
textile prints. We will be painting
motifs on paper, and no matter what
medium we use, eventually, we wait
for the paintings to dry and then scan them
onto the computer. So it's essential to
have a good scanner. You do not need it right now
while taking this class, but if you are serious about
painting for textiles, it's an essential tool to have. I shared some information
on the scanners in my first class called Introduction to Surface
Pattern Design. Now let's talk about paper. I just want to say that
for all fluid mediums, it is very important to use artist paper that
is thick enough. 140 pounds or 300
grams/square meter is ideal. It is okay to use
student grade paper, especially in the beginning, but it's essential
that the paper is thick enough to take
in all the liquid. So I would say try not
to go below 100 pounds. What happens if you
paint on thin paper? Also not the end of the world, depending on how
thin the paper is. Although it's not ideal, it can create warping
on the surface that later can impair the look of the artwork
when it's scanned. The warped areas will
appear blurry on the scan. I will show you this artwork
painted on thin paper. See? First of all, you can
see warping on the back. And, of course, it's not
the end of the world. You can still use this artwork. You can still scan it and turn it into a
repeating pattern. But it can get a
little bit tricky. You have to be really careful. You can, of course,
experiment and see what happens if you
paint on thin paper. Still has to be it's
not printer paper, it is artist paper that we use, and we can compare it to
this one, for example, see how thick the paper is, and I will show you what kind
of paper it is in a second. The difference between artist quality and student grade paper is the way it
preserves over time. The more expensive and
higher quality the paper is, the longer the artwork stays intact and brand new looking. But because in textiles, we usually scan our artwork and don't intend to display
it in galleries, paper quality can be a
little more forgiving. Not so much worried about
the paper artwork itself, you know, this,
but rather getting a crisp and quality
image on the scanner. So the way we scan artwork
will be very important, too. It's definitely up to
you what paper to use, and sometimes if I anticipate
painting a nicer piece, I will use high grade paper. But I think when
we are practicing and playing with brushes, it's totally okay to use more budget friendly
kinds of paper. Here are some of my favorites. Artisa I use quite a lot, and I like the size, and it does fit on my scanner as well. So this is 11 by 14 " or 28 centimeters by
35.6 centimeters. It is cold press paper, and I will record demo of the
texture close up as well. So I do use Canson and
paper quite a lot, as well. So this is a sketchbook
for mixed media. But again, this is
not thin paper. This one is 98
pounds or 160 grams, so it is quite thick as well. Like Strathmore paper as well. There are different sizes, different kinds
available, and this one is eight by ten, a smaller size. So these are kind of, you know, the okay quality papers. Now let me show you the best
of the best of the best, the luxury papers. Of course. Arches is one of them. Arches paper is
really, really nice. So this is Arches paper. Different kinds of texture. I will explain it
later on as well. Sandras Waterford is
kind of new for me, and I mostly use these top tier papers
for painting landscape, but I use them for
textiles as well. This is also Saunders
watercolor paper, 14 by 10 ", bigger size. Every artist has a
preference for size. Someone likes to paint smaller, someone likes to paint larger. As you start painting, you
will see what you prefer. I prefer painting
medium to large, but again, it depends
on the project. This one is called Bohm
and it is hot press paper. For watercolor, we usually
use cold press paper, which has a texture to it. This one does not have
any texture whatsoever. This kind of paper, hot press watercolor paper
is great for gouache, and as we do each project, I will add more details on the paper so you are not
completely overwhelmed. This one is ten by seven, and this is also 300
grams/square meter. Another important thing to
consider is paper size. It has to correlate with your brushes and
palette well sizes, and also we need to make sure
it will fit on our scanner. My scanner glass is 12 by 17
" or 30 by 43 centimeters. So if I plan to paint loose
gestural florals like this, for example, I use
bigger brushes, so it's going to be
something like this. Right? And I need a big palette so I can actually
accommodate this brush. So let me show you a couple
palettes that I use. This is my go to
watercolor palette. It's by Schminke
It was a part of the Watercolor set
in a wooden box. But for this brush, it is even a little
bit too small. So for really particularly
big projects, I will use a plate like this. So this is just a plate, a dish. And you can buy them, you know, thrift stores or regular
home goods stores. You just have to
make sure, you know, your brushes correlate with
the size of the palette. So if I'm painting
something like this, I will probably use about
this size of brushes, ten, 12, and so on. Don't worry, I will show you all my brushes that I
use as I'm painting. And for something small, the smaller we go, the
smaller the brush size. This one is Artisaeight
size round brush. And for something really,
really small like this, you would use an
even smaller brush. And, you know, a small palette is good enough for that, too. So the way I see it, I try to maximize the scanning
surface in one go. So I like to use larger paper. But don't get too caught
up in paper size. As long as it fits on
your scanner, it's fine. And even if it doesn't
fit on the scanner, you can still work around it. Larger pieces can be scanned
in two or more rounds, but it's just a
little extra work, so I don't paint
that big too often. It's also helpful to think of the scale in terms of the
product you're designing for. So I would advise against
painting too small. For example, no smaller
than this size. This is five by seven
artisa watercolor paper. So this is a good
you go smaller, it gets trickier when you're trying to
enlarge your image. I would say stick to this. Working with small artwork
is also not impossible. It is just harder. It's
just extra work to do. It's up to you as an artist if you prefer more textured
or smooth paper. Generally, it is
recommended to use smoother or hot press paper
for gouache and markers, or you can use bristle
paper as well. While watercolor
looks great with a little bit of tooth
to it or texture to it. It does definitely take some
experimentation and play. As I start each of my projects, I will name the paper
that I will be using. Are gradations of
textured paper as well. For example, watercolor can
be called rough textured, which means it has this
maximum rough texture, and cold press is the usual
go to for watercolor. Hot press is the
smoothest paper. Let's look at different
paper textures. Watercolor paper usually has
this slightly rough texture. O colo looks really beautiful
with this kind of texture. So, see, this one is
called rough specifically, as opposed to the regular
cold pressed one. And here, the texture
is really pronounced. It's really, really rough. This is more like a choice. You don't really have
to use this one. It's just, you know, if
you're a fan of texture. This is a popular choice as well with great rough texture, cold press, and these are very
important numbers for us. So this one, see
how thick it is. It is twice as thick
as the regular one. Again, you don't have to use
it. It's just an option. See? How thick one sheet is. It's really, really,
really thick. This is my go to paper. You know, the Artisa one. It's very budget friendly. It is student grade, so this
is not professional paper, so I think this is a good
paper to start with. See, there is some texture. It's not as pronounced
as the arches. Let's look at the
smoother paper. So this is also what
I call a paper, which is hot press. So see, there is very little
texture noticeable here. And this thicker sketchbook
paper is also a good option. This is Canson mixed media
sketchbook with these numbers. And it's also very
budget friendly because there are
60 sheets in here. So, see, it's not as thick as the other paper,
but it still works. There will be some warping
if you use this one. Let me see if I
have any example. So, see if you paint on paper
that is not quite thick, you can get this warping. Hope you can see the paper
is a little distorted. But as you can see, I still keep painting and even
sometimes on both sides, which is risky, which
I do not recommend, you know, as your go to
option. But these are markers. These are not watercolors. I also wanted to tell you that if the paper doesn't
work for watercolor, you know, watercolor is the most demanding in terms of paper. This is allegedly,
everything is right here, everything is great,
but for some reason, this particular paper
didn't work for watercolor color was
sort of curling up, creating, you know, dry patches. So the texture is nice. Everything is nice
here, but the paper is covered with some kind of
sizing, some kind of chemical. So this particular paper did
not work for watercolor, but it works for
gouache just fine. So if paper is not cooperating
with you very well, do not throw it away
right away and use it for gouache because
gouache is more forgiving.
3. Lesson 3 - How big should motifs be. Let's talk design scale and resolution: As I was working on this class, I received a question on
Skillshare yesterday, and I realized I have been
asked this question before, so I would like to
talk about scale. So the question was, how
big should the motifs be? The quick answer is, they can be as big as
you need them to. I would say that you'll benefit the most if you paint
at medium scale, and this is what I
would call medium scale because it's easier to
shrink things down. But when you are
painting too small, it will be much more
complicated to blow things up. So medium, in this case, is about 1.5 " to 2 ". These are the original motifs, and I drew them in markers
on seven by ten paper. So the motifs are
about 2 " or so, and this is the fabric
with the same design. The way the design is
represented on fabric or on wallpaper will also depend on the manufacturer limitations. With digital printing, the possibilities are
pretty much unlimited. There is usually
the bigger limit, meaning that most of the fabric sizes repeats
don't go beyond 24 or 25 ". I will elaborate
more on it later. So here, see, this
is the fabric, and these are the
original motifs. So even if you mean them to
be kind of ditzy designs, hate them a little
bit bigger because all of this detail
would get lost. If I painted it too small, it would be much more
difficult to paint, as well. But it is way easier
to shrink this down. So in this case, the biggest
motif here is 3 " across, and we have this
super long branch, which is about 8 " tall. And the paper is nine by 12. So for me, it's
easier to think in terms of the paper
that we are using, and I included
information in this class on which sizes of paper
I recommend using. So if I were to paint
something at this scale, this is too small, too ditzy. So this is a printout. This is the original, see? This is the way it was painted. Paper is six by nine, and every flower is
about 3 " tall or so. But this design, when
I was painting it, I knew right away that
I wanted to be ditzy. So I did not intend to
blow it up to giant scale. If you know your design
is going to be ditzy, you can paint it smaller. The shirt that I'm
wearing, look at this small scale floral. There is no point in
blowing it up too large. It does look great
at this scale, so that's always a
possibility, too. What you do in case
of small motifs, when your motifs
are fairly small. So I would scan this at 600 DPI. Normally, I scan my
motifs at 300 DPI. This is standard
resolution in design. But when I have
something as small as this or something
as small as this, I will scan these guys at 600 dpi, all of these guys, too. So when I'm drawing, see, there are several designs
on the same paper. I love to maximize the paper
already put this in repeat. I will include a photo here, and I scan those
guys at 600 DPI too. Some scanners have the
capacity to scan even higher, like a 1,200 DPI. Mine can do that, too, but I rarely use it because
it makes the file too large, and I really do not intend
to blow up this little guy, which is about an inch
to the size, right? So 600 DPI is usually enough. And what it does is say,
if this is 1.5 " wide, if you scan it at 300 DPI, you will get 1.5 ". So if you scan this at 600 DPI, he will be 3 " wide. So this is how you
can manipulate the size of your motifs as well. So a couple words
on this wallpaper. I work with, you know, this
is spun flower wallpaper, and I have taken the time to study their
technical limitations. So spun flower roll
is maximum 24 " wide, and they can go
down by increments, like 12, six, four 2 ". When I applaud to spun flower, most of my designs, I applaud as both
fabric and wallpaper, and I usually offer two
sizes, large and small. I mean, there's definitely
a range you can have medium and extra small
and things like that. But I try to make
it a little easier. I don't want to have
too many sizes. So this is my small size. It is a little smaller
than the original, and I had to use, you know, spoon
flower limitations. So on this particular wallpaper, the repeat size is 6 " wide. If we look from this blue
leaf to this blue leaf, I can see the repeat
size. It's six inch. The large size for this
wall paper would be 12 ". So it'll be two times bigger. It is possible to
blow this up to 24 ", too, but I think that it will be a little
bit too extreme. This is a ditzi design, so I want it to be smaller, even at large scale. I hope you see what I mean. Talking about small
scale designs, I cannot but mention
vector designs. And in this course, we speak about paintings only, so we will not be turning any of the stuff we paint
here into vectors. But since we are
talking about scale, if your motifs happen
to be too small, you can turn them into vector. And when I start a design, I usually decide right away or, you know, at least very
early in the process. I think I'm going to
turn this into a vector. This is definitely going
to be a vector design. So if you are familiar and confident in Adobe Illustrator, you can draw smaller designs and turn them into
a vector later on. This is definitely much more
work. This is more intense. But as a reward, you know, this is one of my
best selling designs. Or the motifs. They
are pretty small. You know, they're about 1 "
wide and about 1.5 " tall. You know, I do not like working at this scale
because it's a lot of work. I mean, it does look great, and, you know, I recolored
it digitally as well. So this is my best
selling color way. This is inspired by Milli flour or thousand Flowers, right? The famous tapestries,
medieval tapestries. So what you do with
vector, you know, you turn these into
vector points, and you can enlarge these. So see, this is the
original scale. This is my small scale, and this is the large scale. So if you do
something like this, you have to make sure your lines are crisp and clean
and beautiful. I did not always do the best job here because this was so small. I hope you can see this this
little triangular pedal, which is not very pretty. What I'm trying to say is when you're working at the
scale that is too small, you are giving yourself
a lot of work to do. I would say, for starters, stick to medium scale. Not every design
can be a vector. The way I decide is usually, you know, these are pretty flat. They are not painter
opposed to these, for example, see
these gradations. It's almost like a watercolor effect or a painterly effect. So this looks really pretty. I probably would not flatten it and turn it into a vector. I could, but then you would
just have one solid color. You would not see this
little beautiful gradation. But these are pretty flat.
There is no texture here. There are no flow effects. And I spoke about this quite a lot in my introduction class. Also, it's important to
have a ruler on your desk. I use it quite a lot. As
you're working on the screen, you need to understand how
big your motifs are, right? So I always keep a
ruler on my desk. Now let's talk about large scale because I also get questions
from time to time. People suggest that if they're
painting for wallpaper, they need to go
really, really big. This is not necessarily the case because like
I just mentioned, you can scan at
higher resolution, and this will blow
up your design. And it's also very helpful
to order samples if you can, because very often, when
you are working digitally, you don't have the
feel for the scale. You don't know
what the wallpaper will actually look
like in real life. With this ditty design, I had no idea that it prints
that big. You know? When I ordered the
sample, I was shocked. And then I offered
the second size because I personally think
it looks better, smaller. But again, it's also
a personal choice, and some people might enjoy it bigger because see if it
covers the entire room, maybe it's a little
bit too busy. So this is what I
would call big scale. So this paper is 11 by 14 ", and each flower is
about 4 " wide. So in my mind, this
is and, you know, this is slightly larger
because this is 11 ". And remember the size
of the wallpaper. So this is probably
the 12 inch size, so it's slightly bigger than
this original painting. And this can also be
blown up to 24 ". So this flower
would be this big. And it's also a possibility, and there is a market for
jumbo scale wallpaper. And, you know, one
day I was showing my mom my wallpaper designs, and she was like, I don't
know who uses these. You know, they're
so busy. They're so colorful. They are so crazy. Many people do prefer very
neutral and soft wallpapers. I honestly prefer solid both, but there are maximalist. There are different
styles of design. So, trust me, there is a
market for any kind of design. Maybe not everybody will
buy this wallpaper, but the person who
has the right home for it would be thrilled for it. Also, you can have an
accent wall, right? You don't need to cover your entire home with this design. And remember, with a big size, we have to make sure it fits on the scanner.
So this one does. This is the biggest size
I can fit on my scanner. And I mentioned as well
that your paper is bigger, you can put it on your scanner twice and then merge
them in Photoshop. But again, I
personally don't like giving myself more
work than I need. I hope it answers the question of how big
the motive should be.
4. Lesson 4 - Ink. General info, brushes, brands. Materials care: First medium we'll get
acquainted with is ink. Why? Because it's extremely versatile and beginner friendly. This is one of my
designs painted in ink. The paper I'm going to use for painting with ink is this one. I just took it out
of this notebook. It is Artisa Watercolor
paper, 140 pounds. You can also use bristle paper, which is smooth and thick. Bristol paper is also great
for painting in gouache. You can also use thicker
sketchbook paper, like I mentioned before. So this one is not
quite as thick, but it still works
for ink as well. Ink is a fluid medium, but it is not as wet as
watercolor, for example, we're not going to be soaking
it too much with water, so paper is not so
demanding for ink. Here are some of my
favorite ink brands. Higgins is India
ink or regular ink. Amsterdam, which is new for me, I only have one color, but
it's really beautiful. It worked well for me.
Da la Rawi wasn't bad, either. So it's right here. But my favorite brand of
all is probably Liquitex, and this one is Acrylic ink. And also Da Rawi and Amsterdam
are acrylic inks, as well. They are very
bright, very highly pigmented and look
beautiful when used, you know, as a fluid medium. India ink can also be used
for drawing with a pen. So, see, I did some
comparison here. Yesterday, I played with
the colors a little bit, and as you can see,
liquitex is really, really bright and saturated.
These work as well. Inks can come in a
variety of colors. You're using black
ink, it doesn't really matter which
brand you are using. You can also have metallic inks and white ink for painting on black paper as well and a variety of different
beautiful colors. A general thing to know
about ink is that it is very similar to watercolor
and gouache in a lot of ways, particularly to watercolor, but it dries a little
bit differently. It doesn't flow as
fast as watercolor, and it is way more
saturated with pigment. So it's really, really bright
and saturated like this. Also don't really need much
water to work with ink, but it's helpful to have some, so you can rinse out your
brushes, keep them clean, if you're switching
between colors as well, and we use a lot
of paper towels. It's handy to keep
them on your desk. These blue paper towels
can be purchased in home improvement stores
such as Home Depot. Have to use them, but, you
know, they are new to me. I learned about them
from oil painters in case you're wondering,
you know, what they are. So they are very
dense and smooth, so they are great for
cleaning, you know, palettes. But you can use
regular paper towels. I always keep a roll of
toilet paper in my studio, you know, it's fancy
natural colored paper. So anything that you can wipe
your brushes off, you know, tissues are a little too thin, but you can also use them. No big deal, really. The brushes that work best for
ink are synthetics, and there are a few different
kinds, and let me show you. So here are a few kinds
of different brushes. The most universal type
is the round brush. They are over here
in different sizes. I would say this is an absolute minimum to have, you know, maybe a round brush like this, a bigger one, and a
smaller one, you know, something like this or like have square or rectangular
brushes that are great for painting
stripes and plats, and we have filbert
brushes which are this organic oval shape. Filberts can be
pointed like this, so you have a nice thin tip, or they can be rounded
and blunt like this. And these are great for
painting abstract shapes such as leopard spots or
flowers like daisies. Another helpful kind is a
script liner, very thin brush. If you need to make
a thin, long line, this is handy to as you see, oh, this is a big filbert that
escape to the square brushes. So as you see in
all of my groups, I have a variety of sizes. So I have bigger brushes
and smaller brushes. You know, it depends on the size of the paper you're using, the size of the motifs
you are going to paint, the product you see in mind
when you are designing. The palettes we use with ink
are something like this. With wells because we
want to dip our brush, and we're going to be dropping
some ink in here just so, you know, you can easily rinse out your brushes, you know,
when you are working. But if you let the palette dry like this, this is
what ink will do. You cannot wash it away. I was just reading up on it, and it seems like you can
use alcohol to clean ink, but I haven't tried it yet, so it's a good practice,
you know, to, of course, keep your brushes as
clean as possible and to clean out your palette
after you are done. Heating. Also, you know, I use this little cosmetic jar for black ink because,
you know, I use so much. I just close it, so I don't have to wash it
every single time. A, old cosmetic jar
you might have. And none of these
brushes are expensive. These are all very, very
budget friendly options. So we have here mi, which is the gouache
brand that I will show you. This
is a size nine. But sizes vary greatly
among di brands. And, you know, in
a different brand, this could be a size
12 or size ten, so don't get too caught
up with brush sizes. It's just like big
medium and small brush. Then Royal and Nickel is another brand that
I have quite a lot of. Then creative mark,
these are new brushes. This was a big set
that I bought, so I'm going to use quite a few of these. These
are very nice. I have a couple of those
Princeton brushes, Princeton select
pointed Filbert, and this is Prince
and select Filbert. There is simply Simons, which is half an
inch square brush another Princeton brush. Again, you don't have to go
crazy with brushes for ink. They can be very, affordable. I like to have brushes
that are longer. See? You compare these too. See this one's short
and this one's long. And they will give
you a different mark. And it's a great
idea to, you know, before you embark on
painting your final design, play with your brushes and see what kind of marks they make. And, you know, it's
good to warm up also before you start painting
your main design so you get a little bit loose
and relaxed and you don't stress out so much
about your painting. And this is what we
are going to do. We are going to test out our brush shapes and see
what they do for us. Just some general notes on
art materials and brush care. Keep your containers closed as much as possible as
you're painting, and if you're only
painting in one color, it is possible to dip your brush directly
in this little jar. But then, you know, close it. Don't keep them
open for too long because it will ruin
your art materials. And as for the brush,
so let's do this. I wet it a little bit, just so it takes good shape, and then I wipe it like
this on the edge of my cup, and then I dip it into ink, and I can do this
again and, you know, say you painted something, you, you know, played
with your brush. See, this is too dry.
This needs a little more. Either more water or more ink. And say, you know,
we've painted a design, we did something, and now we want to clean our
brush. We do this. You can dab it lightly
on the bottom, as well to make sure you
get all the pigment out. We do this again,
and then we clean it on and try to never leave
your brushes like this, no matter what
medium you're using, but particularly
acrylics, they will dry. Acrylic inks will dry. Acrylic brushes will dry. So don't leave your brushes
like this wet and dirty. Of course, it can happen
sometimes. Try not to do this. This is good practice to
keep your brushes clean, rinse them well, pad them dry. And there is still
a little pigment that means that I didn't
wash it well enough, so I'm going to do more. Okay, so it's clean now, and I can live it like this
until I need it next time. Start playing with the brushes, and I'm going to use
black ink at first. An important note
on ink is that it does get separated if you
don't use it for a long time, so you need to give
it a very good mix. It takes some time, so you might even need to do it
over a few days. For example. Yesterday,
I knew I was going to paint and I haven't
used them for a while. So I gave my inks a good shake, a good stir so that the liquid
combines with the pigment. And then using the dropper, I will add some ink in my little improvised Well,
reduce reuse recycle. Be careful because it is
very hard to wash out. Try not to get it on your clothing or any
nearby furniture. You can use one of
the Brush rests. You don't have to, but you can. They look Neat,
right? So let's start with round brushes and see
what we can do with them. I'm going to start
with this smaller one. See, some of them
are more pointy, some of them are blunt and rounded, and
they're all handy. I definitely think it's great to have at least one brush with a really good pointed tip because then you can
do stuff like this. Like I said, round brushes
are the most universal. You don't really need to
have a Filbert brush. Round brush can do
the job as well, but it will take, you know,
two strokes instead of one. So let's start with this small
one and see what it does. Like I said, you can
go straight into ink. You don't have to use water, but I will use a
little bit of water just so my brush has a nice tip. And see how saturated
it is, how dark it is, and play with the
pressure, you know, see what you can do when you press against
the paper more. Now I need more.
So I dip it again. You can do things like that. Isn't particularly
a great brush seed. Doesn't have a lot
of body to it. It's a fairly thin brush, so it doesn't do much. But you can draw nice lines
with this round brush. And this one is royal
nickel from a cheap, cheap set, you know, with inks, you can really use really
affordable brushes. So you can do things like polka dots with
this sort of brush. And you can color it in. And you don't have to wash
your brush too much, right? Because you're working
with a solid color. You can do little hearts. Colour it in. If I feel
that my brush is going dry, I add more ink to it. Now let's try a bigger brush. So I do not use
this one anymore, so I'm going to
rinse it out well, pad a little bit on the
bottom, brush it off, and I can put this brush on the table and not worry
about it for some time. It's also good to
dry it a little bit. Now let's see what the
big brush does, right? Let's go to town with
this giant brush. I'm going to wet it a
little bit, add it dry. This is a little too small for this brush, but I think
we'll make it work. See, you can make beautiful organic shapes with this brush. It has a very nice tip here, so we can create flower
silhouettes and whatnot. So just play with your
brush and experiment. You know, what kind
of marks can it make? You can make simple
leaves like this.
5. Lesson 5 - Ink solids - zebra pattern : Using black ink is a great opportunity to
paint a zebra print. So I just Google Zebra to look at the way patterns
look on the zebra, and we can decide
if we want them to go diagonally or horizontally, and we can play and experiment and then see what looks
better and choose. So, see, sometimes they join with stripes
and sometimes they sort of go parallel and we can make them
thicker and thinner. We striving to have some variation in our stripes,
size, scale variation. And I'm doing this by switching up the pressure that
I'm applying to paper. And some of them have
to join something like this and maybe
a new stripe and sometimes they don't touch I sometimes take the sheets out of the notebook like this. Sometimes they just fall out, but also eventually I
will be scanning them, so it's great to have
them flat like this. See, my paper started warping a little bit because it's
wet, but it's okay. It's thick enough, so
nothing bad will happen. And see, I joined my
stripes over here, so I want to join them
over here as well. We're sort of working
diagonally like this. I'm not worrying about
my repeat for now. I'm just painting what
is called a croque, a less known term in textiles. I learned that in college. Croque is basically repeat
that has not been joined yet, though, it's, you know,
your sheet of paper, your tile, before you have
digitally fixed edges, so they line up. I hope
you know what I mean. So this is not a
repeating pattern yet. It's a croque. It's an idea
of a repeating pattern. So what do you think?
Maybe, you know, we could have thicker
white stripes because pretty much here I made all my black stripes thick and the white stripes in
between are very thin. Maybe I could have some
variation in that. Now looking at the negative
shapes at the white shapes. And we will be able to
change our color, you know, when we take it to Photoshop or this is a very good
candidate for vector. We will be able to move
these shapes as well. So this is pretty much a future repeating
pattern, just like that. So we can later turn these
into a vector design, and here are some designs that I created in a similar way. This was also painted in ink. This was also painted with
blank ink on white paper, and then I digitally change
the background color. See how simple it is. But what is important
here is learn to see the beauty of shapes,
lines, and silhouettes. Not every line is created equal, so it's good to relax
your let it go and just, you know, play with the pressure
you apply on the paper, you have some nice,
relaxed flowing shapes. Wanted to show you
how fast it dries. See, it's almost dry already. The paper absorbs ink very quickly quicker than
it does watercolor. There's a lot of pigment
in there, a lot of color.
6. Lesson 6 - Ink: camouflage pattern: Of course, we do not have
to only use blecking and we are going to paint a
camouflage or a camo for short, using several ink colors. So if you look at these
images, of course, we don't want to copy
anybody's work too closely. But this is such a
generic pattern. And, you know, if
we look closely, you see the idea is having,
you know, one, two, three, four colors, three, four, five colors of the same hue
in these abstract shapes. So that's exactly what
we're going to do now. You don't have to
only use black ink. You can use colored ink, and you can mix the
colors as well. You don't have to
always use them as is. So I'm thinking of painting a camouflage and I think this color is
probably a little too much. Let's see what we can do here. I'm going to drop
a little bit here. A little goes a long way
because ink is so pigmented, and we can also add water, and I probably need to change my water because it's
very dirty already. It's good to have
clean water handy. So some people keep two
water jars at their desk. This sap green permanent. These inks come in
sets sometimes, and you can also buy
them separately. But don't plunge into buying everything until you realize, yes, I really do want to
paint with ink quite a lot. You don't have to
have all colors. Although I'm definitely
guilty of that because I like colors
and art supplies. Parent burnt umber,
a very dark color, and I shouldn't have added that much. Let's
see what happens. This is Royal and Nickel
Zen number six round brush. At first, you know,
this is a scrap paper. I want to see what
colors they give me. You know, This is definitely
a little too crazy. So I want to see which
colors I need to mix up. I think I need some kind of
yellow maybe to lighten this. And what I'm going to do is make a darker
green over here. Yeah, that's what
I'm talking about. So this is a mix of
sub green and amber, and I need a lighter
green as well. So I'm going to use Sienna to
lighten my asy green color. You can also lighten
the ink color. If you are happy with the hue, you can just add clear water to it to make it
more transparent. So I think that's what I'm
going to do add water here. This is becoming lighter. And I think this is still
a little bit too green. I could either add
a blue in here or maybe a little bit of
umber, but not too much. An important thing is to
remember which is which, right? This is my amber, the
super dark color. So what if I do this? Yeah, I think that's
a good color. So I'm going to use
probably this one, this one and this one. But let look at our
reference again. So, there seems to always
be a black in there, right? Or, like, a deep dark color. Well, see, we can play, right, and see what happens. So I will start with painting
my lightest color shapes, and the shapes are pretty
chaotic, you know, so we can do these sort
of abstract clouds. I'm still trying to keep
my shapes pretty solid. I don't want to go too
watercolory at this point. See, I'm running out of ink, so I will need to mix more. It's good to premix your colors and make sure you have
enough, you know, once you realize
the color recipe, so I'm going to
need more, I think. Now I don't want my
colors to bleed together, so I will wait
until this is dry, and then I will start
painting the darker shapes. Okay, now this is completely dry and I want to use my medium, you know, my mid tone color, which I think is this one. That's why I have
this paper in here. Yeah, I think that's the one. I could even a
little bit of water. It doesn't have to be this dark. So I will start filling
in some shapes. And they can be quite abstract. I'm running out of ink. Yet again, let me mix
up some more colors. Painting in between. Don't forget to
watch your variety. We don't want everything
the same shape, the same size, you
know, the same length. And now I'm kind of thinking
of what's left here. These shapes will be dark. And maybe I even need to add
more yellow shapes as well. And again, we can change these colors later
on the computer. The most important thing here is the shapes themselves
and, you know, different color
blocks that we can later on select in
Photoshop or Illustrator. And recolor. If you don't feel confident
about your shapes, bring up some references
again and look. So see. Which one do you like? I think this is a little
too ditzy because all the shapes are about
the same size and weight. These are a little better. But again, it's whatever effect you're going for,
whatever you would like. And later on, we can recolor it even into pink if we want. You can also paint a couple
loose shapes over here so you can easily select them later and move
them in Photoshop. Again, I'm going to
wait until this dries. Maybe I want to make this
a little bit darker. And then I will add the
darkest color, the third one. And I think maybe I'll
mix up a little bit more yellow and add in
a few light spots here. But even from here, you can already create
a textile design. Maybe we need to
fill in these spots. Okay. And remember, I added a little water to make
this slightly less saturated and see
how it will behave. We need more yellow. Oh, I accidentally I
added the wrong color. I added green instead
of sea and a yellow. Yeah, now it's, like,
very, very spring green. And we want to have a little bit more
yellow at this point. Something like this. So
maybe a spot in here. And this is a good exercise in seeing shapes and deciding, you know, whether I
want to, you know, I'm looking at this spot. Now, I'm looking at
this negative shape, and how do I want to fill it? You know, Where do
I want to add more? Light. And again, this is not the final version
of the pattern. We are playing and
experimenting and, you know, getting acquainted
with the brush and getting acquainted with ink as our art medium.
Something like this. And then, again, when
this is completely dry, I will add my darkest color. I was going to say this
is a little too big, but actually, it's fine. I think it's fine. My pattern is drying. I wanted to show you that
alternatively, of course, if you're freaking out about painting freehand
without a sketch, nobody prevents you
from making a sketch first if you would
like using a pencil. This is a mechanical pencil, so it doesn't really
matter not too thick, not too bold, right? Just sketch out your shapes. And maybe it's easier than
you can paint them out. But I encourage you
to paint freehand as well because there is
certain looseness to it. There are certain freedom to this free hand
method of painting. But as our first
artwork is drying, let's create another
alternative one, pay attention to how the
shapes relate to each other, how they connect, right? And you can fill
them in as well. You can even, drop
your shape here. In Photoshop, we
can later on grab another full shape and just mirror it over
here and continue it. So it's no big deal. Don't let the paper limits,
constrict your creativity. It's good to train yourself to see interesting shapes,
interesting spots. And we can maybe use
black on this one. Or we could later on paint these same colors and use
them in the same design. But I think this will be
enough for one pattern. So we could play and maybe
add black to it or whatnot. So, again, I have
water on my brush, and I will start by using
the lightest color first. See, when you are using pencil, which is not a crime at all, you will see the line in here, and that could also be
a part of your design. And also alternatively, there are ways to
remove this line. It is, of course, extra work, so why use the pencil? I'm saying, you know,
you don't have to. But again, whatever feels
comfortable for you, no one I remember I went to a painting workshop last year and the teacher said, No one can tell you how to
express your creativity. I was asking him something about painting
bigger or smaller. I'm like, What's the right size? And very often at
classes and demos, students get too caught
up in materials. You know, What is the
exact name of this brush. What is the exact
number of this brush? What is the exact
name of this paint? It doesn't matter that much. What matters is, is it a cool color or is
it a warm color? Is the brush large,
medium or small? And then I'm talking, and I'm trying to
think, you know, am I doing this
right, or I think I need some of this
yellow in here, as well, for good balance. Happens, you know,
alternatively, again, if we don't
wait for this to dry. Are you curious?
I'm super curious. Let's just jump in
and see the ink. See, it flows, but it doesn't flow as quickly as watercolor. So for this purpose, you know, my plan was to
create solid shapes. I did not want to have
any of this bleeding, but it is an artistic choice, and you definitely could
have some bleeding. It's always an option
with fluid media. See, I'm kind of making up
shapes as I go as well. I encourage you to lean
into the properties of ink. Trust your brushes. See, we almost got
the same color. Not good, but we can
fix it in Photoshop. What happens if I just, you know, use ink with a
little bit more water? See? So I have the same hue, but a more transparent shape. That's also an option. And we're still using
the round brush. And now could use brown or it could use black.
What do you think? Maybe let's use black. I will borrow some of my black
from this little Jar? Ready? Let's go.
The darkest color. Does it look like camouflage
to you? Does to me. All painting, every kind of
painting is about shapes, shapes, lines, and values, which means dark and light. Painting with super dark ink is satisfying for some
reason, isn't it? Don't be afraid to
ruin something. Don't be afraid to mar paper. Don't let that stop you
from being creative. We compare these two. See the line is here, and I don't think I like
this bleeding, actually. I think I'm going to
stick with this one, but it's a good experiment, too, and we can use these shapes
till we can scan them. And if there's not
enough in this croquet, I can use this one as an
additional one, as well. Now I have to decide which
color I'm going to use, and I thought I was going
to use a super dark one. But actually, this one
is pretty dark already. So maybe I need some kind of
mid tone to go with this. Let's do some color
experimentation. And if I were to use a mid tone, what
color would that be? What if I take this yellow and add it over here and
add some water as well, because ink is very pigmented, so you can dilute
it pretty well. I think this will be a good one, maybe a little more water, maybe even a little lighter, I'll add a little
yellow as well. I'm using sienna instead of
cadmium yellow or, like, a regular yellow color
because it makes it a little more natural,
more earth tone. I don't want my colors
to be too punchy. I want them a little
more natural. Let's continue playing
with color and finding the right hue
a little more water. If I feel this is too
dark for me here, I can transfer some
of the color into a different well over here
and keep adding water. And maybe knowing that
I will run out quickly, I will premix a little more. I could also add
in a little bit of blue to make a hue variation as opposed to having
everything of the same warm green, yellow. But I think it's
okay. Like I said, it doesn't have to
be my final color. I can change the color
on the computer. I'm more concerned
with shapes right now. I want to have good
edges, good shapes, solid shapes, so I'm avoiding
to use too much water. This big blob over here. Make sure you're happy
with the edge here. See, I made this
edge a little shaky. While this is wet, you can fix it a little bit when this dries. And it dries very quickly. See, we're going to Keep going. A few more shapes. Well, I honestly expected
this to take a lot less time. And I always give
myself extra time. I don't expect to sit down and paint
everything in one go. I make several sheets like this, and then I can choose
what works better. I can repeat something again. But textile design gives you opportunity to manipulate
shapes on the computer, so don't be too concerned with making everything
super perfect. You know, I think
this is good enough. I think this is good
enough for my camel.
7. Lesson 7 - Ink: leopard with filbert brush: A I want to show you one of my favorite
kinds of brushes which are called Filbert brushes that have this characteristic
oval shape. Sometimes they are
also called oval wash. So they are great
whenever you do not need a pointy tip like this. It's good to have
both options, right? Sometimes you do need a
really sharp thin line, and sometimes you
don't when you are painting something
blunt and organic. So these are some
Princeton brushes, Princeton select
Filbert number two, Princeton select
Filbert number 12, HimiGu brush number eight. Filbert. It doesn't say here, but
it is a Filbert shape. And polar flow half an inch
overwash by creative mark. So let's see what
they can give us, what we can do with
these brushes. This is a brand new baby.
Let's put it to work. I'm wetting my brush, and I will dip it
into my black ink. So this isn't
particularly great paper. Please don't pay
attention to it. This is my scrap paper
that I'm just using, you know, to test
out the brush marks. So Filbert brushes are
great for making petals, flowers, things like that. You can also tilt it to the
side and use it like this. So it's really great for painting organic
botanical shapes. You can do different spots
like this and textures. You can play whether
you paint in this direction or in
this direction, right? And you can make lines
when you tilt it to the side. Really, really fun. It's great to make daisies
with filbert brushes. So give it a go, you know, test your filbert brushes
and see what they can do. And now you can probably notice I have some
leopard prints over here, so that's exactly what we
are going to be doing. We're going to use this fashion
catalog as our reference. This is by Boden, which is a British brand, famous for their bold
hand painted prints. This catalog is approximately
August or September 2023. And of course, we have to be very
respectful of copyright, and we're not going
to copy any exactly, but you probably already
know it, right, this mantra. You don't want anybody
copying your designs, right? So we are not going to
copy too closely, either. We're just going to
take inspiration. And, you know, leopard
print is pretty generic. It's pretty abstract. You know, it comes from animal skin, and we're going to look
at animals as well. So leopard spots give us variation in terms of the
shapes and the spacing. Here is one version, and I'm actually going
to cut them out. Here is a bag with
leopard print. So you normally get
these catalogs. If you buy clothes
from different brands, sometimes you go
to their stores. They might have free catalogs. You can also subscribe
on websites. There is an option for
some companies to, you know, opt in for
a paper catalog. Or I bet you could call customer service
and say, you know, can I receive a paper catalog?
You don't have to do it. You know, if you are
environmentally conscious, you can always look online
and create Pinterest boards, you know, and screenshots. But sometimes it's fun to
hold something in your hands. And these are some of my
patterns that I made previously. See how many
variations are here. It's the same leopard
pattern, right? But we can choose what we
create in dark colors. We can choose where
we use black, how much spacing we have
in between the spots. Look at this little fun leopard
pocket and leopard pins, another two collar leopard
print over here and a bag. You know, Leopard can
be very sophisticated. It can be pretty much any color. You can make pink leopard,
if you would like. And even, you know, seemingly the same, look at these three. They all stem from
the same source, probably, but they do
look visually different. As you can see,
spots can be really, really spaced out like this, or they can be really dense. Like, these guys over here
here is kind of, you know, medium spacing, and you
can only have two colors, the background and the leopard. So there are options, right? I'm going to use the
same exact paper that I was using in the
previous sections, and now I just have to decide, you know, what colors
I'm going to use. I think I'm going to use and we could start with
something like this, really one color spot and experiment and see
where it takes us. I'm going to take this Himi
number eight Filbert brush, make it a little wet by
dipping it into water first, and then dip it into black ink. My paper towel is always near. Okay, let's do this. I'm
looking at this reference. I hope you can see it. Well, I forgot to look
at Mr. Leopard himself. Let's do this now.
See, there are also variations in animal
skin patterns. For example, cheetah is
just this dotted pattern, and then we have
variations of leopard, and we could also try
that. So let's go. See, my brush is
creating a little bit of texture because
it's teased like that. And also, see how it kind of
goes around a center, right? I'm rotating my brush
to get some variation. And I can join some of the spots and leave some of
the spots unjoined. See, there are smaller
spots in between. Also, just like
single brush strokes. As long as it still
resembles leopards, it is an abstract print, but it still has to
be recognizable. See how everything is kind
of going at the same angle? I could also rotate
my paper and do this. Just remember not
to touch it with your hand because
you will get dirty. It's kind of starting
to look like flowers, maybe because I paint
a lot of flowers. Time to go back to reference, and maybe I'm making
too many marks. They look like
petals. See sometimes there are only two shapes. There are three shapes in there. So we just pay attention
to the shapes, right? Making it more abstract, and you can definitely
move it, you know, later on in Photoshop
and you can recolor it kind of letting the
brush do the work for you. I think it works, right? We
could also try, you know, doing a little cheetah print
like this to have some fun. This is always a popular
print with fashion brands. I would say Leopard is
already a classic, you know, I used to have this bad
reputation of cheap and gaudy, but like I said, it can
be very sophisticated. We are kind of going to have several prints
on one sheet, right? These are two
different patterns. And honestly, the possibilities with ink spots are endless. Abstract designs. I've made
quite a few abstract designs. Something like this.
You could also take a smaller brush, right? Or a bigger one,
if you would like. Because, of course,
the same brush kind of gives us the same size
of the brush stroke. What if I take
this baby Filbert? Well, it's definitely
very small. I'm not going to
go crazy with it, but I'll make a couple marks. Always, you know, remember,
whatever you are doing, if you're painting something
organic and natural, remember to keep some variation
in there some variety. So it looks more natural. You know, nothing is super
symmetrical in nature. Even if it looks so, it's still very organic. Something as simple as this, you could also easily
modify on the computer. I would probably turn
this into a vector, and then you can
easily add, you know, lighter spots in the middle, something like this, right? Or even if it's in
photoshop still, you can draw very simple shapes and fill them with
a solid color. Now let's create a two
colour leopard print, something more like
this and like this. We have to decide which
color we want to use, and you can always add
a digital background. There is no need to paint
the background right now. It doesn't really
matter, honestly, which color you choose, because you can very easily
change it digitally. But still, you know, to
put you in the mood, whatever you feel like, take some kind of neutral brown. How about we mix raw siana and a little bit of burnt amber? Give them a shake and I
will just add a drop, so it's a little bit darker, you know, I don't want
it to go too dark. Now I need to decide
which brush to use. Of course, you can use, you know, a round brush
to paint Leopard. You don't have to use a Filbert. But I think Filbert just works better for this
purpose. Let's give it a try. Let's try the round
brush as well, and see where it takes us. Mix up our color. So what I'm going to do now is I will paint the
centers in yellow, and then I will paint
the black spots around. Very generic, very
simple shapes. With a round brush
this time, right? See how every brush gives
you a different brush mark, and that's why
they're fun, right? It still looks a
little bit different. And you can use whichever brush
serves your purpose best. Let's try and maybe make this one a little
more spaced out, not so dense as
the previous one. You can also move your
shapes digitally, you know, once you
are done painting. Things like this, honestly, you can take five, six, ten sheets of paper and
just paint and experiment and then see what works
best, what looks best. I keep coming back to the
references and so there is a good balance of
space around the shapes. But I want to make
mine a little more spaced out than this one,
kind of more like this. Also, it's good to break
up the pattern, so to say. What I mean is, see, again, I'm making these sort
of evenly spaced, so maybe I'll add a little
closer to the other one. A baby leopard spot and make some of them
bigger, too, right? Well I'm making these
sort of the same size, space at the same distance. And you don't have to paint large sheets because we will
be reflecting these shapes. We'll be rotating
them, moving them, so you don't really
need to paint, you know, a giant
wallpaper size. You can if you want to. But I think work smarter, not harder and don't give yourself more work
than you need to. Now I want these to dry, I'm going to let them
dry for a few minutes. This is finally dry. Took longer than I expected. It depends on humidity as well. It depends on the temperature. See, we got different
shades of yellow here, and when this is completely
done on the computer, we can decide if we want to keep this sort of watercolory, then we would keep it
in raster in Photoshop. Or we could turn them
all into vector, and it would just be one
yellow in illustrator or it could also be a vector design with
different shades of yellow. All right, so I'm going
to use this brush. It's called Princeton
Select Oval mop, another name for a Filbert, and the size is quarter an inch. Take my black ink, wet the brush a bit, and we're going to start painting the shapes
around the centers. Looking at my references, right? Now, this looks
like leper, right? Okay, I can even look at
my own design over here. Just go easy, you know, easy. Don't take it too seriously. This is a very simple abstract
design. Time to play. Remember to make variation in size and rotate the brush slightly so you get
a different angle. Join some of the shapes and keep some of the shapes
separate as well. We could even throw in a few loose black
shapes in between. Y Just remember to keep your lines pretty. Don't make them flat,
like I just did. Not like this. This
is not good, right? Pay attention to
the silhouettes. It's better to
underdo than overdo. It's better to stop a little bit sooner than when
you think you're done. Join some of the shapes. We goot this little guy. Maybe we could even have
a little black spot without the yellow in here. We'll see how it looks. I think it looks a little
random, right? Do you agree? But it's okay, you know,
that's why we have photoshop. Almost done. You can also cover some of
the yellow, right? You don't have to preserve it. You can go over yellow. And later on, when it's vector, it will be very easy
to change the color. This truly is a very
universal design. And then, you know, this
can be scaled down, so you really have a
dits leopard print. I'm kind of concerned with
this little random guy. Maybe I'll add more shapes. And I can always take them out if I don't like them eventually. Alright, I think
we're done here. So these are our
animal skins here. So I want to show
you a little trick. If this isn't dry yet,
and this is a clean, solid color, you can put
it back into your bottle, so you can save a little ink, make sure the dropper is empty, push here, squeeze, and just suck it all in
and put it back. Art materials are
expensive, right? So we want to save where we can and wipe the palette right
away so it doesn't dry. And clean your workspace
before it dries, too. And
8. Lesson 8 - Ink: stripes w square brush: O, We on working with square brushes. We're going to do
a different design or maybe a few
different designs. And I changed my water. I have clean water now, and I'll show you how you
can clean your palette. Of course, you can just take it to the sink and rinse it out. Quick way, you know,
if this is almost dry, you can just do this. See, it's already
starting to dry and it's already a little bit difficult
to get it out of here. And there's still a
lot of ink in here, and I might use it, so I'm
not going to clean those. See it's already dry, be careful. Don't turn it over. We're going to use this
beautiful ultramarine blue, Amsterdam ink, and we're
going to be painting stripes. Don't forget to shake
your ink beforehand. Preferably a little
earlier because it gets a little bubbly in
other air bubbles, but it's still fine to use. A little bit more. And I can add some water to it because I don't need this
extra saturation, I think. I'm still using the
same kind of paper, you know, the sketchbook. And here are my square brushes. Simply Simmons, one
stroke, long, right? Plat long. Interesting.
Maybe it's a different language
or something. Himi number six, and polar flow, creative mark, one
quarter of an inch. But again, doesn't matter
that much, you guys, as long as you have the size
and the shape you need. And of course, you can go even
bigger. Look at this guy. Premier amethyst size 12. So, what are we gonna do? Go big or go home, right? We're going to paint. A classic design. Nothing more classic
than a blue stripe. Relax your hand.
Have fun with it. There you go. There's
already a textile design. So when you're painting stripes, try to make this straight here because this is where
your repeat will be joining, and there will be
a bump in here. But again, no big deal. It's very easy to fix. You can make uniform
stripes or you can maybe make variegating
stripes, larger ones, right? But I feel like whatever you paint in one stroke
looks better. So I would suggest
if you're going for a thick stripe,
that was not good. Just get a bigger brush if you need, you know, bigger stripe. But it's not
impossible, of course. So that's how we
use Square brushes. And you can finish up painting. You know, I don't
like to waste paper. I will just finish my sheet. With stripes, and then I can choose whichever work for me. I don't think I'm going to use this one because it's so curved. You can play and see what else you can do with
a brush like this. Even from one stripe, you can create a textile design because you will
be repeating it. You don't need to paint
12 stripes, right? Maybe three is enough. It's just, you
know, to have fun, to relax your hand, and to have some
interesting variety. And maybe you notice that I
rotate several notebooks, I rotate several papers while one project is drying and
working on the next one. Just, you know, a
helpful time organizing, tip, optimizing.
9. Lesson 9 - Ink: Square brush plaid: I'm planning to paint a plaid. But first, I want to see which brush works
better for this task. I'm going to use
this leftover color. So maybe that's a
little too thin for me. This is the way this brush makes a mark,
and I'll try this one. Maybe it'll work
better for me, Amy. Yeah, I think that's the one. Yeah. I like the
thickness of it. It's also a little
bit more springy. This one's very soft. See. And this one has
more spring to it. So let me mix up my
colors to use red. So I already put in
some red ink over here. I think this is a
little bit too warm. So I'm gonna see. What happens if I drop a
little quinacridoma get? Let's test it out,
mix it up well, add a little bit of water. Yeah, I think that's
exactly what I wanted. So I'm going to paint a
primary colored clad. Ooh. Exciting. So
I'm going to reuse my sienna that I had from
the previous project. I'm going to use this red mix
and the ultramarine blue. And I need to make sure
my brush is clean. So what you're not seeing
is I'm doing this. Take my paper towel,
dry my brush. So I think we can
add a little water over here as well, clean water. You can also use, you know, as long as your water is clean, you can use a dropper,
something like this. My water is already
a little bit pink, so it's not ideal, but normally you
take a little water and you can add it
to your palette. You can buy these, you know, on Amazon or wherever.
They're very cheap. So now I want to paint a plaid using three colors and my
medium sized square brush, Himi number six,
a gouache brush. So what I just did,
I went for it. I was like, Oh ho, I'm painting. A plaid. But the mistake
I made here, see? If it's a stripe, it's not a problem that the distance
is different here. But because I will
be painting over, we want them to be
roughly symmetrical. We don't have to go crazy, but we would like them to
be more or less precise. So I will use these little
squares as a benchmark, right, or as a starting point. And I know I will
have three colors. So very roughly. I don't even know if I'm using
the square holes anymore. I need to make sure, you know, they are roughly the same. I don't want to have
any pencil lines, either, so I will try
not to go too crazy. Use a ruler if you
want, and you don't have to paint the
entire sheet, either. You can do, you know, a
small section like this. I would just say,
make sure the size of your brush matches the size of the plaid you are aiming for. I added water to my sienna mix. Want to test the
color real quick. I think it'll be pretty. Relax your hand.
Don't freak out. It doesn't have to be perfect, and you don't even have to
go the entire sheet, right? I'm going to use a blue and red, so I will make some
space for those colors. As this is drying,
you can also rotate the paper and let the ink flow wherever you
want it to flow. I waited a little bit
too long to rotate it. So it doesn't look that good, but if you do it quickly enough, it can be really pretty. And if you are getting
something like this, just spread it with
a clean wet brush. So this is almost dry, not yet, but almost it's
been a couple minutes. See? This is still a little wet. I'm going to be careful
and just try to give myself the same pointers
like I did here. I think I can start
painting carefully. Some edges are
still not dry yet. Maybe I should just wait. And as I'm sitting here, I'm contemplating
whether I should now paint my blue and
red horizontally, or I should instead paint
my sienna vertically. And I think I'm
actually doing letter. Though, this, I
think is dry now, and we can start painting. My brush, the same
brush just clean. And I will rotate my paper and make sure you don't
smudge your stripes, but I think this is dry now, so we are pretty much safe. And again, this doesn't
have to be perfect. Don't worry about it. It
just has to be good enough. So maybe I'll start
from the edge, and I'm actually kind
of ruining my surface, but that's okay.
I'll clean it later. So red, blue, it's better not to
go over again because see, I did it here and it
blended the two colors, but we do want to see some
variety over here. Clean this. Red, blue? Red blue. Even if you get a good section as big as this,
that's good enough. So don't freak out, please. I promise it'll be
okay. Red blue. Maybe when this is dry, again, we can go in and reinforce
these overlapping squares. Maybe not. We'll
see. I don't want to have extra bleeding
that I did not want. Let's let this dry. Okay. So this is dry now. It's been about
five or 7 minutes. And some people also keep a small hair dryer
in their studio. If you are not patient enough, you can dry a painting. But I just let things
happen naturally. So I'm going to paint
red stripes now, wet my brush a little bit dry on the paper towel slightly
and dip it into red ink, which started drying
a little bit already. And carefully, I will be painting under the
yellow stripes. This is quite saturated. Maybe we could use a little
bit more water just a bit. And under the second stripe, well, see, it started
warping a little bit. But that's okay.
Remember, we can crop things in photoshop, we can alter what is
not working for us. Yeah, but try not
to do this like me. Now, let's wait for
the red to dry. Now that it's dry, almost, it's a little bit wet here, but I'll start painting here. I'm honestly almost ready
to take out my hair dryer. You have to be patient,
otherwise, it's not gonna work. So I will paint the red
stripes in this direction now. So all we have to
do now is wait for this to dry and paint
the blue stripes. Alrighty. The final stage
rinse our brush well, and we're going to
paint the blue stripes. We could probably
add a little water because this is going
dry a little bit. See what happens. Definitely need a
little bit more water. Otherwise, it's too dark. Trying to keep my
edges straight, but it's not always working out. I think I started getting a
little bit nervous, you know, it's not turning out quite as perfect as I wanted it to be. And the last thing
we have to do is to paint our blue stripes vertically once this
is completely dry. Oops, look, I dropped a
little bit of water here, so it might start blooming. While it's not too late, I'll grab my paper
towel and just very gently try to pat the water dry. Our final step. This is almost dry, and we have to paint this
third stripe in blue. This turned out a little bit
more watery than I expected. I think I need to add a little bit more ink
just a drop. Maybe two. And I just want to test and
make sure it's not too dark. No, that's fine. And we're going underneath this
yellow stripe in here. I know it doesn't
look perfect at all, and sometimes I
start freaking out, but we need to learn to
embrace imperfections, but I want to keep
this edge here, because otherwise, see it's
like I added another stripe. Okay. I think we're done here. Colorful stripe in
primary colors in here. And as you see, when it dries, it becomes a little
lighter so we can see other hues a
little bit better. And of course, you don't have
to use these three colors. You can use other
colors as well. The most important thing in this sort of
design is letting the stripes dry in between and also trying
to keep them straight.
10. Lesson 10- Washy ink, monochrome painterly paisleys: Y, In the previous lesson, we used ink for painting
solid opaque shapes. But since ink is a fluid medium, we can also vary the
amount of water we use to create designs that
look like watercolor. I'm going to use
clothing catalogs as references to paint
a washy inky design. Like I mentioned before, it
is very important to respect copyright when
taking inspiration from different visual sources. We can't copy the design
exactly or too closely. So it's a good
practice to combine several reference sources in order to create a
new unique design. Want to paint a
monochrome ink design with some hue gradations. So as references, I'll use my own artwork that I created during last year's
100 day project. Plus, I'll use a
textile book called 1,000 Patterns edited
by DrusillaKle, which has a great collection
of historic textiles. I will be looking
at Indian fabrics to paint a paisley design, which is more correctly
called Bota or Buta. You can find some
information on. Right over here.
This is page 72, if you happen to have this book. It started being called Paisley
after English factory in the city called Paisley started creating similar fabrics
and the name stuck. So here we can look at
some layout options and also I'm going to use
some fashion catalogs. This one is by
Talbots and see there are different things that
we can do with a paisley. Paisley is a shape, right? So, this one looks like ecote an imitation of
a woven technique. There is a more modern
paisley over here as well. Solid paisley right over here. I don't think I'm
going this way. And there is one the
catalog just arrived today. It's by Garden Hill, so it's a very modernized
painterly paisley. And I think I'm going to
do something like this. So what we're paying attention to over here is what happens, you know, inside
those paisley shapes and what happens around them? What kind of filler motifs
are we going to use? And looking at all these
references and combining them, I'm going to make some sketches because I'm not ready
to jump in right now. Using my sketchbook
and a pencil, I need to decide which
direction I want to go. I already know it's going to be monochrome and
painterly like this, and I will choose a beautiful
color, possibly this one. These all are monochrome. So there are two colors
of ink over here. This is one ink color. And see, I'm varying the
amount of water over here. Same here. It's the same ink. Two colors ink here, right? A cooler green and
a warmer green. But mostly the variation here is achieved by varying
the amount of water. And that's what I want
you to do as well. So we could go, you know, an overlapping paisley
design, something like this. You know, I'm just kind
of thinking out loud. I'm not, you know, ready
yet to commit to anything. Then we could do something
like this where they sort of go in two directions,
up and down. This can also be done in
Photoshop later on, right? We can flip our shapes.
This is not good, right? Exactly the same shape. So one of them has to rotate
a little bit more like this. This is a sketch,
so I'm not super concerned with what
is going on now. We could do this, you know, something simple, two or
maybe four directions. But I think since we're going
to use ink and a brush, I want to go this
really organic way. So something like this. Funny, I was thinking
something like this, and the catalog just
arrived this morning. And I previously did a
design with paisley in ink. I will include some
pictures to show you. So I think I'm going to
paint some paisly shapes rotated and there will be some flowers or
shapes in between. Right? So I'm not going to do
any overlapping like here. I think I will do this organic, flowy kind of design. And then I also need to decide what the shapes are
going to be made of, right? Do I want them to consist of
little flowers over here? Because that's also an option. Can look at my references again. Here they are solid shapes, but they just have little
decorative strokes around them. And very often
inside the paisley, we have this kind
of floral motif, so we need to decide what
we're going to do over here. And it's a combination
of slight pre planning, but also when you
start painting. You decide on the go what
you're going to paint, looking at some references
as well, right? So it could be some
kind of flowers. We could use a tulip
shaped flower, as well, another paisley. I could do, like, a solid line. The decoration could go outside. Or inside. That's
one option, right? That's another option. We could keep them
smooth over here. They could be made entirely out of flowers see
right over here. It's completely
stacked with flowers. That's also an option. We could also, you know, fill it with a color around. We could even have these
little flowers over here, but then we could have, like, a solid color around the shape. I hope you know what I mean. And I will let my brush also help me decide
what I want to do. And I'm not taking this
again, too seriously. Don't get too caught
up with, you know, what do I need to paint?
What kind of shapes. It depends, you know, how much pre planning you
would like to do. You can always change things
a little bit as you go. I don't know if I'm going
to use the solid color. So let's start painting,
I guess, right? I want to use bigger
sheet of paper, and I'm going to use my
bristol paper for this. So this size is 11 by 14. It still fits on my scanner, and I need to pick a color
of ink that I want to use. So I'm going to start
painting in a minute. All my references
are here near me. I might move them out of the frame because there's
not enough space. I want you to see me painting, but I will be looking at them. You know, I will be
looking at my sketch. I will be looking
at these shapes if I need some reference for, you know, what is inside,
the paisley shape. This is a reference for the inky washy effect
that I'm going for. Look, I also have this
beautiful dish that I think would be a good reference for the flowers
inside the paisley. I'll edit in as well. And I think this design requires
a little more structure, so I'm not going to jump
into painting right away. I will do some light sketching, you know, to help myself. I'm looking at the pencil sketch that I just
did a minute ago. It doesn't have to
be super precise, you know, just a
little guidance, so I know what I'm painting,
you know where I'm going. I think, you know, because they are so decorated and ornate, we need to go a
little bit bigger. That's why I took larger
paper and what kind of shape? Maybe in this direction. We need to paint
about five motifs. That should be enough
because we will be digitally manipulating
them and rotating them. But it's good to
have a couple extras because maybe I
screw up this form, the shape, then I
can take this one and use it a few more times. So I think this is about to
be exactly the same as this, so I'm going to erase this, and I want to tilt it
a little bit more. Don't be afraid to rotate
your paper if you need to. So I think I want to
go maybe like this. The pencil will be showing a
little bit through the ink. So try not to make
unnecessary lines, especially too thick lines. Don't press too much
against the paper. But it's okay. Even the
more I'm doing design, the more I kind of like
this raw handmade, hand painted hand drawn quality. So it's not necessarily a bad thing that
pencil is showing. I could jump in and
start painting or I could also plan what
will be inside here, and I have to decide
do I want to decorate them on the outside
or on the inside? I think it will be cute if
I do it on the outside. You could also add
an additional line inside and see where
that takes us. I think that's what I'm
going to do, actually. I will paint the lines first, and then I will decorate them
with a small filbert brush. Then maybe later on, I will start painting
in some shapes like these flowers or maybe
something like this. Oh, you could also attach this little flower at
the bottom, right? That's kind of cute.
What do you think? Like here. That's
an option as well. I'm going to use
these two brushes, a Himi number six
with a pointed tip, and a small Filbert brush
number two by Princeton. I think they should do
the job well for me. Well, see, I might need some
additional brushes as well. Shake my ink, and I'm going to use this
muted green color. It's really beautiful premixed. It was a set, you
know, liquitex. Four different muted inks. They all are really
beautiful. My palette. And I will be varying the amount of water I use
because that's the point. I got some clean
water over here, and I need to make room
for all my supplies. And I also need some
kind of scrap paper, so I cast, you know, whether the consistency
is good for me. Are you ready? So I'm wetting my brush, paper towel here as well. I will add a little bit of clean water to my
ink and mix it up. See what we have here, and I will start painting. I'm using the baby
Filbert brush now, testing the brush
mark before I go into my design. Let's see. I want to do
something like this. So I have to make sure I don't have too much ink on my brush. Otherwise, it will be a blob. It's okay, you know,
if it's not perfect, I'm not aiming for
perfection here, but still we don't want
it to be messy, either. I think one of the most
fun things about this is I don't know what
the final design will look like. I
think it's fun. You know, I can be
nerve wracking, but you never know where
the artwork will take you. Sometimes, and then
you're like, Whoa. How did this happen? But I think it's
part of the magic. I hope you agree. You
can also go, you know, smaller at the tip here
and larger over here. And, you know, as I'm painting, I'm always looking
at the entire shape. Don't be stuck
looking just here. See how each brush mark
reflects on your overall shape. Now, I think it's a good time to start thinking
what goes inside. It could be one of
these flowers here. You could again,
take your pencil and draw if you don't feel
confident jumping in. So there's very often
inside the pasty, there's, like, something
big over here. So we can start
drawing this flower. And it's very easy to overdo. You know, sometimes
you look at it and it seems very elaborate, but it's actually
not overloaded. Kind of like the leaf over here. And I like this little
cross of a flower. And then see this is
going to be so loaded, we have to see what
happens around. We could, again, paint it with a solid color around, right? But I don't think
I want to do this. It could have some
smaller flowers in here, something like this. A couple of leaves. And it
doesn't have to be perfect. That's part of the deal. I'll add some polka
dots in here. Now, let's use our brush magic. I'm going carefully
kind of slowly. I'm painting with just
the tip right now. Or once this is dry, we can also erase the pencil, but you have to really
make sure it's dry. Tulip like flowers, I could use a smaller
brush, honestly. This is a little bit too
big, but it's not bad. When you learn painting,
they usually tell you. Grab a bigger brush, you know, paint with
bigger brushes. I might lose some of
the detail, you know, that I drew over here, but I think it's okay. As long as you have some
interesting shapes in here, I'm squinting my
eye and looking. Do I have enough detail? Do I need more? Do
I like it overall? And I would have to repeat it again in these shapes
or we could have, for example, two
variations of the paisley. They don't have to
be all the same. Like in this design,
for example, see, we have one, two, three, four different
kinds of flowers. This is a modernized paisley. We could do this, as well. Or we could repeat
exactly the same motif. Something is missing.
I have to decide, you know, what is missing. Maybe some vertical lines because it's looking
kind of ditzy right now. Maybe I want to join
this a little bit, the stuff over here. It's very organic, so you can go however you want
to go about it. And I think I want to actually paint a
little bit around it. I'm going to use a more
transparent shade, test it out again. So I think I want
to go a little bit around because there's a
lot of white in there. And that's not exactly
how I want it to be. It's okay if some shapes touch, but again, I don't want them
to bleed too much either. I could also maybe use some
darker dots over here. Maybe some, not all of them, you know, not all the way, but maybe just on top.
I think I like this. So I'm going to paint
the other one now, taking my round brush again, rotating, and I'm going to do exactly the same
things that I did here. I think I do want to stick
with one design. Let's see. Relax your hand. Let me try. And paint the little thing with the same brush.
Will it work? It has a very pointy tip, so you can do some
detailing work with it just fine, as well. Paint this flower again. There's a little dot. Now that we have a plan, right now that we
have done this one, we can repeat what we just did. Or we could also draw
it with a pencil again. So there are a couple, like, tulipy flowers and
some leaves. And dots. And we are looking at
the balance of details, so everything is pretty much the same weight
and thickness now, so I'm adding something thinner. So we have an
interesting balance, but don't overdo it because
it will be too busy. I will let this dry
a little bit and paint with a lighter
ink around here. I think it's time
to start thinking what will be happening
over here, right? So while this is drying, I can paint this guy, as well. Going to do the same
thing that we just did. Maybe I want to try and
add a thin line inside it just with a tip or take a smaller brush if you don't
feel comfortable doing this. I'm looking at this, as well as I'm painting and thinking, you know, whether
anything needs to change. When you're painting,
you're always kind of moving your eyes
across your painting, comparing elements, and seeing
what needs to be fixed. Here, the flower goes
in this direction. And we need to paint the
decoration around the paisley. And when I'm not using
the other brush, I'm putting it in my brush rest because I'm not using
different colors. I'm only using the same ink, so I don't have to rinse
my brush that much. So I'm going to grab
the baby Filbert now and paint these
little dots around. As you're doing this,
watch how your curve goes. You know, I don't want
this to go too flat. So I can make these
a little bit longer. They almost turned into dots. We don't want things
looking strange either. We don't want to
have any, you know, nipples on our paisleys. I think actually these
dots work really well. Maybe a couple more
dots over here. Is that too much? We
can decide later on. We can decide once
we're in Photoshop. Alrighty. I think we
can start painting with a looser mix around
a little bit of water. So I want to leave a white line around the
inside of the paisley. But I'm okay if some things
bleed together in touch. Makes things look more
organic and more natural. All right. And we can
do the same here. Don't forget to add
a little water. It's good to learn to paint
with different values, right? So this is a lighter value now than the original ink
that we were using here. We have a lot more
water in this mix. So there are two more
guys to paint over here. Honestly, even these
three would be enough, but I don't like to waste paper. So since I started this, I'm going to finish them. I am going to pause my recording
as I paint them because, you know, I'm repeating
exactly the same steps. So I finished painting
my paisley shapes, and I would probably call this design kind a toss
because our shapes are toss, and I'm also going to
add flowers in between that are also going to be
tossed in different directions. So I was painting
the same flower, the same things, you
know, as in those, but I added this line
inside of the shape, and I also wanted to
repeat it over here. So these don't have the
other line inside the shape. So it's good to have some
variety and balance. And as we are going to paint the filler flowers
between the pasly shapes, I also don't want to
make them exactly the same as these because it
will be too repetitive. And we also have to be
mindful of the right? We don't want the
filler elements to overpower our main elements. The paisley should be
the center of interest. So this is slightly wet, so I'm going to be carefully
drawing in between. I'm thinking, you
know, since we had this almost daisy shape
as our focal flowers, maybe we could use a different floral shape for the fillers. And we are going to have a
lesson on flowers very soon, and we'll talk more
about flower shapes. But in general, it's good to pay attention that, you know, there are different
shapes of flowers, such as, you know, I don't know all the
botanical names. Clearly, there will be
something like this, something like this,
maybe you will have a little multiple
floral like this. And just like in a good
bouquet, you know, it's good to have different
flowers for visual interest. So I think I'm going to do
something like this for my fillers and possibly
another tulipe Flower or like a carnation
kind of lower for the fillers. And it's also interesting
to think about leaf shapes because leaves
can also be like this. Leaves can be long
and thin like this. Leaves can be thin and small, you know, like branches. It's good to keep these
little things in mind. But don't stress
about it too much, okay? Not very serious. This is not botany exam, so don't you worry. I also need to think
about the direction of my filler flowers, right? How are they falling? How are they being
tossed around? So if your painting is not completely dry yet, be careful. Don't touch it with your
finger. Don't smudge it. It's almost dry, but
I still have to be careful you can probably see that I'm not very comfortable
drawing at this angle. I could rotate my paper. You know, I just didn't want
too much hassle, I guess. So now that I
invented this flower, right, I have to
repeat it somewhere. So probably over
here or, you know, I could just give
myself a little hint and then kind of
paint it as I go. But I think it's good to plan what your shape is
going to look like. You could also have a
few branches, right? And I will need a smaller brush
to paint these guys here. And maybe I could
have another type of filler over here, maybe this, like carnation like laurel
And what about the leaves? I don't want to have the same
leaves in all my flowers. Or maybe I can do, like, a fern type of leaf. What do you think? Like that? So when you have time, thumb through some
botanical books and look at leaf
shapes or, you know, when you're at a botanical
garden or at a walk, pay attention to
different leaf shapes. This is slightly busy here. You know, maybe I
squeezed in too much. Little flower here. Oh, see. That's okay. We can always modify it
on the computer, as well. And we could have some
kind of small fillers, as well, like maybe loose
flowers or something like that. Something floating, so
we'll have big scale, medium scale, and small scale. And it's always cute to have
little, you know, fillers. So I want to use a
smaller brush here. This pointed filbert or oval mop is going to do the job for me. It's one quarter of an inch Princeton
select oval mop brush. I just had an idea. Maybe I will modify this shape. Maybe I will tilt
my brush and have this double petal sort
of situation over here. I think I went a little
too modern here, but I think it's fine. It's okay. I'm not going to
stress out about it too much. Let's paint this guy. So it's very easy
to paint leaves with the side of
a Wilbert brush. But I think I probably need an even smaller brush
for the flowers. You can paint. You know, as I was learning to paint, I was told you can paint
everything with one brush, and that was sort of regarded as a good skill when I
was learning to paint. But using different brushes just makes the job
easier and faster. And, you know, you get
a variety of strokes, not from manipulating your hand, but just from using different
brush shapes and sizes. Oh, that wasn't very pretty. I'm almost going like,
bamboo like, right? Okay. I think I'm going to use my baby
filbert brush that I used recently to paint this
little Uh oh. See what I did. And I can also vary the
amount of ink and water here. It's okay if some flowers are more transparent and
others are more solid. I just added more fresh ink, and I'm going to continue
making my dots. Over here. And remember, flowers, you know, organic shapes, they overlap, they touch each other. So don't be afraid to, you know, make them
a little messy. There are different styles
of painting, of course. You could have, you
know, folk flowers which are very geometric
and symmetrical. But here I am going for
a more organic look. And also, remember
to move your gaze from here because
now I'm painting and I'm so fixated on this branch, and I kind of forgot
what is going on here. Is not good. So remember
to pay attention to all your painting because this is sort of getting
busy over here. I might have to make some
modifications on the computer. I guess I kind of have to decide whether I want to do
five petals or four, because right now it's
all over the place. See the line is
getting too thick, all the thickness is
pretty much the same, so I will use a tip
of the brush to bring in a little more of thin lines. That's getting a little too complicated over here,
but that's okay. It's important to stop on
time, so I'm going to stop. I'm going to leave
this little branch. Let's move on over here, and I'm going to make my
doughty flowers here. And since I made this, I need to make more of them. I remember I was going for
this double petal look. As there are different kinds
of flowers themselves, there are also different
kinds of petals. So there are single
petals and double petals, and we can use it
in our painting. Now, let's paint this
other little guy. And I think I'm going to
use a little more water. I want them to be a
little more transparent. And as I need thinner lines, I'm using my round brush
with a pointed tip, and remember my
fern esque leaves. There's, like, a
little hole over here, so I'm going to add a small bud and maybe
a little leaf as well. So let's see what we have here. I think we're missing
the washy aspect, so I want to have
something washy. It could probably be, you know, the painting around. But also, you know, I don't want to ruin
this and also we could later on add a watercolor wash behind
it on the computer. I think I need to
have one more branch like this because this
one is really big, this one is really small, and I probably need
one of these guys, but I definitely need to
have some kind of Vilar. And maybe that's where I
could also use more water. I'm paint a little
flower over here. It doesn't really
matter where it is. You know, I could do it
here or here because we will be moving
them in Photoshop. But I think I want to have
something a little more washy. So I'm going to use a lot
more water this time. So we have a good balance of, you know, dark and light shapes. Rambi said, we always look at everything and compare
how it all looks. I'm kind of unhappy with
this branch right now, but I think I will make it work. I want to paint a few
more washy flowers so I can use them as fillers. Here, I intentionally
let it bleed, so it looks a little
more watercoloring. Ink bleeds slightly
differently from watercolor. So, see, this is a
little too much. I could take a paper towel
and clean it up a little bit. I think that's better.
And I don't know if I feel like this is
a little empty here, so maybe a few more leaves. So I was going to say,
if you paint around, it's a good solution,
but it might, you know, it will be more difficult to create the repeat
because then you will have to take care of the
watercolor parts as well. So it might be
easier just to put a watercolor wash behind it. But I'm going to paint it, so you just see, you know, the way it looks and you
can decide if you like it. Oh, see? This kind of
looks pretty, actually. I'm using quite a lot
of water here because I want them to look
light and washy. And we can later on decide
that, you know what? We're not going to use
this. We can remove it. Oh, hail photoshop right. Sometimes I think about
people pre computer times when everything
had to be painted really perfect and
beautiful, right? Life is so much
easier for us right now. What do you think? Do you like it with watercolor
wash or without it? I think I kind of like it this way because it also
gives us a good balance. You know, we have detail.
We have decorations. We have solid areas where
the eye can sort of rest. I think I do like it. I'm
using my intuition right now. And you can put almost
anything in repeat. I want to say anything,
but, you know, I don't want to be so categoric, but pretty much you can, right? It's just a matter of
how much time it will take and if you have
the necessary skills. I'm also looking at everything and looking at the
shapes and the outlines, and I want my shapes to be
aesthetically pleasing. So I'm painting around, and I'm paying attention to these white areas
and the way they look. And we can make several versions from this pattern if we want. And I would also probably paint small solid section
over here so we can use it if we need
to fill up the space. But I will also finish
painting around here. Rambi said, you never know what the final pattern is
going to look like. Yeah, that's not
what I envisioned, but I'm happy with
it. I like it. Cause, I've painted
paisleys before, but I've never painted
something like this before. So it's something new,
something original. And I think this is
enough for the pattern, but like I said, I will paint a solid area over
here so I can use it with a clone stamp in photoshop and fill out my space if I need to. But also, it's good to have some generic watercolor washes. You know, once you're bored and you don't want to do
anything too intellectual, in a few sheets of
watercolor washes, so you can use them
as ground fillers. This is what we have here. This is almost dry now, and I think I want to erase
some of the pencil line. I don't think it contributes anything beautiful over here. But please please make sure this is dry because there
are some wet areas, and I don't want to scrub them. I think this is better. Also, an important note, make sure you are using a good quality eraser because if you're
using something bad, it can ruin your artwork
like this is not a very good Easor at
the tip of the pencil. So something soft,
something smooth. And before you jump in erasing
on good quality artwork, just give it a try
on a scrap paper. See? So, see, this is
not a good eraser. It doesn't even erase
properly. This is a good one. Here, I press really
strong against the paper so it doesn't
erase very well. But if I do a light sketch, it erases, no problem. So I'm going to erase the pencil wherever
I do not want it, and I will see you
in the next lesson.
11. Lesson 11 - Gouache, general things to know. Tools, brands. Design vs acrylic gouache.: Gouache is a long beloved medium used in design and textiles. The first medium I
learned to paint with as a teenager was gouache. It's very beginner friendly. There are just some nuances
that we have to know. Gouache gives us a very
flat and opaque surface, which is perfect for scanning. Here are some of my artworks
made using gouache. So this design is from my
textile design college days. It is fully painted in
gouache. This is the original. These are the color chips, and when you're painting
for commercial use, it is helpful to
include colour chips. It is not mandatory, but it is definitely a bonus, you know,
for your customer. So these were made by
masking it off with masking tape and then painting all the colors that are
present in this design. See how smooth and made it is. And there are also some
hand painted colorways. You don't have to do it
every single time like this. It's just while
we were learning, learning to actually create the repeating pattern by
hand using tracing paper, you know, the old school method without using any computers. And we were also asked
to paint some colorways. God knows why I made
his color choices, you know, as a beginner
designer back then. And this is the fabric
from the same design. Just in a different color way. It is fleece fabric, and I changed the
background color digitally, and I probably adjusted the colors a little
bit as well to match the background because usually when you touch one
color in a design, everything else
around is influence. So very often we have to change the colors
around as well. These are some floral designs painted in a more loose
painterly manner, even a little bit transparent. You can do that with
gouache as well. It is not as opaque as the bird design that
I just showed you. To here, it's completely
non transparent. And here I'm using a
little of water as well. Painted on colored paper, and you can even
use black paper. This is black watercolor paper, so it's very thick and it is ready to take in
all the moisture. I'm also wearing a sweatshirt, the design on which was
probably painted in gouache. See different hues of blue. It is by gap just for reference. But we don't know who
actually painted this. It was probably a print studio. The most important
thing to know about traditional gouache is that it reactivates with
water when dry, so you have to be
careful with it. See this pre painted motif that I did yesterday in gouache. If I drop water on it,
it will be ruined. See if I even rub
it a little bit. See what happens. Well,
if I didn't do this, it was possible to fix it. Don't worry. I scanned this, so I can use these designs. If you accidentally
dropped a little water, you can pick it up quickly
with a paper towel. And then also, see, it's still a little bit ruined. This is completely botched. I wanted to show
you how it works. Also, you know, I
can even wipe this, wait until this is completely
dry and repaint it again. So you can fix squash. But you probably don't
want this to happen to very nice artwork.
So be careful with it. Now, I just said
traditional gouache. What does that mean? So there are two
kinds of gouache, the traditional one
or what is now often called design gouache
or designer gouache. And a newer development called acrylic gouache or acrylic
gouache in some sources, which has properties
of both acrylic paint and the smooth matte
surface of regular gouache. So when acrylic gouache is dry, it cannot be ruined with water, just like we did here. You might lift it a little bit, but it will not be completely
screwed up like this. So let's give it a try. And this is also
scant, so don't worry. See, it's completely dry, just like acrylic paint. I can even use a spray bottle. See, it doesn't do anything. This has dried quite a bit, so there's not much
happening to it. I mean, I'm definitely giving
it a very rough treatment, which you normally
probably would not do. But if it is not dry enough, you could still, you
know, lift up some pain. But in normal circumstances, you would not do this, right? So these are the two most
important differences between regular guash or design
guash and acrylic guash. Have to be very careful with
your brushes because if you are using acrylic gouache and you leave your brush
and palette like this, it is going to dry
and it will be very difficult or maybe even
impossible to clean it, and your brush will
get easily ruined. So you have to wash your
brushes very promptly when you're using acrylic paints,
including acrylic gh. But if you do the same
with regular gouache, if you just leave paint like this and your
brush like this, nothing bad is going to happen. Of course, it is not
ideal for the brush. You still have to
wash it on time, but this can be easily
reactivated with water. You can even reuse this paint. If it is traditional gouache, you can clean your
brush as well. And it is not that, you know, either of the two kinds of
gouache is better or worse. It is a personal preference. You have to know the
nuances of using both. I see a lot of
contemporary artists using acrylic
gouache quite a lot. It is also easier to
find for some reason, but I like to stick
with regular gouache. You can even see how
smooth this one is. You know, see the
painted background. Yesterday, I was
painting these two. This one still has
some kind of texture, some striping to it, right? And also, it was harder to load the brush because
it is kind of slimy. You know, acryl gouache
is very sleek and slimy, while regular gouache is just flattery smooth
if it's good quality. So, again, it is your
personal preference. What I often do is I paint the ground with
acrylic gouache, so I don't have to
worry, you know, if I accidentally
drop a little water. And then I paint the designs, especially if they're
very detailed using regular designer gouache. We'll talk about
painting grounds in a few lessons very soon. Guache comes in tubes and pans or tubs and it's a personal
preference. I use both. I tubes. There are
premixed colors, you can get primary colors, you can get larger tubes, four colors that you use a lot of that would be white for sure. Here I have a mix
of acrylic guache and designer guh and
regular as well. Of designer gouache
and regular gouache, there seems to be a
slight difference. So whenever you have
the word design here, it's usually the best quality, the highest quality, but
it's also more expensive. But, for example,
Holbein doesn't have the word designer, right? It says artist squash, and it's really
great quality, too. So as you see, the pens or
the tubs or however you call them are something so you can dip your brush directly. You don't have to squeeze
it out of the tube or these are another
version of the pens. And we will talk about brands in a couple minutes as well. Though I do like to use pens because I can just dive
in, you know, directly. I don't need to
squeeze anything. But of course, it
comes with a price. And so this one, just a couple
of words on the squash, it is not very good quality, so I do not recommend
using but, you know, maybe if you are
practicing because it's, you know, very affordable. So what can happen with gouache, you know, an important
thing to know. It can dry very easily, and it will dry, I promise you. So you should keep it
under a cover like this. But even covered, it will dry. But that is normal.
You know, see, I haven't used this gouache
in about a couple months. So it is already
starting to get dry. So see if I start
painting like this, it's a little bit water.
There's not enough body. So what I would do in this case, you know, some
of them are not bad. Like, this isn't really bad. It is still kind
of liquid, right? But, for example,
this green color is already really, really dry. So what I'm going to
do, in this case, you take some water and
add it into your colors. So whenever you
want your gouache to be a little more liquid, just keep adding
water and let it sit about, you know, overnight. And then you need
to mix it again. You can try mixing it now, but it will be really
difficult because it's so dry. So later on, you know, tomorrow, give it a good mix
with a palette knife, preferably a metal one. Find the made out
of plastic as well, but metal ones are
better because there's a lot of pigment
to move around here. So one of these
shapes should work. It's also a personal preference. So, you know, imagine
this has sat overnight, and then you would just
give it a good mix. It doesn't want to do it
now because it's so dry. You would just stir
it really well, make sure the consistency
is good to paint with. And good consistency
would be something like, you know, straight from
a tube. Let me show you. So nice and smooth like this. We would add a little bit
of water here as well, because it's just a teeny,
tiny bit too thick. So probably something like this. You can keep dropping water if you are not
happy with the texture. But don't add too much
because it will make your paint too liquid and runny. If you do not like
these shenanigans with the palette knife and
reactivating your gouache, just use tubed paint. Here are my three
favorite gouache brands. Turner Design gouache is a Japanese brand that is
absolutely amazing quality. They come in handy
sets like this and boxes that are a good
deal in terms of pricing. And later on, you can also purchase separate
colors if you run out. So I own a few of these sets. This is the regular
designer gouache, and I have a couple boxes
of acrylic gouache, and then these are
separate of pastel colors. So they have interesting
lines like pastel or Japanesque which is
beautiful darkened colors. There might be a little
bit hard to find, I heard, especially in Europe. But again, I'm not saying you only have to use this
brand. This is what I use. And the bird painting
that I showed you earlier was painted
using Turner gouache. They also have large tubes. Himi is a good student
grade quality gouache that has a bunch of fun colors. They do separate quite easily and need a good mix
up from time to time. Like I mentioned. It's
essential to keep them under a tightly closed lid. And, you know, here,
see, remember, I spoke about it in
the previous lesson. I added some water, and I'm waiting until tomorrow
to mix them up. I also have a larger set. They come in smaller
and larger sets. So I think it's a
good starting brand, you know, to try out quash. Artisa is a good compromise
between the first two. I'd say it's a very good
quality student grade quash. How many colors do you need? Well, you definitely
don't need 60 colors. I think something
about 20 colors, 24 or so is a good amount. Again, it's a
personal preference, sometimes, especially when
you're learning to paint. You are told you can mix up
anything and everything. Using three primary colors and white and black.
That is true. But again, who has
the time to mix up all the colors from scratch is definitely a great
learning exercise. But, you know,
particularly for gouache, I think pre mixed beautiful
colors are very handy. Using it for design is
great. I love doing it. There are other
brands, of course, like Windsor Newton
is a great brand. Holbein, I have a
few tubes over here. Holbein gouache is
great quality as well. And there are other brands, and you are very welcome
to experiment with them. Just pay attention
whether they are student or artist
grade and whether it's design gouache or
sometimes they also call it opaque watercolor
or acrylic gouache. So you know what to
expect and can make sure the paints you are
buying fit your goals. Websites such as dgbliq.com, Jerry's Artama, Jackson's Art supplies are
a good place to start. These are reputable website. Some of them have
physical stores, too, some of them don't. I also recommend
you to check prices between all these
stores and also Amazon, as you can often
find a better deal. Also, whenever I
buy a set of paint, any kind of artist colors, I create this swatch
table, you know, so I can refer and see how the color behaves,
what it looks like. And I keep them together
with the paints in the box. And, you know, whenever I'm
painting, and I think, Oh, I really need to find
a pretty lilac color. And I can see that
it's this one. This is actually
a metallic color. So the Artisa big set
contains metallics. I'm not a big fan of
painting with metallics, because as you scan them, they kind of lose this effect. But, you know, as a part
of creative play, why not? You always want to test out different colors and pigments. Da da da da da da
in terms of paper, smooth paper works
best for gouache, and it can be either
bristol paper, which works great for gouache. It can be hot press
watercolor paper, very smooth, very
minimal texture. I use other options as well. You know, you can paint
on acrylic paper, which is even heavier than
we use for watercolor. It's really, really thick. I also use this craft paper, which is a little bit too thin, but it still works. I use pastel paper. There are plenty of
options. You can use watercolor paper as well. So just make sure the
paper is thick enough, and I previously
mentioned it as well. The best brushes for gouache
are synthetic brushes, and you can use the exact
same brushes as for ink. They do not have to
be super expensive. So here are some examples. You can also use
different shapes. You know, round brushes,
Guerre brushes. I have a Filbert brush
over here that I showed previously by
Princeton Select Oval mop. This is a really great
series by Robert Simmons. It's called White Sable. It's a synthetic brush, and I use it even for
watercolor sometimes. So actually, watercolor,
I would say, if you are also planning
to paint in watercolor, keep your best brushes separate and try not to use them
with gouache or ink. Technically, you
can use, of course, natural brushes with
gouache and with ink. But I would say the best
practice for watercolor, keep everything super clean
because it's so demanding. So there's a Grumbacher, round brush number ten. This is a pretty standard
shape with a good tip. Couple imi brushes
that we used for ink, also round with a pointed tip. This is number one
for some reason, and this is number six, even though I wouldn't say
they're that different. There is no universal
sizing, unfortunately, across different brands and once received a complaint
on my, you know, YouTube channel that I named that this was a number 12 brush, but actually, you know, in a different brand,
number 12 is different. Yes, you know, but I have
nothing to do with it. A very important kind of brush for gouache is a script liner. It can be either
natural or synthetic. The most important thing
is that it is very long because to
paint thin lines, you need to have a little
bit of this length, even though it might
seem to you that, Oh, I'm not going to paint
super long lines. You still need this
because the paint will spread along the bristles. So this one is creative mark Mimi Kolinski
script liner number two. This is a very good brush. And this is, you know,
an old cheap brush from Michael's or
something like that, and they are pretty
much the same. You know, I'm a big believer
in being economical, not overspending where
you don't need to. Another good brand is silver, silver, black velvet,
round brush number four. I also have them in number six. Number eight, I
think in number 12, they are great for both
wash and watercolor. But again, I would recommend to keep your watercolor
brushes separate. If you do end up using the same brushes for
different media, make sure you meticulously wash rinse and
clean your brushes. A word on palettes for gouache, I often use ceramic palettes. They just feel nicer. You
can buy these as plates. These are just plates, you know, dinnerware plates like this. Or this is specifically
designed palette. So this can come handy
when you are planning to paint a large area and you need to premix a lot of colors. You don't want to constantly
add and mix the color again. So you have decided,
for example, that you are going to use
a palette of six colors, and you need to mix,
you know, a pink, a blue, a yellow, and whatnot. So you just mix them
up in this well. And, you know, if you're
using regular gouache, non acrylic gouache, it
can stay a little bit. You can cover it
with a plastic wrap, so it will survive
for a couple days. And if it goes a little bit dry, you can add a few drops
of water to reactivate. Okay to use plastic
palettes as well. It's just, you know,
personal preference. I like using ceramics. It's always good to keep
some kind of scrap paper. This is cardboard from
actually markers packaging. So you can test, you know, your stroke before
you start painting. So yesterday, I was
painting the little bows. So I was re using, you know, this old card stock to
test my script liner. I was painting with this brush. Helpful tool that I showed previously with gouache
is the palette knife. I like the round one
because if you're using a round container, you can mix it
really well and it will go around easily.
That is what I mean. If you are painting
something large, particularly painting a ground, which we will have
a separate lesson on you can mix up
your color over here, and this is really convenient to mix it up with
a rounded shape. Or you could also store
your paint in here. If you feel like you
might not finish today, you can mix it up
again and use this. I honestly bought these
containers in college. They told us, you know, it's an option, but I never use them. I somehow just use my palette. There is another one
I want to show you that I use with
gouache sometimes. So this one has nice deep wells. If you are painting
a large design like the one with the birds on blue background
that I showed you, and you are premixing
a few colors, so this kind of
palette can be handy. Of course, you do not have
to own all these palettes. It's just I like experimenting
and trying new things out. And I also want to show you
that there are options. It's not one correct
answer, you know, to use this or that palette
or this or that brush. It's more about the
characteristics of these tools that
we are looking for.
12. Lesson 12 - Gouache demo: sunflowers: Let's do a quick demo so we can see what
gouache is all about, and I'll show you
how I mix color, you know, how I use brushes
and things like that. So you can repaint a colored ground if you
would like, like I did here. Here, I did it very casually. You know, I didn't even tape
it, or I just, you know, had leftover paint,
so I painted it with a flat brush,
something like this. For this size, I wouldn't
use the big one. These brushes are
hemi, flat brush, it came in a set, and this is a ing nickel two
inch flat brush. But we will have
a separate lesson on painting grounds later on, so I will not focus
too much on it. So if you are pre
painting a ground, just wait until it's dry. I'm going to sit down and think, what I want to paint,
right? I need a plan. I want to paint something
simple and something trendy, something that is marketable
commercial interesting and, you know, what people would buy. Decided that I want to
paint some sunflowers. Sunflower is pretty much a very classic motif
that is very, you know, late summer or even just summer harvesty cottage
core, table linens. So it's a classic pretty much. And I'm going to use this
card by CavaliniPapers, which are made with
vintage images. I'm going to use
it as a reference. I don't want to copy
it too exactly. I just want to use
it as a reference for the botany of the
flower, you know, how big the leaves are, how the petals are located, and the colors a little bit. So let's dive in. We can use our sketchbook
to plan, you know, to get the ideas out there similarly to the way we did
with our paisley because we can just have
single flowers like that or we could have
full stem flowers, you know, a half drop like that. We could have the green leaves over here or we could just have, you know, sunflowers
tossed without any leaves. I think this is
what I'm going to just plain and simple
sunflowers like this. But I might change
my mind as I go. We need to decide, you know, what colors we're going
to use and how we are going to treat our sunflowers
because sometimes, you know, this can be all
black. This can be brown. There are many options. There are also painted
sunflowers which have, like, brown spots over here. A lot of options. Tiple ways to treat this texture as well, right? We could use dots. We could even draw, like, a little net, something
like this, right? We could use concentric circles. Decided that I'm
just going to do sunflower blooms freely tossed, you know, and I want to
make it very simple, so I'm not going to go wild. I'm going to use a pencil to
lightly sketch the design. There is no need to draw
every single petal, just kind of the idea of it, because we will later on
use our pointy round brush, which has the exact
shape of the petal. You also have to decide, you know, which scale
is comfortable for you. For example, for me, it is much harder to paint
something really tiny, really small, so I prefer
kind of this scale. And this paper is the Artisa
watercolor paper that I used in my previous
lessons about ink. It does have a little
bit of texture to it, but it's not too
pronounced, so it's fine. You can also turn the paper around because usually
one side is smoother. Actually, that's what
I'm going to do. It's not too late. I
will draw my sunflowers. And I think I'll
do three, right? And then digitally, I will
be able to rotate them. I'm not even going
to draw the petals. I just want kind of the general position
of my sunflowers, but I do have to
decide, you know, what color the centers
are going to be. I think I'm going to
do yellow petals, and then I will paint black centers and do
yellow dots on top. There's also an
option, you know, this doesn't have to be black. If you look really closely, it's not really black, actually. It's more like gray or green. So it's up to you. You know, it's your artistic choice. We could probably use orange to paint some details over here. So I'm going to paint my sunflowers now
using ArtisaGuach, and I pulled out
my color charts. And I think I'm going to
use, you know, this color. I will definitely use white, you know, to soften the colors. Even if you want to use
something straight from the box, it's usually not a good idea. It's good to add a
tiny bit of white into a pure color just so it
looks a little more natural. I'm going to use black, and I'm going to add a little bit of white
into black, as well. I might use one of these colors for the veins on the petals, and let's see what we have. So I will start by
squeezing out my white. And we always try maybe
that was a little too much. Okay, we always try to
keep our white clean, but that is very
difficult because you will be putting your brush
in there all the time. But it's okay. Whenever
you need some fresh white, just squeeze out
more from the tube. My bump will be yellow
for the petals. This is a nice premixed color. You know, it's pretty
much ready to go. Maybe just a drop of white. Orange, for the veins. Painting a fairly small piece, so I'm not using a lot
of paint. And black. So you have to be careful with black because it's very strong. Whenever you know,
you put a little bit of black on your
brush or anywhere, everything will be
contaminated with black. So whenever you're using black, wash your brushes
out really well. And I'm going to
paint that last. I will start with painting
yellow petals first, and then I will add the black. We often start, you
know, light to dark, and I'm going to use my round hemi brush number
six with a good pointed tip. It's about the size the petals
that I'm going to paint. It is better to use brushes bigger than
you think you need, and it's a good idea to learn to paint
with a bigger brush. It kind of just looks
more professional. I'm thinking, you know,
I'm planning my project. We could alternatively
have two shades of yellow. Mix these two and
get a second color. Let's see how it goes. Working with fluid media, it's very important to change
your water frequently, especially when you are
working with several colors. You know, with ink,
we could get away with using less water, but we will be using the same brushes for
different colors. So remember to change your
water from time to time. When it gets cloudy
and colorful, just get some new fresh water. Some people keep two containers
of water on their desk, and they use, you know, one for lighter colors and one for
darker colors. It's an option. There are also water
jars that are double, you know, so you can
have two containers. I tried that, but nothing works as good getting fresh water. I'm going to use
this paperweight just to keep my
paper from moving. It's a metal fish,
so it's heavy. You can also tape your
sheet to the workspace, you know, using masking tape. So I'm making the brush wet, and I will start with
painting my yellow petals, and it's handy to keep a dropper
with water here as well. I'll drop a little water here and start
mixing up my color. We could probably
use a smaller brush. I know I just said it's good to paint with a bigger brush,
but this one's a little. See how slimy this gouache is. This is our tiza, so it's like our medium quality gouache. But it's okay. It's
totally workable. I'm going to grab
a smaller brush. You can use both, too. You can have some smaller
petals and larger petals. Variety is good. Variety is the spice of life,
right? Who said that? Maybe I'll make this guy
a little bit bigger. I'm leaving space for
the other yellow color. Here, see, I made the
space equal everywhere. Here, I want some of
the petals to touch. I think it makes
things more organic. I'm always very inclined
to organic designs, slightly asymmetrical, because that's how it is
in fine art painting, and that's how it
is in nature, too. Two stroke leaves, pretty much. Now we can mix up another color. So I will just add a
little bit of orange. I'll wet the tip of my brush, grab a bit of orange and
mix it into my yellow. So I want the hues to
be slightly different, but I don't want them
to blend, either. You know, they have to
be different enough. They have to have a reason
why you use them, right? Why use two shades. When you squint your eyes, if the colors blend, there's no point in
having those two hues. They still should be different. So we went a little
bit orange over here, which I think is fine.
Where's my reference? I made my petal
shorter than here, which is probably good, right? We don't want to
copy too closely. Things don't have to
be perfect, remember? Nothing is perfect in nature. It might look so, but
if you look closer, no two petals are alike. You can paint on top as well. If you feel like the
brush is getting dry, just dip it into water again. See it's getting dry, dip it in water again. Alrighty. I'm washing
my brush out really, really well in the same
manner as with ink. Paper towel. So I forgot
about this guy, right? I don't think I'm
going to use it, so I can wipe the
excess on paper. It will not contaminate
your water so much. This I also learned from
oil painters recently. You can't use water with oil. You have to use a
chemical called gamsil. So I clean this guy and
I can put it aside. Black is a very strong colour, so what I'm going to do is I
will take some white first, and then I start adding black. You could make it a
little more natural by adding a little yellow to it. It will make it a
little bit warmer. I think this is a
good color for us. I'm loading my brush, so it's fully covered in paint. So this is almost dry. I might have some blending in, but I'm not very concerned
about it right now. A little too dry, dip it
in water, mix it again. Change the angle of
your hand so you can paint in tough areas. And also, I'm going to use the trick that I learned
kind of later in life, you can rotate your paper. When I went to an art
school as a teenager, we were not allowed
to rotate the paper. This was considered cheating, but I'm a grown woman now, so I can rotate my paper. So see how this is a
little messy. It's okay. We can leave it
like that, as well. But I do kind of want to
clean it up a little bit. So it's more comfortable
for me, you know, to paint at this
angle than like this. That's why I'm rotating my paper so it gives me a
comfortable angle again. So this isn't dry yet, but I'm working
with the same color so I can paint on top. And remember not to put
your hand on top of your painting because
you'll smudge. Learn to love imperfections. Nothing is perfect. Nobody
is perfect, even sunflowers. I'm going to let this dry, and there are two things that I want to do
with this design. I want to add some yellow
stripes for detailing, and I want to add the yellow dots inside,
you know, just like here. So but I cannot do
this while this is wet because it will
ruin my painting. So I want to let
this dry completely. So this is dry now. See how nice in mat it is. So it's the white
that makes it so mat. So I want to paint the orange veins or lines on the petals
now. Kind of like this. We could outline everything with our thin liner, you know, the entire petal, or
we could just ed it here at the base of the
flower. No, we choose. We are the artist. I think
that this color is now not dark enough because I kind of used it for
the other petal color. So I am going to pull another
color to darken my lines, and this is going to
be burnt sienna brown. So the color wheel
can be helpful in finding pretty
color combinations. I don't go crazy
about color theory. You know, it can
be overwhelming. But here see. So with this lover we're somewhere
over here, right? Colors that are close
to each other on the color wheel always
look nice together. So I'm going over here. This is called analogous
color palette, the colors that are right
next to each other, right? So there's a complimentary
color palette, complimentary, split
complimentary like this, you would have blue,
orange and green. And where is our analogous
word here? Analogous, right? So this is a fun
little tool to have. They are not expensive at all, and you can read a little bit on color or just use it
as visual reference. I'm going to use a little bit of burnt sienna to darken
my orange color. Remember to cover you
tubes right away, and we're going to
use our script liner. Remember I mentioned this brush. I'm going to use the
old one for gosh. I save the best brushes
for watercolor. So I will use this orange color, and it's a little
bit strange to mix it with this thin long brush, but trust me, it will work. Trust me. See, it's very thick, so I will dip my brush
into water again. And where is my scrap paper? With thin lines, always
test them first. And with this brush, you will have to
dip your brush into paint quite often
because it wears off. You can add a little water, again, add a little
pigment, as well. I hope it's not too dark. Maybe a little
bit. So I will add a little orange and maybe
even a little bit of white. So I think this should work. Why can't we use a short brush? Because if we're using a thin, short brush, the line
will not be as thin, see? Even though the brush is
kind of thin and small. Te is just kind of
short and stubby. It's good for its own purpose. We probably will
use this brush for making our dots
inside the centers. But for now, let's just
stick to our script liner. So I will be rotating my
paper quite a bit now, so I release it from that fish. And I haven't decided yet. Do I just want to go over here? Or do I want to go around? Maybe I'll start with painting a few at the base and
see how it looks. Hmm. I kind of want to add a few long lines.
What if I do this? So I pre painted the
first layer very messy, and now I kind of want to
bring more definition to it. Kind of like this guy, remember? As I'm painting more, I'm watching, you know,
what is happening around. Does it make it better or
does it make it worse? Now that I started
outlining these petals, I kind of need to keep going at least every other petal, right? And of course, this is
not the only way to paint sunflowers
is just an option. I'm not quite happy how
straight this petal came out. Oh, you know what? I could show you how to
fix things, right? But it's kind of more
difficult on the edge. It's easier to fix
things when they are, you know, inside something. I zoomed in a little bit. I really, really
dislike this unusual, unnatural pointy angle, and I need to think
how I can fix this. I could probably change
shape over here. So when this is dry, I will repaint it with
this yellow color again, Saffron golden
yellow color, right? This sky looks kind of lonely. The only one that
hasn't been outlined. So I kind of got the idea of
what I want to do, right? So I will keep painting
the other flowers as well. Don't forget to re wet your brush if
it's getting too dry. And usually when
we start painting, we're a little stiff. You know, our hand
is a little stiff. As I'm painting
the second flower, I'm already more relaxed. That's why it's good to kind of paint something easy
and small before you, embark on your important project for the day, like a warm up. Again, I did this. I'm keeping my brush wet and
covered in paint. I don't want any
teased hair poking out because it can leave a
mark on my painting. As the brush is drying up, I keep reactivating
paint with water. So the painting is
going fairly smooth. It's because we're using
traditional gauche. Yesterday, I was
painting the bows, and I was kind of struggling with the
bulk of the paint here. I don't know if you
can see it over here. The paint was more slimy and
heavy the acrylic gauche. Okay, so this is dry now,
and I want to fix it. I don't like this
big brown blob. I'm going to clean my
brush really well, wipe it on a paper towel. Now that it's clean, you know, I made sure it's clean, I make it wet again, and I want to pick
this color again. So here it is on the palette. Oh, see, it dried, actually. What I can do, I will add
more water on my brush, and I will reactivate
this color. See? It might be a
little bit lighter. So just make sure you grab all the paint you can
before you start. You can definitely, you know, mix it up again with
these two colors. I think it will
be enough for us. Just make sure it's not
too transparent because we want to cover this
area over here. Just made sure that this is dry, right, and I'm
going to fix this. So this is not thick enough. I have to still remix the color. Grab a little bit of yellow and a little bit
of yellow orange, test it out on a scrap paper. When it dries, it will
be a little bit lighter. So it does look a little messy. No, but I think it
will be better. And maybe I could add a
little more white, as well. Sometimes you have to
create several layers. I want to paint
these dots around, you know, around the center. I'm going to leave
the center black. And for this purpose, I need a short Stubby brush like this. I don't need the script liner because I will keep
getting those long lines. This is Artisa number
one spot brush. See, it's made for spots
exactly what I need right now. Let me see which
color I want to use. I think I will add a little
bit of white to my yellow. I want it to be lighter
than the petals, and it's also going
on top of black. So always remember
about your values. In fine art painting, values are absolutely crucial. But the rule applies
in design as well. Paying attention to
the reference, see? It's kind of dark closer
to where the petals grow. Then it's very light, and then
the center is dark again. So let's see how I can do it. I will create a little
reminder for myself, you know, where the
center is like that. It doesn't have to be exact. You know, I could
stop sooner or later. Just has to read as a sunflower. Maybe we could have
a few dots here, so it doesn't look so detached. Again, a reminder for
myself where the center is. And I'll go around, make your brush stroke vary. Don't make them all
copy paste like this. Some of them should be bigger and some of them
should be smaller. I think we're
looking good, right? And we want to keep the
sunflowers similar, of course, but we also want
them to be different enough. So it's more interesting. We don't want three identical
looking flowers, right? Why did we paint them? We could just have painted
one, and that's it. I'm kind of going back
to this area over here, and I will even use, you know, a different
yellow on top. I this area could use a
little love too over here. But again, even if
something is not perfect, that's fine. That's okay. We can fix things in Photoshop, and we can also keep them, you know, imperfect,
just like in real life. I'm kind of tempted to throw in a few leaves now that it looks
so empty, but it's okay. We could actually, you know, put it on a black background. Maybe we could have a
little polka dot inside. We could make them
overlap digitally, right? Kind of cover each
other partially. So there are options, always. We fix this, but
I think I want to have a small orange
line over there. I think I want to
add some leaves. Again, we can omit them
later and not use them. This color is
called olive green. Could be a little bit
brighter on a sleep. Maybe I'll add a drop
of bright green. Let me find a pretty
bright green, sub green, possibly. Exactly. And the brush I started with is perfect to create the leaves. Mixing up my green, mix it well so you
don't have streaks, and I will just paint some
free hand leaves just, you know, as my
soul tells me to. Kind of even like this
torn edge over here. And we will paint
some veins, as well. We could also use a darker green to have variety in leaves. I think I will stick
to this one for now. So as I'm painting, I'm
watching the general outline. You know, I don't want
to overcrowd my pattern. So I also have to add
leaves here, right? So I'm not going to paint more
over here or maybe I will. I'm deciding as I'm
working on this. But we don't want things
touching like this, you know, point to point. Should be overlap if they
are touching, right? So how am I going
to go about it? Is something like this. So this is not good, S.
I accidentally did this. We can fix this later. Maybe I'll rotate this flower
slightly in Photoshop. And again, don't keep the
leaves the same size, see how this one's bigger. This one's smaller. It's
more interesting like this. Even if you go off the
edge accidentally, we can still fix
it in Photoshop. I keep referencing to
Photoshop all the time. Can you imagine
how people created designs when there was no
computer in Photoshop? These are still some of the
most beautiful designs. You know, some companies
modern companies buy vintage designs
from old fabric mills, and I've seen these designs that are like 100 200-years-old. They are beautiful. They're also painted in gouache like this. I mean, way more meticulous,
because at that time, I guess things had to
be more meticulous, kind of perfect looking, but times are changing. Maybe a little leaf. And also, since I know this will
be a textile design, I will also maybe
paint a separate leaf, maybe even a couple, you know, like fill of leaves. Yeah, I think it's
more interesting with leaves and maybe a couple stems, you know, if I decide to
kind of join everything. Maybe even a couple
straight stems. You don't have to use
all the elements later, but it's good to have
them just in case, right? We can use our big leaves. Painting leaves and
botanicals is so satisfying. I think that's good. I want this to dry, and I will add a few dark lines on the leaves, and
we will be done. But this is dry now. I'm ready to paint my
lines on the leaf, and we have a few options here. I definitely want to
use a darker color, so I could add black
into my green. And I think that's
what I'm going to do because I already have black.
I think it will look good. Another option we have, we could use a different hue of green. For example, this is
a very warm green. We could use a cool green. We could use some blue, added to this green or, you know, a cooler
green added here. I think I'm going
to go with black. I'm going to use my
script liner again because I'm going to
be making thin lines. See, my black is dry now, but I can easily reactivate it with water, and
I don't need much. I don't even need
to dip into here. I definitely squeezed
out too much black. But I might need it still. Maybe I'm an optimist. Yeah, I think I do need a
little bit of pure black. I keep dipping my brush into
water whenever I need to. So it looks like black, but it's actually a dark green. And let's give it a try. Is it dark enough for
us? I think it is. So remember when gouache dries, it will be a little bit lighter. And just quick organic
lines. Don't overdo. It's very easy to do too much texture too
many small details. Remember to leave some
air in your design. Don't try to cover
everything and anything. So I think I'm portraying leaves not quite correctly, see? The way veins are
going over here. If you want to be really
precise, we could do that. Maybe let's do a few
for our botany people, so we don't offend them. I respect my botany people, so Alright, how does
it go over here? Also, they start from the
same point over here. I don't know if you can
see or if it's too dark, see? That's what
I'm talking about. Maybe we could even paint
a few darker leaves. Remember I mentioned
that we could have another color, right? For an interesting variety. See, this brush is not particularly made for
painting large areas. It's more made for thin
lines. The script liner. And you can always add
some simple lines. You know, if you forgot
to paint something, you can easily add
it in Photoshop. It's harder to paint something from scratch in photoshop
that looks exactly like this. But if you just forgot to
paint a line over here, it's usually no big deal. You can find a photoshop brush
that looks very similar. So I honestly was going to
create something way simpler, but I guess I went with my
natural instinct then just painted loose organic
free falling botanical. That's what I often do. Alright, I think I need to stop because I'm kind of
already starting to overwork it. I
think we're good.
13. Lesson 13 - Using tracing paper, transfer paper and light table: I want to share with you
a few more helpful tools, such as tracing paper, carbon paper or transfer paper, and a light pad, which
is here underneath. So we already know that you can paint directly
on colored paper. You can paint on
your colored ground, that you prepainted yourself. But what if some of your motifs are more
complex and you don't feel confident enough painting directly or drawing directly? Feel like it happens a lot with animals for me personally. If I started drawing out all
these animals on this paper, I wouldn't be able to nail
them down right away. I would have to use the
eraser quite a lot. I would have a lot
of leftover lines, and I don't want that. So this design was created
using this paper, guash, a white pen to outline, and I used the light pad to
transfer it onto my paper. I cannot locate the
actual painting, but I will include a digital
image somewhere here, the scan of what I painted. And since we're here, let me walk you a little bit through my planning
process as well. How did I end up with
these animals exactly? So I usually start by sketching out things
in my sketchbook, and I did this design
for a design challenge, and the topic was
nocturnal animals, and it's called
Creatures of the Night. I wanted it to be
ironical and fun. So I start by
sketching out ideas, drawing things,
writing things down. I wanted it to be, harvesty. Anything that comes to mind, I just write it down, and I'm not going to
use all of this. Had the name down here. I don't remember if it was
later or early in the process. It helps to name a design
as soon as you can, because then you can save all your files under
the correct name. And here I was throwing
in, you know, Oh, I want to have a hedgehog
and an owl and a fox and a watering can with some
garden flowers and a moth. And, you know, I think I pretty much used everything here. Very often, you know, I
sketch out a lot of motifs, and then I do not use some. When I was choosing
my main motifs, I also thought, What kind of
filler am I going to use? And I sketched out
some flower ideas, and I also added a brown
filler floral over here. So I was painting
my main motifs, and then around them,
I added some flowers. You can always choose
your own layout. Do you want your motifs
to touch or overlap? Do you want things to go
really closely together? I see this kind of pattern
is very popular with people. Then, you know, when
I finalized my ideas, you can prepaint your
entire tile if you want. But here, I just wanted to
have nice painterly motifs. And I also wrote
here LsGuas, right? When I plan to paint
or draw a design, I ask myself, What kind
of feel am I going for. So here I wanted something very, you know, rural New England. And these are all the animals
that I actually encounter. Living here in New England, in the suburbs of Boston. What I did next, I drew
them in my sketchbook, and, you know, I did as
much erasing as I needed. I was using photos for
references of animals. Then when I finalized
my drawing, I traced it with a bold
pencil so I can see. And then I used a light pad
to transfer the design. I accidentally turned it on So this is a light pad, and you can use it to transfer your motifs onto backgrounds. But what I did in this case, I actually cut out this sheet, and, you know, I took
my background paper, and I put my drawing onto here, and I put my final
colored paper on top, and the design was showing
through, and I traced them. And then I painted it in gua find these light pads
or light tables, right? Some people have
fancy light tables. We had one at university, where I studied textile design. You can find them at
artist stores or online. Mine is by I don't know,
you probably can see it. It says US art supply, and they can be much smaller. Again, when you are starting, painting and
designing, you'll have your preference for sizes
that you work with. Again, it's the
size of your paper, it's the size of your motifs. See what happens when you put
something on a light table. You can see things that are on this side and on
that side as well. But when I was tracing it, I didn't have anything
on the other side. But what happens when
the paper is too dark, see, you can't see anything
through a light pad. You can also use a window. Sometimes if you're tracing
something from, you know, white onto white paper, you can hold it against the window pane and
trace it as well. Might not be as convenient, but it's also an option if
you don't have a light pad. So in this case, and I'm going to shut
down my light pad, when the paper is too dark, you can use carbon paper, very old fashioned product
that was used for typewriters, you know, to make two copies
of whatever you were typing. It's kind of hard to
find right now, but, you know, not impossible, and they come in
different colors. Black is the most common one. I also have some
white carbon paper. I used it on a black
pattern that I created, and I needed to transfer, on a pattern that was
on a black background. I mean, let's see
what it looks like. So see, it looks like this. And you can see some bird
motifs that I was tracing. So in this case, you
would do the opposite. You would put your
final paper onto here, put the transfer paper,
make sure you know, it's covering all
the area over here, and try not to
smudge it like this because it will leave a trace. And then you would do this. You might also want to tape this so it doesn't
shift as much. And then you would
trace this again. It will transfer onto your final background.
So let's give it a try. I will pretend that this
is my final product. So I would go like this
pressing kind of hard and trying to make my lines clean because I'm tracing
onto my final surface. You have to press for it to transfer, but
on the other hand, don't make it super duper black because that's one of the
advantages of that method, the line is waxy and it's there. You can't erase this. The
eraser doesn't work on it. Let me give it a try. See,
it's not meant to be race. You probably could, but Imagine this is a gouache
painted background. But again, it's an option. It might be something
that can be helpful. I'm not saying you have
to use this method. Again, it's an
option. It's an idea. It's something to work with. And then you would be painting with gouache on top of this. So I personally
prefer I'd rather draw directly on the
surface, you know, not use this paper, but there are some
circumstances when I had to turn to carbon paper. Another helpful tool, if we
may say so is tracing paper, which is this transparent, crinkly kind of paper
that you can see through. So you might not even
need a light pad. You might be good with, you
know, using tracing paper. So if you take a
sheet, and again, all of your rough sketching has been done in the notebook, and now you just
want a clean copy, and what you can do with
this copy later on, is you can actually draw
your motifs like I did here. Again, this is a very
elaborate design. So I sketched out my palm
trees in the sketchbook, and then I put tracing paper on top traced it a little bit
with the pencil again, and then I just drew my file
motifs on tracing paper. It's quite durable,
so it's possible too. And then I scan this and
created my repeat digitally. So the advantage of this
method is, let me show you. Actions speak louder
than words, right? So the advantage is that you
do not need a light pad. And another advantage
is that you can reflect your
motifs quite easily. So this is one owl. And say I want to add an owl facing in a
different direction, I'm just going to turn over
my tracing paper and do this. Again, it's an option. Of course, you can easily rotate things on the
computer later on. But depending on how you work, this can be handy as well. If you forgot whether you've
traced something or not, just lift it slightly,
and you will see. See? And I could keep going. I could think, Oh, okay, I want to have two foxes over here walking towards each other, so I could have this design. And then later on, when you have
finalized everything, you can either take another sheet of tracing
paper and, you know, trace it finally on top, or you could use a marker, you know, something like
this, a thin marker so we can get rid
of this, right? And I could just
draw on top of this. And finalize my design. I think it's called
inking, right? We're inking now. So all
these things, of course, can be done on the
iPad digitally, but that's not why you're here, right, washing this glass. So this is how things were
done before the computer. And that owl is on the other side, but it
doesn't matter, right? I can see it, so I will
trace it like this. And again, I'm not trying
very hard right now, so it's kind of
sketchy and messy, but you could really,
really perfect your design. Kind of trying to
go symmetrical. Too many feet, right?
And then, you know, when this is dry, you could
erase your pencil again. And when you scan it
onto the computer, it's going to be
really, really clean. Or you could use this with some transfer paper and transfer this onto
this background. We might be even able to
do it with our light pad. No, I can't really see.
Oh, I can actually see. You guys probably can, but
I can see a little bit. The garage layer is quite thick, so you guys cannot see because of the lighting and
camera settings, but I can actually see
the owls over here, so I could go in and, you know, start drawing them
again on my background. I hope these are helpful. I hope they make sense. Again, they are not
mandatory techniques. They are just something
to be aware of, and I hope it's useful. Uh,
14. Lesson 14 - Painting colored grounds in gouache: B. If you would like to paint on
a colored ground, you have several options. First of all, you can
use colored paper. Just make sure it
is thick enough. This is slightly too
thin, but it still works. This paper is
something like this, and you can get it at craft
stores like Michael's. But please be aware that the background color affects all the other colors as well. So if, for example,
you paint this on gray and then you scan it in and you want to change
the background color, you can, of course, do this. But when you remove
the gray color, all the colors here are sort
of gray down and muted down. So if you compare
the white swan, with white paper, S,
it's not white at all. Also, I think it wasn't
white originally. I probably used something
like a cream color. It's just something
to be aware of. Alternatively, you can
paint your own ground, and it's fun to do, and you can get any
color you want. So these I painted in
acrylic gold acrylic paint. That's why they are so textured. But when you paint it
with regular gouache, designer gouache and get the best quality for
this particular task. It's going to be
a battery smooth, gorgeous surface, and the paper won't work once
paint on top of it. An important thing to know is that when you are
painting your ground, it is better to be standing. I am standing right now, so I have enough distance, enough lever, my arm and hand can have this
free, easy movement. When you're painting
your main motifs, you can, of course,
be sitting down. We want you to be comfortable. But when you are
painting a large ground, I do suggest that you stand up. It's going to work much
better. It's important. So in order to paint
your own colored ground, you will need bristol paper, which is very thick and sturdy. It will survive whatever
we're going to do with it. Water, obviously,
water bottle is handy. You know, it's a spray bottle. A brush like this is essential, a flat brush, a palette
knife to mix up the paint, a deep palette well for mixing because we are going
to paint a large area, so we want to premix
a lot of color. And it doesn't have to
be this size, of course. I just try to fit it
inside the camera frame. I've painted larger grounds
having a board of some kind is definitely helpful
because we're going to be taping our
paper to this board. Tape is handy as well and paint gouache paint of the
best quality that you can get. This is essential for
painting the ground. While you can use
different grades of gouache for painting
on white paper, if you specifically want
to have a colored ground, you need to use really
good quality paint. You can use a premixed color, if this color is good enough
for you and it works, you can use this color. This is a little punchy, but, you know, maybe you are
painting something tropical. But the advantage of this method is that you can premix
any color, right? We're going to use
a lot of white, and I want to premix a
blue color, light blue. So this is Prussian blue, and this is Holbein gouache. A word on tape. So in artist stores, you might see this kind of tape, which is not good,
unfortunately, which is a paradox, right? Construction masking
tape works much better. So this one is called frog tape. You can get it at stores
like Home Depot or Lowe's. It also comes in several widths. Whatever works, you know,
for your paper size, for your board size, and you can also get
blue tape, masking tape. So why is this tape no good? See, it doesn't hold already. It's going to stick out and peel off and we haven't even
started doing anything yet, and we are going
to wet the paper. So there will be a lot of physical processes going
on with the paper, right? So we want to have sturdy,
reliable masking tape. So let's get started
by taping our paper. See how smooth and thick
this paper is. Perfect. My daughter made a little bit of art here a few years ago. I was so mad at her at the time, but now it kind of reminds me of my little girl, you know, she's almost 15 now, and this is a sweet
little reminder. I hope it doesn't
distract you too much. So another helpful trick. Why are we so concerned
with the correct tape so, like I said, we don't want
it peeling off prematurely. We want it to be
secure and sturdy. And also what happens very often when you start
peeling this off, the top partial layer can get
off with the tape as well, and we want to minimize
it as much as we can, because it can ruin our artwork. So in order to avoid this, you can take your tape I need about this size
with a little extra, and I'm going to tap
it on my clothing, actually, either on my
belly or on my leg. So it picks up a little bit of the lint from your clothing, and it is not as sticky. You know, it is still very
sticky and very reliable, but it will sort of create a little buffer so we do not
peel off the paper layer. So we want to try to
avoid this as well, because paint can get
underneath this folded tape. Get the paper flat and
tape it to the board, trying to make it straight. So we have to make sure
this adheres really well, and this is not good either. So readjust it. Smooth it out. And this
paper is high quality, so you can take it off
a couple of times. This tape, I mean, trying
to make it straight. I'm looking through the tape and trying to measure so
that my sides are equal. This should be fine. I will
smooth it out with my nail. Now I'm going to tape the opposite side and do
the exact same process. Approximately measure a piece of tape with a little extra. We need a little
extra because we will be peeling it off
when we're done. See what I'm doing. Make sure it's well
attached because, again, if it is not
taped down well, paint will be coming
underneath the tape and everything will start
warping and dancing, and we don't need that. Now we're going to do
the vertical sides. And our final side. So we're all good taped
on all the sides, and now I need to
premix my paint. Preferably not on the surface,
I'm going to paint, right? And it's also handy
to have a pipette, you know, a dropper with water. So I am going to mix
a light blue color, probably something
like this, you know, very roughly, of course. So I will start with
squeezing out my white color. Quite a lot because this is a large surface.
Relatively large. So we want to premix the entire color right away
because it will be very difficult to match the shade once we have used up
the premixed paint, and we're like, Oh, I
actually need more. It is possible, of course, but it's just a little
unnecessary work. I'm going to add a little bit of water here and
Weeze out my blue. I haven't used this
paint for a while. So say it's crumbling a little. Start with a small amount. Maybe this is even a
little bit too much. So now I'm going to use my palette knife and
give it a good mix. It kind of looks
like my paper towel. This isn't the best vessel
that I chose because my palette knife can't touch the bottom and
ideally it should. I might grab a plastic
knife, actually. So I think this
might work better because it's very flexible. So this is not enough
to paint this ground. I need more paint.
So I will add more white and a little more blue. In place of these, you can
use plastic containers. There is a kind of cat food that goes around plastic
containers if you have cats. So, let's see. I think
this is still not enough. I might also add a
little bit of water. Okay, are you guys
ready to rock 'n roll? So we are going to
wet the paper now. My paint is ready. Hopefully
it will be enough. I have a water bottle.
You can spray the paper, or if you don't have a
spray bottle, it's okay. We're just going to
use this large brush, but I'm going to do it. It's essential to wet the paper so that gouache
spreads really well. Here we go. Water needs to be
clean, obviously, and we're going to put
a thin layer of water. You might get some
splatters here. It's okay. We will cover them as long as it's not a different
color, right? Like yellow or something. So wet the paper in
both directions. You can tilt it and look
on the side whether you have made your
paper wet all through. It shouldn't be soaking wet. It should just be moist. And now, quite quickly without going anywhere
with the same brush, we are going to start painting. If you get a gig in
construction business after thank me. I'm just
kidding, of course. So it's not going to be perfect. Don't worry about it too much. When it dries, it will look
better. It will look smooth. If your gouache is high quality, if the paper is the right kind, if your brush is fairly
good brush, it'll be fine. So now I'm going to paint in the other
direction like this. And see if I find some blue
clumps, I mix them in. It's very satisfying, actually. But this has to be done
in one go, you know? See how great and smooth
it already looks. Yeah. Well, I actually
had enough paint. I will do a couple more layers because I don't want to
have any streaks in here. I'm doing my best. Sometimes
there will be streaks. Not the end of the
world, for sure, but if you can make it
pretty, why not do it, right? Yeah, actually, I think I mixed up a little
too much paint. I was panicking,
but that's okay. I like to use this up, so I
might paint another ground. And I'm just
spreading the paint. I'm not adding anymore. There is enough already. See, the paper is
warping slightly. That's why we taped
it, and it's okay. When it dries, it
will look good. It's important to
relax your hand so you don't force
it on the paper. Just nice and smooth. I think we're actually good. I will show you what it
looks like when it's dry. See, everything is painted. There are no holes.
Nice and smooth. It's very important
to let it dry completely for at least an hour. If you can leave it
even for longer, because once you start
tampering with this, you know, you can
mess up your edges, you can mess up your paint. So just go get a cup of
coffee and let this dry. So I decided I had a little
bit of leftover paint here, and I decided to use it up, you know, so I don't waste it. See, this is bristol
paper as well, but I didn't tape
it, and I didn't make it wet before
I started painting. So see the difference. You can use this as
well. It works, right? You can still paint on it,
but it's not going to be as smooth and perfect
as our taped paper. I also wanted to
mention, you know, why paint grounds you might ask. I think it's a great starting
point for your imagination. You know, white paper
is scary sometimes. And when you already have
this color gets you thinking, you know, what am I
going to paint here? Maybe it's going to
be cherry blossoms against the blue sky or
maybe it's a coastal design, or maybe it's a baby boy
design or something like that. But of course,
normally you choose the color depending on,
you know, your project. So when I start a project, I already think about what kind of palette
I'm going to use, what kind of design, roughly, what is it for and
so on and so forth. So this one is just
a little extra. If you don't want to
waste your materials, you can use leftover paint and digitally
change it later on. You know, we can turn it into something vector if we're
not happy with the texture. But actually, texture
isn't necessarily bad. Sometimes you want to
have a texture design. Sometimes you want to put something painterly
behind another design. And I don't know if I mentioned
it in this class already. It's good to have a
library of textures. So something like this,
you know, scan it in. Maybe you'll need
a textured gold somewhere, something like this. Watercolor washes. These
are ink washes, actually. So texture is not
necessarily bad. Another thing to know is that wash reactivates with water. You see, this is already
starting to dry, but say, I want to
modify it a little bit. So I just dipped my
brush into water. See, it does look
lighter at first. And don't leave it
like this, right? You will have two
different colors. But if you start smoothing out the paint on the entire
surface, it will be fine. My ground is now dry. Look at this beauty. The other one doesn't
look so bad either. This needs to go
underneath a pile of books to smooth it out
for a couple hours. This one probably wouldn't
hurt either, right? Let's peel the tape now. It's so satisfying. Let's see if all my tricks
worked well and, you know, we're not going to pull
any layers of paper. So you have to be gentle
while doing this. Don't yank it. There's still
a possibility to mess it up and see how I'm
pulling it at this angle. Not like this kind of flat,
close to the surface. If you see that you started
to lift up paper on this end, you can leave it like this and just start
on the other end. It might work better. Go slowly. Don't rush. Also, another option
before I finish. So you don't necessarily need to take the tape off
now because you already know what you are going to paint here and
you are comfortable enough to draw and paint
on top of this background. So you could finish painting your entire
design, say it's a floral. So you would still be having it taped and you would
just be painting there. And when you are
completely finished, you then can take the tape off. But say you want to trace
something, you know, using a light pad, and then you would need to take this off and then
re tape it again. So let's continue
peeling for now. See, now I'm done
with this edge. It looks good so far. Nothing has lifted.
It looks great. Now I'm going to go to
the left upper corner and start peeling here
because this is on top. Again, be careful.
Don't rush it. See it even lifted
something from my board. I think I painted over
some kind of lint. That can happen. So far so good. This edge is looking great
all the way as well. So now we can start
peeling off the top. Pull it away. Be careful. See, I think we did good.
Nothing has lifted. See, this layer is
slightly lifted over here. There's a little bubble, but, you know, as long
as it stays flat, I'm not concerned with it, unless we're going
to re tape it again, you know, if we choose to paint. Looking good, looking good. And now we final side here. And I think everything
looks great. See, look at this beautiful,
smooth, made surface. The texture is
barely noticeable. I think we did a
great job, you guys. And I'll show you what we can do with this
beautiful background. So here are some of my
designs from college days, this collection was inspired
by 18th century textiles. These are the hand
painted guash, croque, and the fabric. This is hand block printed. This is digitally
printed by spoonflower. So I just wanted to
show you, you know, I was just mentioning that
while painted background. Both of these have been
pre painted in gouache. It's still taped to your board. I drew the motifs with a pencil. You can still see it somewhere. And then, you know,
this was still taped, and I painted these motifs, and that's how you got
this crisp edge as well. And then, you know, when
I was completely done, I peeled the tape off. See, there's a
little drop of water that got onto the
dry gauche surface. This is what happens then.
15. Lesson 15 - Meet Watercolor!: Welcome to our final block of painting for textile and
surface pattern design. Watercolor. I don't
think I need to tell you that watercolor
is a beloved classic. It has established itself
as a perennial trend. It doesn't go anywhere. It is used across different
categories, bedding, home decor, clothing, swimwear,
sleepwear, and whatnot. It's very popular
in baby products, including baby clothes,
blankets, and so much more. Watercolor is revered
for its breathiness, its airiness, its light
hearted and beautiful feel. I work quite a lot
with watercolor, and I'll show you some
examples of my designs. This is a Christmas
watercolor design. I probably doesn't scream
Christmas that much, but these inset of flowers and the greenery kind
of imply Christmas. There is a pillowcase
printed on cotton canvas, and these are the
original croque for this design,
painted in watercolor. This is the original
painting for this design called
Flowers of June. Both of these coways
are created digitally. This is what it looked
like originally. I will show you how to do this eventually in one of
my future classes, how to create digital colorways. Watercolor causes some
distress among art lovers. It is considered to be more difficult than gouache
or acrylic paint. I would agree with it, but
it's not as hard as it seems, and I will do my
best to share tips and tricks for using
watercolor successfully. The most important
thing to remember is that watercolor is all about Water, it cannot be used in
the same manner as gouache, for example, where you load your brush with a
lot of pigment. With watercolor,
you have to make sure your water is always clean. You have to change
it quite frequently. You have to particularly make sure your brushes
are rinsed well. Watercolor is not very
tolerant of muddiness. That's what robs watercolor
of its beautiful airy feel. So we always want to be
as clean as possible. And the art materials are a
little bit more demanding. When I spoke about
ink and gouache, I always said, we can use affordable brushes.
We can use affordable so all the money that we have saved on ink and
gouache supplies, we're going to spend
on watercolor. And I would suggest that
your watercolor brushes are separate from
gouache and ink brushes. That's what I try to do. I have some brushes that I use
with all my art materials, but they are very, very minimal. Let's talk a little bit
about art supplies, the artist colors,
and the brushes. And I spoke quite a bit about paper in one of
the previous lessons, and then I will do a
quick demonstration of what to expect
from watercolor.
16. Lesson 16 - Watercolor Palettes and Brushes: Et's talk about palettes first. This one is my favorite palette. I already demonstrated. It was a part of this Shiminke watercolor set. It came with it. It's ceramic, and I do prefer
ceramic for watercolor. You can use a tile, you know, from a home store if you're
working with small brushes, small size of paper
and everything. And for bigger projects, bigger brushes, you
can use the plate. These are the watercolor
brushes that I use the most. There is no need to buy
them all, of course. I will try my best to
explain what the minimum is, but brushes are really, really important
for watercolors. So in terms of the shapes, it's the same as for
using ink and gouache. So there will be round brushes, pointed and Filbert brushes, again, also kind of bland
and oval and pointed. Different sizes, right? Also, Filbert brushes. This one is called Cat's tongue. It's a new introduction
on the market, and these are script liners
or detailing brushes. I also use square and angled
brushes from time to time, but they are not my
most commonly used, and I will show you in a couple minutes some
other interesting shapes. Let me talk about these so back in the day
when I learned to paint and I started learning to paint when I
was 12 in Belarus, where I am from originally, we were told that only natural bristles
work for watercolor. And that was true at the moment, but right now,
things have changed, and there are some really great
quality synthetic brushes that can also be
used for watercolor. These guys, for example. Are
all the same brand and kind. They are Princeton Neptune. It's a great series. It's a synthetic brush, but it works amazingly
for watercolor. So these are sizes ten and 12. These are called quill brushes, and they are Da Vinci. Great quality brushes. They dig in a lot of water.
So this is the name. I'm not going to
read it in French. So these have strange sizing. So this is size three, size two, and size
two slash zero. So for a very long time, I actually only had these brushes. I also have a are
very good quality. They work amazingly
for watercolors. See how big the brush is and
it takes in a lot of water, which is very important
for watercolor. Next, we have quite
an affordable brand, which is called silver
silver black velvet. This is size eight round brush, and also size four, and I have a bigger
brush as well. So this is a great
economical choice, too. I believe they are synthetic. They work great for
watercolor. Tested and tried. Next we have Chinese
calligraphy brushes. They are very
interesting brushes. This is what they look
like when they are dry. This one's wet, let me show you. They have a great tip. So they do take in
a lot of water. We need to press them
dry a little bit, and then you have this
amazing pointed tip. They can be bought
in sets on Amazon, you know, Chinese
calligraphy brushes. I don't know what
this says here. But these are also used
in fine art painting. When I take watercolor
painting workshops, we use these brushes as well. So these three are
from the same set, and this guy is
just dry as well. Next we have some round brushes, and this is not
an official term. You know, I just
call them blunt, but they do not have as
pointed tip as the other ones. And like I mentioned before, it is handy to have both because sometimes
you are painting, for example, daisy petals and you do not want
them to be sharp. So this is Princeton art brush, round brush number ten. I believe this is a
synthetic brush as well. And this guy is also a great, great synthetic brush, and I
have them in multiple sizes. It's called White Sab
by Robert Simmons, and this is a size 14. This is another one
from the same series. It's a Filbert number one. Big brush, big next, we have a couple Filberts from Mimi Kalinsky
Creative Mark Series. They are both Filberts
number eight and number 18. But again, your choice of
sizes and brushes will depend on the project on the size of paper
you like to use, on the wells of the
paint that you prefer. We have more neptunes
Princeton Neptune. These are called overwash. I would call them
pointed Filbert, so size 1 " and three
quarters of an inch. Read brushes. Good stuff. These you might recognize from gouache or ink I
showed them before. So these are one of
the few brushes that I use across several
art materials. Prinston select pointed
Filbert, number six, Princeton Select oval mop
one quarter of an inch. Different shapes,
pointed and non pointed. This is an interesting
guy called cats tongue by silver silk 88 number six, a very pointed Filbert, nice for painting flowers
and things like that. These are script liners
when you need thin lines. Normally, you can
make thin lines with brushes like this, it
has a pointed tip, you do not really need to have
a specific brush for lines unless you are creating a very specific design
with a lot of thin lines. This is also Princeton Neptune. They come in sets, so maybe some of these guys were
together in a set. Number six, script,
Princeton Neptune and a variety of
different liners, creative mark number two and
number four, script liners. A couple detailing brushes, which you don't need as
much as you might think. Sometimes you need
to add little dots on flowers or
something like this. Is Coda reserva, these
brushes are very expensive, so I do not have a lot of them. Then we have Princeton
Long Round number two, which is a very
affordable brush and Princeton art brush
and co liner, and this is the size 20 to
zero, whatever that means. So a couple other brushes. This one we were asked to buy in college when we were
painting for textiles. It's Windsor Newton Scepter
Gold two, number six. It was very hard to
find for some reason. It's a nice brush. And this one is very affordable Grom Baker, number ten, Golden Age round. And as I promised a few more interesting
shapes of a brush nerd, if you have a lot of extra cash and would like
to splurge on brushes. So I do use these, but not
as often as the other ones. This is the cat's tongue
that I already showed. So some square and flat brushes, these are Princeton
velvetuch, half an inch wash, and Snap is a very cheap brush
from Michael's, I think, 1 " wash. As long as you
have these soft bristles, they should work for watercolor. Angled brushes
like this are very handy for painting color
chips, stuff like this. Is a breeze painting
with this brush, either of the two, you know,
the square or the angle. Some people paint
florals with them. I'm not a big fan,
but give it a try. So this is angled shader
by Princeton art brush, half an inch, angular shader, and another one, same thing. Are they the same? They
don't look the same, right? Oh, this is heritage. Okay. This is heritage, and this is non heritage. See how different
they are actually. Alright. This is a cool brush. It's called Dagger striper, and you can create long lines
with it with this edge. And you can make interesting
floral shapes as well. So it's a fun one to use. This one is by silver, Ruby satin three
eighths of an inch. And this whole big bundle
is triangular brushes. I have a little tutorial on my YouTube channel,
how to use them. They are really
interesting. See, they are shaped as a triangle, and they create
interesting floral shapes. I will probably include
examples over here. Again, choosing brushes, you do not have to buy
every single one. I just wanted to give
you some references, you know, some brands that
are already proven winners. And as you start painting, you sort of decide, you know, what size range you need and what exactly you
will be painting. The most versatile brushes are round brushes
with a pointed tip, size ten or eight,
something like this, and, you know, you will
probably need a smaller brush. So I would say this
is your starter pack, a number eight or
ten round brush and a smaller probably
number four brush. This is something to start with.
17. Lesson 17 - Watercolor paints: Water colo comes in tubes
and pens, just like gouache. And again, it's a
personal preference. It is a general opinion that
it stores better in tubes, but it's not
necessarily the case. I mean, anyway, you have
to keep these closed when you are not using them to hide them from light and air. I personally prefer pens, to be honest with you because they are
always ready to go. You just pull them out
and start painting. With these guys, you have to squeeze them out
on your palette. But again, you can make
some custom palettes, too, so it's a choice. We'll show you some of my
favorite watercolor brands. Again, you don't have
to get them all. I will start with the
most economical ones. I always like to get
a bang for my back. So the first two are sort of
brought to you by my roots. I'm half Russian
and half Ukrainian, and I'm a Russian speaker, and I learned to paint using
these back in the day. So the first brand is St.
Petersburg, made in Russia. These are the ones that I used as a teenager to start painting. This is a very reputable
factory that makes paints. So they're also
called NevskaPatra, which means the
palette of the Neva, which is the river, Neva, actually, in
St. Petersburg. So these are great quality, and the ratio of quality
to price is great. You might not find
this particular set because I bought it
about ten years ago, but they are available on Amazon in different configurations. They're also called
White Knights sometimes. So NevskP white Knights St. Petersburg watercolors next
one is a Ukrainian brand, which I discovered
actually just last year, but they are very similar in
quality to St. Petersburg. It's called Rosa Gallery,
Rosa Watercolor. So here you have a palette, and you can use it to
mix up your colors. It's a nice brand,
as well. I like it. So these are very similar to me. The next brand that I really
like and that is actually very affordable is called Prima Marketing or
art philosophy. They go by two names. So it's Prima marketing here. These are interesting. They are not fine art paints. I would say they are more
like designer watercolor, but they are actually
good quality, too. So they do not work
for fine art painting, painting landscapes,
and things like that. They are great for design. They come pre created
nice palettes like this. And I love these colors. Look at these yummy,
yummy greens. And I do love a premixed
color, especially for design. You know, I fine art, it's sort of frowned upon
to use premixed colors, but in design, I say, go for it. Look at this gorgeous palette. Everything works together.
Everything is beautiful here. The only disadvantage in my opinion is that they
are very, very small. See how tiny they are. So that means you would
have to use a small brush, and you cannot really paint giant watercolor
floals with these. That would be a little
bit challenging. But still, you know, I
use them quite regularly. I like these colors, and I do recommend this brand. My next go to brand
is Schmincke. It is very expensive watercolor, but this was sort of
my gift to myself. I think for 35 years or
something like that, and they come in
smaller sizes as well. They are German watercolors,
amazing quality, amazing segmentation,
highly recommend. If you can't afford
it, it's great. They come in tubes as well. Another nice brand is senilier which I use a little less
frequently for some reason, but the quality is great. So these are the colors. It's like a little travel set with a small palette
and a small brush. Daniel Smith is a great brand. They come in tubes and pens. They come with this pre
printed sheet of colors, but I always suggest that
you make your own something like this and keep it in
your box for reference. And I see, I edded some
colors, which were missing. I added a purple here
and the paint's gray. I mostly use this for
fine art painting, but they work for
textiles as well. And these are,
again, very small. So I do prefer larger pens. That's why I use this set. You can accommodate
bigger brushes over here. But again, maybe you
are not planning to paint giant floals, maybe this is just fine. I also want to show you this guy Durban is
a British brand. They make great colored pencils. This is actually ink. Even though it looks watercolor. Ink tens is their ink brand. They make colored pencils
with the same pigments, and they are very bright,
super highly pigmented. So this is a fun option. I wouldn't say it's my
go to, but sometimes, you know, when you
are looking for something interesting and new. Also, a word on these
Watercolor pens or water pens or whatever
they are called. I'm not a big fan of them, so you're supposed to put
in water in here, and then, you know, you just
squeeze your brush slightly and get the color
onto here and paint it. So I do find it a
little bit challenging, but some people really
enjoy using this tool. Another interesting
brand that I wanted to show you is doctor F Martin's. Liquid watercolor. It's very
popular in textile design. I see it on the Instagram pages of print studios all the time. They are very highly pigmented. They are already
premixed and liquid. So they kind of resemble ink, but they are actually
watercolors. And let me show
you some artworks painted with this
particular brand. They do separate, just like ink. So if you haven't used
them for a while, you need to give them
a good shake as well. So see here, the pigment is
all over the place already. But they can be diluted
with water because they are watercolors and they
come in multiple sets, and of course, I bought
them all. Color freak. Alright, let me show
you the artwork. So these were painted
with this Watercolor. Here, I use the
triangular brush, and I just realized I forgot to mention the brand of
these triangular brushes, so They're actually
not that many. So Princeton makes
triangular brushes. Silver was the
original manufacturer of this sort of brush. So this is the original one, and they only used to
come in two sizes, medium and large or
small. I forgot this one. So these are the two original triangular brushes by silver. It's called triangle, so
it's very easy to find. But then King art, this brand on Amazon, made a set with all these sizes. But this is more like extra. This is definitely not
something you should rush. To buy, okay? I just wanted to show you
all the different effects. So see how saturated these are compared to
regular watercolors. They are almost neon, and it's great because when you scan them onto your computer, you get these bright
vivid colors. So it's another interesting
brand to look into.
18. Lesson 18 - Watercolor effects: timing, moisture, general tips: Let's lay with watercolors and see what we
can do with them. And I'm going to use this
watercolor paper again. It's by Artisa and
it's the expert kind. They have several options over here if you pay
attention to this word, and these are my magic
numbers over here, right? I am standing right now. Usually, it's good advice to stand when you're
painting large. If you're painting
on a small size, you can sit as well. I'm going to use
Rosa watercolor. This set has 28 colors. General notes on
color and pigments. Remember to use this guy. He's your friend. Don't
freak out about colors. The most important thing
to remember is we almost never use colors
straight out of the pen. You always need to
mix them up a little bit with something because
it looks very unnatural, artificial and
cheap when you just take this colors
straight out of the box. Also, a very common
mistake is that beginners take too much
pigment and let me show you. Normally, when someone
starts learning watercolor, they get tortured with
watercolor washes. Watercolor runs or whatever
it's called in English, I'm going to wet my brush. A lot of the principles
we studied in gouache still apply to
painting in watercolor. But the most
important thing about watercolor is controlling
the amount of water. So at my brush, wipe it off, and it's important to have
enough water over here. If this is too dry,
it's not going to work. So you can just start playing even with
water, relax your hand. It's very important to keep
good posture and be relaxed. Otherwise, it's
not going to work. Keeping our paper towel
close at all times. So this is wet right now. What I could do is I start adding a little
bit of colors here. See? What I'm doing
here now is wet on wet. It is more difficult than
painting wet on dry, which would be, you know, I'm adding a little bit
of water to my palette. I'm adding some color over here. And I want to start painting
this gradient. More color. So before you jump into
painting your final project, play with your paper, brushes, colors, and
things like that. So, a very common mistake is that I'm going to use a
different color just for fun. See, I'm washing my
brush very well. It's very, very important
for watercolor. Even more important
than with gauche. So people start doing this. They just take this
very saturated color and start painting with it. They're afraid to
add water to it. But that's what makes
watercolor watercolor using enough water. Like, this is not
really pretty, right? I'm trying to exaggerate it. I mean, of course,
it can be a choice, if you want to use
watercolor squash, who's going to stop you, but that's not quite okay. We like these variations
of flow and water. So if I were to
paint something like variation is always key to
have a beautiful design, so you would have something more solid and something
more transparent. And that would make your
design more interesting. Let's test out our round
brush Princeton number ten. I made it wet, and I want to
use this turquoise color, so I'm looking at my chart.
It's right over here. I will mix it on the palette, and some colors are
more transparent, some are more dense, and you can see it by
those little markings on your paint tubes or pens, I will tell you which one is transparent, which
one is opaque. So see, this is too dense. Now I need a little water. So the round brush is
the most universal one. You can make lines. You can make different shapes with it. It's very easy to paint
leaves with a round brush, right? Basically two strokes. So it's good to practice. You know, take a sheet of
paper and practice leaves, and we will be painting
flower shapes, too, in one of the next lessons. So playing with brushes,
experiment with pressure. I'm going to get some
green just for fun. Can experiment with
pressure again. Even just this could be
a textile design, right? Like that. You can put it
in repeat and it's going to be a beautiful all
over geometric design. So we're playing with pressure, and we're always
playing with angles. See, I ran out of paint, so I'm adding a little
water, rinsing my brush, and I'm going to load
my brush with green again and bring it back
to my palette, mix it up. So when you're painting leaves, you can paint in this
direction, right? Like that. Or you can do the opposite
direction towards yourself, and it will look
slightly different. And you can change your
hand angle as well. And don't be afraid to let
things touch one another. Because then watercolor
will start flowing. I'm adding blue to my green. While this is still
wet, I'm joining these. You usually need two hues to
make a beautiful painting. You can also scratch with
the back of your brush. I filmed quite a
few small tutorials on my Instagram and Tik Tok, feel free to watch
them if you want to repeat simple painting process and painting flowers there. So I just want to keep
playing with the brushes. Always pay attention to
the state of your paper. Is this still wet or
is it damp? Is it dry? These I think are both dry. There's a little bit
of dampness over here. I'm going to grab a different
brush just for fun. It's my pointed filbert. I just want to paint
something over here to use up my paper. I'll use purple. Purple
goes with blue very easily. Colors that are close on the color wheel always
look harmonious together. And another thing
to pay attention to is if the color is warm or cool. You might not know all
the pigment names yet, but it's good to know, you know, what a cobalt is, for
example, ultramarine. But the most important
characteristic is warm or cold because also there
are so many brands and pigments these days. So what happens if I paint here? See, because this is
wet, it starts flowing, and the mastery of
watercolor consists of knowing how to control your
waterflow in the artwork. So there's no harm in playing and experimenting
with different techniques. Learn to make easy light lines because they look
organic and nice. A pleasure to paint with
pointed filbert is made for painting leaves and botanicals and flowers and
things like that. Also vary the intensity
of the same color. See, I didn't grab
any more pigment. I just added more water over here and make it
more transparent. And watercolor always
looks best when you have a variety of
transparencies, intensity. I ran out of pigment,
see, this is not enough, so I add more pigment over here, but this is too dark, so I'm adding a little bit of water. And my brush stays
wet at all times. It's not dripping wet, right? I think it's called
thirsty thirsty brush. So I'm freestyling right now. I'm just painting leaves. This is very relaxing. And of course, you can use
a pencil with watercolor. It is not super desirable
because watercolor is so transparent and you will
see your pencil lines. But it's okay. We will try both. We will paint something with
pencil and without, right? So this is our pointed filbert, love, love working
with pointed filberts. My brush is clean now, and I wipe it off and dab it on the paper towel and let it dry. I forgot to say something
very important. I think I mentioned
it in gouache. Don't be afraid to work
with larger brushes. You do not need to paint everything with
super tiny brushes. So size eight or
ten is a good size. But again, depending on
the size of the paper, size of the just try our script liner by creative mark and see
what it does for us. I'm going to use my
ultramarine blue, a beautiful, beautiful color because the
script liner is so thin, it's a little
challenging to load it. You need to rotate it at different angles to make
sure it's covered in paint. And this is just
made for painting. Thin lines, just like that. You don't really need to keep
it, you know, because see, it's really not very
good for anything else, just for painting thin lines. But sometimes you
really need it, right? See, I got some
splatter on my artwork, and sometimes it's
an artistic choice, and you can do this. But this cannot be undone, so think well before doing this. See how beautiful it is here. So, watercolor offers a lot of unexpected interesting
effects and possibilities if you
know how to control it. And you will know how
to control it, right? It's good to have a
spray bottle, too, to have fun and, you know, spray on your artwork. The key to successfully doing this is waiting
until this is not super wet because it will just
blend in with wet artwork. So these are some of the interesting things we
can do with watercolor.
19. Lesson 19 - Watercolor demo: floral lattice: We just had our
freestyle session when we were playing
with brushes, but now I want to do
some small painting with a pre drawn sketch. So this is student
grade watercolor paper. It is not very good quality. But because I'm
making more, like, a sketch, I'm going to use it. So what do I want to
paint? Let's see. What if we paint something like this floral geometric lattice? I'm going to use this
beautiful Indian box with cards as a reference. I'm going to sketch
it out with a pencil. The pencil shouldn't be
too bold and too thick. It will be showing
through watercolor. It's okay if it's
showing a little. Sometimes it even
adds interest to it. But still, we don't want to
make two lines and make sure your eraser is good quality because you can ruin your paper. If paper is not quite good, the eraser is not quite good. This one is, I think
it's paper made eraser. So always test, you know, how they say ironing clothes test in an inconspicuous place. The same applies to
using an eraser. And I'm going to sit down
because this is small and, you know, I'm not going
to draw like this. So because this is geometric, we don't really need to
repeat it many times. We have to decide, you know, let's look at this pattern. So we basically have this
element that repeats, right? And then we have
something inside. I will also try to change
it up a little bit, right? I don't want to
repeat it exactly. What if I do
something like this? And I'm going small, so we will need to
use smaller brushes. What if I experiment
and you know, I'm changing up the shape. I don't want to draw
exactly the same thing. And then we have these leaves
going out of the flower. We have to pay attention
to the curve, right? We have to decide whether we
want them mirrored or not. And sometimes it's challenging, you know, doing it by hand. Trying to replicate this
curve but reflect it, and I want to do, you know, slightly different leaf shape. Lucky procreate users, right? They can mirror
it automatically. Well, but that's the beauty
of hand painted artwork. We can mirror it in
Photoshop again. So we already have our lattice. I don't know, maybe
I should make them a little bit more
organic like this, so they join easier. And then something should
be inside over here. There's a little bouquet
situation over here. It's going to be half
dropped like this. There needs to be something. I'm going to fix my
lines a little bit here. And don't rub this too
much because it will smudge and it will ruin
watercolor effect. But at the same
time, don't freak out about being
too perfect, okay? You're fine. I promise. So what should be here? Well, they have a
little bouquet, maybe let's just kind
of borrow their idea. Shouldn't be too big
because it should fit within this lattice
shape, right? Probably be about this size. What if we have maybe
three flowers over here? Sort of like a little
geometric number, and it's important to learn
how to simplify things. Sometimes things look more
complicated than they are. But I promise when this is all together,
this is repeated, it will look interesting enough, and maybe we'll do two sets of leaves,
something like this. I just wanted to
show you how to sort of color this in color. And we could use
multiple colors here. This is only three
colors, right? It's blue, yellow and black, and it looks striking.
It looks gorgeous. So I do not really
need this line, so I can try to erase it, and there is some
smudging going on. I will erase it, too. And so these elements are small, right? So I need a small brush. I'm going to use this
silver brush number for black velvet round brush. I will start painting
my you know, I have to decide
which colors to use. So they have yellow and blue, and they are sort of, you
know, opposites over here. So I could also use, you know, a warm and a cool color
orange and green, maybe. Or I could do this
all in one color. I think that would be probably
good for us right now. We could have, like,
accents, right? Let's make the flowers a
warm color. Maybe pink. Okay? So I'm taking some red, which is called bright red. It's a little too
electric for us. I'm going to dilute it
with water a little bit, and maybe I'll even
drop some brown into it to make it a
little more earth tone. I'm using Sepia right now. Very carefully, with
the tip of my brush, my pen is relaxed. I'm just coloring in inside. I'm not worried that it's
imperfect. That's fine. It is hand painted, so I think we are right. Try not to be too sloppy, you know, make your edges clean. Ooh, that was an accident. Things can be fixed in
Photoshop, but at the same time, we don't want to give ourselves
more work than we should. And I want to make
these flowers ink, as well, and I'll try
to leave white centers. There is a hair on my brush.
I want to take it off. I paint around the center, so I have a white dot. So we could use our
pencil here as, you know, the line is black here, or we could even use a black pen later
on and draw on top. You are the artist. You
decide. So which color? I think I want to use, like an earthy green for these guys. And there is just a color in the palette it's called olive, so I'm going to use this color. A little bit more pigment. And, you know, I know I said, don't use them
straight from the box, but this looks like a
nice pre mixed color. I don't think it
needs any changes, so I'm going to
start painting now. So be careful not to smudge
your painting with your hand. So here I'm mostly
using a solid color. I'm still controlling how
much water I have here. I might leave out
some white veins for interest if I want to, and maybe I'll paint the
center green over here. So while painting,
I have to decide, do I want my colors to bleed or do I not
want them to bleed? If I don't want them to bleed, I have to make sure
they don't touch until at least one
of them is dry. That was another accident
happy accidents, right? Was it Bob Ross who said this? I have tiny Bob Ross figurine here that was actually
gifted to my husband. You know who Bob Ross is, right? Bob's going to
assist and inspire. So, see, we have some
thin lines over here, and this brush is thin
enough to paint them. So I painted it small. It's going to be a little bit challenging to clean
it up in Photoshop. But seriously, there
are only two elements, so we can survive. It's not bad. If I painted this entire
sheet at this scale, it would be harder, but
I think we can do this. And then, you know, we're pretty much done.
Very simple, right? You could add darker
areas if you would like. You could add, you know, a line. Could add more
definition, if you want, make it a little more
sophisticated and clean. I'm using the same color, but once I'm putting it as a second layer, it
becomes darker. I still have enough
water over here. I'm almost out of pigment, but I'm also almost done
painting, so I think we're fine. Just make it a little
bit cleaner, right? Or, like I said, we
could use a black pen. And very often
when I'm painting, I don't know right
away if I will be using a line on top or not. Sometimes it looks
really nice and clean and it doesn't
need any definition. I always feel like
putting a line is like cheating because it
makes it better instantly. It's good to learn to
paint well without using a then you can
always add a line, right? It's always a choice. I think I want to refine
my red flour, too, so I clean my brush really well, pad it on the paper
towel, go back to my red. This has become too transparent, so I'm going to add
a little bit red again and my sepia again. So this is a little bit darker, but that's fine because I do want to refine my
lines a little bit. Simple patterns are very often super efficient
and good looking. Not everything has
to be complicated. Let something be easy in
this life, right? Simple. And maybe a little more
definition on these little guys. And see we are working
with just one brush. We don't need to use
a script or anything. A script liner is
really when you have to have a thin and long line. If you just need a thin line, just the tip of your
round brush is fine. The white center a little bit. I think it'll be pretty.
What do you think? Maybe we could use
a little filler dot around, you know, in the middle. I just got this idea, and I'll show you in a second. And maybe it could even be
a third color, maybe, like, a more yellow orange.
Something like this. And I could use the same
brush or I could get, like, a stubby spot brush. And then we could move them. You know, I'm giving
myself more work now. I hope you see what I mean. So this will be our element. Then it will be repeating
into a lattice, and we will have flowers inside, and we will have this
dot filler around. Yeah, see, the pointed tip
is kind of in the way now, so I'm going to
get a blunt brush. Use this baby Prinston
velvet touch size zero, really small. Let's
see how it works. Maybe it's even a
little too small. I tilted a little bit, and this is just a filler, so don't freak out
about it too much. Just dots, simply dots, but we are going to move
them around, right? So what do you think, Bob?
I think we're done here. And I will show you, you know, more complex projects
in the next lesson. I just wanted to
sort of give you a taste of how to
use watercolor.
20. Lesson 20 - Watercolor Christmas design part 1: gathering referencing and pre-planning: Can you hear it? What is
it? It's Christmas time. Creating Christmas designs is essential for surface
pattern and textile design. There are so many different
ways to portray Christmas and so many product categories that the artwork can be used on. And watercolor is also very
well applicable to Christmas. We are also going to combine one more popular
topic painting bird. Birds are an extremely
popular motif. You can see it pretty
much anywhere. I'm going to use this beautiful
card for inspiration. And this is a set
of postal stamps. Each one represents the
state bird and plant. So, for example, I'm
in Massachusetts, so for us, it's black
capped chickadee. And mayflower, but we are going
to be painting cardinals. These beautiful
illustrations, and I will try to find the
artist's name and include it somewhere are a
great example of poses that we can use
for textile design. Not all of them, but, you know, the most traditional poses
are something like this. You can see some birds
with wings spread. We are probably not going to use complicated poses like this. I totally understand why the artist would
do this, you know, doing such a large
illustration project, we want some variety
and interest. But in textiles, you know, in fabrics, surface
pattern designs, people normally react better
to more traditional poses, you know, profile view and the view with spread
wings, things like that. I'm also going to use this
Brex catalog for inspiration. Beck is the company
that sells Dutch bulbs. You know, Holland has famous for selling bulbs for centuries. And this is a gift catalog. And looking at catalogs
like this is very helpful to see what kind
of motifs are popular. So of course, it's a
lot of flowers in here, the beautiful amaryllis
that is actually now blooming in my studio.
It's February now. So holly with redberries is
a classic Christmas motif, and some botanicals and
flowers have come to be very directly
associated with Christmas. So you can see, you
know, Santa Claus and elves and gingerbread, examples of, you know,
Christmas motifs, snowflakes, fair Isle, sweaters. Pine cones and evergreens
of all different kinds, furs, pines, junipers,
and whatnot. Lots of redberries. This is a wonderful design. I think we're going to use
it for inspiration as well. So we are going to be
painting something like this, Branches with redberries
and red cardinals. Here's another great example
of a Christmas design. Wreaths, all sorts, right? This is a wonderful
illustration for Christmas. Obviously snowmen of all
kinds, Red Cardinals again. So in the United States, red Cardinals are birds that are very directly
associated with Christmas. I am from Belarus originally. We do not have red Cardinals
there, but instead, we have these beautiful birds that are called
Eurasian bullfinch. They are also kind
of associated. They're winter birds, you
can see them in winter, so we are going to use
those guys as well. So what I like this
illustration for is the way the artist
simplified the red cardinal. And another important
point here, see how friendly this bird is. Red cardinals in nature, are known as angry bird, right? But in commercial design, we often make our characters friendlier than they
are in real life, because we want people to have good emotions about
buying products, with smiling birds or at least, neutral facial expressions,
if we can say so. It's handy to have
a book like this, you know, some kind
of encyclopedia. So here you can see all sorts of flowers and animals
and whatnot, rocks. So I found a cardinal
for you guys. Here it is. So this is the way a cardinal looks
like in real life. Very grumpy, right?
So for design, we are going to make this
guy a little friendlier. I know look at them.
They're all grumpy, but for design, we are going
to make them friendlier. And how are we going to do it by turning their smile
upward a little bit. It's time to work with
a sketchbook again. I want to have a rough plan of what I want my
design to be like. I know I will
definitely have a bird, you know, maybe one or a couple. I would have to decide, like, which direction I want them in, but you can always rotate them, flip them in Photoshop. So I want to have a
bird that is seated on an on a bench on a branch, and I want to have, you know, I'll see maybe I have
one profile bird and one bird that is sort
of like this front facing. So and I will change
his tail angle. So birds are usually the body, the head, the tail, and wings, the beak, of course. And sometimes you don't
even see all of them. Sometimes you see
the little legs, sometimes you don't
should I say little feet. And I want to use a few
different kinds of greenery. There will definitely
be red berries. Maybe he will be seated
on something like this, you know, something
with red berries. And I could bet that I probably already painted
this a few times. Of course, you know, this
guy is not flying either, so he needs to be seated
on something else. And I think I'm
going to be using fur needles short like that. Pine needles probably
with pine cones. They have long needles, and there will be a pine cone. Maybe this will
be a pine branch. Holly is a signature
Christmas plant like this. It's pretty much a must. It's very prickly. I work at a botanical garden part time, and trust me, it
is very prickly. So this is not a final design. This is just my, you
know, thought process, so I don't want the branches
to overpower my birds. I could have, you know, a
totally overlapping design, and I'm going to include
a couple of pictures. You know, as I was
researching this project, I found a beautiful hand
painted design by Laura Ashley, which is a brand
famous for their shabby chic aesthetic,
which I really like. So many ways to go here,
many things to do. So I want to have some
pine needles, pine cones, redbrries, more
redberries over here, and something over here. And remember, I was showing
you this tin over here. Something like this, a
camelas a beautiful flower, but not to every person, it will immediately ring a bell as a Christmas
flower, right? Well this is really, really Christmasy over here. And I'm going to borrow, I think, some shapes from here. See? The beauty of
this design is that there is a variety
in leaf shapes, larger shapes, and
smaller like this. There are white berries.
There are red berries. There's this beautiful snow
covered fir tree branch, really nice design,
it's probably digital. So if you're interested in
painting white berries, which obviously we can't
paint white on white, right? There are three options. You would either use
a premixed gray. Some palettes have
a gray pigment, like this palette
from art philosophy, or you could mix
up your own gray, which would be if you
mix primary colors, red, blue and yellow, you'll get a gray
neutral hue and you can use it to indicate
some shading, at least. Here, obviously, I use green. That's also an option. So see, there are some
white flowers over here. And here I did mix up red, white, and blue to get. The third option would
be to just sort of paint a white silhouette with
a little bit of shading. And then on the computer, you would put a dark background
behind the white berries, and another option would
be to use white guash. But again, you won't see it against the white
background, right? So in watercolor,
we usually paint white objects by
negative painting, which means painting around. You can see these flowers mostly because
there are a lot of greens and reds around them and some slight indication
of light blue, you can use blue as well
instead of gray shading. Maybe I could borrow some
ideas from here, too. I like the idea of having
these large vignettes with, you know, leaves
and red berries. I like the idea of having
white berries, too. You can also have blue
berries, you know, juniper berries are blue, so they are wintry
berries over here. Oh, you know what I'm thinking? Bows are trending right now, so we could probably
throw in a bow somewhere, maybe on like a wrench. So we would have to repeat
it somewhere, I think. But we can do it
digitally again. Now I have to decide
what size I want to paint at and which brushes
will serve me better, you know, to paint specifically, for example, pine cones. You can use a small
pilbert brush. So painting those
pine cone scales will be a joy using fiilbert
brushes, not pointed, but blunt fil can be
like a one stroke thing, two stroke thing leaf, and we will probably use maybe even some script liners
for the needles over here. And I also have some motifs that I painted a
couple of years ago, but I never put them on repeat. I will pull them
up as references as well. We can use them, too. Some ideas of
Christmas greenery. That's what I was talking about. I'll probably have something
like this in my design. So pine cones with very
simple brush strokes. Something like this is
very easy to accomplish. So it's mostly, you know, if you want to paint botanicals, it's a good idea to learn
to pay attention to shapes, you know, leaf shapes,
flower shapes. How many petals? How are they located and
things like that? More Christmas greens. These are all achieved by
using different brushes. This was probably a
small triangular brush that I tangle brush. I keep calling it
triangular. It's a triangle. And, you know, this
is just the tip of the round brush painting
around the center, and this is the round
brush probably like this. And these, you know, we will
paint flowers like this in our following lessons where we paint loose
watercolor floals. So in this lesson
about the birds, I want you to paint with me
in a traditional manner, which means, you know, we will make a pencil sketch and we will color it in slowly, you know, without stressing out. So see painted some
birds previously. Very simple sketches. You know, these
were done without pencil sketches, I believe, so I was just
painting, you know, directly on paper.
And you can do that. You know, it's a good
exercise to sketch like this. But if you don't feel confident, that's totally okay, and we are going to sketch them
out in pencil first. And even something as simple as this can make a good
Christmas design, too.
21. Lesson 21 - Watercolor Christmas design part 2: painting main motifs - traditional method: So I'm going to start sketching my first bird on a branch, and I'm going to use the same Artisa paper
that I used before, and I'm going to paint here. If you don't feel confident
drawing directly, you can draw elements in
your sketchbook and then transfer them using a light
pad or transfer paper. That will definitely
take longer. So I encourage you to try and
draw directly on the paper. But remember, we're not going to press too much
against the paper. I'm really looking at the
silhouette of the bird, and it shouldn't be
perfect by any means. Just a little plump body, and they have this little
black area around their beak. And eye. And see in nature, you can't really see their eye, but we are going to
exaggerate it a little bit. Like, see here, they added a
white line around his pupil. We'll do something
simple, you know, we shouldn't go too crazy. As it goes for eyes, noses and mouths, it's
very often just a dot. We can give him a little
smile by doing this, or we can just even leave
it like this, you know, just a yellow triangle
or an orange triangle. So and he's going to be
sitting on a branch. You could indicate his
little legs slightly. Well you don't have to. So
I'm going for this, right? And he's going to have some
red berries on the branch, probably something like this cluster of berries over here. And I don't even need to
draw every single berry, just an indication of it. I don't even know if
this plant actually exists. It doesn't
matter, really. I hope no one's going to check. So I'm going to paint him, and then I will draw
other elements. Because if I draw
everything now, I will start smudging all over my paper, and
we don't want that. I have to finish up his tail. Did you know that
red cardinals are male and female cardinals
are beige in color, like, sort of neural
warm neutral gray. And what about his wing? So we will gently indicate
his wing over here, and I will start painting now. I'm using my Sminka watercolors, and right now, I'm going
to use these two brushes. So number four
with a pointed tip and a filbert number eight. So his beak is yellow, and I want to start
with it because once I start painting
the black area, I don't want to contaminate
my brushes with black, so I will do it a little later. A little orange. Be aware that this is going to be a
color present in your design. So it's okay to have, you know, little beige here. They even made it red. I guess it's this color, too. So we need to remember
that this is wet. So if I start painting my black, right now, they will bleed,
and I don't want that. But I can start painting, you know, maybe the
branch, the berries. I'll probably paint the
branch now with brown. I want to make it a
little bit darker, so I'll add some sepia to it. Remember about having enough
water, very important. And remember to try to keep things transparent still, right? I'm painting with a
tip of my brush now. So I think I can start painting his bright
red body right now. So this red is a
little bit too cool, so I'm going to
add orange to it, and we get, you know, this more precise hue, I think. So we could even show
some of his hair on top. I could play with the
amount of water here, maybe make him a little bit more transparent in some
areas because see, we have to show
his wing somehow. Here, they use a
slightly deeper red. The body is a little lighter. As I'm painting, I'm
remembering about this because when
this will get dry, you'll see the stark line
and I don't want it. So let me finish his
belly real quick, and I think I want to probably
just make it lighter. So I will use more water
with the same color. And if my brush is too wet, I pad it on a paper towel. It's a little bit too dark, so I want to add more color
and blend it a little bit. And I'm going to
paint his tail, too. So we don't want to use the
same exact color everywhere. It's going to be boring. So I just added more
orange over here. Let's look at his tail. This, again, doesn't have to
be scientifically correct, just, you know, recognizable, so people can say, Oh, it's a Northern cardinal. I hope I don't hurt any
ornithologist feelings. We can actually use
the same yellow color as we used on the
beak for his feet. And the cardinal is probably the hardest part of this design, so painting branches
will be much easier. Maybe that's a little
bit too electric so adds a little bit
of this brown to it. But it just has to
be an indication. It doesn't have to
be super precise. So I'm going to
add my leaves now. Oh, actually. I already
washed my brush from red, but I could start
painting the berries. But I think I will start
with painting green leaves. I will use this beautiful color which is called
permanent green olive. I could try, you know, a different direction towards the branch or away
from the branch. And I want to use
another shade of green, so I'm leaving some space. I will use this bright
color called My green. It's important not to overdo. You know, this is already
getting kind of heavy, so no more leaves here, and I will clean my
brush very well, and I will try to use the
same brush for berries. I will add more red, and painting it with
filbert should be easy. Vary the amount of water
for more interest, and I'm also going to use
another shade of red, and I'll probably use
a different brush. I'll go back to my pointed
round brush because see, all these shapes kind
of look the same. If I grab a different
brush and a darker red, it'll be more
interesting, I think. And we can let them
bleed slightly. I think with berries,
it's acceptable. You can even indicate some
shine on the berries, right? Leave this white area over here. Watercolor is
subtle. Very often, all you need is a spot, and you can tell it's a berry, right, but it's just a shape. I'm taking oil
painting classes now, and the teacher always
says, it's just shapes. You know, I say,
Oh, painting cows and sheep is difficult. And he says, they're
just shapes. Even portraits, you know, even painting faces is
very difficult to me, but my teacher keeps repeating
they're just shapes. So you could use this dark
color maybe to bring in some texture to feathers, be careful not to smudge with your hand and always
clean clean water. Of course, it's getting
cloudy a little bit, but clean your brush on time. So I keep looking
at my reference. We definitely simplified
him quite a bit. So it's time to paint a black area where I
will be super careful. I will load my brush with black. And I'm referring
to my color chart which you cannot
see, but it's here. So to see which color to grab, I look where they are situated. I'm loading my brush with black, and I need to be
very precise here, so I'm sitting down, and I will start painting the eye and we can do what
we did to the berries, you know, kind of similar and
leave a little shine here. So this area is very
easy to overdo, so you have to be careful here. And I'm painting around the eye, so we can see his eye. We don't want I know here
you can't really see it. But in commercial design, things have to be very easily recognizable and comprehensible. I think he's cute. What do you think? So this is looking a little
bit flat right now. I might add, you know, some veins on the leaves. I could, you know, add some
detailing to his beak. You could outline
the entire bird, if you would like
with, you know, the tip of your brush
and the red color. We could also show a
little bit more detail on his little feet. I'm wondering what are
birds limbs called? Are they called feet or
paws or whatever they are. Okay, so we could
add red to yellow, and then we'll get orange, and we could just have a
couple lines over here. And we could give
him a little smile. So it's not always
appropriate to give a smile. You know, if it's like a
sophisticated bedding design, you probably don't want
any emotions on the birds. Ends. I think, you know, don't make them
grumpy like this. I know it's unfair because
that's how they are, and I actually like
their character. And when I was in college, I painted a bird design with very grumpy birds
I included here. But, you know, as I was
working in corporate design, we were always told things
have to be positive, things have to be
uplifting. So, let's see. We could also add some
branches over here. And even mixing it up with
green, the same color, I'll indicate some
lines on my leaves. Don't try to make every
single spot perfect because it makes a design look
constricted and forced, so it's okay to have slight
imperfections here and there. I will probably add
a little bit of outline to berries
here and there, not every single berry, for sure, but a few, just so the eye distinguishes
that it's a berry shape, not just a colorful mess. I don't know if this
was a good decision, but now we kind of
have to go with it. You know, an outline is
not always necessary. You might think it
is, but no, it's not. He does have some gray feathers, so we can pretend. What it is. When you have a clean
line on the edge, it's easier to clean
shapes in Photoshop, but don't let that
restrict your creativity. Okay, maybe a little
shadow on his tummy. I think we're good, right? So I'm going to let him dry, and I will move on to whatever
next thing I have in mind, you know, it could be
a branch or a bird. Let's see. So when watercolor
dries and, you know, when guage dries, things
usually change a little bit. Remember, I was going for
two shades of green here, but so far, it's
looking the same to me. So I want to reinforce this
yellow green hue over here. And as it is completely dry, I can add another layer. Things will not bleed anymore. You will just have, you
know, transparency. Oh, that was an accent. Yeah, that's I guess
a scary thing about watercolor is that you
can't fix a lot of things. So now I'm looking at this general shape and
it's kind of clunky, so I want to make it
a little bit longer. Yes, sometimes you unfortunately ruin things as you,
you know, paint, but it's kind of fun to
learn to fix them as well and see where
the design leads you. So very often, you know, when I start painting, I don't know what it's
going to look like. I have no idea. I
think I will stop. I really don't
want to overdo it.
22. Lesson 22 - Watercolor Christmas design part 3: Painting branches: Now, I want to paint this branch with pine
cones and pine needles. And I know here I drew
it in this direction, but here I actually want to flip it because I think
it will look better. If I paint this branch
parallel in the same manner, it will look too similar, but I will paint it in
this direction like that. I'm going to paint
a branch like this, but with the shape of pine cone. I hope this is not
terribly wrong, but technically, you know,
I'm a little bit of a nerd. Usually, I research, you know, if this is a pine tree, what does the pine
cone look like? But I don't think that's
what everybody should do. I think we can go easy on this. Even though recently, I saw
some jokes about, you know, only red cardinals being
on all designs means, you know, they're
male cardinals. See, here we have
all our conifers, and they are close to the beginning of the book
because they're really ancient. So, yes, I guess having the sort of needles with
the other pine cone. Oh, no, actually, we could do see Japanese umbrella pines, so this is what we're
going to paint. So I will have, you know, this pine cone and I will have long needles in
different directions. And we will erase
the pencil later on. So it looks neat and nice. So something like this,
it's a little empty here. Let's just start painting
and see how it goes. We already have some
brown on the palette, so we can continue
using this paint. Very easy. Easy does it. But when we're looking at trees, it's helpful to pay attention, you know, the way
the needles attach. Like, where do they start? Do they grow out of
the branch itself, or are they on top of
the branch like here? So it seems like they
go in clusters, right? And I can start playing
with my pinecone while I have brown on my brush, and we can use several
shades of brown as well. You can use one
shade if you want. I guess it's just my
personal preference to use two shades of everything. I think variation just makes
things look interesting. Also, you know, these scales are larger on top of the pine cone, and then they will getting
smaller as we go down. It's okay to make
some things touch. I always say that, you know, branches touch in
nature all the time. And there will be beautiful
watercolor bleeding. I think this says pine
cone to me, right? I hope it does to you as well. Can add a little brunch. Maybe that wasn't
even necessary. So if you want to remove
something real quick, while it is still
wet, wash your brush. Who is it dry and
just lift your paint. This is called lifting
and do it again. See. So warm colors are very difficult to lift because
it has orange in it. You know, it's not
lifting as well as it could. But I
think you'll be fine. You know, when it
dries, it'll be okay. So now I want to
paint my needles, and now is the time to
break out our script liner, this guy, the long thin brush, make it really wet through, and I want to have
a dark green color. I'm still using the same
permanent green olive. But again, it doesn't really
matter which pigment it is, but I want to make
it even darker, I'm going to add
ultramarine blue to it. You can add a little bit of
black to make colors darker, but it is considered that
black dulls the color down. I would say, be careful
with using black. You can also use sepia to
make it darker or purple. I probably don't use all
of them at the same time. Now let's paint our
long thin needles. So when I painted this, I probably wasn't
using a thin brush. That's why they look so chubby. This is not my favorite, but hopefully we can
fix it on this one. Alternate the direction,
you know, in and out, and I will probably
also use another hue. So pine trees are very fuzzy, and some of the
needles will overlap. Just make sure it doesn't look too messy, you
know, and crowded. I'm running out of pigments, so I need more water and
more pigment, again. As I'm painting, I'm looking
at the general shape. Obviously, this is too bold now, there's not enough needles. So this is a big empty area. I have to decide what
I want to do here. Maybe there will be
another cluster over here, and maybe that's
a good chance for me to use another
shade of green. But the thing is pine needles
are not really this color. A board mission,
let's add blue to. I will add indigo, a very dark dark color, sort of black and blue. So my cluster will
probably go this way. And remember, I mentioned
one of the previous lessons. Don't let things touch
with their points, right? So make this overlap, cross the other needle. Hey, I can rotate my
paper because this is a little uncomfortable for
me to paint at this angle, so I'm going to
cheat and do this. I want to add a little
branch as well. So, see, I got some
splatter here. You can either try to lift it again with, you
know, paper towel. I put it in water a little bit. But it's probably
too late. It's okay. We can remove this in Photoshop. I'm running out of colour again, but I mixed up some more, and we'll actually
probably cover this. Just don't want to bleed. Sometimes you want the
bleeding and sometimes you don't you have to be
in control, right? You have to decide what
you want and where. So I added really a lot of
indigo to my green color, so it's going to be darker now. So I'm coming back to
my original shape. So you see, there
is a big gap here. This is not cute.
We need to fix it, so there'll probably be
another cluster over here. And maybe even I'll probably just add a brown
branch over here. I don't want to
overcrowd it too much. And imagine there's, like, another branch behind
the pine cone. Maybe a few needles. So I'm adding brown now to
throw in a branch over here. My brush is too dry, so I'm adding water. So I don't quite like this gap over here.
What could I do? I could add a little
volume to my branch. Also cover up my unnecessary
bleeding, right? Uh, just a little detailing. Not too much. I think it's fine. Maybe I'm just maybe, like, one needle over here. Just one transparent. That's the answer, too. I will add more water to my green, and I will add some transparent
needles here and there. It's going to be a nightmare
to clean it in Photoshop. Yeah, I didn't think of
that. Let's be honest, but that's okay. We
can do this, right? I'll show you how to do it. But this is going to be more challenging to clean
than this, for example. Don't quite like how
this looks over here. It looks strange, right? So maybe what I'll do is I'll add a little bit of
color down here. Almost just water, a
little bit of brown. So, you know, Is it better? And maybe a couple more needles? Yeah, I think that's a little
more natural. Alright. As I was focused
on my pine branch, I didn't notice that, you know, I painted it bigger than the
bird itself. It's quite big. So when you're painting, it's a good idea to
come back, you know, to look at all that you
have on your sheet of paper and not just zoom
in into one thing. But it's okay. Again, we
can fix it in Photoshop. We can shrink it a little bit. And it's definitely
better to have something big rather than too small. Now I want to paint a branch
with a little red bow, so it's going to be over here. And I'm not super concerned about my pattern layout for now. I just want nicely
painted motifs, and I can rearrange
them in Photoshop. But at the same time, I do have it in the
back of my mind. So I am thinking, you know,
we have needles here. We will have needles over here. So a good balance. If you are thinking of the composition a little
bit as you're painting, you are helping
yourself later on. But again, you can, you know, take elements like this. You know, there's no
composition here whatsoever, and you can rearrange them
in Photoshop as well. So I will start with a bow because this is
kind of the point. We already painted bows, right? And gosh, I forgot. So something simple. There will be a branch. Over here, maybe, like, a triple branch,
something like that. Short and stubby. And I will continue
painting with brown. And actually don't need
this yellow color anymore, so I'm going to
clean my palette so I have space for other
colors that I might need. So I will start with my branch sort of to give myself
visual direction. And you can have these
cute little pine cones at the pine cones or fur cones
or whatever they are, right? So I want to erase
my bow a little bit, but I need to be careful not
to smudge my brown paint. Could really just be
a very simple bow. I don't have to
show all the folds. Again, red and orange. You could probably have,
you know, in some palettes, there is a really
beautiful premixed red, which is kind of rare,
something like this. This one is from another
palette to a Christmas red. From Artisa I will make a very simple bowl a
little more pigment. And I think it's okay to
go a little dense here, a little more saturated, you know, but see
this is transparent. We could show some
dimension behind it, right? And maybe a little water. So we have some variety. I think that's good. And
now I need something, you know, not as long as this. I could probably do this, but
it's going to be too thin. So I want to use our long round Princeton
brush number two. So we need another green, and, you know, painting
a bunch of botanicals, you're often challenged
with differentiating all the greens
because we don't want everything to be
one paint color. I already said that, right? So, so I just added
olive green here. I can also add yellow ochre, which is an earthy yellow color. See it will make it a more
natural organic green, and I will just go in and
paint all the needles here. I think this is super
fun. What do you think? See, it's getting a
little repetitive, so I will leave some space, so I can add another hue and I have to decide
what happens here, right? Do I have needles here? Maybe some? Oh, I got
some brown in here, but it's actually okay. Just to make it a
little more earth tone. So they all are about
the same length. Now I'm going to add a
little bit blue here. We have our hue
variation over here. So as things dry, it's important to go in
and evaluate and see, maybe something's
got too pale and you need to add more
darks here and there. Be watercolor is so transparent, we want to have some
dimension to it. We don't want everything
looking flat, right? That's why we are using
several hues of green. That's why we are varying
the amount of water Okay. I'm looking at the silhouette,
you know, the lines. So this is looking
a little strange. I think I need to fix
this maybe even more. Needles like this, I think
that's better, right? So the bow is now dry. I could go in and add a little shading to
it if I want to. So it's not as flat. Maybe some shadow behind. What if now we do our centered number with
berries in the middle? I hope it doesn't matter how many berries you're
supposed to have here. And these pointy leaves, and I have to decide do I want to have one more
petal? Maybe two. I think two will look
a little more organic. And I also make sure
I don't make them all the same exact weight. I think that's
good. I'm going to use this pointed oval
wash number two, masters touch brush,
which is, you know, a small filbert to
paint the berries. You can definitely
paint the berries with, you know, a round brush
or any brush whatsoever. I think it's just easier. This shape really helps with
painting round objects. I'm using a deeper red, which is called Perlan maroon. I want my berries to
shine a little bit. So the shine just
has to kind of be on the same side because see if the light is
coming this way. I mean, the berries are
rotated, of course, but you'll have to remember
where our light source is, and I'm adding a little
bit of orange in order to give some
interest to my berries, so I don't have just
one hue for everything. I'm going to use this silver
brush called cat's tongue, number six, but you can use any medium size pointed
filbert for this, too. And you can also use around
glossy, glossy dark leaves. So I'm using green that is
called cobalt green dark. A little too much water. We could leave out
some white areas. It will imply the gloss,
you know, and shine. Time to switch up our
hue a little bit. I'll add a little bit of this
green, yellow sharp points. It's the essence of
this plant, right? Holy. The ultimate
Christmas plant, isn't it? Switching up the
transparency a little bit, evaluate the general shape, you know, connect some things. This is maybe a
little bit too fuzzy. I don't know if I
want some green in the middle and maybe a slightly
pointier tip over here. I think that's it. I would
probably paint one more bird. You know, honestly, I would paint a few more
elements, maybe, you know, holly branch like this and maybe another
angle of this bird. But as an experiment, I will leave this
as four motifs. I usually go with an odd
number like five motifs, but I think I will
give it a try and try to make a pattern
out of four elements. Just always make sure
you have a nice variety. If you have just
one or two motifs, it might not be
enough. It can work. Of course, you can flip and rotate this bird and you
will have a pattern. But I think it will have
way more interest if you have a variety
of leaf shapes, a variety of branches, a couple of pine cones maybe. Another thing we could
also do I think actually, I might paint a separate
pine cone, you know, something small, because,
you know, this is big, this is big, this is medium, medium, and we need
something small. But what I often do is I pull something out
in photoshop and, you know, make a little
element, a filler. So I just painted a
smaller pine cone branch, so we have a nice balance
of sizes for our pattern. And we have five
elements now and see, there is some repetition, berries, echo with a red bull, with a red bird, and, you know, we have a
couple of pine cones. I also added some dark
elements to my pine cone, but I might still play
with this area in photo. Still not quite happy with it. Maybe what I will
do, I will remove this leaky area in
Photoshop and just grab a section of these
needles and put them behind the pine
cone, whatever cone. So as this is completely dry, I want to erase my pencil
line because I don't think it adds any charm to
this particular design. So I'm going to go
over and erase it. And I might add
some deeper areas because this has dried and
become a little bit flat, which is natural for watercolor. So before doing this, you have to really
make sure this is dry. So watercolor is a
multi stage job. As you noticed, we have to
wait until things are dry. We have to add more layers to it because it dries and
becomes flat and light. So watercolor requires patience. So the line that
is already covered with paint cannot be erased. That's okay. But, you know, wherever we do not need it and it's here on white
paper, we will erase it. It will make the design
look cleaner, nicer. There is a special
brush to do this. This is mostly used, you know, when people are
drawing with pencils. So it's a Davinci brush, but, again, you don't
have to get it. You can always rely on your
hand, right, and do this. But the reason we're
using this brush is because we don't want
to smudge our art. I want to add a little bit of depth here and maybe here too. So I'm mixing up my green
and a little bit of indigo, really, really dark color. And maybe a couple dark
spots on the pine cone, too. Pia and a little bit of black. Us a little bit. And just
some definition, you know, because it will dry again, and it will go dark
again. I think that's it. So here I put together another implied
repeat for you guys. An implied repeat means that
it looks like a repeat, but it is not an actual
technical mathematical repeat. I included more information on this term in my
introductory class. So see how reusing the same five motifs that
we painted together, I created a pattern, basically. Of course, I made
copies of them. First of all, you
know, I scanned them. Them out in Photoshop, I
deleted the background and all the little speckles
and unnecessary pixels. And then I made copies
of those layers, and I arranged my motifs
in a harmonious way. So there are multiple
ways to do it. And depending on the
product in mind, you can have a different
amount of white space. So this could be a tablecloth, for example, there
is a term easy care, which means basically
a plastic tablecloth, so I think this pattern
could work really great if we space the motifs
out a little bit more, we can get a bedsheet pattern. Another thing to
consider is do we want the pattern to be two
directional or four directional? And I also included in this
in my introductory class. Another thing to think about is maybe using some
kind of filler. So maybe some water platters, in the white spaces around
the birds and branches, maybe some dots and maybe not. Again, it depends on the product that we
are designing for. Another important
thing is that you can actually sell
designs like this. So it is not an actual repeat, but it does not necessarily need to so if you are selling, for example, as a studio, a print studio to
large companies, you kind of are giving them an idea of what your
pattern will look like, and they have people in house, designers who can put
the pattern in repeat. This used to be my job at
some point in my career. So even if you don't know how
to make repeating patterns, yet you can already
start creating commercial designs as an
implied repeat like this. Hope it helps, see you
in the next class.
23. Lesson 23 - Loose watercolor florals for fashion and more: In contrast to pre planned
controlled painting that we did in the
previous lessons, where we carefully painted every single motif in
the traditional manner. Another option is to
paint loose or free hand, usually without a pencil sketch. This is closer to
fine art painting. It does take some
prep and practice, but in the end, it's very liberating and even therapeutic. Both approaches are valuable
and equally important. It's just two wonderful
options that you can explore. It's not just the flowers
that you can paint loosely. You can paint anything in
this loose manner, right? It can be geometric shapes, medallions, paisles and whatnot. Also, it is not the only way
to paint flowers, right? There are literally millions
of ways to paint flowers. I just received a catalog today. There is a floral design
on every other page. If not on every page, look at this beautiful
loose floral, probably painted in gouache. There are, folk kind of florals. Flowers for embroidery, all these symmetrical
compositions, this kind of Jacobean
like florals. So flowers are extremely popular and probably a number
one motif for fashion. And again, loose watercolur
florals are just one option. You can always paint flowers
in many different ways.
24. Lesson 24 - 8 keys to a successful loose watercolor floral: I would single out
eight principles for a successful loose
floral design. The first one would be knowing the properties of watercolor, controlling the flow,
working wet on dry, and wet on wet and
knowing what will happen. You know, for example, in order
to get this flowy center, you have to paint the petals, and while they're still wet, you would be painting
the middle in the brown, letting it bleed
together and things. Second one is knowing brush shapes and what
marks they make. And we had an
extensive chapter or even a couple chapters
on our brushes, brush shapes, and what
they can do for us. And Brushes are a huge help in achieving the
necessary shape. Number three is a very
important principle of variety of petal shapes
and flower shapes. And in order to study
some flower shapes, it's helpful to look at flowers, helpful to look at books, go to botanical gardens, Lawrence shops, and so on. So Smithsonian
Flora book going to help us get acquainted
with flower shapes to see there are different leaf
shape eaves are also a very important part of the design, not
just the flowers. You can have only
blooms if you want to, but usually some kind
of leaves are present. And of course, all these
marvelous flower shapes, I'm going to try to move the camera so you
can see the variety. Some flower shapes
are more common and expected in textile
design, something like this. You can have blueblls as filler florals or as
supplementary florals. You'll probably see less of these shapes or
something like this. But it's also an option. This book also has some
beautiful paintings. I like it because
almost every chapter starts with examples of art, you know, floral art, and I'm greatly inspired by Chinese painting
and things like this. And it also has to do
with brush shapes. Absolutely gorgeous. Number four principle is
still variety, right? Variety is the spice of
life and variety is very often the answer to a
successful design or painting. So the variety of flowers,
sizes and angles. To study this principle, it's helpful to
look at bouquets, flower arrangements,
and florist books. So here are a few of
my favorite books. I do buy a lot of
books about flowers. You can borrow them from
the library as well. So this is a whole series about different cities in bloom, and you can see, you
know, different bouquets, flower shapes,
colors, too, right? Color schemes. Oh, these
are super inspiring. This little book, it's like
an encyclopedia of flowers. And here you can see, you know,
also flower arrangements. And this is also a great
reference for palettes. These guys have
written two books. They are very similar but
different a little bit. And this one by em
and Andrew Ingalls. You can see all the
beautiful bouquets and interesting
color combinations. But the next principle
number five is knowing how to adapt
them to textile design. Because, see, this is
very asymmetrical. This is very boho and
high end floristry. Textile design is a
little more traditional. We usually don't have any
crazy angles of flowers. And if you look really closely, you can see that in
most textile designs, you see about the
same flowers, right? You probably will not
see something like this. It's an interesting
flower, right, but we probably would not
use it in a textile design. We would definitely
use a fluffy dahia it would be a branch with
some flowers and leaves, maybe some lemons, you know, seasonally appropriate fruit. This looks a little unexpected
for textile design, right? So you probably would not
use this flower in here. Ranunculus is very popular
in textile design, but, you know, you might
not even know the name. I think it's helpful to learn
the names of the flowers. Gardener, I fully support you. Principle number six is using
nice color combinations. Flowers shouldn't
be too lifelike, right? Use beautiful palettes. But see, the greens are
not so prominent in here. Green is only just one color
of the whole spectrum. See, most of these designs
use color palettes that are, you know, analogous. I
mentioned this already. They will be just a small
pop of complimentary color. And also the colors don't
have to be lifelike. You know, your leaves don't
even have to be green. They can be a neutral color. Don't forget about neutrals. Gray leaves or beige leaves look great or navy
leaves, right? You can use your
imagination here. The next principle is
probably the most important. It's necessary to practice regularly and warm
up before painting. It's not enough to only
know the theory, right? Because you might
know the theory, but if your hand and your brain are not
used to painting this, it's not going to happen. And, you know, I wanted to show you this pile of paintings. So in order to get to this, which looks very easy, right, and minimalist, I had to
paint a whole pile of stuff. Of course, it wasn't
done in one day, right? But you usually
start with studying a single flower, right,
a chrysanthemum. These are my tiny tutorial
paintings and, you know, simple compositions like this, getting to know your brushes, getting to know how
the water flows. How can you paint a
white flower, you know, using complimentary colors, small compositions.
Wild flowers. And then, you know, you put it all together. So less successful florals. Roses me personally,
I very difficult. Easy flowers like
this. And remember, I spoke about the
principles of variety. So you usually have, you
know, some vocal flowers, right, your main flowers, and then some supporting
flowers or fillers. Here I explored
some navy leaves, simple flowers like that. This was practice, you
know, I was practicing. But they can be put into repeat. This one I have already turned in repeat. I'll include it here. So I didn't mention there
is also round paper. If you want to have some fun, you can paint on round paper. Here, I also used pencils
on top of watercolor. So these are loose
watercolor florals. And then in order to
bring in some detail, I used watercolor pencils, which you can
either leave as is, you know, because
they're pretty thick, you have a nice bold line, or you can also smudge them
gently with wet brush. So remember, I said we pretty much use the same shapes
all the time, right? This large flower, anemone
or whatever it is, the same shape with a little
bit of variation in petal. Same flower, right? So here, it's a Christmas
composition, right? We have the same flower, and we have some
Christmas greenery, which is very easy to paint. Ranunculs painted with a tip of the brush or it could be a rose or whatever
you want it to be. Some blue bells, right? Simple color palettes,
nothing extraordinary. This is something easy
to paint, as well. The same flower, right? Our daisy or whatever
it is. What is it? Anemone, I guess,
peonies or roses, and I will show you how to paint these these are some
gouache flowers. So the last principle
number eight, is that a lot of the principles
apply to all wet media, watercolor gouache and ink. Of course, you're not
going to have, you know, water color effects, your gouache paintings,
something like this. But the use of the
brushes, the brush shapes, the variety, it all
applies the same way. And, you know, in order to paint something complex as this, we start with studying
simple shapes. Simple shapes. Alright. We can do this. I also
wanted to show you this highly embarrassing
floral painting, and, you know, this is how I started at some point.
What is wrong with it? It's very overworked. There are too many details here. There's a little bit
of mud in here, right? This is what happens when you don't wash your brushes well. Well, it's busy, it's packed. The color is not
particularly thrilling. It could also be
used but I think, you know, something
like this, you know, a loose watercolor floral
is way more refreshing than a tight and forced
flower painting. Also, there is not enough
variety here, right? It's just the same
exact flower all the time and the same
exact green leaf. I think it's better to have at least three elements
like these focal florals, this filler, blue branch, and leaf, and also
this guy, right? Learn on my mistakes, okay? Don't do this.
25. Lesson 25 - Loose watercolor leaves: Are you ready to paint? So we will be painting different
leaf shapes to warm up. And, you know, we'll be painting
basic leaves like this. These look interesting
too, things like that. I will be using round brushes, quill brushes, a dagger striper. You know, these are
round brushes and a pointed filbert
or cat's tongue. And you will see that
you can very easily create interesting leaf
shapes by using, you know, bigger sizes, smaller sizes, longer brushes, thinner brushes, thicker brushes, and
so on and so forth. I will be using some
student grade paper because we are just practicing. For now, we are warming up. I'll be using my St.
Petersburg brushes. Apologies. They are written in Russian because it was a
very long time ago, even before I became a designer. So I'll be using the greens. We just have to
make sure we're not using them as electric as this. So in order to tone down
the greens a little bit, you can use you can add
some browns to them or you can add a little bit of yellow or a little bit of blue. Or we can have blue leaves
as well or gray leaves. So paints gray is a very cool color that we
can use from time to time. You know, it's not
as dark as black. I will start with painting
the most basic leaf shape. Even as simple as this, it already reads
as a leaf, right? I like to paint
two stroke leaves, or even if you press it
against the paper like this. Oh, that was a little
intense, right? So I like to do two stroke
leaves and you can leave a little white
line in the middle and experiment with direction, you know, down and up. You can make your leaf a
little more fuzzy if you want. If you take the same
simple leaf shape and connect it into
a compound leaf, it will look very
interesting, too. Working with the
tip of the brush. Let's test out another brush. Number six round brush by
creative Mark Mimi Kolinski. S, we are doing the same shapes, but because the
brush is smaller, it looks a little bit different. You can do a single
stroke leave C. This one is very pointy
and thin and long. It creates a slightly
different mark. Also, while the
paper is still wet, you can scratch with
the back of your brush, and it will create a line. Or you can come back later
on when this is dry, making sure it's dry and
add a thin line on top. So I would say, when
you are adding lines, try to not do everything
leaf the same way. So for example, here,
we've added a line. Here, there is a
white line already. Maybe let's do one more line, and this one I'm
not going to touch because we are always
looking for variety, variety of sizes, right? Bigger leaves, smaller
leaf, variety of lines. Not all leaves are
super successful here, but, you know, this
is a nice one. These guys are nice, too, and keep these sheets
that you paint, you know, as references. So if I want to paint
small leaves like this, I will use a smaller round brush and just basically do the same. Now I'm going to
use my dagger brush and explore what
it can do for us. And I'm also going to use. I just want to use
up this paper, and I'm going to add
some yellow ochre or some kind of yellow to migraine to switch up the
hue a little bit. So dagger brush can
do different things. You can make interesting
leaves with a too. You can draw with a
very thin tip as well. You can explore
different directions. Up and down, right, up and down. This looks nice. This
one doesn't, right? So I would just suggest
take every brush you have and play with it and see
what marks it can give you. Dega brush can also
go very wide, see? And we can create long
leaves, too, if you want. It's always helpful
to have some stems, you know, and long leaves. Just getting to
know your brush and getting used to painting
loosely and freely. And, of course, how can I not play with a cat's tongue
or pointed filbert? I'm going to add some
blue to my green. Very easy to paint
leaves with it. See, I'm pushing away
from the center. And you can create shapes
that don't exist in nature. No one's going to
punish you for it. Just make sure you're
maintaining a good balance. It's okay to make some
shapes touch as well. Don't be afraid, and I just
added a little bit more blue. And I'm going to add a little bit more water to the same mix, so I have a slightly
different shade and a very transparent
cobalt blue. I think this brush
is my favorite. So very often, I don't know
exactly what I'm getting, you know, I have an idea, and I can look at my references, I can look at my
botanical books, but there is a certain
kind of magic in not knowing what exactly you are getting at the
end of your painting. But, of course, you have to have some idea of
what you're doing. What if I add another branch
and say this is still wet, they're touching, and they are starting to bleed together, and I think it
looks really great. So I'm adding ultramarine blue. And just whatever blue
is next to it, you know, I don't get too caught
up in pigment names. What I think the most important is, you know, whether it's cool, whether it's warm, whether it's a slightly different shade. Green consists of
blue and yellow, and by adding more blue or
more yellow or different kinds of yellow because, you know, there is a cool yellow, right, and a warm yellow, you can
create interesting hues. So with a tip of the same brush, I'm going to load the
brush with indigo paint, and I just want to
create kind of like a filler floral filler
leaf, actually. And it's just playing
with your brushes, seeing what you actually like, teaching your hand to paint this and keeping these
reference sheets, you can later on join them
into interesting compositions. You can add some berries
to it, if you'd like. Who's gonna stop us, right? Little dots. Things like that. Another thing I want
to show is, you know, eucalyptus leaves are very popular in flower arrangements. So to paint those,
it's very easy to do with a blunt
Filbert brush. For instance, select
Filbert number 12 or anything similar
that does the job, and we will need another
brush with a pointed tip, right, because this
one painted like this. So I can use my number
four round brush. We can reuse this blue color, even mix it with the indigo, it will add a little
blackness to it, and I'm adding a little
bit of paints gray. So this shape pretty much creates round
leaves pretty easily. And I'm rotating the brush a little bit because, you know, in nature, not all flowers or leaves and leaves
are facing us, right? We have some leaves
that are turned. We have some leaves that
are turned away from us. I think I want a darker stem, so a little bit of ultramarine here and never make the lines too straight because that's not how it is in nature. It's slightly curved. You can add some veins
if you would like. But again, try not to overdo. Don't add them on
every single leaf. Maybe skip a few. See, this doesn't
look very nice, so I'm going to try to
cover it up a little bit. That's okay. Even if things are a little imperfect, they
still work, you know? And what I would do here, see, there's a green and a blue here. So in this guy, we can
leave it like this, but I would probably mix
up a very light green, very transparent green
with a lot of water. And I would just add a
few leaves in the back, just a couple, you know, so we have a little bit of variety. See, it's a little bit harder to paint round shapes
with this brush. This brush was almost, you know, making it for you. This is very wet, so I'm going
to scratch a little bit. But this can't be undone. Once you scratch it, you know, you kind of damage the surface. So you have to be very
confident of what you're doing. Maybe just a few
more round leaves. When you're painting
for textiles, it's helpful to have
single elements, too, so you can fill
up the space better. Well, this looks a little
bit like cherries, maybe another leaf behind it. They are bleeding slightly,
and I think it looks good. We might want to
wait till this is dry so we can as
watercolor dries, it becomes lighter and sometimes it becomes
too flat and pale, so we might add some dark
lines when this is dry.
26. Lesson 26 - Anemone: You might be thinking,
Enough leaves, darrha, give us flowers. Okay, let's paint our special
Anemone flower, right? And you can have
variation here by having five petals or six or
even just four petals. It's still pretty much
the same process. I'm going to wash my brush
and clean my palette. It would be helpful to bring
some clean water, as well. So the way this flower
is painted will go. Boom, boom, boom. Towards the center.
Boom, and boom. And then while
this is still wet, we'll grab another dark color. Create lines like this and stuff will start bleeding here. And the brush we're going to use for it is a blond filbert. I think that's the
best choice here because we want
these to be blunt. But we will need a sharp
brush for the center, round brush number six. I'm going to use the
same filbert that I just used for leaves or we could
take a bigger one, too. And let's take some
turquoise color. Make sure you mix enough color because the petals
are quite big. I just added a little
bit of purple, so it looks slightly
more natural. So when I slant my
hand like this, This paper isn't very good. I don't know if you can see it, but I can definitely feel it. So while this is still wet, I'm going to take
my pointy brush and load it with black just for fun and start making marks here gently
touching the blue part. We could make another
flower like this but add more water this time. So this is a little
more transparent. And remember, don't paint every single flower at
the same angle, right? See how this flower
is facing this way. This flower is a little
more straight, right? So I'm going to rotate it this time a little bit. I'm
adding more water. I don't want my flowers
to be exactly the same. I'll drop a little
bit of purple too. So that the hue is
a little different. And if you make these bottom
petals a little bit smaller, it's going to appear
as if the flour is turned towards us a little
bit, which is good, too. I'll use the same pointed brush. But this time, I'll add a little purple to my
black, the same process. We kind of, you know, we
want a little bleeding, but we also want to have
some sharp areas over here. We could add some
leaves over here with our cat's tongue
brush and green color. It's okay if colors mix up. They will look more harmonious
if you are using the same so when we're adding
leaves around flowers, it has to look organic, right? The leaves are growing
from under the flowers, so you could have
a stem, you know, if you want to
have some vertical movement in your pattern, or I would probably
do, you know, something like this
coming from under. Touching, okay, too. Bleeding is pretty.
And what a color. So see, this is getting a
little stubby in short, so I'll add maybe another stem. So this way, the leaf is
going downward, right? So I'll paint my
leaves like this. And I will leave some space for another green color here because it's getting a
little repetitive already. So I will throw in some
yellow and add another leaf. Transparent yellow
leaf over here, yellow green, maybe
a little line here. So this isn't the
pattern itself, right? But if I want to turn
this into a pattern, I probably need a third flower because this is not
enough just yet. So why don't we take
the same brush? I'm not even going to grab the filbert brush and just paint another flower
that is, you know, these are about the same size because I was using
the same brush, and maybe we should make
a slightly larger flower. And see, these are bigger.
These are smaller. You could have, you know, full size petals as
well, if you'd like. I'm grabbing my pointed brush, adding a little more
black over here, and maybe I'll even
use green this time. I'm still within
the same palette. So it should work. And see, this is very dry now, and I could probably even add a little bit of dimension to it. Just a little bit, not much. Just a bit of depth. Alright? So we can already turn this into a
repeating pattern, but there are probably
not quite enough leaves. Maybe I will add a
transparent one. Slightly smaller and maybe
another loose leaf over here, so we can just use it
later on in Photoshop. See, it's not hard
at all, right? Do you agree? I hope you agree. It's surprisingly simple. It's just to know how to use it. Alright? And these
are our anemones. If this dries, you know, if it's not good enough, we can add a little
more depth to it. But see here on these guys, I didn't even add anything. I just left them airy like this. This looks like I used
some kind of sharp brush, maybe even a triangle brush, with a very, very pointed tip.
27. Lesson 27 - Daisy: To paint this kind of flower, which is a daisy or a dahlia, the principle is the same. We'll be painting
towards the center, and we are using long
pointed round brush number ten, Princeton Neptune. Soak it very well in water
and loaded with a color. I'm going to use a
color called bordeaux. So we are going to paint
towards the center. Sometimes you have
this natural instinct to go away from
the center, right? It's not a crime. Whatever
does the job, so watch out. I made this a little too long. I think it's okay, but I need to be more
careful next time. So fix the shape a little bit, and I'm going to use Amber, you know, dark brown
to do the center. Here we go. We could do a
black eyed Susan, right? The yellow flower
with a black center. So let's mix up a nice
sunny yellow color. Make sure we use enough water and maybe a little bit
more orange, just a drop. You see, this bled really a lot. Which is okay, right?
With watercolur, you have to learn to
embrace what is happening. Again, I'm not planning
a design right now. I'm just practicing my
brushes and flower shape. So you basically have
to pay attention to how many petals we
have? How long are they? How are they located close to each other? You
know, are they close? Are they not close? So here, I made some of them longer and some are shorter at
the bottom, too. It's like the flower
is rotated towards us. And here I'm going
to use indigo, which is a bluish black. And I don't want it
to bleed too much, so I won't go too
close over here. I'll start the center first as this is
drying a little bit. But then I will have to
make them touch eventually. Just a little bit. I don't
want it to bleed too much. Right? So it's a
little flat right now. Maybe I'll wait until
this is dry and add orange to my yellow and
create some shadowing. So as this is dry, I will take a smaller
brush and add orange to my yellow and just
make a couple pedals. So don't forget that you can rotate your paper to be
more comfortable to paint. I discovered this trick
very late in life. Makes your life so much easier. I think it was one of the
Skillshare classes I watched, actually, from Esther
Peck, I guess. So here, it's very
important to stay mindful because if you are
thinking of something else, you'll just cover
everything with orange, and we will lose
our variety, right? We don't want to lose it with
just a couple more lines. Easy does it very gently. Watercolor is gentle and airy, and we don't want to
lose this feeling. I think this is a
little bit intense. So I'm going to lift
it a little bit. But now this is too straight, so I'll add a little
more yellow in here. I think that's okay.
We can stop here. So when choosing
leaves for flowers, I usually, you know, Google. Like if this is what is it? Daisy or something, you
know, black eyed Susan. They usually have leaves
kind of like this. Of course, they don't have
to be botanically precise, and mostly we are concerned
with the aesthetics. You know, we want the
leaves to look pretty, even if they're not accurate. But I think these flowers have, you know, leaves like this,
like heart shaped leaves. You know, this brush
is not very good. Job need something
bigger, for sure. But sometimes when you are working with an improper brush, it kind of creates, you
know, a new effect. Remember I said we use
very conservative shapes. There's not as much variety
as you might think. But I think these are still, you know, normal leaves. They don't look like
out there too much. You can also pull
paint down, see? So it's just important
to have, you know, if you have several
flowers in your design, it's important to have
some leaf variety. So, you know, leaves
are not all like this. And some leaves are
rotated as well. Even some of the
pink got into green, it's fine because
they are, you know, complimentary colors, and
it just creates, like, the shadow color for the green, which actually works for us. So see this completely
dissolved in here, and we need to reinforce
it a little bit. The brush is almost dry. It's like, very,
very saturated right now. Just a little depth. I think that's it
for this flower. There is a gazillion
variations to this flower. It can be something like this. It can even be as small as this, and it's good to have
some smaller fillers. Here's another one, right?
Here is another one. It's all the same flower. Same flower. These
are chrysanthemums. So you just make this
a different color. You just make it
smaller or larger, and you get a new
flower, pretty much. So I was just
painting off camera. I wanted to show that, you know, you make them smaller,
pretty much the same shape. It's a different flower now, and it's good to paint in
clusters like this, too. You can also duplicate
them in Photoshop and have more flowers and
rotate them slightly. This didn't turn out very well. See these are not very
successful flower shapes. I mean, especially this one. This one could still
work probably as, like, a little flower
behind this one. So in this case, you know, when something doesn't
look very good, you you know, you
don't have to use it. When you scan it
onto the computer, you can just, you know,
forget about this guy. That's the beauty of
having photoshop. Editing is a very
important skill. It's not so much as, you know, nailing every single
flower at one attempt. It's more of getting
the right shapes, choosing the right shapes, and using the best
ones in your design.
28. Lesson 28 - Peony: Uh, So maybe you are thinking, Enough daisies, darhaGive us peonies and all the
beautiful fluffy flowers. Okay, here I come. So peonies are very fluffy,
big, beautiful flowers. The problem with them is sometimes they can
look shapeless, and we have to find some kind of shape to make them
visually appealing. So the way we are
going to do this, peony has this almost, like, a round shape. And then, you know,
it's all like wrapped, wrapped petals over here. And then the petals start unraveling over
here, going down. And it's helpful to have a bad, you know, like a peony bad. Their leaves are
kind of like this. They can be like that, and of course, they can go in
different directions, too. And the way we will be
painting them is, you know, we paint this bow over here. Then using the tip of the brush, we kind of show some
texture in here, and we paint these
petals going down. Alright. This is kind of the same
principle over here, see? And these are the flowers that
we painted before, right? Same principle,
towards the center. So I changed my water because we will be
painting in pink, and I don't want green
water to mess with it. I'm going to use
the same brushes, the quill brush and the number six round with a pointed tip. So I want to make a pink color. I'll take some red with a lot of water and add
some orange to it. Here we are. So I will start painting
this ball, right, and kind of wrapping
it up at the top. And now I'm ready to
paint my petals below. So you have to be careful here. It's very easy to overdo. And now I'm going to
grab my other brush and some green color maybe
with a little bit of blue. I can start painting my stem. I don't want too much bleeding, so I won't go too close, and now my leaves. So you can look up,
you know, on Google, like what peony
leaves look like. I'm not sure. Buds can
also be half open. I'm going to paint a
green bud over here. And we can also do this. I'll let it dry because I don't want it to
bleed, meanwhile, I'll paint another peony facing
in a different direction. And to have some variation, I will add a little
more orange to it and make it a
little more saturated, and it will be facing in
a different direction. And I'll make it a
little smaller, too. You can add some dots in the center if you
want, like here. And when this is dry, we can also add a little bit of shadowing here, like I did here. See, otherwise,
it's just going to be a big blob, and
we don't want that. We can even add a
little while it's wet. Okay, so I think I can
paint my half open flower now and go back to my greenery. I can have a few
more leaves here. Beware of going too messy. You know, I know
painting loose is nice, but sometimes it crosses the line and becomes
way too messy. And I've gotten
comments like this on my social media that it's
too messy for their taste. Oh, well, this is a
little too straight. I wish it was more like this. So let's let this dry
and see how it looks. I think I'll probably add a
few more lines over here. Maybe one more green bud, something a little
lighter than this one. So my peonies are dry now. I think they're not bad at all. Maybe just a few lines
over here to show shadow. Maybe I won't even
touch this one. And maybe a few
green lines here. I'm going to use my
number six round brush, and we can make this
color darker by using a warm brown and add a little more orange
to it, too, or red. I'm looking here just
a few more pointers, you know, just a little bit. Don't overdo it and
maybe some dots as well. To kind of indicate the
shape a little bit. So it doesn't look
like a big blob. And we could add dots
in a darker color, maybe, you know, umber,
again, in brown. If we want, we could
use yellow as well. I think I will use amber. Just a little
dimension and depth. Maybe a couple of dots here. I know maybe this is not
exactly what peonies look like. We have to make some kind of sense out of that
giant fluffy shape. Alright, and maybe some greens. See, I just added
my brown to the green and just a few lines. Maybe I want to make it a
little more green still. I could also maybe add
some lines over here. And we could darken this
because it's in the shadow. It adds more volume. Ooh. That was intense, maybe just a little bit. Well, I don't want to turn
them into poppies, right? We do need some shadows. I think we're good here.
29. Lesson 29 - Buttercup/Ranunculus: The next flower we will paint is ranunculus or a buttercup. It is made out of hundreds if not thousands of very
thin layered petals. It's a beautiful flower, which can be a little
tricky to paint, but I'll show you
how to do this. So here are some
buttercup references. We're just basically
going to be using the tip of our run brush
to paint the center, and we are going to hold the brush almost
vertically all the time. Did we start painting with
yellow or light green? And then we start bringing
in the main color. And also, you know, this is our almost frontal look, and here the flowers
are slightly tilted. So we do this by
moving the center to the side or even
down here, right? And then the lines will go
around the center still. And the leaves an uncle
has are kind of like this, almost like a brush, so they're not very welcome
in textile design. So we would probably
use some, you know, generic leaves with
them. Alrighty. Let's get started.
So I'm going to load my brush with yellow.
Greenish yellow. The color has to be quite saturated because
it's in the center, so we want to see it. And I'm going to paint
with a tip of my brush, circular motions
around the center, very gentle, and we
don't need a lot. Now, using the same brush, we rinse it very well, and we load it with
our main color, which, you know, we already
started using red, so let's keep using it. And we want them to
bleed a little bit, so I'll make them touch. Here I am varying the
amount of pressure. You have to be very gentle here, and you stop right on time
before you overdo it. Mine's looking a
little bit force now because I'm not
very comfortable. You know, standing,
hanging above, trying to see what I'm painting. Well, it turned out
pretty good, right? It worked. So let's
paint this guy now. The principle is the same, but we're moving the center off, moving the center to the side, a little greenish yellow center, and we'll be facing this way. But, you know, a
circle, when you turn the side turns into
an oval ellipse. And maybe to have a
little bit more variety, I'll add more fiery orange. See? Even here, like, this is transparent and this is dense. So there is always variety. So here we have to be
careful with the angle. See? This is going to be
small down here, and most of the bulk of
the flower is at the top. The flower is rotated and
facing the floor, I guess. Mostly working with a tip.
All right. That's it. You can experiment with
all the different colors. You know, they look
beautiful when they are really soft and pink and blush. That wasn't the right color. I just want to use pink. So when you want to turn red
into pink in watercolor, you just add more water, and
this is a little too cool, so I'm dropping in a
little orange again. And I have to go
back to my center. I'll use a more golden
green this time. Golden yellow.
Something like this. And you can also make it
smaller, see, like this. So let me use this color.
I hope it's lighter. I want to have a pink one. So here you have to be really delicate so that you
see these lines, you know, because it
has so many petals. If you mix everything together, you will just have a
pink blob like this. We don't want that.
It's okay to have a little bleeding and
mixing, but not entirely. You can make some petals
larger, too, right? The way they unravel, kind of open up like this. All right. I don't want
to turn it into a rose. That will be our next one. You know, they have a
lot of similarities. So maybe some generic
leaves with olive green. So this has dried on the palate, but I just added a
little water to it. You know, this is the leaves
that they have in nature, but they do make it look
a little like Christmas. I'm going to leave it to you to decide which leaves
you want to use. Maybe something
generic like this. Alright. So I didn't do
a little design here. So essentially, with the tip, you just start
making these lines, thin lines around the center. That's what we do, right? Or if it's tilted, then your centers to the side, and you just kind of
go around the center. And that's ranuncles.
30. Lesson 30 - Rose: The last flower I want to
paint with you is the rose. So usually there are two angles that we paint the rose at. It's this, you know,
fully open angle. Or this kind of to
the side angle. This is the same as well, see? It's like the
principle is the same. It's just those
roses were so small. So I painted them as a cluster. They're called spray roses. And here are more, too. So here, you can see pretty well the shape of
the rose, right? It's like a cylinder with
petals going around it and the fully open rose is
this big cloud of petals, kind of similar to
peony in a way, kind of similar to ranunculus in the way the petals are
swirling here, right? So our rose, you know, we start with a very
similar center, like here. We basically usually
paint a few petals, and then we kind of start
going around like this. But this will be with a brush
shape, so it's not exact. It's hard to replicate
it with a pencil. I'll show you in a minute. Then the way it goes, see, the next petal goes kind of
between the previous two. So it goes like this.
They alternate. And it can be very
sweet, you know, almost like for a
baby girl rose, or it can be a little
more, you know, flouffy and
sophisticated like this. And this angle, you know, I said it's like a cylinder. So essentially, rose
is shaped like this, and then the petals
go around it, right? Basically, we're going to have, you know, let's draw this rose. So we will have some
petals on the side. Then we will have an
indication of this, you know, body of the rose, and then some petals
wrapping around this body. And like I said,
for me, personally, rose is one of the most
difficult flowers. But we will make it work. They are very easy to paint
and beautiful leaves, though. Usually like this. Alright. Are you ready? So it's better to have a brush
that has some body to it. So this is too thin. We need this plumpness
to create the paddles. So let's paint our roses. We're going to use
a quill brush again or use a plump round
brush with a pointed tip. Kia all our roses, even, you know, the smaller
spray roses are here, too. I'm using my pink watercolor. It might be called oprah
rose in some sets. This one isn't quite opera rose. Operos is super bright, almost like a neon pink. So there will be
similarities to ranunculus. We start in the center. I'm going to paint
this view now, and the center will be darker than the surrounding petals. We almost make a little triangle and then add a few more petals. And now I will start adding
more water to my pink. And I will play with the
pressure a little bit, sort of wrapping the
petals around the center. You can add another
shade if you'd like, you know, a little orange. But I think this is
good enough already. And as for this guy, as for this angle, I usually start by painting
the body of the rose, and then we have oval
situation over here. And then you have some petals. Again, wrapping around
the cylindric center. This can be painted
in so many ways. It can be really, really simple, just like that, right? And you can change
the angle slightly like we did here with
this slanted guy, and let's add the greens, too. You can use the
same brush or I'm going to take a smaller
brush, this one. So roses very often have these
pointy leaves over here. I don't remember what they're called sepals or
something like that. I think they make the rose
instantly recognizable. And again, you have to
decide what happens here, how long of a stem you
would like to include. I'm not going to
make mine too long. And I will add a few
very simple leaves. Here you can have
stuff like this. A few half covered leaves, and we can have a full
leaf over here so we can later on use it in Photoshop to it may be a little
branch as well. All right. Oh, and you can
always use buds, right? They always add interest
do shapes, closed flowers. Alrighty. So it started
bleeding over here. We can leave it like
this, or you can lift it a little bit
with paper towel.
31. Lesson 31 - Ways to approach loose florals: So here are all
the flower shapes and leaves that we have painted. Take your time
practicing these shapes. And as you see, varying the color slightly
varying the size, varying the combination
of these flowers, you can get an infinite number
of floral compositions. There are different ways to
approach painting flowers. It can start with
a color palette. It can start with wanting
to paint certain flowers. For example, this one, I painted in fall, and I really wanted to do a floral composition
with mushrooms. And I added some fruit
and berries here. This one started with a bouquet. It was actually a
bouquet that I bought, so I painted those
flowers together. And I meant this as a
Christmas composition. There's so much red and green
here and white as well. So these two were
painted on the same day, and I didn't have any plan. I was just playing
with my brushes and learning to paint the
shape of the flower. I painted this first, and then I painted this almost
immediately after. So it stems from
the flower shape. And sometimes, you know, just playing with the brushes, just painting something
for fun will bring you beautiful viable
commercial designs. On the contrary, you
can have a plan. Painting flowers,
you almost have to adapt a mindset of a florist. As florists create
interesting arrangements, they always think of what
the focal point will be, and, you know, some flowers draw more attention
than the others. So the same in textile design, these flowers are more
prominent, right? And these are
supporting players. And then these that we can call fillers are interesting
and important, too, and beautiful
leaves as well. Here as well, there's
a lot going on here, but there are a few flowers that are actually located
kind of diagonally. I work a lot on the diagonal, and this is not particularly a textile design, but it can be. I can put it in repeat, but a lot of the principles
are the same for, you know, painting
flower arrangements. And if you would like
a separate class on painting floals, please drop a note. So here, again, some flowers
are the biggest in scale, some are medium,
some are very small, and this very often leads to
a successful composition. Of course, you have options
in terms of layout. Do you want to have fully
all over pattern like this? Or do you want to
have some space? Space is very important
in textile designs. Do you want your
flowers to touch and overlap or do you
want them to kind of, hug each other in this way? Or, you know, when you are
working with a large scale, you can bouquets or
arrangements like this, and then small
bouquets to fill in the space and even ditzy
fillers like this. So these are not loose
watercolor floals. I mean, these are, right?
But these are more, you know, traditional
pre planned. And I did a sketch in
my sketchbook first, and I planned, you
know, I wrote, I want to have a
blush dahia here. I want to have a
maroon, sunflower, blue anemones, a berry branch, and some tobacco colored leaves. Here's how I would
plan what composition. If you already know
your flower kinds, you can say, Oh, I want
to have large rose here. This is an orchid. You know, I'll find
this composition and show you how I painted
it in the end. This was painted in gouache. And, of course, we did not cover every single flower
in the world, right? But knowing the principles of using different brush shapes, you can paint all sorts of
flowers. I believe in you.
32. Lesson 32 - Multi floral pattern painting: So now, using all the flowers
that we learned to paint, let's create a multi
floral composition. I think I want to
have a couple roses. Then we're going to have,
you know, these anemones. It's going to be like a
mini bouquet, some leaves. So this will be my large scale, my medium scale flower, and maybe a couple uncle, and there will be
some greenery over here and maybe just one peony. Maybe something like a
fern leaf over here. Well, see, it doesn't have
to be precise, right? But we'll let the
brush guide us. Maybe we could have, you know, some side spray roses over
here. Something like that. I very often decide on the
color as I start painting. You can, of course, sit down. Sometimes, you know,
I do think, okay, I want this to be blue and I want this to be
pink and so on. Usually, I start with
something that speaks to me, and then I sort of
figure it out as I go. So I'm going to be painting
on this watercolor block, and I just wanted to show
you what a block is. So the paper is
glued on all sides, and there is just
a small area over here where you can
detach the paper. So this is very convenient when you are using
a lot of water. So it's not going to curl up. You know, as you're
painting, you don't need to tape your paper, you don't need to use paper weights or anything like that. But when you're done
painting when this is dry, you will need to take
it off the block. And for this, you can
use a palette knife. You would just put
your knife in here and separate your sheet
going around like this. Some paper manufacturers
include this tool. I think it came
with a round paper. You can use an exacto knife
or this kind of knife, but please be careful
because this is very sharp. So I think a palette
knife works the best. I use this tool as well. My sketch is near me. I can't fit it in the frame, but maybe I'll include a photo
somewhere or just keep in mind that I'm looking at my sketch because there
is nothing here, right? You can jot it down
with a pencil if you want to sort
of help yourself, you know, guide
across the paper. But I would suggest to gradually move away from sketching, you know, just kind go in. That's why we did our
preliminary sketch, right? And that's why we
practiced so long, and now I'm warmed up and
ready to paint my flowers. So remember, we have
two roses here, and this can change, you know, This is not like a
final commitment. I decided that I want
to paint a yellow rose. We haven't really painted
any yellow flowers, and because this
paper is bigger, 14 by 10 ", I'm using bigger brushes
and a bigger palette. Still using the same
watercolur though, and I need to mix up a little
bit more paint, right? So I don't run out
every 10 seconds. This is going to
be my main color, and as for the centers, I will start with orange. See, this brush is so big, it took in all the water, all the paint, which is good. It's good for watercolor. Do you think I'm terrified? Because, yes, I am terrified. It's always scary
every single time. And from the masters that I take workshops, they
say the same thing. They are also terrified. So don't you worry,
you're in good company. So it's very important
to stop on time, right? And this is very
high quality paper. So hopefully you'll
see some difference. I can start doing
the other rows now. This is very satisfying,
though, you know? It is scary. I can mess
it up, but then what? You know, I'm going to
jail? I don't think so. Press, you know, against the paper and change
the angle slightly. Add more water when you need to. I can use the same
brush to paint leaves. And I'm looking at my sketch still just kind of
to help myself out. I don't have to
commit to it 100%, but I kind of already resolved some creative choices
and decisions, so why not use your own sketch? So now it's time to paint my
anemone flower over here. And I want it to be
smaller than the roses, and I have to decide which
color it's going to be. Maybe let's keep it blue just
as we painted it, right? Maybe just a little bit lighter. I think we're going
to end up with an Easter floral,
which is not bad. Easter is coming soon. So now
I'm using a combination of ultramarine and the color that is called bright
blue in my palette. So now we are going
to paint this flower. Do I want to have
another anemone anywhere? Probably here? So I think I'll go with
purple for the centers, and you don't have to change
brushes all the time. You can keep using
the same brush. I think it's just fun
to change brushes. I'll add a little bit
of black to my purple. So this is a little
bit too much, so I'm going to lift it. And I can even add more
blue if I want to. But try to minimize
interfering with this, right? This is leaking too. It's okay. I think I remembered now that I wanted to have a peony here. That's right. So
now I'm looking at, you know, what I have
here, what is missing. So I think I do want to
add a big fluffy peony. The composition's getting
a little bit off, but it's okay because I will
be changing it in Photoshop. So I want it to face this way, and I'm not comfortable
painting in this direction, so I will turn it upside down. A lot of water because I want
to have a light pink peony. Pink and a little orange
to make it warmer. And I will start
painting my center, painting around a little bit. And now the petals
that are going down. I'm wearing the hue now, so I added more orange. I'm making sure the pale shapes are organic and not too forced, not overly sweet, you know, because we want to remain loose. I'm watching the scale, too. I want this flower to
be the biggest one. Well, I think it's
time for me to stop because I'm starting
to lose the shape. So it's very important
to stop on time. Alright. Maybe I'll add
more as this dries up. And as I'm at my
comfortable angle, I can add some peony leaves, and we already have this
warm green in here, so I want to use a cool green. Not as bright, of course. I'm adding blue to it, and I think I'll use this color. It's turning out very springy, and I think it's fine by me. See, easy, easy leaves. Magic, right? This is because this paper is
very high quality, and the brush is
very high quality. Easy, effortless leaves. So let's turn it
back upside down and see what is happening here. So we could definitely repeat these leaves
somewhere, maybe here. It's okay that there is
no peony here. It's fine. But I would probably, you know, use this pink color
somewhere else, add like a half open peony
or something like that. So now I need to
think what's next. So we're missing some
kind of small flowers, and I was also going
to add these guys. Now, as there are
more and more colors in this design, I
have to be careful. I don't want it to
look, you know, like a bright summer
multi floral. I mean, you can. It's a choice. But I'm going for the
Mother's Day spring vibe, Easter, something like this. So I want to make my ranunculus pink but deeper than this. Maybe I'll even use this color that keeps getting on my brush. It's a little too
autumnal, I think, so I will brighten
it up with orange. I think it should work? What
do you think? Not too much. So these are not quite dry, so I have to be careful. And I'm painting this close.
I want them to touch. I want this to look more
natural and organic. They almost look like small
roses, right? Who cares? And I'm following the
principle of scale balance. So see, we have all
these large flowers, and now we're adding
smaller flowers. So what I didn't do here is
I didn't do the ring center. Which is probably cute,
so I'm going to do it. So I think this is
enough. Things look good. And three, flowers particularly look good when you have an
uneven number, not two. So as things are starting
to dry, I can also add, you know, some dark areas on these flowers,
possibly on roses. I actually like roses like this. I could add some depth to them, but I'm gonna wait for now. I don't want everything
to look the same. I will add some lines over here. And while I have my
pink on the palette, that's exactly what I will do. So we just have to make
sure looks natural. So if you need to rotate your
paper again, please do so. And I'll use indigo to add
some stamens to my anemones, and I'll even add these, like, very precise shapes and dots. So when you have a
balance of flowy shapes, watercolor washes and
some sharp edges, it usually looks good
because it's variety, again. So what else are we missing? I had some spray roses
here on my sketch. I need to see whether
I need them, actually. I think I have enough flowers. I would possibly add something
even smaller than this, teeny tiny daisies or
something like that. And maybe more
greenery, more leaves. And we could probably use
a neutral color because we have been using all
the real colors so far. I'm going to use this
small blunt Filbert brush to paint flowers like daisies. I have to decide which
color they will be. Maybe I'll make them light
blue so we don't go too crazy. So when using the same colors, you know, two blues, I have to make sure they're
different enough. I don't want them to blend. So I will add a little
bit of purple here. Maybe it'll be like
lavender or periwinkle. I'm rotating my brush so
I get interesting marks, and I also want to use a slightly different shade
of blue here for variety. Variety is my favorite
thing on Earth. We could add some centers to these small flowers if we
want. We don't have to, right? But I would repeat these flowers somewhere else so I
have more to work with. So I will add another
section over here. Y. As I'm painting, I'm watching my general shape, how it's connecting to the rose, and the flowers are
behind the rose, right? You could have a flower in
front. That's possible too. Maybe just one more
little flower somewhere. I'm looking over everything
and thinking what is missing. I think we could have
another pink flower, so I'm going to add it here. It is going to be a
smaller peony and I'm going to cheat again and
turn my paper around. I'm using a small filbert
brush, Princeton number eight. Adding orange as I
need and more water. So I want them to be
similar but different enough. I think this is good. And we've used this
green for peony leaves, so I will throw in a stem. Maybe I could have
a little bud, too. So it's kind of empty
here now, right? We could use a little
leaf here as well. Nice tip. So I think here I want to add another one of those leaves. So I'm grabbing my quill again. And we could connect everything a little bit if we
want to, right? We could have some stems. It's a bouquet, right? So things need to be connected. Anything else? Let's think. Maybe another one of those here. I think I'm going to stop now. So like I said before, you can wait till this
is dry and maybe add some depth if you
want on your flowers. But I am personally,
as an artist, learning to stop one step short because I don't like
overworking my designs. So I think I'm going
to leave it like this. It is good enough. It has
a nice balance of scale. You know, we have this
giant flower medium, smaller, smaller and tiny. It has a good leaf
balance, right? We have different colors. We have different transparency. We have different
leaf shapes as well. Oh, we have to decide
whether we want to add centers to these guys. Again, it's a choice. I think it will be
pretty if we add, like, black dots in there, or we could leave it airy and breathy like this
breathy or breezy. So as a designer,
you constantly have to make these small choices. Let me think for a little bit. They will be easier to clean if they are connected
because cleaning, you know, in Photoshop between these petals will be
a bit of a nightmare. So I'm going to use
a small round brush and just add black
dots in the center. And I didn't mention that you can create flowers
like delphinium. You know, if you
paint these small and you put them on a branch
and you paint like six, eight, ten of them, you can also create cluster flowers or
whatever they are called. Oh, I forgot. I
was going to paint some neutral leaves,
right? I didn't do that. So just make sure your
dots are also organic. They don't look, you
know, too round. Dolphinium is one of
my favorite flowers, if not the most favorite one. And I tried to plant
it many times, particularly with
the black centers. You know, that's how my
friend's grandmother had it in her garden
when I was a kid. But unfortunately, they don't survive in my garden.
It's too hot. So all I have left to do
is paint them, right? So I've added my dots. And I think I'm
going to throw in a couple gray leaves, too. I think it'll make
it more commercial, you know, more trend forward. So in order to get gray, I can take my black
and water it down. I can add a little blue to it, but I think it's blue already. Maybe I didn't wash
my brush very well, which I am guilty of, to be honest with you,
I know I teach you not to use dirty brushes,
but sometimes I do. I'm a rebel. Okay, so just
some simple leaf shapes. My brush is very full of water. It's loaded very well. It's a pleasure to paint with good quality brushes
and good quality paper. Again, try not to overwork
it because as you start chatting and thinking
of something else, you forget about your artwork, so make sure you are present. I made it more full
than I expected. You know, I thought
there would be more air, but you can always
take stuff out, right? And remember I said,
you never know exactly what the design is
going to look like in the end. It's magic. The brushes
take you on a journey. Watercolor takes
you on a journey. I think we're done here.
33. Lesson 33 - Outro. What's next?: Mm hmm. I hope you enjoyed painting and trying out all the different
art materials. Of course, these are
not the only ways of creating motifs for
surface pattern design. I'm also considering
making a class about drawing for
textile design. So leave a note if
you are interested. Also, when practicing,
you can repeat after me and also paint birds
or Christmas designs. But of course, the
class lessons are just examples and you can shuffle the topics and the techniques. So you can paint
paisleys in gouache or paint loose free hand
geometric designs and so on. You can and you should, I think. Now, what happens next after we've painted all these
motifs and designs? Like I said before, we need a scanner to make a high
quality scan and take our artwork to the
computer where we will use software to
clean up our artwork, make color saturation
adjustments if needed, and put the designs in repeat
eventually using Photoshop, Illustrator or other programs. This is something
that I will tell you in the next classes. I shared information
on the scanner I use in my introductory class. Some people also take photos
instead of scanning artwork. It is not something
I personally do, but it's also an option. Another helpful exercise for surface pattern
designers is to observe patterns in retail and try to identify how
they were created. You can go to your favorite
stores online and in person. Department stores are a
great place to start, as they offer a variety of different surfaces and products. In time, you will start noticing that some mediums
are the most common, and there are some that we did
not discuss in this class. Like block printing,
for example. Also look at the social media of different print studios and see what materials they
use to create artwork. Example, if you look
at these two fabrics, see, this is most
likely painted in ink. There are no watery
washes whatsoever, but the shapes are fluid, see? So I'm guessing it was ink, very high pigmented, very solid, but still painterly and fluid. This could have been
painted in ink, as well, or maybe, you know, some kind of paint, gouache or opaque watercolor. Definitely not transparent
watercolor, right? The shirt that I'm
wearing here, see, is clearly a watercolor
design right here. Maybe even with a
touch of pencils. Thank you so much for
joining this class, and I hope you enjoyed
it, and it was helpful. If so, please consider leaving a positive review so others can benefit from
this class as well. In our final lesson, I will
introduce your class project.
34. Lesson 34 - Class Project: I hope you enjoyed taking the
class and had fun painting. Your project worksheet is attached in the class
materials section. It is best to do the assignments after completing the lessons. For your class project,
I suggest that you try at least two mediums
with the same motif. You can use any reference
sources that work for you. Take a photo of bouquets in
a florist shop, for example, or use a coffee table book with flowers and create two designs, you know, paint flowers in gouache and in
watercolor, for example. Which one or ones do
you enjoy the most? If you put it in review, think about what kind of product can this
pattern be used on. List three to five products. You can submit the
photos or scans of your worksheets in the
class project section if you would like
to get feedback, have fun painting motifs, and don't forget to refer to class lessons if you
need a refresher. I hope to see you
in my next classes. While I'm working on them, check out my YouTube channel
where I share lots of helpful and inspiring info for surface pattern
designers and artists. Patterns are
everywhere. Goodbye.
 Darya Karenski, Textile Designer & Artist