Transcripts
1. Trailer: Do you ever go for a walk in an ordinary place like your neighborhood or maybe a small park near your work and find yourself surprised by all the beautiful things you find growing there? Not the flashy flowers like the dahlias and the roses, though I genuinely love those two, but the less assuming, more resilient and somehow more surprising and interesting weeds and wild flowers. My name is Kendyll Hillegas. I'm a full-time freelance illustrator. I worked with clients like The Wall Street Journal and Oprah Magazine, and my work is used commercially worldwide on products carried in stores like Whole Foods and Target. I love painting plants and flowers, and I wanted to merge that love with my enthusiasm for finding butterflies on the milkweed plant growing beside the road or watching a bee humming around a patch of clover. Being in those moments makes me feel like a kid again, when I didn't really understand the difference between a weed and a wildflower, and all I cared about was finding the perfect dandelion. In this class, we're going to celebrate those moments of ordinary beauty by learning to draw them in a unique vintage inspired style. This is a Paint With Me class, which means that you'll come along to my studio and watch over my shoulder as I draw. All of the instructions in this class is real-time with real-time demo, which means that you'll be able to follow along each step of the way as I create three unique pieces of botanical art. In this class, you'll learn to create a beautiful stylized composition from simple photos that you snap on your phone when you're out for a walk or even ones that you find in a public domain image site. Weave together those photos to create a one of a kind illustration that transcends the reference image. You'll also learn to work on a dark background to give your florals a dramatic vintage look that really stands out and shows off tiny details. We'll be working with colored pencil in this course, but any opaque media will do so you could easily do this class with paint pens or with gouache. This course is best suited for those at an intermediate level who have some experience with observational drawing already. So if you wanted to celebrate the bees and the pollinators and the weeds and the wild flowers that they and us rely on, come on with me and let's get lost in a wildflower meadow and draw. I can't wait to see you in the class.
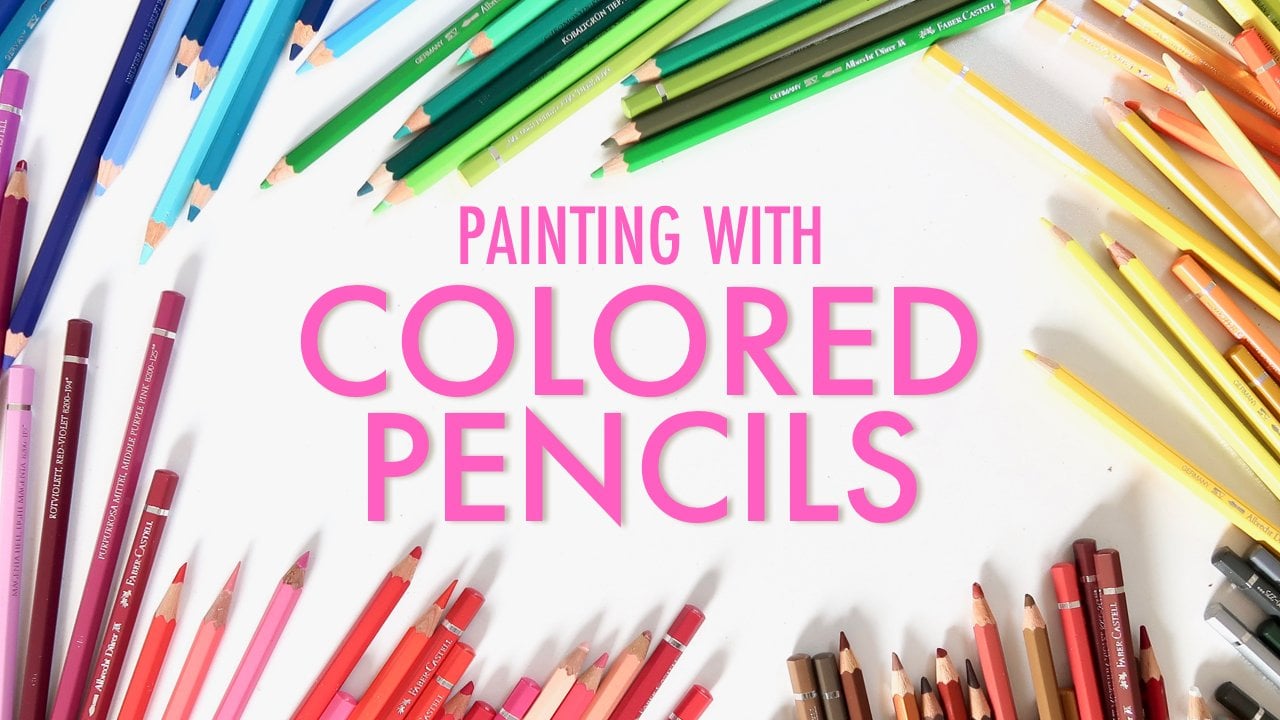
2. Supplies: Welcome to the class. I am so excited to see you here. We are going to dive right in just a moment. But really quick before we do, let's go over a few foundational things. First of all, the materials that you'll need for the course. Number 1, you'll need some black or dark mixed media paper. It doesn't necessarily have to be black, but you want it to be pretty dark. If you don't have that on hand or if you're not able to easily get it, you can take a piece of watercolor paper yourself and tone it by laying down an even layer of dark watercolor on it letting it completely dry. I, myself will be using Rives BFK printmaking paper in black. Number 2, you will also need some opaque media like colored pencils. Colored pencils aren't perfectly opaque, but they're pretty opaque. They're going to be opaque enough for our purposes in this class. But yeah, you could use colored pencils, gouache, paint pens, any opaque media. But one note here is that if you are using a wet media like gouache or a paint pen be sure to go ahead and buy the dark paper rather than toning it yourself. If you're going to tone it yourself with watercolor you really want to plan to use a dry media like colored pencils or even pastels to be honest. Oil pastels, any of those will be fine on a paper that you've toned yourself. But if you have toned you're own paper, you're going to want to avoid any wet water-based media. I will be using a combination of Prismacolor, Holbein and Caran d'Ache color pencils. But I have a ton of colored pencils on hand since I am a professional illustrator and I work with colored pencils all the time. You don't have to have a massive set for this class, you can really use any set that you have on hand, you just want them to be soft core colored pencils. Something like a Prismacolor and that'll be just find. I'll be describing each color that I use. But I'll also try to not just tell you what the color name is, but to give you a little description of what the color is like, so that if you don't have the exact pencils that I'm using, you can figure out the equivalent pencil or how to mix it with your own set. Lastly, you'll need a way to collage several different references together. You could do this on your computer with a program like Pixelmater or Photoshop, or you could use an iPad in Procreate, which is what I'll be using, or you could even use printed reference photos that you cut out collage, like make an actual collage. Lots of ways to do this. Or you can also skip the collage step and just pull together several different reference images and create a compositional sketch. We will unpack all of that when we get into that lesson, which is what's coming up next. But I just wanted to give you a heads up that you'll need some kind of collaging, some way to create a collage or just forego the collage and go with a compositional sketch. That's it for the groundwork. Let's go ahead and dive in.
3. Composition: Let's talk a little bit about composition and how to create composition using multiple different reference images. For this class, for the pieces I'm going to be working on in this class, I wanted to have a little bit of a vintage feel, a scientific textbook feel, which is a popular look right now. You can find a lot of stuff, a lot of vintage pieces if you look on Etsy or Pinterest or whatever, and I just think they look really cool. I've always enjoyed having them in our home and I enjoy that style as an overall approach. It's like a nice balance between something that's super, super realistic, which is what I do a lot for work, and something that is a little bit more stylized and planned out. That may depart somewhat from reality but still looks realistic but stylized. That's the look that we're going for here. The first step that I would recommend and that I would undertake is just to do some image searching, whether it's on Pinterest or on Google, to get a sense of the types of things that you would want to include in your composition. If you have an idea already of the subject that you want to do, let's say that you want to do, I don't know, bachelor buttons or something. I'm just thinking of another common weed or wildflower that we won't be doing this class or if you want to do something that I am going to be doing like Queen Anne's lace. We're going to do dandelions, Queen Anne's lace, and milkweed. You could just start by googling scientific illustration or a vintage illustration of Queen Anne's lace and see what comes up, see what compositions you find in your image search. That can give you a good sense for what types of things they will include or not in their piece. Sometimes you'll see roots or seed pods or something that includes a little bit more anatomical detail. You can also get a sense for the different growth stages that they typically show and that gives you a clue for what types of photos you need to look for. Once I had done a little bit of looking around and have gotten inspired. I will create a very rough, and I mean a very rough sketch just to show the overall shape. This isn't the very rough sketch right here. This is actually my finished reference image. I already deleted the layer that had my sketch in it, but when I did have my sketch, I just had a very basic sense that I wanted to have like these three bigger blossoms and two in-process, some other part of the growth phase. Then I knew that I wanted some leaves, but I didn't know exactly which leaves I was going to do. Some of that would be informed by what I would be able to find for reference images. I actually had pretty much all the reference images from things that I had taken. Just this one here is one that I did not take myself, one that I found on a public domain image site. But if I don't have the reference images, I would go on either Pixabay or MOGG file, one of the open-source public domain reference image websites. I will start searching for Queen Anne's lace photography. A picture of Queen Anne's lace search or just on those, all you have to do is say Queen Anne's lace. But you could also say Queen Anne's lace bud, or Queen Anne's lace greenery, or Queen Anne's lace seed pod, whatever it ends up being at the end of the life cycle so that you get a good sense of all of the different stages of growth. Once you have those, then you can pull them into a program like Procreate. If you don't have an iPad, there's a number of different ways you can do this. You could do it on your computer in Photoshop. If you don't have Photoshop, I don't have Photoshop personally because I don't use it. You can use something like Pixelmator or anything that will enable you to cut up a photo and move it around like a collage. If you want to, you can even do this the very old-fashioned way and get the photos printed out and cut them up, and put them on a piece of paper like a collage first. If you don't want to do the collaging together, you can just look at the individual images. For this one, I obviously have collaged it together. I've done that so that you all can see the reference image, a unified reference image but to be honest, if I was just doing this on my own, I wouldn't probably take the trouble. I would do the rough sketch, the newer things we're going to go. Then I would just look at each of these individual images. It's up to you how you want to approach that, whether you want to take the step of collaging things in. But basically, once you have your concept, you've created the rough sketch that's inspired by some of the compositions that you've seen. Obviously don't just directly copy a composition, but you can get a sense for how people lay things out and approach it in a similar way. Once you have that, that's your framework, your skeleton, that's the foundation of your piece. Then you can start looking at these reference images that you've sourced, and look and see what would fit, what would work where, and for example, when I did this piece, I think I had everything except for this little in-process. What is that? I think that's the end of the life cycle, after the yellow things have popped off but before it's puffed out. I'm not sure. I'm not a dandelion expert but I realized that I was missing part of the lifecycle. That's the point of that anecdote. I went and I searched for that reference, and then I found it and dropped it in. Having a little bit of a plan beforehand so that you know what pieces you're looking for, is super helpful. Then for this piece, if I was doing this in my usual style, I would do a very detailed sketch. But you can see here, all I end up doing is a really simple digital sketch to have the basic parts, the basic location of things, and then when I need to transfer it is I print out my sketch onto printer paper and then I use the transfer paper with my sketch on top and the black paper underneath. I'm not going to go into how to transfer our sketch in this class because this is already a long class and there's a lot of info. But if you go on my YouTube channel there's a very in-depth tutorial about how to use transfer paper. If you're not comfortable with it or if you haven't done it before and it's totally free, so you can just search on YouTube Kendall Hilly gets to transfer paper and Kendall Hilly gets to transfer a sketch and it should come up. I'll print off my sketch, lay down the transfer paper, lay down my sketch, and then just lightly transfer at that way. Once we dive into the demos, you'll see what the sketches look like once they're transferred. That's the basic idea for how I would create a composition, how I created the composition for each of these reference images, they're all compilations, they're all pulled together from multiple different sources and they're all things that I thought through ahead of time, what I wanted the composition to be. Then I sourced the images and then I plugged the images in. But again, if you don't want to go through that added step of collaging the images together, which I don't usually do that myself, it's totally fine to just have your sketch and then have your individual reference images that you'll look at. However, you want to approach it there works well. I think we are ready to go ahead and dive into the demo.
4. Start on Your Class Project!: Hey, folks. Just jumping back in here with my face one more time before we dive into actually making the work. I wanted to just quickly mention that since this class is real-time and there's a lot of real-time footage, a lot of content, it is really the perfect fit if you want to try making your class project right along with viewing the demo. Now, I've made paint within classes before and they've all had that end goal in mind, that somebody would be able to paint right along with the class. But something that a lot of you have flagged and a reason why this class has been created at all is that it's sometimes challenging to do when the process has been sped up or when little things have been cut out. Even when I've tried to make the process much shorter, I have still had to condense the videos. This is the first time that I have not condensed anything, not cut anything out, not sped anything out, it's just real-time process. It's really like you're sitting next to me or two feet above me as I'm painting. I would encourage you to get a jump on your class project. Since we have already seen the composition section, the composition lesson, and talked about how to create your own composition if that's something that you want to do, I have available a couple of different compositional sketches that you can download if you're on a computer. I don't think you can do it from the mobile app, unfortunately, but those are the two options. You can either create your own composition or use one of the ones that I've created, but what you'll need to jump right in is just to have one of those sketches, have it already transferred onto your black paper, and have your colored pencils ready to go. Then if you've got that in front of you in your computer or your phone or whatever you're watching this class on right there, you can just work right along with me. We're going to work first on the dandelion. If you are wanting to do exactly the same one that I'm working on, that's the one that you should get set up first. Then we'll go to the Queen Anne's lace and then to the milkweed. Of course, I would love it if you do your own thing and you make your own compositions, I would love to see those. I'm super excited to see what you all come up with there, but I just wanted to provide those existing ones just in case somebody just wants to do it more of like a relaxing thing as opposed to trying to create their own. I think that's it. Grab that stuff and go ahead and get a jump start on your class project while you're watching the demo.
5. Dandelion 1: We're going to go ahead and dive into our dandelion. I have my reference image set up here in front of me on my iPad. The exposure right now is set for this black piece of paper, so it looks washed out and there's not much color variation in there, but it's a relatively normal looking photo. Maybe I'll pop it up on the screen as well so you guys can see it. As you can see, when I zoom in here, it's just a compilation of different images, just like we talked about in the concepting lesson. I haven't really done anything too fancy. I've just pasted them around in roughly the shape that I want, done a basic sketch, and then transferred the sketch to my black paper. A really quick note on colored pencils before I get started. For the most part, I'm going to be using Prismacolor colored pencils. There are a few Holbein colored pencils that I'm going to use as well because they are colors that Prismacolor doesn't really make. They're slightly different. They're not crazy different, but this one, in particular, mustard yellow, this Holbein mustard yellow, it's a nice darker yellow but it's cool. This is the color I use all the time for Prismacolor goldenrod, it's a nice dark yellow but it's really warm. You can see even just in the casings, the difference between these two. This Holbein one has become my new favorite. Since we're going to be doing yellow, yellow is a tricky color, especially subjects that are entirely yellow. So these flower heads up here will be a little bit on the tricky side so I want to have a good range, some good options for yellow-colored pencils. I also have a couple Caran d'Ache luminance pencils. I have the full range of these and I do like them and I use them when I need to, but they are probably three times as expensive as Prismacolor pencils so I tend to save them and try to only use them when I really need to. Then a range of different greens here. I've got everything from some lighter warm greens like chartreuse, then some deeper warm greens, lime peel, and then some really light cool greens. I have this, this is just light green. You can see it's a little nub in way down at the end, and I've got it glued to the birch dowel. Just used super glue to glue the end to the birch dowel so that I can use up the whole pencil. Have a couple of those. This is pale sage. If I use these up, I may swap out the actual new color pencils for these, and then for dark greens, I have olive green, and then this one by Caran d'Ache which is dark English green. I'm going to grab Prismacolors dark green as well. As I'm showing this to you guys, I realize I also need some neutrals for the stems of the flowers and for the puffy part of the dandelion. So, of course, I'm going to grab white. We're going to need some white. I am going to grab black as well. We're not going to use a ton of it, but we will use some probably to clean up edges. Then I'll get a couple of different light grays, a warmer light gray and a cooler light gray. Beige mastic, which is a cross between gray and putty, and then this one here, this is called seashell pink, but it's a really nice neutral color. I think it'll go really well on the stems of the flowers. Then I'm going to grab burnt sienna and burnt ocher, and then terracotta as well. I think that's probably all I'll need for now. I know this looks like a lot of colored pencils. I probably will not use all of these, and if you don't have all of these colors, that's okay. Some of the reasons I'm going ahead and getting so many colored pencils, having such a big range here is that it's going to allow me to work a little bit quicker. Since it's the demo, I'm always trying to do it the most efficient way possible. So if you have a smaller range, just work with what you have. You don't have to stop and go get special colors for these. You might not have had black paper on hand, but if you've chosen to take this class, you may either do have black paper or you've done some of the workarounds that we've talked about in the previous lesson, ways to get around, or make your own black paper. If you're finding that you don't have all the same colors that I have, that's totally fine, just work with what you have and it might take you a little bit longer to blend or test things out but yeah, there's no need to get any special colored pencils for this. Then I've also got a little piece of test paper here, a little strip of test paper here. This is just so that I can have something to test out the color of the colored pencils on, makes sure it's what I want before I lay it down, since we're going to be doing it 100 percent colored pencil here. I'm not going to be doing any watercolor, and we're working on this black surface, we really are going to have one chance to get it the way that we want to get it. Overall, this is going to be a looser interpretation of these objects anyway, compared to the super tight realism that I usually do, but still I want to be able to just check and make sure the color is what I'm aiming for. I'm going to start with a little bit of a lighter yellow and I'm going to lay it down fairly lightly on the paper and then gradually build it up. I've got my piece of paper here to keep from smudging everything. I think I'm just going to start building up some of the little petals here. Now, with this subject at this scale, it would be really easy just to scribble around and make the border of the flower that way, but I'm trying to be intentional and make some little petal shapes so that it will have more dimension and not just feel like a rough scribble at the edge. I'm pressing probably about 30 or 40 percent of what I could do in terms of the pressure that I'm applying. I'm going to wait until we get more down and there's more pigment to work with before I start pressing really hard. So just working my way around the dandelion. As you can see, it's really nice, this stuff from the transfer paper, it just pretty much gets covered right up. I have tested this so I can confirm that once you lay down really heavy layers or pigment, you're really not even going to notice any of the white coming through. Now, I'm building up the central ring you can see in the reference that the petals are a little layer cake of petals. I'm just adding in some of the central layer. This one's aiming right at us. So it is pretty circular, pretty even, I'll lengthen some of these petals here. Some of these are longer. I don't want to lengthen all of them because I want it to have an irregular look as anything in nature does. There is symmetry, but there's also a lot of irregularity. I'm going to start adding in a few here, few petals in between. Really building up that layer cake. Now, if you're anything like me, every time you start on a piece that has multiple different elements, the first thing you start on, the first thing that I start on always takes me the longest. I think that's because I'm figuring out the process; the approach that I want to take. Then once I get it nailed down in my head, then I'm able to move much quicker throughout the rest of the piece. Looking at the reference here, I see the yellow has an interplay between warm and cool. There's some really warm areas of yellow that are more down in between the petals and then the cooler areas of yellow are up top, and that's reversed from what you see a lot of the time with shadows tend to be more the cool colors and the light colors tend to be warmer, but it has that interesting reversal so I'm going to just go with that. I think I'm going to put down some Spanish orange because interestingly, these shadows are actually quite saturated. So I'm going to put some of this down, and then I think I'll reach for the whole pencil after that, we'll see.
6. Dandelion 2: I'm just going to some of these little in-between areas. Ultimately, I am going to cover up pretty much all of the black here. But I'm trying not to put too much pigment down until I know that I've got the right colors. Because yeah, with colored pencil, It's kind of one and done once you lay it down. Once you've really heavily lay it down, you can't go back from that. So I'm trying not to overdo it with any of the colors until I know that I've got them right. I am looking at my reference, but I'm looking at my reference more for just general information about the color and the shape. I'm not being super, super tight about like which petal I'm doing, the scale of each of the petals. I'm just trying to go out of my way to make sure that I'm not really being super perfect with them, that I'm allowing there to be some difference and some irregularity since that will help with the realism. But unlike a lot of what I do with a tighter realism, I'm not measuring and really closely trying to capture the proportions of all of these petals, more enjoying the experience and trying to just look for the information that I need from the reference image, but not rely on it too closely. Adding some more of this canary yellow on top. I think I'm going to use the whole line, mustard yellow that I mentioned because now that I'm looking at the image for longer, I do see some cooler areas down here. I'm just going to tuck this behind some of the petals. I am going out of my way to try to communicate a shape to the petals. I'm not just having it be a bunch of zigzags, I'm trying to actually make the petals look dimensional. This will be especially apparent once we put the highlights in. But for now, I'm trying to go around some of the lighter petals and makes sure that that sense of dimensionality is being communicated. Actually no, that's the same color. Which color am I looking for? This is the color I'm looking for. This is sun, is it the same? Yes. This is sunburst orange here, which is just a little bit more orangey and a little bit more saturated than Spanish orange. I'm just popping a little bit of this in a few spots. Now I'm pressing probably like 60 percent as hard as I could press, trying to create more dimension and lay more pigment down, trying to cover up more of the black. All right, [inaudible] center there. All right. Let me see, what do I want to do here? Okay, think right now I want to add in a little bit of this lemon yellow. This is a really saturated yellow that has a tiny bit of white in it. It's going to read as cool, and it's going to really brighten it up because it does have white within it. Some colors with colored pencils since they're mostly all blends and mixes we'll have white already mixed in, so just be aware of that when you're laying them down. Just continuing to follow some of the structure that I have already set up. I'm concentrating more of this on this upper part of the flower because I'm going to try to make this area over here be like the down or shadow area. Now I'm going to grab some golden rod, maybe put a few little bits of this in, in between things. This is not going to be perfect by any means, it's going to be a loose interpretation of a dandelion, but that's exactly what I'm going for. I want it to be kind of stylized compared to some of the stuff that I would usually do. Let's see, I think I'm going to use, this is a color called bronze, which is like a yellowy, greeny, brown, a little bit more yellow, even something like umber. Before I had this, before I had the mustard yellow from Holbein, I would always use this, but as you can see, it's quite a bit darker. I'm just going to put this into some of the overlap points, some of the areas where I want it to really read as they're being one petal laying on top of another, rather than just a big poof ball. Oh yeah, this is nice. This is the lemon yellow from luminance. It doesn't have as much white as the lemon yellow, brown Prismacolor, but it still really pops because the pigment and luminance colored pencils is so intense. Right now I'm trying to thicken up some of the little petals that ended up looking too wispy to me or too much like they didn't have any structure. I'm just adding a little bit of thickness to those so that they feel dimensional. Then I'm going to do a tiny, tiny glaze of Spanish orange over the top of it because the color overall just feels a little too cool to me. I think some of that is because it's been laid down on a black background, so that's making it read as more cool. When I do a glaze, I'm holding the side of the pencil, going pretty softly, and rather than having the tip of the pencil hitting the paper, I have this side of the pencil glazing over it, and that helps just add a little bit of warmth to the subject. Now where's my white? I'm just going to do a few little petals here and then I'll probably do more white at the end once I have pigment laid down across the whole piece. But for now, I'm using this sharpener here, this is called the tia sharpener. It's become my favorite for colored pencils that tend to break a lot because you can change the angle of the point for how steep or how shallow you want it to be, so like you can see this pencil I've sharpened with my regular favorite sharpener, the alvin brass bullet, which is still my favorite because it's the easiest to use, really easy to change the blades, but it has quite a steep angle. If you're dealing with a pencil that's breaking a lot, or crumbling a lot having a shallower angle like the one on the tia is really helpful and this is about $ 6, I think. It's a fairly inexpensive sharpener, but the downside is that you, well, I find it cumbersome to hold compared to the brass bullet, which is just so nice and little, and then the other downside is that you can't change the blades so you have to be throwing away this whole big plastic thing every time you needed a new blade. If you're like me and you do a ton of colored pencil work and you go through a lot of blades, it can be a little bit tricky. I think I'm going to pause on the weight for now, I just wanted to get a sense for a little bit there. I haven't even pressed that hard, l so I'll come back and add more. I think now I'm going to start on this little guy here because I want to break from the yellow, and then I'll move on to the other dandelion blossom in a minute. This looks like a pretty cool green, let me test this out. I think that's nice actually. This is sap green lights. Then I do notice that it warms up towards the end of the, I don't know if this is still technically called the blossom or if it's changed to, looks like a little pod. But I think I'm going to add some of this Holbein, Olive Yellow. You could also use something like chartreuse.
7. Dandelion 3: This is just not quite as saturated and intense as a chartreuse would be, but if all you have is chartreuse, then by all means just use that. I'm going to start by doing a quick little glaze of this over the top. This is my first time having used this white transfer stuff with just colored pencils. Whenever I've used the white transfer paper before, it's been with a watercolor piece, so I was a little bit nervous about how well the colored pencils would work with it, and I did some tests just to make sure. But now that I'm using it in action, I just really like it. It blends really nicely with the color pencils. It's much easier even than I expected or hoped. This here just adding a little bit of the warmer green up at the top. I think I might need to get a slightly darker, cool green, it's why I left these colors out. Let me see. Do I have that already? Let me try olive green, see how that works. That should be good. I only have a tiny bit left on here, as you can see, down to the very end. Adding a little bit in here so that I give it some dimension. I think I am going to try to create some of the striations that I see in the side there, it looks like that indicates maybe where the petals were. How light is this? A little bit lighter. Let's see. What about this guy? This is pale sage and I'm going to add this. I'm putting this in, laying this down with a stripy long, narrow stroke because I'm trying to emphasize the striations that I see in the subject. Then I need to get another color that I wasn't anticipating. This always happens. I build up my palette and then I see colors that I didn't expect in the subject. Right at the top area of this little pod, the tips of the leaves look almost pinkish, so let's see, I'm going to grab pink and mahogany red. Let me see, I'll start with just a little bit of pink. Now, this is more saturated than what I see in the subject, but I want to amplify it. Then also, since we're working on a black background, the colored pencils, they do have some opacity to them, absolutely, but we're never going to fully, completely cover the black to the extent that it's like working on untoned white paper. You have to compensate if you want something to read as really medium saturated, you may need to use a more saturated colored pencil. Now I'm going to use this misty green from Holbein on some of the little leaves coming down here. I'm just doing a little light glaze of the green, and then let me add some of the ash rose and see how that looks. Let's see, it needs a bit more saturation here. Maybe this guy will help. lead green from Holbein. Well, the Holbein pencils, if you are curious about them, they've only recently been available open stock, they used to be you could only get the set of pencils which I never am interested in doing because I don't want to love using a colored pencil and then only be able to replace the colors that I use the most often by buying a whole new set, it's just not practical for somebody who uses a lot of colored pencil. But once they did open stock, I started trying a few more colors and I really liked them. They're very similar price-wise to the Luminance, so they're a much more expensive higher end pencil, but they're a bit softer than the Luminance, which I do really like as well. They feel more creamy like the Prismacolors do. Now these, I really want to truly feel dimensional, so I'm going to be adding in some shadow using chestnut here, which is like a pinky brownish color. It's a really nice, neutral, not too intense shadow, so sometimes if I'm just figuring out what I want to happen in a given area, I'll lay that down because you can start a shadow but then not be fully committed to like really dark brown or something and have it still work well as a mid-tone. Then if you do really want to push it all the way back to a shadow, it's easy to do later. Another little leaf over here. You can see how soft these are. It's a positive and a negative, it's really nice to be able to blend and they lay down very opaque color, but it is really a pain to deal with the breakage. If you're somebody who, like me, uses Prismacolor, but hates the breakage, it might just tear your heart apart to have to get another pencil that also still has issues and breakage. With the Luminance pencils, one nice thing about those, even though they're so expensive, is that they certainly are much less prone to breakage than the Prismacolors, but the Holbein are just as expensive as Luminance and still break. They just have really some interesting colors that Prismacolor doesn't have. Going back in with the chestnut here to try to carve out a few little shadow areas. Now, I think I want to use dark green to put in a really dark shadow deep in there. I grabbed black by accident. I was like, "Wow, that's very intense for a dark green." That's okay, it doesn't look that bad actually, maybe I'll just roll with that. I don't usually like to use black for shading because I feel like it's just not quite as interesting as using a color. There's so many interesting colors and interesting things that you can do with combinations of colors, so I tend to reach for that more when I'm creating my shadows. But we do have the black background, so maybe I'll just experiment a little bit with this one. Now, if you're not as interested in getting really tight and realistic with this kind of thing, you can be much looser with this, you can be much more stylized, you can make it really even and perfect, and that will give it a different look. But it's not inconsistent with this kind of work. A lot of scientific illustration, especially botanical scientific illustration you'd see, is pretty stylized and has been made a lot more uniform by the artists. If that's the way that you like to work, if you prefer that, that works perfectly well too. As you can tell, I get super into these areas that look irregular and different, and so I tend to want to amplify that. This is back in with a deep green, which is that really cool green from Prismacolor. I'm going to add some of the lettuce green on top in just a few spots to warm it up.
8. Dandelion 4: Where did the chestnut go? There it is. The chestnut to add some shadows, usual shadows. This one that I did with the bronze actually needs to be a bit darker. This one needs to have some darkness underneath it, too. Let me see. This one is all pink and I want to add a little bit of green. That's pretty good. Let's just put in a few tiny little spots of black here. When I do the one with the black colored pencil, I'm going pretty soft and pretty delicate because I don't want to overwhelm things. I wouldn't be able to blend it out either if I did end up deciding that I have done too much. This is a new thing, I'm just realizing. I can use the black pencil to clean up an edge and sharpen an edge a little bit, which is super nice on something like this that has these really little tiny sharp points to it. That is a cool thing that you can do with the black paper that you couldn't do with white paper. Then, up top here there's this little fluffy stuff. It looks very white to me in the reference, but I think I'm going to make it cream so that I have some room to add on later if I want to brighten it up. If I go right in with white, then I'll be stuck. Pure white and pure black are really powerful colors. You have to be judicious with how you use them and make sure you're using them at the right times. Otherwise, because it's light and shadow, you have to be careful with how you communicate that. I'm liking this so far I think. Now I'm going to go in and I want to just get a sense of what the stem is going to look like before I go into this leaf. I'm going to grab that color, the seashell pink, I mentioned earlier. Give it a sharpen. I'm going back and forth between these two sharpeners just based of which colors I know tend to crumble a lot. Sometimes, to be honest, it's not just a specific color, it's an actual pencil, it's health. There are times when I've had white colored pencils that are great that don't crumble. But then, this white-colored pencil I'm using right now has been super crumbly. Same thing with Tuscan red. That's another color that sometimes it's great and sometimes it's just completely falling apart and I end up having to sharpen it like 20 times to get a point. Just keep that in mind as you see me switching back and forth, there is a rhyme and reason to it. I can already tell by how this is looking that it's feeling a bit pale and anemic to me. I wanted to only be chestnut actually because I want it to be a little bit pinky. It looks like it has a pinky undertone to me, that's nice. I'm just doing a thin little glaze over the top here. These stems are probably the most stylized part of the entire piece. I've really created this imagined shape for the dandelion. It obviously, there's not really anything quite like this in nature just because there's so many different bloom stages happening at the same time. But I really like that look and that is something that you see quite a lot with vintage botanical illustrations. They'll have multiple growth phases on the same plant, even though that's not really how nature works. But it really is pretty something interesting to look at. Right up to the top here. Let me see. I think that's going to be a good overall color. Then I'll have to decide how much I want to work to make it look fuzzy because dandelion stands for like a very unique 30 look to them, so I'm not sure if I'm going to try to communicate that here or not. But that color, the seashell pink, and chestnut are just perfect for the dandelion stem. I want to darken it a little bit. I want it to be lighter. I'll make that decision in a little bit. This one I think I'm going to do the chestnut first. I'm already regretting that because I went back at the reference and saw that there's a really cool, the stem gets green as it gets towards the top. Maybe I'll be able to lay that down on top we'll have to see chestnut is a stronger color. It maybe tricky to lay a light green down on there, but we'll give it a try. That's what happens when we have one of these classes where it's a droopy with me class and I haven't completely figured out all of the kinks ahead of time. Surprises happen and I end up having to problem-solve through it and you get to see that. Let's try a little bit of the lettuce green and actually, what I want to do really quick first, you can't like full-on erase with colored pencil, but you can. Yes, awesome. Cool. You can pick up some of the pigment. This is for whatever reason, this needed an eraser like a really sticky one. It's not great for rubbing back and forth and getting marks off of the paper, but it's turned out to be really good for picking up pigment. I was just able to get most of the chestnut off there. Let's see what we have. There we go. That smells cool. Have the green at the top and it'll fade to the muted pink of the chestnut. I think I'm also going to go in with a little bit of a brighter green. This is the Prismacolor spring green. It's very similar temperature-wise to the lettuce green you can see, but it doesn't have as much white in it. There we go, that's cool. Then that will fade into the chestnut, which should be the darkest at the bottom. I think I might even grab, do I have it out here? No. There's a color called Henna, which is similar to chestnut but it's a bit more pink and a bit more saturated. I'm going to grab some of that for the bottom of the stem. That's nice. When I'm doing a stylized piece, even if I'm going to be taking some liberties and making it look different than it does in real life, it's not strictly realistic. I still really like to draw inspiration for the stylization from nature, from real life. I'm going to probably amplify some of the intensity of the colors that are in this stem. But the pattern, that the green at the top going down to the pink-red at the bottom, that is taken from reality. I think that working that way, drawing your inspiration from the real world, even if you're going to stylize, can just make things a little bit more interesting and surprising than what you usually do if you just pull it completely out of thin air. Actually, I should pull some of this off at the top so I can get more of the green there. On the blossom, I don't actually see much of the greenish color up at the top of the stem, but I still like it. I'm going to do a little bit of it anyway, but maybe not quite as intense as what I have on whatever these little seed pod thing is called. Just a little bit up there and a little tiny bit of the saturation. There we go.
9. Dandelion 5: I'm just moving on to working on this leaf and developing this leaf a little bit before I go on to the other blossoms. I'm going to grab, where did my test strip of paper go? Here it is. Can I grab my test strip here and figure out what color I want this leaf to be? I think I need to pull some of the colors that are already in here. I'm going to look at this one again. This is the sap green light. Then I was using this olive-yellow from Holbein. Look at that too. I think that'll work well. Then if I want something a little bit brighter, I'll go with this lattice green I think, there'll be maybe nice for the center of the leaf and the veining. Then I also have, of course, some of the yellows and I pulled in any way for the dandelions himself. I may do some combination of these four. Then also maybe similarly dark green here. I just pull this in. Have this ready to go for some of the darker areas. I superglued this one a little while ago and had to add the tape to keep it on because I wanted to use it before it was fully dry, but that's been several days ago now so should be good to go. I think I'm going to first add in the veining in the center. I could do veining out to the little segments of the leaves, but I think I'm just going to stick to one main central vein. Keep it a little bit more simple and stylized. Going down. Fairly light. Again, like I've been on all of the other elements when I first go into the pencil, I'm not pressing all that hard. Then even though this leaf has a very realistic shape, I do want to continue to stylize the same way that I happen throughout the piece. I think what I'm going to end up doing here is choosing one side to be a little bit darker, one side to be a little bit lighter. Since this side is a little bit foreshortened, I think I'm going to make this one the darker side and then this one the lighter side but honestly, it could be either one since this is stylized in a little bit. I don't want to say artificial but definitely not exactly what it looks like in real life. I'm starting on the darker, cooler side here with the sap green light. I'm just going really soft over the whole surface area here. I'm going to have to do a little bit harder to cover some of the white sketch. But for right now I'm going to keep it nice and soft. I think I'll do the warmer color on the other side. Then we'll work on building some dimension, making it feel not quite so flat. Probably pressing it about 50 percent strength. Now if I wasn't doing this for a class, this wasn't a demo, I would be constantly flipping this piece around to have the angle on these different little points be easier to get into, easier to reach. If I'm filming, I tried to keep it at the same angle so nobody gets vertigo. But if I'm working by myself, I will turn it around, turn it around constantly just to make it simpler and easier to reach things. That's one of the reasons why I like working flat, even though there are a lot of reasons that it's better to work on an easel. I like working flat because I love being able to turn things around really easily and work at different angles. Now I'm switching gears to the Holbein, all of yellow. I think I mentioned this before, but it's similar to the Prismacolor chartreuse. It's just not quite as saturated. If what you have is the Prismacolor chartreuse, by all means, just use that. There's no need to get the specific color. Just pick a warmer, lighter green. Again just doing, they're really, really light, soft strokes. A mix between circular. Just like, I don't know, straight up, coloring like a little kid back and forth with almost line-like strokes. I am trying to cover up the edge a little bit here or at least get right to the edge because I don't want to have a visible white outline. I wanted to all be gone just like it is in these other elements of the piece, but for now, just softly covering it. Then we'll go over make some hard at the end. I'm bringing and just run right up to the edge of where this central vein is here. But I'm not going over that because I want to preserve that's one area where I want the lightness, I want that brighter line running through it to look like a leaf thing. Close to the end here. Now as I'm doing this, I feel like this is just looking too yellow for me. Even though this is the lighter side, the warmer side, I definitely going to do another layer of something on top because I wanted to feel more like this color here, maybe this section up here. I think I'm going to have to do a glaze of another color over it. Just another really light layer. First, I want to get this area here a little bit darker. I'm going to try. Let's see, I don't think I want a full-on use dark green. I will just be a bit too intense. I have a little bit, just the tiniest bit left of olive green on this little pencil I'm having here. I think I might use that because that's what I was doing for some of the darker areas of there. That'll be nice bit on the saturated side, but I think it's going to be good. I'm not too worried about having perfect edges here on the leaves because I'll go back in and clean some those up with a black-colored pencil. Once I get towards the end, I already experimented a little bit with that and it seems to work really well. But as you can see at this point, I am directly going over the white lines, trying to get those covered up. I might leave a little bit of them in some places because then that'll allow me to put a highlight there and have it really pop. I'm not going over it uniformly, but in most places I am covering it. I need to sharpen this pencil, but I think once I sharpen it, I'm going to be down to the very end and I'll have to go find another one from the backup storage. Let's see, make a little bit of a light area on the end of this too I think. Then coming down towards the bottom, this is probably where I want to get the darkest because I want it to feel it's curving underneath like all pulling down to this central point at the bottom of the plant and actually going underneath those stems. I may just see how this looks. I think I may use some of the dark green here. Whenever I come in with a really dark color, I always go tentatively first because you can always add more. But as we've been talking about this whole class, it's much harder to take it away. Even maybe impossible to take it away. By the time you put it down with full strength, the full pressure, it feels like really driven it into the tooth of the paper, you're going to have a very hard time making it truly disappear, even if you use a kneaded eraser to pick it up. Let's see if I have one more sharpens in this thing. No. See that's what happens when you get down to the end. That piece is done, that pencil is done let me grab another one of those. It's all as green. I got a new olive green. Then I also grabbed, I forgot that I had this color. This is called pale green and second nice dark cool I think there is still a little bit of white in this whole leaf so maybe it's more of a mid-tone, but it's a darker version of the sap green light. It goes really well with the sap green light. Yeah, that's nice. That's going to be great.
10. Dandelion 6: I think I'll use some of this, some of the midtone areas of this leaf. At this point, I am pressing basically as hard as I can press with my full strength. Really small circular strokes and trying to burnish it down into the tooth of the paper. Then with the olive green which is darker than this and come into the shadow area and press nice and hard. The basic formula I'm using is that it's going to be darker towards the center of the leaf, towards the vein and then darker towards the base. Then some of these little areas that are sticking out, I'm going to add a little highlight too. I am looking at my reference image, but it's not especially helpful in this situation because as you can see, the lighting is just very different from what I have here. This is really complex, natural outside lighting and thus backlighting. Lots of different things happening there. Since I am working with a composite image, lots of different images that I've put together, I have to make the light make sense and be cohesive for the overall structure of the piece itself. I can't just go off then follow the light really closely. Sounds funny to say. Follow the light pattern really closely from the reference when all of these other things have a different light pattern going on. That light pattern and the references are very specific. If you are doing this as your class project, and you are also doing a composite image, you've decided to do a composite image, just keep that in mind, that you need to maybe stylize and simplify the lighting, format, the structure of the lighting. If you're doing a composite image where one of the elements has a really distinctive lighting pattern and the other ones look more neutral. Something that will make lighting pattern look very distinctive and very recognizable and specific to a certain context is really strong direct light. The rest of these elements are in more indirect light. They look just gently lit with a soft light source coming from one side or another, whereas this, since it's in the heart, natural, really bright direct daylight has all different shadows and light sources coming in so much more complicated. I am going to do a tiny, really soft little glaze of black colored pencil down here to darken this up. This is not something I usually do. I hardly ever use black for shading. Tons of artists do, and it's totally fine, but I tend to like to use complimentary colors to darken things. But since this has a black background, I've been noticing that the black shading actually looks really nice. Now I'm going to use this sap green light once again and try to cover up some of the final little bits of white there. Then we'll work on the other side of the leaf. My sharpener has a little bit of olive green pencil still stuck in it. Here we go. I want to have it nice and sharp. Then try to create an edge here. I can't clean up the edge like we talked about. I can't clean up the edge with the black colored pencil later on, but it'll just be easier if I keep it nice and sharp for now. The sap green light is actually feeling pretty intense and maybe a little bit too light. Because I don't want this leaf to look shiny. Dandelion leaves are soily and rough and scratchy and very textured. I don't want this to look like a really nice, shiny, waxy leaf. I want it to feel soft. Yeah, that's better. I think what I'm going to have to do is just knock down. I'll use a little bit of this to knock down the intensity with kelly green. See. I sharpen it. I'm really trying to keep my hand on this paper as much as possible since we're laying down such thick colored pencil. It will be really easy to smudge things. It's nice stuff there. Then doing a little bit the darker kelly green on the very outer edge, and even a little bit of olive green. Now what I'm imagining is that this leaf is going down on this side, so it looks darker over there and then coming up touching a little bit of a highlight here and then going down again. Very stylized light pattern, but I'm going to try and be consistent throughout to make it look stylized but still realistic. That's the whole name of the game in terms of the look that we're going for with these pieces. Having it being both realistic, recognizable, making sense, structurally in relation to itself, but then also having something that looks yeah, more stylized, almost perfected like an ideal form of the image. Then I'm going to go in with a black colored pencil here right along the edge to just try to sharpen that up a little bit. When I do that, I'm not doing just like a really strong sharp line because that will draw quite a bit of attention to itself. Even though there's black paper. After I put in the line, I feather it out a little bit. It's just slightly darker than the black paper. But I think it actually looks cool. It adds a little bit of a shadow, a little bit of dimension. I'm not going to do it on the whole piece. I'll just do it in a few areas. Areas where the edges look a little bit softer or where I want there to be more crispness. That's where I'll add the black in. Kelly green again down here. It's bouncing back and forth between the kelly green, the sap green light, and the olive green. Olive green is the darkest. Sap green light is the lightest and then kelly is the mid-tone. Yeah, kelly definitely has some white in it. There's not a ton of white, but there definitely is white in it. This a little bit here, I think it needs some sharpening up to those little points. How lost their pointing is. As soon it's over, going to do this on the other side. Something I would do differently is, I would pull up some of the white pigment from the transfer paper. I would pull some of that up, I think along the outer edges just to make it easier to get this nice crisp edge. I like it in the center because it's made that center vein really pop. But I think along the edges I would take some of it away. I made it up when I do the other [inaudible] leaf fro the other side. See here. Sometimes to get rid of every little bit of weight transfer paper, I've got to get the pencil very sharp and then come down with little tiny circular strokes right on that area. Now at this point, I'm very glad that I went softer initially and didn't fill up the whole tooth of the paper because you really can only do. Even though this is black paper, you can have a little bit more flexibility in terms of how you build things up, and what order you work in. It's just like any reefs PFK paper, where it has well, any paper at all really. It has a limited amount that it can withstand a limited amount of pigment that it can take before the fibers of the paper are full.
11. Dandelion 7: Software initially gives way more flexibility later on. Right now when I want to add more of that nascent, develop the form a little bit more. I think that's going to be good for this side for now. Well, I think it needs a little bit more work. That's the impression I have at the moment, but right now I want to further develop the light side of the leaf and get back to a more completed stage before I make any more decisions about how much complexity I want to have there. I'm switching to let screen by Holbein. This is a lighter version of spring green, a little bit less saturated and a little bit more white. But if you don't have it, I would do a little glaze of spring green and then maybe a little glaze of sage green light. Where is that? I know I have that around here, somewhere. There it is. Just a tiny, tiny little on the left. I suppose you could actually you could probably just do sage green light. Sage green light in and of itself is just slightly less saturated, but you get a similar look there if you're working exclusively with prismacolor pencils. Sorry about the background noise. If you're hearing any of that, they're doing construction all around my studio. The thing that's going to happen over here is that we're going to use some of the nice definition from the center of the vein. Because now we're bringing it much closer in terms of value to what the center vein is. But I think we'll get this lay down, see how it looks and then maybe create some more separation with another color. I had been pressing really hard on this other side earlier and now I'm back to pressing pretty light. Quick switch to fix something out. Just saw something I wanted to change. Pressing pretty lightly, just doing a more of a glaze and even glaze over the whole surface. This is getting the color much closer to where I want to be. I actually really like that mix of the yellowish nuder green with the cooler lighter nuder green on top. The same colors that I'm using over here for the light and leaves as the strata. I'll probably use the Kelly green and the sap green line. Anywhere I see obvious pencil strokes I just glaze back over that. I get a relatively smooth surface. There is going to be some texture at this phase because I haven't started burnishing yet. Then only it smooths out once it's burnished, at least with this paper. But still I'm trying to minimize texture so I don't end up with a ton of it that I have to deal with at the end. I think I'm going to hold off on pulling too much of this down, really to the below area, into the shadow area because it has quite a lot of white in it. Once I pull that down there, if I want to add a darker color, it will be hard to do that without creating muddiness. At this point I am just going in with the Kelly green to try to create some of that downward slope, that sense of it. The leaf curving down towards the big central vein here. I'm pressing a little bit harder but still not quite at full strength. Do in circular strokes, doing a little bit of burnishing. Maybe towards the center where I want it to be the darkest but mostly still glazing. Again, I'm going to hold off from going all the way down to the bottom here because this color does have white in it and I want this area to get almost as dark as this area. What I might do actually is just go over the vein down here. There we go. That's going to be good. Because that should get darker too if it's going down towards this darkest part of the leaf. It shouldn't be as light as it is up here. Just re-describing some of that vein. Some of the edges got a little bit soft because I was coming in right along the sides. Here's the olive green. I think this is what I'm going to put down here for the shadow. That's looking good. I don't want to have a hard stop there. I want to fade it up a little bit. I'm just doing a line right along this side, this side of the vein. A little bit of a back and forth here to get a nice straight edge. Of course I have to cover up all the white there. I think I'm even going to go over the vein at the very bottom because I just want it all to feel like it's coming underneath the flower. Going to try to avoid adding too much detail down here because the more detail I add, the more interesting it will look. I really want this area to just sit down and be quiet. Back to the Kelly green. For some of these leaves that are a little bigger, I am making the suggestion of a leaf-like shape in the center here. I'm not going to add a vein or anything I am just going to stick with that one central vein, but I'm bringing up the shadow into the center of these little points on the leaf to make it feel a little bit more dimensional. Again, this is very stylized, well, at this point quite stylized. We're not getting a completely realistic light pattern here but trying to make it look consistent within its own world. That to me, is the key to having something that's stylized look, quote unquote realistic, is that it makes sense on its own. It's the same reason why I like any of those super realistic computer animated movies. There are parts of them that do look just like real life, but plenty of it is highly stylized, but somehow it still looks realistic. That's because it's consistent in and of itself like the the lighting and the structure all make sense in the world of that subject. They all work together to make sense. Keep that in mind as you're working on your stylization. It doesn't have to be exactly real life. But it does need to all look like it belongs in the same world in order to have that feeling of realism. Little bit more of the Kelly and then I think I'm going to come back in with the light and start popping out some of the highlights. Obviously I need to do quite a lot to clean up the edge here. There's still a lot of visible light. Here we go. I'm going to do the same thing that I did on the other side where if something gets too fuzzy, looking out, come back in and clean it up. Don't worry too much about creating a perfect edge. I think I want to knock down the intensity of the vein up here too. I want it to be the most intense right in the middle, since that's going to be what makes the most sense in terms of the lighting and the structure. Just pulled the dark green over here. I am going to put some of that down at the base of this leaf.
12. Dandelion 8: I think I also want the highlights that are down here to be a little bit darker than the highlights that are up here. I'm going to use the Kelly green instead of this super bright Lotus green as I'm tracing the edges of these. Sharpen this again. These little tiny points can be very tricky to get if your pencil's not sharp. I mean they can be tricky to get anyway, but you definitely have to have a sharp pencil in order to be able to capture them. Now if you can tell them what I'm doing here, I've done this a few places where I've decided to go beyond what's in the outline. Like this little tiny spot right here, if you can see the tip of the leaf here, really just touches the edge of the stem. Compositionally, that can be a little bit awkward. It's much nicer to have an overlap than two lines that directly meet unless you're doing it on purpose. Anywhere there's two lines or points meeting, it's going to draw a lot of attention to itself. I'm going to try to make sure to put a little overlap in. That will just look more intentional. That's looking good, I think. Right, come back in with the Lotus green and go nice and hard over the white outline. At this point, I'm pressing probably 80 percent of my strength. I'm doing quite a lot of pressure to get a lot of pigment onto the surface of the paper. Don't like how that looks. I'm going to use the black to cut that edge. That's a little better. That's nice and sharp there. Much better. Just using that black to really softly describe those edges where I want there to be more precision. Then any place where I want to add a little bit more shading or fade things out to make it look more dimensional, I'm coming in with the Kelly green. I probably will also come in a little bit more with the olive green. Now because this side is so light, I'm feeling like I need to make the highlights on this side a little bit brighter. I'm just going with that same colored pencil, the Lotus green, and I'm burnishing a little bit more on the high points, some of the highlights on this side to make it feel more balanced. Then up here, I think I also want to make it a little bit more of a crisp line. I'm using dark green. Pretty soft. I'm just adding an extra little shadow up there. I think that might be as far as I'll go on that leaf for now. Actually, let me just fix this. I just noticed another white edge. I think I'll hold off on any further development on this leaf for now. Then once I get more of the rest of it laid down, then I'll come back in and add probably some white highlights and maybe sharpen some additional points up as well. Moving on to this next blossom. I know that we're going to have the stem look more or less like these other stems. I have some of those colors here right now, so I think I'm just going to go ahead and do the stem first using the C-Shell pink. Really light because I have to add in that green ombre look. Now I put these lines in to indicate the curve that I wanted in the stem. But now that I'm turning them into three-dimensional shapes, not just a single. Well, they're still 2D, but now that I'm giving them a sense of form, I want to change the curve slightly. Want to have this one coming out this way. I'm still using the line as a general placeholder but I'm not following it. I'm not treating it like an outline. You could see I've gone on one side there and then I've switched to going on the other side over here. I think I'll just do a light glaze on all of the stems so I can see where they are. Then I'll wait to finish this one off. I just thought of it as I was working, I should get some of the shape of the yellow in up here because I don't want to have the stem get in the way of how big I want these petals to be. I'm going to do the light glaze for the stems and then start at least doing some of the footprint of the yellow dandelion. Well, the only yellow dandelion we did so far, I think we started with canary yellow to get the structure and the form down and that worked out well. They come in and do that again. I think that I'm going to do differently here is, here we had the direct view. On this one, it's like a three-quarters tilted side view. I want to make it feel like we're seeing the side of a dome almost. I'm going to try to really emphasize that in the shape of the petals. I am doing some of the same thing that I did for the first one. I'm going to lay down some of these initial bigger petals. Not too dark and then I'll build up the layers. Some of these I might do a little bit exaggerated, make the petals a little bit longer to increase that sense of it being that opening dome. Then up top, I want to take note of the fact that the structure of the dandelion, we switch from seeing, here, we see all the petals pointing down. I don't want to just have petals pointing up here. I want these to actually look different. I should have checked the flower anatomy. I don't know the specific name of these little things, but the little fronds that are coming up, I want to capture some of those so I'm going to make sure to leave some of this space in between here to make it look a little bit more area and a fluffy. I sharpen my pencil quite a bit and then I'm going to come in here with a few sharp lines. I can always add more. I can always thicken this up, but I only really get the one shot to make it look nice and delicate and airy.
13. Dandelion 9: Also wishing I had erased the white outlines here, since they're making it a little bit tricky to get the airiness. They're a bit on the thick side themselves. I'll leave that for now, I can always come back and do more. Yes, I need to stop. Now we're going to do some other levels, some layers of the petals, just like we did with the first dandelion. I'm trying to avoid the temptation of being too symmetrical here, trying to keep some element of randomness or surprise. Then again, this is not going to be super tight and realistic because this is stylized, but something I do notice is that we see there's some foreshortening happening here. We see almost the whole length of the petal because they're long and facing down, but then the petals start to tilt up, and up, and up, and up. Just like what's happening to the pencil where you see the full length of the pencil, and then you see less and less of the pencil as it tilts up towards you. The same thing is happening with these petals. The petals that are up here need to be really foreshortened to compare to the petals that are down here. I think that's a pretty good initial structure, or maybe you want a little bit more over on this side, maybe another long one over on this side, a medium one coming out here. I really want that expanding, opening dome feel, so I'm just adding a few more. Here we go. I think that's a good initial structure. It has that shape that I want. We've got the leaves in their various stages of foreshortening. Then I'm going to do the same color pattern that I did the first time. I'm going to go in first with the Holbein mustard into some of the shadow areas, which on this one are, again, a little bit more on the right side of the blossom, Some of the in-between spots, of course, the inside of some of the petals themselves, especially as you get down to the bottom, those will also have more shadow in them, because these petals, they're not completely independent. They're stacking on top of one another. Wherever one petal crosses over another petal, you're going to have some shadow there. I'm not going to do quite as much of the mustard once I get over to this side, because on that side, this shadow areas look a little bit more warm, so I'm going to probably switch to the sunburst yellow like we used on the initial dandelion. Pause on that. Sunburst yellow, and I'm going to actually be fairly judicious with this, not going to do a ton of it. Let's see I'm trying to squint my eyes when I look at the reference image so I can get just more of a global sense of where is there a lot of warm color, where is there a lot of cool color, and I see a lot of warm color in this area here. That's where I'm going to concentrate it, again being careful not to come up too far and lose these empty spaces here. This side, I'm noticing, just has a lot of really bright yellow. I probably am not even going to have too much shadow over there. There's a little bit of areas that have the warmer sunburst yellow, and then a little bit of the cool yellow, but mostly it is those really bright canary yellow lights. I think I might use this one here. Try this, if this. I can't remember if we did this last time. Is this lemon yellow? Bismuth yellow. No, I don't think we actually used this one last time, but I am going to give it a try over here. Really trying to use the pencil to create actual petals instead of just scribbles. I want the petals to feel dimensional, like there's a shape and form to them, even though I'm not super closely following the reference. This bismuth yellow is actually super nice. It doesn't feel as cool as the lemon yellow, which looking at them side-by-side makes sense. This is the lemon, and then this is the bismuth. If you remember with this one, it ended up being too cool, and we had to do the glaze of the warmer yellow on top. I'm going to switch back to the canary yellow, we do a little bit more of this in the in-betweens over here, you need a bit of it here, just not that much. Some of these petals that I was fairly light and delicate with, now I'm going with much more pressure, trying to really burnish that pigment in and get a lot more opacity. Whenever you're doing a lighter color, or especially something like yellow, which has just a lot of natural translucency, it doesn't cover as well as even like white does, so with a yellow, you're going to have to press a lot harder to get the same kind of opacity that we did on the leaf. I'm doing that brighter canary yellow out towards the tip of the petals, and then letting it fade in to be a little bit darker on the inside. These really foreshortened ones up here, and we just see the tiny little edge of, are going to be some of the harder ones to make stand out. I want this to be a little bit warmer. I'm filling in any areas where I see black with the sunburst yellow, which is really like a yellow orange if you're using a different set than Prismacolors. I think I'm going to sharpen up the bismuth and try to do a little bit more up here to get that to look more structural. Right now it looks odd and disconnected from the rest of the blossom. Just trying to get some nice, clean, little lines here. I'm adding a few of these little curlicues that are visible in the reference, but I'm not going overboard with those.
14. Dandelion 10: I keep having to stop to sharpen the pencil because it just loses that point so quickly, and that's the reason I'm using the clear and ash one actually over any Prismacolor here, is because clear and ash is better than Prismacolor at keeping an edge, even though it just broke off there. In general, it's better than Prismacolor at keeping an edge. Now, I'm going to do a few little lines of the sunburst yellow, and I think I'm going to have to do some more work in the shadows after this. I'm going to run some of these up, these little things mostly look like a cool yellow, but there's a few areas where there's some warmth. I wanted to take note of that, try to create it here. Okay. Squinting my eyes, again, every time I get lost or if I lose my place in terms of where the values are at overall in the whole piece, I'll squint my eyes just to get a sense for whether the area I'm working in should be light or darker, some combination. This lemon yellow, this is a Prismacolor and this has some white in it, so I'm going to use this over here to try to brighten up some of these petals. Actually, before I sharpen this, the dull pencil actually is really a nice size for getting the edge of the petal. I want to have it dull for that, for some of these bigger petals and then I'll sharpen it up. Now, on this side all of the edges look really bright, I'm using the lemon yellow pretty uniformly on this side, whereas on this side, just the very tip of some of them look bright and then the insider or along the petal is more of the midtone. We haven't really done it yet, but I think we will add some more white, some significant white to both of these, I'm just holding off until the end. Which is a carry over from my usual process with any other subject, it's not specifically to do with the fact that this is dandelions on black paper, I would do that regardless. Now, when I add the shadow over here, I'm doing it in the in-between places. But I'm also running it along the the petal itself to try to make it feel like the petal has a shadow in it. Couple of these petals I want to thicken up, give more of a shape. I think I'm going to use just a tiny, tiny bit of the bronze here on some of the bigger overlaps, just those really deep down inside areas. The mustard yellow is darker and it is cooler and in overall it gets the job done, but there's just a few spots that do need something that reads more like a traditional shadow and the bronze is helping us do that. You really have to be careful when you're working with yellow to not go too dark with the shadows, especially really luminous yellow like these, it starts to look really muddy and overworked if you do too dark of a shadow. Now, even though I use the bismuth yellow which is a little warmer, I still feel like this ended up feeling too cool, so everywhere where I see the warm yellow, I'm glazing this over. This is a Spanish orange, which is a bit more muted than the sunburst yellow, the sunburst yellow is just really quite intense. I'm avoiding this area down here because I want that to be more cool like what we have over here. Then just this very center area that has the really intense warm color, just in these in-between spots. I'm putting more sunburst yellow and this is a little bit of a risk, I'm not sure if this is going to work, but I'm going to do tiny, tiny bit of the cadmium orange just in a couple of spots. I'm treating it like a shadow, even though it's in the reference image, it actually looks like it's got that lit from within glow. Then I'm fanning out the edges with the sunburst yellow and a little bit of, where did that color go? Goldenrod, which is much less saturated than any of these colors. Then back over the top, where is this bismuth go? There it is. Back over the top of some of the petals to redefine their shape with bismuth yellow. Couple areas where I feel like the petals are too even, like multiple in a row that look exactly the same, I'm trying to add some more irregularity there. Okay. I think that's going to be good for that for now we'll, obviously, add the white like we talked about, we will add that at the end but for now I'm going to develop the stem a little bit. Now, on this one, I'm going to have to indicate that there's some kind of a shadow back there. I'm pulling out the olive brown, hopefully that will help me make the stem look like it's going underneath these leaves. Olive brown might not be dark enough, I think I might actually need a bronze, which is slightly darker. See, and then we're going to have to make sure that the petal looks nice in light so that it pops out. Then I think on this one I added some spring green or maybe it was the olive yellow. No it must have been spring green, tested it in the tiny area and it just looks too warm, yeah, that looks better. That looks awkward to me, I think I might end up putting another petal in. I keep losing the bismuth, there it is. Just having this one petal line directly up with the stem just feels awkward compositionally, so I'm going to add in another petal that's coming in at a different angle. Try to extend that one off the side, here we go. I think I'm also going to try to bump that out slightly, and then take this edge up slightly with the black colored pencil. Let's see here, yeah , that looks better. I do want that inside area to look tiny bit darker, did I pull out dark brown? Well, let's try testing that and then see how that works. Might be getting closer.
15. Dandelion 11: Just going back and forth between multiple different colors as you can see, until it starts to look right to me. I think why don't want some Christmas on that side too, there. I think that looks pretty good for the connection point. Now I need to fade it down onto the stem and develop some of the pink. We are using this ash rose by Holbein, but clay rose by Prismacolor would also work really well for this. Then I'll fade this into something that's a more saturated pink and then the henna at the bottom because I'm pretty sure what we did on the other side too. A tiny bit of this, I think. Going up here getting that crisp edge in. Then here's chestnut and henna can be used both of these. Henna is much more pink and saturated. Has one of those colors that doesn't come in the base Prismacolor set or even the 72 set I think. But it's an add on one that you can get OpenStack and it's a really good versatile color. I use it all the time for really anything alive, plants, animals, people. It's really great for anything in that category. Don't use it so much for food illustrations, but it's a versatile soft, neutral, dark pink and can be really good for shadows and skin, or obviously we're using it here in a plant. Lots of applications. If you don't have that color, I would recommend picking it up. Then we'll do chestnut down at the bottom. Chestnut is like darker, less saturated version of henna. Now this feels more white than what I have over here. I'm trying to remember what I did differently. I think I need to just bring the saturation up on this one a little bit to feel like it matches. Now that little mistake that I just made, I may be able to just pull that up with an eraser. There we go. We are moving right along. Let's get this little top of the dandelion that has lost all of its fronds. This is quite white in the reference photo. I think I'm going to start out with something that is more in this lightest pink range, the ash rose and then maybe I'll switch to seashell pink. This will have white in it, but I don't want to have it just be solid white, it's boring, I want it to feel like it has some dimension so I'm going to start with some color and then build the white on top afterwards. Where it is seashell pink go? There we go. Seashell pink is a very similar in terms of value, but it's not as saturated, I mean these are both very desaturated colors, but very muted colors. But seashell pink is quite neutral, and then ash rose is just a bit pinker, so there is a difference, but you can use either one for the top color. I'm using seashell pink for the top color because I know I'm going to get to white eventually on top here, but you could use it. The more neutral one is the shadow. Really, you could do whichever one you want, you just have to be consistent. Then these little frondy things coming off the bottom are not as interesting as the ones over here. I think I'm going to make them slightly more interesting than they are in the reference photo, but I am going to try to stick to what I see in real life. I'll start with this warmer green here. It's like a yellow green, that's why I said yellow. This is going to need quite a bit of black, I think around the edge to make it look nice and sharp. Adding another little frond because it felt unbalanced to me. Here we go. Let's pull in some Kelly green. Did it just break? no. Before I go, too many white colors up here, let me use olive to describe the edge of it a little bit and create some shadow. Sap green light. Come in here to save the day for the highlights. Tricky thing about these compared to these is that they have a cup shape, so I need to drag the shadow down on the inside to make them look like they're curling in and dried out. That's why they have that look. That's a little bit trickier to do than what we were working on over there. I'm just pulling a little bit of a shadow down inside the leaf, trying to give it that dimensional effect. Then I'm going to pull some highlights on the edges of the leaf and then I'll sharpen up the little points. I think this may be the simplest of the three flowers. I have to fix that with that black color pencil. Let's see how much this helps. Going to get it nice and sharp here. That's the dark green, I don't want that. The black and the dark green looks so similar just from the outside. Once they're laid down on the paper, the dark green is considerably lighter and obviously much more saturated. But when you're just looking at the pencil casing, that dark green can easily look black. Just sharpening up those points. Adding in an image.
16. Dandelion 12: Now, even though I don't really see it the reference, I like the pink hue of the points on this one. I think I'm going to add a tiny bit of it here. Maybe not even to all of them, just to a few of them. I'm trying to recreate very similar to what I have over here. Maybe a little less saturated, I feel like I wish this was not quite so saturated, they may knock that down later. Doing the lattice screen right now, and then I'll switch to clay, ash rose, I could probably apply ash rose. I'm really getting excited to work on the white puffy dandelion. Ash rose, blending up into the green a little. I think I want to slim down that side of it. That's what I'm looking for, sharpen up that corner there. Now, let's do a little bit of the more saturated green mountain, just a little glaze to brighten that up and a bit of the pink as we fade down into Hannah. I'm going to have to decide. I didn't really think a whole lot through. When I was doing the sketch and the idea, I didn't really think through very well how these points were all meeting up. As you can see, this is a bit awkward how these are all going over here and these are over here. I may try to lift some of this and pull this closer to right here so they all intersect at that one point. Right now it's looking a little too weighted to this side. Of course, if you were doing a bunch of really careful sketches and you took more time in your concepting phase, you would probably not have that problem. This is definitely something that could have been noticed in the sketch, but I was just going a little bit looser on this, wanting to be more loose than I usually am. My typical process was embracing some of that looseness, so I ended up putting things maybe where they shouldn't be. Because of that, I'm going to avoid developing too much more there because I'm not sure how I'm going to solve this problem. Let me see how well this will come up if I pull this up. If you decide to do this, definitely do the press and pull as opposed to rubbing it all over. Especially with the black paper, you'll get quite a lot of haziness, which we're going to have some haziness anyway, there's no getting around that. But if you rub around the transfer paper, you'll have way more haziness to deal with. Looks like I can get most of it out there. Let me use this Kelly green really quick. What happens if I pull that back here? Just pulling up the edge of the leaf. Since these are stylized, I just have to make sure that it makes sense. It doesn't have to be perfect. Just has to make sense in this world that we've created here. I want these to have the same edge. That's going that way and then that's going to widen out a little bit here. I think that'll work okay. The part that remains awkward is having these two stems be right next to each other. Trying to think if there's a way that I can fix that. Actually, I know what I can do. I'm going to bring the edge of this one down so that it meets this stem here, and then I'm going to wait a minute to do this because I won't be able to go back from it. But then I'll carve down in here to thin it out from this side. That'll make all the stems meet up in a little bit more of an even way. Here you go. Using chestnut right now, going backwards from what I've done on the other stems. Chestnut to Hannah and then we'll do the ash rose. Hopefully, seeing that little decision-making process gives you a sense for how you will be able to keep making decisions and keep thinking about things like composition even after you have finished your sketch. I find that we tend to want to separate them completely and it is really good to do most of your compositional thinking when you're at the sketch phase and it makes your life much easier. If you don't have any things that you need to change and you don't have any problems later on. But that's not always the reality. There's plenty of times for me, both in personal drawings and in working with clients where something has gone beyond the sketch phase and I end up having to change the composition even slightly. I feel for me the compositional part of my brain never fully turns off. I'm still looking for little awkward areas like lines that shouldn't intersect and looking to fix those when I can. Because composition, especially in a stylized, really in any piece, but especially in a stylized piece, having a well thought, balanced feeling composition or interesting feeling composition that has a sense of movement, that's going to really help and adds another level of interests beyond just the image itself. Having a solid composition when you're working on a stylized image especially can really help. I think I probably will sharpen up these edges a bit more later. Smooth that out a little bit whenever I do this, but right now, I just can't wait to start on the dandelion. I'm zooming in a bit closer on my reference image. Let me think through how I want to approach this. Right here, it's not just like a solid white puff ball, there's a visible darker center there. We can even see little bits of the stem behind that. I want to take note of that. I want it to have this structure that feels like soft and fluffy on the outside and then we'll see the interior as well as these little bright or white spots which are the foreshortened little seed pods that we see. That's the general plan here. Similar to some of these other areas where I used a color other than white first and then have saves the white for last. I think I'm going to go in first with this. This is 10 percent warm gray. I could even use a darker color, like I could use beige mastic. Actually, that's what I'm going to do. I think I'll go in with beige mastic. This little guy is definitely ready to go into a pencil extender, but I don't feel like stopping right now. I think what I want to do is make note of a few of these little brighter areas in the center.
17. Dandelion 13: I am definitely looking at and I'm pulling from the reference image right now for this, because this is the thing that's just way too easy to end up making it look too symmetrical. I'm looking at the actual placement of these in the reference image so that it will have that nice irregularity that I am interested in. These, I'm just softly putting down here. I'm not pressing really hard, I'm not trying to get them really bright. I'll get them really bright later on with the white colored pencil, but for now, going soft. Then I think I'm going to do a few lines here, going in from the outside. It's important when you do this thing to switch your angle up a little bit so that you don't end up with a really even overly regular line all the way around the edge. I just want to have a sense for where the edge of the object is. It's going to help me in terms of the planning. It goes through in a little few hints of green back there. Maybe we should have a brighter green actually. I think this is Prismacolor spring green. I'm not filling this area in, I'm just doing a little almost like stippling to just get a little bit of green. This one is going to be interesting because on both of these, we were more or less filling them in solid. Whereas this one, we're going to still see some of the black coming through. To be honest with you, this exact dandelion, this is the thing that inspired the whole class. I wanted to paint a dandelion. Even though they're considered a weed, I just find them really interesting and beautiful. I wanted to paint one and they're mostly white, so a white dandelion on a white piece of paper. Not that it could be done, but there would be some inherent challenges with it and maybe things that would just not be quite as nice as having it on a black background. That is what inspired this whole class, my wanting to paint the dandelion. I definitely want to take my time with this guy and get it right. Again, I'm being really soft with this just like I was at the beginning with all the other sections. I'm just doing little circular strokes to try to make note of the fact that there is the center of the dandelion visible here. Now, let me think through which color I want for that. I need a darker brown in there and I don't have the dark brown pulled right now. Let me just grab, this is Prismacolor dark brown. I'm going to do a little bit of stippling in there, but actually I don't want to do too much. I think maybe I'll add this after I do the lighter colors. This beige mastic is working pretty well I think. But I might go try to grab a different one of the Caran d'Ache because they hold their edge better. I don't have one here right now, but I'm going to go grab on really quick. I just pulled three Caran d'Ache colors. We have raw umber 10 percent, French gray 10 percent, and silver gray. Where did our test paper go? Here we go. Let's see. Here's the raw umber. That's nice. It's very similar to what we've been using. Here is the French gray, a little bit cooler. Then here's the silver gray, coolest of them all. I think I'm going to use the raw umber. I'm going to get a nice sharp point and then work on some more of these fronts. Now, with fronts, we can see in the reference, it's not just a straight line. Actually here, you can see one of them coming off here. They fan out a little bit. We want to have the straight line and then indicate the fanning out of the front. That's what gives it that edge, that really fluffy, irregular look. It's also why I wanted the really sharp point on my pencil here. I think to get that fluffy look, the edge is going to have to be a combination of more heavy opaque application and then some really soft, light, more translucent applications. I'm doing a little bit of the heavier application initially. Since we do have some soft application underneath, just trying to build up the edge here, and then I'm going to work my way in. This one of my favorite things about drawing, just generally at all. Drawing and painting art-making in general is that it is so much problem-solving. The sooner you realize that every painter, no matter how experienced they are or how detailed their plan is, once you get in it, it's like a journey and you can only just do one step at a time. Even if you are one of those artists who has a super detailed roadmap and you have a general idea of where you're going, the actual process itself is always an adventure and you end up encountering problems that you didn't expect or having to figure out your approach in a different way. Sometimes, at least for me, I'll have an approach planned at the beginning. Then once I'm in it and I'm actually trying to execute it, then I end up having to change plans and take a different approach. Here we go. Now, I'm going to do some of those first lines all the way to the center. I'm trying to keep this pretty light until I know for sure that I like how it looks, just part of the problem-solving I was just talking about. If you have a naturally heavy hand, which I definitely do, a good way that you can force yourself to lighten up is to hold the pencil further back and almost just drag it across the paper as opposed to pushing it or really digging it in. Now, I'm doing lots more of those little strokes. You could, by all means, do this with the Prismacolor pencil, but you will just have to stop and sharpen more often. You might be thinking maybe I should use a polychromos or artherine, but unfortunately, those are just a bit too hard. You might be able to get some nice light lines with those on this, but you won't be able to get the opacity and pigment lay down that you can with a soft core pencil, be it a luminace or crayon, or a Prismacolor or a Holbein. Those are all soft core colored pencils. I'm liking how it's looking so far, but now I'm afraid of messing it up. I think I'm going to, let's see, what do I want to do next here? I think I want to try to thicken up and fade in this border. I'm still going to keep using the same colored pencil. This is probably actually going to be the main colored pencil for most of this piece, I think. I'm doing little lines, but I'm putting them in a fan shape to indicate the fact that they're coming out from these little seed pods or seeds nutty pods little fronts.
18. Dandelion 14: Now because of foreshortening, the way that this is working is that, imagine that this pencil is like the little seed with the frond at the end fanning out. So on the sides we see the side of the fan, which is why this looks so much thicker and then as it gets towards the center of the dandelion, we're looking more top-down through the fan, so we can see the top of the seed and we have more of a translucent view of the center of the dandelion. I'm almost doing like little X's, going back and forth from connecting the two edges of the X to form the V-shape for the frond. As I work inwards, I'm not doing quite as much layering because as we talked about, were looking down over the top of the fronds, so there's going to be significantly less opacity. Then at the edges. Some of these I'm even trying to indicate like a little bit of a star shape. These ones in the center you really are seeing directly down over the fan. So I'm making the little points of the fan spread out around it like a flower and then when I get to the side instead of looking directly down over it, we're looking towards the side. So it should have a little bit of a tilted view, ones on the top should be foreshortened and the ones on this side should be longer. Want to go a little bit darker in a few spots and by darker, I just mean, heavier. I press down a bit more, which is obviously still a very light color and I think around the edge here, I'm even just going to do a little bit of, that's what it needs. A little light glazing, kind of a circular stroke, trying to increase that opacity. Still want their really soft, fluffy look. Going to come in here with maybe a few little spots of dark brown. Just trying to define things and a little bit of the green here, this olive brown. Excuse me. The whole bind. I think I'm going to wait on any further development on the dandelion until I do some of the leaves down here. This is going to be more of a straightforward pattern. I'm going to treat this edge which is like, this leaf kind of has more of a open shape or more of a canal. I can't think of the word for that, but it has more of a V-shape going through. So this is going to be the shadow side and then this will be the lighter side. I think on this one I'm just going to go right in with the Kelly green because I know that that's going to be primarily what I reach for and I'm even doing a little bit heavier pressure than I did on this leaf for my first coat because I know that this is the plan. For this one, I was still trying to figure out what the color formula was going to be, so I was a little more tentative with some of my choices but, now since I know that the Kelly green is going to be the main color of the shadow and I'm going to have olive green in there and maybe a couple little highlights, I'm just being more bold with it. I do find that pretty regularly actually that with any painting, the first part that I do is always the part that takes me the longest because as you've been talking about, it's always like this new adventure. It always has to be figured out. The next step always has to be figured out and discerned. When I'm first starting out, that's always when I'm the most time-intensive. That's always the part that's most time intensive and then once I figure out the pattern and the overall approach, I tend to be able to just execute much more quickly. I'm guessing. This is me just speaking into existence that these leaves are going to be a little less time consuming than that first one. Where is the olive green? There we go. Let me really quick pick up some of this white because otherwise I'm just going to be fighting it since this is all going to be darker over here. A little better. I actually picked up some of the green as well. I don't want to give anybody vertigo, but I am going to flip this over. I can't resist on this one. I know I'm just going to get a much better line if I work at it from this angle and then I'll flip it back. I'm pretty much going in full strength or maybe like 85 percent strength in terms of how heavy I'm laying this down because I'm very confident about the color and the value here. Now maybe just a tiny bit of dark green down at the bottom here. I wish there was a dark green. That was as dark as dark green, that's the name of this color, but that also is less saturated. That's the one thing that drives me nuts about this color is, for how dark it is. It's still very saturated and to me that always makes it stand out a bit more and if I'm doing a true [inaudible] shadow, I want something that's less saturated. Now, I'm going to fill in the inside. What did I end up doing on this one? You remember? I think I did quite a bit of the sap green, I'm pretty sure I did the olive yellow as the first layer, I did these three. Let's try to replicate that. On this one, I am going to go really soft. This is going to be more of a glaze because I'm building up a few different colors to get the look that we have over there on the other side. Soft little circular strokes and then here's where I made the change from the original sketch. I made the leaf widen out a little bit to fill up some of this negative space down here. That ended up being just not what we were looking for and I will leave that because I think I probably will do more of a mid tone because again, just like on this first leaf, I want to have the color get darker towards the base, so that feels like it's pulling underneath. Really light glaze with the lettuce green here and if you don't have this, if you just have prismacolor, you could do sage green light, sorry, I think it's called light sage actually.
19. Dandelion 15: We need to do a really, really faint pass with them, spring green. That's a pretty common Prismacolor. I think that one's in the base set. Again, going about probably half strength here, I'm trying to keep it nice and soft. Now I think I'm going to flip the back over, then come in some with the sap green and try to create more dimension, right now it's just flat. Actually before I do that, I think I'm going to go right up to the edge here with this one and cover up that white. Pressing not as hard as I can press, but definitely considerably harder at this point just to get that white covered up. Then down here, I think I'm going to use kelly green since this is more of a shadow, fade it up into sap green light, where did my dark pink go? I'm going to make this edge actually a bit more defined. Now, I'm going to have the sap green be down in the inside portion here fading up to the top, and then I'll probably also put some kelly green down there, and then that may lead me in a position where I need to reassert the edge there to make it nice and crisp. This one is just not going to get as detailed as the other one, which is fine. There's two on this side, so that's inherently more interesting. That's where the complexity is coming from over here. I'm going to have to even further darken the dark side because by the time I put in a little bit of a shadow to indicate a curve here, it's just losing the edge. It's hard to see where the dark side is, the underside. This is olive green. What I'm going to do is have a darker, heavier application of the olive green towards the top edge and then it's going to fade to make it look like there's a curve because then, it goes all the way down to the darkest greens on the bottom side, but I need to still have a really, really strong edge here, otherwise the inside doesn't look like a different plane. We're getting closer. Sharpen up the olive green here. Make these edges nice and tight. I think I'm going to add a tiny bit of kelly green to the edges of the lighter part. It would be the brightest up here because it's the top of the leaf and most in the light. Now I want to clean up a couple little edges down here, and then we'll finish the last leaf. On this one, I think I want to flip the pattern and have the light side be this right here and the darker side be this up here. This is probably not going to get as dark, it's going to be more of a medium dark, starting with the kelly green. Now at this point, if you're anything like me, it can start to get tempting to rush things because you're at the end. You're so close, the end is in sight and it's really hard not to just push through full steam ahead and try to finish things, but you want to keep the same care and attention that you have given the rest of the piece. You want to keep that going throughout, all the way to the very end, otherwise you can end up with some inconsistencies. On this one I forgot, I want to add the veining just like we have over there. Coming into the corner with the olive green right up to the edge of the veining. Maybe I'll put a little sap green right here at the top edge. Yes, mostly kelly green and olive green here. Little dark green down at the base because it's going under that top leaf. Then here, we'll do the same thing we've been doing olive yellow and then lettuce green with kelly green for shadows. Now I'm not going to take the lettuce green all the way down there, because I don't want the darker colors to get chalky. With the light colors, you're always trying to avoid muddiness or light tones and mid tones you're trying to avoid muddiness. With the darker colors, if they're right up next to a white area or if you go over a really dark color with a white colored pencil, then you can sometimes end up with chalkiness. Kelly green and some olive green. Let's see here. Just about done with this little leaf here and now I'm going to have to decide whether I want to do the final light areas first or the final dark areas first. Could be either one. We're going to use the white colored pencil finally and the black colored pencil, and maybe I'll do the dark areas first because that's what I'm dreading. That's figuring out what's going on down here. I need to make that feel like it's all pulling under and in and make more sense structurally, and then I'll save the really fun highlights until the end.
20. Dandelion 16: The highlights feel less intimidating because I feel like I mostly know what I'm going to do with those. The shadows, I'm not quite sure how I'm going to solve this problem yet. I'll talk it through in a minute here. I'm going to make this edge curve down a little, and then the highlights will be up top there. If I start doing stuff on dark paper regularly, I'm going to have to change my buying habits with prisma colors because right now I hardly ever use black colored pencils. I'm always using Tuscan red or dark green, or even violet to create a shadow. Let's see here. Let's do the black color pencil. I think what I'm going to do is try to separate some of these stems like we talked about earlier. I think I'm going to try to make it look like this stem is actually going in front here, so I have to think about the structure a little bit and then I think I'm going to fade the bottom and the bottom edge of these leaves I think I'm going to fade it in with some black. Let me first work on the structure and then this one, to make that feel like it's coming in, let me use a little dark brown. I'm finding the edge there and then I'm just following the curve down and over. That'll be one stem, and I think I want this one from the big central dandelion, to also feel like it's going in the same direction because right now these three, boom, boom, boom, all going that way, is really a bit too intense compositionally, it's a bit too powerful, so I want that to feel like it's going in a little bit of a different angle. Let's think about this here. That's going to fade in, into the black. This one, since it's on top, is not going to fade into the black in the same way. I'm going to add some chestnut and I get Tuscan red out, but here it is right here. I'm going to use Tuscan red, a little Tuscan red. You know what, that's too saturated. Back over the top with some chestnut. I think I'm going to put a little bit of black down here in the very corner and just softly glaze it over. Adding a little bit of ash rose up here as a really delicate highlight. I don't want to full on highlight, but I do want that section to feel a little bit like it's popping out, compared to the other things around it. A bit of henna there, tiny bit of black in the corner, and what you want to do if you're doing this thing is avoid having any strong lines. You don't want to just trace all of these and then leave those lines there. It'll be too powerful visually so you want to make sure that the black is being used has a fade to it, that it's softened a little bit and not just put in there full strength. Dark brown, this is a good, less intense shadow. I'm adding a little bit of that there and there so that they can feel like they're behind. A little bit of the black fading up here, each of these stems. Now, I need to connect some of these leaves in here. At this point, you can see why it's so important to take a minute to think about what is over, what is under and we wouldn't have been able to create this structure down here, even though it's an imagined structure, it is still a structure. We wouldn't have been able to create that if we hadn't thought through which of the stems was going where. I need to do the same thing here. I think what's happening is that this leaf, this one down here is a little bit underneath, and this one's a little bit inside, so I'm going to add a little black at the very base and then fade this up into the leaf here. So soft by the time I get towards the lighter colors, I'm just really keeping it very soft. Just fading it into the bottom part of the leaf structure so that it looks believable like it's all pulling down to one central point. I think I want to have a little tiny bit of a drop shadow right there. Nice. Just cleaning up a few of the edges here with the black. I think I'm just about ready to get going on the highlights, but before I do that, I want to add a few little bits of color to this. When I'm looking at it, I see not all the stems look white. There are some that look like they have some color to them, some subtle color. So I'm just adding a few little bits of this and then I think I'm going do, this feels a little crazy, but I think I'm going to do a couple tiny little dots of black in there to make it feel like it's really sinking down and then where is the pencil I was using? I was using the amber 10 percent, [inaudible] ash. Just a little bit more glazing here and then we will come at it with the white colored pencil, which is, I know what everybody is waiting for. That part is always so satisfying. Since this is stylization and not super realistic, just as we've been talking about the whole time, all I have to do is make sure that it makes sense within the context of the piece. It doesn't have to be exactly what the reference photo says, so I'm picking some of the places that I want to have these white highlights and if I was doing different kind of leaf, these leaves are ordinarily a place where I'll do pretty intense white highlights because it gives it a nice, shiny waxy texture, but the dandelion leaves, as we already talked about, are much more like fuzzy, so I don't want to overdo the white highlights.
21. Dandelion 17: Sticking with the Prismacolor colored pencil because it is in my opinion the most opaque for the white highlights, way more opaque than Caran d'Ache. It's going to be a little bit darker as well in some of these areas. You can see this pencil is so soft, it's already crumbling. Keeping it nice and sharp here. Now, these on the flowers we're going to try that concentrate the highlights on this side, since that's where our imagined light source is coming from. Then if ever I get too intense, I'm just going to go right back over the top with some yellow. A couple of these just got too white because even looking at my reference photo, there really isn't any actual white here, it's just really bright yellow. I don't want to go overboard with the white colored pencil. I want it to help bring it up and make it feel more intense but I don't want it to feel washed out. Couple of these one is on the edge, I'm going to hit with the white since they're potentially getting some backlighting. Then maybe the tips of some of these petals too but I'm not going up the whole length of the petal on these ones like I did on the other side. Again, rebonding whenever I need to with the yellow colored pencil. This is bismuth once again. Bismuth yellow. Sometimes adding in highlights makes you see some places where you need additional shadows or you need the structure to be more clear. It's always fine to go back in and change that, tweak that as you see fit. Now, I love in my reference photo how the stem has little hairs coming off of it. If I was doing this at a larger scale, I would be totally into that but I think because of the scale of this, we need to avoid getting too detailed on those. I'm not going to depict those little tiny hairs even though I really want to. Just going to add a couple little highlights on the stem. Moving away across. Now you can see the difference between this one and this one, how much of a difference the highlights make. I'm going to add some highlights to this one right here now. I'm going to basically do the same thing that we were doing on this first guy right here. Concentrate them on this left side and then add a few little bits on the right side to indicate backlighting or bounced light. I'm paying attention to where I've indicated there's a structure to the petals. I'm not just like going everywhere with this. I'm trying to follow the lines of the petals that I've already established rather than going over some of the areas where there might be shadows or dark spots. Then as I cross this line of the stem, I'm going to switch to having the highlight be really only at the tips of the petals and then just like I did with the first one, I'm going to soften some of those up especially, if it got too white. Now a little bit of the stem highlight. Now, this little guy won't see. That's really interesting. It has a fractal pattern and I was expecting the little dots to be the lighter part but once I zoom into the reference, oh boy I knocked over my stand, hope you can see this, lightest part is actually the base of the flower and then these little dots where the fronds came off, those are the darker parts. Let me figure out how I'm going to do that. I think we'll probably just try to trace some lines, what is that, to try to create that little fractal pattern. I want to first make note of where the center is, so I don't get too lost. Just because of the scale of this, there's no way I'm going to be able to be as detailed as it get as many of these little bumps in. Now, it looks to me like it's a swirl pattern. I'm going out like a fan, like almost like a nautilus shell in one direction and then I'm going to go back like a nautilus shell in the other direction. There's several of those happening, several of those lines that creates that bumpy texture. I'm not going to be able to fully get to all of it. Now I'm changing my mind, I'm doing just like a little bit of a glaze over the whole thing and then I think because I wasn't able to get it dark enough or bright enough rather with just those lines. Yeah, there we go. That's closer. Which color do we want to use? Maybe the same, maybe the umber. This is French gray actually, that's not going to be dark enough.
22. Dandelion 18: Let's try putty beige really quick and see if that's dark enough. Not dark enough. This is 20 percent warm gray. Trying to just add in a few of these little dots, still not dark enough. I think this is 70 percent French gray, so this should definitely be dark enough, and in fact, I'm going to have to be careful not to go overboard. I think I'm going to take this opportunity to use this to help me with shading. I'm going to make it darker around the edges to indicate that it's going under, and then I'm just going to try to stipple some little dots in here. I'm not going to be able to get that beautiful spiral pattern, again because of the scale. If we're working in a larger scale, we'd be all about getting that cool spiral pattern. But for the smaller scale, we just have to settle for the basic look. I want it to look textured. I think that's actually going to be pretty good. Maybe a few little more here on this side. Then I think I'm going to very carefully take a little bit of black under the rim just to make it feel connected to the background. Too much, softening it up with that French gray. Thankfully, I was pretty light with the black, I didn't press too hard. I think that one is good. I don't love this bright white edge over here, get rid of that, little highlight on this guy on the stem. Now, oh my goodness, it's happening, going to be the dandelion. See what we need to do here. I'm first re-locating some of those little dots that I made earlier. I'm pressing really hard, just putting the point of my pencil down and pressing really hard to try to re-describe those. We're not just going to go over the whole surface of this because I want to keep that color variation. This is one of those things where it's going to look way more interesting if we try to have some color complexity the same way we do in real life, even though we're stylizing this. Now, I'm getting it as sharp as I can. We might have to switch to the Caran d'Ache one for this. I'm getting it as sharp as I can and we're going to do a few little white fronds, some white lines. Again, don't want to go overboard here, but just add a few of the little white Vs. Already have to stop and sharpen again, that's how soft this pencil is. Then I think we need some more concentrated ones on this side here, since that's where we have the light coming from. Few more down here, whiter fronds down there. I think I want to make a couple of these dots bigger and more prominent. Then I want to have a couple of visible little frilly frondy things coming out from them. A little highlight for this stem here. Then some highlights on the leaves. Let's see, no, I don't think I like that, getting rid of that, the olive green. Now I'm just going to use my kneaded eraser to pick up some of these little bits of dust so that we don't end up with too much haziness on our piece. I think this piece is finally done. I think we have it to a good point, it is about as developed as I want to get for this class. Here I'll bring it a little closer so you can see, and I'll definitely put a scanned version up on the screen as well. We are going to set this one aside and move on to the next piece in our Weeds and Wildflower series.
23. Queen Anne's Lace 1: Welcome back. We're going to dive right into our next piece, which is Queen Anne's Lace. This is another weed or wildflower, depending on how you want to say it, that I really enjoy. This one is going to have a little bit of a different color palette. We'll start off the same way that we did with the last one by choosing the colors, and I'll show you the reference image that I'm going to use, which is, again, a compilation of several different images, and then we'll just dive right into making the piece and I will talk through each step as I go. Actually, before I pick out the colors, before I choose the color palette, I thought I should just go ahead and show you the reference images that I'm going to be working from, so you have a sense of what I'm looking for when I select the colors. Depending on how this looks on screen, I may just pop up a version of this for you to see. As you can tell from this compilation here, we have several different lighting schemes going on. I think this one here is the one I'm going to try to follow the most closely in terms of the lighting structure and the colors that I want to use. These ones are a lot cooler. This one is pretty similar to that. This one's a little bit different, but overall, I'm going to go for something in this warmer, bright range, and then I'm going to follow this one here for the leaf structure. Let's go ahead and choose the colors that we're going to work with. I think this one is going to be fairly limited in terms of the color palette. I'm just going to leave out my entire container of whites here. This has, of course, my go-to, the one that we used so much in the last piece, the Prismacolor white. I also have some whites of different temperatures that are from the Caran d'Ache luminance range. I have titanium buff, which is like a little bit of a yellowy white, and then I have pink white, which is, as the name suggests, a pink or white, and then some colors from Prismacolor as well. This one is pale gray-green, but it's really almost a white. Then I have some 10 percent warm gray, 10 percent cool gray. All the colors that are really in the white range, we'll just go ahead and leave these out because I think we're going to need a variety to work from. Then I'm going to pull as well a couple of these really super light blues. I have powder blue and I think this is sky blue light. It's a PC 1086, they're both Prismacolor versions. Then I'm also going to grab this one from my purple and pink bucket here. This is grayed lavender PC 1026. Then let me come here. I think I will go ahead and pull a couple of pinks. I'm going to grab blush pink and deco pink and then maybe this PC 1018 which is I think clay rose. I've already sharpened past the name at this point. I think that's all I'll grab for the pinks right now. I may not even end up using those, but some Queen Anne's Lace does have a slight pinkish tint to it, and I think I might want to incorporate that even though the reference images don't have it. Then I'm going to grab a couple of yellows, going to get cream, which is Prismacolor's lightest yellow and then another one called lemon yellow, which is very light, very bright. I'm not sure whether we'll use it or not. Then I'll grab golden rod, canary yellow and, where did that go, deco yellow. I don't know whether these are going to get used all that much. They probably will just be little hints of those colors, but I'm going to go ahead and grab them. Then I've got this whole buying color here, which is a cooler yellow. I expect this might get used some in the greens. Then I'm going to grab another Holbein color, which is lettuce green. Then onto the Prismacolor is all pole sap green lights, apple green, which is my go-to green for a lot of leaves. This is Prismacolor lime peel, it's another really good one. Spring green, another great one from Prismacolor, and then this is a tiny, tiny little [inaudible] of dark green here. I'll probably use that up pretty quickly. What is this one? I believe this one is chartreuse from Prismacolor, is that the name of it? Yes PC 989. I'm also just going to grab bronze here, which is a lighter, slightly greenish, slightly yellowish brown. I think that will be pretty much it for these, and of course I have all the whites right here. I think that'll be a good starting point, and I need to just grab my paper that I can rest my hand on really quick. We are ready to dive in. Again, just as I did with the dandelion piece, I'm going to work my way left to right here. Which means even though I really want to start with this one, I think I'm going to try to force myself to start with this one here and get this leaf laid down. Let's see how this looks. I got my tester paper here as well. That's the whole line, lettuce green, Prismacolor sap green light, and then Prismacolor apple green. I think this is going to be a pretty good starting point for this leaf here. Since this is the mid-tone, I'm going to go lightly over much of the leaf here with this midtone, and then I'll come back over the shadow areas and the highlight areas with the proper colors later. Just going really, really softly, little tiny circular strokes. I am trying to go over the white as well where I find it because I want to neaten up the edges here. I'm probably going to have to do a similar thing that I did on the dandelion where I go over some of those edges with the Prismacolor black, just to get them really nice and crisp. But for now I'm just trying to lay down this first layer. I know I've said this a couple of times, but it bears repeating, whenever you are going to add additional layers on top, you want to make sure not to press as hard as you can right from the beginning. I'm only pressing maybe like 30 percent of what I could be pressing. I am trying to lay down a nice even layer of this, but I don't by any means want it to be a truly opaque layer. I want to have still more room in the tooth of the paper to add in the shadow and the highlight. When you're working with colored pencil, it's fairly common, I would say, to only color in the one area that you're going to be using that color. A lot of people have that approach where they might just try to look specifically and say where are the several spots where I need only sap green light, and then try to lay the pencil down only in those areas? If that approach works well for you, then by all means, go ahead and do it. For me, it's just never really worked that well, I think a lot better in layers and I think that's because I originally was a painter and I still consider myself a painter because I do paint as well as draw, as well as illustrate. But it's much more of a painting mindset to lay down a big area of color like this and then build the darker areas and the lighter areas on top, and if you're going from it more from a strictly colored pencil mindset, you're much more likely to not paint by number, but that's the image that's coming to mind, where you try to figure out everywhere where you're using that color and lay it down only in those spots. But for this application, for the way that I like to work, I think it's going to work really well to be laying the whole midtone down. Another reason that works in this instance is because it's actually not that far, these three colors are not that far off from one another in terms of their values. If I was trying to have a super, super dark green here, even the greens in the dandelion leaves, there was a lot more value differentiation, so the darkest darks were significantly different, much darker than the lightest lights. Whereas here we're all more or less in the same neighborhood.
24. Queen Anne's Lace 2: There's a slight difference between them and especially there's a difference in temperature and saturation and some value difference, but they're not that far apart. It works to lay this all down. If I was trying to then lay some really dark colors on top of it, this has a decent amount of white in it as you can see, so that would make the dark colors a little bit on the muddy side and kind of difficult. I want to clean up some more of that white edge. I think I'm going to sharpen this up a bit. I trust the Alvin Brass Bullet here. Keeping your pencil relatively sharp is another good way to avoid pressing down too hard. If you have a good tip on your pencil, you'll be able to lay it down a bit easier, especially in these tight areas that we have working on little leaves and flowers and those subjects. I think I will come back to these edges later with a black colored pencil. For now, that's going to be pretty good for the mid-tone. Now my reference image here is actually pretty flat looking. There definitely is some difference and there's some subtlety in terms of the color and values, but I'm not seeing a ton of dimension here. Some of that's just because of the lighting that was happening in the reference image. This type of piece, this type of style, I want to have that stylized look the same as I did with the dandelion. I'm going to imagine a little bit more structure than I actually see in the reference. I'm still going to pull from the reference to get a sense for how I want to make those decisions. You can see here, there's some differences in how I have laid out the sketch, and what I have for the reference image. Actually, let me just turn off this sketch. Make it a little bit easier to see the reference here. These leaves, you can see they're not perfectly flat. They're a little bit of a V-shape like if you imagine this is the leaf and a lot of leaves have that structure to it. It's not super apparent here, but you can see there's a little bit of a seam running down the middle of the leaf. The overall leaf has that structure to it. Then the little individual fronds here have some of that structure as well. I'm just going to amplify that by making one side the shadow side and one side the light side. Now there's not really a super-strong clue as to which one should be which in the image, but if you can see it, this topside looks slightly darker, and that's because the light's coming from the top. You can see it a little bit better in this one here, slightly more shadow. I think I'm just going to go ahead and follow that for a clue. It's going to be a lot more evident in the final illustration once it's stylized. I can already see as I'm doing this, I'm going to need this to be a little bit darker most likely, but I'm going to wait until I get my highlight down. This is why it is so important and so helpful to have references because, even if you are making significant changes as I did, you could see some of the differences in the sketch. It's still is just invaluable to be able to look at an actual source for information about how the light is working. Then you can use that information to make it say, really whatever you want it to say. That's harder to do for sure when you're first starting out when you're relatively new at art-making, but it gets easier and easier with practice just like anything else. I think I'm going to make this piece here. In the reference image it's pointing down, and it's a bit of a different shape. I'm going to make this piece facing up, I think so it's going to have more highlight on it. This is the Holbein lettuce green that I'm using here. We're going to pop some of this down over here. I'm pressing maybe 50 or 60 percent. I still want to leave myself some wiggle room if I decide that I need to add some white here if I need to add a mid-tone instead. I want to have some wiggle room to adjust, but you can see just by adding that in there, we're already getting a significantly larger amount of dimension. Even though it's a little bit counterintuitive, sometimes if you really want to increase the sense of a curve of something curving downwards, you want to have the lightest point be down at the seam in the leaf, have the lightest point and the darkest point meeting. Then you can have another light point, another highlight at the tip of the leaf and that will give it that curved rounded sense. That is what I am working on building up right here. Now with some of these areas, I am going to come back in here and sharpen up the edges with the black colored pencil, just like I did with the dandelion piece. I'm looking a little bit tired here. Adding some more highlights on the tips of these leaves. This is my first experience using the Holbein colored pencils for a longer project. I just tested them out here and there before, but this time I have actually been using them throughout much of this process, both on this piece and on the dandelion piece. It's only a few select colors, but so far I can say I do really like them, but they're even more fragile in some ways than the Prismacolor pencils. The best thing about them, in my opinion so far is that they have some unique colors that Prismacolor doesn't have. Like this one right here that I'm using this lettuce green, there's nothing quite like this in Prismacolor. There are very light greens, but they're much more muted like the sage green light, which is as you can see, a lot lighter, more muted, less saturated, and overall lighter than this one that we have from Holbein. This is a Luminance colored pencil. I don't think I really used any of these on the last piece. I'm trying to remember if I used any Luminance ones, but these are a little harder than the Prismacolor pencils, but the color range is more limited. You can see I'm just doing the same thing I did last time building up layer by layer. Most of these color choices at this point I am making intuitively, based on how I want the piece to look and the kind of greens that I want to have in the piece, as opposed to making them solely based off, of the reference image, or even based off of either some strategy that I had planned from the beginning. Right now I'm mostly just laying down a little bit of color lightly and then seeing if I like how it looks and I like how it looks, then I lay down more and press a little more firmly to give something that's going to be more of an opaque application.
25. Queen Anne's Lace 3: In that sense, colored pencils can end up being a lot like painting where you're just working in layers and adding it on and going incrementally bit by bit. That'll look nice when I come in with a black. I'm going to wait on that. I think I just want a little bit more darkness at the base of this guy here. Maybe a little bit of saturation in there as well. I think I need to get some of these edges a little bit crispier and then we'll be ready to move on to the first blossom which I'm super excited about. Now, just like I did with the dandelion piece, I'm going to save the super bright whites until the very end and that's going to help me not get to too light or have anything that I can't easily add shadow to later on. But I'm definitely creating highlight structure. I'm just not going to go to the lightest highlights until the very end of the piece. Even more important given that this is a piece that has quite a substantial amount of white in it. I need to make sure the white is used judiciously. That's pretty good for now. For this next piece, I'm zooming into this little blossom right here. I'm going to try to get the general idea, again, I'm not aiming for photo realism, I'm aiming for a stylized look. It is very clear that it is Queen Anne's Lace, but it isn't necessarily photo-realistic representation of Queen Anne's Lace. I think I need this. Other green here. Let's pull out this Chartreuse. I'm going to start here with Chartreuse and with spring green Chartreuse, as you can see, is a lot warmer. I'm going to just really lightly mark out a few of these stems. I'm going to follow some of the lines that I have here trying to get these first and foremost covered up. But then they're also helping me determine how I want things placed. The nice thing about working on the black paper, I'm relatively new to this, to working on black paper, but something I already love about it is that if I want to add more negative spaces in here, because, I don't know what they're called, the little fronds. They're close together, they're packed in, but it's not a solid object. If I want to add back in some more negative spaces, I will be able to which is just a really nice. It's harder to do with white. I've got a few of these laid down. Now since I don't want to go right in with the white, I am going to do a software. This is 10 percent warm gray. I think this is why I'm going to use mostly throughout the piece for my baseline color when it comes to the white areas. But actually let me just see how this looks. I think that's going to be good. I want to check one other thing as well before I move on to working on a blossom. Let me just pull something up on my iPad here. I've just done a quick Google search for pink Queen Anne's lace. I know that when I've seen Queen Anne's lace in the past, like if I'd been on a hike or something and I've seen it. There there are some times where there's a little bit of a hint of pink in it. This is a good example actually, here. I wanted to look and see where the pink occurs on the blossom and what stage of the blossom you might see the color pink in. Because some of these are a little bit artificial looking. But here this is a good example. This one looks a lot more pink. I'm not entirely sure whether that is Queen Anne's lace though. It looks like it might be some fissile. But this is what I'm looking for, there's just a little bit of a soft indication of pink. I don't want to make them pink flowers they're white flowers, but having another color that I can rely on aside from gray in order to create something that's not pure other than relying on just the pure white, it's going to be really helpful. It looks like it's just intersperse pretty evenly throughout the blossom. I think I'm going to have to rely on that in terms of following any color or pattern. This one's potentially helpful there. Let's see. Hopefully that gives you a good sense of what I'm looking at. Now I'm not going to look at any of those reference images specifically, I'm going back to my reference image, but I'm just keeping in mind the general color pattern like where I saw the pink in those. I'm still going to start with the same gray color, but I'm going to probably incorporate a little bit of pink into this. If you are fairly new to drawing or especially fairly new to drawing realistically, I would recommend that you stick to your reference image a little bit more. If anytime you make a change from the reference or tried to incorporate something else that's not in your reference, it's going to get a little bit more complicated. If you're fairly new to this, I would stick just with your reference image and then later, once you have a bit more experience then you can incorporate some other colors, other reference images and it will be easier at that point. When you're new, try to stick to just your initial reference image. Something I notice about this blossom is that we see, not only do we see these little stems, but it looks like the inside of an umbrella almost this little bit here. These bits that are holding up the white flowers so I need to indicate some of those. I'm not going to go too crazy with those because again, this is stylized, not hyper-realistic. I'm just going to indicate a few of them. Sharpening up some of these stems a little bit. [inaudible] at the base here. Now I have done what I have done in every other phase, I started out really light and now I'm starting to gradually increase the pressure with which I am pressing my pencil. Some of these little guys, the underneath, the parts underneath the blossom look like they have almost a stagy silvery color. I'm going to come in with this jade green and do just the tops of them. There are more of these in the reference image, but I'm going to simplify and just have a few here, otherwise it'll get a bit too cluttered, I think. Now I'm coming in with this illuminance which was this mosque green 225, bit of a darker, less saturated green. I want to try to concentrate some of this around the base of this little blossom here.
26. Queen Anne's Lace 4: Then I think some Prussian green here. Darker again, but a little bit more saturated. What is this? Olive yellow by Holbein, this is probably my favorite color from Holbein so far, the one that solves the most problems for me, it's like a genuinely cooler reading yellow. If you just have to get one Holbein color, I would go for that one. It solves what I think is a pretty big gap in Prismacolor palette. There's no cool, darker yellow tracing over some of those at all. I don't know what to call them, umbrella bottoms up here. I think I might use this jade green as a little bit of a shadow color here. This thing actually has a little bit of a cup structure, it's not just adjusting the side or seeing inside a little bit. I'm going to indicate that by creating a shadow here. I think I'm going to test a little bit of pink. Let's see how this looks. We'll still be adding white on top of this as well. Kind of trying to go in little dots, little circles to make it look like the little petals that we see. I want to put a few little highlights here with the lettuce green. We hope these pop out. Some spring green here, the chartreuse is just a little too warm for the size of these and for the stem. When it comes time for the stem, I'm just going on freehand down here along the sketch trying to make a nice smooth arc since the lines I have here from the original sketch are a bit rough because of being transferred and the way that they were transferred with the weight transfer paper, there's a lot of them be edges, so I just want to make sure to get a nice smooth arc. That's really going to be consistent with that more Victorian feel stylization. Terms of the stylization. This is the Prussian green again. Let me see. I'm going to use a little bit of white. I'm not going to press super hard, but I'm just going to get a sense for whether the shape is going to make sense. Whether it's going to be seen magical, whether it will read as three-dimensional or whether I need to make some tweaks to it. One thing I definitely can tell I want to do already is make this less even up top. I want to have a few more of these little round shapes feel like they're coming off of the cluster. Because otherwise, it just feels too compact and too perfect. I do want to make these little seed pod things. These little black things that are at the base of the fronds here, I'm going to try to put some of those in, but I don't want to go right in with that super dark color. I think I'm going to start with, where did that go? My hand, nope. There it is. I think I'm going to start with this Prismacolor bronze. Now I'm going in with a little bit of darker color. This is technically green Ochre but it really means just like a pretty cool, medium, dark brown. I'm going to try to add in a few more little frond things. I'm going to make a sharp point here and then flick a few of them outwards as well. Let me see. Now, when I'm doing something like this, I always like to try to keep them from looking too perfect. I want them to be a little bit irregular, a little bit surprising. I try to pause and think before I place them. If I just go really intuitively, it will end up being way more even than I wanted. Of course, looking at the reference image itself is always great for that sort of thing because real life is going to be a bit more random and a bit more surprising. I'm looking back at the reference quite a bit here. I remember, I can make these a bit sharper once I go back in with a black. A little more lettuce green here for some highlights. Then this is dark green, which is very cool so you have to be careful because if you end up laying too much of this down over white, it'll bleed a bluish color into the white. Now having a few more of these little spots, these little seed things but this time, I'm carefully using black and I'm putting them a little bit inside of the flower since that's what I see in the reference. Few little dark areas. Now I am going to press a little more on the white, I know I said that I was going to wait till the end, but I need to make sure this is working structurally, so I'm pushing about as hard as I can on this adding a few little petals outside of the main area too, to make it look more surprising and irregular.
27. Queen Anne's Lace 5: This is the 10 percent warm gray again to make it clear that they're going on inside of the blossom, and I hit this part here a little bit more of an intense applications of the pink, and the inside here is going to go a little darker gray. This is 20 percent warm gray. This is 30 percent. Now prisoner color makes warm gray, cool gray and French gray, they're all nice but personally I think French gray it's good for some things and it is a really nice color. I would just go for the warm gray and cool gray if I have to choose. Additional little paddles outside of that center of gravity again just trying to make it look more irregular, down here. Coming back in with the jade green, I think I may actually need to do something even a little darker there to make it truly feel like it's sinking down. Let's try, this is a color called slate gray, which is a very bluish middle gray, sometimes with temperature having really cool temperature that can help you to get something to read is going down. If you don't want to use a dark color. I think I'll pause on that for now, and I'm going to come back in and tidy up all of these stems more later. Let's move on to this open blossom here. This one we see quite a bit of the underside, this will be quite a bit of the underside on as well, and I think what I'm going to do is have pink visible on this one and this one, and I think these three. I'm going to have less visible pink on. I may even come back on on this one and make a few little darker areas of pink, but for now I'm going to start up here with spring green. Now, this one the little umbrella handles are a much more distinct because this one they are packed really closely together. This one are all spread out, so we're going to see the stems, the individual stems quite a lot more, and I have the base stems here in my sketch, but I didn't include any of the other ones. The other ones, I'm just going to freehand a few and again going to try to avoid making it too perfect, too regular. If you imagine these are gradually curving towards us. We need to account for foreshortening and make sure we're changing the angle as we get closer to the center. If you are new to drawing, again, this is something I would recommend you get a little bit more clear on in the sketch, but I'm fairly certain that I can make it look realistic enough for my purposes in this drawing. I'm just free handing, and of course these will be those same little base fronds. Now on this one, I don't think I even going to put any gray. As a base I'm just going to go in really softly with white and try to mark it out some of these flowers. I'm probably pressing about 30 percent of what I could press. Now the basic idea is the closer we get down to these fronds the more tightly packed the little white marks should be I'm thinking of each one of these is like a one of the little petals or one of the little miniature flowers. Here I'm doing some circular strokes because I can see the base of the cluster, all these white flowers, there's actually like a straight line across are a relatively straight line across, so I'm going to indicate that here with a really soft application of uniform white, and I'm going to try to keep following some of these irregular lines I've put up here for my sketch to indicate the edges of the different little clusters of flowers. You don't have to make perfect little flower shapes for each one, but if you do it on a few that will help give the impression that that's what's happening overall, even if you're not articulated in every other area. I'm taking the time here to do a few actual little flower shapes. The other ones I'm just going to do a little circular marks here pressing 30 percent still just trying to get a basic structure down for the white footprint essentially, and then I'm going to go back in probably with a little bit more green and make things more clear. Little more glazing with the white. Think I want a few more to stick out over on this side. Here we go. Maybe one little flower here. Now let's get a few more of this as the same idea of those upside down umbrella stands or umbrella handles. I'm going to pull some of those in.
28. Queen Anne's Lace 6: I think I want to do a few more of these with the darker green and then I'll come back on top with the lighter ones. This is just going to help make it feel dimensional. If I have them all the same color, they will all tend to read like they're on the same level. Having a variety of different greens that you make your stems with can really help. Of course, since we have the dark background, the darker greens, the more they will sink into that background and blend in as opposed to popping out. Just using the mask screen from Luminance. I think I made that stem a little too thick up here, but the good news is I can just narrow it back out again with the black. First, I'm going to do this, cover it up a little bit with these little base fronts. I'm adding a few more of the brighter umbrella handles, for lack of a better word. Now I'm going to come in with the lettuce green, which is what I've been using as the highlight. I will still use some white later on, but this is what I've got for right now. It looks like it has a little bit of a shadow underneath. Now, all of these that I want they're really sharp points on, I'm going to have to come back in and get those with the black color pencil because there's just really not a way to get that sharp of a point unless I'm constantly sharpening. A few more dark areas down here at the base. Make it read more dimensional. I'm going to add a few little bits of this warmer green at the base here, going around where the umbrella fronts would be connecting to the little white flowers. I really should have learned some more flower anatomy before making this class. Now I'm going to go a bit heavier with the white. Pressing down close to as hard as I can at this point. Not fully, but very close to as hard as I can. Now let me get this stem. Now I can actually do a couple of more little flowers here. Now let me get this stem a little bit more articulated. I'm going in with this spring green, which is the same color I use for the stem on this piece. At this point, I do want to be fairly consistent. I'm just using my kneaded eraser to pull up a little bit of this white haziness that I see. I should probably wait till the end to do it, but I just want to get clear on what's what. Now this blossom is facing different directions, so I think on this one I'm actually going to start with the white. I'm going to do a similar thing that I did over here where I start out fairly soft and then go on harder. Doing the same thing as well, trying to indicate little petals and go outside the lines of my sketch. I avoid having a hard line that would really make it look less lacy and airy. I do want to make that lacy separated feeling quite a bit more prominent at the front. Because of foreshortening, this area is going to be tilted towards us. We're going to see more of that petal structure. I'm making that more visible here and then at the back I'm going to blend things together a little bit more and maybe even keep it a little softer, at least for now. At least for me, with how I work, once I have a sense of what the plan is or how I'm going to approach something, I'm able to move a lot more quickly. Some of the initial parts of the piece when I'm figuring out exactly what color I want to use, how hard I want to press, what color I want to start with, what color I want to follow up with, all of that is the stuff that takes the most time. At this point, since we have most of that laid down with this one and this one, I know how I want to start and I'm able to just dive in and get going a lot more quickly. I would say that is something that's true. Yes, on a piece by piece level, but it's also really true with art-making as a whole. The more comfortable you get with it and the more often you're drawing and painting, the more quickly you'll make those decisions and the more easily you'll be able to see what your plan is for a piece. It's not as though there's no decision-making involved anymore, there always is. That's one of my favorite things about art making, is that it is just a process of constant decision-making. But you get better and more confident in making decisions, so you don't have to go back and forth so many times and you memorize your approach, memorize how you want to solve problems, what you want to do.
29. Queen Anne's Lace 7: At this point you can see I am again doing a little bit more of a glaze. I'm really lightly, even maybe 25 percent or so. Pressing down with the white colored pencil and giving out more of an even coating across the center here. I'm not going totally solid. I do still want a few little areas where there's going to be black peeking through. But since I do see a lot more petals and a lot more density in through the center, especially as we get to the back, just is a lot quicker to lay down that base and then I can add some more bright spots on top. On this one, I'm going to avoid the pink, but I think I might add a tiny bit of yellow. Let's see how about or maybe even this is a color called titanium bus. This is a luminance color. It's just like a slightly warm white. It's not like Prismacolor, it's cream. It's not yellow, it's just warm. It's a little almost like a beige undertone. Adding that in a few places upfront here. I think I want this side to tip out a little bit more. Now I'm grabbing powder blue which is the Prismacolor color and I'm just experimenting with this a little bit. I'm not sure if I'm going to like how it looks, but I'm putting a little bit of color blue at the back just to make it sink back a little bit. Let's see. It's really subtle. I'm not sure if it's even going to carry on camera, but it is a nice way to give a little bit of a sense of dimension without going too dark. Then this is Prismacolor cream. I'm going to give a few little spots of that upfront here. Then a few to contrast with the blue. Now I'm going to leave that for now and do the stem. Same color, spring green. Which is that nice, bright cool green. Again, I'm prioritizing smoothness. Once I get these all laid down I'll probably flip it over so I can get a nice sharp edge on the other side of the stem. But for now I'm just going down one side. I do want the stems to eventually be very nice and crispy. I am going to sharpen this to the super sharp point again so I can get some more visible freely front pieces coming out. There's just a few that we can see. We can't even see all of them, but I'm making some very simple indication that we can see some little green underside stems there. Then while I'm here, since I have the nice sharp point on the pencil, I'm going to add a few more up here. Flip these ones out a little bit further. Now we're going to move on to this guy and this one I think I do really want the paint to be fairly visible and a little more prominent. I'm actually grabbing some additional pinks. This is blush pink. What is this one called? I think it's just a rose, but it's a Prismacolor color. This one, I think it's going to be good for some more saturated areas. That would work well. Just testing and add on this side before I lay it down over here. Now I'm going to go in with the rose and I'm going to go around the edge of each one of these little groupings of petals. I do not see this in the reference photo, as you can see if you're looking at the reference photo with me. This is not apparent in the reference photo, this is just something that I noticed. This is a pattern that I noticed when we looked up the pink Queen Anne's lace and it's a bit of a risk. I'm not positive if I'm going to like how this looks but I'm giving it a go and then we'll come back over the top of it with white. I'm pressing with probably 50 percent strength. They are tiny circular strokes. Definitely I'm going to want to go back to this one I can tell. Now I'm going to come in with the white and I'm going to do a little bit of a soft glaze over each one of these. Just doing those light circular strokes and I'm purposely trying to leave some negative space in between them. Since this is the really big, completely opened blossom I want it to have that nice hairy spindly look that Queen Anne's lace has. Then this area back here is going to get the same treatment , little circular strokes. Now Queen Anne's lace is really the perfect subject to highlight what is so great about working on this darker paper. If we were trying to do this on a white paper, we would just have almost none of these little detail will be visible unless we were outlining each one of those, which just becomes really challenging at a certain point to do that much outline works. The darker paper really does make it possible to do quite a bit more in terms of the detail, if you're working with a subject that's all-white or white, really light colors like we have in the Queen Anne's lace here. Now, this is a very, very pale pink that I'm using. This is called deco pink and I'm doing the same thing I did over here where I'm making some of those more defined little groupings of petals that almost look like their own little flower. I'm trying to specifically go outside of the line that I have here. I'm actually pressing quite hard at this point. I really want to cover up that sketch line.
30. Queen Anne's Lace 8: On that note, actually if you do the same method that I did, if you do the white transfer paper, and you're working with colored pencils on this dark substrate. If your subject is really dark, if it's a wildfire or it has a lot more dark bright values than this. I would recommend trying to erase more of the sketch, or pull up more of the sketch with a kneaded eraser. Because I will say as somebody who's relatively new at this particular method, you have to press really hard to get all the white covered up, and even then some of it may show through. If you're working with a darker color that can get made muddy by the way, it could be a little bit tricky. I think that's going to be pretty nice in terms of amount of pink that we're showing. I'm just adding a few little hits in here to help fade it up to the top. I'm going to come in doing the same treatment. Making those little petal shapes. I'm not quite stippling, doing the little dots, but it's like a combination of stippling and a little circular stroke. Pressing really hard to get the white down nice and opaque. I'm leaving the center. I haven't done the center yet. In each of these little clusters leaving out a little bit open, I may try to get some of this, the green stem to show through from underneath. I'm just going incrementally so I can leave that option open. My hand get's tired when I have to press this hard. Do that same thing across the whole surface. Well, not across the whole surface but across each one of these little circles, each one of these little clusters. We're going to experiment with something. This is another risk, this seems to be the blossom that I want to experiment on the most, but I am going to use what. Do I want this one or I think actually maybe I'll do sharp truce. No, I guess they will do the latter screen. If I come in here with a little bit of green up at the top, not pressing too hard. Because if I really don't like how this looks, I should be able to pull most of it up with the kneaded eraser. Little bit of green just doing the soft circular strokes here, and I'm going to try a little bit some other centers. I don't know, what I think of that. I like it better if I add some into this one. That is verily realistic actually, you would see the green on the center of these. That makes more sense. It is certainly more interesting to have another color in there than just a plain white. Still going really soft. Now, I think I want to add in some of those little stems underneath, just like we did with the last blossom. I'm going to add some more of the little petals up here. Right now, the texture of this just looks very uninteresting compared to the texture down here. I need to add a bit more complexity so that it can compete. Let's just let that green sit for now, and I'll see how I feel about it once I've got the other components more laid out. right now, I still can't quite tell for sure whether I like it or not. Part of me thinks, yes, part of me thinks no. Let's see, I think I also want to extend this a little bit. Now, the stem I'm going to have it come behind this flower. Now, the reason I extended that was because before, what is the tip of this would have just touch the curve of this stem, and that would create a really powerful, a little bit awkward point in a composition whenever there's two lines that intersect. I try not to do that thing unintentionally. Whenever I intersect lines, I want it to be on purpose. Rather than having that a little bit awkward intersection point, I just pulled it over slightly. Pull the flower over slightly. I could, of course push the same over to but it's easier to do with the flower. Same deals with the other stems, spring green and just trying to create a nice neat curve. Well on down here I think I will pull this stem up as well. Don't worry, I will spend some time at the end to neaten up all the stems. I know they are looking a little bit rough right now. Here we are onto our last lesson. I think what I've said was that I was going to do white, and then have these to be pink, but I think I'm also going to have this one be pink. I think that will just look really nice. But first I need to get clear on the little front pieces. I'm going to get a nice sharp point on this, and this is very similar to what we did over here. It's just a little bit more closed-up. Again, pretty light to start with. For this one, I really want to think of it more like a solid object. I think I'm going to put some of the mid-dark green in the background here. This is my [inaudible] screen laying it down pretty lightly. How do I want to make this pink? Let me think through my approach here.
31. Queen Anne's Lace 9: I'm going to use that darker pink rose. I'm going to start softly glazing some of it in up here. Trying to get inside a cluster as well as on the top. I'm going to add just a few, little, visible petals. I don't want as many as I have over here. I should probably sharpen this a bit more. I think pink was the right choice there. This is, again, decor pink. Go a little bit darker on a few of these on the inside. Now I want to make a few of these little stem things look like they're really sitting on the top. I'm first going to go pretty hard with the spring green, because it's nice and saturated, and it is lighter. I've been using the mid tone, but it is typically a lighter color. Then I'm going to use the lettuce green as the highlight. First I'm going to sharpen it though. I also need to do some of these, little fond thingies. I'm trying to concentrate the highlight towards the top portion here, so the bottom will still feel like it has some more depth and dimension to it. Now I'm coming in with the pression green trying to push a few of these little areas back. I want it to have that kind of birdcage look to it. Putting a few more of these little pokey things in here because this is just those really tight, clustered, upside down umbrella handles or skeletons I guess, umbrella skeletons, it's probably the more accurate word. I am going to do a few little pops of white up here at the top. Fill this in with the lettuce green. Pression green again to try to add a little shadow on the inside here. Now let's get this last little leaves done. I don't really have a reference for this, so I'm just going to try to mirror the structure that I had on this side. Actually, what did I use? I think I used this, which I haven't really used in many other places. I will bring this in on the stems, but I'm pretty sure I used that green light as the [inaudible]. One of the hazards of filming across multiple days. Just doing a thin glaze here and then I go over much of this area. I think this is a different approach I took at the beginning, but that happens sometimes. I'm going to keep it real with you all. We are in the home stretch for this piece, and then we'll just have one more to do in the course. Again, I'm going to pick one side to be the dark side, the one side to be the light side. I think I will stay consistent with what's over here. This is going to be the darker side. This is the moss green again. Little bit of apple green. Moss green and apple green are very similar, but the moss green is a bit more muted and a bit darker. It's also a luminance pencil, so its a little bit of a finer, sharper point, which is really nice for some of these tiny detail areas. Now just as I've been doing the whole time, the closer I get towards the end here, I am pressing harder and harder with the pencil so I can get more of an opaque lay-down of color. I'm going to come in with the lettuce green on the light side of the leaf. It's doing an even glaze to start with. Pressing maybe 50 percent, 60 percent. That is the baseline color. At this point I'm going to pull off the tape so that I can flip this around, which is going to allow me to work from multiple different angles on the stems, so I can get those nice, crisp lines. I apologize in advance if this makes you dizzy, I hope it doesn't, but that's why I'm doing all the spinning. Let's see.
32. Queen Anne's Lace 10: Before I do the sharpening of the edges with the black colored pencil, I'm going to come in with this color which is the moss green, and then the sap green light, spring green. Then I'll probably give some highlights with this, and then I'll do the final highlights over the whole piece with white. At this point, since I have so much pigment on here, it's even more important for me to use my hand rest. Sap green is the shadow color. Now I have to decide which one I want to be in front. I think I want this stem here to be behind this one, but to be in front of this one, which means I need to put a little tiny drop shadow back there to make it look like it's in front. It doesn't even need to be anything too intense. You can see that's like a really subtle shadow there. Hopefully it carries on screen, but just having that little bit of darkness, a little bit that's less saturated, it really helps it to sink down in the back and look like it's underneath. A bit of the sap green light here. This is just helping to tone down some of the intensity of the spring green, highlight at the lettuce green right here. A little highlight of lettuce green right there. This is a spring green, and sap green light to knock down that saturation. I don't want to use any of the moss green on this because the moss green is what I have for the drop shadow behind it. But if I put the moss green in there, it'll just be a little bit harder to tell what's what. A little highlight right here to make it pop out even more. This one, I want it to go behind this stem so I'm going to put the drop shadow on this one on this stem right here using that same moss green. I think it's going to go behind this one as well. In front, behind, behind, in front. Now remember what I was talking about with the intersecting lines being a really powerful element in a composition. This area here has been done intentionally. So this is all lots of different intersecting lines obviously, but it's been thought out and planned from the beginning of the piece. So it's different than if we just randomly have lines intersecting without having thought about it or planned it that way. These intersecting lines were meant to be this way. Now I think I'll have this one go underneath. It went in front over here, I'm going to have it go underneath over here. I think that's all the overs and unders that we have to decide. Coming in with the sap green light to knock down some saturation in a few of these spots. Again, this is lettuce screen, which is going to be a highlight, but there's still going to be the white highlight, which is going to be the brightest highlight that we have. But this is what I'm using if I want something to feel like it's up above another element or component in the piece. More sap green light. Now I'm going to use the black just like I did on the dandelion piece to sharpen up a few edges, or things have gotten less crispy than I like, or maybe where some of the stems have gotten a bit too thick. I'm fading out a little bit, just a slight, very light feathering. If I were to do a really hard outline over everything, it would end up looking like an outline even though it's black on black. So I want to just be careful not to get too crazy with it. On the other side, I'm going to try to stick with the green. This is sap green light that I've gotten nice and sharp. I always find it easier because I'm ready to get a clean edge on something that I'm facing. So that's one of the other reasons why keep twisting the paper around. But line work really isn't my strong suit, so if you're somebody who has a really steady hand or you feel really confident with line work, you may now want to do quite as much flipping. But for me, since I don't particularly feel competent and I don't have like a super steady hand, flipping is really helpful. Just a tiny bit narrower top. Just a tiny bit. Now I'm going for some of these little fronds and try to sharpen those up, and I'll deal with it around the edges of the leaves. Then I think we'll be ready for our final white highlights, which is the super satisfying fun part. Just get these nice and crispy. Let's fade that out a tiny bit more. I'm going to get the edges of some of these leaves here. These look the fuzziest to me over on this side. All right, let's do our final white highlights.
33. Queen Anne's Lace 11: This is a holbein white colored pencil that I haven't gotten a chance to try yet. I'm going to sharpen it with this one as opposed to my oven brass folate, which is what I have been using for most of the course. Because white colored pencils, well, holbein color pencils in general, and then white colored pencils specifically tend to often be a lot softer than other colored pencils. Just going to see how this compares to the Prismacolor. The Prismacolor white colored pencil has been my holy grail, white colored pencil. If I'm pressing down as hard as I can, that's about how opaque I can get a Prismacolor. Oh wow this is so soft, oh my goodness. Wow, look at that, oh my goodness. That is crazy. Sorry for the intensity of my reaction you guys, this is a big development for me. Prismacolor may have just been unseated for my favorite white colored pencil. I will say this is even crumblier than a Prismacolor white, but I don't even care because look at how opaque that is, that is just wild. Prismacolor up top, Holbein down below. I guess we know what we'll be using for the highlight here. We're going to go with the Holbein. You can even see, hopefully you can see the end of that got bent just with how I was pressing, that's how soft this is, it almost feels like an oil pastel. I'm going to carefully cover this up here. I'm going to choose a few areas to add my really opaque white. That is wild, I can't believe how opaque this is. This really feels actually quite similar to working with like a oil pastel or grind ash neo color if you've ever tried those. Very creamy feeling, very waxy, really nice for giving that super opaque white. I haven't sharpened it once at this point, I've been just working with a more dull tip. But I think I'm going to sharpen it a little bit more. I've noticed on the side of the pencil it says to sharpen with a knife sharpener. I think that that would be good if all you had was this. But this sharpener so far has been really great for me with any fragile pencils. It seems to be working okay so far with this one, but I'm going to order several more of these. Just super excited about it. I think I'm going to, do I need anything here, maybe one or two little bits. I'm going to sharpen it and try to get some highlights on the stems. This is probably harder because I want to maintain a sharp tip for this. Let's see. What do we think about this here? It blends out nicely with another color pencil. It's just so opaque even if I do a really light, I was pressing really hard up there on the flowers. But here if I just use super, super light glazing it across it's still is really opaque, wow. I think we are done with the Queen Anne's Lace. We now have two pieces completed, the dandelion piece or I have two pieces completed. The dandelion piece and the Queen Anne's lace piece. We're going to go ahead and move on to the third piece for the class.
34. Milkweed 1: I decided to do milkweed because it's really important. Well, number 1, I would see it going all the time whenever we would take trips up to Maine. It's really important in the life-cycle of the monarch butterfly. It's one of the places where they lay their eggs. I hope I am getting that right. Again, I'm thinking I should have looked that up before I started filming, but I know it is super important to the life cycle of the monarch and important to other pollinators as well. With this piece, as you can see, I did a little bit more of a complex composition. I have more things going on. It's more of a center-weighted, but then it also has some additional elements on the side. I have the main plant with the blossoms on it, then I also have the seed pods at different stages because they're just really interesting looking. I also decided to mix it up a little bit on this one and include a monarch butterfly on there, since it is such an important part of that insect's life cycle. Before we dive in here on this one, I am going to pick up a little bit of the extra white from the transfer paper. It just got really, really bright on this one. I'm kneading my eraser [inaudible]. It's nice and sticky. Then just pressing it over the top of some of these areas. It's going to pick up a lot of it, but it's not going to pick up all of it. On the Queen Anne's lace I felt like I left way too much on there and I was really fighting with it throughout most of the piece, so I wanted to make sure not to repeat that mistake here. If you notice I'm not rubbing back and forth. I'm just pressing down. Rubbing back and forth will take off too much of it and also make it a little bit messy. As you can see, it is still creating a little bit of that halo outside of the lines, but I'll take care of that just as I did with the other subjects, so I'm not too worried about it. Since there are really nothing more to say about this and it's a little bit boring, I might go ahead and skip forward here, so you don't have to watch this whole process. I think that's good for now and we should be ready to go ahead and get started. I am going to build out my palette a little bit here. I'm just picking up right in the same workspace that I left off and where I was working on the Queen Anne's lace. I'm going to add some other greens here. I think I might tweak the temperature of the green a little bit in this one. Then I also need some colors for the monarch butterfly, and for the purpley background of the milkweed blossoms. I'm going to grab lavender, which is a Prismacolor color, lilac, which is probably a bit on the cool side, but I'll go ahead and grab it anyway. Dark purple which is very warm and Dahlia, which is also pretty warm, and then black cherry. Then I'm grabbing some orange, some pale vermilion, those are both from Prismacolor, and then some carnelian from Luminance, and then I think this is sunburst yellow, also from Prismacolor. Then I want celadon green and Kelly green. These are the cooler greens I think I might use. It also looks like I need a brown for the stem. I also need some brown for the seed pod. This is Luminance color, it's burnt ocher, I have burnt ocher, 50 percent, and just regular burnt ocher. Then this is russet, another Luminance color. I think those will work really well for the seed pods. This is Ginger Root, which is Prismacolor 1084. It's a little bit like a cool greenish, grayish-yellow. It's a really nice, versatile color, I use it for a lot. Then Prismacolor dark brown, Prismacolor chocolate. Then I have black here as well. Grabbing beige, Prismacolor beige, and then Prismacolor seashell pink. This subject has a lot more variety in the colors, so I'm not totally sure when I'm going to end up using it. I think we're going to start at the upper left here and work our way down. I'm going to start with deco pink, and I'm going to block out some of these little flowers, these little flower structures here. I'm not going to get super, super tight and realistic with this. This is going to be stylized just like all the other pieces, but it is still helpful to note the overall structure. It looks like these little blossoms have five petals or what look like petals in the interior. Then they have, like five petals on the exterior as well and they're in this round cluster. That's what we're going to try to recreate to some extent. I'm just going in really, really light with the deco pink and making five little petals. We did this with the Queen Anne's lace as well, where the flowers, the little flowers that were closer to the front were more immediately visible, readable as flowers. They had that structure, they had that shape. Whereas once you get out towards the side of the blossom, they're a little bit more diffuse and we just see the overall color. I'm going to try to follow that same pattern here. I'm going to get less articulated, less well-described as I turn towards the outside. That's also because of perspective. This is a ball that we're looking at. The ones at the front, we'll see the full view. But once we turn towards the side of the ball we'll see only the side view. We won't see as much of the blossom, so it's totally normal. The way this looks at the edges though is that we see the profile view basically of the blossom. I'm trying to make that clear. Again, trying to avoid being too perfect and too regular. This is the first one. I'm just figuring out the structure here, figuring out what I want to end up doing on the other ones. Pressing maybe 25 percent of what I could press. I don't know how carefully you are looking at the reference photo, but the reference photo, this little globe here, was actually partially broken down. But I'm going to go ahead and make it a round one. Just making my way all the way around. That's looking decent. I think I'm going to do the same thing over here. Just doing those five little interior petals. I will try to describe the exterior petals, some, but I'm not going to be as detailed on those because they're going to be lower down.
35. Milkweed 2: Just when you're working at this scale anyway, you have to make decisions about what to keep or what not to keep. If you're working on really large scale, you can get pretty much into any amount of detail that you want, but this is a fairly small piece, so we really are limited in how much detail we can go into. I'm still pressing really light. If you don't have deco pink, if you have just blush pink in the Prismacolor range, that would work well too. What we need is really just a soft pink with a lot of white in it. I suppose you could even use white if you wanted. I just have to go really soft to make sure it doesn't get laid down too heavy. I think I'm going to clean up some of this additional white stuff from the sketch. I got pretty messy when I was trying to pull off the extra. Just so I can see what's what. Same thing here. You can only really see the side angle of the blossom, I need to account for foreshortening. Then I think I actually need another color. I'm thinking of the color henna, which is a Prismacolor, and I keep mine in red. Right here, is this him? I think so. Oh no that's mahogany red, but that looks good too. Actually, we might use that. Here's henna. We have three different muted or reddish options here. See if those are going to come into focus for you. I'm thinking that these are going to work really well for the inside of the milkweed. For the interior lower down petals. I'm thinking henna is what I want since it's the most pink, most saturated looking one. But I may end up using some chestnut, which is the least saturated, or some mahogany, which is a little bit more purple. Then we can come in with the brighter colors like this is what I initially thought I might use a lavender for, but this is just so light and so saturated. I think it'll be too much if I go in with that from the beginning. I'm going to start with henna and I am going to try to describe some of those little petals. I'm going to get it nice and sharp, and my superglue should be dry by now so I'm going to pull off this tape. This is what I do when a pencil is too short to go into a pencil extender anymore. I glue it onto a dowel with superglue, that way I can use all of the pencil. I'm double checking here on the structure, so a lot of the time flowers that have these two layers of petals will have the interior and then the exterior petal will be in-between two of the interior petals. That's what it looks like we have here. I'm going to follow that pattern. I'm just doing the same thing that I did with the exterior petals. Just squeezing these in-between, this is another nice thing about working on black. We're going to have all that negative space already filled in, which will help create a sense of depth. Now these well probably need to have some highlights added to them, but this is going to be a good base color, I think. Then something else that would happen since this is a dome, is that as we get towards the outside of the dome, we'll see more density of the lighter interior blossoms because they're sticking up higher. When we're looking directly at the dome, when we're looking right at it, we're going to see the interior blossoms and then the really visible the exterior blossoms. But then as we move towards the side of the dome we're just mostly going to see the interior blossoms because they stick up further. That's why we're going to have more darkness, more visible purple in the center and then as we go towards the outside, it's going to be more of the white and pink. This is already starting to evoke a milkweed blossom. Still not quite there yet. Of course, that we are on the right track, I think. Just like I was saying in the last lesson, the first few parts of any subject are always the most time-consuming. Because that's when you're testing out your theories as to the approach that you want to use or the way that you want to make something look and you test it out a little bit. See how you like it and then if it looks good, keep going in that direction and if not, you have changed direction and that process takes more time than just executing the same thing over and over again. Doing a little bit almost of a glaze here and we'll add more visible petals with white later. They look pretty good so far. I know that I'm going to want to increase the sense of depth, of thickness, right now they read as very airy because I haven't really laid anything super heavy down yet. But I know that I'm going to want that more solid sense because that's actually what they look like in real life. They don't look as airy as a dandelion for example. I'm coming in here with the mahogany red, which is a little bit cooler and just filling in a few of the little spaces. Now, before I do too much more on these, I think I want to do a little bit on the stem and a little bit of the leaf. I'm going to do the same thing that I did with the last two piece that's where I'm going to get somewhat formulaic in the leaf structure. I think I'm going to use Kelly green for the darker green and then maybe sap green light or a potentially, what's this one? Misty green from Holbein. Let's see. Let's compare those two. That's misty green it's pretty muted, soft, light, sap green light, Prismacolor. Those are very close, if you just have Prismacolor, I would say you're totally fine to use this one. The sap green light is a little bit more saturated and a little bit darker, but then the misty green, I think it's going to work well as a highlight, with the Kelly green. I may end up using all three, but I think these two are going to be the ones that I mainly rely on. I'm going to have this to be the darker side, I think, because since it's up against the blossom. I'm just doing a thin light glaze here. Oh, so much easier having erase some of that white, not having to cover that up. I think I will actually start with sap green light, just to really light glaze and then I will go over it with the misty green.
36. Milkweed 3: Changing your mind is totally normal and part of the process. I do it all the time. I come up with a plan to do something and then end up changing one little thing about it and then doing that as the plan instead of what I had initially come up with. Yeah, just very normal part of the creative process. You don't have to completely know where you're going to get somewhere good. Well, you don't even really have to know where you're going at all, I think, to get somewhere good. Eventually, you learn. All right. I'm looking for, let's see, do I want this one? Maybe I do. I'm going to grab that moss green to illuminate small screen that we were using yesterday. Too, too light. Prussian green maybe? Yeah. A bit on the saturated side, but we want something that's more of a true shadow underneath that blossom there. Here's dark green. Actually, I'm going to hold off on that for a second. These leaves have a really shiny, waxy look. probably I'm going to go in with several layers here to build that up. This is my first one, so I'm taking longer here so that I can develop what I really want as the overall structure. Then it'll be a lot quicker once I execute it on the other ones. Pressing pretty hard now since I want to get a nice thick layer down. Now I'm going to come in with the misty green. I'm going to hit some of these areas that I would expect there to be more of a true highlight. You can get a little sharper on this one. Just as we've been doing throughout this whole process, we're going to hold off on adding any true white here. I will come back and do that once we're closer to being finished. Pressing with about 80 percent strength right now. As I get down towards the base, I think I want it to be more of a mid-tone. It's still going to be lighter than the other side, but I don't want it to be quite as bright as it is up top. Then glaze over a little bit of the Kelly green. Not a really heavy layer, but just a little bit to knock down the brightness slightly. Pressing really softly. Maybe add a little bit of the Prussian green here. Yeah. I think that's a pretty good start for the leaves. Add a little bit more darkness there, but yeah, I think it's a pretty good start for the leaves. The Stem looks like it's bleeding. It's more of a brownish color to me. I think I want to do something fairly quiet that doesn't call a lot attention to itself. I want to do this bronze color for the stem. It's actually a bit on the thick side, interestingly. Thick and [inaudible]. Same as all of the others, if I end up with too much thickness here, I will just clean up the edge with a black colored pencil once we get towards the end. Kelly green, I'm working on the underside of the leaf. You can have undersides of the leaves be darker or lighter. It doesn't really matter. You just need to be consistent with whichever one you choose. Changing the shape of this one slightly. Sap green light, misty green. Winding a little bit with the Kelly green. Coming back in with sap green light. I think I need actually a bit more darkness, so I'm going to get a nice edge on the Prussian green here. Whenever you're working with lights and darks where there isn't that enormous of the value difference between them especially in a small area like this, it can get a little bit tough to see what's going on. Adding just a tiny bit more of a dark color, a color that is more dramatically separated on the value spectrum can really help make things make sense. Okay. I think I'm going to grab some chocolate by Prismacolor and do a little bit of work on the stems, and then get these ones closer to being finished. That'll give me a good sense of the overall colors and values for the piece and where we're going to be going with things. Chocolate is still a bit on the saturated sides. I may need to actually bring in some dark brown, which is another Prismacolor, just much less saturated.
37. Milkweed 4: The stem is fairly dark, so I think what I'm going to do for the shadows on the stem is have the shadow going down the center, and then have it be a bit backlit from either side, so there's going to be the light area coming down either side. That will just help it read a little better. Help it pop off the black more. This is seashell pink. I'm just using this to create that little edge highlight, and then I'm going to add a little tiny bit of texture with it too, just stippling on here, to give me a sense of that stem being rougher, more textured looking, as opposed to the really shiny green stems from what we were just working on. That's pretty good. Now let's see. Now to figure out with these interior blossoms, with these interior petals rather, how to make them look a little bit more dimensional. Right now they're pretty flat. Let's try a little bit of this lavender, Prismacolor lavender. See how intense this is. Going super light, like 10 percent maybe, just glazing it over the top. I think that's okay. I think that could work. I'm just trying to trace out the edge of a petal. That's actually what it looks like to me in the reference. The highlight seems to follow the edge of the petal, and make it a little bit more clear what is what. Yeah, that's really helping. I hope that's carrying on the camera. It's very subtle, but it is making it a lot more visible, and then I'm going to grab the mahogany. Actually, maybe I should grab the chestnut. Where did the chestnut go? Yeah, mahogany is still quite saturated, so that's really popping out. Chestnut, no. Maybe black cherry. Let's try that for the shadow. Yeah, that's good. That's what we're going to use, black cherry. Now, I technically could have used my swatch paper for that, and sometimes I do, but I've been working for a little while on these. Now I'm in the zone. Just wanted to get it onto the paper. Now, if you remember from the last piece, the amazing white that we discovered, the amazing Holbein soft white. I'm going to save that for the very end, and I'm going to use this Prismacolor white to see about doing the same thing that I just did to the exterior petals, to these interior petals. I'm drawing a little white outline along the petal, which is what I see in the reference. Then I also put a tiny bit of white in the center. Let's just try it with these three, and then we'll see how that looks. I'm going to come back in with the deco pink. This is, I think, dusty rose, I think that's the name of this. It's a Prismacolor, it's PC1018. Taking off some of this tape because I don't need it anymore. This is similar in terms of value to deco pink, but it's much less saturated. It's going to read a little bit more as a shadow. If I'm looking at the reference, these things actually are not super, super saturated. Now I'm going to go into the center portion of each of these little petals, and lay this down a bit heavier. Let's see if this works. Yeah, I think that looks pretty good. I'm going to do a little bit more of those white outlines. The white centers. Yeah, if we were doing just one of these blossoms really large, there would be so much interesting detail that we could get into. But we're not going to be able to do all of that at this scale. Have to keep this really sharp, otherwise we lose that edge pretty quickly. Another thing you can do to keep the edge is to rotate the pencil like a quarter turn whenever you're moving it. You still will eventually have to sharpen it, but it saves you a little bit. It saves you a little more time before having to do so. Then I'm going to come back in with the dusty rose, and add a little bit to the center of each of those petals. Oops, black cherry. Don't need a ton of this. This is just a few little shadow points. Now I think I'm going to grab the deco pink again, and do a little bit more of a heavy lay down around the outside. You can see just how much of a difference this development makes in this one versus this one. This one just looks a lot more hefty, a lot more solid, and the details are a lot more visible and readable compared to this one. That being said, if you're not obsessed with detail like I am, you don't have to take it this far. You can bring it about to here, and leave it at that point if that's the look that you like. I'm pressing probably about 70 percent, and I'm trying to make it look like these are the profile views of some of these little flowers. I'm actually making petal shapes rather than just scribbling on the outside, or doing a glaze. Actually trying to create a little flower structure. I probably should have done this one first, since now I'm going to have to be on top of this one and smudging it, but, oh, well. Now I'm going to come over the top with a little bit of white. Just going to follow some of those petals that I laid down, pressing about 80 percent. But again, this is the Prismacolor white, so we'll save that super opaque Holbein white.
38. Milkweed 5: Now yesterday after I finished filming, I posted about that white colored pencil on Instagram and a number of people suggested the Darwin's, Chinese white as well. But that's another one that is really nice and opaque in addition to the one that I was talking up all about yesterday, the Holbein one. If you can't find the Holbein one or if it's easier for you to get Darwin or whatever apparently, Darwin's Chinese white is also very nice and opaque. This is henna again. I'm trying to fill in a little bit of the black that's along the side here. If we end up with the shadow along the outside that's darker than what we have on the inside that will mess with the effect that we have going on. I'm going to put a little bit of this lavender on there too, just sneak in it in-between anywhere I see a little bit of black peeking out. Maybe even a little bit of mahogany. That's nice. Now, this may be overkill. I'm not sure if it will even carry, but I think I'm going to try to do a little line with chestnut just around the center of each of these little flowers. Yeah, that's nice. It's a really subtle, but it helps make that part clearer. I only need to do it on these center few, I don't need to get it really anywhere else. Now let's do the same thing to this other blossom. How many more blossoms we have in this piece, by the way. Well, whole cluster of three more over there. This is going to be the most time-intensive one, I think. I'm going to first do the lavender around the edges of the henna petals. This should hopefully go a little faster. Just tracing each one of these little tiny line. Since I know I wanted to do this, fill in some of those spots on that one. I'm going to go ahead and just pop a little bit into some of these negative spaces, these black areas right now since I'm here. I've gotten most of these outlined here. Now I'm going to switch to the white, and I'm going to do the white on the interior blossoms. This would be very difficult with that super soft white because even this one is having a hard time maintaining a point. There we go. Now I'm going to come in with a dusty rose and do the center of each petal A bit more of it form lay down. Now am going to use chestnut to circle those centers, a little shadow to the center. Doing this in a different order than I did the last one. The last one, I put the light part in the center first and then I traced it with a chestnut. Let see, I think I'm going to do the decor pink for the center. There's little better to do the chestnut second otherwise some of them get smudged. Now, I don't know because I'm not watching the clock, but it feels like this one's going a lot faster. Since I know what I'm doing. Actually, I want the black cherry. I'm using that to fill in a few little gaps here in the center. Then moving towards the outside, I'm going to fill in the gaps with the mahogany. I'm not going to do all of them yet, just grabbing a few and then I'm going to do the petals, the exterior petals. Getting another nice sharp tip on the decor pink here. I'm trying to make visible profiles of these little flowers. If I have an opportunity to make one stick out a little bit further than the others, that really helps to keep it from looking too matchy matchy and perfect. I don't know if you guys can hear that loud music, but there's a brewery right next to my studio. They really like to listen to death metal while they're making beer. Now I'm going to do what I did over here where I faded in a little bit to give it that sense of curving, the sphere that curves. A little bit of white here as well. Make it feel more dimensional. Now, I'm going to come in with little Henna, get some of those in-between places and then a little bit with lavender. I always want to call this one lilac and this one lavender but that's the reverse. I'm not quite happy with that angle down there.
39. Milkweed 6: We're going to move down the plant a little bit. I think we'll do maybe this chunk of leaves right here and this seed pod. Then we'll move over to this side over here, which is going to be the overall, the much more complex side. Up here I have the bottom of the leaf as the darker green, which is Kelly green. I'm going to try to be mostly consistent with that. This is an underside here, and this is an underside here. Let's just do a quick glaze to get those in place and since we're going to do a big clump of leaves right now, I might just go ahead and knock out all of the areas of Kelly green where I know I'm going to want a glaze of that particular color. This is Kelly green. This part here is another underside, this little wavy part here. I'm going to get that down. Another reason it can be helpful to do this aside from saving time, is just if you're doing a big cluster of greenery like this it could be easy to get lost in there and then you make the wrong section, the wrong color or you use the wrong color on the particular section and then you end up stuck because you want to create that consistency. Now, that's what we're trying to do here because it's more stylized. Again, if we were trying to do a super realistic depiction, we would just be following what we have in the reference. We would also try to be working more with the single reference image since lighting is super important to ultra realism. But since this is just a realistic, but stylized, we're taking more liberties with the lighting and using a more stylized approach, which just requires you to be consistent throughout. What's happening there? Let me see. I'm going to clean up a little bit, I may mess here with this extra white. I think that's another underside right there. Quite a lot of Kelly green. Now I don't want to lose that edge. Let me really quickly mark that out with some with some dark green. Now milkweed, I'm noticing as I'm looking closer at these leaves. It does have a pretty visible vein structure, but I think we may just simplify that and include maybe the center vein running down each one. But I'm not sure we're going to make all of the vein structure visible because there is already a lot going on in this piece and I want to keep that stylized simplicity. This one is an underside too. This one is underside, this one is inside. I think I'm going to save these ones. Let's get this articulated. Now here is one where it would be nice to see a really visible stem. I'll start out with the same color that I used, or sorry, a really visible vein. I will do that. Then we'll see maybe we will add some more veining depending on how complex this looks later, but this will be good for a starting point. I got a little bit too thick on that one, but I will fix it with a green later. Then I will do the sap green light, just a thin layer and then I'll go over it with the misty green. I'm going to start twisting this a little bit so that I can work on getting more of these crisp edges and covering up any of the remaining white from the sketch. This is dimensional, it has a curve to it. I think I'm going to add a little bit of sap green light as a underside highlight on a couple of these curves. That's going to look way more interesting. I'm just having a big flat plane. A little bit of Prussian green blended in here for a tad more saturation. That is looking good, I think. I accidentally grabbed some of the misty green. A little edge highlight there. This side, it's going to be the same thing, sap green light. I'm not even being very careful with my marks here. I'm just scribbling back and forth because I'm doing this thinner glaze and I know that I'm going to come back and with a lot more pressure in subsequent layers. Kelly green, laying this down a bit more thickly. Twisting again. Let's add a little bit of a stem here, I'm going to make it thicker at the base and make it taper away as we get up the leaf. I'm going to put some of the Prussian Green at the base of the leaf as well to give it a sense of curve. That needs to be sharpened.
40. Milkweed 7: Then let's do some moss green. Now, let me think, how do I want to approach this? I think I'm going to make it the lightest at the outer edge, and then have it fade towards the center and then I'll do another highlight along this edge. Now, I made that decision by looking at one of the leaves that is in the reference, this one right here, there's a very strong highlight along the edge of the leaf, and then there's another very strong highlight here. Now this one, we're getting some light shining through the bottom of the leaf. That's a little bit more complex than what we have going on. We just have the shadow on the underside, and then up top we'll have a highlight, but it's not going to be quite as intense as that, but that's the overall plan. The lightest on the two edges and then fading towards more of a mid tone as we get down away from the edge of the leaf. Sap green light, Prussian green, a little bit of Kelly green here at the end to make it feel curved. Sap green light again, pressing really hard. Misty green along this upper edge here. White's going to be really helpful for this as well when it does come time to add that in. I'm actually going to change my mind. I think it's too confusing, it doesn't really read very well. I'm having a highlight up on top of this. I'm going to cover that up. Thankfully, it wasn't pure white and it wasn't too intense, and then I'm going to add a line of Prussian green actually. I feel like I was losing some of the sharp, crisp edge of the leaf. Here we go, that's much better. I'll bring some dark green in down here, help it sink down a bit more. Now I'm going to come back in with the bronze for the stem inside there and then I use, what did I use? I used chocolate a little bit down the center, and then dark brown down the center. Then I use seashell pink to get that little edge highlight, wraparound highlight. Then I also use seashell pink to help me texturize the stem a little bit. Add some shadow down in here so it looks like it's sitting on the inside of that leaf. I better term this so I can get a more crisp edge. I should probably wait, but I just want to get it tidied up. We ended with the black here. Now on this one here, since we have the Kelly green in the underside shadow, this section of the leaf is going to be the lightest, and this section will be more of a dark mid, probably not as dark as the underside, but it's going to be similar to how we approach this one here. Again, just doing a really thin light glaze and then sap green light over here. Since I'm here, I'm going to do the sap green light on this side as well. Now pretty much just follow exactly what I did for this leaf since I know that it works. I lay this Kelly green down a bit heavier here, and add a little bit of sap green light at the exterior tip for a highlight, and then I'm going to use some Prussian green because I really want this one to sit back a little bit. It's underneath this leaf, so I want it to feel like it's behind the others. Dark green here. I'm going to come in here with misty green, which is the lightest one. I'll have a highlight at the end here. Highlight down the center. Sap green light. Pressing pretty hard here because I'm wanting to create a lot more opacity. Prussian green, similar to what I did up here. I'm also going to put some of this at the center of this leaf just like I did up here, and then coming back in with the Kelly green.
41. Milkweed 8: Twist it around here so I can get it nice and crispy on the edge. Just trying a little dark green down in that one. The dark green has a much cooler temperature, much bluer, more saturated than some of these other greens. If I have it on some leaves and not at all in others, it looks a little bit odd. I need to add just a few spots to make it consistent. Here, I'm going to do it on the inside, which is a bit of a flip-flop from one I've had on some of the other ones. Prussian green. Feeding the Prussian green into the Kelly green here. Kelly green You can see once you get all those layers down, it really does start to look quite nice and creamy at last. A little bit of Prussian green on the edge of these. I think this one still needs a little bit more of the dark green, otherwise, the color just looks too different from the other leaves. Sap green light over here. Misty green. Prussian green. I'm going to do the same thing that I did on this one, has the little waviness to the edge where I add a little bit of Prussian green to the inside of the wave to make it feel like it's pushing down, and then I'm going to use a little bit of the sap green light as a highlight, even on the underside here. Then I come back over it with a Kelly green to soften it up and blend it into the sap green. No, not this one. Not sap green, Prussian green. I think I want to add a little stem on this one too. Not stem, center vein. I like how those are looking. A little bit more of the Prussian green and then I'm going to put some dark green down in the corner here to have that really sink down. I've got a nice edge on the Kelly green here, so I'm going to come in to try to get a really sharp crisp point on this leaf. There we go. Misty green. I'm going to stick a little bit of the Kelly green here in the corner to help it sink down. Put more misty green along the edge here. While I'm here, I'll do this little bit of stem bronze then chocolate and dark brown. Since it goes under in a few spots, I'm going to put a little bit of a line of dark brown, almost like a cast shadow, and then a little bit of the seashell pink. We're plugging along. Sap green light on the inside of this leaf here. I'm going to go a little bit, actually, put some of the Prussian green. Same thing on the interior of the little waviness, I'm using it to create some dimension and then over on the side here bring some him green in, where it looks like it's sinking behind these other leaves or where I want to make it look that way. Then a little more of the Kelly green, this time with more intense pressure. Fading in the Prussian green. I'm going to add that center vein with the bronze and then some of the misty green here up on the peaks, the highlights of the inside of the leaf. Sap green light. I think white is really going to help when I bring it in on some of these leaves. It's really going to help with the dimension. Right now, some of them feel a little flat. Well, a bit of Kelly green down here in the corner. This one is pretty much just underside, that's visible. I'm going to add some of the Prussian green.
42. Milkweed 9: The dark green, and then the kelly green. Little bit of sap green light as a highlight out here on the end. Coming back with a kelly green to fit it in. Now I pause on the leaves and think about these little seed pods here. Now these guys are what I wanted those really, really cool sagey blues for. They look very interesting, they're spiky. Is this celadon? It's PC 1020, it's Prismacolor. Then where's the other? This is celadon, celadon green, and then this is jade green. These are the two that I think I'm going to use. That's the starting point for this. We probably need to pull in a different color, a green for a shadow. I'm going to start with the jade green because it's a little bit lighter. Those are both super light. I'll just grab kelly green for now and put a little bit along the center. Actually this one, I think the scene is going to be less visible. Let's just do a little glaze of jade green. Very light here, not really pressing too hard. This I think is going to be one of the trickier components. These little spikes that are on the surface are going to be challenging to do with colored pencil. Really little soft circular strokes, 20-25 percent of how hard I could be pressing. Just trying to get the whole surface down and then we're going to think about the dimension, how they're shaped, how we want to create a sense of form. Then last of all, I'll think about the texture, the little spiky things. The stem is actually similar to the leaf color. I think I'll use sap green light as the base for this stem, then I'll come back with something else later. Celadon green, it's really not that much darker. It's a little bit darker and a little bit greener, but it's not that much darker. Let's try slate for a shadow color here. This is Prismacolor, slate gray, which is also pretty light. See what other options we have for green. We may not have exactly the right color, we may have to mix one, but let's test out a few here. I'm a little lost so I don't want to just keep piling on, otherwise I'll end up filling up the paper. I'm not sure which color this is, but it's PC 109. It's a nice darkness, but it's still pretty warm. This is olive green, it's a great green. It works really well for a lot of leaves, but I think it's still pretty warm for this moss green. Very warm actually. Now I grab the cobalt turquoise. Let's see what this looks like. It's a good color, but it's a way too saturated, way too bright. What happens if I mix cobalt turquoise and slate gray? Let's see. I'm going to do really thin cobalt turquoise, and then some slate gray on top. That's a very pretty color, but I think it's still a bit on the bright side. How about cobalt turquoise and celadon? Also, very bright and saturated. This might be three colors. How about cobalt turquoise? Where did olive green go? Actually, I wonder if pression green will work for that? Pression green, and then sage. That's looking closer to what I might want. Let's try that. We're going to see how this goes. I can tell I'm still going to need some other really dark color there, and I think I might just rely on a really dark gray. This is French gray, I think, 90 percent French gray. No, it's 90 percent warm gray. I'm laying that down a little bit in the deepest shadow because I already have some colors that have a lot of white in that deep shadow and I don't want to put too many more. Like this gray actually has white in it, the celadon green has white in it. If I get too much white in there, I'm never going to be able to dial it back. Oh man, it looks so bright but doing a really thin cobalt turquoise. Then I'll do a little bit here. Shadow part here, and a little here. I'm probably pressing 15 percent of what I could press. Now you can do quite a lot of blending and mixing and layering. I'm going to do one more test here. What happens if we do cobalt turquoise with dark green and then slate? Bit too blue I think. We'll stick with cobalt turquoise, then pression, then slate. Yeah, you can do quite a lot of mixing with colored pencils. There are a lot of people who do mix more of their own colors, but personally, since I use them for work and since this is my vocation and I'm often working on client projects that have short deadlines and quick turnarounds, it's much simpler to have something very close to the color that you want and maybe only have to mix it or layer it with one or two other colors. Well, with really one other color as opposed to what we're having to do here, which is really carefully lay on a few different colors. This will be up to four colors by the time we're done. If you're doing that all the time, it just ends up eating up a lot of time. Do a little more around the side here.
43. Milkweed 10: Still pressing really light. Another thing actually that can change the color, if you press very hard and you end up burnishing, it can make the colors bleed through in a different way and can give it a different temperature, different saturation. It can really change things quite a lot. That's why for me if I'm layering I try to go really light so I have more control. Let's see. I'm going to grab espresso, and 90 percent French gray. Let's see where this gets us. Now I am trying to do a little bit of a particular shape with the marks that I'm making. I'm trying to make some little circles so that I have a center area that looks a little lighter. I'm not going to be able to do it perfectly, and that's fine, because this is stylized. But I want to have some indication of the little kind of, what do they look like, little pokey thingies. They're not quite thorns, but there's like a nubbly, pokey texture to the surface of these things, and I want to at least allude to that. It's going to let me create some sense of that. Still using the espresso, laying down a little bit of a heavier layer here on the side. I want more of a shadow than I have right now. This is the 90 percent French gray, bit too brown. Now over here instead of doing the little circles, I'm doing some little lines that look like shadows on the backside of the spikes. I'm going to add a tiny bit of black in here. Really soft to make it look like it's sinking down underneath, a little bit up over here. Still continuing on with the little lines to look like spikes rather. Now I think I'm going to grab celadon. I'm going to try to create a few little spikes poking out. Now I will say I tried to pull some color cues from the reference, as you know, that's part of why I pushed this towards the blue end of the spectrum. But at this point I am actually really wishing that I had just kept it consistent with these, would've been less realistic, yes, but I think it would have been nicer for the overall piece. But this is where I'm at right now. We'll see if I can change it at all. Now I'm just adding some of these little spikes sticking out from the side of the seed pod. Just like I did when I was working on the flowers, I'm trying to avoid making these super perfect and I want to preserve some element of irregularity, otherwise they'll just look really boring. We want this to look like it grew, not like somebody made it. Now I'm going to do a few of them on the surface of the pod as well, again, trying to give them that pokey vibe. Adding a few little bits of Kelly green here, just in an attempt to pull together some of the color of the leaves and the color of these pods misty green. Doing the same thing. Trying to use the marks to indicate where the edges of the little spikes are. This is going to really be helped by white as well. Let's do a few more little spikes. Now I'm going to come in with the misty green, all by misty green. Adding a few more little highlights. This thing has the same highlight pattern as the stem, it's a little bit backlit. Adding a little bit more shadow here in the center. This is tough, I can't quite get the color that I want. It's making me think I need to search for another green that doesn't exist yet. Let's add a little Kelly green to this stem, and then maybe a tiny bit of a misty green as a highlight there. I think we're going to pause on that for now. Let's get these leaves done, and then we'll move up to this whole quadrant here, which I'm super excited about, it's the most interesting-looking part I think. Sap green light for the inside. Then we'll do Kelly green over on the other side. This is an underside, so this is actually going to be an all-over Kelly green glaze as well.
44. Milkweed 11: Let's block in some of this bronze here at the stem, and here at the base, and for this one as well. Getting confused thinking that why did I put this giant stem on this leaf? But this is actually this stem right here. Once there's color in there too, that'll look more connected. On this piece, the stems I mostly just made up similar to the other ones I've created the shape that I wanted and then just made stems to fit and work within that. Just pulling up a little bit of this white smudgy stuff because it's confusing me and making it hard to see what is what. Let's get these more defined, do a little bit of the Prussian green here on the inside of this leaf, and then maybe some, where did the dark green go, where is the dark green? Dark green in the corner. You know the deal, to help it sink down a little bit more. Anytime we use the really dark colors, it's going to help press things down, make them look more like they're underneath whatever else is around it. Of course, the one tricky part of that is if it's really saturated like this is actually pretty saturated green, that can sometimes make it pop out a bit more than you might want. That's something I'll decide about at the end. Right now, all these little shadow areas are looking quite saturated, so I may end up going over those with a little bit of a gray just to knock them down a bit or maybe even a red. I like to do that quite a lot. Use complementary colors to dull the saturation. This is sap green light. Just wanted to create a soft little highlight up there. I don't want it to be super bright, but I do want a little highlight. Now let's pull a little bit of the Prussian green up on the inside so it doesn't feel like such a block of dark green down there, and then here there is a little curve right here, so I think that's going to be the highest point, that's going to be the highlight. Block that in, and then we'll put some Kelly green down here for a shadow, a little Kelly green in there, and then the rest we're going to blend out with sap green light, I think. Let's see. There we go. Pull a little bit more of this up in. Sometimes it takes several layers when you're mixing two colors to get the blend that you want. Let's do a tiny bit Prussian green here, make it sink down a little and then this, I think this is all underside, but we're going to make this side over here feel a little bit darker, like it's pulling back and away from us because that's what it is doing. I'm putting down a little bit of a heavier Prussian green right now along this stem, and then some of the Kelly green, again with the heavier application. It's helping us not only to make it seem like this side is pulling away, but we're also creating a little bit of dimension here. The leaf has a really interesting fluttery shape to it. It looks very natural. It's not a fake-looking leaf. Hitting a sharper point on here so I can make some of these edges nice and clean, and crispy as I like to say. I know technically it's crisp, but it feels crispy. It looks crispy that's why I like to use that word. Now this side, let's do a dance back and forth between the sap green light. I think we'll just sap green light up towards the top, and then Kelly green down towards the base. Probably even a little tiny bit of Prussian green down there. Yes, definitely. Then we'll pull the Kelly green all the way up here. The one tricky thing is this spot here, we're going to have to find a way to create some separation there, so I think I will do a little bit more of the Prussian green, a little bit more dark green in here, and then some more of the Kelly green to make this feel like it's down and under a little bit. Then maybe we'll just pull some of this sap green light along the bottom edge here to create a highlight and help it pop up. That works. I have a large surface area. I'm just using the flat side of the pencil to lay it down. I'm going to use a little bit more Prussian green here to create the suggestion of some veining. I'm not actually going to put the veins in I think, because I don't want to draw too much attention to the leaves with a whole lot of attention-grabbing detail, so I think I'm just going to stick with creating the suggestion of the leaves, or the suggestion of the veins, but not actually fully drawing in really well-described veins. I think I need a little bit more dark green here, otherwise it just looks dissonant with the other leaves. Little bit in here too. I want to get a nice sharp point right there, and then I'll finish off these stems, and then we're going to go work on all that fun stuff. Let's get those stems finished off, so I need chocolate and dark brown. Again, I'm trying to create those drop shadows. It looks like the stem is underneath the leaves.
45. Milkweed 12: Okay, now, seashell pink, which is really not pink at all, but like a sandy beige almost like a cool beige, that's the way to describe it. Using this on those edge highlights. Although that's a little too intense, I think. I should maybe just be a little quieter with not quite so much highlight since it's down and underneath this part can stand out a bit more. Although, it still has a lot of white on the edge. Let me do this first. Then come in here with this sharpening up the edge and then also adding the texture to the stem. Same thing down here. Texturizing the stem and creating that little side backlit shadow. Even trying to make the edge of the stem feel a little bit bumpy. Back over it with some chocolate to warm it up. Now, we have seed pod, these three flowers, and the butterfly. Well, I really want to do the butterfly, but let's save the butterfly for the end. I'm going to do the same process that I did with these. I'm going to try to articulate these little flowers. Then I'll add the outside, then we'll do the interior petals, and then I'll go through with all the details. Excuse me. Just do the exact same thing, doing a little circular shape here, more like an oval to describe each one of the petals. I think I'm going to add another little flower here. Just a few more that I want to squeeze in. I didn't get quite as developed in this sketch as I did on the other two. Do the same thing I did on those ones. A little bit of a soft edge, just putting some lines down here. That's another flower back there. This is one right here. Let me just put some bronze down here so I don't lose track of that stem. Let's get this one down. All right. Adding this little edge in. I'm actually zipping through this a little bit on a quicker side and I know I'm going to come back and put some more things in here, but I just want to get a sense for how the scale is going to work with these three. This is another one back here. Another blossom. Let me pull back up this reference image. Same thing over here. Getting some of these flowers laid down and then we'll put in the interior petals. Just adding a few little bit of stippling with the pink around the edge to create that sense of roundness. I also want to clean up a little bit here. Here's a few, oh no, that's from a leaf. That's good, I didn't erase that. On that note, since I was just about to lose my spot there, I think I'm going to go ahead and put down, some Kelly green here so I can see what's what, just a thin glaze similar layer. I'll finish that leaf off after we do the flowers. I just wanted to get these down so that I can see what's there, see what the values look like around these flowers. This is the underside, so that should be Kelly green as well. That's better how we can see what we have to work with there. What did I use? I think I used henna for the interior blossoms here. Going to sharpen that up. I'm just going to do that same thing in between each of the pairs of pink petals.
46. Milkweed 13: I'm inserting one of these other interior, the deeper pink petals. Just trying to follow essentially the structure that I see in the reference image but obviously this is a stylized and simplified version. I'm just going to work my way through all three of these, each of the steps for all three of these. Now I'm going to come in with the lavender and do the edges of the interior petals. Now let's do the white around the interior petals and then we'll start shading to bring it all together. I'm definitely pressing hard here but probably only like 60 or 70 percent because if I press super hard it's just very difficult to maintain any point with this pencil because it still means not as soft as the other one, not as soft as the Holbein one but it's still quite soft. Then I'll just end up having to sharpen over and over and over again. All I really need is a little bit of lightness on the edge here. I don't need it to be a completely opaque application. Just wanting some crispiness on the edges. These ones, since this is in the background I may not want these to get quite as to find. I'm going to add some little centers here. Actually I think I use the pink and I'll come back around with the chestnut. Now I want to do a mahogany and black cherry or do black cherry and there we are. Mahogany is going to be out towards the edges there and I'm just doing, it's basically stippling. I'm hitting the surface like dotting it down to the surface and then wiggling the pencil around a little bit but it's similar to what you would do with the brush. Then here with the black cherry coming into just a few of these little in-between spots. The goal is to get most of the in-between spot, so along the outside filled up so we don't want to do any of the black cherry over there but here on the interior, it works well. Excuse me. Stippling with the mahogany on the outside. Can see they're already starting to look more round. Now let's do some more exterior petals with the pink. Actually let me just get the interior circles with the chestnut since I'm thinking about it. I'm not going to do this on all the flowers, just on a few of them. Pressing pretty light here as well because I want to maintain that point. Now, can I try to create those petal flower profiles. These ones that are in the back and that are a little bit smaller. This one is on the smaller side and this one is in the back. I'm not trying to get quite as well-described quite as clear on these. I'm not trying to make them look as much like a well-described petal as I am going to add this one and as I did on these, they're a little bit more of a uniform soft edge because I don't want them to pop quite as much. This one I think I'm going to make it go down inside the leaf a little bit just because we're ending up with the same problem that we had here at the Queen Anne's lace where there was a little bit of an awkward intersection so rather than having these two things just bump right up against each other I'm going to try to make it look like this one is truly intersecting. That's going to be better I think. Now, let me do some more really clear petals and then I'm just doing same thing that I did over here, I'm fading them in a little bit. I don't want just the really light ring around the outside. I want it to have a soft fade so that it looks truly round. Same thing up here, fading it in a little bit. Now I'm going to use, I realized I forgot a step. Dusty rose on the inside of some of these petals and I'm also going to use it down here I think because it's a little bit less saturated, it's a little more gray and I want this one to sink back a tiny bit. Now, a little bit with the white, I'm just going to add a few petals on top. Back over with the pink. Same thing up here and I think I'm going to keep the white off of that back one because I want that one to sink down a little bit more. I actually need to think of something to do to push that a little bit more down. I think I'm going to take this warm gray here to see what happens if I do just to a little bit of that where the top of some of these wider flowers and maybe right here as well. Yeah, this is tricky because I want it to look like it's down below but I don't want to get muddy. I think I'm going to just probably stop while I'm ahead and try not to do too much more.
47. Milkweed 14: I think that'll be good for now. Because I'm going to come back in with the soft white and lay down some more intense colors. For right now let's get some of these leaves finished off and then we'll do the seed pod and then we'll do the butterfly, I've been saving the butterfly for last. Just used some color green in there. This is the misty green I've been using for my highlight. I think I'm going to add a stem, I keep calling it a stem but I mean the center vein. I'm going to add that to this leaf down here. Get a little bit darker with the color green and I'm going to add in some Prussian green here, so let me sharpen that up. Pushing that down towards the base of the leaf to make it look like it's curving down, curly green up top and then I'm going to use this sap green light towards the tip of the flower. It's going to be a highlight. I don't remember if I've talked about this in this course so far. I know I've talked about it in other courses but with highlights and shadows, really anything can be highlighted, any thing can be a shadow. You just need that color to be lighter or darker than what's around it. Even though sap green light has been a mid-tone on a lot of other things. Since it's right next to the Kelly green, it's going to read as a highlight over here and I don't need to even come in with anything as dramatic as the misty green. Putting a little bit of Prussian green behind this leaf, just trying to make it clear on what's happening there. Now this one, what did we decide? We need the sap green light for the upper part, the mid-tone part and these are both underneath. I would start with the Kelly green but I think I'm just going to actually go right in with the Prussian green on this one because the Kelly green is on the inside here. I already know I'm going to need something that's a little different. Otherwise, they won't read as separate planes. I'm just going to do a little bit of a darker application, thicker application rather. Try to get more opacity. Going to put some Prussian green in here behind this flower head and then down into the little crevice here. I think I'm going to put some dark green down there as well. Now, I'm starting to really think about the end of this piece and how we're going to wrap this up and I'm wondering whether we should do those final white highlights first or whether we should do the butterfly first. I really was wanting to save the butterfly until the end but I think probably makes the most sense to do the final highlights at the end. Back to the Prussian green here. Let's put a little bit of sap green light here at the top and then maybe right here as well. I will blend this in with the Kelly. Then I'm going to do a little Kelly green down here for the shadow. Have your application of sap green light. Heavy application of sap green light here as well. Nice crisp edge. Now, I'm going to put in the misty green right here. Since that's the lightest part hand right here. I need just to a little bit of a fade with the Prussian green on the edge of that leaf. Just a bit too sharp of a decline there. Looks better. Now, I'm going to do really thin a little bit of the center vein, be visible on the underside of the leaf. Here we go and I'm going to put a little bit of the dark green in here too, make it clear that that's curving down. Now, let's do the seed pod. Let me think through what my approach is going to be here. But I think I'm first going to try to get the exterior structure of the seed pod. I going to make this big, so you guys can see it. I hope that's okay. The exterior structure of the seed pod and then I want to get some of these little interior seeds and we can see that they're attached to these little hair almost, really long corn silk colored hair. I'm going to do that part last because that's the least structured. I think we're going to use seashell pink again for this actually. Where did that end up? There it is. I'll do the middle burnt ocher for that and I'm going to need some gray as well. I think I'll use the French gray that I had been using on the nog lid flower. I will do a really light seashell pink first. Super soft not really pressing hard at all, just getting color blocked in for the outside of the seed pod here. I want to clean up a little bit more, so I don't get confused. Now, these little guys, I'm just going to lightly lay these and I'm hardly pressing at all. This luminance pencil is very pigmented. They tend to be on the more pigmented inside in general than Prismacolor. But they are also not quite as soft in my opinion and they are super expensive. They're like three times the price of Prismacolor. Little more right in there. Now in this one, I may not actually fill in all this area I make try to have these fade into the black because the inside does have some really, truly dark areas, darker than anything up here has.
48. Milkweed 15: Right now I'm just putting a little bit of brown in the tops of some of these seeds that are underneath and fading them into the background. This is the background. A few other little seeds there. Now I'm going to take this as the ocher, 50 percent, which just means it's cut with white, so it's the same pigment, it's the same color, same hue, but it's a lighter value. That is something really nice about luminance. They have that in a number of different colors where they've just created essentially the lighter version of it. I'm using this to create that sense of dimension, the particular shape that these little seed pod guys has. There's a highlight around the edge and a highlight in the center. Again, just like with these ones, I don't have to get every single one of them equally detail. If I get a few that are in the foreground nice and detailed, that will go a long way. Yeah, I think that's about what I want to do actually. I want to do that much more [inaudible]. Now I'm going to pause on those and take the 30 percent french gray, do a little bit of shading here on the side of the seed pod. It's very bumpy but it has almost a fuzzy look to me. I'm going to add some bumpiness to the outside here. I think I'm going to use a little bit of dark brown actually, where's the espresso? Let me use espresso. Espresso is little cooler, more gray than dark brown is. I draw really, really faintly using this to create some dimension. Now, the challenge I've run into here is that the color that I laid down initially, the seashell pink has so much white in it. This actually should be pretty light but I need a little bit of shading here so that that 30 percent french gray just wasn't cutting it. I probably should have done that as the base color actually. Yeah, looks good as the base color. I'm going to add a little bit of the brown to the inside here and a little more seashell pink, but this time I'm laying it down a little bit more thickly and I'm trying to use it to create a little texture. Now I think for the fronts, I'm going to go with that color that I was using yesterday, the titanium buff for tobacco. I've too many colors at this point. Now I have [inaudible] started. There it is. I'm going to start with this which is called beige mastic which is like a very warm, almost pinky gray. Then this is the buff titanium, the warmer white, and then this is sable or sand I think. Well, sable, at least the french one is still on there. It's PC940. These two are both prismacolor, beige mastic and 940 are prismacolor and then buff titanium is luminance. I'm going to get all of these sharpened up because I need a really nice sharp point to get the little fronts of fluff. Now again, this isn't going to be super realistic, it's going to be stylized but I do still want to pay attention to some of the structure here. The temptation when you're doing this thing can just be to flick on a bunch of little hairs. But if we look closely we can see that there's lots of ups and downs. There's these little lines in here that indicate where there's a gap in-between. Then this here as well, it's going down over by the seeds and then coming up, and then going down again. I'm going to try to articulate some of that. Then we also have basically like two layers here so we see the seed and then the little furry bits, and then the seeds and then the little flurry bits. I'm going to try to get all of that expressed in here. First of all I'm going to I think come down the center here and put a little bit of yellow in there. There's a little bit yellow in the corner here too. A little bit of yellow at this edge. Then we have the little fur that's sticking to the seeds. This is beige mastic, what I'm using here. I've been super, super light just trying to get some of that structure down. I'm going to use the buff titanium where I see a few more highlights and I'm just going to do like a really rough lane of what I see as a highlight. I really don't want to get too dark or too bright here with a subject that's just overall so bright, like what we have right here. There's so much lightness in it. It's really easy to lose any sense of depth or dimension so I want to make sure that we retain what we can. Even just doing it a heavier lay-down of the beige mastic will still function like a highlight. Here are the areas where I want to put them more heavy application of yellow down as well. I'm going to do a few little wisps out to the side [inaudible] center I think. I'm doing some more of the highlight here with the titanium buff.
49. Milkweed 16: A few little highlights here. This needs to come up to, way too dark. This little interior area right here is actually quite a saturated yellow. I'm going to darken that, and then pull in some more of the buff titanium. Do more little bits right there. I'm adding a little bit of bronze up here as the shadow. I want it to look like this fluff is peaking out. I'm going to sharpen it up again. I'm going to get some more fronts. Then I may actually coat quits on this part fairly early because I just don't want it to get overworked with this. It will start to look not good very quickly if I get it overworked. Beige mastic. Now this actually needs a little shadow in addition to that saturation. That's good. I think it needs a bit more over here to. Then maybe a little bit right here to. Then some highlight up top on the pod. This is nice and sharp. Let's do another couple of crazy bits flying out, and then a few more little highlights on the seed pod itself. Now we'll come back to that with the super opaque white. I think that's going to be good for now, and how we are going to move on to the little butterfly. I think what I'm going to do first is lay down the orange. Then I'll go in with some white. Probably not pure white, but some white for the wing spots and the spots on the body, and then we'll be leaving quite a bit of it black. I'll have to figure out whether I'm going to do any additional black or an outline or something. But I think these interior spots here, these look like a reddish orange. I'm going to start right away with the pale vermilion. It's one of my all time favorite Prismacolor colors. I use it all the time for all different sorts of things. It's a really just luminous, nice, warm red, sorry, orange. Vermilion is a red color which is why I always think of it as a red, but it's technically. It looks like an orange. I think that could even get a little more intense. I'm going to add some poppy red to it. Then I'm going to grab this sunburst yellow here. Well, that glue didn't work. That's going to make it difficult to sharpen. Let's see if I can get what I need. It's a little bit on the yellow side, but I think I'm going to just do this as a really thin layer, and then I'll come back in with some orange over the top of it. There is just regular. This is just straight up Prismacolor orange. I'm going to go over all the top of those areas where I have the sunburst yellow. If you have Prismacolor Spanish orange, that probably would've been the best color for this. But this is what we have now, so we're going with it. This is another luminance color, it's called pink white. You could just use white for this, but I'm going to go ahead and start with pink white, and put some other dots that are on the body and on the wing. Now, if you do have something like aluminum, that's a sharper pencil, it would be really nice and helpful at this point to use that. The Prismacolor white will work but it's softer and more crumbly, you'll have a harder time keeping a point on it. Now, what I'm going to try really hard here is to avoid just making polka dots. I'm going to try to make these a little bit variated in terms of there shape and there placement. I don't want it to just look like a row polka dots. I want it to look natural even though it's stylized. I still want to have that natural randomness that we would see out in the real world. [inaudible] interesting. There we go. I just realized that this wing right here is actually, this is one wing and then there's the other wing right there. I got confused on my sketch there, so I almost lost that detail. But thankfully, we have it here. Just continuing to polka in some of these little lighter areas, these white spots. Some of them are actually a white orange. I'll do layering to get the color that I need. Then up here we have the same pattern as we did down there with two rows that have dots.
50. Milkweed 17: I think I may end up just leaving some of this white outline or even sharpening up this white outline because it's the best way to help the wings stand out from the background. I don't know. I'm not positive whether I like that or not. Let me see how it looks if I get rid of some of them. I'm going to just lay down some black on the inside of this wing. Put some dots on the body here. Adding a little more black. Let's see. No, I think maybe I'll do a dark gray, maybe [inaudible]. Adds a little bit of a highlight underneath the body to help that pop out from the background. Here we go. Let's see about this for the legs. Think that may be about as good as we can get with the butterfly. I think that's going to be about it for the butterfly. This is literally the one part where being on the black background was more challenging, not less challenging. I hadn't really thought that through when I decided to put the butterfly in this piece, that was a little bit of a last minute on a whim decision. Next time I will think more carefully about all of the parts that are going to be seen because this butterfly having an all-black body just made it really difficult to completely see the details. But that being said, I still like how it looks, and I like having that pop of color up there. I'm going to go ahead and do the very finishing touches with the Holbein soft white. This is just really going to help things pop out and give them that nice, shiny, waxy look. Just picking places that are consistent with the lighting scheme. Anywhere there's light or anywhere where it seems like a light would potentially catch one of the darker areas, that's where I'm adding this. Then if I ever feel that it's too intense or too different of what's around it, I'm just going to blend it in using the misty green. I'm going to get a few little bits down here on the seed pod. Now, I'm going to do a little bit on these. Let's see. I'm honestly not sure if I like how that looks. Going over a little bit more with the pink to soften it up, and then I'm going to break some of it up with the henna. Just looks a bit too solid to me. [inaudible]. I'm going to try taking up a little bit of it because it's just a little too intense. Here we go. Just going to do a smaller amount on this one and more focused and concentrated on the top of the blossom. That's good. Now I'll do a little bit on these two, I think. This one I think I want to do this exterior edge here to make it pop out from the back. Here we go. Then, down here, going to hit just a few of the highlights. That is honestly what it seems like it's the most well-suited for. It just blends so silky and nice on those areas. Here we go. Maybe a few little spots on the butterfly. I think that's about it for this piece, which means that we are just about wrapped up on our demos. Not just about, we are wrapped up on our demos. I'll do one last little show of each of these pieces so that you can see them all together, then we'll move right on to wrap up.
51. Share Your Class Project!: Before we wrap up the class, I just wanted to pop in here to really encourage you to work on a class project, finish a class project, share class project. If you have been working along throughout the course as you've been viewing these demos, then you already have your class project, you're ready to go. All you have to do is share it, just take a picture of it, scan it, use your smartphone to grab a picture, whatever is the easiest way for you to get it up. You don't have to have it completely finished before you share it. You don't have to finish all three demos certainly or finish three pieces. Just finish part of the piece or do a little bit towards it and then post it to the class projects and get some feedback from your classmates. I will pop in there as well. If you haven't yet, if you haven't been working along with the demo, if you've skipped around a little bit and viewed some of the demo first. Then, I would encourage you to dive right in yourself and to get working on the class project. Doing these things yourself is absolutely the best way to learn how to do it. That's why even as I created this real time piece, real-time class that you could follow along with with every single step, the intention is never to just give you, here, follow these steps and this is going to be how you create it. The hope is that you're going to use that as a broader influence to learn how to actually make these things yourself. Of course, while we have been creating these pieces with botanical focus in terms of the subject, you can really do it whatever you want with this. You don't even have to work on black paper if you want. You can work on a different colored paper or on white paper. Take something that you have learned from this class if you haven't been doing the exact class project all the way through while you're watching the demos. Take something that you have learned from this class and make something out of it. It doesn't have to be the exact thing that you saw me make. It can be something that you make from what you learned in the class. I really encourage you to do that. Share it to the class projects, and thank you again for taking the course.
52. Wrap Up: That is it for this class. We are done with all three of the demo pieces. This is probably the longest class I have ever made, so I hope you enjoyed it. Please let me know what you think. You can always find me on Instagram, at Kendyll Hillegas. If you like this longer-form content, it's great for me to know because I, first and foremost, want to make classes that are helpful for you, classes that you enjoy taking. If you do like the longer-form real-time content, then let me know because this is significantly different than what I usually make. Thank you so much for taking the class. Thank you for coming along with me as I experimented with a little bit of a different approach, different media for me. It was really fun to have you in the studio with me and I am excited for whatever we do together next. Good luck on your own pieces and yes, don't forget to post them on social media and tag me at Kendyll Hillegas so that I can see what you make. Bye.
 Kendyll Hillegas, Artist & Illustrator