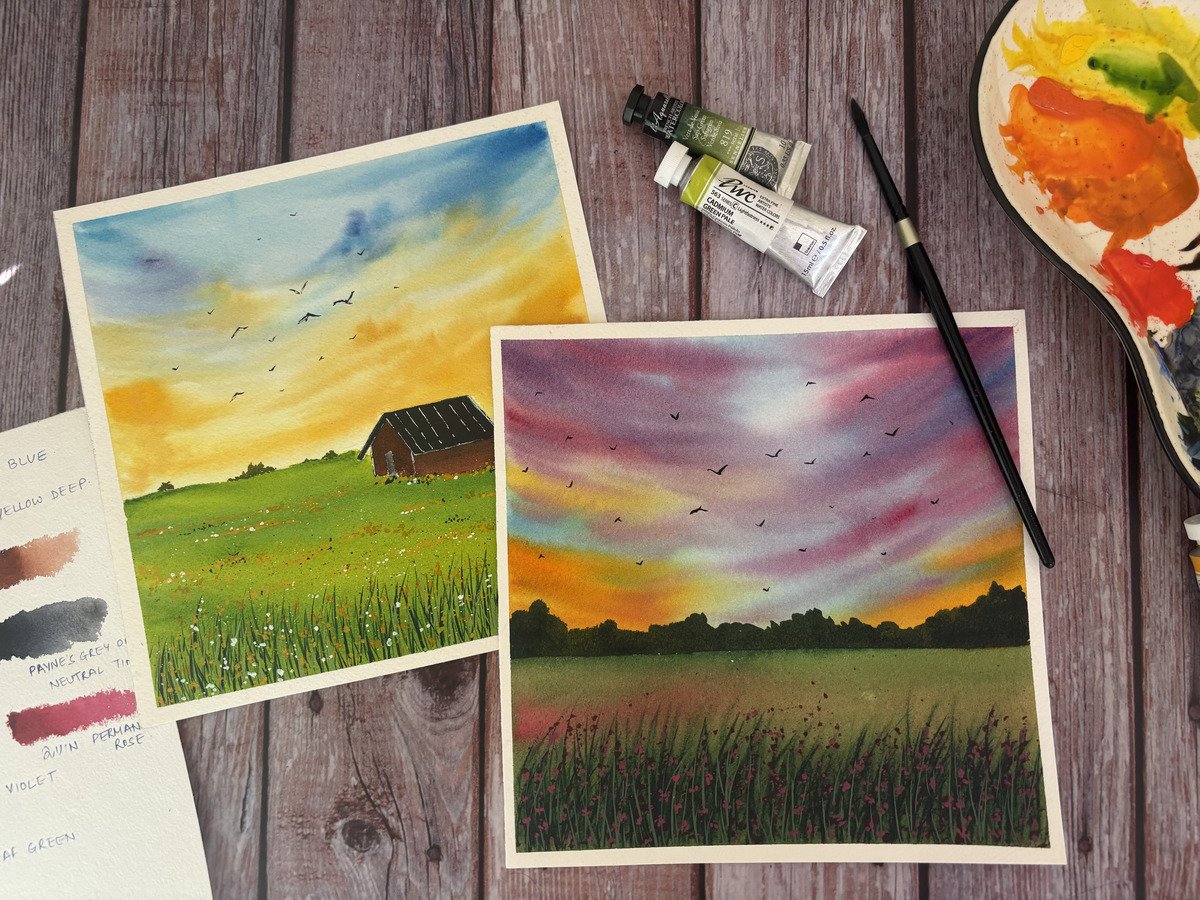
Transcripts
1. Introduction: Hello, everyone. I'm Shalika,
a watercolor artist, and I welcome you
to paint with me 15 days of easy
watercolor landscapes. I am so happy that
you are here and I'm excited to paint alongside
with you for the next 15 days. Whether you are a complete
newcomer to watercolors, or you have been painting
for some time and simply wants to build a
consistent creative practice. This class is designed
to help you enjoy process of painting one
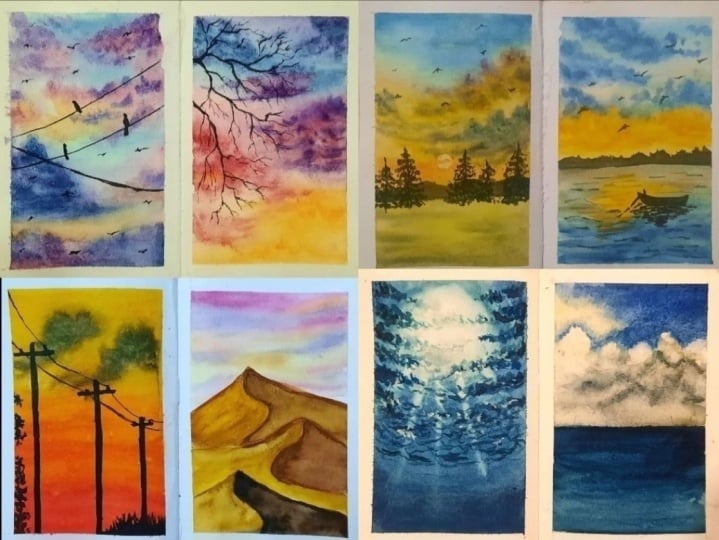
small artwork each day. Over the next 15 days, we will create a collection of beautiful beginner friendly
watercolor paintings inspired by nature and
peaceful landscapes. Each project is thoughtfully
designed to be approachable while helping you explore essential watercolor techniques, such as creating smooth
washes, blending colors, building layers,
adding textures, and finishing your painting
with simple details. This class isn't about
creating perfect paintings? It's about showing every day, enjoying the creative process, and becoming more confident
with each brush stove. By the end of these 15 days, you will not only
have a collection of finished paintings, but also a stronger
understanding of watercolor and the confidence to build your own landscape. I'll guide you through
each project step by step, sharing my process, color choices and
techniques along the way so you can paint
comfortably at your own pace. So grab your enthusiasm, set aside some creative
time each day, and let's begin this wonderful watercolor journey together. I can't wait to see
you in my class.
2. Materials: Let us look at the materials that we require for this class, starting with the papers. I'll be using Archie, 100% cotton, 300 JSM paper. I have this paper pad with
me and I've cut these papers into these smaller size
papers for us to paint on. Then we need the brushes. These are the brushes
that I have used. I've used this Hake brush to apply even coat of
water onto the paper. These two large size brushes, one medium size brush, and two detailed small brushes. Moving on to the colors, I use mix of colors
from different brands, megaloms, shin hen, Sennelier, white knights, and I use
this squash from rostro. Then we need
watercolor palettes. I use these two
watercolor palettes. I always have colors on them
so I don't wash it off. You'll have one jar of water. You can also have two so
that you can have one for clean water and the other
to clean off your brushes. We will also need masking tape to tape down the
paper onto a board. This is the board
that we will use to tape down the paper
with the masking tape. Next, I have this rough cloth. You can also use a tissue
paper if you want. This is to dab off
your excess water and to clean off your brushes. We will also need a
pencil and an eraser to sketch out for our sketches. That's it for the
materials for this class. Gather all the materials
that you have, and then let's start
with the 15 day journey.
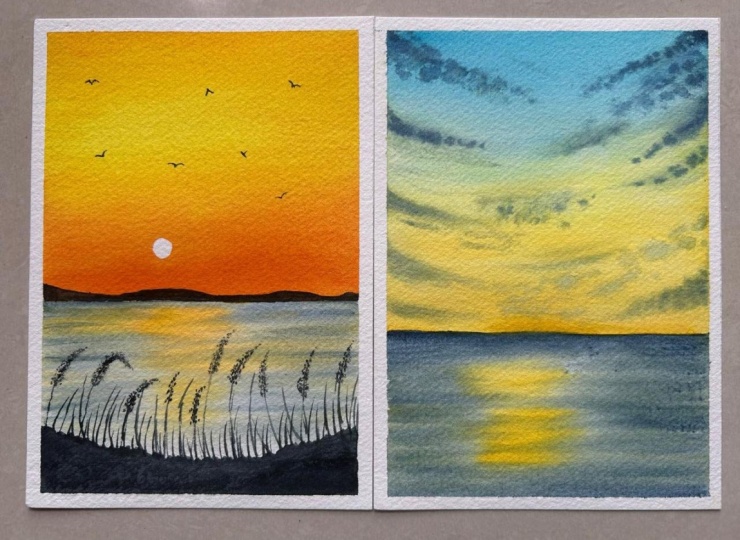
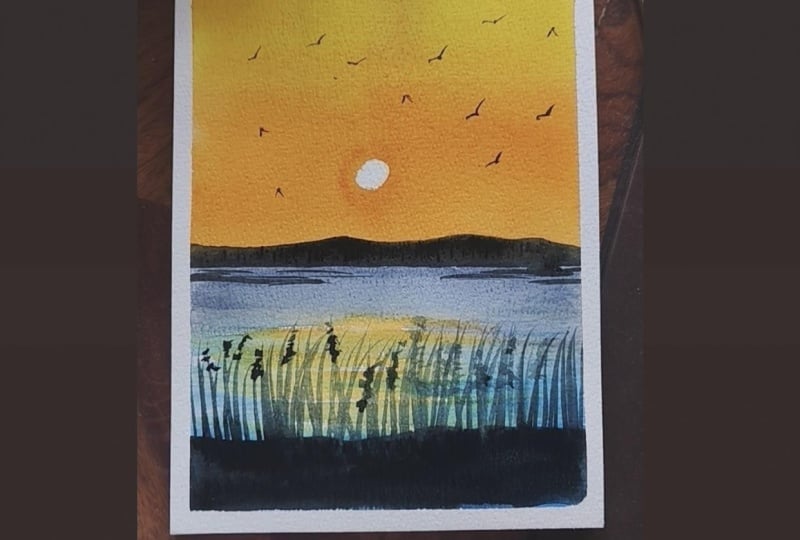
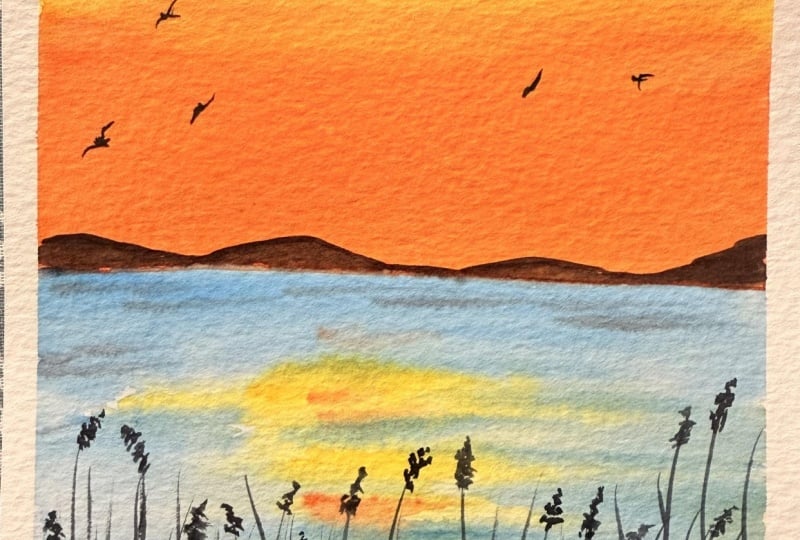
3. Day 1 : Beach Sunrise/Sunset: I have my board, I
have my paper ready. I'll just tape down this
paper onto the board. Okay. Make sure to run your fingers between the gaps
of the paper and the tape. Okay, now for a quick
sketch for this one, we have our horizon line
somewhere over here. Okay? The sun is
somewhere this side. Okay. And we have our brushes, and the water come
somewhere over here. Okay. Let me just using
the kneeling azul, just lighten up these
graphite marks. Okay, now this is my hake brush. I'll just apply an even coat of water throughout
the sky area. Using your tissue
or the rough cloth, dab off all the excess
water from the corners. And now switching between the large size brush and
the medium size brush, we will start with the painting, taking in yellow, dabbing
off the excess water, start with the sky. Okay? Moving to Indian gold
and adding that as well. Now I'll switch to the
medium size brush. I'll take in orange, tabbing of all the excess water. We'll try to build in the
bottom section of the sky. I will mean adding
that depth to the sky. Just playing around with the colors that we
have already applied, the yellow, the Indian gold, and trying to build in
the sky bit by bit. So you will have a
yellowish tone coming in from the top and you
will have darker, orangish, reddish tone
coming in from the bottom. That is what we are trying
to add in over here while trying to maintain the
whiteness around the sun. Okay. We're taking a
little burn sienna and adding that to the
bottom of the sky. Okay, what I'll do is
using this rough cloth, I will just add on to
the sun that we had built right and try to remove the colors
from the sun area, taking a mix of burn sienna and vermili and just adding
that to the sky. I will have some
yellowness over here, so gust adding that it
can be more vermilion. To blend it out,
taking some orange, dabbing of excess water, and just blending this
out with the sky. Similarly this side as well. Okay? What I'll do is just try to maintain the
circle that we had created. So I'm just lifting
off some color from around the sun to bring
in that brightness. Okay? Just clean up your brush, tab off all the excess water, and just lift off the
color from the sun area. That's it. Now again, taking a little bit of orange and just trying to blend it out. That is major for the sky. We will just have to
be mindful of the sun till the complete
layer dries off and keep on lifting of the color as in when we see some color
coming in onto the sun area. So till this dries off, just be mindful of this. While this dries, and I'll continue to have a look at this, using my hake brush again, I will just apply even coat of water to the bellow section, but being careful of the fact that we have
the color over here. I've left some gap. I don't
know if it's visible, but I've left some gap between
applying this new layer of water and the colors
that we have from the sky. Let me just dab off
all the excess water. Okay. Let us also
tap in onto the sun, again, using the dried brush, lift off the color. Now using indigo, we will just add in some streaks like this. Okay? I'll take an orange and add in some layer of the orange tone as
well to the water. Okay, the middle section
would have more of orange. And taking indigo,
dabbing of excess water, I'll just try to add lifting off some color
and trying to see it doesn't bend off it again, little bit of more
indigo and trying to build in the layers
on the water? That's it. These thread
like streaks that we have, I'm just working out to remove these, just
blend these out. Taking a little bit of more
orange and trying to just get that into this middle
area that we have. This will have a lot of
reflection of the sun, just trying to maintain that. Now, what I'll do is I'll
take in my detail brush, take indigo, and with that, I will just try to
add in some layer of indigo waves between the
oranges that we have. C say I'm working with
a very light hand, just adding in some streaks
here and there, okay? So streets in between
these oranges. Just blending this out
with a dried brush. Almost there is
no water on this. Just trying to get that
round shape of the sun. Okay? Okay. This one, don't worry. We will anyways have
a mountain range coming in on the horizon, so that should be fine. Just trying to see
if there is a way to add a little
bit more depth to the water a very light hand, detailed brush, less of water, more of color, adding
in some streaks. Water is far the
view that we have, so that's why we don't have very evident waves and ripples, but you can just try to add some to just give that
depth to your painting. I think that's all.
Similarly from the orange, I will just add some here. Now, what I'll do is this has
tried using a neutro tint. We can add this
giving an effect of a mountain range at the horizon. So I've taken very
less water and more of color to get this done. I have just added
some brush strokes of indigo color just
to give some tint. We will just add in some bushes. So for now, just adding in
this layer of neutral tint. And then we will add in the
grasses and the plants. Or taking in my detail
brush, neutral tint, dabbing of excess water, starting from this itself, I will just add in these
streaks, you can see. I'm adding these
streaks over here. Some shorter, some
taller, some thin, thick Actually, we can extend this. I think we had it
till here, right? I'm purposefully keeping
these like this so that we can build in
the grasses, okay? Now, then, just try to
build in the grasses. Some are toys, some
are shorts, some ten. Um And now what my is, we just add in some flowers
in some of them, okay? Now again, because
it's a sunset you, so you will not be able
to see the flowers. So that's why you have all of these things in black color. Adding some. Oh yeah, that's it. And what we'll do
is this section. You can just add
in some drops of water to give you some
different effect. You can see this will bloom
out and we give some effect. Now, the last thing that we do is the sun that we have right. I just use whiteqh
my detailed brush, and we will just mark it out. Very careful in this do
not rush this process. As this is sunset and
you have the sunset sky, I think if you have been
following my classes, you would know I would
not leave the sky barrel, and I would definitely
add in some birds. So just taking neutrtin
my detailed brush, and adding few birds. That's it for the class project. Some of the parts are still wet, so let's just wait
for this to dry, and then we will peel
off the masking cake. Okay, paper has not dried. Let's peel off the masking tape. This is the final look of the painting. It looks so serene, right? I'll see you now in the
next class project.
4. Day 2 : The Lone Tree: I have my paper here. Using the masking tape, we will tape down the
paper onto the board. Okay, paper is now ready. Let's look at the quick sketch. So around three fourths of the paper is
your horizon lying. You have your tree coming
in from here. Still here. Okay? And then you will have your leaves branches of the coconut tree or
the palm tree coming in like this. Okay. And this is here
your sand and beach. Okay, simple sketch
for this one, tapping off to lightly
graphite marks. Okay. And for this one, what I'll do is using
the masking tape, I will just add this over the horizon so that we
have a very crisp horizon. Okay? So this part is your sky, we'll paint that first and then we'll come to our beach section. Now again, taking
in my hake brush, apply an even coat of
water to the sky area. I'm just running my brush to make sure that
there is no pool of water that is formed
when we apply the water. Okay. Now again,
using my rough cloth, I will just quickly dab off the excess water
from the corners. Okay? Okay. Now using my large size brush and serlein blue or cobalt blue or any other
blue that you have, we will paint the sky. You can choose to
leave some white caps. It's a very simple sky, blend of fun color, leaving out some white spaces for
depicting the clouds. What we can also do is
using your tissue paper or your cloth and making it
something like a tip like this, we can paint out the clouds. See, I'm just dabbing
off my fingers, drifting up the color, and trying to get in
the clouds shape. Okay. And what we can do is using my detail
brush and a very, very diluted tone of paints
gray or neutral tint, we can add in the
shadow of the cloud. Similarly, say
this side as well. It's very, very diluted. So That's it. Now, we will wait for this to dry and then we'll
paint on our waters. The paper has not dried, t we just peel off the stape now we will
start with the sea. So I'm just taking in
my medium size brush, taking in indigo, tabbing
of the excess water. I'll just add that
indigo on the horizon, be careful of the tree
branch that we have. Taking a little bit more. Again, dropping off that color. Okay. Now, taking in turquoise green and
just blending it out, building hair turquoise Blue, seeking side as well. Just blending on this out. Oh We also adding a little bit of bright
blue just to bring in little tone
change to the sea. Okay? Just let me just add a little bit
water to the paper, and then we will blend
all of this out. Going ahead again with indigo, dropping that tone at
the horizon, okay? H Okay. Now going ahead with turquoise blue and just
adding that tone as well. Okay. And a little bit of
bright blue, too. Okay. Now for the sand, what
I'll do is I'll take an Indian gold and just add
that to the beach idea. It's okay if some of this
blends out with your blue. Okay. I'll take a little bit of burn sienna and drop
that tone as well. Just adding that near the. These thread like
streaks, right? I'm just trying to reduce them. It's okay even if it
comes in because we will add in the
white foam of the C. I'm just trying to lift off some color from here to make it
a little lighter. Okay, I'm just
cleaning up my brush, lifting off some color just
to make it a little lighter. Okay? Okay, I think that's it. This should be good. Now, we will have to wait for
this to dry before we start painting the tree or adding
in any details to the beach. Okay? The paper has
tried almost 80%. Now, we can start with the tree. So I'll start with Indian
gold diving of excess water. We will add in that
shade on the tree, okay? Well switched, burn Sienna, d of fixes watered and add
the tone towards this cod. Now, what I'll do is I'll
take a neutral tint and add that to bone
Sierra to get sepia, and I will add that tone as
well towards this section. So we will have a darker tone of our tree towards the side sunrays are
coming in from there. So this area would be a little brighter compared to
the rest of the tree. Cleaning up my brush, taking a little bit of burned sienna, and just blending
all of this out. Actually, let me
take a little bit of Indian gold and use
that to blend this out. You can add a little bit
more of neutrtint at some places just to
bring in that depth. Now, for the tree leaves, I'm going to use
my detailed brush, with the detail
brush bit by bit. Taking in burn sienna. I just adding ready
to get these lines. Now, I'll take in sap cream. Actually, I'll take
in yellow with a very little add in a very
little bit of sap cream to it and start painting this side because your
son is this this way. So you will have
some leaves which are a little lighter
in shade, right? So we'll start with that. Adding some to this
branch as well. This one, too. You can just add a little bit
in all the branches. Okay. Now I'll take
in sacre dabbing of excess water and build
this on top of it, okay? Just lay on with this, add in some larger streaks, some thick, some short, okay? So just start from the
inside and just let it go. Just leave it, okay?
This side as well. S starting from the inside, and then you can see,
I'm just letting it go. Be careful of your
water that you have. It has almost only dried, so I can keep my hand. Otherwise, you wait
for your paper to dry and then build
on this, okay? It's looking nice, as
we build on it with different layers of green, it will look more beautiful. We will add in different
tones of green as well. So this will look
more beautiful. I'll add a little bit of neutral tint to sap
green to bring in a little darker tone of green
and we'll add that on this. We will just keep on building
a little bit more of darkness to this green
that we already have. I'm liking how this
tree is turning out. Okay. I think what I'll do is
I'll just not directly take neutral tint and just add very little strokes
towards the inside. This is the darkest tone of
greens that we want to add. So I'm just taking in directly the neutral tint to
build that up, okay? And it will be mostly towards the inside the sun rays are not reaching
over there, right? And you have a lot of
leaves in the inside. That's where we will
add them the most. Okay. That's it. Now what I will do is take in a neutrtint dabbing of
all the excess water. We'll just add some dry brush
streaks on the paper, see. You can see as I
don't have any water, I'm able to create
these textures. These are called as
dry brush strokes because your brush does
not have any water. And if you just
pick up the color, this is how you get the streaks. No, I have cut a little water, so I'll just dab off all the
water still more dab off, and I'll just run my
brush across this. And coconut trees have
rings like this, right? So I'm just trying to
build in that rings. So that's why all
my strokes now are trying to bring in and
create those rings. Okay. Now for the waves, we're going to use white quash. Okay. And now with my medium size brush
and my detail brush, again, for creating
the waves as well, right, we will be using the
dry brush technique itself. It's the first
layer, we will add. So I have tapped off all the excess water and
more water to be removed. I'm just trying to
build in the waves. Taking in more color and just building on
the waves. You see? You can build in your waves. Okay. Now what I'm
going to do is using my detail brush and gouache dabbing off
all the excess water. At least for this corner right, for the beach side, I add a differentiator this is what you have
the waves coming in, so just building that here. Okay. Now, what I'm going to do is using my medium size
brush and white quash, I'll just try to add in
some these streaks, okay. Okay. Now again, using
my detail brush, I'll just try to create in these lines these forms, right? I'm just trying to bring
that some structure to a continuing with the waves. What we can add is at some places just a little
bit of waves, right. In the middle of
the Seau sometimes see small waves forming, right? So I'm just trying to add that. Okay. What I will do is, I'll take in burn sienna, mix it with neutral
tin to get sepia, and we'll just try to add that here at the bottom of the waves. When your waves touch
your sand, right, that part of the sand is the darkest if you
note it, right. So I'm just trying
to build that. And now using Indian gold, we'll just blend it out. So this is that
part of the sand. You can add it a
little bit more. Doesn't have to be just
exactly near the waves, so you can just add it as if water has
passed in from here, and that's why you have the
darker shade of the sand. Okay, adding in some
darker platters here. Okay, that's it
for this painting. Let's just wait for this to dry, and then we will peel
off the masking tape. Do one thing using
a white gelpin, I will just try to add in
some white waves on the sea. Again, just depicting
that there are waves coming in. Add some. Now, let's wait for this to dry, and then we will peel
off the masking tape. Okay, the paper has not dried. Let's peel off the masking tape. This is the final
look of the painting. It looks beautiful, right? I'll see you again the
next last project.
5. Day 3 : Ocean Horizon: Welcome to day three. Okay. Just running
my fingers across the tape to make sure that there is no gap between the
tape and the paper. There is a such no sketch
for today's class. I will just add in this tape
to mark out the horizon. Say this is the horizon. Okay. Okay, using my hake brush, just apply even coat of
water to the sky area. You can see I'm just running
my brush across the paper, the sky section and
making sure that there is no section which is left
from the application, and also making
sure that there are no pool of water anywhere
on the paper. Okay. Now using my tissue, I will just dab off all the excess
water from the corners is to make sure that the
water does not see back in to the painting when the
painting starts to dry. And now using my medium size
brush and nelar yellow, we'll start with the painting, dabbing off the excess water, and just going to apply this
color on the middle section. Okay. Cleaning of my brush, taking in orange, dabbing
off again the excess water. I'll just add that towards
the bottom of the sky. Okay. Now what I'm going to
do is using the compose blue, a very diluted tone of it, you can use any
blue that you have. My compose blue got
mixed with indigo, but that's okay because we do want different
layers, right. Just apply the color to the sky. Always start with lighter tone, and then bit by bit, you can build on the
tone of your painting. It's easier to manage
your painting that way. Taking a little bit more of compose blue and just adding the tone,
another layer, okay? Now I'm taking the yellow, dabbing off the excess water
and building that too. And now similarly, the orange. Okay. Now, using indigo dabbing
of all the excess water, I will add in some
clouds to the painting. So you can see, from the left, I'm just adding in some clouds. Okay. Similarly, taking
a little bit more of indigo and adding some clouds
from this side as well. You can see my strokes like I'm pulling off indigo
from left to right, and just trying to
add in the clouds. Okay, this side as well. Okay, taking a little bit more of indigo and adding
a little bit more of the hoisin Just cleaning up my brush
and blending all of this out to just reduce this thread like streaks
that we see the hair like streaks, trying
to reduce that. And now what I'm
going to do is using my detailed brush and indigo, tabbing of all the excess water, I'll drop in some small
clouds in the middle area. And also try to build in the clouds that we
have already added in. Okay. So it happens that
you start with a big cloud, but the tail of dead Cloud
as you come to the tail, it becomes small, right? That's what I'm trying to
build with this detail brush. Small, small streaks of cloud. Sore this side as well. And also take a little bit
more of orange and try to build some clouds below the
blue ones that we have. S here, adding a little
bit of orange clouds. This side as well. Just in some places to bring in that different
depth with the sky. You can see I'm just using my detail brush and
adding in some clouds. Let me take a little
bit more of indigo and build some clouds over
this side as well. I'm switching it between
orange clouds and blue clouds to just build
in some different tones. You can see every time
I take up more water, I dab off all the excess water because the paper has
now started to dry, and if I add in more water, it will cause in blooms, so I don't want that to happen. So what now I'll do is because I'm still not
happy with the sky, I will take in my
dakebush and with a very, very light hand and
very little water, I will just apply an even coat
of the water on the paper. And now we will
build on the sky. It's very dry at my place, so the paper is
getting dry very fast. So I'm just trying to add a
little bit of compose blue, and now taking indigo, trying to build
in the sky again. So in case whenever you're
painting and you're not very happy with
your painting, right, you can always wait
for it to dry, add another layer of water, and then try to paint again. Now I'm taking an orange, dabbing off the excess water, and just building in the sky. Now, again, taking in a
dense tone of orange, dabbing of all the excess water. Just try to add in some clouds now taking in my detail
brush and indigo, dabbing of all the excess water, we'll try to build
in the clouds. You can see I'm just pressing in my brush and trying
to build in this guy. You can play around with the sky and add in as many tones
of blue that you want. So the top one,
I'm just trying to wiggle that a little
bit more darker. So I'm just adding a little
bit more cloud streaks on top of the one
that we already have. Similarly, this side as well, just trying to add a
little bit of more clouds. Small. It's a cluster of
very small small clouds. So I'm just trying
to build that and here I will just clean it up and we don't want these
hair like streak side, so we will just clean it up. Using a clean brush, damp brush, dabbing off all
the excess water, I'm just running my
brush through the paper. This looks much better. Again take in a
little bit of blue. I will just try to build in some dense clouds or darker
clouds here as well. Now let's wait for this to dry, and then we will
start with our ocean. I'll just take in again
the tissue and make sure that the water from the
corner is all soaked in. Okay, the paper has
somewhat dried. I'll just peel off
the masking tape, and then we will
paint in the ocean. Now for the sea as well, I will just take
in my hake brush and apply even coat of
water on the paper. I'm just careful on
apply near the horizon. Just keeping a very
small gap over there. We will add our color directly. Just dabbing of excess
water from the corner. And now taking in my
medium size brush indigo, we'll just add that
on the horizon. You can see I'm being very careful while I'm applying
the color over there. Work on it very
slowly and apply the Now, I'll just
clean my brush and I will just lend this color out. Okay. So using an orange, just add streaks of it
the middle section. This section would have the most of the orange, so I'm just adding that
Tanning off my brush, just blending this out. And now, using in paints
gray and indigo combination, we will just add in the color. So you can see, I'm just adding
in indigo from the sides similar to this side as well, paper has started to
dry a little bit, so let me just
apply the color and then we will build
in the layers. Okay? Now, what I'll do is I'll switch
onto my detail brush. I'll take in
painscreen indigo mix, tab off all the excess water, and just try to add in the
layer over here, okay? Just a little bit of
wave like streaks. As I said, we will not be painting a lot of
detailed things, so I'm just adding in a little
bit of streaks here and there to just give it
the effect of water. Take in my medium
sized brush, orange, tap off all the excess water, and just try to add that tone. O taking indigo, just trying to bring out
more depth to the color. I'm not adding anything
no waves or anything, just taking an indigo
and just trying to build that tone, from the sides. Taking a little bit of
paints gray as well and adding that too
from the sides. You can say I'm
working with very, very light hand dabbing
off all the excess water every time I go and pick
up color or more water, cleaning up my brush and just
trying to blend this out. Clearing of my brush, taking in a little bit
of pange and adding the tone. That's it. That's all for the
painting for today. Let's wait for this to dry, and then we will peel
off the masking tape. Okay? So paper has got dried. Let's peel off the masking tape. The pile of copper beautiful. Looks beautiful, right? I'll see you again in the next cart.
6. Day 4 : Golden Reflections: Welcome to Day four. I
have my paper here ready. I'll just tape down
the paper onto this board using
the masking tape. For the sketch for this class, so this is the horizon line. This is where we have our boat. Okay. Have a rod like this. So this is the boat, a very simple sketch
and a simple boat and say this is where
your reflection of the boat will come in. Okay? Now, starting
with the sky, using my hake brush, I'll just apply an even coat
of water throughout the sky. I'm making sure that no
corner of the paper stays dry and also making sure that there is no pool of water that
gets formed on the paper. Being very careful
near the horizon, spending some time
on this step to make sure that the paper
is thoroughly wet, the threads of the
paper are wet. The more the paper
is wet from inside, the longer it will stay wet and the more time you will
get for painting the sky. Using the rough tissue or cloth, we will just wipe off all the excess water
from the corners. This is to make sure
that the water does not see back in when the
paper starts to dry. Now, starting with the painting, using cobalt blue or bright
blue or serlein blue will start with the sky. You can see I'm
just painting the blue till say half of the sky, starting from the top
till this half area. Now I'll take in yellow
and add in that tone. Yellow and blue when mixed
together gives you green, so be very careful when you
paint it on the edge. Okay. And now taking in orange, dabbing off all
the excess water, just adding in some streaks. Taking a little bit more
of orange and trying to add some orange clouds in
the town section of the sky. It's not a very cloudy sky, so you will not have
a lot of clouds, just adding some tones of
orange as clouds in the sky. Taking a little bit
more of yellow, dabbing of excess water, adding that in the sky. Okay? This is a very
simple sky you can see. We're not going with
very complex details, the orange is what I'm trying to build in the lower
section. That's it. Okay, that's it for the sky. Now, while the paper dries
using the masking fluid, I'll add that onto the boat so that when we start
painting the water, the boat is safe from
getting any colors on. So I'm just taking
some masking fluid. I have this old brush, add some soap to my brush. Okay. Take up the masking
fluid and just add it. I usually remove
it on a palette or something and then apply
the masking fluid. But today, my palettes are
all busy with the colors, so I'm just directly applying the masking fluid
from the bottle. That's it. Now, let's wait
for the paint to dry. Let's wait for the
masking fluid to dry, and then we will
paint out the water. The masking fluid
has all dried up. Using my large size brush, I will just apply even coat
of water on the water area. Again, I'm going
through my brush multiple times to make sure
that the paper stays wet. So what I'll do is I'll
just put this below. So what happens is all the water that you
have applied, right, all the excess water will automatically flow down
because of gravity, and then you can tap it off with your tissue paper or
with your rough cloth. Let me just take my cloth and just remove all this excess
water from the corners. Now using my medium size brush and detail brush is what
we will paint the water. First, starting with
bar glue or serlo, the blue dirty have
used for the sky, I'll just apply a
layer of water. For now, we will leave
out the reflection area. Even if some slight
color goes in, that's okay. No worries. But we will
purposefully not try to add in any color
over there, okay? Now I'll take a little bit of yellow, a very diluted tone. You can see it's very,
very light, right. So I'll just add that
to the water as well. Now, taking in orange, diluted tone, dabbing
of excess water, and adding that as well. Now, using this detailed
brush and orange, dabbing off all
the excess water, I'll add in very, very thin and light waves
at the horizon side. Okay. Using this
medium size brush and a darker tone of the blue, dabbing off all the excess
water painting the waves. So near the eye view, the waves are darker and
thicker and as you move away, it starts to become
lighter and thinner. So that's the thumb rule
that we're going to use and paint out the waves. Whenever I take in color, you can see I try to paint in the thicker waves
near the eye area. And then when I
know that the color is lighter on my brush, I tend to paint out the farther one near the horizon ones. Okay. Now again, I'll take in Takatn of blue,
which is indigo, dab off all the excess water, and just add in in some places
near the eye view waves. Okay? Now, what I'll do is using this detail
brush and indigo, dabbing off all
the excess water. I'll try to build in
these wave streaks. Okay? Taking in the
lighter tone of blue, the cobalt blue or the
serine blue that you have, and again, adding in the waves. Near the boat because
of the reflections, the waves would be
a little darker, so I'm taking indigo
and adding that tone. Now, what I'll do is I'll
take in a bit of orange, dab off all the excess water, and in between, we also add a
little bit of orange waves. Between these blues,
there is orange as well. Okay. I'm just lifting off some colors between the waves to give
it a wave effect. Taking a little bit
more of indigo, dabbing off the excess water, and just trying to add in
the waves here and there. Okay, the paper has
started to dry. So what I'll do is I'll wait for it to dry off completely, and then we'll apply
an even coat of water and try to paint
in the waves again. Just trying to lift off some of the colors in between the waves. Okay, let it completely dry off. We will add another layer, and then we will paint
on the waves again. Okay? The paper
has almost dried. I'll take in my brush and
apply an even coat of water on this side with a very
light hand as we don't want to move the colors that we have applied
in the base layer. So with a very gentle hand, I'm just applying
another layer of water. Now, we again follow the same steps and
paint out the water. So taking in the blue, dabbing of excess water
and adding the same. I'm just trying to
make the waves again. I'm just going to
add a little bit of neutral tint to indigo to get a very dark tone and add to
these waves near the pi area. Okay? Now, taking in my DTape brush and
taking in indigo, add in some of the thin streaks. Okay. Now tapping of all the excess water and with
a very light and thin hand, just adding some water waves
on the horizon side, okay? M detail brush and neutral tint adding some streaks
on the high side. Okay. Now I will just lift off some color in
between these waves. Let you take the
medium size brush, and just lifting off some
color in between these waves. As the blue and the indigo is
a staining strain of color, you will still have light
bluer shade on the paper. That's it. Let's wait
for this to dry, and then we will add
in more highlights on the waves and paint out
the boat and reflections. Okay, paper has now all dried. The waves have come
out beautiful, right? Now, we'll start with the boat. For that, I'll just first remove the masking fluid
that we have applied. So with your fingers
or with a eraser, you can just quickly
remove this masking fluid. As the sketch has
also gone away, so I am just very lightly re adding the
sketch that we had. The main reference
is still there, so just adding in those details that got
removed with the mask. Now, using my medium size
brush and burnt Siena, I'll add in the first
layer on the boot, dabbing off all
the excess water. Just adding these details. Taking in sepia. So
from the left side, I'm just adding in
Tarkaton of brown, which is sepia and just blending that
out with burn sienna. Okay. I'll just take
in burn sienna again, dab off all the excess
water and add that on top of the sepia that
we have applied, okay? Okay. Just adding a little
bit of burn sienna again on this side and just
blending that out. Now, for the other side, I'll use in sepia, a very, very diluted ton of sepia
and just add in this color, a flat wash of the same, okay? Taking in slightly
darker tone of sepia and we'll just add that on the
edges and let that blend out. Now, while this dries, we paint out the reflections, at least the first layer. So I'm just taking in sepia. So the reflections near the
boat would be the darkest. So the one that's
touching the boat, right, that's
usually the darkest. So I'm just adding that And this side, say, there is sun reflection. So we have burned Sienna
this side, right? So I'm just going
to take in burn Sienna and add that over here. We can blend out both the shades and just add in these
line like streaks. You could leave in some
white spaces as well. That's all okay. You see I'm just
trying to add in different tones of own sepia and burn sienna and just
building in the reflections. Now because it's a wavy water, your reflection
will also be wavy. So that's what I've
tried to depict here. Now, what I will do is using my detail brush and burn
Siena and sepia mixture, I will just add in some slight small reflections
here and there. Just the edges. I'm just trying to build in the reflections. This rod would also
have a reflection, so it's over this side, right. We will just add
in something like this depicting the rod. So the reflection starts longer, and as you move away from
it, becomes shorter. Building some this side as well. Just some reflections
here and there. This looks beautiful, right. I'll just take a little bit of burn sienna and
neutro tint mixture and just these details. Now, using my Indian gold, dapping of all the excess water, I'll add that tone on this
line that we have, right. So I will add the Indian
gold over here. Okay. And towards this side, just a little bit of
burn sienna to bring in the different
tonal value to this. Okay. Using sepia, adding sitting that we
have on the boat, right? The wooden planks to sit. I'm just adding that over here and on this little rod, as well. This part of the boat,
this is the darkest, so I will just add in
burn sienna and sepia. And actually, this is what the tone should be of
this side as well. So using my medium size
brush and this tone, dabbing off all
the excess water, I will just add a fresh
wash to the boat. Taking in burn sienna as I come here and just blending
all of this out. At least on the section where your water touches your boat, there should not
be any whiteness. So I just trying
to blend it out. We're just left with one
tiny detail on the boat, but as the surface is still wet, so we'll wait for it to dry. Meanwhile, on the
horizon, right, I'll just add in some mountain
range using neutral tint. They are very far from us. We're just trying to build
it on the horizon, okay? This one is little more
farther than the first one. So you have them in the
lighter tone, okay? This one is a little bit darker as it's front
of the other one. Just cleaning up the sit. This looks good, and while we are waiting again for
the boat to dry off, I will just add in some
boards using neutral tint. That's it. I think
these are enough. Now, adding the last
final details, again, using my detail brush
itself and neutral tint, we'll just add in the line that we had sketched out, right? Remember? So we'll just
add that in over here. That's it. Now, what I'll
also do is using indigo, I'll just also add some
water ripples as well. That's it for today's class. Hope you like the class project. Let's peel off the masking tape. Okay. This is the final
look of the project. Hope you enjoyed today's class. I'll see you again
in the next class.
7. Day 5 : Path to the Sea: Okay. We'll come to the
next class project. I have my paper here ready. Using the masking tape, we'll tape down the
paper onto the board. I'm running my fingers
onto the paper just to make sure that there is no gap between the tape and the paper. Now starting with the sketch. This is the sky and this
is basically the horizon. Mounted trail coming here, another rocky surface come in side and say this is the great. And this is where we
have the path. Okay? Then we have the
greenery over here and the rocky surface over here. So this is the greenery part, and then this is
the rocky surface. Okay. That's it for the
sketch for this class. Using a yielding eraser, I will just lighten
the graphite marks. You can roll your
kneading eraser or you can just tap off
and slide in the marks. Now, starting with the sky, I'll use bright blue for the sky because the sky
area is very small. I'll use my mop brush and just apply an
even coat of water. That's it. Now again, using the cloth or the tissue, I'll just tab off all the
excess water from the corner. Now using the medium size brush, bright blue, just
add in the sky. It's a very simple sky. Just leave in some white spaces. And That's it. That's all that we
have for the sky. We will have to wait
for the sky to dry before we can start
painting the sea. Otherwise, the sky and the sea, the color will blend
off between them, okay? So we will just quickly
wait for this to dry, and then we will
paint on the water. Okay, the paper
the sky has dried. Now we will paint
out the beach area. So I will take in my
large size brush, we'll take in turquoise blue, and we will just add that
color onto the horizon. In between, we will
also add in u to give in different tone of
blues the water, basically. At the horizon, I'll just
add tinge of indigo, Okay? Using my medium size
brush and indigo, I'll add that darker tone
to the horizon side. Okay. Now using turquoise Blue, dabbing of excess water, we will just blend
all of this out. Just at some places we'll
add in a little bit of indigo to bring in the depth
and the shadow effect. Okay. That's it for the sea. Now for the hills,
starting with yellow. Okay. We'll add in
first this side because we have just
painted the Sea, right. So I don't want to
touch that data otherwise the color will
bleed into the water, but we're starting with this. And if you see I'm having
my strokes like this, we'll just add in the
greens and the yellows. Taking in different
tones of green. So I'm just taking in
sap green for now, dabbing off all the excess water and trying to add that tone. Taking in some olive green, adding that as well. Also taking a mix of neutral
tint and sap green to get a little darker
tone of green and dropping that tone as
well in some places. Okay, taking it more of yellow, dabbing of excess water and just blending the
harsh edges out. Similarly painting out
this side as well. Starting with cellular yellow. Okay. Adding in the greens taking in olive cream. This first layer is
a free flow sort of layer where you can drop in the different shades of green, darker green light. And then we will build on top of this and add in some flowers, some textures to the
greenery that we have. Let's wait for this
to dry slightly. It will dry off in very quickly, but let's just wait
for this to dry. Meanwhile, I'll just take
in a little bit of indigo, dab of excess water, and try to just clean this out. What I'll also do is I'll
take an Indian gold, a very diluted tone of the same, grabbing of all
the excess water. We add the base layer
to the pathway. Taking in burn Siena
and just dropping off some darker tones
towards the border side, intersection of the
pathway and the grass. We'll clean up all of this in the second layer that we add, so it's okay if some
color spills over. Similarly, let's paint out the base layer for
the rocky surface. So I'm taking in very
diluted tone of burn sienna, starting with that and then we will add in the darker
tones of brown. Okay. This is one rock
that has come in. Let me also pull out en Dike brown and add in
those details as well. Okay. Now using neutral tint, dabbing of excess water
will drop in that toll too. Similarly, this rocky
surface as well. Nutritent Okay, so again, that's the base layer. Now for the greens that we have, so this is a green pathway
with flowers and grasses. So we will now start building on the grass streaks that
we want to add in. So I'll take in my detail brush
and my medium size brush, and using in sap green, starting with that, we will just add in a few streaks of grass. So the one which are
nearer to our eye would be very evident to be
seen as grasses, right? So I'm just adding those. And the one that we
go a little far off, we can just add in dot like streaks to just depict that
there are grasses, right? Okay. And very far off, we will not be able to
see the grasses as such, so we can just tab in some
colors like this. Okay? I'll take a little
bit of olive green using my detail brush, tabbing of the excess water, we'll add some olive
green streaks as well. Okay? Actually, let me take sap green. And instead of these
very evident streaks, let's just build
on to the grass. The way we had created
the first layer. We will just try to build on
the grass in a similar way. I know it'll messy, but let's see if you are able to revive this, and if it does, then I'll add this
as a class project as well so that you all get this experience
of rebuilding your painting as
and when required. Okay. Taking some darker tone of green and adding them at some places as if it's a
cluster of grasses, right? I'm just trying to build
that out in some places. Okay? I think this looks better. And now we will just add
in some flowers on this. So let me take in cadmium red. Dabbing off all
the excess water, just dropping in some
cadmium red in some places. And we will add it again
once the paper is dried. Basically this layer is dried. But this basically will give you some effect of
flowers being there. And in a very similar way,
using cadmium yellow, dabbing off all the excess
water in a similar fashion, we will add in some yellow
flowers as well. Okay? Again, once this will dry, we will add in another
layer to bring out the brightness of the
flowers. But this looks good. Following the same approach for the other side of the grass, taking in sap green, just dropping in some colors for diet apply an even at
of water on this area. That will help us blend out
the colors very easily. Now taking in sap green, dabbing of excess water, dropping off some colours. Similarly taking in leaf green. This is basically your cellular
yellow and sap green mix. I already have that as a color. So I'm using that. If
you do not have it, you can mix in
your sap green and yellow and just adding that
tone as well in some places. Okay? Now, taking in your olive green, tapping of all the excess water. So on near the path right, I'll add in the sap green to give that little
darkness to the path. Okay. Now taking in the
darker tone of neutral tint and olive green and just dropping off that
color in some places. Okay? I'm also taking a little bit of
just neutral tint and dropping of tat tone as well in some darker tone
areas to bring in more depth. Now, taking in my detail brush, cadmium red, orange, and just
dropping off those colors. I'd be a lot of
flowers this side. Similarly using in cadmium yellow and just dropping
off some colors. This is a bed of flowers. It's been just
filled with flowers. That's what we are
trying to show in here. Okay. I think that's it. Now for the path area, again, I'll wet the paper. This just helps in building
that softness that we need. Okay. Now with burn sienna
and neutro tint mix, basically sepia, dabbing
of excess water. We will add in some darker
tones towards the corridor, so these could be
like the shadow from the grasses, right? So that's why you have
these darker tones. Similarly here as well, you would also have your grasses coming up on the pathway, right? So that's why somewhere it
is getting a little broken. Again, add a little bit of burnt sienna and
just dropping in some darker tones
to depict stones and pebbles that you would
have on the footpath. Okay. This is okay, blending out the
hair like streaks. Now for the rocks, we will start with
the Bendike brown, or you can also use burnt umber, above all the excess water, and we will try to
paint in the rock. So you can see I'm just
trying to add in the color. My brush does not
have a lot of water, and in gym some places
trying to build in the t the direction
of my brush strokes are from top to
bottom so that we get that sloping feel
to the rock. Okay? Similarly now on the other side. Okay. Without covering the whole of the base layer
that we have added, we will just add in
these streaks, okay? Okay. We'll wait for this to dry and then we'll add in a dry
brush stroke of pain screy. Let this dry off, and then we will add in the
final layer on grasses, flowers, rocks, and the sea. Okay, now using in pink
gray or neutral tin, dabbing off all the excess
water from the brush, we will add in dry
brush streaks. I still has water and dabbing
of all the excess water, adding in the dry brush streaks. Okay, so we'll learn
the side as well. Continue to build in the rock. Okay, I'll take in the
detailed brush and add a little bit more
of details to the rock. Okay. Just in some places, adding in very dark
tone of paints gray. Okay, now with the same brush, you will add in the flowers. So I'm just taking in cadmium
red or cadmium orange. You can take whatever color
you want for the flowers, and I'm just adding in some
flowers here and there. Okay. Similarly, taking
in cadmium yellow. So these are very small, small wildflowers that we have, right? So they are always
in a group together, and that's what we're
trying to build here. Now, what I'll do is taking
in this detail brush and olive green and neutro tint makes a very
darker tool of green. I'll just try to add
in some streaks, at least for these
flowers, okay? Just trying to build in that. Okay. You can also take in sap green and add those streaks. I'll add in some here as well and then add in some
flowers to these. They will visible as I said, only to the nearer
eye area, right? The other areas, it might be
not very evidently visible. So you can drop that off and again say just adding
in the flowers. Similarly, we will add in the
flowers this side as well. So I'm taking in cadmium orange, cadmium red, adding
in the flowers, add in as many as you want. Farther from your eyes, you will just see a bunch of them, but you will not see the gaps between them or
the stem between them. Similarly, taking in
cadmium yellow now. It could be in some
places there are just so many flowers that
you can't even see the stem. Okay. Similar way,
adding some streaks like not adding a lot of
them, at some places. Now, taking in sepia, dabbing off all
the excess water, just adding some details
on the pathway as well. Just some mud and
rocks that you see. Twigs you will also have fallen leaves, twigs
and everything, right? So just adding that
on the pathway. See, again, you can also try to build in the drivers
streaks over here. What I will also do is there
could be some flowers that have using my very
detailed brush, I'll add in a few
more stems over here. They're very, very thin, just to bring in a little
bit more depth. Okay. Now moving to gosh. Using white gouache, we will add in the waves crashing
on the rocks. There would be waves that would
be crashing on the rocks. So using white gouache, we will just try to add I have literally no
water onto my brush. I'm just taking the
guash directly from the tube and adding
in these details. As they're very far, you
won't see it in too detail, but you would be
able to see some white foams forming near the rocks because of
the waves hitting them. So that is all that we're
trying to create here. I'm extending this out a
little bit onto the water. There could also be some white spots here and there as well because it's a pathway between the flowers
and the grasses, you would also have some
highlights coming in over there. Okay. That's it. For this class, let's just peel off
the masking tape. One thing that I'll do is
using my white gel pen, we'll just add in some
foaming waves near the rocks. That's it. This is the
final look of the painting. Hope you enjoyed the class, and I'll see you again in
the next class project.
8. Day 6 : Twilight Peaks: Welcome to the next
class project. I have my paper here ready
using the masking tape. We'll tape down the
paper onto the board. Okay, I'm just running my fingers on the tape
to make sure that there is no gap between the tape and the paper for the
sketch, for this class. Say, we will have our
mountain ranges coming here. I'll paint them out randomly, but I'm just adding a
slight placeholder types. This is where trees
starts coming in, and this is the foreground. You will have three
trees on this side. Okay? So that's
the class sketch. Now using my hake brush, I'll add even coat
of water ski area. I'm running my brush
multiple times to make sure that the
paper gets thoroughly wet. This will give us more
time to paint our sky. Okay? Using my rough cloth, I will just dab off all the
excess water from the corner. And now, starting
with the painting, using my medium size
brush and Indian gold, we'll start with the painting. So I'm just applying that color somewhere from the middle
section to the bottom. Okay. And in the top, I'm going ahead with quin
rose or crimson red, adding the colors. Okay? So the crimson ish is like a
slanting one where you have a darker tone coming in from the corner and a little
bit from the top as well. And the Indian gold is what you have as the background
waste color, okay? I'm just building on
to the sky, okay? And now taking an Indian gold, dabbing of excess water, and just blending this out. Using my detail brush
and crimson red, dabbing off all
the excess water, I will just add in little bit of clouds coming in from this side. And on the same one,
using my toilet, dabbing off all
the excess water, this side, I'm just trying
to build in some clouds. It's just a bunch of fluffy
clouds floating in the sky. And say, somewhere
here is the sun, and I'm just going to
lift off the color. Taking a little bit more of
quin rose and adding that. I'll just take a little bit
of orange and try to build that between the pink and the
Indian gold that we have. Now taking an Indian gold and just blending all of this out. Adding in a little bit more
of pink, clouds like streaks. Okay. From the top as well. I think that's it for the sky. I will just again
use my detail brush, try to build on the violet
clouds that we have, add, you know, another
darker layer on top of it. And there could be some
clouds here and there, which is blending out between
the pinks and the lets. Let me see if I can just
build in a little bit more of quin rose or add in slight purple tone
on top of the quin rose that we have just
to give it a little bit more of drama on the clouds. Just trying to add some clouds here just to bring some
harmony on the sky side. Now, using let, dabbing
off all the excess water. Let this actually get dried off, and then we will paint
off the mountain. So we will add in
the layer again because we don't want these
hair like streaks to come in. Let the paper dry
off completely, and then we will add in
the mountain ranges. The paper has not dried. Now using the let, we will start painting in the
first range of mountains. Okay, so here is the range Okay. And now we will just blend
this out with wallet, very diluted tone
of wallet, okay? Okay, so this is the
first mountain range. Okay. Similarly here, we
have a mountain range, so it's somewhere, both of
them are similar lines. So we just add this as well. Okay. Okay. Now for the second mountain range, we will have to wait, let this dry completely, and then we will add
in the second range. The second range actually
comes from here. So we will add that once
all of this is dried. Okay? Okay. This has dried. Now I'm going to take again let and add a tinge
of indigo to it. Okay. And then start painting another range which starts from here and goes
to here, okay? So say this is the range
of mountains that we have. Okay. Same approach. We will just add in a
darker tone at the peaks. And now, what I will do is se my large size brush and
just blend all of this out. And again, using my
medium size brush, just adding in the colors and
blending all of that out. Okay, so you can blend that out till the bottom of
your paper as well. We just need to make sure
that the mountains have a natural blend and natural misty effect
that comes in, okay? Now, again, let's
wait for this to dry. We will paint in our next
range of mountains after this. Okay, this has not right. Now, just using Indigo, you will add in another
mountain range. Okay. And now I'm just
going to lend this out. And using my medium size brush, we'll just top it off
with some color for it to naturally blend off with the water that we have applied. Okay. Now again taking in some water and just
blending this out. Okay. Now again, let's
wait for this to dry, and then we will add in the second last layer
of mountain with trees. Okay, the paper has not dried. What I'll do is I will
mix in sap green with paints gray or neutral tint to get a very darker tone
of green and using that, we will add in a
mountain with the trees. So I'm just going to
add in these streaks. Okay. But what I'll do is with this detail brush is where I will add
in these streaks. Okay? So it gives a little
bit more of the fineness. So let me first then just add in these three light streaks. These are all very far. So you would just see
something like this. And I will just add that
color towards the bottom. Okay, so the slope
that we had right, this is what this would be. You might have some darker tone, some places, you would have
some slightly lighter tone. So we will build on
top of it, okay? The very detailed tip, you can add these streaks. Now, obviously, they
will be, as I said, sometimes just you can just use in a lighter tone
of darker green. So you have basically more of your sacre and
less of neutrtint. But then there will also be places where we
will have more of neutral tint and less
of your sap green. So we will just paint
that accordingly. Can just drop in any
color that you want. Just let it be a darker tone, not just the sap green. So you can mix and you can
even take olive green, which is basically nothing
but a mix of sap green and burn sienna and just
add these streaks. Okay. That's it for this layer. I just add a little
bit of three streaks. Now what I'm going
to do is using seniliar yellow and sap green
and a mix of both of them, which is basically
your leaf green, we will paint in the foreground. But we'll just be
careful that we have just applied
color over here. So just being a little
mindful of that, although it is not
a very wet wash, so the colors might
not spill over, but just still being
careful about it. Okay. Now taking in some
of your leaf green, taking in sap cream. Okay. And what I'll also
do is towards the corner, I'll take a little bit of
darker green and add those two. Okay, so that's the base
layer that we have. Let this thrive.
We will just add some trees towards the
side that we have. Okay? This is not right. Now, using my detail brush
and medium size brush, we will paint out trees. We'll add in two
trees over here. Remember, we had sketched
out to three lines. Now, what I'm going to do
is I'll use in a mix of cadmium green and sap cream and then try to
build on that tree. So say here is that tree, and we can also add in a darker
tone paints gray as well. Okay? Just painting
in the pine trees. I add a little bit
more of paints gray. Taking in the mix
of cadmium, green, sap green, and neutral tint, we will paint this tree out. Now, at the background, we have a darker green the
trees that we see right. Now, if we add in sap green on top of it,
it won't be visible. If we add in neutral tint, that might also not be very evidently visible because the
background is super dark. So what we have done
is we have mixed in cadmium tone to your
green and paints gray, and using that is what we
are painting out this tree. No cadmium has
opacity like gouache. So because of it, we are
able to see the colors, a lighter tone of colors on top of the darker
background that we have. Okay? So that's the reason
of leveraging cadmium. So if you don't have cam green, you can also mix in
white gouache to your sap green and
paints gray mix, and you will get
something like this. Okay? Similarly, painting
another one over here, again, starting with
a very smaller tip and building in as we come down. Okay, I think that's it. What I will do is using in my medium size brush
and sap green, dabbing off all
the excess water, we'll just blend this out. Lastly, birds. So take my detail brush
and neutral tint. I will just paint some
words fining the sky. That's it for the class project. Let's wait for this to dry, and then we will peel
off the masking tape. Okay, painting is not right. Let's just peel off
the masking tape. This is the final
look of the painting. Hope you enjoyed
this class project. I will see you in the next.
9. Day 7 : Whispers at Dusk: Hi, everyone. Welcome to
the new class project. I have paper here ready. Using the masking tape, tape on the paper
onto the board. I'm running my fingers
across the tape to make sure that there is no gap between the tape and the paper. For the sketch for this class, it's a simple sketch. We will just have a
mountain range over here. This is the sky and we'll
have one tree side. That's it. The sketch is ready. Now, let's start
with the painting. So I'll use by Hake brush and apply even coat
of water throughout the paper and spend some time on this step to make sure that
the paper is thoroughly wet. I would ideally want the
paper to stay wet for a longer duration because
we are painting sky, and it's best when the longer
the paper stays wet, right? The more chance you have
to work on your sky. And with the sky that
we are painting today, we would ideally want the
paper to stay wet longer. So I'm just running
my brush across the paper to make
sure on two things. One, nothing gets left out on which the water is
not applied and two, that there is no pool of
water onto the paper. Okay. I will just dab off all the excess
water from the corner. Okay, I'm just taking
a little bit of water again and adding in
the final layer of water. Starting with the painting, I'll use my medium size brush and we'll start with queen rose, dabbing off all
the excess water, start to build in the sky. You can see just a few
places I'm adding in these strokes and also starting in with a very
diluted tone for now, we will see how the sky
goes and bit by bit, we will add in more tones. Okay? Now, taking in violet, dabbing off all
the excess water, and I'm trying to build
in the violet sky now. Moving on to darker tone, the corners and the top
have darker tone clouds. So I'm just trying to get that What I'll also do is using in
very lighter tone of blue, I'll add some of that color in these white
areas that we have. The base layer ideally is
of quin rose and blue. Quin rose and blue
makes in purple. So even if it mixes
out, that's okay. But we at least have
the base layer. And what I will also do
is I will just add in this for easy flow
of color and water. And now again,
starting with let, I'm trying to build
in the sky again. This side as well.
Again, another dab of purple clouds coming in. This side, say we have some longer streaks of
purple clouds coming in. So we're just adding that. Okay. Now, building
onto the sky. I'll take a little bit
more of quin rose, adding more color
to this sky area. So you have your quin
rose clouds and top of it is what your purple clouds
have started to come in. That's what we're trying
to show over here. Okay, taking a little
bit more of purple and building onto
this section as well. Within the purple color as well, you will have some areas which would have a darker purple tone, and there would be some
which would be lighter tone. So just trying to
build that in, okay? Uh Just taking a little bit more of dark purple
for the top clouds, adding in their
tone side as well, a little bit more of
purple tone clouds. Building in some pockets
of darker tones, okay? And finally, in the bottom side, the purple tone clouds. Okay. I'll just take a
little bit of quin rose and add some streaks to
this bottom side as well. Okay, with just no color
and almost mill water. I'm just trying to
blend the clouds out to not have these
hair like streaks. I'll take a little
bit more let and just add in some tone over
this side of the sky, along with very, very diluted tone of
Queen Rose, as well. Okay, that's it for
the first layer. Let this layer dry. We'll have a quick
look and see how this one looks, and accordingly, we will paint out another layer or we would paint
out the full round. Okay, the paper has dried. I'm liking the sky. They could have been a
little bit more of, say, darker violet coming
in here and there, but I like the
softness of the sky, so I'm just going to
continue with this. Now, what we will do is we will paint in the hill and the tree. So just taking a neutral tint, adding it the hilly area. Just blending this out, okay? There could be some grasses here and there, so
just adding that. You can see I'm just
making this grass like brush streaks. That's it. Okay. And now for the main tree, I'll use my both the
detailed brushes. So the tree is somewhat
starting from here. Just adding some
leaves at the top. There is another
branch over here. There are some leaves
this site too. You can see I'm just creating these dot strokes
from the brush. Again, another bunch
of leaves, say, slightly darker than
the other ones, and there is another
branch branching out and with a lighter
leaves density. We will just keep on adding the branches and
the trees like this. Another one goes here and you have some
leaves on top of this. Next is I will just tense
out the tree branch here. Work on this tree very slowly because this is the only
element that we have. This painting basically
focuses on the sky, and the other focus
is on the tree. So paint it out with a lot of patience and take your
time in building this up. Okay. So there is a
branch that is coming out from here and then branching
into thin branches. And you have only
little leaves on this. This is the one where
we will be showing the branch on the
focus, this area, and then there are
very little leaves on this section of the
branch. That's it. Now, say in the below one, there is another
branch branching from this side to two
different branches. But then this has leaves. So I'm taking in the
bigger detail brush and adding in the leaves. So this has a denser
leave section, so we will just at that out. Okay. Now this is, again, a denser leaf
section of the tree, so I'm just going to add in these dot dot streaks
and depict the leaves, okay? This is good. Okay. Say some
leaves, but not many. And there is another branch
buching out from here. And this has your leaves
at the tips tips, adding. Okay. So that's all
for this class. The tree has come
out really well. I will just do one more
thing because this comes to be very
straight line, right? So I will just add
in some branches, some protrudings to
give it some natural. Similarly, this side as well, some branches, some protrudings. Okay. That's it. Let's
peel off the masking tape. Okay. This is the final
look of the painting. Hope you enjoyed this. I'll see you in the next class project.
10. Day 8 : The Evening Whispers: Welcome to the next
class project. I have my paper here ready. Using the masking tape, we will tape down the
paper onto this board. Okay, I'm just running
my fingers across the tape to make
sure that there is no gap between the
tape and the paper. Now for this class,
there is no sketch. We're just going to paint out. Okay. Now, let me just
take some time and apply even coat of water
throughout my paper. The more time you
spend on this step, the longer your paper stays wet. And we're painting sky, right? So I want to spend a lot of time on painting the
sky and the clouds. So I will add in multiple
layers of water to make sure that each and every
thread of the paper is wet. What I'll do is I'll keep this here so that all
the extra water, it flows down, and then I
can easily remove it up. Okay. Let me just take my cloth and wipe off all the excess
water from the corners. You can see there's
a pool of water that has form at the bottom, so I'm just going
to wipe it off. Now, using my medium size brush and bright blue cobalt blue, serle blue, any
but that you have, we will start with the sky. So just add in these blue
clouds in some places. Okay, that's it. Now
taking in cellular yellow, capping up all the excess water. Going to add that
at some places. Taking it more over
this side as well. Okay. Similar to this side
too, adding this out. Okay? Now, taking in quinose dabbing off
all the excess water, start with building the clouds. You can see with a
very lighter tone, I'm just adding in
some quinose clouds. The quinose and blue
gives you purple, right? So we can just build that
out and I will also add in the quinos over here as well. Okay. Similarly, this side too. Taking in more colors and adding some over
the side as well. Can see I'm working on with
a very, very diluted tone. We will build on top
of it once we have the base layer ready and we
want to build in our clouds. But for now, a very, very diluted tone is what we will use to work
our clouds with. Say here as well. Now, in a very similar fashion, taking in volet, we will
add in that tone as well. So you can see, I'm just
trying to build in the clouds. Okay. Taking a little
bit more of wallet, adding that here as well. So more on this side. Okay. This came in as a darker tone, but it's okay. We will blend all of this out. Okay? Okay. You can see I've added in very,
very diluted tone. Now we will slowly
build on the colors. So I'm taking in Quinn rose, dabbing off all the
excess water and trying to add that
layer onto my clouds. Now in the same area, I will take in my toilet, dab off all the excess water, and add in that tone too. You can see the streaks are
all these C shaped streaks. I'm going to use that
to build on the clouds. I'll just try to
lift off some colors here and there to bring
in some contrast. Taking in in rows, adding in cellular yellow
as well in some places. And now going ahead with violet and adding
in the ta clouds. The base is in some
places you have your sunlight you have the
yellow clouds coming in. But the main structure of this class project is where
you have your pink clouds, the quin clouds and
then on top of it, we add in our violet ones. Okay. So see here, there could be some
clouds over the side. Again, taking in quinros and building onto the
clouds over here, taking in violet and just dropping off the
color in some places. Okay? Similar with
this side as well. Just building on the clouds. So you can see I'm following
in the similar pattern, places where I have added in
yellow in the first layer. I'm adding it in the
second layer as well. Otherwise, it's all quinros
topping it up with the let. And the brush strokes are
all similar see strokes or the fluffy cloud streaks because we're trying to
build in that fluffy clouds. Okay. And I'll take
in queen rose, tap off all the excess water, and add that in some places. This is where we have the
darkest purple clouds. So I'm just going
ahead with purple tone and adding another dense layer on top of the ones
that we already have. Plus, what I'm also going to do is mix in your
purple with indigo to get a little
bluish purple tone and add that too on top of this. So this is like the darkest tone which you have in
this cloud area. Similarly, this area as well, we will add in let. The paper has started
to dry on this side, but let's see if we can build in and then let and indigo mix, we will add that
in in some places to bring out the denser
clouds that we have. Okay, taking in quinrose
as well and adding that to just to give that effect that there
is purple cloud, you have the quin
rose clouds as well. So just building that in. Okay, I'm just taking in quin rose and just in some places, just adding those clouds. So I am playing around with this because my
paper is still wet. If your paper has
started to dry, especially from the middle area, do not work on the
clouds anymore. Okay? Like when
people had started to dry from this bottom section, but that's okay because
I could still paint out. I could still blend
out the harsh edges. But if your paper
has started to dry, so then just wait on it, let it dry completely. Okay, so I'll also wait for
this to completely dry, and then we will
see if we need to add in another layer or
we are good with it. Okay, paper has dried, and this is the final
look of the sky. Now I'll just add in
some minor details. So using painscray with
my fine detail brush, we'll just add in some say electric wires from one end
of the paper to another. Okay and say another one going somewhere like this. Okay. And so there's one which
is going like this. Now what we will quickly
do is just paint out some birds
sitting on this sire. There's another sitting
over this side. Say one sitting over here. And say some are
flying in the sky. Just add in as many birds as you want because this
is just the sky. We don't have any other
element apart from birds. That's it for this class, we'll just peel off
the masking tape. This is the final
look of the class, very soft pastel sky. Thank you for joining me
in this class project. We'll see you again
in the next world.
11. Day 9 : Sunset Canopy: We can do the next
class project. I have my paper here ready. Again, using the masking tape, we'll just tape down this
paper onto the board. Okay. I'm just running
my fingers across the paper to make
sure that there is no gap between the
tape and the paper. And now using my Hake brush, we'll apply an even coat of
water throughout this paper. This one as well
doesn't have a sketch, can just directly apply
water on the paper. I'm going to spend some
time on this step, again, to make sure that the
paper is very thoroughly wet because the more time
you spend on this step, the better your paper gets
wet from the threads, and the longer your
paper stays wet, so the longer you get
to paint out your sky. Making sure that
there is no corner on the paper which does
not get wet and as well as there are no
pools of water that gets created at any corner
or anywhere on the paper. Okay, using my cloth, as usual, I will just quickly dab off all the excess water
from the corners. Okay, moving my brush again. Let's start with
the painting using my medium size brush
and ennilar yellow. We start with the sky, just applying an even wash of
yellow on the bottom area. Okay. Moving on to quin rose, adding that as well in
the middle section. This is just the base layer
that we'll be adding in, so you can just create a
gradient wash of these colors. Next, moving with serleine blue or bright blue
or cobalt blue, or even Prussian blue. A blue that you have, you
can just add in the tone. And now with violet, just adding in the top layer. This is the base that we have. And now we will build in the
clouds starting from bottom, using orange, dabbing off
all the excess water. We will just add in some clouds, taking in quinos again, dabbing off all
the excess water. We will build in some
quinose clouds as well from this
direction this time. Okay. Taking a little bit more of quinrose, dabbing of excess water, and building in the
clouds from here as well. Taking inlet, dabbing
of excess water and trying to build
in the wilt skies from the top to her sky. You can just play around
the way you want. Just add in the clouds. Say, there are some clouds, purple clouds here on top
of the pink that we have, so we will just add
that as well. Okay. Now on this side,
on the quinose, I'll just take a little
bit more of quin rose and add in those clouds. Another layer just darkening
it out at some places. So there are very small small
clouds coming in, okay? Similarly, taking
in more orange, dabbing off the excess water, and trying to build that
in on the lower side. Okay? Moving back to the top, taking a little bit more of bolet and just adding
that to the sky, taking in a mix of indigo
and let and adding that to you're taking in let, tabbing of excess water, and adding the clouds
from the top left. I seem slowly slowly
building onto the sky. We add in more layer in between. After the first layer is done, you have your base sky ready. In some places, you just
add in the darker details. Okay. I'll take a little
bit more of quin rose, above all the excess water, and try to build in that within this purple cloud as well. Adding some to
this side as well. Let me just take a little bit more of quin rose and adding that layer on top of this section of the
clouds that we have. What we'll do is
we'll take in let, dab off all the excess
water and try to add the darker tone of the let as well on top of these clouds. Again, taking in
quinros dabbing off the excess water and trying to build in this side of
the clouds as well. Okay, that's it for the sky. We'll just take in clean brush, run it across the clouds. I'll just try to lift
off some color here and there to bring in
some highlights. And with this orange, I'll just add a
little bit more on the clouds and just
bending it out. Okay, let's wait
for this to dry, and then we will add
in our tree element. The paper has dried. Now using my small detail brush
and black or neutral tin, we will just paint out the so we have the branches
coming in like this. So there is another one
protruding like this, and then you have
the spits coming in. And another one. Now, I will use
the brush and just chart out these very
thin tree streaks. So you can spend some time on
this and just add in very, very thin tree
streaks over here. Okay. You can see him just
with very light hands, building out the branches. You can take it in any
direction that you want. Okay, that's it. This completes car painting. Let me just peel off
the masking tape. This is the final
Look of the painting. Hope you enjoyed this. I'll see you again in the
next class project.
12. Day 10 : Sunlit Meadows: For the next class project, I have my paper here ready. Using the masking tape, we will just tape down
the paper onto the board. Okay, I'm just running my
fingers across the paper. This is to make
sure that there is no gap between and the paper. Now for this one, we just
need a horizon line. So say, this is the
horizon line that we have, you'll have some
hills over here, and then this is the foreground
and then some trees. If you want, you can even
skip the sketch. That's okay. Now using my large
size hake brush, I will just apply even coat of water on the horizon area, okay? Taking some time on this step to make sure that
the paper is thoroughly wet. The more time you
spend on this step, the longer your paper stays
wet and the longer you get to paint your sky or any painting that
you want to do. I'll take my cloth and just dab off all the excess
water from the corners. Okay. Now using my
medium size brush, we will start with the painting. So I'm going to take in blue. You can use any blue that
you have on your palette, dab off all the excess water, and just paint out the
top of the sky like this. Okay. Again, taking
a little bit more of blue and just
painting this out. Now taking in yellow, dabbing off all
the excess water, we'll just add in some
yellow tone to the sky. You want the yellow brightest
to be at the center area, so I'm just applying
that and then just pulling that color to the
other sections as well. Now, blue and yellow when
mixed together make green, just be very cautious
on that part. It's not that we do not have a natural blend so you see I've tried to create
a natural blend, but just being
cautious that we do not blend them a lot and now taking in orange and just
adding that over here. Okay, taking a little
bit more of orange, so yellow and adding
that to this section, the middle section that we have, and just pulling that up to
the upper corners as well. Now, using orange and dabbing
off all the excess water, we will try to add in some clouds on the middle
section of the paper, so you can see just
adding some of that. Again, taking a little
bit more of orange, dabbing off all
the excess water, and adding the clouds. Now, taking in dabbing off the excess water and adding
that very carefully, very lightly on
top of the orange. The orange and let
do not go together, so that's why we are being
very careful and just adding a very lighter tone of bolet
on top of the orange clouds. Now taking in neutral
tint or paints gray, dabbing off all the
excess water and adding that on top of
this in some places, as well as adding some just paints
gray cloud coming in from the sides to
the middle section. You can see it just
added some clouds here and there. That's it? Let me just tap off some water. I think some of that is getting seeped back
into the paper. So I'll just take in my blue
once again and just add that over here and say we
have some blue clouds, okay? Okay, taking in yellow,
blending this out. Okay. I'll just use
this lifting technique, and in some places
on the blue sky, we'll try to pull off the color. Okay. Now, what I'll do is using this
orange and vermilion, actually, we'll just
try to depict the sun. We'll take in yellow, say, carve out a sun. Okay? And then using my
detailed brush, taking in vermilion
and orange mix. S there are some
clouds coming in from between the sun and just
blending all of that out. Again, taking in yellow, just trying to blend that in and on the sides
just adding in a little bit of orange or vermilion to bridge
in that sun effect. Okay? Okay. So we did not create this
at the first go because our paper was very wet, and if we would have
tried to create that, we would have not got the
results that we want. So there is say this red cloud which is passing
through the sun. So that's what we're
trying to create here. The colors would blend out, so it's okay if this goes away. Okay. And taking in this vermilion, just blend this out. So that's it for the sky. Oh, no, I've got a blue. You can see a water
blue forming. So I will just take in
a little bit of yellow, dab off all the excess water, and try to blend it out. So these accidents do
happen, which is okay. We just need to take in
a little bit of color, almost no water and
just blend it out. That's it. The bloom is
taken care of. Okay? The very, very, very diluted to because we have anyways
added water over here, right? I'll just add in very
few paints gray clouds to bring in some more
drama to the painting because it felt all
the clouds were just coming from
that one direction. That's also okay. If
you want to paint that. I just thought because my
paper is still not dried, I will just add in
few more streaks. That's all. And I will
just try to remove these hair like streaks
and blend all of this out. That's it. I will not
touch it anymore now. So now let us wait
finally for this to dry. Okay. The paper has now dried. The sky looks
beautiful, doesn't it? Now, we will paint
the foreground, start with olive green, which is nothing but
a mix of burn sienna and sap gree dabbing of
all the excess water. We'll add in a mountain
range over here. Okay, what I'll do is
I'll add a little bit of neutral tint and add
that darker tone on this. Okay. And now using olive cream, just peel this out. Lutrotintmx. You can drop in at some places just to
bring in that diversity, that this is a far
off hill, right, and obviously it will not
have a uniform color, so there would be some
changes here and there. Okay. That's it. Wait
for this to dry, and then we will
paint the front area because if you apply
the colors now, this will bleed into it and
we don't want that to happen. So let's wait for this to dry, and then we will paint off. Okay? So this has
somewhat dried. Now using my large size
brush and clean water, we'll just add that onto just a layer or so because we don't want a lot of
water as well. Okay. Now using my medium size brush and a mix of sap
green and yellow, basically the leaf green color, which is a mix of sap
green and yellow. I'll just add in
the tone over here, taking in yellow, just
add it over this side. Okay. And now taking
in sap green, we will just add that
in some places, okay? And I will take in olive green
and add that tone as well. Okay. I'll take a mix of
paints gray and olive green, just a little darker tone
and add that that's it. Now, again, we will have
to wait for this to dry, and then we will add in
paint out the trees. What I'm going to do
is I see there is a very light white space that
has got left out, right. So I will just use in yellow and just very slowly
paint this out. Okay. And just
blending all of this. Okay. Now we'll wait
for this to dry, and then we will paint out
the final trees that we have, and we'll be done
with our painting. This is not right. Now,
let's paint out the trees. So I'll use these two
detailed brushes. We'll start with
painting the trees. We'll use olive green
and paint gray mix because it's going
to be a darker tree starting from here. So there is a small
one over here. I've added in a little bit of neutral tint to bring in a
little diversity as well. So we will keep on adding more of neutral
tint as we go down just to bring in a darker tone of leaves towards the bottom. Okay. That's it
for the first one. I just take a little bit
more of neutral tint and add in some tone on what
we have already painted. Okay. Now for the
next one, again, starting with a mix of olive
green and neutral tint, we have another one over
here and similar way, starting with some
smaller leaves. And as we move down, we'll add in denser
leaves over there. Okay. Now, you keep
on building this, and I'll add in some
denser leaves as well. Okay. There will be some overlap
between these two trees. Okay, that's the second one. We will add in a
third one over here. Again, the same thumb rule, starting with less of
leaves at the top. And as you come down, we will
add in denser leaves, okay? Okay, we will add in a very
small one over the side. Okay. Just adding a
little darker tones in the top as well. Okay. And one final tree on the side. Okay. That's all. Little bit of water
spilled over here. So I just thought we'll just quickly add in the colors again. That's it. Now, we'll
wait for this to dry, and then we will peel
off the mask tip. While this dries, let me
quickly add in some birds. My paintings are always
incomplete without birds. So we're just taking
a neutral tint, dabbing off all the excess
water es adding in few words. Now, let's wait for this to dry. And then we'll peel
off the masking tap. Okay. This has not right. Let's peel off the masking tape. This is the final
look of the painting. Hope you all enjoyed the class. We'll see you again in
the next class project.
13. Day 11 : Harbor of Light: Welcome to the next
class project. I have my paper here ready. Using the masking tape, we will tape down the paper again. Okay, paper is ready. I'm just running my fingers
across the paper to make sure that there is no gap between the tape and the paper. Now for the sketch for this
class, we will have a sky, cloudy sky and water, and we have save
a boat over here. And the reflection.
That's it for the sketch. Now for the sky,
using my Hake brush, we will add an even coat of
water throughout the sky. We can actually apply water
on whole of the paper, and then we can build on the
sky and the water together. Spend some time on this step. Make sure that there
is no section on the paper left without water, and also make sure that
there are no pools of water getting formed
anywhere on the paper. The more time you
spend on this step, the longer your paper
will stay wet and the more time you will have
to paint your painting. Let me just give a few seconds for the paper to just
soak in the water. Meanwhile, I will just tap off all the excess water
from the corners. And now starting
with the painting. I'll switch between the brushes as and when I feel comfortable. For now, starting
with the painting, I'll take in yellow and we'll add the tone over this
side and this side. Okay. Now taking in
ultramarine blue, tabbing off the excess water, which is building on the sky, the first very light
layer at the top. Similarly, adding the
same the bottom as well. Okay. That is the base
layer that we have. Taking in my medium size
brush, using an orange, starting again with
the diluted version, Dablopon the excess water, we will try to build
in some orange clouds. E Okay. Similarly, we will
have the reflection of the same in the sea as well. So I'm just adding some orange, taking a little bit more
of darker tone without water and trying to build
in this orange sky. And similarly,
trying to build in this orange in the
water as well. H Now, taking in
ultramarine blue, dabbing off all
the excess water, we will start to build in
some clouds in the sky. You'll see another bunch
of clouds say this side, we have a very big bunch
coming in from this side. I'm just trying to first
add the base layer, and then we will build
on top of it with different tones of ultramarine
blue and pains grey. Okay? So we also have some of these
blue clouds coming in on top of the orange, okay? Similarly, building on the sea. This is the ultramarine, adding a little bit
more tones to it. We have clouds, right, so just adding ultramarine
blue some places. What I will do is for the ocean, taking in mix of ultramarine
blue and paint gray, I'll just add in some
of these darker tones as my water areas it's
getting too dry, right. So I'm just trying
to add some of these darker tones to the water. Once this dries, we will add
in more waves to the water. But just for now,
while this stays wet, I'll just add in some
darker tones, okay? Now, again, focusing on the sky, taking darker tones of
ultramarine blue and trying to build in the
clouds that we already have. Again, now for the
clouds as well, I'll take in a mix of
ultramarine blue and gains gray to build in the darker
tones and just add that. Say some darker tones
this side as well. I'm going to add in
very small small cloud aches on the sky. So there is a big cloud
that comes in from the corner and then that
splits into small clouds. That's what I'm
trying to show here. Okay, I'm again taking
ultramarine blue, dabbing off all the excess water and trying to build in
these clouds that we have. Okay, taking a mix of neutral
tint and ultramarine blue, dabbing off the excess water and building that
too in some places. Okay. Just dropping
off some color here and there and letting
the water blend it out. My paper has started to dry, so I'm not getting
very clean blends. So I will just
clean up my brush, tap off all the excess water, and with just dry brush, run my brush across the clouds to just
smoothen out the edges. Okay? I'll also take in again a little bit
mix of paints gray, and ultramarine blue and see if something can
be added to the water, whereas you see my water
has started to dry, so I'll just leave it off. Please do not add any brush strokes if your
painting has started to dry. We will add in more
details later. Okay. So you can see I'm
just cleaning up my brush and trying to blend out all of these harsh
edges that we have. Okay, that's it. Now, let's wait for the painting
to completely dry. Then we will add in
the other details. Okay, the paper has now dried. What I will do is I want to paint in the sea
a little better. So I will just apply water on
this section of the paper, and then we will
repaint the waves. So I'm just going to take
in my hake brush and just apply a layer of water with a very light hand.
Okay. You see? And now using my medium size
brush and ultramarine blue, we'll just add in
some water waves. I've taken in a mix
of ultramarine blue and paints gray to add
in these darker waves. And then with just
the ultramarine blue, I'm dropping in the color. Not creating anything new, just on the waves that
we already had, right? I'm just trying to
add in some Darkatols Okay. Similar to
this side as well. And over this side, too, taking in orange, dubbing of the excess water, and trying to build in
the waves here as well. Or taking in ultramarine blue. Okay, that's it. Now, cleaning up my brush, tapping off all
the excess water, I'll just try to
lift off some color from between the waves,
give it the natural look. Okay? Taking in my medium size the detail brush and
ultramarine blue, just going to repeat
what we already did, but with a thin brush to get
in some well defined waves. I'm just making sure that every time when I
pick up more color, I just dab off all the
excess water so that the excess water does not
flow in the paper and cause blooms switching between
the ultramarine blue and the pink screen. Okay. That's it. Well, let's
wait for this to dry, and then we will
paint in the details. Okay, the paper has
to dried now using a medium size brush and paint
screen or neutral tint, we'll add in some
mountains on the horizon. H And now just adding in some details. Okay, now using my
detail brush and, again, paints gray
on neutral tint, I'll paint out the board. Now, this boat will also
have some reflection. I'm just going to add that the water touching the boat
would be absolutely dark, and then you will have the
reflection waves coming in. So we will just add that. Towards the boat,
you will still have some darker and
denser reflections. As you move away, the reflections become
thin and scattered. Okay? Taking ultramarine
blue, very similar way. We will also add in some reflections in
the water as well. It's mostly on the
same pains where we have had the waves
painted in right. There itself, we will just add in some of these water ripples. Okay. I'll take in some, which is a mix of
paints gray and ultramarine blue and add
those as well in some places. The water was near
the boat would be somewhat a mix of the colors. So I'm just trying to get there. So far off waves, okay? Similarly, I'll take in orange, Dabbing off all
the excess water. We'll add in some orange waves or reflections as well, okay? Okay. That's it. Just adding in some orange
reflections here and there, although it's blue water, but you will have some So just adding a little
bit of more waves. That's it for the painting. Do you think we should
add in some birds? Let's add in some
birds, as well. Okay, that's it. Now let's
peel off the masking tape. Okay. This is the final look. Looks beautiful,
right? Thank you for joining this class project. We'll see you again
in the next one.
14. Day 12 : Golden Wires: Hi everyone. Welcome to
the next class project. I have a paper onto the board. Using the masking tape, we will tape down the paper. I'm just running my fingers
across the tape to make sure that there is no gap
between the tape and the paper. So for today's class, there's
no sketch that we need, or actually we do. So we just do one thing. Let me just sketch out
some electric poles. It's going to be a simple sky for today. That's it. Just added in as a
placeholder for us to know where to paint out
our electric poles. Now using my hake brush, I will just add in an even at of water
throughout the paper. That's it. No taking
my large size brush, starting with orange, we
will paint out the sky. It's going to be a simple,
fairly simple one. After all the days of painting
little complex skies, I thought of adding in a
very simple one for today. So that's the orange.
Next, I'll take a little bit of vermilion
and add that to the base. There are days some days
when you just want to paint in a very
simple landscape. This is for one of those
days and at the last, taking in yellow,
adding it at the top. So that will exactly be a sky. I will just build on to
the layers a little bit. But these are the only
colors that we will need, starting with the
yellow at the top. Okay. Okay. Taking a little bit
more of vermilion, that taking in more of orange. Oh. And at the end, taking a little bit of yellow
and adding in the final. That's for the base. The sky is still going to
be pretty simple. But before I add in a
little bit more details, I will just tap off all the excess water
from the corners. We forgot to do it after
adding the water layer. You can see there is a lot
of water on the corners, and then this will seep in into the paper when the
paper starts to dry and we don't want
that to happen, okay? Now, what I will do is using my medium size brush and paint scray dabbing
off all the excess water, I will just add in just one
cloud actually on this side. And one more in this
middle area. That's it. That's all the cloud
that we will add. As I said, I wanted the sky
to be pretty simple today, so that's it with the sky. Now, let's wait for this to dry, and then we will
paint in our pools. The paper has now dried. Now using neutral tint, we will add in the
electric poles. Using my medium size
brush, and again, with neutral tint, you will add in some leaves
towards the corners. With a detailing brush
and little tint, we will add in the electric
wires to the boards. You can see I've got some
black smudges on a paper. So what I'll do is using
my clean brush and water, I will just try to
just blend it out, and then using my rough cloth or you can use a
tissue paper as well, just dab off the water
that you have applied. So your colors will have been this smudge
that has happened, that would be easily managed. So this is a trick that you can use in any of your paintings. If any of your
color gets smudged, you can just try to blend
it out with the clean water and then just dab it off with a tissue paper
or your cloth. And at last, we will
just add in some birds in the sky. Okay. We're done with the
painting. Let's peel off the masking tape now. This is the final look
of the class project. Hope you guys enjoyed this and I'll see
you in the next one.
15. Day 13 : Golden Desert Dunes: Welcome to the next
class project. As usual, I have my
paper here ready. I'll just tape down the paper onto the board with
the masking tape. I'm just running my fingers
across the tape to make sure that there is no gap
between the tape and the paper. For the sketch for
today's class, say, this is the
first sand dune. It goes from here to here. Then you have another
one coming like this. We see who's like this. You have another coming in here. I would say, who's like this. Okay. So we will be painting
in layers for this one. Now for the sky, I will
just apply even coat of water in the sky area. It's okay if something
comes on the dune, we will apply a
very light tone of color towards the bottom. That's it. Not a lot of
water needed for the sky. Now taking in yellow, dabbing off all
the excess water. I'll just add some
streaks in the sky. But Next, taking this
light vermilion. I'm just adding that as well. You can see I'm just working
on a very, very light tone. We want the sky to
be very light tone. The main focus is on the dunes. Now taking in quin rose, dabbing off all the excess water and adding some tone
of this as well. Okay. And finally,
I'll just take in let and add that in the sky. So it's a colorful
sky that we have. I'll just add in the purple
tones in between the sky. Some places, especially where we have pink up light because those are
complimentary colors, right? Now, we'll just very slightly
build on top of this. So I'm just taking in yellow and adding some tone here and there. But this is basically
a main sky. That's how we'll have
to paint it out, taking in quinros I'm just adding some darker tones because watercolor
when dries off, it dries one shade lighter. Now when we apply another
layer on top of this, it will uh, dryer and will look like the layer that
we had just before this. That's the one that
we want? I'm just trying to add a little bit more more of tone color tones to the sky so that
when it dries off, it gives you that
beautiful blend. Okay. I think that's it. I'm just running my clean brush across to just see that there are no thread like
streaks that we have. What I will also do is
taking in my cloth, I will apply just
clean off the corners is to avoid water flowing
down onto the painting, and I'll just add a little
bit of color over here. Okay. That's it. Let's wait for this
to completely dry, and then we will start with the sand dunes
layer by layer. And Indian gold, we will start
with the first sand dune. Dabbing of all the excess water. S this is the flat
side that we have. You can just add in color
towards this side of the dune and we will
just pull this down. These brush strokes
are important because when the paper will dry, it will capture the
strokes that you had. The colors will capture the brush strokes that
you have added in. Working on that and
now towards this side, so this is a slight darker side. We will also take
a little bit of burn Siena and add that as well. You can see I'm just
leaving some gap right now between this and
the other layer. This is to just make sure that the color does
not move that side. All the blending that
I'm doing right now, I've just picked
in the Indian gold and just working on the blends. Again, picking in a little
bit of burn sienna, dabbing of all the excess water. Being very careful of the corners and just
bringing that out. Again, your brush
streaks is what will help us define
the sand use. I have just cleaned up my
brush without any water, dam that over here to
just add in some gap. Between this, I've taken in burn sienna and I'm just adding it here on the orders
I'm not taken any water, just taken in burn sienna and I'm just playing around
with the color only. See, the color, no water. There's water already
onto my paper and I'm just leveraging that to
build in this smooth blend. Now I have to collect
little bit of water, and I'm just adding
that over here. Again, blending all of this out. Getting a little
bit of darker tone on the Burnsiera side. That's it for the first dune. Now again, this one, we will have to wait for
this to completely dry. What I will do is this
feels very, very off. I will just take a little bit of burn sienna and just
try to dilute it tone, add some tones on this
side of the Duna as well. Just to make it a
little bit uniform. Otherwise, it has come out to
be two contrasting colors. I've just taken in
a little bit of burn sienna and just
added that over here. Now cleaning up
all my brush with diluted to of water with
just the dried brush. Sorry, I'm just
blending this out. Okay. That's it. That's it for the first dune. Nolet sweet for this
to dry and then we will similarly
add in the next one. This is not dried.
Now, similarly, we will paint off the second
santion Second sandiu. What I will do is taking
in my large size brush, I will just apply some water
on this side of the santune Very little water just so that the color flows in seamlessly. Now again, with the Indian gold, we'll start in with the sand. Similar to what
we did last time, we'll just add in
different tones. Okay. And using and burn Siena, we'll just add some
tones here at this. Okay. Now taking in burn Siena, we will add in the Tarke
dune color on this side. Again, I'm just leaving out some white space for now
and just lending this out. Being very careful near this what I will do is
clean up my brush and just bend this out. Okay. And I'll take in
very, very diluted, little tone of paints gray, mix it with bol sienna, and just add that
over this side. Just clean my brush and I'm just reading my
brush across this line. Taking in Indian gold and just adding in some
tone over here. Taking in more of burn Siena and just building these sharp
curves of the sandw. Just take I burn sienna
and just building that. Okay. That's it. Now, let's wait for
this to dry again. And then we'll paint
out out the last tune. Okay. This has now
completely dried. Now we will paint
in the final layer. Using my large size brush, we'll just quickly
apply some water so that the blending
happens smoothly. Okay. And now with a
medium sized brush, taking in Indian gold
and burn Siena mix. We will start painting
this sand dune. And maintaining the
same side stroke. Just adding in burn
Siena in some places. Okay. On the other side, I'll take in a mix
of burn Siena and sepia and pains gray, which is nothing but your
sepia shade and we'll add that to this side
of the D. Okay. I'm just going to
blend all of this out. Okay. So in a very similar way. This side, your burn
Siena and this side your burn Siena
was a darker tone and Indian gold was
a lighter tone. On the other side, your
burn Siena becomes your lighter tone and sepia, which is nothing but
pains grave plus, burn Siena becomes
your darker tone. That's it, okay? I'll also take a little
bit more of bon sienna and sepia mix and add that in
some places here as well, just to bring in the blend. I'm taking in boon sienna. Uh there's a like thing onto my paper. I'm just trying to remove that. Just making a little
bit more defined. Okay? And what I'll also do
is using in my wait 1 second. I'm still not happy
with this curve. So I will just add
on the tone here. And just blend this out with the burnt sienna that
we already have. Okay. And using my brush, I'll just die off
some water droplets, just to give it some texture
and different effect. So that's it. Now, let's
wait for this to dry, and then we'll be done
with our painting. Okay, so this is not dried. You can see the effect
that we got after we added some water
drops, right? His This looks beautiful. Let me just peel off
the mask and take. This is how the final
painting looks. The desert scape looks
beautiful, right? I'll see you again in
the next class project. Thank you for joining me.
16. Day 14 : Into the Blue: I have my paper here ready. Using the masking tape, we will tape down the
paper onto this board. Okay. I'm running
my fingers across the tape to make
sure that there is no gap between the
tape and the paper. This class project does
not have any sketch, using my hake brush, I will just apply an even at of water
throughout the paper. Make sure that no collar
of the paper is left out, and also there are
no pools of water that gets formed
anywhere on the paper. I will just keep this masking
tape under the board, and then we will apply
even coat of water. So all the extra water
with gravity will flow off towards the bottom, and then we will just wipe that off with tissue
paper or cloth. Okay. Let me just dab off all the excess
water from the corners. Okay. Now using my large size
brush and ultramarine blue, we'll start with
painting the bottom. So you can see every time
when I pick my brush, pick more colour
from my palette. I tend to start from the bottom and then come
up with the lighter tones. The bottom of ocean will have
the darker tone of colors. That's why whenever
pick up fresh color from your palette,
start with the bottom, reapply that color so that the darkest tone
gets captured over there, and when you have less
color on your brush, then you can slowly
move towards the top. I'm just having these
semicircular motion streaks. For now. Now taking in Indigo and adding
that again to the bottom. We will enhance the
color tone bit by bit. Slowly we will increase the
tonal value of the colors. But for now, we'll keep on painting with
the lighter tones. Switching to the
medium size brush and taking in turquoise blue. We'll start to add in
that color as well. Okay. And this color
will be specially applied here on the top section. Trying to add that. H I will be switching between my
large size brush and my medium size brush. Taking in more of indigo and now starting to build in the tonal
values of the painting. Taking in ultramarine blue. Adding that as well. Now switching to
turquoise blue and adding that to you can see the bottom of our painting
is in the most tone. We have the indigo
color over there. Then as we move towards
the top, it gets lighter, we are transit using ultramarine blue as the
transition tone between the topmost turquoise
blue shade and the darkest tone underwater, which is the indigo
to clean up my brush. And we'll just try to
clean up this circle me, building on this. Again,
starting with indigent we will also add in a little
bit of paints gray to the very bottom to have that
darkest tinge coming in. Now using ultramarine blue. Okay. And now taking
in turquoise blue. Okay. Cleaning up my brush
and just cleaning up this taking in some tones of turquoise screen and trying to add that as well when
we move towards the top. So just building that
out in some places. You can see you with
a very light hand, just trying to bring in
this tone in the painting, especially in the top sections. Okay. I think that's it. We'll just try to bring
in a little more of the Tarkatons in the
bottom of the sky. Using ultramarine blue,
dabbing of the excess water, blending all of that out. Now taking in turquoise green and building in
that tone as well. You can see the very light hand. And without mixing
up the colors, very clearly see that there are different tones of
blues that's being applied, and we are trying not
to merge them all. Let the different tones be
very evidently visible, I'll just ran this out. Oh Okay. So now let's wait for
this to dry and then we will add in the water waves. But you can see, we can see the change in the color from
darker to the lighter tools, and you can see
ultramarine blue, you can see the turquois
blue, turquoise green. Indigo very evidently. I'll just wipe off all
the excess water from the corridor so that the color, the water does not see back in. And once this is dried, then we will add in
the water ripples. Before we do that, what I'll do is because it's sun's reflection that's
falling on the sea, right? So there would be
some highlights coming in on the water as well. So using my clean brush, I am just trying to build
in that ray of light. Okay. That's it. Now, let's wait for this to dry. And then we will
add in the waves. Okay, the paper has now dried. Now, what we'll do is using mix of medium size
and the detail brush, we will start adding
the wave streaks. So we'll start with
the turquoise green, a diluted tone of the same
tab of all the excess water. And say, from here, just start to add in
these strokes, the waves. You can see I'm just touching my brush on the paper and you're just trying to build in these
water streaks, water waves. Similarly from
this side as well. There will be some
thicker streaks, some thinner, some just
dot streaks, right. So we can just play around with this with
different tones, different tonal value
of turquoise blue, turquoise green, and indigo. And bit by bit, we will try to bring in the waves together. Adding some darker
toner values on top of the existing one that we have just added in so that
it blends out well. So just take your time on this and slowly build on the waves. So you will have
some darker tones coming in from the corners. But as you move
towards the center, the tonal value of these waves reduces because you have the light
coming in right, so you will have
the lighter waves seen as you come
towards the center. Now on the same one, I will just take a little bit of indigo and just add in some very darker tones
towards the corners. Lighter tones of lighter tone of indigo and just adding that. Similarly, this side as well. Just adding in some
darker tones on top of the color that we
already have and also building in another layer on Okay. Now again, taking
in turquoise green, adding in the x. We will continue to do this. It's easy streak. We just continue to build a
cross in a similar pattern. Just drop off the color,
touch your color, touch your brush on the paper, and we will build on the tones. I switch on to a detail
brush and trying to build on the waves
in a similar way. Specifically where
you have these a the reflection that
we have added in right, those points, we will
add in a little bit of a darker tone of your color, be it Digo or be
it the turquoise green to bring that shadow or the highlight effect,
the light effect. It very evident if you have a darker tone
of color on top of the light rays. Okay. Taking an indigo again
starting with a darker tool. Moving to lighters. Now, what we'll do is as we're moving towards
the bottom right, we will try to add in the waves not super
detailed types and a little bit
of bigger streaks. So the same way, a little bit of a bigger brush tab that
we want to show in. Or You can see my streak, my brush is in a
slanting position. And I'm just trying to
add in the just touching my brush tips to
the paper. Right? Similarly adding in indigo. Oh No, just where you have the
light source coming in, we'll just add a little bit
of lighter tones as well to depict the effect of
the light on the water. But the major effect of the light strokes
would be at the top, which we have already achieved. Now just trying to build in lighter tones of lighter or just the waves like
we generally have, right? Just trying to build
it slowly, slowly. Taking in green as well. Just trying to add
it wavy streaks. I'll take it my detail brush and then try to just
add in the waves. So between these
big waves as well, you will have some
lighter waves too, or thinner waves, basically, not lighter. Thinner waves. Just try to add that Okay. So slowly, slowly, the
waves will just disappear because as you move towards
the bottom of the Sea, the waves become less. So that is what we're
trying to achieve here taking in the
turquoise screen and trying to add in the waves. Okay. Okay. Just trying to add some over
the sides, as well. Just trying to add some
over this side too, in between what we already had. Just taking in a
little bit more of indigo and trying to add in details onto the the
streak stack we have? You can see it just
at very random places with a very light hand, adding in some darker
tones to bring in the depth and similarly
with turquoise screen, we'll add some tones and some
streaks with that as well. Just building onto the waves
at the bottom that we have. Just at some places, making it a little bit
more darker and thicker, mainly more than darker. I'm just trying to
make it a little bit more thicker because
we had thick waves and then it feels like
abruptly now we have thin. I'm just adding in
some thicker waves. And then thin ones. Okay. Similar with the
turquoise green. Just adding in some thick waves. Now what I'll do is
using in white quash, so I'll just pick it up
from the tube directly. I'll just add in some highlight along the reflection line. You would have some
highlights coming in. Let me just add that
in at some places. Let's see, the streaks are very, very just dotted streaks, wherever you have
these highlight of light coming in from the top, we'll just add very tiny dots on that line to show in the effect of the
light coming, right? So adding that. That's it for this class. Now let's peel off
the masking tape. This is the final look
of the class project. Hope you guys
enjoyed this class. I'll see you again in
the next class project.
17. Day 15 : Endless Horizon: Welcome to the last
class project. I have my paper here ready. Using the masking tape, I will just tape down this
paper onto the board. I'm just running my fingers
across the paper and the tape to make sure that
there is no gap between them. For this class project, there is no sketch as such, but I would want to
using the masking tape, I would just add that to say three fourths from
the top of the paper, and this will be
your horizon line. Instead of sketching it out, I'm just adding this and first
we will paint on the sky, we'll peel up the masking tape, and then we will paint
on uh, the ocean. Now, using my hake brush, I'll apply even coat
of water throughout the sky section of the paper. You can see I'm
just going back and forth to make sure that
each section of the paper is thoroughly wet and also
to make sure that there is no pool of water that gets formed anywhere
on the paper. Now using my rough troth, I will just tap off all the excess water from the corners. Okay. Just running my brush again on the paper and tapping off all the excess
water from the corners. Okay. Now let's
start with the sky. I'll use my large size
brush ultramarine blue and we'll just add that tone to the top
section of the paper, leaving in some
white caps as well. Now taking a little bit of yellow tabbing off
the excess water, adding that towards some
sections on the sky. And now taking a little
bit of paints gray, dabbing off again
all the excess water and adding that as
well in some places. Let me just tab off all the
excess water from the corners again from this side as well. Now, moving to the
medium size brush, taking ultramride blue again and adding in some darker
tones in some places. That's it. Now, taking
in cellular yellow, dabbing off the excess water, and some places building
that tone as well. Now with pain gray, again, dabbing off excess water
and just trying to highlight some sections
towards the horizon side more. Okay. The ultramarine blue, let me try to add
a little bit more of the darker tone on
the top of the sky. Taking in the ultramarine blue
with my medium size brush, dabbing off the excess water, just trying to build that tone in a little bit in the
middle section as well. Similarly with the pain screy adding in some darker
tones on the horizon side. Okay. Now the interesting part. For this, we would
need a tissue. So I've taken a
tissue, just trying to build it in this circular way, we will dab off some color from the paper to build
in these clouds. You can see. I'm just dabbing off the
color with a tissue. Similarly this side as well. Just dabbing off some
color and trying to give in the cloud view. We will go over again
with the tissue. The base color that
we've got right, we wanted to maintain that and then on top of it,
building the clouds. You see you have the
base color coming in and then you have the cloud
formations also coming in. Now what we will do is using
in my medium size brush, say a very, very
diluted tone of yellow. We'll try to add that
somewhere on the cloud. This side as well. Similarly, pains grey. This is where a well
diluted version of pains grey would be used to build in the shadow and bring in the depth
on the clouds area. You can see I'm just
trying to build in some shadows on the clouds. Similarly, this side too. We will blend all of this out. All of this we will blend
out and make it softer, the edges being more soft. But for now, I am trying
to build in the clouds. And now using my clean brush, just trying to
blend all that out. Towards the bottom.
Using Pains gray, we'll try to build
in some clouds here. That is why I was focusing on adding more of pains gray on the bottom section because
we wanted to also add in some just pains gray
clouds near the horizon. We will all just blend this
out and play around with it. I'm just using my clean brush, no water, and just trying to blend all of these edges out. Blending all of this out. This gives you the whiteness of the paper as well as gives you a slight tinge to the sky that there are clouds and there are shadows
that has been built in. I'm just trying
to build that in. Again, using a tissue, you can still play
around and try to dab off some color from some places. Okay? The tramarin blue, I'll just try to dense
it out a little bit. So that your clouds, they then very evidently
become visible. I'm just laying around and making the background
a little bit more darker, the clouds become
evidently visible. You see, after adding
in that blue tinge, the clouds have become
very evidently visible. Similarly, I just try to build
that in over here as well. Taking together the yellow
that we already have. On this side, we'll just
add a little bit more of blues to build in the so that the clouds come
out to be very, very evident. My paper has not completely
dried and that is why I am able to
play around on this. If your paper has
started to dry, do not add more color or water, I will just clean up
some of the clouds from here and here. Okay. So that is the sky that we wanted to
build in in today's class. Let us wait for this
to completely dry. We'll peel off the tape, and then we will
add in the ocean. But this looks good, right? This is a different
way of building on the sky that you can try with
your different projects. Okay. Now let's wait for
this to dry and then we will work on the sea area. The paper has somewhat dried. Let's peel off the
tape and then we can paint on the ocean. The sky looks beautiful, right? Now, complementing
this dramatic sky, we will have turquoise
blue waters over here. Let's start with that. I'm
using my large size brush, taking in turquoise blue, and we just adding in
the water over here. Because this is a
very small section, so I did not apply an even coat of water
and then start with it. We can directly also paint out the sections and using indigo. We'll add in the
color over there and blend it out with
turquoise blue. Being a little careful
near the horizon. You can switch to a medium
or a detailed brush. My brush has a tip, so I am leveraging that
and trying to build in the ocean horizon
that we have. Now, I'll move. I'll also switch to
the medium size brush. Taking in indigo, dabbing
off the excess water. We'll just add that tone
to the horizon section. Taking a little bit darker tone of indigo and just adding that in till the middle section. Okay. We won't have a very detailed S because it is somewhere in the
middle of the ocean. We will just add in
these horizontal streaks to depict the ocean. I will just take in the detail
brush with turquoise blue, add in some streaks
here and there. And similarly with indigo, some streaks here and there. No waves details
that we're adding. We're just adding
in these streaks to build in the depth and depict the different colors that the ocean would
have. That's all. Okay, so we just
painted this ocean. What I've done is using my
detail brush and paint scray painted out these birds and
peeled off the basking tape. And this is the final
look of the painting. Hope you enjoyed
this class project. Thank you for joining
me in this class.
18. Conclusion : Congratulations on completing your 15 day watercolor
journey with me. I hope this class has
inspired you to slow down, enjoy the creative process, and discover just how rewarding a daily
watercolor practice can be. Over the past 15 days, you have explored a
variety of landscapes, practiced essential
watercolor techniques, and most importantly. Showing up for your creativity, one painting at a time. Every breaststroke
that you have made is a step forward in your
creative art journey. So take a moment to appreciate
how far you have come. If you haven't already, I would love to
see your projects. So please do a pot in the
class project section. It's always inspiring to
see each other's artwork. If you enjoyed this class, please consider
leaving a review. Feedback not only helps
me improve in my classes, but also helps other
students discover this one. And if you like to
continue painting with me, do follow my Skillshare
profile so you will be notified whenever I
publish a new class. Thank you so much
for choosing to spend these 15 days with me, keep painting, keep
experimenting, and most importantly, keep
enjoying your journey. I'll see you again till then. Happy painting. Bye bye.
 Shalika Gupta, Watercolor Artist