Transcripts
1. Intro: If you've ever wanted to dive
into digital watercolors, but you felt overwhelmed by the drawing part, this
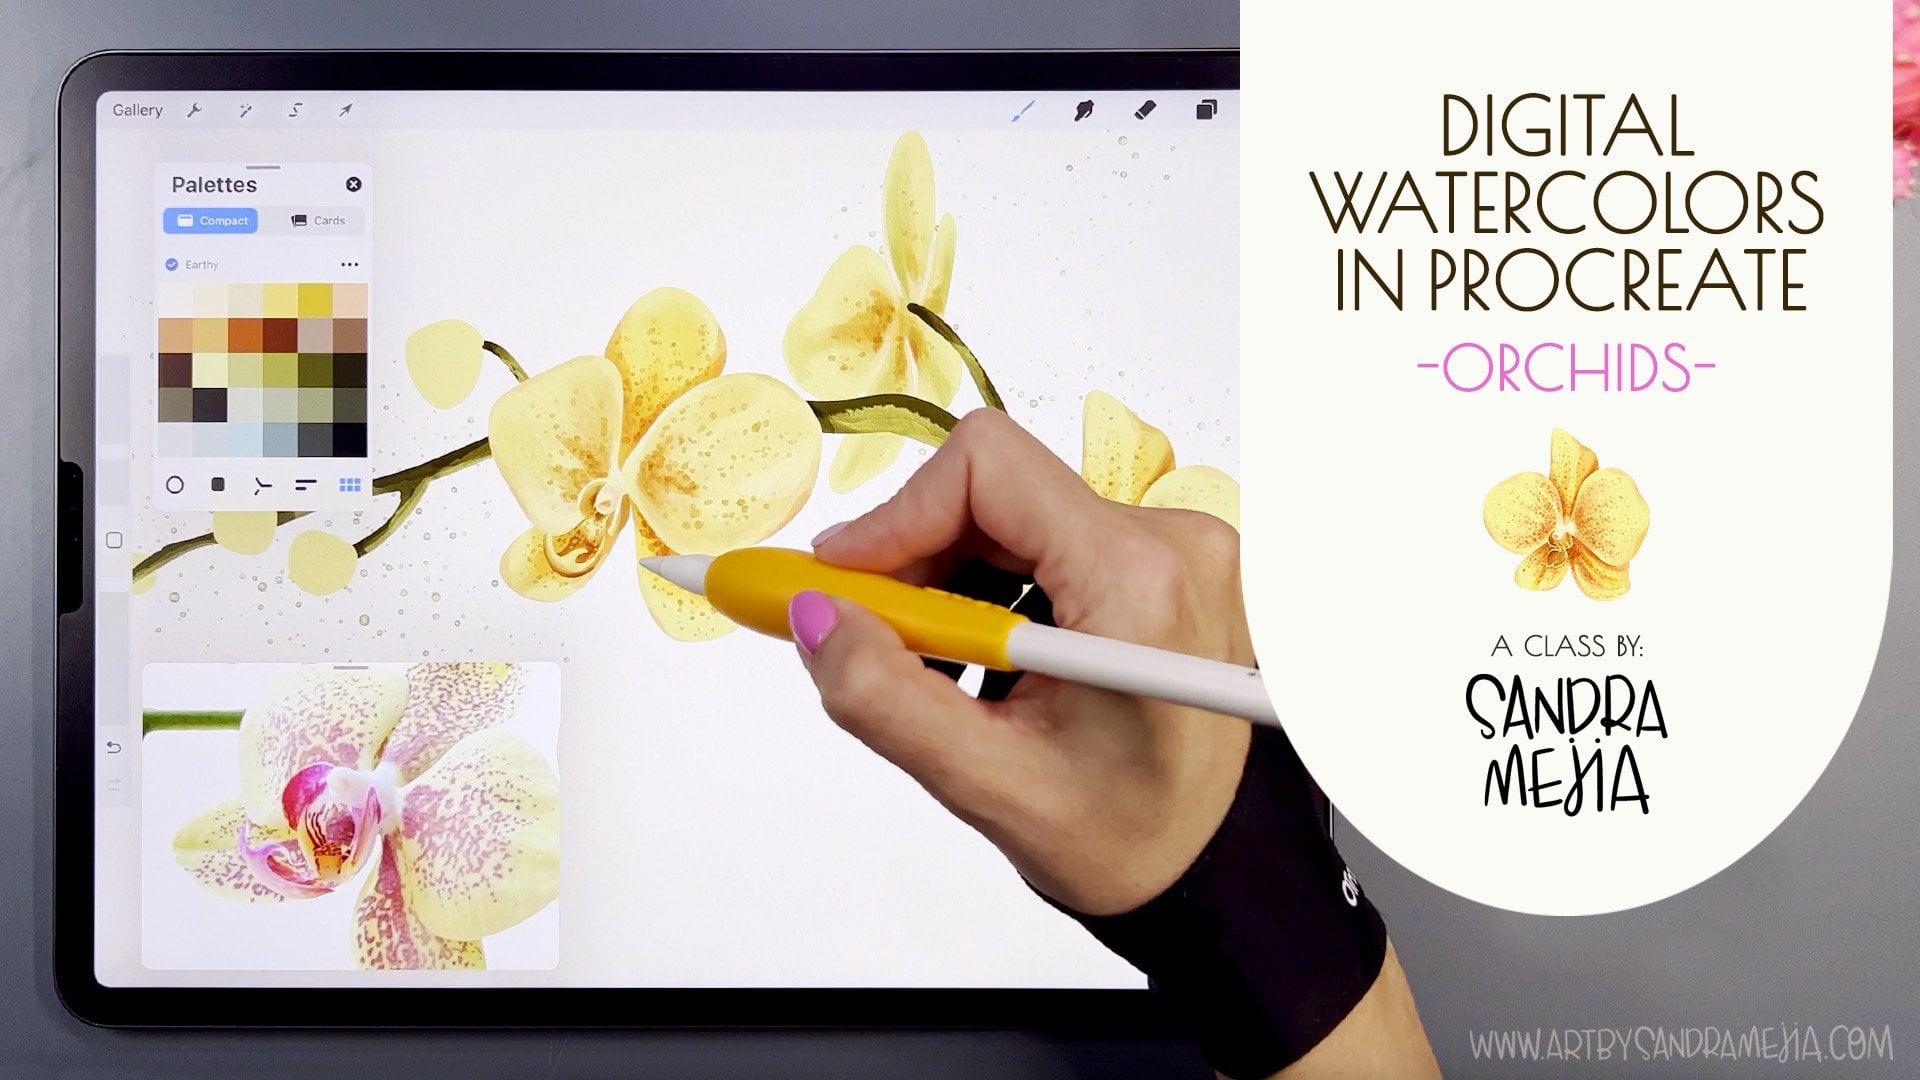
class is for you. Hi, I'm Sona Mahia. I'm a surface pattern
designer and illustrator, and I license my art for companies to put
on their products. And Procreate is what I use every day to
create my artwork. So I'm here to share with you my digital watercolor
painting process. This class are going to be
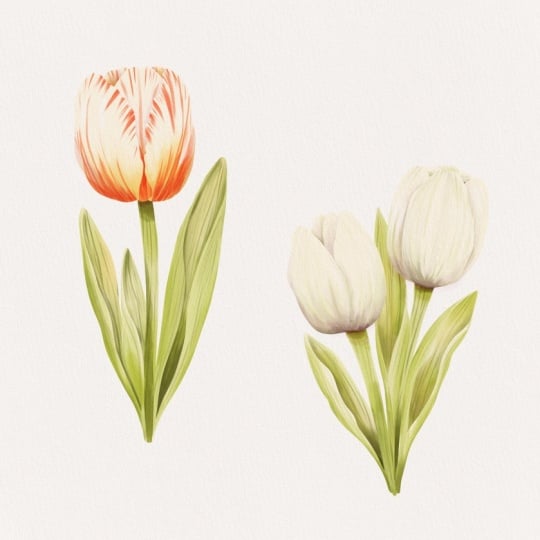
painting these three tulips, but the best part is that I have already prepared the
base shapes for you. That means that you can jump
straight into the fun part, which is adding color
and adding textures and practicing your
brushwork without getting stuck in
the drawing stage. It's like using a coloring book. Our class project
will be to create these three tollps and I created three different color
ways so that you can practice different
layering and effects. You can follow along with mine or you can create your own. This is a great way to
experiment and play. All right, ready to have fun, let's jump right
straight into it.
2. Class Project + Setup: Our project will be painting these three tulips using
different color ways, different textures, and
different techniques. You can follow along with mine, but you can also choose to
paint them any color you want. To get started, you'll need to download the base
Procreate file. The best way to download
this on Skillshare is to actually access your class on
a browser and not the app. And then look under Projects and Resources Sab and you'll find a list of the
available resources there. As I said in the intro, I'll be using my own watercolor brushes. This is not required. You can follow along with
any brush you want. This is also the brush
that I have used for all my previous watercolor procreate classes
here on Skillshare. So if you have taken those, you already have them probably. And just a little note about copyright just because I get
asked this question a lot. If you're using my base files, then that is just for you to study and to learn and practice. But that work is my copyright, so you cannot sell
the flowers that you create with my base file. But if you draw your own
tulips, your own flowers, and you use my brushes, if that's your own creation, then definitely, you can use that for
commercial purposes. That's your art. Just use
my base file to practice, and then if you want
to sell things, use that knowledge to
draw your own stuff. And go ahead and make
some money with it. Remember to post your
projects in the project area. I can't wait to see
what you create. And if you want, you
can also tag me on Instagram at art by Sandra Maia. Let's go to the next
lesson and start painting. Before I go, I will
also add a video. It will be the bonus
video at the end of the lesson about how to open the files and
install brushes and color palettes in Procreate in case you don't
know how to do that. Now let's go to the next
lesson and start painting.
3. How To Use the Ready-To-Color File: The file is already set up
this way because we're going to focus here on the painting techniques
and not the drawing. You'll see that I
have a paper texture already done here. It is locked. If you want to modify that, you just have to swipe to the left and press unlock and then you can do whatever
you want to that layer. You can also delete it
if you don't want it. I'm going to lock it so
I'm not drawing on it, and then I have my
text layer which has just the name of the flower
and my information here. You can turn that
off if you want to. I also have the sketch here. I have it a little bit
transparent that is full opacity, but I like keeping it transparent so that I can
see what's underneath. I'm going to keep it this way. You can modify it, do
whatever works best for you. I have my four
drawing layers here that I have named very
easily for three to one. What each layer here has is
the base layer for you to start applying color on top and it has Alpha
lock turned on. You'll see that it has a
checkerboard in the back. You activate that by
swiping to the right. There's no checkerboard. That means let me
grab this purple, for example, and a big brush. That means if the alpha
lock is not turned on, that I can draw
wherever I want on that layer. Let's undo that. But if I turn on the alpha lock and the
checkerboard appears, it means that what I paint will be confined
only to that layer. This is really cool because
now you cannot go out of the line and you
don't even have to worry about that. You
just have to paint. So each of the layers
has the alpha lock turned on and you'll see here, let me turn off these layers. I'm going to make
this background dark so you can see
what's happening. The first layer has some leaves, then the second layer has other parts of the leaves
and some of the petals. Then the third layer, again, some parts of the
leaves and some petals, and then the fourth
layer, the top petals. This way, the illustration is built from the
bottom to the top. Whatever is on the bottom
is going to be on the back. This is like stacking pieces
of transparent paper. What you paint
here, then what you paint in the next layer shows up whatever's on top of that and then the other one
and then the other one, and then you end up
with this composition. Once you have those base layers, this makes it really
easy to paint. This is why I provide
my coloring sheets for people that
already know how to paint and my tutorials in case you want to
learn how to paint. So the reason that all
the figures are colored in in this very light shade of a cream color is
because I like to work on my watercolors as if I'm working in
traditional media. I start with a very light
base and I start building the color there like I do when I'm painting with
traditional watercolors. I don't make it totally white, so I can see where the layer is, and that is why I have
chosen this color for that. And the reason these type
of files are great is because everything has been drawn for you already
and sketched, so you don't have to think about the drawing or the
composition or anything. You're here just to paint
and relax and have fun or to practice your watercolor
style paintings in procreate or any other style. I'm going to be using
watercolor brushes. The brushes are included
with this class, you can use those or you can use any other watercolor brush you have or any other
brush you want. So just let your imagination run wild and do whatever
feels best for you. Now that you understand
how this file is set up, let's go to the next
lesson and start painting.
4. Painting the Tulip: In this lesson, I'm
just going to show you some basic watercolor techniques and how to create
different effects. For that, we're going to paint
these three tulips using different colors and variations so we can practice
different effects. I will be using my watercolor brush set it
is included with this class. But if you already sign up to my newsletter or to any
of my previous classes, it'll be the same
watercolor brush set that I use for everything. If you follow my classes, you know that the
ultimate fill rough is my absolute favorite brush. But for this class,
we'll also be using the super cool watercolor and some of these bloom
and splatter brushes. Start with the ultimate
fill rough and well, we have to get our
color palette. I'm going to set the soft
botanicals as a default. That way, when I drag it out, it'll be out here and
it's easier to choose colors from here than to go
here and then look for them. I'm standing in my
number one layer, which is the furthest
back if you want, you can just leave that pressed and it will be the
only layer visible. If you want to bring
back the sketch and the text and the texture, just tap on there if that
makes your life easier. I'm going to choose to make
the leaves with these greens. I'm not going to use the
bluish greens because the tulip leaves are
very yellowy green. I'm going to start with a
light shade of green and make my brush very big and just start filling
out these shapes. Because all the shapes are done, I'm just having fun here and pressing harder
in some areas and lighter in some areas so that I can create different
watercolor effects. See? Just have fun with it and start adding more and
more layers of color. After that, I'm going to choose a darker color and same thing, pressing harder in some
areas and softer in others, see, then I'll have all
these little effects. If you don't like
that, you can always use a water blend
brush and don't just go back and forth
like that because it blurs the color so much, tap it. Dissolve that a bit, so it's not so obvious that it's like digital watercolors, and I think that
looks much better. The other trick that I like to use is going to this brush. I like to use different
shades of other colors. For example, I can
choose some of these yellow and add a bit of it here to this
leave This way, it gives it more of a
realistic watercolor look. Now, I'm going to
with the bloom brush, I'm going to add
some darker shadows. I'm going to make this big. This brush is meant
for you to tap it and see it creates that
beautiful granulation effect. If you drag it, nothing happens. It only works when you tap
your brush to the screen. I really like that and you can make it darker or you can
use different colors, say you wanted to use some blue, I don't, but let's try it here. See, I introduces a bit of that color to give
it more variation. You can also make
it way smaller. Let's say we're using this super dark green and just create some little darker areas
that is too black. Let's use a lighter
green for that. You can tap Im going to choose an even lighter
color and make it a tiny bit bigger. And see? I like that. Maybe a
bit here at the bottom. I'm going to paint this flower first and then we
will paint these two. I'm not going to even
concentrate on those layers. Let's go to the next layer. I'm going to turn it on and I see that it's the stem and
these petals on the back. I actually like turning
on all my layers so I can see what will be visible because now I've lost a
big part of my leaves, I like to have that in
mind when I'm painting. So now I'm going to grab my
ultimate field rough again, and again, with the greens, big brush, start
painting the stem. Now that I'm seeing
what's on the back, I'm going to try to make
the stem stand out. I'm going to grab
this dark green to make the shadow here. I could do it pressing
very softly and create a very soft blended shadow. But I want that to
be very sharp edged, so I'm pressing harder. I'm going to reduce the
size of the brush and add some darker areas here
and those I want to be faded. I'm going back with
my brush and fading the edges. I think
that looks good. Now let's paint some petals. I'm thinking I want
to make this one. The ones that have I'll
put a reference up here. They have a lot of
detail and I love that. So the background is
going to be white, so I'm going to leave
this cream colored. You'll see that I have added little indicating
lines for the sketch. That's so it can guide you of
where to make the pattern. Because I'm painting
these back petals here, I'm not going to add
much of a shadow. I'm going to add a tiny bit
of yellow here, and for that, I'll be using the
soft wash brush because it's a very soft brush. I'm just barely
touching down here. See that I'm not even
touching on the petal, it's the darker area falls out, and then I still get this
very light shade outside. I'll grab my ultimate
fill rough brush and I'll make it smaller and
grab this bright red. I'm just going to
follow these lines and just add a little tiny
bit here at the top, maybe one at the middle
if you see the reference, some of them have
just one little line or very little lines, but not too much. I'm just going to add a
bit of lines here and in the corners, one here. Then I'm going to do the
same here at the middle one and then maybe
a tiny bit here. Now I can move on to
the next layer and this layer has more leaves
and the petal in the middle. Now that we're here, let's
start with the petal and choose a soft wash brush
again and some yellow. And I'm going to
make that bigger and just tap it a bit here. You'll see that the
one in the reference doesn't have yellow,
it's more white, but I am taking some liberty
here because they also have the yellow ones
that have a lot of white and I'm going to
create a mixture of those. Now that I have that shadow, I'm going to grab the ultimate fill rough brush
again and the red. I'm going to make
my brush bigger. If you see the
reference, for example, it has a lot of
red at the bottom. I'm basically going to cover these making lines like this
so it has some texture. Up here, I'm going to make my
brush smaller and just add some lines and then
some go up till here. I'm going to start some
from the top also. But some are just done here. Now we're going to
finish the leaves. I'm just going to make my brush bigger and start with
the light green. I just cover this. It's just
the folds of the leaves. You can turn off your
sketch if that makes it easier to see where
these folds are. I want to keep the folds lighter here so you
can actually see the difference and maybe
take a darker color. And add it to the outside. See, I'm keeping it lighter
where it touches the leaf, so it's folded over so you can actually see
what's happening there. Then here, I'm just going to
add a tiny bit of dark in here because I also want this one to be separated
from the one in the back. Same here, add some
darker areas here. Then here because the
inside is so light, I can either make
this part really dark or I can go back into this layer
and make that very dark. I'm just going to make
this dark like this. Then I can go in with
my water plant brush and just blend that in a little bit.
I'm just stopping. Yeah, I like how that looks. Now I can go to the next layer, which would be the petals and
just finish painting those. Let's choose a soft wash
again and choose the yellow, make it big, and I'm
going to just stop here. See, this is a very big brush, so you can make it
smaller if you want more control and
stop here a bit in the bottom and then go back to the ultimate fill
rough brush and grab the red and make
it a bit bigger. If you need the sketch to guide you, just
turn it on again. And I'm going to make
it a bit smaller. Then just create like this one in the middle, which
is the biggest one. And then make it smaller and use this to
create the details. I'm going to create
the biggest one here. Okay. Now I'm going to keep
adding some lines, and you can add as many
as you want or as little. I really want to add like a
bunch here in the borders. Like, these ones in the
reference don't have so much, but if you look
at tulips online, you'll see that
there's some that have much, much more detail. And this is why I don't like
following reference so much. I just look at some of the
images and then I just do whatever I feel
will look best. I see that I'm not making
every line the same distance on the same width
and I'm pressing differently. This is to create some variation because that makes your
painting more interesting. If you want to see how that
looks without the sketch, so you can really see
what's happening here, you can turn off the sketch, and then you can
make some areas here darker because right now it's blending with
the back petal, but don't worry, we're
going to add some shadows. But I'm also going to make
some areas here dark. I can go back into this
other petal too and make some errors of it
darker also if I want. Now that I'm there,
I am going to create a new layer on top and I'm going to set
that to clipping mask. That way, that layer will only interact with whatever
is in this layer, and if I set it to linear burn, I can use my soft wash brush. I'm going to make it smaller. Let's try this purple and
see I can add some shadows. I'm going to do exactly the
same thing with this layer, create a new layer,
set it to linear burn, tap on it, and set
it to clipping mask and add a tiny
bit of shadow here. I'm just tapping. I think that looks
great to create separation between these
petals and that one, but this one is still very
blended with this one. I'm going to go back
to that shadow layer and in the borders
here, tap a bit more. Because I don't want the purple to just
look out of place, I'm going to go on
top of the top layer, create a new layer, tap it, create a clipping mask, set that to linear burn also, and now I'm going to
use that same purple to add some shadows here. You'll see that the purple looks different here than here. It's because this
part of the petal doesn't have yellow
and that purple is going to interact differently with these areas
that have more yellow. I think that looks pretty good. You can also add a tiny bit more here to create even more shadows and then go back to this layer, which is a middle petal
and also add a bit here, just so you create some volume and it looks like
it's folding over. Now that we're there, we
can make this even smaller and we can create a bit more definition
here between the petals. Now as a finishing
detail for the flower, I'm going to create
a layer on top. This layer will be painting
on top of all the layers. It's not alpha lock. It doesn't have base
shape or anything, but I'm just going to grab
I'm going to go here and grab super white color
there in the corner ultra white and using
my ultimate fill rough, I'm just going to use it to create some highlights on this. I'm going to make it a tiny
bit bigger and I'm just adding some actual
white highlights here. I'm keeping in between here
because if I paint here, I'll be painting outside of the flower and I don't
want that to happen. This helps brighten up the
flower a bit and also helps to blend in some of those red lines so
that they're softer. Now, because this now actually looks ultra real sick
or too detailed, we can't leave the
leaves super simple. We're going to go back
to the leaves layer, starting the first one,
and we're going to add a bit more detail
and a bit more shadows. I'm going to grab
my darkest green and add a tiny bit
of shadows here. Just to make these
folds really pop. Great. I'm going to make my brush even
smaller and with that, I can create some
veins, for example. These leaves usually
have lines going down, so I'm just going
to press softly in some areas and harder in
others and create some lines. Now, go to the next layer and
do the same for the stem. I'm going to give it some lines, but it's not so bland. Looks bland right now. Now on the third layer, choose
a lighter green and add some lines to these
two. Just a little bit. My hand is very wobbly, so don't worry if you
can't make straight lines, just make them interrupted, make them wobbly,
doesn't really matter. That's great. I'm
actually going to delete a tiny bit of this stem here
because it looks too thick. By the time you get the
final file for the class, it will be fixed. So your stem will look way
thinner from the beginning. I think that looks
much much better. Okay, so we're done
with this one. And in the next lesson, I'm
going to spit paint through the leaves because
they're going to be exactly the same process, and then I can show you how to paint that or two leaves
with different colors.
5. Painting the Leaves: So in this lesson, I'm going to spit paint through the
leaves because they're exactly the same process
as the other leaves and then I'll come back and show you how I painted the flowers. So our leaves are down,
and in the next lesson, let's paint the flowers.
6. Painting the Yellow Tulip: In this lesson, I'm going to show you how to
paint the flowers. The first ones are going to be yellow with some red details, I will put up image, the reference image here and we're going to focus
on that one first. Let's start with layer
number two because that one has a petal on it, and I'm going to
choose this yellow and my soft wash,
make it a bit bigger. I'm going to start by
making the tips red, and I'm just going
to barely touch. I'm touching outside of the petal so that the
edges are soft. I'm going to add a little bit of yellow to the
bottom, same thing. I'm lifting my pencil and tapping more times here so
that I create a darker area. I'm going to create the base
for all the petals like this and then I'm going to come
back and add some details. Let's go to the next layer. And I have the yellow selected, so the yellow goes
at the bottom. I'm just adding this
to the bottom of this petal and then choosing the red. The reason I'm not
painting here with the red is because
then it goes too much into the yellow I'm
touching outside the petal so I can control how much it blends into the yellow. My point is here, but it's
spreading all the way there. I want to make this one a bit darker so you can see the
difference with the back petal and I'm just
going to go to the next layer that has these two petals and
do exactly the same. Going to add the red here. Just in the border and
some in the middle. Then I'll make it smaller and add a bit more to the borders. If you need to see the
sketch, just turn it on. Whenever you need the
sketch, just turn it on. I'm going to go down here
to create that division. Then I'm going to select
the yellow and make this way bigger and add the
yellow to this petal. Again, darken it down here. If you want to blend
this more smoothly, just grab the water
blend and again, tap. You want to make it bigger
to make it a softer blend. I think that works. I'm going to make the sketch
even lighter so it's barely there and I'm going
to start adding details. I'm going to grab my super
cool watercolor brush and see this size.
That's pretty good. I love this brush because it
creates jagged lines here, but it can also create
very soft lines. I want to create the middle
lines very defined and then blend in because they don't seem to
go all the way down. Then I'm going to start
creating some lines. I'm just holding my
pencil a little bit, I'm just adding some
lines like this. You can let this
sketch guide you. And then go even
darker in the middle. Then I'm going to grab my ultimate fill
rough brush with this cream color and I'm
going to make it small. It's like a 2% now. I'm going to start
adding some lines. This is just to create
texture on the petal. Here you can use it
to create the border of this petal that's separate from the
one in the back and then go here and
add some lines also. I think that looks good. I'm going to go to the
next layer underneath, which is this petal and
do exactly the same. I'm going to grab the super
cool watercolor brush and red and just draw that line in the middle
and then just some lines. Then the ultimate fill rough and that beige color and more lines. And then go to the last petal, which is this one, and with the super cool
watercolor and red, draw the line in
the middle and for the line I'm pressing
hard and then softly. And then some more lines and
then grab the ultimate fill rough with a cream color
and a little bit of lines. Now I'm going to turn
of the sketch and see the differentiation
between the petals and they're not too clear. I'm going to do the
same thing I did with the other flower and just go to the shadow layers with my
soft wash and purple again, I'm going to add some shadows. So layer, this layer here
has the back petal C. I'm going to
paint on this one. I want to be careful because I don't want it to become muddy, just a bit and then go to
the next shadow layer, which would be this one that is on this petal and
do the same thing. Just a bit and you can make it smaller, you can control it. Just a tiny bit, even smaller. Then for the top petals, I want to make it bigger
because I wanted to make it smoother and just
add a bit down here. And that immediately makes the flower feel
more like treaty. Bit on the sides also for the same reason and maybe
even make it very small and I'm going to press very soft and create that separation there between these two petals. I think that looks good, but I want the yellow
to be brighter, especially in these petals here. What I'm going to do is
grab my ultimate fill rough brush and go to
the yellow and make it very big and I'm
going to add a little bit more yellow and blend
everything together. C pressing hard here
and then soft up here. I think that looks
so much better, but this one has a lot of detail and this one
has lost some detail. What I'm going to do is make my brush smaller and
with this light color. I'm going to go into the layer, see that I painted the yellow in the shadow layer because
it has linear burn, it has intensified
the yellow a lot. If I go back to this layer and I paint some white details, they won't be very visible. What I have to do
now is to create another layer on
top of the shadows, set that as clipping mask also. That one will be attached
to this bottom one, too, so I'll paint everywhere
on this layer. The I can actually draw my details and
now they'll show up. I want to add some
of these lines here. And you'll see between these two petals that that actually makes it come to life. At least for me because I
absolutely love adding details. You don't have to by the way, you can make this a very loose watercolor and not
add as many details. But if you're like me, I want to show you how
to add the details. Great. I think that looks great. Now finally, I'm going to show
you how to paint this one. For this one, we're going
to create a red tulip. It's going to be all red. The reason we're going
to do this is because red is sometimes
hard in watercolors. Adding the shadows to red
sometimes looks very ugly. In the next lesson, I'm going
to show you how to do that.
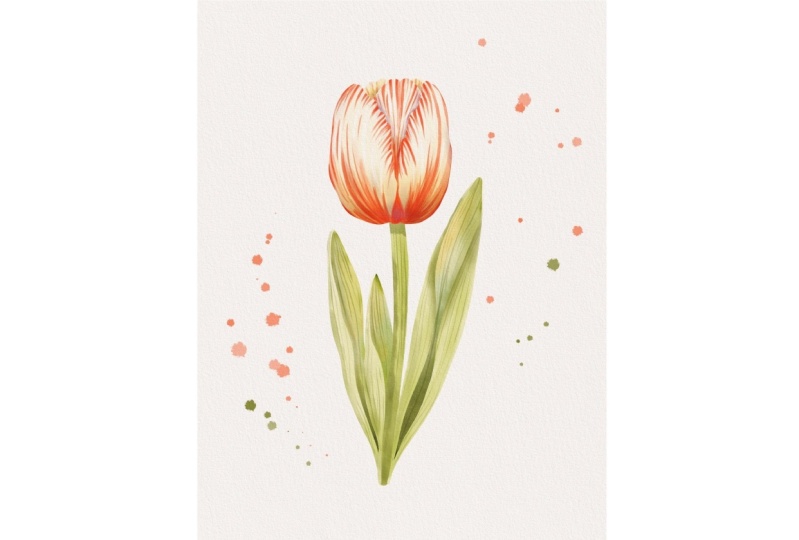
7. Painting the Red Tulip: In this lesson, I'm going
to show you how to paint dark dark red flower in
digital watercolors. The process is
basically the same, but I'm starting with
my ultimate fill rough and the darker red. I'm going to start
from the back again. I layer number one, we
have this little piece of flour here and that's all that I'm going
to do to that one for now. And then in layer number two, we have this one and
I'm pressing lighter. That's what I'm going to do for now and then layer number three. When you come here, be careful because this is
attached to the leaves. Just make sure you're
not painting your leaf and I'm pressing darker
there and darker here. So to make something darker, I lift my pencil and
then I go over it again just like real watercolors when you're adding more
and more layers. I'm going to add
some more layers here to make that very bright
and do the same thing here. Finally, layer number four, I'm going to leave the
borders a bit lighter so I'm pressing lighter and then I'm pressing way harder
here in the middle. S. That way we'll be able to see where this petal ends
and the other ones start. If you paint it over,
it doesn't matter. We can add lighter later. This is the magic of
digital watercolors. What I'm going to do now is just create the shadows in
the shadow layers. Let's start with this one. I'm going to be using the
same red and make my brush smaller and just
create the shadows. As I'm adding a
texture to the flower. Again, if you want to see
a sketch, just turn it on. I have indicated some
lines of how the veins go. Now I'm going to turn it off. But this way, at the same
time that I'm adding shadows, I'm introducing
some texture too. This doesn't look
so good right now. I'm going to go here
and darken my red, so I'm just going
to go down and then add more shadows
using this brush. Then I'm going to
make my brush really big and then add some
shadows here at the bottom. Same way we did with the
other ones to create this folding over
texture of the bulb. Now what I'm going to do is grab my water blend and I have it at 26 and I'm just going
to drag in some areas. So that you're blending
those lines in some places. But in some other places you can still see the lines
so that is texture. Then if I think I need to
go even darker with this, I'll grab my bloom brush and I'm still using
that dark red. I can't make it too
big because this petal has the same
layer as this. You can either make it
smaller or you can grab the selection tool and select the flower
you're working on. And then it doesn't
matter if I paint here because it's only going to paint in the area
that's selected. So let's just tap here a bit and see that it creates
that very rich red. If we were creating
the shadows in a normal layer that's not set to linear burn
like this one, the shadows wouldn't be rich. Now let's go back to
the other shadow layer, and I still have the
selection there. I'm just going to tap here. I notice that I have some red
painted already in my leaf, but I'll show you how
to fix that later. I'm going to tap until
it's really dark and I can see the difference
with the top petal. You see? This brush is great for
creating these types of shadows because it's
basically effortless. Now I go back to my
ultimate fill rough and go back to the regular
red and then make it smaller, maybe 4%, then add some lines
here just for that texture. And then you can go
back here and grab that darker red and even
add some more lines. Then again, you can use your water blend to just smooth
out some of those areas. If you see that you need
more definition here, you can use your ultimate
fill rough brush and make it a bit
smaller and then add some more defined
shadows here. The more times you cross over, the darker that shadow will get. Now we have the back
petals to work with. Let's go to these ones, which is these two here. I just want to add
a little bit of red here so that you can see the
difference with these ones. I'm just pressing hard
in some areas and then softer in others
so that it blends out. If you keep going and it
doesn't get any darker, you can always lower the color here and then
make a darker shade. These ones are very dark now. So these ones are
going to be like this. If your percory doesn't let
you create anymore layers and you need to create another layer for the shadows for this one, for example, you can
start managing the layers you have to reduce the number of layers so that you
can create new ones. For example, here, you could delete the text or
if you need the text, you could delete your
sketch, or for example, if you're done with
this layer number four, you can just merge these ones, and if you're done
with number three, you merge these ones that way, I'm freeing up space to
create even more layers. My iPad can still handle this, so I'm going to
leave them there, but if your iPad can't,
that's a good way to do it. I'm going to create
a new layer here, set that to clipping mask, set that to linear burn, and I'm going to add a
bit of shadow here with just enough so that you can understand that this is a different petal in the back. I'm not going to
add tails to those because they don't need it. Finally, what I like to do is in the forward petals
like four and three, is to choose a white and
make your brush smaller, and I'm going to turn off the sketch and just add
a little bit of white. Like a little bit of lines here. Just to bring that texture out. Then I'm going to
go to layer number three and do the same. Sially here in the tips, and then go to layer number two and I can add a tiny bit of that then layer number one, add a tiny bit of that,
and we're done with that. Now I'm going to release
the selection and I'm going to show you how to fix the leaves that I painted. First, we have to determine
what layer is painted red. I think it's number
three. So I'm going to grab my water blend brush and just blend this to this side and then grab the green
and blend it onto it. Grab the green and
blend it onto it. Now it's gone. But
these top parts aren't disappearing
and the reason is because they're
on this layer. See? If I turn off that
layer, they disappear. What I have to do is go to that layer and with
my eraser brush, just erase those
little parts of red, and then we're actually done. In the next lesson, we're
just going to recap and I'm going to show you what you
can use these flowers for.
8. Wrapping Things Up: Yeah, you made it to the end of the class. I'm so happy for you. I hope you had lots of fun and that you learned
different techniques and that you feel great about your watercolor
skills in procreate. I hope you can apply everything
you learned and draw different kinds of flowers
and paint your own things. And before you leave, remember to subscribe to my newsletter. I send a monthly creative brief. And tons of freebies. And if you love this class, remember to check
the ECI Procreate botanicals edition class
here on Skillshare. That one explains
a whole process from creating the base shape, setting up the canvas to exporting the files and
creating compositions. Remember to post your project, leave a review, share
this with your friends, and follow me here
on Skillshare. See you soon. Bye.
9. Bonus: How to Install Brushes and Open Files in Procreate: Hello. In this video, I'm going to show you how to install brushes and
color palettes in Procreate and how to
open files in Procreate. So let's say that you
bought some assets. I'm using the assets in
my daffodils tutorial. And when you see that
a file says brush set, that is a brush file, obviously, and Swatches
is color palettes, and then procreate files are just procreate files, obviously. I am going to download all
of these into my iPad. Let's say I'm going to
download just the brush set. I asked me if I want
to download it, I'm going to say download. If I go here to my downloads, it's here and if I tap on it, it will import it
directly to Procrit. So now if I go into
one of my files, it'll be the first one imported here, see,
Sandra's watercolors. If it's not there
for some reason, you're going to
have to find where it downloaded onto your iPad. So if you go to
your files folder, it will usually be
here in your reasons, or you can find your downloads
folder and find it there. And once you're there, you
can double tap and it will import into procretT
it's there again. Or you can also
drag your screen up slowly because you just open that files folder,
it will be here. You just leave it
pressed and you drag it out here to
create a split screen. Now you can just drag your brush set and it will import it. You do exactly the same process when you're importing
color palette. The only difference is that when you import color palette, they're going to be at
the bottom of your stack, not at the top like brushes. See? Here's mine. It's also the same thing when
you have a procreate file. Say we download this one and
now we can find it here. If we tap on it, it will import
directly into Procreate. Or if you have it saved in your dropbox or any other file, you can also find it here in your files and when you find it, you can just tap on it
and it will import. That one you will find
here in your gallery. See? These are the
two I just imported. If for some reason you
have downloaded all at once and you've
downloaded a CIP file, you will see it here
in the downloads also and you can just tap on it, or you can go to your files
and if you just tap on it, it will unzip it, and then you will have access to all of the elements here, and now it's the same process
as I showed you before. I hope that's
helpful. Procrad has made it very easy
to import assets. I hope you have fun
with your assets and see you soon. Bye.
 Sandra Mejia, Illustrator + Pattern Designer