Transcripts
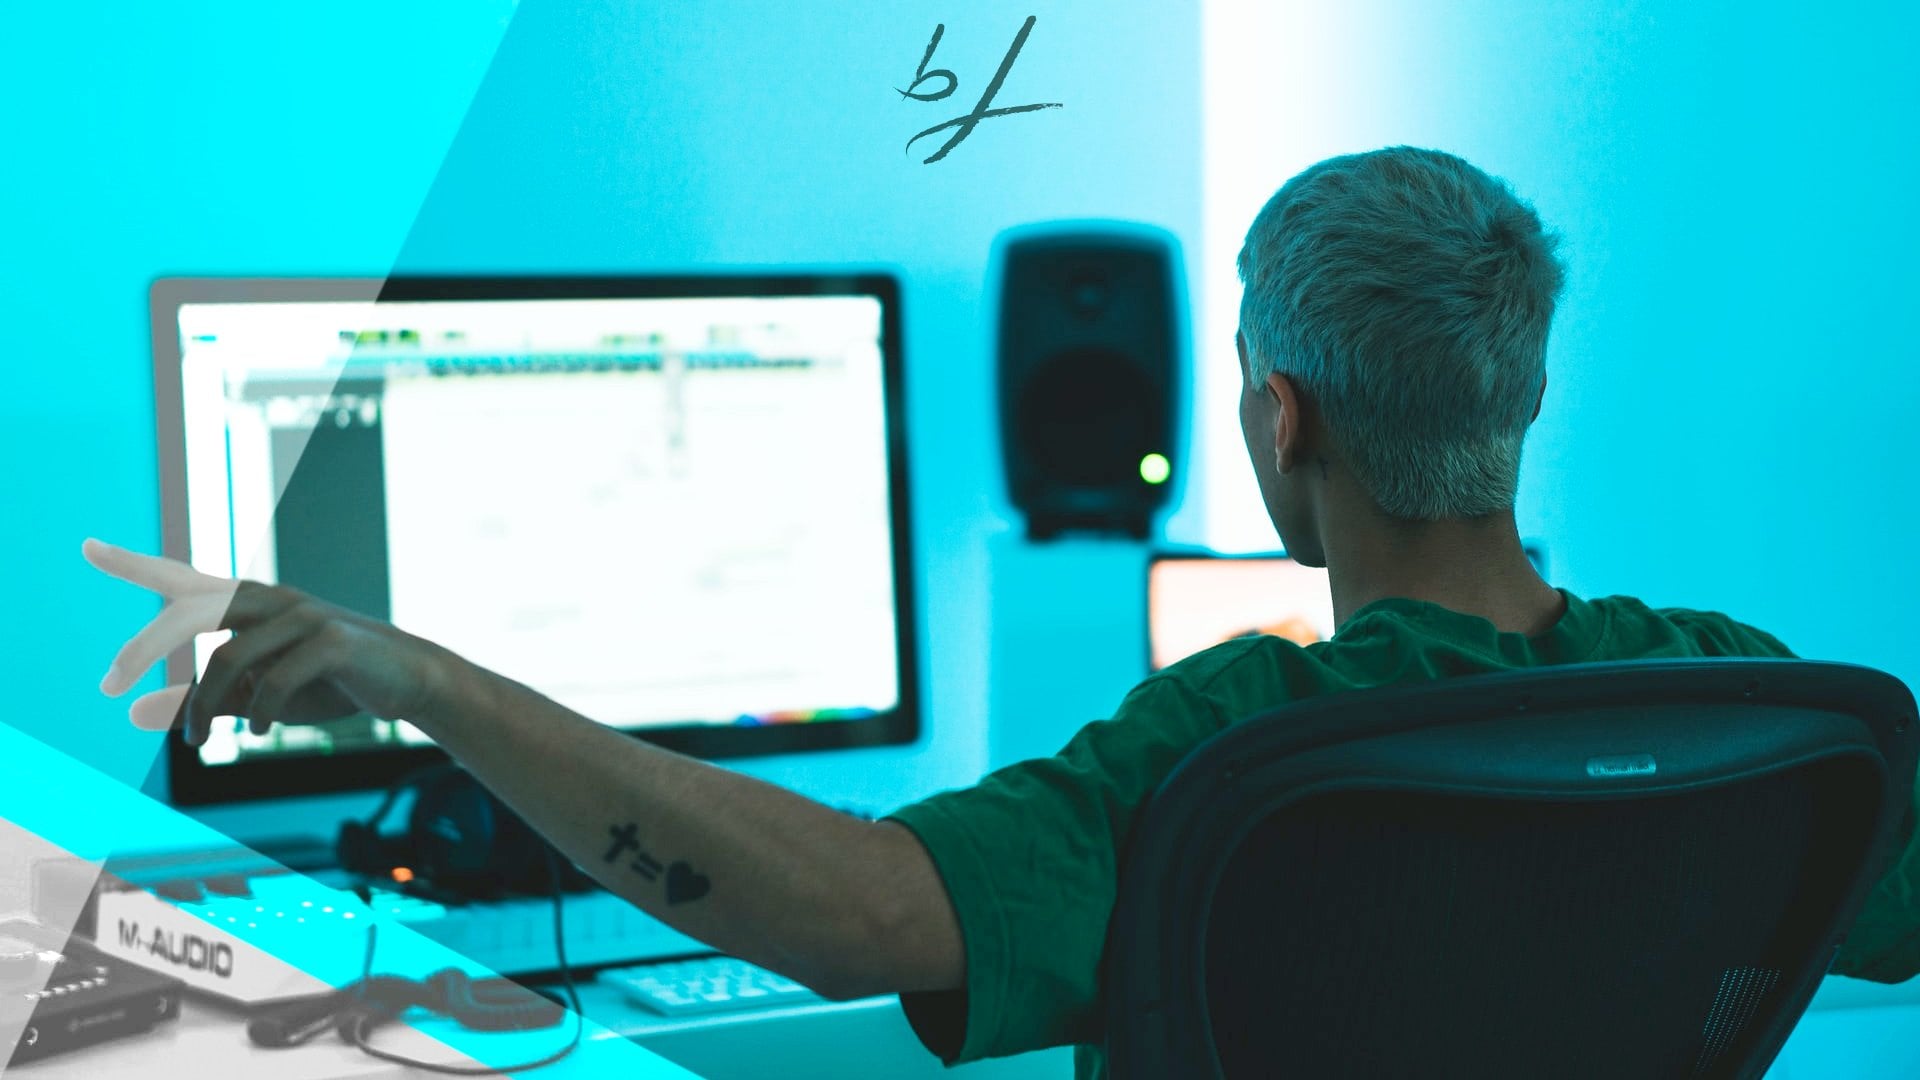
1. Introduction & Course Overview: Hi there, My name is Ben, and this is the complete game music composition and music theory course. My aim is to take you from not knowing anything about music for games, or how composers write music for games, to being able to write music for any type of game. So let's have a look at an introduction or an insight into game music composition. So music for any kind of media is a form follows function situation. So this is a reference to 19th century architecture, where the exterior of a building would be designed to reflect the interior function. But we're not learning about architecture. So what's this mean for music? Well, essentially it means that the form of your music will follow the function of the visuals. So film music is composed so that it reflects the tension or the sadness or whatever other interior emotion is being portrayed on the screen. Game music is no different. We must compose our music by following the interior functions and emotions of the game. When left alone with nothing to look at and no deadlines to meet. Composer will in most cases, right, very different music from the music that, that same composer would write if they were writing music for theatre or film or games. Okay, so the challenges in writing for these mediums include understanding the aesthetic principle of the medium and working with the production team to produce a satisfying user experience. The main difference in game music is that the experience is open-ended, and so it possesses a very different set of challenges for the composer. So with the game score, you've no idea how long a player is going to remain in a certain location in the game. You also don't know what path that player will take to move through the game world. So the challenge here is to make music that won't drive the player crazy by being too short and repetitive. And it won't drive the developers crazy by being too long and taking up too much file space. So to solve these issues, a composer may create a piece of music that can be broken into smaller pieces of music and work together as a whole, no matter what is going on in the game. It's a different aesthetic approach and it's an interesting compositional challenge to write music that can fit together like a puzzle in many different ways. Another thing to keep in mind is that games can be long. A film is usually about two hours long. And we know when we get the film project, we know that right, it starts at 0 and ends at the two-hour mark, and that's it. That's as long as it takes. But now, imagine writing music for a game that's made to be played for as long as a 100 hours. It's a lot of music. Game composers faced a whole host of issues and challenges that don't exist in the linear medium such as film and TV, okay? The complexities and the requirements of the game environment raised many questions. Questions like, if you don't know how long the player is going to stay in the game level. How long should you make the piece of music? If the action and intensity speeds up as the player goes through the level, should the music speedup as well? Will the music sound different on different devices? How do I know what format to deliver my music in? Hopefully, this course will clear up some of those questions and give you important tips and techniques that will help adjust your mindsets to composing music for games. So just before we go any further, I wanted to make you aware of a Discord group that I have set up for all of my students to come and join and interact with each other, share projects, give advice, all of that good stuff. It's just a place where everyone can, as I said, come together and chat about music and music production. At the moment, it's all students from my other course, which is about EDM. So adding some composers into the mix should be beneficial for everyone. You guys can share your skills about music theory and composition, maybe helped them write better EDM tracks and they can share their skills about music production and mixing to help you guys achieve a nice balanced composition. So make sure you join that Discord server as it's a great way to further your skills and make connections, work on projects together and even asked for advice or feedback. There is an invite link attached to this lecture that you can click and join in a matter of seconds, okay? Also, before we move on, there is a Facebook group as well. So if you don't have a Discord account, we do have a Facebook group, but it's totally dead. I'm not going to lie to you. Nobody really interacts in the Facebook group at all. So if connecting with other students and composers is something that you're interested in, I'd recommend creating a Discord account because it's much more active on the Discord server then than it is on the Facebook group. Okay, So moving on to the course content and what can you expect to find as you progress through the course? I've done my best to try and structured this course logically, essentially starting at the very basics and then working our way up to some more, some more advanced concepts in game music. Composition. Because of this course is mainly information-based, okay, so it's going to be a lot of slides and just pure information. I don't do any composing at all, apart from showing examples of what I'm talking about or how to do something in the DAW. I don't think you watching me do stuff is very helpful. That just teaches you about me, not the process, okay, I can't tell you exactly how to compose because everyone has a different style and every game is going to be totally different. What I can do though, is B, given you some universal tips, guidelines, approaches, and techniques that you can take with you and use your benefits when you're composing for a game. So what you'll be doing as a student is taking this information that I give you and then applying it to the various different assignments throughout the course. This way you can get some practical experience and I'll also be able to give you feedback on your projects and what you've done. You can also upload those projects to the Discord group and get feedback from other students as well. Also, the last point there, don't forget to leave a review. Okay. Reviews are actually quite important because. They can help me to update this course if there's any issues or improvements that could be made that can help me with future courses so that I can get it right from the very beginning. But most importantly, if you really, really like course and you think it's beneficial, leaving a review can help another potential student choose the right course for them. So make sure you leave a review if you like this course. So just a quick heads up about the course. It might feel like I'm bombarding you with music theory and the first part of the course. So if you get overwhelmed or board, that's okay. You can just skip it and move on to a section that you actually do want to learn about. Both if you come across something that you don't understand, I probably covered us in the music theory section. So let's say I mentioned dissonance in the lecture about open world games. You can always hop back to the theory lecture on dissonance and then go back to the open road lecture and continue on. So how you interact with the course is up to you. But everything you need to become a great game composer is all here. I would advise you to watch the psychological music tricks, which is the music theory part of the course. I'd advise you to watch that at some point. Okay. I don't teach you how to write notes and stuff. It's just some really, really cool extra techniques that you can, that you can use to make some really advanced sounding compositions. And finally, this course is about the actual composing of game music, okay, not the technical side where music is implemented with FMOD or W twice. A game composer does not need to know how to use FMOD or WY is the game's developers and sound designers. They're the ones who will implement the music for you. As a composer. You just have to provide the music assets or the music files. It's about the music, not the coding. Okay. If you want to learn about FMOD and WY is, you can send me a private message on here or use the Q and a section of the course. If there's a lot of people talking about it, then I will bring out a new section dedicated to FMOD and WY is, and I'll announce it when it's out. I didn't want to just throw that whole section in because it's a really technical section that could potentially scare you away from composing if implementation isn't what you want to be doing. So there's no point in thrown that in when it's honestly not that necessary. It can certainly help if you understand how FMOD works and is used to implement music. But it's really not that necessary for a composer to know how to use it. And the reason why is that most games today are just traditional, okay, and that there's one song for the menu and different songs on different levels. Most games are still like this. It's mainly the triple a Actian games that tried to do blending between cam and suspense and combat tracks. And a few games even tried to go more procedural, almost having like a music sequencer inside the game. But honestly, that is quite rare. Okay, Mostly you'll find yourself working on a traditional game. I will be teaching you how to create music for both of these game types. Okay, so don't worry, but will be gone from the traditional one track per level to also knowing how to approach a AAA title that needs several different levels attention in one piece of music. Okay, so let's move on now and we'll have a look at the first section, which is receiving the project.
2. The Game Composer's Job: Okay, so in this lecture, we're going to have a look at the game composers job. So as a game composer, your job is to accompany the game with music, right? Well, it goes a little bit deeper than that, okay, because music for a game is basically psychology. We're actually using the music to manipulate the player in a certain way. It's not just a matter of following the visuals like you may come across in film. But we're actually using the music as a device to make the game feel much more immersive. There's a lot of musical techniques that are genuine psychological tricks. And they can make players field the exact way that we desire them to feel. We'll be covering a lot of them in this course. But it's important to alter your mindset from the music following the visuals to the music manipulating the players feelings. So sometimes you may have to evoke emotions such as tension, may be feelings of heroism or a heroic feeling, or even sadness. These could be triggered by a scene or an event in the game, like a character dying. Other times we may have to make the player feel panicked, are under pressure. Sometimes we're just providing a setting to immerse the player into Piano Bar, elevator, nightclub, or even certain cultures or countries. We can also communicate mood or atmosphere. Now this is similar to emotion, except that you're providing a feeling of atmosphere. So danger, peaceful, scary. The difference here is that it's not linked to a plot. Events are seen in the game, but it's actually linked to the location or the setting that the character finds themselves in. Sometimes we have to create character music to make the player feel certain feelings about the characters. For example, our main protagonist could be an inspiring warrior who was a hero. But there are also drunk most of the time and they make silly decisions. These are very, very specific traits and the music, believe it or not, can communicate all of these traits. We must also set the pace. So fast music can make players feel agitated and tense. And if there's a particular sequence of gameplay, maybe that's fast-paced or the developers wanted to be fast-paced. The music can really help to immerse the player and make them feel tense and under pressure. Now I know I mentioned this before about evoking emotion, but pacing is more so related to time rather than emotion. So the player could be under time pressure if they have a little amount of time to reach a certain destination in the game. There's also the shorter compositions that are triggered by events in the game, such as completing a level or dying. Grand Theft Auto Five makes use of this. When a character dies, they play this sort of death stinger it would be called. And Mario Bros, they have a death singer to or they even have a stinger for completing a level. We must also create general teams that are not adaptive or triggered by anything and are basically just pieces of background music. So the title screen, pause menu, and the credits. But most importantly, and this is the most important job. Do not be distracting, okay? Especially during scenes of dialogue or in high action gameplay where the player is fully immersed. It doesn't matter whether or not you like the melody that you made or whether you prefer the more busy version of your piece of music. What matters is the end project, which is the game, okay, not your music. If it's distracting from the actual game, you should rewrite it, or at least try to edit the piece so that it's no longer distracting because your job is simply to accompany the game. Now, if you're working on a triple a title, composing will be your only job. Just composed the music. And there will be more than likely hundreds of compositions and then hundreds of variations of those compositions. Okay. There is something called implementation, which I mentioned before. This is where the music and audio are implemented into the game. And it's done through middleware, which is a type of software, okay, It's kinda like the middleman between your DAW or digital audio workstation where you do your music and the game engine, okay, so Unity or something. Okay. So there's two main middlewares, which is FMOD and WAS. Now, I don't teach you how to use them. But I am going to say that if you understand how to use one of these softwares, it can be a great benefit, okay? As your musical vision may be different to the sound designers musical vision. So if you can demonstrate exactly how you imagine the music being implemented, that can help. But that's the only reason why a composer would need to know how to use middleware, okay, the game developers, they're the guys who are going to be programming your music into the game. Or the sound designer will program it in. The composer is not required to know how to implement. As I said before, it can give you an advantage, especially for indie games. They probably don't want to spend extra money by hiring a sound designer. So that might help you get the job. If you can implement it yourself. Didn't want to be hiring an extra person. If you can do the job to both. Really, it's not that necessary. Anyway, what you do need to understand though, is how game music works, okay, how a game score is actually built. Because quite often sound designers will have their own way of doing things on their own methods is that they want to use for the game. They'll ask you to compose to fit this. If you can grasp the concepts in this course, you'll be able to understand what they're asking for. And you'd be thinking like a game composer and no time. But unfortunately, it's not just as simple as writing a piece of music and then handing it off because they want to be sure that you're not just going to hand them a five-minute piece of music that they have to chop up themselves. So that's why I'm saying if you can grasp the concepts in this course, then you'll be able to deliver the precise already chopped files that they're looking for. So with all that said, I think we can start learning about the information that you should ask for when you've been hired to compose for a game.
3. Getting Started on the Right Track: So in this lecture, we're going to be getting you started on the right track. Before you start composing anything, there are a few things that you should do. So the first thing is to find out as much as you can about the game. Now, this depends on how much of the game is already completed. Sometimes you'll only have hypothetical ideas to work off. And this is often the case with Indie projects. But other times you will have storyboards or even some finished gameplay or cutscenes, even to work with AAA titles are usually much more organized. Not always. For us as composers. We need to know as much as possible to create suitable teams and evoke the correct emotions. So what you should do is request a meeting, a resume call, or even email the game developers and requests as much information as possible. The information that you asked for will depend on the type of the game. But if you can, you should always ask for the following information. The team of the game, okay? It could be patriotism, it could be time, maybe technology, the most important pieces of information at the team, or the tone of the game and the setting, okay, but we'll get to that. These two aspects alone will shape all of the compositions. Technology is the main theme of the game than the music should probably use a lot of synthesizer sounds to reflect this is loneliness, the team, then the tracks should be quite empty. Inspires reflect the team of the game in your music. You should also look for any available character designs or descriptions about the main character. Are they shy, strong, lonely character designs and traits? They allow us to develop character teams. So if you have a big brutish monster and his team should reflect his character, then you should probably use big brutish instruments like cubism bases and yellows is the main character, mysterious and shy, but also a kindhearted warrior. Reflect this in the music. Also, a brief plot or summary of the game. How did the characters grow and change? What kind of action sequences are going to be in the game. The plot is important because it allows us to actually develop those teams that we compose. Perhaps the main character starts out tough and strong, but towards the end of the game, they're weak and they must overcome all odds to survive. We can create variations of the character music to reflect this. Maybe by changing the key, changing the rhythm, or changing the mode or the tonality. We look at modes later on in the psychological tricks section. And the final point there on the bottom of the screen. And this is a definitely a must if you don't do any of the other things, definitely do this, okay? Ask for reference composers and a reference game score. So this tells you what the developers are looking for in terms of style, sounds, and watch it they think would fit already. This way, you know what kind of direction you should go in with the music. Now, don't worry if they're not sure or if they don't give you all the information that you need immediately, okay? You will be communicating over and backward the developers, as you write your compositions, you can always send over a draft of a track that you're working on and say. Hey, what do you think that this main title also, did you get a chance to draw up those character designs that I was asking about before, you know. So don't worry if they haven't given you everything immediately because you can get it later once it becomes available. The second thing to do is to make friends with the sound designer or the main programmer on the game, okay? This person will be the one who actually implements your music into the game. So it's good to be friendly with him or her so that you can explain how you envisioned the music playing or being interacted with. It also helps to know the sound designer as the actual sound effects in the game can totally reshape your composition. So for example, you might have a very, a drum heavy track for a battle scene. Okay, you think it sounds really tens and great because there's lots of drums. But then when you hear the sounds for the battle scene, there's loads of explosions and gunshots and lots of percussive footsteps of people running, okay, and all these sounds are already in the soundscape. Now, your track with lots of drums probably won't work as well as it did before, because it will clash with the soundscape for the battle scene. So it helps to be able to hear the sounds that a designer is planning to use for a certain level or a certain environment. Being friendly with this person will allow you to e-mail or message them quickly and say, you know, ask if there's any sound effects that are going to clash with the music in a certain part of the game. And finally, the third here is to play some games. If you're not an avid gamer, you're going to have to play some games. And if you are an avid gamer, you're still going to have to play some games, okay? You need to become comfortable and familiar with games as a narrative format. When you play games, you probably don't pay attention to anything going on behind the visuals. But now you have to, you have to pay attention to how the music is used, where it's used, where it isn't used, and why it's being used or not being used at that particular point. If you have the opportunity to play a game that you're actually composing for, definitely play it. If they have a base or a rough version of the game, or even one or two of the levels. It will help you to come up with ideas for your music. Obviously, this is impossible most of the time. So what you should do is play some similar gains in the same genre and games in the same setting. Basically, any game that you think you can learn from that relates to the game that you're working on. Play it, and take notes of how the music is being used and what it's actually doing for the player. In this case, you're the player. So how is it making you feel? Why is it making you feel like that? How does interacting with the game caused the music change? What actually happened when the music changed? Because I guarantee you it didn't just cut out and start playing a different piece of music. So next we're going to move on and have a look at how the orchestra works. I understand some of you probably know this already, but I wanted to make sure that all levels of composer are accommodated here. So we are going to take a look at how the orchestra is set up and also how you can set up your own virtual orchestra in your DAW.
4. Strings: The string section contains all of the instruments that use strings to make their sound. The located at the front of the orchestra. And there are five subsections of instruments. There's the violins, violas, Chelly, bases, and harps. We're going to start with the violence, okay? In this section, they're actually split into two smaller sections again, Okay, There's the first violins and the second violence. So inside that sort of ellipse circle thing, the first violins would be the violins and the very left, or at the very bottom. And then the violins that are on the right are kind of on the top. Those would be the second violence. The main difference here is that the first violins usually take melody lines, and the second violins would play a supportive role. So the second violins will often accompany the first violins with some harmony and courts. The violin instrument has arranged from G3 to A7. Okay? So if you look at the keyboard and the top of the screen, and the white keys are on the bottom. So where you see not named. And it goes from G3, which is kind of in the middle, all the way up to a seven, which is way, way, way, way up the top on the very right-hand side of that image. Okay, so the violins play in quite a high register. Any notes that fall outside of this will either come out of your plug-in as complete silence. Or if a real orchestra is playing them, the instrumentalists, they'll have to ignore these notes because it's outside the range of the violin. Violinist will find it difficult to play three or more notes at a time. So if you're writing for a real orchestra, keep this in mind as well. For us composers who use computers to make our music. We don't need to worry about this as much. Next, we look at the violas. These are the same as the violins. They're just bigger insights. And because of this, they play at a lower range than the violins, because the strings are longer, there's more stretched out. Ok, so the violas range is from C3 to E6. So again, if we look at the diagram, S3 is kind of on the left, that's kind of the middle left. And all the way up to E6, it's not as far up to the right as the violins were. So the viola has a lower register then the violin. The viola is usually provide harmonic accompaniment rather than melody. But you can absolutely write melodies for the viola if you wish. Step down from the violas, then we have the Chelly. And again, these are basically the same as the violas, except they're bigger, okay, they play a full octave below the violets from C2 to C6. Solo melodies can sound amazing on a cello. So I definitely recommend trying this for some of your compositions, especially the ones that need extra expression or sadness. Stepping down from the Chelly, we have the basis. And yes, again, they look like their previous counterparts, but they're just bigger. These range from E1 to G3. Okay, So really, really deep, really low register. These provide the deep bass frequencies for the whole orchestra. All of these instruments collectively are commonly referred to as the violin family because they all look like different sized violins. Okay, the violin is the smallest. The Viola looks like a bigger violin or the cello looks like an even bigger violin. And the double bass looks like an even bigger violin again, okay? Now a common orchestras string section will also have hack, okay? The strings and the run diagonally. And there's usually only 1.5 for the entire orchestra. Sometimes there can be two harps, especially if it's a particularly large orchestra. The higher-up has a very wide range from C flat one to G-sharp seven. Okay, so on this diagram, the keyboard at the top of the screen, C-flat one, would be known as b 0 on the very, very, very, very left. Okay, and G-sharp seven. And if you see that up on the top, you'll see the sharps, okay? Um, the very, very right, you'll see G-sharp seven. So a massive range there for the hierarchy. As for how it sounds, think magical and innocent. Here is what all of these string instruments sound like together. Let's move on now and have a look at the brass section.
5. Brass: Brass instruments get their name from the material that they're made from. These instruments are extremely loud and provide a lot of the weight for the orchestra, like we did with the strings. We're going to start with the highest in pitch again, okay? So in the orchestra, the brass that's highest and pitch is the trumpets. These range from F sharp three to C6, okay? The trumpet is monophonic, which means that it can only play one note at a time. Okay, so keep this in mind. If you have to compose for a real orchestra, the trumpet can't play more than one note at any given time. Stepping down then from the trumpets, we have the trombone. Now, with the trombones, they can often be split into two sub sections, okay, there'd be a tenor trombone and a bass trombone. A typical orchestra will usually have three trombone, honest, and only one of those would be a bass trombone. They'll often play harmonies with each other. So in this case, the bass trombone would play the lowest line of notes. Stepped down from the trombones. Then we have the French horns. Again. These are very loud instruments, okay, so they're often used for climactic moments. There can be anywhere from two to eight of these instruments in an orchestra. With eight probably been a bit over excessive. These range from A1 to F5. A solo horn melody can actually sound very, very nice, so it can be something to experiment with in your compositions. Finally, we have the tuba, Okay, these instruments are so big and loud that most of the time there's only one tuba in the whole orchestra. They never play melody and instead provide a harmonic accompaniment for the rest of the instruments. The tubers range is from D1 to F4. Here's what all of the brass instruments sound like together. Next, we'll take a look at pitched percussion.
6. Pitched Percussion: The percussion section is the largest section in the orchestra. And because of that, I'm only covering the most common instruments. I've split it into two lectures as there are two subsections. Again, with the precaution in an orchestra, There's the pitched percussion and then there's rhythmic percussion. So in the pitch percussion section, we have instruments like the piano, this Leicester, tubular bows, blockage below xylophone and the marimba. There can also be a lot of other instruments in this section, but they're not as common. So we'll only focus on the most common here. We'll start with the piano, because we all know what the piano is and how it sounds. The piano has the largest range of any instrument. It ranges from a 0 to c, okay? Some may argue that the piano is a string instrument, as it has strings inside that make it sound. However, when you press a piano key, a malice springs forward and hits the corresponding string, okay, This all happens on the inside of the piano. So because there's a malice and the act of striking the string involved, it's classed as a percussive instrument. The tubular bows can also be known as the chimes. And these consist of several brass tubes that are suspended in front of the percussionist. So they would strike them with a wooden malice to produce a sound. The standard range of the tubular Bose is from C4 to around F5. But it can go with small. We had higher on different models. Next, we have less data. And from the sound that it makes, you wouldn't imagine it to look the way it does. And it's essentially a piano, except on the inside, there's metal plates instead of strings. However, it has a shorter range. It only goes from C4 to C8. Glaucon spiel is one of my favorite percussion instruments. The higher-up, it can sound magical and innocent. It looks like a xylophone, except that it's made of metal instead of wood. It's range is from G5 to C8. Okay, so it's a very high pitched instrument. It plays in the high register. The xylophone then very similar, but it's made of wood instead of metal. Its range is from F3 to C7. The marimba then is like a much bigger xylophone, except it uses a soft malice. So the sound of a marimba is much softer than that of a xylophone. It also has a much larger range. With that being said, there is no definitive range for the marimba. They come in all different shapes, all different sizes. And so the ranges can vary between the different sizes. Let's hear this section playing altogether.
7. Rhythmic Percussion: The rhythmic percussion are the instruments that don't play any specific notes. They just create rhythms or beats in an orchestra. These include the timpani, triangle, base drum, and the snare drum. The timpani is the most distinct rhythmic percussion in an orchestra. There are four Tiffany's in Assess of orchestral Tiffany's. They each play different pitches. And so they can create interesting pitched rhythms, just like the tom-toms on a drum kit. Now, the timpani is do have to be tuned to the key of the music. So it's a little bit contradictory, but calling them rhythmic percussion instruments, but they're used rhythmically so they fit into this lecture. The bass drum is a little bit similar, but it has a much deeper sound, okay, it provides a lot of the percussive waste for the orchestra. The snare drum then is just a standard snare drum, and it can provide interesting rhythms for the composition. It's sharp sound allows the rhythm to be played very fast. The triangle is interesting. It just provides a very high pitch sound. A lot of people actually joke that the triangle players job is the easiest and it probably wouldn't be. But in an orchestra, the instrumentalists who played the triangle are actually known as percussionists. And what this means is they have to know how to play a lot of other different instruments as well. So they'll often be picking instruments up and putting them down very quickly in order to play several different lines of music simultaneously. The triangle player could be playing the triangle, the snare, and the symbols in any given piece of music. There are also other rhythmic percussion, such as the symbols and the Gung. These are used to accent certain beats of the bar and the music. In the example, the symbols would play first and then the gang. Here is what all of the rhythmic percussion instruments sound like together. Okay.
8. Woodwinds: Woodwinds used to be made of wood, which is where they got their name. However, today, they're actually made of plastic or metal. These instruments produce their sound by using a very thin piece of read that vibrates when the player blows air into the mouthpiece. Other wind instruments, such as the trombone or the trumpets, do not have this read inside them. The player must vibrate their lips in order to make a sound. Their lips essentially act as the read. Because of this, the saxophone is actually considered a woodwind instrument, even though it's made of brass and it looks like it fits into the brass family. It utilizes a piece of read to make it sound. When being used in an orchestra, a saxophone is test to sit in the woodwind section, not the brass section. Let's look now at the most common woodwind instruments in an orchestra, which are at the flutes, oboes, clarinets, and bassoons. These are the instruments that traditionally makeup and modern orchestras woodwind. However, there are almost always more than this. So we'll have a look at the piccolo, the Koran, and the saxophone as well. The other sections, we'll start with the highest in pitch. So this would be the piccolo. Piccolo is a flute, except it's been chopped in half. It has all of the same fingerings and capabilities, but a plays an octave higher than the flu. The piccolo has a range from D5 to C8, so it's used for especially high melodies are additional high frequencies in the orchestra. A step down from this and pitch, we have the flutes. These are just longer versions of the piccolo. It has a range from B3 to D7. However, to reach B3, the player needs to have a longer foot joint. This is just an attachment for the flu that can be attached when necessary. The flute can also play up to F7 when it's forced, but the standard range of the flute is from B3 to D7. Next, we have the clarinets. There are several different tunings for a clarinet, such as the clarinet and be flashed the clarinet, E-flat, et cetera. However, they all have a range from E3 to C7. There is also a bass clarinet in some orchestras, and this has a range from E-flat 3 to G6. The bass clarinet is not always present. However, you can see the bass clarinet in the top circle on the right. It kinda looks like a saxophone, but it's not, It's actually the bass clarinet. After this stepping down, we have the oboes. These are from B-flat 3 to G6. Generally, they don't play very high and would occupy a lower register to fill out the lower frequencies. But they can play high lines to, it depends on the composition. Then we have the Qur'an LE, or in the US, this would be known as the English horn. Call wrongly is the literal French translation for English horn. It actually got its name from the Germans who called this the angelic horn, as it looked like an instrument found in a lot of angel paintings. The French then mistranslated angelic into assembly, which means English, which is why the US causes an English horn. But you're up still causes the Koran. This is definitely my favorite woodwind instrument and solo melodies, and these can sound very, very nice. It has a range from E3 to C6, so it's kind of a middle of the road instrument. I'm going to stick the saxophone in here because technically it can play higher than the Quran lay. However, there are several different types of saxophone. There's the soprano saxophone, alto saxophone, tenor, baritone, and bass saxophone. So okay, they all have different ranges, and it depends on the piece of music that you write, which saxophone you're going to need. Generally, the standard saxophone, which is the alto, will have arranged from B-flat 3 to F6. So yes, it can play higher than the Qur'an, but the saxophone can actually play in any range necessary. Finally, we have the bassoons. And as the name suggests, these play a more basi would win patch. They play from B flat one to G5. Okay, there's also the contra bassoon, or also known as the double bassoon. And this is just a larger version of the bassoon. And a plays the lowest note in the orchestra. It has a range of b's to C4. Here's how they all sound together.
9. Choirs: Orchestra quires can vary. Not only do they vary in the different choir sections, they can also vary in the type of choir that's used. There can be female acquires, may acquires mixed choirs or boys choirs. Let's have a look. In a full Mixed Choir, there are four parts, sopranos, altos, tenors, and basses. Okay, this is commonly referred to as an SATB choir. Each part refers to a certain range. The Sopranos have a very high register. The altos, or a step down from the Sopranos. The tenors then step down from the altos, and the bases are the lowest register. Generally, females will take the alto and soprano lines as they have a voice that's naturally high in pitch. However, some males can reach these registers, but it's very, very few and far between the singers that can reach these registers, the male singers that can reach the soprano and alto lines. These guys are referred to as counter tenors. And all female choir will generally only consist of altos and sopranos. This is because females can't actually sing tenor or baselines, okay? Because in this case, the tenor classification refers to the Tambora of the voice, the sound of the voice. Okay. Females certainly can sing in the same range, but they're actually referred to as contra alto singers because they lack the croquet Tambora, the croak equality, that a male tenor voice can produce. Similarity with an all-male choir. And the males will take the tenor and the baselines, which are the lower two registers of the choir. The most common choir that you'll come across is the Mixed Choir that we were looking at before, which is the female parts, soprano and alto, mixed in with the male parts, the tenor and the basis. Okay? A full SATB choir can give a really, really lovely and full sound. With an all boys choir, It's a little bit different. Boys choirs consists of males who have yet to hit puberty, okay, So they still have their high pitched voice. The range of the prepubescent boy is actually referred to as the treble range. Okay, so it's not tenor, bass, it's not soprano and alto. It's actually its own unique range called treble. So a boys choir has a very, very unique sound. Now, up until recently, boys choirs were strictly male only. Some boys choirs will still not allow girls to participate in the choir. A lot of very, very famous boys choirs are sticking with the traditional approach of boys only. And the final point in this lecture then is just a live choir, for instance, plug-ins. A real choir. They're often going to sing words rather than chords, okay? They're not going to do the thing, okay? But when computers were kind of limited, generating words that sound realistic, if not very easy to replicate. There are plugins that can do this, okay? They can allow you to create choirs. They can sing words, but most of the time you're stuck with them. Latin syllables. Okay. Because if it was in any language that is spoken today, we would recognize the, I suppose, the robot sickness of the sound. So you're kind of limited to Latin with the plugins. So recording a live choir is always going to sound better. Next, we'll learn about articulation.
10. Articulation: So in this lecture, we're going to look at articulation. There are many different types of playing techniques that instruments can articulate, okay, you'll find the option to change the articulation on most of the orchestra plug-ins that you use. Not all of them, but most of them give you the option to change the articulation. So what I've done is I've set up a really, really quick melody, very simple melody. Okay, I'll just play it so you can see what it sounds like. Really simple. And it's got lung notes, so you can hear the vibrato and tremolo and it's got some shorter notes here so that you'd be able to hear the other techniques, which is pits of cattle and spiccato. Okay? So the first one we look at, I suppose, is vibrato because that's already set up. Okay, so most plugins when they open, they're going to default to either legato. And we look at that in just a sec. They either default to legato or vibrato, okay, and in this case it's vibrato. So we're on the first violins here, as you can see, if you remember the diagram from the slides before, we'd have first violins, second violins, viola, cello is, et cetera, right? So we're on the first violins. We have vibrato selected here, and I've played it already, but I'll play it again now that you're aware that the sound is vibrato. Okay? And this is what it sounds like. So the brando was created by vibrating a hand very, very fast on the string of an instrument. And as it's being played, wind instruments such as the flu, they can also create a vibrato effect if the player blows pulses of air through the instrument. Okay? Vibrato is associated with very emotional, very emotional music and long sweeping harmonies. Okay, Let's have a listen again. So the next one we're going to look at is tremolo. And this is where the instrument altars in volume very fast. Okay, so for Brando, sounds like a wobbling of pitch. Tremolo is going to sound like a wobbling of volume. So tremolo works amazing for a scary or dark music. Think trembling tremolo, okay, you only tremble when you're scared. So it works really, really good for scary music. So it's over here on the right-hand side. I'm going to click this and it'll change the articulation to tremolo. And now we can hear what tremolo sounds like on these first violins. The next one we look at is pits of cattle. And this is where the string instruments, as sorry, the instrumentalists who are playing the instruments, they pluck the string rather than using the PBO. Okay? So pizzicato can sound great for playful music. Or if you wanted to plucky sound, but the precaution just doesn't sound right. Pizzicato works great. Let's have a listen to how this sounds. And then finally, spic at all. Okay. It can also be called Stick cattle. Okay. And the reason for that is because the nose is called a staccato, nought, S, T, ACC, ATO, okay, stick at all. But the technique is called spiccato. So you'll hear that used interchangeably, but whichever you use this fine people know what you're talking about. So spiccato was very similar to, sorry, speak out. It was similar to pizzicato. Okay. Except that the string instruments, the ball is used here. So staccato can be played on any instrument. These notes are essentially very, very short and sharp. They work great for high-energy scenes are tense music. Let's have a listen to spit staccato sounds like on the first violins. Now just for interest, the opposite of a staccato note is a ligate or not. Okay. Which is this one here? Or lung? I think. I'm not actually sure, but I think legato means long in Latin. I'm I'm not sure, but I think it does. But anyway, legato means that the sound is going to be smooth. So legato or vibrato, this is what the default sound of any orchestra plug-in will be. So when you open it up, you're going to get either vibrato or legato. It's basically a long-held notes that is used for creating smooth melodies. Okay, so what we're gonna do now is we're going to move on and take a look at some different types of orchestras and how they can be set up.
11. Different Orchestra Setups: The orchestra can take many different forms. In fact, any group of instruments that are being played simultaneously is considered an orchestra. You can have a synthesizer orchestra, a guitar orchestra, a percussion orchestra. As long as it contains a group of instrumentalists who are all playing to a conductor. The conductor is just the person who's kinda stands in front of everyone and conducts how the music should be played. However, there are two traditional orchestra types, okay? These are the chamber orchestra and the symphony orchestra. The chamber orchestra is much smaller because it was designed to be played in a small room or a chamber. It has its own unique sound. It will typically consist of the same instruments as a bigger orchestra, but just with less players. What? A symphony orchestra then is much bigger and it sounds much more full. As a result, this is the typical orchestrate that we know and love today. Okay? There's also something called a quartet. This is kind of like a tiny orchestra, OK, and it only consists of four instruments, violin, viola, cello, and bass. It can also contain a piano. And there can be anywhere between one to four players of each instrument. So you could have for violinists, for players of the viola, for cellists, and for bassist all in a quartet. The Cortes name comes from the four instruments that are being used, not the four players. Finally, make sure you experiment, okay? An orchestra can have any instrument that you desire, okay? You can include electric guitars, big drum kits, synthesisers, anything that you can imagine can be added into these traditional orchestras. So when you're creating music for games, make sure you're choosing instruments that fit the vibe of the game. Synthesisers will sound great in a sci-fi game, but not so much in a medieval one. Whereas with the medieval game may be a quartet or a chamber orchestra is the way to go without any of those synthesizers. In the next lecture, we're going to be hopping back into the dock and we're gonna see how we can set up a virtual orchestra inside the software.
12. Setting up a Virtual Orchestra: So in this lecture we're going to be setting up a virtual orchestra inside the dot. So I'm using FL Studio as my door. You could be using Ableton or logic or whatever, whatever other software you use. But we're going to be setting up a virtual orchestra, okay? Now, I usually start by adding all of the ensemble instruments and then I add soloists as I need them. Okay? And ensemble just means each section. So I add the violin section, then the viola section, then the cello section. And I just go, I go about it that way. I add, I add all of the sections that I need for whatever orchestra I'm using. And then I'll add the soloists if I need some additional soloists. Now, for this course, I'm going to be using free plugins so that you can download them and follow along with me. That was a complaint on my last course, my EDM course, that a lot of students couldn't follow properly because I was using plugins that they don't have, that they couldn't buy or they couldn't downloader, they didn't have access to. Okay, so for this course, you will have access to all of these plugins that I'm using. So you should be able to follow along nicely. I'll be using things like labs, the BBC and Spitfire Audio Plug-in and Lillian for silicon studios orchestra plug-in. I'll show you them all in just a minute. Okay? So if you get into this professionally, if you get into composing professionally, you'll mainly be using contact. Okay. And I have the summary here, okay, contact or you'll be using another paid plugin, like maybe the Philharmonic, okay, but with contact, there's a lot of different libraries that you can buy as add-ons and packages. And honestly contact is amazing. And if you are serious about composing, you should definitely definitely invest in us. And if you want to become a serious composer, also omni sphere, and that's a great synthesizer for making cinematic electronic sounds like effects pads since etc. Now, I have loads of synth already. I have, because from doing EDM, I have a lot of synthesizers anyway. So I usually just use those. But omni sphere is definitely something that I will be getting in the future because a lot of composers actually swear by it for their electronic sounds that they add into their, into their scores. Okay, anyway, let's set up our orchestra. I'm going to be using the Spitfire plugin, which is this BBC, and sorry, BBC Symphony Orchestra. So I'm going to click it and added into our project. And I'm using this simply because it already has the sections set up for me. So as you can see here, we have strings, we violins, one violins, two violas, Chelly bases, horns, trumpets, all of these sections, sorry, the brass sections, but all of these sort of ensembles is what I call them. They're already here ready for us to add in. Okay, so for a start, I'm going to add in my first violins, I'm going to click that. So now this one is setup at my first violins. I'm going to close it, and I'm going to rename it, okay? Which is here. And I'm going to call this first violins, okay. I also like to color-coded so that I know. So let's say that the violins, we'll make all of the violins or less, will make all of the string section and green, okay, That's usually how I do it, not color-code the violins, I could decode the sections. So the string section, the brass section, the percussion section, I have colors on them. So I know what I'm looking at because with an orchestra There's a lot, a lot of different, you're going to have a loss of instruments all the way down here and it's going to become a mess if you don't color-code your stuff. When I make an EDM, I don't color code, but with orchestral music, I definitely do. It's something I recommend. So anyway, I'm going to clone this. And I'm going to select the second violins this time. So now we're adding this section in. And again, I'm going to rename that to second violins. And we're just going to keep doing this. Okay? We're going to come down here to clone. We're going to clone the plug-in at, in the next section that we want violas. So if I'm going for a full symphony orchestra, I'm going to be adding in all of these. And again, rename it. If I Ola's. And okay, let's say I am done on my string section and now I'm moving on to the brass. Okay, so I've cloned it now for a brass plugin. And I come down here, sorry, it's the way to, let's say the horns. So we add in the horns. So I'm going to rename it horns, but I'm also going to color-code it so that I know that this is the brass section. And let's go with a nice coppery color for to reflect the brass. Maybe this. Okay, so this now is the color that I'm using for my brass instruments. Also, I would usually add more layers to these. Okay, so I, I'd use layers from different plugins. Like I could have another horn section here from contact, maybe another horn section from the Brazilian plug-in. And I'd have all of these layers together to make one big horn section. Okay? Often composers will have several plugins all loaded with shallows. And they just call this the cello section. And that's okay too. And I actually recommend this because you can get some really, really realistic sounds because the different plugins will have different timbres. And it sounds like there's actually different players, different instrumentalists playing the instruments, okay, they're actually playing the cello is it sounds realistic. So I can choose to add those layers now, or I can choose to add them in when I'm composing as I need them. For now. I think just sticking with the one plugin is a great starting point. Also, I would recommend adding in every single instrument. Okay, I know you're probably going to want to skip this part, which is the boring part. And you don't want to go adding in all these plugins, but I do recommend going through this and adding in every single section, every single ensemble, okay, because what happens and what has happened to me a few times is you'll have written this lovely orchestral arrangement. And then all of a sudden you realize you forgot a whole section, okay? Like for me it's usually the woodwind section. I forget about that because I haven't added it in. And so I'll have done the strings, I've done the brass and percussion. It sounds lovely. And then I realize, I forgotten to write a whole woodwind section. There is a reason why all of these sections exist and why these particular instruments are actually chosen to be in the orchestra. Ok. And it's to give this huge spread of frequencies and Philip, Philip every frequency range. Because that's what sounds nice to us, humans. Okay? Um, if you leave the section out, your whole arrangement might sound a little bit on balanced, okay? So I do recommend adding in every section now, okay, before you even begin to write anything, because you're more than likely going to forget as to action or an instrument or Something like that. Okay. Also, something that I do is I come on to my master channel and I add a reverb. Okay, now I've taken, I've gotten rid of my, my own personal plugins there, in this folder here, or in this more plugin section. But I want to be using plugins that all of you guys can use as well. So I'm using the default FL Studio plugins. But what you can do here on the master channel is you can add a reverb plug-in. And this will not only make it sound nice, but I actually find it, it, I actually find that it helps with composing, okay, if everything sounds big and as if it's all being performed in front of me in the same room, we'll be looking at reverb properly. And when we come to the mixing section and kind of how to tweak the settings to make the arrangements are much better for what you're trying to achieve, okay, but for the moment, when I'm composing, I do stick a Reverb on there just so that it sounds nice and it sounds like it's it's all being performed in a live concert hall. So for this, I would probably just pick a preset over here. Something like large hollers up like that. And then if it's too wet, I might just adjust this, a smile this until it sounds the way I wanted to. Next, I would add all of the plug-ins to the mixer track. So I would select them like this. And then I would say channel routing. Go roofs selected, sorry, root selected channels to this track. So that's going to, oh no, sorry. Root select the channel starting from this track. So that basically takes these channels up here that I've selected and it will route them along the mixer track starting from this, which is track one. So I'm going to say channel routing. I'm going to do that now. And as you can see, it's added them there, and it's also color-coded them and they're already named for me. Okay, so I can see this is first violins, second violins, violas, and Florence. So anything that plays on this instrument will now come through this channel and eating the place on this one. Oops, will come through this channel. Anything on this one will come through this channel and so on. Okay? So once you've done your kind of your full orchestra, you've, you've, you've added each ensemble in each section. You can do what I did there. Select all the channels, add them to the mixer track, and you'll have probably about 20 or 25 mixer tracks here. Full color-coded and RD named, ready for you to start composing and mixing. Now that we're set up and ready to compose, we can move on and look at some compositional guidelines for different parts of the composition.
13. Melodies: In this lecture, we're gonna talk about melodies and a few little tricks that you can use to make sure that your melody sound great. I can't actually tell you how to compose a melody because it really depends on the game and the situation that you find yourself in. So I'm giving you these pointers and these techniques that you could use to communicate your message. Firstly, melodies should follow the chords that are playing underneath. You should also try to stay in the same scale that you're writing in. Okay, Now, this may seem self-explanatory, but I've heard some composers ignore this rule completely without any reason for ignoring us. It's okay to have passing notes or grace notes that use notes that are outside the court or even outside the scale. But you must ensure that the majority of your melody stays within the tonal boundaries of the chord and scale. We're going to talk about grace notes and passing notes in the next slide. So don't worry about that just yet. Here's a nifty trick that I learned about how you can make sure your melody is following the court. What you do is you only focus on the long notes, okay? So which nodes are being held for a longer amount of time than the other nodes. Make sure that these notes are playing a note of the chord. So if we were in the key of C, for example, the longest note of my melody must be on either see E or G. To go. They're shorter notes don't necessarily matter because the longer notes are going to establish the tonal center. So if I have three long notes and five short notes and my melody, I would make sure that the three long notes are playing on the notes of the chord, which in this case would be either C, E, or G. Now this is just a very, very general tip for composers who may not understand music theory that well. So if you do understand music theory and have the ability to, I don't know, home out your melodies and input them into your software, that would be a better way to go about it. But for those of you who don't really understand music theory or you haven't taken the time to learn it? Yes. Definitely try the long nose method. Definitely try the long nose method because it will make sure that all of your melodies are staying within the cord and within the scale. Next, we'll have a look at grace notes and passing notes. What are these? Well, they're essentially note that aren't really part of the melody, but they serve a very specific purpose, okay, with grace notes, they're used almost rhythmically. They're also extremely short, and they occur immediately before a main note of the melody. Passing note then is used harmonically. So this is often used to step the melody up or down. It can be a note of the chord or a note outside the court, but it's just a short note that allows the melody to feel more smooth. Next, we have leaps. This is when there was a large pitch gap between two adjacent notes. Okay, so leaps are used to communicate celebration, excitement, and euphoria. They also work amazing for love Teams. Now let's have a look at contour. How does the melody actually look? If we were to draw a line that connects, each knows, a smooth contour will feel calm and evoke a sense of floating. A jagged contour will feel hectic and out-of-control. Stepwise movement will feel secure and safe. The shape of the melody can actually play a role in the psychological effect. Articulation. We've looked at this before. Short sharps to cattle nodes can communicate tension. That can also sound playful, happy, and innocent, depending on the tonality in tempo. Staccato notes in a slow minor piece will sound quite tense, whereas staccato notes and a fast major piece will sound quite playful and happy. Similarly, pizzicato can give a different feeling. Pizzicato can sound curious and even mischievous when played in a minor key, but can sound energetic and hyper when played fast in a major key. Tremolo is great for fear and danger. And vibrato is very strong, emotionally used for broncho, for sadness or love. Continuation of the line is where we take an already existing melodic idea and then repeat this an octave above or below. So the Indiana Jones team does this really well. It can be a really, really interesting way to copy and paste your melody while still allowing it to sound different. This method also gives a great feeling of adventure because the melody is essentially exploring itself or its venturing into new territory. There's a reason why it was used for the Indiana Jones team. The final point I have here is about form. We'll be talking about form later on in the course. But this is the most important part of writing a good melody. It's so common for composers to just write a four bar melody. And then lupus. This is something that we're used to hearing on the radio. Everything in modern music is repetitive, both with orchestral music. Tried to be more imaginative. I'm not actually going to speak about form here because there's a whole lecture dedicated to it later. So just make a note that it's important for your melodies to have good form. Most melodies will have an a section, then a B section that sounds new and fresh, and then returning a section. Okay, So we've had a look at a few melody techniques here. But you need to really feel the music and decide what kind of melody best communicates what you're trying to say. There are so many techniques out there for good melody rising. But the best technique that I can teach you is the one that I keep coming back to all the time. Reflect the game in your music, okay, especially your melodies. Game music is created out of a communication, not a musicality. Obviously there is a sense of musicality, but your job as a composer is to communicate the mood, the emotions, and the atmosphere of the game world. You should always try to reflect this in the music with melodies. This is what the listener is going to focus on when they're listening to a piece of music. So definitely try to communicate through the melody as much as possible.
14. Basslines: So baselines are little bit different melodies, but once again, it can be used to communicate feelings to the player. The baseline is a foundation for your composition. Every melody and harmony is going to sit on top of this. And because of this, you can make a very solid sounding composition become unstable just by changing a few notes and the baseline. And this is the first of the lecture, which is foundation. Obviously, a strong foundation is going to sound nice, but using a weak foundation can make the piece feel unstable or vulnerable. Now, maybe you wish to communicate vulnerability through the music. And in that case it's okay. But generally, I would say to use a strong foundation, unless you have a reason to use a weak one, it's up to you, obviously in your game situation. How do we know what a strong and weak foundation is? Well, if your baseline is playing the root note of the chord. So for example, it's playing the C in C major or the F and an F minor chord, then this would be a very, very strong foundation. However, if your baseline is playing maybe the G and a C major chord or the a in an F minor chord. Now your foundation is going to sound weak and a little bit unsure of itself. With this being said, I'd like to also mention that the baseline will emphasize the feelings that you already have in the composition. So let's say you create a really, really scary composition. Using a strong baseline is going to make that scary feeling even more intense. Using a weaker base line will make the scary feeling become more mellow and it may end up just sounding kinda creepy rather than full on scary. So what's the strongest baseline that you can use? That will be a drone, okay? There also the simplest baseline to use. And this one, it's basically a solid continuous note that plays the root node of the piece. It's an extremely strong foundation for what you're communicating, okay, So it will make a sad melody sound even sadder, or a happy melody sound even happier. However, it can also create a sense of loneliness or creepiness. So be careful when using it for happy compositions. Because these drones, they usually work best in a sad, dark, or scary piece. Pedal notes are similar to drones, but you can change the nose to fit the court. So instead of playing one long continuous no's throughout the whole piece, the baseline will just hold the root node of whatever chord is playing. This is the most common type of baseline that can be heard today, but they're also very, very basic. And I would argue that you should develop your bass melody is a bit more so that they don't just sound very static and they're not just holding those static notes. Like melodies. You should mostly use notes from the court. So if you're playing a C chord, your baseline should ideally use C, E, and G for most of the notes that are plates. You can add in some passing notes, but make sure that the baseline is centered around the court. The baseline should also complement everything else in the composition, the place above it, okay, So if your melody is quite busy and it has lots of rhythms and leaps going on, make the baseline less busy so that it's complementing the melody. This is more so appointed bud arrangement rather than the baseline itself. But it is important to note that the baseline is basically carrying everything else on its shoulders, so it should always be complimenting them. The rhythm of the base can also be important. Is it steady? Is it secure or is this interrupted and nervous? A steady rhythm will create a much stronger foundation then a rhythm that is syncopated. So keep this in mind for your baselines. Finally, I just want to mention one type of baseline that you could use, which is a walking bass line. This is where the notes walk or roll up and down to each other. So you could start out with some pedal nodes, let's say that are playing the root note of the chord. And then introduce more notes that will walk the base up or down to each of those courts. This is another strong foundation, but it's a great way to introduce movement into an otherwise pedal note baseline. Ultimately, when composing your baseline, keep in mind what you're trying to communicate and make sure that you're centering around the naughtier court.
15. Harmonies: Harmonies are like extra little melodies that we can use to accompany our main idea. These should generally reflect the main melody in terms of rhythm, but there can be different in notes and contour, okay? They can play above the melody or below the melody or both. You can also use them to create cord variations. So if you have an F chord in the strings playing F, a, and C, then you could add a note into the harmony line that creates a variation of that chord. For example, if we added the nodes of G to this, it would then create a chord of F7 instead of the chord of F. We'll be looking at CT variations later on in the course. So don't worry if you're unsure as to what this means for now. Now, the most important part, different harmony lines can create different feelings, okay, the harmonic conventions that we have today, they're actually shaped by biological responses to emotions. For example, people who experience sadness will display a lower body temperature, less skin conductivity, higher blood pressure, and a lower pulse rate. Because of this, you'll find that most sad songs are slower in tempo than the happier pieces. And this is because slower tempo music is proven to lower the pulse rate, which genuinely simulates the psychological response that we have to sadness in relation to harmonies. When subjects were listening to minor harmonies, they displayed the same physiological responses as those who experienced sadness. Major harmonies then produced a change in breath. And the limbic system responses identical to that of happiness. Dissonant harmonies increase a person's pulse rate and it lights up areas of the brain associated with fear. All of this was concluded in studies from Cornell, Tufts, and McGill University's. So in the future, hopefully more information will become available in relation to more complex harmonies and modes. But for now, all we have is the simple information that minor chords mean sadness, and major chords mean happiness. But harmonies are extremely important in shaping the mood of a composition. Just like baselines, harmonies can be strong or weak depending on the notes that you use. If you're using strong notes of the scale, such as the third, fourth, fifth notes, the harmony will sound much stronger than a harmony that uses maybe a second or a six. And also make sure that you're using your ears. Obviously, all of this theory is useless unless the actual final composition sounds good. Personally, for me, I find the best way to write harmonies is to sing out that harmony line and then program that into my DAW. Most of the time, I'm not even thinking about theory. If it sounds good and a communicates what you wanted to.
16. Chords: In this lecture, we're going to take a look at chords so that you can start using some advanced variations Accords in your music. When we talk about chords, we use Roman numerals. And the reason why we do this is because we can denote whether a chord is major or minor simply by whether the letters are an uppercase or lowercase. So uppercase Roman numerals mean that the court isn't major. And lowercase means that the cord is minor. So let's say we had the Roman numerals written like this. We would have 1, 2, 3, 4, 5, and so on. Okay? All of these are major courts. But if I was to write the same chords like this in lowercase, this would mean that these chords are now minor. So if a composer says to you, you ask what kinda chord progression are you using in your track or in your composition? And they might say I'm using chord 1645, right? We can see that the six is actually minor in this case. So we know now if this was the key of C chord, one would be C chord, six would be a chord, four would be F. Chord, five would be G. Now, chord one. Okay? So I, chord one is always your reus cord. So if you're in the key of C chord, one is C. If you're in the key of a chord, one is a. If you're in the key of F chord one is f, and so on. Okay? And the reason why is because we can then count up from that, from that node. So that's a chord. One is F, will know the court is going to be G because this is the second node. G is the second note in the scale of f. Okay? So if you were to say cord to, you'd know that if we're in the key of F, then you're going to be playing a G. So as you can see, it's really, really simple to just kinda define courts in this way. We can say, back to the key of C. C is one, D is core to, he's Core 3 chord, four chord, five chord, six or seven chordates. And whether or not it's written in uppercase or lowercase tells us whether it's minor or major. So now that we understand how cords are named, Let's move on to our first advanced technique, which is inversions. Ok? Now this is going to be, it's going to be a bit heavy going. But with this, we're adding a little tiny letter after the Roman numeral. Okay? So not only can we have chord four, we can also have chord for a, chord for B and for C. Okay? But again, don't get worried. This one is logical, Okay? The a inversion is the cord in its default position. So let's take the key of C. Our fourth chord would be f. We know from the capital letters that this is going to be a major chord. And we also know from the smaller letter here, the actual alphabet letter a. It means it's in it's first inversion, which means f is going to be the base of the court. Then we're going to have our a and we're going to have our C. Okay? So this is our chord of if we're in the key of C, You remember this is our court of four major a, indeed a inversion. So what does the B inversion mean then? Okay, well, with the B inversion, this is when the third note of the chord becomes the base naught. Okay? So the third note here would be a, okay? Because if we're in the chord of F, 123, our third node would be a. Okay? So a, which is the third, now has to become the base and the base note. So what we do is we move already bass note that we have from the first inversion. We're going to move that up to the top. Okay? And this is what that sounds like. Now, I'm sorry, I don't think I played the original inversion, the a inversion, but this is what this sounds like. And if we're to put it back into its B inversion by moving the F up, it sounds like this. And finally, the C inversion. And this one here. This follows the same logic. Okay? So whereas before, and we wanted the third note to become the base, we now want the fifth note to become the base. Okay, so remember we were in the court of f, So we would have been 1, 2, 3 onto the third node, 3, 4, 5 onto the fifth naught. Okay, So we want this note now to become the base of the court. So what we're gonna do is we're going to move the a up to the above. So now this is the base note of the chord. Okay? I'm going to bring the a back down and turn it back into a for B. And I'm going to bring the F down and turn it back into a four a. Okay. Moving this up to four B. And then moving this up to four C. Okay, it's the same chord, just a different inversion. Why is this beneficial? Well, the chord inversions have their own level of strength and their own Tambora. A is quite strong, but it's the most basic inversion. And a chord being played in the a position often sounds quite amateurish. I'll just play that here again. So this can sound quite strong, but also it's very basic and can sound amateurish. The B inversion is extremely weak, okay, but it can be used to great effect if you wish to resolve it onto a stronger cord in the progression. So if we just listen to what this sounds like, okay? And finally, the C inversion, which is this one where the fifth nose is now the base. This one sounds like the strongest of the model. Now, musical scholars and Genoa, very smart music people. They will argue that this is technically incorrect. Okay, this is not the strongest, the strongest is a. But in terms of how it actually sounds, I think, and I think most people would agree that the C inversion will sound the best, okay? So I would recommend using this inversion when you're creating your chords. And I'll just demonstrate that really quickly if I put a bass note of f down here. So let's pretend this is a bass instrument playing that note. That's, that chord sounds really, really full. Whereas if I turned it back into the original a inversion, It's going to sound a little bit less full. And if we tried to be in version, whereas the C inversion just opens it up and it gives this really bright and full sound. These inversions can also be called the first inversion, second inversion, and the third inversion. Okay? So am just be aware that there's different terms. There's, there's for a, for B and for C, or there's for first inversion, for second inversion, for third inversion. Now, deleting this again, there's also some very basic variations of chords that we can do. So these would be the augmented chord and the diminished chord, okay? Or in musical terms this would be AUG or dim. Or sometimes you might see a plus, okay, with the Roman numerals. If we see, let's say chord four plus, that means chord for augmented, okay? And then with the Roman numerals, you would see if you had a chord, okay, you had chord four and then a degree sign. Now I'm not actually sure. That's why I'm laughing at I don't know how to where the shortcut is for degrees, the little circle, but that's how they, that's how they write it with Roman numerals for a diminished chord, you would see for and a little circle. But anyway, we don't really need to care about this. Okay, let's just come over to the piano roll and we'll have a look at how to set them up. Okay? So the augmented chord is when you take the fifth note of any major chord, right? So we're looking at C major here. I'm just going to transpose that up. So this is C major. And augmented chord is where you take the fifth note and you raise it by one semitone. Okay? So this has now turned this C chord into a C augmented chord. And it's going to sound magical, kind of nervous or curious. Okay, Let's have a listen. The diminished chord then is when you take the fifth note of a minor chord. So I'm gonna make this back, I'm sorry, I'm gonna make this into a C minor chord, right? So that's just C minor. But what we do is to make a diminished. We take the fifth note and we lower it by one semitone. Okay, this is a diminished chord. It's also known as The Devil's court in some religions, or even a tritone, because it sounds extremely dark and creepy. Now, these are the basic versions. Okay, next we're going to have a look at some advanced versions of chords so that we can really get you up and running with your compositions. So what we're going to be looking at here are the sevenths, sixths, the flattened, flattened fifth. And we're going to be looking at the add nine and the add 11. Okay? These are all variations according that you can use in your compositions. So the seventh is when you take a chord. So let's go for our see. And what you do is you layer in the seventh note. So in the key of C and the core to be obviously C-E-G. And if I were to layer a 17, we would count seven notes up from C, 1, 2, 3, 4, 5, 6, 7. Now remember I'm sticking in the scale. Okay? So this here is the seventh note. Now, this is the confusing part. For a true seventh chord. What you have to do with you have to flatten the seventh, okay? You're going to have to bring this down a semitone. And this, right with the a sharp instead of the B, we were on the B, what we have to flatten it to get a true seventh. Okay? This is a true seventh chord. So the chord of C7 is actually C, E, G, and B flat, or a sharp as it says here. Okay? Now, if you were to play the B without flattening is you're still going to get a type of seventh, okay? It's still, it's still a seventh chord, but it's just a different kind of version of us, okay? And this is what this sounds like. Come back to the original seventh and back to the other version. Okay, So these can sound jazzy, mysterious and magical. The sixth chord then this is where we kinda take the same principle. So what we do is we take the ordinary C chord of C, E, G, or whatever chord you're using can be ethical, be a, could be G-sharp, it could be F-Sharp, whatever you're using. I'm just using C because it's easy. Most people know that scale. So what the court is see, what we do is we would take the sixth note, so we're going to count six or from z 123456, which is a and we're going to layer that in. So now this will be the Court of C6. Okay, deleting that again and we're going to move on to the flattened fifth. This is where you take your card, okay, it's already established you have your first, third, fifth. What we're gonna do is we're going to flatten the fifth, okay? So we're going to move it down onto the F-sharp, okay? So this is what this sounds like. So this chord sounds dark, creepy, but it can also sound cartoonish if it's being used in a bright and happy composition. So just bear that in mind as well. Now we're going to move on to the add nine, okay? So bringing this back to our original C chord. So we have C, E, and G. As you know, we have sevenths, we have six, we have flattened fives. And these are easy to remember. Okay? It's simple. You just count the number up from the roots. So we have a seventh would be seven nodes above, a sixth would be six notes above. A flattened fifth would be five nodes above, and then we flatten it. And then to make things awkward, you can't have a second or fourth chord, okay? You have to call them by a different name. So what we call them is an add nine or an add 11. Okay? The add nine is the second nose, and the add 11 is the fourth note. So with an add nine chord, we would have C, D, E, and G. And with an 11 chord, we would have C, E, F, and G. Now, you've probably noticed that these two chords don't sound grace. And I'm going to explain why. But the reason why this doesn't sound good is also why they're called add nine and add 11 rather than two seconds and forth. Okay. Generally, the second fourth notes. Right. They would be on the top of the court. So what I mean for this is for the add nine chord where we had the second, this second nose would actually be up here. Okay? The second on the octave above. So the add 9 chord sounds like this. Much sweeter. The reason it's called add nine is because if you take your root, your root note of the chord, and you count nine keys up, you're going to have 1, 2, 3, 4, 5, 6, 7, 8, 9. So you're taking your chord of C and you're adding in the night, which is above. And this sounds really, really sweet. And the same goes for the add 11, where we stuck the ISOC, the F in here. That would actually be the F above. So I'm going to move this up to the F. And now we're going to have an add 11. And the same thing applies if we counted 11 notes up from the sea, we'd end up here on this F. Okay, Let's have a listen to the add 11 chord. It's not as nice, but it still sounds kind of magical and enchanted. So what I want to say now is that all of these chords, they're going to sound different in major and minor. So what you should do is you should experiment with them because this, these chords, right, this really is the key to unlocking powerful and emotive scores. I really hope this isn't too confusing so far because I'm going to go deeper. We also have suspended chords, okay? Suspended. Or these would be called SaaS chords for short. We can have a SUS 2 and a sauce for. So a SaaS two chord is when, if we take our C major chord again, this is when you replace the third nose. So you get rid of that and you replace it with the second. Okay. So this looks similar to the add nine that we were looking at before, but the difference is with the add nine, we also had the e in there, okay, But with this 4s2, we're getting rid of that E and we're replacing it with the d. So this sauce to chord sounds like this. And the sauce for is no different. But we're using the fourth is this time. So what we had before was we had C, E, and G, the standard C chord. And to make a sauce for, we would replace the third, which is the E. Replace that with the fourth, which is an F. And this sounds like this. I like to think of sauce as meaning suspense rather than suspended because these two chords are going to sound very, very suspenseful. And the reason why is because they want to resolve, okay. They I'm not gonna go into the technical reasons as to why. But basically, if you're using a SaaS 2, it's going to want to resolve to the standard chord of E, or sorry, the standard chord of C. So we're in C, we're using seesaws two. That's going to want to resolve to the standard chord of C. And you'll see that this will sound very, very nice. Okay? Same thing goes for the source for this also wants to resolve. Okay. And it wants to resolve to the same the same court wants to resolve back to its home, which is C. Okay? So if you want, you can think of sauce for suspense, because what you could do in your score is you could really drag this, this sauce courthouse, this suspenseful cored out and leave the, the nice kind of resolving cord until the very end. So you could have this long chord of suspense and then resolvers towards the end. However, both of these chords, the cells to in the sauce for they sound quite bright and happy. So make sure that if you are, if you're using them as suspense data, it's leading to something good because you're going to contradict yourself if you have happy, suspenseful chords and something bad is happening in the game, makes sure that it's something rewarding for the player. Okay, now we're through the lecture. We're at the end. I hope you're still watching, you haven't skipped because these court variations that really, really are the secret to unlocking an amazing score. Okay, I emit an example earlier where I have to 2M to core patterns. They use the exact same chords, right? We have G-sharp, G, G, C. Same thing here, G-sharp, G, G, C. But this would be an ordinary, just the normal chords, right? This is what, if they were in their normal inversions and their normal variations there with this discord pattern would sound like this. Okay? But we can turn this into this by using some simple variation on the chords. And simple, actually, I don't think I even inverted or anything. I just added in some variation. Okay, so we can turn that pattern, which we heard before into this. Okay? So they sound totally different, even though it's the same chords, same kind of idea that's going on. But all I'm doing is I'm adding in variation here. I'm using some sus4 chords. I'm using an augmented chord here and the G. So you can really see how these court variations are genuinely the secret to unlocking a really, really powerful and emotive score.
17. Rhythms: This will be a nice and short lecture. Just to close out this section, we're gonna talk about rhythms. Rhythms are very, very powerful tools when they're used correctly. The rhythm of a piece can completely change its meaning. So the most common rhythm that you'll come across is the triplets or the try back or try batch can communicate a heightened tension. It's great for battle scenes, and it also works amazing as a sense of adventure. With the Avengers team and the Legend of Zelda, both taking inspiration from the triplet rhythm, the matching rhythm, then these are great for getting pumped up and going into battle. It mimics the matching rhythms that soldiers would use and therefore will make the player feel as though they're about to go to war. It's a great rhythm to have under your tool belt. The sword fight rhythm is very random and chaotic. It can work great for battle scenes, especially sword fights or hand-to-hand combat. Star Wars makes use of this rhythm in the Battle of indoor music. And the rhythms are seemingly random and chaotic, which gives a great sense of battle explosions and the kind of pandemonium that a war can create. We also have some more generic rhythms. Okay, so you can use these two. These would be the Crochet, the IM, the ductile, the anapest, and the spondee. And you can see there on the, on the image that there's the tribe arch at the bottom, but that's just the triplets that we were looking at at the start of the lecture. So you can use these rhythms as well in your compositions. This was just a very quick lecture to close out this section. But as I said, these are some of the possible rhythms that you could use in your compositions to further communicate an emotion or atmosphere to the player.
18. Musical Keys & Their Moods: Writing a piece of music in a certain key can evoke certain moods and people, the psychology of music, it's very complex and nobody really has a definitive answer as to why keys can do this. But nonetheless, here we are. Human emotions are quite complex. Okay? If we look at the flower diagram, you can see there's a lot more than just happy and sad. There's anticipation, ecstasy, joy, trust, grief, rage, anger, annoyance. There's loads and loads of emotions that we can experience. There's even some in-between emotions that are made up of one or more. So, for example, if you see submission on the right-hand side, this would probably consist of acceptance and fear and or disapproval down the bottom, that would consist of surprise and sadness. Writing in different keys with music can evoke different emotions. A melody written in D-flat can sound much more depressing than a melody written in G. It's very much kind of if this, then that situation, okay, so if written in G, then triumphant, if written in D-flat, then depressing. So because of this, the lecture is going to be really short. Okay, There's a table on the next slide that has all of the keys and their associated moods. And we're just gonna go through some of them really quickly. But what you need to do is at the end of the section, you will find a downloadable resource that has this table on it, okay, along with a little description of the emotions associated with the keys. So you can download that are printed and keep it for whenever you need to decide on a key for a piece of music. So from the table, we can see that there's a lot of keys and a lot of moods that you can achieve. C minor is great for break-ups or unrequited love. When Love hurts, use C minor. E major is great for boisterous feelings. A character who has perhaps a troublemaker, but is also kinda likable. What's even more interesting is you can also change keys throughout the piece. If you need to switch up the mood halfway through, you can do that. And we'll be looking at how in just a few lectures. For now though. This one just is what it is, okay? Nobody has an explanation as to why keys can make us feel a certain way, but it's useful to know. You can check them out fully on the downloadable resource and also use that as a cheat sheet. Also, I will say that you shouldn't get too hung up on this one, okay? A major says Love on the table, but one of my favorite ever loved teams, which is across the stairs by John Williams that was written in D minor, which on the table says, serious. What's more is, in that piece of music, it changes key six times and the melody is heard in all of those new keys. So this lecture really isn't one that you have to worry about. You can absolutely write a happy piece of music in F-major, even though it says furious on the table. The table is just giving you the sweet spots for these moods. Okay? So love can sound good in any key, but it sounds especially good in a major. In the next lecture, we'll focus on instrumentation. We're starting out lies in this section with the easy stuff, but will gradually go deeper with these psychological music theory tricks throughout the section.
19. Instrumentation: Similar to keys, choosing different instruments can have an effect on the listener. This is a little bit more grounded then the Musical keys idea because with this, the instrumentation that you choose will play a big role in shaping the mood of your music. Like I said in the lecture about different orchestras using a synthesizer in a medieval game setting, that's not going to work. It will feel out of place. So in this lecture, we're not going to be looking at the orchestra as a whole, but rather a few individual instruments. So this applies to your melodies or any solo instrument that you want to have in your music. If you write a solo melody on these instruments in this lecture, it will suggest the mood that's associated with them. So starting out with the blockage below, this is often associated with children innocence or playfulness. I often use a block and spiel to suggest innocence and it can become really, really interesting if you develop your ideas. Honest. When I was composing for a radio adaptation of a Doll's House, I used the Glaucon spiel to suggest innocence and playfulness for the main female character. As the plot developed, this character is demeanor changed from being playful to becoming more resentful and then eventually leaving her husband towards the end of the play. So toward the end, I brought the blockage bill back in to remind listeners about this character's innocence. But the melody has changed to a much darker version of what it was playing before. So the contrast between these two elements made the scene much more emotive because we could see how much the character had changed since the beginning. Hi. Anyway, moving on. We have strings. Strings are commonly used for depression and sadness. I think we all know that anyway, it's a musical cliche, okay, and some composers, they tried to avoid it by trying an adagio on brass or woodwind. But cliches are cliches for a reason. If the audience associates strings with sadness, then you should exploit that to your benefit. Drums or grace for excitement, intention. Humans are born with only two fears. Every other fear is learned from either trauma or observing other people's behavior. The two fears that we're born with is the fear of heights and the fear of loud sounds. We all get a fries, but it's something loud and unexpected happens. Now, animals would usually run away from this loud sound, but we're extremely intelligent and we often understand what caused the loud sound in the first place. So we don't run, but we still get a fright. And using loud drums in your music can make us feel uneasy. Drums are loud, biasing instruments. A fast drummer them can make us feel out of control, panicked, or even under pressure. Slower drumbeat will make us feel uneasy and safe. They're really, really useful instrument to use. Horns are great for inspiration and effort. This probably comes from our ancestors who were blowing into horns when riding into battle. Using a French horn can make us feel inspired and motivated to achieve something. If you play around with different keys and tempos. They can also represent nobility, accomplishment, loneliness, and solitude. This closes. This piano then can be mellow and can represent contentment or even from another angle, romance. It can also be extremely sad when played slow and in a minor key. I would argue that the piano is the most versatile of all, and it can represent almost any emotion. If the melodies, the key, and the tempo is all right. To see the trumpets. Bone and other brass instruments represent excitement and energy. We said this before with the French horns, but other brass instruments needed mentioned to. The main one to focus on here is energy though. Use brass instruments for climactic sections. They're very loud and powerful instruments, and so they can make us feel powerful too. The research, the violin and cello represents cold sadness, tranquility, sympathy, fragility, and even sometimes joy. A solo violin, as we all know, this is the saddest thing known to man, hence the joke about playing a tiny violin. It's a very, very expressive instrument, as is the cello, which when played solo, almost always sounds incredibly alone and depressed. It's a great instrument to write sad solos on you. And we'll have a distorted guitar represents power, aggression, and strength. Think of the doom soundtrack. But a clean electric guitar without distortion is used to symbolize anguish and solitude. And acoustic guitar then means humility and contentment. It's an instrument that a lot of people play and you'll find it at any kind of sing-a-long or family gathering. We associate it with those feelings of contentment that we had during those sing-alongs. The acoustic guitar makes us feel safe. And CAM in. A pipe organ represents power, fury and rage, but also overwhelming joy. Essentially, the pipe organ is overwhelming. If you play a dark and depressing melody on the pipe organ, it's going to sound like the end of the world. Really, really great instrument for extreme emotions are uncontrollable. Emotion. Synthesisers mean complexity, chaos, speed, and sophistication. So that's where the science fiction part is represented through complexity and sophistication. They're also incredibly cold and clinical. In general, live instruments are warm and emotive, whereas electronic instruments are mostly cold and more kind of melancholic. You'll notice that there's no actual human emotion associated with them. Chaos isn't an emotion, neither is complexity or sophisticated. Electronic instruments represents something, but they're cold and emotionless. Robotic. A marimba represents happiness and adventure. A lot of music from The Legend of Zelda made use of a marimba because of this fact. We can also use instruments to communicate animals, such as fruits for birds, or an oboe for a duck. The Tambora of the instrument reflects the Tambora of the animal. This is called word painting. For example, you could use a flute pairs that sounds like birds chirping for a piece of music that's going to be played in a forest. Choosing the right instrument is a great way to subtly communicates something to the listener, or in this case, the player. There'll be a PDF that you can download at the end of the lecture that lists everything that we went through here. I love cheat sheets and that's why I keep giving them to you because they're so handy if you're stuck and you don't want to do a lot of research.
20. Leitmotifs : In this lecture, we're going to look at leitmotifs and variation. So what is a leitmotif? A leitmotif or a motif for short, is a musical idea that recurs throughout the music to highlight something important or kind of a characteristic, it must represent something in the game. Maybe it represents a character, a relationship, or even one of the game's main themes like technology or war. A motif can create genuine memories and emotions and the listener and the psychology behind why this happens is really cool. Basically, we can use a motif to create artificial memories in the player's mind. We can also use them to make the player or listener connect to certain characters or emotions. What happens is as the motif recurs throughout the piece of music, or more commonly, they actually recur throughout the entire game score. But what happens is anyway, the player will subconsciously register that they've heard this motif before, or that they've heard a variation of it or something similar on a different instrument, they won't even be aware of this happening. But their brain will remember the time that it first heard the motif and all the other times. And it will create a genuine memory and a strong feeling of connection in the player. The best example that I've found is actually from a movie trailer. There's a motif hidden in the Rise of Skywalker is trailer where the first bar of the oldest team can be heard. A lot of hardcore Star Wars fans won't even notice that this is Yoda theme, but their brain will remember when it heard it first, which probably would have been the original Star Wars movies. And psychologically, any fan that's watching the trailer is given a nostalgic feeling that makes them want to go and see the movie even more to chase that Star Wars feeling. So this is your team. And then this is it hidden in the trailer. We're doing there are three Bill. Taking one last look. It's so simple, but it creates a feeling of genuine memory and connection. Leitmotifs are definitely one of my favorite things to use in a score. They can also be grazed if the game's needs the player to connect with a character or maybe a relationship between characters by playing the motif throughout the entire game. When that final scene comes with the big kids. So the sudden death of the main character, playing that motif again, can create a genuine emotional response and the player, because they remember the journey that they've just taken to get to this point. The most common motifs that you find are the actual teams that you've written, the love team, the heroes team, Battle Music, et cetera. But there can be much shorter motifs that represent other things. The key to writing a great motif is to add variation or to try and hide them in the music. And motif will be constantly developing, and often it develops at the same pace as the plus or the character. You can have a very quick, maybe four note motif that plays on a blockage below to represent the characters innocence. Because of this, may be a place in a major key. But towards the end of the game, the characters innocence is gone because they've gone through so much during the plot. Your motif should also develop with the character. Maybe now that same motif comes back, but it's played on a guitar and it's an, a minor key. It's still the same 4-node idea, but it's been changed to reflect the character. A quick recap. A leitmotif is a musical idea that recurs throughout a score. It can be blatantly obvious like a love theme, or it can be hidden in the music. And motif can be as long or as short as you like. You can also use them to suggest a remained in the Star Wars trailer music. If you can recall, the entire yield as team melody wasn't played. It was only the first few notes. It was merely hinted at. And that's what makes it so effective. Here are some ways to add variation into your motifs and to disguise this within the music, or to develop it and reflect the game. So you can change the key. You can change the tonality. So maybe you change it from minor to major, or maybe the opposite way around. Or when we come to modes, you'll see that we could change it for maybe minor to, I don't know, Phrygian or something like that. So you can change the tonality to add in some variation. You can alter the melody, you can alter the rhythm and retrograde, which is a very fancy word for just playing it backwards. So if you were to take your motif and basically put the note that comes last at the very start and the note that comes at the very start at the very end. And kind of, I suppose, work your way through it and basically fit the melody around. That would be retrograde. Inversion then is kinda the same, but we're flipping it upside down rather than playing it backwards, we're going to play as kind of upside-down. So essentially you take the note that's on the very top of the motif, and you'd put it to the very bottom. And the notes that are on the very bottom, you put them to the top and so on. Okay. You can also change the instrument. And one cool thing that I've done is I've changed an instrumental motif. So let's say it was a motif that was playing on the piano. I would change an instrumental motif to drums for a really interesting kind of rhythmic effect. In this case, we're losing all of the melody, but we're still keeping the rhythm. You can also elongate the motif. You can shortness some of the notes out, add some more notes in, etc. There are so many ways to add in variation to your motif. You can hide these motifs anywhere in the game score, but the brain will always recognize it and it will always register that memory. We're very intelligent creatures and most of our thoughts never actually reached the surface of our consciousness. A lot is going on down in the subconscious, and we can use music to manipulate that.
21. Modes & Modal Interchange: Modes are a very interesting and powerful to. Each mode has a certain mood associated with it. So the ability to use modes is another one of the most powerful tools in a composers to, but most people are already aware of two modes, Ionian and eolian. But you probably know these guys as major and minor. There are actually five other modes that we can use. Modes are special scales that exist in each key. And each key has seven modes. Will begin with Ionian, because we know this one already. It's major. This one is bright, happy, cheerful, uplifting, or it can be very, very sentimental when plate's slow. Next we have Dorian. This one is often used for documentaries. It's peaceful, hopeful, and relieved. It can also have an 80s vibe to it, especially if played on synthesizers. Phrygian, think pharaoh, this sounds Egyptian or exotic. It's dark, mysterious, and it's also very tense when played fast and high. Lydian. Very commonly used for cartoons course, such as the Simpsons. It's playful, lighthearted, incorrectly. Mixolydian. This is the mode that's used for Irish music. And because of that, it sounds Celtic. It also sounds happy, celebratory and energized. Now we're onto eolian. This is the opposite of major, which is minor. Now, there's actually three types of eolian, which is why you'll see natural in brackets beside the word eolian. Okay, this, this scale here. This is the eolian natural scale. It's sad, dark, and very kind of final. So another type of eolian would be the harmonic scale. This is the same as the natural aeolian mode, but the seventh note is raised by a semitone. This one is creepy, intense and deck. The third variation of eolian then would be the dominant. This is also called the Hindu scale. It sounds exotic, suggestive, and anticipatory. It also sounds like it's waiting for something to happen. And the seventh and final mode then is Locrian. This one is pretty cool, It's unstable, scary, intense. It works great for her music. Each mode has their own set of chord progressions that sound good. But the best way to use these modal chords is with something called modal interchange. This is where we borrow chords from a parallel mode and then bring them into our regular chord progression. So let's say you wrote a lovely chord progression in a minor. And maybe it goes something like this. A minor, C, G, and F. Okay. Now, that sounds all right, but what if we added in a chord from a Phrygian? If we added in say, the second chord, which is a B flat major, and we place that before the F in our original chord progression. We can get a really interesting sound. Modes can become very complicated very quickly. But the real benefit to using them is the ability to borrow chords. Remember I said before, the chords are extremely powerful when trying to suggest emotions and moods. Now we have even more chords to play with. The best way to experiment is to use your ears, right? A chord progression, and then borrow some chords from a parallel mode. Insert them in different places on your chord progression until you like how it sounds. There's also a video and it's linked to this lecture that you should check out. It really explains modal interchange in a fun way and it shows you some really nice chord progressions. The video uses a jazz style piece, but we can absolutely adapt the modal interchange techniques into our orchestral pieces.
22. Scales: In this lecture, we're going to be looking at scales. So scales are kind of related to modes, but they're a little bit different. They actually refer to the distance between the notes. So whether that's a tone or whether that's a semitone. Okay? So for example, a major scale has a relationship of tone, tone, semitone, tone, tone, tone, semitone. And if you play that pattern, that I'm tone, tone, semitone, tone, tone, tone, semitone. If you play that in any key, if you play it in F sharp, if you played an a, if you played him be, you're always gonna get a major scale. The same thing goes for minor. Minor is tone, semi-tone, tone, tone, semitone, tone, and tone. Okay? And if you played that pattern in any key, you're going to get a minor scale. The main difference between scales and modes is that with scales, you can vary the amount of notes, whereas with modes always use eight notes. So in Western music, we like our eighth notes. We like 12345678. That's what we like. We like to eight notes and we like the seven modes. That's what we stick with. But have you ever wondered why Chinese traditional music is instantly recognizable or why Middle Eastern music has a very, very particular sound. That's because of the scales that they're using. Some of these scales would be pentatonic and only use five notes. Others use six notes, and others use only seven. With the pentatonic scale, you can only have five notes. And this restricts the composer to working within those five notes. It really, really opens up the possibilities. And I know that that kinda sounds contradictory, but restricting yourself can actually force you to create something that you'd never have created before if you had, if you didn't have any limitations. So in total, there are over 4 thousand scales for composers to use. Okay? However, some of these probably won't sound very good. The number, it just means that there's 4 thousand possibilities for the distances between a certain amount of notes. So we're taking into account two notes as well. So there's a possibility for two notes that are a semitone apart. That's one. There's a possibility for two notes that are a tone apart. That's another possibility. So there's over 4 thousand of these possibilities. And obviously, not everyone knows all of these 4 thousand scales off by heart. But what I suggest you do is you familiarize yourself with some of the more unusual and exotic scales and scale types. I can't cover them all here, but I will show you a cool website in the next lecture that has around 40 really nice scales that you can use. Going back a step for a second. If we remember, the distance between the notes is what matters. Well, a very common Chinese scale is pentatonic, which means it only uses five notes. But what's more important is the tonal relationship. Okay? So the relationship for this Chinese scale would be a tone, a tone plus a semitone. So we're gonna go overtone and then add in an extra semitones that'll bring us up to F and then tone, tone. Okay, so that, that sounds like this altogether. So as you can see, it can be easy to replicate a cultural sound. So because of this, you should also familiarize yourself with some scales from other cultures because that can really aid your compositions, especially if you're aiming for a particular cultural sound. And again, with all of the lectures in this section, I'll have a cheat sheet ready for you to download. Okay, this isn't a music theory course, so I'm only brushing over these topics, but if you have any questions, you can send me a message on Discord or as a question in the Q and a section. In the next lecture, I'll show you that website I mentioned earlier. And you can start playing around with some exotic scales.
23. Omni : So this lecture is just to demonstrate omni. Okay? You can look this up on Google or you can type in the femur design.com slash omni. And it'll bring you into this webpage, Okay? Now, basically, it's just, there's 40 scales in here, I think. Yeah, so I've picked 40 of my favorite scales to explore. So basically, what you can do is you can pick a scale by choosing the arrows. And as you can see, the keyboard updates. So we'll go back to that hex and you own, which is, I think the default scale that it opens with. And here you can see what notes it's using. So for this scale, it's C, E, F, G, and G-sharp. Now, the lines don't really match up to the 0s here. So it would be actually a few what's called ribo tones, which are between these two notes. And you can also change the key as well. So it was set and see if you wanted to play in D. You can see what it sounds like India, you can see what it sounds like, an F for whatever. So I'm just, I'm just going to demonstrate. I'm going to, I'm going to drag the key, sorry, the mouse across the keys here. And we'd ever listened to what the heck's knee sounds like. You can also use your computer keyboard. Or if you have a midi keyboard, you can connect that to. You can also record and what you're doing, What's your plan. And you can play that back down through here. If you hit the three lines like I did earlier, I just wanted to see how many scarcer were yeah, how many scales to where there was 40 that he has. But if you come in here, it actually tells you about the scale you're looking at. So if we try the hero Joshi scale, let's try Hungarian. And the benefit of this website is the fact that it does tell you what notes are there. So you can go back into your data and you can set up the scale yourself and start playing around with this in sand. This is another Japanese scale. Tomorrow, maybe this That's interests in these two notes are very, very close together. It's only a couple of rye buttons way. So a rabbit tone is between a semitones. So remember, in the last lecture we had tones and semitones. In a lot of western, western, sorry, Eastern music. They have right buttons, which are the tones in-between semitones. So you have a tone, and a semitone is between a tone and then ribo tons, or between semitones. Okay, so you get this really close sound. I'm going to try one more here would try this erato or wacko. So this is just a cool website that you can use to explore some different scales and try and bring in some exotic colors into your compositions.
24. FL Studio Trick for Scales: So in this lecture I want to show you something that you can do in FL Studio. And that is you can stamp in some scales and modes and chords and that kind of thing. So if we come into the piano roll, we come up to this little arrow up here, down to stamp. And here you can see we can stamp in some chords. So any of these chords, we have scales, all of these, we have precautions. These are just kinda drum patterns that we can throw in really quickly. Or we have a glissando effect, but we're not going to worry about these. We're just going to talk about the scales and maybe the courts, okay? There are some advanced chords that we haven't covered because there's loads of them. It's just a minefield. And I don't want to confuse anybody, but if you want to try out some of them, you can click them and stamp them in. So let's, let's do that actually, let's, let's pick one of these. Let's try this minor six at nine. So I'm going to try that on the sea. So I can see the notes of that. It's going to have a C, a D sharp, a G, and a, and a D. So I'm going to pick that up and make it longer so we can see what that sounds like as a court. I like that one. It's kinda dark, it's kind of mysterious. So let's try something else. Let's come back in here, stamp. And let's do something that we know already. Maybe the suspended forth. So sauce for the stamped out on the sea as well. A pitch it up. And remember that's always going to run to resolve. But the real interesting thing here is with the scales, okay? Because that's what we've been looking at in the last lecture. There's a bunch of scales here. There's some scales that we haven't looked at, just like the chords. But there are, of course, the modes and scales that we do know. So let's try Dorian down here. Let's try this one. Will stamp that in on C, and we can see the notes. So for the Dorian scale, we're going to have C, D, D sharp, E, F, G, a, a sharp. And then we're about to see. So if you were to write a melody only using these notes, you'd keep yourself in the Dorian scale. Same thing goes for any of the other scales or modes that you pick. Let's try one that we haven't done. Maybe the blues scale. I didn't do those ones quite an order, but you can see the benefit of using this stamp function. Let's try maybe augmented. Before we move on. In the next lecture, I'm going to show you a really cool technique to generate some villain melodies.
25. Musical Trick for Villain Melodies: In this lecture, I'm going to give you a really quick tip for if you're composing a villainous melody, or a villain team or something like that. Something dark, evil, rebellious, or shocking. Okay? So what you wanna do is you want to write us in the harmonic minor, okay? So I've done that. This is the harmonic minor. Remembering that we have this kind of raised seventh. And you can see that here with the B. Okay? But what you're gonna do then is you're going to raise the fourth. So any fourth note that you have, we're going to raise this, appear a semitone, okay? So the scale kind of becomes, all right. It's kinda like the blues go. Oh, okay. So I'm going to play this melody as it is. It's really simple. And it's written in the harmonic minor, and it sounds like this. But listen to how much more evil. It can guess if we just raise the fourth, okay, we raise this up a semitone. Now have a listen to it. It sounds much more dark and evil. And you can use any chords, you know, your silver ion in the minor. So let's say we have a piano here really quickly. I'll just add in some simple minor chords. So we will go into C and H sat down. I'll see maybe the sixth. So as you can see, it still works with any, any minor chords or sorry, any minor scale and chords that you add in. But this raised forth, okay, this gives a really, really nice clashing sound. Here. It sounds lovely. So if you want to use this technique, if you're stuck, you know, you're trying to find a, an evil or a dark kind of melody sound, what you can do is you can use this technique where we take the fourth note of the scale, okay? So we're in z, that will be f. Let me raise us. In the next lecture, we'll have a look at modulation.
26. Modulation: Modulation is a helpful tool for changing the mood of a piece halfway through. This technique will come in handy for the cutaway scenes in particular. This technique will come in handy for the cutaway scenes in particular, where we must follow the events on screen and create a score to match. With modulation, we change key mode or both in the middle of a composition. This can happen as little or as many times as we need it to. Obviously the piece of music still has to work as a piece of music. If it starts to feel random or the modulation isn't smooth, it just won't work properly. The modulation should be on noticeable. There are several ways to modulate, but I'm going to show you the easiest and most sure-fire way to modulate two different keys and modes. The easiest way to modulate between keys and modes is to use a pivot chord. A pivot chord is a chord that's native to both the old key and the new key. And it must contain the leading tone of the new key. So what is the leading tone? I hear you ask, well, the leading tone is the nose located one semitone below the root node. So in the case of C, the leading tone would be B. In a, the leading tone is a flat. So for the pivot chord modulation to work, we need a chord that's present in both the old key and the new key. And we also needed to contain the leading tone. So if we're in the key of G and we want to modulate to the key of a, we would need to use a pivot chord that contains the node a flat, because as we said before, a flash is the leading tone of a. We now have two options. We can use either the chord of E or we can use the chord of a flat diminished, or as it says on the screen here, G-sharp diminished, but they're both the same thing. Whichever option you decide is up to you. Here's an example of both being used. The first chord pattern modulates from G to a using the E pivot chord. And the second example will modulate it from G to a using the a flat diminished pivot chord. Pivot chords are the smoothest and easiest way to modulate. The reason why it's so effective is because the actual pivot chord itself contains the leading tone of the new key. The leading tone will always want to resolve itself to the root node. And that's why it's called the leading tone. It leads us to a certain note. So what happens if your keys are completely unrelated? Remember how I said the pivot chord has to be present in both the old key and the new key. Our example was easy because the G scale and the ACE scale, they both contain the node E, which allowed us to use e as a pivot chord. But what happens if your two scales are totally unrelated? Well, here, you would modulate to the key that is related to the new key. And then once a Nike, you can modulate from there into the key that we actually want to be in. Or we can modulate two times or three times or five times. It's all up for grabs. Remember I mentioned before my favorite loved team is across the stars by John Williams. I also said in that lecture that he plays the main melody in six different keys. And that's because he modulates six times in that piece of music. Most listeners would never even noticed that the key is changing because it sounds so smooth, but it does change six times. Modulation can be a cool way to refresh a piece that's kind of gone stale or even change the mood of a piece halfway through. In the next lecture, we'll be looking at cadences and a cool little trick called tears to Picketty.
27. Cadences: Cadences are a fairly standard technique in music theory. They refer to how a musical phrase ends. Different cadences are much stronger than others. You could use a weak cadence to suggest that there is more to come as if it's kind of a musical cliffhanger or Add To be continued sign. A cadence refers to the final chords at the end of your musical phrase. Most modern music, we'll end on the tonic or the root chord because that's home. That's what we'd like to hear. But with game music, we want to tell a story and sometimes the music will call for a different meaning. There are several different types of cadences, but the most common are perfect, imperfect, interrupted, and plagal. Remember before in the court section, we gave all the chords, some Roman numerals from one to seven. Well, this knowledge will come in handy here. A perfect cadence is when your phrase ends with the chords five to one. This cadence is called perfect because it sounds the strongest and is a great way to end piece. An imperfect cadence is when your phrase ends with any chord going to five. This will end your phrase on a question or a cliffhanger. An interrupted cadence is when your phrase ends with the fifth chord going to any chord except for chord one. Okay? And that's because if chord five went to chord one, then that would be a perfect cadence. So we have to go to any chord except for one. The interrupted cadence is interesting because it shows all of the signs of being a perfect cadence. Excepted suddenly interrupts that feeling and ends on a different court. A plagal cadence then is when the phrase ends with the fourth chord going to one. This is also a strong cadence, but it's not as strong as the perfect cadence. Try experimenting with the cadences and see what you can come up with. Tears to pick 30 is probably my favorite cadential technique. Okay? This is where you write a piece of music in a minor key, a reminder mode, but unexpectedly changed the tonality of the final chord to major. So let's say you wrote a piece of music in the Dorian mode, which is one of the minor modes. We could introduce tears to Piketty by changing the final cadence to major. So instead of going from, say, G to C minor, we will be going from G to C major. It's an interesting technique and it can end the piece on a bright or hopeful notes. In the example on screen, that piece of music is written in E minor. And we can see what the courts and the bottom, remember the Roman numerals. So the coordinate very left is, I write it's the small lowercase i, which means minor one. Then we're going to minor six. We're going to minor 46. So that'll be our inner membrane are accord with the sixth note added in this kinda suspended sixth, and that will be 46. Then we're going to minor one again. Then we're going to a major 56. Then we're going to measure five, major five. And finally, we're ending on a major one, instead of ending on a minor one, even though we're in the key of E minor. Finally, I wouldn't say that I'm cadences, They're all that important, okay? They can certainly change the finality of the piece. And some cadences can make it sound like there's still more to come. But this technique, it's not that important. It's just, it's one that's interesting and it can be used as a communication to the listener.
28. Descants & Counterpoints: So, so after all of these heavy lectures, Let's take a look at something more simple. Desk cans and counterpoints. These are just melodies, the play either above the melody line or in partnership with an already established melody. Looking at desk cans first, these are melodies that play above the main melody. So if you've been using your main melody for a long time and you need to introduce something fresh, a desk and can be a great way to do that. You can also use a desk times to harmonize with the main melody line below. Or you can create a totally new melody that plays above the main one. Counterpoints then our melodies that play underneath the main melody. These are melodies that provide harmony to the main melody, but they can also move in a different direction if you wish. And desktops and counterpoints can be used to accentuate a certain part of the composition and make it feel like more of a climactic moment. Or they can be used to fresh in the composition up if the main melody has been playing for a long time. Because of this, a desk Kant would usually appear towards the end of a piece, but they don't always have to. There's no rules and music, only guidelines. It's all up for grabs. If it sounds good, then it doesn't matter whether it's right or wrong. Desk cans and counterpoints are very common in church music and hymns. But you can add them to any composition on any instrument. It's something that's not really heard a lot nowadays, and it can be interesting when they do appear in modern marks. Next, we'll be looking at dissonance, a really, really useful technique that can add color into your score.
29. Dissonance: Another quick and easy lecture. Now, let's talk about dissonance. Dissonance is the big fancy word that we use for clashing notes. These are notes that generally don't belong together in a typical harmonic situation, some of the chords we've been looking at already would be considered dissonant because the notes clash. The sauce to card, for example, is considered dissonant because the interval between the first two notes is quite short. An interval is the word that we use to describe the difference in pitch between two notes. So an interval of a second is always going to sound dissonant, which is what our sauce to court is. I know this sounds like the chords lecture that we had already, but dissonance applies to melodies as well. And anything else in your composition, the place simultaneously. So we could have a chord of C major plane, just ordinary C major with the C, E and G. But if in the melody we have a node of D playing, this would create dissonance. So really, the only reason I'm giving you this lecture is to tell you that when you're writing melodies, you shouldn't just be sticking to notes from the court in the core to see your melodies should have more notes than just c, e, and g. For example, like I said, I'm using a note of d in the melody when a C minor chord is playing, this can sound very emotional. And this would be dissonance because there's an interval of a second between the D and C. So let's look at the types of dissonance that we can use. We can have a minor second, major second, tritone, minor seventh, and a major seventh. So with the minor second, those two notes are only a semitone apart. So a minor second would be the likes of C and C sharp playing at the same time, a major second, one tone apart. So that's the likes of your C and a D blend together. A tritone is when you take the fourth note of the scale and sharpness. And we also looked at this, but I call it a flattened fifth, okay, it's the same thing. So in this case, you would take the f of c, so c, d, e, f, the fourth and sharpness to get an F sharp. So playing a C and an F sharp together would give you a tritone. For a minor seventh, you take the seventh note of the scale and then flatness. This would be the equivalent of B-flat playing at the same time as C. And finally, the major seventh is just the seventh note of the chord. Okay? So that would be the equivalent of C and B playing at the same time. These are all considered dissonant tones. But when you use them well, they can sound very emotional or even tense depending on what dissonant intervals that you choose. So how do we use dissonance properly? How do we make sure that it's not going to just sound bad? Well, because all of these intervals are considered to be somewhat unpleasant or tension producing in tonal music, which is what we're writing. Chords containing dissonances are considered unstable. Meaning that when we hear them, we expect them to move on to a more stable court. So this is what we do. We move to a more stable court after using dissonance, this creates a pleasurable feeling of resolution. And that's what the technique is called. Moving from a dissonant chord to the stable card that people expect to hear. This is called resolution or resolving the dissonance. The pattern of tension and release that's created by resolving dissonances is part of what makes a piece of music exciting and interesting. Music that contains no dissonances can tend to seem simplistic or boring. On the other hand, music that contains a lot of dissonances that are never resolved can be difficult for some people to listen to because of the unreleased tension. So if you are using a dissonance, makes sure to resolve it at some point, preferably with the next court. Finally, just to talk about the opposite of dissonance. And this is called consonants, okay? These are notes that don't clash and sound stable. We don't really need to learn about this because the consonant intervals are all of the intervals that we didn't mention in the dissonant section, okay? They're also pretty self-explanatory. Minor third, major third, fourth, fifth. You know, anything that sounds good. We know all of these sound stable and good already. All you really need to know is that continents is the term we use for notes that sound stable.
30. Time Signatures: So let's talk about time signatures. It's very easy for a composer to stick with the 44 time and never explore any other time signatures. But there's so much more than 4, 4 time and they can be used for very specific purposes. Time signatures can be complicated to make sense of. So I'm going to simplify them here. The top number refers to how many beats there are. So in 44 time, there are four beats. In 6 8 time there are six beats. The top number essentially tells you how many numbers to count two when listening to the music. With 404, you count 123412341234. With 68, you would count to 6123456123456123456, and so on. Okay. The bottom number then, that's a little bit more tricky. This refers to the length of nodes that receives one of those beats. So because of this 24 time and 22 time are very different. Even though with both of these time signatures, we'll be counting to, to, to make life even more difficult. The US and Europe refer to notes differently. Time signatures are probably a little easier to understand in the US system of notes. So I'm going to use those here in this lecture. The numbers will match up so it'll make it much easier to understand. But I'll give you a little downloadable resource them with American to Europe, no names so that you'll know what I'm talking about here. I'll also use the European names on screen as well so that we all kinda know what's going on. So back to the bottom number. We've already said that this refers to the length of knows that receives one beat. So when you see a four as the bottom number, this refers to a quarter note with something like 24 time. There would be two beats, 1, 2 of quarter notes in every buyer. If you have, say two to time, this would be two beats, 12 of half notes in every bag. With 6 8 time, there will be six beats. 1, 2, 3, 4, 5, 6 of eighth notes, and everybody see how the numbers match up. So even if I gave you a very strange time signature of 58 time, you would know what that means. That would be five beats of eight notes in everywhere. Now, this can actually get really, really complicated. But the good news is, it's not necessary to know in order to create great game music. In fact, you don't even need to worry about the bottom number at all. If you're using a dot, you just have to focus on the top number or rather how many beats there are in a bag. That's what matters here. So you can ignore the last slide if you want. I just wanted to explain how they work so that you can understand what's happening underneath the surface. Anyway. Starting with the most common time signature, we have 4 4 time. We all know this one. Come to 41234. 1234, but there are other time signatures that we can use. 6 8 time will give a more adventurous field. It's also great for medieval or fantasy music using 6 8 time for a game-like sky RAM, for example, could work really, really well. 6 8 time consists of two triplets. So 123123 in the example, try to come to six while it's playing. Or you can try saying this. Bacon and sausages. Say it over and over again. And you're speaking in a 68 rhythm. Bacon and sausages, bacon and sausages, bacon and sausages. Okay, so try to count to six or do the same. When the example is playing. 34 time is used for a waltz. It also works amazing for a mafia or Italian music. Topic 2 for time is great for a military March or battle rhythms. Through our more time signatures than this, okay. Like 54 or 12 A's. But these are called compound time signatures and it's basically two times signatures combined together to make one time signature. Sometimes it can be really, really complicated, like the first half of the buyer could be in 34 time, and the second half could be in 44 time. We're going to ignore them. I am, I am planning to make a music theory course where I'll start at the very basics and work right up to college level music theory. There will probably be several courses that come out like part one, part two, exedra because music theory is so deep and complex. But I love it. Anyway, you guys should just focus on the easy ones for 43468 and 24. Now, you can also change the time signature throughout the piece. So you could write a piece that contains three or even four different time signatures. It might start in 44 and then change to 6 8 for a nice triplet rhythm field, and then switch to 24. If you need the music to become more of a matching style, you can change time signatures whenever you want and wherever you feel it's necessary. The only important thing to do when changing time signatures is to make sure that music is flowing well and it doesn't sound awkward unless you're deliberately going for that kind of IPE. It could work for maybe I don't know, a clumsy character or something. But in general, we want the music to flow and be easy to listen to.
31. Musical Form: When you're writing music, sticking to a particular form can be a sure-fire way to make your composition sound great. Musical form is a principle that can be used for melodies, phrases, passages, or even an entire composition. It provides an interesting structure. So what is a phrase or a passage? Well, a phrase is typically four bars long, and a passage is usually for phrase Islam. And then your entire composition would be called a movement, in this case. And movements are made up of passages. So phrases, makeup passages. Passages, makeup movements, and movements make up your full score. You can use musical form on any of these things. You can also use form on any other element within the score, melody, baseline, or even in harmony. How do we use form? Well, we label these passages, phrases, and movements with letters to create a structure for the piece. When we talk about form, we use letters a, B, C, D, etc. These referred to parts of the composition that are different. I'm sure you've done this before an English class when labeling a poems rhyming scheme, you know, all the airlines would rhyme, all the B lines would rhyme. But a and B lines, they don't rhyme with each other. It's kinda the same thing here. We could have an entire composition where the form goes something like this. A B, C, a B, D, a B. In this case, all of the parts of the melody are exactly the same. And all of the B parts of the melody are exactly the same too. But the a and the B parts or different to each other, the C and the D part, then these are completely different to every other pairs. So hopefully I'm explaining this, okay? I'm very worried that a lot of this is going to sound confusing. But anyway, we'll keep going. Okay, Let's look at the three main types of form, which are binary, ternary, rondo. Binary means two. So with this form, there are two parts to your melody. You're afraid you're passage whatever. Part a and Part B, binary form would look like AB. But it can also look like AA, BB or AAA, bbb. As long as you only have two paths with the B part following the a part. Ternary form then is like binary except instead of meaning to, it means three. So think the letter T for ternary and the letter T for three. In this form, our labels would look like aba. And after the B section, you're a section must return. Next, we have Rondo form. This form looks something like AB. Ac, AD and so on. After each API, there's a new part completely different to any other path in the composition. Once this new part finishes, we returned to the a part again. If you draw your attention now to the background picture on the slide. Okay, that's fair, Elise. And by Beethoven, if you look at the colors, you can actually see that it's been written in rondo form. Okay, So you have the pink is a, the blue then would be b, and then we have another pink part, a common back. Then the green is C. And then another pink part comes back, which is a. So the form of for Elis would be AB, AC a, which is rondo form. Now, those were the most kind of common or basic forms. And I would argue that ternary is probably the most useful as a melody written in ternary form can sound grace, you know, it could be 16 bars long. The first four bars would be part a. The next eight bars could be part b. So it's a whole new idea completely different to a. And then for the last four buyers, the APAC comes back. This always sounds good and it sounds like solid form or a solid structure. But there's obviously way more than these three. We have sonata form, which only applies to a full composition. Okay? With this, there are three sections called the exposition, the development, and the recapitulation. Okay? The idea with this form is to create three sections in your composition that tell a story. If you want to get really technical, sonata form is actually binary, okay? I know it looks like a ternary form because it has three parts, but it's actually binary. The exposition is part a, and the development and recapitulation, these are part B, so AB binary. But I'm not gonna go into too much detail and explain why. Okay, So just remember that the sonata form has three parts, the exposition, development, and recapitulation. And also remember that it applies on the large scale. Okay, So usually across your entire composition, cyclic form, okay? Think of this like a cycle. That's where the name comes from. Cyclic form is a constant cycle or repetition of a fixed phrase or passage. So let's say you write a really nice passage of music and it's about a minute long, but you need it to be four minutes long. You could use cyclic form and essentially repeat the one-minute of music four times. Every time the passage repeats though, you should develop it, change the texture or instrumentation, changed the dynamics, add in some new additional character, even take some parts out. This will avoid sounding too repetitive, but also keep the same overall musical idea. Your main melody should always be present, but you can change the instrument if you wish. Cyclic form would look something like a a11 because it's similar to a, are based on a but it's not exactly the same. Okay, so we have a, a1, a2, a3, a4, and so on. Cyclic form was used a lot by Mozart, Hayden, and even Beethoven in his Fifth Symphony. Next, we'll look at strophic form. This is the very same acyclic except we don't develop the passages. So instead of being a1, a2, a3, a4, strophic form is actually AAAA and so on. A lot of nursery rhymes and lullabies are based on this form. Hush little baby is one of them. Okay. The lyrics changed throughout the lullaby. The actual music, you know, the melody that never changes, it stays the same for every verse. And this is strophic form. Generally, this form only works well with lyrics. It also sounds very operatic, but it can work for nursery rhymes or lullabies if you ever need to compose for those. However, if you're not trying to write an opera or a nursery rhyme or a lullaby, I'd recommend that you stay away from this form because otherwise it can become very repetitive, especially if there's no lyrics in your piece. We can also expand on all of these forums a little bit. Okay? You've heard me already using numbers after the letters. So we can apply this principle to all the farms. For example, we could take Rondo form, which is AB AC AD. But we could structure it's something like AB, A1, C, a, D, a2, and E. In this case, the a parts are still all the same, but the a one part will sound slightly different to a and a2 or sound slightly different to both A0 and A1. But they're all based on the a part. Okay? This is a good way to create a feeling of progression throughout a piece. Musical form. It's not really a psychological trick, okay? It's more so just a piece of music theory that can make your music sound very solids in terms of structure. You can also use the standard pop song form, um, you know, verse chorus, verse chorus or whatever. With music, you can do what you want basically, but have a look at these forums and try composing with them. Your music should become much more solid structurally.
32. The Game Composer's Mindset: For a game music composer, we have to think a little differently to the traditional form of composing. In this lecture, you'll find some of the most important things that every game composer should keep in mind when working on a game score. The first mindset that you should adapt is to write cues and not compositions. In games, a lot of the sounds and music are triggered by events. You should be prepared to break up a full composition into four or five smaller passages that can be triggered at anytime. But the player, these smaller passages are called cuz as they're cued to play when something triggers them. This way, the music will always sync up with events in the game. We'll look at how to actually do this when we come to adaptive music. But for now, you need to start thinking in smaller passages of music or cues of music rather than a full track. The second tip then is to treat the game like an interactive film. With film, it's very, very linear. You know exactly what's going to happen, exactly when it will happen. And you also know roughly how the audience should be feeling at the time. And again, this is not the case at all. Some players will do things differently to others and they may even choose different paths to play the game. Maybe they just might be different types of players. For example, in Minecraft, the music will change if you enter a cave. There's cave music and Minecraft, but some players may not enter a cave for hours, but another player might enter the cave as soon as the game starts. We have no idea when something will happen in a game. So it's important to anticipate all situations that could happen in the game and write music to fit that situation. Finally, the last important thing that you must do is to keep everything nice and organized. You'll often be using Dropbox or another kind of online drive to exchange files with the developers. If a developer emails you and asks, Can you change the piano sound in DAC monster music version 3.7, you need to know exactly which file this is. Preferably, you should have a system for naming your files. Version 3.7 could mean that this is the third monster composition that you created and maybe the seventh tension level forest. So 3.7, you need to know which version of file everyone is talking about so that you can edit them as fast as possible. This will keep everyone happy, make you look professional and also avoid confusion. You should definitely try to avoid the, you know, the typical naming scheme that was composers and producers use. Final version, final version 2. This time definitely final version. Avoid that. It will look much better if you have a well-organized system in place.
33. DAW Techniques for Orchestra Realism: In this lecture, we're going to look at some tips to ensure that your virtual orchestra can sound as realistic as possible. And the first tip is to record yourself playing every part using a midi keyboard. Okay? Now, obviously, not everyone has this luxury. Okay, so we'll look at how to overcome that. But for those of you who do have a midi keyboard and complaints, definitely record every element in yourself. Okay? It's gonna make everything sound more realistic, more expressive. You know, we want the listeners to believe that a real orchestra has played our music. And because of this, it will help us to be able to record the parts in ourselves using a midi controller. And you see the reason is OK. When a computer plays a sound, it's going to play at the exact same way every time, because it's a computer. But when humans play something, it'll never be the exact same. Okay, we're going to have slightly different volumes, different note lengths, different expressions, different velocities, and so on. If we record the median ourselves, then we can incorporate this human field. Okay, so if you do have a midi keyboard, definitely start using that record in each different element yourself. If not though, we have to do things manually. And here's how. So we should be changing the velocities of the notes. All right, that's the first thing. So I have a piano pattern here. All right? And when you add in piano notes, okay, let's say I want to add an a D, right? And I want to add in an E and a, D, and a C, okay. If you look at the velocities of all of these notes, they're all the same. All right? Each one of them is going to play at the same volume every time. And this is what happens when you input notes via your computer. You know you're using your mouse and your keyboard or whatever, okay? Not your midi keyboard, but your actual keyboard that you type on. So when you input notes this way, all the velocities will be the same. Alright? And I have this piano pattern here and I'm going to play it. All right. It's kinda sad, sad kind of classical piece, but all of the velocities are the same. Alright? And it's gonna make the p sound very kind of robotic. And it's just, it's not going to sound realistic or expressive. Okay. Let's have a listen. All right. But if I was to go in to just this part here, I'm sleeping this part. If I was to go in here and change some of the velocities of the notes. Okay, so let's say we take these top notes and we make them really quiet. Let's say we take these notes here and we kinda make them all different velocities as well. Make these notes some different velocities. Maybe they're really quiet and maybe they get loud here and then quiet. I'm just doing this really quickly, okay. And these notes here, we'll make them loud when you're actually doing this, okay, you should be listening and listen to the pattern and make sure that what you're doing with the velocity is actually sounds and natural. There's probably won't sound very natural. But I'm just trying to demonstrate really quickly. Watch. Changing the velocities of each node can sound like, all right, let's have a listen. All right? It does. It sounds a lot more human and a lot more realistic. So what I have done though, oop, sorry, but I have done, just to demonstrate is I've loaded a piano here. Same pattern, same instruments, same everything. Except I have actually gone through the velocities myself, all right. To try and make it sound as realistic as possible. So so I'm going to play the pattern again and you'll be able to see how natural and realistic it sounds, um, when you purposefully change the velocity of each node. Okay, Let's have a listen. Now, the next thing that we're gonna do is we're going to have a look at a midi event editor. Okay? So for this, we're going to need some strings which I have loaded here. All right, It's just some shadows. There's no reverb or anything on it, I don't think, but it's just a simple cello pattern following the same chords as the piano. Okay? And if I come into my volume knob, okay, Make sure it's the volume knob that you're using and not the panning knob. Okay. But with the volume knob and you come into this thing called Edit Events, okay? That will bring up this little window here. And what we're doing is we're basically saying, how loud do we want the notes to be as each bar, okay? So I can draw this in, and it works really well for strings. So I can draw this in like this, all right, and I can make it get louder. It will swell up. For the second bar. Maybe it will come down a little bit in volume here, and maybe come right back up for this third bar here. And then we'll make it fade out for the last pair. Okay, I'll just draw this in. So if we listen to the strings now. Okay? And again, I've done this really quickly. So when you are doing this, you need to make sure that it sounds natural. Okay, and now that that definitely didn't sound natural. But if it was to sound natural, maybe I would probably do something like this and bring it up. Maybe bring this bit down. And then I don't know, something like this. Let's have a listen and see if, if this sounds any more natural. Maybe not. But the point is if you use this Edit Events window, you'll be able to edit the volume of the strings at any given moment during the pattern. So what this allows us to do is to add in some expression, okay? So starting out quiet and then swelling up too loud, and then swelling away again and then maybe swelling up to really loud and then kind of fading away. This mimics the sound of a real orchestra, okay, the way a real orchestra would play. So definitely if, if your DAW has us now, I know FL Studio definitely has it because I'm using it, but some other does do have this and some don't. Okay. But if you do have to make sure you're using it because you can get this really realistic swelling sound. Okay, Finally the last tip, and I'm going to go back to the piano for this one. Actually, I'll go back to the one that had, had the velocities changed. But for this one, okay, what we should be doing when we're putting it in the notes is turning off the snap to grid. Okay. This this is how you do it in FL. Okay. You come up to this little box where it says line, and then come down to one of these grid settings. Now I'm going to turn it off completely by clicking None. All right, So the grid is off, basically. The grid is all these lines here. Okay, So when you put in a nose and it's unlined, when I click, if I click in the middle here, it's going to snap it to this line. Okay, Do you see that? I'm clicking in the middle, but it's snapping it to this line. If I turn on none, if I click in the middle, that node will be added where I click. Okay? And this is going to simulate the kind of timing aspect of the human field. Okay? When humans are playing, they're playing the keyboard. They're not going to hit every nose bang on the beat every single time. Okay, Then Mica close. If there are very, very good piano player, but they're not going to be bang on. Which is why we use this none setting. To, whoops, I want this type of node, which is why we use this non setting. Okay? So, so we can essentially take each note that we have, okay, and take it away from the actual line. So basically try and move it off the beat. Okay, so that sounds a bit counter-intuitive. Okay, but, but what we're doing here is we're trying to simulate human field. So maybe this node could be a little bit early. This note could be close. There's not maybe close. This note will keep it on the beat. So these notes are shorter. And this one here, maybe we'd have this smell, this lace. And then maybe the next note, we could have this maybe early and then this nose. I don't know. I'm just going to really quickly click all these notes and just make it sound a little bit more human in terms of timing. Okay? Again, when you're doing this, you should be doing it methodically to make sure it sounds good. But I just want to demonstrate really quickly what this can sound like. Okay, let's have a listen. Okay, so obviously some of those notes are way too, way too early or way too late. Okay, especially these chords one, these coordinates, sorry, where were these two notes or pen at the same time? These should be closer together. That's what's causing that funny sound. If you were to delay one of them, you would delay both at the same time to make it sound more realistic. Okay, so when you're inputting notes using your mouse and keyboard, again, you're typing keyboard, not your midi keyboard, but when you're inputting notes in this way, avoid using the snap to grid, which is this. Okay. So turn it off and set it to none. All right. No human can play notes exactly on the beat. So turning off this snap to grid will allow us to mimic that human error. Obviously, things are still going to need to sound in time, alright, but the slight variations and timing can really, really make a piece come alive.
34. Recommended Orchestra Plugins (free & paid): Let's look at some recommended plug-ins. These will allow you to achieve a really nice, professional and realistic orchestra sound. What I'll do is I'll talk about the free plugins first so that no matter what your budget is, you can download these and begin composing with some great sounding plug-ins. Then you can stick around. And if you're interested here about some plugins that I think you should buy. If you're serious about composing. If you're only starting out composing for a few indie games, or maybe you're just trying to learn how to compose for games. I'd stick with the free ones. But if you're composing for a serious game and serious developers, I suggest you invest in some of the paid plug-ins. The first free plug-in that I definitely recommend you get is labs. With this, you can download a whole array of different sounds that can be used to add to your orchestras texture. And it doesn't come with strings or brass or any of that, but rather atmospheres and textures that can be layered into your music and create a really cinematic sound. Along with this, this Labs plug-in, There's also the option to get a free version of the BBC symphonic orchestra. To get the free version, you have to fill out a survey and then wait around two weeks for them to actually email you the download link, but it's totally worthless. This plugin sounds amazing considering it's free. Okay? You've heard it already during some of the lectures and pretty much all of the examples that have been playing throughout the course. The free version, it does have a few limitations with velocities and articulations, but still okay, regardless of whether or not you have a budget, it's definitely worth getting. Now, if you don't like surveys, you can download the silly in studios plug-in, okay. And this is also quite good. It actually has a little bit more functionality than the BBC plugin. But the instruments sound more like a chamber orchestra then a big symphonic orchestra. The solo instruments in this plugin sound grace. And the thing is with the BBC plugin, you don't get any soloists, not with the free version anyway. So this facility in studios plugin is definitely wanted to get as well, considering it's free. Hello. You can also download a variety of free sound fonts, okay? Now these don't sound that realistic, but they can work if you use a lot of them. Harish EQ and lots of reverb. Where these really shine though is if you use them as layers or as a decoration, okay? If you only use a few of them in a full composition, then you can mask the fact that they don't sound as good. Let us now any other free plug-in that I found, it just doesn't sound that great. Okay. But there are loads out there. I just wouldn't necessarily recommend them. But if you want, you can check out the sun Latino orchestra module, one track orchestra and the DSK set of orchestra plug-ins as well. In terms of plug-ins that you have to buy. The full version of that BBC symphonic orchestra that we were looking at. This is definitely worth investing in, okay? The full version contains absolutely everything that you'd ever need to be able to create a realistic symphonic sound. Following this, then there's contact. This is the king of the industry. Everyone uses this, even Hans Zimmer. Once you buy the Contact plugin, you'll also have to buy some expansion packs. Have the money. This is definitely the way to go. You can get absolutely anything you want with contact from Hollywood orchestras to tribal drums and even scraping pots and pans for atmospheric effect. The expansion packs for contact are amazing and the functionality and sound that you can get is totally unmatched. And again, there's more than just these two. But mostly I use contact, so I can't recommend any of the others. And I do have the mirror slab Philharmonic login, and that's the last one on the list. And that's quite good as well. But the reason I'm not recommending it is because with contact, you can expand this as much as you need to with the expansion packs. And the thing is, most of these paid plug-ins, they also come as contact expansion libraries, so you don't need to download the Philharmonic plugin because they have a contact library that you can buy instead. That gives you the exact same thing, but just with the Contact plugin. But if you want to, you can check out some of the paid plug-ins on screen as well. Anyway, we'll move on now and have a look at which techniques we can use to compose for some very specific emotions.
35. Scoring for Sadness: Composing sad music is really interesting. And the one hand, it seems easy, yet there's actually several different forms of sad music. They're sad music that can be fragile, empty, depressing are then they're sad music that can also be inspiring and hopeful. The psychology of music is predominantly undefined. We don't know why minor modes make humans feel sad, but major modes invoke the opposite. In any case, using some of these techniques will help you to achieve a sad composition. Slow tempo. Having a slower tempo is proven to slow the heart rate down. This induces a calming effect, which allows the brain to enter a meditative state. This is why sad music can often make us reflect on our lives and our past decisions. Nevertheless, using a slow tempo is definitely advised for sad music. Lots of space. Make sure to leave your arrangement relatively sparse and empty. Adding in too many instruments will make the composition sound more powerful, which will change the response to one that's more hopeful or romantic. Make sure to allow instruments to ring out and don't try to fill up some of that empty space. That space is where the listener has room to think and respond. So using sparse instrumentation will help to achieve that effect. So having a drone that plays underneath or above the composition can really help you to achieve a sad sound. The single held note with clash and resolve with other notes as the music place. This can really help to create an emotional response and the listener using soft sounds is also really important. Software instruments sound much more mellow than Herod instruments. For example, the piano can be played softly, which gives it a smooth and kind of gentle sound. In contrast to Glaucon spiel is quite a hard sound, and no matter how it's played, it's going to sound bright and happy. You should be aiming for Docker sounds. Using long reverbs will help to create an empty atmosphere. Think of an empty room. It's going to have a lot more reverb than a room that's full of furniture. Simulating this effect will add to the sadness in your composition. So bravo is a very expressive musical technique. It's commonly used in fat compositions because of this fact, extra expression equates to extra emotion. So you should definitely try to use vibrato in your compositions, especially on solo instruments. Legato is another one of those expressive musical techniques in music terms it means to play smoothly. In this case, your actual midi notes will be touching each other or even overlapping each other. In real life, a string player would change notes without even removing their finger from the fretboard. Playing in a minor key create sadness. And several of the modes are actually based on this minor court, namely eolian, which is just ordinary minor. But we also have Dorian, Phrygian and Locrian. Be careful though, okay, the modes can create their own feeling as well. Dorian can also sound quite calm and peaceful, and Phrygian can also sound ominous. Ensure that you are achieving the specific emotional response that you desire. Contrasting feelings. This technique is most certainly a contradiction to the last one. But there's a psychological theory behind us. Playing music that is somewhat happier during a sad scene can actually create a conflict of emotions within the listener. Now, don't go overly happy with this, but sad music doesn't have to be extremely depressing all of the time. Suspended chords, okay, we've looked at this one before. And this is in relation to actual cord variations, including suspended chords is very important for adding emotional drama. Sus 2 and sus4 chords work particularly well, as do seventh, ninth. Chord progressions and melodies that move downwards can sound much sadder than chord progressions that move upwards. A falling baseline will invoke a sense of melancholy and reflectiveness, whereas a rising baseline will do the opposite. Make sure the contour of your melodies and chord progressions and baseline are all moving downward. Okay?
36. Scoring for Happiness: Happy music is, believe it or not, the hardest to create. It's very, very easy to sound cheesy by adding overly bright cords and overly bright instruments. These techniques should help you to create happy emotions in the listener without sounding too GZ lively temple. I wouldn't go as far as to say fast tempo because to faster tempo can turn into Celebrate story or an excited feeling. However, tempo is always important. Temples have a direct effect on the brain and the heart rate. So it's important to consider your temple when composing music. I think lively is the best way to describe a happy piece. Using hard sounds concern Bryce, and celebratory. Instruments like the xylophone and the Glaucon spiel, are hard sounds and they can add an element of happiness into a composition. Likewise, playing the piano loudly will produce a harder sound than playing softly. Which is why attack piano is often used in Honky Tonk buyers and silent films. The Herod Tom tax that are used on the malice can give the piano attorney and hard sound. It sounds loud, Bryce, and cheerful. Adding clashing notes to a happy piece is generally okay, but notes like the suspended second, fourth, they can change the mood of the piece. Generally tried to keep the peace as consonant as possible, except for the next point. Dominant, seventh. Dumb seven chords sound great. They sound carefree and lackadaisical. They will prevent your composition from sounding two major, which can inevitably lead to that cheesy sound that we were talking about before. Dom sevens are great to use, but be careful not to overuse them. Okay, don't make every chord progression in your piece a damn 7. A damn seven chord would take the seventh note of the major scale and lower it by a semitone. So c dumps heaven, looks like C E, G, B flat. And Aidan seven would look like a C-sharp E with a G. Happy music will often make use of rhythmic elements. As humans, we're hard wired to enjoy rhythms and low frequencies because this is something that we subconsciously linked to our first ever memories which were in the womb. We like steady rhythms like our mother's heartbeat. And we like lots of base because of the muffled sounds inside the room. Use major modes, okay? We all know this major creates happiness. Using major modes will directly affect the emotional response for the listener. Similar to the sadness lecture, be careful with modes, okay? Each mode has its own feeling that it can convey. The major modes are Ionian, Lydian, Mixolydian. Lydian can sound quite cartoonish, and mixolydian has an element of confusion or darkness despite being relatively bright. And finally, the last slide is the opposite of the last slide and the sadness lecture. And this time we're talking about upward motion, okay? Chord progressions are melodies that contain upward motion will give a sense of joy. Downward motion that can actually work to, for example, Joy to the World is predominantly downward and motion. However, most often, upward motion can create a celebrated every field.
37. Scoring for Love: Music for love is almost like a mix of happy and sad, okay? The sad element allows the listener to reflect and really connect with the music. But the happy element gives the composition a sense of joy and lightweight fitness. Love is happy, sad, weightless, heavy, carefree, obsessive. It's incredibly complex, so trying to convey that in music can get pretty deep. So we're going to want to use slow tempo. Again. We're attempting to slow the heart rate down and allow the listener to connect with the music. Love music shouldn't be as slow as sad music, but definitely it does take on a slow tempo. We're also going to use solo instruments, okay? Using a solo instrument for a loved team is incredibly powerful. One of my favorites to use is the Qur'an LE or the cello. The deep register of these instruments can provide a beautiful sound. Woodwinds actually seem to be a favorite amongst composers. Oboes, clarinets, flutes, that kinda thing. So maybe try out some woodwind instruments for solos. Big sound. A love team will almost always increase in volume for a climactic section to really catch the audience's attention. There is a large amount of dynamics that are used in music for love, because this can convey a feeling of overwhelming euphoria that we get with love. Melodic layers. This is an extension of the previous point. The instrumentation will make use of layering. For example, loved team may start out on the cello. And for the climactic sections, the violins, trombones, flutes, and clarinets may all take that melody line and play in synchronization. The rest of the instruments would provide harmony. Soaring melodies. Okay, this is probably the most important one. Melodies that contain large leaps upwards and seem to kind of soar above the rest of the orchestra. These can really, really drive home a feeling of euphoria and love. In the minor mode? Yes, minor. Although minor is associated with sadness, It's also associated with beauty. Minor tonalities are very important in achieving an emotional love composition. A major mode would remove this element of beauty and replace it with celebration. So make sure you're using a minor mode when you're making a love theme. You're also going to want to use bidirectional motion, especially with the melody, allowing it to flow upwards and downwards, can mimic the unpredictability and the unexpectedness of love. Using the legato technique is also important. Music for love needs to flow and feel smooth. Using overlapping notes or longer notes can help with this. And finally, vibrato, a very beautiful articulation. It will work brilliantly in this context.
38. Scoring for Fantasy Music: Scoring for medieval or fantasy. Now I say medieval or fantasy because these two settings often contain similar music. Games in these genres will have a lot of sword fighting sequences, horseback riding, and other activities associated with the middle ages. The only difference that fantasy presents is the existence of trolls and dragons and Orcs and other things like that. Medieval music is typically associated with RPGs and other massively multiplayer online games. World of Warcraft and sky RAM, or two examples. For this setting, you're going to want to use modal interchange. Borrow chords from other modes. It creates a very interesting sound. For example, you could borrow a major chord from the parallel minor. If you write a piece in C major, then you should borrow chords from C minor. The sixth, seventh chord from the minor concern particularly good when inserted into a major progression. This also works well for a hero's team, but definitely experiment with modal interchange, okay, it can really open up your horizons. This is commonly associated with the Irish jig or pirate music, okay? It's a time signature that the average listener won't have heard very often. So it can create a sense of foreign or otherworldly music. 34 time can also work well here. These two time signatures are actually directly related. Odds are with the game in this genre, there will be a lot of quests involving battles. These can range from sword fights, two nights and kings, or even using magic to take down a dragon soaring above the player's head. Fast-paced, complex rhythms will help you to add tension into the battles. Consider rhythms such as the triplets and the sword fight rhythm. And the next slide which gets a heading all to itself. Polyrhythms. These are great for an adventurous field, and also to create rhythmic dissonance for added tension and battles. Polyrhythms are where you have two conflicting rhythms playing simultaneously. The most common format is to have a triplet rhythm being played alongside a standard for four of them. For example, for triplets in the same bar as four semiquavers. When these two rhythms played together, they don't exactly match up. This can create a really interesting and adventurous texture for your music. Usually fantasy games will require some sort of hero team, either for the main character or as a general heroic team to inspire players during quests. There is a full lecture on this subject. So I suggest you watch that for the techniques I'm merely staging here that writing a hero's team will probably be a Jew in creating a fantasy game score. Using woodwind instruments for melody lines can actually contribute greatly to a fantasy field, flutes, clarinets, oboes, and currently work really well here. The reasoning behind this is that genuine medieval instruments were very, very similar to these. Games of this nature are set in times of little to no technology. Okay, So instruments were crafted at a bone and wood. Mandolin, harps, marine buzz, happy record, woodwinds, etc. Think about what was probably available at the time. This alone will enable you to create a sense of setting. Also, if you want to secret tip, traditional Greek or Arabic instruments, work amazing. Instruments such as the UD, liar, Mizuki, dulcimer. The canoes can deploy era, et cetera. I strongly, strongly urge you to look up some of the Greek and Arabic traditional instruments, okay, they will flawlessly communicate a fantasy world. I'm sorry. Okay.
39. Scoring for American Frontier: Another common setting is that of the American frontier. Games like Red Dead, Redemption, and gunslinger are all set during this period in the wild, wild west of America. Music that conveys this setting is pretty unique and the instrumentation can get very unconventional at times. Yes, somehow, we commonly accept instruments such as the electric guitar as a means to convey the Wild West, even though they definitely did not exist at the time. This lecture will give you these strange conventions to use in your work. First up, we have the modes, specifically Phrygian, Mixolydian. These modes are great for establishing a Wild West setting. Dorian can also work well too, when played on the right instruments. So string instruments. There'll be another point about instrumentation in this lecture, but this one is dedicated to the string instruments. Okay? We commonly associate these type of instruments with rural America and they will greatly help you to convey a Wild West setting in your music. Guitars, banjos, mandolin, fiddle, steel guitar, et cetera. There's plenty of unique string instruments that can add to your score. Oh, yeah, but don't overdo the banjo. Okay, It's a great instrument, but it's really, really cliche. Galloping rhythms are what you want here. Okay, think of the boom checker rhythm in country music. You know, chicken, chicken Boone, Chicka, Boom. You'll get a sense of what the galloping rhythm sounds like. Baba, baba DOM is good too. It's the same rhythm just flipped around. Us rhythms that simulates a horses hooves of William tells overture contains the most famous use of the galloping rhythm. And unsurprisingly it was written to sound like horses. Have a look at the finale of this William TO piece by G. Aquino Rossini to hear what I'm talking about. Instrumentation. This one is a big one, okay? The instrumentation is a large part about what will tell your audience where the music assessed. Some of these instruments are unconventional and they certainly don't belong in that setting, but they work. And that's all that really matters here when you're composing music. I'm just going to list these instruments out, okay? You don't have to use them all, but consider picking some of them if you're finding yourself stuck. A clean electric guitar, okay? Not distorted, clean. And use this for melodies, not chords. Acoustic string instruments like the banjo, mandolin, and the acoustic guitar, the fiddle, okay, the fiddle is just a violin, but it's the, it's the style in which it's played, that it gets its name. Okay, So for a fiddle, you're going to use a violin, but your melodies will be very fast-paced and have a lot of rhythms going on. The harmonica, a piano. And preferably if you can, slightly out of tune a voice, okay, vocal solo melodies, whistling, and quires work really well in this setting. There's an instrument called the Jews hierarchy, or the jaw harp. Okay, look this up. It is magnificent. Also, you're going to want to use Latin percussion, okay, things like the castanets, wood blocks to ballets, the logo, et cetera. This is because the American frontier has a very close proximity to Mexico. You're also going to want to use a solo trumpet or a solo currently. Irish music. As strange as this one sounds, it can really help. When the Irish famine occurred in 18.5451 million Irish people fled to America. They took their traditional instruments with them, right? The fiddle, the flute, the tin whistle, the accordion, the Irish Mizuki exedra. Okay, they took all this stuff over to America. And this is where the birth of bluegrass and country music actually took place. It's actually a fusion between American folk music and Irish traditional music. It's very common to hear fiddles and accordions playing in country music nowadays. And this actually came from the Irish. The Irish rhythms were also kept. I encourage you to look these rhythms up as they will greatly help you to write Western sounding music. Namely the real the jig, the horn pipe, and the slip jig, Okay? Using some of the traditional Irish techniques in your scores will actually help you to achieve an American frontier field. Finally, word painting. This is a musical technique where the instruments mimic real-world sounds in order to help paint a picture. We've talked about it before, right? For example, flutes can be used to mimic birds chirping, and in this case, shaker instruments. Okay, That's what you're gonna want to use. Use a shaker such as the maracas to mimic a rattlesnake. The arrow, which is another Latin precaution instrument. This can mimic some of the ravens, are crows that are also found in the area.
40. Scoring for Science Fiction: With science fiction, we actually have two options. We can go the digital route using synthesizers and computer sounds to add interesting textures into the score. Or we can use the orchestra alone and compose a huge space opera style score. Obviously, with science fiction, the team of technology is a major one. So it can be beneficial to reflect this in the score. But if the plasma has a Space Western few twists which let's face as science fiction often does. We may prefer to use the sound of a full orchestral score. Starting with probably the obvious. Synthesisers are great too, for science fiction. Using electronic sounds and instruments is going to instantly communicate technology to anyone listening. Think of Daft Punk, Tron evolution score or even Call of Duty, Black Ops three, which blended synthesisers seamlessly with the orchestra. However, this isn't actually that common in games with titles such as destiny, halo, mass effect, Star Wars, et cetera, they opt for a more orchestral approach. The synthesizer approach is more prominent in film music and game music. T2, T2 to T1 to T2 into. Science fiction games will often deal with giant spaceships, huge futuristic structure's massive planets, etc. We want to mimic this sense of the massive in our music. And we can do this by using a large orchestra. Adding in extra instruments are layers can help us with this. For example, a typical orchestra would only use four flutes, but why don't we use six or ACE? In our dogs? We can layer different flute ensembles together to create a huge flute sound. You know, you could take a flus ensemble from contact. You can take the flute ensemble from that BBC orchestra plugin that we're looking at. And you can take the flus and somebody from the Brazilian plug-in and layer all of those three together to make a huge flute sound. Tried to emulate this sense of size in your score. Open voicings, okay, so instead of writing a C chord, C, E, G, You should write it like CGE. This spreads the notes parents creating a bigger field. It gives the impression that things are kind of far apart, which is exactly like space. Epic instrumentals. Epic is a specific genre of orchestral music, although nobody quite knows what it means. Essentially, an epic instrumental is a piece of music that is very powerful, uplifting, and dramatic. Most trailer music is scored in this way. These epic instrumentals use modern pop chord progressions. Modern pop musical structure, intro, verse, chorus, et cetera. Lots of big drums, loud horns, emotional string counter melodies and so on. I urge you to listen to this genre of music because it suits the sci-fi genre impeccably. This wave of epic music was started by Steve Job landscape when he scored transformers, he changed the way modern cinema is scored. Games are a little different, but you can definitely draw inspiration from the epic instrumental scores. And finally, anything goes. Yeah, it's rather strange for music. Science fiction actually has very little tropes. The score for a sci-fi game can be complex. There's elements of fantasy, elements of emotion, even elements of culture. Just take the halo score as an example. Lots of ethnic drums, ethnic rhythms, and even Middle Eastern solo vocals. This one is a bit of a trial and error situation, experiment. Find things that work and develop a score around them. A game about robots will likely have much more synthesizer sounds then a game about aliens. One trope that I have noticed is the use of African rhythms and tribal drums. Perhaps, maybe you could try incorporating this into your compositions to
41. Scoring for Culture: Cultural settings are the most unpredictable. There's literally hundreds of cultures around the world and any number of them could be presented to you in a game. In this lecture, I'll give you some tips for some of the most common cultures that I can think of. And then at the end, I'll give you instructions on what to do if you're thrown a curve ball or if you're just really stuck. Middle East, this one would apply to the likes of Assassin's Creed and a lot of first-person shooter war games are often set in this cultural setting. Techniques to try would be the harmonic minor. So the eolian harmonic mode and the Phrygian mode. Traditional Middle Eastern instruments such as the says, The Duke, Can noon, coming where? The NEH and the Zona, okay? Use traditional Middle Eastern modes are, as they're called over there, Arabic McKamey, Okay. Major law, Korean story in leading whole-tone inverse. Neapolitan major, leading whole-tone erupt in Lydian minor, et cetera. Also, the Middle East has their own traditional rhythms, such as the AUB, Karachi for law, he, Saudi, Malthusian, et cetera. There's loads. Okay? If you want to keep things sounding Western, maybe stick to Phrygian and just add in some of the Arabic instruments. If you want to get really traditional, try using a traditional Arabic MCAT mode and then using what's called attacked ensemble. Okay, That's TA, Haiti. And it's kind of like a type of Middle Eastern orchestra. Oriental. It's a culture that we can easily find out so much about. And then we can adapt their musical traditions into our scores. Things like a pentatonic scale, okay, this will definitely go along way into creating an oriental sound. Have a look at the in and the JO, scales. Traditional instruments such as the Tyco, Shamash, sun, wooden flutes, kowtow, Gui Zang, et cetera. Use little leaps, Okay, Try not to include leaps. Oriental music tends to maintain a kind of material placidity, okay, leaping is too much of an excited sound. Simple, melodic rhythms, stick to quarter notes. Notes are variations of those, okay, the percussion elements can be more complex, but for the melodies, keep it really, really simple. Also tried to achieve an ambient field. Oriental music does a lot with very little. It's sparse and simple, yes, extremely material and meditated. African music. Some first-person shooter games can be set in Africa. Metal Gear Solid Far Cry two, Assassin's Creed Origins was set in Egypt. And so here are some tips to create an African sound. Again, we're going to try to use traditional African instruments. With this, there's going to be a lot of different percussion instruments, like the Bellerophon, Cora, and go knee in Birra and even the marimba, which is the traditional African instrument, also tried to look up some African drum patterns or African drumming rhythms. Because these could really communicates a traditional setting, tribal vocals, using some traditional vocals from Africa and may help you achieve a good score. African music is very focused on drums and melodies. There's no cords, there's no modes or anything of that sort, okay, because of this, blending it with contemporary Western music often takes place in the rhythmic elements and the instrumentation. Drum beats, traditional rhythms, and African instruments will be the tools that you need to create a good score in this culture type. If possible, research this specific area. East African traditions are different to West African traditions. Not many people will recognize these differences and for the most part, it's probably fine. However, if you wish to fully replicate traditional music, you must conduct a lot more research into the culture, which brings me to my next point, which is a curveball. The cultural areas that I mentioned above there, the most common that I can think of besides our contemporary culture. But everyone already knows how to write Western music. If you're presented with a cultural area that you're unfamiliar with, the first thing you should do is research the music of that culture and its traditions. Listen to some of the pieces and develop a direction in terms of where you want the composition to end up. Also, when you're presented with a culture that you don't fully understand, you have two options for your composition. You can create a fusion between elements of the culture's music and, you know, our own kinda Western orchestral scores. Or you can decide to sound as traditional as possible and replicate the culture's music. However, doing this can present its own problems. It can offend people who grew up in this culture if you misrepresent their traditions. So if you aim to accurately reference traditional music from a culture, it's important that you understand everything you can about that culture's music. So make sure you do adequate research about the culture and its traditional music before attempting to replicate this. Sometimes keeping the instrumentation accuracy, but the actual composition simple is key to a good score in unfamiliar territory. Don't over-complicate things. Stick with the traditional instruments and create a score as simple as possible. This will ensure that you don't accidentally stray outside of the culture's tradition. For example, a culture may restrict the use of the tritone. And in fact, a lot of religious cultures do. And if you complicate your composition too much, you may accidentally use it without even realizing which could then disrupt the immersive experience for anyone who understands the culture. So again, just to recap, research the musical traditions. For example, what are the typical Irish rhythms are Native American music modes, etc. Listen to traditional pieces and listen to any scores that have already successfully replicated the music or have successfully blended disclosures music with Western music.
42. Scoring for Tension: Tension is a major aspect of all games. It plays a direct role in how immersed a player feels and how much enjoyment they receive out of the entire gaming experience. Your music can greatly help to improve this tension and really immerse the player in the game. This is also the most common piece of music that you'll find yourself composing. Games are generally quite action-packed and plot driven. The good news is, because it's so common. There are loads of tried and true methods for creating tension in a musical score. Fast tempo. This is what gets a player's heart rate, elevated and elevated heart rate will simulate genuine tensions and allow the player to experience a rush of adrenaline as they play. Loud music has the power to agitate listeners. It can actually cloud their thought process, which will force them to concentrate even more. This can make them feel very under pressure. Make your composition loud and full of instruments. So using big drum sounds to play fast rhythms is a great way to communicate both of the points above that, a player isn't really concentrating on the music are that much. Big drums would be easier for the brain to subconsciously register. Shepard Tone. This one is very easy to create, but it's an amazing auditory phenomenon. This creates the illusion of a rising pitch that never ends. I highly suggest that you learn how to create this technique as it's extremely simple, but so effective. Rising pitches create tension in the listener as they're expecting something to happen. We can make that tension never end by using the Shepard Tone. Oh, clashing notes. Dissonance, trashing notes make us feel uncomfortable. Utilize this experiment with sound design. If you have the ability to record instruments, a great technique to try to play them completely run. For example, how would a violin sound if you strummed it like a guitar? What would happen if you scraped guitar strings with a coin? When we hear instruments that we recognize, but they're being played in a strange way. It can create this really uncomfortable feeling. Similarly, you can actually buy instruments that are dedicated to these terrible in a harmonic and strange sounds. Checkout the water phone instrument or the apprehension engine. When you don't have the luxury of recording instruments, we can use electronic sound design. Distortion has a great way of creating tense feelings and the listener. Imagine a lead violin melody being played on a heavily distorted violin. It would sound nasty and kind of scrapie, experiment with sound shock the listener. I can't not mentioned mods, particularly the darker minor based modes, phrygian, the harmonic minor, et cetera. Try out some different modes. But ultimately, remember, we're aiming for a tense feeling. And finally, the last point here, polyrhythms, okay? This is just rhythmic dissonance, and we've talked about it before in the fantasy music lecture. So I'm not going to talk about it again here.
43. Scoring for Placidity: Sometimes again, will call for you to write placid music. This can be in any game and it can be employed for a variety of uses. The most notable placid score is that of Minecraft, which did a fantastic job of creating peaceful music, whilst also establishing itself as one of the most iconic game scores in history. Let's explore some techniques to create placidity in a game score. Slow to moderate tempo. Probably obvious, but nonetheless, keep the tempo on the slow side. Placid music's tempo is often compared to the speed of walking. A tense person will be running fast tempo. However, a camp person would probably be sauntering along at their own pace. This is reflected in a slow tempo, free rhythm. This is an expansion on the last point. Sauntering along involves an element of freedom, okay? If we were to remove all of the restrictions of steady time, we can create an even camera piece. The best way to achieve this is to record your music without using a metronome. Allow the music to flow freely as if it hasn't a care in the world. We don't want a full orchestra here. It should be bare-bones. Most often, a placid score will consists mainly of a piano with maybe some additional instruments. I'm giving a gentle harmonic accompaniment. Dorian, Dorian, dorian, Dorian. It has an element of sadness because it's minor based, but the major fort gives it an extremely calming atmosphere. Other modes can work well too, so experimental, some of them. So 4s2 and sus4 chords will be your friend. But make sure they resolve themselves. Okay? These chords can create a sense of carefree, especially if you hang on to them for a little bit too long. The listener knows that the court has some quite rice and needs to be resolved, but there's no need to panic, no need to rush to resolve the court. Let us just hang there as if it's completely carefree. Gentle dynamics. A lot of these techniques will be similar to sad music. Gentle dynamics will create a sense of Kam. Playing instruments softly will allow the piece to feel much more placid.
44. Scoring for Ominous: Games often make use of villains, buses, and evil characters. But what happens when the setting becomes the villain? In this case, there is no actual battle or villainous character involved. But the setting that the player finds themselves in is one of a threatening and ominous nature. It may be that they have just entered the main villains layer, or perhaps they may have traveled to a dark and dangerous planets. We need to make the player feel as though they have entered an ominous world. Slow to moderate tempo. We're not engaged in battle here, okay? We're just entering a dangerous setting. We want the player to feel tense and uneasy, but not necessarily indicate that they will be fighting for their characters lives. We're aiming to make them feel nervous, not under pressure. Loud instruments like the French horn, trombones, screeching strings. These will help you to achieve a sense of ominous. Try using staccato to an effect here. When the strings play very short kind of stabbing notes at a high pitch, it can create a feeling of unease. Chromatic dissonance. If things sound slightly out of tune or notes are being played that audibly don't belong in the scale. We can create tension in the player. If you have the liberty of recording the instruments, try tuning them ever so slightly out of key. It will still sound okay, but there will be something off about the sound. If not, you can create this easily in your DAW by using pitch modulation. Vibrato works well for emotional scores, but tremolo is amazing for tension. This is best when played at a high pitch on string instruments. Okay, think trembling tremolo, Give it a try. We are no stranger to modes at this stage. Utilize the darker ones to improve your scores. Soft dynamics. I know that this is kind of a contrast to the loud instruments that I mentioned above. But it's just another technique to try using software dynamics in a piece of music that sounds ominous, can instill a feeling of anticipation and the listener. It simulates the feeling of holding your breath in the bathroom whilst a burglar sweeps through your house, the music is holding its breath. Why is something dangerous nearby? This is what will subconsciously register for the player. Diatonic dissonance. Ok, notes, the clash will work well here. I'm sure you're wondering what the difference between diatonic dissonance and chromatic dissonance is okay, and I'll tell you the difference is, diatonic dissonances exist within the mode or scale already. So in the key of C, we would have dy, That's a diatonic dissonance because it exists in the scale, produces a dissonant sound. A chromatic dissonance then would be the likes of C-sharp, okay? Because that also produces a dissonant sound. But C-sharp is not in the key of C, okay? The scale of C, C, D, E, F, G, a, B, C. Okay? There's no see Sharpen there. Okay? So dissonant notes that are outside the scale are known as chromatic dissonances. And then dissonant notes that are inside the scale are known as diatonic dissonances. Use a deep drawn a drone that's very low and pitch can create an ominous effect. Drones are very common in this kind of music. Finally, choirs and changing voices, and often used to create tension and music. Deep voices and religious chanting can make people feel uneasy. And that's exactly what we're trying to achieve.
45. Winning or Completion: The winning or completion stinger can play upon completing a level, finishing a race, finishing emission, et cetera. The winning stinger needs to communicate a feeling of success and achievement. This is exactly why you often hear a fanfare type sound and bright tonalities. So the winning stinger is typically five to ten seconds long. You're going to want to write it in a major mode. You're also going to want to use bright instruments, such as trumpets, strings, flutes. And in terms of melody, you're going to want it to move upwards. This will really communicate a feeling of achievement. It's kind of as if the melody itself is overcoming high obstacles. Let's listen to this example of a winning or completion stinger.
46. Death or Mission Failed FIXED: When a character dies or the mission has failed, a minor based team is most often heard. These, again, are usually five to 10 seconds long. It's also more than likely made up of softer, more mellow sounding instruments. However, it can also use bright instruments. And this is just really shove it into the player's face that they lost. Doing this can actually make the player feel defensive and inspire them to try the level again. It's another psychological trick where the player thinks, hey, screw you. I'm going to complete it this time. In contrast to the celebration stinger, the failure stinger will have downward motion. The melody would usually descend in order to communicate, deflation and defeat. However, the most important aspect of this stinger is to use a minor mode. It needs to sound as if the music itself has been defeated. Let's listen to this example of a mission failed stinger.
47. Integrated Stingers: Integrated stingers or distinguish that play during actual gameplay. The winning and death stingers are not heard during gameplay because the player has either completed or failed the level. There is no action currently taking place when these stingers or heard. But there are lots of integrated stingers that we must approach a little differently. Things like leveling up, reaching a checkpoint, jumping. These actions can all have stingers that play during gameplay. Integrated stingers are much shorter than the other stingers that we've looked at. These fingers are meant to fit seamlessly into the gameplay without distracting the player. When a player wins or loses, gameplay is finished, and so it's okay to have a longer, more intricate piece of music. However, level ups, grabbing coins, jumping, et cetera, these are all integrated into the gameplay. They should be very simple and short. As a general rule, these integrated stingers, or three seconds or less. Also, there could already be an underscore playing when a particular stinger is triggered. So it's important to design these, the fingers in a similar aesthetic so that they fit into the game. That way the music feels seamless and there's nothing that stands out, which could be bad for the game, as the player may notice it. This would then pull the player out of the game, but music needs to be immersive. You do not want to interrupt gameplay, ok. Now, if the trigger itself interrupts gameplay, then it's okay to be a little bit more invasive, which are stinger. For example, if when the player reaches a checkpoint, the game itself actually visually interrupts the gameplay and requires the player to press a button to continue your stinger here can be much more invasive because the visuals have already invaded the gameplay. However, if reaching the checkpoint does not interrupt the game, other than a brief flash of light, or in most cases, a short integrated stinger, then you must ensure that you're not interrupting the gameplay. Finally, stick to the game's setting. If the game has adeno, a sci-fi setting, make the stinger sound. Sci-fi, if you're underscore, is one that uses fantasy instruments, consider using fantasy instruments as a stinger. Keep in the aesthetic of the already established gameplay and music.
48. The Title Theme: The main title team is what sums up the entire game in one piece of music. It's the first piece of music that gamers will hear when they play the game. And probably counter-intuitively, it's the last piece of music that you should write. The reason for this is so that one, you have complete freedom with all of the other music. And you're not constantly referring back to this title team. And two, you can use this piece of music to hint at the rest of the game, but much more subtly. By now, you should have composed the rest of the game music and you'll be aware of the little motifs and teams that you've used throughout. We can use these in our title track to hint at the rest of the game. The most important thing to do is to capture the essence of the game. If it's a game set in Barcelona, like Weil man, you'll definitely want to go with a traditional Spanish sound. If it's a space opera, big orchestras and synthesisers could be important. You also have to think of the way the game is played. Is that a big exploration game? Does it have a lot of sad and emotional moments? What's the general feeling the players will get from the game? You must capture this in the main title also. For example, let's say our game is about a dragon who can explore a modern-day city. What I would do here for the main title is I'd use modern instruments mixed with maybe some medieval or fantasy techniques. So maybe I would choose a full orchestra and some synthesizers, but I'd also use 6 8 time and adventurous polyrhythms. I could even mix up the instrumentation and I didn't melody line on a Greek instrument like the liar. All of this would capture the modern adventurous feel of the game, whilst also implying the element of fantasy with the dragon. This piece of music is what greets the player, so you need to set them up for the feel of the game. The title music is honestly the most fun. It doesn't have to follow any onscreen action. You don't have to worry about interrupting anything. It's just a piece of music that plays under the title screen and the title menus. It's also the music that players will actually notice, remember, and probably listened to because they're not concentrating on anything else and they're not immersed in the game. So have fun with this one. And worse and worse, and worse and worse. Okay.
49. Pause Menus and Loading Screens: In this lecture, we'll talk about pause menus and loading screens. The pause menu is often a CAM piece of music. There's currently no action happening, and players will usually pause the game to take a break, texts or friends, or go and eat some lunch, whatever the reasons are, the pausing of a game is a pausing of the action. Your music should be onPause to. And so it will be a much calmer piece than the main title, but it should still captured the games essence. You could even take the main title team and redesign it so that it has longer legato notes and very little drums. The key here is to remove all elements of tension. A lot of games will often use a very simple ambient piece of music for the pause menu. Or sometimes they'll even use silence. Keep the peace within the game's aesthetic. It's a piece of music that isn't linked to any action, setting or plot in the game. So it must be reflective of the game as a whole. All of these points also apply to the loading screen. You definitely want a CAM piece of music here, as players can often get impatient with loading times and having loud and aggressive music might annoy them even more to the point that they actually turn the game off. So you definitely want to go with something CAM or pleasant to listen to. Sometimes exciting music can work to, to make the player feel pumped up and in anticipation of what's about to happen.
50. Multiplayer Menus: The multiplayer menu is very like the title screen, except it serves a specific function depending on the game. You can imagine multiplayer as a real life scenario. In Call of Duty, the players are essentially wasting to be dropped into the battlefield for war. In need for speed, players are waging to compete against each other in a fast-paced race. Tried to reflect the specific situation in the music. Multiplayer menus or a time of preparation and waiting. Players choose their load out, customize their cars, their characters, perks that they think they'll need. This is the preparation. Then you have the matching lobbies and the decisions about which game modes to play. Therefore, your music shouldn't be very action heavy. It's still a cam movement, but it's one with an element of tension and suspense. Because the player is about to be dropped into a battlefield or a racetrack or any other assortment of things. It's kind of as if the music is the calm before the storm. It's quiet, but to quiet cam. But two can try to capture this in the piece. Tried to keep it simple cam, yet tried to use elements of suspense to really make the player feel anticipation about the multiplayer match they're about to play. Hi.
51. Character Music: Sometimes you may have to compose music for certain characters. For example, hero or villain team can be used to establish character presence or inspire players to undertake the missions and quests. These are often known as the hero or villain teams. They are also especially prominent in fantasy or role-playing games where players have a direct connection to the main character. Now, they work best in third-person games. The reason for this is because in first-person games, the player literally is the main character. So yeah, they may be playing as someone by the name of Johnny. But psychologically, in a first-person game, the player feels as though they are the main character. With third-person players are always aware that they are playing as a character. They're controlling a character that they can see moving around in front of them. And this creates that connection. Players will have a human connection to this character as if they're kind of like family or friend. Whereas with first-person, there is no connection to be had as the player is the character. I'm not sure how much sense that makes. If you keep the general rule is being first-person games don't often require a hero's team. However, they can have villain Teams and Teams for other characters, just generally not the main protagonist. Obviously there's times that this convention is broken and that's okay. But just bear in mind that the player needs to feel a connection to the on-screen protagonist in order for the heroes team to really work. A villains team is different. There can be a villain and all games having a piece of music that plays every time they interact with the player can communicate how this villain should make them feel. It's a great way to sneak in some extra tension and suspense into the villains character. In terms of techniques that you can use, a hero's team, always have large leaps upward. It will also use a strong chord progression with very little dissonance. This gives the impression that the hero is strong and inspirational. The contour of the melody will also be mostly rising. The upward motion communicates a sense of strength, spirits, and power, which is exactly how most heroes are described. This is where the character drawings and descriptions will come in handy. The game developers should be able to provide you with a general idea of the characters traits. So in the example that plays, I was given a hero's team for a female, okay, who loves to slay dragons and go on quests. However, she also has a delicate and gentle side to her, where she likes to help anyone that she comes across. Therefore, I've chosen a blockage field to reflect her caring side. And the chord progression even feel somewhat soft and delicate. When we get to the main section, the heroes team comes in on the horns and provides us with a sense of inspiration and adventure. Hi, we can use this idea as a basis to form other motifs throughout the game. For example, she may take mercy on one of the Dragons and decide to help it instead of slaying it. Instead of playing the big heroes team, we could opt for just the simple Glaucon trivial parents that would remind us of the players original theme. This in turn would remind them of how she usually enjoy slaying dragons, but she has taken mercy this time. The villains team, on the other hand, will be dark and have an ominous tone to it. Dissonance, augmented notes, dark instruments, et cetera. So if we have a monster in the game who our hero keeps meeting but not defeating, we can create a piece of music that will constantly remind the players of their previous encounters. The aim here is to use tension techniques coupled with loud, low instruments, such as bases, organs and horns. Staccato notes can work great too. Hello. Hello.
52. Overworlds: Some games will have what's called an overwhelmed. And this is basically an area that connects the game's levels together. Players can move around in this overwhelmed and actually physically move to where different levels begin. Nintendo do this a lot where the player can move around the map. That isn't really part of the game. It's only used to launch missions, side quests, or mini games. Think of Zelda, Mario Bros. If this is the case in the game that you're working on, then you're going to have what's called an overwhelming theme. It's a little like the main title music. And oftentimes it's actually the exact same. But I believe there should be some variation. If your title, team is a full orchestra playing a cool fantasy melody, you're overwhelmed. Team could be maybe a simple four-piece band, but they played the exact same music. It's the same but different. You can of course compose a whole new piece if you wish. Also. Now, the big one, there can be several settings in an overrode. You could have a snow setting, a forest setting, a city, a desert, all in the one over world. You have an option here. Do you want to compose different overwhelmed teams for each setting? Or do you want to stick with one piece as it captures everything is good on its own. If it's a 3D world and the overall does like in kind of an open world map that you can explore to begin levels. I would stick with one track. If it's a 2D world and players explore a flatMap from above or from the side. I would use different pieces for the different settings. Now, this is very general advice, okay? Because we're going to be talking about zones later on in the course, which kind of contradicts this. And you also might feel like your 3D game could really benefit from several pieces of overwhelmed music. That's okay. This is a creative media. It's art. There are no rules. I mean, if there were, I have a lot more facts in the course for you guys, but I can only give advice and guidelines that one piece of overrode music could be adaptable and maybe communicates all the settings at once. There could be slavers to reflect the snow setting. Maybe another section has Egyptian instruments and melodies that are never heard again. This could reflect the desert setting. You could also make the music into an overwhelmed itself. Transporting the players through each setting, even if they don't interact with the actual setting in the game. Or you can just design a very general team and stick to that. Sometimes with a 3D game, the overruled itself will actually transition into different settings, okay? The player may have to use a transportation device such as a boss or a portal or a giant door. And the game may use this as a transition to actually load the new setting. This means that when the player gets off that bus or through that portal, that when they turn back around, they're not looking at where they came from there now deepen the middle of this new setting. So if you have a game like this, I would advise you to create multiple overwhelmed teams for each setting. A snow team, a city team, a desert team. You could have different pieces of music for each array. The same piece of music just composed and arranged differently. For example, the city music could be Jazz, and the desert team could be the exact same piece of music, but it's played with a kind of Egyptian style. Both of these settings are kind of cultural. So jazz is often associated with the city. And Egyptian music is amazing for deserts. But again, as I mentioned before, do your own research into cultures that live in the setting. What kind of music is associated with that setting, etc. For 2D games, I would recommend that you use different overwhelmed teams regardless of whether the game transitions or not. With these games, the player can't stand in a snow setting and then turn around and look back at where they came from. And in a 3D game, if they did this right, if they were coming from, let's say grass into snow. And in front of them you see this brilliant Weiss kind of these white plains at runtime. Okay? But the player then turns around and all of a sudden the screen is filled with green. Again. They're looking back at the grass from where they came from. So that's the problem with the 3D over worlds. It's kind of what point do you transition into the new music Genome is that as soon as he steps foot on the snow, that it becomes snow music. Even though he can turn around and look back at the green grass and the music's going to contrast? Or do you wait until they get further into the setting to transition into the music? This is why with 3D games, I recommend just using one piece of overrode music unless the game itself actually transitions for you. But anyway, back to 2D. With these 2D games, the player, he can't stand in a snow setting and then turn around to fill the screen with the green. Okay, It's extremely quick to transition into a new setting. The player is walking on grass and suddenly the white snow setting comes onto the screen. As they walk into that setting, you can trigger the snow piece to play, or you can wait until they're a little further into the setting. As it's often just a matter of seconds before the screen is filled with this new setting. If the player turns back to face the other way, the visuals aren't going to change because it's a 2D game and all the backgrounds are in 2D. So I recommend for 2D over worlds that have different settings, you should compose multiple themes. And just again, to reiterate, these are not the rules. You can go completely against this if you feel you need to. But this is a general guideline that can help you get an idea for how to approach an overwhelmed team. Okay.
53. Ensuring Music is Immersive: Most of the points in this lecture you've probably heard before. But as I said in the intro, I felt the need to have a full lecture on this because it really is important if you want to become a great composer. The first is, do not be distracting. What you should always be thinking about is the game, the final product, not your music? So if it means that you have to ditch a really amazing melody line, so be it. That's what happens. I've had to scrap plenty of really nice tracks simply because they were going to distract from the main story-line. This goes for any composition that you do, be it, film, TV, games, anything like that, you should always be thinking of the final product. It can be quite hired for composers to swallow this pill or even recognize when their music is becoming distracting. But it's something that you're going to have to learn and adapt if you want to become a great composer, the best way that you can ensure your music is not distracting is to ask someone else to come and listen. Your own opinion will always be biased and someone else who was fresh ears will be much better at picking out when the music is distracting them. Don't worry if this person is your brother or your mom or your dad. It really doesn't matter whether or not they have any musical experience. In fact, I would argue that if you can find someone who is clueless about music and composing, you're better off. These guys would be like the general public. Most gamers aren't going to know about music or composition because gaming is just their hobby. Just like composing music is your hobby. These guys are passionate about the games they play, not the music. So if a musically clueless person can recognize the music is becoming distracting, then there's a good chance that a gamer will definitely recognize it because they're used to playing games all the time. We don't want that. So the first tip here is to get a second opinion. So make sure you're always getting a second opinion. Or even a third or a fourth, get opinions from musicians, gamers, and the general public. Even if you don't agree with what they're saying, you still need to take their opinion on board because if they're thinking it, other people might be thinking it too. You should avoid clashing with dialogue and other sound effects. The latter of which is often overlooked. But if you've seen that could really benefit from music and there's lots of intricate sound effects going on. You should probably be careful with the actual composition. In film, we avoid clashing with dialogue, but sound effects, they're not that important. In games. Sound effects or everything, they drive the immersion for the player. So our music should not distract from that. For example, the player might jump onto an airplane and I don't know, they have to hang on while it flies. Music could work great here because of the tension, but also airplanes are quite loud. Your music and the sound effects the plane. They might be fighting against each other. In fact, the loud engines of the plane might even drown out some of your melodies. So make sure that you're composing music that isn't going to clash with the sound effects. Make sure your music fits the setting. Fantasy music in a sci-fi game might create a conflict of aesthetic. And this can confuse gamers about the game. Music is supposed to accompany the on-screen events so it must fit the setting. There are times when you could be specifically asked maybe to make a fantasy score for a sci-fi game. But what this really means is make a sci-fi score, fuse it with fantasy music. Again, set in the year 3000, is probably not going to have a score that's played on really old instruments because the Tambora and the texture of the music just won't fit the visuals. But what you can try is to fuse those instruments with maybe a synthesizer chord pattern or synthesizer melodies to create a unique score that fits the aesthetic. But it also links to that fantasy genre that the developers were looking for. You're expected as a composer to work on your own initiative. The developer will probably say things to you that you know won't actually work for the game. And it's your job to say, Hey, I don't think that will work, but I understand the idea you're going for. So let me try something and you can let me know what you think your decomposer, they will trust your opinion about the music. But the key is to produce something that fits the game, but also satisfies the developer's request. Don't completely ignore the request, okay? You still have to produce what they asked you to, but you have artistic license to experiment with different things and make the music that they asked for more immersive. This tip is about the when, when should music be heard during the game? Now, this is something that the developers will more than likely already know and they'll tell you, they'll tell you exactly what they need music for. However, in today's world of indie games and bedroom studios, you may not get any information at all. Ideally, you should request a spotting session, okay? And this is where you and the developers sit down and go through the entire game and talk about where the musical go, What type of music they're looking for in those areas and certain gameplay situations. Bigger video game developers will have a music director and they will decide what fits or doesn't fit, or how much is too much, etc. But as I said, you're probably going to be working with indie devs. So it's important to be able to do this yourself. To places that always need music are high action or high tension or high-intensity gameplay. So boss battles, carrot chases, gun fights, etc, anywhere that feels like a climax to the game. And also cutscenes. So cinematic scenes, dialogue scenes, new areas being unlocked. These are basically short films within the game. They're more linear than a game, and so they're easier to compose for.
54. Blocks & Cues: Flux and qs. Okay, so you'll often hear these used interchangeably, but they actually mean different things. A queue is the piece of music itself. It's cued to play when certain conditions are met. For example, attention, cue a sadness. Q. A comeback. Q. These are the cues, the blacks, or the smaller parts that make up the q. These are the actual building blocks that game music is built upon. So with these, we have the intro, the loop, the transition stinger, and the tag. I'm going to reorder them in a way that will make sense. So we're going to start with the loop. This is the staple diet of all successful game music. It's the main track that we intended to be heard during gameplay. It has the ability to seamlessly loop an infinite number of times until it's triggered to stop. It can be as long or as short as you need it to be, but it must be an absolutely seamless loop. We'll be looking at how to do that properly in the next few lectures. Hello. Now, we're going to take a step backwards for a second. And we're going to look at the intro. The Intro Block serves as the introduction to the main loop, okay, that will be heard pretty self-explanatory. It literally is an intro to each piece of music. But it's one of the important blocks as it defines either the gameplay that's about to follow and the texture and Tambora of the music that's about to follow. So when your music is triggered to play, the intro will be triggered, not the loop. This is so that the loop doesn't just start randomly playing the main melody as that would sound very unmusical. We have to first introduce us. How long or short the intro is depends on your scenario. For battle music, you may want to get into the main loop as quickly as possible to drive the tension. But for stealth situations, maybe a longer intro could work. It really just depends. Next we have the transition stinger block, okay? This is another block that you will slam into your scores. Again, self-explanatory. It's a short block, very like a stinger, and it's used to transition between different loops. So let's take a scenario where the player is fighting a dragon. And let's say that three times during that intense battle, his character was low on health before recovering. Imagine we had composed battle music to play during this fight. But when the character is low on health, we want to bring in more tension and make the player feel totally panicked. So we could have two cues for this. One q would be general battle music, and the other would be a high-intensity version of that battle music. Maybe with extra drums and loud instruments. Instead of just jumping from one loop straight into the other loop, which would cause a sudden change and it would sound on musical. Instead, we could compose a short transitions dinner that quickly introduces the drums and louder instruments. It could be one-bar long or even four bars long, but it will help the music transition into this high-intensity loop whenever it needs to. And every time it does, the music will sound seamless. This transition block can then be slotted in right before the high-intensity loop. Okay? We could also have a second transition block maybe to transition us back into the general battle loop if we need that to happen, or we could even use the same transition block. Finally, we have the tag. This is the outro, the opposite to the intro. So after the music has been looping indefinitely, the time has come for the music now to stop. So in our scenario, the player has finally kill the dragon. The battle has ended. We need the battle music to end also. So once the dragon is killed, we would trigger a tag to close out the piece of music. Because again, if we were to just stop the music suddenly, it would be very unmusical. And we don't like that. This is not the way. Now, we could also use a transition to bring us from any of the loops. Okay, So in this case there's only one loop on screen, but you could have different versions of the loops are different intensity levels of a loop. But in this case, we could use a transition block to bring us from the loop into the tag. And this would be the more recommended way to do it, so that you can ensure your music sounds seamless. All of these blocks combined together to make a queue of music. Hi. Okay.
55. Stem Mixes (Vertical Orchestration): Stem mixes, or in other words, vertical rays orchestration. Or it can also be called vertical orchestration. This technique is more commonly known as stem mixes, but I've seen other Udemy courses call it M, vertical orchestration, and it's the same thing. Now, when it comes to stem mixes, There's two different types, okay? There's the ordinary instruments stem mix, and then there's a technique called sub mixing, where the stems are just different versions of the same track. To be able to understand how a stem mix works, you're going to need to leave your conventional methods at home, okay? We all know that music is horizontal. When we compose an ADA, we do so from left to right, we build an arrange our piece of music over time. And it's visualized by the play head moving from left to right, you know, when you hit play in your DAW. And that little line kind of moves left to right. We can visually see that this kind of music is a horizontal medium. And also over the course, um, I've been saying that we can create different loops and different intensity levels for the pieces of music in your game, okay? And we can transition between them as needs be, okay, this is still all horizontal. You're still kind of making three separate them, intensity levels and pieces of music. And you would use the techniques in the blocks lecture, where you would have maybe one of these versions. Then you could have a transition into the second version, and then you can have a transition into the third version. Okay? But as I said, this is all still horizontal. So what about vertically? Can we arrange a full composition vertically with layers? And the answer is yes, we can. And we do this by using something called stem layers, okay? So we export the music in several different stems, which can all run simultaneously and can be switched on or off depending on the games events. One of the most common events is gameplay intensity, where the stem layers will fade in the additional tension that's needed whenever we need more intensity on the main loop. So if you look at the colored squares on screen, and these represent three different stems, okay, the first one is a piano stem and it's playing, I don't know, maybe the chords of C, G, and F, Okay, loop 2 is tense. So this is the brass instrument. Now, this is the brass instrument that actually fits with the piano. This loop to it fits with loop one. It's a layer. It will come in on top and it will add extra tension when we need it. So we can fade in this to this tense brass. We can say that in for some extra intensity when we need it. And then with the third loop there, which is intense and that's the drums. We can fade in the drums to get that most kind of, you know, the highest level of intensity. We can fade in the drums to achieve that at any point using this vertical orchestration technique. Now, we can also link these stems to other things such as enemy count, zones and help, etc. Okay, so let's have a look at those things now. Enemy count. This is where the tense stem layers like drums and loud horn parts will fade in if there are certain number of enemies on screen. This will add more tension into the game and will appear to follow the visuals seamlessly. Zones. Okay, we'll see this again in a few lectures time. But we can use stem mixes with zones so that the necessary music fades in whenever a player enters one of the zones. For example, a player may find themselves running through a collapsing cave. And maybe they can duck into like little crevices in the walls of the cave to avoid the falling debris. So for this, you could have really intense music playing when the player is running down the cave. But when they duck into that crevice to protect themselves, the music could become a much less intense version of the main underscore with the zones. We could use the vertical orchestration technique to maybe pull out the drums or pull out the baseline whenever a player docks into these crevices. Anyway, I know I kind of skipped over this one, but as I said, we'll be looking at zones in just a few lectures time. The next one is health. Okay? When a player is low on health, you may choose to fade in some maybe adeno heartbeat drum effects to reflect this. However, the most notable use of stem mixes is the ability to link an automation to the stem layers. You guys as composers, you don't need to worry about this, okay? The game's sound designer and the developer, we'll implement this for you. But you can request that your music be utilized in this way. So for example, let's say we have a general peaceful loop. Playing. As a player maybe explores the forest. And the deeper in they get, the darker and creepier the forest becomes. When the player is at the edge of the forest, there's kind of some CAM and exploratory music playing. However, when a player reaches a certain point in the middle of the forest, we should only be hearing maybe dark and creepy music to reflect the way the forest gets creepier the deeper you go. But this is also where we could use vertical orchestration. As the player gets deeper into the forest, we can begin fading in and out the necessary stems. The fade itself is actually controlled by the players movements in the game. The further they go into the forest, the more the stems will fade in and out and the creepier then the music will get. If they decide to turn around and walk backwards, then the music will gradually fade the opposite way back to the peaceful music. It will do this at the same pace that the player is moving at. So even if the player stops moving, the music will stop dating. It's as simple as using a distance parameter to trigger a volume fader automation. But as I said, you guys don't need to worry about that. What do you need to do is just plan for this situation ahead of time. And if you do get the opportunity to use this vertical orchestration will allow you to achieve this result. Personally, in my opinion, I think vertical orchestration is great and I actually use it all the time. It's probably my favorite technique to use for game music. The music is literally arranged vertically out of these different stems that can be triggered when necessary.
56. Creating Blocks in the DAW: Let's look at creating loops in our music in the DAW. And with this lecture, I'm also going to show you about the, the other blocks that we looked at, which is the intro and the tag, okay? Because they're very similar to what we're doing with the loop. So there's no real reason to overlook them here. So what I have here is a kind of as I suppose, a futuristic kind of piece of music that would fit into a racing game. Um, as I said, that was kind of set in the future. So what I need to do is I need to identify the part that I want to loop, okay? Generally it's better to go for a longer loop. As a shorter loop could catch em repetitive very, very quickly. Usually the best loop opportunities start from the bar after the intro, okay? Which I have here, and end at the buyer right before the tag or the outro. So in this case my tag or outro is here. Okay. So if you have, I don't know, a four minute long piece, then this loop section could be three minutes long, okay, It's essentially the bulk of the music. Now, this example is a little bit shorter than that because I don't want to subject you to have to listen to a solid three three-minute piece. So I'm trying to keep things short for you guys, but the reason that we pick these two points, okay, the point just after the intro and the point just before the tag, okay? The reason we pick those is because this is where dynamics and expression are often very similar. Which means the loop won't have a massive jump and dynamics or something. There's nothing worse than a loop that just doesn't match up. You know, your piece might climax towards the end here. And if it does, let's say a climax is here, but the start of your composition is kinda quiet. Looping that back around. It's not going to work okay? Because this will climax, climax, climax, and all of a sudden you'd be dropped into this quiet part again. So if you're making a loop, what you should do is try to match the dynamics and try to match the instrumentation and everything up so that when it does loop around, okay, so when it hits this point and it jumps back here, that when this section is playing, you don't even notice that it's, it's looped. Okay. That's the whole point of a loop you're not supposed to notice. Also, you don't have to pick these two points, okay? You can pick any points, any kind of parts and the music that you want to loop, any practice you think will work well. So to do this, the first thing I'm gonna do is I'm going to set my DAW to loop. Okay, So the way I do with fl Studio is I right-click up here and I can draw in a loop. All right, so I'm just going to check, does this part that I'm thinking I want to loop, does this sound good? Like when it jumps back to the start, is unnoticeable. So what I'll do is I'll just play from here. And I'll see doses isn't noticeable when the play head jumps back to here. Okay. So let's have a listen. Yeah, That's sounding good to me. All right. I didn't really notice any. Here we have a kind of arising arising feeling or it's kind of swelling up to something. And then this feels like a climax or sorry, a climactic section here. So there's actually feels like it's, it's actually leading us up to this at this point here. So I think this loop works well. So the next thing to do, okay? Now I found my loop. I know this is the part that I'm going to be handing off to the sound, sorry, the sound designer or the developers and saying this is the loop bubble music for the race scene or something, the race, sorry, the race gameplay not seen. And so what you do here is you basically slice the rest of your project, okay, from that point. So this is the point that it's going to loop back to the start. So I'm slicing it there. Well, if slice this down here too. Okay. And I'm going to take everything that's kind of after this section. So this is, this is technically my tag. So I'm taking the tag and that's taken HSI not adjusted to say. And I'm going to move it. Okay. And I'm moving it back. And this is important, okay? Because when you render it, all right, a lot of people will just render it like this. Okay, they'll drawn the loop and the renderers, and that's, that's fine. Okay, but what happens is this part, right? There's a reverb on the drums, okay, There's effects that I'm using on each of these plugins. So these don't have time to bring out, okay? They do bring out an ad like when you play it in the DAR, okay, you won't notice the loop because the reverb still going to ring out here. So this swell is actually still ringing out when it loops around. But if you render this as it is now, what will happen is every piece of sound that's after this point, we'll just get cos and it's cut off. Okay? So when it loops back around, all of that reverb, all of that nice kind of tail end. And the sound of the instruments kind of dying away. That's completely gone around it. It will sound funny, okay, you'll hear this kind of swell up and then all of a sudden there'll be nothing, no remnants of this over here. So what you have to do is you have to allow some extra space in your render for these instruments to wring out. Okay? And what you do is then once it's rendered, you're going to take this part. Okay, the part that's the renounced just the ring out. And don't take the instruments, just take the ring out. How much you do then is you cut that and you move it to here. So I'm gonna do that really quickly here, okay? And I'll just do it internally in FL Studio, which is by opening up Edison on the master channel, which is down here. Edison. I'm just going to tell it to record on sung playback. So when I play the song, It's going to record it for me and I'll be able to record that tail and that tail end of the instruments. And are they able to loop back to here? Okay. Okay, so now I've caught that tail end. I'm going to drag in my sample and place it exactly where the playhead was so that I can get this on time. So everything. I don't want any of the instruments. I don't want any of that sound. I just want the tail this bit. Okay? What you do then is you move this, sorry. You move this to the very start of the loop over here. Okay? And now, now you can go back to here with your loop point and now you can render this out, okay? You can render this section that no, because you have this little bit of a ring house. And I'll solo as this bring out will play on the actual audio file that you render. Sorry, I have to turn off Edison. Try that again. Okay. Now I will show you a trick in FL Studio, Okay, That actually does this for you when you're rendering. So for you guys to use FL Studio, you'll be able to do this without having to do it. I just did it and record it and then put it in, bring it back on manually. Okay. Fl Studio the software will do it for you. I'm not sure. Does other software do this? But if it does great, because it's such a handy shortcut, I use it all the time. I don't I don't actually do this and this cutting thing, but I'm just showing you this method just in case your dog doesn't have the shortcuts. Okay? But anyway, now that I have that cleared up, you're gonna do the same thing with the intro. So this is my intro section here. Okay? So I am going to cause everything. So as soon as my main loop starts, I don't want any of that to be in the intro. So I'm cutting that out. Getting rid of that. And I'm sorry, I'm not cutting it out, but I'm I'm moving us. Okay. So I'm going to sorry about that. That's a notification. So what I'm doing is I'm going to move this away so I can catch the tail end of this. All right? Okay. And what this tail allows you to do is write when you're rendering is okay, you're going to make sure that you catch that tail, okay? It's different for the loops and you're not going to have to record and then move it back to the start because that's not actually looping back around with the Intro Block. This is going to play, and then it's going to transition into something else. It probably into the main loop. Okay. But with the nature of games, the main loop could be different every time, okay, There could be six or seven even different versions of this main loop. And there might be seven different transitions that we've made that'll bring us into each variation. So because of that, okay, because of that, when we're making our blocks, we need to make sure that you're capturing the tail end, okay? Because this will make the music sounds way, way, way, way more natural, okay? In fact, if you, if you just cut it off here, it will sound very, very strange. And the audio files, they're not going to match up. And the developers will come back to you and they'll ask you to do it again, or the last cue to render it out again with his tail end on. Okay. So just make sure that you're allowing some extra space at the end of your blocks. So that goes for the intro, and it also goes for the tag. Okay, so if I was to render this out, I would make sure that I have some extra space at the end. Now for the shortcuts. Okay. I'm going to get rid of this talent thing that I had in before. All right, remember I made this at the start of the lecture. Going to get rid of that. I don't need us, not what FL Studio and hopefully not with your DAW either if you're not using FL Studio. So I'm going to catch my loop, okay? I suppose draw in where I want my loop to be. And what I'm gonna do now is I'm going to hit Command and, or which brings up the render window. And I'm just going to call this looping and save. And now we come into F0 studios render, render window. So with this, I'll be going through the rendering settings and towards the end of the course. Okay, so don't worry about any of this. Yes. But all you need to know, but all you need to draw your attention to is this bit up here, which says tail, okay? And see how it says Leave remainder. What we wanted to do, okay? What we want the software to do is we want to wrap the remainder, okay? And that's going to take the remainder of sound that should have been here. And it's going to wrap it back around to the start. Okay, this is going to basically do what we did. But it's going to sound, it's going to sound much more, much more natural, but it's basically going to take the tail end of these instruments and wrap it back around. Okay. Cause remainder will just cut off that sound completely gun. And this little it'd be if you had, you know, if you had left some tales based here, okay. It would actually just cut off the tail basically. And even though you've left a space, there won't be any tail left because you've told the software cut off the sound so we don't want to use caught. I'm I don't know. I don't actually use cars at all really. But anyway, Leave remainder will leave the tail end there and wrap remainder, which is what we want for loops. We'll wrap it back around to the start. Okay, So when you're making loops, make sure that either if your software allows it, you're using wrap remainder for your tail, or if it doesn't allow us, your allowing a little bit of extra space here. And you're taking bash tail, you're taking that section and you're manually moving it to the start. And then once you've done that, you're going to have to render it out again by dragging it back to your, your loop points. So you can create a seamless kind of loop that follows the beats, follows the correct rhythm. So that's all I wanted to cover in this lecture. I'm going to leave you now by just playing out this loop, maybe twice, just so you can see it loop back around and get a feel of how kind of seamless that a loop has to be. Okay. Hi.
57. Zones: In this lecture, we're gonna talk about zones. Zones are areas in the game environment that triggers a change in the music. This is how games like Styrofoam have town teams and Dungeon teams, et cetera. It's because they use zones that when a player enters a certain zone, it triggers a certain track. Well, usually a series of tracks. There could be maybe three or four dungeon teams for the game to choose from at any particular moment. Zones can also be used during linear games and even linked to player progression. For example, we could have attention track that has three different tension levels. We can then use zones placed at three equal distances across the entire level so that the music seemingly increases and intention as the player is progressing through the level. We can also link this zonal music to actual characters in the game. So if the player is being stalked by a wolf or something, it will start to play ominous music to make the player paranoid, as long as the predator or a villain is within a certain distance of the player, the tense music will be triggered. We can also use vertical rays orchestration here. So for every explorer area that the player explores, there are different Explore Layers and different explore loops being added in and taking out. This is using zones to read orchestrates the music. We looked at this before when we were talking about the forest example. Zones are one of the most common ways that composers make music for games nowadays. Also, by now, I'm sure you're feeling like this whole course is very general and there's no real structure rules to it. And you're right. But as I've said before, this is because there is no rules for composing. I can't tell you exactly how to use zones because they're not something that must be used in certain conditions. It's simply a tool that's triggered by the player's location. That's it. Your game might be using it at all. And if it is, you might even find different ways to use it, you know, and that's okay. Everything that I'm giving you here is important information and there are good techniques, but you will have to think about them for yourself. You have to apply them to your situation. Composing is unfortunately not a one size fits all.
58. Branching: Let's talk about branching. Some composers call this horizontal re-sequencing, but it's the same thing, just a different name. Okay. So these are like branches on a tree. You have the main trunk in the middle of the tree, but there's several different branches coming away from that. It's the same here. The player's choices will lead to different musical results. And this is called conditional music because it changes based on the conditions of the game and not the player's location. As we saw in the previous lecture. If a player chooses to walk path a, then you should play music. A. If a player chooses to walk path B, you should play music be. Now, obviously, the conditions can get a lot more complicated than this. But all of this stuff is a game of logic. At its core. It's what we call an if this, then that situation, okay? If player walks left, play music, if player walks rice, no blame music. Okay. We can also use branching to literally branch the piece of music. Let's say we had a sad piece of music playing during a mission. And the player has a decision to make. A. Decision a leads to his partner being kidnapped, but decision B will lead to them both escaping. Well now we have potential for the music to branch. Decision a will trigger different music to decision B are basically decision A's music will end. Probably much sadder than decision B's music. How you want to approach this is up to you, but branching is another important tool to consider when approaching music for a game.
59. Dovetailing : In this lecture, we're going to have a look at dovetailing. Now, dovetailing is where you split a piece of music down into really, really small segments, usually about four bars long. Each segment is completely separate to the other segments and it allows the game to create an extremely smooth transition. With dovetailing, there is no need for the audio implementer or the sound designer to pick the transition points because they're already defined by you. So we're back looking at this, this kind of futuristic racing game music. Okay? What we're going to try and do here is we're going to try and take take the arrangement as it is now and split it up so that we can create some dovetailing. Before we do that, I just want to explain how a middleware engine would, would actually work in this scenario. Okay, So let's say during the game and the racers racing along and this music is playing in the background. So this would be sliding along like that because it's playing in the background. And then all of a sudden, I don't know one of the racers, he goes off road and now he's in a desert setting and we want to play desert music instead of this music that we have here. Well, what will happen is the desert music won't kick in until a predefined point. And that's usually set by the audio implementer or the sound designer. Okay? So they'll say, you know, here, probably, and here is a good point for the game to make a transition. So let's say the music is playing here and the racer goes off road here. Okay? This music will still have to play the whole way through until it hits this predefined point. And then it will skip on to the transition that's needed to bring it into the desert music. Okay? So of course you can have loads of predefined points if you want to do that, but that can get very complicated. Whereas with dovetailing, it's much, much easier. So for this piece of music, I'm going to be focusing on two bars at a time. And what I'm gonna do is I'm going to chop after my toolbars, chop everything here. And then I'm going to keep doing that. Okay? I'm going to go across and I'm going to keep chopping every two bars. So here, here we get another chop. And it looks like here now, the way the timing goes in this piece of music. I know this looks like this should be one, but actually one is back here because there's an extra, or there's one less bar in the music. So I'm actually going to, I'm going to leave that as one there, as one bar instead of two bars. So we'll do this. Then we'll chop two bars on from that here. And two bars on from that, which is here. And again, tubers on from that here. Okay. So now this whole section has been split up and dovetailed. Actually have to do the first bit as well. Okay. So now this whole section has been split up and dovetailed. So what we're gonna do now is I'm going to take. These, this, these two bars, okay? And I'm going to move them perhaps down here out of the way. So where I where I know where I can see them and where I'll know they're different. Okay. I'm just turn all those back on. So now these guys are down here and these guys, I might move them up, so they're here. Okay? So these guys are down here now. I'm going to leave these two bars up here. Then I'm going to take the next two bars, do the same thing. I'm going to move them down to same line. And actually I might leave a line between them just for organization sake. I'm gonna move this down. And I'm leaving that bar up there. So we're starting with these two bars. Track these down here. These two bars now. Track these down here. And now, okay, because this is where the section ends. We have dovetailing, okay? And what you're gonna do is you're going to render each of these two bars as separate audio files. So let's say we take this one here. So I'm going to say I want to select this portion of the dovetailing. I suppose these two bars, and I want to render these. Now, what did we say in the looping section about the intro and the tag, okay, the same thing applies here. We're going to need some extra space, which is why you get rid of this is why you move every two-bar, every whatever your sections are, okay, every second section, you're going to move it down or upper. You're just gonna get it out of the way, okay? Because we want this space here to be empty, okay? And what I'm gonna do is I'm going to solo all of these. Sorry, that's the wrong button. I'm going to solo all of these so that it's not going to pick up any of these guys down here. And if I press play, this will give us that tail. And that we desperately, desperately want as composers. Okay? And I need to turn on, there's some automation here. That's the reason why I'm the drums don't sound as good as they usually do. Okay. So you would render that out and then you'd come along and you do the same thing to this guy down here. Okay? Skewed solo him. And like this. And then I'm going to turn on all the automation again just to make sure that we have some drum sound. And now this is your next dovetailing section. Okay? But what does this allow us to do? Well, this essentially allows the game to transition more smoothly, okay? For example, if segment 3 is playing and the game triggers a combat sequence, okay, let's keep going with the example we were doing. Okay, so let's say Segment 3 is playing and suddenly they've triggered the desert scene, okay? Instead of having to wait for a predefined point, which could be maybe here, even here. The game will make the transitional switch here, okay, at the end of the dovetail. This ensures that everything happens exactly on the beat. You can also get very precise with this. Okay? For example, let's say Segment 3 is playing, but the desert music is in a different key. The middleware, okay? The software that developers use to put the music and the sound into their games. The middleware can be told to play a specific amount of the desert music, Okay, so that it matches up. So maybe segment 3 of normal music, okay, the normal underscore will trigger segment four of the desert music. Okay, Not segment one. Because if it triggered segment one, the timing might match up properly. But when we're on segment three, the next segment that's going to come after that is going to be a segment for so in order for everything to sound like it's flowing well, if the desert music is triggered while segment 3 is playing, then segment for on the new piece of music is probably what will be triggered next. Again, you guys won't be doing this. Okay, So there probably isn't any need for me to explain this, but I think it's important to know what's going on under the surface because then you can kind of make your music tailored to this technique. There are many different approaches that you can take when writing music for games. And often you're going to be using a combination of all of the techniques in this course in one game. In the next lecture, we'll look at transitions.
60. Blocks for Cutscenes: In this lecture, we're going to talk about blocks for cut-scenes. Okay? So with a cutscene, like the example that we had in the intro, where a player most press X to continue. We should be thinking in blocks, okay, in this case, I would have five blocks. I would have the main piece that accompanies the entire cutscene. I would have another piece that loops on the press X to continue screen. I would also have a quick tag or outro that plays whenever the player presses X and continues the game. And then the other two blocks would be made up of transitions, okay? One to bring us from the intro into the loop, and then another one to bring us from the loop into the tag. So the Intro Block will accompany the entire cutscene, okay, until it reaches that bad press X to continue screen. Okay, because this is the loop point. So this is when the cutscene is finished, but we're given a screen where the player has to interact, or rather in gaming terms, it's called perform an action. Okay, so the player has to perform an action which will be press X to continue. So on this screen, this is where the loop Q is triggered. So in this case, the loop cube is actually part of the main accompanying piece. Okay, It's part of the intro q, but it's an intentional loop that was placed at the end of the main piece. And this will loop indefinitely until the player presses X, and then it will trigger the tag, okay, which could be maybe a short 5 second cadence just to close out the piece before gameplay resumes. Now, what happens if a player has the option to skip the cutscene? Okay, So while the cutscenes playing, they have a press X to skip button. And we're going to talk about that here on this slide. Okay? First of all, I just want to mention on skippable cutscenes. Okay? So this is where you're forced to watch the entire cutscene, okay? Usually an on skippable cutscenes will only have one block or rather one q, okay, because it will play the same way for every player. Everytime. Where cutscenes can get really complicated though, is if they are skippable, okay? There's actually a few different variants of this. If it skips straight back into the gameplay, only compose 1 q. Okay, Let the developers fade the audio out with visuals. If it skips to a final few seconds of the cutscene, you should compose three blocks, the main block to accompany the entire cutscene, the tag which plays on those final few seconds, and then a transition that will bring us into that tag anytime the player presses X to skip. So with this, if a player watches the whole cutscene, the music just flows naturally into the tag. But if they skip it at any point, a transition will play and we'll bring us into that final few seconds, that final tag, okay, or the outro, and then the music will end. For this to work. The transition has to be really, really quick, okay? You also, you may not have time for a transition at all to play. And if that's the case, just stick with the other two blocks. Let the developers worry about how to transition the music into that tech. Another variant of this skippable cutscenes is one that skips into a blank screen that says press X to continue, okay, in this case, follow what we said in the last slide. Just this time, you'll have that transition that will bring us from the intro into the loop. So anytime the player presses X during the cutscene, it will transition into that loop screen where it says press X to continue. And then the player will have to press X again to continue on into the tag. And at which point with the music, the transition will play and we'll bring us into the tech. You may also be scoring for an interactive story where there could be five different versions of the same cutscene, depending on the route that a player takes. In this case, you're going to have many, many qs, okay? You would have one main kind of accompaniment queue until the player reaches the first interactive choice, at which point, start looping the music indefinitely as they make their decision about what they want their character to say or do. The player may have the choice to skip the cinematics and jump straight to this decision-making screen. So you might need to have a transition from the main loop into this first kind of decision loop. And then these choices could trigger a totally different version of the cutscene, okay, which should trigger a different musical cue. And then from here, we could have more decision-making screens, depending on which routes the player took. So for interactive cutscenes, your music has to branch along with the plot. But you're still following the same techniques by using blocks. You're just going to have to use a lot more of them. Now, I hope this doesn't sound too confusing, okay, because honestly, cutscenes are actually kind of easy. Once you can understand the logic behind them, you should ideally make a logical list of blocks that will be needed for the cutscene. And then you should also consider how might a player maybe interact with a cutscene and design cues for every single way that that player may interact, be that skipping everything, watching everything, skipping half, making quick decisions. If it's interactive, maybe making lung decisions. If it's interactive, your music should feel seamless, no matter how a player interacts with the cutscene.
61. How to Score a Cutscene: So the techniques that you find here will also apply to film music, because in essence, a cutscene is kind of like a short film. The exception here is that we have to remember to create blocks rather than one long piece. But now that we know what blocks are, we can look at the general techniques for creating cutscene music. First of all, the cutscene is important for the plot, okay? It's usually a dramatic sequence to drive character development or to set up the sequence of gameplay that's about to follow. A lot of cutscenes will do what's called a reveal, where the cutscene pans up to a new setting or to a new bus, or even an objective that needs to be completed. So with that mind, our music obviously needs to follow the visuals. And that's point number one, complement the visuals. Secondly, try to find out as much as you can or figure out if there are action buttons in the cutscene. Press X to skip, press X to continue. These are action buttons. If there are, you will have to plan out where the loops will go and how you will transition into each block if necessary. Have a look at what kind of emotions are being communicated through the cutscene. Are two characters forming a bond. Is it a reveal of the main villain? Is an action sequence in the cutscene designed to highlight the next objective that players must do. Have a look at what the cutscene is actually doing. Its function at that particular part of the game is watch. This will help you to create music that can follow that same function. Cutscenes are a great place to use any themes or motifs that you have created already. If a villain is being revealed, it's an amazing time to use a villain team and make it really, really cinematic. Or maybe it's two characters beginning to hate each other. Why not take a happy team that was played so far and flip it upside down or rewrite it in a minor mode. It will remind players of the previous music, but this version sounds much darker. This version is growing to reflect the character is Bond. Film music is very deep. It's not just a matter of following the on-screen visuals. Film scores will often use motifs to hint at important aspects or accentuate them, reminding viewers about previous scenes in the film. Used this film technique to your advantage. If you can use an existing motif to score a cutscene, do, as we said before when we were learning about them, create a feeling of real connection between the player and the characters involved. As they will be reminded of the previous times that they heard music. Even if you change the terminology or the instrumentation, it will register subconsciously and give a feeling of real memory. Next, we must set a tempo. Just download a tempo tap or onto your phone. Okay? It's an app you can get on your App Store and you can basically tap out the tempo as you're watching the screen. So tap your finger at the pace. You think the visuals are moving. When do the camera angles change? When her lines delivered, there's almost always an established pace in these cut-scenes. Sometimes the tempo can change several times throughout, but it's possible to tap a general tempo for the whole scene so that the music doesn't feel random or like it's going out of sync. It's important to make the music fish with the pace of the cinematics. You can also automate the BPM meter in your DAW to change, okay, so that it can slow the music down or speed it up depending on the pace of the visuals. Don't make these changes to sudden though tried to disguise the tempo changes in the music itself. For example, there's a part of music where a court has held for two bars long. And you know that a tempo changes coming soon. Use that held court to change the tempo. There's no rhythmic elements, so the change will go unnoticed. It will just sound like expression that the composer decided to pause or kind of speed that chord up. Tempos can even be changed drastically in one piece of music. Yes, they can also be seamlessly hidden. You can also change time signatures if necessary. This can change the feel of the rhythms or it can help you to elongate certain buyers if necessary. So if you want to make a big impact on a certain part of the cutscene, maybe the lead character says something witty and you want to accentuate that by using a big drum hit. But if you change the tempo, the pace feels off. And if you placed the drum head where you want it to be, it comes in on the wrong beat. So why not switch the time signature to maybe 78 time for the two bars before the drum is, which will naturally elongate the phrase. This will allow you to get that drum hit where you need it without changing the pace of the music. As I keep saying, with cutscenes, it's very important that you do not interrupt the dialogue, okay? If you have a really nice melodies, well that gets louder and sounds amazing, That's grace. But if the melody is getting louder while characters are talking, that's bad. Don't be distracting. Tried to fit those melodies swells. Are those busy? Practice the melody into areas of no dialogue or areas between the dialogue. Remember, It's not about your music, it's about the final product. And in this case, it's the cutscene. The main point to take away from this is to score a cutscene like a film scene. It's a cinematic aspect of the game to drive the plot. So use your music to drive it even further. Now, I also really urge you to learn as much music theory as you can, okay? If you want to be a great composer, it really is one of the most important tools that you can have on your belt. As I said before, I will be doing a full music theory course. Okay? So if you like this course, but you like my delivery, you can keep your eyes peeled for that music theory course in the future.
62. Mini Games: Many games are a unique genre of game. These are games that have smaller games contained within them. There's a common misconception that many games are just short and simple games that don't really have a plus, but rather just endless levels. However, this would be more so like an arcade game or a mobile game, not mini games. And mini game is contained within a bigger game. So for example, Mario Party, where every time a player moves along the board, mini game is triggered. There are loads of many games contained within Mario Party. In fact, Mario Party is based fully on many games, okay, so you could approach this one a little differently. For example. Or the mini games displays into genres, maybe trivia, racing, fighting strategy, etc. Could you create a thematic piece of music for each of those teams so that whenever a trivia mini game is being played, the trivium music is triggered. Maybe the mini games, they're all very similar. So you could create maybe, I don't know, five or six mini game tracks that could be randomly selected when the mini game is triggered. The reason you would make this many different tracks is to ensure that the music doesn't become repetitive, as there are five tracks for the game to choose from at random. With these games, you will probably need to create blocks and loops so that the mini game music can continue indefinitely if needed. It should also be able to transition to an ending at anytime. You will also have stingers with these games for mini games ending and many games beginning winning, losing, collecting coins, et cetera. You should ensure your ending stinger is either linked to the mini game itself or it can fish all of the mini game tracks. For example, if a racing mini game is selected and my racing music is chosen, I would have already created a specific racing stinger that will play when the game ends, whenever that may be. When the player crosses the line, my end stinger is triggered and it fits the racing music. This stinger may not work in a trivial mini game where the trivium music is different, but at the same time, maybe it will. Do you need to create separate stingers as well as separate music tracks? Well, that depends on the game. Now to get more complicated with this, there can also be mini game functions within a bigger game. So if you were to take the hacking in mass effect or even the lock picking in Skype them. These presented themselves as returning motifs in the game, but they were actually mini game puzzles. So what you could do here is design a piece of music that goes with the motif. Let's say you were working on skyrocket and you're told about the lock picking mini games. You could design a piece of music that plays during all the lock picking mini games. So now the music itself has kind of become a part of the mini game motif. But why stop there? What if on one of the levels There's a cutscene that reveals a door or even parts of a level that a player has to actually figure out how to escape a building maybe. And it's by picking a lock. Why not compose some of the lock picking music into the cutscene music or into the underscore. And use it as a motif to prompt players about how they should progress through the level or kind of hint at what they're about to do. It can make the game feel so much more immersive and drive that feeling of suspense that's so important. These are the two main types of mini games that you may come across, okay? The games that are entirely based on many games like Mario Party or we sports resort. And then the mini games that are contained within a bigger game, like lock picking and sky RAM or the hacking in mass effect. The approach can be slightly different to irregular linear gain. Next, we're going to move on to side scrollers, and these have their own unique quirks as well.
63. Mobile Games: With mobile games, we're referring to the arcade style of games that you can play on your phone or tablet. Games like Candy Crush or eight ball pool. I don't mean Pub G or FIFO. Okay. Because these are actual 3D games that have much more depth than an arcade game does. Arcade games are simple. Often they just have a set amount of levels to complete an NOL, real storyline or main character. They might not even have characters at all. So because of this, these arcade kinda style mobile games have very limited music. The games are usually in a 2D format and they don't really feature of flatline. Generally, there's only one or two fold tracks in the whole game. What there always will be though, is main title music which plays on the main menu when the player is choosing settings or game modes or whatever. So again, here, you want to capture the general feel of the game, even though it's a small mobile game, there's still a calling for capturing the genre and the game itself. For example, Tetris, if the music for that game had a full orchestra playing on old medieval instruments, the game just wouldn't have the same impact as it did. Tried to be clever with this, as arcade games are often very specific in their teams. Racing, Building, player versus player battle, etc. Take the famous mobile game eight ball pool. If I were assigned to that game, I'd be thinking like this. Okay. It's based on a spores, but it's a casual sport. Okay. Anyone can play and there's pool halls and almost every city in pool tables, in almost every bar. Therefore, the music should be some more casual. This also fits the game itself as it's a form of casual gaming. As players can play anywhere they're like on their mobile device. It should also be upbeat as it's still a sports game, okay, there's an element of strategy and winning, so the music should be somewhat exciting but not overly exciting. So now we have casual, upbeat and exciting that would call for a smaller arrangement. No need to have huge orchestras here. So we'd strip it back. Maybe even a rock or pop arrangement that would satisfy the feeling of casual and accessibility as rock and pop are genres that everyone can relate to. The upbeat part would refer to the temple, so it should be fairly fast-paced. This would also help with the excitement element. However, we could also incorporate some rising motifs are high melodies to create excitement. Now, I'm not actually sure what the music for a papule sounds like, but if it were me, that's the angle I would be approaching it from. We also have stingers, okay. Little pieces for winning, losing, maybe time running out, and maybe something that plays every time a great move is made, like in Candy Crush, or a great word has played in Scrabble, that kind of thing. As you already know, you should be requesting a spotting session with the developer. So have a list of places you think music could work. Ask them what they think. I'm sorry that this is some very general information, but it's hard for me to tell you exactly what to do. Each game is totally different. But as I mentioned before, you can message me at anytime if you're working on a game score and you don't know how to start. Or you can join the Discord group and ask some other composers and producers what they think would work. We're a community of musicians and we should be helping each other. A rising tide lifts all boats, as they say.
64. Side Scrollers: In this lecture, we're going to talk about side scrollers. And these games are self-explanatory. They are games that scroll to the site. There are 2D and they usually involve the character moving to the right to progress through the game. There are so many side scrollers out there, but the most famous would probably be Mario Bros, limbo, hill climb racing or anything else that involves the character moving left or right. The key to side scrollers is that the camera will always scroll with the character's movements, which is where the style again gets its name. These games are almost always level based, so you have predesigned levels that players must complete to get through the game. You may even have different overwhelmed or just worlds as they're called. And Mario Bros. Let's say we have a game and there's 50 levels in each setting. And the first setting is a deserts. So at Sandy, the second setting is a city, and maybe the third is a forest. So now we have around a 150 levels and three settings. How do we approach this? Well, it's a side scroller, so it's 2D. If we remember from before, 2D games with different overwhelms can have different pieces of music for each world. So I would start by composing three different overwhelmed teams for each different setting. Now we have to look at the levels themselves. Sometimes the levels will have their own setting or the character may find themselves in a climactic situation during certain levels. For example, Mario is chasing browser through a castle. The music here will be unique to that level to communicate the tension and the setting at that particular time. Other times, the level will just be set in its general setting. So for those general settings, you could have three to four general tracks that the game can choose at random for the general levels, then any boss battles are levels that are important to the plus. I would compose them separately to make them feel much more important. You can also use them to evoke tension and panic and the player, the music will also have stingers for dying, winning, maybe power ups and stingers when a player selects a level or is waiting for it to load, et cetera. All of the same elements that we've been looking at so far, they still apply. But in terms of the underscore, it's just a little bit different because there's kind of like general music the place during general levels. You don't have to compose each one individually, not for a side scroller anyway.
65. Simulation: Simulation, okay, This one should be short. Most of these games consist of actual licensed music, with the exception of a few stingers and maybe some shorter compositions, FIFA, Madden, NBA live. These are all examples of simulation gains. Their sports games, yes, but they simulate real life events. Farming simulator, Sims, your old truck, planet coaster. These are more examples that aren't sports related. Now, There's actually a big fat gray area with this one. Okay? You could argue that need for speed is a simulation game, even though it's sold and marketed as an arcade racing game, which it is, but racing is a real-life action being simulated. Most of the storylines, physics, and game mechanics are more arcade styles. However, this could also be said for Sims and maybe planet coaster. So it's all a little confusing. Which ones are simulation and which ones aren't simulation. The good news is, it doesn't matter. And that's because as I said, most of these games, we'll be using licensed music tracks. All of the sports games and most racing games will take this approach. You may be asked to compose stingers for in-game events like winning or losing. Maybe a handful of underscore for some cutscene tracks, but mostly they use real songs. Again, meet with the developers and ask them where they need music and start from there. With the simulation game. You'll often be asked to compose a main title team. However, to do this, right, it needs to be a little bit longer than usual. Obviously captured the game's genre, teams and atmosphere and the main title music. All of that still applies. But with simulation games, players are going to be spending a lot more time in the menus than any other game. They're customizing their truck logo, upgrading their engines of their character, looking at the season stats for their left back and who can be transferred in and out there, spending time designing the roller coaster before they actually opened the park. There's a lot of menus and customizing. Make your title music longer to avoid repetition, you have to plan for players to be spending at least 15 minutes customizing and the menus in that time, a pop song could have repeated five times. And this is actually why these games opt to license more than 50 music tracks for a playlist rather than use one composer. They understand that the player is going to be spending a lot of time in the menu. So if you're asked to compose a title piece that you know, a player will be spending a lot of time hearing. It's best to make it longer than you normally would. For the likes of planet coaster, city skylines and even Minecraft a little bit. Now, Minecraft isn't technically a simulation game, and we'll get to that. But it does have elements of simulation because the game's mechanics reflect the real world. But anyway, with these creative simulation games, okay, you're going to have a simple casual piece of music playing in the background while you're building your coaster, there could be simple coming or funky piece of music in the background. You can help to hold the player's attention if you compose the music. Well, here, there is no need for attention. This is a creative environment to music should be simple, casual and relaxed. Taking other simulation games like farming simulator and Euro Truck. These type of simulation games are genuine simulation, okay? In fact, they usually have the word simulator in their title, flight simulator, training simulator, etc. These games are trying to be as accurate as possible, so they almost always have absolutely no underscore during gameplay. There may be a radio station that plays music, but there's no need for a composer to come in and compose high tension music when a player is just picking up passengers on their boss, It's meant to reflect reality. There's no need for underscore. The menus again, are the only real place you'll be required to compose for. So make sure you spend that extra bit of time on those pieces and make them longer and maybe more interesting to listen to while players are customizing their options. Finally, brown to stingers. Again. Stingers will always be necessary in any of these games, okay. In simulation games that could be something like your delivery was made on time, you're running out of time. You won the football match, you lost the football match. Stingers are great. We love stingers. There's always going to be somewhere in a game that needs a stinger.
66. Linear, Non Linear, Interactive: Linear, non-linear, and interactive. This does not refer to the storyline, but rather the game's mechanics. Linear games are very simple. The missions are specifically laid out and gamers must follow the objectives exactly as they were designed. Or you don't progress. Go here, climb this, shoot this enemy, open this door, etc. A lot of first-person shooters operates as linear games. Essentially, the player has no choice but to follow one series of events that the game has to offer. This style of game is slowly going out of fashion as most players value to replay ability of a game or an ability to choose their own plot line. And this is where non-linear and interactive games come in. A non-linear game is when a player can choose from a set of options to complete a level. For example, they could choose to follow a side character into a dark cave and help them to feed a dragon. Or they can choose to walk up a hill with another character and fix their cars until that side character returns. These choices do not affect the plus, as both characters inevitably meet at the top of that hill, regardless of the choice made. But there is still a choice. Non-linear games, or when the player can choose from a number of methods to complete a level. However, as I said, none of these choices affect the plot. An interactive game is similar, but the choices do affect the plot and the plot can branch off into several completely different storylines. So how do we compose for each of these games? Well, linear is fairly simple. There's only one thing that will ever happen. The only variable is the timing of each player. So our previous techniques of cues and looping and blocks, they still apply here. Nonlinear games will not affect the place, but the choice is do affect the gameplay. Our previous example had two completely different moods, okay, fighting a dragon in a cave versus fixing the broken cars on a hill. One of those sequences is action-packed, intense, and the other one is Cam and has little action. So obviously, one piece of music is not going to work for both gameplay situations. And unfortunately, our job as a composer is to ensure that every single scenario in every single situation is covered. So in that particular example, you're going to need two different queues, okay, that are triggered by the player's choice. So you could compose a main underscore to play up until this point. And then when the time comes to make the decision, you could have two different cues ready to be transitioned into depending on what the player chooses. This is the technique that we looked at before called branching. Now sometimes with these nonlinear games, one track we'll cover all scenarios, but other times you may need five separate tracks. It really just depends on how the levels are designed, but it can be tedious when every level is almost like five levels built into one. Finally, we have interactive games. These are the likes of Cyberpunk or the Last of Us or any other game that involves the player making decisions about the plus. In Cyberpunk, when you choose your backstory, it changes the missions during the first part of the game. If you went back and chose a different backstory, you would be presented with a completely different set of missions until you reach the main city. So the players decision here has affected the games. Plus similarly, early on in the game, you may be given the choice to kill one of your enemies. If you choose to kill them, the plot will arc in one direction, but if you choose to spare them, perhaps he teams up with you and the plot arcs in a totally different direction. If the player's decisions are affecting the actual story, then this is an interactive game. Now some games give players these interactive options, but the plateaus and change. Like in GTA where you can choose to kill or spare some of the characters. But whether you spare or kill them, the plot doesn't change. This is just an interactive elements, not an interactive game. So there's no need to branch off into different potential plot lines. You may argue that GTA 5 gives the choice on how to complete a heist. You can choose to go in loud and heavy with guns blazing, or you can choose to go in stealthy and quiet. However, these are options about how the player wants to complete the level, not the game, okay, So therefore, it's more kind of non-linear rather than interactive. If this game where to be interactive, then all of these decisions would have to cause the storyline to change. For example, if the loud and heavy option got your character arrested and it's spiraled into a prison storyline. Whereas the quiet option, you escaped the police and there is no prison storyline. This would be interactive. Now we have two separate storylines that we have to be prepared for. So with interactive games, you have options. You can compose each storyline meticulously and make sure that the plot line has a unique score. Or the more recommended option is to compose general mood music so that they can slot into each storyline. For example, you could have three tension tracks, 3 high action tracks, three sad tracks, three celebration tracks, et cetera. Anytime gameplay becomes tense, the game can choose from any of the three tension tracks at random as they're designed to fit all tense scenarios. The most important thing about this lecture is to just be aware that there are non-linear and interactive games that can branch off into different gameplay directions, are different storyline directions, okay? And so the music can either branch off to, or it can go down the more general roots.
67. Open world, sandbox: In this lecture, we're going to look at open world games and sandbox games. Open world games are where the player can explore a huge map, launch missions, do side quests, and interact with other characters. It's as if you were dropped into another universe to do whatever you like. Red Dead Redemption, GTA, and sky room are all open world games. Some games have something called Free Roam, okay, which is kind of like open world. Except from the Free Roam world, you can't launch missions or interact with anything, okay? The missions are contained separately in a different game mode, um, but the free roam option is just a chance to explore the map without being able to actually do anything other than explorer. Racing games will often have a free roam element where players can drive around the map for as long as they like without being able to start any races. Sandbox games are similar again, but this is where you can alter the terrain of the map. You can build things like spaceships or castles, or even destroy structures. Minecraft is obviously the most well-known sandbox game, but there's also Roblox, Antarctica grounded, and Norman's guy to name a few. A lot of games have a sandbox element, like what, GTA, you can build race tracks and obstacle courses online. We're in Fortnite where you can build structures and fortresses. These are not sandbox games, they're just games with Sandbox elements. A true sandbox game involves exploration and usually very little storyline. Sandbox games also have another name, which is non-games because there is technically no objective apart from your own personal goals. But the main thing to note here is that the game involves a lot of exploration, building, finding parts, materials, destroying terrain, and very little plot or storyline. So how do we approach these games? We use zones, okay, on the map, there can be several zones that if a player enters, it triggers a certain piece of music. In Minecraft, There's different music for the Caves than there is for exploring the surface. There can be different nighttime music today time, if a player enters an area where there's lots of danger, it could trigger tense music. Okay, these are zones. The music in a zone can not only be used for atmosphere or mood, but it can also be used for setting. For example, in a tavern, you could have some honky tonk music playing. If the player decides to leave the buyer, the music will fade out and the general kind of outdoor underscore will come in. Don't worry about the fading. Okay, all of this will be done by the audio implementer or the sound designer. So don't worry about this. You just write the music. One game that's really, really good at zones is skyrocket. Okay? Sky rim is great at adaptive music. There's different music for daytime, nighttime towns, taverns, and there's even battle music if an enemy is attacking and dungeons, et cetera. These are all zones within the sky room open world setting. We can also use vertical orchestration to make the zones more elaborate. So I'm pretty sure we talked about this before, but I'm just gonna mention it again. It's the example. And with the forests, and the deeper you go in, the more tense the music gets. So these zones are the tools that we use to approach games of this nature. When you're using zones, it's a matter of finding out where the music would work best and composing for that setting or that scenario.
68. The What and Why of Mixing: The wass and why of mixing? Firstly, what is mixing? This is where you balance all of the frequencies and audio together to create a nice, balanced and clean mix it so that no instrument is too loud or too screeching. Or maybe the cello has too much bass frequencies and it sounds heavy. We can use mixing to clean out or that up. Why do we do it? Well, exactly why I said to make it sound cleaner and more pleasurable, we want the music to sound the best that it can. So it also has to have a nice balanced mix. As for the how we use various different plugins, things like an EQ, a compressor or a reverb, et cetera. But we're going to get to that in the next few lectures.
69. Playthrough Without Mixing: This is okay.
70. Buss Channels & Send Channels: In this lecture, we're going to be looking at both channels and send channels. Okay? Now both of these are very similar book, they're used for different purposes. You would use a boss to group different instruments together. Okay? And you would use a send for effects. Okay, So if you wanted to load reverb on to this and reverb launch this and then this and this, and this. You would use a cent. Okay? So we're going to have a look at these now, okay? So I'm going to come into my mixer. Yours will be in a different place on your software if you're not using FL. And it will probably look different, but everyone's software can do this, okay? And we can all make buses and sends because it's actually a very important part of mixing. Okay, so I have all of my instruments named and color-coded. So all of the pink ones are strings. And these are legato strings. And then down here at these different shade of pink, these are pizzicato. Strings are no, sorry, not pizzicato there. Stick cattle or spic at all. Now, as things stand, all of, all of these instruments are separate. Okay, I'll just play this section here real quick. Actually, I'll solo the strings, okay? Because I just want to hear these guys. Alright? Now, because all of these are strings, an easier way to do it when I'm okay, when it comes to mixing, I would have to individually adjust all of these. Okay. But there's a much easier way to do that. And then if I came back, maybe I don't know, after I've mixed other things and I think, you know, the strings need to be louder. I would have to individually turn all of them up. But what that would do is that would mess up the balance that they had already. Okay, so now these, so now these faders are in different positions in relation to each other than they were when they were quieter. So there's a much easier way to do this, okay? And we use what's called a bus, okay? So think of a boss like a real boss. All right? The people that get onto the bus are your instruments. So in this case, I want a strings boss. So I want a boss that's basically bringing all my strings somewhere. Okay? So I'm going to come down here and I'm going to create a new channel, rename it, and I'm going to call this strings boss. Yeah, um, some people spell it with two Ss and other sped up at one. But whatever you like, it doesn't really matter. I'm going to use two because that's what I usually use. And I'm going to give it a color that's kind of different to the rest, maybe maybe yellow over here. Okay. I'm going to turn it back up. I don't know why it was turned down. So this is my strings bus, and at the moment, there's nothing on it, okay? If I solo that you can hear there's nothing coming through on the strings bus. So what you do is you take the instruments that you want. On that bus. So in this case, it's the strings here. And what I'm gonna do is I'm going to highlight this one, okay? And I'm going to come down to my boss. And in FL Studio anyway, I'm going to click, or sorry, I'm going to right-click this and say reus to this track only. Okay? Now, any sound that's coming out of this, okay, it'll come down here through this and then follow this arrow down, follow the line, and it will come in here, this channel, okay? And then this channel is routed to my master channel. So I'm gonna do the same thing with all of these. I'm going to take the cello and I'm going to route it to the bus route to this track only. I'm going to go back and I'm going to take the violas. Didn't mean to do that. I'm going to take the violas and route them to this track only. Okay? And I'm going to take the violins and I'm going to route to this track only. So now, if I solo these guys again, you'll see that the sound from Ds are actually coming through on this. And if I want to turn all of the strings down at the same time. So what this allows me to do is I can get a balance between the strings first. So I can say, we'd like the base at this level, but maybe the violins are too loud. So I'm going to drag these down. Now I think the shadows are a small bit too loud. And let's say this is the balance that you like. Now if I was to try and go doing that to the brass, um, and I was to mix all of these together. All of a sudden, I might realize that some of my strings are too quiet, but I don't want to mess up the balance that I have there because I liked that balanced. So what I would do is I would turn them up here. Now, ideally, you won't be going past this point here, the default position, because technically you're not supposed to kinda push it that far. But I'm only doing this for demonstration purposes. So, you know, you won't find yourself going up this high. What volume am I promise? But just remember that the purpose of the boss is to group instruments together, okay? Now I would have more than a strings boss. I'd actually have a boss for everything. I'd have a boss for the brass. Okay, let's create one now. I'll have to create the channel first. I'm going to bring it all the way down here to this empty one. Rename this brass. Brass plus, and give it a color that's the yellow, like we have the other one. And then I'm going to come back to my bras which is here, this nice orange colors. And I'm going to route these to the brass track only by right-clicking and saying reus to this track only. And now, if I was to solo the brass and all of the brass instruments, I will get this. Again. I can turn them all down at once if I want. Okay, so next we're going to have a look at sense. So ascend channel is a little bit similar, okay? What we do this time is we kind of do the same thing. Okay? Let's say we're doing the strings. Okay? I'll hang on there over here. So let's say we're doing these strings and we want to put reverb on all of these strings at the same time. But we don't want to put that reverb on any of these or any of these or any of these. Okay? So what we're gonna do is we're going to select the ones that we want to put this special reverb on. And we're going to again create a new channel. But we're not going to route to this track only, okay? Because with the sand, we want to do things in parallel. Okay, and I'll show you in two seconds what that means. But for now, you're going to select roots to this track. Ok? So I'm just going to rename this so that we can see us. And this would be string, Send and go to color really quickly. And I'm again, we'll go with yellow. And now if I solo the strings, okay, come down here. Solo. These guys. Make sure I solo the string bus, which it is. And you'll see that we're getting the signal through here. Like the bus or sorry, unlike, okay, if I go to turn this down, the strings don't disappear. Only these strings disappear. So what we do is with the sand, we add the plugin that we want. So in this case, I'm going to use the fruity stock plug-ins. I've gotten rid of my third-party plug-ins. Usually am. My thing would be a lot wider bus. What I'm looking for now is fruity reverb 2, which is up here. Select that. And if we turn up the West, so that we're getting much more reverb. Okay? We've been looking at reverbs in two or three lectures time. So don't worry about this for now, bush. I just want to show you that on the send. And we should have a reverb signal now on the strings. I'm not sure if you can hear that. But if I was to turn it off and play it again, I might just load a more noticeable plugin. And just so you can really tell the difference, Let's go with a delay. Okay. Just so you can tell the difference. Yeah. Okay. We can hear that definitely. Now if I was to turn that signal down. So as you can see, this only controls the delayed sound, okay? So we can use the send to mix that in to our strengths to weaken. Find a point where we like it. Say it's somewhere around here. And now we have the sound of that delay in our arrangement. In FL Studio. You have sand tracks by default, okay, and there over here on the right-hand side, these guys here, these are separate to the normal channels. You see if I scroll, these guys aren't moving. And the reason for that is because these are send channels. Okay? So what we would do with these is a little bit different. We take our instrument and we just click the little button here, okay? Because it's a predefined send channel, okay? And actually you can do that as well with the main channels. So if I was to take the base, I could, if I wanted, just click this or this or this, that will create a quicksand, okay? It's only for buses really that you have to right-click and say route to this track only. But anyway, over here with the basis will see that there is no signal coming through here now. But as soon as I click it, my turn up the volume of that scent can see the signal is starting to come through there. Now, we can use any plugin that we want to use. Let's say this time we're looking for something like distortion or something. Let's go for a blood overdrive. And I'll just very quickly drive it up, make it really obvious. Something like this, okay, really, really obvious. So I'm going if I just solo the bass, so you can hear the difference there. And I can use to send them the send level of discipline knob here to control how much of that signal I want it to sound. So with your mixes, you should be creating buses for every m section. So a string boss, a bras bas, a woodwind bus, and maybe a precaution boasted you have that too. Then I would create a staccato bus for the strings, brass to cattle boss, and so on. Then create some sense. Okay, I usually use the four here. And, but if your software doesn't have this by default, you can create for manually yourself and then you'll be ready to start mixing.
71. Surgical & Aggressive EQ: In this lecture, we're going to be looking at something called surgical EQ and aggressive EQ. Okay. With surgical EQ, we use that to fix something. We're going to try to find some nasty sounding frequencies and all of these instruments and all of these precautions and stuff. And then we're going to cut those out so that we don't have any of those nasi frequencies in the final sound with the aggressive EQ. We're going to use that to shape the overall sound so that everything sounds really, really pleasant and just nice to listen to. This is also the EQ that will blend everything together. Okay, So let's say with the strings I have lots of high frequencies. I'm probably not going to want high frequencies in another instrument because that's going to cause a clashing sound. So I would boost the highs in the strings and maybe cut the highs from somewhere else. So let's use some surgical EQ on the strings. Okay? I'm going to solo these guys throw over here. And we're on the basis already, so we'll just stick with that. And let's have a listen to just the bass soloed. Now, I'm going to turn off all the sense that we had before because we don't need to. Okay. So I'm just going to get rid of all these because we're not going to be using them. Because I like to use descends over here. So let's listen again really quickly. So for surgical EQ, we're going to open up an EQ plugin for this. I'm going to use the parametric EQ to. And it opens like this. We have seven bands that we can choose to alter the sound so we can either boost or cut. And we can also change the shape or the type to maybe a bell, which, and this is actually called peaking. And it makes it more like a bell shape, as you can see like this. Alright, so I'm going to reset that and we're going to start finding some nasty frequencies. So for this, I'm going to boost one of the bell curves. So in this case I'm using two. As you can see, it looks like a bell, and I'm going to change the q. Okay? So this will tighten that line in. All right? If you're using a different plug-in, this will be called the q, okay. Just the letter Q. Q. You're going to change that knob and make the curve tighter in like this. Okay? And then we're going to scan through each frequency and find something that doesn't sound nice. All right, we'll start down here. You'll notice there's a lot of resonance around here. But because this is a bass instrument, I'm going to keep this in, okay, I want that low end and that waste in the composition. We're looking for something like that, right? That doesn't sound very nice. And I think that might interfere with the overall sound. So I'm going to pull that out. Not too much because it is still a base frequency. And I'm aware that I don't want to take too many bass frequencies out, otherwise it'll start to sound a little bit kind of top-heavy. So let's just bring this out slightly and look at it again with three. I'm going to tighten that queue up. And we'll start from here now because we've already looked at these frequencies over here. So starting with three from here, that's just a harmonic. Want keep that in. Okay. That doesn't sound right. I don't like that, so I'm going to pull that out. And I'm going to widen the queue a small bit just so we can catch kind of there was a few here I didn't like either. I'm going to try it with five now. Just because it's close. Queue, make sure it's tin, even thinner than that actually maybe. And we'll listen again. Okay. So there's a lot here that I'm not really a fan of. And also because it's a base, I'm aware that we don't really need all of these frequencies up here. Now, we're not going to get rid of the model totally okay, because that's, that won't sound very good BUS. I'm going to reset this to something called a shelf, which would be a high shelf in this case, because the shape of us, I wanted to kind of fall away this way. If I said low shelf, it would actually follow it this way. So if you're in the high section, use a high shelf and if you're in the lows, use a low shelf. For here. I want a high shelf and I don't want to cut too much out. Maybe only something like this just to kind of subtly reduced the highs. And I'm going to bring this right down to the frequencies that I don't like. So now we've used surgical EQ on the basis, Let's abs. So we'll turn it on and off as we're listening and see what kind of a difference it's making. I'll start with it off. So it's already sounding a lot cleaner. Then you're going to do this with every single instrument, okay? All of them. You want to get rid of all of those nasty frequencies. With orchestral music though, you want to make sure that it's subtle, okay? You see how these are only pulled out very, very gently, very, very slightly. Okay. With EDM or rock or pop or something, you would, you would have this pulled right back and you'd have to queue much wider with something like that. You're being way more aggressive. But this type of music, it shouldn't be aggressive, okay, you shouldn't be using aggressive and shaping. So that's why I've only pulled it out very, very slightly like that and I'm keeping the queue kind of accurate. Okay. So you're gonna do that with other instruments as well. Let's have a look at maybe, maybe something different. Let's look at the violas this time. And same thing again, grab an EQ. Let's try find some nasty frequencies. So I'm going to boost this, narrow the queue. And we go again. They sound a bit resonant. And they're kind of in the lower register, which we don't need because the base is going to cover that the cello is or even lower than the violas. So we really don't need this in here. So I'm gonna pull that out. Not too much again, but keeping things subtle. And we'll try now with three. Does this narrow the queue? And we'll have a listen. That sounds a little resonant. And I want to pull this out, not too much, okay? Because that also sounds to me like a harmonic. And harmonics are important to the overall sound, but it is a bit loud. So I'm going to pull that out very gently. And we'll try again with five. Narrow the queue. And again we'd have a listen. And everything up here just appears to be a harmonic is jumping out. So I'm going to reset this because I don't think there's anything else that needs to be pulled out. Okay. So close this. And now we have our violas with surgical EQ on them. It's a very subtle difference. So you won't hear it if you don't have headphones, but it does make a difference. Now we're going to look at aggressive EQ, okay? This is the opposite. Okay? So where we were cutting out the nasty frequencies with this, we're going to boost some nice frequencies with this. So let's take this down here. We're still on the viola. And I'm going to find something that's nice. And for this, you're going to use not an arrow q. Okay? And arrow q will make you find the nasty ones. We don't want to find the nasty ones. We want to find the nice ones, which is why we make it a little bit wider. So keep it wide. So listen. Now, down here is a bit honky. I don't really like it. So I'm going to cover most of this out. Okay. It sounds a bit honky to me. I don't like is, and getting rid of that gently, not too much because it's orchestral music. We don't want to overdo it, but just gently get rid of those kind of honky frequencies that I don't like. Let's try again with four. That sounds nice. Okay. And here's a thing that you're going to come across is the upper frequencies will always sound nice when they're boosted. But because this is a viola and the violins are going to be taken this, these, these high frequencies. I'm not going to boost this, okay, even though it sounds good, it sounds I'm not going to boost this. I want to boost the kind of fundamental area of the violas, like the area that the violas shine in. So let's find that it should be a bit lower down. Here. We're not going not aggressive with it obviously. So this would be 0. I'm going to boost this. And I might even narrow the queue of that a bit because I don't want to catch to any of these kind of mid-frequencies will boost that up. So now we've used an aggressive EQ to shape the sound. Let's have a listen to what this sounds like if AB it. Now on second listening, I don't think that actually sounds good when I'm listening to it off. I think that sounds more natural than this does. So I might actually not boost this, and I might move it up and boost those frequencies that we did like before. Maybe not that much. And it sounds to me like the Medes here, what we had boosted before or adding something kind of honky, like we said down here, for adding something honky in that I don't really like. I'm going to pull these out very gently. Okay. Even, even less or than this. I don't want to be too obvious with this, with the CQ. That's sounding better to me now. Now, just for the point of demonstration, I'm going to do the violins. Okay? So this is the violins here. Okay. And I'm, I'm not gonna do the surgical EQ because what you do is you'd soloists and then do the surgical EQ. Okay? Surgical EQ works that way for all instruments or you're going to solo them solo this do surgical EQ solo, this do surgical EQ solo, this, and so on. Okay. When you're using aggressive EQ, you don't soloist. All right, you want to make sure that this is sounding, that the violins, sorry. We've already used aggressive EQ and the violas. We want to make sure that the violins are going to sound good when they play next to the violas. So we use, so imagine that I already have my surgical EQ done. I'm going to load a aggressive EQ. And we're going to find frequencies in the violins that make it sound good when it's playing next to the violas, okay? If you solo it, you're going to find the frequencies that sound good on the violin. And that's okay. Bus, that doesn't kind of work for the whole mix. Okay? The, the whole mix is a solid collective group of instruments together. So we want this to sound good when it's playing next to the viola IS All right. So let's find those frequencies now. See around here. I think here might be distracting a bit from the violas. So I'm going to narrow that q and just take this out ever so gently. Actually inelastic. I think this might be a frequency that we should boost. Because if I was to pull that out, I think that's most of the violin and a lot of the frequencies of the violin or around there. So if I was to pull that out, we might lose a lot of violin. And we're only kinda keeping the air. So definitely, let's boost this frequency. Not too much though. Again, you want to be subtle with this. I might widen the queue so its mass, it sounds a little bit more smooth. It's catching all of these frequencies as well. Let's try for a frequency up here. So will boost six. Now the Q is small but not too much. Okay, I like this here, but it's a little bit kind of resonant. Okay, it's kind of screeching. So I'm going to boost that, but not too much, alright, even less so. Then this one over here, maybe some of these frequencies here could we really don't need them? Now, if we AB this, this EQ. So that's how you do that. Okay. That's how you do your surgical EQ and you're aggressive EQ. Now when you're using aggressive EQ on another instrument, like the trombone, you're going to make sure that this, the trombones sound good next to both of these, okay, because you've already used aggressive EQ on both of these. So basically, anything that you've already used, aggressive EQ on, stays on, and anything that you haven't needs to get us. Okay. So I'm going to do this really quickly. Just to prove. Not to prove, but just a fear. I have to solo that has the brass on us. I don't need this frequency here because the strings might feel some of that up. But I'm not gonna take it out too much because we like bass frequencies in our arrangement. Somewhere around here is nice. Okay. If I was to turn that off. So you can see how when the EQ is on, it's cutting through the base trombones or cutting through the mix. Whereas if I was to turn this off. So this is how you use surgical and aggressive EQ. In the next lecture, we'll have a look at compression for orchestra.
72. Compression for Orchestra: So in this lecture, we're gonna talk about compression for orchestra, okay? And there's no real need for me to actually be in the DAW for this lecture because the thing is with orchestra, we don't compress, okay? Or at least if we do, we do so extremely, extremely subtly. Compression essentially squashes the dynamics of a piece, okay? It takes the quiet parts, makes them louder, and takes the louder parts and makes them quieter. It compresses it down into one solid dynamic throughout. Okay? It's used a lot on vocals and in rock music, you know, when you're listening to a pop song, it doesn't really change dynamics. It's kind of loud at the start, loud the whole way through and then loud at the end. That's because of compression. Okay? Orchestras are not like that. Okay? They don't start loud, play loud the whole way through and then end loud. They might start loud, get really quiet, then get really, really quiet, and then get really loud, and then get really gritty quiet again and then go back to be an average load. Okay? Orchestras like to be dynamic. In fact, dynamics are actually written into a score as part of the score that the composer decides where he wants to Dynamics. He says to the orchestra, I want you to play loud here and play quiet here. So because of that, dynamics are a big part of the music. So compression should only be used if you absolutely need an instrument to stay at a consistent volume throughout, okay? Things like maybe a synthesizer or maybe a vocalist, if they're singing vocals, but generally we don't use compression. So with that said, I'm going to go ahead and show you how to compress something, okay. But again, I don't recommend it unless you absolutely need to. In this case, I might take the guitar. And this could do with some compression, maybe kinda says at the same volume throughout. So let's take this and we'll add some compression to it. And it's over here, guitar. And then I'll load the compressor. So we'll take fruity compressor down here. And what I do is start with the ratio. The ratio is basically how much compression do you want? The higher it goes, the more compression you have. Anything above 10 is very, very extreme. And it actually turns into something else called a limiter. And which basically instead of compressing is limited and it says absolutely nothing is going past this volume. Whereas a compressor will take us and kind of push it down and make a quieter. So never go past 10. And in fact, an orchestra don't go pass, I would say five. And to be honest with you, I rarely, rarely go past three. Okay, so with the guitar going to leave it at three, then I'm going to bring the threshold down until I can hear it starting to be compressed. If I bring this the full way down, you'll hear it fully compressed. Okay? So I'm going to bring it down until I hear it's starting to be compressed. Too much. Maybe somewhere there. 21. Your attack is how quickly you wanted to compress, how quickly you want the compressor to turn on. In this case, I want it to be quite quick. So I'll turn it down because I want you to catch notes as soon as they start. The release is how quickly you wanted to turn off. So essentially, if you do this, the compressor will turn off as soon as the note has come through. But if you do this, the compressor will feel more smooth and it will turn off much more slowly. So for this, I'm actually going to keep us around 200. I think where it was. Your gain then is called makeup gain. And this is basically because you're turning down the volume at the threshold. You're going to use the gain to turn a backup or boosted even more. If you wanted that little bit louder. I'm going to turn that off. Maybe the okay. And then this, this is only something that you find on this compressor. Most of the compressors won't have this, but it basically changes the type of compression from like vintage soft hired and stuff. So I'm just going to leave it where it was because I don't want to go too in depth with this. But now basically our guitar is compressed. Now it's very subtle. If I wanted to be very aggressive with this, could turn it right down to it right up. You see, what you'll notice is okay. If i be even more aggressive, turn it right down and turn this right off. If I turn it off, look how much these wave or not, these waves, these m indicator things are jumping. But if they're jumping right down from here to over here. But if I turn this back on, they become a little bit more consistent. They're not jump in as much Dani, jumping from maybe here to here. So that's what a compressor does. It squashes the sound down. Now FL studios stuck compressor, It's not the best. Okay. I would advise you if you are compressing to get a different one, because as you can see it, it doesn't really, it doesn't really work. If this was a different compressor, that would absolutely be a kind of a brick wall here. But anyway, you won't need a compressor because you shouldn't be doing any compressing and not with orchestral music anyway. In the next lecture, we'll have a look at reverb for orchestra.
73. Reverb for Orchestra: So in this lecture, we're going to be looking at reverb for orchestra, okay? And this is probably one of the most important parts of mixing an orchestra. You need to make sure that your overall arrangement sounds like it's being performed on a stage in front of you. This will make it sound really realistic and pleasurable for the listener. Okay? So what we're gonna do is we're going to use ascent. And I'm going to solo, maybe the guitar, um, just because we were looking at it in the last lecture. So we'll solo this and play it here. We're going to be using a scent. So for this, I'm going to come over to one of FL Studio send channels are ready. Now if you've made one, that's okay. You can load it up as a reverb send, but I'm gonna make this one my reverb send. And I'm going to, first of all, I get rid of this, which is what we had on it before. But I'm going to open up a reverb plug-in. So for this, I'm going to use the fruity reverb to. All right, I'm going to see what kind of a difference the default sound mix. Now you'll notice that nothing is coming through. And the reason why is we forgot to link this to this. Okay? We have to tell, we have to tell this channel that we want to take signal. So to do that, we highlight channel 26 and we turn up this. It's called the send level. So we turn this up so that we can get some signal through. And now you'll start to hear the sound of the reverb coming true. And we can try different preset. Maybe we'll go for large hall, like an orchestra would be in. Ok, and you can hear that ring out there. So there's a lot of knobs that you'll come across on a reverb plug-in. And to be honest with you, nearly every single reverb plugin looks completely different and they all have different parameters that you can change. So this isn't a mixing course, and I am doing a mixing course in the future. And I also, I already have an EDM course. I was where I go in, I go into a lot more detail with mixing. So if you are interested in making your, your arrangement sound as good as possible, I would recommend that you take that EDM course and just skip to the mixing section so that you can learn a bit about mixing and you can apply those techniques to your orchestral arrangements as well. But for now, I would say just stick with presets. Okay, so I have large hall here. I'm kinda like in the sound of that anyway. Or maybe we'll try the venue because that sounds like it could be somewhere where an orchestra would perform in front of an audience, would try this. Oh, pressed the wrong button there. Let's have a listen. No, I think I preferred the large hall. So this is what a reverb does to the instruments in your arrangement. The other thing I wanted to mention is a convolution reverb, okay? And this is slightly different to a normal reverb plugin. So for this we're going to take the fruity convolve over. Okay. Convolution convolved her. And basically a convolution reverb is where the company, so let's say the guys who make this plugin, they would have gone into several different real life spaces and record used it. They would have used a microphone and a signal to generate a map of the reverb in that space. So if you can try to use a convolution reverb, because what this allows you to do is you'll see from the presets now, it allows you to simulate a real, genuine place that people can go in real life. Okay, So I'll show you. We have things like here, a corridor arise. So they would have mapped different types of corridors, downstairs, hallways, stairwells, and we also have exteriors like fields, forests, that kinda thing. Okay, But the most important thing here, what we're looking for is things like a real space here like these halls, okay, cathedrals, churches appear, even a public swimming pool that could sound pretty cool. So I'm going to try us in maybe a cathedral, okay, the clear Cathedral. And we'll see what that does to the sound of the guitar. All right, It sounds a little bit thin for my liking. So I might try a different one. Maybe we'll take a church, maybe we'll try something like this. Maybe this one. That sounds much more reverb. And if we try the firewall, so we're on the closed at the moment, Let's try a firewall and see what kind of a difference that makes. Yeah, we're getting more of a tail there. I kinda like that. So now what you're gonna do is you're going to add reverb to every instrument in your orchestral arrangement, okay? And you're going to use the same reverb, same reverb plugin, and the same reverb preset, okay? Because this will pause all of these instruments in the same space. And that will really, really glue all of these individual elements that you had before. This will glue them all together, okay, it'll make it sound really, really nice and pleasurable. So for example, let's really quickly throw on some base trombones. I have to, I have to solo the brass bus. Okay, so it turns out the distorted guitar was just too loud. I couldn't hear the bass trombones underneath, but am I can hear them now. So we've put this in a space by turning on this scent and turning up the send level. Let's give it loads are reversible. And we'll try it again with the trumpets and trombones. Okay, We're getting a lovely reverb tail there. And maybe we will just really quickly do the same to the strings. And without even listening just to establish some sort of spatial lab situation. So we have turned these up. Just have a listen to what they sound like with the guitar and with everything playing together. So now we have the horns, sorry, we have all the brass on, we have all the strings on. And we'll turn on the guitar and I'll just turn it down so it's not as loud as it was. And the privacy turn that reverb off. So you can play around with different reverb plugins and reverb presets. But ideally it should sound like it's being performed on stage in front of you. Okay, that's what's going to sound realistic and pleasurable to the listeners. And reverb is great as well to put everything in the same space. And especially if you're using different plug-ins, okay, like I am here I'm using, but I have a synthesizer and playing a big baseline. I also have the for silicon studios plugin, which is this guy here. And I also have the BBC one. Okay? So these are all different plugins and they have their own different reverbs that they come with anyway. So me turning on my own reverb here allows me to put all of these separate instruments into the same space. In the next lecture, we'll put the final shape on our orchestral arrangement by using volume balancing and panning.
74. Faders & Panning: So now we're on to the final stage of our mix. Okay, by now, you would have used surgical EQ on all of these instruments. You would have used aggressive EQ on all of these instruments to get a nice kind of shape and a balanced together in terms of frequencies, you would have also used compression where necessary. Okay. Don't use it willy-nilly, but if you do need to use this, you would have used it by now. And reverb to put all of the instruments into one big similar space and get that kind of blend of the tails and the kind of release of each instrument. Okay, so we're onto the final stage now, which is volume balancing and panning. So here is where the graph from before or not the graph, but I suppose the diagram where we were looking at the orchestra and where each part is situated. This will come in handy now, and I'll just bring up this plugin because it actually has it for us. Okay? We can see at the moment we're on the Chelly, okay, so that's the cello section. And this part here is highlighted. Okay? So if you were the listener here, if he were standing here, you would be listening to the yellows coming out of the right-hand side. So I'm going to pan my cello to the right. Okay, so actually I'll demonstrate that a soloist, and we'll have a listen. And we'll push it out to the right-hand side. Maybe somewhere there. We don't want to go too extreme with this, okay? Because you could really end up disrupting the balance if you're pushing it way too far. We only want this to be a subtle kind of a panel. Okay? We want to hear a comment from the rice, but we don't want to really notice it coming from the right if you get me, so don't do it too much. Kind of leave it at around maybe two o'clock. I would say don't go pass three o'clock with this. And so I'm going to leave. The cello is somewhere around there. And then the violas, if we remember from before, actually, I'll bring up the diagram again just to show you. The viola section is here, okay? It's kind of in front, kind of off to the right of small this. So we'll do the same thing here. We'll try and reflect that by pushing it out a small bit to the right. Not as much as the yellows, but enough to give us a sense of coming from the right. Violins, if you remember, they should be coming from the left, right out. And the basis then will becoming from the very right. Now, I don't know if I want them to come from the very right. You see them here. They're on the very right-hand side. But in terms of balance, in terms of mixing, we like to keep the base frequencies in the middle. I know the base section is over here, but for the purpose of mixing, I'm actually going to keep them centered, okay? If I push this out, you'll see the foundation sounds a bit lopsided. So I'm gonna keep the bases in the center. And then you're going to do the same thing with every section. Okay? So if we were taking the base trombones, let's have a look at where they are. That's these guys here. They're off here to the right and now all of the brass are going to be on the right-hand side and just a little bit more than others. Okay. So If we're taking the base trombones, they're going to be out to the rice. If we're taking the trumpets, they're also going to be x to the right, but not as much. They actually, they sit somewhere kind of in the middle. See here, kind of in the middle of the orchestra. But on the right-hand side. So I'm going to keep the trumpets there. Then we're going to push the trombones out and the horns. So now these, all these elements are panned in relation to each other. Let's get some elements on the left-hand side. Alright? And so you'll see that some of the woodwinds extend around to the left, okay? Like the piccolo, which we don't actually have in this arrangement. And the flutes will be kind of on the left and the oboes will be centered. The clarinets will be to the right, and then the bassoons, which we also don't have in this arrangement, but they would be out to the right as well. So we're taking the oboes, clarinets, and the fluids. Okay, So the oboes, which is what we're on, these guys, are centered. So we leave that there. The clarinets will be pushed slightly to the right. And we have another clarinet here. So push that out. And then the flutes, which are over here. My bad organization skills, I might actually bring that over just so they're all together. And this will be out on the left. Okay? So now if I skip to a section where everything is playing in an orchestra, this is called Tuesday, okay, to you. Tti. If we have a look here, we'll see everything is playing and it will sound nice and spread out across the stereo field. So once we've done the panning, it's time to balance the volume. Okay. You'll notice when we were playing back there, the horns were really loud and some of the brass were really taking over from the strings. So what we're gonna do is we're going to solo our lead instrument. And in this case, I think it's going to be the trumpets. They kind of take a lead section here. I'm going to use this as a basis. So I'm going to mix everything around this lead instrument and make sure that everything else is complementing this guy. Okay? So we're going to start with the brass. And we've tried to trombones. Turner's. The way you mix is, right? You solo, your solo instrument, the instrument that you want to be the center of attention, you solo that and then you turn everything else down. So whatever your mixing next you turn it right down to 0. You press Play. And then you bring it up gradually until you feel like it's really kind of accompanying and that need instrument. Well, okay. So let's have a listen again. Might be somewhere there. Let's try the horns. We'll turn them down. Okay. Write down. Now I know these were too loud before. Even maybe some are there. Sounds good, a good balance between all these instruments. And then we'll try the base trombones number. Maybe they're OK. Now, you will put a lot more thought into this. Okay, I'm just doing this really quickly for the purpose of demonstration, but really you should be really thinking about this and trying to get a really nice balance between each section. But then once you're finished with one section, you move on to another section. So I'm gonna do the violins now, and I'm gonna make sure the violins are accompanying the brass section nicely. So to write down. So maybe there, we tried to violence now. Maybe some are there for the viola is now the Chelly. This we can do at nine, they're playing. Okay. I'll be there. And that will enter the basis really quickly. Okay, So now I think we have a nice balance these sections. Let's have a listen to another section just to make sure that we do indeed have a good balance. There's nothing there. Let's try this one. And the trumpets are actually a bit node. And basically, this is the way you mix. Okay? If I was to mix the guitar in, I would turn it on, start from 0 and slowly bring it in until I find a nice places. And it's kind of a company and everything. Well, again, we might try these elements. Guys obviously need some reverb, so we'll turn them up. And finally, this is a point that only applies to FL. On the mixer. You have a nub, okay here. And this is called the Stereo Separation knob. And with this, when it's blue, are heading towards the left, is, is separating the audio. And when it's red, sorry, purple. And when it's heading towards the right, it's merging the audio together to make it mono. Now, in terms of modern music, we like a wide sound. So we're going to push the Stereo Separation on all of these instruments and really forced them out wide. Okay? You're going to want to keep some elements in the center. So for example, base trombones, these are playing bass frequencies are going to keep them actually centered. Saying goes for these. But for the jellies, I might, or the closer the jelly, I might separate them. I might separate the violas and maybe the violins. Ok? And you'll see what kind of a difference that makes. Now, let's have a listen. Just really pushes them out as wide as they can go. So once you have done all of these steps, okay. You've done surgically Q aggressive EQ compression if you need us and reverb and also the volume balancing and panning, you should have a really nice sounding, well-balanced mix. In the next lecture, we'll have a look at mastering for orchestra.
75. Playthrough with Mixing: Is this hello? Hello. Hello.
76. Essential Mastering for Orchestra: In this lecture, we're going to be looking at mastering for orchestra, okay? This is the final stage. Once you've completed your mix, you can use an EQ to shape the final sound at a compressor to kind of glue everything together. And finally, a limiter to make sure that nothing is going above 0 dB. Okay? So let's do that now. Okay, I'm gonna go to a section in the arrangement where a lot of instruments are playing, which I think is here. From here, then I'm going to load an EQ. That's the first step in the mastering process. So we'll load up this EQ. The first thing you're gonna do is take this one band, okay? Or whatever band you have at the very edge here on the left-hand side. And we're going to change this to something called a either high-pass or low cost. Now in this case, we're going to have to have a high pass. Some other plug-ins will say low cost. It's the same thing. I'm taking a high-pass. I'm going to make sure that the Q is kinda narrow so that we can get captures many frequencies as we can. If this was up here, we're kind of losing these frequencies around here that we don't need to be losing. So I'm going to bring the queue up like this. And I'm going to bring this down around maybe 45, okay. Now if yours is sharper, if your line goes straight down here, you should bring this down to about 30, maybe even 28, okay. But if it's a little kind of gradual line like this, around 45 we'll do for seven, we're going to do the same thing, but the opposite way around. So this time we're taking a low-pass or a high cost if you have a different plug-in. And again, I'm going to hire up this queue so that we can capture all those frequencies. And I'm going to go for somewhere around. In this case, I'm going to go a lot higher with us, probably around 14,500. Okay. This is called a high roll-off. So we're just rolling off some of those unnecessary kind of hash frequencies that the human ear can't really hear anyway. And once we get past kind of 13 thousand, you're into really, really scratchy sounds and mostly air. Okay, we can still here up there, but it doesn't sound very nice musically. And the same thing down here. Anything below, I think around probably around 60 is just wait. Okay. So see the 50 mark here. I suppose we'll go with 50. Anything below here is just Meet, you know, it's just a lot of ways that we can't hear the actual tones in there. We just fill us in our chest. We feel the base. Okay. So we're kinda trying to get rid of a lot of the unnecessary ones because that's going to create moodiness and kind of appear will distract from the clarity. Okay? So we're going to do a high roll-off and a low cost. Okay? Next, we're going to have a listen and find some frequencies that sound nice. Alright, we don't do any surgical EQ on the Mastering. We don't need to do that. Okay. We don't want to be cutting any frequencies out and we should have done all that already when we were doing surgical EQ with each instrument. So when we're mastering, we're just looking for some nice frequencies. And what we do is mastering. You don't want to have your cue like this, okay? This is very sharp. This will be very, very obvious that you've affected just this frequency. So with Mastering, we want to be subtle. And to do that, we must make sure that the Q is white. Okay, something like that. So what I'm gonna do is I'm going to reset this and I'm going to find some nice frequencies to boost interface. There's a lot of lovely clarity up here, around 3,020. So what I'm gonna do is I'm going to turn that down. We don't want it to be that aggressive. Obviously. I'm going to turn it right back down to 0 and then bring it up slowly until I find a place where I like. I might actually bring this up even further and then widen the queue so that we're still capturing the frequencies down here that we liked. But we're also bringing in some of the higher frequencies because as humans, high frequencies sound nice, okay? And generally with mastering, I'm your EQ always kinda looks the same. I find that I'm always doing the same thing. I'm always boost in here. I'm always going to be cutting something out of about one hundred, ten hundred, five hundred. And then I'm going to boost something down here. This is how the mastering EQ just looks. So if you want to kinda copy the shape of mine, I'm nearly show or 99 percent it will sound good on your music as well. So anyway, we're going to stick with the shape. As I said, I'm going to cut something out of about 100, okay. Because this, these frequencies are not very nice. She Okay, You hear that? So I'm going to cut these out. Not too much. We're being subtle again, okay? But something like this. Gentleman are hundreds out there. And then I'm going to pinch all of these frequencies down here, very wide like this. So now if I turn this off and on, we will see what kind of a difference it's making. Strings that you can see. It's cutting out a lot of those harsh kinda honky frequencies and really making it sound warm and just pleasurable to the ER. So that's the first step and mastering. The next step is to use a compressor to glue everything together. Now for this, I'm going to use something called Maximus, which comes with fl Studio. This is a multiband compressor, okay, and don't be scared away with the name of it. It literally is a compressor, but you have a separate compressor built into the low frequencies, the mid-frequencies, and the high-frequency. So you can compress all of these separately to each other. And that's great for mastering, okay, because that means if we want to, like we said, the mid, the mid frequencies are hashed, okay? Which is why we cut them out here. So, sorry. So we're probably going to end up compressing the mids a lot more than we would compress. The laws are the heights. And likewise with the laws, we don't want those low frequencies getting out of control, okay? If they get out of control, they can really, they can essentially take over the entire mix. Okay? So with this, we're probably going to be a lot more aggressive with the compression on the low end. Then we will be on the highest and the highest. We probably won't compress that much at all. Okay? So the first thing I'm gonna do is I'm going to turn up the pre-game for each band, okay? And that can be done here or a commit on with these lines by dragging them up And when you come into bands here. So, so I'm going to do that. But while I'm doing that, I'm also going to find a cutoff point between the lowest and the highest, okay? If I solo the low frequencies, you can hear that we're still capturing a lot of these myths appear. So I want only the laws. Okay? I'm not really hearing the snare in here, so that's how I know I found the laws. And if you're still hearing the snare at the clapper, whatever, you need to go a bit further down until you can't really hear the snare, but you're hearing all of the low frequencies, then I'm going to boost this, maybe by about 3.3 dB. Next, we're going to the mids, okay? And we're going to find the kind of mid cutoff point between the highs. So with the highs, we only receive the highest. I tend to come down a bit more. A lot of people will tell you to go up here, okay, and cut out. Again the snare. You don't want to be here in the snare, right? But I don't do that. I actually tend to go down quite a bit with it. Because I like to capture in these frequencies as well. So whatever you decide or whatever you think sounds best. But I'm going to leave mine around here. And I'm going to boost it again by the same amount, 3.3 because I don't want to disrupt the balance that we had already here with the EQ. If I boosted this more, does the same thing as me boosting the highs and the EQ and I don't want to mess that up so I'm keeping everything the same. Which means the mids will also have to come up with by 3.3. Okay? So now everything's on the same line. We can begin to compress. So into the laws. And I'm gonna look at the manager the same. So I can see the waveform coming through. And I'm going to put a point. You see this graph moving, okay? Here is where it's peaking. So I'm going to put a line somewhere in the middle. Another line, sorry, a point. And I just did that by right-clicking. So you can see that this is kind of in the middle of this, this moving graph. Okay? So now to compress, we pull this down, alright? And the more you pull it down, the more compresses by. So let's play the track and we'd have a listen to the compression as it's happening. So you can see the compression happening here. If you look at the purple, the purple is what it was. And the white is what it is now. Okay? So if I was to pull this right down, you'd see a big difference there, see the purple. But I want I don't want to be that aggressive with the compression. Okay, i'm I pull it down a smile but more. Just to keep these kind of peaks under control. Now move on to the mitts. Okay, same thing. And the final point to middle here, you can see the capillary, that's what it was, and the y's is what it is now, the highest will do the same thing. Now with the highs. You don't want to be as aggressive. Compress the highest really lightly. Okay, didn't have less automatic death. And the reason for that is because with the high frequencies, compression sounds really obvious. So generally the LOS is what you compress the most. The mids kinda gets compressed. In the middle of the two, has both. And then the highs get compressed the least. Okay? Once you've done this, we're going to go back into the LOS, okay? And we're going to use this Stereo Separation knob. Okay? This only comes with maximus. So if you're using maximus, you can use this. If you don't have maximus, and you will have to use something called a stereo enhancement plugin. But if you do have maximus, you can use this. Okay? So this works like the knobs here that we had before, the Stereo Separation knobs in the mixer. If we turn it to the right, we're merging it into mono. And if we turn to the left, we're making it wider, okay? For your low frequencies, we want these to be Mano, Ok. So I'm going to push this all the way over to Mano. For the mids. We're going to push these out wide out to around here. Not too much. I don't want to go all the way to like nine o'clock, maybe around 10 o'clock. And the highs, I will push out to nine o'clock. Okay? And what this does is this will really, really give your arrangement of further boost into the stereo field and it'll make it feel really wide. And kinda like a modern mix, okay, which is what we want to achieve here when we're making game music. You don't want to be shown up to a gig. And they're asking you, can you compose really heavy music for our shooting game? And all you can do is make 8-bit music and mono. That's not going to fly. Okay? They're looking for this nice modern orchestral and wide sound. Okay? So make sure you're pushing the frequencies out as much as you can if you're using maximus and if you're not using maximus, you would load up a stereotype login. After your compressor. You'd load one up here. And FL Studio has some down here. It has the stereo enhancer or the stereo shaper. Okay. Once you're finished with all these steps, now we have to go back in and do the makeup gain. So remember I was saying before with the compressor, when you compress, you're basically turning things down. Okay, if I go into the medial, see that? Saw that the purple. As before, and the y's is what it is now. Well, we've just essentially turned it down, so we have to make that backup again. We want and we want that to go back to where it was, came on, suddenly boost this memory gently. You don't want to go too much. But now you see the green is what it is now. The green is with the boost on. And so I might even boosted a small bit more. And we'll try low will boost the laws until we see that green. Now I'm seeing some green in there. And the highest we do the same. Okay. So now when I listened to my master, we should have a nice compressed sound. That's not too obvious, but it should be kind of gluing everything together. Let's have a listen. This is the one which is the specificity is x. Now the next thing we do is we add a limiter, okay? So I'm going to bring up the fruity limiter, which is here. Okay? I remember I was saying before a limiter is basically a compressor, but the ratio is just really, really high. Well, that's all this does. It basically. It's a compressor that says nothing is getting past this ceiling. Okay? So if I set the ceiling, if I set the ceiling down here at minus seven, it's essentially saying, now obviously we're not going to go that extreme with it. We just want to make sure that nothing is getting past 0. So I'm going to set it at about minus 0.1. You can see it up there in the left-hand side. So now we're making sure nothing goes past 0. So nothing is going to clip and nothing will damage any speaker systems if it's played back on the speaker. But we're also retaining the maximum loudness that we can get without making it sound overly boosted. And that kinda thing you don't want to, not with orchestral, okay, it's different with rock and pop music and EDM and stuff. You are going to go in and try and boost this as loud as you, as loud as you can. But orchestral music is totally different, okay? We don't want it to sound overly compressed and boosted and too loud. Okay, We'd like Dynamics and we like the kind of natural swell of the orchestra so we don't want it to sound overly processed. So with the, with the limiter, you're just going to set your ceiling and make sure that nothing goes past 0. Just so happened that this particular arrangement, it find out as adults, sometimes you'll have arrangements that are down here. That's okay. If you want, you can boost it up to around here. I just wouldn't pushes as fire. I wouldn't put writing. I wish I wouldn't push it so far. So that is resting against the 0 here. Because that's just going to sound like it's way too overly boosted. Okay? We want, we want it to be kind of maybe tipping the 0 at the very odd time, but most of the time maybe around minus 3 or somewhere in between. Okay? So this is where it is. Now I'm going to have for that particular atomic dots, if I turn off all of these Mastering plug-in, it will sound completely different, right? It's quieter. It's not as wide a task glued together and it sounds a bit tinny. Voice of the chylomicron is shaping the sound of the face, the sound with the predator. And the tethers is to make sure not to guess, pass in 0. Before. Then.
77. Exporting the Final Track: Okay, so now you have your track composed, mixed, and mastered. Okay, it's ready to be shipped off to the developers to be implemented into the game. So what we have to do now is we have to export the file. So whether, whether you're exporting the full track as a whole, okay. You know if it's like the title team or something, or whether you're exporting different blocks. Remember we did before where we, we would have moved everything past this point so that we're leaving the tail end. Whether you're doing that or you're doing this, which I'm doing, which is exploiting the full track because this is a title team. You're going to use the same settings, okay, so it really doesn't matter what you're doing, you're still going to have to use the same settings. So what I'm gonna do is I'm going to press command in order to render, to export it and I'm going to call it mixing. And here we are in the little window and every dog will have its own kind of version of this, okay, it'll ask you what you want to output it as. So in your DAW, you might not have all of the same things as I do. And you probably might have more than I do, but that's okay because you will definitely have something called wave MP3 OGG flak. You will have these, okay? And what we use is we use wave. Wave is the industry standard. Mp3 is just low quality, okay? And that's what you download off YouTube kinda sounds watery. Game devs don't want this, they want the highest quality possible. You can have. Some people use FLAC because it is another lossless audio quality. But again, it's compressed. It's a compressed audio file and we want to send them an uncompressed lossless audio file, okay, so that if they want to compress it themselves, it's not going to lose any of the information that a FLAC file what? So we always use wave, okay, it's the industry standard in across all audio platforms. Whatever you're doing, if you're doing, if you record and dialogue for a movie and your onset with the microphone, you're going to be using wave, okay. And your bit depth. Now, yours might not go as high as 32, but it will definitely go as high as 24. Okay. So this is 24 bit interleaved. So don't worry about whether knee that means just know this 24-bit is what you're going to go for. Okay. 16 days. That was okay back in 2000 when we still had CDs, but nowadays we're into the digital world and we use 24 bit audio, okay? If you have an option for 32-bit flows, I would click that, okay, because it's basically 24 base wrapped into a 32-bit package. So, you know, in the future, if 32-bit ever does become available, your audio will support it. Okay? So I'm using 32-bit flows, but you might have to use 24 bits, but that's okay. They're both going to sound the same. Next, you want stereo am. Not a lot of softwares will have this option, but you're not going to want to export it in mono unless you're doing like 8-bit music. But I'm, you know, games have gone away from that, going to think, you know, ever since the 1970s. So we're sticking with stereo, the tail here. Remember we had wrap remainder on for exporting the blocks. If you are exporting blocks and you're doing it using the tail method, okay, instead of actually moving manually moving the tail up yourself and then re-export it. Make sure you're using wrap remainder. Ok. Now in my case, I'm not using blocks, okay? I'm actually exploiting the whole track as its entire kind of form, as the entire composition. So for this, I'm actually going to have on Leave remainder, okay? Because I don't want, I don't want the tail to wrap back around. And B costs at the very start of the composition. Because what'll happen is if someone presses Play on the intro, I'm going to have some remnants of what's happening here. Paste it here. And I don't want that, not for the full enough for the full piece of music. Okay? But if you are using blocks, use wrapper Mender. But I'm not, so I'm sticking with Leave remainder. And then after this and if you're in FL Studio, you're going to want to turn on high-quality for all plugins. And draws are going to want to disable maximum polyphony, okay? What this does is it basically, any instruments that can only play like two notes at a time, it will turn that off so that I can play five notes at a time. Just in case you have something in your arrangement that plays five notes. But the instrument can only play one. If you disable that, it will allow the instrument to play with five notes. Okay. It's kinda just like a backup thing, just in case. And then after that you're going to hit Start and it will start to render, Okay? This is also the point that you have to do some organizing. So if you're exporting blocks, make sure you're naming it well, okay, so if I was exploiting this as a block, I would probably name it as main title team Intro Block. And then I would have main title team loop. And then, you know, I could have main title team tag and then maybe main title team transition one, transition to transition 3 and so on. Okay, we wanna make sure that everything is organized so that you and the developers know which files you're talking about. If something needs to be changed at some point in the future. Once your track or the blocks have been exported. Now it's time to upload them to your Dropbox folder, okay? Or whatever folder you are using, okay, it might be Google driver, even WeTransfer or something like that. But essentially, you're going to want to get the developers to listen to each track and that you upload as soon as you can or as soon as they can so that they can give you the green light or request changes. Alright. So you're not kind of, you know, you don't move on. You know, you're working on a battle team and all of a sudden they get back to you a month down the line and they say, Hey, can you go back and change the whole main title team? You don't want that. You want to e-mail them and say, Hey, main title theme is up. Now let me know what you think. Is there anything that needs to be changed and so that they know it's there. And there'll be back to you within three or four days and you can begin working on something else. If they don't get back to you, obviously keep working on because you don't want to be struggling to meet deadlines. Okay. But if you counted all uploaded as soon as it's done and tried to get the green light from the developers. Another reason why you should upload them as soon as they're rendered is because if you upload everything in one go, they might have to make several changes or they might want you to make several more pieces or change a piece entirely, okay. And that, that can be disheartening if there's, you know, they get back to you and there's 12 tracks that they want changed. So if you upload them, Dropbox as you're working on them, and you can kind of let them be a part of the process. And that way they can give you feedback early and you can shape your music to fit their needs without kind of struggling to meet the deadline. In the next lecture, I'm going to give you a few quick tips on where to begin when you get a job as a game composer, you know which part of the compositions do you start with, and which parts do you end with? And then after that, we're going to go on to the final lecture in the course, which is landing your first gig. Okay, so that's, that lecture will help you kind of get your first job as a composer, whether it's paid or not. And you can start putting what you learned in this course to use.
78. Where to Start: Okay, So this lecture is going to be really, really short, okay? It's just to help you guys who were stuck. Or if you do lambda gig, and hopefully you will. But if you do lambda gig in the future and you're looking to know where do you start when you're composing for a game. I'm going to tell you now really quickly. You would start with the teams. So things like the love theme, the heroes team develops theme, okay? Or whatever other themes are in the game. Start with these teams and then compose everything else around us. As I said before, you're going to be writing the main title team last, okay? And a lot of composers will actually write this first. Don't do that, because as I said before, you're going to want to hint at the rest of the game in urine main title team. So if you write a love team first, you could be able to include that love theme in the main title dame, or even the heroes team or the villain theme or all three in the main title and kind of hint at the entire game, which will make the whole game OSAT, feel much more solid. Obviously, if you've got inspiration from somewhere else, like, I don't know, maybe the setting or something, that's okay. Follow your inspiration. But if you are stuck, okay, if you don't have the inspiration or you don't know where to start. I would start with the main themes, trying to come up with melodies that convey the emotions that I want to convey as for the actual music, okay, So let's say you've settled on the love theme. Where do you start with a love theme? And start wherever you get inspiration, okay, some people, Everyone's different. Alright? Usually with me, I write the melody first. But a lot of composers might write the chords first, or they might pick an instrument first and then go with that, you know? So wherever you get inspiration from, that's where you start. Okay, I can't really answer this for you. Because everyone's different. I mean, music is an art form and ours is different for everybody. Okay, So start wherever you get the inspiration from and wherever you get the motivation to write.
79. Wrap Up & Bonus Lecture: Welcome to the final lecture in this course, which is course wrap-up and bonus lecture. If you have managed to stick with me this far. Thank you so much. Okay, You made it through the course and I genuinely hope that you learned something and we'll go on to become a great composer. If you did enjoy the course, please make sure to leave a review. And if you haven't done already, this just helps other composers to choose the right course for them and start learning the same things that you did. Also don't forget to join the discord or Facebook group by using the links provided and share your projects with us, share your compositions, we'd love to hear them. You can also ask for feedback or help on future projects or any future games that you're working on. And very quickly, where do we go from here, okay, now that you've finished the course, what should you do now? Well, find a game to compose for, okay, The best way to really develop your skills as a game composer is to actually composed for a game. Okay, it really is the best way to learn. Also, try to learn more about music theory if you haven't already. Okay, I know it can be boring, but it really, really is helpful when it comes to composing. And finally, just before the bonus lecture, make sure you check out my EDM course, okay? Only if you want to learn more about mixing and get that graze modern orchestral sound. And now we're on to our bonus lecture, okay, which is landing your first gig. All right? And the first I want to make here is to join a website called indeed dv. It's basically like a forum for game developers and game composers to interact with each other, ask each other questions and post their games, okay? But a lot of the time on there, you'll find ads, okay, for indie developers looking for a composer, or they're looking for a sound designer, they're looking for, you know, an environment modeler or someone to do ray tracing or lighting in the game or something like that. Okay. So you'll often find ads for a game composers on there. So definitely check that out. And also an indie DB, you can advertise yourself, okay, you can put up a post and say, I'm a freelance composer and a work for free. I just want to get some experience. Does anyone have a game that they want music for? So you can post that up there. And you'd be surprised how easy it is to land an indie developer game. The next point on here is to go to game developer conventions. The thing is, a lot of people would go to composer conventions, okay? But that's our eyes. But why not go to a game developer convention? These guys, they don't have a lot of experience with audio or music, okay? They just make the games annoyed them with questions about audio in a game music and demonstrate that you could compose for them at some point, you may land a quick job, even a trial run, or being a temporary composer before they bring in the real composer. This is an invaluable experience. If you do go, try not to come off as desperate, okay, Don't message millions of developers begging them for a chance. They'll just reject you. You need to appear as if you have the high ground. Pretend you don't care if anyone hires you are not. You can sell message these developers, but don't come across as if you're begging for a job. A better approach would be to just chat with them, talk about games you like or games that you've done in the past, maybe. Ask some detailed questions and then say, Hey, if you ever need a composer for something, I'm always available. I'm open to any kind of work. You're not desperate to get hired. You're just offering your services as a friendly gesture. This will work out much better in the long run. Choose one game genre that you want to focus on, okay? Pick one genre and masters. Many composers, they tried to be amazing at everything, and that just never happens unless you're extremely, extremely talented. And your best bet is to pick a genre that you love, that you want to work in and that you're actually good at, then you can master that and you have a much better chance of being hired because you can display your skills at this one particular genre. As your career grows, you can expand into other genres. But for those first few games, okay, stick with the genre that you're good at and master it. Set up an online presence and establish a mailing list. So here's what you do. Okay, start uploading your music to SoundCloud in YouTube, Okay, Upload free game music tracks in specific genres. So what you would do on YouTube is title your videos, maybe free music for RPG games. You know, Mr. Composer, the name of my piece. Okay. Have the entire track available to listen to in the video and provide a free download link to the full quality audio file in the description below. But here's the catch. They have to provide you with their e-mail address to get that free download. Okay. So they liked the track on YouTube they want to download. And so they give you their e-mail. Now, you can start collecting e-mail addresses of everyone who has downloaded your music from the YouTube channel. Use the email address to send them more free tracks. Or anytime you upload a new piece of music, send an app for free. And eventually, once you've established a big mailing list and you've been sending them a few free samples. You can send out an email that says, Hey, let me compose original music for you. And at this stage, these developers have sampled your music and they like us, you know, you could get a response from a developer who wants to work with you. But this way they're coming to you. You're letting them find you rather than, you know, begging them for work. Also sell music packs on your YouTube channel. Okay? Maybe the developers by these packs for some of their games, you really need to brand yourself and start selling your product and providing great free samples and growing an email list that will put you on the map. Maybe some developers can pay you, or they're just a small single man company, but that's okay for your first few games, take the business, your name will appear in the credits and you can build a website that says, you know, I worked on these games. As you get more business, you can pick and choose who you want to work for. And you can start saying, no tanks, I want to work for that game. That you don't want to do it because you're in demand. And if you're in demand, you can raise your price. But certainly for the first few games, start at a low price or even work for free. Platforms like Fiverr are a great way to get a few commissioned jobs as a composer to, but I wouldn't rely on us. Just set up a profile there and set a rate per composition or whatever. It's up to you really, but you have to get yourself on the map to get discovered. So once again, I wanted to say thank you, You've made it to the end of the course. I really hope you enjoyed it and hopefully you learned something and can go on to become a really great game music composer.
 Benjamin Lynott, Veteran Music Producer, Audio Engineer